
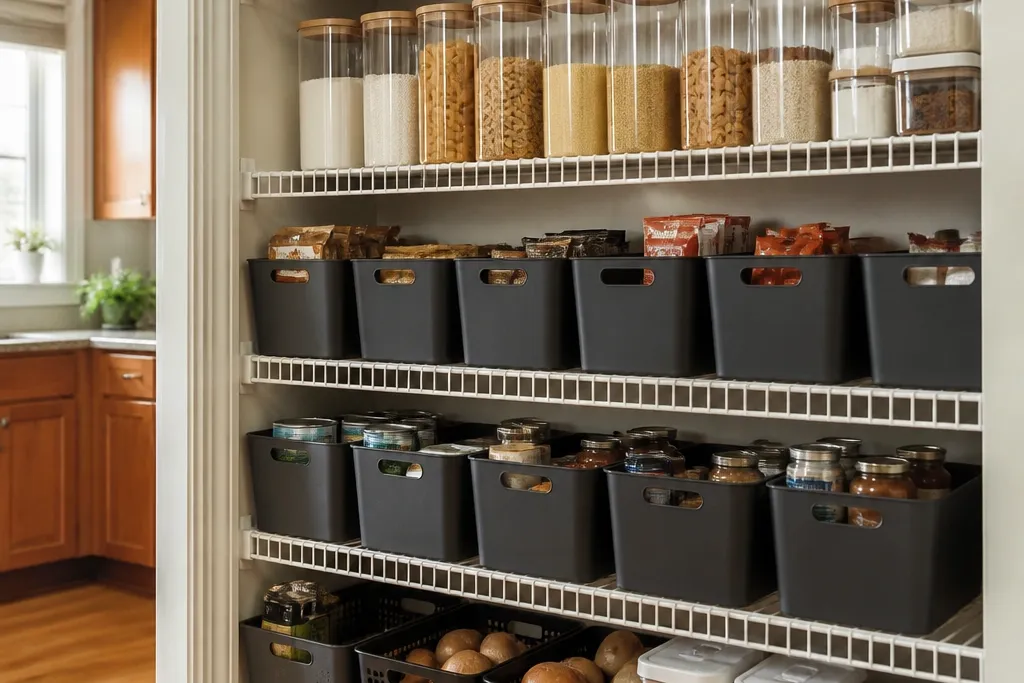
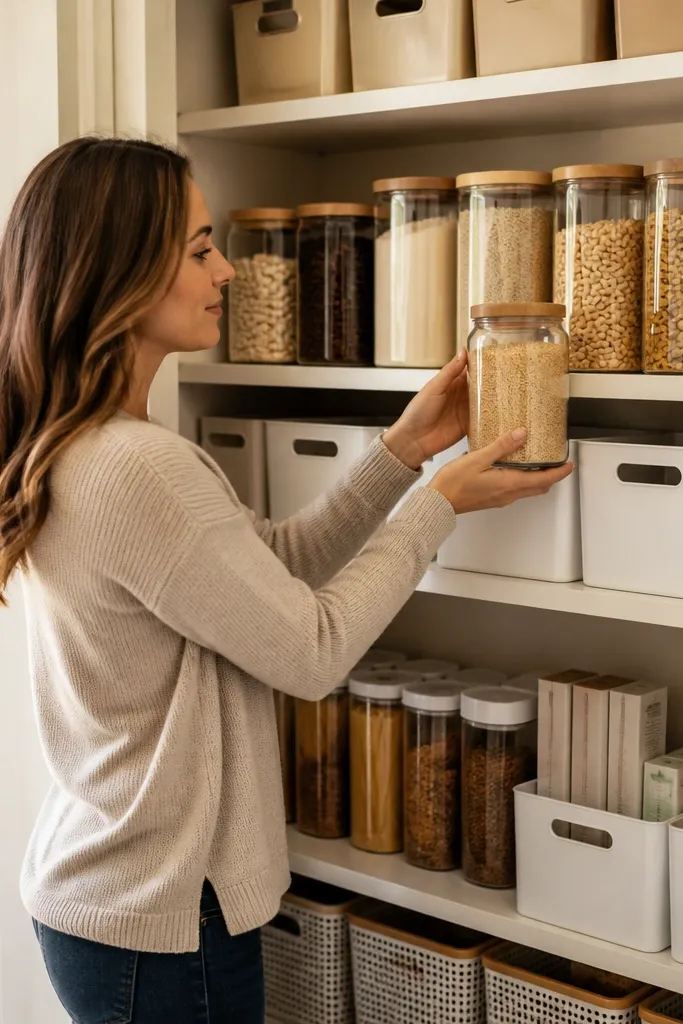
1. Three-Tier Label Wall With Matching Matte Bins
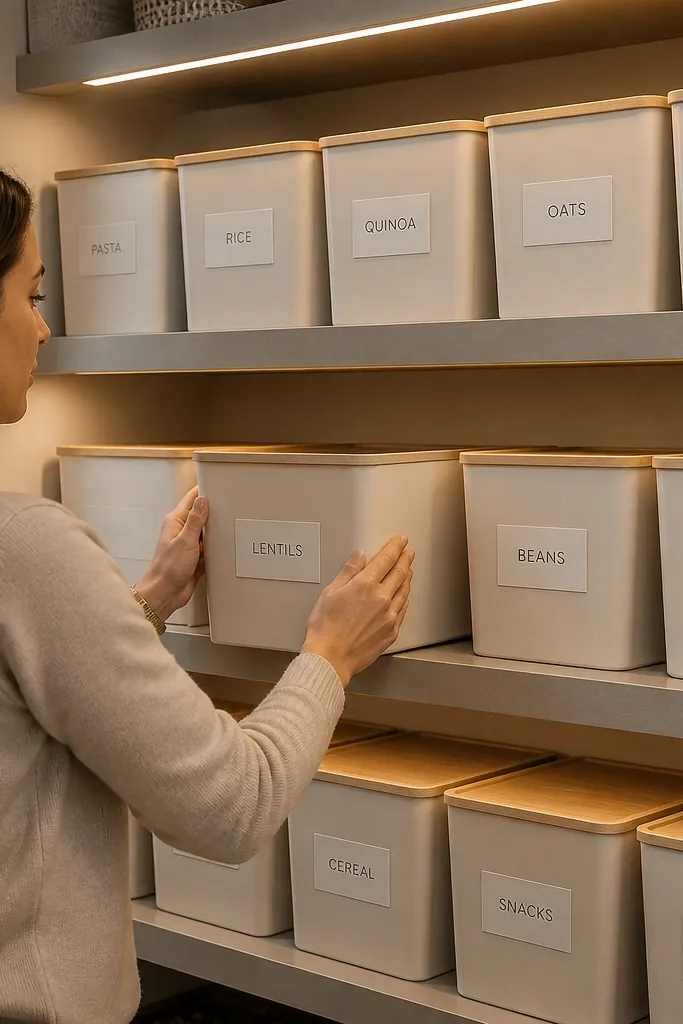
This setup makes your pantry look like a calm retail shelf because every container shares the same front shape and the labels line up. Use matte white or soft oat bins so the shelf doesn’t look shiny or cluttered under kitchen lighting. Keep the labels consistent: same font style, same placement, and the same label size for each category. It’s ideal for spices, baking staples, and snack items where you want quick scanning and a clean, uniform look.
Start by measuring each shelf bay width and depth, then choose bins that fit with a small gap (about 1/4 inch) so they slide in without scraping. Lay everything out on the floor in the order you want, then mark label positions with painter’s tape at the same height for every bin. Fill bins with pre-portioned items and close lids before placing them back so the front stays neat. Finish by using a label printer or consistent label maker and apply labels only after the bins are fully set on the shelf.
Print labels on matte label paper, not glossy, so they don’t glare under overhead lights.
Avoid mixing bin brands and lid styles; one “odd” container makes the whole shelf look messy.
2. Clear Front Canister Row for Baking Staples
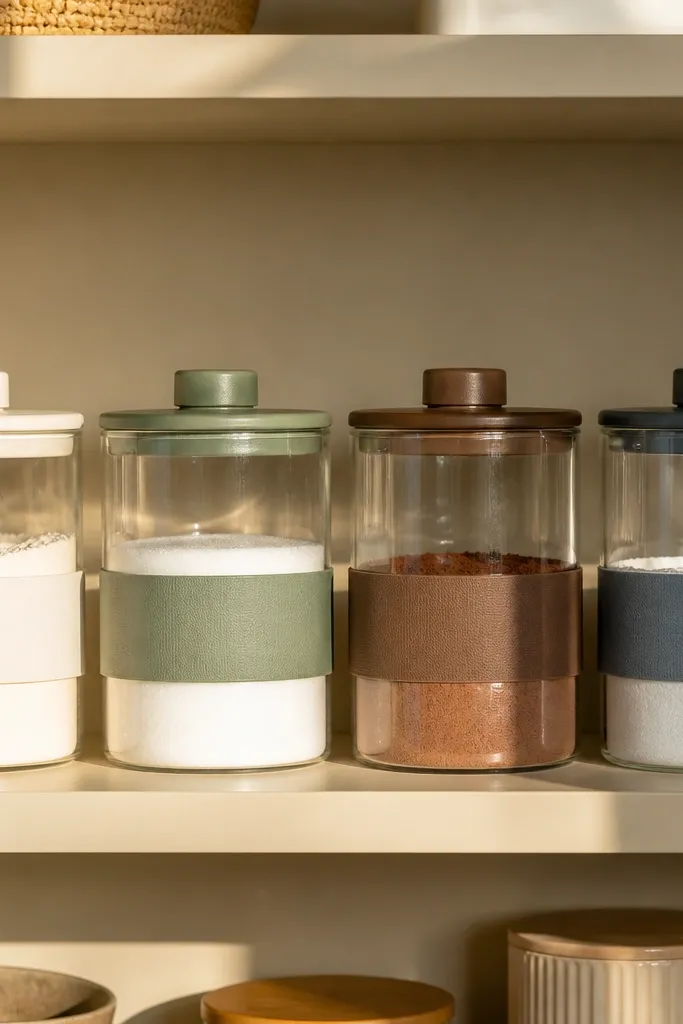
Clear canisters create a neat, high-end look because you can see levels and portions, and they stack visually in a straight line. Choose canisters with similar height and lid color so the row reads intentional instead of random. This works best for flour, sugar, cocoa, and baking powder where the contents look tidy and don’t spill. The aesthetic bonus is that the shelf looks organized even when you’re low, because the front stays consistent and readable.
Pick canisters with matching lid shapes and measure the shelf depth so the lids don’t hit the back wall. Use funneling: pour each ingredient into the canister, then wipe the rim with a damp cloth so no residue clouds the view. Label the front with ingredient name only, and keep the same label size across all canisters. Place the canisters in one continuous row, then add a small tray at the bottom edge to catch drips from scooping.
Editor's noteUse a small desiccant pack inside each canister for dry goods to keep clumps from ruining the look.
Skip thisDon’t overfill — leave about 1 inch of headspace so scoops don’t smear the lid.
3. Bamboo Drawer Bins for "Grab and Go" Snacks
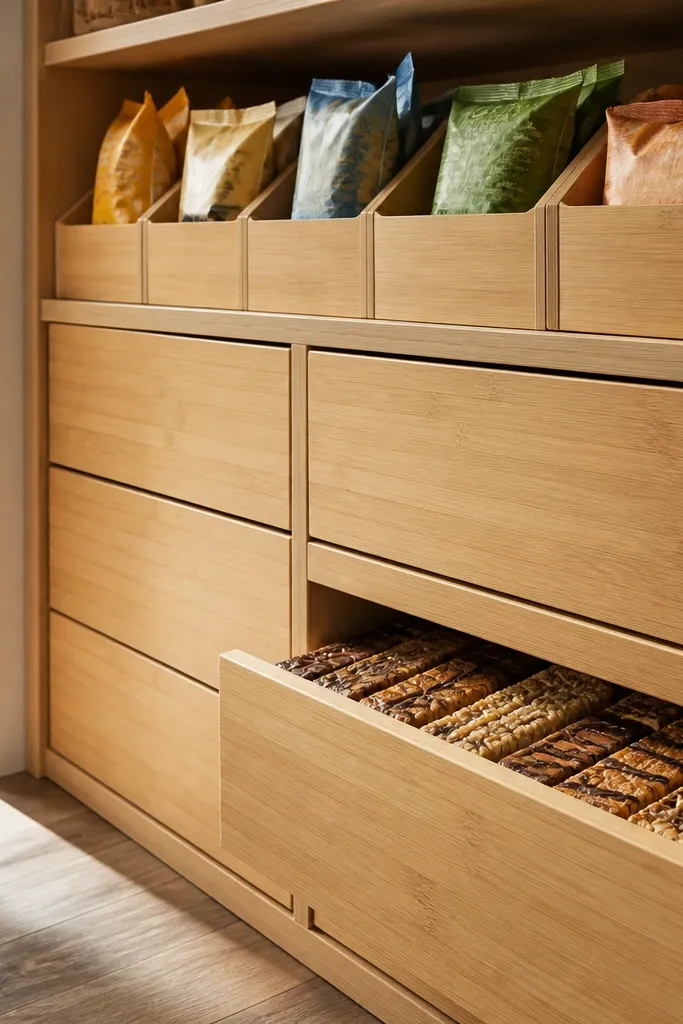
Drawer-style bins make your pantry look neat because the front is flat and uniform, and the contents stay hidden until you pull the drawer out. Bamboo or wood-toned drawers add warmth, and they photograph well against white or light wood shelves. This is best for snack bars, chips (in controlled portions), and breakfast items you don’t want sitting exposed. The look stays clean because everything is “closed,” even if the snack drawer is the messiest zone in your pantry.
Measure the shelf opening and choose drawer bins that fit without forcing. Install a simple stop lip or add a thin rubber pad on the shelf base so drawers slide smoothly and don’t drift. Portion snacks into bins using small bags or snack-size containers so nothing collapses. Label the drawer fronts with category labels like “Bars” or “Breakfast,” then keep drawers in a left-to-right order you can remember.
Add a thin strip of felt tape to the inside drawer lip to reduce noise and prevent scratches.
Avoid loose snack bags directly in the drawer; they wrinkle and look messy even when closed.
4. Stacked Clear Baskets With Color-Coded Tags
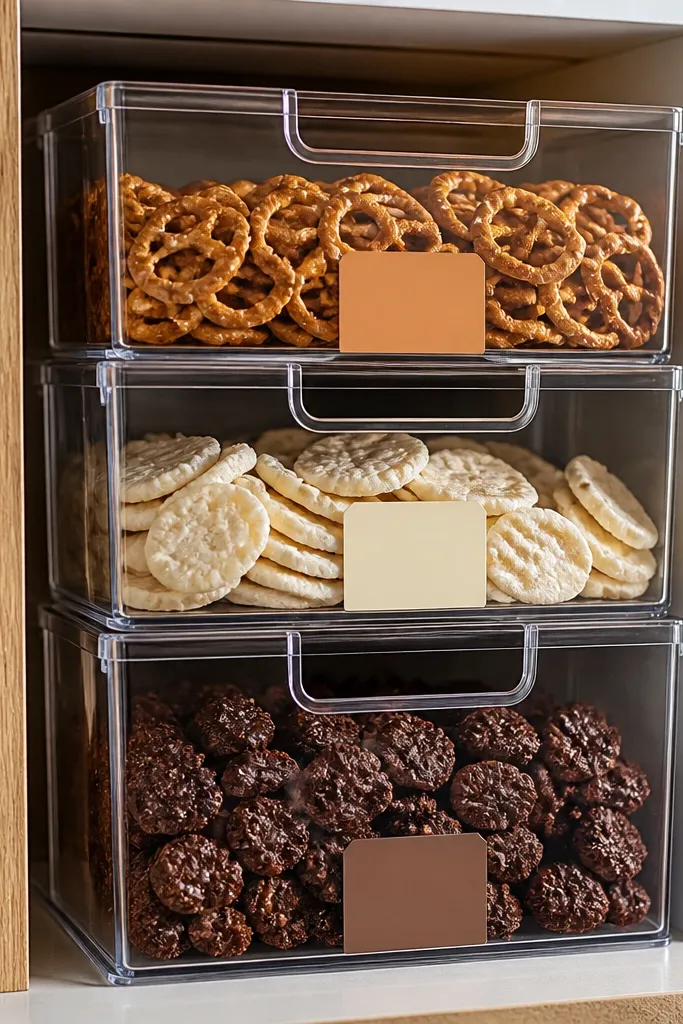
Clear baskets look neat when you control the color and the front labeling. Use baskets that stack cleanly and keep items grouped by color family or category so the shelf has visual order. Color-coded tags make the shelf look styled, not utilitarian, and they help you keep refills in the right bin. This is a great choice for pasta types, rice varieties, and canned goods that you don’t mind seeing.
Choose baskets with the same front height so stack lines up across shelves. Add a small colored tag on each basket front using binder clips or adhesive label tabs, and keep the tag size consistent. Fill baskets with pre-bagged portions or containers so items don’t spill and create a lumpy front. Place the baskets in a stacked “tower” pattern on one shelf, then stagger categories so each basket tag is visible from your standing position.
If your pantry light is yellow, use cooler tag colors (navy, teal, charcoal) so labels stay readable.
Don’t mix tall and short baskets in the same stack; it breaks the clean grid.
5. Can Rack Inserts for Baking Sheets and Trays
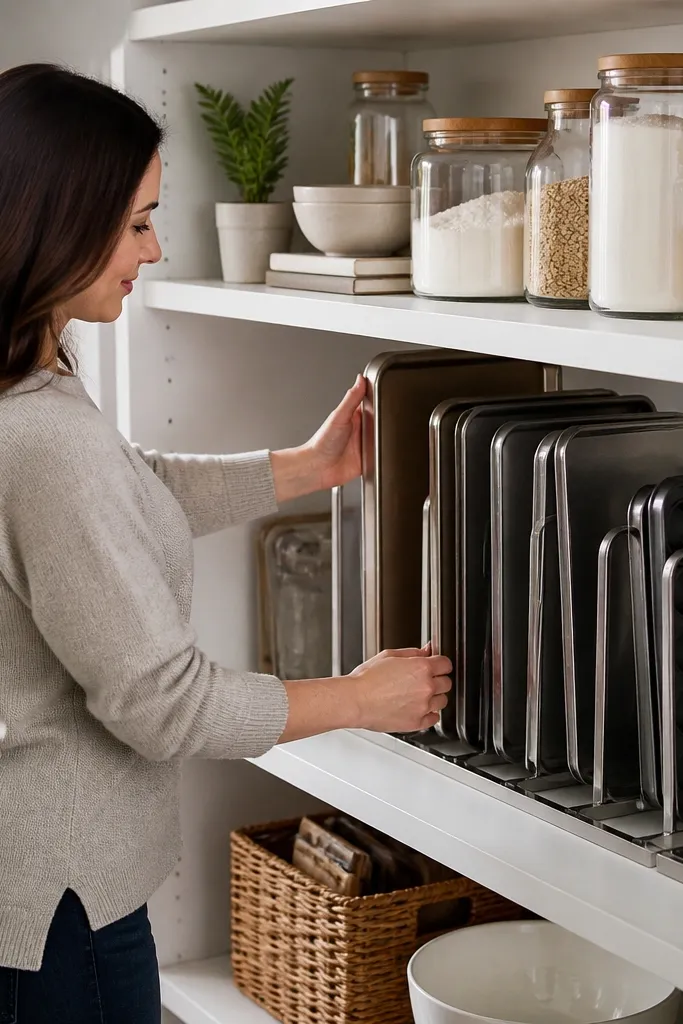
This is a shelf “look fix” for people who store baking trays and pans in the same pantry area as food. Upright storage with slim metal racks makes the whole shelf appear organized because the lines are straight and items stop leaning. It also frees space for the actual pantry items so you can place containers in neat rows. Use this when you have awkward flat items taking up shelf real estate and making everything else look crowded.
Measure the shelf width and depth, then buy or build slim vertical racks that hold flat items upright. Slide the racks in so the tray edges don’t scratch the back panel. Store pans and sheets upright, then use the freed space for bins aligned to the same shelf edge. Add a small “food” label zone on the front of the shelf so it reads as intentional, not mixed storage.
Put a thin rubber shelf liner under the rack feet so metal doesn’t slide when you pull trays.
Don’t store trays flat under food bins; it creates an uneven lip that makes containers look crooked.
6. Black-Lid Matching Jars for Tea, Coffee, and Spices
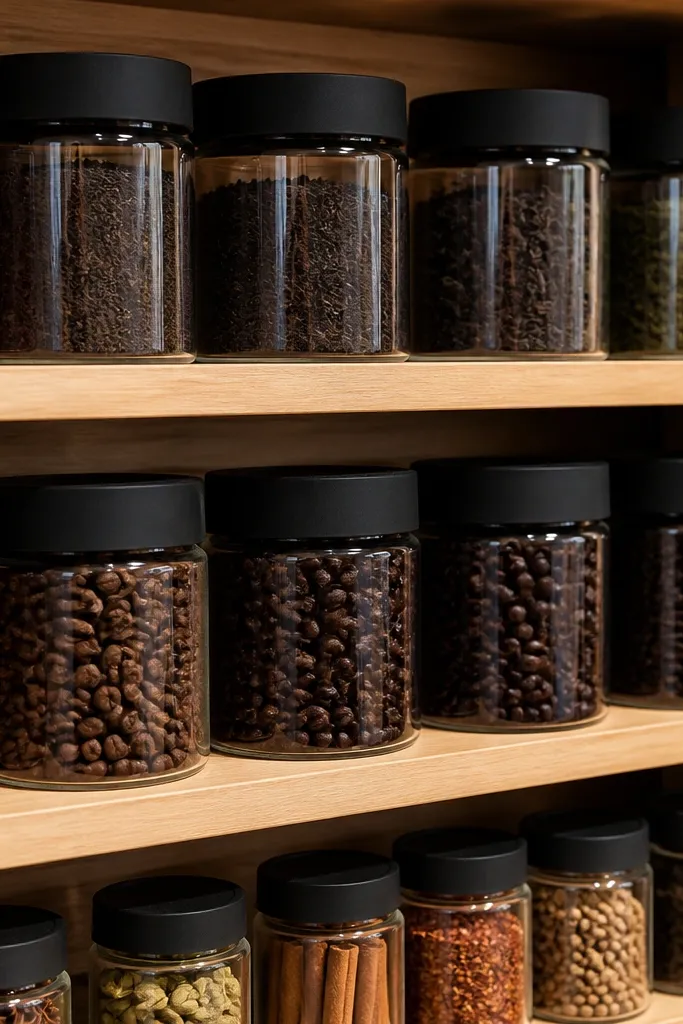
Matching jars with black lids look sharp and intentional, especially if you group them by category and keep spacing consistent. Black lids create contrast on light shelves, so your pantry looks “styled” instead of random. This works for tea bags, coffee beans, and spices where the jars keep contents contained and easy to grab. The shelf looks neat because jars form a clean rhythm: same diameter, same lid color, and labels that don’t sprawl.
Buy jars in one diameter size so the shelf front stays uniform. Choose a lid finish you can repeat across all jars, then wipe jars clean before filling to prevent smudges from showing. Use small labels with category + item name, and keep label placement consistent (same height, same side). Arrange jars in blocks by category, leaving a small gap between blocks so the shelf looks structured.
Use a small tray behind the jar row if your pantry shelf is slightly uneven; it keeps the jar line straight.
Avoid using different jar heights in the same row; the shelf front stops reading as tidy.
7. Labeled Spice Drawer With Shelf-Front Pull Tabs
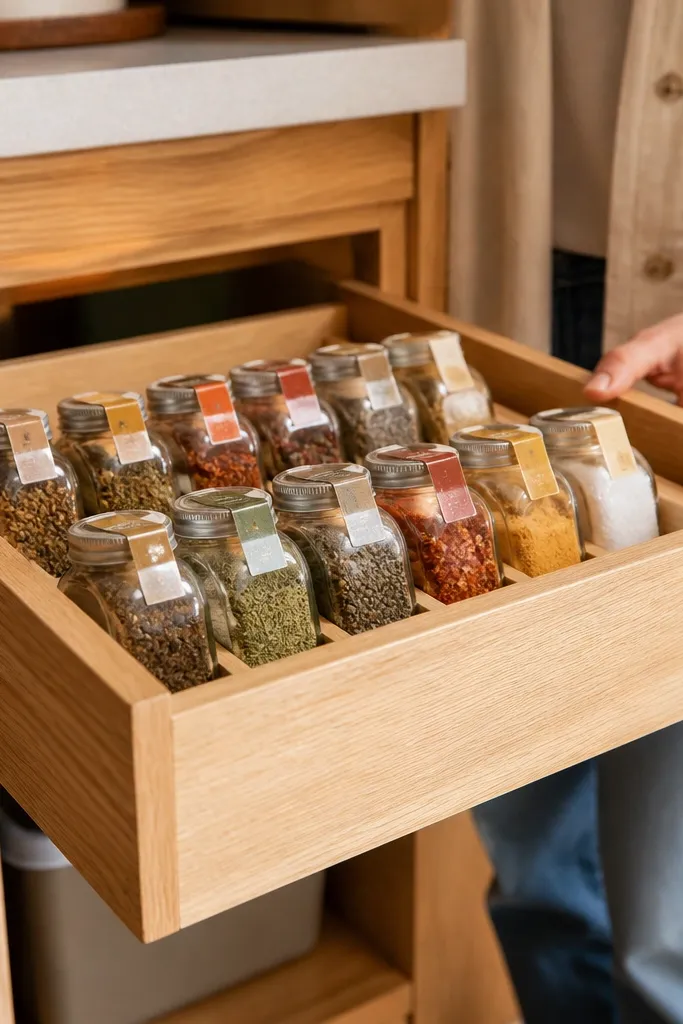
A drawer-style spice setup looks neat because spices don’t scatter across open shelves. Use a shallow drawer bin system so jars sit upright and labels face forward. Pull tabs make it easy to grab without yanking the whole drawer, and the front stays clean even with daily use. This is best for anyone whose spices live in a jumble because they’re too small for big bins.
Install a shallow drawer insert or use a stackable drawer organizer that fits your shelf depth. Put the heaviest jars at the back corners and lighter items in the center so the drawer feels stable. Label each jar with a consistent prefix like “Cumin” or “Smoked Paprika” and keep label text small and centered. Add pull tabs to the drawer fronts so you can open smoothly without smearing labels.
Use painter’s tape to map jar spacing before you glue anything or commit to final placement.
Don’t let jar labels face different directions; that kills the neat, grid-like look.
8. White Riser Steps for Tall Bags and Boxes
Risers turn a messy “stack tower” into stepped rows that look organized instantly. White risers keep the shelf airy and let you see labels without pulling everything forward. This setup is perfect when you have tall boxes, cereal bags, and bulky mixes that block each other. The look stays neat because each item gets its own visible front edge, so your pantry doesn’t become a pile.
Measure the shelf depth and pick risers that match each shelf’s width. Place the risers so the front row sits flush with the shelf edge, then build a second row behind it with about 1 to 2 inches of offset for visibility. Put tall bags and boxes on the risers and keep smaller items on the shelf base. Label the front row items and make sure the label heights are aligned across tiers.
Add a thin anti-slip liner under risers; bags slide less and the stepped look stays straight.
Don’t stack items directly behind each other without a riser; you get a blocked, chaotic front.
9. Canned Goods With a Tilted Face-Forward Row
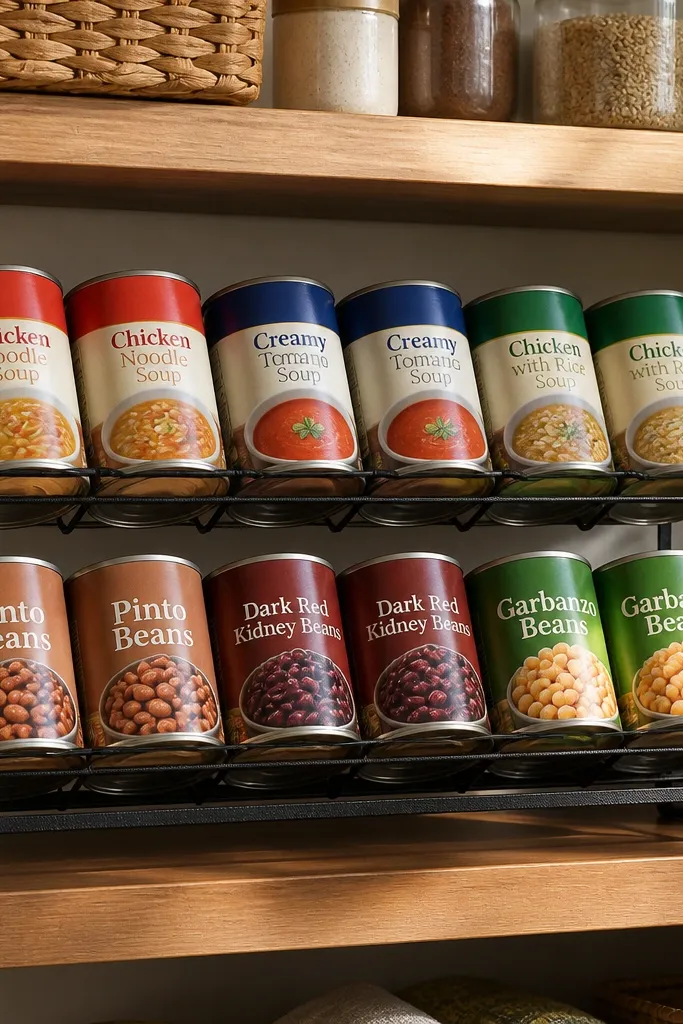
Cans look neat when they’re face-forward and evenly spaced. A slight tilt rack makes labels visible and keeps cans from leaning, which is what usually makes the shelf look messy. This is one of the fastest ways to make your pantry look “done,” even if the inside is still being organized. Use it for soup, beans, and tomatoes so you can scan quickly and grab without knocking other cans.
Choose a simple can tilt rack insert sized to your shelf depth. Place the rack so the front edges align with the shelf front; then load cans with labels facing outward. Keep spacing consistent by using the rack’s compartments rather than free stacking. Add a small category label strip at the front edge of the shelf like “Pasta Sauce” or “Beans.”
If your shelf is uneven, place the rack on a thin shelf shim so the tilt stays consistent.
Avoid mixing can sizes in the same rack without dividers; different heights ruin the clean front line.
10. Fabric-Box Fronts for Bulk Flour and Sugar
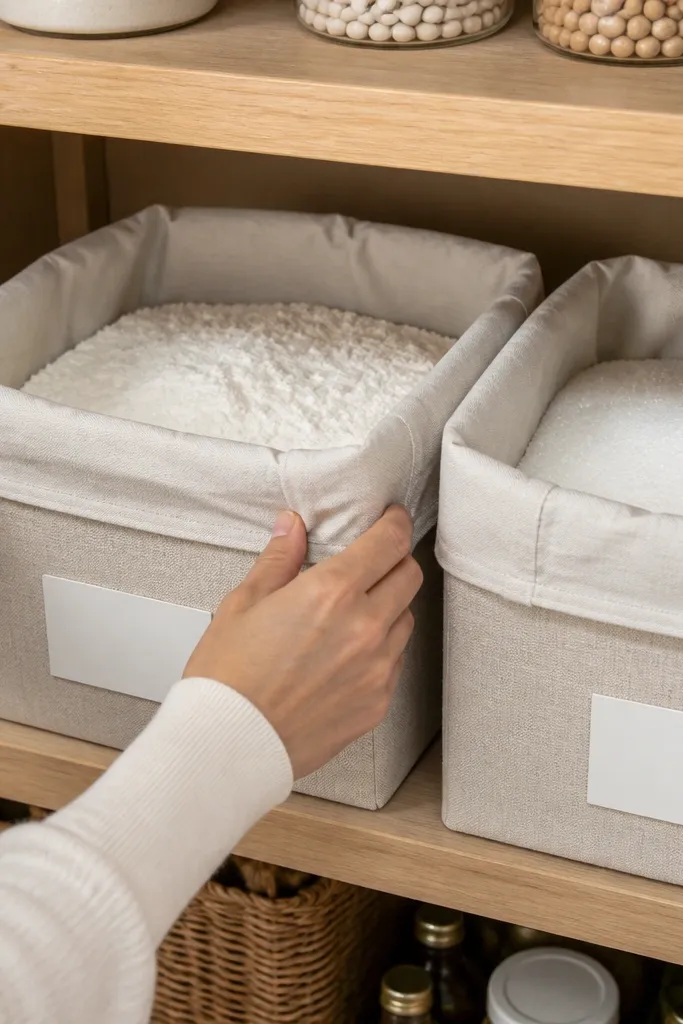
Fabric-front boxes make bulk storage look tidy because the front is soft, uniform, and visually quiet. You get the practical benefit of keeping flour and sugar contained while hiding the messy reality of bags and scooping. Choose boxes with stiff fronts or removable liners so they hold their shape. This works when your pantry has big bags that always look wrinkled and chaotic, even if you’re trying to be “organized.”
Use boxes sized to your pantry shelf depth, then insert a liner bag or a washable inner bin for each bulk item. Cut or fold liners so they stay smooth and don’t bunch at the front. Label the fabric front with a single ingredient name and keep the label centered. Place boxes in one row, then use a small tray or narrow basket at the bottom for scoops so everything looks intentional.
Editor's noteUse white or cream fabric fronts; darker fabric shows dust and lint faster.
Skip thisDon’t use floppy fabric bags without structure; they slump and the shelf looks uneven.
11. Pegboard Shelf Back With Color-Matched Labels
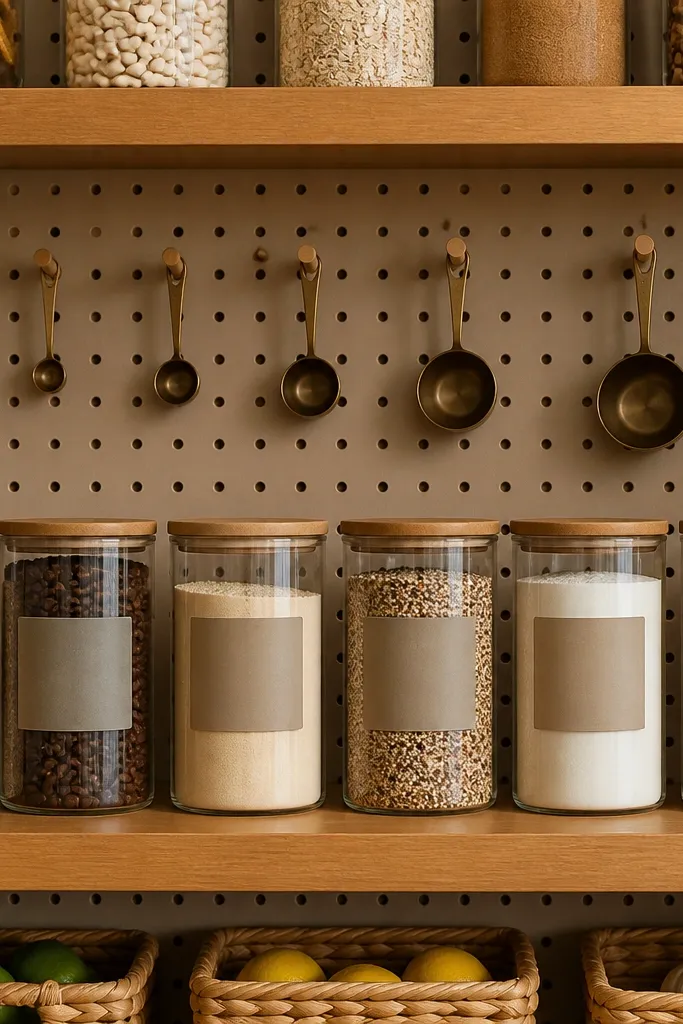
A pegboard backing makes shelves look designed because it creates a clean visual background and gives you a place for utensils like measuring scoops and small tools. When containers are placed in front of a structured backdrop, the whole pantry reads neater. This is great for small pantries where the back wall tends to look cluttered. Use it with jars, small canisters, and labeled bins so the shelf has both storage and a styled “set.”
Cut or size pegboard to fit your shelf back, then mount it with screws so it sits flat. Paint or seal the pegboard in a matte finish that matches your container color palette. Install hooks for scoops and small tools, then place containers in front so the pegboard pattern stays visible. Label everything with consistent label placement and keep hook items all facing forward.
Seal pegboard with a matte clear coat; it stops dust from catching and keeps the background clean-looking.
Don’t hang random tools at mixed heights; keep tools in one horizontal band so the look stays orderly.
12. Staggered Bin Heights for a Controlled, Stylish "Mess-Free" Look
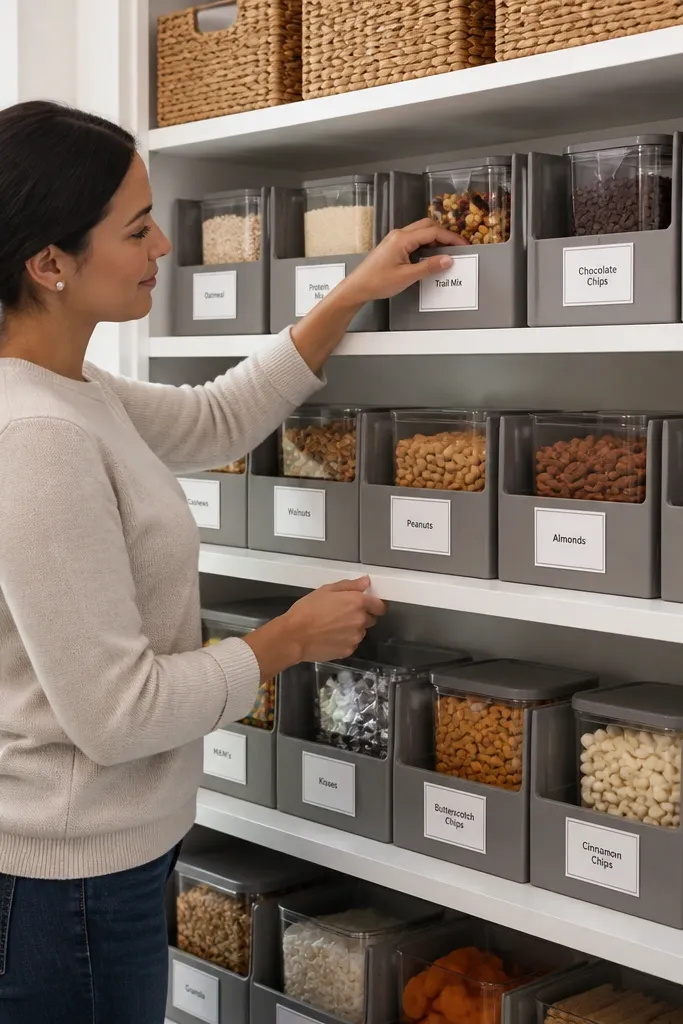
This idea makes your pantry look like it has a plan by using only two bin heights and staggering them intentionally. The visual rhythm is what reads neat, not the specific brands. Use it for pantry items that vary in size, like snack mixes, baking chips, and cereal toppings. The shelf looks curated because the fronts line up in a pattern instead of forming a single chaotic stack.
Pick bins in two heights that match in width and front profile. Place the taller bins on the left and right ends of a shelf, then use shorter bins in the middle so labels stay visible. Keep the front edges aligned to the same shelf line for a clean look. Fill bins so the front stays flat; use smaller inner containers for anything that clumps or bulges.
Editor's noteUse a level to check shelf slant; staggered bins reveal uneven shelves fast.
Skip thisAvoid using three bin heights; the stagger stops looking designed and starts looking accidental.
13. Two-Color Rotation System for FIFO Shelves
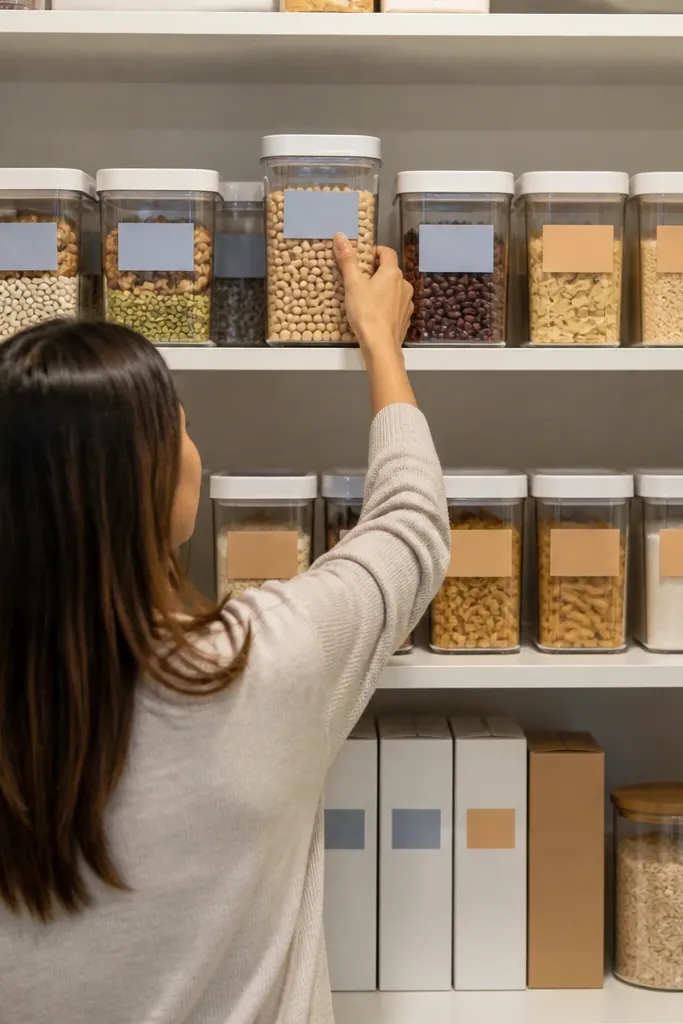
Neat shelves get ruined when old items get buried. A FIFO-looking system fixes the mess while still looking tidy: use two label colors for front and back placement so you always know what to use first. It looks clean because labels are consistent and the front row stays uniform. This works for dry goods like rice, pasta, cereal, and flour where you rotate often. You’ll also reduce the “hidden expired stuff” problem without making your pantry look clinical.
Choose two label colors and assign them to front-row and back-row items. Create two zones on each shelf: a front zone for current items and a back zone for backups. When refilling, move new product to the back zone and pull older items forward. Keep the containers identical in shape and use label placement at the same height across the whole shelf.
Editor's noteWrite labels with month/year for backups only; you don’t need dates on everything.
Skip thisDon’t rotate by moving loose bags around; pour into uniform containers so the front stays neat.
14. Oversized Pantry Basket With a Label Plate on the Front
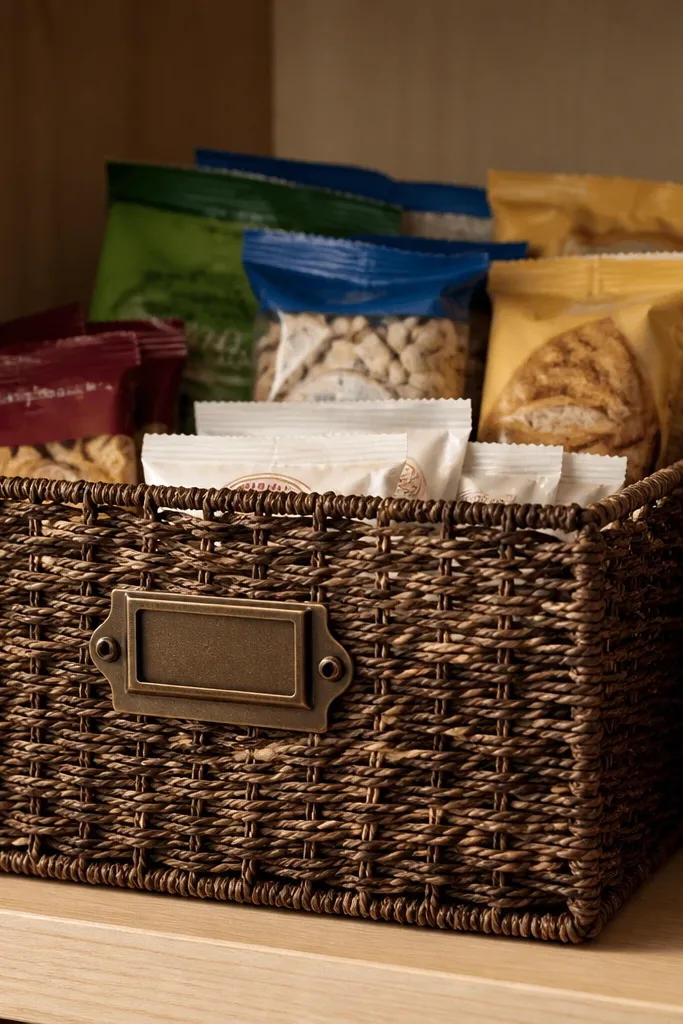
A single oversized basket looks neater than lots of small loose containers when you have “in-between” items like snack bags, packets, and single-serve mixes. The label plate on the front makes it look intentional, not like a catch-all. Choose a basket with straight sides so it holds shape and looks tidy. This is ideal for awkward pantry categories that don’t fit perfectly into canisters.
Pick a basket that fits your shelf width with at least 1 inch of clearance on each side. Add a label plate or a laminated label at the front center so it’s visible without digging. Use inner organizers inside the basket — small paperboard trays or mini bins — so items don’t slump and spill over the front. Place the basket where you can see the label from standing height, then keep everything else on the shelf more structured.
Line the basket bottom with a washable mat so crumbs don’t stain the basket and ruin the look.
Don’t skip inner organizers; an unstructured basket becomes a wrinkled pile.
15. Rope-Handle Wicker Bins for Oil, Vinegar, and Condiments
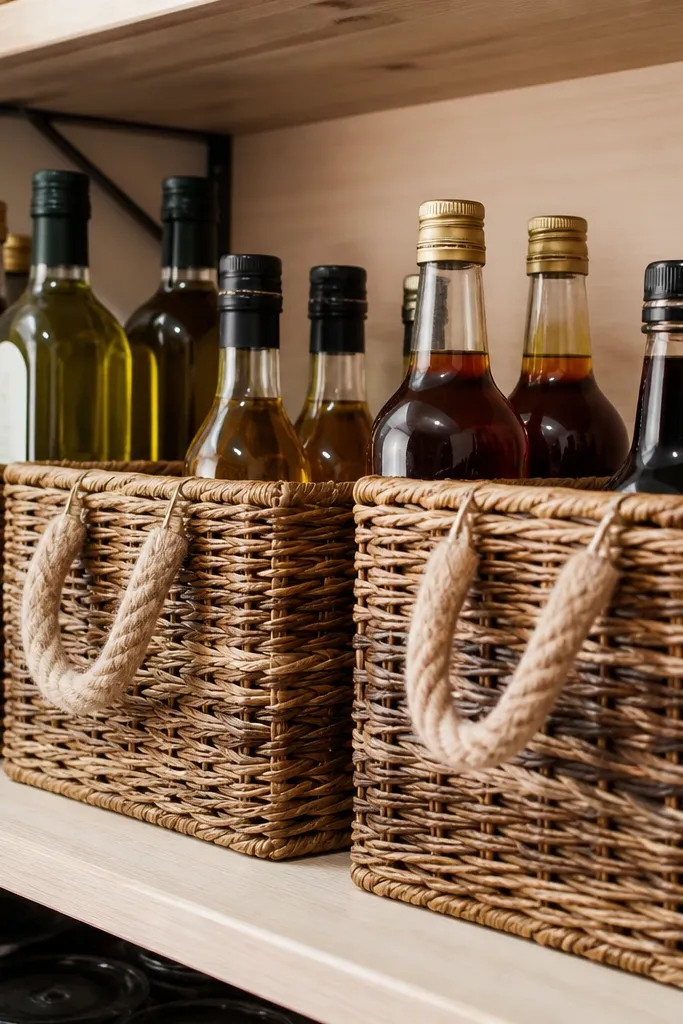
Wicker bins look warm and neat because the texture hides minor clutter while keeping the front organized. Rope handles also add a clear visual feature, so the shelf looks styled even in a functional area. Use this for bottles and condiments that can look messy when they’re loose — olive oil, vinegar, soy sauce, and specialty bottles. The look stays tidy because bottles sit upright inside the bin and labels face forward.
Choose wicker bins with enough depth for bottle height and sturdy bases so the bottles don’t tip. Add small bottle separators if needed — thin foam or cardboard dividers — so bottles don’t knock into each other. Place bottles in rows with labels facing the same direction. Attach a category label to the front of the bin and keep the bin on the same shelf edge for alignment.
Put a drip catcher mat under the bin so any condensation doesn’t stain shelves.
Avoid bins that bow inward; bottles tip and the shelf looks messy fast.
16. Linen-Look Totes for Breakfast Packs and Cereal Toppings
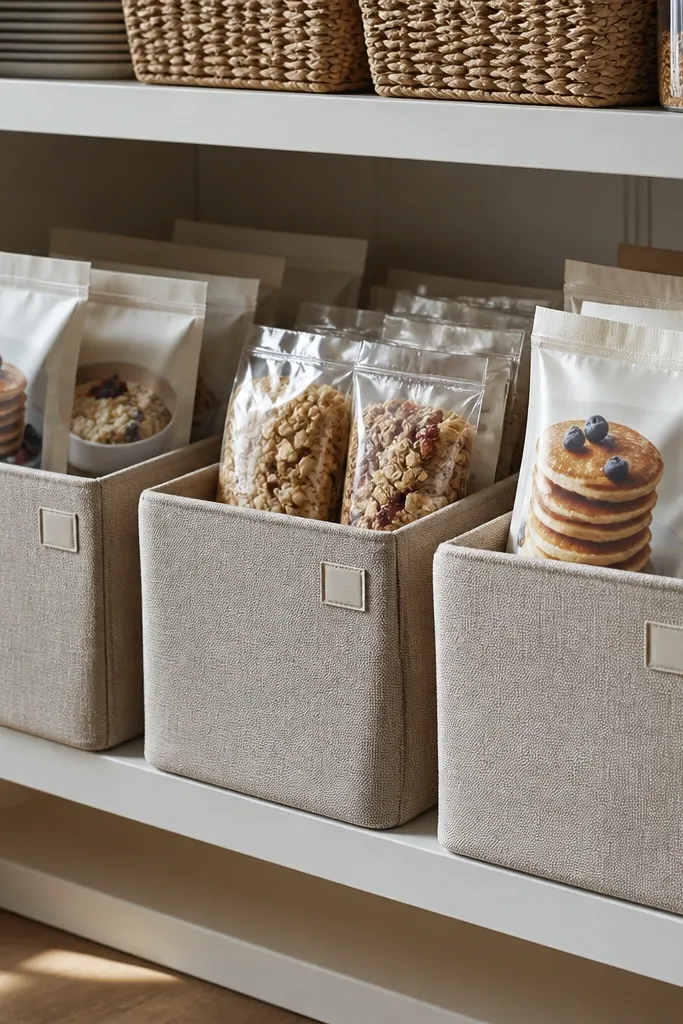
Linen-look totes keep your pantry aesthetic soft and clean while hiding the chaos of small packets. The fabric front makes the shelf look less “plastic bin city,” and the labels keep it searchable. This is perfect for breakfast mixes, pancake mix packets, cereal add-ins, and seasoning packets you don’t want loose on open shelves. The shelf stays neat because you pull a tote, take what you need, and set it back without leaving a mess behind.
Pick totes with rigid inserts or thick sides so they don’t collapse when partially full. Insert a washable inner bag or use a plastic liner so spills wipe easily. Label the tote front with a single category name in the same font style across all totes. Place totes on one shelf in a row, then keep only one category per tote so the shelf looks organized at a glance.
Use label tape on fabric and press firmly with a scraper so it sticks under kitchen humidity.
Don’t put wet or opened packets loose in the tote; they stain fabric and look messy.
17. Modular Shelf Dividers for Uniform Front Edges
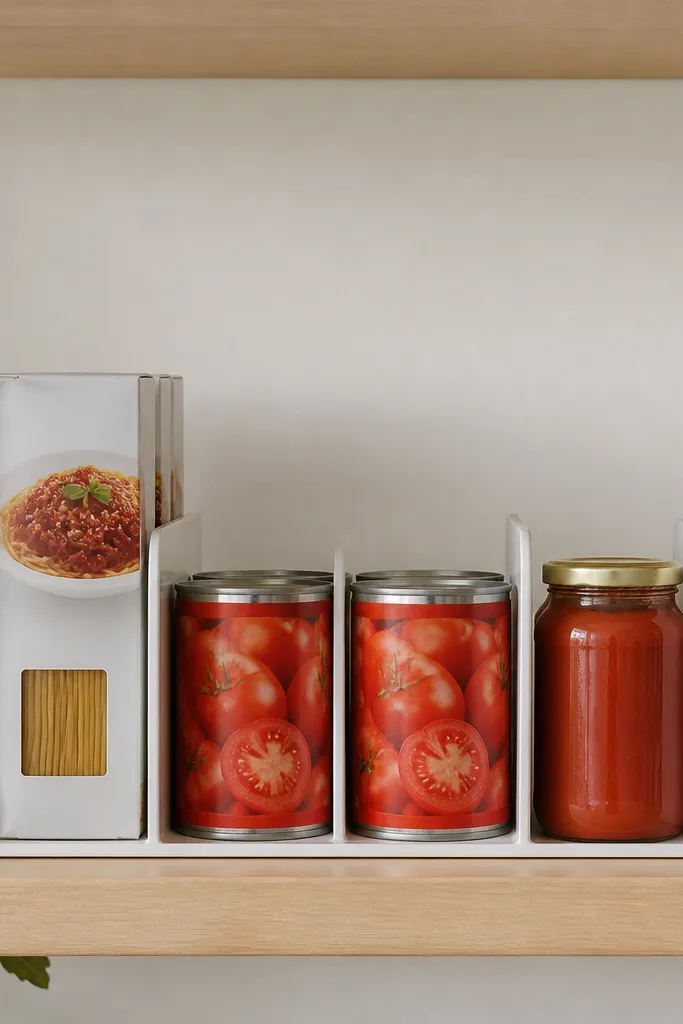
If your pantry looks messy even when it’s “sorted,” it’s usually because items are touching and leaning. Modular shelf dividers fix that by giving each container its own lane. The result is a clean front edge line that looks neat in photos and in real life. Use this for boxes, cans, and small containers that vary in size. You can keep your existing bins and still improve the look dramatically just by controlling spacing.
Measure your shelf and plan divider widths so each lane holds one container type. Install dividers with screws or strong adhesive strips, keeping them aligned to the shelf front. Place containers into lanes and use a thin liner to prevent sliding. Label each lane with a small front label so you don’t have to read container text from the side.
Use clear dividers only if your containers are already neat; otherwise opaque dividers hide mess better.
Avoid dividing too tightly; containers need a little breathing room so they don’t scrape and shift.
18. Under-Shelf Baskets for Labels That Stay Visible
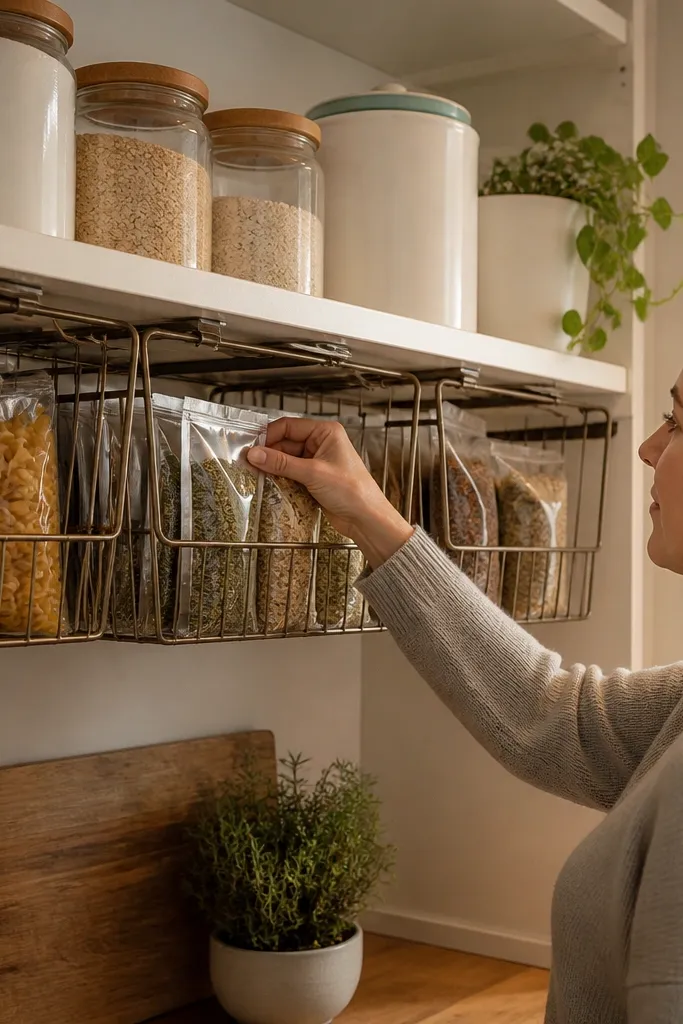
Under-shelf baskets are a smart way to add storage without making the top shelf look crowded. The trick for a neat look is to keep labels facing forward and keep the basket fronts aligned with the shelf lip. This works for backups and overflow like paper towels, extra pasta, or bulk seasoning refills. Your pantry looks cleaner because the upper shelf stays “display-ready,” while overflow lives behind the basket line.
Choose baskets sized to fit under your shelf without blocking the pull-out space. Install basket brackets or use adhesive shelf supports designed for wire baskets, then test pull clearance. Add inner organizers inside baskets so items don’t slide forward and hide labels. Use consistent front labels and keep the basket fronts aligned so the shelf reads like a single unit.
Use matte label paper on the basket front so it doesn’t glare under bright kitchen bulbs.
Don’t store overflow in tall stacks above basket height; it collapses into a lumpy mess.
19. Matte Black Tiered Shelf for Snack Frequency Items
A tiered shelf stand makes your pantry look neat because it creates a structured display without needing custom carpentry. Matte black stands out against light shelves and gives a “cafe” feel, especially for snack items you reach for daily. Use it for items you want to stay visible like granola bars, breakfast puffs, and grab-and-go trail mix. The look stays clean because everything sits on tiers with clear boundaries and consistent spacing.
Pick a tiered shelf stand that fits your pantry shelf depth and doesn’t block access to the back. Place it in the center of the shelf so the front tiers are visible when you open the door. Use identical containers or stackable boxes on each tier to keep the front uniform. Label only the tier categories (not every single item) and keep the tier edges clean by wiping container fronts before you set them down.
Editor's noteChoose containers with flat fronts so labels sit straight on each tier.
Skip thisAvoid mixing tall bags on a tier stand; they lean and ruin the clean tier lines.
20. Spill-Proof Pantry Trays for Sticky or Crumb Items
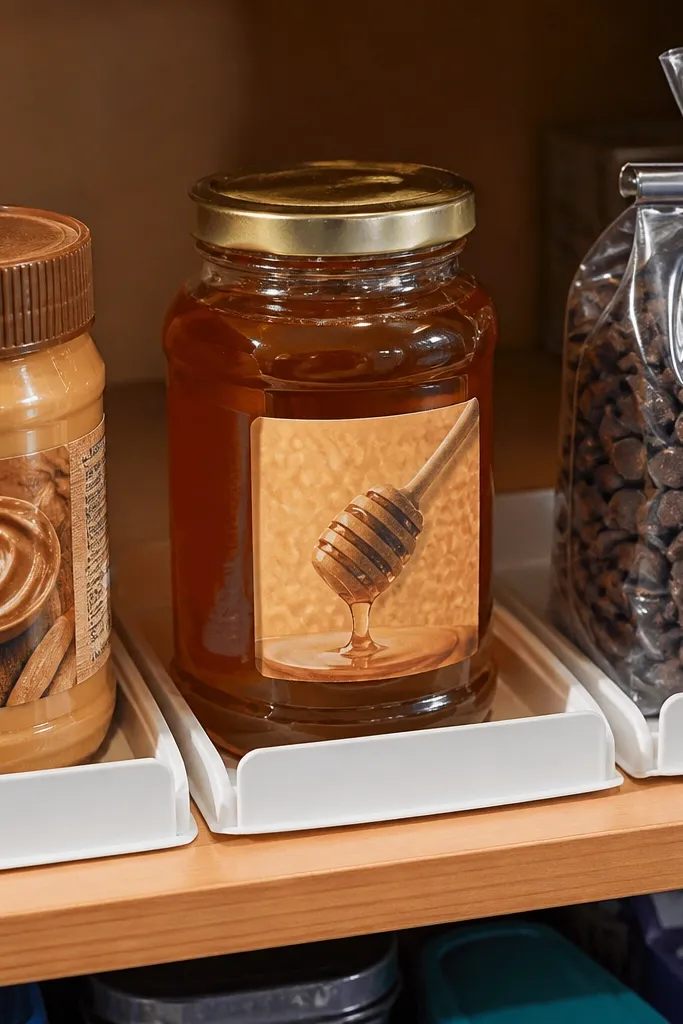
Trays are the hidden secret to neat-looking pantry shelves because they prevent the slow mess that makes shelves look dirty. Use trays for peanut butter, honey, chocolate chips, and any crumbly baking mixes that leave residue. A clean tray front makes the shelf look styled, even if the inside items are messy sometimes. Pair trays with simple containers so everything sits inside a defined boundary.
Select trays that match your shelf width and have raised edges (at least 1/2 inch) to catch drips. Place trays first, then set containers inside so they don’t touch the shelf sides. Line trays with a wipeable mat or silicone liner if you want extra protection. Add a small label on the tray front for the category and keep the tray arrangement consistent across shelves.
Wipe tray rims every time you refill; that one habit keeps the shelf looking new.
Avoid skipping liners; sticky drips dry and make the shelf look permanently messy.



