

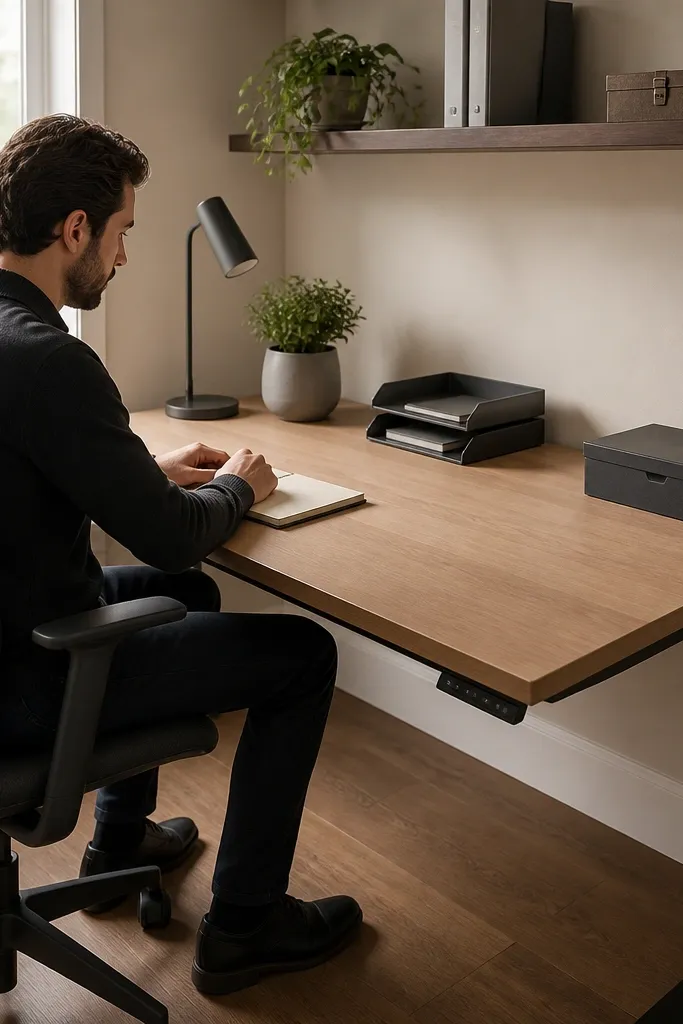
1. Walnut-look laminate top with matte black steel frame
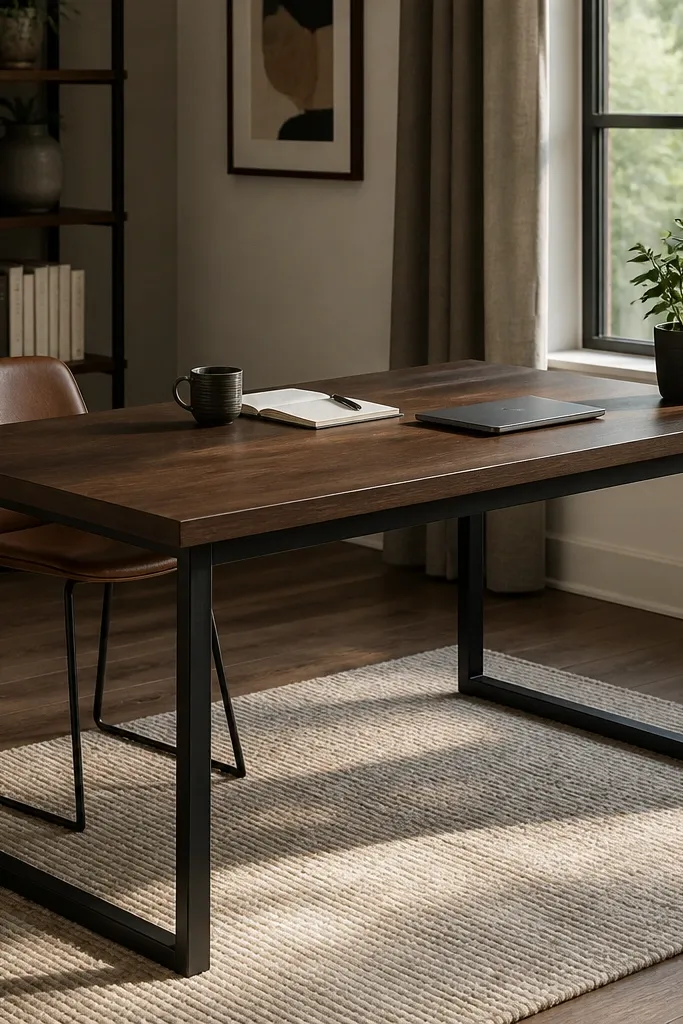
This is the quickest way to get good-looking Study Table Ideas that read modern and expensive. The thick-looking laminate top holds a consistent color and resists scuffs, while matte black steel gives you crisp, straight lines that photograph well. Keep the top overhang even on all sides so the silhouette looks intentional. Add a simple cable channel on the back edge so cords disappear instead of dangling. Skill level is beginner-friendly if you buy pre-cut steel legs and focus on a clean top attachment.
Cut your tabletop from a 3/4-inch sheet with a 1.5-inch “thick” look using a glue-and-screw edge build-up (add a 3/4-inch strip under the front and sides). Sand the laminate edges lightly and apply matching edge banding with an iron and trimming knife. Attach a rectangular steel frame using corner brackets, then bolt the frame to the underside of the top from the inside with washers. Finally, drill a 1.25-inch cable pass hole near the back corner and install a snap-in grommet; route a power strip behind the rear lip.
Use black oxide screws and washers so the underside doesn’t show bright metal through gaps.
Don’t mount the top flush to the frame — you lose the shadow line that makes it look designed.
2. Light oak top with white shaker-style drawer front
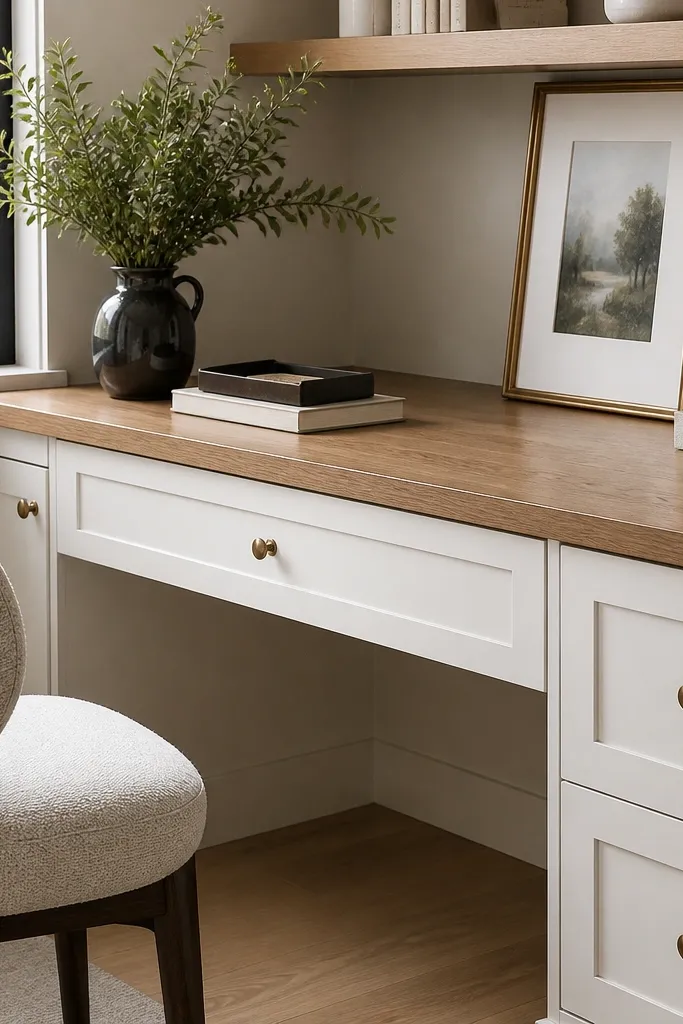
This combo looks expensive because it mixes warm wood grain with a crisp painted panel. The shaker-style drawer front gives you modern depth without adding clutter, and the light oak top keeps the desk bright for a study nook. The secret is that the drawer front is flush and aligned, so it reads like built-in cabinetry. If you’re working with limited space, a single wide drawer is enough for chargers, notebooks, and small supplies while the open top stays clean.
Build a simple carcass from 3/4-inch plywood or MDF, sized around 48 inches wide by 24 inches deep. Install a drawer box using 1/2-inch sides and a 1/4-inch plywood base, then mount full-extension drawer slides centered under the top. Create the drawer face with a white painted panel and recessed rails/stiles (use 1x2 boards ripped into thin strips). Seal with paint + clear coat for a durable finish, then add a matching wood edge band to the desktop for a clean border.
Sand the drawer face edges to a slight radius before painting so the white finish doesn’t chip at corners.
Avoid mismatched drawer slide heights — if the drawer sits crooked, the whole piece looks cheap.
3. Floating desk top with wall-mounted cleat and hidden storage
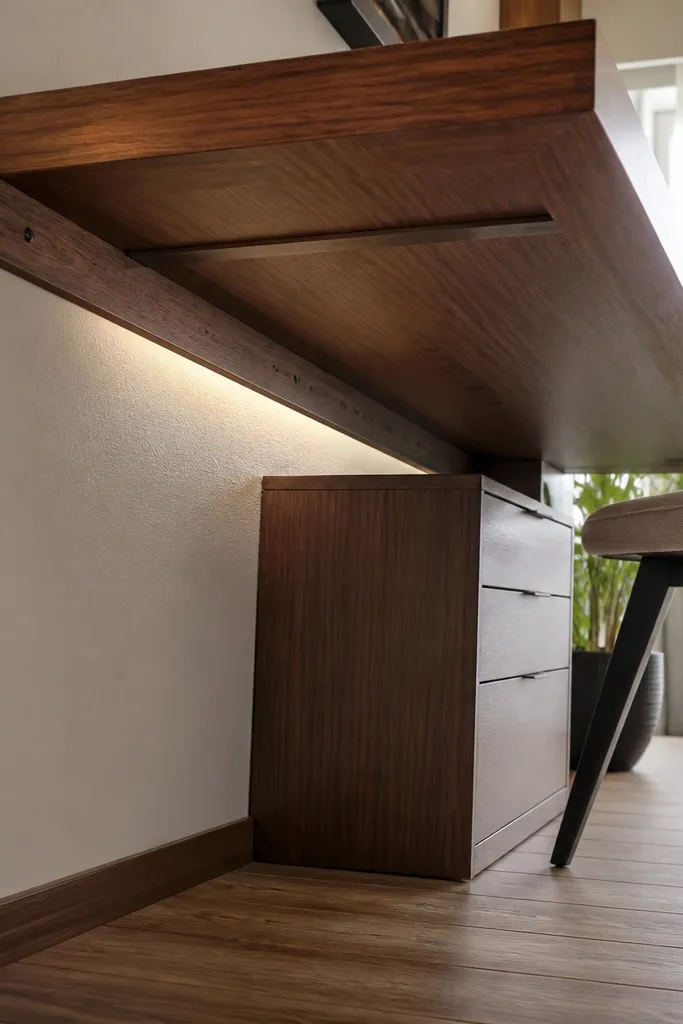
Floating desks look modern because there’s no bulky frame under the top. To make this read as good-looking Study Table Ideas, you need a strong wall cleat and a storage method that doesn’t look like a DIY afterthought. Pair a floating top (about 2 inches thick) with a slim drawer unit tucked under or beside it, so the underside stays clean. Add a cable raceway along the wall to keep the desk area calm and photo-ready.
Find studs and mount a continuous cleat strip (2x4 ripped to 2 inches wide works) at a height of about 30 inches to the top surface for most adults. Use a level and long structural screws into studs, then pre-drill the underside of your tabletop so you can bolt it down without splitting. Build a slim drawer box or cabinet unit and mount it so it aligns with the desk depth (around 20 to 24 inches). Install a wall-mounted power strip inside the storage cavity and run a cable raceway up to the desktop.
Cover the wall cleat with a thin trim board so the top looks like it’s floating from a single clean line.
Don’t rely on drywall anchors — the floating look is only worth it if it’s solid.
4. Concrete-look tabletop with warm wood legs

Concrete-look surfaces look high-end, but real concrete is heavy and messy. A concrete-look tabletop finish gives you that modern industrial look while staying workable as DIY. The key is balancing the cool top with warm legs so the desk doesn’t feel harsh. Use light ash or oak legs with a matte clear coat; the contrast makes the table look more expensive than the materials. This is a great choice for a study corner with gray walls or black shelving.
Start with a plywood tabletop and apply a concrete-look finish using a two-step system: a gray base coat and a textured overlay with a trowel effect. After it cures, seal with a matte protective topcoat so it doesn’t feel sticky or chalky. Build a leg frame from 2x2 hardwood (or purchased legs) and add cross braces for stiffness. Attach legs to a skirt or directly to the underside with threaded inserts so you can re-tighten if needed. Finally, seal all hardware holes so the finish doesn’t chip.
Mist the finish lightly between coats with a fine sprayer to keep texture even and prevent harsh ridges.
Don’t use glossy topcoat — it kills the concrete look and shows every patch.
5. Walnut stain + French cleat cable tray desk
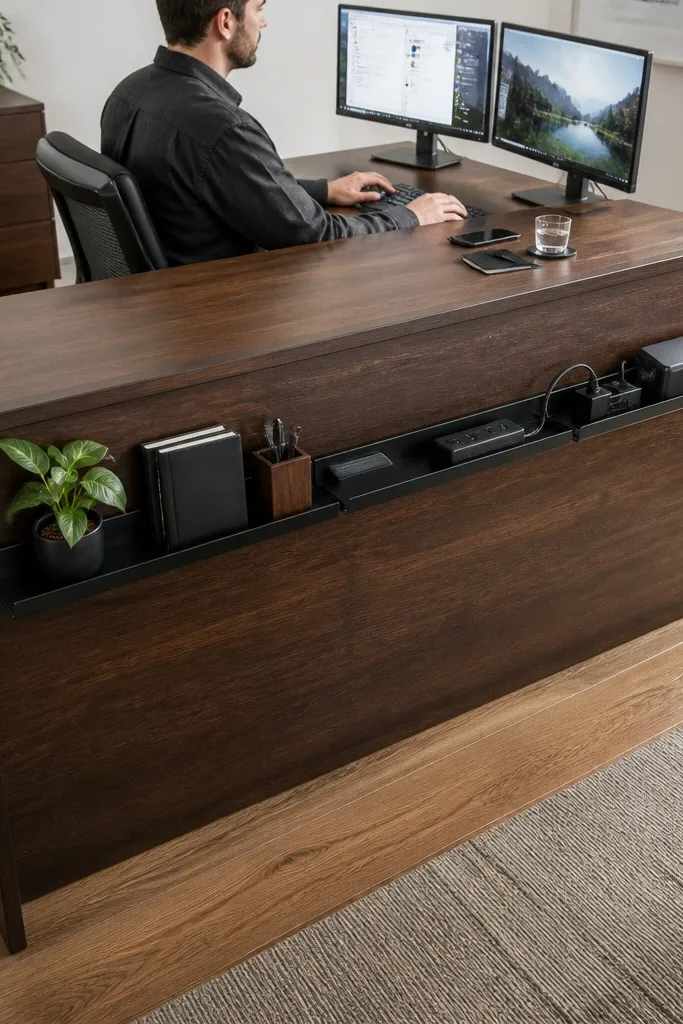
Use 3/4-inch plywood or solid wood for the top, sand to 180 grit, then apply walnut stain with a rag followed by a clear matte or satin topcoat. Build a French cleat from two matching strips (the angled halves) mounted to the wall at the desk height. Screw the matching cleat to the back panel of your desk or to a thin backboard attached under the top. Install a metal cable tray or plastic raceway on the cleat so you can remove it later. Drill a grommet hole in the desktop and route cords down into the tray.
This build looks expensive because the back area stays organized and intentional. A French cleat rail behind the desk lets you hang a slim cable tray, power strip, and small organizers without visible clutter. The walnut stain makes the wood look deep and modern, but the real “stunning” part is the hidden cable path. Your desktop stays clear, and it’s easy to swap accessories later as your study setup changes.
Skip thisSkip the cable grommet and cords will snag, fray, and ruin the clean line.
Editor's notePaint the inside of the cable area black so any stray cable ends disappear visually.
6. Rounded-edge desk with plywood veneer and soft radius
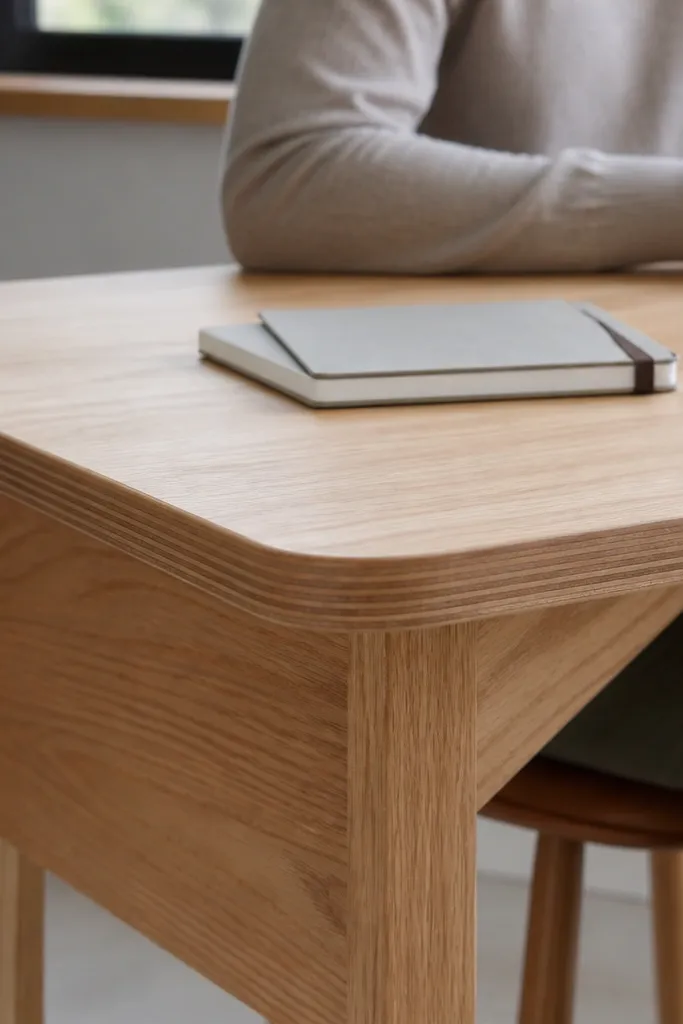
Sharp corners make DIY furniture look homemade. A soft rounded edge — around 1/2-inch radius at the corners — instantly upgrades the look and makes the table feel more premium. Combine that with a thin wood veneer top for a consistent grain that reads warm and modern. Keep the base simple: either a light wood frame or matte black legs, but avoid extra decorative parts. This project is ideal if you want good-looking Study Table Ideas that feel gentle and clean.
Laminate or veneer a plywood core to get a stable top, then use a router with a 1/2-inch round-over bit on all front and side edges. Sand the radius lightly and apply a satin polyurethane topcoat for a smooth feel. Build a basic base with two side frames and a front-to-back brace so the tabletop doesn’t flex. Attach the top with countersunk screws and wood plugs or threaded inserts for a clean underside. Finish with matching edge banding on any exposed core layers.
Do the round-over before final sanding — it prevents uneven grain at the corners.
Don’t leave raw plywood at the underside edge; it will telegraph through and look unfinished.
7. Two-tone desk: white top shelf with dark lower cabinet
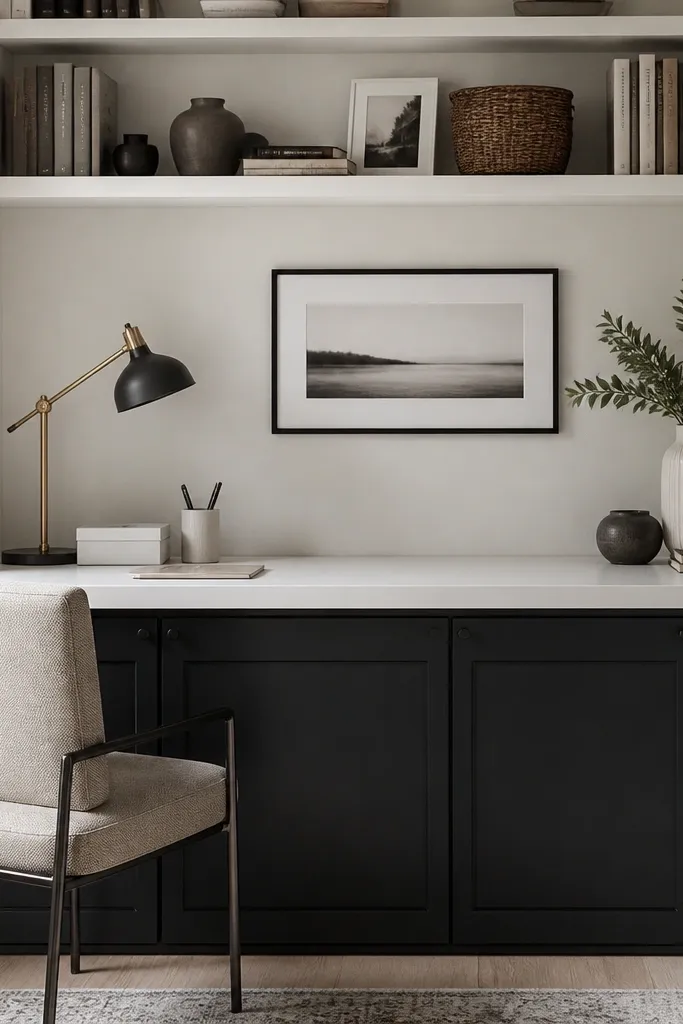
Two-tone furniture looks intentional because it creates separate visual zones. Use a white upper writing surface or shelf and pair it with a dark lower cabinet for storage; the contrast makes the desk feel like a piece of built-in furniture. The cabinet doors keep the mess hidden, which is what makes the desk look expensive even when you’re using it daily. This works great in small rooms because the closed storage reduces visual noise.
Build the lower cabinet from 3/4-inch plywood with a door opening sized around 18 inches wide by 18 inches tall, then add an adjustable shelf inside. For the top writing shelf, use 1-inch thick board or laminated panel and attach it to the cabinet sides with hidden brackets. Paint the white shelf and cabinet exterior with a durable cabinet paint; use a sprayer if you have one or do careful brush rolling for even coats. Add soft-close hinges and magnetic catches for clean door alignment. Install a small LED puck light under the shelf if you study at night.
Use foam tape under the shelf where it meets the cabinet to prevent tiny rattles.
Avoid glossy paint on the desk surface; it shows fingerprints and glare.
8. Desk with slatted front panel for a modern, airy look
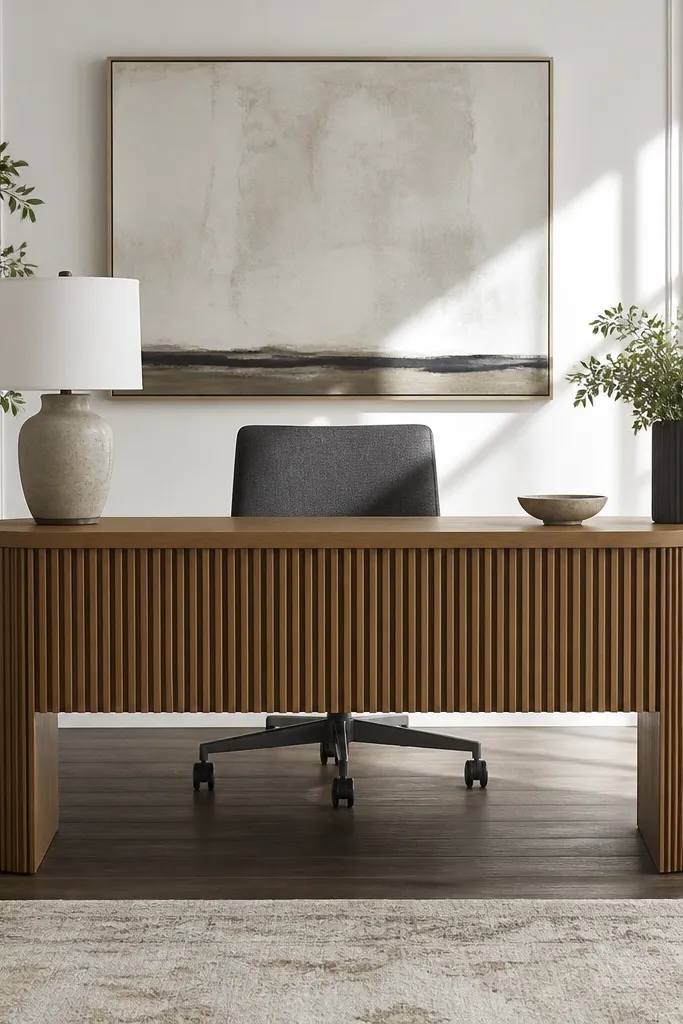
A slatted front panel turns a plain desk into something that looks designed. The slats break up the mass of the storage area, and the light shadow gaps make it look more expensive in photos. Keep the rest simple: a clean tabletop and a hidden drawer system behind the slats so you still get functional organization. Use this when you want good-looking Study Table Ideas that feel light, not bulky.
Build a storage carcass using 3/4-inch plywood and install a drawer on the lower section with full-extension slides. Cover the front with a slatted panel made from 1x2 boards ripped to consistent widths, spacing about 1/4-inch apart. Paint or stain the slats to match your top or create contrast with matte black slats. Attach the slatted panel with screws from behind so the front stays smooth. Seal the slats and edges so the finish won’t chip when you wipe it.
Clamp a spacer jig while assembling slats so every gap stays even.
Don’t make slats too thin — flimsy slats warp and look cheap fast.
9. Minimal desk with mitered joinery look using trim strips
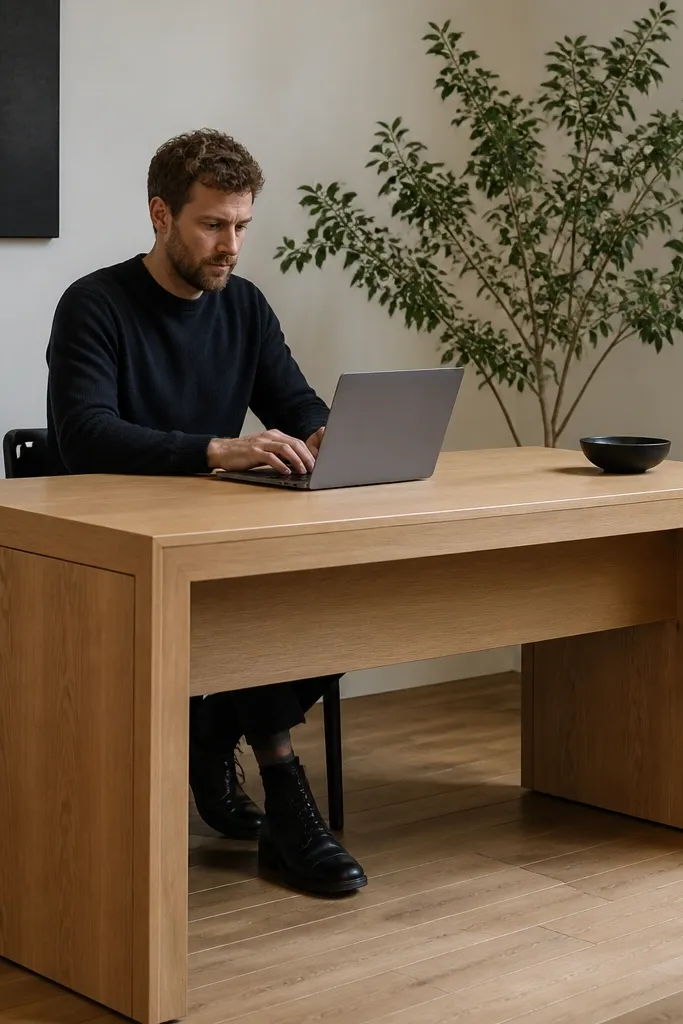
Cut a plywood core tabletop to your size, then add a frame border using trim strips ripped to about 3/4-inch width. Cut the trim ends at 45 degrees with a miter saw and glue them to the top surface, then clamp until set. Fill tiny gaps with wood filler and sand flush. Build a simple base and attach the tabletop using underside brackets. Finish the whole visible surface with veneer, laminate, or stain + clear coat, and keep hardware matte for a modern look.
This is a smart trick for good-looking Study Table Ideas if you want a “fine furniture” frame without complex joinery. You create the mitered look using trim strips around the top and front, so the desk has a framed border that reads expensive. Keep the core simple plywood or MDF inside, then finish the visible surfaces with a durable laminate or veneer. The result is sharp lines, a clean silhouette, and fewer finishing headaches than true mitered carcass work.
Skip thisDon’t over-sand after veneer or laminate — you’ll thin the edges and expose darker layers.
Editor's noteDry-fit every corner and mark the orientation of your trim strips before gluing.
10. Desk with integrated monitor riser and backlight strip

Build a top with a rear raised platform about 6 inches tall and 16 to 18 inches wide for a monitor riser. Cut a shallow channel under the riser to run cables and mount a small power strip inside the cavity. Install an LED strip behind the riser lip with a diffuser cover so the light looks even. Seal all edges and paint the interior cavity a dark color to hide wires. Finally, drill cable exit holes at the rear and route cords through grommets into the channel.
This project looks stunning because it turns the desk into a workstation, not a flat surface. An integrated monitor riser gives you a cleaner cable route and a higher viewing height, which makes the whole setup look more intentional. Add a subtle backlight strip under a back lip so the desk glows softly without turning into a gimmick. The look is modern, tidy, and photo-friendly because the electronics are contained. Build it if you use a monitor and you want your study area to look “finished.”
Skip thisDon’t place the LED where it shines directly into your eyes — route it behind a diffuser lip.
Editor's noteUse a dimmer controller so the LED looks warm and subtle instead of bright.
11. Laminated fold-out side shelf with hidden hinges

Build a standard desk base with a side panel or frame near the left or right edge. Install a fold-out shelf board sized around 14 inches by 10 inches, using concealed hinges rated for the shelf weight. When closed, the shelf should sit 1/8-inch below the top edge so it reads flush. Apply edge banding to all exposed edges and seal with clear coat or laminate wrap. Add a small magnetic latch to hold it tight when closed.
A fold-out side shelf makes the desk look sleek because it stays clean when you’re not using it. When you need space for books or a laptop, the shelf pops out and gives you a second working surface without adding a bulky extension. Good-looking Study Table Ideas here come from the flush alignment and hidden hinges, so nothing looks like it was added later. Use laminated surfaces so edges wipe clean and the shelf stays durable.
Skip thisSkip the latch — without it, the shelf creeps open and ruins the clean look.
Editor's noteTest the hinge geometry with the shelf empty first so you don’t misalign the reveal gap.
12. Reclaimed wood top with crisp black trim base
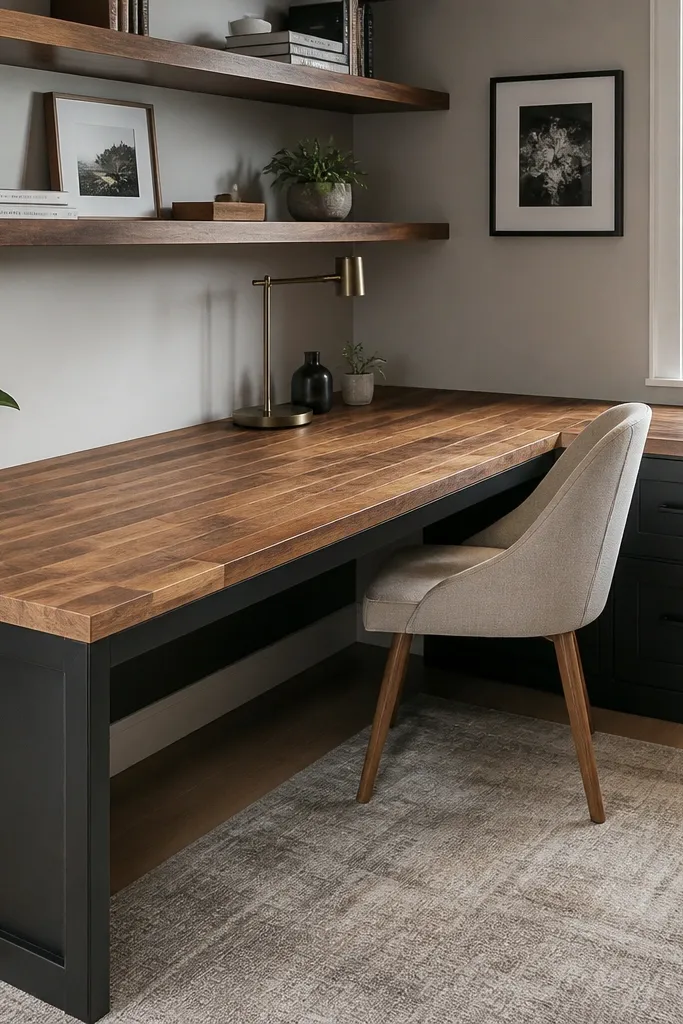
Reclaimed wood looks expensive when it’s restrained. The trick is not chasing rustic mess; it’s selecting pieces that look consistent in color and sealing them so the top looks smooth and uniform. Pair the reclaimed top with a clean black base and crisp trim lines, and you get good-looking Study Table Ideas that still feel modern. Add a single drawer or closed cabinet so your study area stays tidy. This suits rooms that need warmth but still want a sleek, contemporary vibe.
Choose reclaimed boards and plane or sand them until they sit flat, then glue them into a tabletop panel with minimal variation in height. Cut the panel to size and sand to 150-180 grit. Seal with a clear, matte or satin finish that locks in the grain and prevents sticky spots. Build a black base from plywood painted in matte black, then add a thin trim strip around the top perimeter for sharp lines. Install drawer slides and a simple drawer box, then add a minimal pull or push latch.
Use a foam roller for the final clear coats to avoid streaks in the grain.
Don’t leave random high spots on the reclaimed panel — they make the whole desk feel uneven and cheap.
13. Birch plywood desk with clear coat and brass pulls
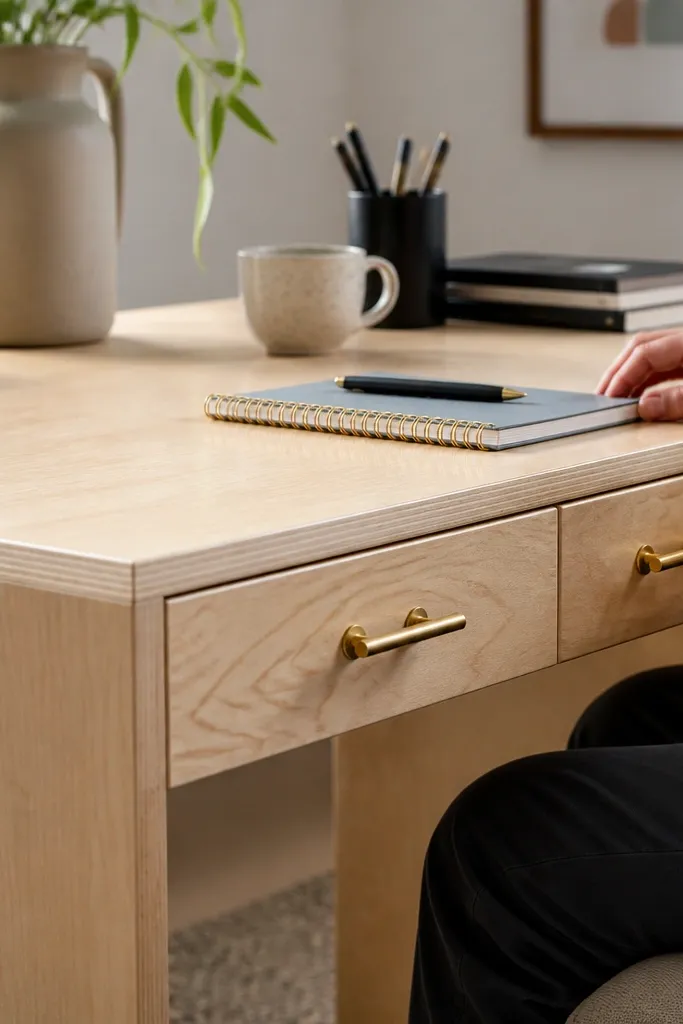
Build the frame from birch plywood panels and keep the visible edges sanded to a smooth, sharp line. Apply a clear satin topcoat in thin coats and sand lightly between coats for a glassy-but-not-shiny finish. Install drawer slides under the top and build two shallow drawers for stationery and cables. Use brass pulls mounted with consistent spacing and straight alignment. Add a back panel or cable tray so cords don’t show between drawers and wall.
Clear-coated birch plywood looks clean and modern because the grain is light and the surface stays bright. Brass pulls add a warm accent that looks intentional next to the pale wood, and they photograph well against matte finishes. Keep the design simple: a light frame, a drawer stack, and a flat top. This is a strong option for small study rooms because it doesn’t visually weigh the space down.
Skip thisAvoid thick clear coats in one pass; they cause bubbles and uneven gloss.
Editor's noteWipe birch with a tack cloth before each coat so dust doesn’t catch in the clear finish.
14. Corner desk with rounded inset and under-shelf storage
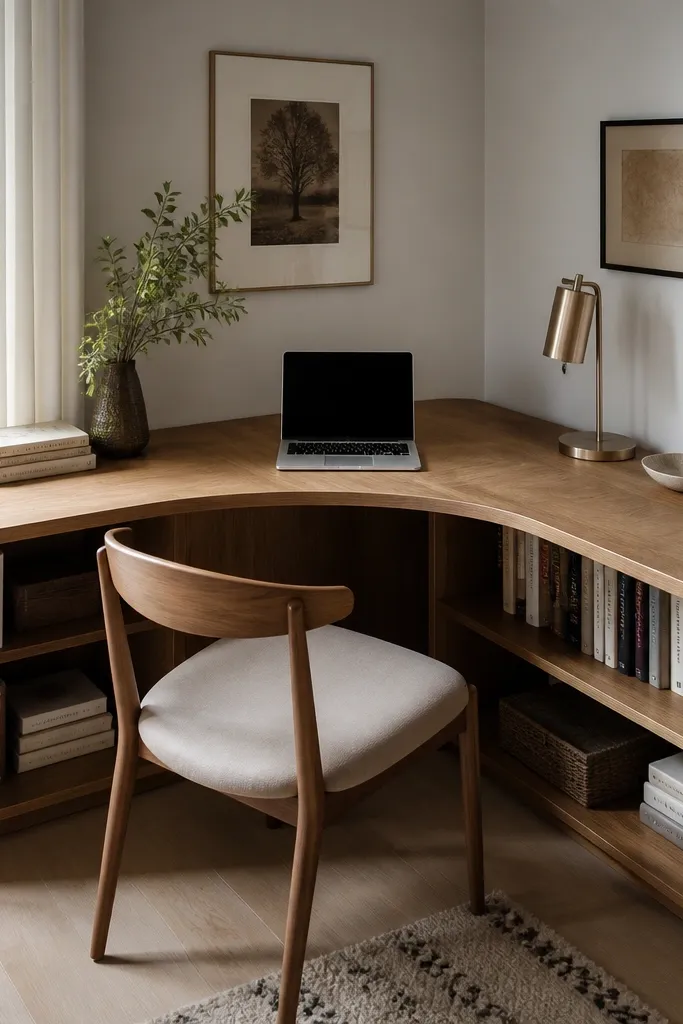
Measure your corner opening and cut the desktop as a two-panel L-shape with a rounded inner corner radius around 10 inches. Build a base from plywood with a support brace at the inner corner so it doesn’t rack. Add a slim under-shelf for books and a closed cabinet below it with a door or drawer. Route a cable channel along one side panel and add a grommet where cords enter the underside. Finish the top with a durable matte laminate or stain + clear coat.
A corner desk can look custom because the shape itself feels built-in. For good-looking Study Table Ideas, make the top follow the corner and add a rounded inset edge so it looks soft, not boxy. Include under-shelf storage so the area below doesn’t look empty or unfinished. This layout is great for apartments where you need maximum usable work space without pushing furniture into walkways.
Skip thisDon’t leave a raw underside edge at the corner — it’s visible every time you sit down.
Editor's noteUse a template for the rounded inner corner so both sides match and the desk looks symmetrical.
15. Desk with vertical slat back panel for shelves and hooks
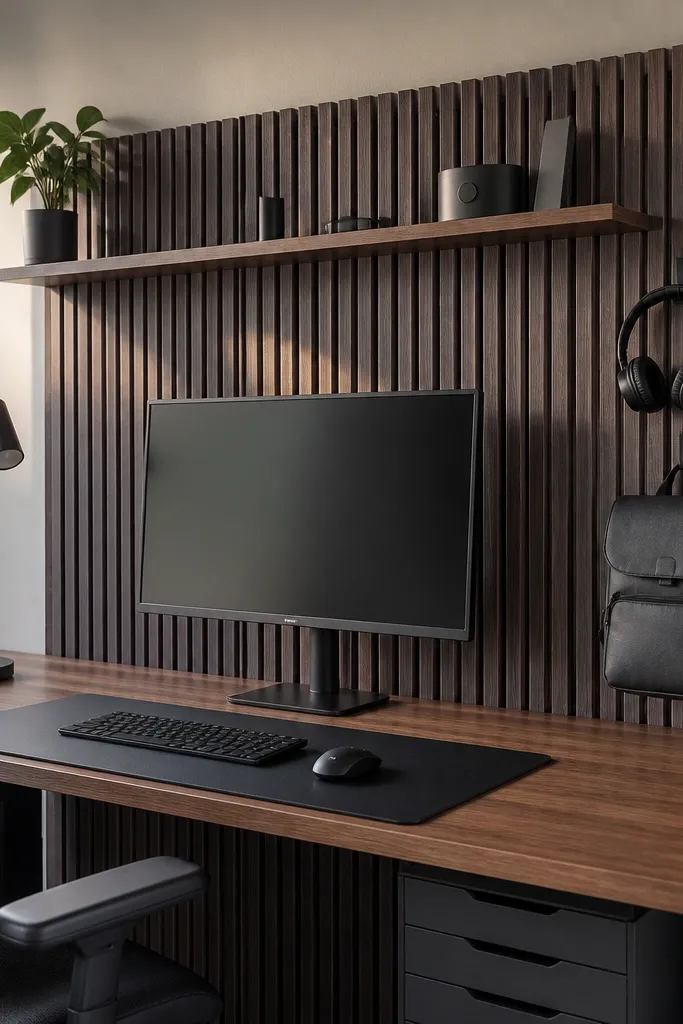
Build a back panel from a rectangle of plywood, then attach vertical slats spaced about 1 inch apart. Sand and finish the slats to match your desk palette, then mount the panel to the desk frame using hidden screws. Add a narrow shelf bracket system so you can position a small shelf at eye level. Use hooks with the same finish tone as any drawer pulls. Install a cable route along the back panel so cords drop behind it instead of draping over the side.
A vertical slat back panel makes the desk look like a designed workstation. You get a place for hooks, a small shelf, and a clean way to hang headphones or a bag without cluttering the tabletop. The slats also create a modern texture behind your monitor, which looks great in photos and makes the desk feel like a feature. Use metal or wood slats and keep the accessories minimal so the panel stays clean.
Skip thisAvoid piling accessories on day one — the panel only looks expensive when it stays mostly empty.
Editor's notePre-drill slats and use countersunk screws so you don’t split thin wood strips.
16. Slim desk with hidden pull-out keyboard tray
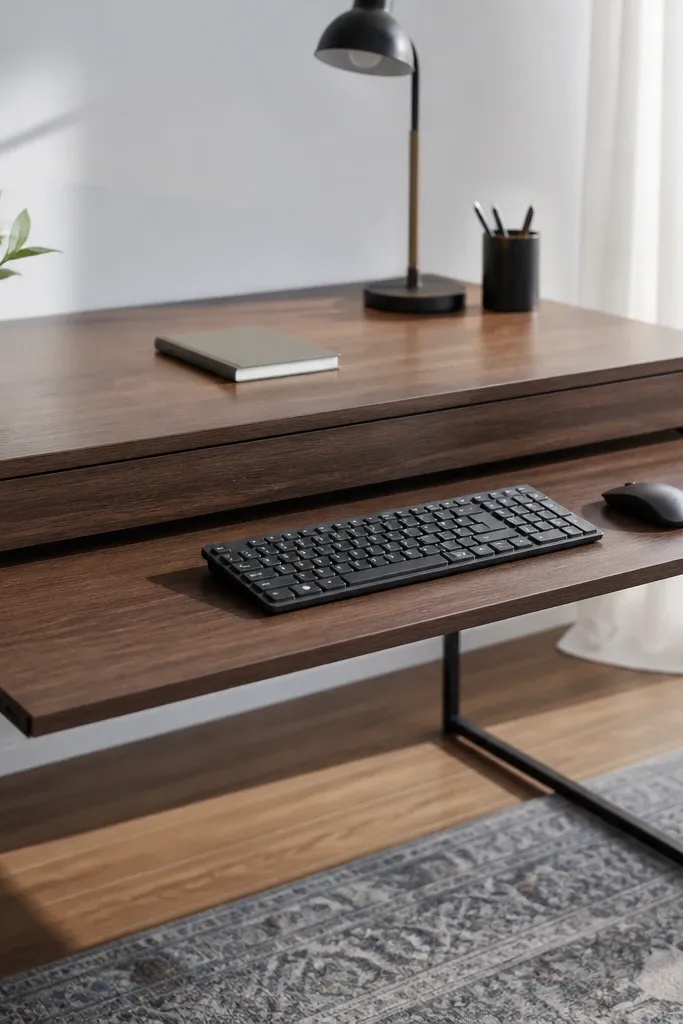
This is one of the best ways to make a small desk look bigger and more expensive. A hidden pull-out keyboard tray keeps the front of the desk clean, and it gives you a proper typing surface without storing a separate keyboard stand. Good-looking Study Table Ideas here depend on smooth slides and a flush front panel when the tray is closed. Choose a slim profile desk with a thicker top so it still feels substantial.
Build a slim desk carcass about 40 inches wide and 20 inches deep, with a thicker top board around 1.5 inches. Install full-extension undermount slides for the keyboard tray so it pulls out smoothly and closes tight. Make the tray about 28 inches wide and 11 inches deep, and mount it to the slides from underneath. Add a cable grommet near the back so charging cables don’t wrap around the tray. Finish the tray and front panel to match the tabletop for a seamless look.
Adjust the slide stops so the tray closes flush — a tiny gap makes it look DIY.
Don’t choose bargain slides with weak bearings; a tray that drags instantly kills the premium feel.
17. Matte white desk with integrated drawer handle channel
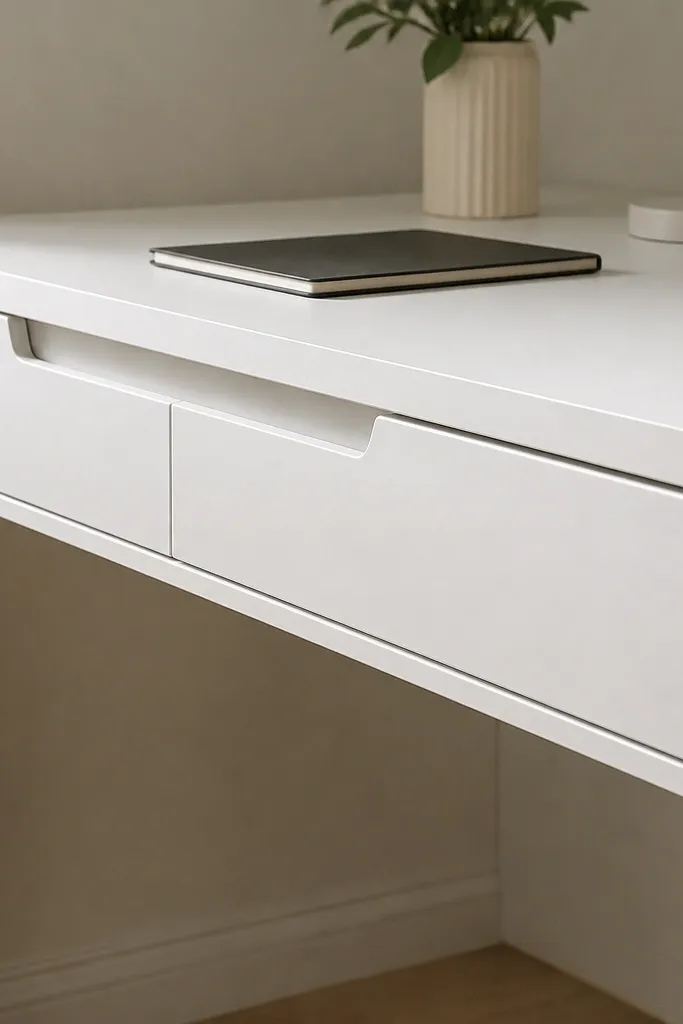
Handle channels are one of those design details that scream modern. A matte white desk with recessed drawer pulls looks clean because your hands find the channel, not a visible knob. For good-looking Study Table Ideas, the payoff is a smooth, uninterrupted front panel that looks built-in. Keep the drawer lines perfectly straight and the paint finish consistent so the desk looks professional, not homemade.
Build a desk front frame with two drawers and a center divider, using 3/4-inch plywood for the outer carcass. Install full-extension slides and build drawer boxes with 1/2-inch sides and a 1/4-inch bottom. Rout a shallow recessed handle channel on the drawer fronts using a straight bit and guide for consistent depth. Prime with a bonding primer, then paint with a cabinet-grade matte enamel. Let it cure fully before heavy use, and add a soft-close damper if you want a quiet feel.
Use painter’s tape as a guide line for the router so the channel stays centered and symmetrical.
Avoid gloss paint on drawer fronts; it highlights tiny alignment issues and fingerprints.
18. Modular desk system with interchangeable panels and tool-less swaps
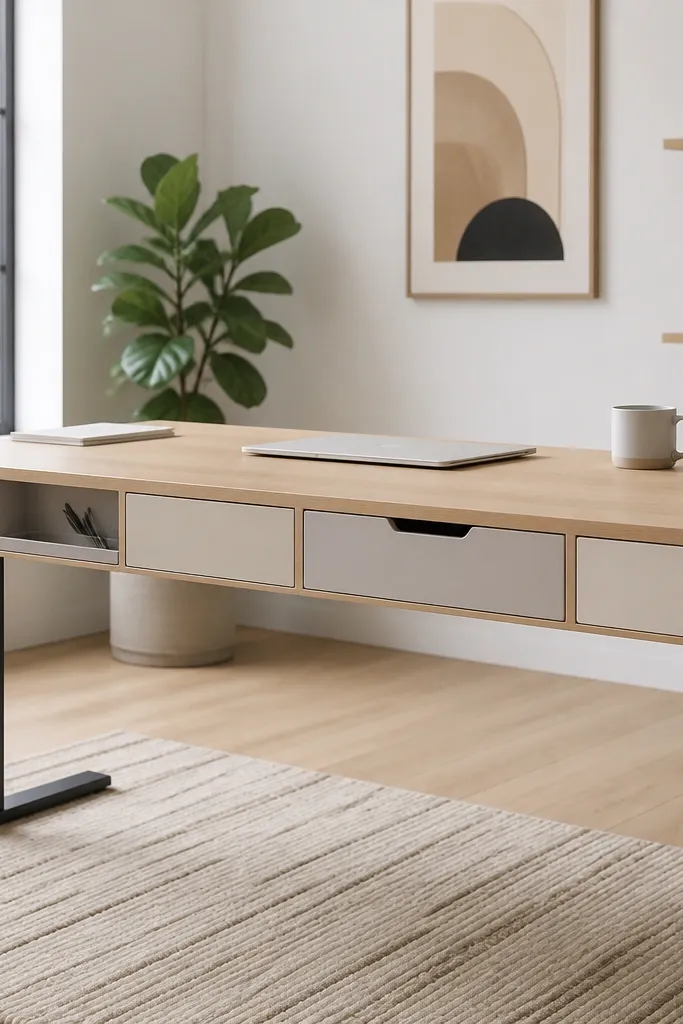
Build a rectangular frame from 2x2 hardwood or plywood, about 48 inches wide and 24 inches deep. Add a grid of 1/4-inch slot rails on the front and sides so modules slide in and lock with rare-earth magnets or metal cams. Make 3 to 4 insert modules: a slim pen tray, a closed cable cover, a book cubby, and a small drawer. Finish the frame matte and keep module finishes consistent. Install a power strip in a dedicated module so wiring stays hidden and doesn’t snake around the desk.
A modular desk looks stunning because it evolves with your setup and stays organized. Instead of one fixed storage layout, you build a frame with panel slots for different inserts: a pen tray, a power module, a small book cubby, or a cable cover. The visual payoff is a clean front because only the modules you need are visible. This is ideal for people who study with different materials — textbooks some days, laptops and notes other days.
Skip thisDon’t overcomplicate the module design — too many parts makes the desk look cluttered fast.
Editor's noteMagnet size matters; use strong enough magnets so modules don’t shift when you bump the desk.
19. Round-leg desk with wood veneer top and side drawer stack
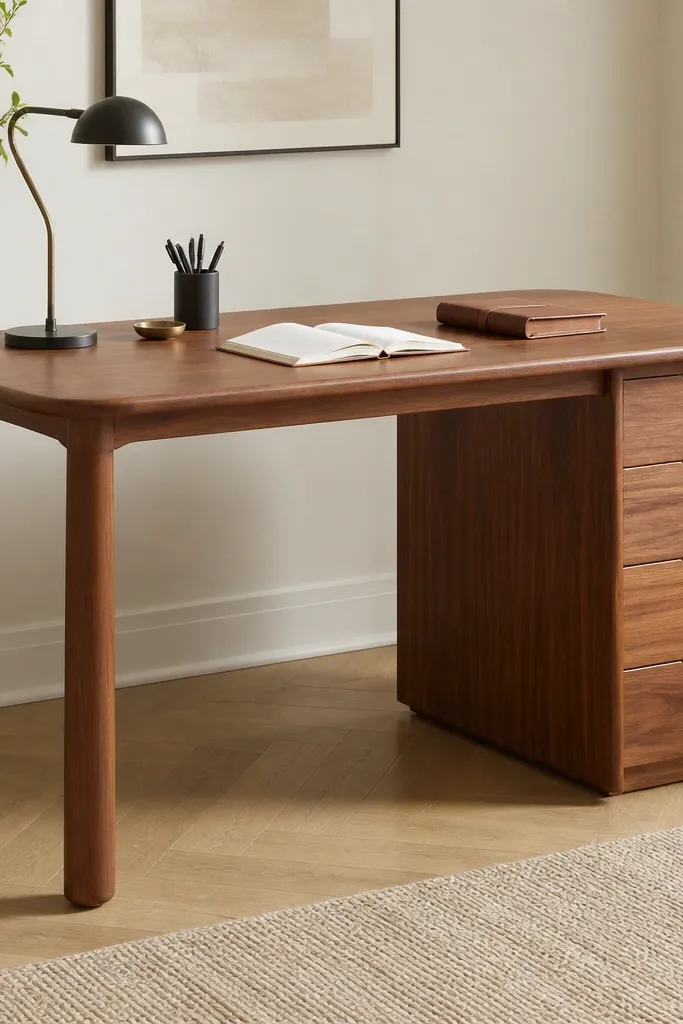
Round legs soften the look and make the desk feel more furniture-like than typical flat-leg DIY builds. Pair them with a wood veneer top so the surface looks smooth and premium, and add a side drawer stack so storage doesn’t interrupt the writing area. This layout looks good because the drawer stack creates a vertical line that anchors the desk visually. It’s also practical: you can slide a chair close without bumping into bulky cabinet fronts.
Cut a veneer-faced tabletop panel and apply edge banding for clean perimeter edges. Install a side frame using 3/4-inch plywood and mount a drawer stack with full-extension slides on the inside. Use pre-made round legs or turn legs from dowels and secure with metal leg brackets. Add a stretcher bar behind the legs so the frame stays stable and doesn’t wobble. Finish with a satin clear coat and align the drawer fronts so the gaps are even across the stack.
Drill leg bracket pilot holes carefully so the veneer doesn’t chip around screw points.
Avoid uneven drawer gaps — round legs make alignment issues more noticeable.
20. Thermofoil Desk With Walnut-Trim Edge and Floating Pencil-Ledge
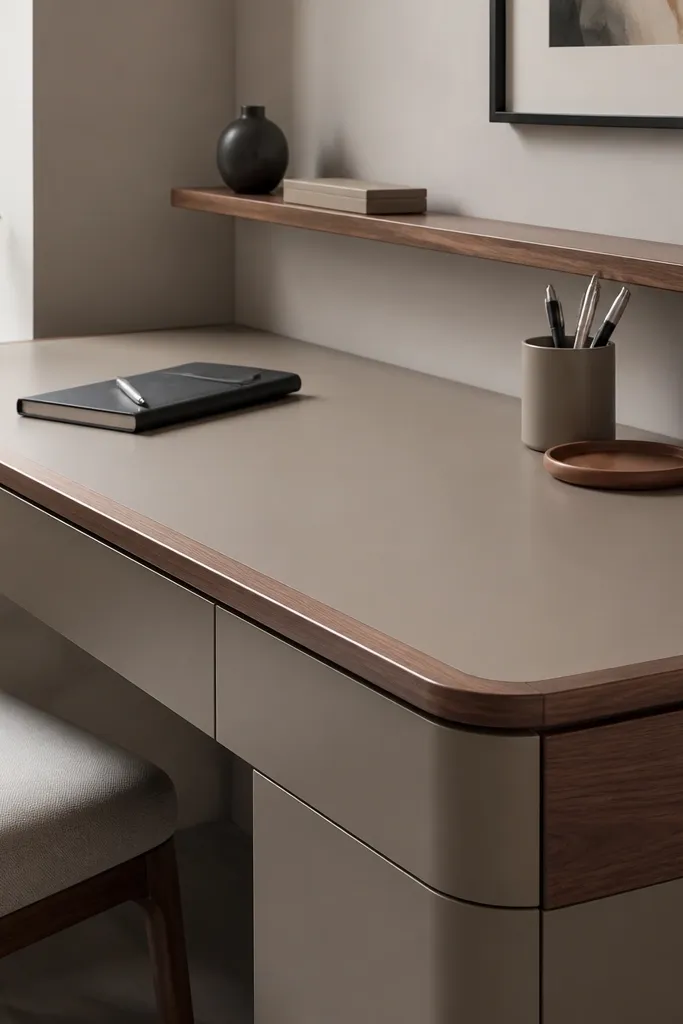
Build the desk top from a 3/4 in (18mm) MDF core sheet with thermofoil cladding or buy a matching thermofoil cabinet top panel sized to 48 in wide x 24 in deep. Cut two 3/4 in wide walnut veneer strips (or walnut-look edge banding plus a real veneer cap) to wrap the front and both sides, then glue with contact cement or PVA plus clamps and wipe squeeze-out immediately. For the frame, use a simple 1-1/2 in x 1-1/2 in steel angle or a wood base with a flat apron so the top sits flush — keep the overhang at 1 in on both sides for a balanced look. Install a floating pencil ledge using two hidden shelf brackets spaced 24 in apart, mounted to the underside of the top with a 1/4 in pilot hole so the screws bite cleanly. Finish by sanding the walnut trim edges lightly, then apply two thin coats of satin polyurethane and let it cure overnight before loading the desk.
This one looks clean because the top surface stays unbroken and the “edge” is what does the styling. A matte thermofoil top reads modern and hides everyday scuffs better than glossy laminate. The walnut trim wraps the front edge with a crisp shadow line, so the desk looks more expensive in photos. Add a slim floating pencil ledge above the work area and you get a tidy place for pens that also frames the desk visually. Build difficulty is medium — the carpentry is basic, but the edge trim and hidden brackets need careful measuring. It fits small bedrooms, apartments, and any study nook where you want a polished look without bulky joinery.
Skip thisDon’t glue thermofoil directly to raw wood without scuffing the bonding area — it can peel under heat and humidity.
Editor's noteUse a 1/8 in spacer strip when you glue the walnut trim so the shadow gap stays even along the whole front edge.



