
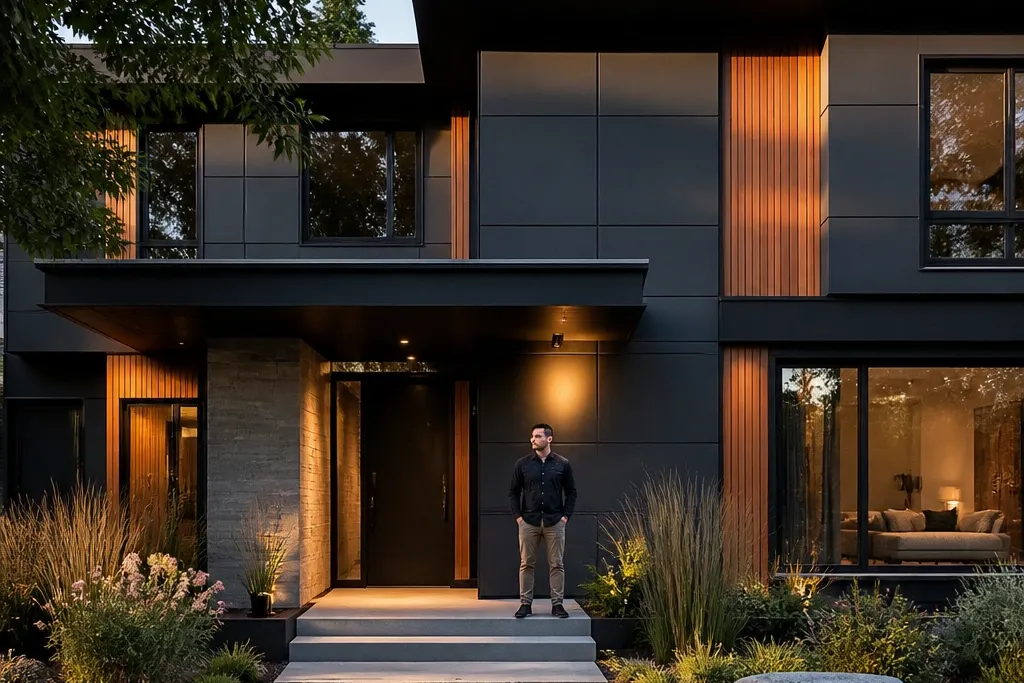
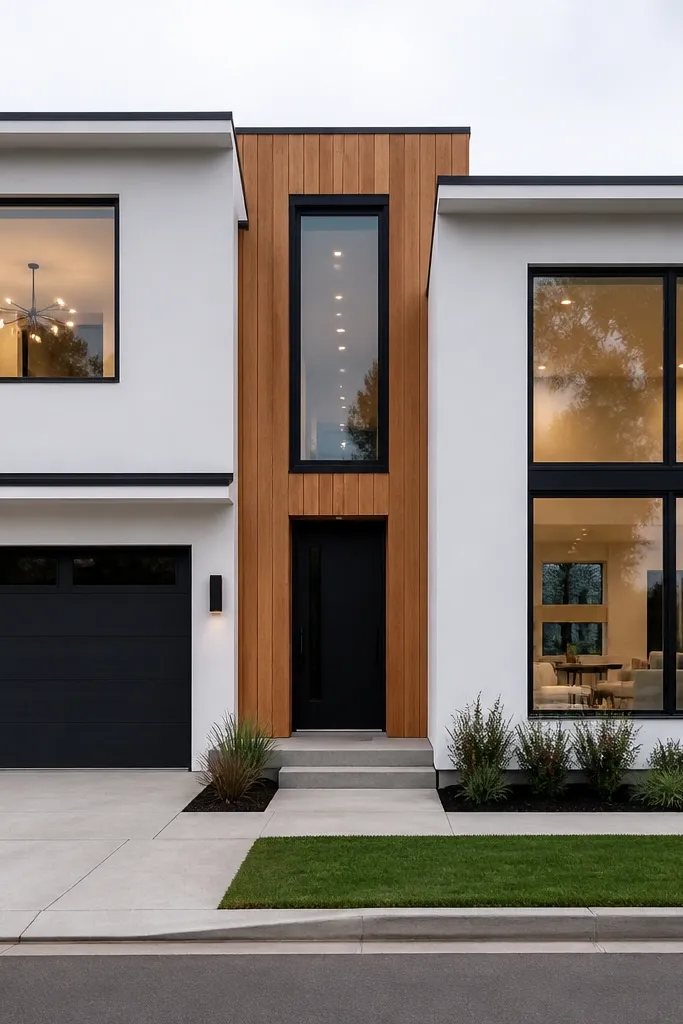
1. Charcoal fiber-cement panels with 1-inch shadow gaps
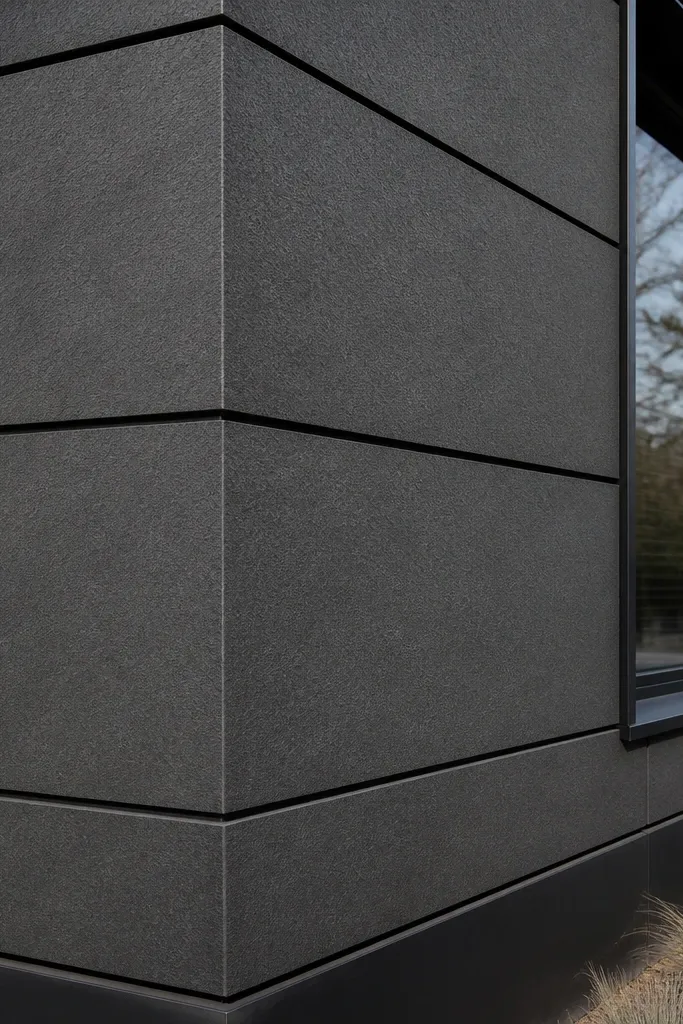
This facade is for the clean, modern look where the “lines” are the design. Fiber-cement panels stay crisp at the edges, and charcoal reads strong without turning flat like pure black can. The 1-inch shadow gap is the secret — it creates a visible separation so the wall doesn’t look like one big sheet. Pair it with matte black window trim and a light-toned base (off-white or warm gray) so the facade has depth in photos and in person. It suits new builds and renovations where you can add furring for proper ventilation and a drainage plane.
Start by laying out a vertical or horizontal panel grid and decide your reveal width — set spacers so you consistently get a 1-inch shadow gap. Install vertical or horizontal furring strips over a water-resistive barrier, keeping the plane straight with a long level and string lines. Hang the fiber-cement panels, leaving the same reveal everywhere, and use corrosion-resistant fasteners at the manufacturer’s spacing. Finish by adding trim returns at window edges and caulking only where the system allows it (follow the panel trim guidance). Finally, paint with an exterior-rated system made for fiber cement so the finish stays uniform.
Make a simple jig from scrap plywood to keep reveal spacing identical on every panel row.
Don’t run random reveal widths around windows — it’s the fastest way to make a modern facade look DIY.
2. White stucco planes with deep black window reveals
If you want modern but soft, go with smooth stucco planes and bold, dark reveals around windows. The stucco gives you a clean, monolithic field, while the black reveals create the modern “cut lines” that read from across the street. This works best when your windows have simple shapes and consistent spacing, because the facade becomes a composition of rectangles. Use a warm white or light greige stucco so it doesn’t look icy. Add a flat, low-sheen exterior paint finish to avoid a shiny, dated look.
Trowel or apply stucco over a properly prepared substrate and keep the surface flat with consistent thickness. After it cures, install window trim boards or metal flashings that create a visible recess — aim for 3/4 to 1 inch of dark reveal depth. Paint the reveals and trim in matte black, then paint the stucco in a matching exterior system. Add a simple base trim at the foundation line so the wall doesn’t visually float. Seal all joints at corners and around penetrations with exterior-grade sealant compatible with stucco.
Editor's noteUse painter’s tape to mask the reveal edges and keep the black line razor-straight.
Skip thisDon’t choose glossy stucco paint — it catches light and makes the facade look patchy.
3. Warm cedar slats with a vertical rhythm grid
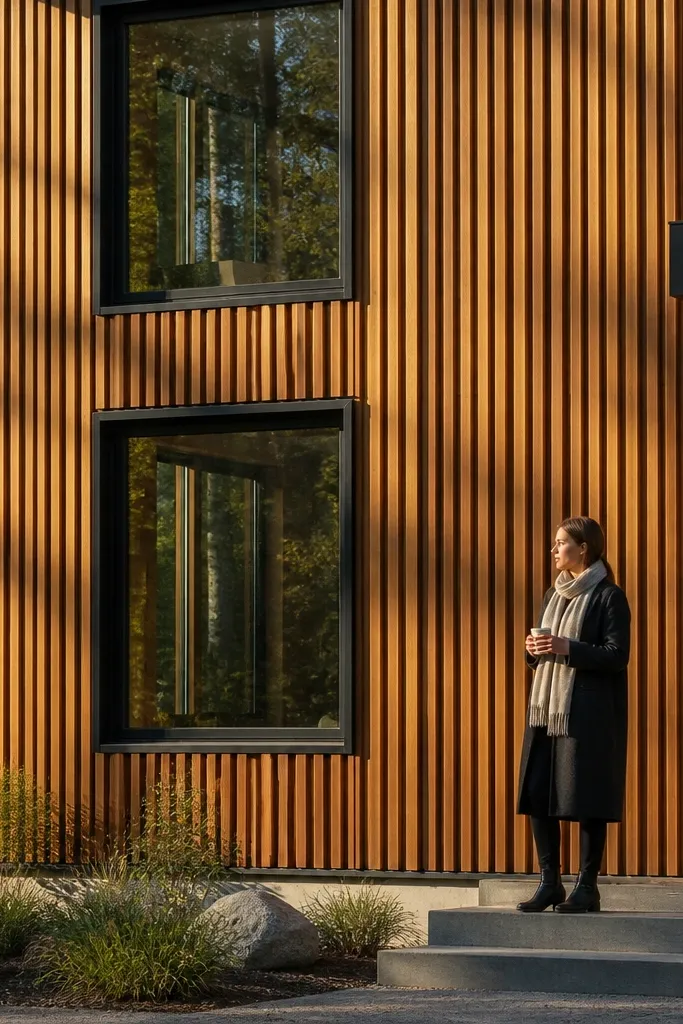
Vertical cedar slats give you an honest modern look with natural texture that still photographs cleanly. The key is spacing and alignment — slats that are evenly spaced create a grid effect, not a random fence. Cedar also warms up the facade so it doesn’t feel sterile. Pair the slats with flat, light trim in black or dark bronze, and keep the entry framing simple. This design suits homes with wide front elevations where the slats can run uninterrupted across the main wall.
Start by choosing your slat width and spacing; a common modern rhythm is 2x4 in slats with consistent gaps of about 1/2 to 3/4 inch. Install a ventilated rainscreen backing with horizontal furring so air can move behind the slats. Mount slats with hidden clips or stainless screws through the slat ends depending on your chosen hardware, keeping each slat perfectly plumb. Finish by sealing with an exterior oil or stain system rated for cedar, then touch up knots and end grain with extra care. Add drip-cap flashings at the top of the slat field and a starter flashing at the base.
Pre-stain slats before installation for more even color, then seal the cut ends after trimming.
Skip inconsistent spacing — uneven gaps make vertical slat facades look cheap fast.
4. Matte black metal panel rectangles over a light base
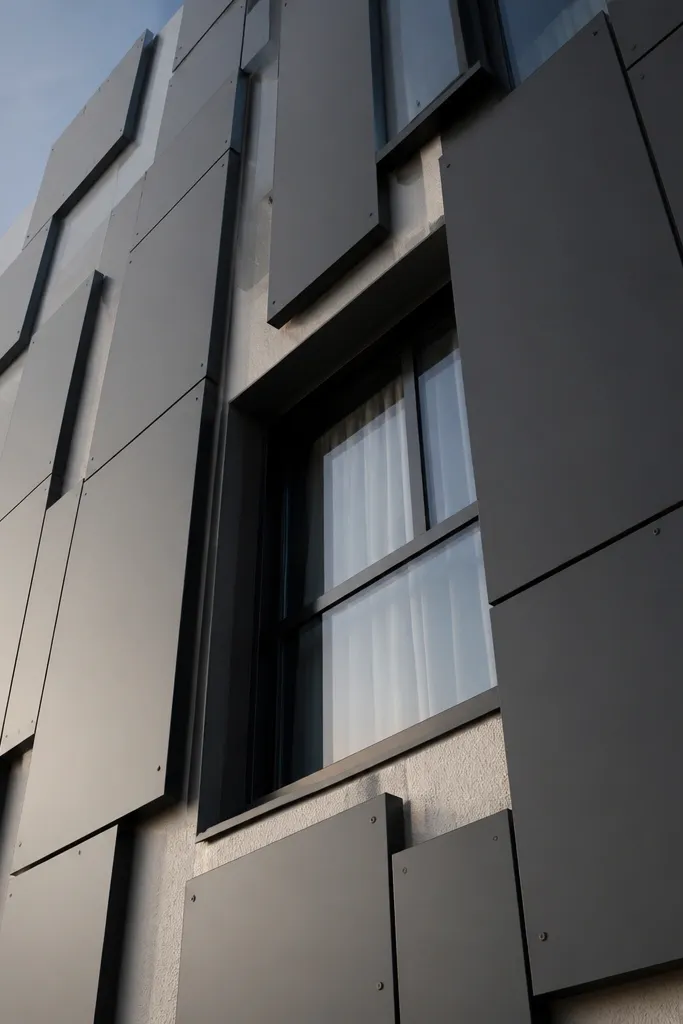
Metal panels create crisp geometry and a modern, industrial-clean vibe. Use matte black metal over a light gray or off-white base so the facade has contrast and depth. The best results come from panel layouts that repeat in rectangle blocks — it turns the front into a deliberate pattern rather than a single material wall. This design works great for narrow lots or compact facades because the rectangles help the eye read structure and scale. It’s also a strong choice if you want minimal maintenance compared to wood cladding.
Pick a metal panel system designed for exterior cladding with an air gap and drainage — don’t mount directly to bare sheathing. Install battens or a rainscreen frame, then mark a rectangle grid with string lines so every panel edge lines up. Attach panels with the approved fasteners and keep expansion gaps where the system calls for them. Add trim at window openings and corners using matching metal flashing. Finish by checking all seams for tightness and applying a manufacturer-approved coating if required for color consistency.
Editor's noteSnap chalk lines before you start — metal panel edges show every tiny misalignment in photos.
Skip thisDon’t skip a ventilation gap — trapped moisture makes metal systems fail early.
5. Cement board with staggered vertical seams
This is a modern facade trick: you use the seams as design. Cement board sheets look flat, but if you stagger the vertical joints and keep the reveal width consistent, the wall becomes a controlled pattern. Choose a light gray or greige so it stays modern and doesn’t look harsh. Pair with white or dark bronze trims and keep the window trim thickness consistent. This design suits renovations where you can add a rainscreen and want a crisp, architectural look without custom carpentry.
Start by planning your sheet layout so vertical joints land in a consistent rhythm; stagger every other course by a set amount (like half a sheet). Install furring strips and keep the plane flat; check with a long straightedge. Fasten cement board per manufacturer guidance, leaving the required expansion gaps at edges. Caulk joints only where the system specifies, then prime and paint with a quality exterior coating. Finish by adding corner boards and window trim so seams stop cleanly at openings.
Editor's noteUse a laser level to keep each joint line straight across the whole facade.
Skip thisDon’t line up every seam — straight stacks read like “basic siding,” not modern architecture.
6. Two-tone horizontal banding with a recessed midline
Two-tone horizontal banding looks designed when there’s a recess line between the colors. Instead of painting two stripes on the same surface, create a physical break with trim and a shadow gap. The lower band can be darker (charcoal or deep brown) while the upper band stays light, which makes the house feel taller. Keep the window trim color consistent with one of the bands so it doesn’t float. This design is great for longer front elevations where you want the facade to look intentional without complicated detailing.
Decide your band height based on window placement; a common approach is setting the midline so it runs just above or through the window heads. Install a strip of exterior trim or a rainscreen battens layer to create a recessed shadow line about 1/2 to 3/4 inch. Apply finishes to each plane: stucco or panels for each band, with the recessed line left clean and shadowy. Install matching base and soffit trims so the bands don’t stop abruptly. Seal transitions carefully at corners and around openings.
Measure from the garage slab or a fixed datum point so the band line stays level across the entire front.
Don’t rely on tape-and-paint for the line — a real shadow gap looks modern; a paint stripe looks like decor.
7. Boxy entry porch with fluted side panels
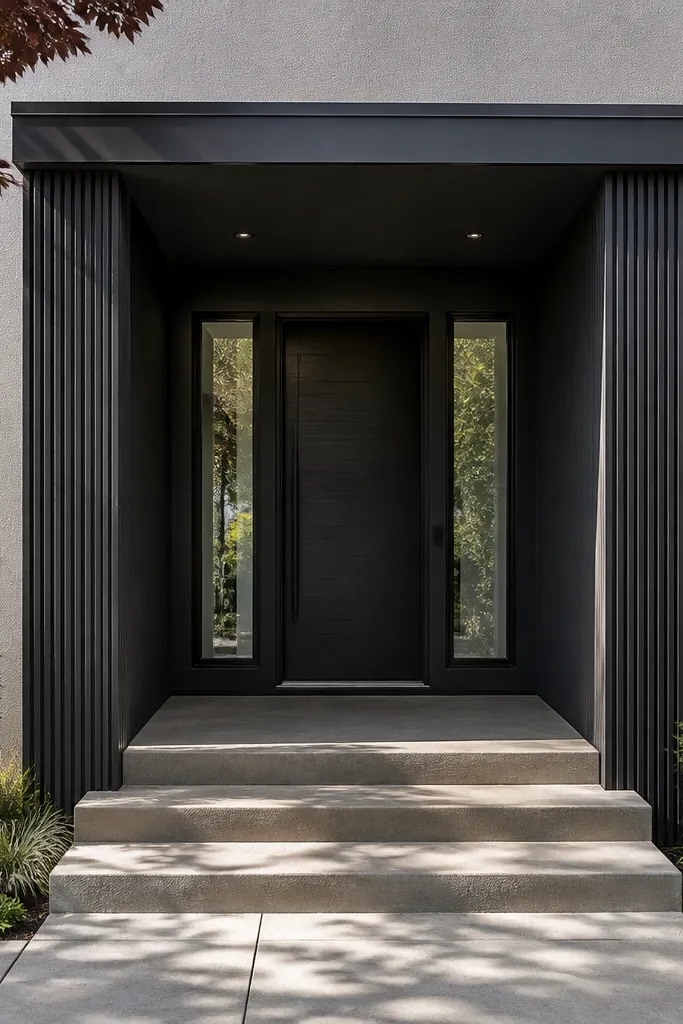
Make the entry the focal point with a boxy porch form and fluted side panels. Fluting adds light-and-shadow texture without needing a bunch of colors, so the facade still reads clean. Keep the entry canopy flat or slightly sloped and use dark trim to frame it. This design works even if your main wall is plain — the entry architecture gives the facade that “someone planned this” feel. It suits homes where the front door placement can become a visual anchor, especially with a window on either side or a single tall sidelight.
Frame a simple entry soffit and canopy structure with treated lumber or steel, then cover it with exterior-rated sheathing. Build two fluted side panels using routed MDF or better, exterior fluted fiber cement boards, mounted over a ventilated backing. Leave a small reveal gap between panels and trim so shadows show. Install a modern door surround with straight trim boards and a threshold flashing. Finish by coating everything with an exterior paint system, then add a clean light fixture and sealed caulk lines.
Editor's noteUse fluted boards only for the vertical side elements; fluting on large wall fields can look busy fast.
Skip thisDon’t skip flashing at the canopy edges — water intrusion ruins the look quickly.
8. Stone veneer base with smooth plaster above
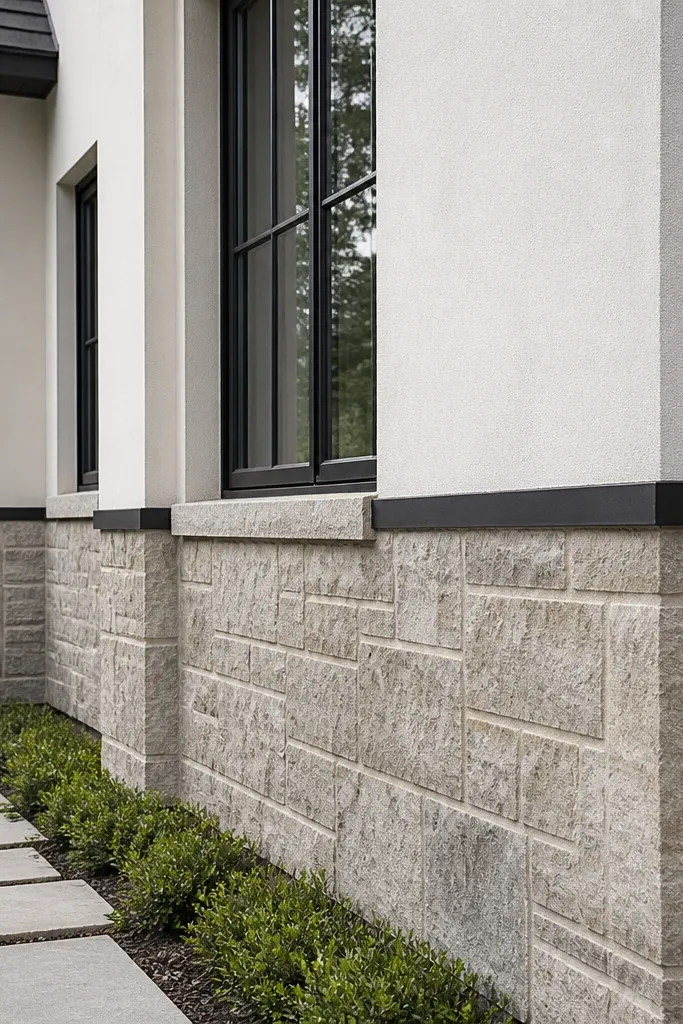
This combo looks expensive without being complicated: a stone veneer base that grounds the facade, paired with smooth plaster or stucco above. Modern design needs contrast, and stone at the bottom gives visual weight while the smooth upper plane stays calm. Keep the stone color consistent and choose larger, rectangular pieces so it reads modern rather than rustic. Use straight window trims and keep the upper finish light gray, warm white, or pale greige. This works well for sloped lots because the base can handle height changes visually.
Start by planning the stone height — a typical range is about 24 to 36 inches above grade, then adjust based on your window layout. Install a proper water-resistive barrier and lath for the stone area, then apply thinset and set veneer pieces with a straight, level starter line. Keep joints consistent and avoid tiny chips that break the modern look. Above the stone line, apply plaster or stucco in a smooth finish and paint with an exterior system. Seal every transition between stone and plaster with a compatible sealant and install flashing where needed.
Editor's noteDry-lay a small section to pick the stone mix so you don’t end up with random light/dark clustering.
Skip thisDon’t let the stone run up the corners without clean edge control — modern facades need crisp terminations.
9. Reeded concrete-look panels with tall window slots
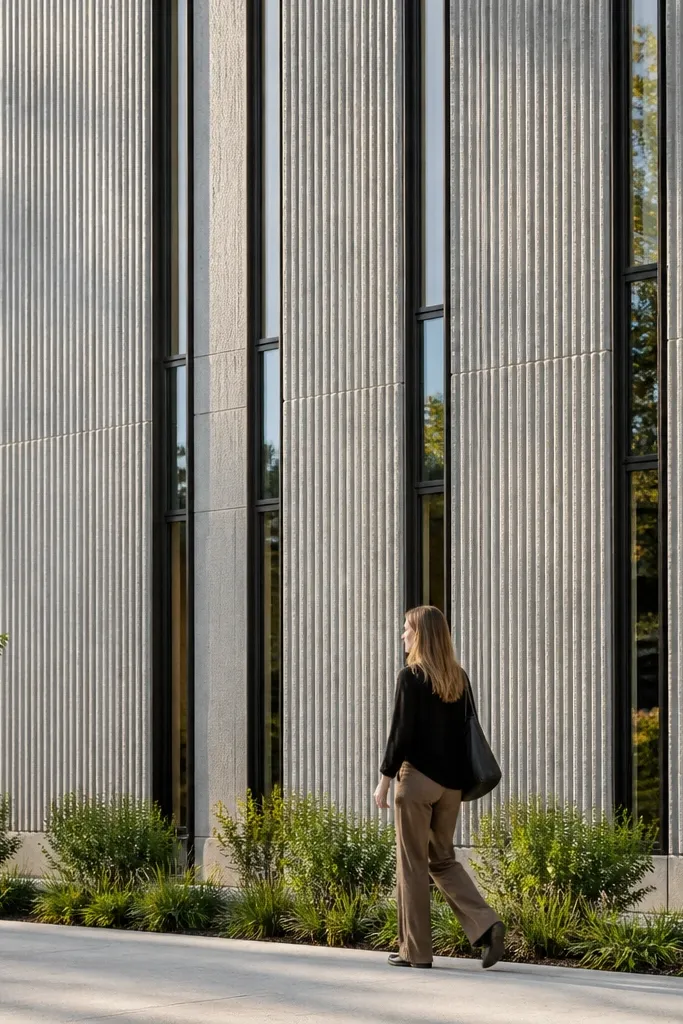
If you like brutalist-leaning modern, concrete-look panels with reeded texture do the job. The reeding creates subtle vertical highlights, so the facade doesn’t go flat like smooth panels can. Tall, narrow window slots add that vertical momentum and make the house feel taller. Use a restrained palette: concrete gray panels, black or dark bronze frames, and a minimal entry. This is a strong choice for single-story fronts that need vertical structure.
Choose exterior-rated concrete-look panels or fiber cement reeded boards made for cladding. Install a ventilated rainscreen frame and keep your mounting plane perfectly straight because panel texture shows waves. Mount panels vertically, aligning reeded lines across adjacent boards so the pattern reads intentional. Install window openings with trim that creates a consistent shadow gap around each window. Finish with exterior paint or coating if required, then seal all edges and penetrations.
Editor's noteAlign the reeded pattern to a fixed reference line so window slots feel centered in the overall rhythm.
Skip thisDon’t mix panel textures randomly — reeding + smooth panels can work, but random combinations look messy.
10. Louvered facade screen over a full-height window
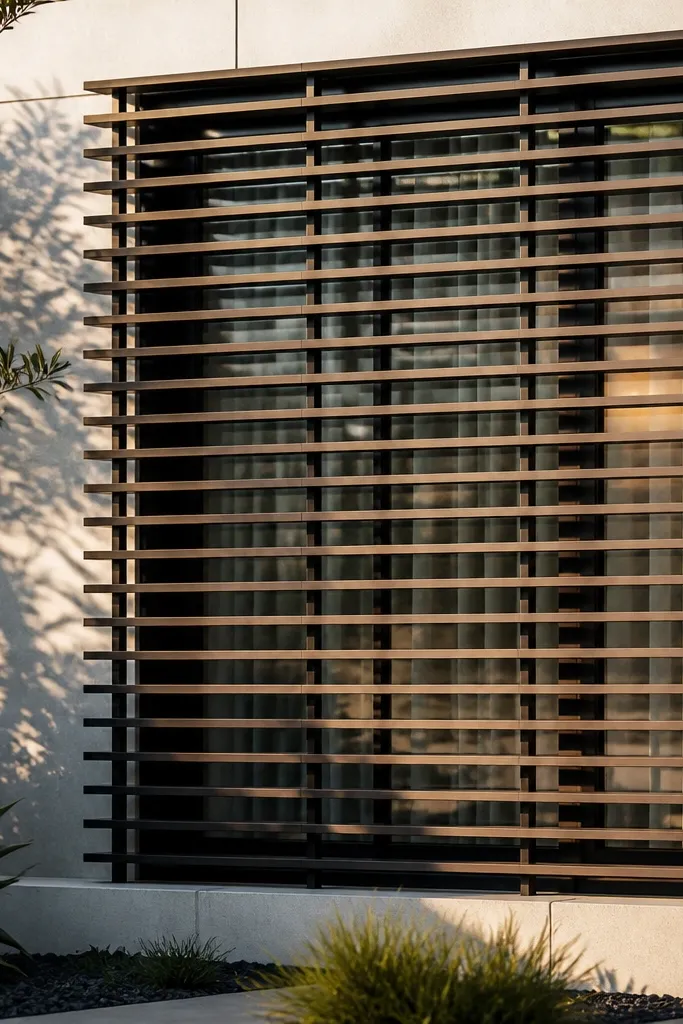
A louvered screen on the facade is one of the best ways to get modern depth without covering the whole house. It adds a layer of shadow that changes through the day, but the overall facade still stays simple. Choose louvers in dark bronze metal or painted wood for a sleek look. This design works especially well when you have a full-height window panel or a tall opening where the screen can frame it. It also helps with privacy while keeping light inside.
Start by measuring the window opening and planning a screen that overlaps the edges by at least 2 to 4 inches on all sides. Build a rectangular frame from exterior aluminum or treated wood, and install it with standoffs for airflow. Mount louvers at a consistent spacing and angle — many modern looks use 25 to 45 degrees for a clean shadow pattern. Seal joints and add drip edges at the top of the frame. Finish louvers with exterior paint or a coating rated for sun and water exposure.
Editor's noteUse identical louvers cut from the same batch so color and sheen match across the whole screen.
Skip thisDon’t mount louvers tight to the wall — you need airflow so the screen area doesn’t trap moisture.
11. Patterned perforated metal panel center feature
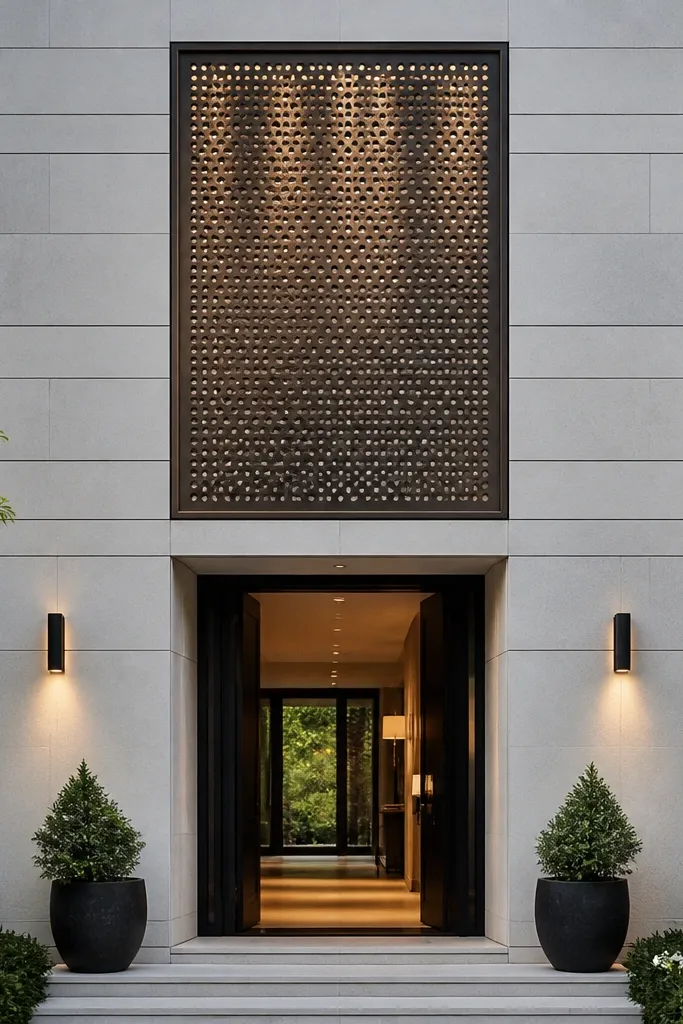
A perforated metal feature panel is a modern facade move that reads “designed” because it creates controlled texture. The trick is to keep it limited to one area — usually a center bay above the entry or beside the garage door. Choose a simple perforation pattern so the view stays clean, not like random holes. Pair the panel with smooth cladding around it so the feature stands out. This design is ideal when you want something photogenic but don’t want to redo the whole facade material system.
Pick a perforated panel sheet system made for exterior use, including a frame or mounting rails. Install the rails over a ventilated backing, then mount the panel so it sits in a shallow recess with a shadow gap. Frame the feature with trim pieces that match your main facade color. Use corrosion-resistant fasteners and seal around penetrations with exterior sealant. Finish the surrounding wall in a smooth finish so the perforated panel doesn’t fight the texture.
Choose a perforation pattern with a consistent hole size and spacing so it looks architectural up close and from the street.
Don’t use perforation on two adjacent bays — it turns into a distraction instead of a focal feature.
12. Warm wood + white vertical board-and-batten entry wall
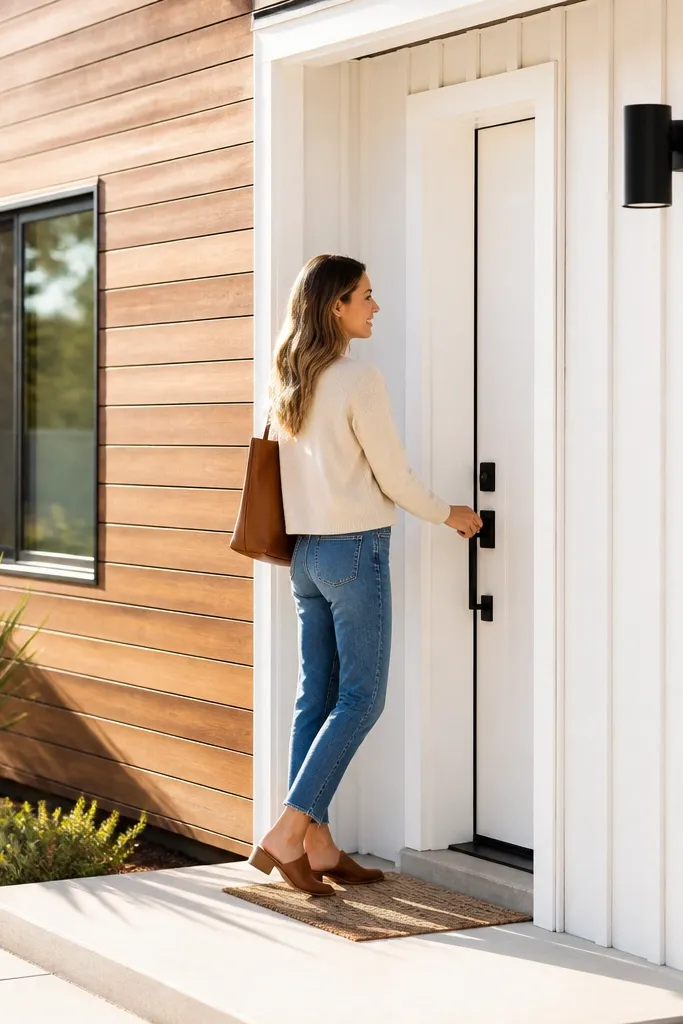
Board-and-batten can look modern when you keep it vertical, narrow, and paint the trim clean white. The warm wood gives texture, while white trim makes the entry feel crisp and architectural. Keep the battens narrow and evenly spaced so it reads like a facade panel system, not a rustic fence. This works best on the entry wall only, so the rest of the facade stays simple. It suits homes where the entry needs a strong focal point and you want a friendly modern look.
Frame a small entry feature wall with treated lumber and add a water-resistive barrier. Install vertical battens at a consistent spacing; a common layout is battens around 1 to 2 inches wide with 3 to 6 inches between them depending on the look you want. Use exterior-rated wood boards or fiber cement boards, then prime and paint the trim. Add a matching trim surround around the door and any sidelights. Seal end grain and joints with an exterior sealant, and install flashing where the feature meets the main wall.
Editor's notePre-prime everything before assembly so the wood color stays consistent after weathering.
Skip thisDon’t mix stained wood with painted trim without a clear plan — the facade can look mismatched.
13. Monochrome gray with vertical metal fins at window bays
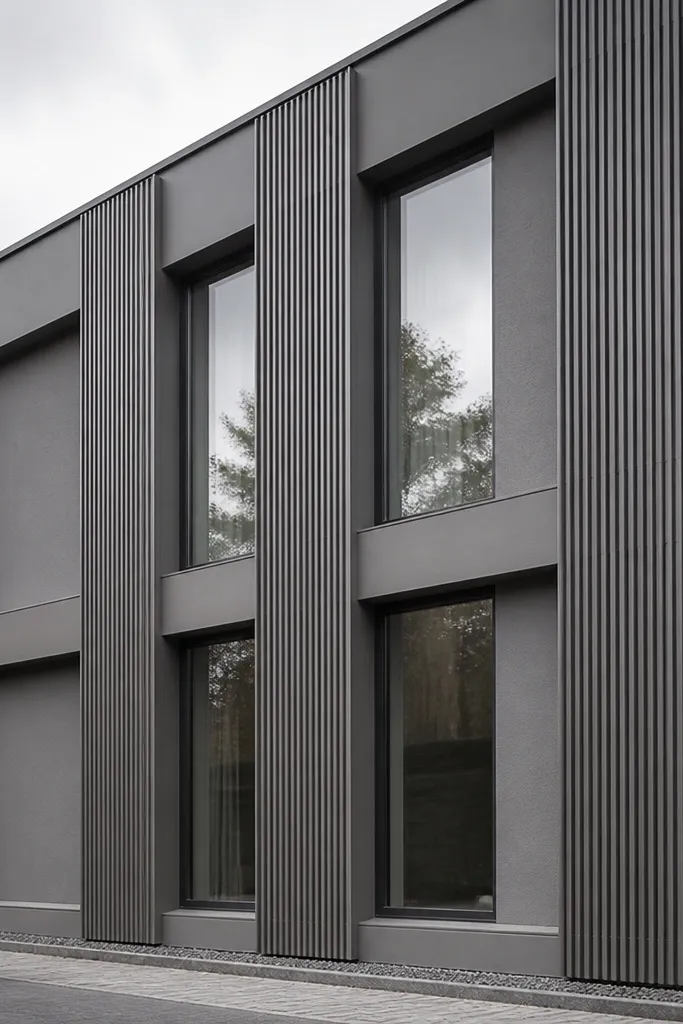
Metal fins add a modern “architectural depth” effect because they cast narrow shadows and break up big wall planes. Keep the rest monochrome — same gray family for walls and trim — so the fins become the only visual punctuation. Place fins aligned with window bays so the facade rhythm looks intentional. This suits large windows and wide garage doors where a plain cladding field would feel too flat. It also looks great in photos because fins add a crisp edge line.
Choose a fin material like aluminum or steel with a powder-coated finish in dark gray or near-black. Install a ventilated rainscreen frame first, then mount fin brackets at consistent spacing — typically 12 to 24 inches apart depending on wall size. Align fins with window edges so they look like part of the window framing. Finish the wall with fiber cement or stucco in the same gray tone, then paint trim in a matching finish. Seal all penetrations and add corrosion-resistant fasteners.
Mark fin locations on the wall before you start cladding so you don’t discover misalignment after panels go up.
Don’t use fins of wildly different widths — keep them uniform so the facade reads clean.
14. Horizontal cedar siding with a recessed garage reveal
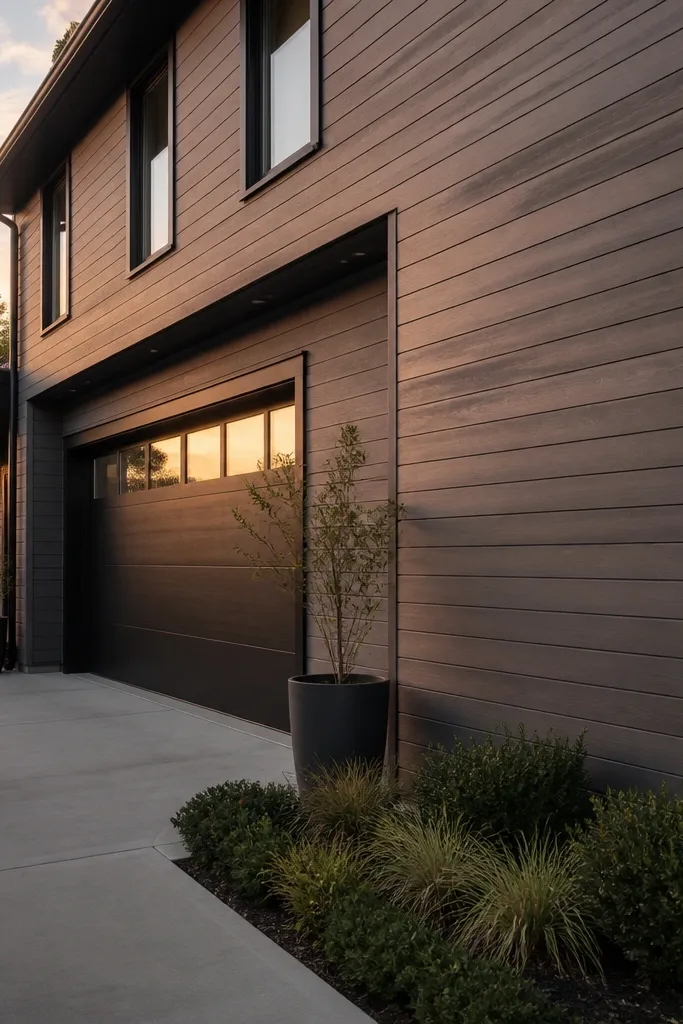
Horizontal cedar siding gives a long, modern line, especially when the garage bay is pushed back visually with a recessed reveal. That reveal makes the garage look like a designed mass, not an attached box. Choose a warm stain or painted cedar in a muted gray-brown to avoid orange tones. Pair with dark trim and simple lights so the facade stays sharp. This design is good for homes where the garage dominates the front and you want to balance it visually.
Install a rainscreen backing and mount cedar boards with consistent exposure — most modern horizontal looks land around 5/8 to 3/4 inch exposure depending on board width. Create a garage recess by adding a trim frame or cladding return that sits deeper than the main wall plane by about 1 to 2 inches. Apply the same siding to the recessed surfaces so the garage reads as one composition. Install flashing at the recess edges and seal all joints. Finish by staining or painting with an exterior system made for cedar siding.
Editor's noteUse spacers or a siding gauge to keep board spacing identical across the garage recess corners.
Skip thisDon’t rush corner transitions; sloppy miters on horizontal siding scream “cheap” in daylight.
15. White shiplap panels with black steel window frames
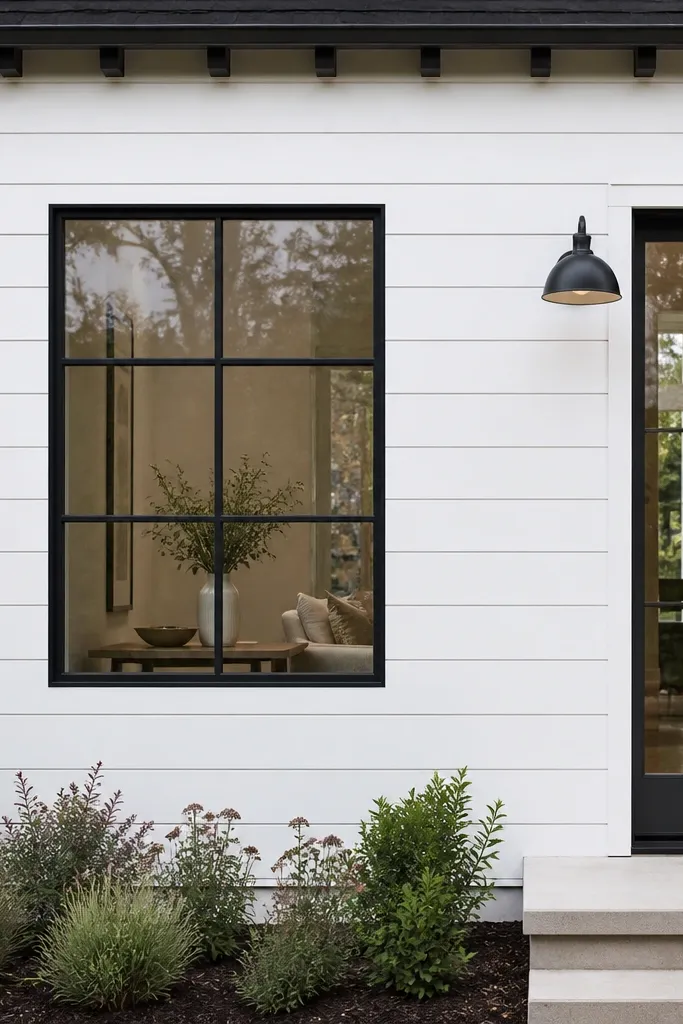
Shiplap can look modern when the boards are laid in a clean vertical or horizontal field and the window frames are crisp steel black. The thin shadow lines between shiplap boards create the modern striping effect without needing extra reveals. Keep the paint finish matte so it doesn’t glare. This design works on full facades where you want a brighter look and a friendly home feel. It also pairs well with modern doors like flat slab styles and simple transoms.
Install a rainscreen frame, then mount shiplap boards with consistent overlap or reveal width per the board system. Keep board lines straight using a laser level and check every course before moving on. Paint with a high-quality exterior primer and matte exterior paint rated for wood siding. Install black steel window frames with proper flashing and sealants. Finish by adding trim boards at corners and around openings so the shiplap doesn’t stop awkwardly.
Editor's notePaint shiplap after installation if the boards are already well-matched, but pre-prime all knots first.
Skip thisDon’t use glossy paint — it turns narrow board shadows into a shiny, uneven mess.
16. Stucco cladding with horizontal aluminum trim caps
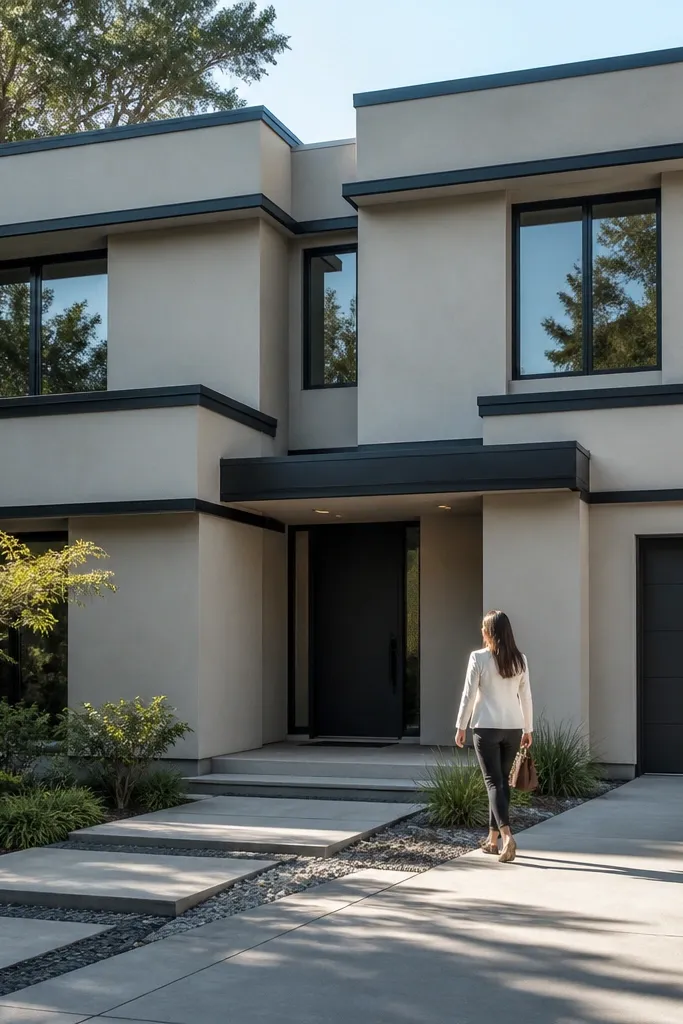
Thin aluminum trim caps on a stucco facade make the whole house look more engineered. The modern read comes from repeated horizontal “caps” that create a line at window heads and at the entry. Stucco gives smooth surfaces; aluminum trim adds crisp edges and durability. Use a consistent trim color like matte charcoal or dark bronze. This design suits homes that already have stucco or can be converted to a stucco finish without rebuilding everything. It’s a good choice if you want modern details without covering your entire wall with paneling.
Apply stucco over a prepared substrate and keep the finish smooth with consistent thickness. Install aluminum trim caps at planned heights using proper anchors and sealant compatible with stucco — treat it like flashing. Set the caps so they align across window bays, and keep the top edges level with a laser line. Paint the stucco in a matching exterior system and leave trim in its factory finish or repaint if needed. Seal every joint at corners and around fasteners to prevent water intrusion.
Editor's noteDry-fit one window cap first, then use it as the template for every other cap.
Skip thisDon’t skip sealant at trim ends — water finds the smallest gaps and stains stucco fast.
17. Dark brick veneer with a cantilevered horizontal canopy
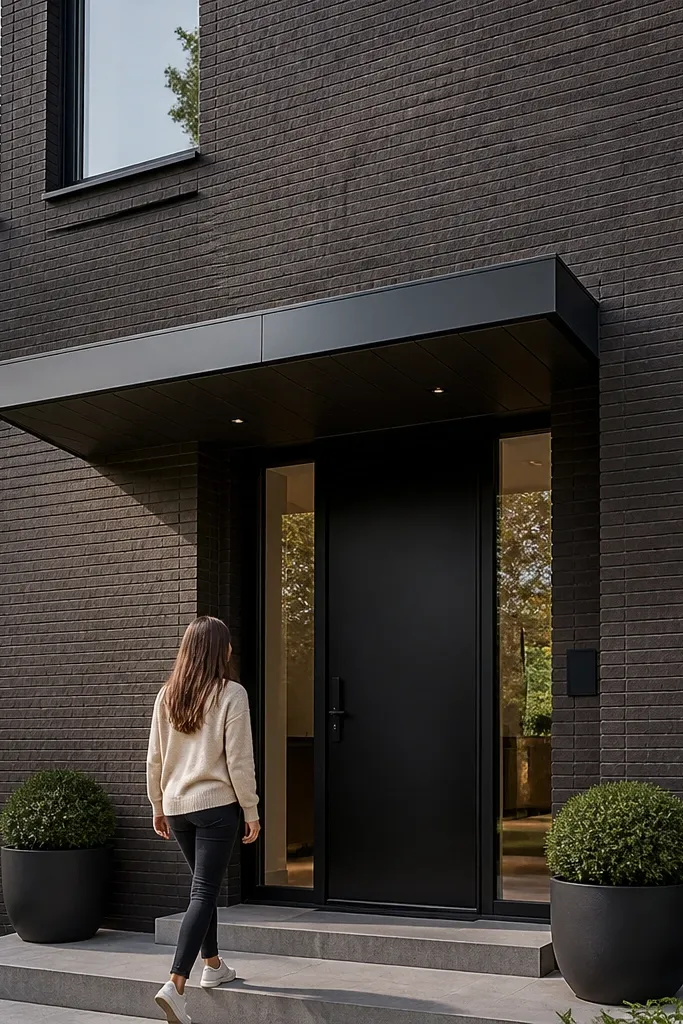
Brick is the hardest material to make look modern — until you pair it with a simple, sharp form. Dark brick veneer feels contemporary, especially when you keep mortar color consistent and avoid busy brick patterns. Add a cantilevered horizontal canopy over the entry with clean underside panels, and the facade suddenly reads architectural. Keep window openings simple and use dark trim to unify everything. This design suits narrow houses and urban-style fronts where brick already fits the neighborhood but needs a more modern composition.
Install brick veneer over a proper wall system with drainage — don’t set veneer directly on untreated sheathing. Choose a dark brick with a consistent face and a mortar color that stays close to charcoal or deep gray. Run the brick in straight courses and keep corners crisp with metal corner trims. Build a simple cantilever canopy frame, then cover the underside with exterior-rated board or metal sheet. Flash the canopy edges and seal around the entry surround so the underside stays dry.
Editor's noteKeep the entry surround trim width the same as your window trim so the canopy doesn’t look like an add-on.
Skip thisDon’t mix multiple brick tones — modern brick facades look best with one consistent brick face.
18. Large-format porcelain panels with minimal joints
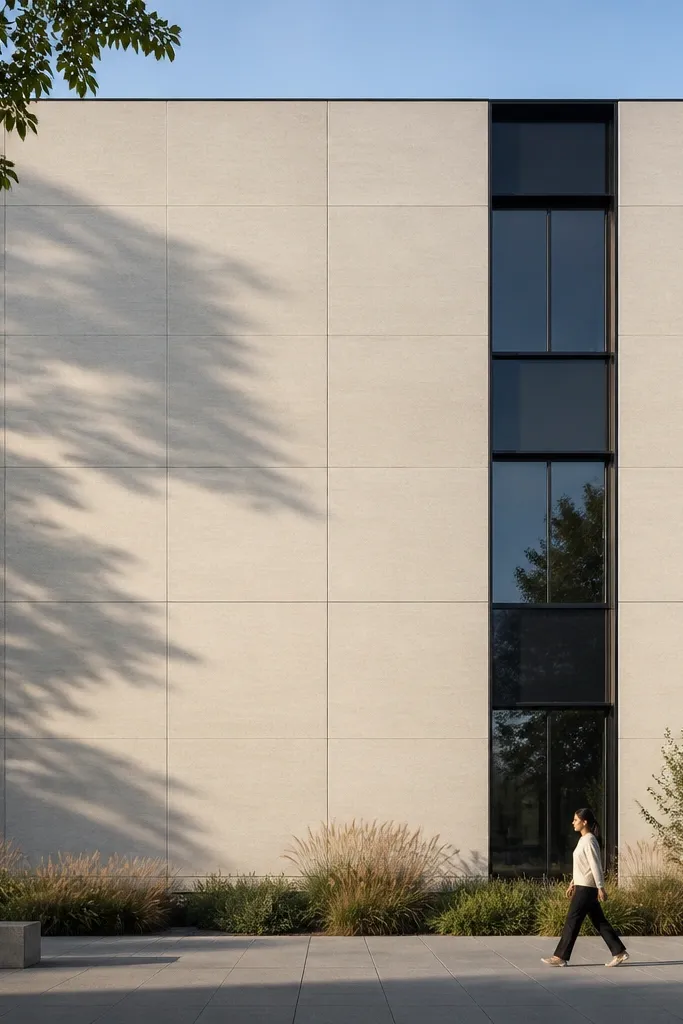
Large-format porcelain panels make modern facades look clean because the wall becomes fewer, bigger pieces. With minimal visible joints and a ventilated mounting system, the front reads like a single architectural plane. Choose a light warm gray or off-white porcelain so it doesn’t look flat. Pair with thin, dark metal trims at openings for sharp lines. This design suits contemporary builds where you want a premium look and you can handle a more detailed installation. It also photographs exceptionally well because there’s less “busy” texture.
Use an exterior ventilated rainscreen system rated for large porcelain — that’s the part people skip. Install the carrier rails and brackets according to the panel size and weight, keeping the plane perfectly aligned. Set panels with the approved clips and spacing system so joints stay consistent and drainage is maintained. Cut panels around windows with proper wet-cut tools, then seal edges with the system’s recommended sealant. Finish by installing matching trim and flashing at all openings and corners.
Editor's noteDo a dry layout on the floor first so you know where cut edges land at corners and window returns.
Skip thisDon’t use interior panel mounting methods — porcelain needs a proper ventilated exterior system.
19. Mid-century modern wood panels with black vertical trim rails
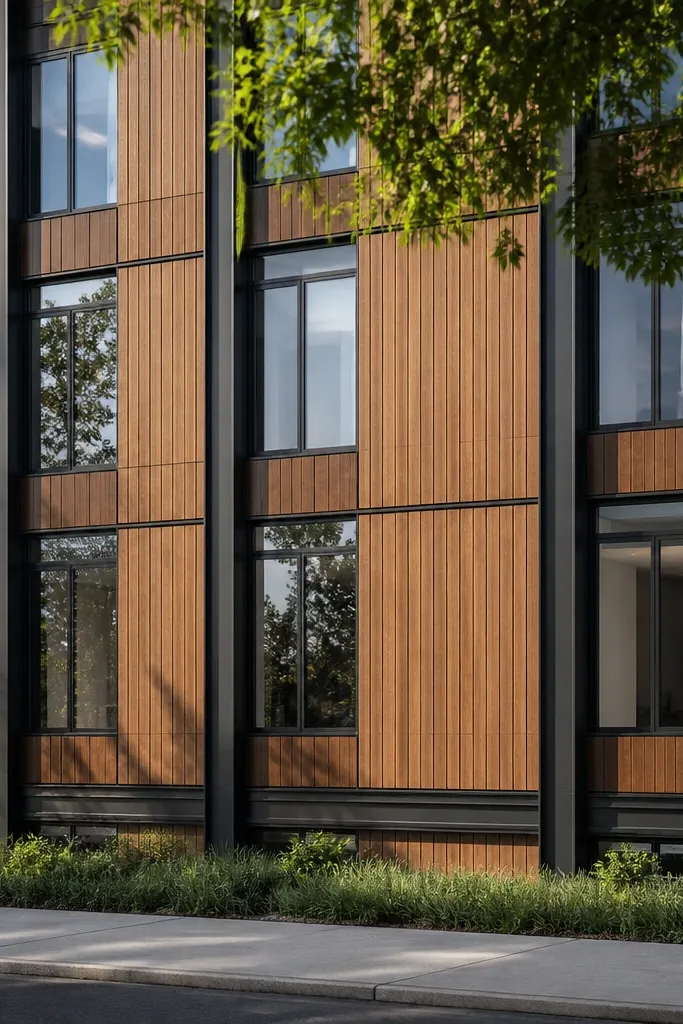
This is a modern take on mid-century lines: warm wood paneling broken by black vertical trim rails. The rails create an obvious rhythm and give the facade a structured grid without feeling too industrial. Keep the wood finish matte and avoid heavy gloss so it doesn’t look like a furniture finish on the outside. Use simple rectangular windows and a flat entry surround. This design works for wide fronts where you want a strong pattern but not the stark look of all-metal or all-black.
Plan your panel grid based on your window positions so rails land evenly across openings. Build a ventilated backing frame, then install wood panels (exterior-rated) in large sections or as multiple boards. Mount black vertical rails over the panel field, not into the openings, so you keep clean edges. Seal joints between panels and rails with exterior-rated sealant and use flashing at the top and around windows. Finish by applying an exterior clear or stained system designed for wood cladding.
Use the same rail spacing on both sides of the entry so the facade grid feels intentional.
Don’t place rails at random heights — the pattern has to read as a grid, not stripes.
20. Limestone-look precast with recessed window frames
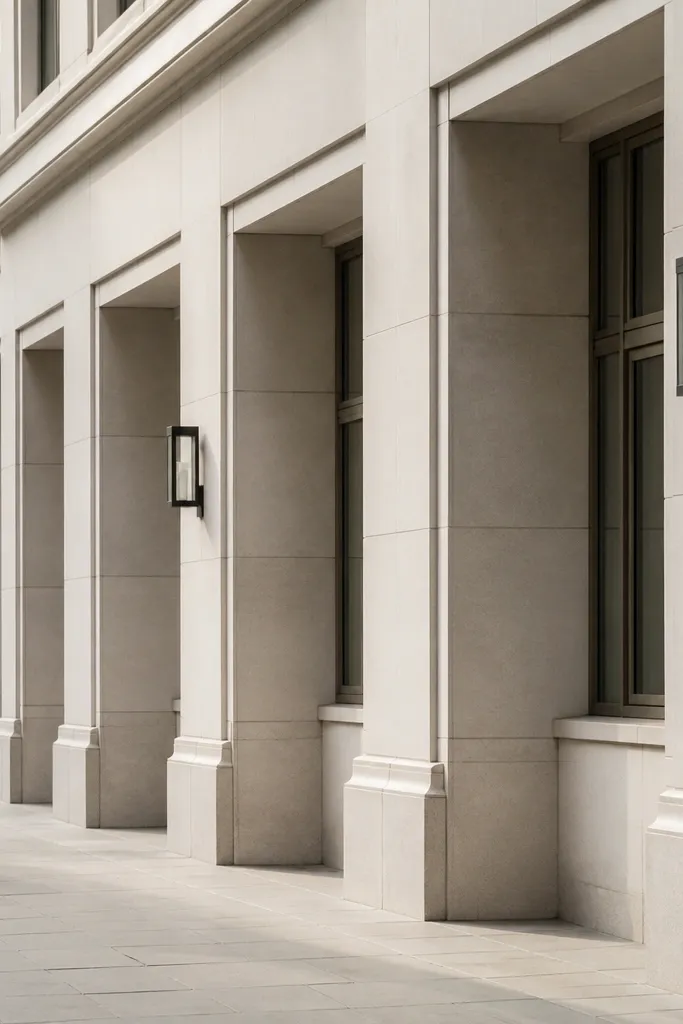
Precast or cast-stone look panels can look modern when the windows are recessed and the facade stays monochrome. The recessed frames create shadows that mimic architectural depth you’d get from expensive stone carving. Use a light limestone tone with a matte finish so it reads like real stone texture, not painted stucco. Keep window trims in the same color family but slightly darker. This design suits homes with large window openings and a desire for a solid, weighty look.
Install a ventilated rainscreen or approved precast mounting system so the stone-look panels can breathe. Layout the panel joints and mark your window recess depth before any panel work — a common approach is 1 to 2 inches of recess around windows. Mount panels with the approved anchors and keep joints consistent. Install window frames in the recess and flash them properly so water doesn’t sit in the shadows. Finish the facade with a matching exterior coating only if your panel system calls for it.
Use a consistent recess depth around every window, even small sidelights — it reads more modern from the street.
Don’t paint over unsealed stone-look panels — some coatings trap moisture and cause uneven spotting.
21. Rainscreen wood boards with diagonal corner accent
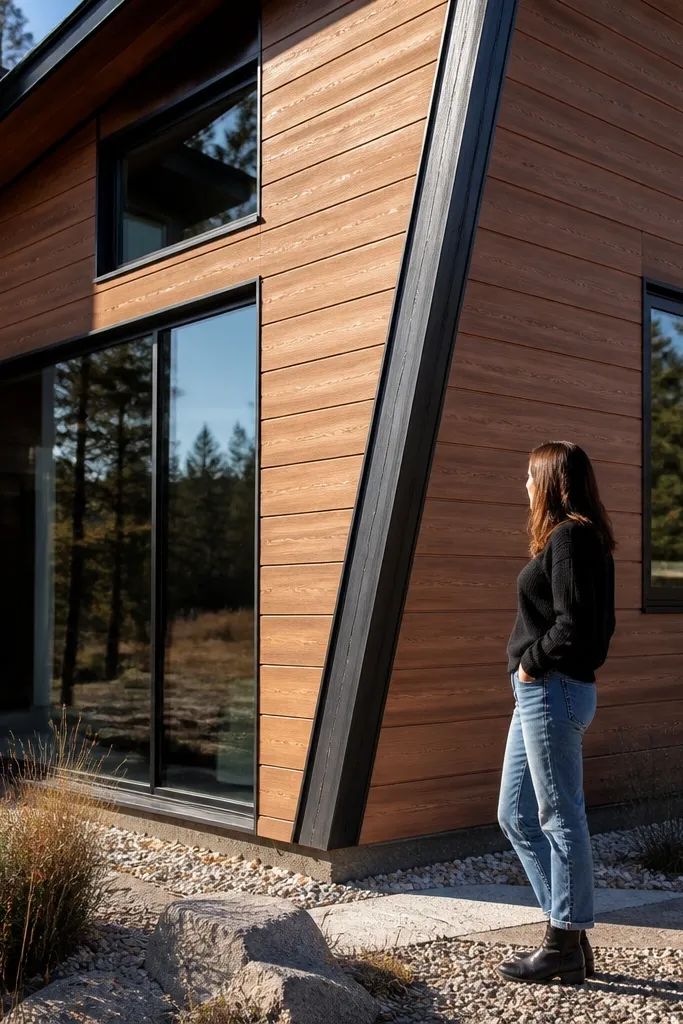
Diagonal corner accents make a facade look custom without adding a bunch of extra materials. Keep the main wall cladding horizontal or vertical in consistent boards, then add one diagonal accent strip at the corner to break up the flat plane. This creates a clean modern “twist” that reads well in photos. Use dark trim and a muted wood tone so the diagonal accent doesn’t look like a graphic overlay. This works great for homes with a visible corner — like end units or homes on a corner lot.
Start with a ventilated rainscreen frame and install your main wood boards in one direction with consistent spacing. At the visible corner, create a diagonal plane by installing angled battens so the accent boards sit flush and straight. Cut boards carefully and keep the diagonal line true with a template — corners are where sloppy work shows most. Seal the accent edges and add flashing at the top and around transitions. Finish by staining or painting the system so both main boards and accent boards match in sheen and color.
Editor's noteMake one full-size paper template of the diagonal line and transfer it to the wall before cutting any boards.
Skip thisDon’t use a diagonal accent without a real framing line — it will look like a sticker when viewed from the sidewalk.
22. Monolithic black entry tower with light stone cladding
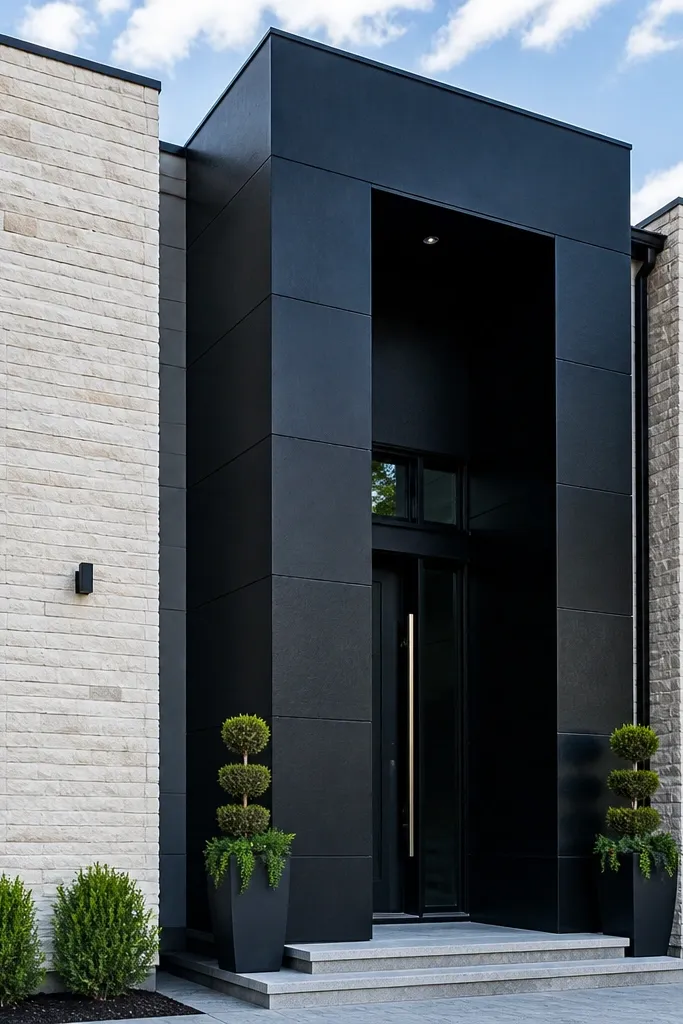
A monolithic entry tower gives you a modern focal mass even if the rest of the facade is simple. Use a deep black finish on the entry tower (metal panel, stucco, or fiber cement) and surround it with lighter cladding like light stone veneer or pale panels. The contrast makes the entry read like a designed sculpture. Keep the tower shape clean — rectangular with sharp corners — and use a flat canopy or none at all if you can protect the door area with proper flashing. This suits homes where you want a dramatic entry without changing the whole house.
Frame the entry tower section as a separate cladding zone so you can keep lines crisp. Install rainscreen backing and mount the black cladding system in a continuous vertical plane. Surround the tower with your chosen light finish and keep the joint line straight with trim. Build the entry canopy or overhang with proper flashing and drip edges. Seal every joint at the base and around the door opening, then use a matte finish so black stays uniform.
Editor's noteChoose black finishes with UV-stable pigments so it doesn’t fade to gray in the first year.
Skip thisDon’t use shiny black paint — the facade will look blotchy as light hits it.
23. Two-story vertical glazing with slim metal mullions
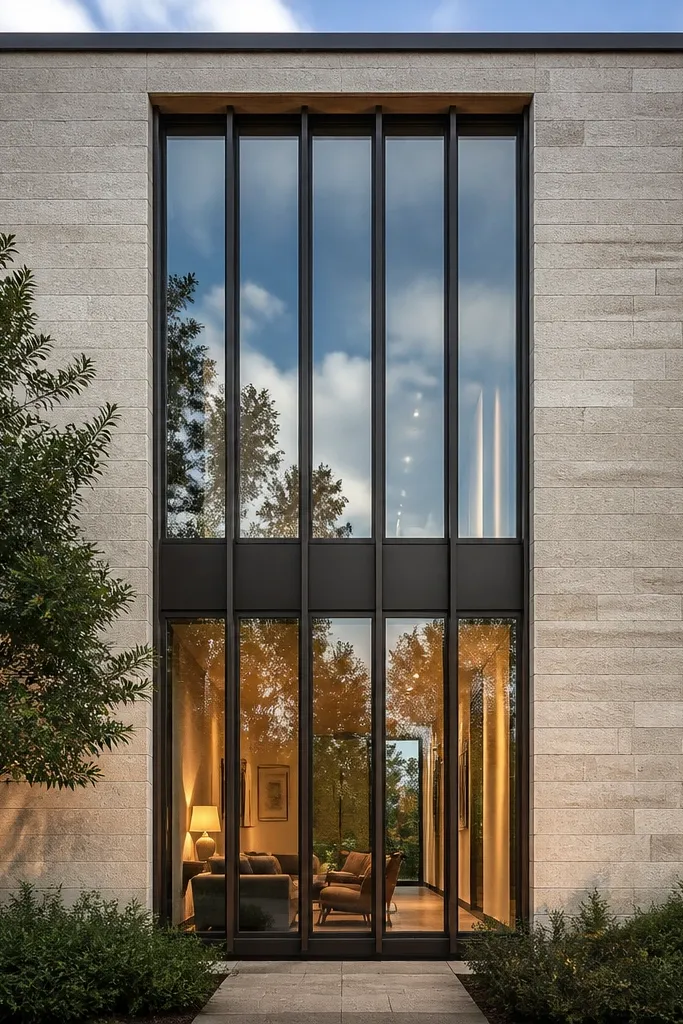
Tall vertical glazing is a modern facade design that looks intentional when the mullions are slim and the surrounding walls are simple. This design works when you have a strong window composition — often a tall center bay — and you keep the wall cladding in a single plane. Use slim metal mullions in black or dark bronze and keep curtains or interior glare controlled. Pair with light cladding (stucco or panels) so the glass doesn’t dominate the whole front. It suits contemporary homes where you want natural light and a clean architectural look.
Plan the window opening sizes and mullion spacing first, then design your facade cladding around them. Install the window with proper flashing and insulation, using a continuous water-resistive barrier. Apply the surrounding cladding in large panels or smooth stucco to avoid busy patterns near the glazing. Add trim returns that create a consistent shadow gap around the window perimeter. Finish by sealing all exterior joints and checking that water sheds away from the window sill line.
Editor's noteUse non-reflective or low-glare glass options if you shoot photos — glare can ruin the look even when the facade is good.
Skip thisDon’t crowd the window with extra trim pieces — slim mullions look best with minimal framing clutter.
24. Horizontal slat soffit with matching facade slats
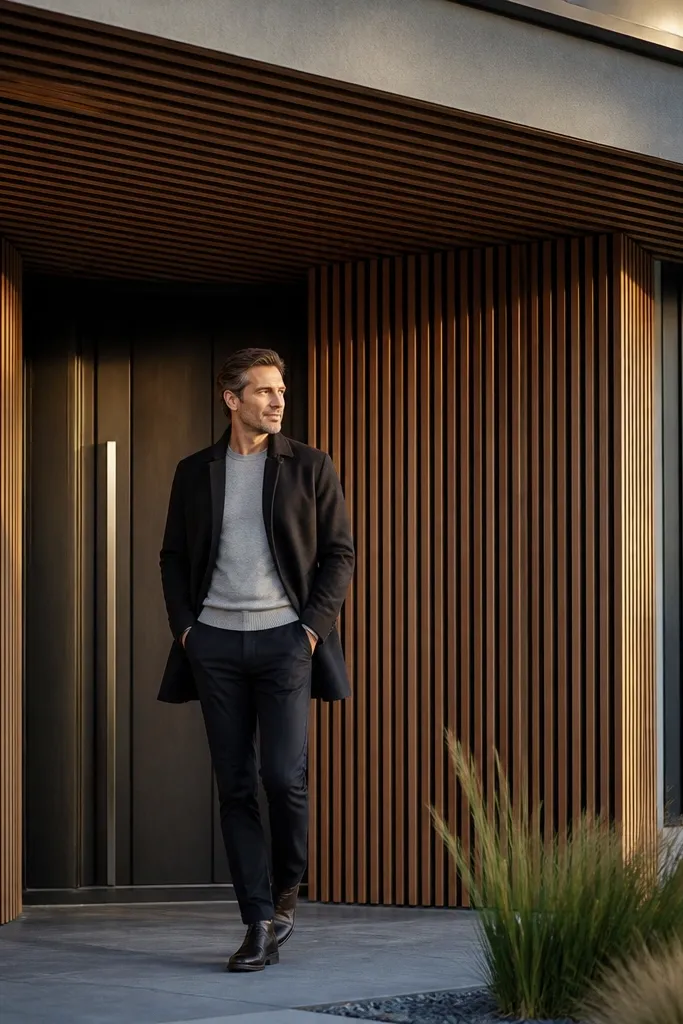
Matching slats on the soffit and facade look modern because your design repeats in two planes. The soffit slats add a shadow line overhead that makes the entry area feel architectural. Use the same wood tone or metal color on both slat sets so the facade looks unified. This design is photogenic because the soffit catches light and frames the front door area. It suits homes with a noticeable overhang or porch where soffit detailing is visible from the street.
Choose a slat material and spacing and repeat it on both wall and soffit. Install a rainscreen frame on the facade, then mount wall slats with consistent gaps. Build soffit framing and install slats with the same spacing and angle; keep the underside plane flat. Add ventilation openings if required by the soffit system. Seal edges and prime/coat as needed so water doesn’t stain the finish.
Editor's noteKeep soffit slats aligned with the wall slats — even a small offset shows immediately in photos.
Skip thisDon’t use different slat spacing on soffit vs wall — the repeat effect disappears.
25. Matte white panel facade with a dark vertical spine
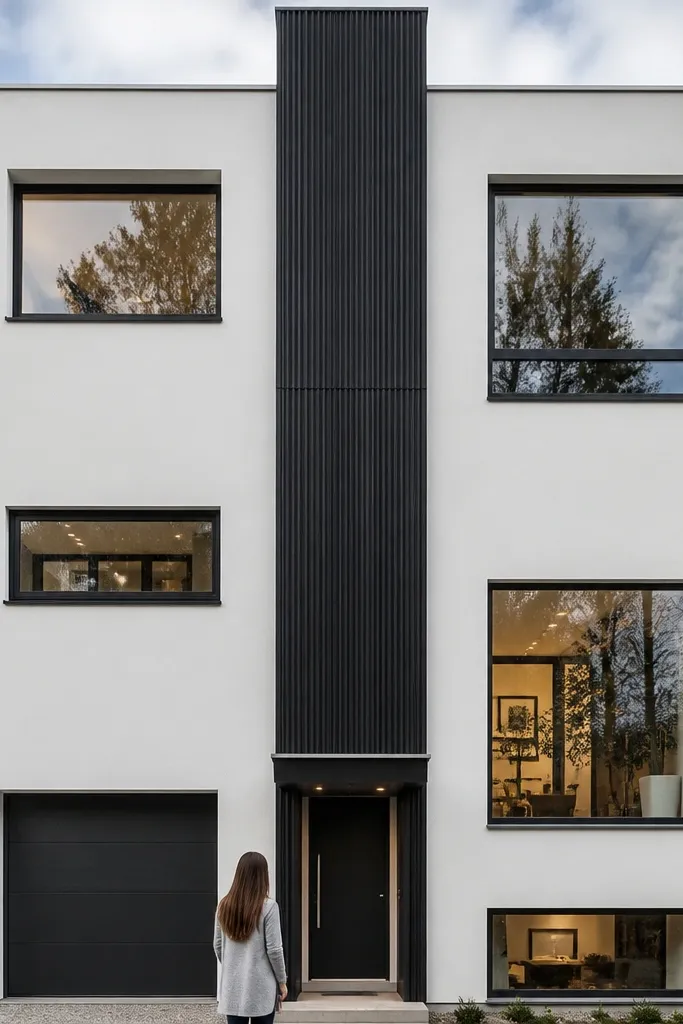
A matte white panel facade looks modern when it has one strong dark vertical spine. The spine can be a different cladding type (metal fins, fiber cement strip, or wood slats) that runs full height near the entry or between windows. This creates a clear composition line and helps the facade feel tall and structured. Keep everything else in matte white or near-white, with trim in black. It’s a good choice when you want a bright facade that still looks architectural, not plain siding.
Install the main panel system in matte white, keeping joint lines straight and reveal widths consistent. Decide where the vertical spine sits and frame it as a separate element with its own backing so edges look crisp. Mount the spine cladding — metal fins or a single strip of panels — with straight alignment from base trim to soffit. Add consistent window trim and base trim to connect the spine visually. Finish with an exterior paint system rated for your panel type and climate.
Editor's noteUse a single long straightedge check along the spine edges before you fasten the final row.
Skip thisDon’t add multiple dark strips — one spine looks designed; many strips look decorative.
26. Charcoal stucco with vertical wood battens around windows
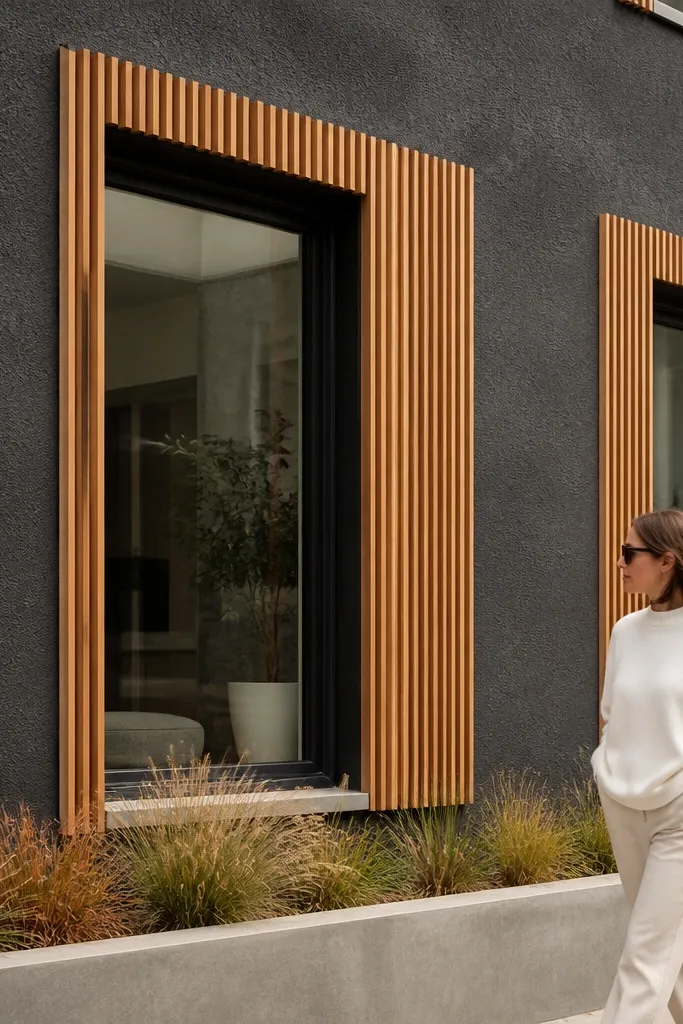
This design is for modern warmth: charcoal stucco as the main field, then vertical wood battens used specifically to frame windows. The wood battens create a “window frame architecture” effect that looks high-end without being a full cladding overhaul. Keep battens narrow and evenly spaced so the look stays modern. Use a matte finish on both stucco and wood so textures don’t glare. This works best on facades where you already have stucco or can do a stucco finish and want a simple upgrade.
Apply charcoal stucco over a prepared substrate and keep the surface smooth and flat. After curing, install vertical battens around each window opening with a consistent offset from the window trim — keep the battens aligned across all windows. Use exterior-rated wood and seal all edges; mount battens over a ventilated backing so moisture management stays correct. Add a simple trim frame around each opening to keep lines clean. Seal joints at corners and paint the battens with an exterior stain or paint system.
Use the same batten width and gap on every window — mixing sizes makes the facade look random.
Don’t wrap battens around the whole wall — the modern look depends on them being an accent frame.
27. Steel-gray fiber cement with chamfered trim edges
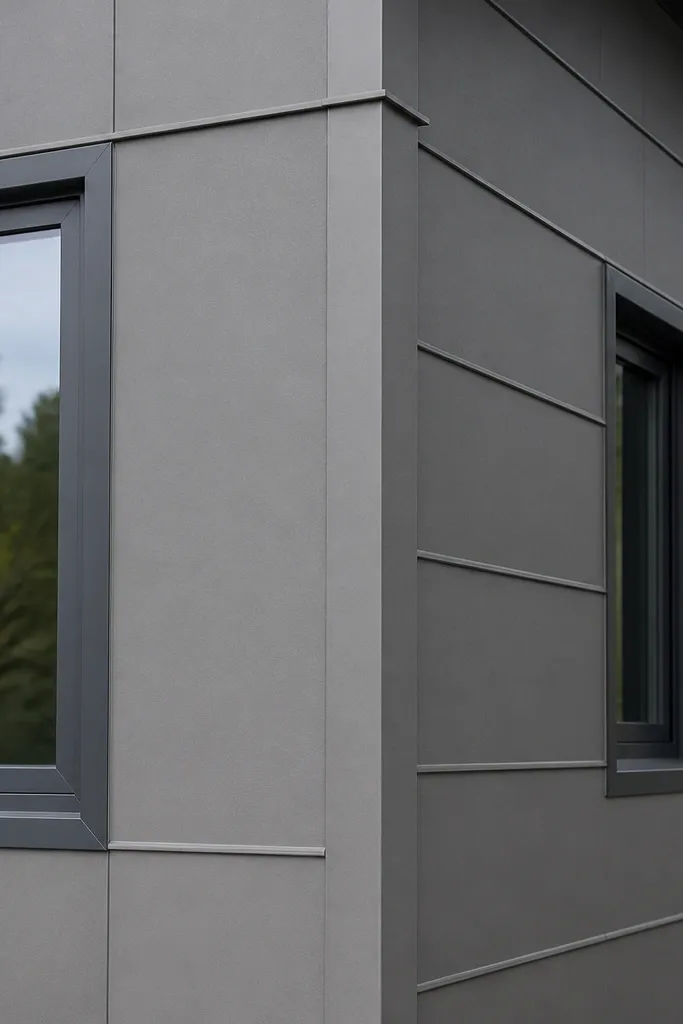
Chamfered trim edges are a small change that makes a big difference in modern facades. When you pair steel-gray fiber cement panels with chamfered trim, you get crisp shadow lines at corners and around windows. The facade looks engineered because the edges catch light in a controlled way. Keep the trim color a touch darker than the panels for definition. This suits homes that want a quiet, modern look without bold contrast colors. It’s also a practical choice because fiber cement holds up well and is paint-friendly.
Install fiber cement panels on a ventilated rainscreen with consistent reveal gaps. Choose exterior trim boards with a chamfer profile and install them at corners, window openings, and where the facade changes direction. Keep the trim thickness consistent so the shadows are uniform. Prime and paint everything with a system designed for fiber cement and exterior trim. Seal around openings with exterior-grade sealant and verify that water sheds away from the trim edges.
Editor's noteDry-fit one window trim set and confirm the chamfer shadow width before doing the whole facade.
Skip thisAvoid flat trim next to panel reveals — the whole modern edge effect comes from the chamfer.
28. Light oak cladding with black metal corner guards
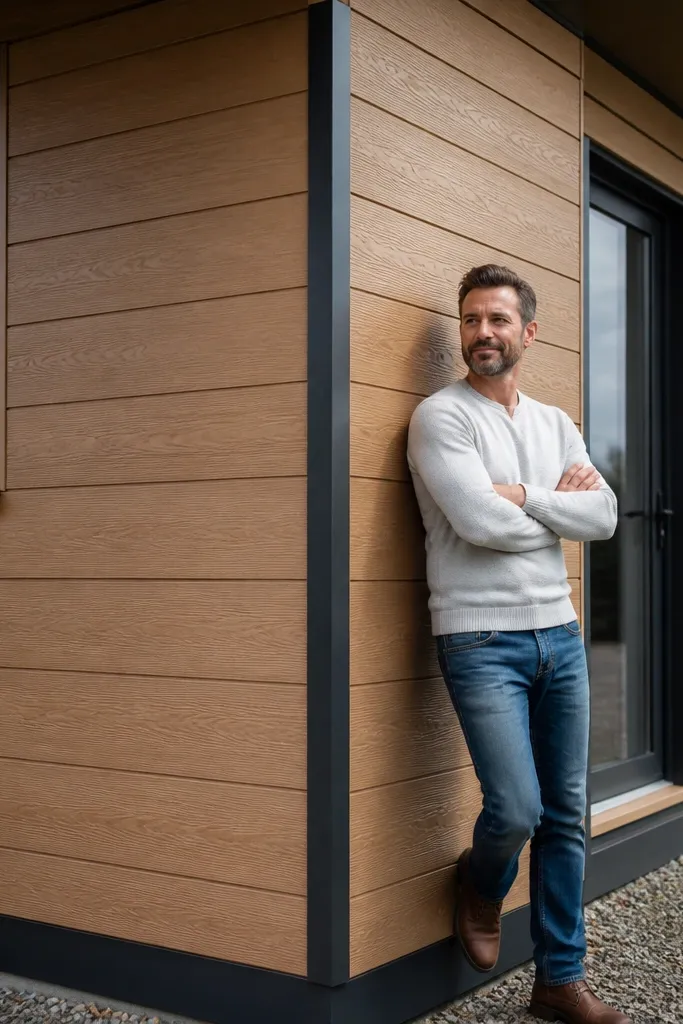
Light oak cladding looks modern when you add black metal corner guards that protect the edges and sharpen the shape. The corner guards create a crisp boundary where wood otherwise gets visually messy from weathering. Use a light oak tone that doesn’t go too yellow; keep the rest of the facade calm with simple window trims. This design suits homes with a lot of vertical cladding where corners are visible and need protection. It also gives you a functional upgrade — corners stay cleaner longer.
Install exterior-rated wood cladding over a ventilated rainscreen with proper flashing at the base. Mount black metal corner guards at all exposed corners using anchors that won’t rust or stain the wood. Keep the cladding edges straight up to the corner guard so the guard line reads intentional. Stain or paint the wood in a light oak tone and seal all cut ends thoroughly. Add trim around windows and seal joints where wood meets metal to prevent water creep.
Use pre-formed corner guard pieces if you can — the seams are cleaner than field-welded corners.
Don’t leave wood corners unprotected — modern wood facades age worst at the edges.
29. Modern lattice privacy wall beside the entry
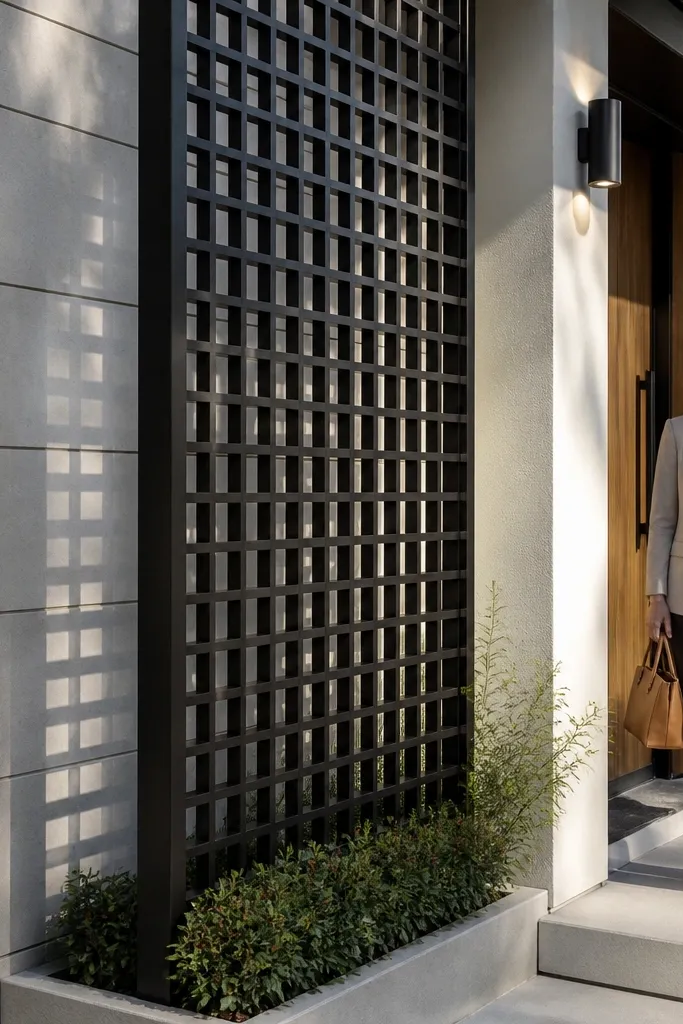
A privacy lattice wall next to the entry gives you modern texture without turning the whole facade into a pattern overload. Use a clean grid lattice in dark frames, and keep the surrounding facade simple — stucco or panels. This works when you want to soften a blank wall area near the door, or when side windows need privacy. The lattice casts shadows and adds depth, which helps the facade look designed in both daylight and evening. Pair it with a modern light fixture and a simple walkway edge so the entry reads cohesive.
Frame the lattice wall with treated lumber or aluminum so it stays straight over time. Install a water barrier behind it if it sits over a wall, then mount lattice panels with consistent spacing. Use dark metal or primed wood frames and finish with exterior coating. Connect the lattice wall to the main siding with trim so water can’t get behind edges. Seal all fastener penetrations and add a top drip cap to keep water from soaking the lattice frame.
Editor's noteMatch the lattice frame color to your window trim so the facade doesn’t look like two different projects.
Skip thisDon’t put lattice on the entire front — one side feature looks modern; full-front lattice looks busy.
30. Vertical board-and-batten facade with hidden gutters
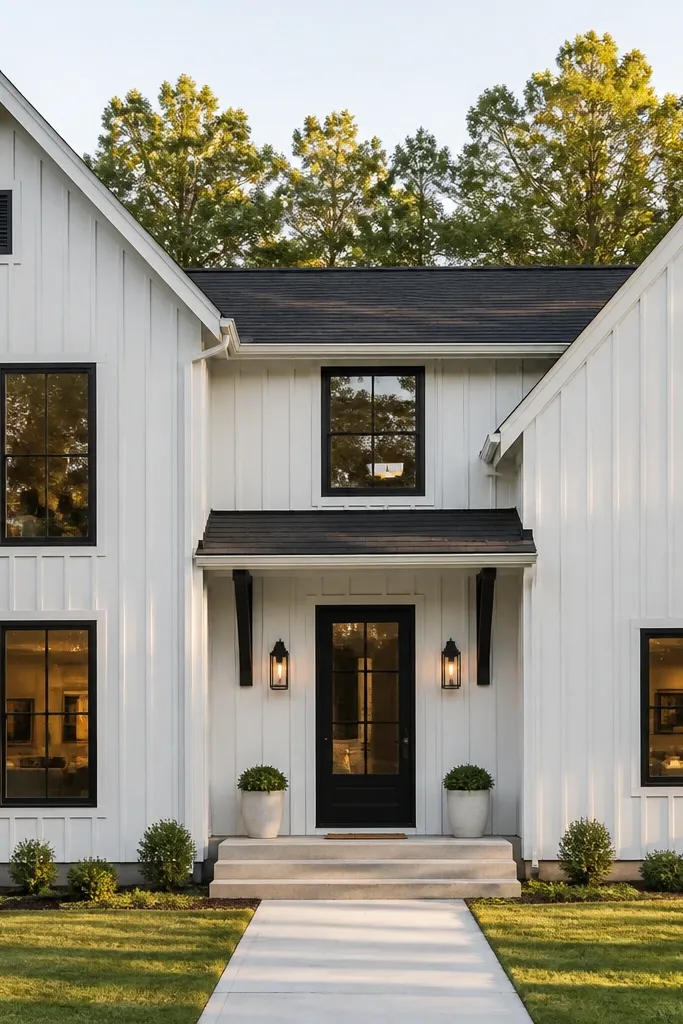
Vertical board-and-batten looks sharp when you keep the top gutter line hidden and the trim minimal. The vertical battens create a strong rhythm that reads modern, while concealed gutters keep the facade clean and photo-ready. Use matte white or light gray board-and-batten, then add black window trim and a matching entry door. This design suits homes where rainwater staining and visible gutter clutter are issues. It also makes the facade look intentional because the roof edge stays uninterrupted.
Install a ventilated rainscreen backing and then mount vertical boards with consistent spacing for the batten gaps. Add a fascia and concealed gutter system along the roof edge, then wrap with trim so the gutter isn’t visible from the street. Install battens over the boards with straight alignment and consistent reveal width. Prime and paint with an exterior system rated for board-and-batten profiles. Seal all joints and ensure that water flows into the concealed gutter without leaking behind trim.
Editor's noteUse a long level to keep battens straight — vertical lines show every wobble.
Skip thisDon’t skip roof edge detailing — a visible gutter line ruins the clean modern effect.



