
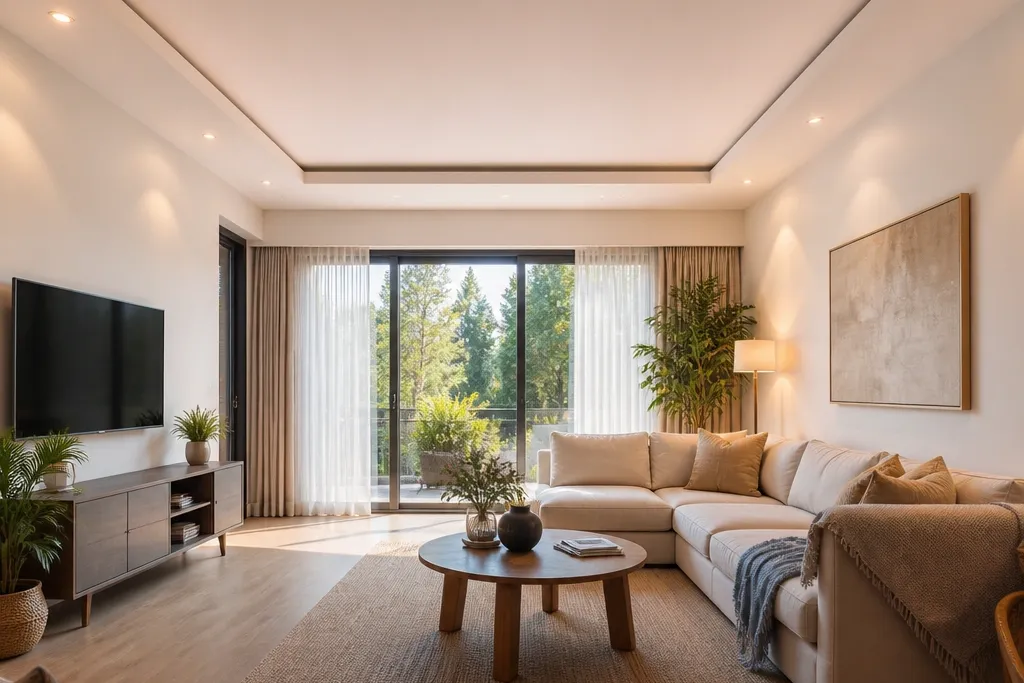

1. Shadow-gap perimeter border with 2-inch drop
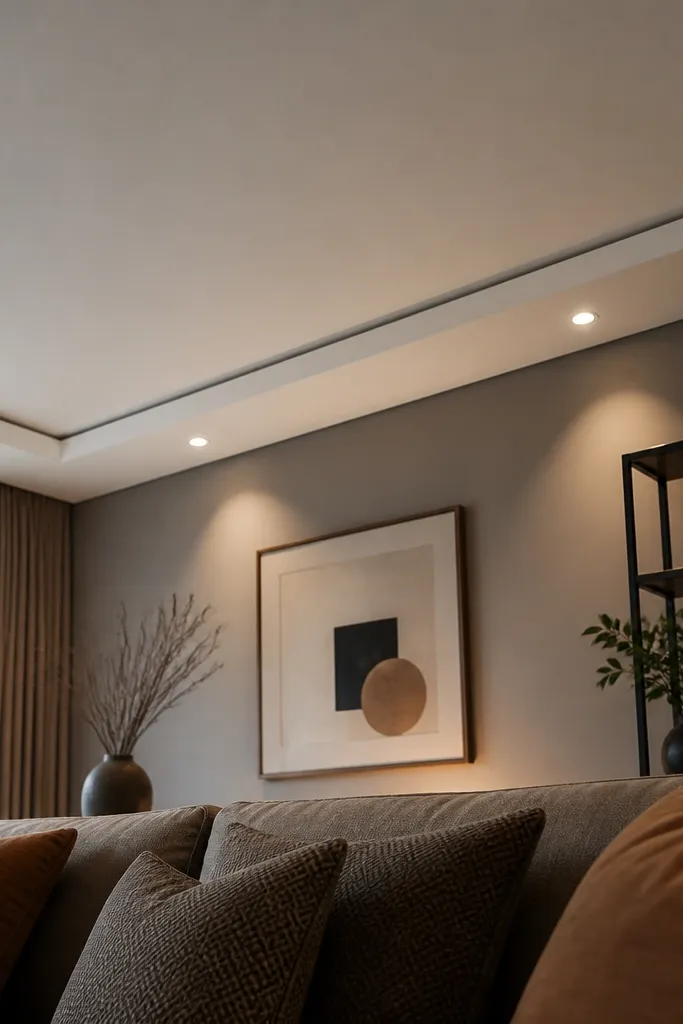
This is the easiest way to get a good-looking False Ceiling Living Room without making the ceiling feel lower. You build a simple perimeter frame about 2 inches down, then add a slim shadow gap so the border looks crisp instead of chunky. The room instantly looks “finished” because the eye reads the ceiling as a clean picture frame. Pair it with a few recessed downlights spaced evenly for bright, even illumination.
Measure the room perimeter and mark a level line 2 inches below the main ceiling using a laser level. Install perimeter battens first, then add cross members so the board edges are supported. Add the shadow-gap channel and thickness spacer so the gap stays consistent all the way around. Fix gypsum boards, fill joints with tape and putty, then prime and paint the entire ceiling the same sheen. Finally, cut and install downlight openings exactly where you marked them, then test the lighting before final touch-ups.
Use a 1-2mm consistent gap spacer strip when setting the shadow channel so you don’t chase uneven lines later.
Don’t skip a full level check — a ceiling border that’s off by even 5-8mm will show in every photo.
2. Center square panel with recessed perimeter lights
If you want a focal point that looks intentional, a centered square panel does it without going overboard. The recessed perimeter lights around the square create a soft halo effect that makes the room feel more layered. This layout works especially well in rectangular living rooms where the eye needs a centered anchor. Keep the panel edges sharp and the lighting warm for a clean, modern vibe.
Editor's noteUse the same trim ring on every downlight so the ceiling stays uniform when viewed from the couch.
Find the room center by measuring length and width, then mark the center point. Build a shallow drop (around 1.5-2 inches) for the entire ceiling, then create a raised or recessed square panel using additional battens (aim for 6-12 inches inset from the outer border). Install the perimeter downlights along the panel’s inside edges, spacing them evenly (about 12-18 inches apart depending on fixture size). Board the ceiling, cut openings for lights, and seal joints before painting. Paint the square panel and surrounding area the same color so the panel reads as shape, not patches.
Skip thisDon’t place lights randomly — uneven spacing creates a visible “hot pattern” in the center.
3. Cove lighting with thin U-channel border
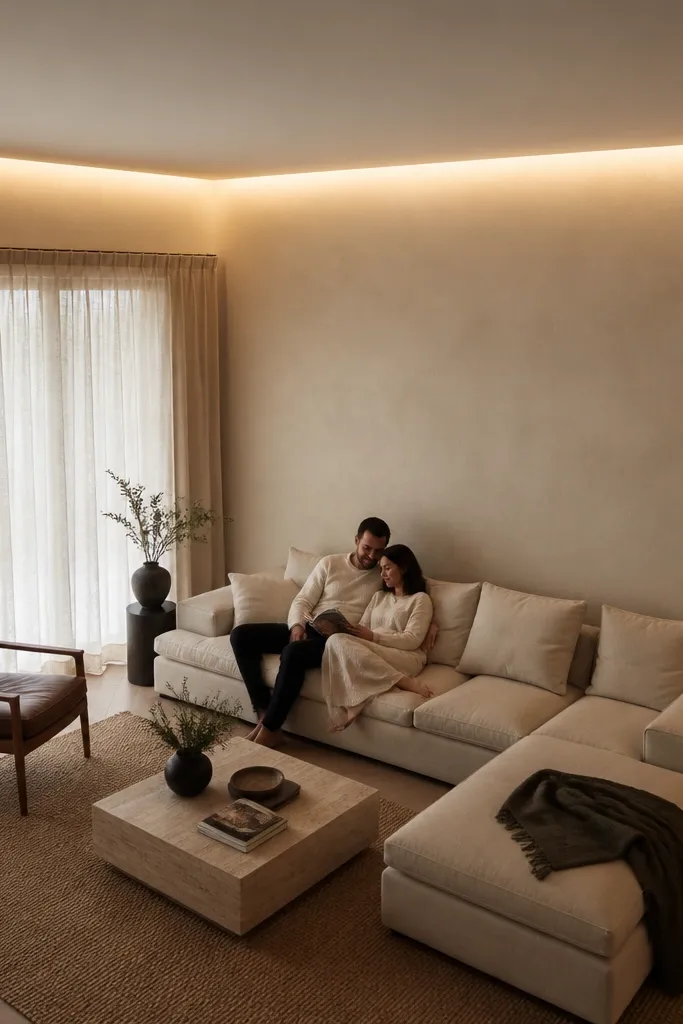
Cove lighting is the fastest route to a good-looking False Ceiling Living Room that feels cozy instead of flat. The thin U-channel border hides the LED strip so the glow washes the upper wall and makes the room look taller. This looks fantastic in living rooms with neutral paint or textured walls because the light reveals texture gently. It’s also very photogenic: you get that clean, ambient ceiling-to-wall gradient.
Editor's noteChoose a diffuser that spreads light evenly; if you see LED dots, your diffuser is too clear or the angle is wrong.
Set a perimeter line about 3 inches down for the main border depth, then mark the top of the cove channel. Install battens and the U-channel so the LED sits behind a diffuser, not in open view. Run LED wiring in conduit or neat cable paths before board closure. Fix gypsum boards for the outer face and add the diffuser panel so the LED is fully concealed. Prime and paint, then install the LED strip and test the glow direction before final sealing.
Skip thisDon’t use a wide open cove — it exposes the strip and kills the clean glow.
4. Step-down concentric rings (two-level)
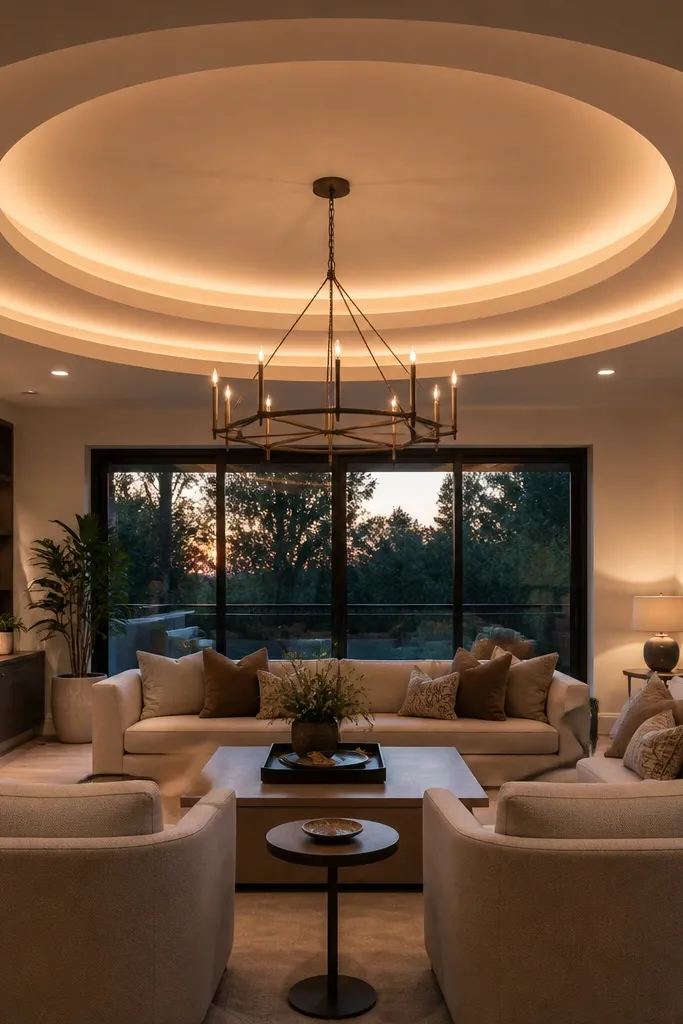
Concentric rings give you a sculpted look that still reads clean in everyday lighting. Two levels are enough — one ring raised or recessed and another ring slightly offset. It draws attention to the center and looks great with a chandelier or ceiling fan. Keep the rings symmetrical and use warm lighting so the shadows fall smoothly.
Mark the ceiling center and draw two concentric circles using a string and pencil method (measure radius carefully). Build the outer ring drop first, then add the inner ring at a slightly different height (about 1-1.5 inches difference). Add cross members under the board edges so the curves stay supported. Install recessed spotlights along the ring edges, aiming them toward the center for controlled shadow. Board, tape, putty, prime, and paint, then install fixtures after the paint cures.
Use flexible gypsum board for curves or cut small relief cuts on straight sheets — it prevents buckling at the edges.
Don’t rush the curve support — unsupported board edges crack along the ring line.
5. Wood-look slatted false ceiling with hidden LEDs
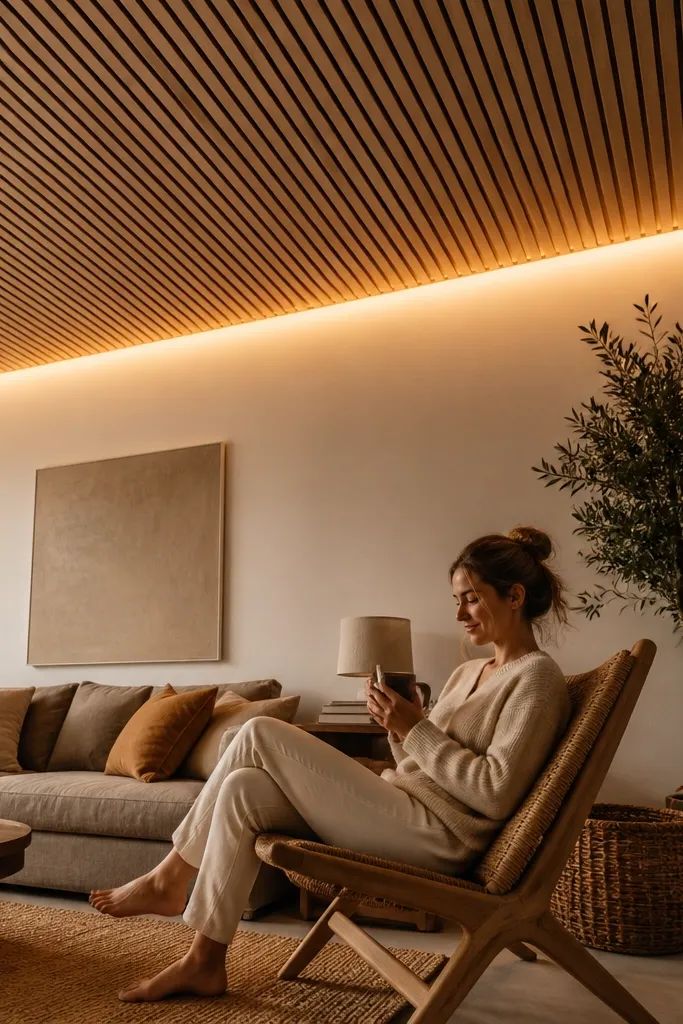
If you want a good-looking False Ceiling Living Room that feels warm and high-end, slats are the shortcut. The slatted look adds texture instantly, and hidden LEDs behind the slats create a gentle, modern glow. This works best in living rooms with warm wall colors, natural wood furniture, or neutral beige tones. Plan the slat direction so the lines align with the room’s longest wall for a cleaner visual flow.
Editor's noteUse spacer jigs for slat spacing; consistent gaps look intentional, inconsistent gaps look messy.
Choose slat material like pre-finished wood veneer strips or plywood battens cut to consistent width (common widths are 2-3 inches). Install a flat primary frame, then add secondary supports at slat spacing so every slat lands cleanly. Leave a continuous channel behind the slats for LED placement and diffuser. Fix slats in a consistent pattern, then board only where you need smooth surfaces (like borders). Wire LEDs in a concealed channel, test the glow, then finish with a matching top coat or clear sealer.
Skip thisDon’t mix slat widths in one ceiling — it creates visual noise even if the room furniture is calm.
6. Geometric hexagon grid with recessed spotlights
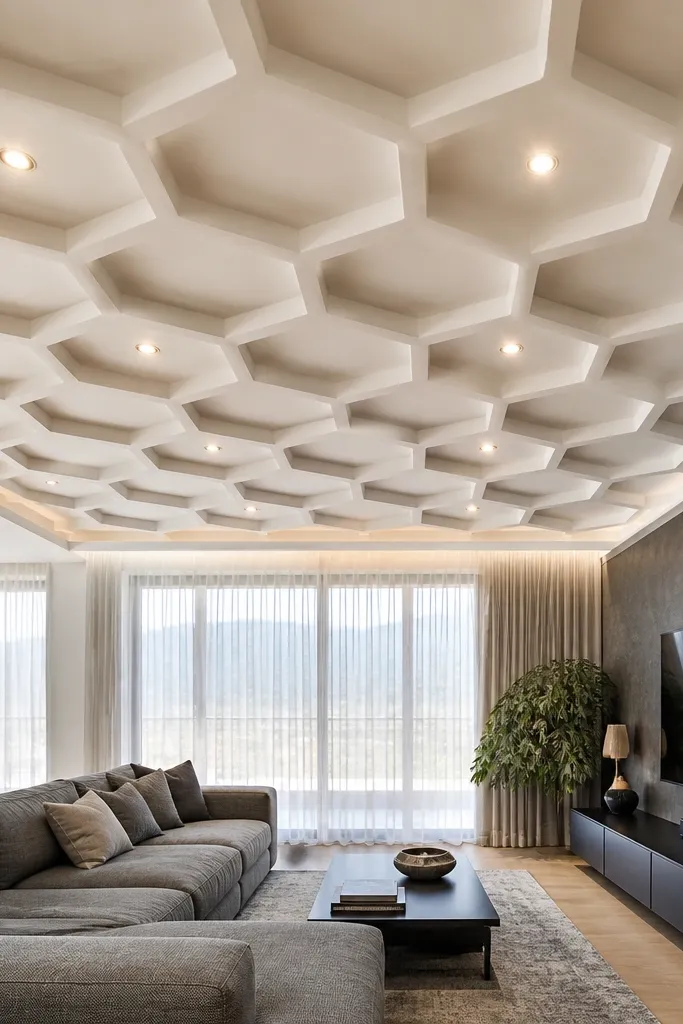
Hexagon grids look architectural and modern, especially when the ceiling is painted matte and the recesses are crisp. The key is keeping the grid tight and the recess depth consistent so it reads as a pattern, not random cutouts. Use recessed spotlights inside or around the cells for a clean sparkle effect. This layout is perfect for living rooms that need a design moment without adding a large chandelier.
Plan a hexagon size that fits the room width without awkward half cells at the edges (measure both directions and scale the grid). Build a shallow drop frame and install battens along the hexagon edges. Cut and fix board panels in the hexagon recess shapes, then create a raised grid face if you want a 3D look. Mark and cut recessed spotlight openings, keeping spacing uniform (aim for consistent center-to-center spacing). After installation, tape joints, putty the grid edges, prime, and paint with a matte finish to reduce glare.
Do a dry-layout with pencil marks on the boards before cutting any hexes — alignment mistakes are hard to hide.
Don’t make the recesses too deep; deep hex cutouts trap shadows and look uneven from seating height.
7. Tray ceiling with crown border and downlights
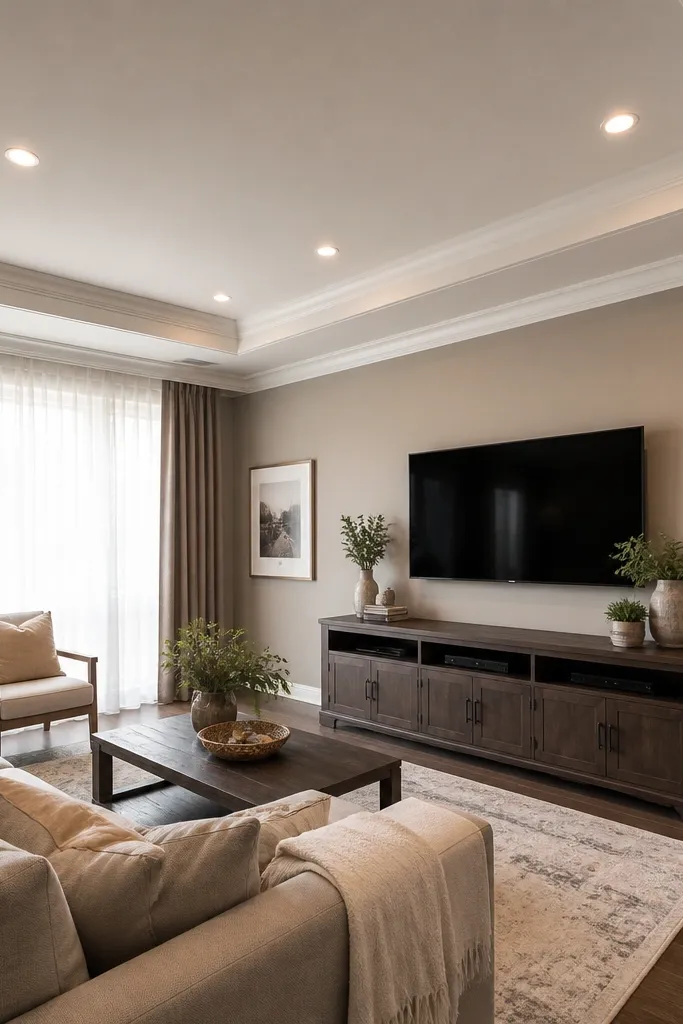
A tray ceiling makes a living room look more “designed” because it creates depth without turning the whole ceiling into a big carving. The crown border hides the transition line so the drop feels intentional. Downlights inside the tray area light the room evenly while the outer border keeps the ceiling looking clean. This is a strong choice for living rooms with a ceiling fan or a planned chandelier.
Editor's noteUse a wider crown border profile if you want the ceiling to look taller from the couch.
Mark a perimeter line for the outer tray drop (2-3 inches) and a second inner line for the tray depth (usually 6-10 inches inset). Build the outer frame first, then build the inner tray frame with level support. Fix gypsum boards for both levels and ensure the step edges are straight with a level and straightedge. Install downlights within the tray area, keeping the distance from edges consistent. Tape joints, putty, prime, and paint the tray and border the same color for a seamless look.
Skip thisDon’t under-support the tray edges — the thin step line will sag and crack.
8. L-shaped cove around the seating wall
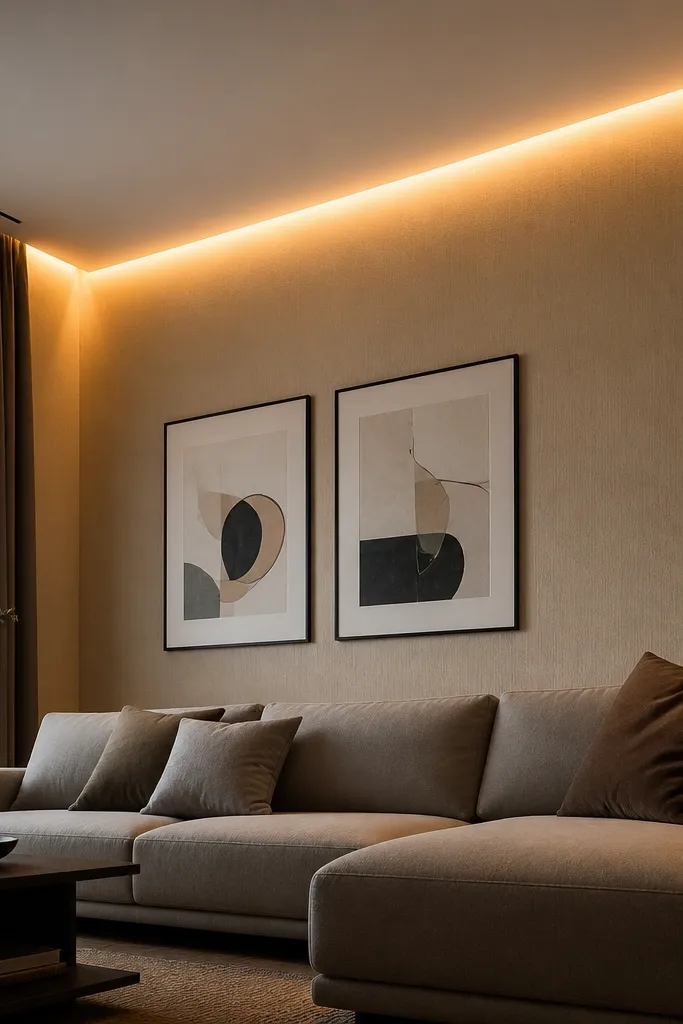
Not every living room needs a full perimeter cove. An L-shaped cove around the seating wall is a smart way to add drama where people actually look — toward the sofa wall. The glow makes the wall feel richer and helps the room look styled even if the rest of the ceiling is simple. It also saves money because you build less border length than a full ring.
Editor's noteUse two light circuits if possible — one for downlights, one for the cove — so you can match mood lighting.
Identify the main seating wall and measure the L shape you want (usually one side wall plus the wall behind the TV). Mark the cove drop height (around 3 inches) and install battens only along those two sides. Add the LED channel and diffuser on the inner edge so the light washes the wall, not the ceiling. Board the border faces and keep the rest of the ceiling flat or with a thin border. Install recessed downlights on the flat section for overall brightness, then test all lighting zones.
Skip thisDon’t aim the LED too steep; if it hits the ceiling, you’ll see glare instead of a soft wall wash.
9. Recessed linear LED channels along beams
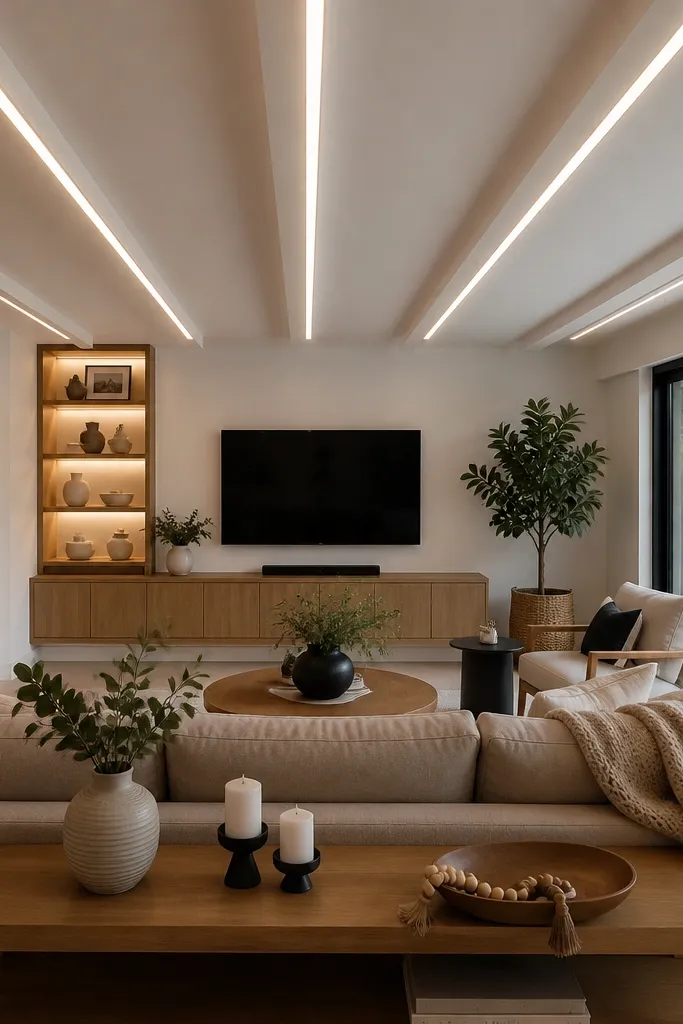
Long channels look clean and high-end because they create a continuous line, not dots. This layout works when your living room has a TV wall and you want the ceiling to guide the eye toward it. The linear channels also reduce harsh shadows compared to random spots. Keep the lines parallel and use warm lighting so the glow feels calm on the walls.
Decide how many channels fit the room width with even spacing (often two to four lines). Mark the ceiling and install a frame that supports the channel edges at the same depth. Create a narrow recess using boards or channel profiles, then install LED strips behind a diffuser. Wire each channel neatly with labeled connections so troubleshooting is easy later. Board the main ceiling surface, prime, paint, then install diffuser covers and test the output under room lighting conditions.
If you see LED dots, switch to a thicker diffuser or reduce the channel opening width.
Don’t paint the channel interior the same glossy white as the ceiling — it reflects glare and ruins the line.
10. ACP panel ceiling with border frame and concealed lights
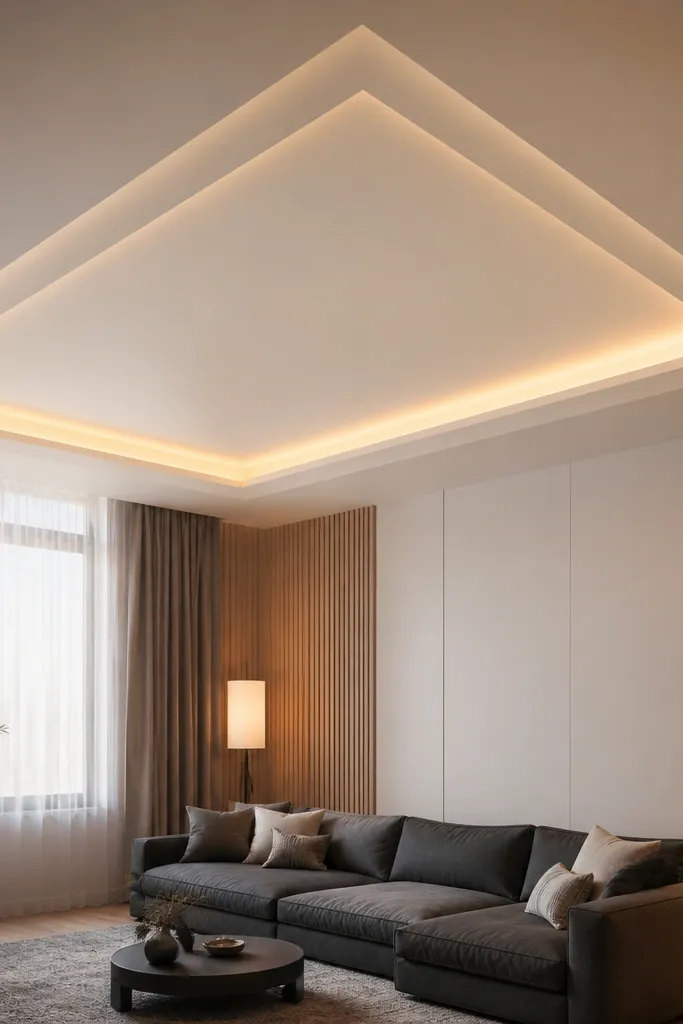
ACP panels give you a crisp, uniform surface quickly, and the sheen can look sharp under warm LEDs. For a good-looking False Ceiling Living Room, combine ACP in the center with a painted gypsum border so the edges look clean and the panel stays flat. Concealed lights under the border create a soft glow without showing fixtures. This is a great pick when you want a modern, clean look with less board joint work.
Editor's noteUse edge trims on every ACP cut; raw edges look rough in close-up photos.
Pick ACP sheet thickness around 3mm and a finish that matches your room palette, like matte white or off-white. Build a metal or wood frame for the panel grid, with supports spaced so the sheets don’t flex. Install the border frame first, then fix ACP sheets on the center area with proper edge finishing trims. Leave space for LED channels behind the border and run wiring in the ceiling cavity before closing. Seal cut edges and add corner finishing so nothing looks raw.
Skip thisDon’t skip frame spacing checks — ACP panels will show waves if the support is uneven.
11. Matte white ribbed ceiling with slim recessed strip lights
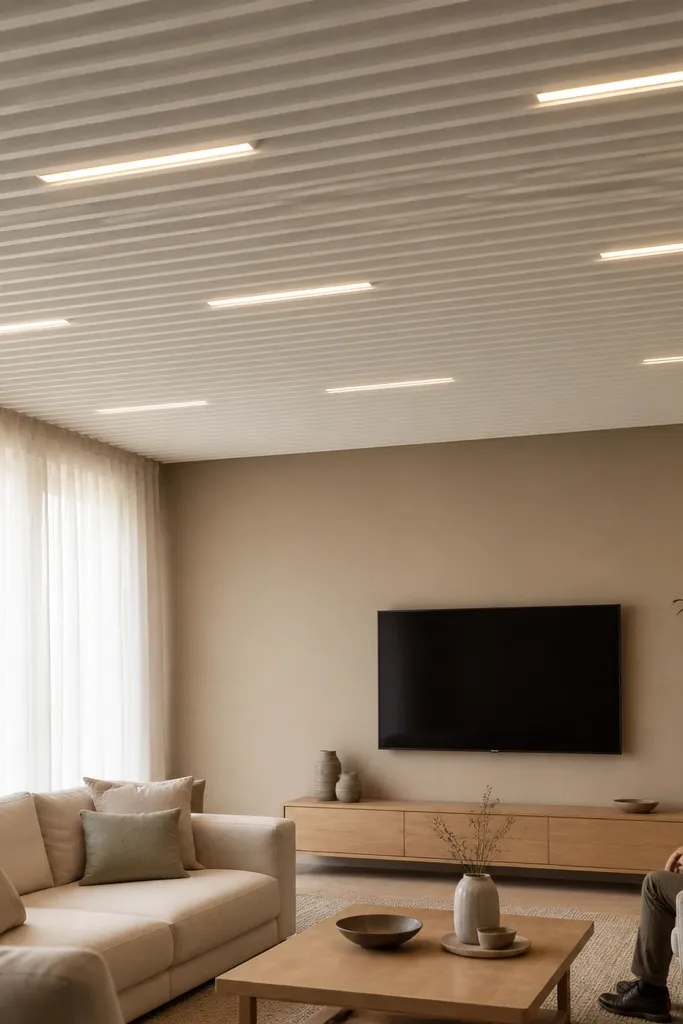
Ribbed ceilings look premium because they add texture that catches light softly. When the ribs are shallow and the finish is matte, the room looks modern without looking busy. Slim recessed strip lights between ribs create a clean glow pattern that feels intentional. This is one of the best looks for living rooms that already have strong furniture — you want the ceiling to add style, not compete.
Plan rib width and spacing, then build a primary frame with secondary supports for each rib line. Fix gypsum boards or plywood strips to form ribs, keeping the rib depth consistent (around 1-1.5 inches is a safe visual range). Install recessed channels for slim LED strips inside the rib spacing, using a diffuser to prevent dot glare. Fill joints between ribs carefully and sand smooth so the ribs look crisp, not messy. Prime and paint in matte white, then install LEDs and keep wiring access through a small service hatch if possible.
Sand the rib edges with a long sanding block — short sanding tools create uneven rib shadows.
Don’t use glossy paint on ribs; it highlights every roller mark.
12. Raised circular dome with halo ring lights
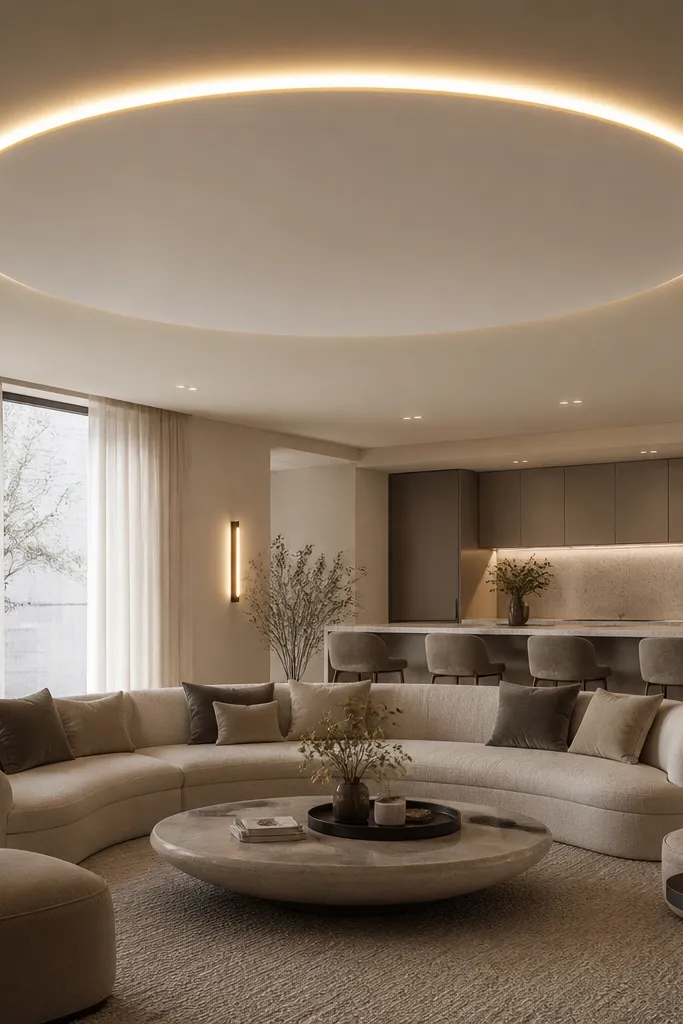
A raised circular dome gives you that centerpiece look without needing a big chandelier. The halo ring lighting around the dome makes the feature glow from the edges, so it looks photogenic from every angle. This layout suits living rooms with round or curved decor elements, and it also works in square rooms because the circle softens hard corners. Keep the dome height moderate so it stays classy, not theatrical.
Mark the center and decide dome diameter (common range is 24-48 inches depending on room size). Build a circular frame for the dome using curved battens or plywood segments, then create the halo ring recess around it. Install a diffuser channel for the halo LED so the strip is hidden. Board the dome surface in curved pieces and tape joints carefully. Cut and install any central fixture space, then prime and paint. Finally, install the halo LED strip and test for an even ring glow.
Use a diffuser that creates a continuous halo; a too-thin diffuser shows strip boundaries.
Don’t overcut the halo channel — if the ring depth changes, you’ll see it in the glow.
13. TV-wall focus panel with angled light spill
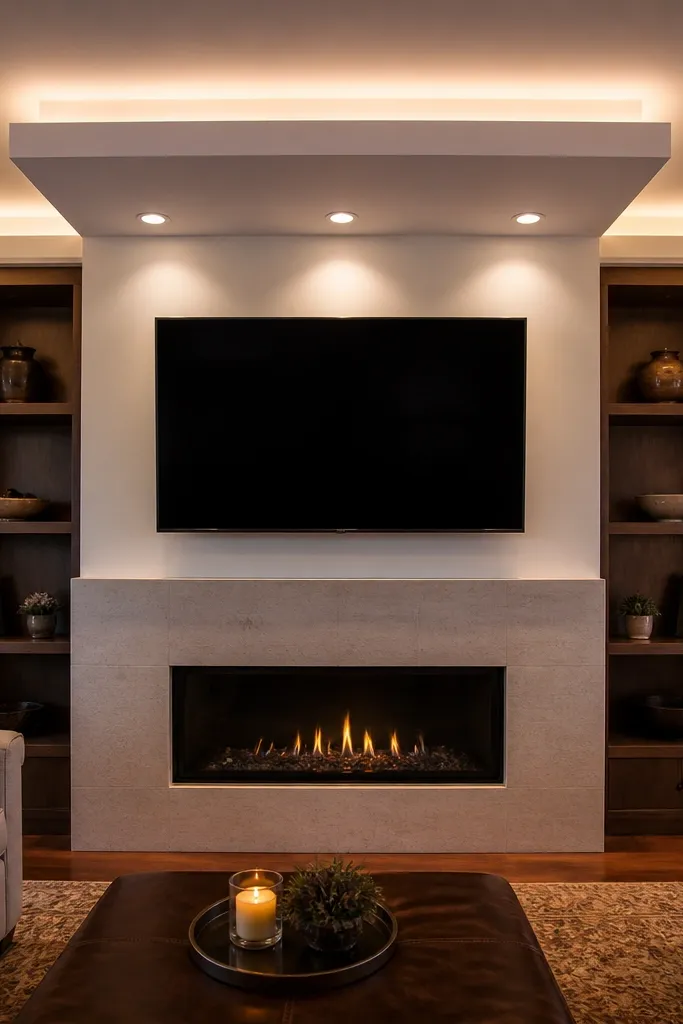
If your TV wall is the visual anchor, build the ceiling feature to match it. A focused panel above the TV wall with angled recessed lights creates a clean “spotlight” look without glaring eyes. This makes the room look styled, and it helps the wall feel deeper. The trick is direction: you want light to spill onto the wall and reduce shadows behind the TV setup.
Editor's noteMark light angles with painter’s tape on the ceiling before final wiring so the beam lands where you want.
Measure the TV wall width and center point, then design a rectangular or slightly wider panel above it (usually 6-12 inches wider than the TV). Build a shallow drop around the TV zone and keep the rest of the ceiling flat or with a thin border. Install angled recessed lights inside the panel so the beam targets the wall area behind the TV. Run wiring and install a dimmer if you can. Board, tape, putty, prime, paint, then install lights after the paint cures.
Skip thisDon’t aim lights straight down — it creates glare on the TV screen.
14. Thin border with three recessed light rows
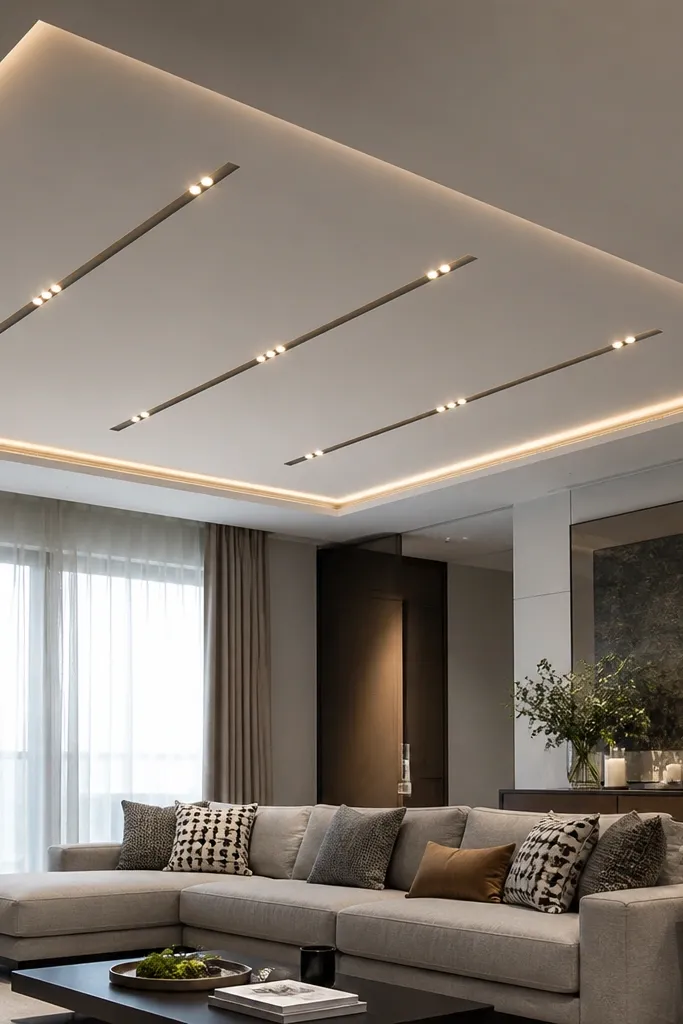
This is a clean, practical layout that still looks good-looking because the lighting is disciplined. Three straight rows make the ceiling feel structured, and the thin border keeps the drop minimal. It works in most living rooms because it gives even illumination without complicated shapes. If you want a “designed but not loud” ceiling, this is the one.
Editor's noteUse a consistent distance from the border to the first light in every row to keep symmetry.
Install a perimeter border frame at a shallow drop (around 1 inch if you just want the look). Decide your recessed light spacing so each row is evenly spaced from the border edges. Build cross members under the board area where each row of fixtures will sit. Board the ceiling, cut openings in the marked pattern, and wire the lights in parallel for consistent brightness. Prime and paint after the wiring test confirms everything works.
Skip thisDon’t use mixed wattage bulbs in one ceiling — brightness mismatch shows immediately.
15. Two-tone border with white center and colored edge strip
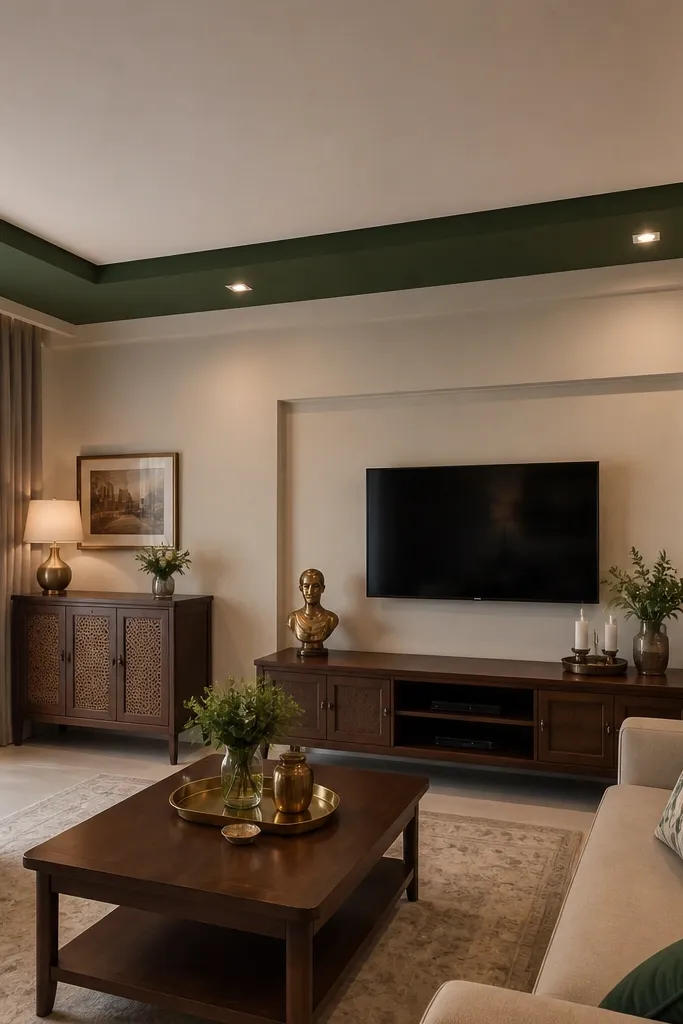
Two-tone ceilings look expensive because they create separation lines the eye can read instantly. Keep the center area white for clean brightness, then add a colored edge strip in the border to match your room palette. This is a strong option for living rooms with a specific accent color like deep green, navy, or terracotta. Recessed downlights keep it functional while the color border makes it photogenic.
Build a simple perimeter border drop (around 2 inches) with a crisp shadow gap or thin reveal. Prime everything first, then mask the center area so the colored border paint stays sharp. Paint the center white and the border strip in your chosen accent color, using two coats for even coverage. Install downlights through the border or just inside it, keeping the openings consistent. After paint dries, remove masking carefully and touch up any edge bleed with a fine brush.
Use painter’s tape with a burnishing tool so the edge line stays razor straight.
Don’t choose a glossy accent paint; it reflects the downlights and makes the border look messy.
16. Floating baffle strips with recessed perimeter glow
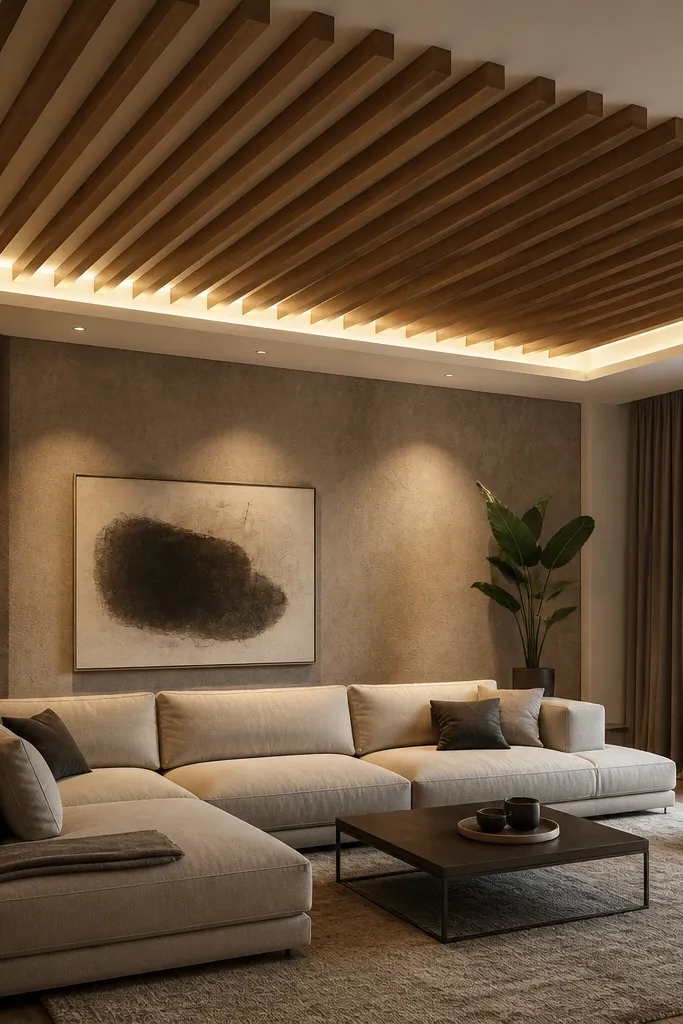
Floating baffles add depth like a gallery wall, and the recessed perimeter glow keeps the overall look soft. This combo makes a living room feel modern without relying on a single big feature. The baffles can be wood-look or painted, and the glow makes the edges look cleaner than a flat ceiling. It’s a great fit for rooms with neutral decor where you want texture overhead.
Build a flat base frame first at the main drop height, then add secondary hangers or supports for baffle strips so they sit slightly separated from the base. Install a perimeter recess channel for LED glow behind a diffuser. Fix baffle strips with consistent spacing and alignment, using a straightedge to keep them parallel. Fill and paint the base ceiling, then leave baffles as wood-look or paint them in a contrasting shade. Wire LEDs, test the glow, and add a small service opening if you need access to the driver.
Keep baffle spacing consistent — measure from one strip edge, not from the centerline.
Don’t skip diffuser coverage; if the LED is visible from the sofa, it looks cheap.
17. Cross-shaped recessed panel with corner spotlights
A cross-shaped recessed panel gives you structure and symmetry, which reads well in photos and in real life. Corner spotlights add sparkle and reduce shadow pockets that happen with only central lights. This layout looks best when the room has a clear seating zone where the ceiling center is visible. Keep the recess depth modest so the cross lines stay crisp.
Editor's noteUse a laser to keep the cross arms perfectly aligned with room walls.
Mark the ceiling center and draw a cross layout with equal arm widths, like each arm being 12-18 inches depending on room size. Build a shallow drop frame for the main ceiling and create a recessed cross panel by adding inner battens at a lower height. Install corner spotlights in the recessed area near the cross intersections. Board, tape, and putty the edges so the cross lines are sharp. Prime and paint, then install fixtures after paint cures to avoid scuffs.
Skip thisDon’t let the recess edges waver — wavy lines kill the clean look.
18. Waffle grid ceiling with hidden perimeter LEDs
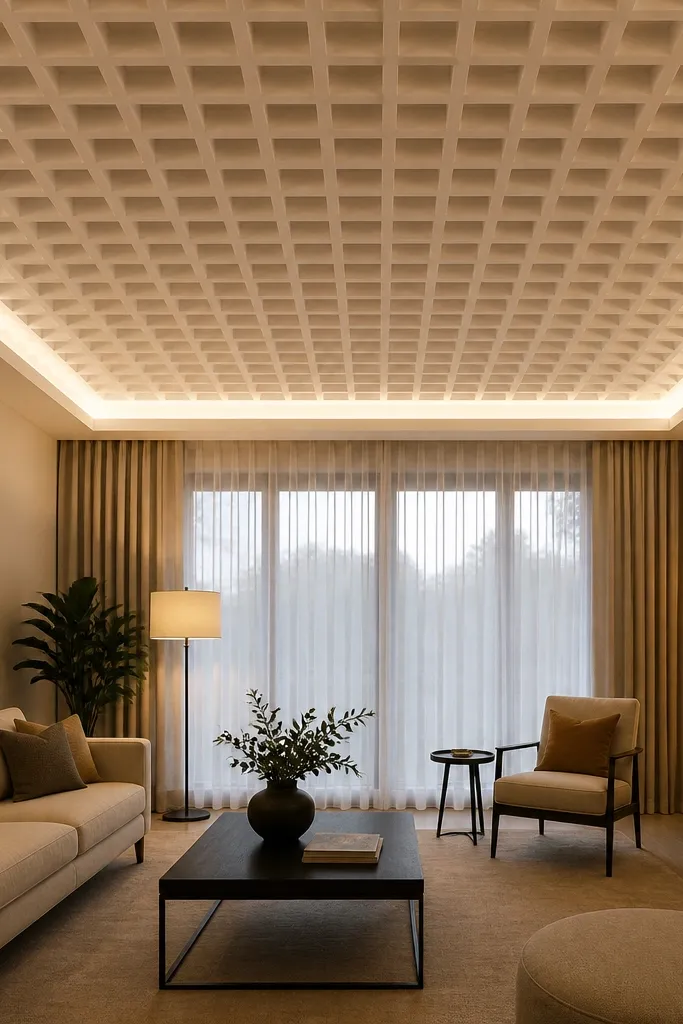
Waffle grids look engineered and modern, and they hide imperfections because the pattern breaks up the eye. When you add hidden perimeter LEDs, the grid looks dimensional instead of flat. This is a good-looking False Ceiling Living Room idea for people who want more design than a border but less risk than complex curves. Use warm lighting so the grid shadows feel soft.
Editor's noteDry-fit the grid layout on the floor first — it helps you spot spacing issues before you cut anything.
Choose a grid size that matches your ceiling dimensions cleanly, like 12-inch cells. Build a frame with battens for each grid line, keeping every grid intersection supported. Create the waffle recess by fixing boards to form raised cells or recessed pockets; keep depth consistent across the grid (around 1 inch visual depth works well). Add a perimeter LED channel with diffuser and install it before closing the ceiling. Board, tape joints, prime, paint matte, then test the LEDs for an even glow around the grid edges.
Skip thisDon’t paint the grid with high gloss — it turns shadows harsh and highlights uneven putty.
19. Slim recessed border with three medallions
Multiple medallions make the ceiling look styled without building a large centerpiece that dominates the room. Put three small circular features in a gentle triangle layout so it feels balanced. Each medallion can hold a small recessed light or a fan fixture area, depending on your ceiling setup. This works well in mid-size living rooms where you want interest but still want clean ceiling lines.
Editor's noteUse a template for circle cutting so each medallion diameter is identical.
Build a slim perimeter border at about 1.5 inches drop, keeping it simple and level. Mark three medallion centers in a triangle layout centered on the room, with equal spacing. Create recessed circles by adding circular battens and board segments so each medallion has a consistent depth. Install recessed lights inside the medallions and wire them to a controlled circuit. Tape, putty, prime, paint, then do final caulking around medallion edges for a clean line.
Skip thisDon’t place medallions too close to the border; the edge shadows make them look cramped.
20. Raised border + floating center rectangle
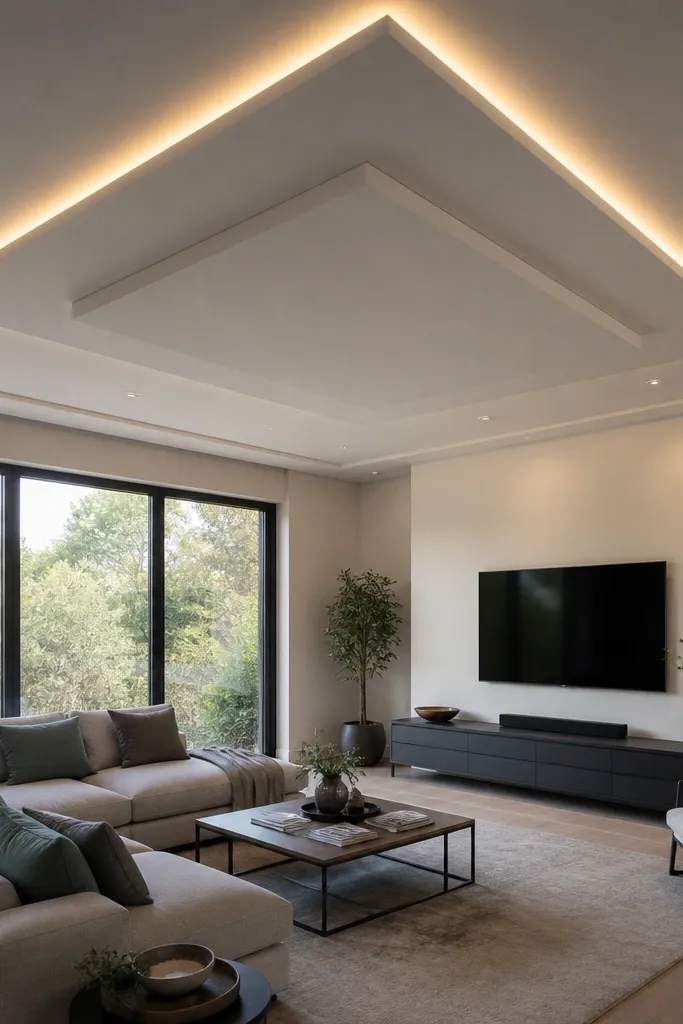
This layout makes the room feel structured because the ceiling has a “frame” and a “floating” center piece. The raised border gives you definition, while the floating rectangle creates a modern, minimal centerpiece. It’s especially photogenic in living rooms with large windows because the ceiling lines catch natural light. Keep the rectangle size proportional to the room so it feels intentional, not random.
Mark a perimeter drop frame at around 2 inches for the border. Then create a smaller rectangle in the center at a slightly different height (about 1 inch up or down) by adding inner battens. Board both levels, ensuring the transition edges are straight and supported. Install recessed downlights along one side of the floating rectangle or around its perimeter for soft shadow definition. Tape joints, putty, prime, paint, and then install lights after paint cures.
Check the rectangle alignment with a tape measure from both room corners so it’s perfectly centered.
Don’t make the floating rectangle too small — tiny features look like mistakes at living-room distance.
21. Corner cove + straight downlight pattern
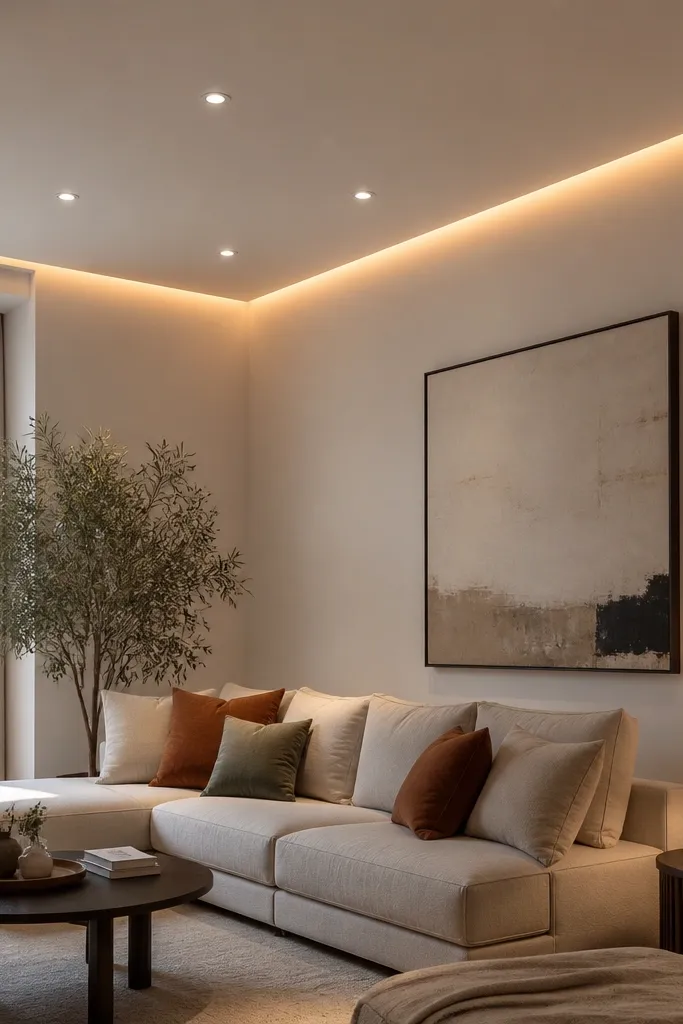
If you want the glow effect but don’t want to build a full cove ring, do it in the corners where the light looks best. Corner coves make the room feel warmer and hide the ceiling-wall transition. Pair it with a straight downlight pattern so you still get strong task lighting. This layout works in living rooms with one main seating direction — you get the glow where you look.
Editor's noteUse a dimmer for the cove circuit; it’s the easiest way to adjust mood without changing brightness everywhere.
Mark cove channels only in two adjacent corners, with a cove depth around 3 inches. Install battens and the diffuser channel for the LED strip in those corners, keeping the channel line level. Build the rest of the ceiling with a flat board surface and optional thin perimeter border. Install downlights in straight lines so spacing stays even. Prime, paint, then install LED strips and test both circuits separately.
Skip thisDon’t let the corner cove height vary — even small differences show up in the glow.
22. Mirror-finish accent panel with warm backlights
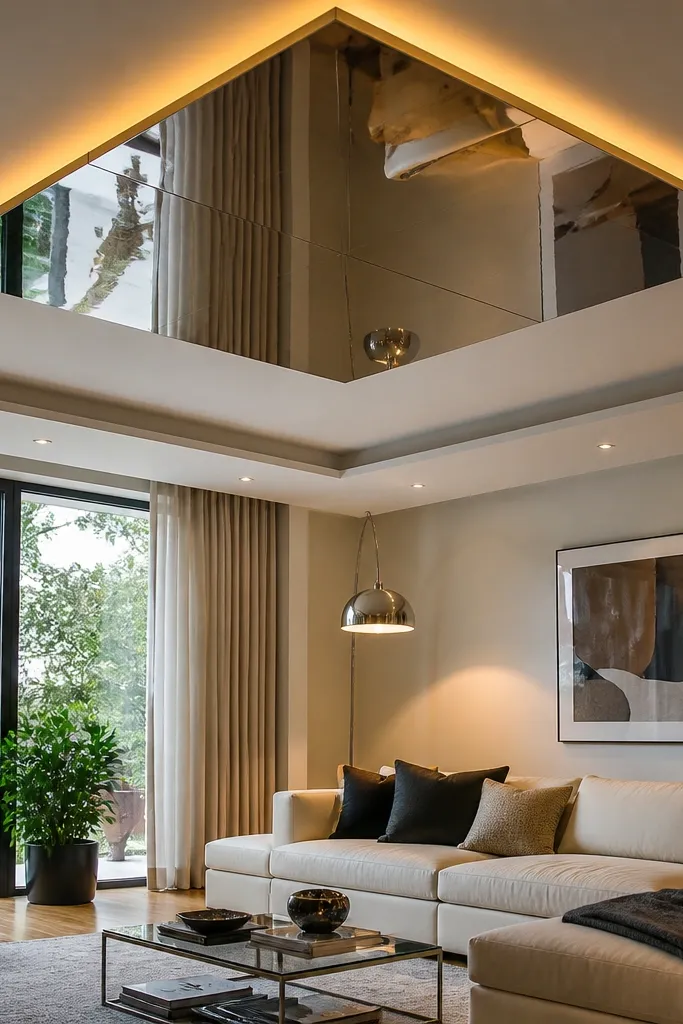
A reflective accent panel can make a living room feel brighter because it bounces light across the ceiling. The trick is to keep the rest matte so the reflection looks clean, not chaotic. Use warm backlights behind the reflective panel so it glows softly instead of looking like a bare bulb. This is a good-looking False Ceiling Living Room idea when your walls are neutral and you want extra light without adding more fixtures.
Choose a reflective ACP or acrylic panel designed for interior ceiling use, and keep the panel size moderate so it doesn’t dominate. Build a recess in the ceiling frame where the accent panel sits, with a clear channel behind it for LED strips. Install LED strips behind a diffuser so the reflection is even. Board and prime the surrounding ceiling, paint matte, then mount the reflective panel with proper edge finishing. Wire and test brightness before final sealing around the panel edges.
Keep the reflective panel slightly inset to prevent dust buildup on edges and to hide mounting hardware.
Don’t combine mirror panels with glossy ceiling paint; you’ll get glare and uneven reflections.
23. Fabric-texture look ceiling with hidden cove glow
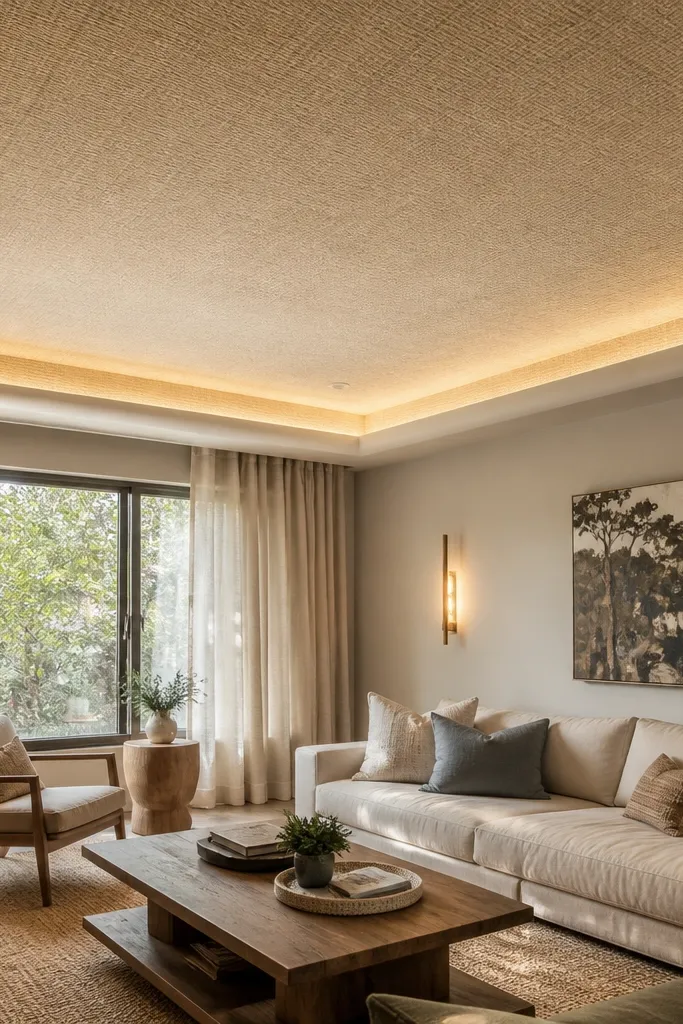
A fabric-texture look hides minor surface imperfections and gives a cozy, designer feel when paired with cove lighting. You can get this look using textured paint finish or acoustic ceiling panels that mimic fabric. The warm cove glow makes the texture readable instead of flat. This is great for living rooms where you want the ceiling to soften the whole space, especially if you have hard surfaces like marble or glossy tiles.
Editor's noteChoose a texture finish with fine grain; heavy texture looks messy under direct downlights.
Build a simple perimeter cove border first using gypsum frame at about 3 inches drop. Create a flat base surface for the textured finish, then prime it thoroughly. Apply textured paint or mount textured acoustic panels on the base area, keeping panel edges aligned and consistent. Install LED strip inside the cove channel with diffuser and wire to a dimmable circuit. Paint the perimeter faces and touch up texture edges after LEDs are tested.
Skip thisDon’t place spotlights too close to textured areas — harsh beams make the texture look uneven.
24. Slim recessed crown with indirect light from behind molding
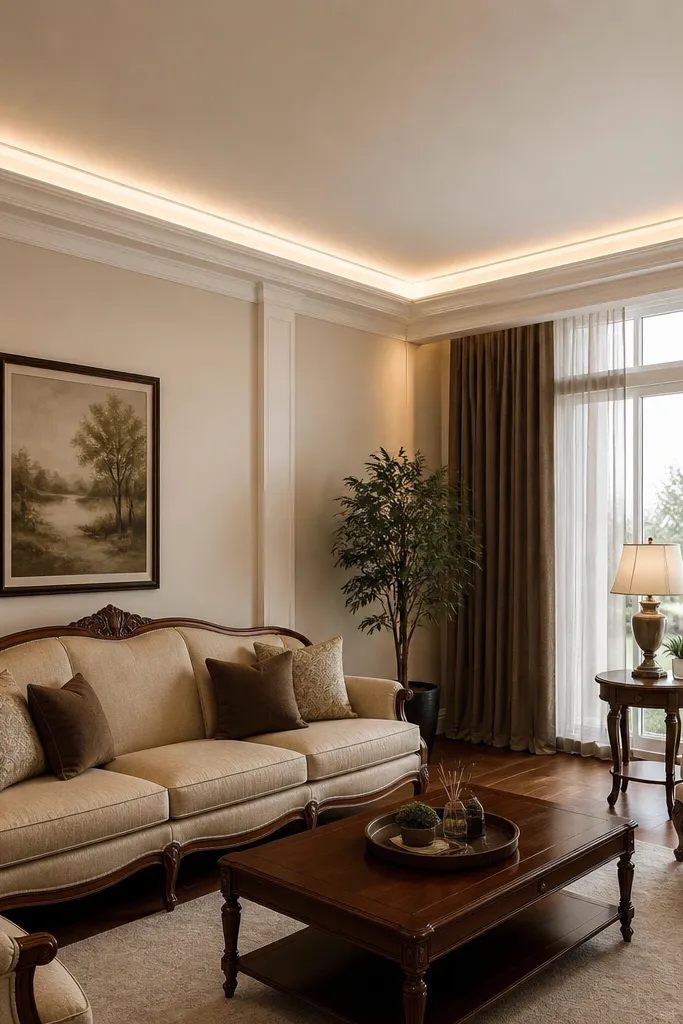
A recessed crown border looks classy because it mimics traditional molding, but the light does the heavy lifting. Put the LED behind a molding-style channel so the wall gets a soft wash and the ceiling edge looks clean. This works well in living rooms with classic furniture — the ceiling feels finished and warm, not futuristic. It also photographs well because the glow line is smooth and continuous.
Mark a perimeter line and build a frame for a slim crown border, keeping it around 2-2.5 inches down. Install a molding-like channel with a diffuser so the LED is hidden from direct view. Board the face areas carefully and keep the crown edge straight using a guide rail. Run cables to the LED driver location before board closure. Prime and paint, then install LED strips and adjust the diffuser placement until the wall glow looks even.
Use a straight guide board when installing the crown channel so the glow line doesn’t wobble.
Don’t skip caulking at the crown edge; tiny gaps let light leak and looks sloppy.
25. Checkerboard recess pattern with alternating light intensity
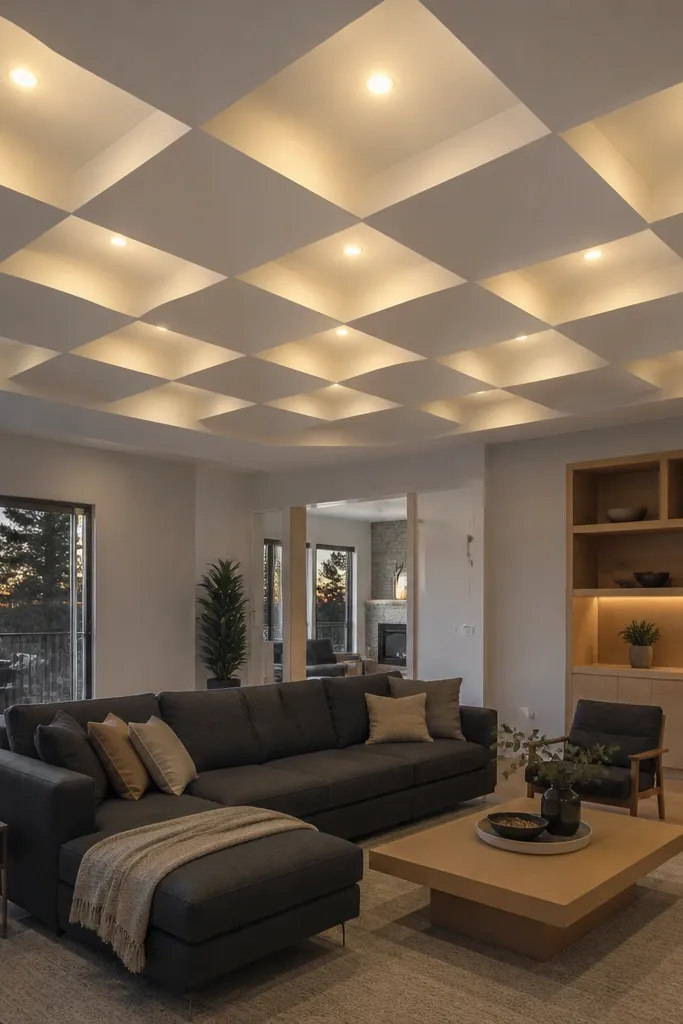
A checkerboard recess pattern looks playful but still polished when you keep colors consistent and lighting controlled. The recessed pockets create depth, and alternating light intensity adds a rhythm that looks good in photos. This is a strong choice for modern living rooms that can handle a bit more visual energy overhead. Use warm LEDs and keep the background ceiling matte so the pattern reads cleanly.
Plan a grid of rectangular recesses, like 16-inch by 16-inch cells, and draw it on the ceiling layout. Build the frame and create alternating raised and recessed sections so the pattern is consistent. Install recessed lights in alternating cells, wiring them so you can control them separately or using two circuits. Board and tape carefully, then putty and sand so edges stay crisp. Prime and paint matte, install lights after curing, and test the alternating look before you finish the final paint touches.
Label your two circuits clearly before closing the ceiling — it saves hours later when you want dimmable control.
Don’t use random light colors or temperatures — the checkerboard will look messy.
26. Minimal perimeter border with a single central chandelier recess
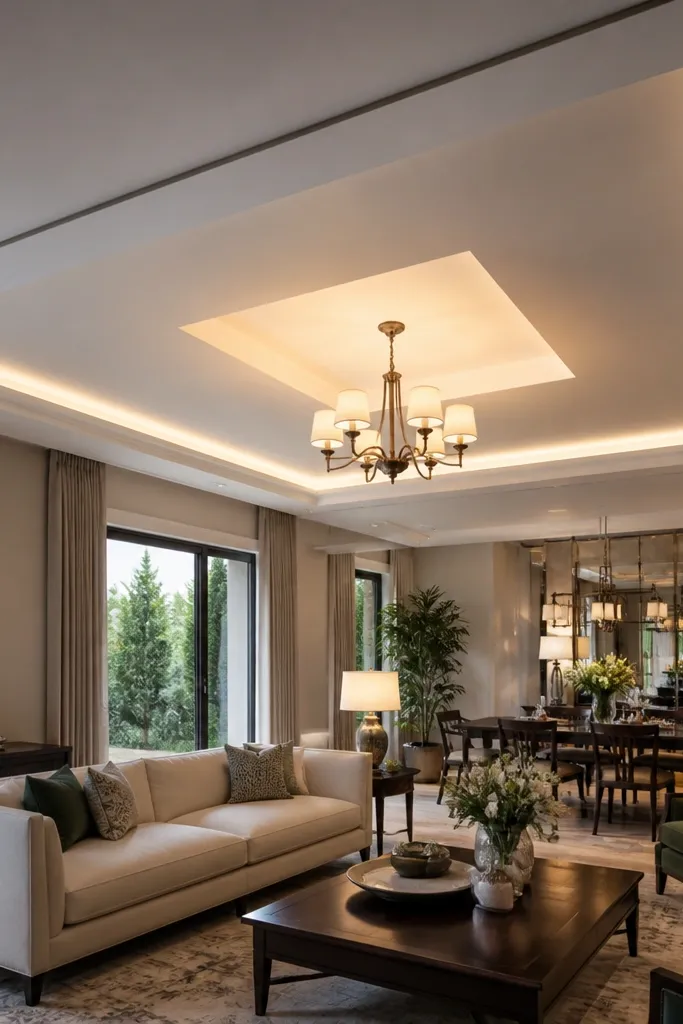
If you already have a beautiful chandelier or ceiling fan and you want the ceiling to support it, this is the cleanest approach. A minimal perimeter border gives definition, while the centered recess frames the fixture so it looks intentional. This layout is perfect for living rooms where the furniture and lighting are the stars and the ceiling should stay quiet. Keep the border thin and the recess symmetrical so it looks sharp from every seat.
Install a thin perimeter border at about 1-1.5 inches drop, keeping it level. Build a centered recessed square or round area sized to your fixture and ceiling fan bracket needs. Reinforce the fixture mounting point with extra framing so the load is safe. Board, tape, putty, and prime the entire ceiling, then cut the opening for the chandelier support. Paint, install the fixture, and finally do touch-ups around the recess edge.
Plan the fixture wiring height before you close — lowering the chandelier later is harder than raising it.
Don’t build the recess too deep — you’ll create a dark well around the fixture.
27. Double cove with inner LED and outer soft glow
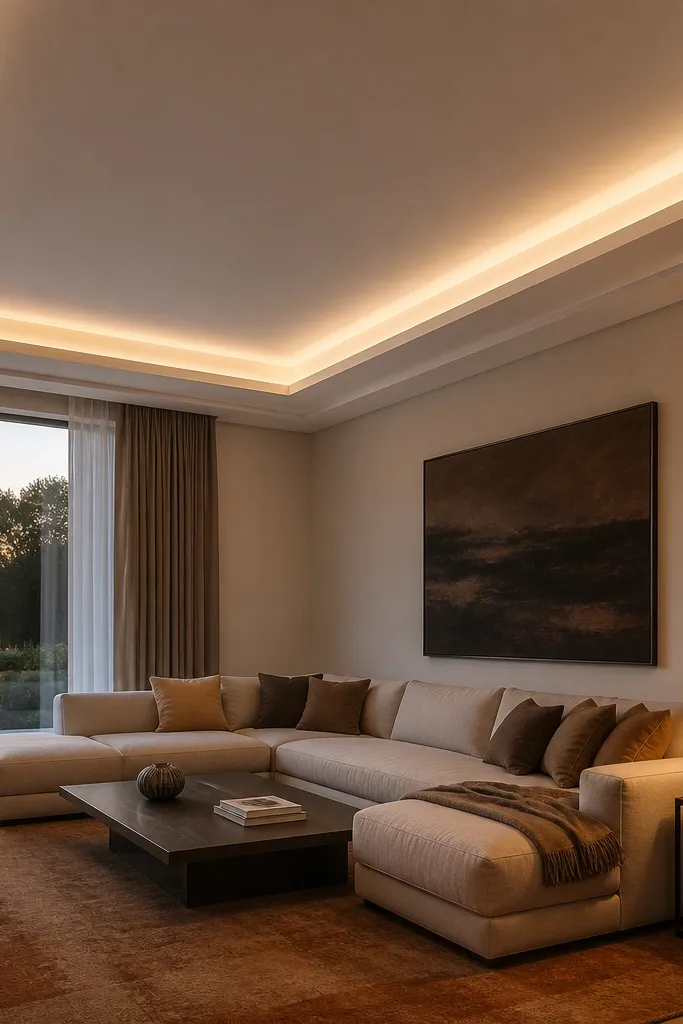
Double cove lighting creates depth because you get two glow layers: one closer to the ceiling edge and one softer farther out. This makes a good-looking False Ceiling Living Room feel premium even with plain furniture. The key is diffuser quality and consistent channel alignment so the glow looks smooth. It’s ideal for larger living rooms where you can see the ceiling from multiple angles.
Mark two perimeter channel lines: one for the inner cove and one for the outer edge. Build the frame so the inner channel depth is about 2-2.5 inches and the outer channel adds another 1-1.5 inches. Install two LED strips with separate diffusers, each wired to its own circuit if possible. Board the ceiling faces so both coves are concealed. Prime, paint, then install LEDs and test the glow layers separately for smooth blending.
Use the same LED strip model in both coves so the color stays consistent across the room.
Don’t let the inner and outer channels tilt — one crooked channel makes the whole ceiling look off.
28. Geometric stepped border with recessed downlights
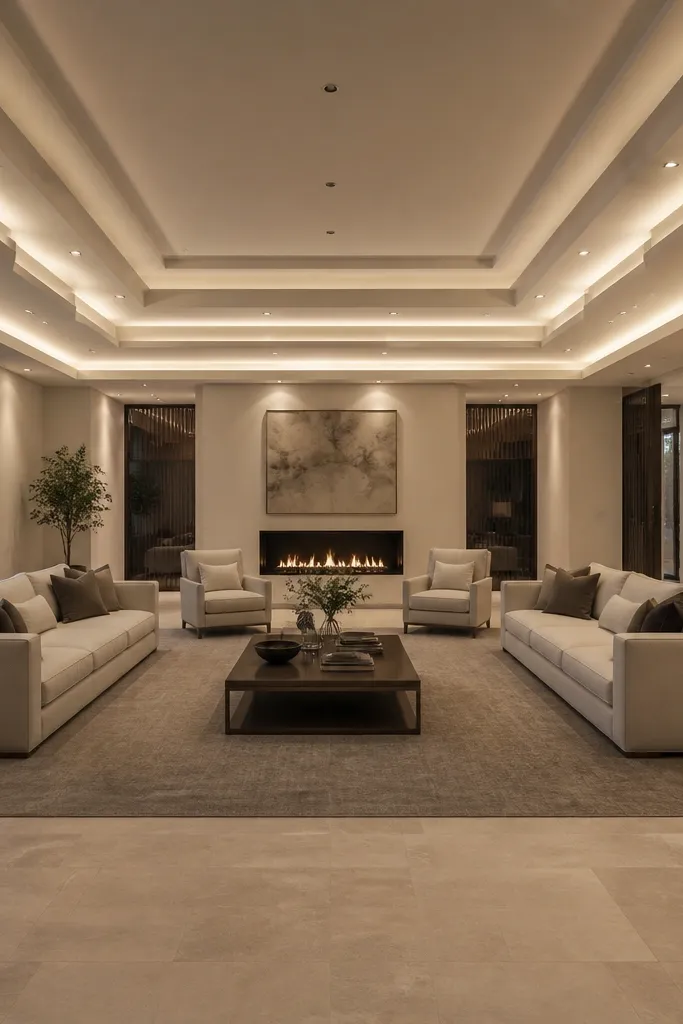
A stepped border adds architecture without needing a full center sculpture. The geometry gives you strong lines, and downlights placed inside the steps create a clean, even brightness. This look works well for square living rooms where you want the ceiling to frame the seating area. Keep the steps consistent around the perimeter so it reads symmetrical.
Editor's noteUse corner guides or a metal angle to keep step edges straight — freehand corners look rounded.
Decide on step widths and keep them consistent, like a 3-inch outer drop with a 2-inch inner step. Build perimeter frames for each step level and add cross members so the board edges are supported. Fix gypsum boards at each step, then create recessed openings for downlights within the step faces. Tape joints and putty carefully at every step corner so the geometry doesn’t blur. Prime and paint, then install lights after paint cures.
Skip thisDon’t over-fill putty at step corners; it rounds edges and kills the crisp geometry.
29. Wood and white contrast frame with hidden LED strip
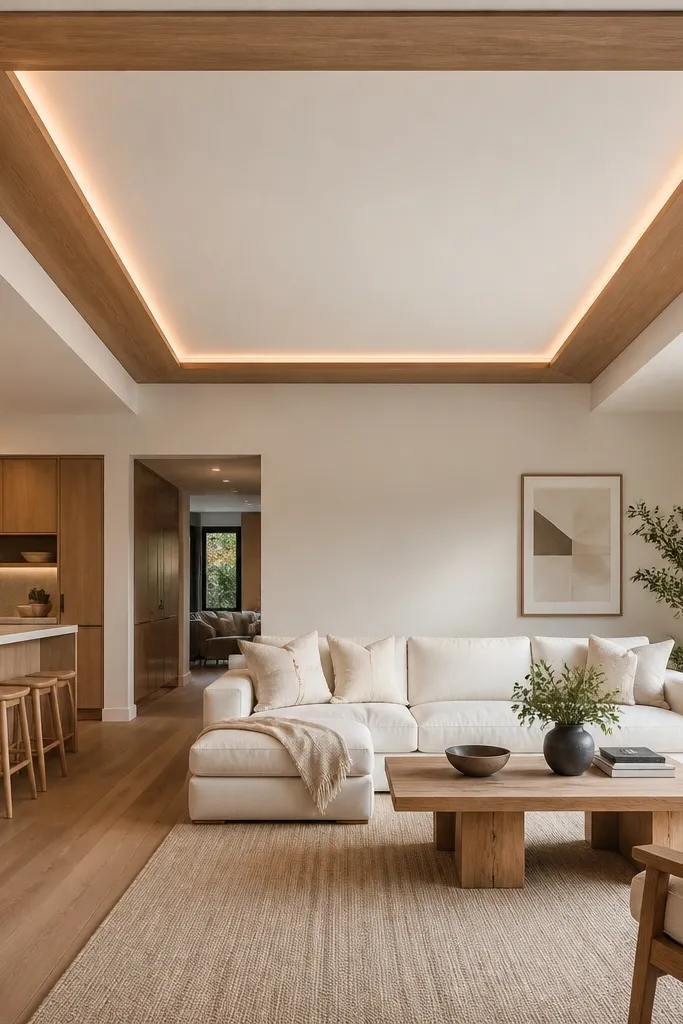
Contrast frames look good-looking because they separate ceiling zones visually. Use a white base ceiling, then add wood-finish frame panels around a simple center area. Hidden LEDs behind the frame give a warm glow that looks expensive without needing complex shapes. This is a strong pick for living rooms with wood flooring or wood TV units. Keep the wood tone consistent with your furniture so it feels cohesive.
Editor's noteSeal the wood frame with a matte clear coat to reduce glare from LEDs.
Build a white-painted gypsum ceiling base first, then create a frame layer using thin wood battens or veneer strips. Install a concealed LED channel behind the wood frame so the light washes the white surface. Keep frame spacing uniform and use a level to align the wood strips. Prime and paint the white base, then mount the wood frame pieces after the paint is dry. Wire LEDs to a dimmer and test the glow before final edge finishing.
Skip thisDon’t mix wood finishes (warm oak and cool walnut) — the ceiling will look mismatched.
30. Round medallion with slim border and micro spotlights
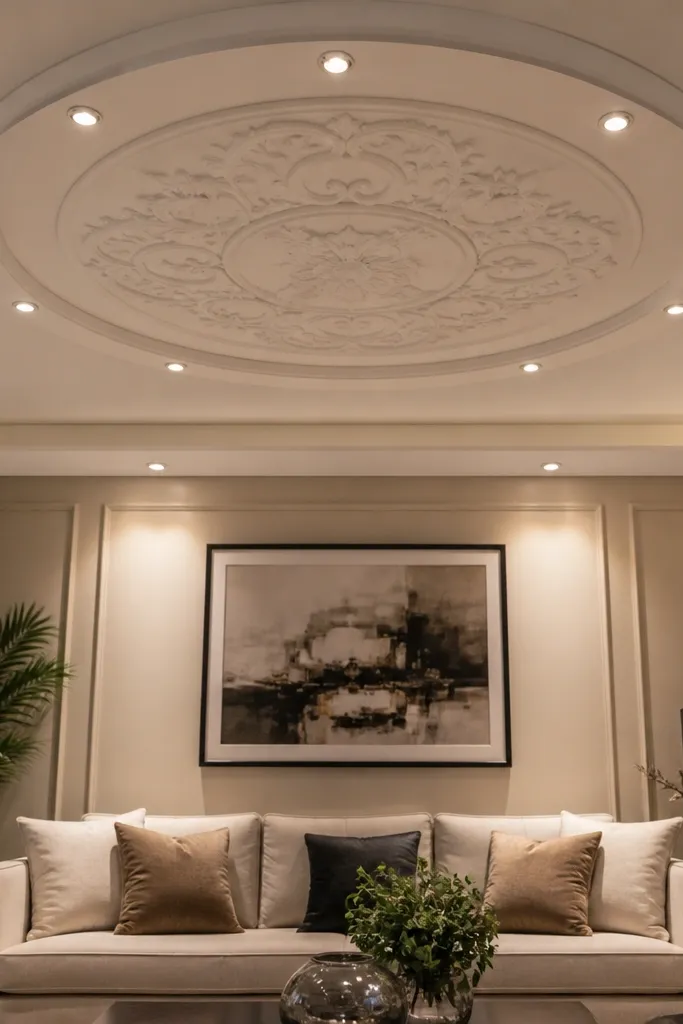
A round medallion is classic, but it looks modern when you keep it slim and pair it with micro spotlights. The medallion gives a clean focal point, while micro lights create controlled highlights instead of harsh broad beams. This layout is great for living rooms where you want a centerpiece without a heavy chandelier. Keep the medallion centered and the border thin for a balanced look.
Build a thin perimeter border at about 1.5 inches drop. Mark the center and install a circular medallion frame using curved battens or segmented plywood rings. Add micro spotlight openings around the medallion edge with equal spacing, then reinforce wiring so it doesn’t snag during installation. Board the ceiling, tape joints, prime, and paint. After paint cures, install spotlights and secure the medallion trim for a sharp edge.
Use identical micro spotlights and trim rings so the medallion looks uniform when lit.
Don’t use oversized spotlights — they overpower the medallion and look out of scale.



