
1. Black Slatwall Tool Stations With Matching Hooks
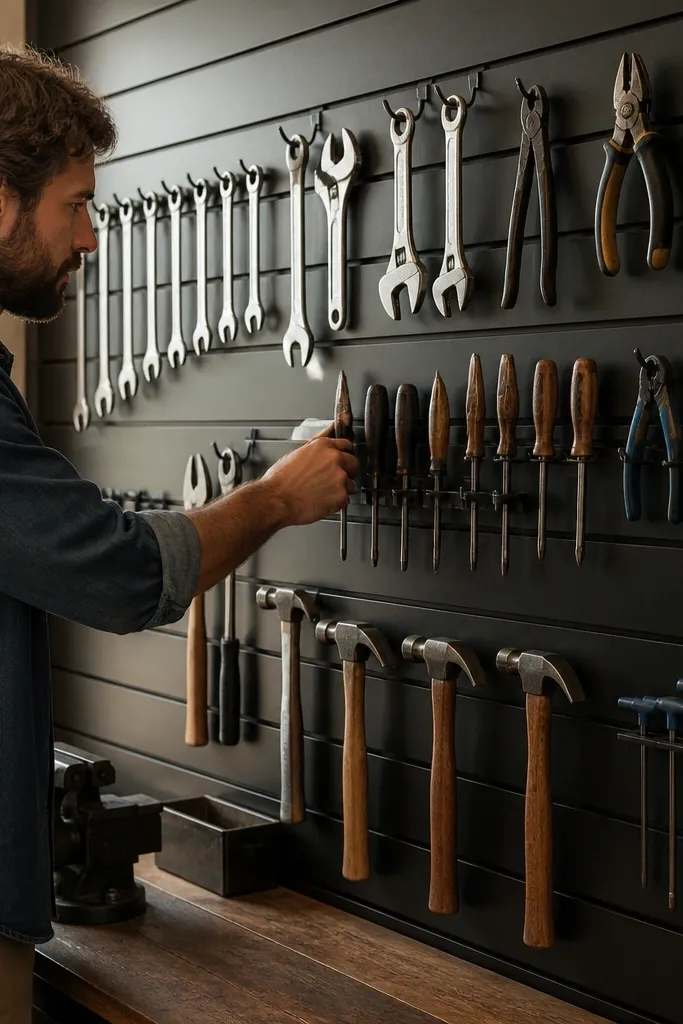
If your tools are scattered on benches or leaning on walls, slatwall makes the garage look designed. The visual win is the grid: every hook lines up, so the whole wall reads neat even when you’re using it daily. Go with black slatwall and black or matte-gray hooks for a consistent, modern look that hides wear better than bright steel. This works best in a garage where the tool wall is visible from the driveway or when you walk in.
Start by measuring your slatwall run and plan a layout with vertical rails that line up at the stud locations. Use a laser or long level to mark straight stud lines, then fasten the slatwall with 2-1/2 inch screws so it bites into framing. Install hooks after mounting so you can space them evenly based on your tool widths. Finish by adding a small label strip or a simple photo guide card so tools return to the same spots.
Use a scrap spacer block to keep hook spacing consistent while you install.
Don’t mount slatwall only into drywall — it’ll sag and your neat look will fail fast.
2. Plywood Pegboard Frame With Hidden Cable Clips
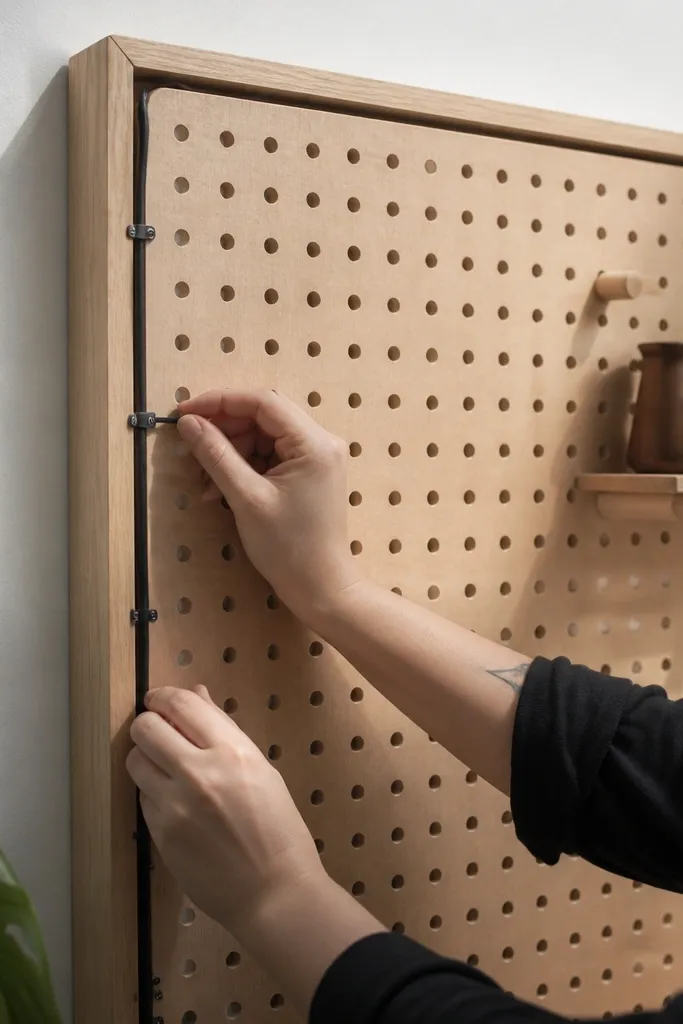
Cut 3/4 inch plywood strips for a flat frame, then attach the pegboard sheet inside with wood glue and small brads. Sand everything to 120 grit and seal with a clear matte topcoat (or paint the frame) so it doesn’t look rough. Mount the panel onto the wall using stud screws and corner brackets if you’re spanning more than 4 feet. Add cable clips along the inside edge using screws, then route cords through so they sit flat instead of hanging.
Pegboard can look cheap when it’s just sheet metal and random hooks. A plywood frame makes it look like a built-in panel, and hidden cable clips clean up chargers, extension cords, and air hose lines. The modern look comes from a flush, square border and a controlled color — raw or stained plywood plus a light pegboard surface. This suits workshops where you want your “small stuff” to be visible but not messy.
Skip thisDon’t mount the pegboard without a frame; the edges look unfinished and collect grime.
Editor's notePre-drill all frame holes — plywood splits are the fastest way to ruin the clean look.
3. Floor-Standing Tool Cabinet With Glass-Front Upper Shelf
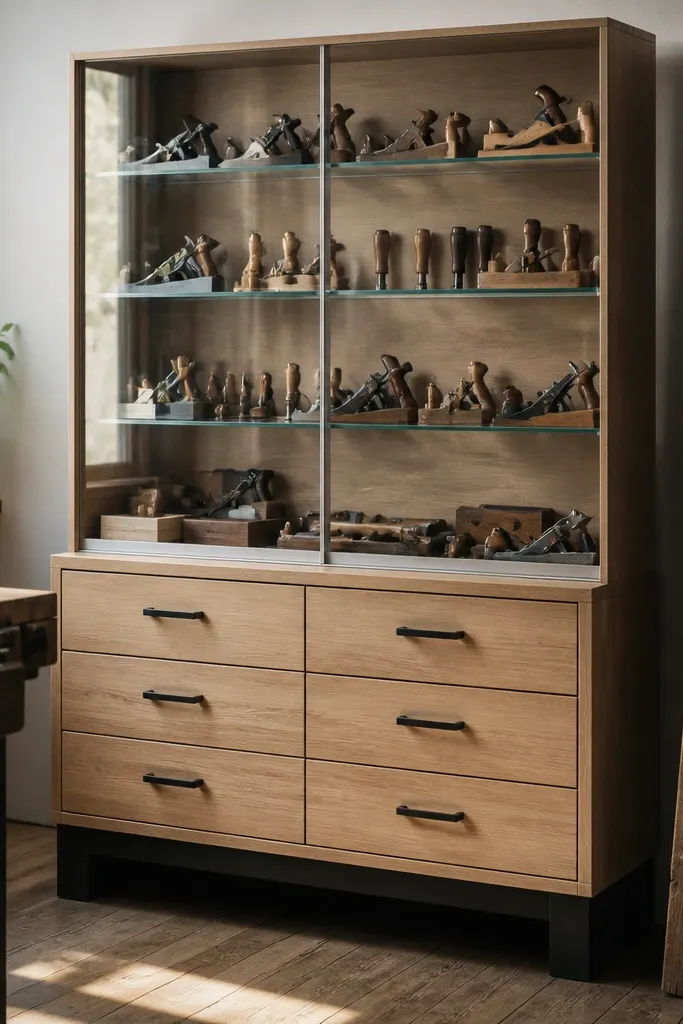
If you hate open bins but don’t want a full workshop cabinet, this hybrid cabinet gives you both. The lower cabinets hide bulky items, while the upper glass-front shelf lets you display frequently used tools or neatly stacked organizers. The look is sharp because the cabinet has a strong base line and clean door alignment — it reads like furniture, not storage. Build it for garages where you have a dedicated corner and want the storage to look intentional.
Build a simple carcass from 3/4 inch plywood, using a 34-36 inch height for the base and a 12-16 inch glass section above. Install soft-close hinges on the doors and use a 1/4 inch acrylic or tempered glass panel in a thin frame. Add a fixed shelf inside the glass section and a removable shelf in the lower area so you can adjust clearance. Finish by staining or painting the exterior with a satin finish, then add magnetic catches or a small handle set for a clean face.
Use magnetic catches instead of visible latches; they keep the front looking sleek.
Don’t skip door alignment checks — crooked doors make the whole cabinet look DIY in the worst way.
4. Galvanized Ladder Rack for Bicycles and Long Boards
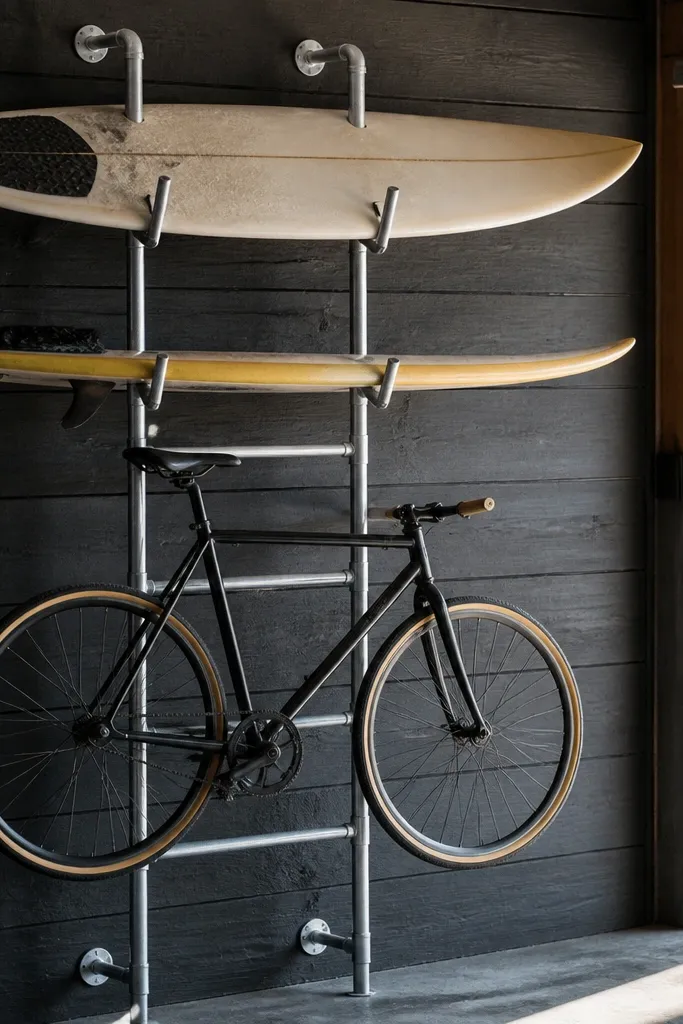
A ladder rack looks modern when it’s clean metal and straight mounting. It’s also a practical way to store bikes, ladders, and long boards without taking up floor space. Galvanized steel gives you a cool industrial tone that pairs well with black hardware and light wall paint. This is a great move for garages where the center floor path needs to stay open.
Find two studs and mark a level line at the height that keeps tires and boards from touching anything when you lift them. Build the rack from galvanized angle or EMT-style tube, then drill bolt holes at consistent spacing. Mount the side rails to studs with heavy-duty lag screws and add horizontal rungs for tie-down points. Paint or clear-coat if you want a consistent sheen, then install foam or rubber pads where bikes contact metal.
Add two tie-down straps per item; it prevents sway and keeps the look tidy when you open the door.
Don’t mount it too high — if you can’t lift comfortably, the rack turns into a storage graveyard.
5. Sloped Shelf Wall for Paint Cans and Supplies
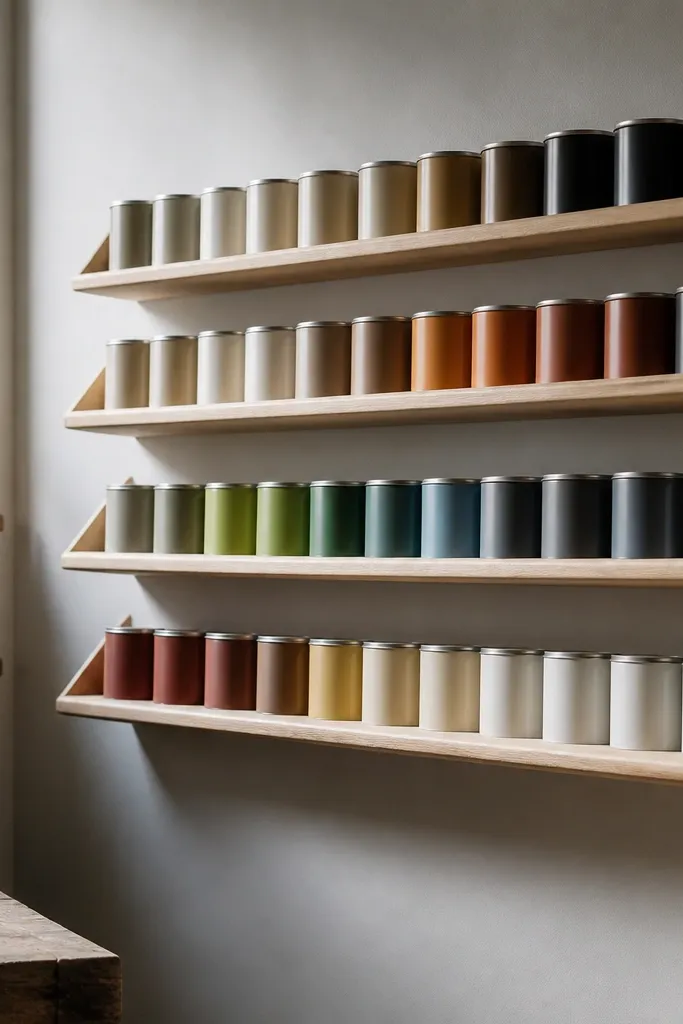
Paint and solvents look messy when they sit in random stacks. A sloped shelf makes cans sit in place and gives the wall a clean, purposeful line. The look is sharp because you’re using a repeatable geometry: straight shelf fronts, consistent can spacing, and a controlled finish. This suits garages where you keep a “paint station” and want it to look organized even during projects.
Cut shelves from 3/4 inch plywood and add a thin cleat under the shelf front so each shelf holds a mild slope. Build a back rail and side rails so cans can’t roll sideways; 1x2 rails work well. Mount the assemblies to studs with hidden brackets or through-bracket mounts for a clean underside. Seal shelves with epoxy or a hard paint so drips wipe clean.
Use shelf labels with exact paint brands and dates — the visual order matters as much as the sorting.
Don’t use bare wood — paint drips soak in and the shelf starts looking stained.
6. Clear-Front Bin Wall With Magnetic Lids

Mount a grid backing panel (painted plywood or pegboard) and set bin mounting locations so all bins share the same height and spacing. Use bins that accept magnetic lids, then install small magnets on the lid underside or a thin mounting strip. Attach bin frames with screws into studs or into a horizontal support rail. Label each bin with a printed label that matches your grid order, then set the bin wall at eye level for quick access.
A clear-front bin wall looks modern because it reads organized at a glance, and magnetic lids keep the top edge clean. You get visibility for fast grabbing without the chaotic look of open bins. White backing with black bin labels gives a crisp contrast that photographs well. This works best when you’re storing smaller consumables like fasteners, batteries, chargers, and gloves.
Skip thisDon’t let bins sit crooked — even a 1/4 inch misalignment makes the whole wall look off.
Editor's noteKeep bin sizes consistent across the wall; mixed sizes create visual noise fast.
7. Benchtop Drop-Front Parts Organizer
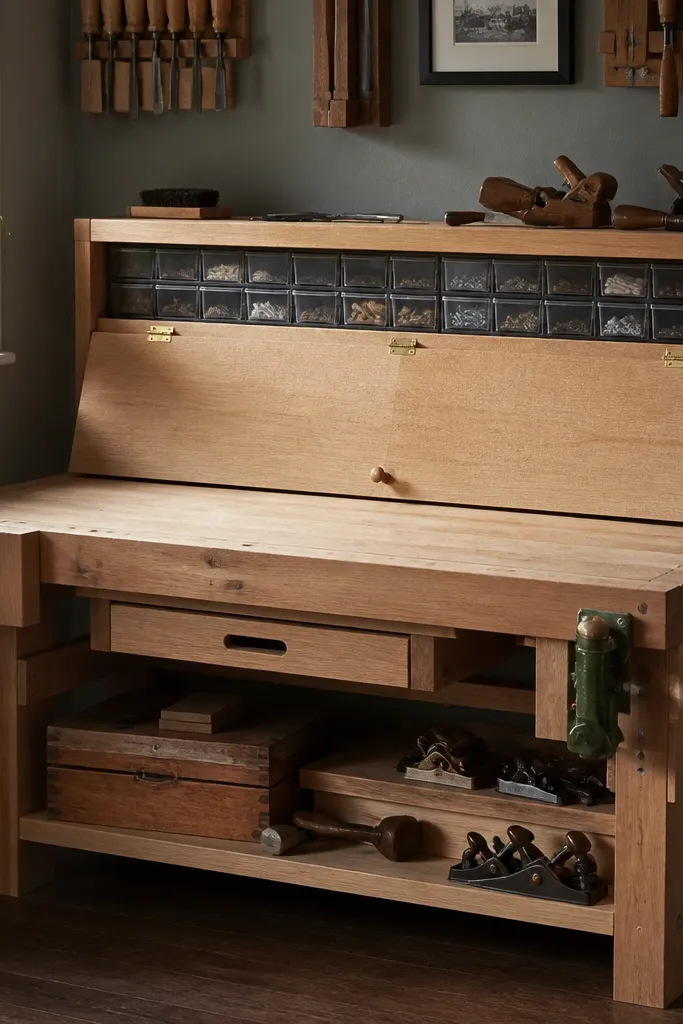
Measure your bench front width and cut a drop-front panel from 3/4 inch plywood with a smooth, sanded edge. Install a track or hinge mechanism on the underside that keeps the panel from sagging. Inside, mount small organizer bins on a fixed panel so the bin faces align with the opening. Add a simple latch or magnetic catch so the front stays closed, then paint or seal the panel for a durable surface.
If your garage bench looks cluttered, a drop-front organizer is the cleanest fix because it hides the mess when you’re not actively working. The look is modern because the front panel stays flush and the bins are behind a controlled opening. It’s also practical: you can grab screws and bits without dumping everything onto the bench. Build this for a workbench that already exists, so you upgrade the look without redoing the whole garage.
Skip thisDon’t mount bins randomly — align bin faces with the same spacing so the opening looks neat.
Editor's noteUse a soft-close hinge or a friction stay so the panel doesn’t slam.
8. Bike Wall Rack With Powder-Coated Arms and Wood Cleats
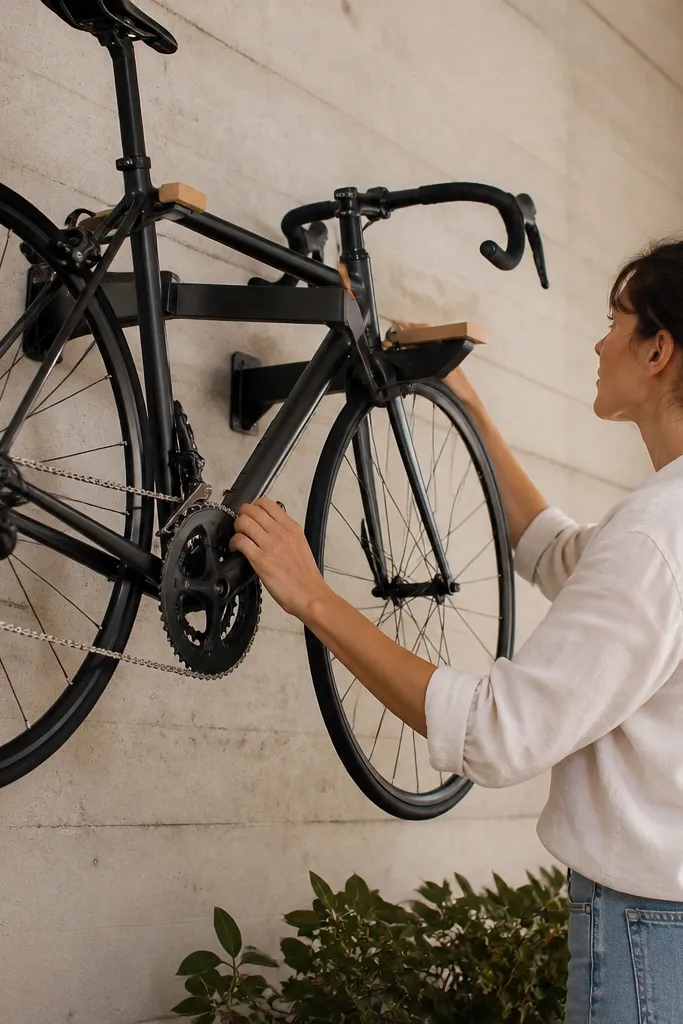
Choose a wall rack system with adjustable arms, then mount it into studs using a level line at the correct height for your bike tire. Add or swap contact pads with thin wood blocks wrapped with felt so they grip without scratching. Install a small curb stop on the wall if you need to prevent the bike from shifting. Finish by adding a simple wall shelf underneath for helmets or small gear so the whole bike zone looks styled.
Bike racks can look ugly when they’re bulky or when metal contacts scratch your frame. Powder-coated arms keep the hardware visually clean, and wood cleats at contact points look intentional and protect paint. This is a modern answer for garages where bikes are stored vertically and you want the wall to look tidy. It also keeps bikes out of the floor space and prevents the “pile” look that builds up around them.
Skip thisDon’t mount into studs only at one point; side load makes weak mounting obvious quickly.
Editor's noteMount the rack so the handlebars clear the door trim with at least 2 inches of breathing room.
9. Recessed Tool Wall With 3-Drawer Center and Side Peg Panels
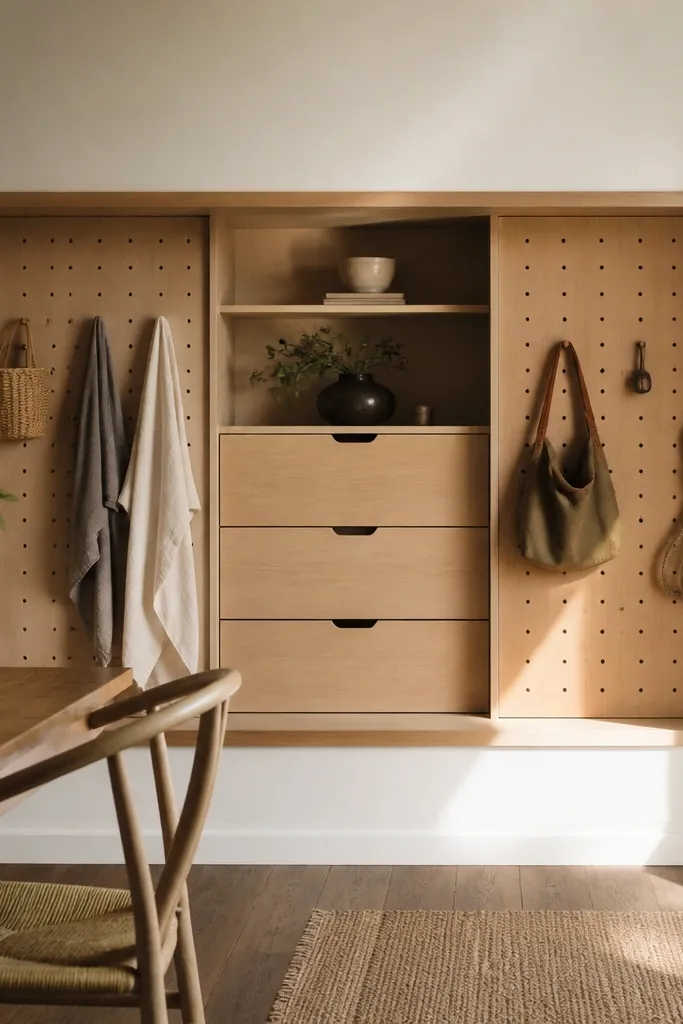
This is the “built-in” look without custom cabinetry pricing. Recessing a tool wall gives you clean edges and a natural frame for the storage, so it reads like furniture. The center drawers hide messy tools and small parts, while the side peg panels keep the everyday items visible. If you’re trying to make one wall feel intentionally finished, this is the move.
Frame a recessed box in 2x lumber so the face sits flush with your wall plane, then skin it with 3/4 inch plywood. Build a three-drawer stack using full-extension slides and install drawers with consistent gaps. Add peg panels on the side flanking sections and mount tools with uniform spacing. Paint the recessed interior and drawer faces with satin enamel, then seal the peg panels with a clear coat for easy wipe-down.
Use a single drawer handle style and align handle heights across all three drawers.
Don’t skip a proper depth check — drawers that bind ruin the whole “sharp” look.
10. Ceiling-Mounted Storage With Ladder-Style Rails

Install two ceiling rails into joists using heavy-duty mounting brackets, then add cross rails so you have a grid for bins. Use steel angle or ladder-style rails and set them at a consistent spacing so bin lids align. Strap storage bins to rails with ratchet straps or cam straps, then add edge guards so straps don’t rub. Finish by painting the rails to match your hardware color for a clean look.
Ceiling storage clears the floor and instantly makes the garage feel bigger. The look comes from rails and straps that are consistent — no random hanging cords. Use this for bins, seasonal items, and holiday gear where you don’t need frequent access. It also keeps your walls clean, which matters if your wall storage is part of the aesthetic.
Skip thisDon’t store heavy items too high; you want safe lifting and stable straps.
Editor's noteLabel the bins by zone (left, center, right) and write the zone on the floor plan so you don’t hunt up there.
11. Wall-Mounted Hose Reel With Enclosed Side Cabinet
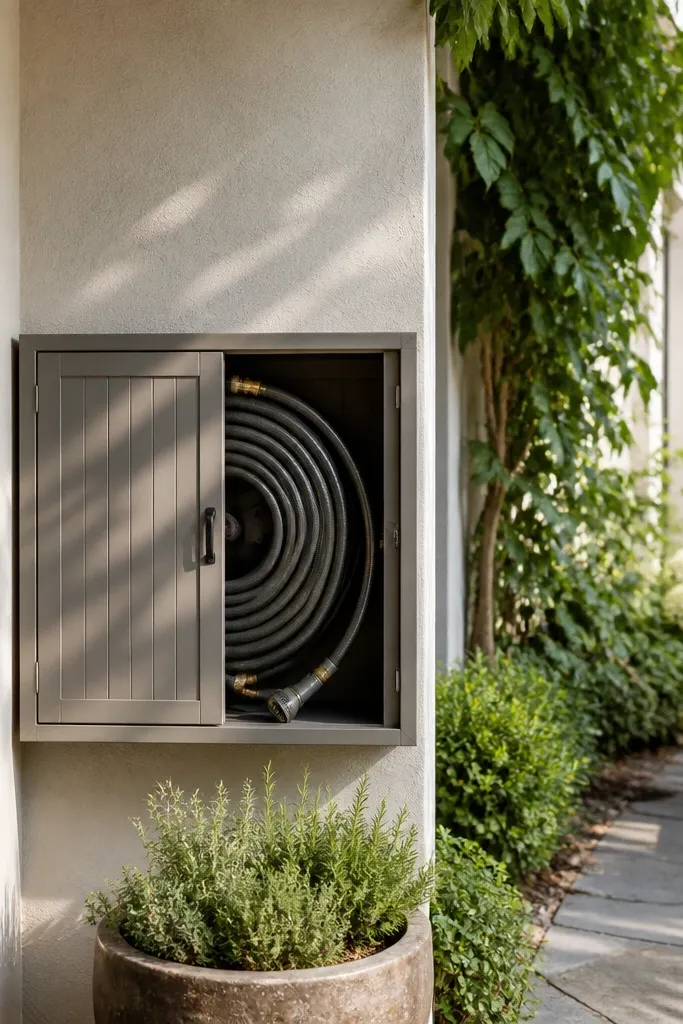
A hose reel can look messy because the hose drapes and coils unevenly. Put it inside an enclosed cabinet so only the hose outlet is visible, and the rest disappears. The aesthetic upgrade is huge: the wall stays clean, and the cabinet doors give you that “system” look. This is a great choice for garages that share a wall with the yard and need quick hose access without clutter.
Mount a hose reel bracket on studs at a comfortable height, then frame a small cabinet around it using 3/4 inch plywood. Add a door that swings open enough to load/unload the hose without snagging. Route the hose through a side cutout with a grommet so it doesn’t wear on wood edges. Seal the cabinet interior and install a simple latch so the door stays closed between uses.
Use a rubber grommet at the cutout — it keeps the hose from abrading and keeps the cabinet edges looking new.
Don’t make the cutout too tight; hose rub marks are ugly and show up fast.
12. Pegboard Tool Shadow Box for Wrenches and Bits
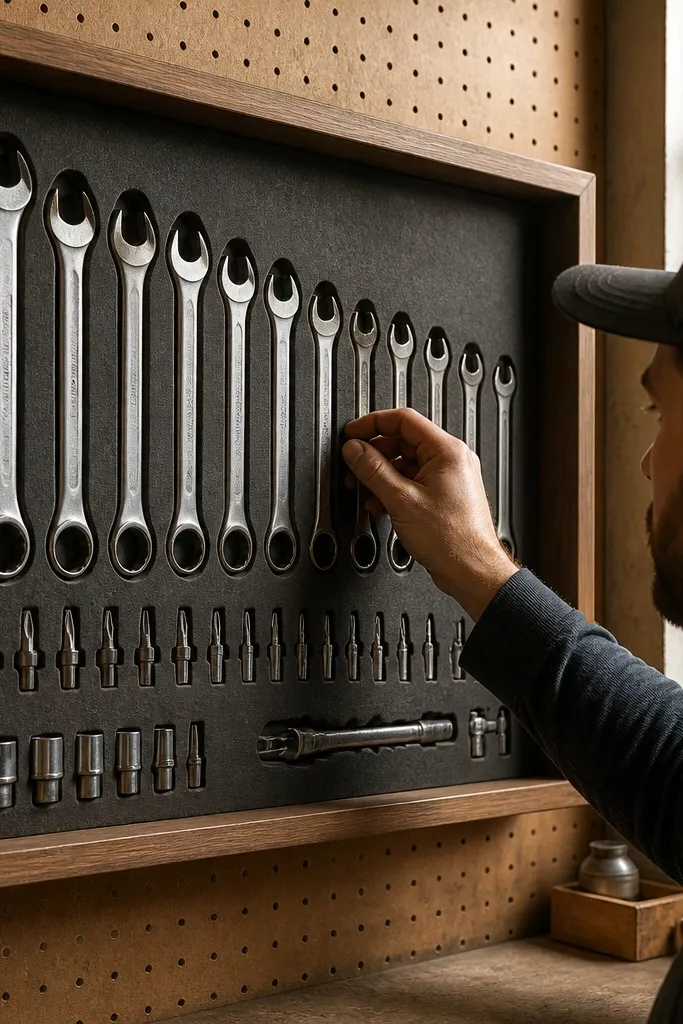
Build a shallow frame from 1x2s or 2x2s and mount pegboard behind it with a tight, even reveal. Sand and seal the frame, then paint it satin black for a crisp look. Mark tool locations based on the tool shapes and create a simple outline label system. Add hooks or holders, then test each tool fit so it sits flat and doesn’t twist.
Shadow boxes make tools look like a display, not a pile. You get a clean, modern wall piece by mounting a pegboard panel inside a simple frame and adding outlines or color-coded spots for each tool. This is perfect for garages where you want your “top tools” to look good even when you’re not actively working. It also improves consistency because every tool has a home that looks correct from across the garage.
Skip thisDon’t put the tools too close together; crowded spacing makes the whole panel look messy.
Editor's noteUse matte paint on the frame so glare doesn’t wash out the tool outlines.
13. Modular Wall Shelves With Hidden Brackets
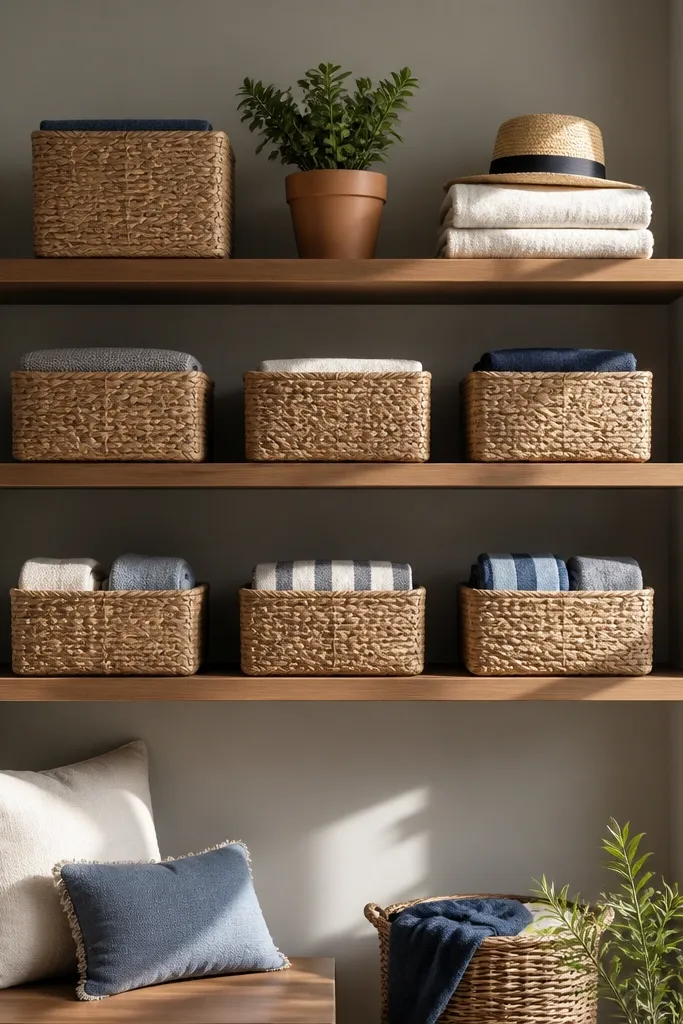
Cut shelf boards from 3/4 inch plywood to the widths you want, then sand edges and round them slightly with a router or sanding block. Install a level ledger rail into studs, then attach hidden brackets to the ledger so shelves sit flush. Place shelves at consistent height increments, usually 16-18 inches apart for easy bin stacking. Seal with paint or a clear coat and add bin labels after you place the shelves.
Shelves look modern when the supports disappear. Hidden brackets give you that floating look, and modular sizing lets you build a system that fits your exact wall. Pair the shelves with uniform bin sizes and you get a wall that reads organized instantly. This works great for garages where you need storage for paint rollers, cleaning supplies, and small seasonal items.
Skip thisDon’t eyeball the spacing; a slightly uneven shelf line screams sloppy.
Editor's notePre-finish shelves before mounting — it’s faster and gives cleaner edges.
14. Laminated Wood Slat Shelf for Bulk Supplies

Bulk supplies look better when they sit on a repeating structure, not random stacks. A wood slat shelf wall gives you a warm modern look that pairs well with black tools and gray floors. Use it for detergent, car wash items, gloves, and specialty cleaners so each container has a visible place. The slats also keep containers off the wall a bit, so drips don’t stain the backing.
Cut slats from 1x2 or 1x3 lumber and laminate them into a solid shelf surface or mount slats with gaps depending on container type. Mount a back rail to studs first, then screw slats into the rail at equal spacing. Seal the slats with a matte polyurethane to resist garage grime. Add a painted backing panel behind the shelf so labels pop and the wall looks uniform.
Use a light backing color like warm white so dark bottles don’t blend into the wall.
Don’t use glossy clear coat — it shows dust and fingerprints more.
15. Wall-Mounted Saw Storage With Door Panels
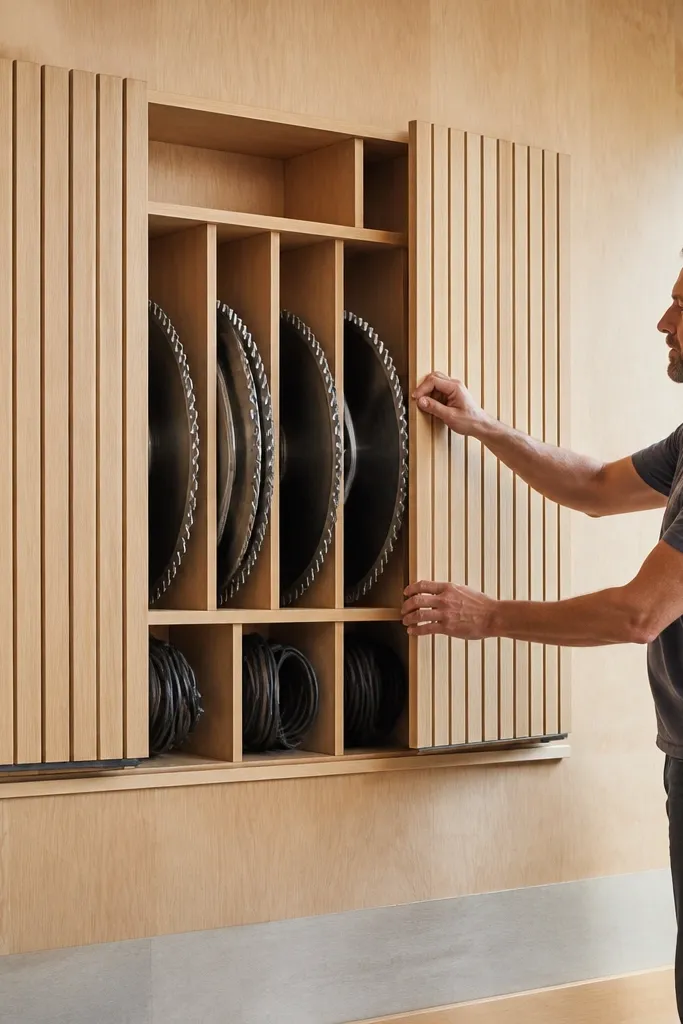
Build a back frame from 2x lumber or 3/4 inch plywood, then mount it into studs. Install a hinged door panel on the front and add tool mounts inside using metal brackets and straps. Create a cord channel inside the bay so cords sit neatly. Paint the doors satin black or match your cabinet finish, then add a simple latch so the bay closes flush.
Power tools look chaotic when they’re hung with exposed cords and blades. A door-panel storage bay hides the mess and keeps the garage looking clean between projects. It also protects tools from dust, which keeps the storage area looking better longer. This works well in garages where you have a dedicated power tool wall and want it to look like a workshop display.
Skip thisDon’t hang cords outside the bay; hanging cords are the fastest way to ruin the clean look.
Editor's noteAdd a small rubber strip at the door edge to keep dust out and reduce rattling.
16. Corner Utility Station With Closed Storage and Open Tool Rail
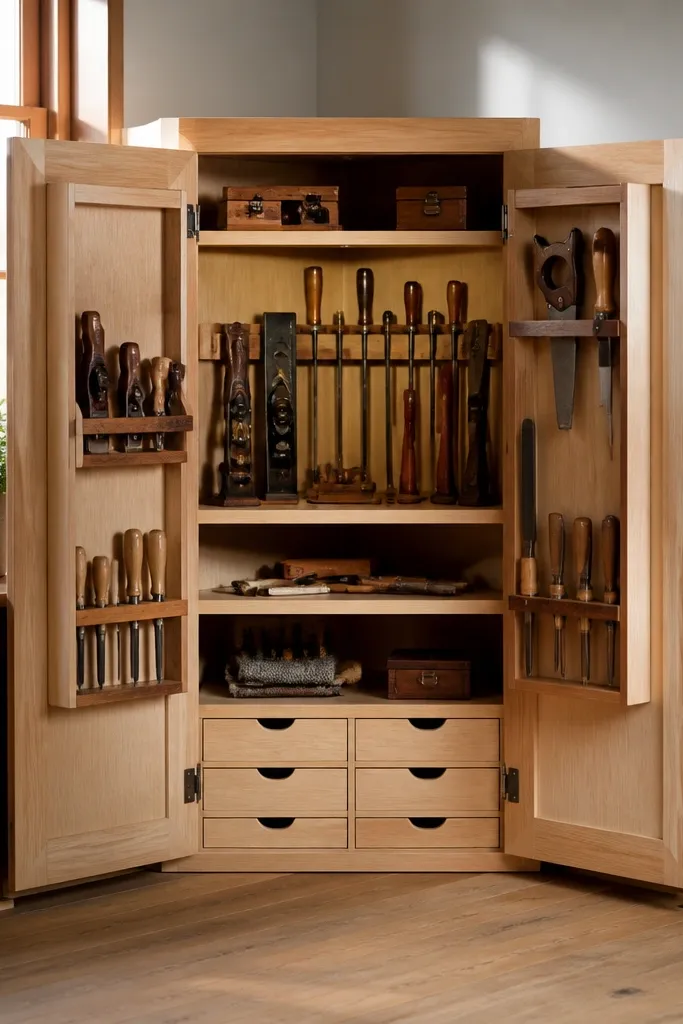
Corners are where garages get ugly because everything ends up shoved there. A corner utility station fixes the look by combining closed storage on the sides with an open rail for the tools you grab most. The visual payoff is clean vertical lines and a strong center panel that makes the corner feel designed. Build this if you have a corner that holds cleaning supplies, rags, and random hand tools.
Frame a corner cabinet using pre-cut plywood sides with a triangle or box-style corner interior. Install doors on the outside faces and add a small open tool rail on the center face using a mounted metal rail or slat strip. Mount the cabinet into studs and add a shelf inside for labeled bins. Seal all wood surfaces and paint to match your garage hardware color, then add a small tray at the base for spray bottles.
Use two door styles in one station max — too many hinge and handle types look messy.
Don’t put open bins in the corner; they catch every glance and make the corner look cluttered.
17. Magnetic Wall Strip for Screwdrivers and Bits
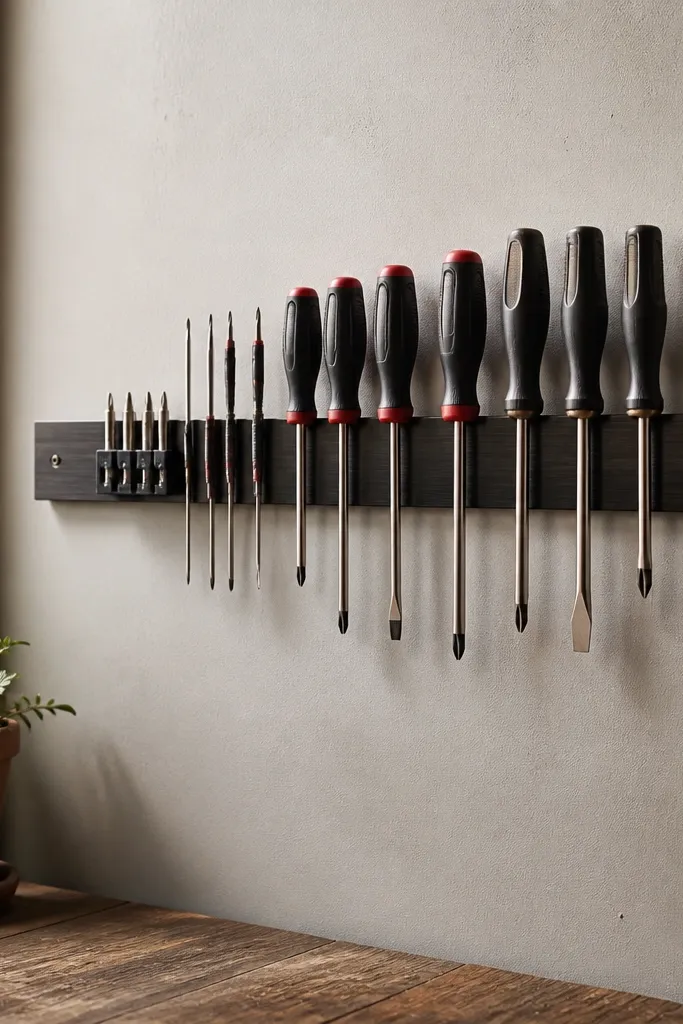
A magnetic strip looks clean because everything hangs in a straight line with no hooks. Pair that with a tidy bit holder system and you get a wall that looks like a tool library. It also reduces the “where did the screwdriver go” chaos that makes garages look disorganized. Use this in a visible tool zone near your workbench so you see the orderly layout every time you walk in.
Mount a stainless or painted magnetic strip into studs at a comfortable height, leaving space for handles and bit cases. Add small magnetic bit holders or a separate tray so bits don’t scatter. Use a level and mark mounting points before drilling. Seal the wall area with touch-up paint so screw holes don’t look fresh and messy next to older paint.
Group tools by type and size, not by what you own — the wall reads cleaner when the layout follows a system.
Don’t mount the strip on thin drywall — you’ll lose the line and the magnets won’t hold securely.
18. Stacked Bin Cabinet With One Clean Door Front
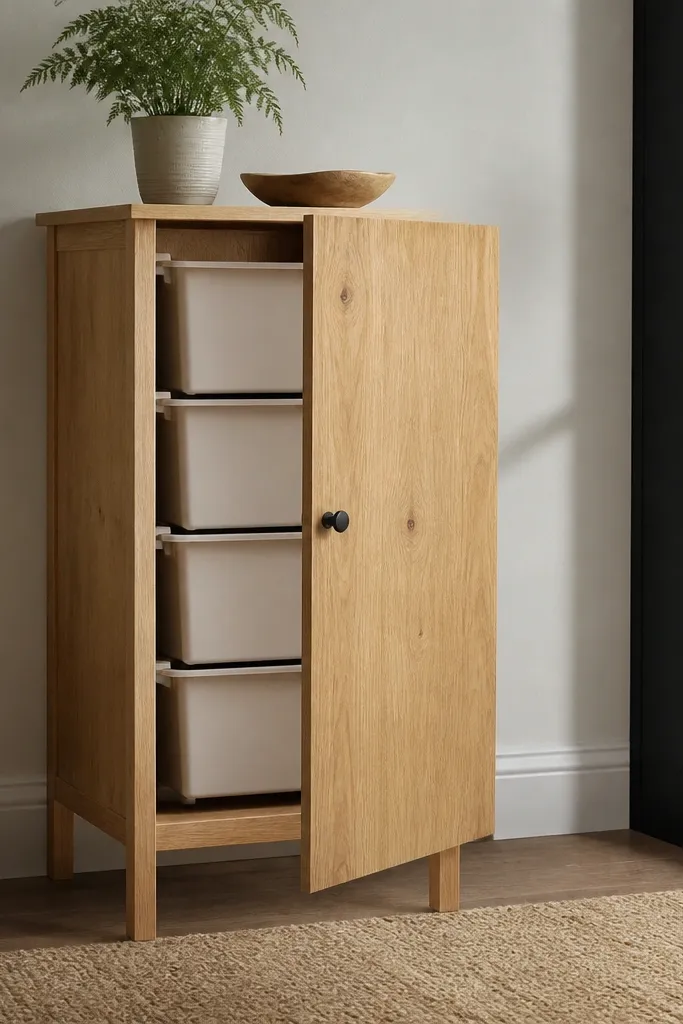
This is one of the easiest Good-looking Garage Organization Ideas that still looks custom. You stack bins inside a cabinet and hide the messy labels and lids behind one clean door front. That keeps the garage looking sharp even when you’re mid-project and your bins are full. It also protects your storage from dust, which keeps the cabinet looking better over time.
Build a rectangular cabinet from 3/4 inch plywood, sized around your bin dimensions plus a small clearance for sliding in and out. Install a door with concealed hinges and a magnetic latch for a flush face. Add fixed shelves inside so bin stacks sit at consistent heights, usually 10-14 inches for common plastic bins. Paint or stain the exterior and add a simple handle or pull that matches the rest of your garage hardware.
Use the same bin brand across the cabinet so the door clearance stays consistent.
Don’t skip a vent gap — cabinets can trap fumes from chemicals stored inside.
19. Paint Roller Vertical Rack With Numbered Slots
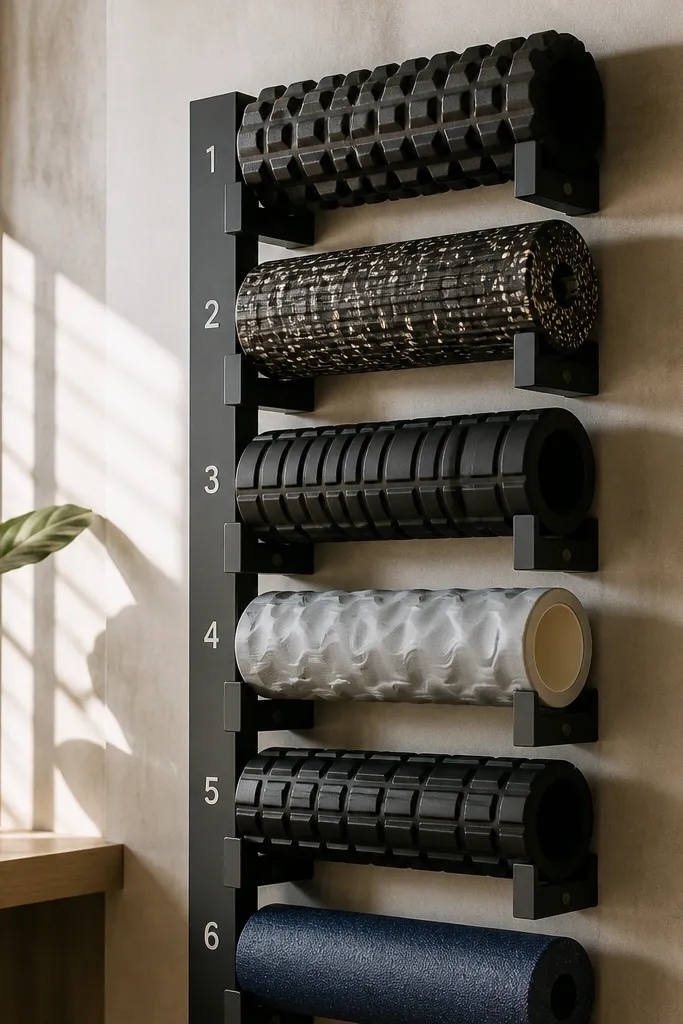
Build a vertical rack from plywood strips with evenly spaced slots sized to your roller handles and brush thickness. Mount the rack into studs and keep the face square with a level. Add numbered labels under each slot using adhesive vinyl or printed tags behind clear laminate. Seal the wood and edges so drips wipe without staining.
Rollers and brush sets look messy when they’re piled. A vertical rack keeps them upright and aligned, and numbered slots make the wall look like a system. The look is clean because the rack has repeatable spacing and a consistent face — it reads organized from across the garage. This is ideal for a paint station wall where you want the storage to look sharp even when you’re actively painting.
Skip thisDon’t make slots too tight — rollers should slide in smoothly without forcing.
Editor's noteUse thin plastic slot liners so rollers don’t snag on wood grain.
20. Workbench Drawer Bank With Color-Matched Liners
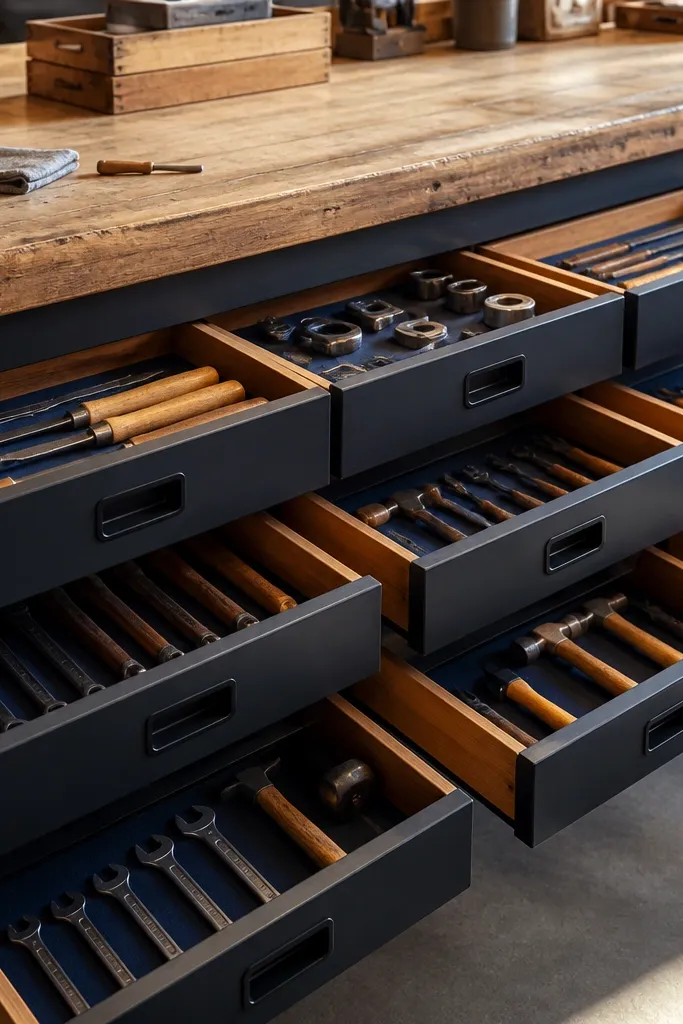
Build a drawer bank frame from 3/4 inch plywood sized to your bench front width, then install full-extension drawer slides. Make drawers shallow for fasteners and deeper for hand tools, and keep drawer gaps consistent across the bank. Add liners using thin rubber shelf liner or felt sheet glued to the bottom. Finish by painting the drawer faces satin and adding simple, uniform pulls.
Drawer banks make a garage look instantly more finished because they remove loose parts from sight. Color-matched liners add a modern, intentional feel instead of the usual scratched metal and bare wood. This idea is great if your bench top is cluttered with bits, fasteners, and small tools that never stay in a single place. Go for a minimalist drawer face so the look stays modern and photo-ready.
Skip thisDon’t use mismatched pulls — one drawer style across the bank looks clean.
Editor's noteLabel drawers with a small label strip at the top edge so labels don’t crowd the front.
21. Corner Shelf Tower for Cleaning Supplies With Tray Bottom
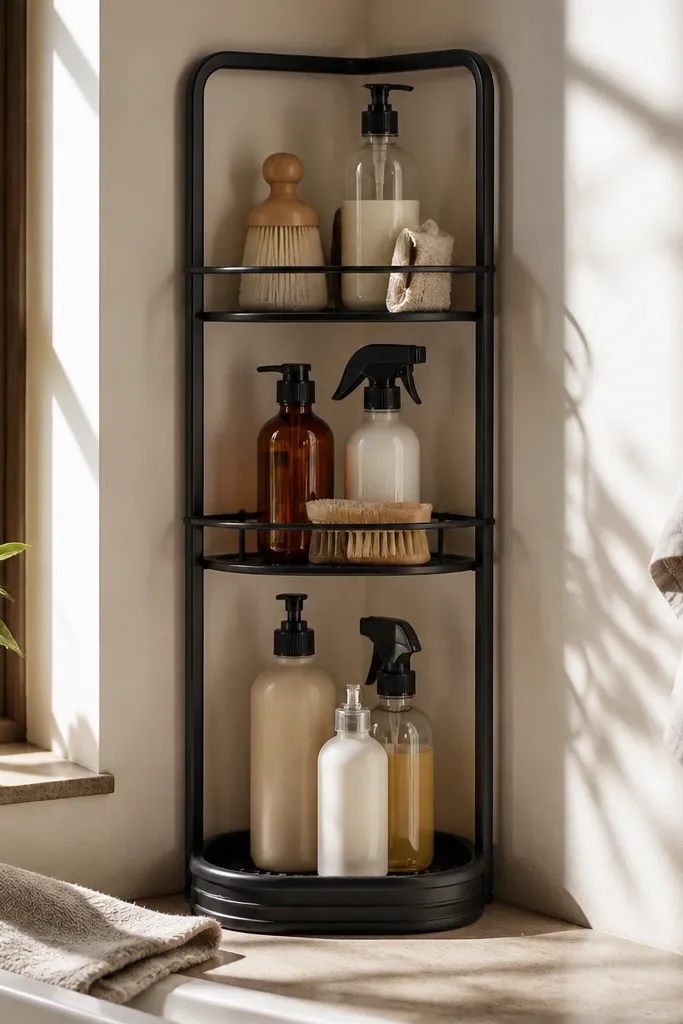
A shelf tower in the corner is only good-looking when it has a tray bottom and consistent bottle spacing. This setup keeps sprays contained and prevents drips from staining the corner wall. The look is modern because the tower reads as one piece: straight sides, repeated shelf heights, and a clean base tray. It’s best for garages where cleaning supplies are currently spread across the bench and floor.
Cut side panels from 3/4 inch plywood and build a narrow tower sized to fit the corner gap. Add shelves at equal intervals, leaving enough clearance for the tallest bottle you use. Install a removable drain tray at the bottom — even a simple plastic tray works if it fits tight. Sand edges, seal with water-resistant finish, then mount the tower into studs with angle brackets.
Use shelf liners in a single color so the bottles look like they belong together.
Don’t place open bottles on bare wood — stains and cloudy residue kill the look.
22. Garage Door Side Storage With Vertical Bins and Closed Top Box
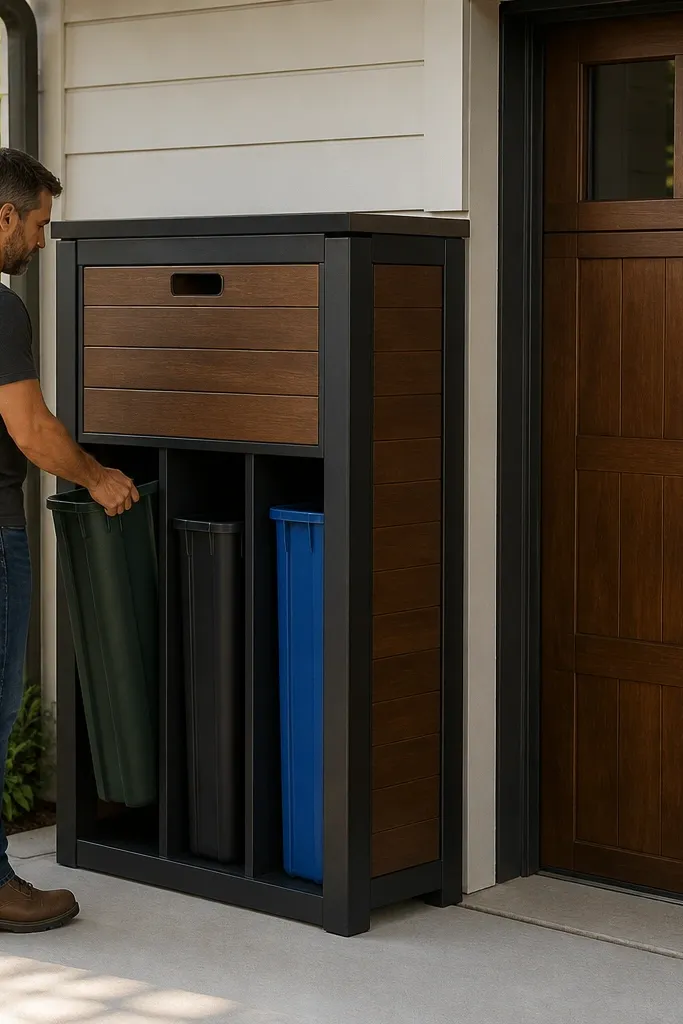
The area beside the garage door is prime real estate for Good-looking Garage Organization Ideas because it’s what you see every time you drive in. Vertical bins create a crisp column look, and a closed top box hides the random seasonal items that always appear. This combination keeps the space tidy while still giving you fast access to car supplies and small tools. Build it as a slim side cabinet so it doesn’t block the walkway.
Measure the side wall between the door track and the corner so you don’t end up with a shallow, unusable cabinet. Build a slim frame from plywood and add a top closed box section using a hinged lid or door. Install vertical bin supports inside the lower section so each bin sits straight and shares the same face alignment. Paint the exterior satin and use black bin label strips for a consistent look.
Keep the cabinet depth consistent across the whole unit so it looks built-in rather than bolted-on.
Don’t stack bins randomly — columns need equal spacing to look intentional.
23. Industrial Pipe Shelving With Wood Slabs and Black Feet

Buy a pipe shelving kit or assemble black pipe using nipples and flanges, then cut wood slabs to width and length. Sand wood to 120 grit, then stain and seal with a matte topcoat so it doesn’t look glossy. Attach shelf brackets to studs and level each pipe set before tightening fittings. Mount wood slabs with screws through pre-drilled holes and use black rubber feet under vertical supports if you have a base frame.
Industrial pipe shelving can look sharp when the wood slabs are thick, sanded, and finished — not when everything is thin and wobbly. Black pipe and matte wood create a modern contrast that still feels garage-tough. This setup is great for storing boxes, tires, and bulky items where you want visibility but not clutter. It’s also one of the fastest ways to add height storage without building full cabinets.
Skip thisDon’t use unfinished thin boards — they warp and the shelf starts looking sloppy.
Editor's noteUse thick wood (at least 1.25 inches) so the shelf face looks solid in photos.
24. Tool Cart With Pegboard Back and Closed Drawer Base
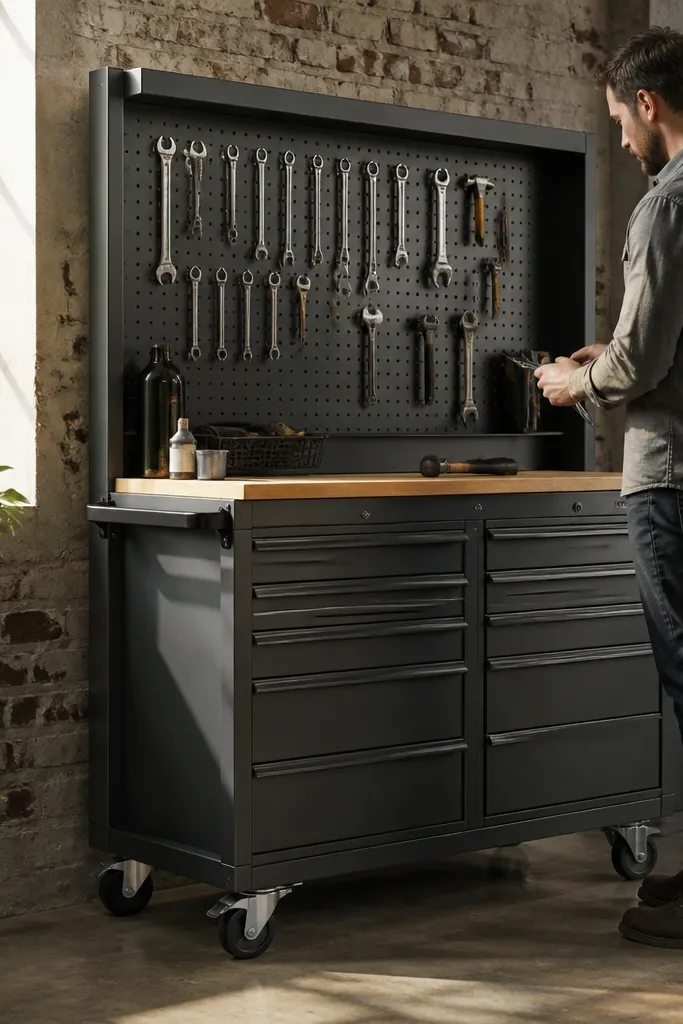
Build or buy a cart frame, then attach a pegboard panel to the back using spacers so it sits flat. Install hooks for tools you grab daily and keep the hook layout in a tight grid. Add drawers to the bottom section or retrofit drawer slides if your cart has a compartment space. Seal and paint the cart surfaces, then add a top mat or tray for small items so they don’t slide around.
A rolling cart keeps your tools close while you work, but it looks messy when the cart is open and chaotic. A pegboard back creates a clean tool layout, and a closed drawer base hides parts and rags. The cart looks good because the face is structured: pegboard grid, consistent hooks, and drawer fronts that match. This suits garages where you work in different spots and need a mobile station that still looks organized.
Skip thisDon’t overload hooks — if every inch has a tool, it stops looking curated and starts looking crowded.
Editor's noteSwap to locking casters so the cart doesn’t drift when you pull tools.
25. Wall-Mounted Propane/Grill Accessories Cabinet With Mesh Shelf
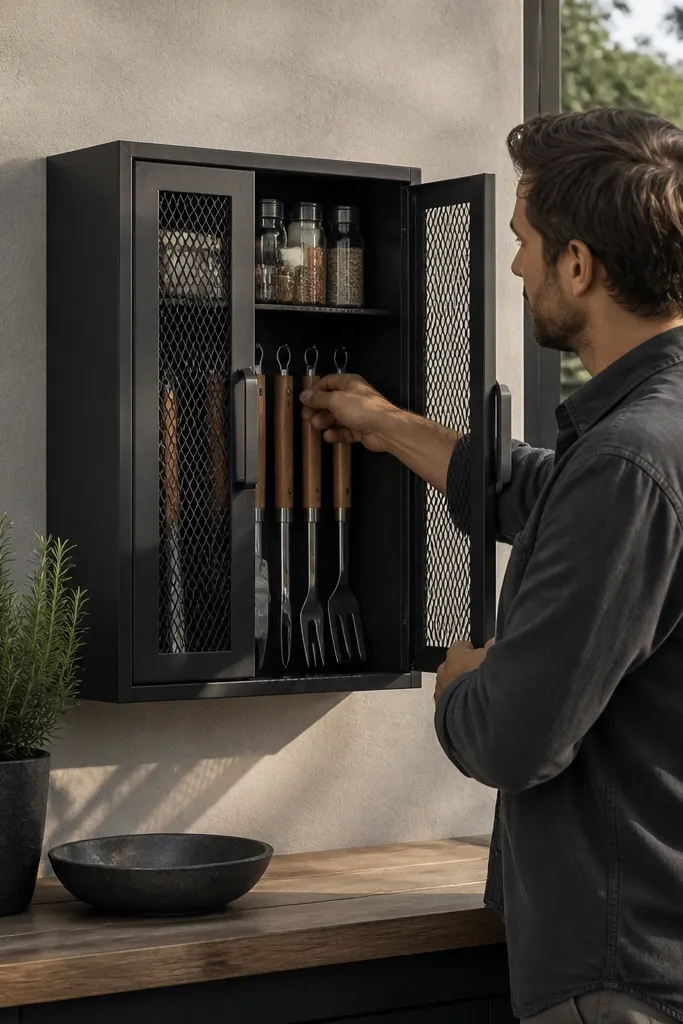
Frame a small cabinet around studs or a mounted backer panel, then install a door with a simple latch. Add a mesh shelf inside using metal shelf supports so airflow stays open. Paint the exterior satin and seal the interior surfaces so grease residue wipes clean. Mount the cabinet at reachable height and keep the door handle aligned with your other hardware for a consistent look.
Grill accessories look random in garages unless they’re kept in a defined zone. A small cabinet with a mesh shelf keeps items visible and ventilated while still hiding the mess behind doors. The look is modern because the mesh shelf gives a light, technical feel, and the cabinet front stays clean. Use this for spatulas, grill brushes, lighter fluid, and replacement parts you grab for weekend use.
Skip thisDon’t store liquids directly on wood; use a sealed tray or plastic container inside the cabinet.
Editor's noteUse a drip mat under the mesh shelf — it keeps any leaks from staining the cabinet bottom.



