

1. Linen-look panelled accent wall behind the sofa
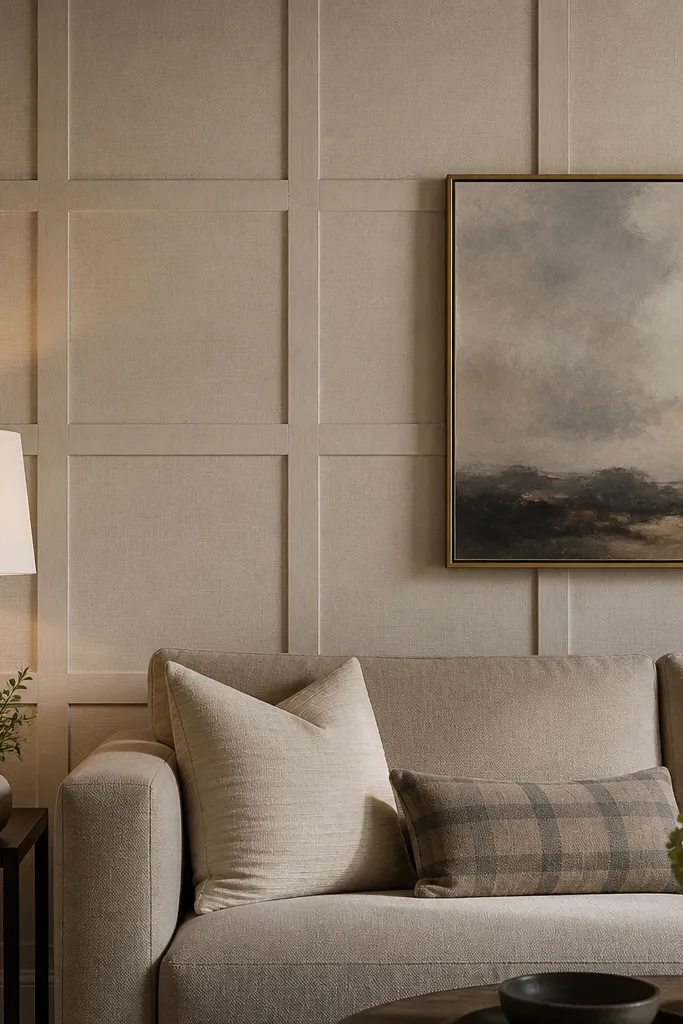
A panelled accent wall behind the sofa gives your drawing room a clear focal point that reads “designed” in photos. The trick is texture and spacing: use a linen-look finish so it doesn’t feel plastic, and keep the panel grid consistent from top to bottom. This idea works because it replaces visual noise with a structured surface, so everything around it looks intentional. It also makes the sofa area feel finished even when you keep decor minimal.
Start by marking a centered rectangle where the wall panels will sit, then measure the sofa width and leave equal margins on both sides. Build or buy MDF slat panels cut to a simple grid (for example 60 cm wide sections with 2-3 cm slats and 1-2 cm gaps), then sand edges smooth and prime. Apply a matte paint with a linen-look texture roller, let it cure, then mount the panels using construction adhesive plus a few brad nails. Finish by adding two vertical picture rails or small nail holes for art alignment if you want the wall to look extra tidy.
Use a laser level or long spirit level for the first panel line — the rest will stay straight.
Don’t paint over glossy primers; the sheen will fight the linen texture and look cheap.
2. Gallery wall grid with mismatched frames in one finish
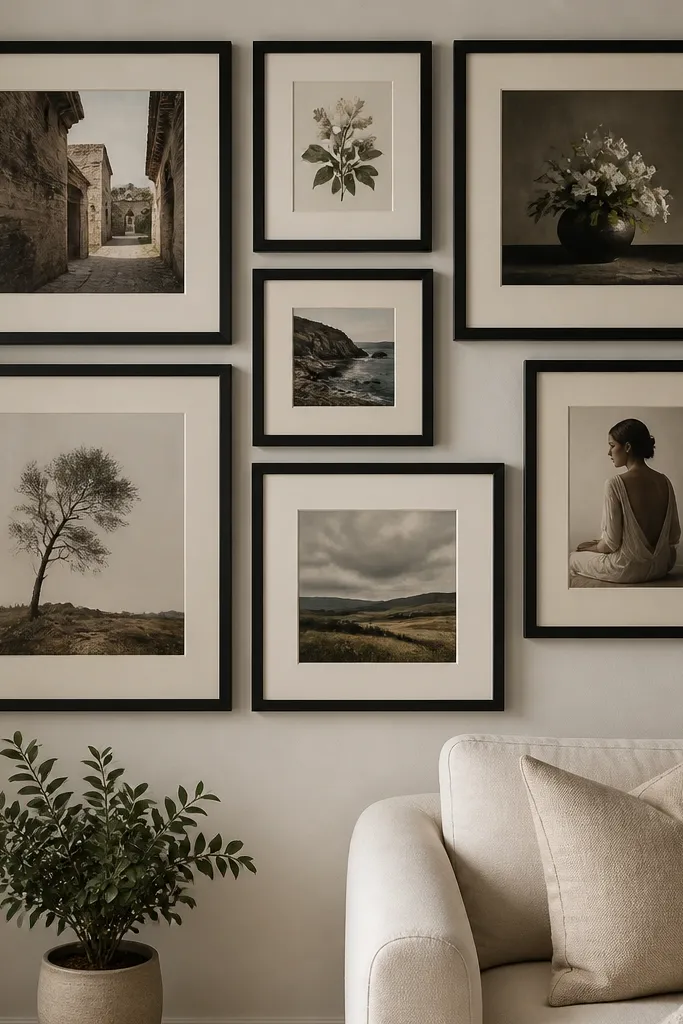
A gallery wall grid is the fastest way to make good-looking drawing room interior decor without redesigning the whole room. The key is not matching every frame — it’s matching the finish so the wall looks curated even with variety. Use a consistent mat color (warm white or light oatmeal) so prints don’t clash. This works especially well in drawing rooms with blank wall space above the sofa or along a hallway that leads into the living area.
Pick one finish family first: black frames plus warm white mats, or walnut frames plus cream mats. Lay out a simple grid on the floor using painter’s tape to simulate spacing, then set the top row height so the center aligns around eye level (about 150-160 cm from the floor). Mount a level guide strip on the wall, then hang frames with matching wire lengths so the top edges line up. Use spacers or consistent mat widths to keep the gap between frames even.
Spray-paint cheap frames in small batches so the texture and sheen match across the set.
Don’t mix mat colors; even one bright white mat can pull attention off the whole grid.
3. Ceiling-high curtains with a 20 cm side overhang
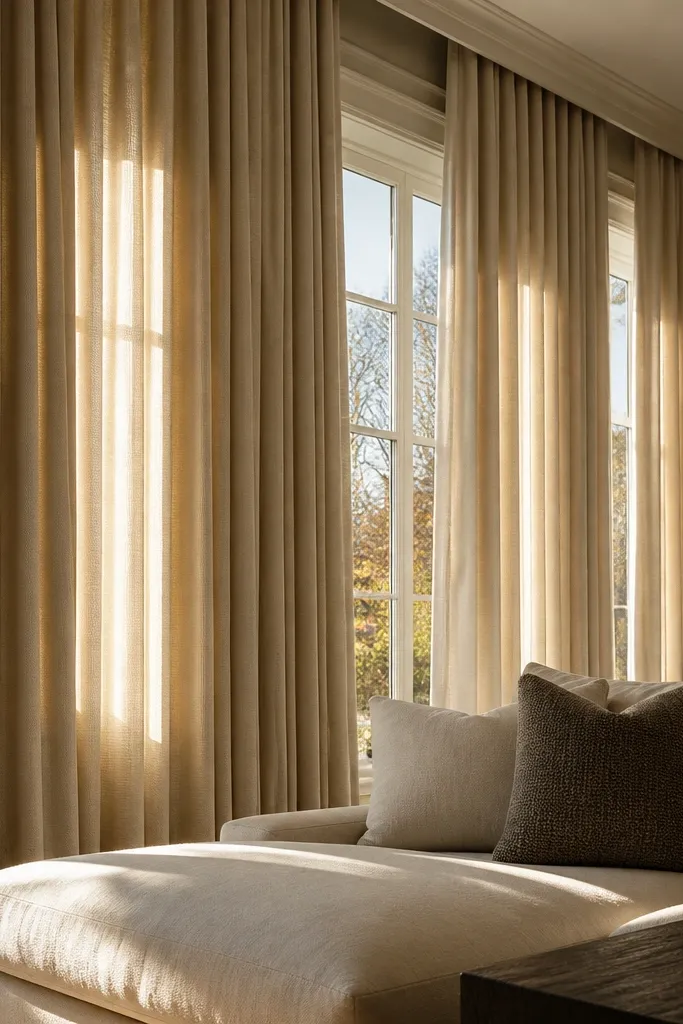
Curtains change how the entire drawing room reads — height, light, and softness — and they photograph beautifully when the folds are deep. The best look comes from mounting high and extending wide, so you get a continuous curtain field rather than two narrow panels. Choose a heavier fabric than you think you need (linen blend, cotton sateen, or medium-weight voile lined) so the folds hold their shape. This is a high-impact DIY upgrade when the room feels short or cramped.
Measure from the ceiling line down to your desired floor clearance; aim for 1-2 cm above the floor for a clean break. Install the curtain rod 15-20 cm beyond the window frame on each side and mount it as close to the ceiling as your hardware allows. Use rings or hidden clips that slide smoothly, then hang panels so both are the same length and width. Steam the fabric in sections and pull the fullness so the fabric forms consistent pleats.
If your curtain fabric is light, add a blackout or thermal lining — the drape improves because the weight increases.
Don’t mount the rod at window height; it flattens the room and makes the decor look temporary.
4. Rug layering with a flatweave base and a patterned runner
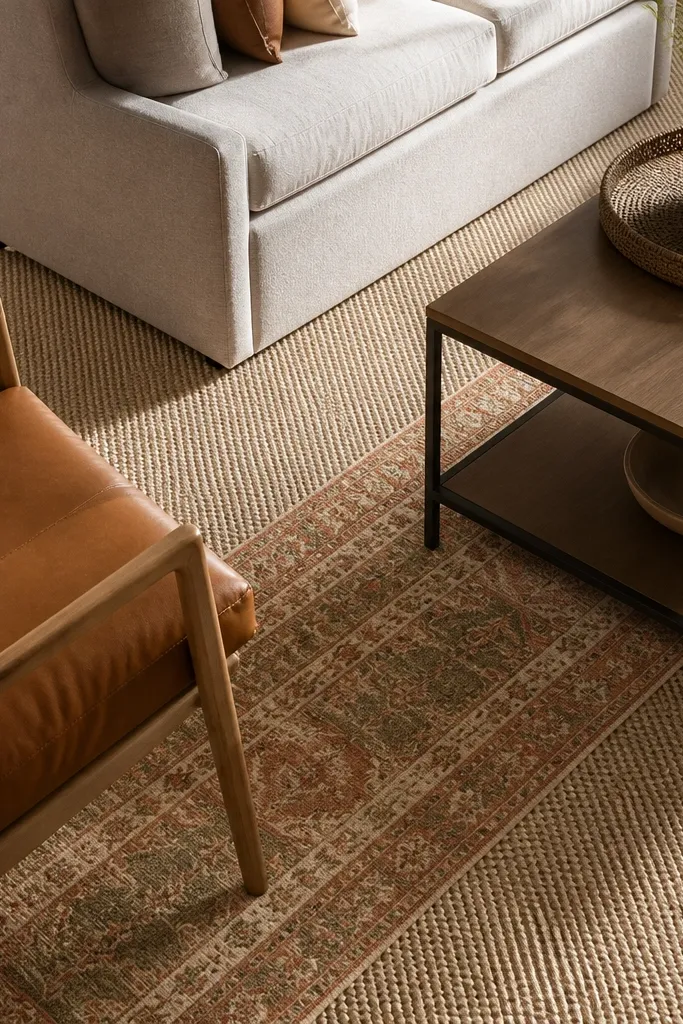
Layering rugs gives drawing rooms a controlled, styled look without installing anything permanent. A flatweave base anchors the room with calm texture, and a patterned runner adds movement where people walk past furniture. This works because it creates a visible “path” and reduces the harshness of bare floors in photos. Keep the base rug large enough so front furniture legs sit on it.
Choose a neutral flatweave as the base, sized so at least the front legs of the sofa and chairs land on it (a common target is 20-30 cm under the front edge). Place a patterned runner in the main traffic direction, centered between coffee table and seating. Align rug edges so the layered border looks intentional, then use rug pads under both layers to stop shifting. Trim any overhang only after you confirm the runner placement.
Pick one dominant color from your runner and repeat it in small decor (cushion, tray, or frame).
Don’t layer rugs that clash in texture; a shag over a flatweave usually looks messy instead of styled.
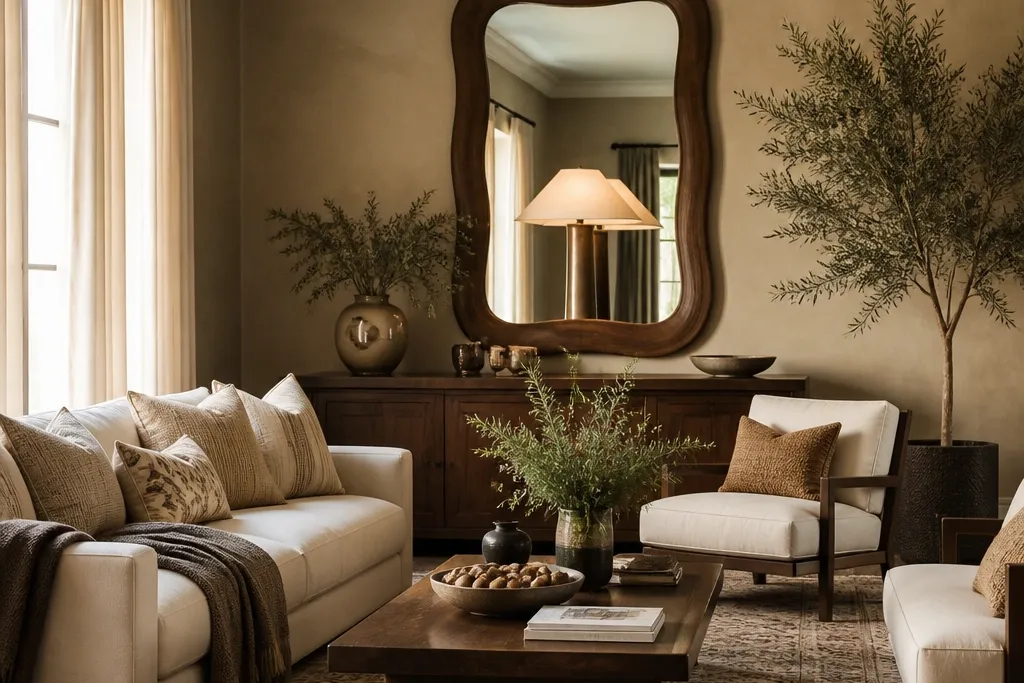
5. Oversized framed mirror with a sculpted wood-look frame
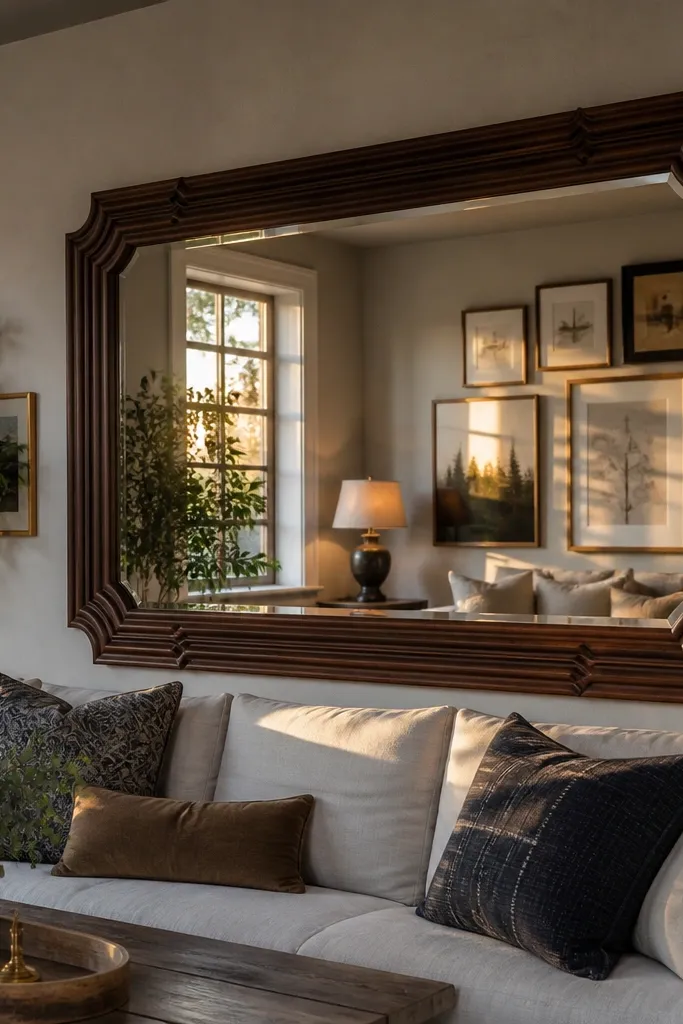
A large mirror instantly upgrades good-looking drawing room interior decor because it adds depth and bounces light back into the room. The DIY win is using a sculpted wood-look frame so it looks expensive without being fussy. Place it where it reflects a warm lamp or part of your art wall, not a TV screen or clutter. This is a strong choice for small drawing rooms or rooms with limited daylight.
Measure the wall space and buy a mirror panel size that leaves 5-10 cm margin on each side. Build a frame box out of MDF or plywood strips (for example 5-7 cm wide), then add simple profile molding or rounded corners for a richer look. Prime and paint with a wood-look technique using glaze over a base coat, then seal with matte clear. Mount the mirror using French cleats or D-rings with anchors rated for the mirror weight.
Use a matte finish on the frame; high gloss looks harsh in warm room lighting.
Don’t mount a heavy mirror directly into drywall without proper anchors.
6. Sculptural coffee table tray in brass + stone-look finish
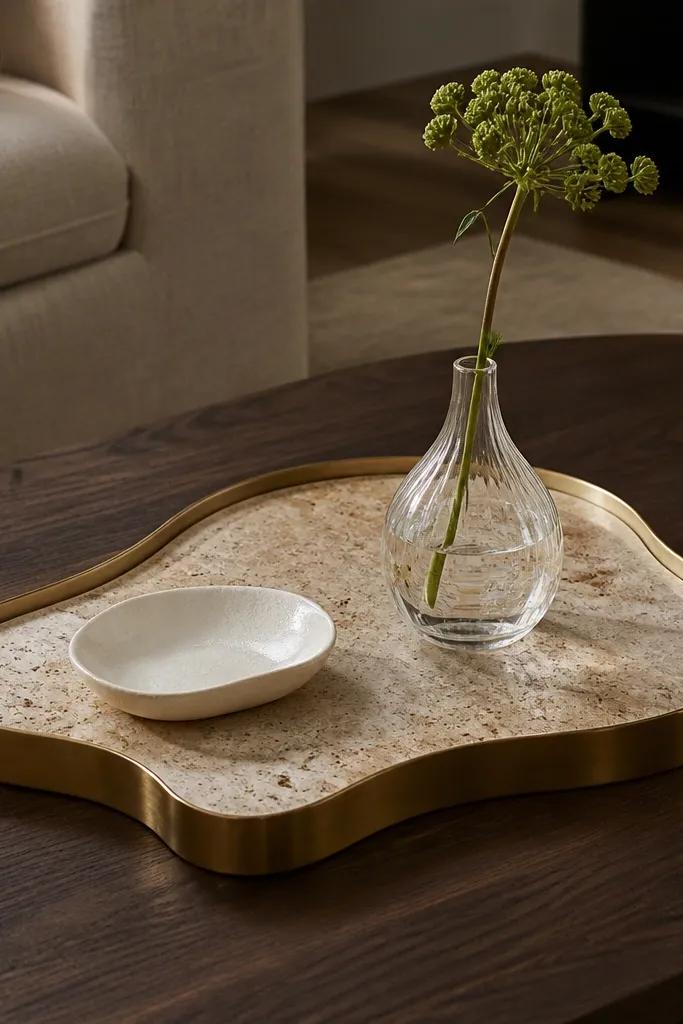
A tray is small, but it makes a drawing room look organized and photo-ready because it creates a tidy “zone” on top of the coffee table. Go for a brass frame with a stone-look center so it reads high-contrast and doesn’t blend into dark wood. This idea works when your coffee table keeps collecting random items; you’ll control the visual clutter. Keep the styling minimal: one candle, one small vessel, and one texture element.
Buy a tray base (brass-finished metal or a simple MDF tray covered in brass-look sheet) and a stone-look surface insert. If you’re making from scratch, build a shallow tray with 1.5-2 cm sides, then apply a stone-look effect using two layers of tinted paint and a faux-stone glaze. Seal everything with a clear matte or satin topcoat so it wipes clean. Arrange your objects inside the tray footprint so they never spill into the table edge.
Pick tray dimensions that match your table: leave at least 5 cm of clear table edge around it for that styled look.
Don’t use a tray that’s too small; it makes objects look crowded instead of intentional.
7. Stair-step floating shelves for books and framed photos
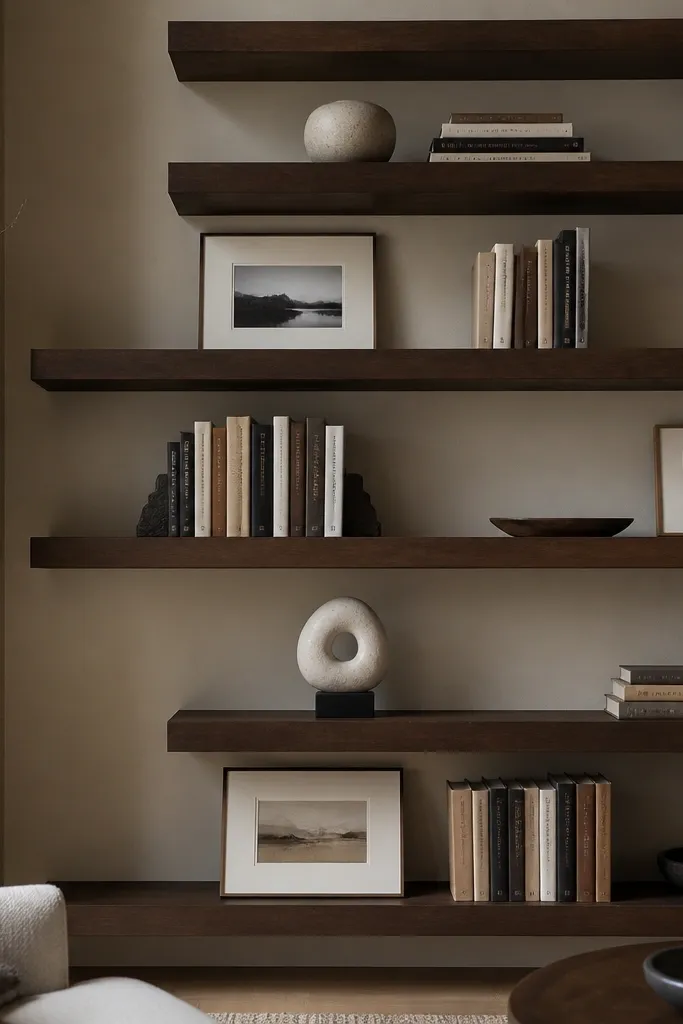
Floating shelves with a stair-step layout add height and rhythm without making the room feel boxed in. They’re great for good-looking drawing room interior decor because they give you vertical styling — books, framed photos, and small sculptures — while keeping the surface line clean. Choose a matte finish and keep shelf depth shallow so items don’t look bulky. This works best on a wall near the seating area where you want a readable “story” in layers.
Decide shelf widths and depths first, then mark a centerline on the wall. Install a continuous ledger level using a stud finder, because floating shelves need strong backing. Cut shelf boards to staggered sizes (example: 20 cm, 25 cm, 30 cm wide) and route a small lip if you want a neat front edge. Prime, paint matte, then mount with hidden brackets sized for the weight of books.
Editor's noteUse color blocks in books (same spine tones) so the shelf reads intentional in photos.
Skip thisDon’t load shelves with tall items on every level; mix heights or it becomes a visual wall of vertical lines.
8. DIY plaster-effect wall paint in warm greige
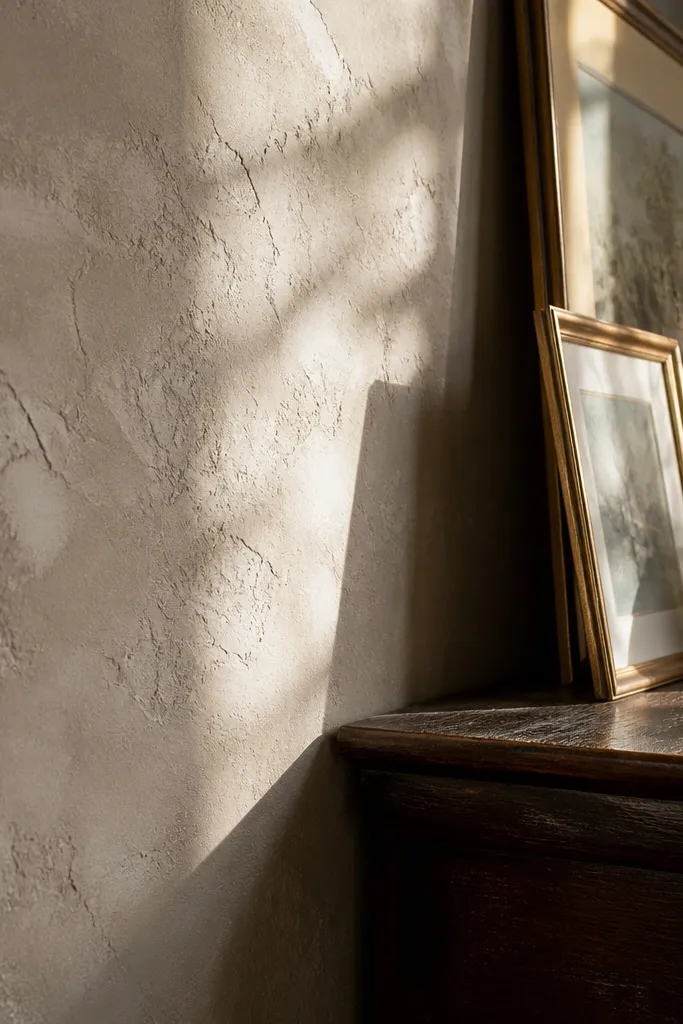
Plaster-effect paint gives you that expensive, tactile wall look even when you’re not doing real plaster. Warm greige is forgiving and pairs with dark wood, brass, and cream textiles — exactly the combo most drawing rooms need. The texture catches light and makes the room feel layered instead of flat. This is a smart choice when your wall looks too smooth and cheap under daylight.
Patch and sand walls flat, then prime with a bonding primer. Apply a base coat in warm greige matte, let it dry fully, then use a trowel technique with a thin plaster-effect compound (skim coat) to create soft peaks and swirls. Work in sections so edges blend, and keep pressure consistent. Once dry, lightly sand high ridges, then seal with a matte clear so the finish stays wipeable.
Use a test patch the size of a dinner plate, then view it in morning and evening light before committing.
Don’t rush drying times; touching the texture early creates streaks that show under lights.
9. Woven rattan accent chair corner styling with a floor lamp
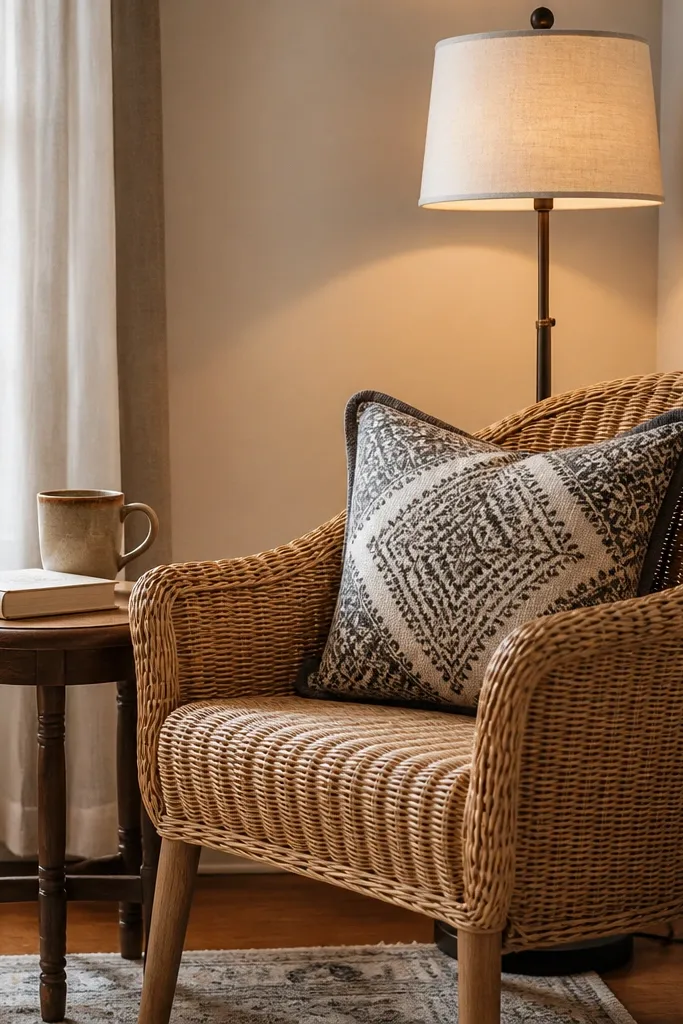
A rattan chair corner is a reliable way to make the drawing room feel welcoming and styled, not sterile. The texture plays well with framed art and soft rugs, and the corner layout creates a clear “reading nook” spot for photos. Add a floor lamp with a fabric shade to keep the light warm and flattering. This idea works best when your room feels empty between the sofa and a side wall.
Choose a rattan chair with a tight weave and a seat cushion you can swap easily. Place it 30-50 cm from the wall so the chair back doesn’t disappear into the corner. Add a small round side table or tray stand, then drape a throw over one arm and stack cushions with one solid and one textured cover. Position the floor lamp behind or slightly to the side of the chair so it creates soft shadows across the wall.
Keep cushion sizes consistent: one 45x45 cm square and one smaller 30-40 cm accent looks cleaner than random sizes.
Don’t put a glossy lamp base near textured rattan; it reflects too much and breaks the calm look.
10. Custom curtain tiebacks with braided rope and brass hooks
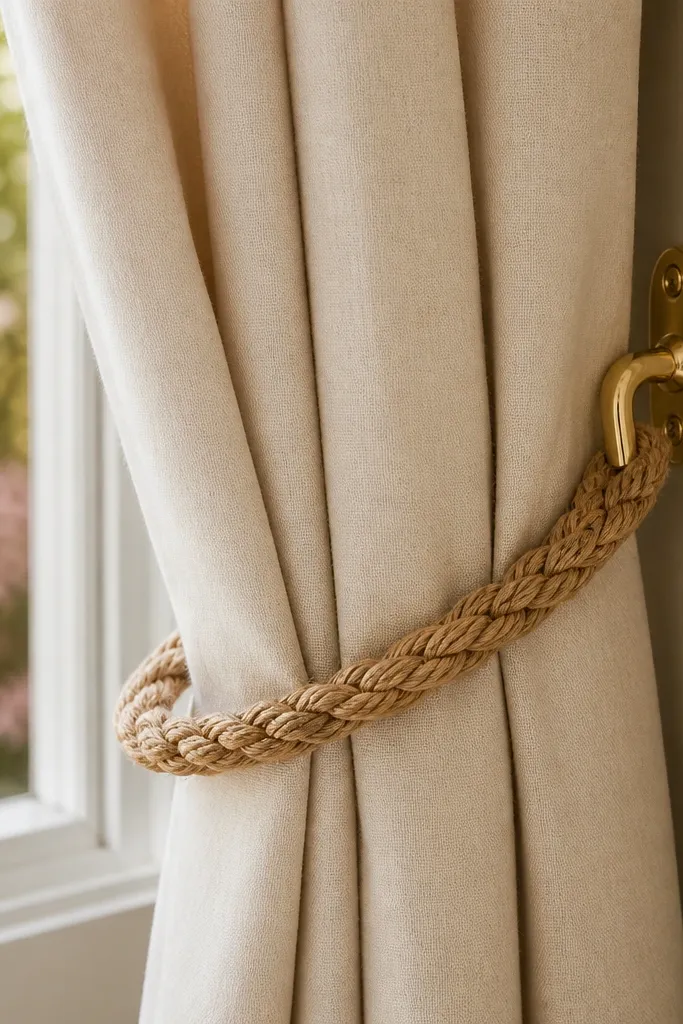
Tiebacks look like a small detail, but they change the silhouette of good-looking drawing room interior decor. A braided rope tieback adds warmth and a handmade feel, and brass hooks bring in the metallic accent most drawing rooms need. Use tiebacks when you want the curtains to frame windows or show the panel behind the sofa. This is a great DIY for styling a room that already has curtains but looks “flat.”
Pick braided cotton rope in a warm neutral (sand, caramel, or tobacco). Install two brass hooks at the height you want the curtain to gather (usually around 110-130 cm from the floor depending on curtain length). Make rope loops long enough to hold the fabric without pulling tight, then attach the rope ends to a small leather or fabric strap if you want a cleaner grip point. Hang tiebacks symmetrically on both sides.
Editor's noteUse fabric glue or stitching to secure rope ends so fraying doesn’t ruin the look in a few weeks.
Skip thisDon’t tie curtains too high; it creates a “pulled up” look that shortens the room.
11. DIY macramé-style wall hanging with a modern twist
A modern wall hanging adds softness and vertical interest without taking up floor space. The good-looking part comes from scale and color restraint: one thick rope texture in a neutral tone looks intentional, while tiny knots look like craft clutter. Hang it near your sofa or between shelves so it fills a blank gap. This works well in drawing rooms with smooth walls that need warmth.
Use a thick cotton rope (around 10-12 mm diameter) and a straight wooden dowel. Create a simple knot pattern with consistent spacing across the width, then trim ends evenly after the hanging is fully weighted. Keep the design asymmetric — a slightly longer section on one side — for a modern look, then finish with a matte fabric dye if you want a deeper tone. Mount the dowel using two wall brackets so it stays level.
Editor's noteSteam the rope gently after trimming so the strands fall straight.
Skip thisDon’t hang it too low; if the bottom hits cushion height, it reads messy instead of styled.
12. Floating media console with a slatted front and warm wood finish
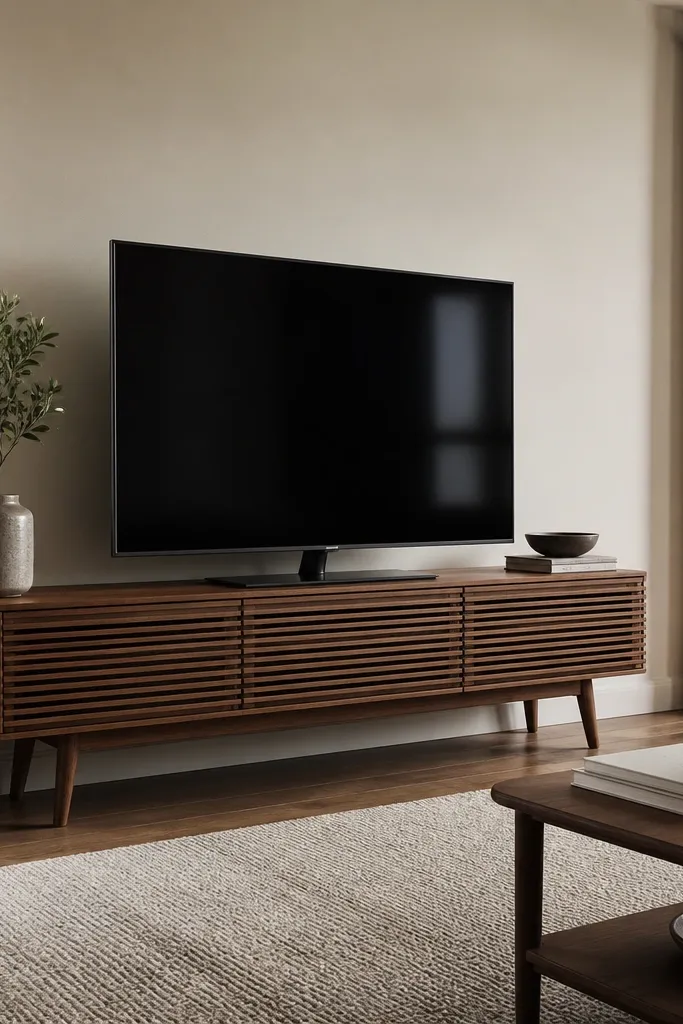
If your drawing room includes a TV, a floating console instantly improves the look because it clears the floor and hides visual clutter. A slatted front adds texture that looks good up close and in wide shots. Keep the finish warm (walnut stain or warm oak) so it pairs with cream curtains and beige walls. This idea is worth it when your current unit looks heavy, dated, or full of visible cables.
Measure your TV width and plan a console that is 10-20 cm wider on each side for balance. Build a simple box frame using plywood, then install slats at a consistent spacing (example: 15 mm slat with 5 mm gaps) on the doors or front panel. Stain with a warm wood tone, seal with matte clear, then mount the frame to wall studs using a strong bracket system. Add a cable raceway behind the panel and cut a clean ventilation gap if needed.
Paint the back panel flat black; it hides reflections and makes the TV area look cleaner.
Don’t mount without confirming stud locations — a floating unit pulled out ruins the whole wall look.
13. DIY fabric-upholstered wall panels behind accent chairs
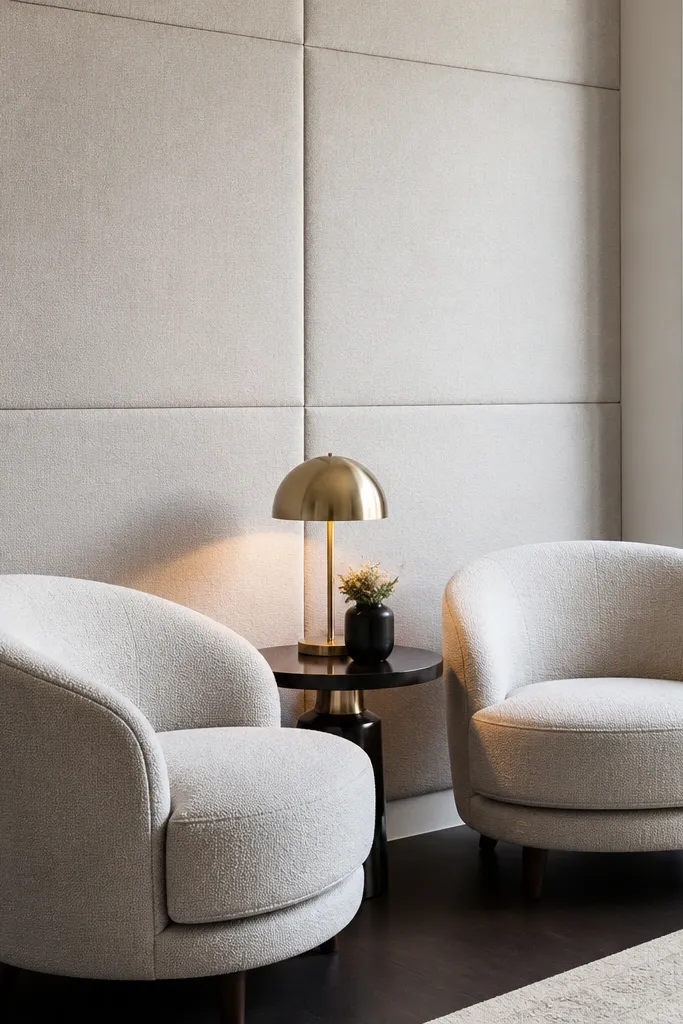
Upholstered wall panels behind an accent chair make the whole corner look finished and expensive. It’s one of the best ways to get good-looking drawing room interior decor when your wall is bare and your seating zone feels unfinished. Use medium-density foam and a tight fabric weave so it looks tailored, not floppy. The panels also absorb sound, which makes the room feel calmer.
Cut foam and backing boards to a set size like 60x60 cm, then wrap with fabric pulled taut on the back. Add a thin border strip so the front edge looks crisp. Use a staple gun for the back, then mount with heavy-duty picture hooks or French cleats depending on board weight. Choose a fabric color that matches your curtains or one cushion — repeat the tone and the room looks coherent.
Do a dry fit and check the panel height relative to chair seat; the top edge should sit above head height when seated.
Don’t use stretchy fabric; it will warp the panel edges and look uneven.
14. Painted wood sideboard with two-tone top and brass pulls
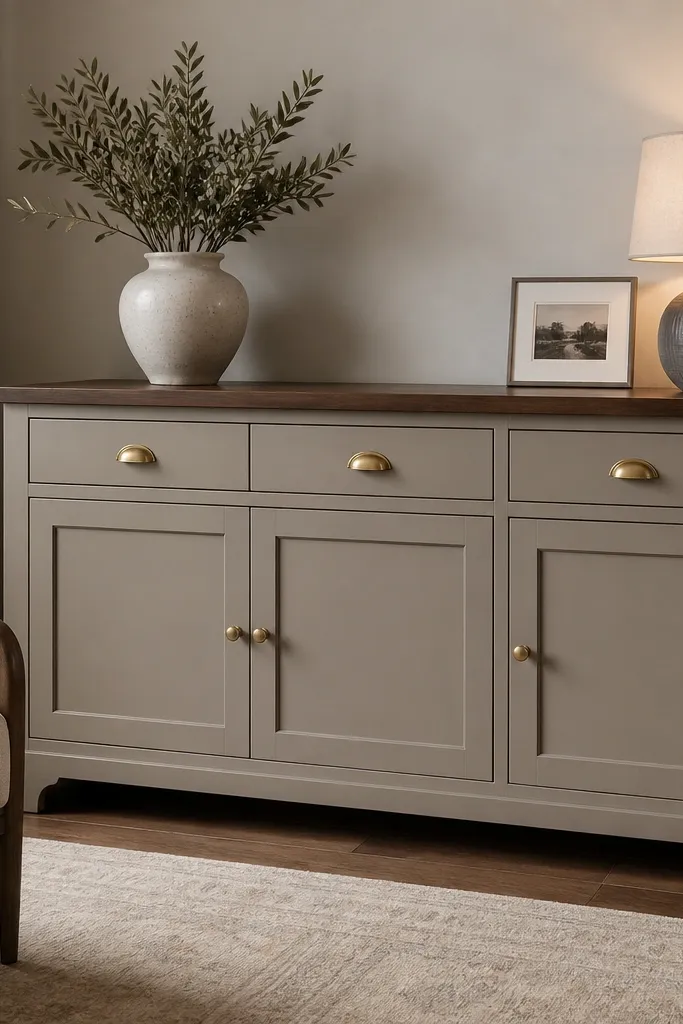
A sideboard is a big visual block, so a two-tone paint job makes it look intentional and modern fast. Keep the body matte and the top slightly darker or in a wood-look stain so the furniture reads grounded. Brass pulls tie the look to lamps and frames, which is what makes the room feel styled rather than random. This is a strong DIY when your drawing room has a functional but boring storage piece.
Sand the sideboard thoroughly, remove dust, then prime with a bonding primer. Paint the body in a matte color like warm greige or soft sage, using a foam roller for a smooth finish. For the top, either stain after sanding or paint a darker tone and finish with a clear protective topcoat. Install brass pulls at equal spacing using a template so doors line up.
Use painter’s tape to mask the top edge and remove it while paint is still slightly tacky for a sharper line.
Don’t skip primer; over bare lacquer the paint peels and the mess spreads across the piece.
15. Wall art triptych with a consistent matte background
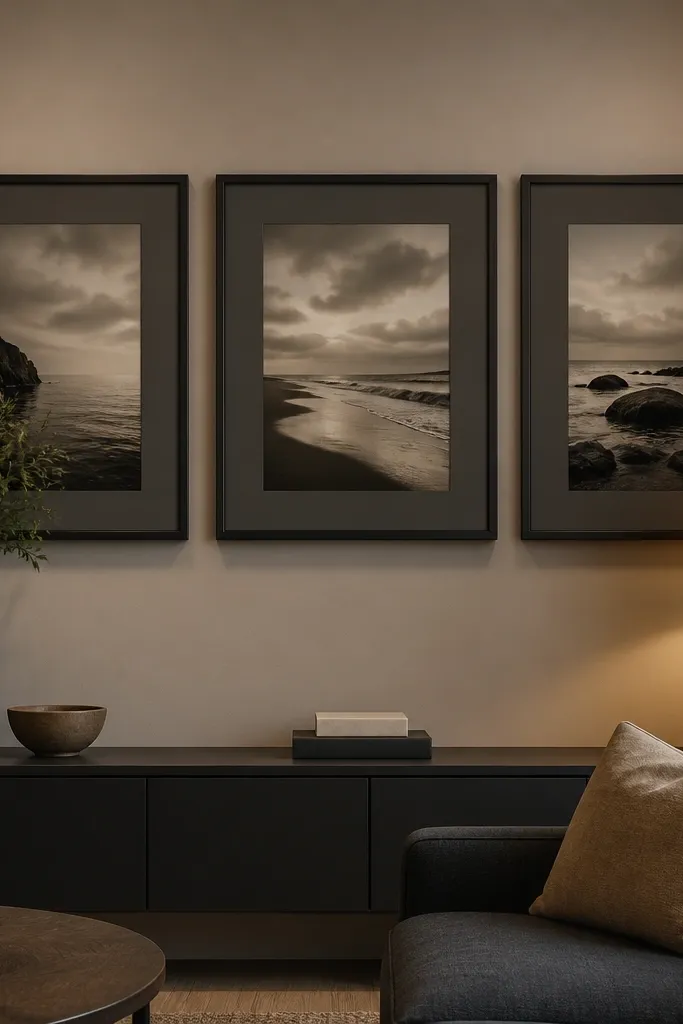
Triptych art gives you a clean focal point that reads balanced even when you have limited wall space. The “good-looking” part is the matte background color and frame consistency, not the artwork type. Use one matte tone across all three pieces so the wall doesn’t look like a random collage. This works well above a console table, behind a sofa, or along a narrow wall where a gallery grid feels too busy.
Pick three pieces with the same background tone and similar contrast levels. Use identical frames and mats, then set the spacing at about 5-7 cm between frames for a tight triptych look. Mark the centerline of the wall and hang the middle piece first, keeping the top row aligned. Use a level and measure from the floor so the trio stays straight even if the wall is slightly off.
Choose art that has one repeated color that appears in your cushions or rug so it ties the room together.
Don’t vary frame widths; one thicker frame makes the whole triptych look accidental.
16. Sofa-back throw styling with a stitched edge and one color repeat
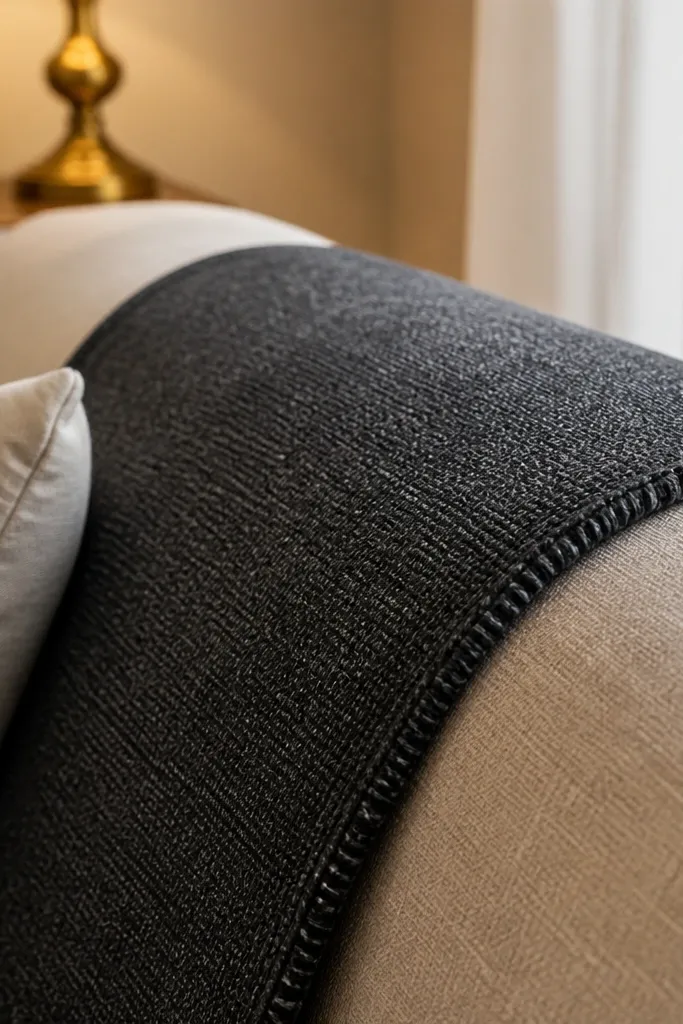
Throws are the simplest way to get good-looking drawing room interior decor because they add warmth and texture where people actually look. The difference between “messy blanket” and styled throw is the edge and the fold. Use a throw with a visible stitched border or woven texture so it looks intentional even when it’s just draped. Repeat one color from your rug or cushions so it visually locks into the room.
Choose a throw that is wide enough to drape across the sofa back without hanging past the seat by more than 2-3 cm. Fold it into a clean rectangle and drape with the fold edge aligned straight across the center of the sofa back. Use one color repeat: if your rug has a warm tan, match the throw with that tone. Tuck the corner ends under a cushion edge so the throw stays in place without sagging.
Steam the throw before styling; wrinkles show in photos faster than you’d expect.
Don’t use a throw that sheds heavily; it collects lint on dark cushions and looks sloppy quickly.
17. DIY candle wall sconce rail with glass holders
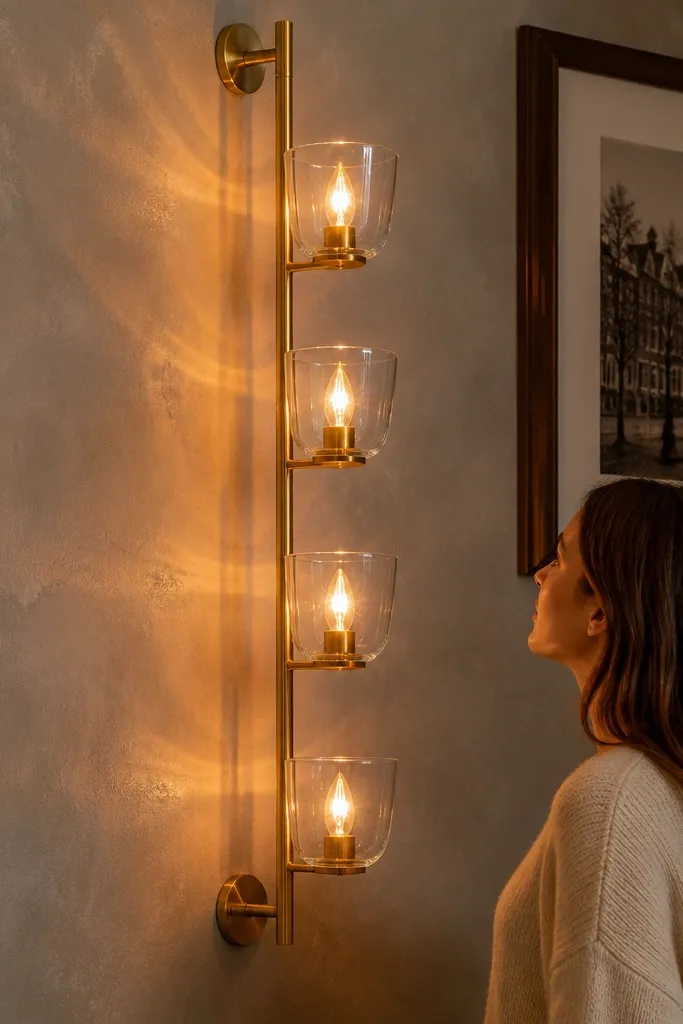
A wall sconce rail gives you layered lighting without adding floor clutter, which is a big deal for drawing rooms. The look is photogenic because glass cups catch warm light and create highlights on the wall. Keep it simple: one rail, three to five holders, and a warm bulb or candle-style light. This idea works in rooms that feel dim even with a ceiling light.
Measure the wall section and mark a level line where the rail will sit, usually around 140-160 cm from the floor. Mount a metal rail or build one from a straight bar with pre-drilled screw points. Add glass holders using threaded cups or small brackets and ensure each holder is secured firmly. If using electric lights, route wiring through a concealed channel and use a dimmable warm bulb.
Use 2700K bulbs for a warm glow that flatters skin tones in photos.
Don’t place it too close to artwork; the glare can wash out prints and make the wall look busy.
18. Modern console table with a marble-look top and tapered legs
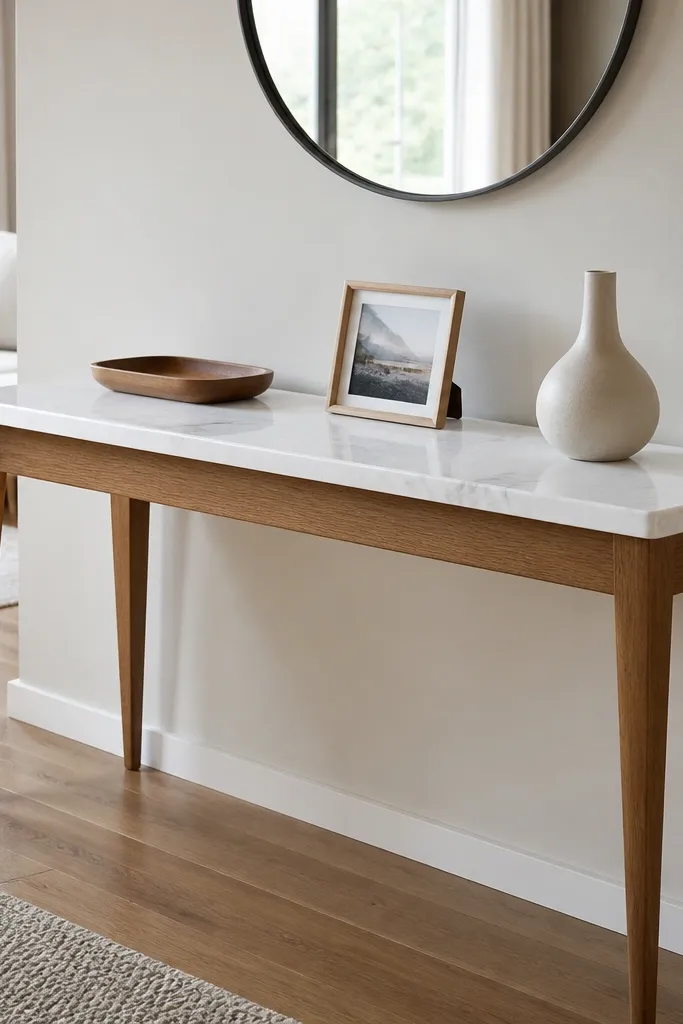
A modern console table adds a styled “surface” for decor and makes the entry-to-drawing-room transition look intentional. The marble-look top reads clean and reflective, while tapered legs keep it visually light. This is a great DIY or upgrade when you need a place for keys, small lamps, or framed photos without turning the room into a storage area. It also photographs well because the tabletop creates a crisp line under overhead light.
Choose a console size that fits your wall — aim for 30-40 cm depth and leave at least 75 cm walking clearance in front. Build or buy a frame with tapered legs, then top it with a laminate sheet finished to look like marble using a white base and grey veining pattern. Seal with a clear topcoat so it’s easy to wipe. Style it with one tall element (lamp or vase), one flat element (tray), and one textured piece (linen runner).
Editor's notePlace the console under a wall mirror or art piece so the composition feels anchored.
Skip thisDon’t crowd the console; more than three items turns it into a clutter shelf.
19. Ribbed ceramic vase cluster in three heights
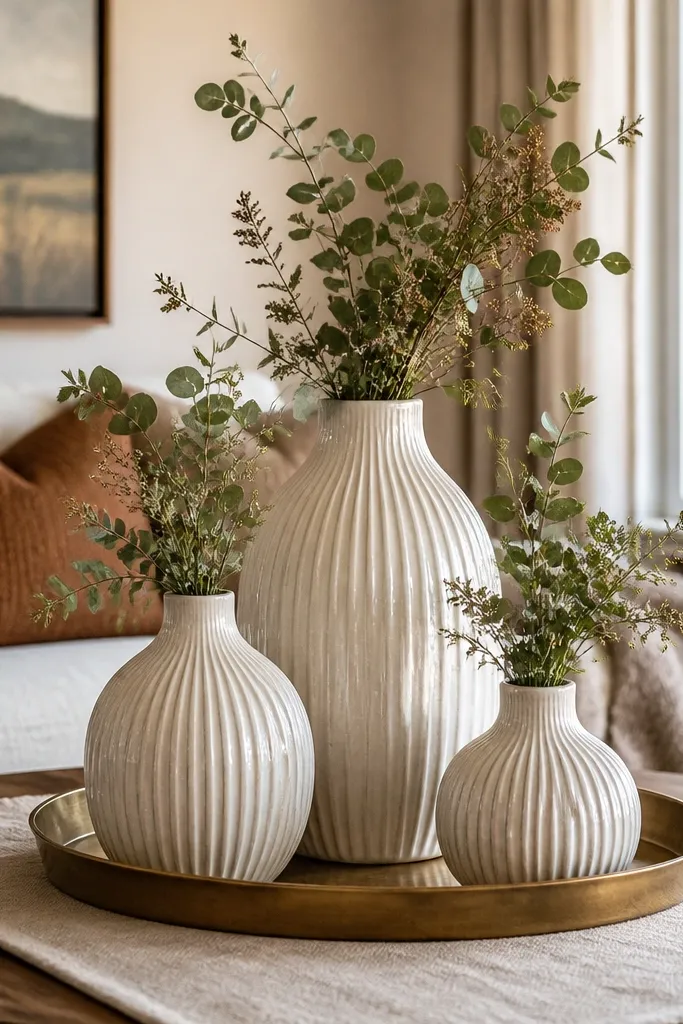
A vase cluster makes good-looking drawing room interior decor look styled even when you don’t want big artwork changes. Ribbed ceramic has built-in texture that catches light differently as the room changes, which is why it looks good in both daytime and evening shots. Use three heights so the cluster has rhythm instead of looking like a random pile. This works perfectly on side tables, console shelves, and the coffee table tray.
Pick three vases that share one material look (matte ceramic) and one palette (cream, taupe, and warm grey). Arrange them on a tray or directly on the surface — place the tallest in the center, then two shorter ones on left and right. Use a neutral filler like dried palm, pampas-style grass, or eucalyptus bundles cut to different lengths. Keep the stems spaced so leaves don’t overlap and make a single dense mass.
Wipe vases with a dry microfiber cloth right before styling; fingerprints show on matte ceramic.
Don’t choose vases with wildly different shine levels; glossy pieces next to matte look mismatched.
20. DIY window sill ledge styling with a linen runner
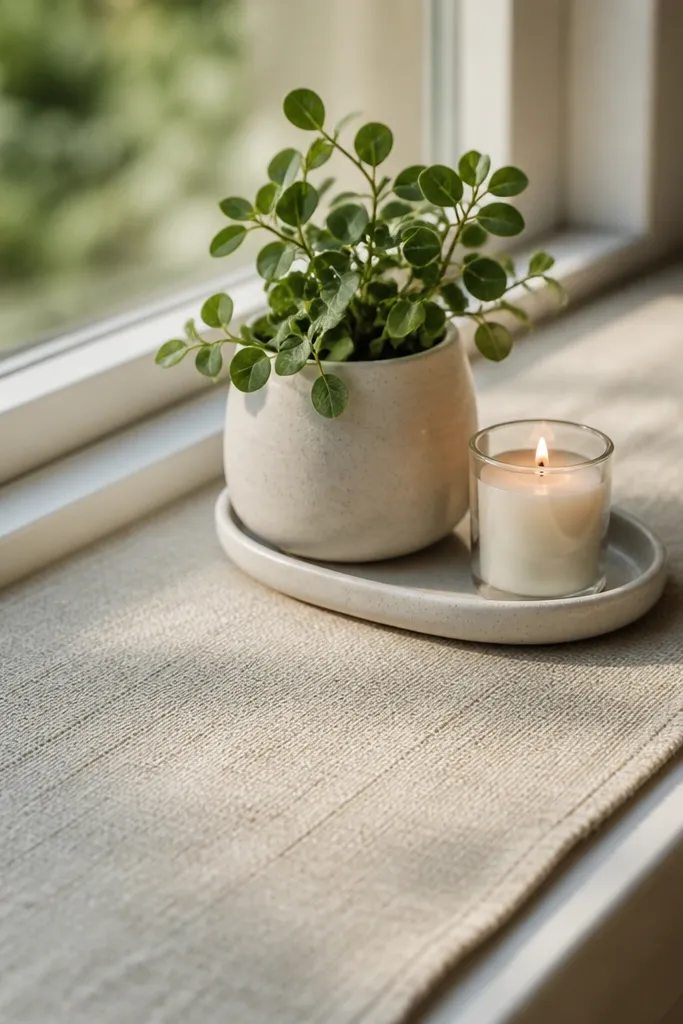
Window sill styling is underrated because it’s easy to do and it instantly frames the light source. A linen runner makes the sill look like part of the interior design instead of an afterthought. Add a small plant and one candle or small tray so the area reads intentional. This idea works best when your drawing room has a wide window or a sill that looks bare.
Measure the sill depth and cut a linen runner so it leaves 2-3 cm on each side. Place a small tray at the center, then set one plant pot and one decorative item like a short candle holder. If you want a neat look, wrap the plant pot with a matching fabric cover or use a matte ceramic pot. Keep the arrangement light — no more than three items — so the window still looks bright.
Choose a runner in the same tone as your curtains so the window area looks pulled together.
Don’t place tall items that block the window view; it makes the room look darker.
21. Textured wall molding in a simple rectangular frame
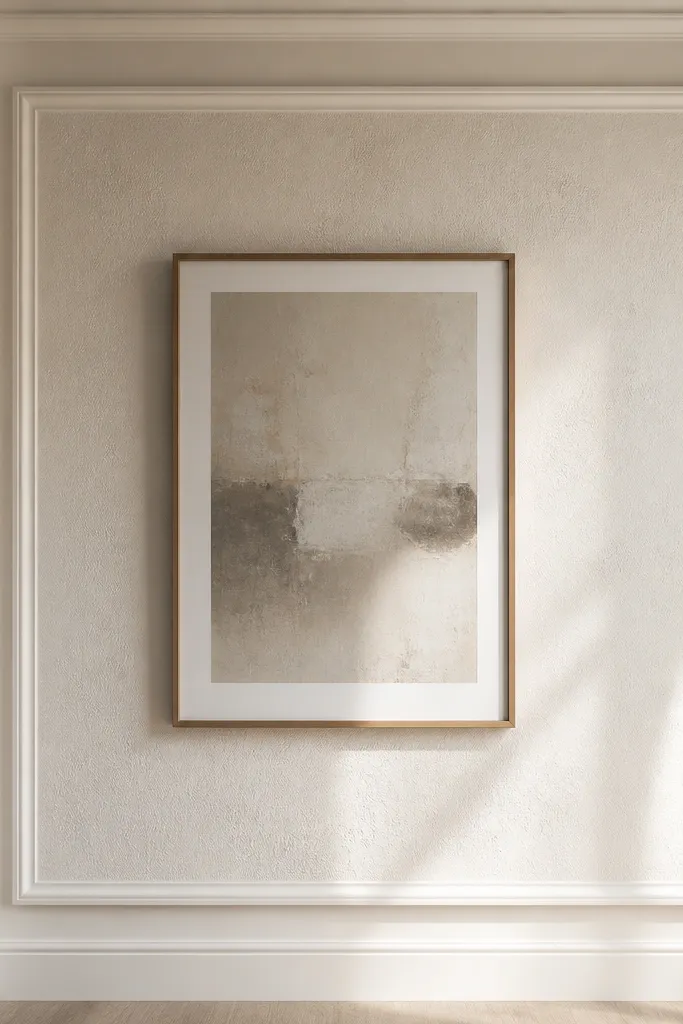
Simple wall molding gives you architectural structure without going full panel wall. A rectangular frame around art or a textured insert makes the drawing room look designed and gives your focal point a “stage.” Use a slightly off-white so it doesn’t look like harsh trim. This is a good DIY when you want good-looking drawing room interior decor but your budget doesn’t stretch to major renovation.
Mark the rectangle on your wall with painter’s tape and measure the inside opening based on your art size. Cut MDF molding strips and test-fit the corners using a 45-degree miter for clean joins. Prime and paint the molding and the inner textured panel separately so the finish stays consistent. Mount the frame pieces with adhesive plus brad nails, then add an art piece or a textured insert inside.
Editor's noteKeep the molding thickness consistent and avoid mixed profiles; matching profiles read more expensive.
Skip thisDon’t install molding on uneven walls without filling gaps; shadow gaps make it look sloppy.
22. DIY accent rug border using painter's tape
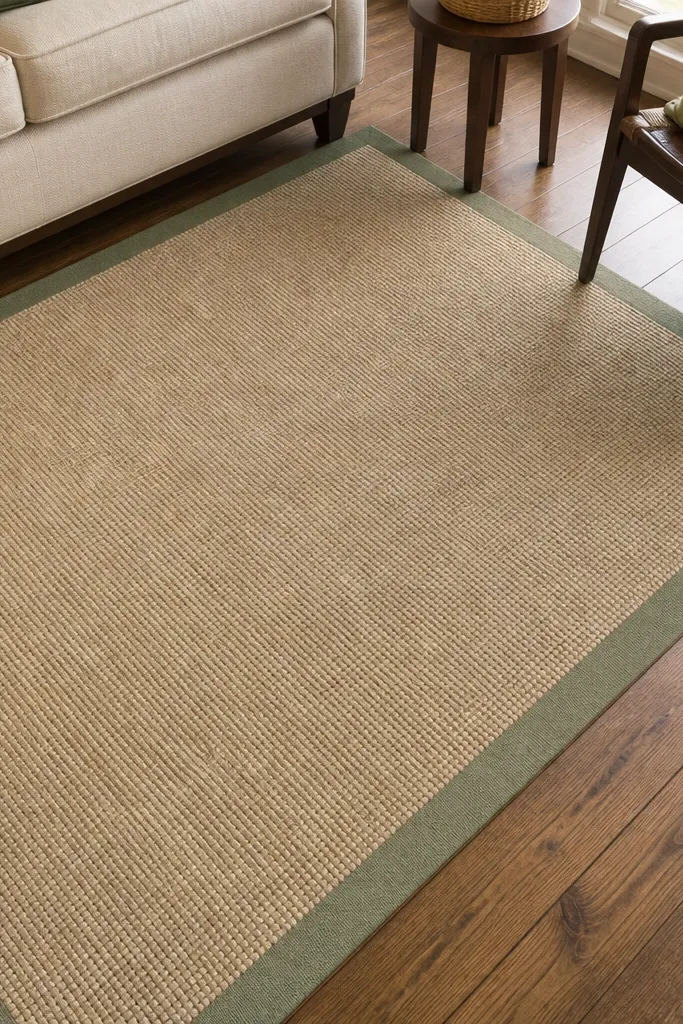
Painting a border on an existing rug is a smart way to upgrade good-looking drawing room interior decor without buying a whole new rug. A crisp border creates a framed look, which makes the rug feel intentional and helps it sit visually with furniture. Choose a muted color that matches your cushion or frame tone so it doesn’t look like a random craft job. This idea works when your rug is fine but feels plain or too bland.
Clean and dry the rug thoroughly, then tape a border using painter’s tape with even spacing from the edge. Use fabric-safe paint designed for textiles, and apply in thin layers with a foam brush to avoid bleed. Let it dry fully, then remove tape slowly while the paint is still slightly firm to prevent tearing. Seal if your paint instructions require it, then air out the room until fumes are gone.
Editor's noteTest paint on a hidden corner first; rug fibers absorb differently and the border can darken.
Skip thisDon’t use regular wall paint; it cracks and peels on rug fibers.
23. Corner bar cart with a mirrored back and warm lighting
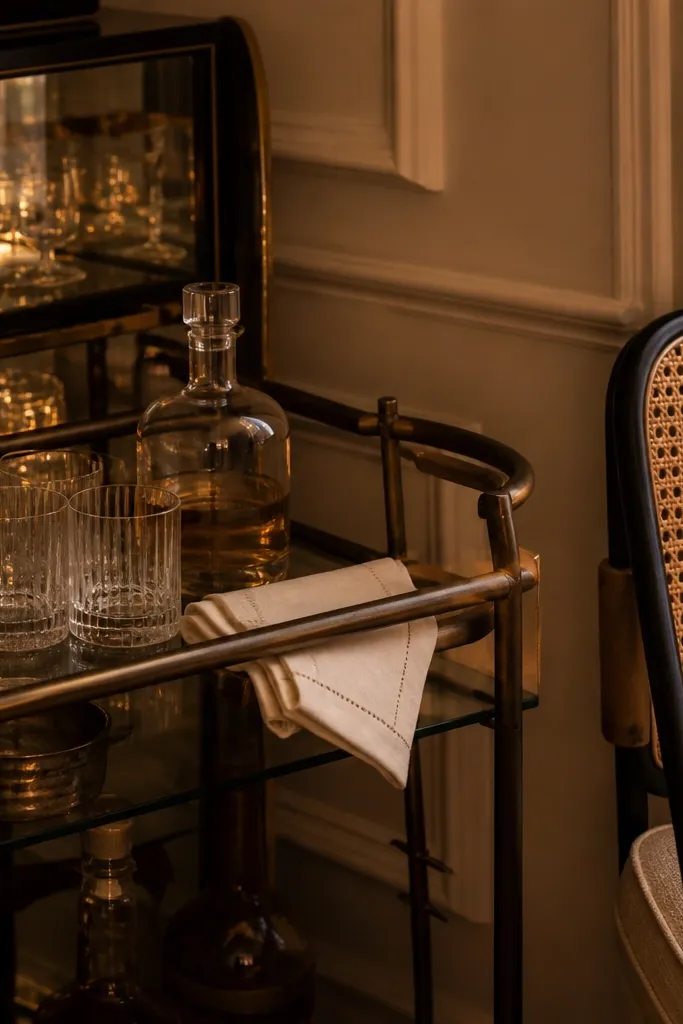
A bar cart tucked into the corner is a stylish way to add function and good-looking drawing room interior decor at the same time. The mirrored back makes the cart look bigger and adds sparkle without extra clutter. Warm lighting inside the cart flatters glassware and makes the corner feel like a feature. This works well when you want a “moment” in the drawing room but don’t want a large build.
Start with a metal or wood bar cart with at least two shelves so you have visual layers. Add a mirrored sheet cut to the back dimensions using mirror-safe adhesive. Place small warm LED lights inside the cart edges so the glow reflects off the mirror. Style with three categories: glassware, one bottle group, and one tray with a candle or coaster set.
Keep glassware consistent — same shape family — so the cart looks curated instead of random.
Don’t overload the shelves; if you can’t see the cart structure, it looks cluttered.
24. DIY wall-mounted reading ledge with a leather strap
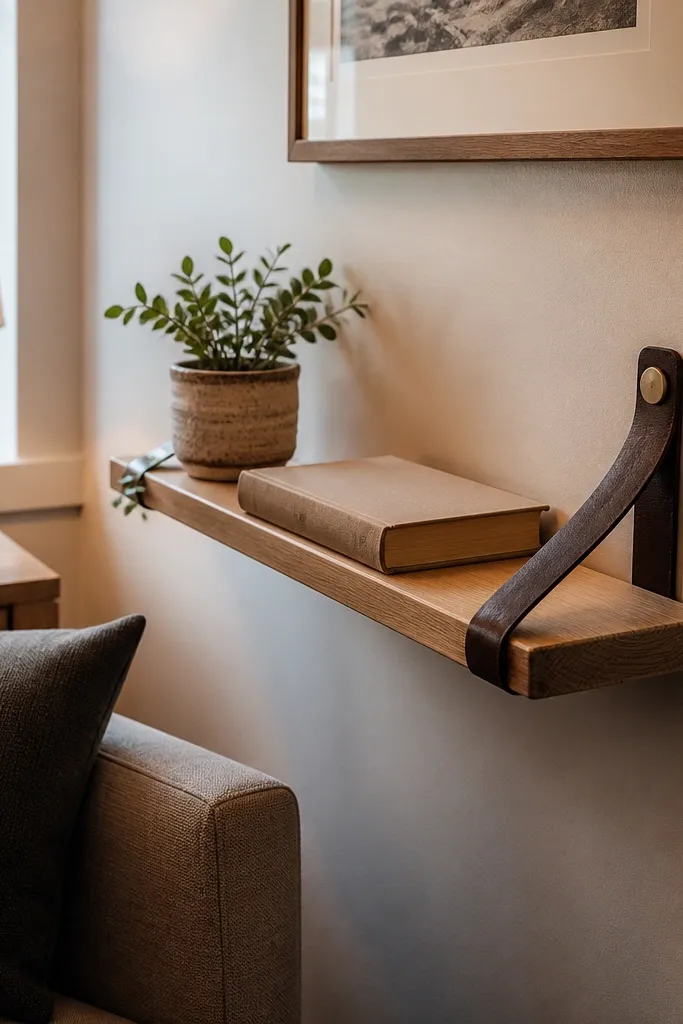
A wall-mounted reading ledge turns a blank wall into a functional styling spot. It looks good because it adds a horizontal line at eye level and creates a “designed corner” feel. The leather strap detail brings warmth and a tactile contrast to painted walls and fabric curtains. This works best near an armchair or sofa end where you want a place for books, a small lamp, or a decorative tray.
Choose a ledge size around 25-35 cm wide, then cut a board and sand edges smooth. Mount two wall brackets into studs, then attach the board securely. Add a leather strap anchored at two points so it holds a book or small object without sagging. Paint or stain the ledge to match your wood tones, then seal with matte clear.
Editor's noteMatch the leather tone to your other accessories like belt-brown wood pulls or tan cushions.
Skip thisDon’t mount over drywall only; a ledge needs stud support for safety and clean alignment.
25. Statement floor lamp with a drum shade and linen cover
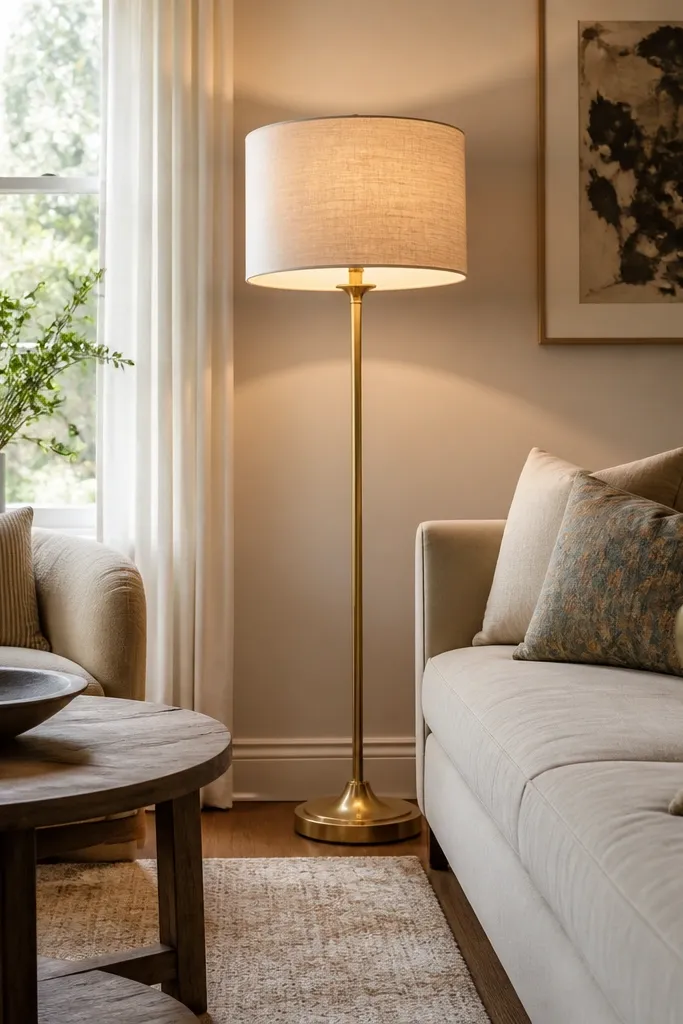
A statement floor lamp improves good-looking drawing room interior decor more than most people want to admit. When the shade is linen and the bulb is warm, it softens shadows and makes your wall art and furniture look smoother. The drum shade also creates a clean silhouette that photographs well from the doorway. This is ideal when your ceiling light is harsh or your room feels flat at night.
Pick a floor lamp height that reaches around 150-170 cm from the floor to the top of the shade. Choose a drum shade in linen or linen-look fabric with a warm inner lining. If you’re DIYing the shade, replace the lining with a warm white fabric and stretch it smoothly before stapling. Position the lamp slightly behind the seating area so it lights the wall and not just the floor.
Editor's noteUse a dimmer or a bulb with a dimming capability; you’ll control the room mood instantly.
Skip thisDon’t use a bright cool-white bulb; it makes fabrics look grey and kills the cozy look.
26. DIY wall-to-wall bookshelf styling with hidden cable shelf
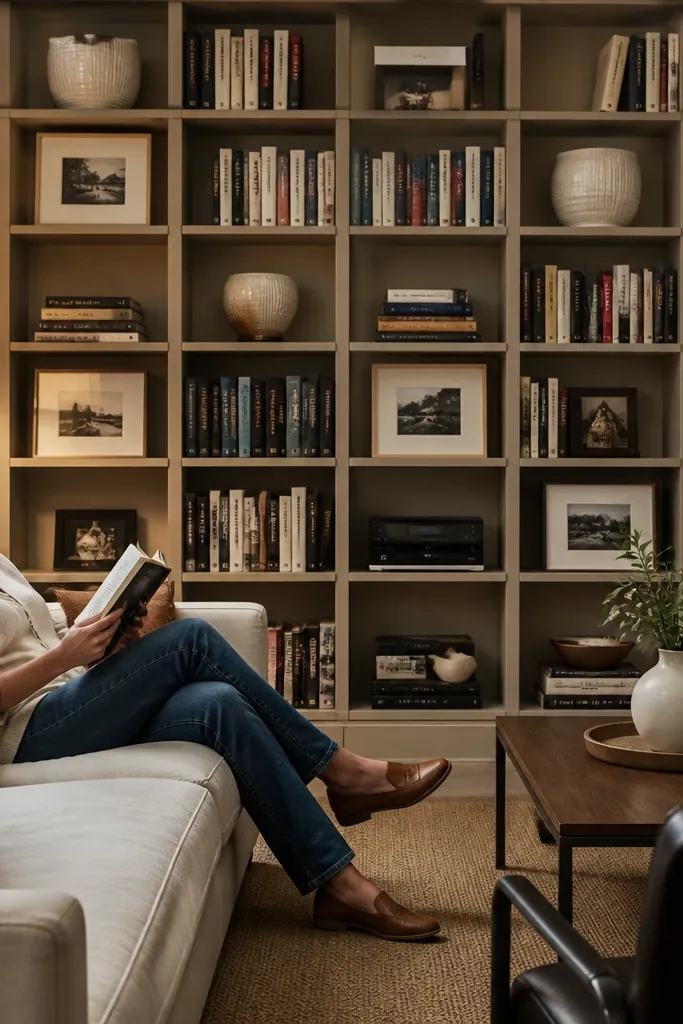
A styled bookshelf wall turns your drawing room into a designed backdrop, not a storage corner. The look comes from compartment rhythm: mix books with framed photos, small vases, and one or two larger objects per section. Add a hidden cable shelf if you have speakers or a small device — it keeps the visual line clean. This idea works best when you already have shelving or can build a simple modular unit.
Plan your shelf layout in sections of similar width, then decide a consistent height for the top of each compartment. Install shelves level using a stud-supported rail, leaving space behind for cable routing. Style each compartment with one tall element, one small cluster, and a book stack — keep the colors within a palette. Add felt pads under objects to prevent scuffs and keep the shelves quiet visually.
Use uniform book placement direction (all spines facing out) for at least half the shelves; the room reads calmer.
Don’t mix too many sizes of frames; one size family looks sharper on shelves.
27. Textured linen cushion covers with a contrasting piping line
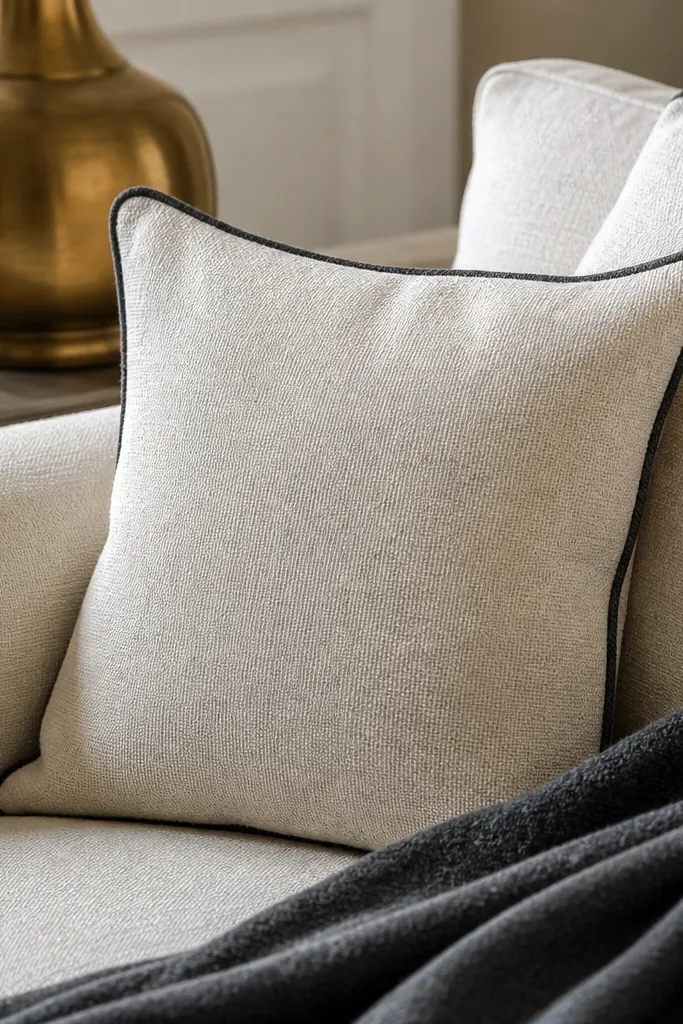
Cushion covers are the easiest way to make good-looking drawing room interior decor look cohesive fast. Texture plus piping gives you a crisp edge that looks polished even when you’re not changing the whole room. Choose linen or linen-blend covers with visible weave, then add piping in a darker neutral like charcoal, cocoa, or deep olive. This works when the room feels flat and you want a “finished sofa” look.
Buy cushion covers or sew new ones with a zipper closure and add piping along the outer seam. Use an insert size that fills the cover properly (45x45 cm cover with a 50x50 cm insert for a full look). Match the piping color to one existing element like your frames or rug border. Fluff and align cushions so the piping lines sit straight and don’t twist.
Editor's noteIron covers lightly on low heat with a pressing cloth; linen crispness reads better in photos.
Skip thisDon’t overstuff with too-large inserts; it stretches seams and makes the sofa look lumpy.
28. DIY wall-mounted coat and bag hooks with a hidden shelf
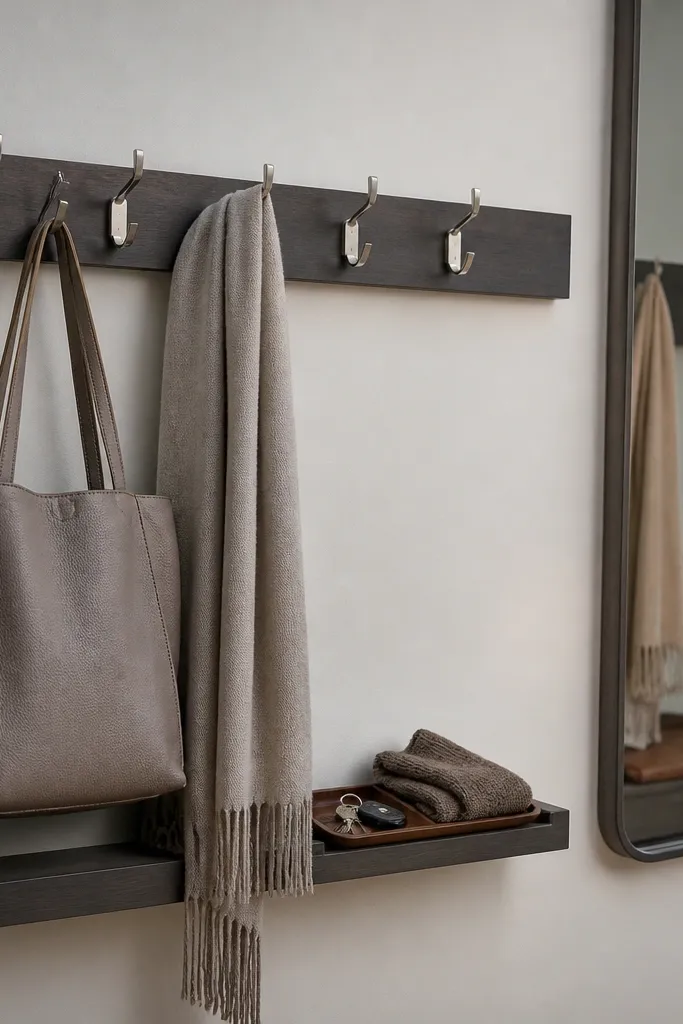
A clean entry wall near the drawing room changes how the whole space feels because it stops jackets, bags, and scarves from migrating onto chairs. The look stays good-looking drawing room interior decor because the wall hardware is neat and the shelf gives you a place for small items that otherwise clutter. Choose hooks in a consistent finish and keep the shelf minimal. This idea works when your drawing room looks styled but gets messy daily.
Find a wall section near the door or near the sofa that receives the mess. Mark stud locations and mount a slim shelf board with hidden brackets, then install hooks underneath at a consistent height. Use anchors if you’re not hitting studs, but only with hardware rated for the weight. Paint or stain the shelf to match your frames and add a small tray on top for keys.
Use one hook style across the wall — even if you add more later, keep the same line.
Don’t mount hooks too low; bags end up on the floor and the wall stops solving the clutter.
29. Modern wall clock with a matte finish and large numbers
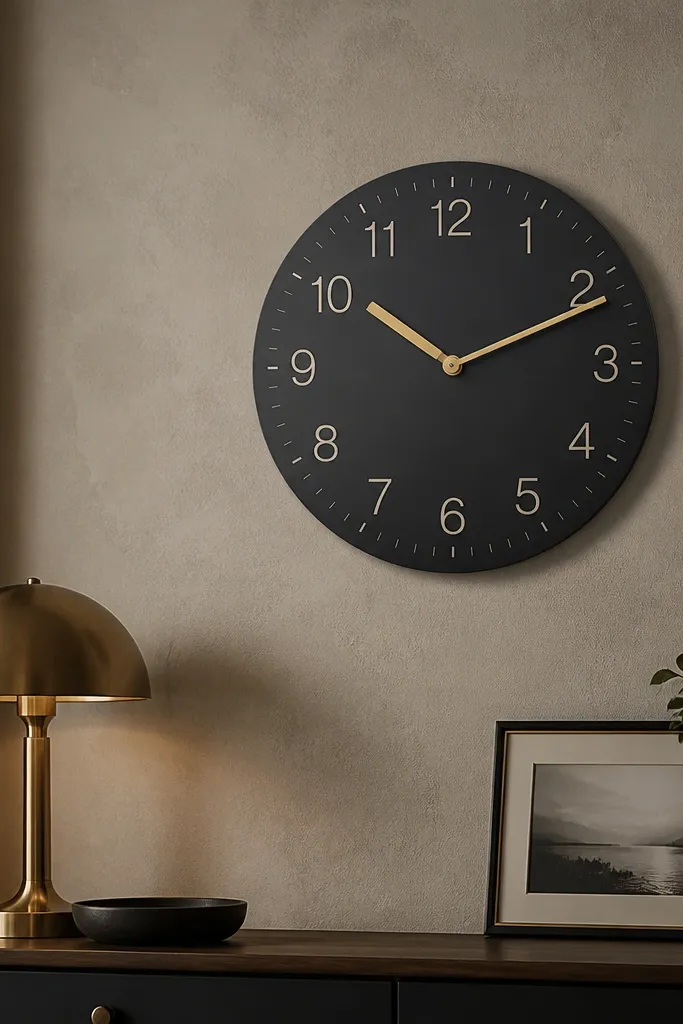
A wall clock sounds boring, but the right one cleans up a drawing room wall and adds a functional focal point. Large numbers and a matte finish look better than tiny clocks because they read from across the room and don’t create glare. This idea works when you have a blank wall near seating and you want something that looks styled but still useful. Keep the clock centered under a mirror or art so it doesn’t look like an afterthought.
Measure the wall and choose a clock diameter that’s roughly 40-55 cm for most drawing rooms. Pick a matte finish and a contrasting number color so it’s legible in daylight. Mount at a height where the center aligns about 150-160 cm from the floor. If you’re making a custom clock, attach a printed number decal to a flat board, seal it matte, then insert a quiet quartz movement behind.
Use a single color — either black and cream or dark brown and sand — so the clock matches your palette.
Don’t place the clock where it reflects light from lamps; glare makes it look messy.
30. DIY framed cork board for small art and notes
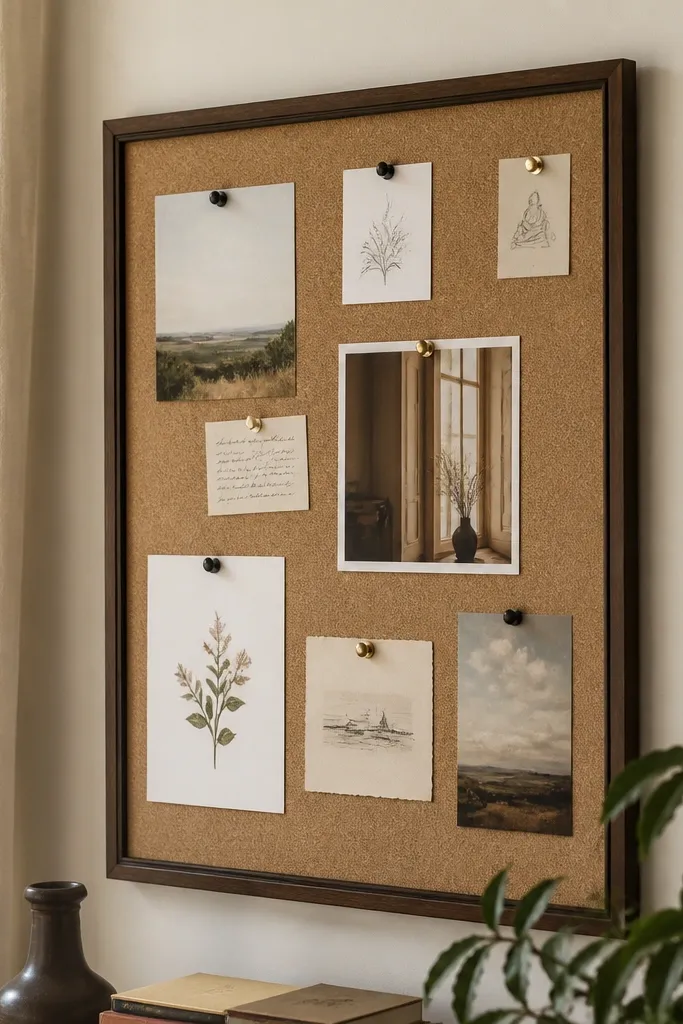
A cork board framed in wood or black metal gives you a functional wall surface that still looks good. It’s a smart DIY for good-looking drawing room interior decor because it replaces scattered notes and random paper with one clean display. Frame it so it looks like wall art, not office storage. This works when your drawing room also plays a “planning” role and you want the wall to stay neat.
Buy a cork sheet size that fits your wall space, then build a slim frame around it using 2-3 cm wide strips. Paint or stain the frame and seal it so it wipes clean. Attach the cork to the backing board with adhesive, then mount the whole piece using two wall anchors. Style pins with intention: add one small calendar card and two or three art prints, not dozens.
Use push pins in one metal finish, like brass, so the board looks consistent.
Don’t pin full-size pages that cover the cork — it turns into a paper wall quickly.



