
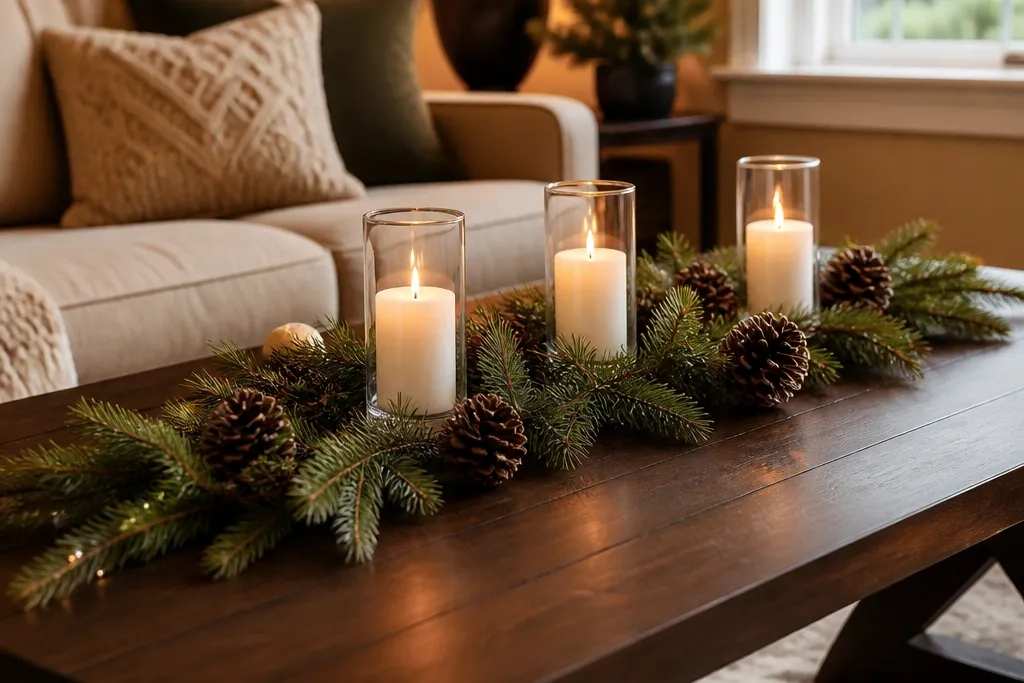

1. Pine Runner + Mini Glass Candle Trio
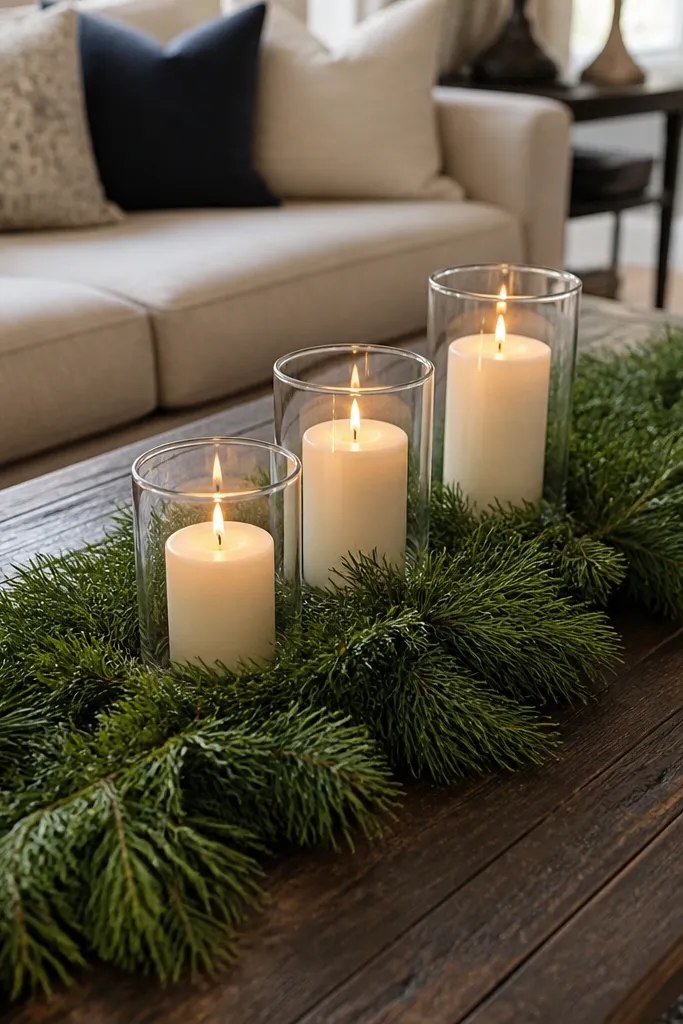
This is the quickest “styled” coffee table Christmas look because a runner already creates a long, intentional line. Add three glass candles in different heights and you get depth without adding more clutter. The runner hides small messes like stray ornament hooks and keeps everything aligned. Go with faux pine that has visible needles, not thin wisps, because the texture shows in photos even in warm indoor light. This setup works best on rectangular tables and on round tables if you rotate the runner diagonally.
Editor's notePut a strip of non-slip shelf liner under the runner so it doesn’t creep when you move coasters.
Start by cutting a faux pine runner to match your table length, leaving 2-4 inches of space on each side. Tie a thin red ribbon around the center of the runner, then separate the ribbon ends so they lie flat. Place a candle at each third of the runner using small adhesive felt pads under the glass bases. Finally, add one tiny evergreen sprig behind the middle candle so the candles look “grown” from the runner.
Skip thisAvoid using candles that are all the same height — the arrangement will look flat.
2. Kraft Paper Gift Stack on a Tray
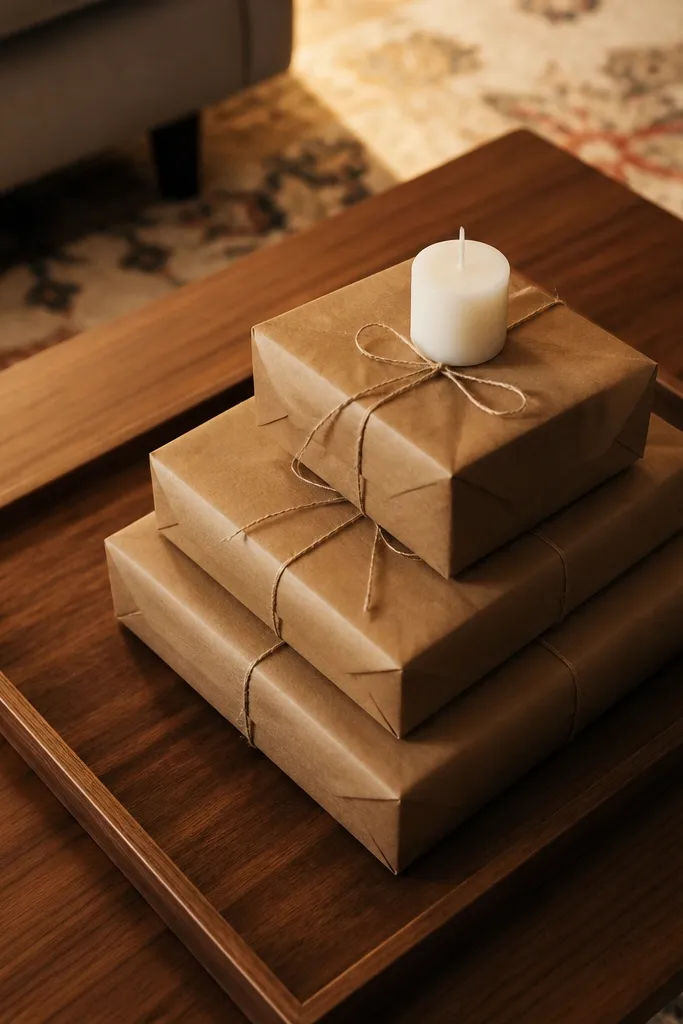
If you want Christmas decor that looks tidy and graphic, a tray with a paper “gift stack” does it. Kraft paper looks warm and expensive when it’s crisp and tied neatly, and it photographs well against darker wood tables. This idea gives you instant height and a clear focal point without needing fragile glass ornaments. It also makes it easy to swap themes later — change the ribbon color and you’ve got a new look. It works especially well if your table already has books or a small plant you don’t want to move.
Editor's noteUse a paper cutter or ruler and blade for straight folds; sloppy edges ruin the expensive look.
Cover a small stack of shoebox-sized cardboard pieces with kraft paper, then fold the edges tight to keep corners sharp. Tie a single satin bow on top using wire-edged ribbon so you can shape the loops. Place the “gifts” on a shallow wooden or metal tray, with the largest piece in the back and the smallest in front. Finish by tucking one faux pine branch along the tray’s back edge so it frames the stack.
Skip thisSkip glittery stickers on the paper — they read cheap and reflect harsh light.
3. Three-Ornament Centerpiece in a Clear Bowl
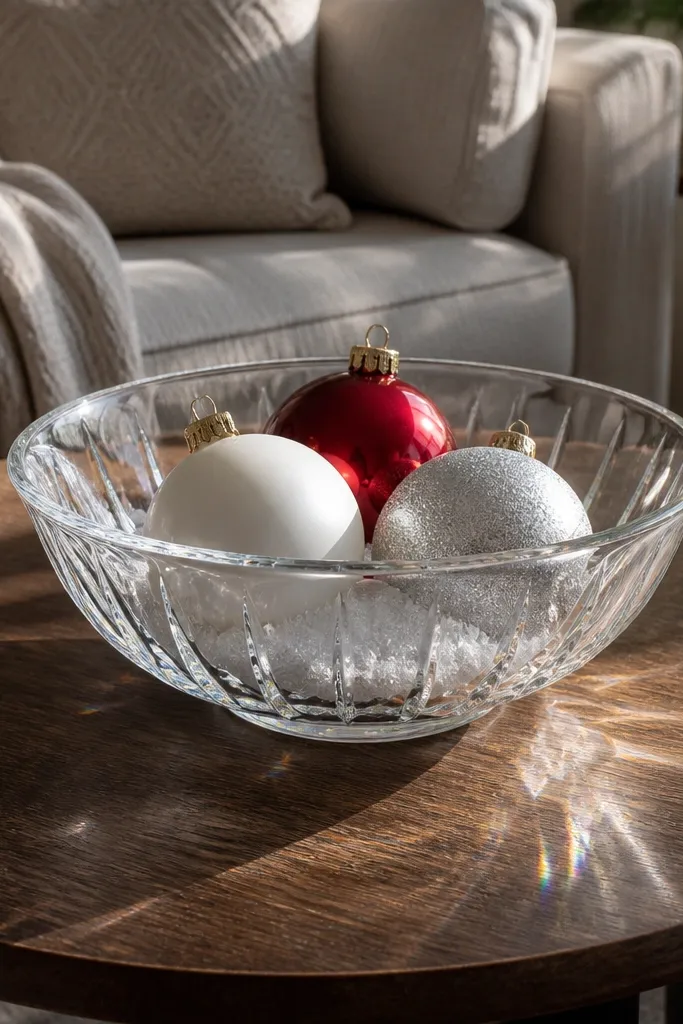
A clear bowl with just three ornaments looks intentional instead of crowded. The bowl traps light and makes the ornaments feel “curated,” even when you’re using budget ornaments. This setup is great for round tables because the bowl gives you a natural center anchor. Choose ornaments with different textures — one matte, one glossy, one bead or knit style — so the light catches in multiple ways. The evergreen sprigs fill the negative space without taking over the table.
Pick a clear glass or acrylic bowl that’s about 10-14 inches wide. Arrange evergreen sprigs around the inner rim first, then place one ornament in the center and two slightly behind it at a gentle angle. Add a few pine needles or dried orange slices in the gaps so it looks full, not floating. If the ornaments slide, use a dot of hot glue on the sprig base only, then let it cool before setting.
Warm up the room light first — ornaments look best under amber bulbs, and you’ll see gaps immediately.
Don’t use a dozen tiny ornaments; three larger pieces read better from across the room.
4. Felt Snowdrift + Candle Cloche Look
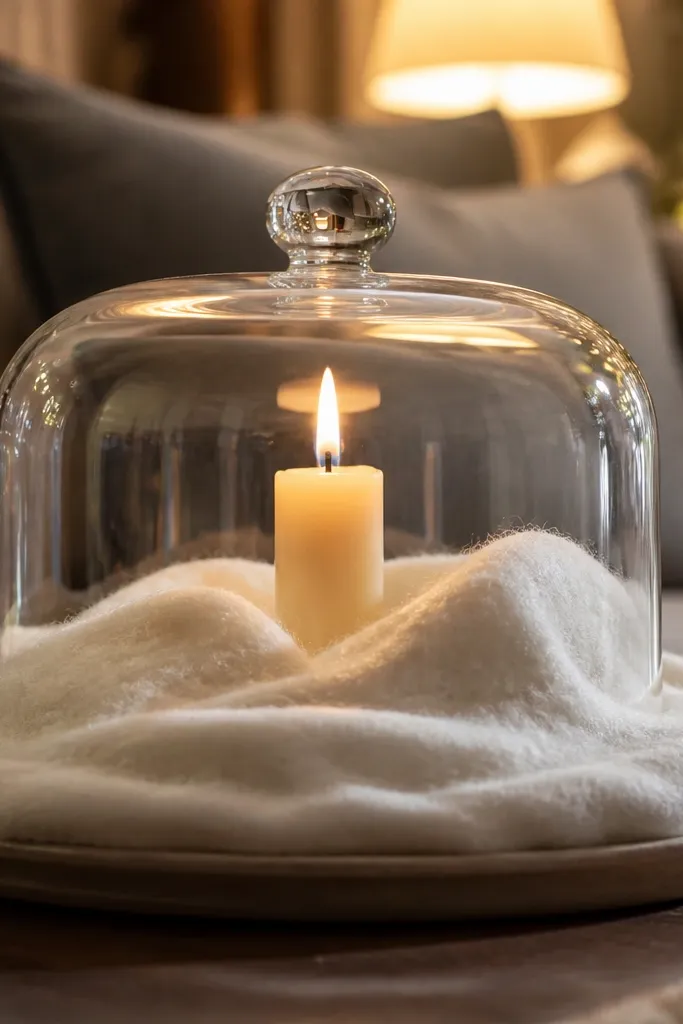
Felt snowdrifts give you a soft, wintery look that feels cozy and looks good in photos. Under a glass cloche, a single candle reads like a mini display instead of a random candle. This is ideal if your table space is limited because it concentrates everything into one tidy footprint. Choose off-white or light gray felt so it doesn’t look stark under warm lighting. This also works well on tables that already have a centerpiece — it adds winter texture without competing.
Cut a felt base shaped like a shallow mound, about 12-16 inches wide for most coffee tables. Stitch or hot-glue the edges for a clean silhouette, then place a small candle on top of a circle of felt to protect the glass. Set the cloche over the candle, leaving 1-2 inches of clearance so the glass vents safely. Add a thin faux pine sprig tucked under the cloche rim for a “snow on evergreen” vibe.
Use a battery tea light for the cleanest look if you’re worried about heat around felt.
Avoid using thin craft felt — it wrinkles and looks uneven under the cloche.
5. Vintage Book Stack with Ribbon Spine Tie
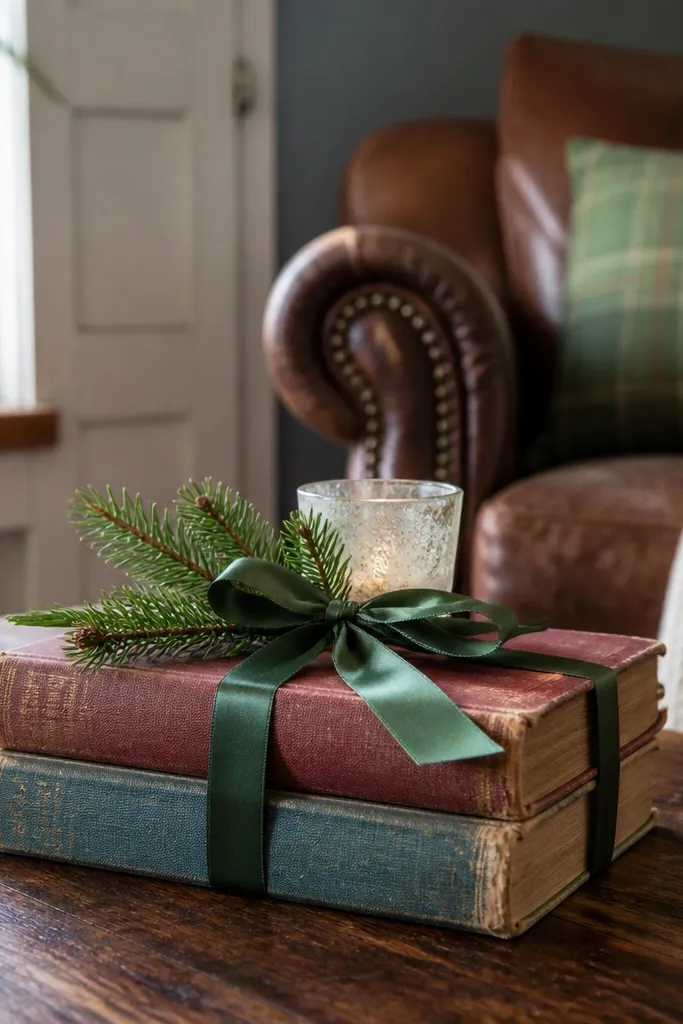
This one looks like you spent money at a vintage shop because old book spines have built-in texture and color. Stack two or three books, then tie them with ribbon so the bundle looks intentional and not like clutter. Add a small candle or tiny pine sprig on top and the stack becomes a centerpiece without needing extra items. It’s also one of the best budget options because you’re using what you already have, then upgrading it with ribbon and a tray. It works on almost any table shape as long as the stack is stable and not too tall.
Editor's noteIf your books are too modern, cover spines with craft paper cutouts before tying the ribbon.
Choose books with spines that match your color plan — green and cream, or red and black. Stack them so the spine text is visible, then place the stack on a tray or directly on a folded linen napkin. Wrap ribbon around the center of the stack, then tie a bow flat against the spine. Finish by adding one small candle or a miniature evergreen bundle on top using a small piece of floral foam or an adhesive felt dot.
Skip thisSkip tall stacks that reach above your armrest height; they look top-heavy and block sightlines.
6. Brown Boots Candle Holder Hack with Reused Jars
This is a clever way to get that rustic Christmas look without buying matching candle holders. Reused glass jars become “boots” with a coat of brown paint and a ribbon tie, then you fill them with small LED candles and pine trimmings. The result looks designed because the jars match in color and shape. It also keeps the table safe since glass jars can handle heat better than flimsy plastic. This works best when you use three jars in a row on a tray.
Editor's noteUse LED candles with a warm flicker; real flames in jars can look cramped and get drafty.
Clean and dry glass jars, then paint them brown with spray paint meant for glass. Once dry, tape a simple boot-like shape on the front using painter’s tape and add a darker brown accent stripe. Tie a small burlap or satin ribbon around the jar neck. Place LED tea lights inside, then wedge a few faux pine sprigs around the candle so they sit above the light line.
Skip thisDon’t skip primer if your jars have glossy labels — paint peels and ruins the look.
7. Red and Cream Striped Runner with Pine Cones
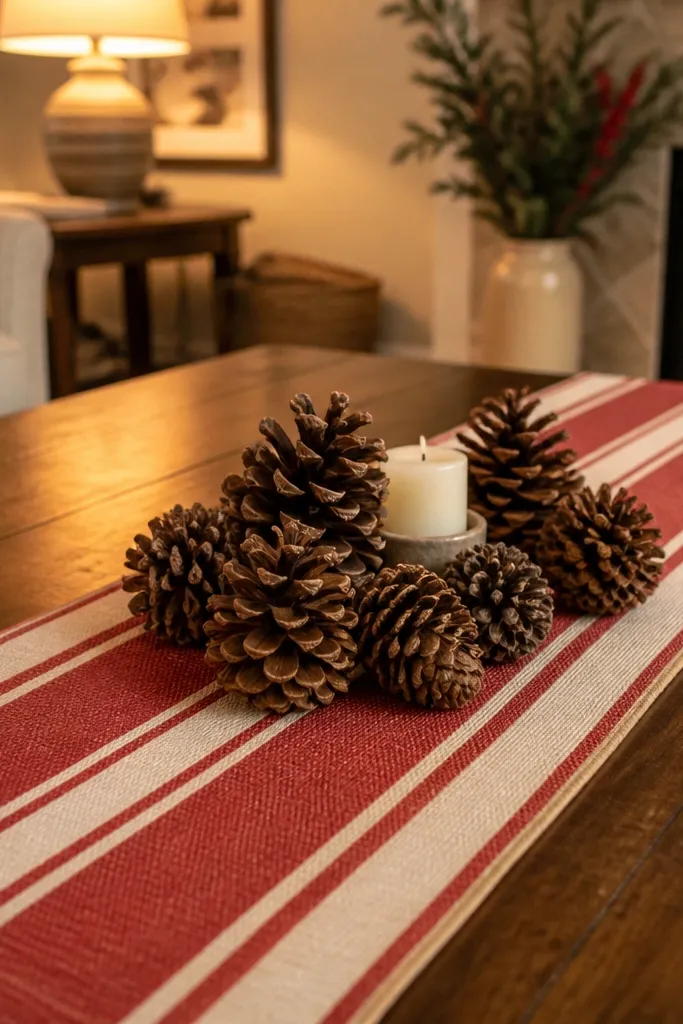
A striped runner gives you instant Christmas energy, and pairing it with pine cones adds real texture. This look works because stripes provide structure while the cones add organic shapes. Use a small candle near the center so the light warms up the red tones. Keep it simple: one candle, a cluster of 6-10 pine cones, and a couple of evergreen sprigs. It’s photogenic from straight on and from the side because stripes lead the eye inward.
Cut the runner to length, then iron it or press it under a heavy book to remove wrinkles. Place the runner so it’s centered, then set a candle holder at the middle. Arrange pine cones in a loose semicircle around the candle, mixing sizes so it looks natural. Add two or three evergreen sprigs tucked behind the cone cluster so the greenery reads as one unit.
If your cones look dusty, wipe them with a dry brush so they look clean under indoor light.
Avoid using too many cones; a tight pile looks messy instead of styled.
8. Monochrome White Ornament Cluster on a Trivet
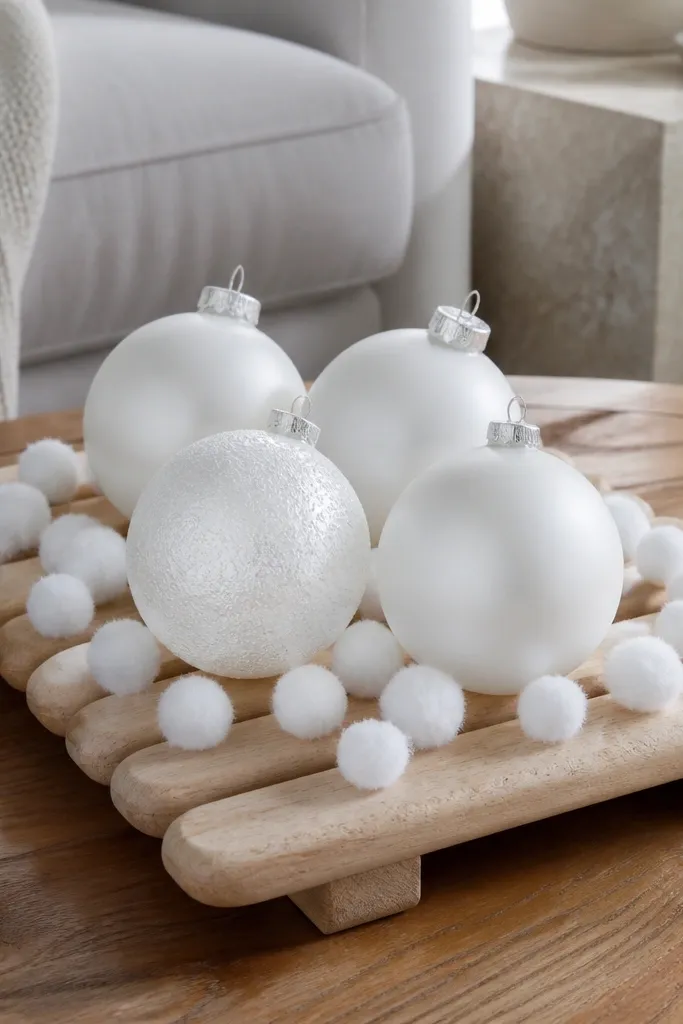
Monochrome looks expensive because the eye isn’t fighting color. A cluster of white ornaments on a trivet gives you a raised display that stands out on wood tables. Add faux snow or white craft pom-pom “snow” to fill gaps and make it look like it belongs together. This idea is perfect if your home already has neutral decor and you don’t want red everywhere. It also works well for small tables because the cluster stays compact.
Choose a wooden or metal trivet about 8-10 inches wide. Build a base by placing a small mound of faux snow or white craft stuffing in the center. Set 5-7 ornaments on top, mixing sizes and finishes like matte, glossy, and beaded. If ornaments won’t stay put, anchor the bottom ornament with a dab of hot glue to the snow base.
Use ornaments with different textures — matte vs shiny — so the cluster doesn’t look flat.
Skip silver and gold mixed in; monochrome looks best when it stays one family.
9. Mini Wreath Swag Over the Front Edge
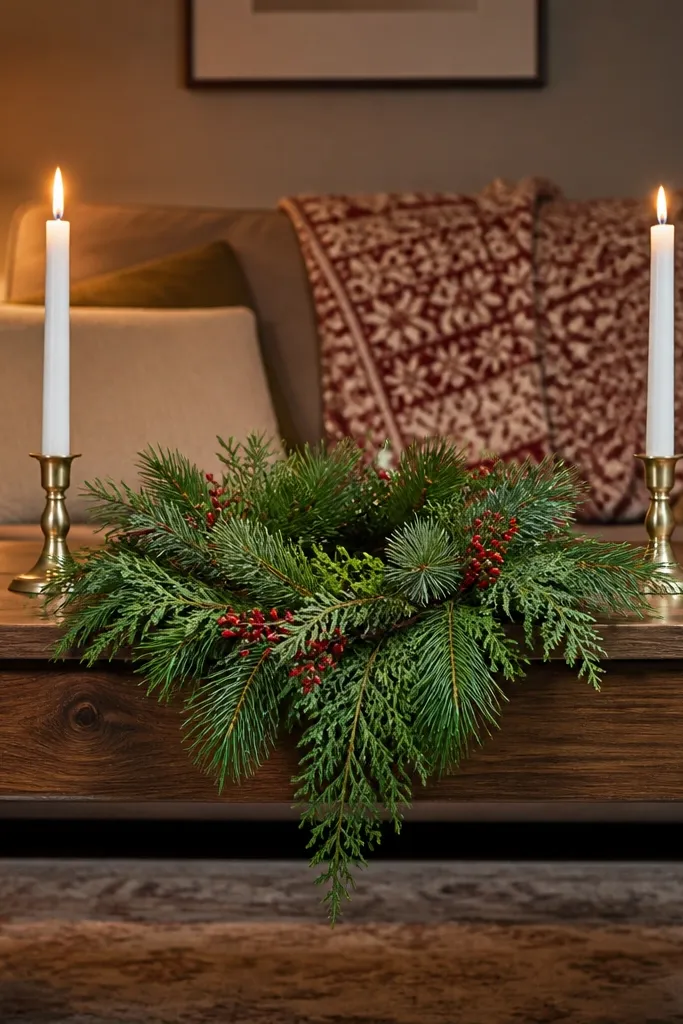
Most people decorate only the center of the table. This one uses a mini wreath swag draped slightly over the front edge, which makes the whole table look dressed from the couch. Pair it with two taper candles in matching holders so the wreath becomes a frame. The best part is how photo-friendly it is — it creates a strong silhouette. Use it on tables with open front space where a hanging element won’t block walking paths.
Editor's noteAnchor the wreath with removable Command-style hooks or a ribbon tie so you can take it down easily.
Buy or DIY a small wreath (10-14 inches) using faux greens. Attach a piece of fishing line or ribbon to two points on the back, then hang it over the front edge so it sits 1-2 inches above the tabletop. Place two taper candles at the left and right of the table center, spaced evenly. Tuck a few pine picks behind the wreath so it looks fuller where it overlaps the table.
Skip thisDon’t hang it too low — you want it visible, not in the way of mugs.
10. Cinnamon Stick and Orange Slice Tray
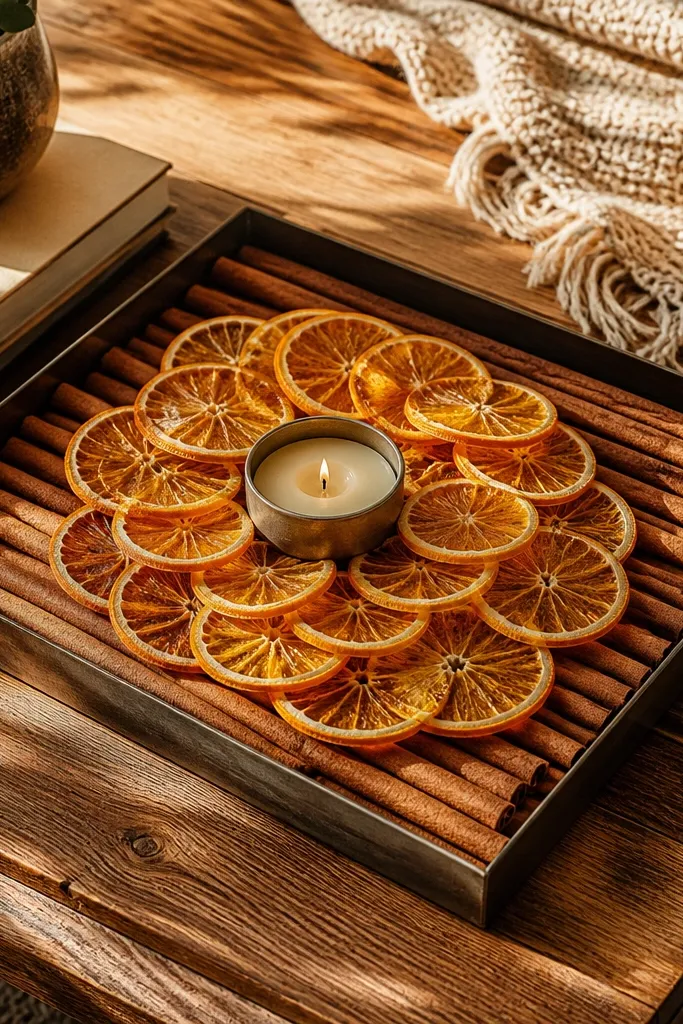
This decor smells like Christmas and looks like it belongs in a cozy cabin, but it’s still clean and structured. A tray keeps everything contained, and cinnamon sticks give you straight lines that look tidy on camera. Dried orange slices add warm color and a natural pattern. Put a small candle in the center so the tray reads as one unit. It’s perfect for kitchens or living rooms where you want holiday decor that feels grounded, not just decorative.
Editor's noteSeal dried orange slices with a light mist of clear craft sealant if they shed too much.
Choose a rectangular tray, then line it with parchment or a light fabric so oils don’t stain. Arrange cinnamon sticks in a fan pattern, then place orange slices in the negative spaces. Add a small pillar candle or LED candle in the middle, and tuck two or three evergreen sprigs around the candle base. Finish by tying a thin twine bow around one cinnamon stick so the tray looks styled, not random.
Skip thisAvoid using fresh citrus — it gets wet and turns the tray into a mess.
11. Gold Rim Mirrored Tray with Red Bauble Mini Tree
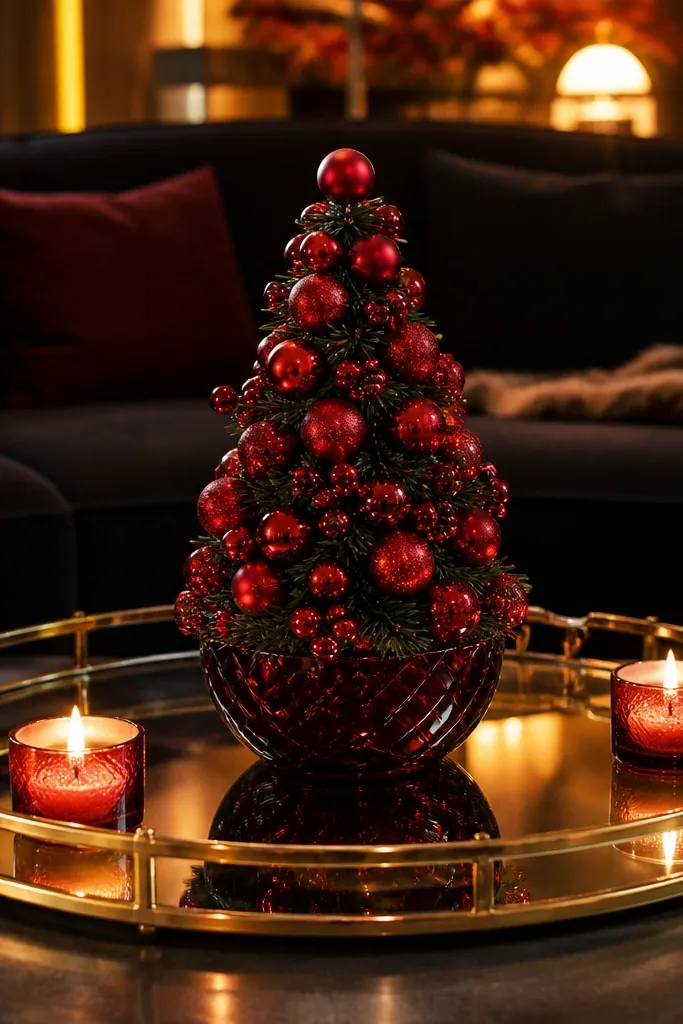
Mirrored trays are a cheat code for holiday decor because they multiply light and make small items look bigger. A mini bauble tree on the tray gives you height and a clear holiday focal point. Use red ornaments so the reflections look warm, not icy. Add two small candles at the tray corners and the whole arrangement looks symmetrical. This works best on low, wide coffee tables where you want the centerpiece to read clearly from multiple angles.
Editor's noteUse ornament hooks with a tight grip so the baubles don’t shift when you move the tray.
Pick a mirrored tray about 18-24 inches wide. Place a small foam cone or DIY styrofoam base in the center and cover it with red ornaments using wire hooks. Add faux pine around the base so the tree looks rooted. Set two small candles near opposite corners of the tray and keep the ornament cluster centered so it doesn’t tip the look.
Skip thisSkip silver ornaments with red if your mirrored tray is already cool-toned; it can look off.
12. Tealight Line-Up in a Row of Mason Jars
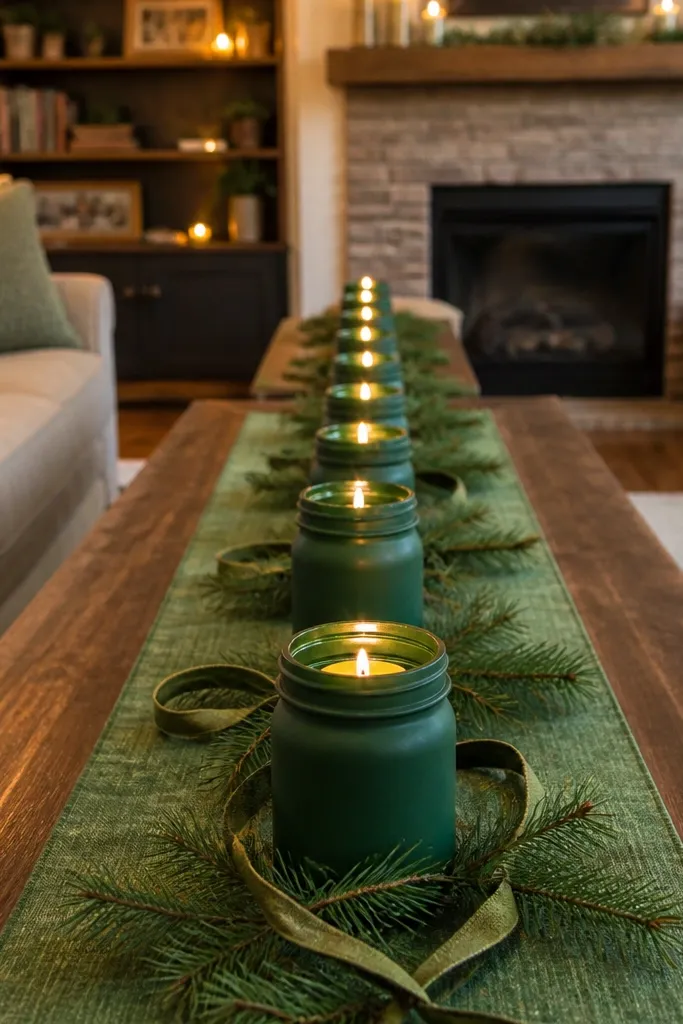
A line-up gives you order, and order looks expensive. Mason jars are cheap, and painting them the same color makes the whole display feel coordinated. Add pine picks and a ribbon tied across the runner and you’ve got a modern Christmas look that still feels warm. This is one of the best options if you host people often, because the candles sit low and the jar bases keep everything stable. It also works well on narrow coffee tables where big centerpieces feel crowded.
Editor's noteUse the same LED candle brand and color temperature across all jars so the glow matches.
Lay a linen runner lengthwise down the center of the table. Paint 5-7 small mason jars matte white, cream, or soft gray, then let them dry fully. Place LED tea lights inside each jar and arrange them in a straight row on the runner. Tuck a few pine sprigs between jars and tie a thin ribbon across the runner ends to connect the whole arrangement.
Skip thisDon’t mix jar heights; a staggered row looks accidental unless you’re intentionally building a tiered design.
13. White Linen Napkin Fold with Evergreen Center Knot
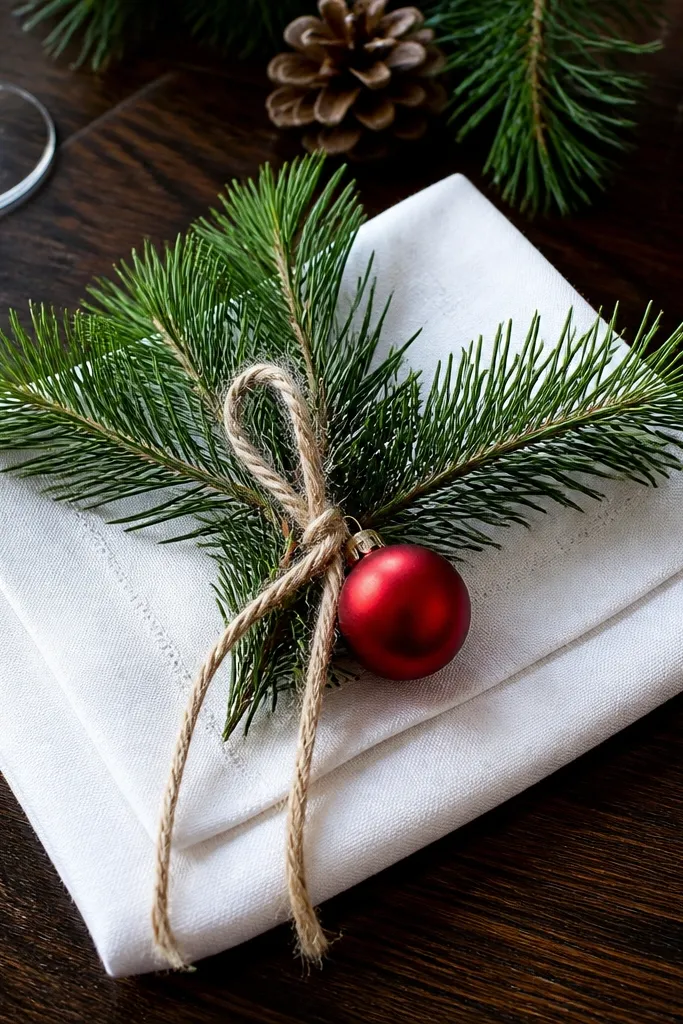
This looks like a restaurant table, but it’s doable at home. A folded linen napkin acts like a base that makes your decor look crisp and intentional. Add an evergreen center knot — a small bundle of pine tied with twine — and you get a strong holiday focal point without a big centerpiece. The white linen also makes red and green pop, especially under warm lights. It works best if you have a coffee table with a simple surface and you want the decor to feel clean rather than busy.
Fold a large white linen napkin into a rectangle, then roll it lightly so it forms a neat base pad about 10-14 inches long. Tie a small evergreen bundle with twine and place it on top, centered. Add one small ornament or berry pick tucked into the knot area. Secure the napkin base with a strip of non-slip liner under it so it stays flat while you move the setup.
Press the linen with a hot iron or steamer before folding so it holds shape.
Avoid thick, fuzzy fabrics as the base; they look messy once you add greenery.
14. Layered Tray with Wooden Beads and Mini Ornaments
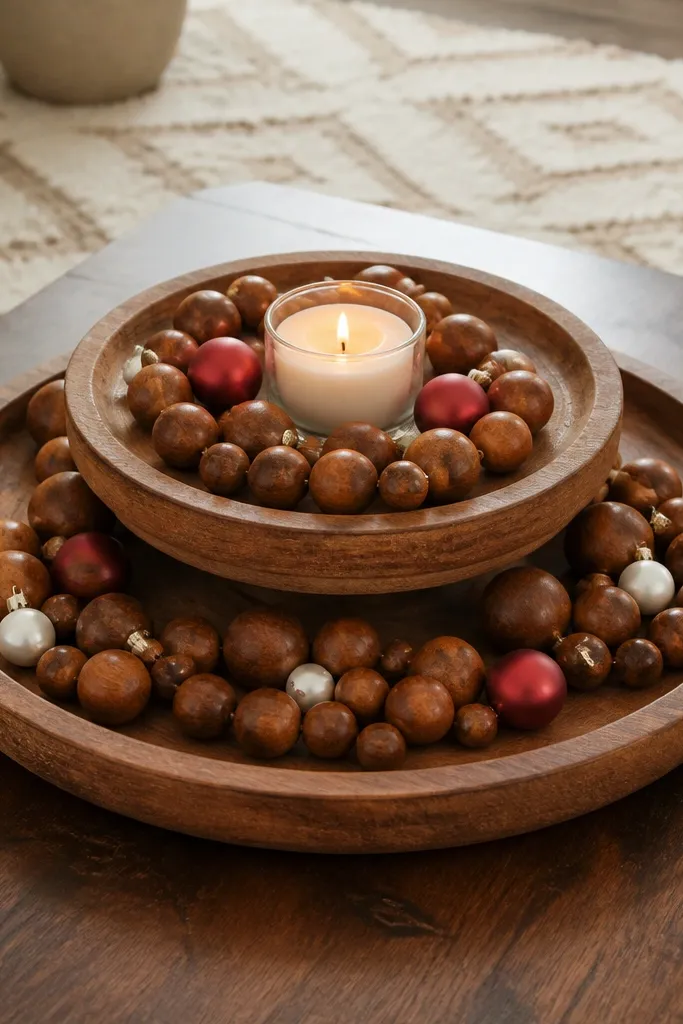
Layered trays look good because you get height and a clear boundary. Wooden beads add warmth and movement, and mini ornaments bring the Christmas cue without overwhelming the table. This is a smart budget move if you already own a few small ornaments but don’t have enough for a full centerpiece. The trick is using a tray insert so the beads don’t spill and the arrangement stays tidy. This works on round and square tables, especially if you want something that looks styled but not heavy.
Editor's noteUse a tray liner that matches your decor color — cream felt makes everything look cleaner.
Pick a shallow tray and line it with a piece of felt or fabric cut to fit. Pour or arrange wooden beads in a loose mound, then place a small candle holder at the center. Nest mini ornaments into the beads so they sit upright — use 6-9 ornaments for a visible cluster. Top with one sprig of pine or eucalyptus-like greenery if you want a little extra texture.
Skip thisSkip loose beads directly on glass surfaces; they roll and your “mound” becomes a mess.
15. DIY Snowy Pine Branches in a Tall Vase
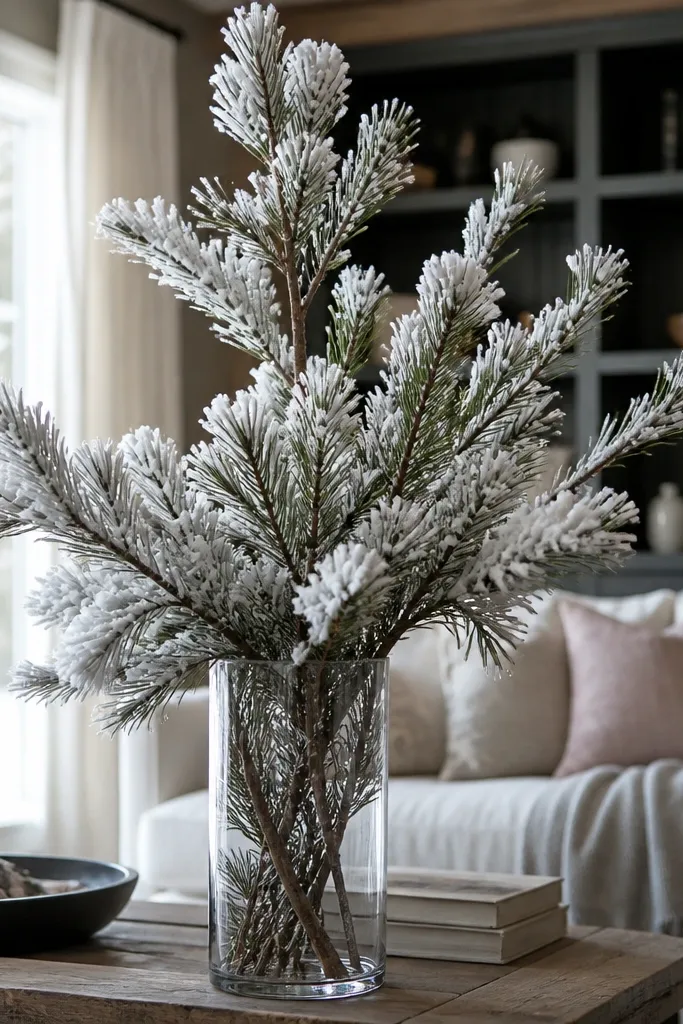
A tall vase arrangement gives you the vertical hit your table needs, and it reads well even when the table is otherwise simple. Frosted pine branches add a snowy look without needing real snow. This idea is budget-friendly because you can use a small vase and just a few branches, then “snow” them with craft materials. It looks great on tables near windows because light passes through the vase and makes the frosted texture glow. Choose a vase size that’s tall enough to be visible above your tabletop but not so tall it blocks faces when you sit.
Editor's noteSpray the faux snow lightly with a brush or mist so it doesn’t clump into hard chunks.
Trim faux pine branches so you have 3-5 stems that reach about 10-14 inches above the vase rim. Place them in a tall vase with floral foam or tightly packed zip-tied stems at the base. Add faux snow powder sparingly, focusing on branch tips so it looks like it settled naturally. Finish with a single ribbon loop around the vase neck, then place the vase on a tray if your table is polished or slippery.
Skip thisAvoid covering every inch in snow; it turns into fake fluff and looks messy.
16. Red Plaid Bow + Candle Lantern in Kraft Base
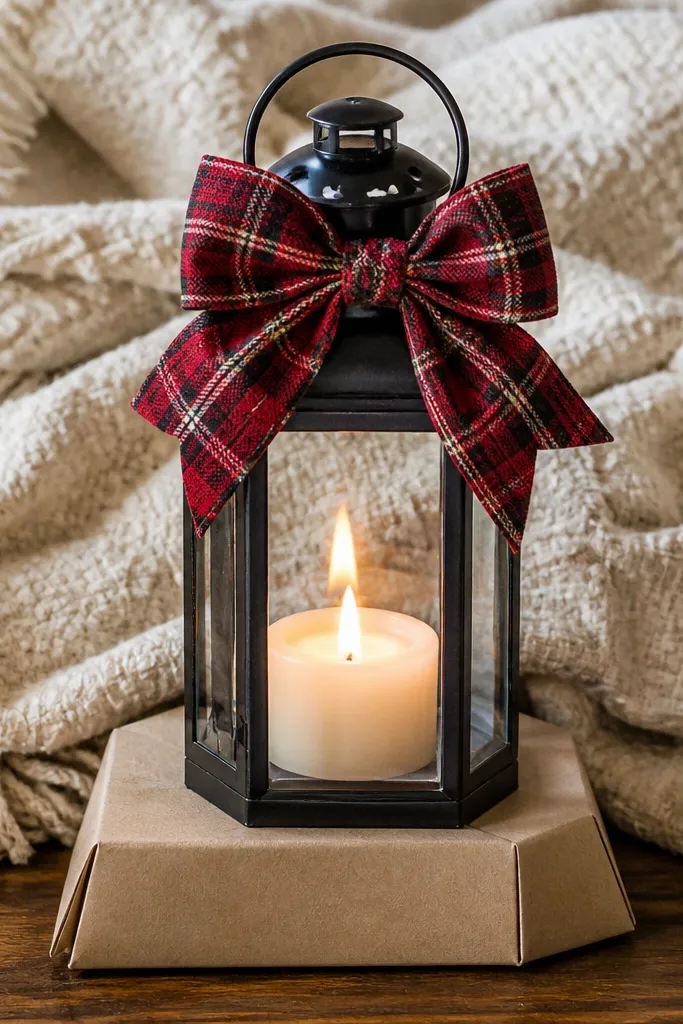
This gives you that classic Christmas lantern vibe without buying expensive lanterns. A lantern on a kraft paper base looks warm and grounded, and the red plaid bow makes it feel clearly holiday. The lantern brings a focal light source, and the kraft base keeps the decor from floating visually. This is a strong choice if your table decor usually looks scattered because lanterns anchor the scene. It also works well in living rooms with neutral walls since the lantern silhouette reads cleanly.
Place a lantern or candle holder on a flat piece of kraft paper cut into a circle or square base. Fold the kraft paper edges down slightly so it forms a neat tray-like platform. Tie a red plaid bow and attach it to the lantern handle or to two points on the lantern frame with wire. Add a small evergreen sprig at the lantern base so it looks connected to the kraft paper, not placed on top.
Use wire-edged plaid ribbon so the bow holds shape without sagging.
Skip oversized bows; if the bow hangs too low it blocks the view of the lantern.
17. Green Glass Bottle Group with White Berry Picks
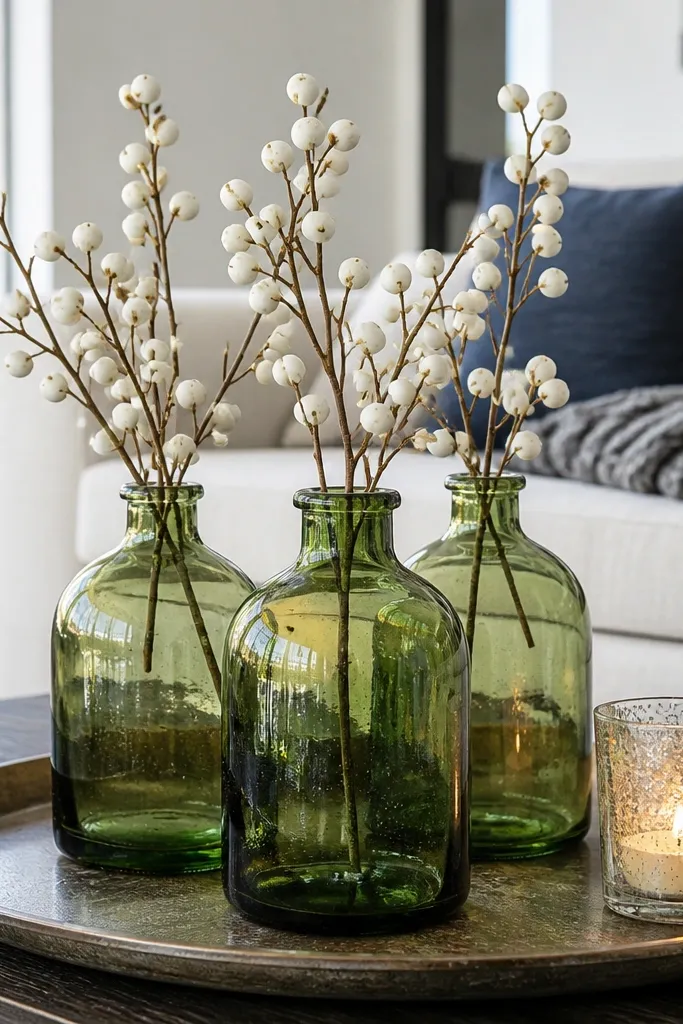
Green glass bottles feel very holiday-modern when you keep the palette tight. Group three small bottles on a tray, then add white berry picks to brighten the arrangement. The glass reflects indoor light and makes the table look styled even with simple materials. This works especially well for budgets because bottles are often available cheap at thrift stores, and you can keep the rest minimal. It’s also a good option if you hate bulky centerpieces; bottles stay slim and don’t take over your coffee table.
Find three small green glass bottles and remove labels with rubbing alcohol. Place them on a tray lined with a cream cloth or kraft paper so the bottles read clearly. Insert white berry picks into each bottle, trimming stems so the berries sit just above the bottle opening. Add one pine pick across the top between bottles to connect them visually, then secure the tray to the table with a non-slip pad underneath.
Trim berry picks at angles so the berries sit at different heights and avoid a flat look.
Don’t mix bottle shapes wildly with no color tie; keep them all green for cohesion.
18. Mini Wreath Place Cards on a Tray
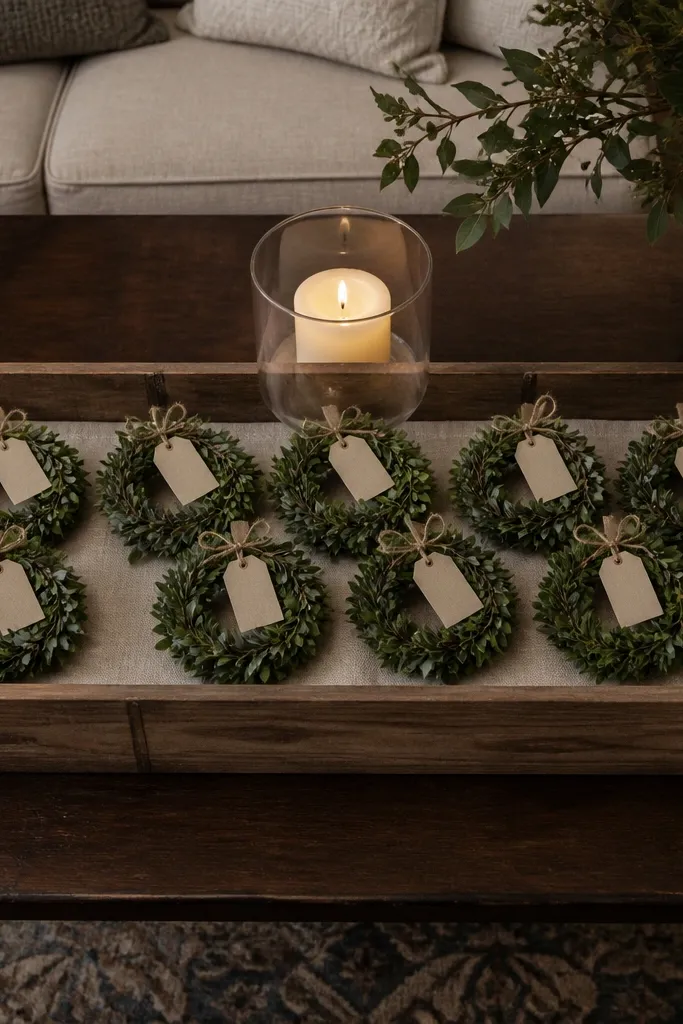
This is a clever way to make your coffee table look holiday-ready without building a huge centerpiece. Mini wreath place-card style pieces create a repeating pattern, which photographs well and feels intentional. Pair them with a candle so the tray has a clear focal light. It’s also practical if you host — you can use the place-card pieces as actual serving markers later. Keep the palette to two colors so it stays clean: evergreen plus red, or evergreen plus cream.
Editor's noteUse tags that are thick enough to stand on their own; flimsy cardstock collapses and ruins the symmetry.
Make or buy 6 small place-card sized wreaths using faux greenery and a thin foam ring. Attach a small kraft tag to the back with twine so each piece looks finished. Arrange the mini wreaths in a circle on a tray with a candle in the center. Add tiny pine picks between wreaths to fill gaps, then keep the candle low so the tags stay visible.
Skip thisAvoid mixing too many tag colors; it turns into a craft table instead of decor.
19. Glowing Paper Star Garland Centerpiece
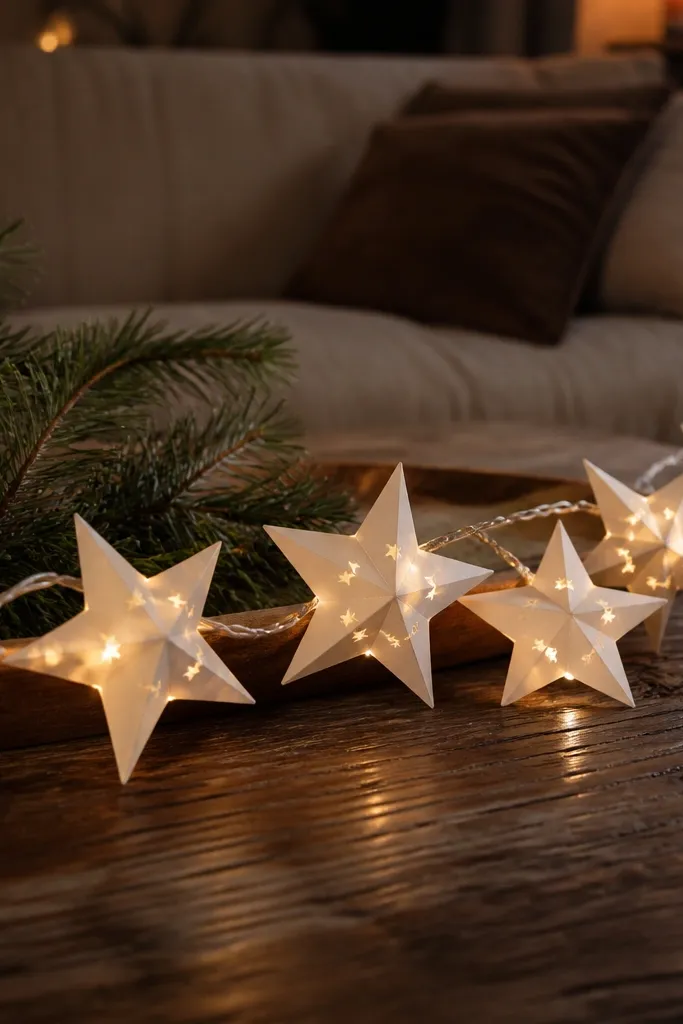
Paper stars sound simple, but laid across a tray with warm lights they look like real holiday decor. This idea gives you movement and sparkle without buying ornaments or glass. The look is especially good on long coffee tables because you can stretch the garland in a gentle curve. It also works if you want something that doesn’t take up a lot of surface area. Choose sturdy craft paper in cream or soft gold so the stars hold their shape and reflect light.
Editor's noteUse warm white lights, not cool white; cool white makes paper look flat and gray.
Fold paper stars using thick craft paper and a simple star template, then punch a small hole at each point. String warm fairy lights through the holes, keeping the battery pack hidden under the tray. Place the garland across a long tray, then tuck evergreen sprigs at both ends so it looks framed. Add a small candle or LED candle near the center to deepen the glow.
Skip thisSkip thin printer paper stars — they sag and look fragile once lights heat them slightly.
20. Monogram-Style Pine Initial on a Small Board
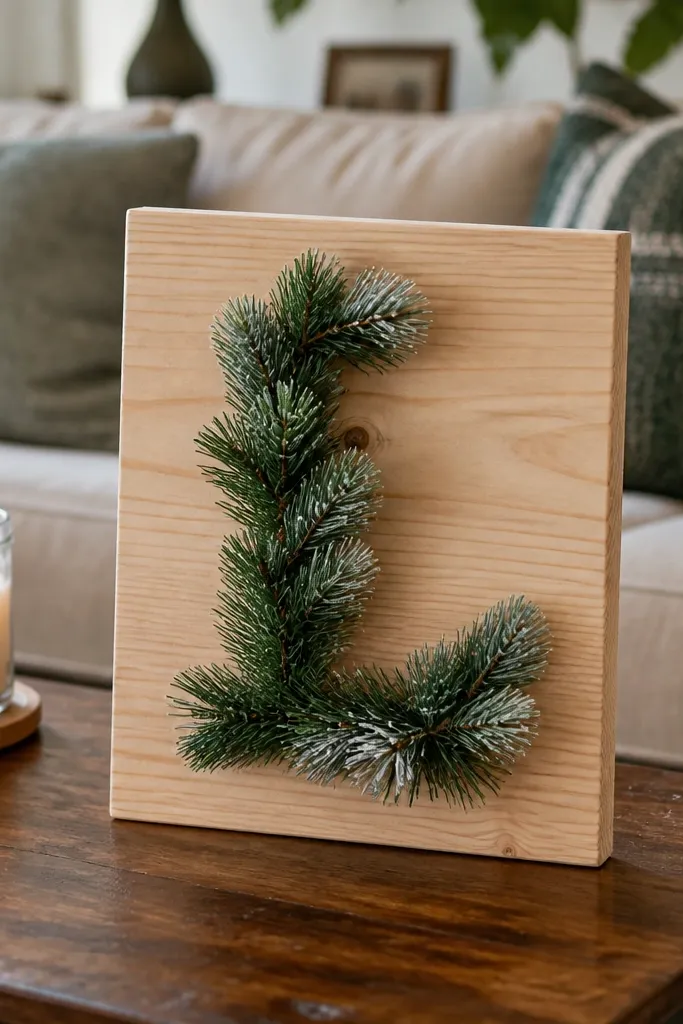
A pine initial is a clean, graphic holiday decor move that looks good even when you’re not doing a full table centerpiece. It gives you a strong focal shape, and you can build it with cheap faux greenery and a scrap board. The board keeps everything flat so there’s no clutter on the tabletop. Use it when you want your decor to look designed but not busy. This also works with changing seasons: swap greenery color later for spring or fall.
Editor's noteUse a stencil and step back every 10 minutes; letters drift quickly when you’re gluing freehand.
Cut a scrap piece of wood or use a small MDF board, then lightly sand the surface. Choose a letter shape and outline it with pencil, then hot-glue faux pine sprigs along the outline to fill the letter. Leave the edges neat so the letter reads clearly from a distance. Tie a small ribbon bow at the top or bottom of the letter and set the board on the coffee table inside a tray or on a folded linen mat for stability.
Skip thisAvoid a too-thin letter made of tiny sprigs; it looks patchy and hard to read.



