
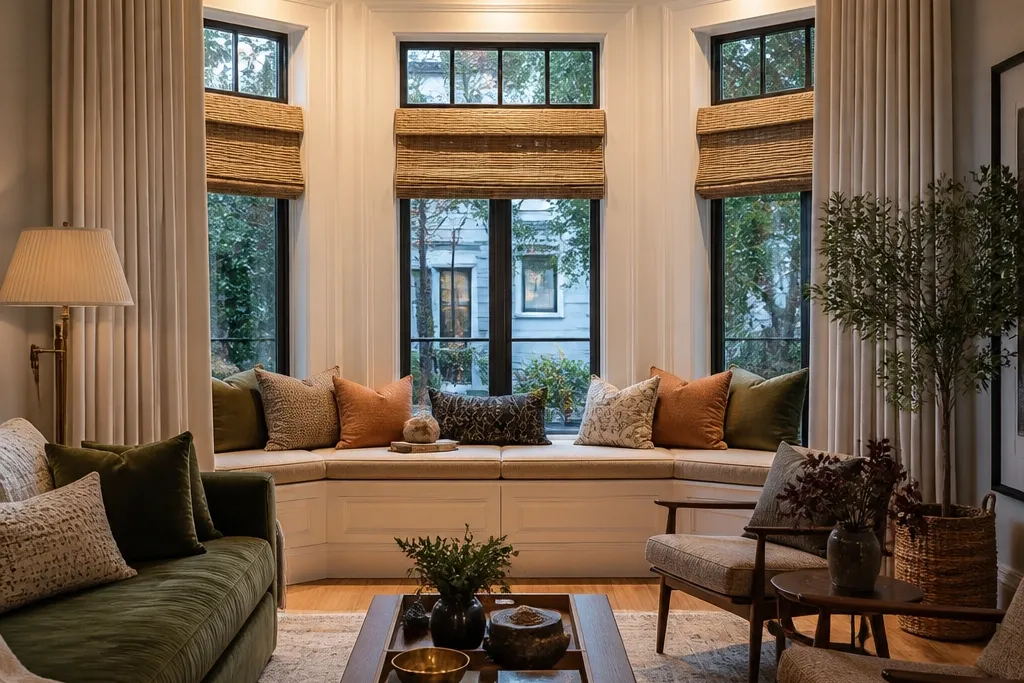

1. Built-in window bench with hinged storage and tailored cushions
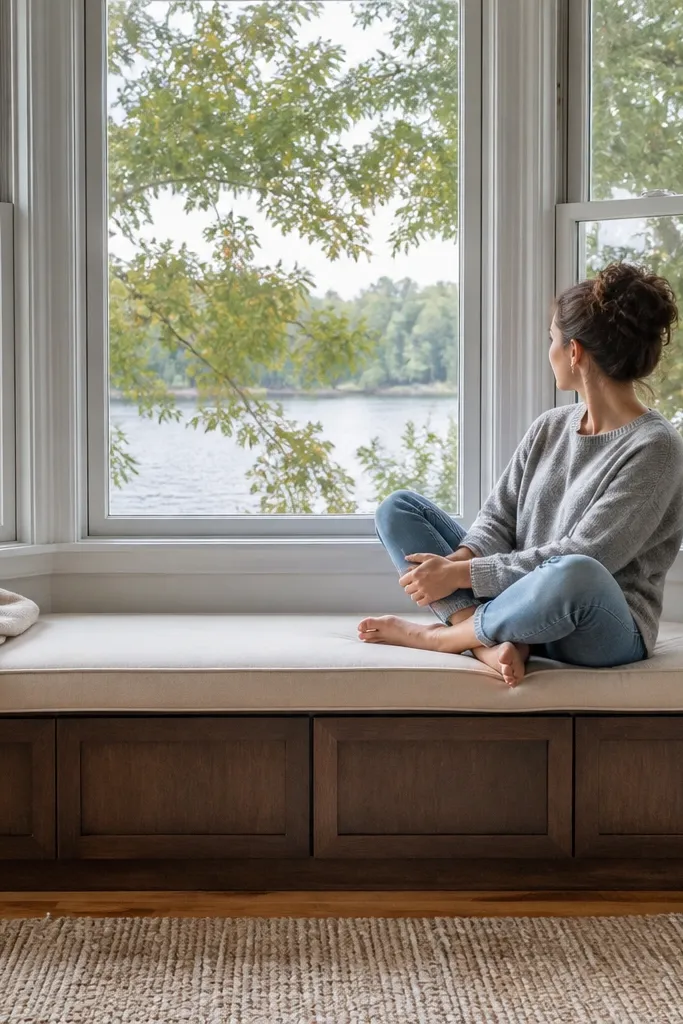
A built-in bench makes a bay window look like it was designed with the house. The dream effect comes from three things: the bench runs straight across the bay footprint, the cushion top is framed so it reads like furniture, and storage keeps the bay from turning into a clutter zone. Use a medium-density wood core for smooth edges, then finish it the same sheen as your baseboards so it looks intentional. This is the best option if your bay sill is low enough for sitting and you want the room to feel cozy even when you’re not actively decorating.
Measure the bay recess depth and the sill height, then decide your bench height so the seat lands about 18-19 inches from the floor. Build a box frame from 3/4-inch plywood for the straight sections and use mitered or angled blocking pieces for the side angles. Install a hinged lid with gas struts if the bench is deeper than 14 inches. Finish with wood filler, sand to 180 grit, prime, and paint with a satin trim paint; wrap the cushion in fabric and add a 1-inch welt to make the edges look custom.
Editor's noteAdd a thin rubber door stop strip on the lid edges so it closes quietly and stays aligned.
Skip thisSkip foam that’s too soft — it collapses and the bench stops reading “tailored.”
2. Framed bay window trim kit with shadow-gap paneling
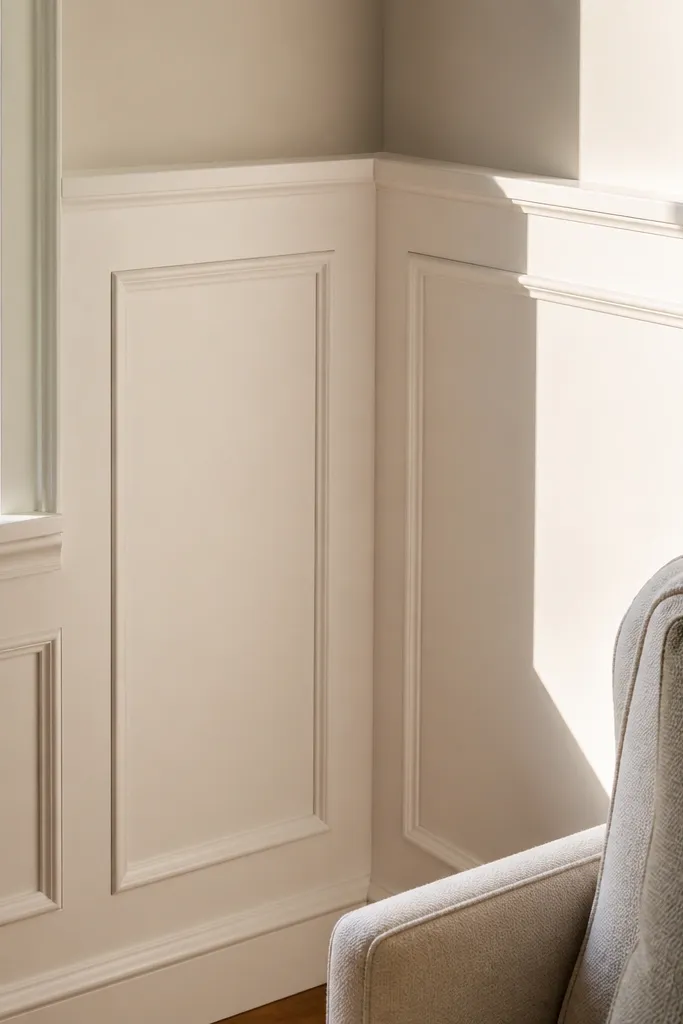
If you want good-looking Bay Window ideas that look expensive fast, frame the bay like built-in millwork. A shadow gap — a thin recessed line between trim and wall — creates depth that reads high-end in photos. Paneling also hides uneven drywall seams around the bay angles, so the whole opening looks crisp. This plan is ideal when you don’t want to build furniture and you want the bay to look architectural even on days you don’t style it.
Choose a trim profile that creates a flat face and a clean reveal; cut 1x2 or 1x3 primed boards to match the bay angles. Create a shadow gap by installing a flat backer strip on the wall first, then mount the outer trim to leave a consistent 1/8-inch gap. Use a laser level or long straightedge to keep the top line level across the middle pane. Fill nail holes, sand, prime, and paint with a satin finish so the shadow gap stays visible.
Editor's noteDry-fit every angle cut and label each piece with painter’s tape so you don’t mix left/right reveals.
Skip thisDon’t rely on caulk to fix gaps — it looks messy in the recess line.
3. Three-way drapery track with ceiling-mount and floor-skimming hems
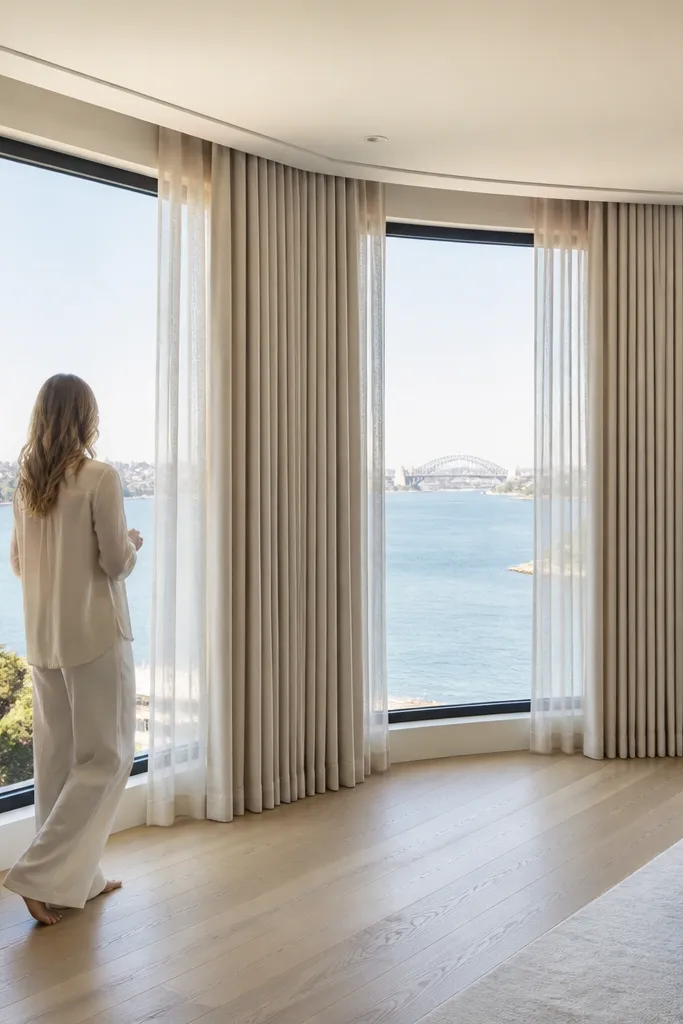
This is the cleanest way to make a bay window look dressed without a tangled mess of separate rods. A ceiling-mount track lets you keep the drapes in one continuous plane, so the fabric falls naturally into the angles. The expensive look comes from floor-skimming hems (not puddles) and a consistent fold spacing across all three panes. Choose a medium-weight lining so the fabric drapes with shape instead of clinging to the bay’s recess.
Mark the ceiling track line 2-4 inches above the window trim so the drape doesn’t visually shrink the opening. Install a three-way track system designed for corners, then hang two panels per side plus one panel for the middle if your track needs it. Use a hem length that lands 1-1.5 inches above the floor for a living room look. Steam the folds and secure the track end stops so the fabric doesn’t creep when you open the bay.
Editor's noteUse ceiling anchors rated for your drywall type; sagging tracks ruin the whole line.
Skip thisSkip thin sheers as your main layer — they show the bay angles and look flat.
4. Custom valance box with upholstered face and boxed sides
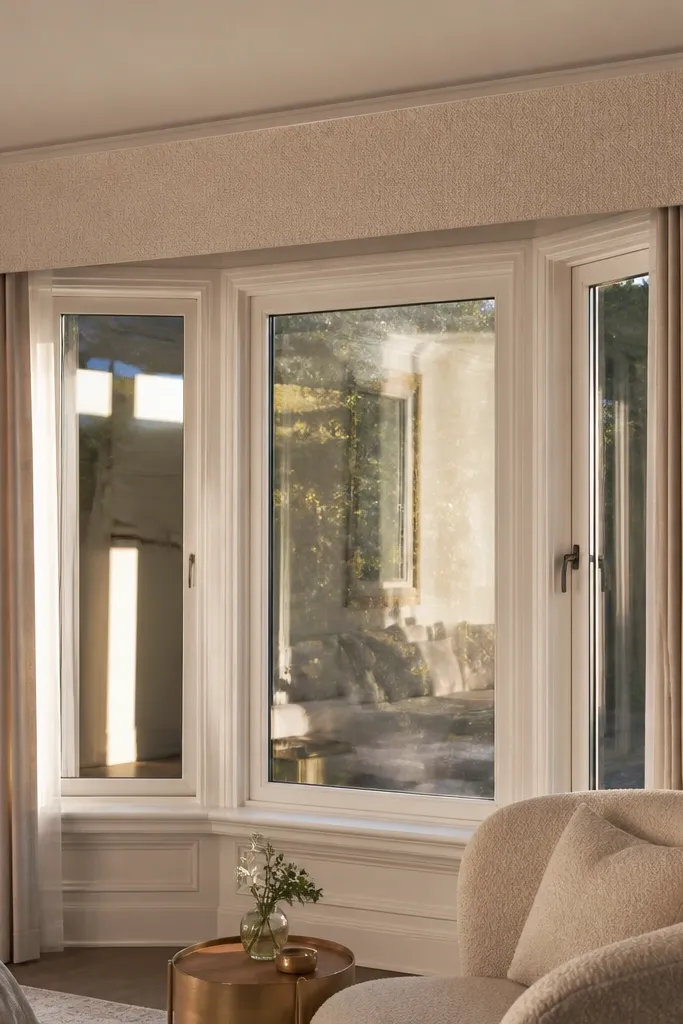
A valance box turns a bay window into a focal point without building a full bench. The boxed sides are what make it look expensive — they hide the track or rod hardware and create a tailored silhouette above the window. Upholstering the face (even with a simple foam backing) adds warmth and texture that photographs well in evening light. This works best when you want a dreamy living room vibe and you like a soft, rounded look rather than sharp trim.
Measure the bay width across the middle pane and add 2-3 inches on each side for coverage. Build a shallow valance frame from 1/4-inch plywood with 1x2 backing strips for the boxed sides. Wrap the front with fabric over 1-inch foam, then staple to the back and cover raw edges with a thin lining fabric. Mount the box to a French cleat or directly to studs, then add a blackout lining panel if you need light control.
Editor's noteUse a fabric with a directional weave or subtle texture so the valance reads luxurious from different angles.
Skip thisDon’t mount it too low — keep the bottom edge at least 1-2 inches above the window trim.
5. Window-seat cushions with tailored piping and anti-slip base
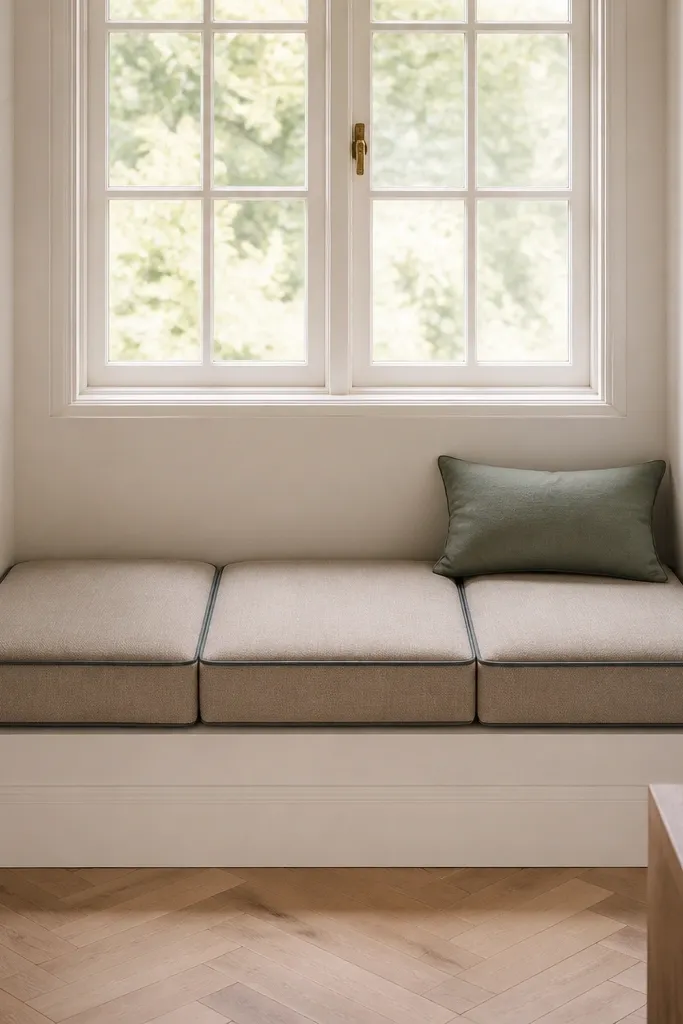
If you already have a sill or shallow platform, go all-in on cushion styling. Tailored piping along the edges creates that custom-furniture look, and an anti-slip base keeps cushions aligned when you open blinds or move through the room. The bay looks dreamy because the cushion fills the recess and creates a comfortable “moment” you can style with one throw and two pillows. This is a smart pick when you want a project that’s cheaper than millwork but still looks intentional.
Measure the bay recess width on each pane and cut cushion bases from 1-inch plywood or high-density foam sheets. Cover the base with a thin batting layer, then wrap with upholstery fabric and sew piping using 1/2-inch cord and fabric strips. Add a non-slip layer on the bottom: rubber shelf liner glued in place or heavy-duty Velcro strips. Layer two cushion sizes — one seat cushion and one back cushion — so the bay reads like furniture, not loose cushions.
Choose piping cord in a slightly darker tone than the main fabric; it sharpens the edges in photos.
Skip thin foam — it looks wrinkled and cheap within weeks.
6. Bay window wallpaper only in the recess with framed edges
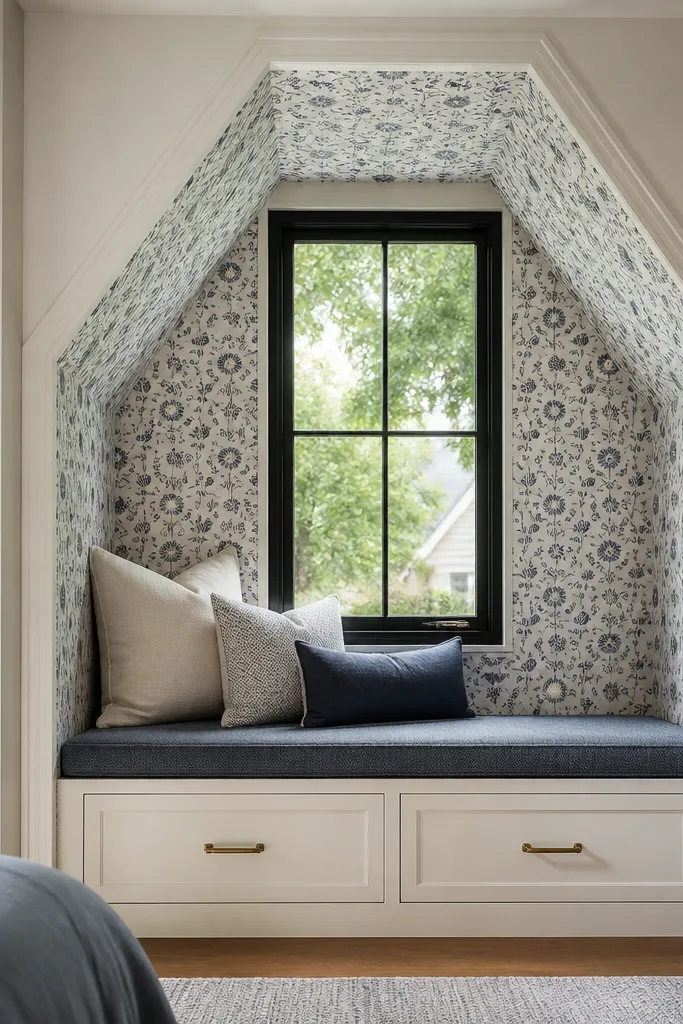
Wallpaper inside the bay recess makes the window feel deeper and more designed, especially with a simple trim frame. The key is confinement: apply wallpaper only to the recess panels, then frame the edges with matching trim so it looks custom. Choose a pattern with small-to-medium scale so it doesn’t fight the angles. This is a great solution when you want good-looking Bay Window ideas without changing the whole room paint.
Remove any loose trim caulk and clean the recess walls with a degreasing cleaner. Cut wallpaper to fit each panel section — do not try to run one continuous sheet across angled corners unless the pattern alignment is forgiving. Install a thin border strip or 1x2 trim frame around the wallpaper edges to hide seams. Seal with a clear wallpaper sealer if the area gets frequent cleaning, then caulk edges lightly to keep it crisp.
Use a straightedge and a sharp blade for every cut so your seams land in the recess corners, not in the open bay view.
Don’t pick a huge pattern — it turns the bay angles into visual chaos.
7. Sconce lighting aimed into the bay with dimmer switch

Lighting is the fastest way to make a bay window look expensive because it changes how shadows shape the angles. Sconces aimed inward light the recess so it doesn’t look like a dark hole behind the glass. Warm 2700K bulbs keep skin tones friendly and make wood and fabric look richer. This is the right move if your bay is already decorated but feels flat at night.
Plan sconce placement on the wall beside the bay, then aim the fixture so the beam hits the inside recess — not the floor. Install a dimmer rated for the bulb type (LED-compatible) to keep the mood adjustable. Choose wall plates that match your room hardware finish, then mount into studs if possible. Use 2700K LED bulbs with a high CRI (90+) so fabric colors stay true.
Editor's noteAngle the sconces slightly downward so light grazes the trim line and makes the bay look deeper.
Skip thisDon’t use cool 4000K bulbs — they make the bay look harsh and gray.
8. Oil-rubbed bronze curtain rod with corner brackets and three-panel setup
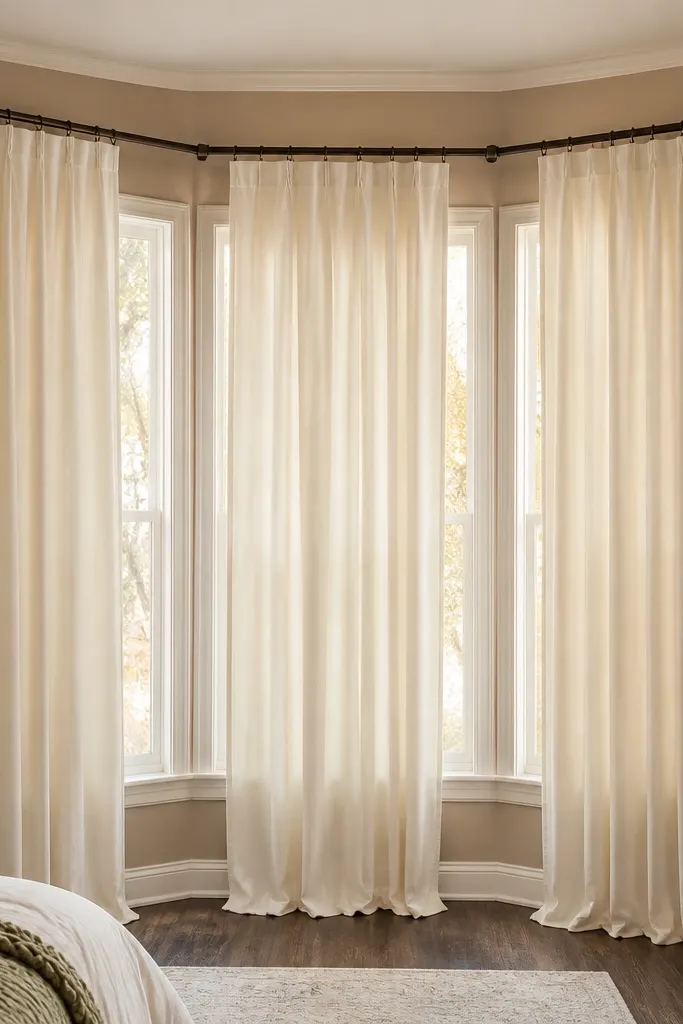
Hardware choice matters more than people think. A single continuous rod look across the bay angles — using corner brackets that keep the rod line consistent — makes the window feel custom instead of pieced together. Pair it with three panels that cover each section fully, and the bay reads cohesive. This is a solid option if you want the good-looking Bay Window ideas look without ceiling drilling for a track system.
Pick a rod diameter around 1 inch and match the finish to your room (oil-rubbed bronze or aged brass are the easiest to live with). Install corner brackets at each angle so the rod line stays straight in appearance, then hang two panels per side with enough fabric width to create folds. Set the hem length to hover 1-2 inches above the floor. Use fabric weights so the drape doesn’t cling to the glass.
Use rings or clips that let the fabric slide smoothly; stuck folds look sloppy.
Don’t choose a rod finish that clashes with your existing cabinet or light fixtures.
9. Bay window built-in bookshelves with ladder and back panel
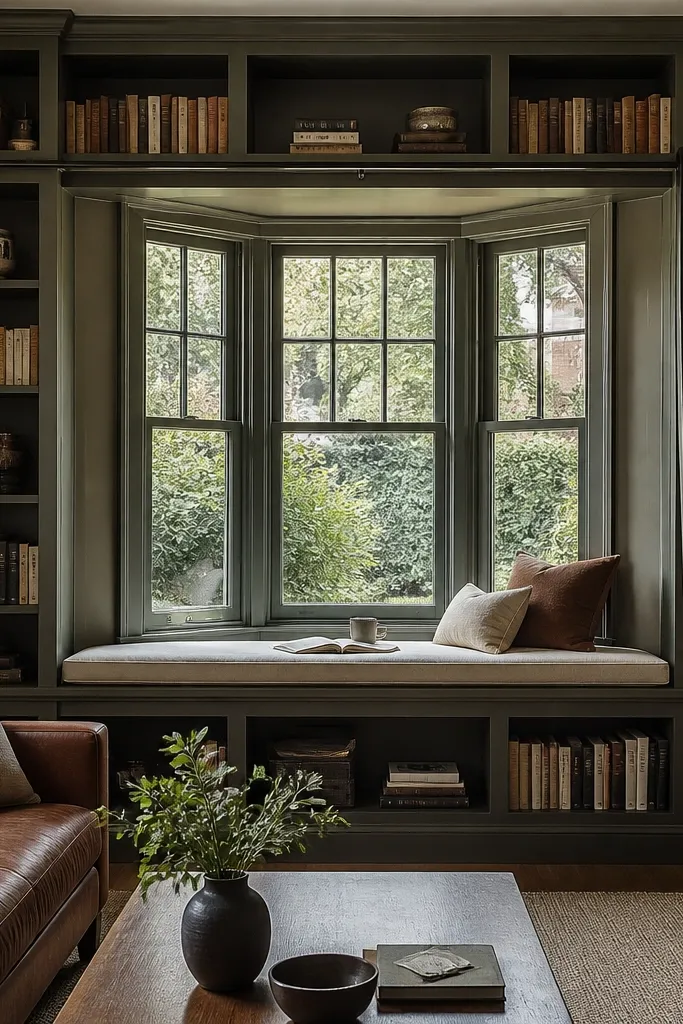
Bookshelves around a bay window look expensive because they create permanent architecture. The ladder or a simple reading nook styling makes the bay feel like a room-within-a-room, and the back panel adds depth behind spines. This works best in living rooms that can handle visual clutter in a controlled way — like books and baskets with consistent tones. If you want the bay to be the star, this is one of the most photogenic options on the list.
Use 3/4-inch plywood for shelves and 1/2-inch back panels so the structure stays rigid across angles. Frame the bay sides first, then build shelf runs in segments that match the recess width. Add a vertical divider at the corner angles to prevent sagging. Paint or stain the back panel, then install shelves with hidden shelf pins or pocket-screw brackets. Finish trim edges and add a ladder only after the shelves are loaded so you don’t misjudge clearance.
Editor's notePick one wood tone for shelves and one metal tone for accents; mixing makes the bay look DIY instead of designed.
Skip thisDon’t leave the corners empty — corner gaps read unfinished on angled bays.
10. Painted window-seat base with two-tone trim and linen slipcovers
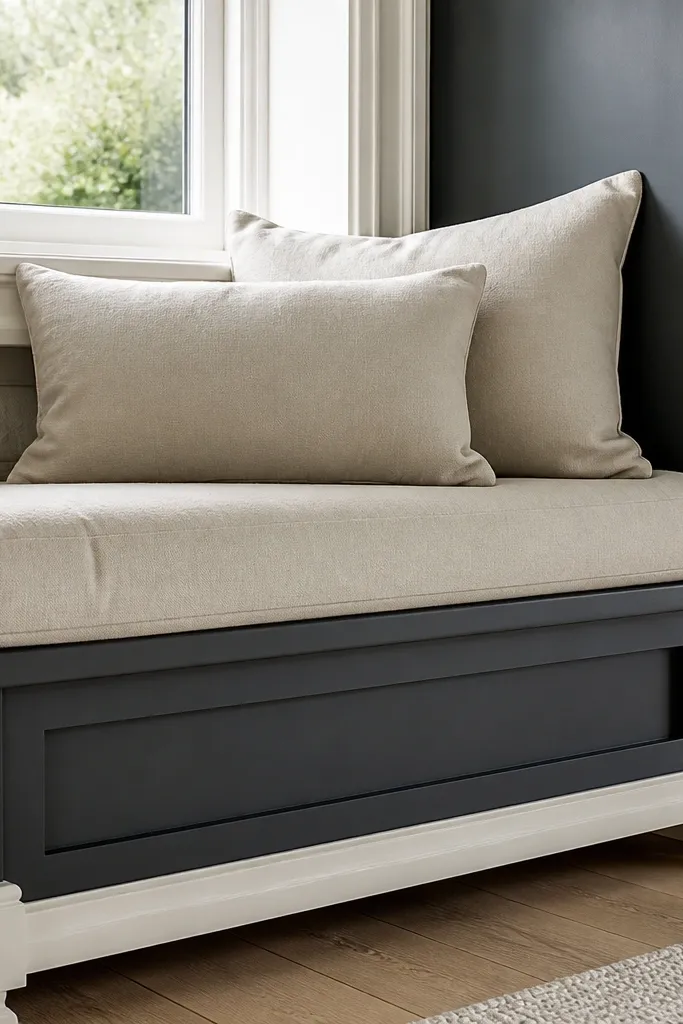
Two-tone paint gives bay windows that designer contrast without changing the whole room. Paint the seat base a deeper shade than the wall, then keep trim and cushion fabric lighter for a clean, expensive read. Linen slipcovers keep the look fresh because you can remove and replace them without rebuilding. This plan is best when your living room has plain walls and you want the bay to add color in a controlled way.
Sand and prime the seat base if it’s existing wood or install a new bench frame and prime everything. Mask off trim lines and paint the base first — use a semi-gloss or satin for wipeability. After curing, add a lighter top coat on trim and edges so the lines stay crisp. Sew or buy linen slipcovers that fit snugly at the corners, then add a simple box cushion with removable covers for washing.
Use painter’s tape burnish on the edge and pull it while paint is still slightly soft to keep razor-clean lines.
Skip low-sheen paint on the seat base — it scuffs and looks tired fast.
11. Sheer + blackout layered roman shade in three sections
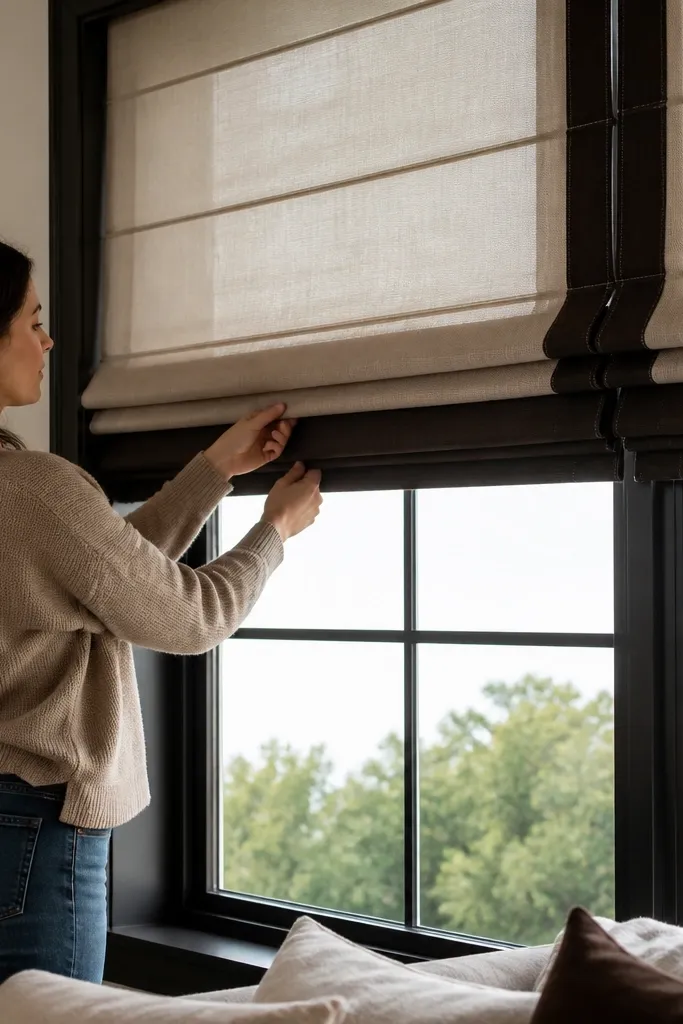
Layered roman shades make a bay look tailored because the fabric stacks neatly when raised. Use a sheer outer layer for daytime softness, then a blackout inner layer for evening drama. Split the shade into three sections so each panel folds with its own angle instead of fighting the corner. This is a great option if you want privacy and light control but hate the visual bulk of heavy drapes.
Measure each pane width and height separately, then order or build roman shades cut to those measurements. Install three mounting brackets so the shade fabric aligns with the recess edges. Use a sheer fabric with a light blocking backing for the outer layer and a blackout fabric for the inner layer. Sew the interlining so the folds stay crisp, then test raising and lowering with the bay furniture in place.
Add a small cord pull on the middle shade only; it keeps the look clean and prevents extra hardware clutter.
Don’t mount one continuous shade across the whole bay — the angles will twist the folds.
12. Bay window floor-to-ceiling panel curtains with magnetic tiebacks
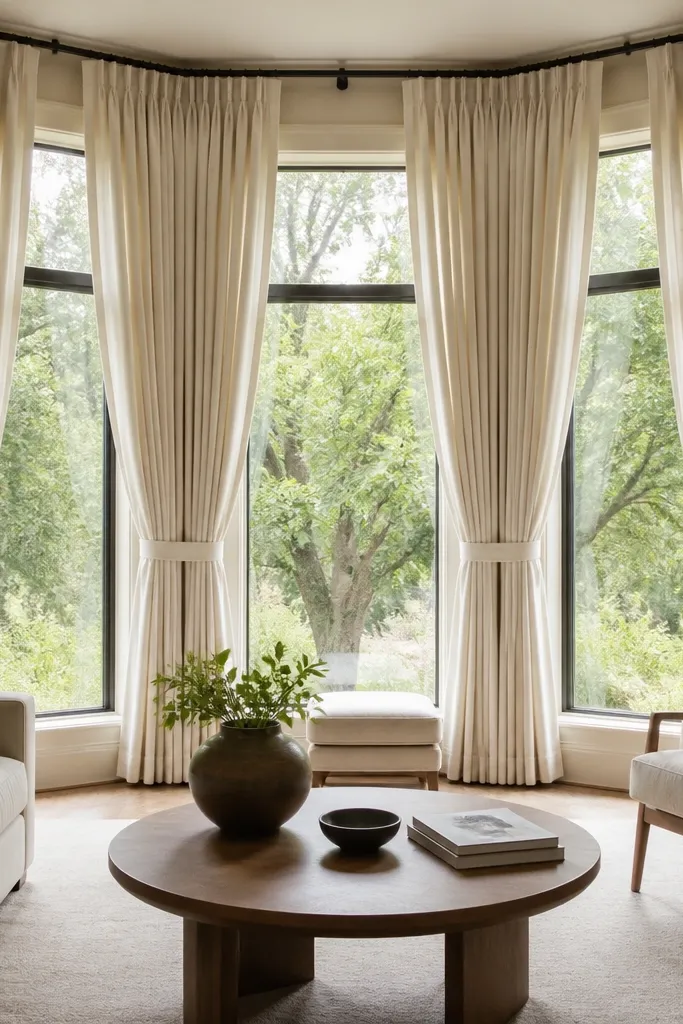
Full-height panel curtains turn a bay into a dramatic frame, especially if your living room has tall walls. Magnetic tiebacks keep the panels pulled at consistent heights, so the bay looks styled even when you don’t touch it. This is one of the best good-looking Bay Window ideas for people who want low-fuss beauty. The fabric choice matters: pick a medium-weight material that holds shape and doesn’t collapse into the corners.
Hang a ceiling-mount track or tension rod system that supports full-height panels. Install tieback magnets at the same height on each side so panel pulls match. Use panels wide enough for layered overlap at angles, then hem to land 1 inch above the floor. Pinch-pleat or grommet style both work, but test the angle movement before final installation.
Use two tiebacks per side panel if your bay is wide — one tieback makes the panel lean.
Skip flimsy curtains — they won’t hold the pulled shape and will look messy.
13. Rattan or cane screen panel in front of the bay for texture contrast
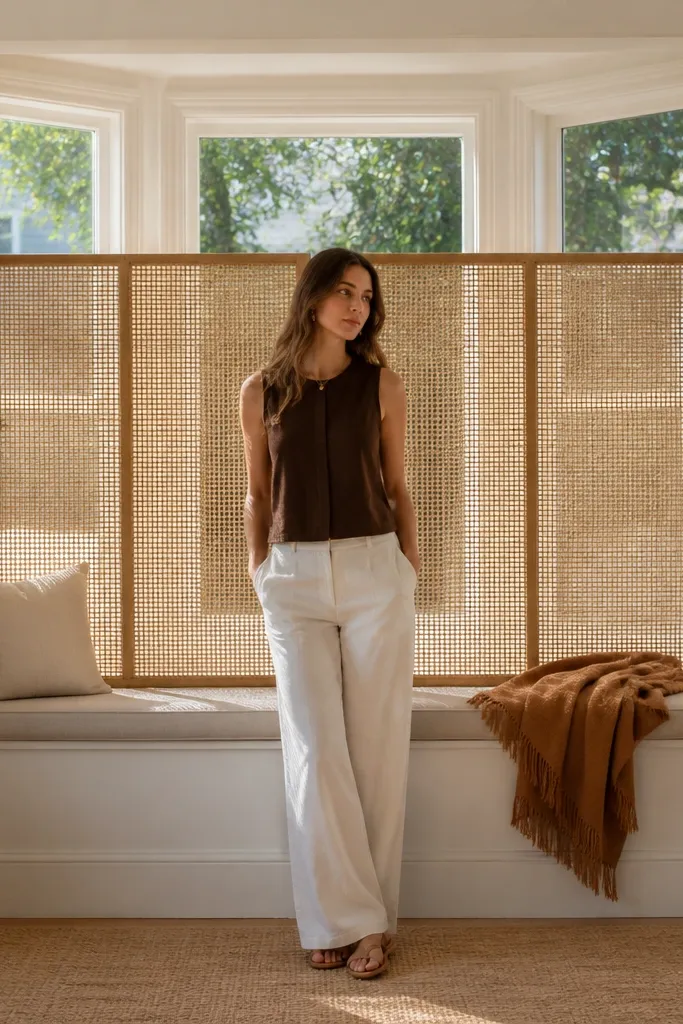
Woven cane or rattan in front of a bay window adds texture that reads expensive because it catches light. It also softens the harsh geometry of the three panes and makes the living room feel warmer. This option looks best when you keep the rest of the styling minimal: one neutral cushion, one warm throw, and a simple plant pot. Choose a screen with a clean frame — thin, even lines — so it doesn’t look like a garage craft project.
Measure the bay opening and buy or build a screen panel slightly wider than the recess so it covers shadows. If building, use a straight wood frame and tension cane or rattan sheets evenly. Finish the frame with a clear matte or a warm stain, then add felt pads on the bottom to protect floors. Place it so it sits a few inches away from the glass for airflow and visual depth.
Editor's notePick a screen with a uniform grid spacing; irregular spacing looks handmade and less polished.
Skip thisDon’t set it flush against the glass — it looks accidental and blocks light unevenly.
14. Stone-look or tile-effect sill surround with water-resistant finish
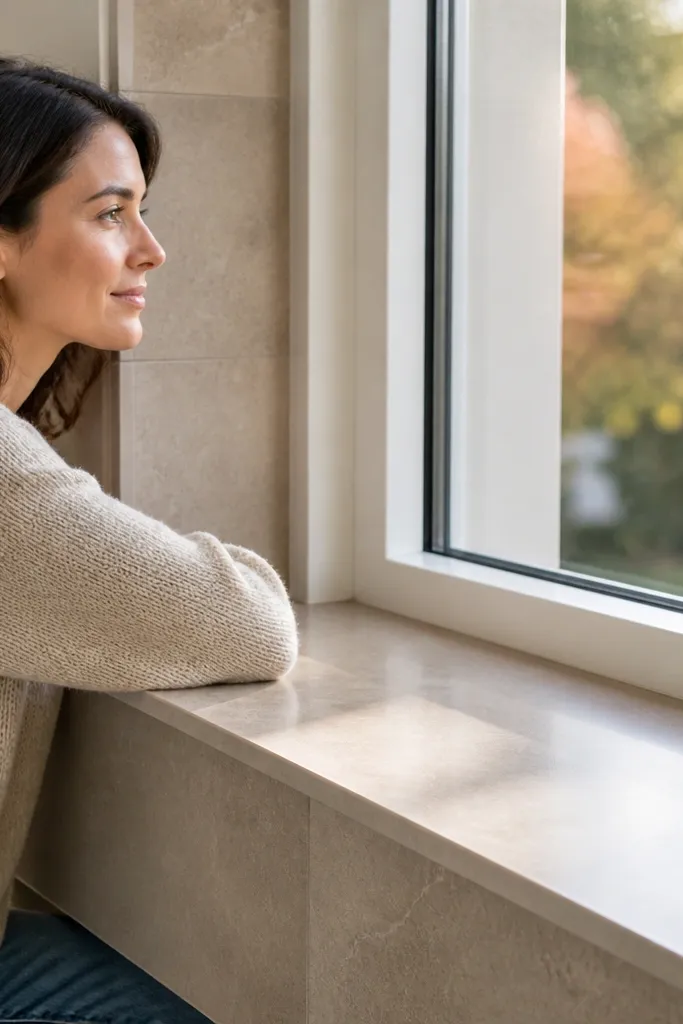
A sill surround upgrade makes a bay look high-end because it frames the window at the exact place your eyes land. Stone-look tile or a durable tile-effect panel gives crisp edges and a solid, built-in feel. This is worth doing if your current sill looks painted, chipped, or too thin compared to the trim. It’s also practical — tile-effect surfaces wipe clean and handle sunlight exposure better than flat paint.
Remove any loose caulk and clean the sill surface thoroughly. Install a water-resistant board on the surround if needed, then cut tile-effect panels or small-format tiles to fit each angle section. Use thin-set or panel adhesive rated for your substrate, then grout only if you’re doing true tile. Seal grout and edges with a clear silicone sealant where the surround meets trim to prevent cracking.
Use a mitered edge trim piece at the corners so the angle looks sharp, not rounded.
Don’t glue directly over peeling paint — the surround will lift.
15. Wallpaper + wood picture-ledge styling with matching trim frame
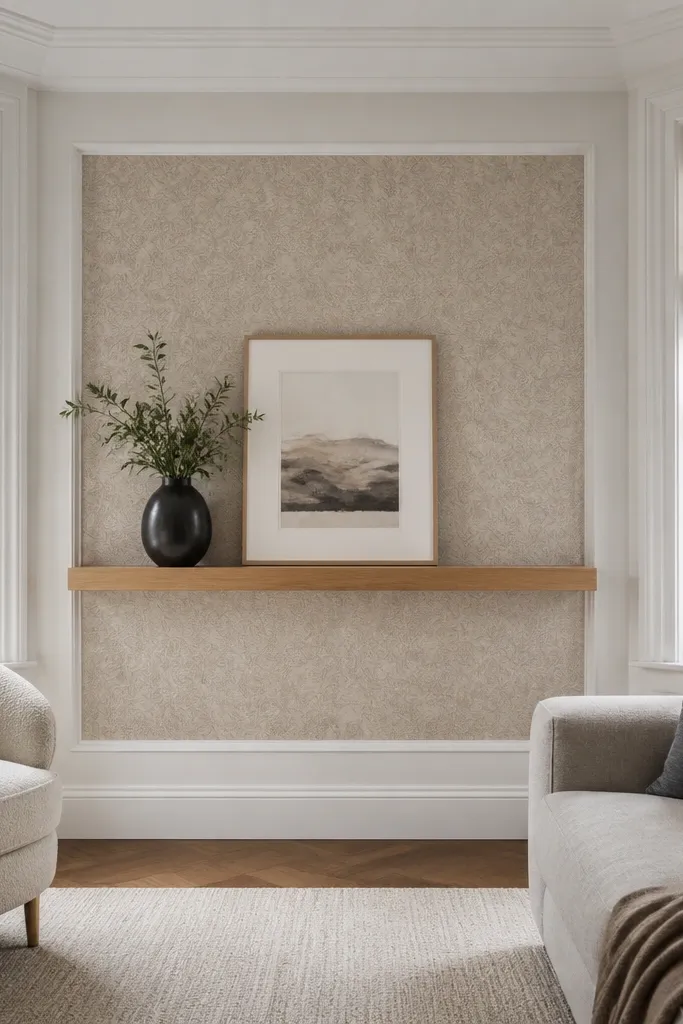
A picture ledge inside the bay turns it into a gallery wall without crowding the floor. The look comes from a centered ledge line and wallpaper behind it, so decor sits against a finished background. Keep the decor palette to two colors — like black and cream — and you’ll get that expensive, designed feel. This option is best for bays that don’t have a comfortable seat depth or when you want a clean, vertical styling moment.
Apply wallpaper to the vertical recess panels first, then install a wood picture ledge board across the bay with angled side supports. Use a level and pre-drill into studs or add blocking behind drywall. Paint or stain the ledge to match your trim, then seal it with a water-based polyurethane. Style with one tall object per side and a small stack or tray on the ledge so the arrangement looks intentional.
Use museum putty or clear adhesive tabs for small items so you don’t mar the ledge finish.
Don’t overcrowd — three items per section reads more expensive than a dozen.
16. Mirrored accent panels at the bay angles with warm bulbs

Mirrors inside the bay recess make the room look brighter and more spacious, and they photograph beautifully because they bounce light into the corners. The expensive look comes from placing mirror panels at the side angles where they reflect the living room, not the ceiling. Pair mirrors with warm lighting and a simple cushion palette so the reflections don’t feel busy. This is a strong choice when your bay faces a darker side of the house or you need more daylight sparkle.
Measure the side recess areas on each angle and choose mirror panels with a consistent thickness so the reflections line up. Use a mirror adhesive made for glass and apply to the back panel edges with even spacing. Add thin trim borders around the mirrors so the edges look finished and safe. Install warm 2700K bulbs nearby (or add sconces) and test the reflection direction before final mounting.
Editor's noteUse painter’s tape to map the mirror placement lines so you keep symmetry across the bay angles.
Skip thisSkip cheap mirrors with waviness — they distort and look low-end in photos.
17. Galvanized or black metal window seat base with cushion top
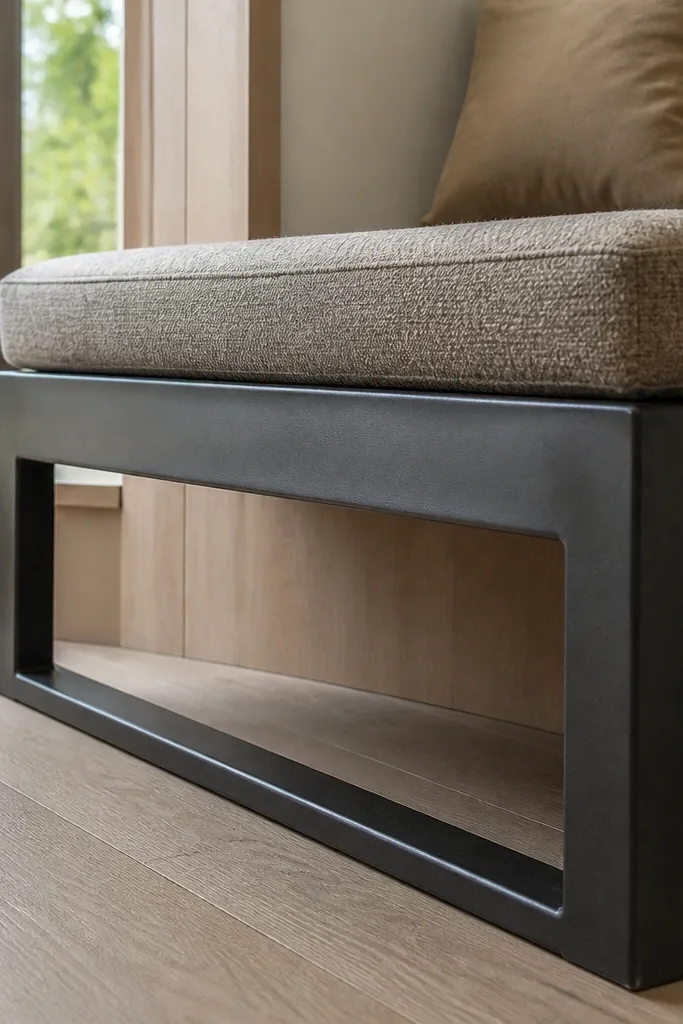
A metal base under a cushion reads modern and expensive because the material contrast is clear. The best look is black or aged iron with a powder coat so it doesn’t rust or scuff. Add a cushion top that matches your room fabric — linen, wool blend, or a textured weave — and the bay becomes a sleek seating zone. This works best in living rooms with a modern farmhouse or industrial vibe where you already have black hardware.
Build or buy a metal frame that matches the bay footprint; keep the seat height around 18-19 inches. If building, use powder-coated steel tubing and weld or bolt cross braces for rigidity. Top it with a plywood deck sealed with primer, then add foam and fabric. Secure cushion fabric with a removable cover or Velcro so you can wash it. Paint surrounding trim to match nearby black metal accents so everything looks coordinated.
Use furniture-grade felt pads under the frame feet to prevent floor scratches and reduce noise.
Don’t use bare steel — it will rust and the look will degrade.
18. Painted ceiling valance with recessed lighting for a soft glow
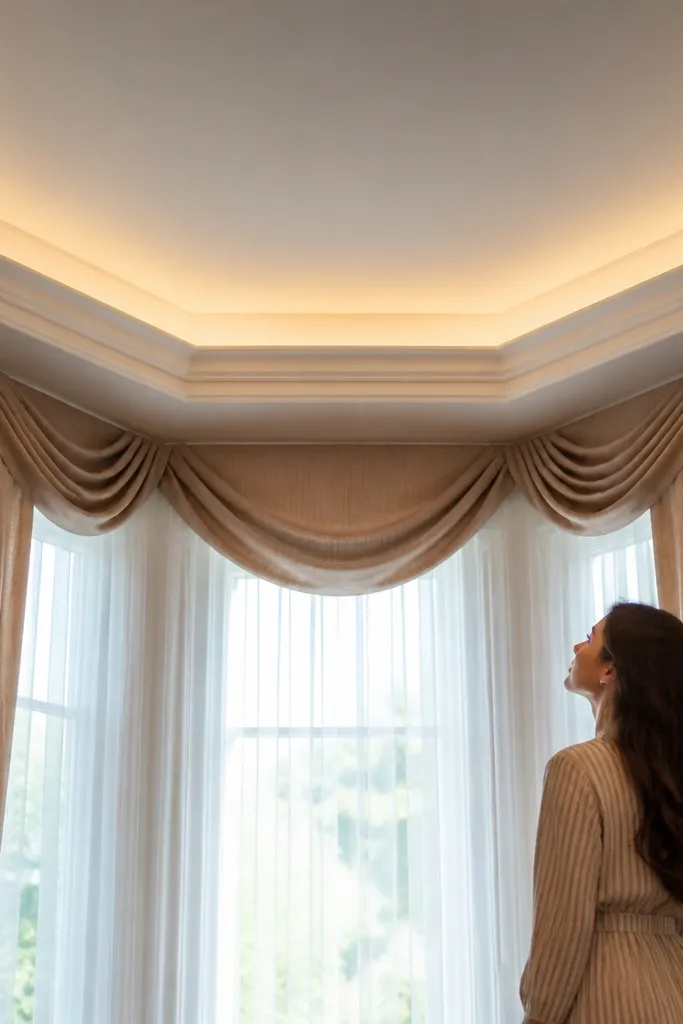
A ceiling valance with hidden recessed lighting makes a bay feel like a boutique hotel. The glow washes the recess and makes fabric folds look dimensional. This option is photogenic because it creates a halo effect at the top of the window, where most bays otherwise look flat. It’s a strong pick if you can access the ceiling space above the bay and you want the dreamy living room look to show up at night.
Plan a shallow soffit or valance box above the bay using 2x2 framing and 1/2-inch drywall or plywood skin. Install recessed LED fixtures or strip lighting with a dimmer, keeping the light line aimed toward the window recess. Paint everything the same color as your ceiling for a seamless look, then test the glow with the room lights off before closing the final panels. Finish with trim so the valance edges look crisp.
Editor's noteUse a narrow beam LED so the light hits the recess trim, not the glass directly.
Skip thisDon’t use un-dimmable fixtures — the bay will look harsh when you want cozy.
19. Large-scale art panel framed across the bay middle with side shelves
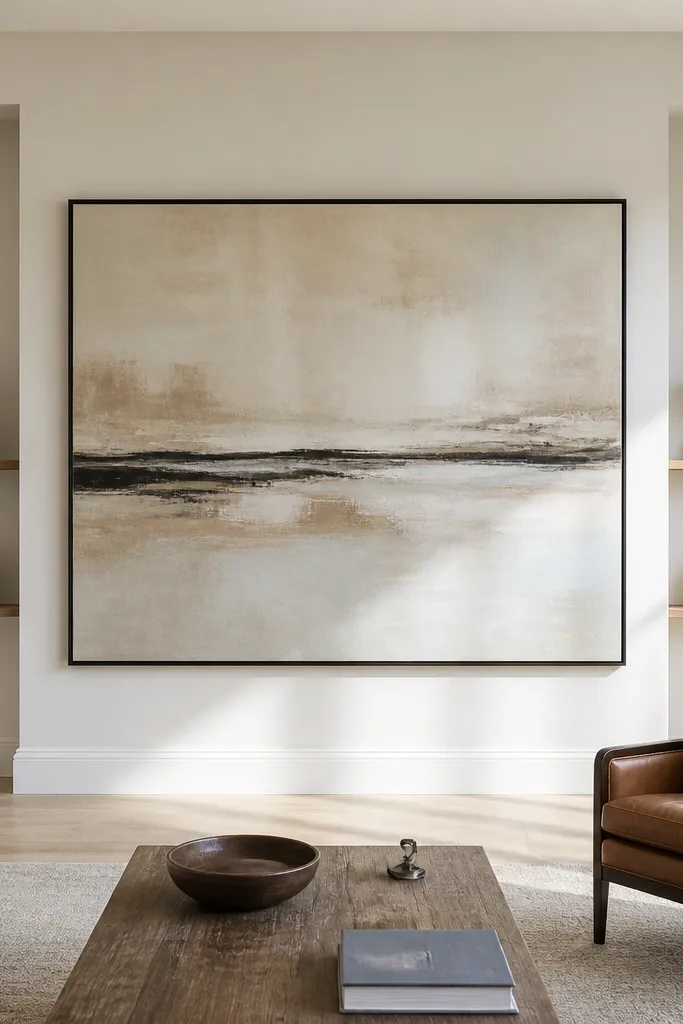
A single oversized art panel makes the bay feel designed because it stops the eye from getting lost in three separate panes. Frame the art to create a rectangle that visually anchors the bay, then add tiny shelves on the sides for balance. This is a good-looking Bay Window idea for renters or anyone who doesn’t want to build furniture. Keep the art palette close to your sofa colors so the bay becomes a cohesive backdrop rather than a random accent.
Choose an art piece or printed panel sized to cover the middle pane area plus extra width for a frame. Build a simple frame with 1x2 or 1x3 boards, using miter cuts and corner blocks for strength. Mount the frame to wall studs with heavy-duty picture brackets so it’s level with the seat or sofa. Add two small floating shelves on each side angled slightly parallel to the bay recess, then style with one object each.
Match the frame finish to your curtain hardware or light fixtures so the bay looks intentional.
Skip small art — it looks lost in bay windows and won’t read as a focal point.
20. Cushioned window seat with removable slipcover and two-tone throw pillows
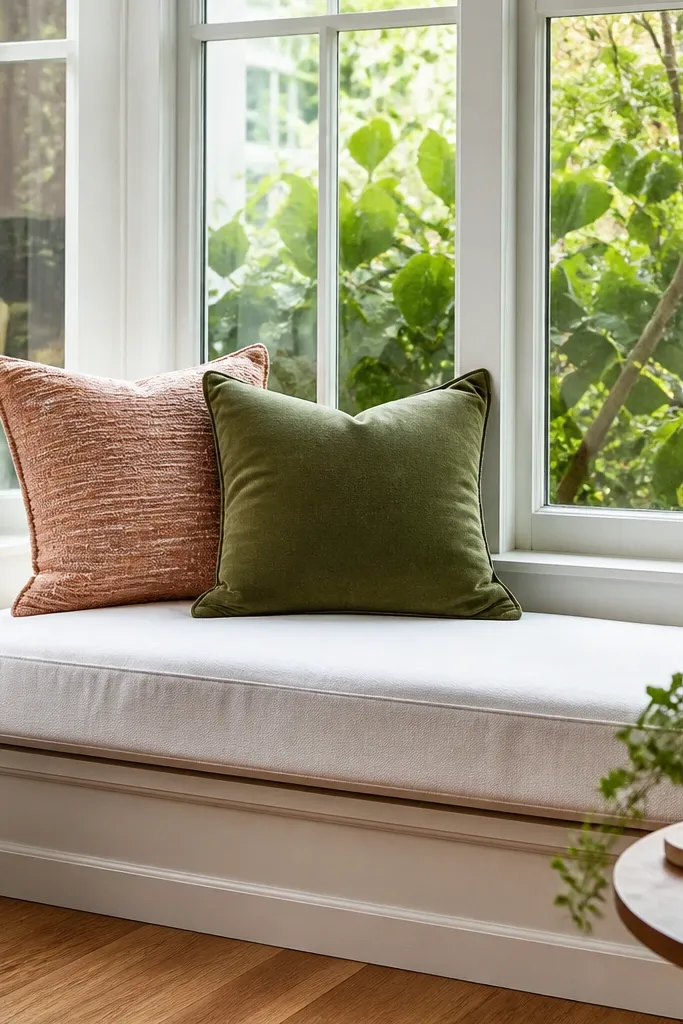
This is the cozy version of a built-in look, and it stays photogenic because the covers keep lines neat. A removable slipcover prevents the cushion from sagging permanently and makes it easier to keep the color palette tight. Two-tone pillows add depth without clutter: one textured pillow and one solid pillow in a complementary shade. It’s ideal for living rooms where you want the bay to invite sitting but you don’t want carpentry.
Cut seat cushions from 4-inch foam for firm support, then cover with a removable slipcover fabric that has a slight weight so it drapes smoothly. Sew a boxed edge seam so corners stay sharp. Add a thin non-slip layer between cushion and base, like grippy shelf liner. Style with two throws: one draped over the seat front and one folded across the middle pillow so the bay looks layered.
Use a fabric with a subtle weave — it hides wrinkles and looks better in daylight.
Don’t skip a firm foam core — soft cushions look tired quickly.
21. Bay window paint refresh with crisp trim and consistent sheen
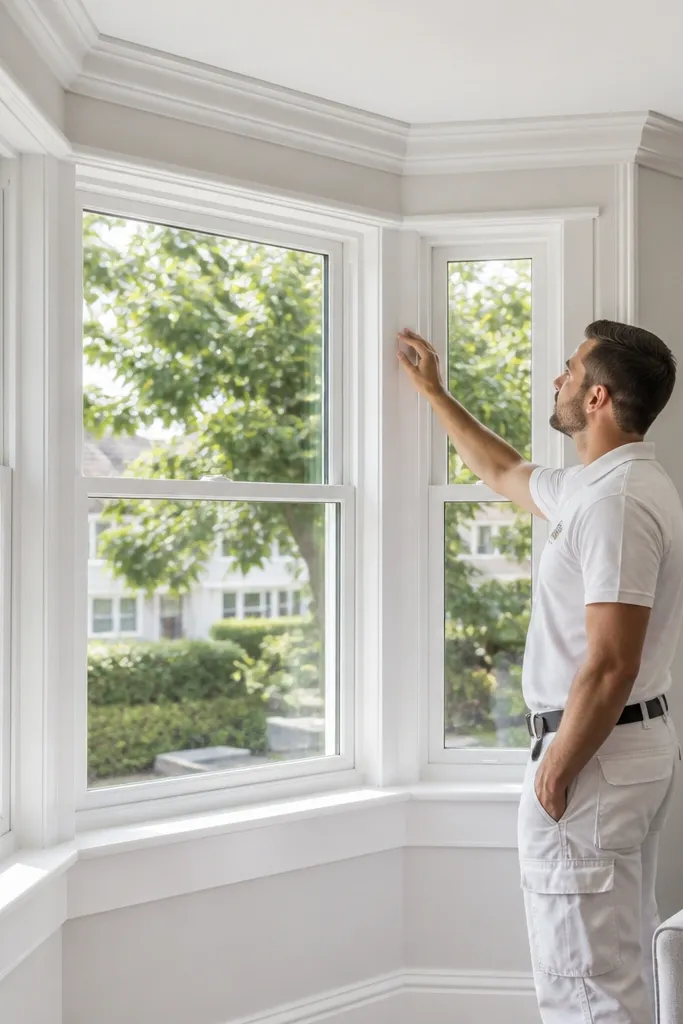
Sometimes the most expensive-looking upgrade is fixing the paint job you already have. Bay windows show every uneven brush stroke, so a full trim refresh with consistent sheen makes the whole room feel newly finished. This plan makes good-looking Bay Window ideas work even if you don’t want to build anything. Match the sheen across trim and baseboards — satin looks clean without looking glossy.
Remove old caulk where it’s cracked and scrape off loose paint. Sand trim lightly with 220 grit so new paint bonds, then vacuum and wipe with a tack cloth. Caulk gaps with paintable acrylic latex, then paint trim with a high-quality trim brush or mini roller. Let cure fully, then touch up any missed spots around the recess edges with a small angled brush.
Editor's noteUse painter’s tape only for straight edges; for curved trim, cut in freehand with a steady angled brush.
Skip thisDon’t paint over chalky or glossy patches — the finish will peel.
22. Floating cabinet under bay with open display and closed doors
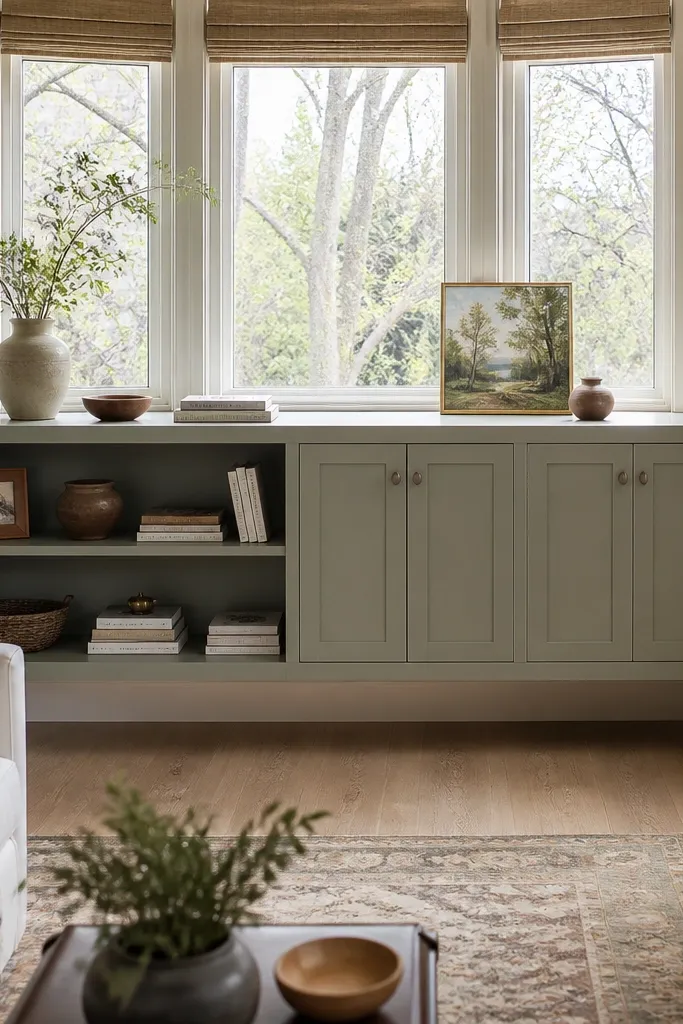
A floating cabinet under the bay creates storage and a styling platform while keeping the floor visually light. The expensive look comes from a mix of closed doors and open shelves so the bay area stays tidy but still has personality. This is one of the best good-looking Bay Window ideas for families because it gives you a place for throws, games, and extra pillows. It also helps if your bay has a low sill and you want a clean furniture line instead of loose décor.
Measure the space under the bay and plan a cabinet height so the doors don’t block the view or sitting. Build a frame from 3/4-inch plywood with a fixed top shelf and two compartments: one open with adjustable shelves and one closed with doors. Mount the cabinet to studs or a ledger board for support since you’re floating it. Finish with a durable paint or laminate, then add a top cushion or a small bench pad on top if you want seating.
Editor's noteUse concealed hinges and keep door gaps consistent; they read “custom” in close photos.
Skip thisSkip flimsy shelf boards — they sag and the cabinet stops looking built-in.
23. Bay window plant ledge with drainage tray and hidden cords

Plants look best in bays when they’re supported by a proper ledge and a plan for water. A dedicated plant ledge with a drainage tray makes the bay look intentional and keeps water from staining the sill. The photogenic part is vertical layering: one tall plant on the ends, medium plants in the middle, and a trailing plant over the front edge. This is a strong choice if your living room needs life but you want the bay to stay clean and tidy.
Build or mount a ledge at sill height plus 2-3 inches so plants aren’t touching window trim. Place planters on a removable drip tray system so you can lift and empty without moving every pot. Route any grow light cords through a small hidden channel behind the trim. Use planters in one material family — ceramic in cream or matte black — so the bay looks cohesive.
Editor's notePick planters with matching rim thickness; small differences read sloppy in close-up photos.
Skip thisDon’t set plants directly on bare wood — water marks kill the expensive look.
24. Textured linen bay drape with Roman tie-back and corner rings
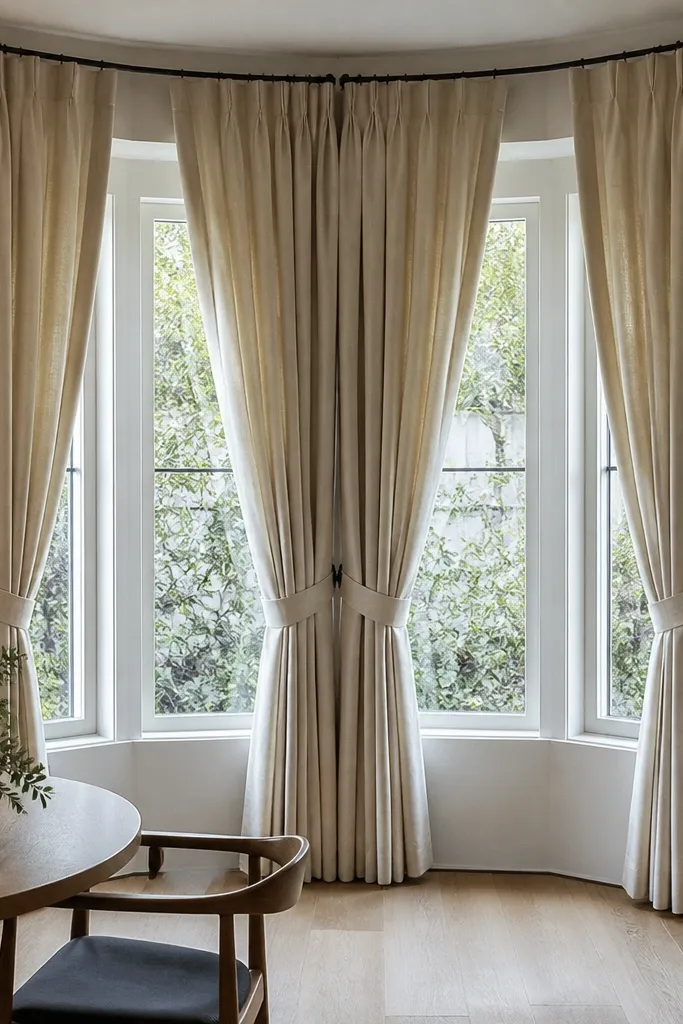
Textured linen gives you that dreamy, soft look without needing heavy ornament. The expensive part is how the fabric is controlled: use tie-backs at the same height and corner rings so each panel curves into the bay instead of hanging straight. This plan photographs well because linen texture catches light and the tie-back creates a clear silhouette. It’s best for living rooms with neutral walls and you want warmth without going dark.
Hang curtain rods or a track at ceiling height, then choose linen panels with a medium weight. Install corner rings at the recess angles and use tie-back cords or straps that pull panels into a consistent arc. Hem so the panels stop 1-1.5 inches above the floor. Steam and then adjust tie-backs until the fold spacing looks even across the three panes.
Editor's noteUse a tie-back fabric that matches the drape — contrast tie-backs can look costumey in bay angles.
Skip thisSkip slippery fabric like thin polyester — it won’t hold the tied shape.
25. Bay window beadboard paneling with painted arched trim
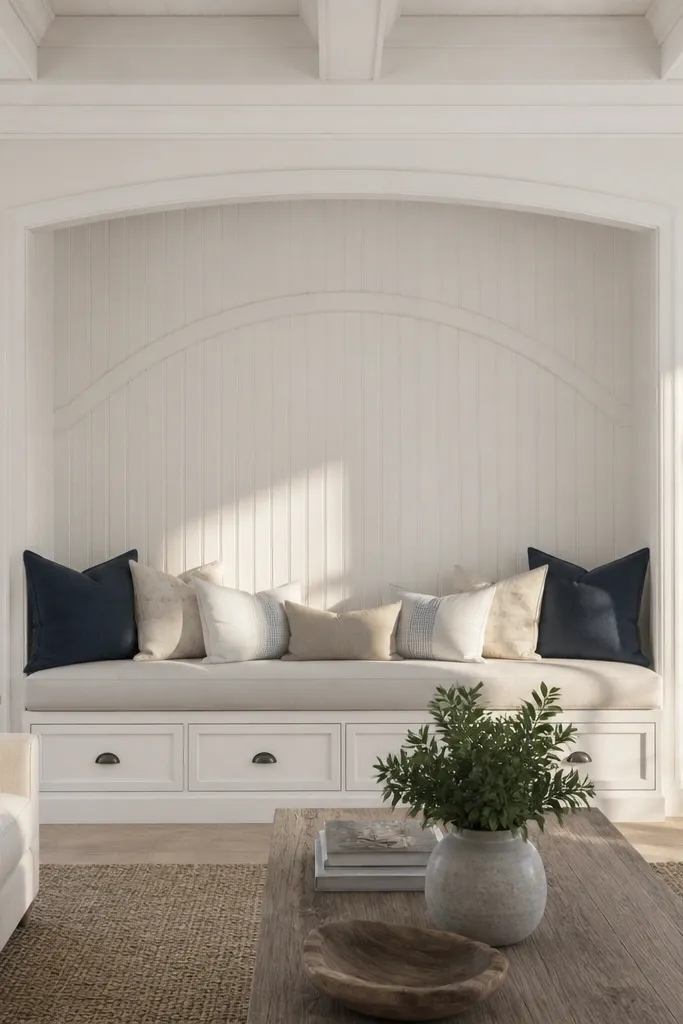
Beadboard adds instant cottage charm, but the expensive-looking version comes from crisp paint and a shaped trim detail. Use beadboard in the recess areas and add a gentle arched trim line across the middle for a refined touch. The bay looks dreamy because the lines repeat across angles, and the painted finish makes everything feel built-in. This is a great pick if your living room style leans traditional but you want it cleaner and less cluttered.
Measure each recess panel and cut beadboard to fit, leaving a small gap for expansion. Install beadboard with construction adhesive and small brad nails into studs or blocking. Add an arched trim piece across the middle pane area — use a template cut from MDF so it’s symmetrical. Prime, caulk nail holes, then paint with satin trim paint.
Sand beadboard edges lightly before painting so the grooves don’t snag with brush marks.
Don’t skip priming — beadboard shows tannins and can bleed through paint.
26. Bay window curtain valance with layered trim molding and tassel fringe
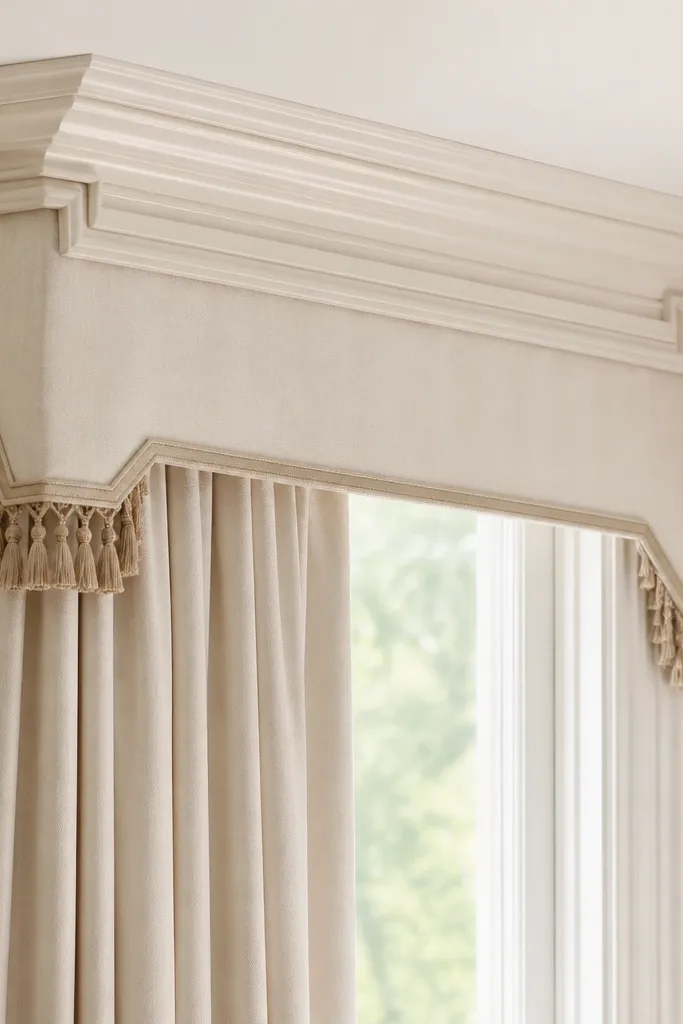
A layered trim valance brings the “expensive” look because it adds depth and shadow, not just fabric. Tassel fringe can look cheap if it’s too heavy or mismatched, so keep it subtle and place it only on the valance edges. This idea works when your bay already has rods or a track and you want to upgrade the top treatment. It’s a good-looking Bay Window idea for people who like a classic, styled living room.
Build a valance face from 1/2-inch MDF or plywood, then add layered molding strips to create a step profile. Wrap the front with fabric using spray adhesive and staple the back. Attach the valance to the wall above the window so it covers hardware and creates a clean rectangle. Add fringe along the bottom edge and secure it with a narrow trim strip so it stays straight over time.
Editor's noteUse a tape measure to match valance height at each corner — tiny differences show in bays.
Skip thisDon’t choose fringe that’s longer than the valance depth — it droops and looks messy.
27. DIY bay window art ledge with built-in cable-free task lighting
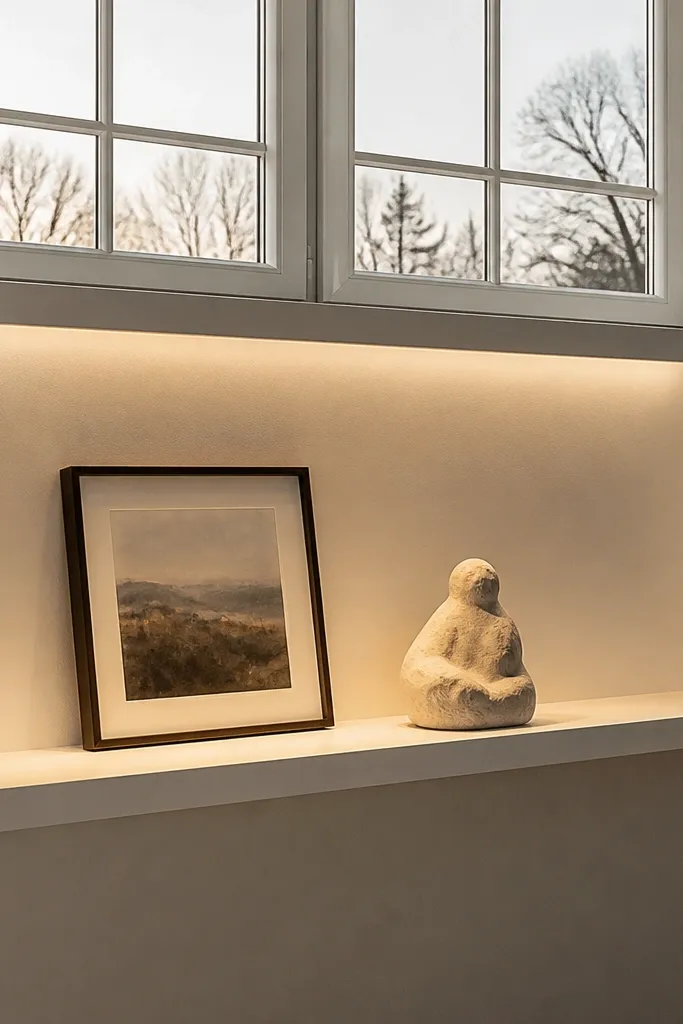
This plan makes the bay feel like a gallery with lighting that doesn’t steal attention. By putting a narrow task light under a ledge, you highlight the décor and keep the recess bright without glare. It’s photogenic because the light creates a gentle gradient across the wall and objects. This is best for bays where you already want a ledge, shelves, or framed art and you want the evening mood to look intentional.
Install a simple ledge board across the bay recess, using blocking behind drywall and a level to keep it straight. Mount a slim LED strip or puck lights under the ledge, then wire to a dimmer or use a plug-in system with a hidden cord channel. Use diffusion covers so the light stays soft. Paint the ledge and underside finish to match trim so you don’t see raw light fixtures.
Editor's noteChoose LED strips with a 90+ CRI so fabric and wood tones stay natural.
Skip thisDon’t mount lights too close to the glass — reflections can look harsh.
28. Bay window corner banquette with angled back cushions
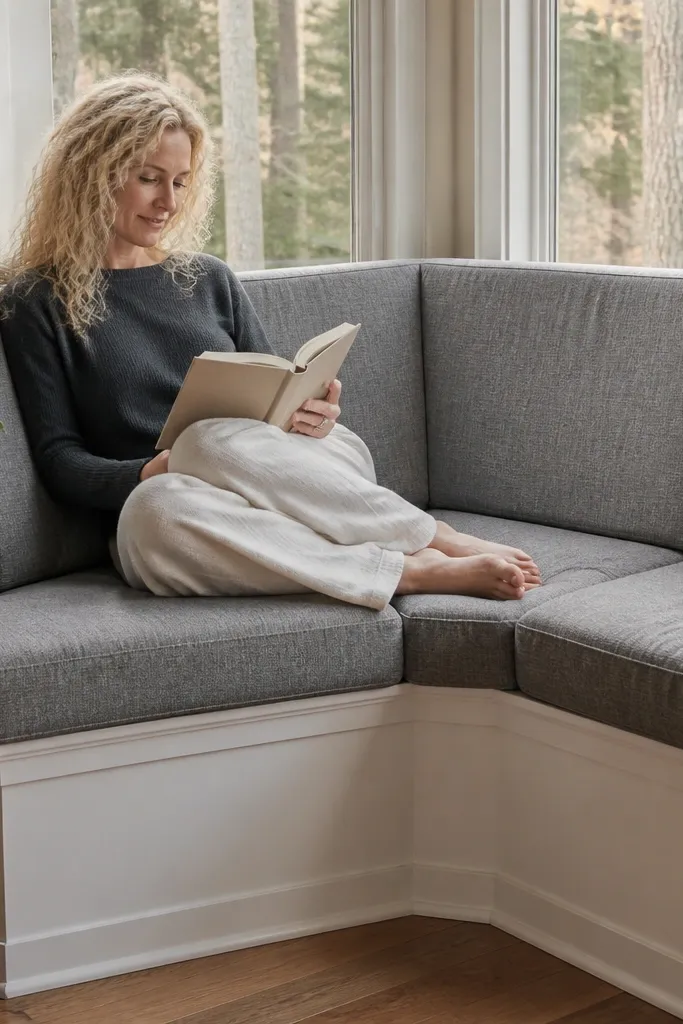
A corner banquette makes the bay feel like a reading nook, and the look is instantly more “built” when you add angled back cushions. The back cushions should follow the bay angles so the seating looks custom, not like a single straight couch shoved in. This is ideal when your bay depth is enough to sit comfortably and you want a dreamy living room corner. Keep the cushion fabric consistent and add one patterned pillow for a focal point.
Build a low base platform that matches the bay footprint, then cut two angled back cushion panels using the bay side angles. Use foam that holds shape: 3-4 inches for seat, 2 inches for back with a firm core. Cover with removable fabric and sew a piping edge so the angled seams look clean. Add a non-slip base layer under the seat cushions and anchor the back cushions with hidden Velcro strips.
Editor's noteUse a cardboard mockup of the cushion angles before cutting foam — it saves you from redoing seams.
Skip thisSkip the angled back — straight cushions make the bay look like a compromise.
29. Warm wood slat paneling behind the bay for a modern cabin look

Wood slat paneling behind a bay window adds warmth and depth while still looking modern. The expensive look is in the spacing and finish — even slat widths and a clear matte seal. This plan is photogenic because slats create thin shadow lines that move with daylight. It’s a great option if your bay feels too plain against a painted wall and you want a cozy living room vibe without heavy wallpaper.
Measure the recess width and height, then decide a slat width — 2 inches is a clean starting point. Install a backing frame of thin battens spaced evenly, then mount slats with a consistent gap of 1/4-inch between boards. Stain or use a clear finish in a warm tone, then seal with a matte clear coat to prevent glare. Finish edges with trim so the slat grid stops cleanly at each angle.
Use a spacer strip for the gaps so every line stays the same across angles.
Don’t use glossy stain — it reflects and makes the slats look cheap.
30. Bay window mirror shelf with tray styling and scented candle moment
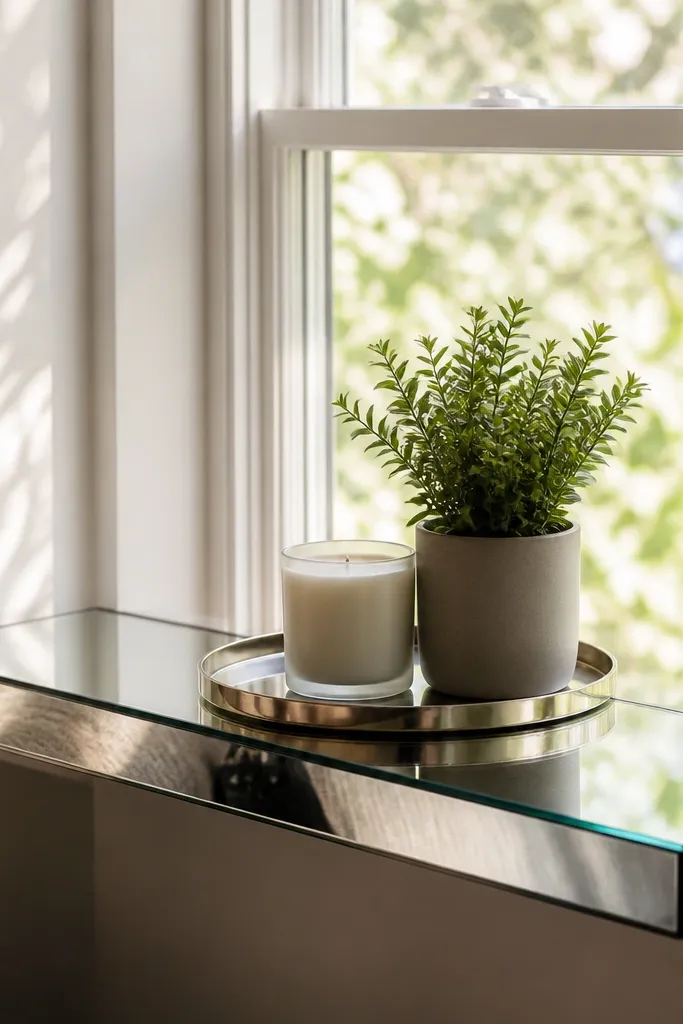
A mirror shelf in the bay gives you the “expensive” glow without building a full cabinet or bench. The shelf makes styling easy and keeps small items from cluttering the sill. Use a simple tray, one candle, and one small plant to create a repeatable photo-ready setup. This idea suits bays that are more decorative than functional, and it works especially well in living rooms with neutral sofas and warm metals.
Buy a small mirror shelf or build one with a wood base and mirrored top panel. Mount it into studs on the side wall of the bay recess or on a sturdy bracket that won’t sag. Add a removable tray that fits the shelf depth so you can change styling seasonally. Place the candle and plant so they’re centered in the bay sightline from the sofa.
Editor's noteUse a tray with a matte finish; shiny trays reflect light too much and look messy.
Skip thisSkip tiny shelves — if it’s too small, it looks accidental instead of intentional.



