
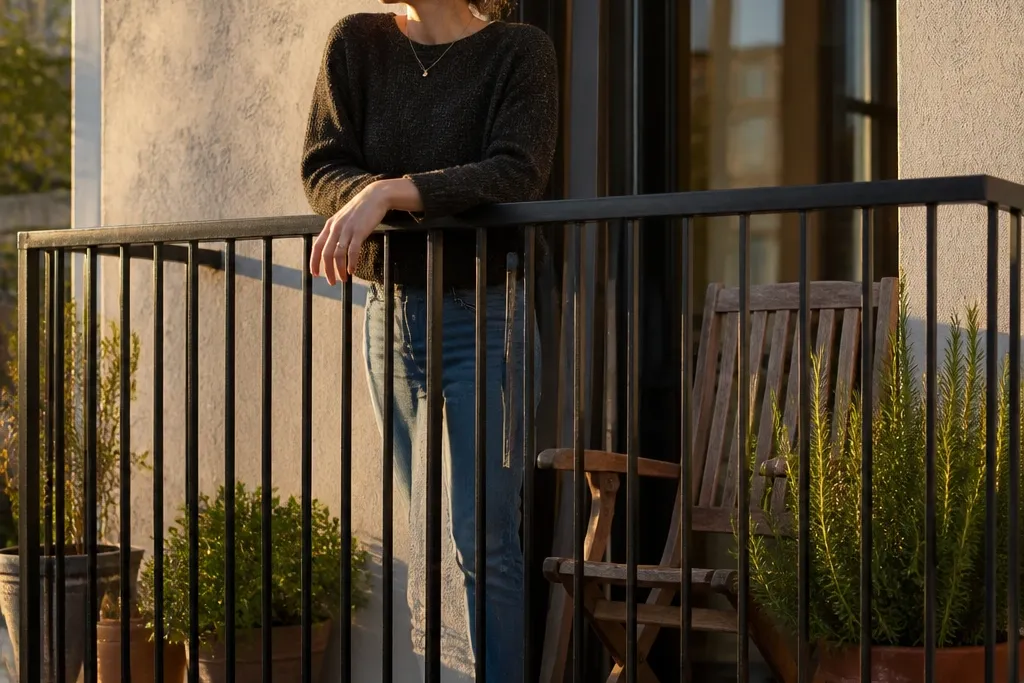
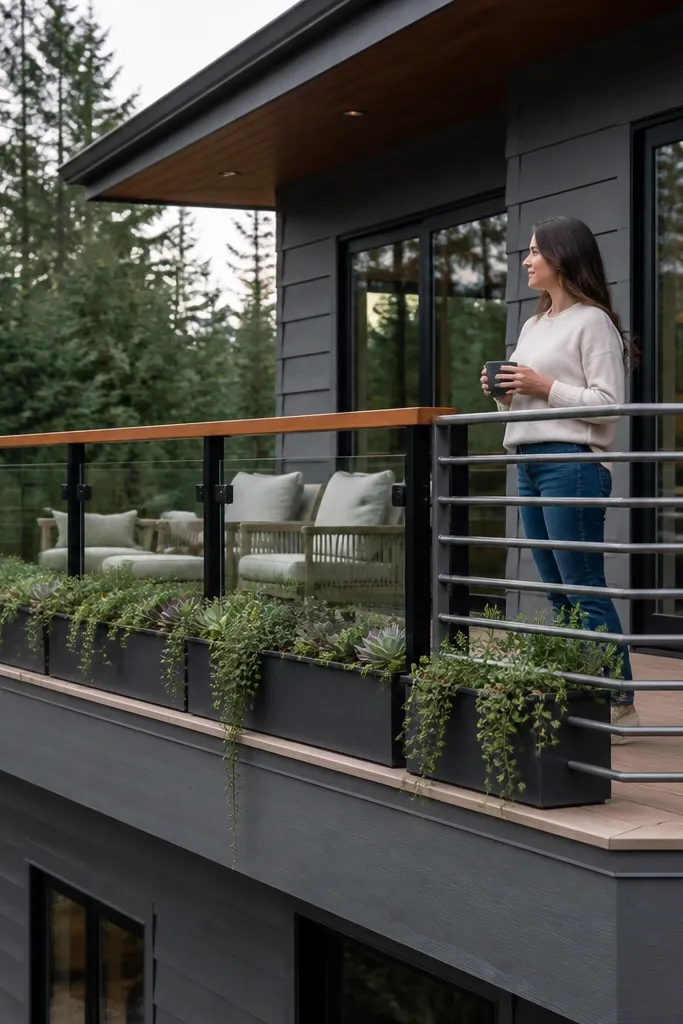
1. Matte Black Steel with Flat Cap Top Rail
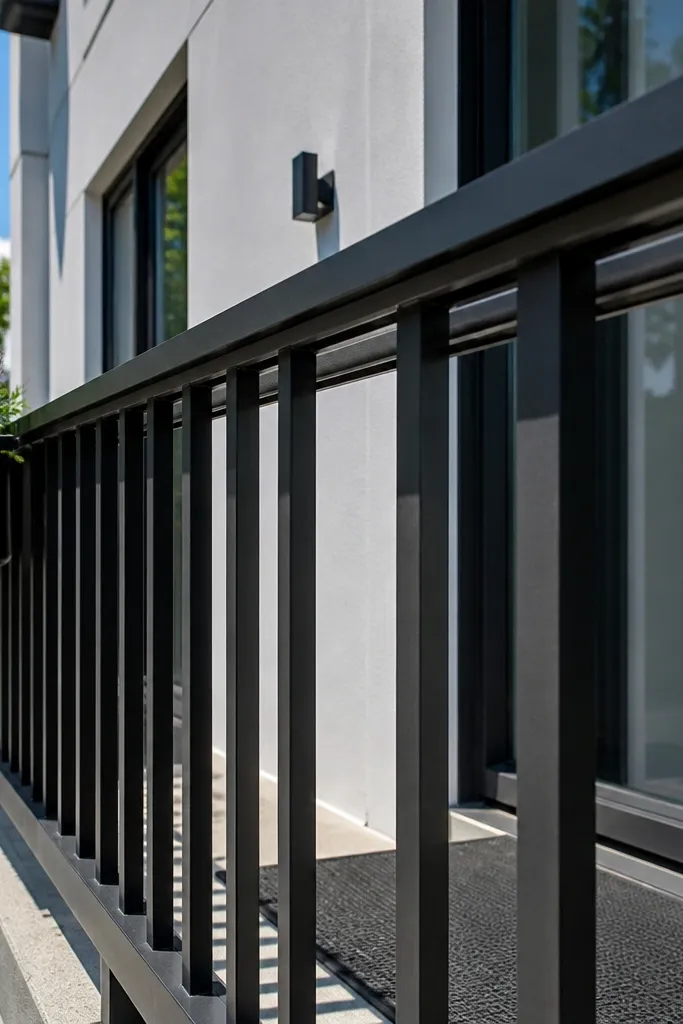
This is the “clean and expensive” route: matte black steel reads crisp in daylight and doesn’t glare at night. The flat cap top rail gives you a sharp horizontal line that frames the balcony opening, which is what makes photos look tidy. Narrow, evenly spaced vertical bars keep the view open without turning into a flimsy fence look. If your balcony is small, this design makes it feel larger because it doesn’t add visual bulk.
Editor's noteUse a laser level to set baluster alignment; small angle drift shows up hard in photos.
Start by sourcing powder-coated steel posts and vertical balusters, then pick a flat top rail profile that matches your posts (common sizing is 2 in wide with a 1/8-1/4 in cap lip). Install posts plumb, then set balusters with a jig or spacers so every gap is identical. Finally, cap the top rail and add end trim plates so the joints look intentional from every angle.
Skip thisAvoid mixing glossy black with matte parts — the shine mismatch makes the whole railing look patched.
2. Warm Cedar Top Rail with Black Vertical Pickets
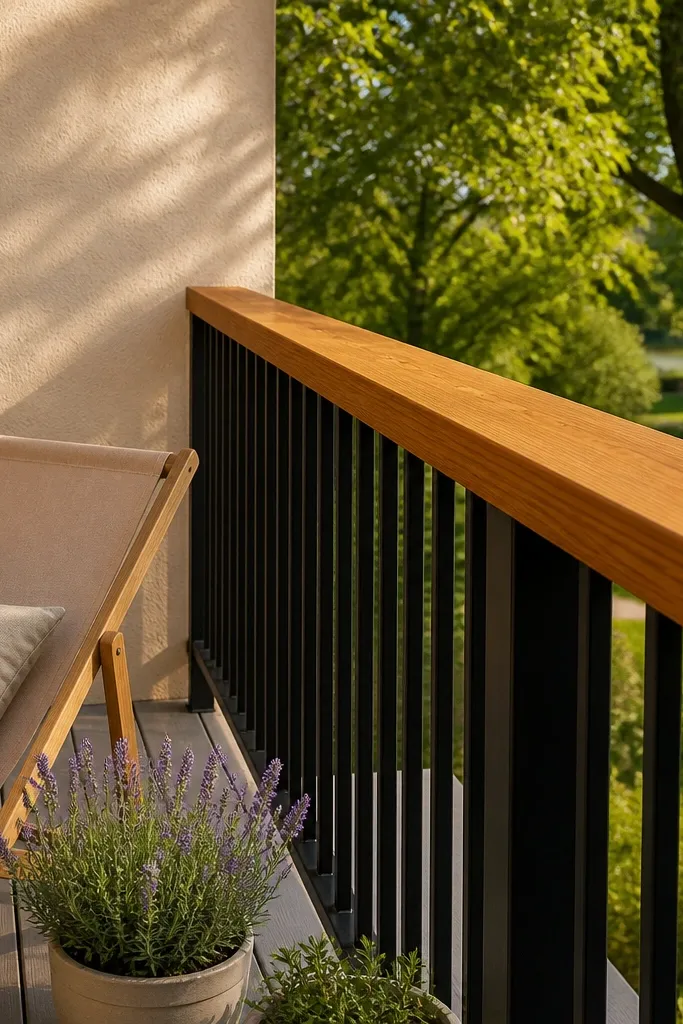
Wood on top is the cheat code for warmth. A cedar top rail adds color and grain that softens the hard lines of metal pickets, so the railing looks more like a custom build than a stock kit. Black vertical pickets keep it modern and readable, and the contrast helps the balcony edges pop. This design works especially well on stucco, light siding, or anything that’s off-white or beige.
Editor's noteSand the cedar to 120 grit before sealing; it stops the stain from looking blotchy.
Cut cedar to the exact measured run length, then seal all sides with exterior penetrating stain or a marine-grade sealer before installation. Mount black metal pickets to a steel or wood frame, keeping spacing consistent from post to post. Install the cedar top rail with hidden brackets from underneath so you get clean lines, then add end caps to cover cut grain at the edges.
Skip thisDon’t leave cedar untreated — raw wood darkens unevenly and looks messy fast.
3. Clear Glass Panels with Slim Aluminum Posts
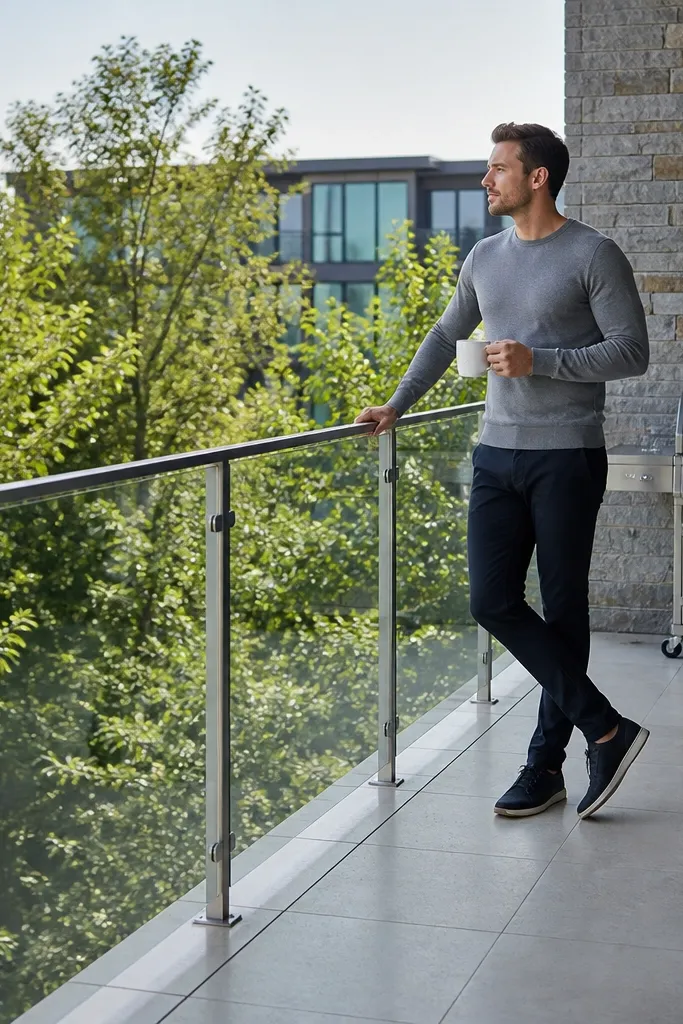
Glass makes the balcony feel bigger because it removes the “grid” effect. The design looks best when the posts are slim and the glass sits flush so you don’t get thick, chunky lines. Use tempered or laminated code-rated glass and keep the hardware dark or brushed so it disappears into the frame. If your view is the selling point, this is the most photogenic option because the background stays uninterrupted.
Choose aluminum framing sized to your posts and install end posts first, perfectly plumb and level. Set glass panels with proper glazing tape and spacers, then secure with manufacturer-approved brackets and channel covers. Finish by adding top and bottom caps over the glass edges so the joinery looks crisp from every angle.
Plan your panel layout before you buy — the spacing between posts determines the look more than the glass itself.
Skip DIY glass cutting; use pre-sized panels or your install will look crooked.
4. Horizontal Slat Screen in Powder-Coated Charcoal
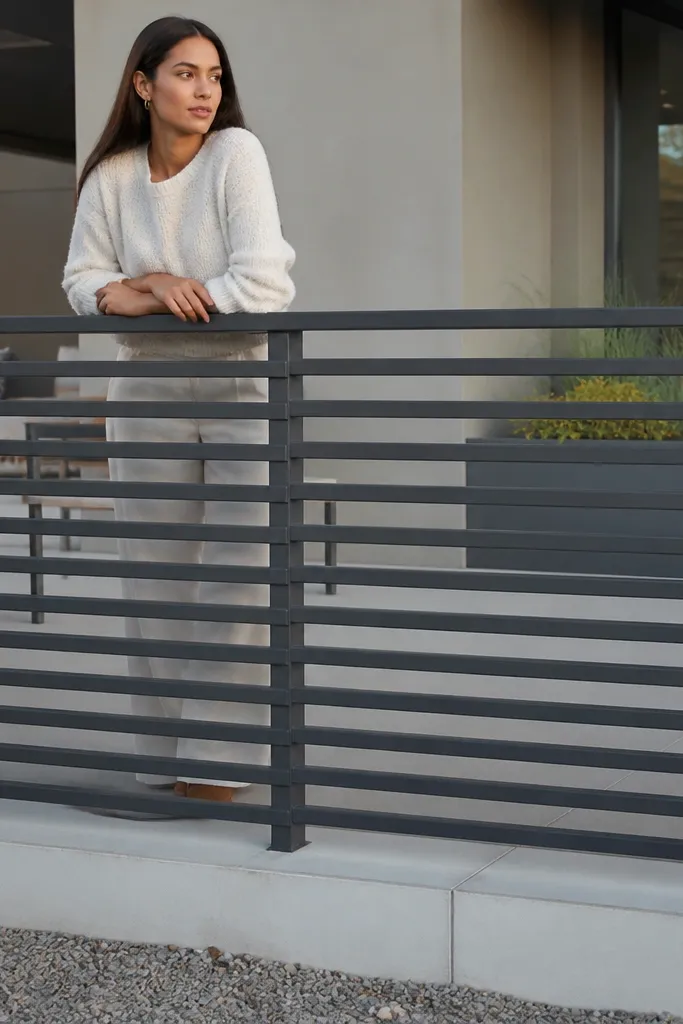
Horizontal slats make a balcony read modern and calm. The trick is keeping slat spacing consistent and choosing a finish that’s matte or satin; glossy slats look cheap because they show every wave. Charcoal is a great middle ground — it’s darker than steel but not as harsh as black. This design also gives you light privacy without blocking the entire view.
Editor's noteCut slats in a single batch and label them; mixing lengths ruins the line rhythm.
Build a simple rectangular frame between posts, then attach horizontal slats using identical spacing blocks. Aim for slat thickness around 1/2 in equivalent and set the gaps so they look even from corner to corner. Finish by adding a matching charcoal top cap or a separate top rail that visually unifies the slats and posts.
Skip thisDon’t vary slat spacing to “make it fit” — photos catch those gaps immediately.
5. Espresso Stain Wood Frame with White Spindles
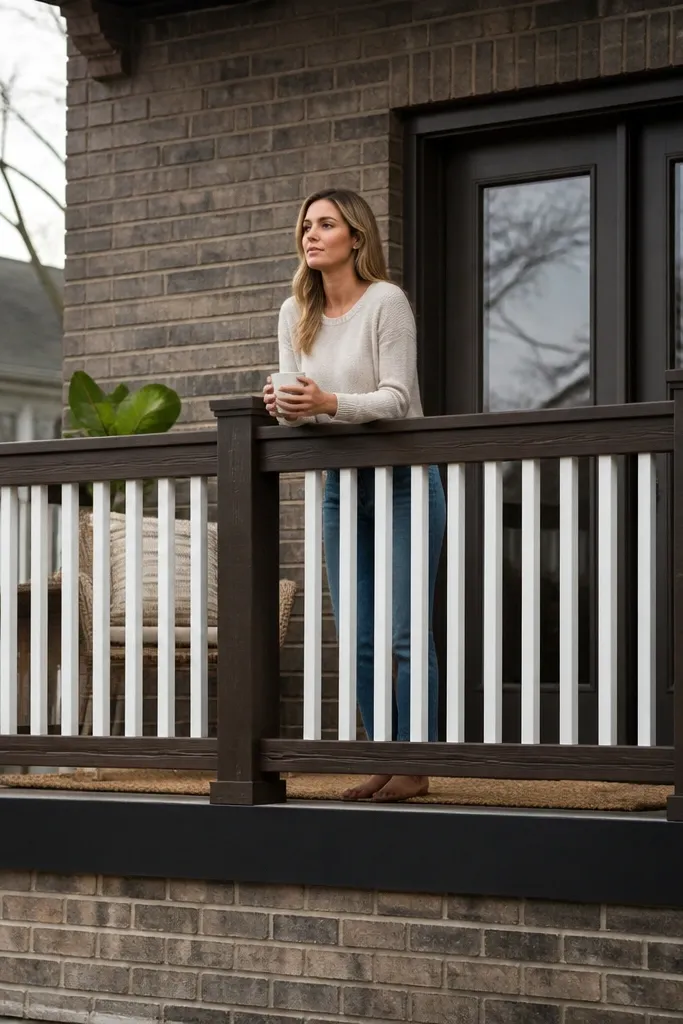
This is the “country-meets-modern” look that photographs beautifully against brick or warm siding. Espresso-stained wood gives depth, while white spindles create crisp vertical lines that read clean instead of cluttered. The contrast also hides minor imperfections in alignment better than all-dark designs. Use this when you want a railing that’s a feature, not just a safety barrier.
Frame the opening with treated wood rails and posts, then stain with a consistent espresso tone and seal with exterior clear coat. Install white-painted spindles into the frame using pre-drilled holes and consistent spacing. Add a smooth top rail that matches the frame color and covers the spindle tops for a finished look.
Spray-paint spindles for a uniform finish; brushing shows streaks at balcony distances.
Avoid mixing two wood stains — the undertones clash in daylight.
6. Cable Rail with Dark Tension Hardware
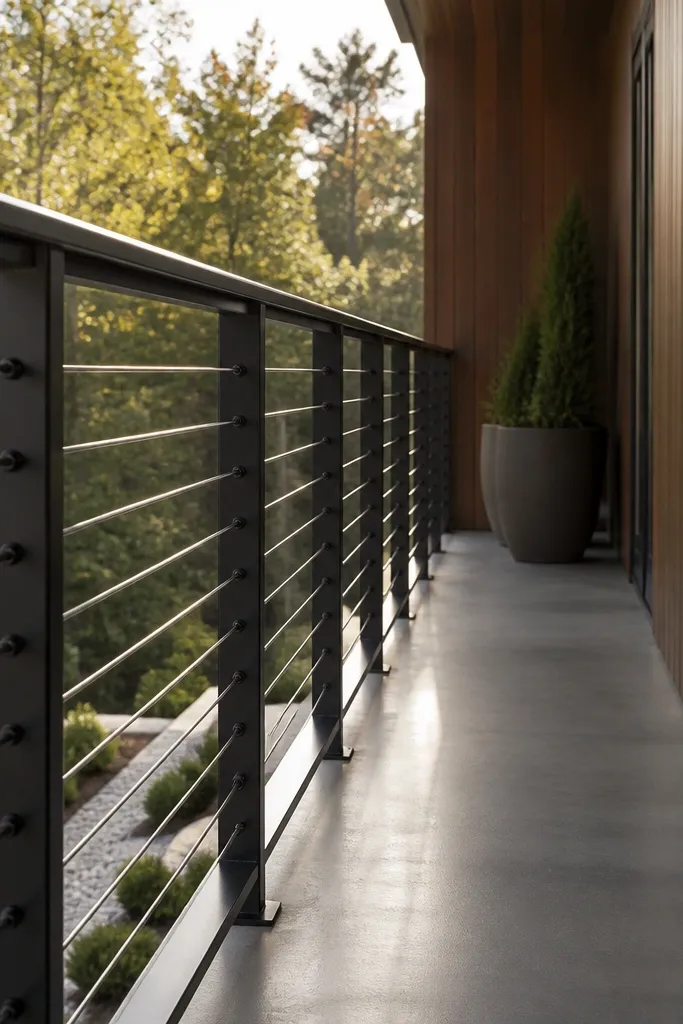
Cable rail looks sleek and airy because it replaces solid balusters with thin lines. The clean look comes from two things: tight, even cable spacing and hardware that blends in. Dark tension fittings keep the visual noise down, so your eye reads the cables as a single graphic element. This design suits modern homes and also works on balconies with a lot of vertical sightlines.
Install posts with pre-marked cable holes at the correct height range, then mount top and bottom cable blocks to keep the cables parallel. Thread stainless cables, attach tensioners, and set tension evenly so cables don’t sag. Finish by trimming ends cleanly and adding end covers so the fittings don’t catch light and look messy.
Use a cable spacing jig — freehand spacing makes the lines look uneven in photos.
Don’t leave cables without proper tension; sagging cables look sloppy fast.
7. Wrought Iron Scroll Corners with Straight Middle Bars
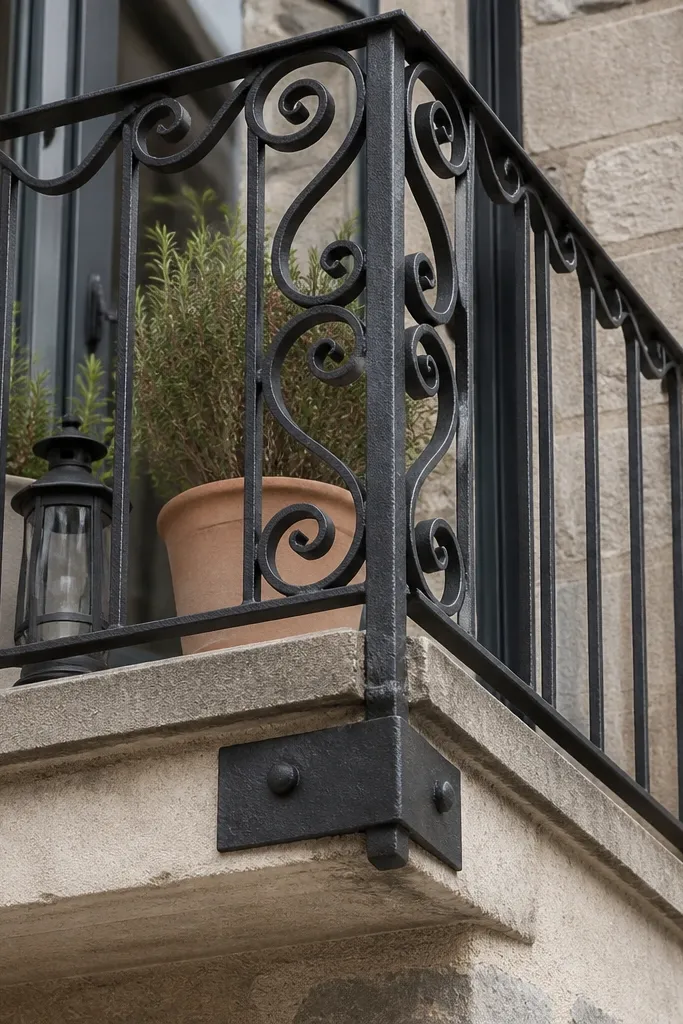
This design adds personality without turning the whole railing into a busy pattern. Scroll corners are a focal detail that reads elegant in daylight, while straight middle bars keep the structure visually balanced. Choose a matte black finish for the iron; it hides minor texture and looks more refined than glossy spray paint. It’s a strong choice for older homes, brick facades, and balconies with classic lines.
Start with a wrought iron kit or fabricate corner scrolls, then weld or bolt them to end posts so the scrolls align perfectly with the top rail. Fill the middle section with straight vertical bars at consistent spacing. Powder-coat or properly paint the iron, then add decorative top rail brackets to cover any joint gaps.
Keep scrolls only at corners; repeating them across the whole run makes it look crowded.
Avoid thin, flimsy bar stock — it twists and makes the pattern look off.
8. White Composite Privacy Panel with Narrow Metal Edges
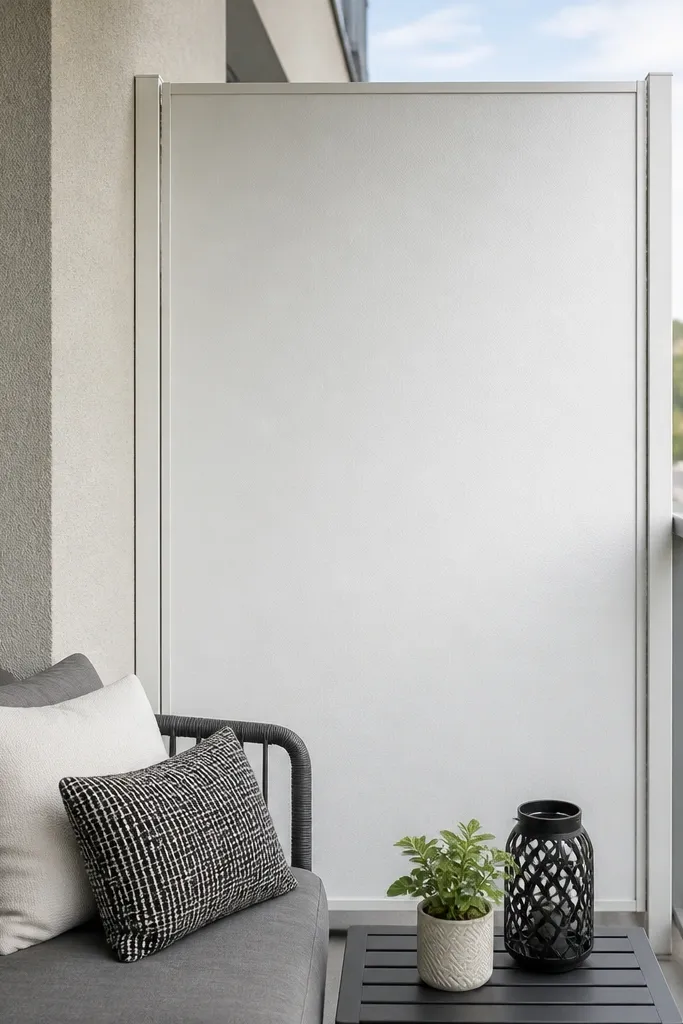
If you want privacy and a crisp, modern look, a composite panel does the job while staying photogenic. The key is keeping edges slim and using a light color that matches your exterior trim. White panels reflect light and brighten the balcony, which makes small spaces feel less boxed in. This works especially well when your balcony faces a neighbor and you need visual separation.
Editor's notePre-drill composite and use stainless screws; it prevents cracking around screw points.
Frame the opening with metal or treated lumber, then cut composite panel sections to fit between posts. Install narrow metal edge trim to hide panel seams and give you that clean border look. Add a top rail cap that covers the panel top, then seal any cut edges per the manufacturer’s instructions.
Skip thisDon’t leave panel edges exposed — they weather unevenly and look rough.
9. Brass-Tinted Aluminum with Clear Infill
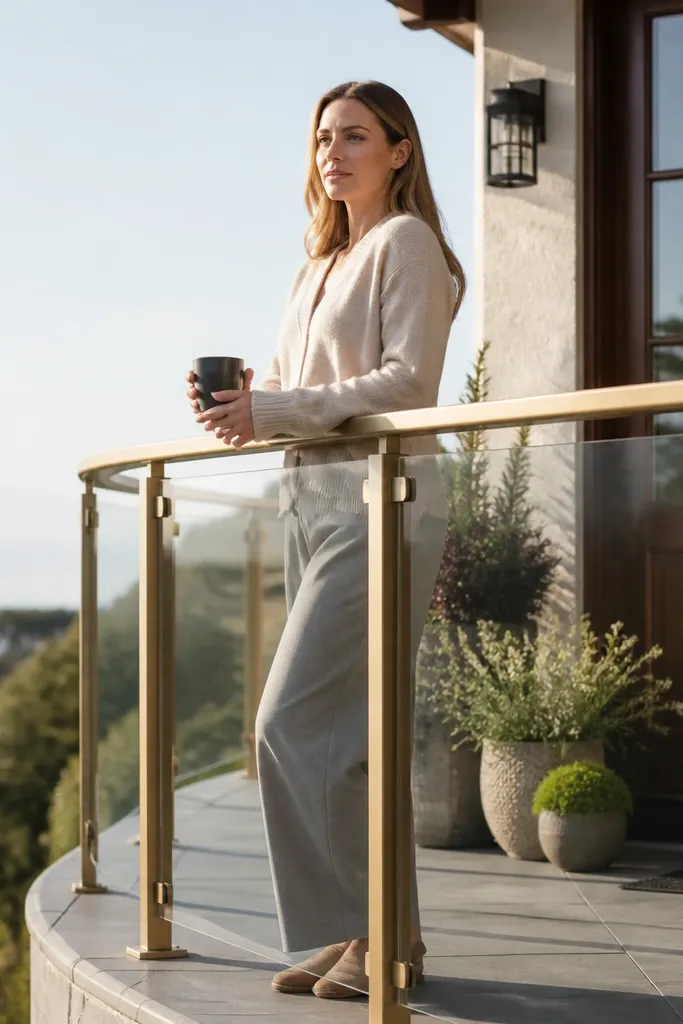
Brass-tinted finishes are a visual upgrade that reads warm and intentional, especially on homes with warm metals like door handles or light fixtures. Pair the toned posts with clear infill so you get brightness without losing the airy feel. The look is photogenic because brass catches light and creates a subtle glow around the balcony edge. Keep the rest of the balcony simple so the railing becomes the focal line.
Choose anodized or powder-coated aluminum in a brass tone, then install slim posts at your measured spacing. Use clear infill panels that match the post system and keep the gasket edges neat. Attach a matching top rail and cover plates so the join lines look like one continuous assembly.
Test the finish outdoors in sun — brass tones shift depending on lighting and nearby colors.
Avoid pairing brass with cool gray trim; it makes the railing look stuck-on.
10. Two-Tone Metal: Black Posts with Natural Wood Top Rail
Two-tone looks best when one tone is functional and the other is warm. Black posts keep the structure crisp, and a natural wood top rail adds texture your eyes can rest on. This design is a sweet spot between totally modern and totally traditional. It also hides small installation variations because wood grain reads as “designed,” not “mistakes.”
Editor's noteUse a wood rail with rounded edges; square corners chip and look rough after a season.
Mount black metal posts and vertical balusters with consistent spacing using a spacer block. Cut a natural wood top rail slightly wider than the metal so it overhangs evenly on both sides. Seal the wood with an exterior clear finish or light stain, then add end caps and a drip edge under the rail for water management.
Skip thisSkip thin wood rails that flex — they look wavy once people lean on them.
11. Vertical Slat Wood Screen with Shadow Gap
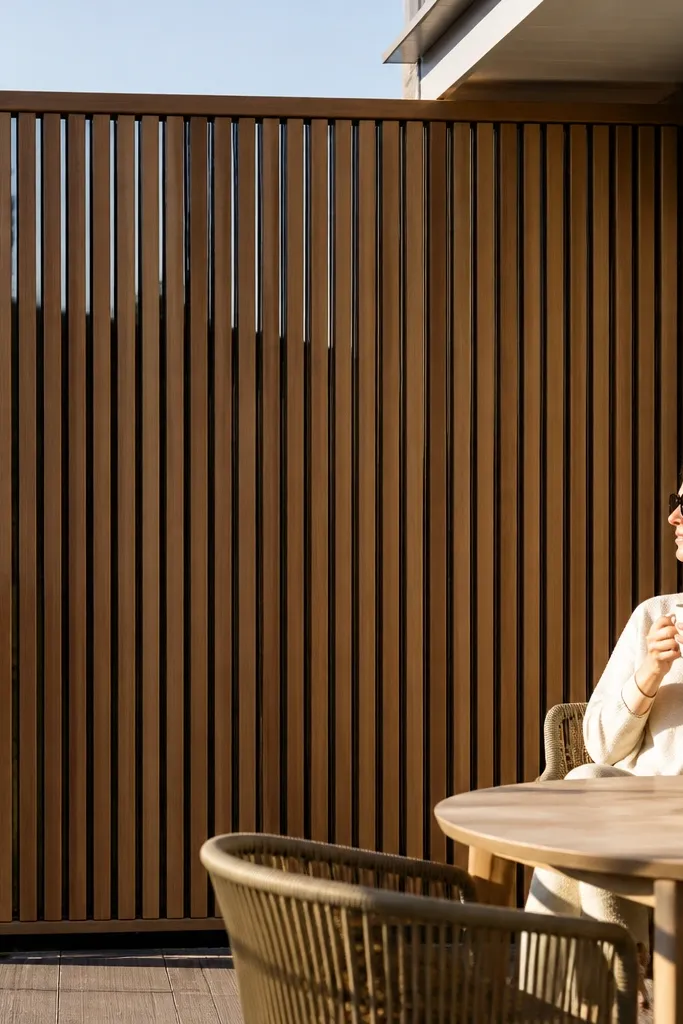
Shadow gaps make wood railings look custom because you see negative space between slats. This design gives you privacy and a layered look without blocking the whole balcony. The slats should be the same width and thickness to keep the rhythm even in photos. Choose a medium stain that matches your exterior trim for a coherent look.
Editor's noteMake a slat spacing template from scrap plywood so every gap stays identical.
Build a frame with posts and rails, then install vertical slats with spacers that create a consistent gap, often 1/4-3/8 in. Use exterior screws and countersink so the heads sit below the surface. Sand edges smooth, stain, and seal, then add a solid top cap rail to lock the slats visually together.
Skip thisDon’t use random-width spacers; tiny inconsistencies show up as a wavy pattern.
12. Matte Gray Metal with Rounded Baluster Rods
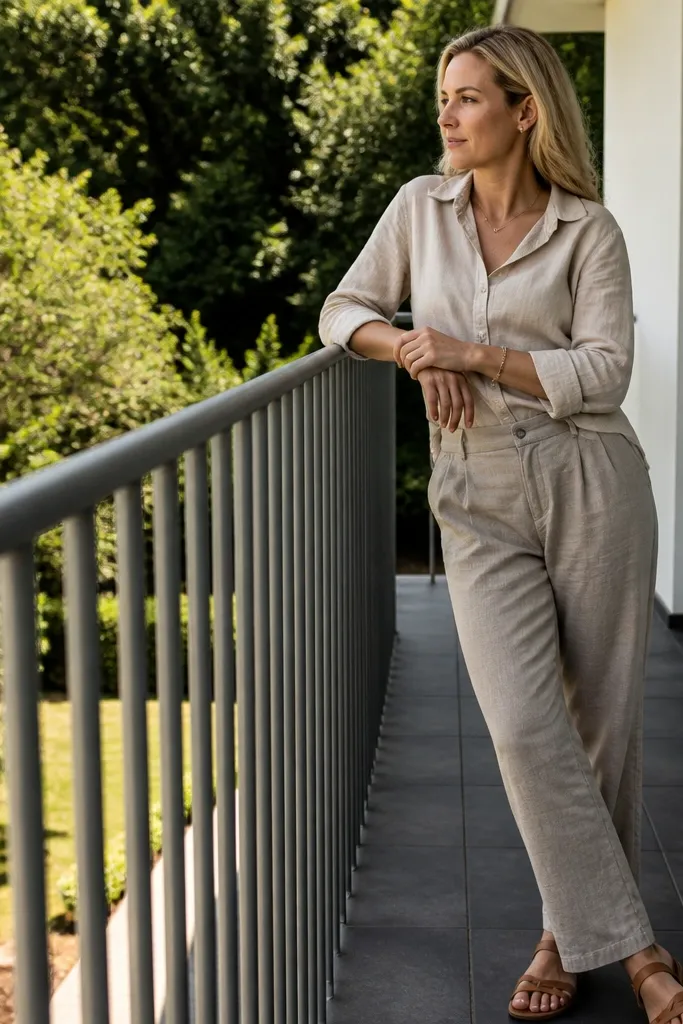
Rounded baluster rods soften the look of metal. Matte gray is also forgiving — it blends with siding and looks modern without screaming for attention. The rounded shape catches light differently than flat bars, which makes the railing look more dimensional in photos. This is a smart choice for contemporary balconies where you want a clean line but not a harsh “fence” vibe.
Editor's notePaint or coat the brackets too; bare metal edges look like unfinished repairs.
Install posts and top rail first, then mount rounded rod balusters using uniform clamp brackets. Keep rod spacing consistent and use a jig to set the distance from the inside face of the top rail. Finish with a matte powder coat or paint system rated for outdoor exposure, then seal any cut ends.
Skip thisAvoid mixing rod diameters; it breaks the uniform rhythm.
13. Stone-Look Composite Infill with Black Frame
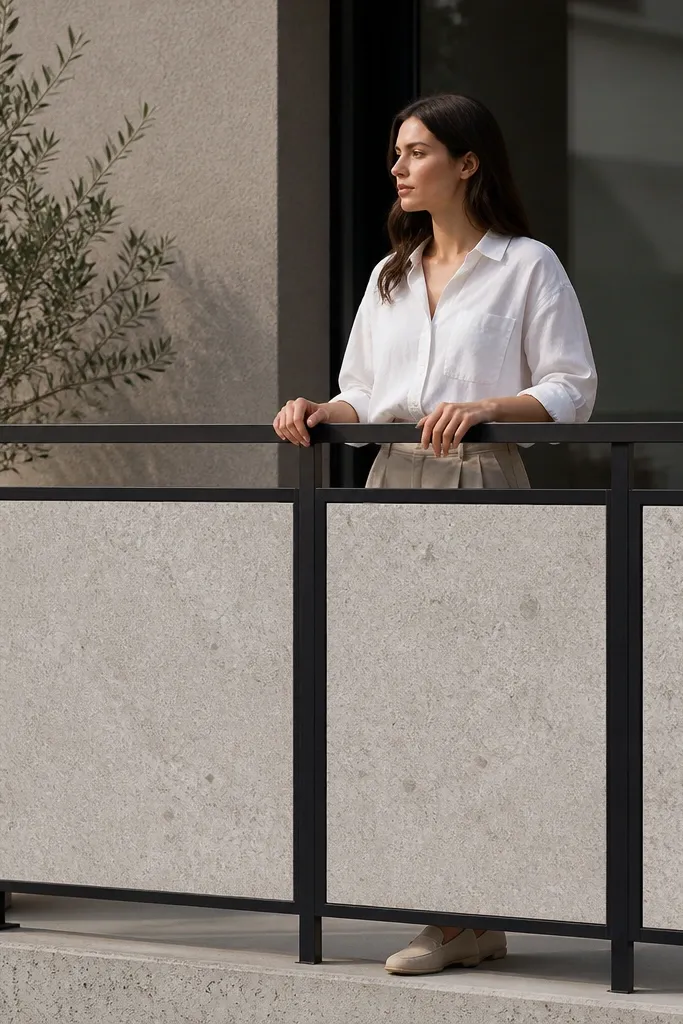
Stone-look infill gives you a bold visual surface while still staying tidy and modern. The black frame keeps the pattern contained so it doesn’t look like a random tile wall. This design photographs well because the infill has texture and depth, even in flat light. It’s a strong option when you want privacy and a feature element on a balcony that’s otherwise simple.
Build a black powder-coated frame between posts, then install stone-look composite panels cut to fit. Use gasket tape between panel and frame to prevent squeaks and reduce water intrusion. Add a top cap that covers the panel seam and finish with bottom trim to keep dirt from collecting at the edge.
Dry-fit panels and mark cut lines with a sharp pencil; composite edges show errors immediately.
Don’t skip bottom trim; water and grit get trapped and stain the panel edges.
14. Clear Acrylic Panels with Hidden Clips
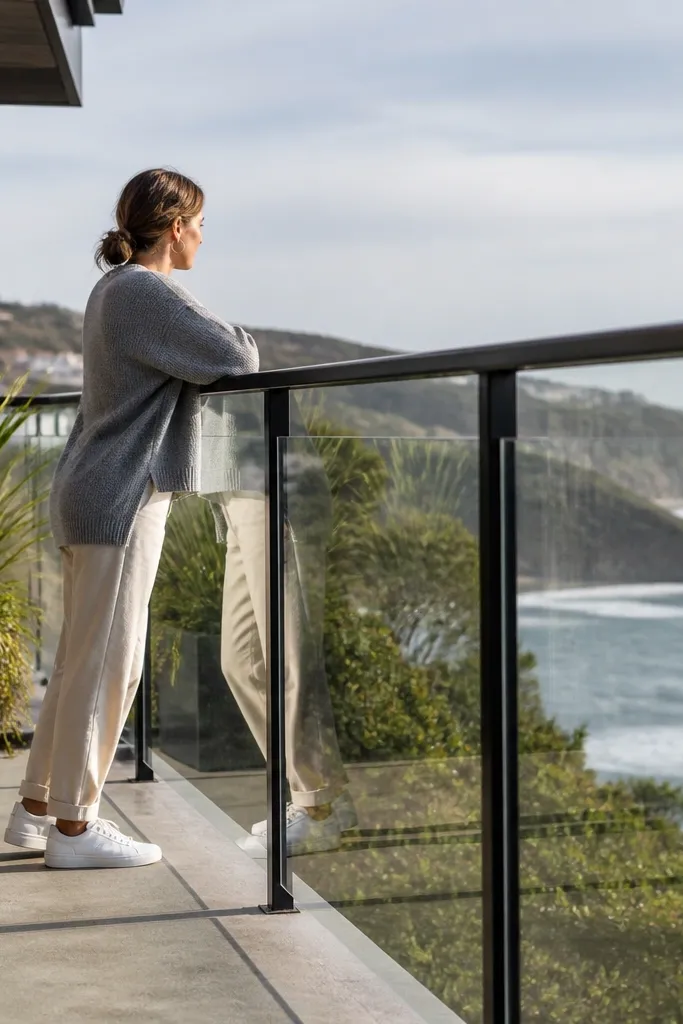
Clear acrylic can give you a glass-like look when you want a lighter, cheaper build. The photogenic part is the hardware: hidden clips keep the panels looking smooth and continuous. This design works well for balconies where you need wind protection but don’t want a heavy grid of metal. Use it when you’re okay with more maintenance than tempered glass.
Editor's noteUse acrylic-safe cleaner and microfiber only; regular glass cleaners haze acrylic.
Choose UV-stabilized outdoor acrylic sheets and cut to panel sizes with a fine blade or scoring system recommended for acrylic. Install a metal frame with slots for hidden clips, then slide panels in and secure the clips from the inside. Add top and bottom cover rails so edges look finished, then clean with acrylic-safe products.
Skip thisAvoid over-tightening clips; acrylic stresses crack under pressure.
15. Chevron Metal Infill in Satin Bronze
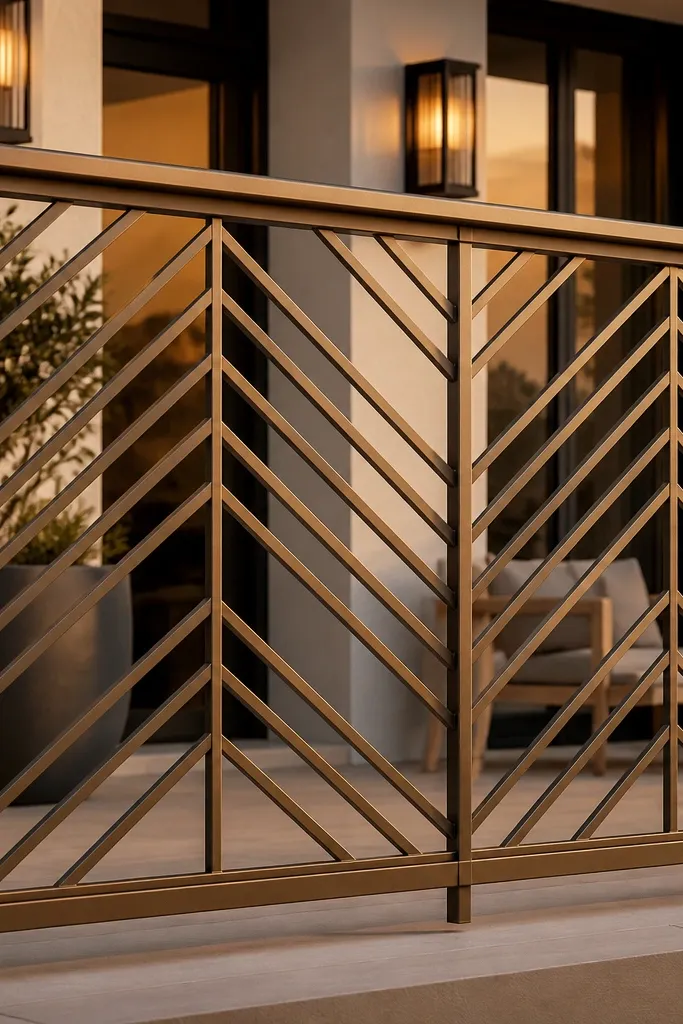
Chevron infill is graphic. When the pattern is aligned and the finish is satin bronze, the railing reads like a design feature instead of a safety line. The diagonal geometry makes the balcony look deeper in photos because it adds motion to the static space. This design works best when you keep the rest of the balcony minimal — plain floor, simple planters, and one accent color.
Frame the opening between posts, then cut or buy chevron metal panels sized to fit exactly. Bolt the panel to the frame with countersunk fasteners and add a top rail cap that hides the panel top edge. Finish by sanding and touching up any cut points, then seal with a matching outdoor coating to keep bronze even.
Align chevrons to a centerline so the pattern looks intentional from both sides of the balcony.
Don’t use a glossy bronze; reflections make the chevron lines look messy.
16. Brick-Matched Mortar-Gray Frame with Vertical Wood Battens
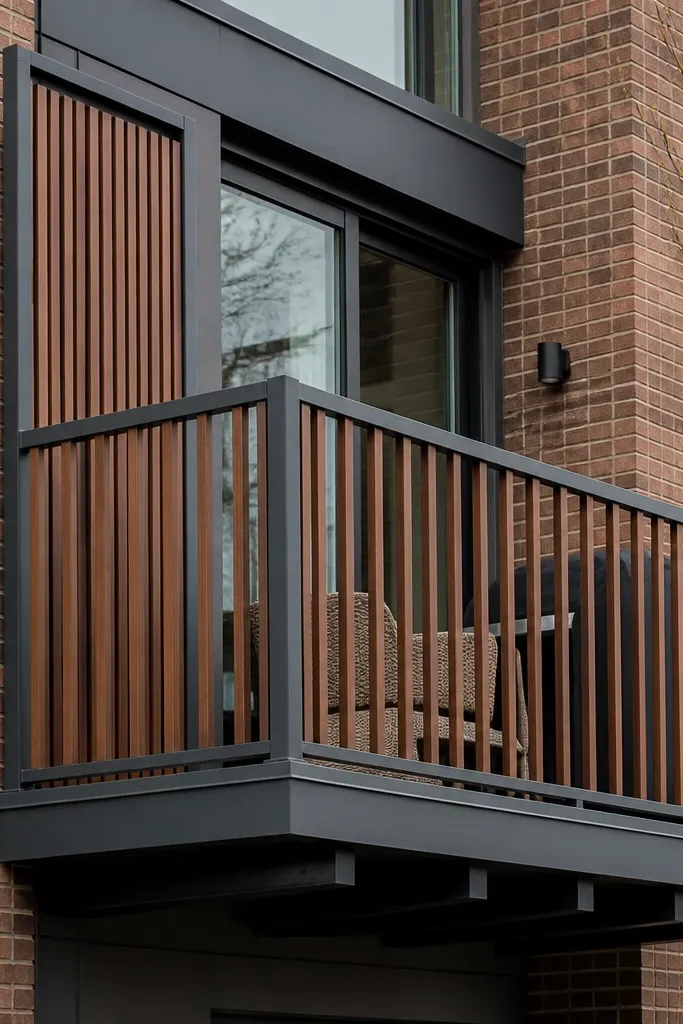
When your home is brick or textured masonry, the best-looking balcony railing design matches the mortar tone. A mortar-gray frame keeps the railing visually quiet while vertical wood battens add warmth and texture. This combo balances modern structure with natural material appeal. Photos look better because the railing blends into the facade instead of fighting it.
Editor's noteUse a single batten width across the whole run; mixed widths make the facade feel patchy.
Measure the opening and build a mortar-gray painted or powder-coated frame to fit between posts. Attach evenly spaced wood battens to the frame with hidden fasteners or countersunk screws. Seal battens with exterior stain and clear coat, then install a top rail that bridges the frame and battens so the top line is uninterrupted.
Skip thisAvoid painting the frame with a random gray; pick a tone close to your mortar.
17. Rope-Style Synthetic Braided Infill with Black Posts
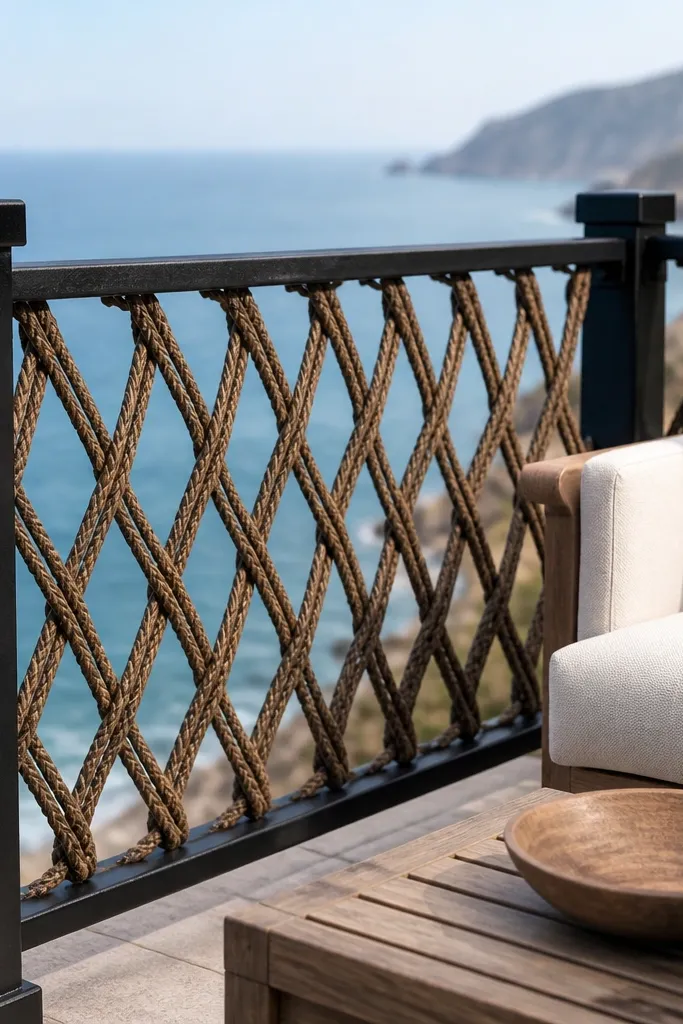
Rope-style infill looks handcrafted and softens the balcony edge. Synthetic braided rope gives you a similar look to natural rope without rotting, and it photographs well because the strands create texture. Keep the rope color neutral like natural tan or dark brown, and use black posts to keep the contrast crisp. This is a great choice for coastal or cottage-style homes.
Editor's noteTension each rope line the same amount; uneven tension makes the pattern look sloppy.
Install black posts and add anchor points at top and bottom rails at evenly spaced intervals. Thread braided rope through the anchors in a consistent pattern, then tie knots or use rated rope clamps depending on your anchor system. Trim ends cleanly and seal knots with a small amount of outdoor-rated end cap or heat shrink if your rope allows it.
Skip thisDon’t use real rope — it frays and looks worn quickly outdoors.
18. Diagonal Wood Lattice Infill with Wide Top Cap
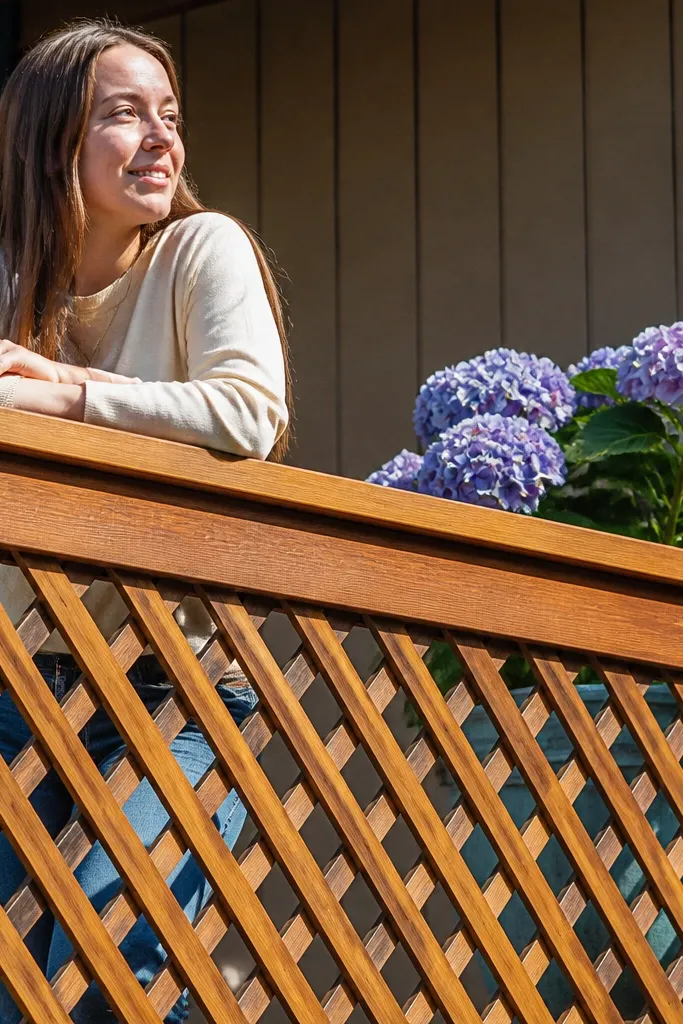
Diagonal lattice adds energy and makes a balcony railing feel like a design panel. The wide top cap keeps it grounded and gives your eye a strong horizontal line to balance the diagonals. This looks best on balconies with a lot of vertical wall space where you want the railing to add pattern without covering the view completely. Use lattice when you want shade and privacy but still want airflow.
Build a framed opening between posts, then install lattice strips at a consistent angle, usually 45 degrees, with spacers for even lines. Secure lattice to the frame with exterior screws and wood glue where appropriate, then sand edges and seal. Install a wide top cap rail that covers the lattice ends and hides fasteners so the top looks smooth and finished.
Make a cardboard angle template so each lattice strip hits the same geometry across the run.
Avoid thin lattice strips — they warp and create a wavy pattern.
19. Powder-Coated White Metal with Slim Vertical Spacers
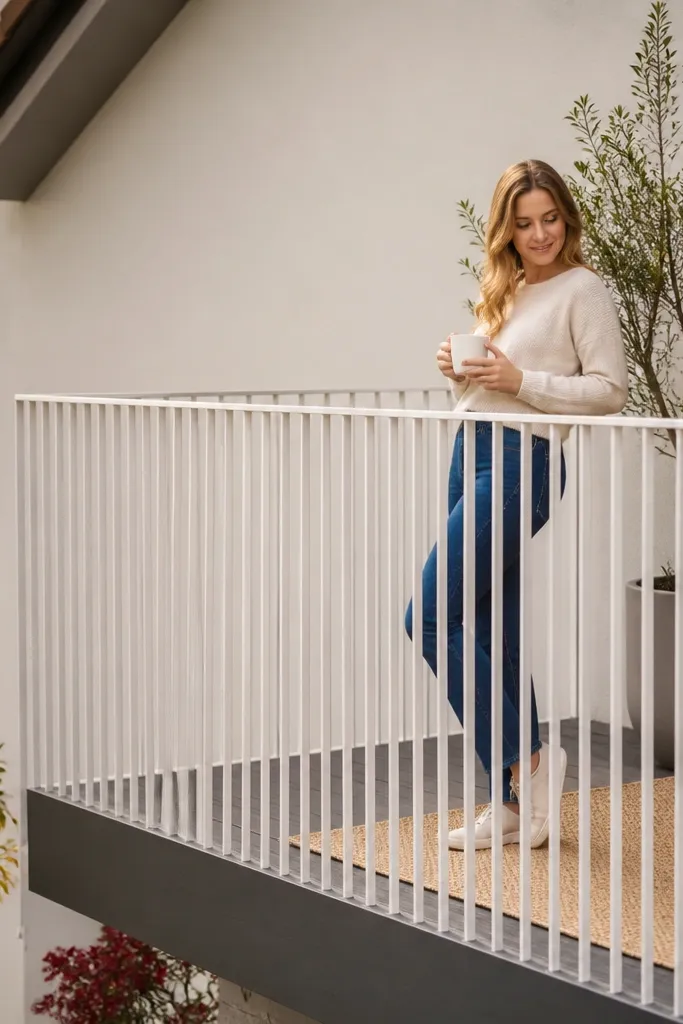
White metal railings look bright and clean, especially on darker floors or when your balcony has light walls. The design stays photogenic when the vertical bars are slim and the top rail is minimal, so the railing doesn’t feel heavy. Add slim spacer details to keep the lines straight and consistent. This is a strong pick for modern homes where you want the railing to look like part of the architecture.
Mount posts with a consistent spacing and align them with a level. Install slim vertical bars using spacer blocks so gaps stay identical. Finish the top rail with end caps and cover plates, then touch up any cut points with outdoor-rated white coating so the color stays uniform.
Choose matte or satin white — glossy white reflects too much and washes out in photos.
Skip off-white paints; the slight color mismatch shows up instantly.
20. Black Steel Frame with Cross-Brace Infill
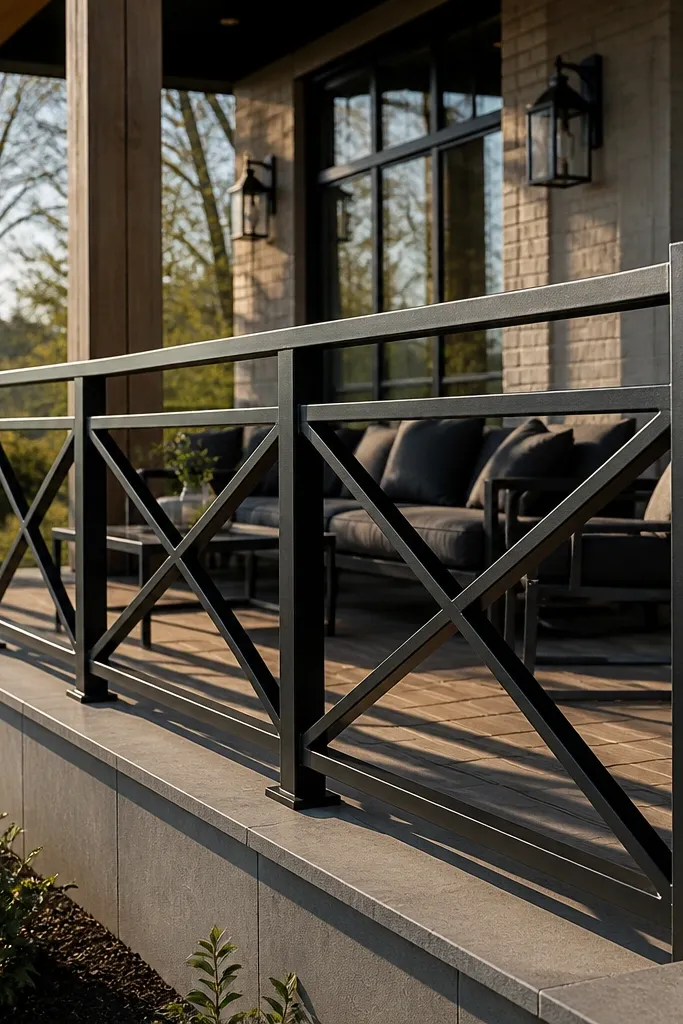
Cross-bracing gives you a strong graphic look and makes the railing feel solid. It also hides the empty feeling you get from plain vertical bars. The key is keeping the cross pattern aligned and using a flat top rail so the geometry reads clean. This design suits wider balcony openings where a simple vertical grid looks too plain.
Editor's noteMeasure brace angles with a digital angle finder — matching angles is what keeps it symmetrical.
Build a black steel frame between posts, then weld or bolt diagonal cross-brace rods so they intersect at the same point in each section. Add a flat top rail cap on top of the frame so the braces look contained. Finish by powder-coating and adding bottom trim so the base line looks straight and deliberate.
Skip thisAvoid random brace lengths; mismatched diagonals make the whole section look uneven.
21. Natural Teak Top Rail with Glass Block Side Panels
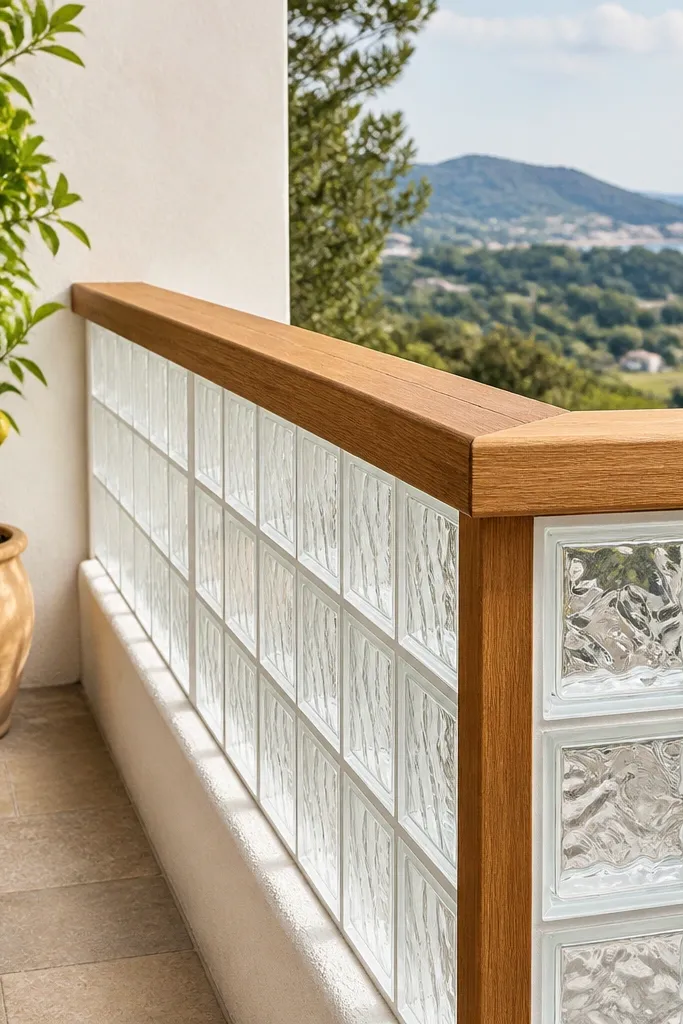
Frosted glass blocks add a soft, architectural texture that looks great in daylight. Pairing them with a teak top rail brings warmth and makes the railing feel like a custom wall detail. This design works for balconies where you want privacy on the sides but still want light to pass through. It also hides imperfections in the underlying opening because the blocks create a uniform pattern.
Editor's noteUse spacers designed for the specific glass block size so the grid stays even.
Frame the sides with a strong base channel, then install glass blocks in a grid using the correct block mortar or block-setting system for your product. Cap the top with teak and cover frame edges with trim so the blocks look neatly contained. Seal grout or joints per the block system instructions and add a top cap to prevent water intrusion.
Skip thisDon’t rush grouting; uneven joints look bad from balcony height.
22. Textured Metal Mesh Infill in Charcoal
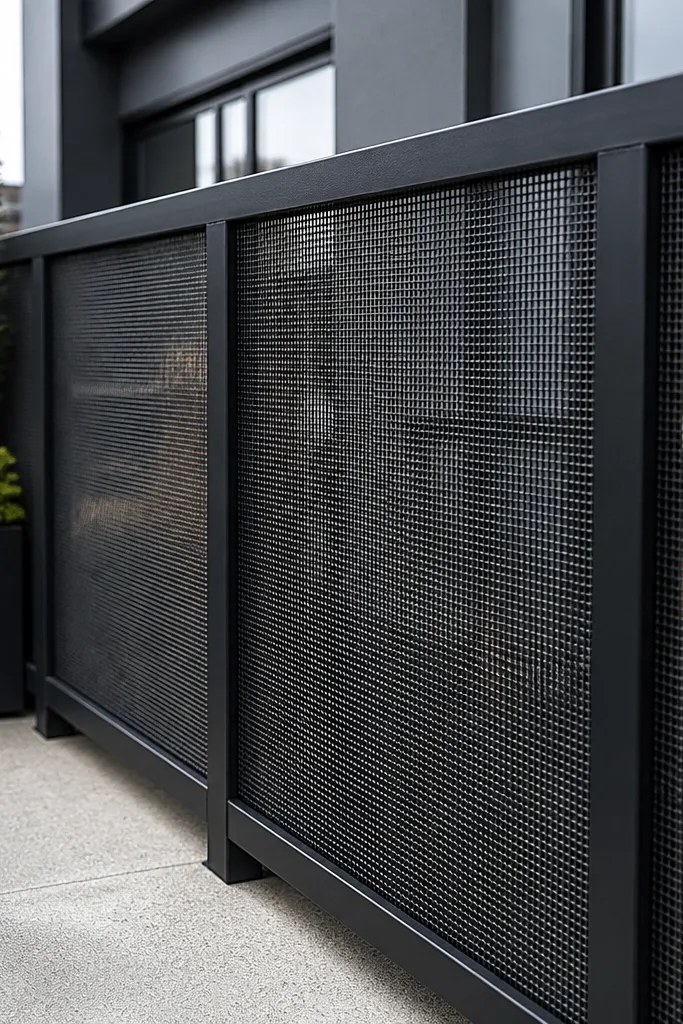
Mesh infill creates a modern industrial look while still giving some visual privacy. The photogenic part is the texture: it breaks up reflections and makes the railing look dimensional. Charcoal mesh also hides dirt better than bright colors, which matters on a balcony that collects dust. This design suits balconies with a lot of open air where you want airflow but not full visibility.
Install posts and top rail, then cut mesh panels to fit between them with a small overlap at edges. Secure mesh with clamps or welded tabs so it stays taut and doesn’t sag. Finish by adding end trim and a top cap that presses the mesh edges into place for a clean border.
Choose mesh with consistent opening size; random patterns look uneven in close photos.
Don’t leave mesh edges raw; sharp edges and fraying ruin the look.
23. Cedar Board-and-Batten with Vertical Narrow Openings
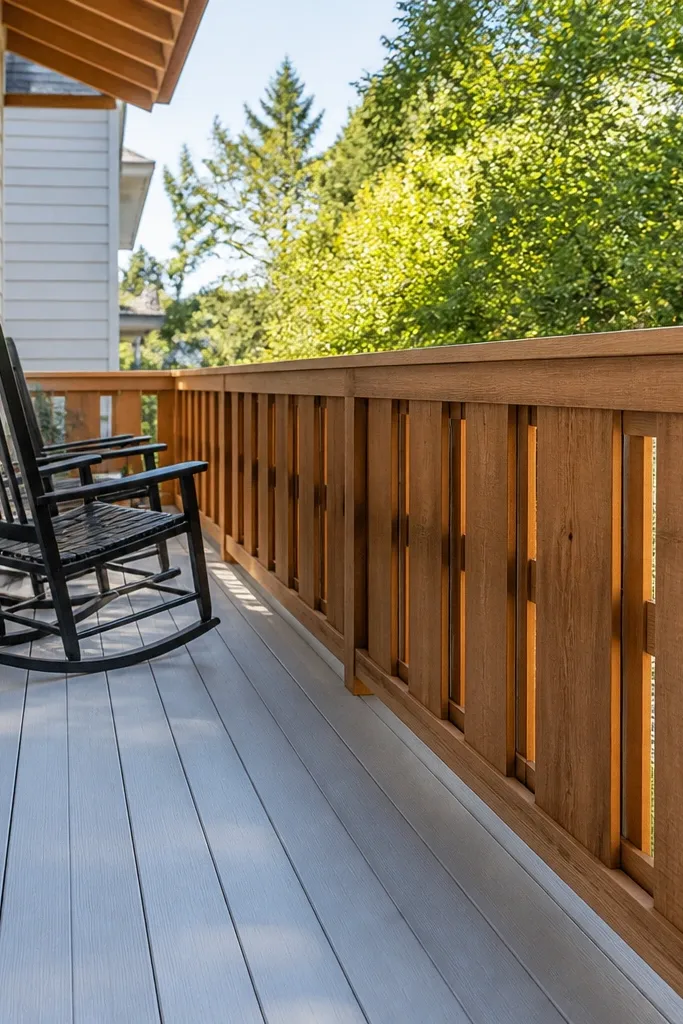
Board-and-batten style makes a balcony feel like it belongs to the house, not like it was installed later. Narrow vertical gaps keep it from looking like a solid wall, so the balcony still feels light. Cedar gives you a warm grain and a soft color that looks good in both overcast and sunny weather. This is a top pick for DIYers who want a classic look without complex metalwork.
Editor's noteUse a consistent gap measurement spacer so the vertical openings look uniform.
Frame the railing with posts and horizontal rails, then attach vertical boards spaced to create narrow openings. Use battens or thin strips to cover board edges and make the pattern crisp. Sand, stain, and seal cedar thoroughly, then install a top rail that covers the board ends and keeps water from sitting in seams.
Skip thisAvoid wide gaps — they turn board-and-batten into a cluttered fence.
24. Stained Wood Frame with Black Steel Vertical Inserts
This design mixes the best parts of wood and metal without looking messy. The stained wood frame gives warmth and structure, while black steel inserts keep the lines sharp and modern. The contrast makes the railing look intentional, especially when your exterior has wood trim. It’s photogenic because you get layered depth — frame, then vertical inserts, then the top rail.
Editor's notePaint the insert ends before installation; it prevents raw metal from showing at cuts.
Build a wood frame between posts and stain it, then install black steel vertical inserts inside the frame using pre-drilled holes. Keep insert spacing consistent and align them so they line up with the frame edges. Add a top rail that sits over both frame and inserts, and use trim pieces at the corners to cover joints.
Skip thisDon’t mount inserts with random depths; uneven inset depth looks crooked in photos.
25. Matte Black Posts with White Ceramic Tile Infill
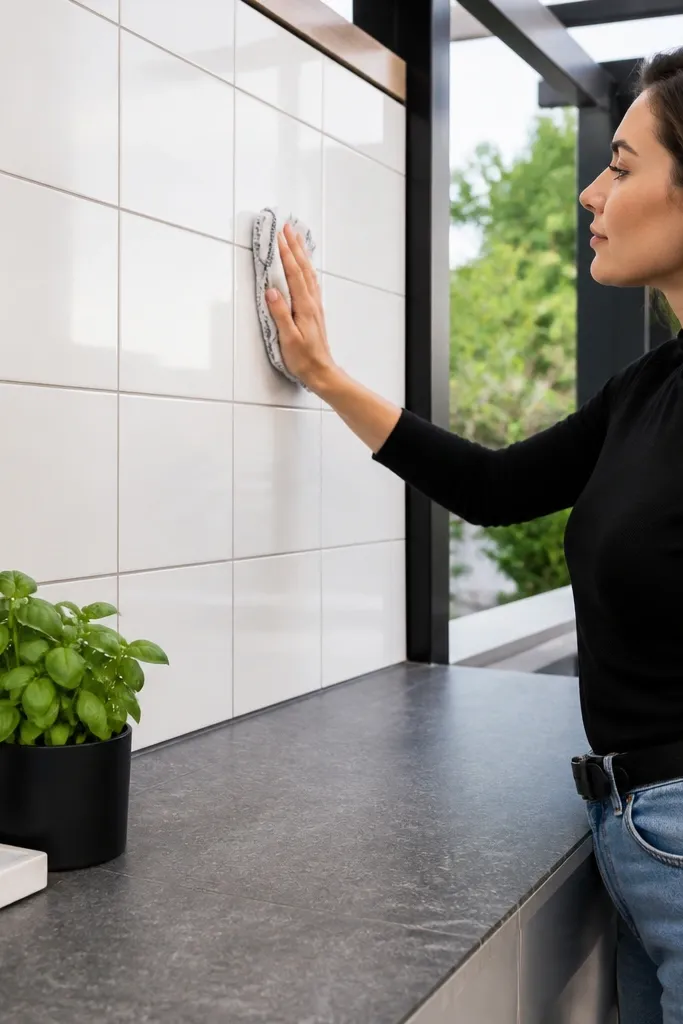
Tile infill is a visual flex that looks clean and architectural when done with the right grout lines. White ceramic keeps it bright and modern, while black posts frame it like a picture. This style is great for balconies that need a strong, easy-to-clean surface. It also photographs well because the tile pattern stays consistent and doesn’t rely on complicated metal geometry.
Frame the opening with a waterproof backer board system, then set tile panels in place using thinset and spacers for straight grout lines. Seal grout thoroughly and keep tile edges covered with trim at the top and bottom. Install the assembly between posts, then finish with a top rail that covers the tile edges so water doesn’t seep into the frame.
Use spacers and check grout lines with a straightedge; uneven grout reads as sloppy instantly.
Skip waterproofing behind tile — balcony moisture ruins backer materials.
26. Dark Walnut Top Rail with Bronze Vertical Rods
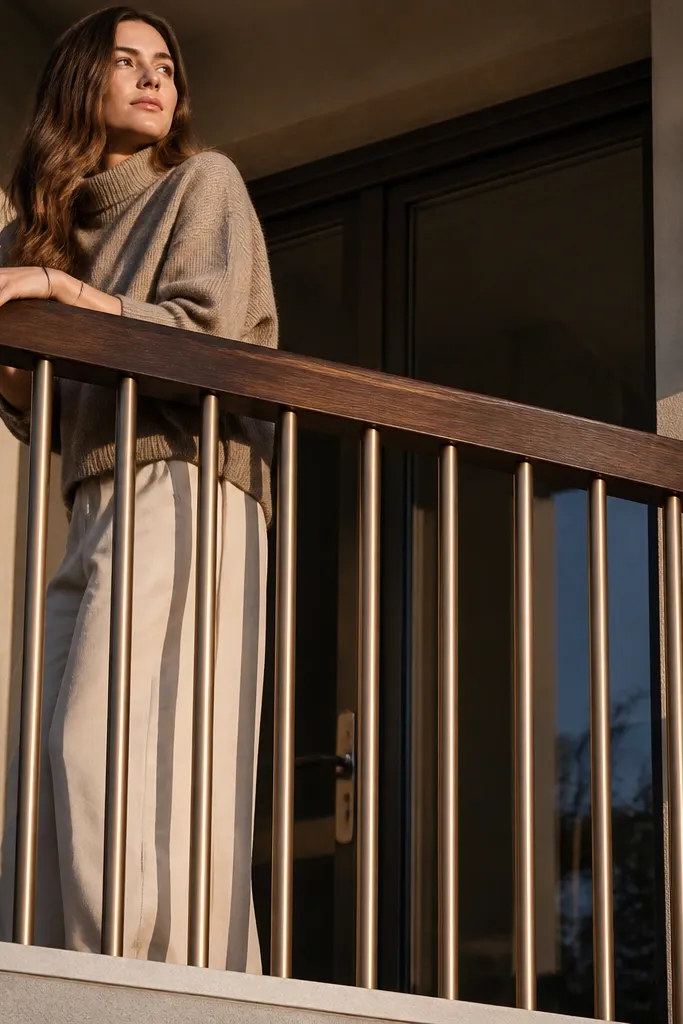
Walnut top rail adds depth and a richer color than generic “brown wood.” Bronze rods bring warmth and a subtle glow that looks great in late-afternoon light. The combination feels upscale without being flashy, and the vertical rods keep it modern. This design works well when your balcony door hardware or light fixtures are bronze-toned too.
Editor's noteChoose walnut with straight grain on the visible face; knots look fine in furniture but can look chaotic on a railing.
Install posts and a black or dark frame base, then attach bronze vertical rods using uniform brackets. Cut walnut top rail to length and seal with exterior clear finish or exterior oil-based sealer. Mount the walnut rail with hidden brackets so screws don’t interrupt the smooth grain line.
Skip thisDon’t leave walnut edges raw; they darken and split around the cut line.
27. Powder-Coated Steel with Vertical Slats and Top Light Strip
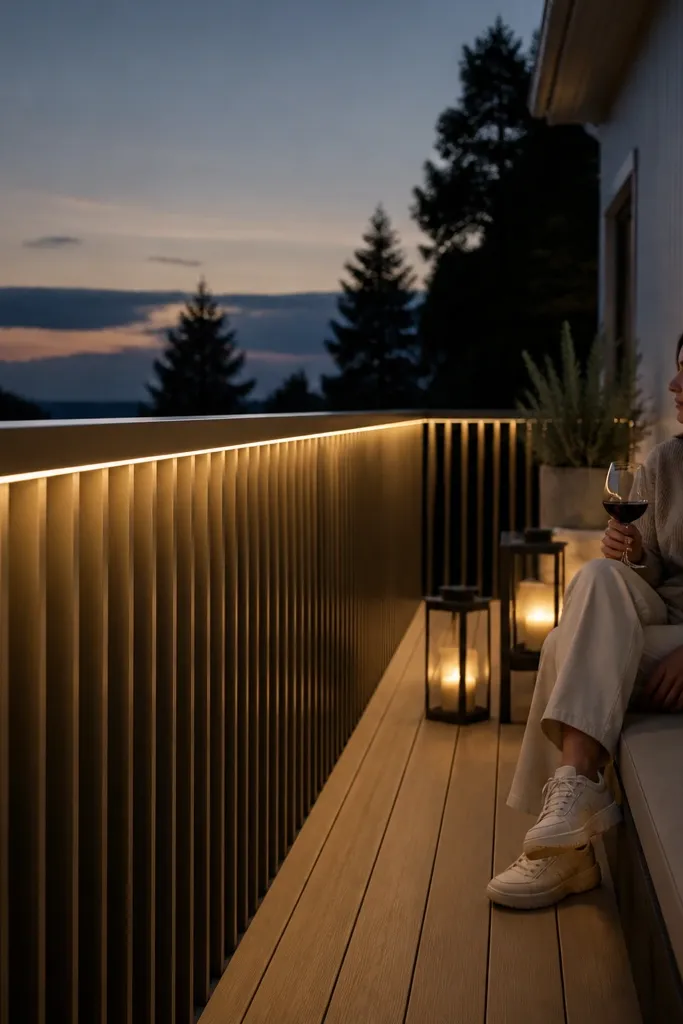
Lighting turns a railing from “safety” into “design.” A thin light strip under the top rail creates a soft glow line that looks amazing in evening photos and makes the balcony feel warmer. Vertical slats keep the structure from looking like a plain wall, and the light emphasizes the spacing. Choose a powder-coated finish in black, charcoal, or deep bronze so the glow stays clean and doesn’t reflect harshly.
Editor's noteUse a diffuser channel; exposed LEDs create hotspots that ruin the “clean line” look.
Install the railing frame and vertical slats first, then mount an aluminum channel under the top rail for the LED strip. Use a low-voltage LED strip rated for outdoor use and route wiring through the post to a weatherproof power source. Finish by adding a diffuser cover so the light looks like a line, not a row of dots.
Skip thisAvoid running wires exposed along the balcony edge; it looks messy and can get damaged.
28. White Horizontal Rail with Black Diagonal Infills
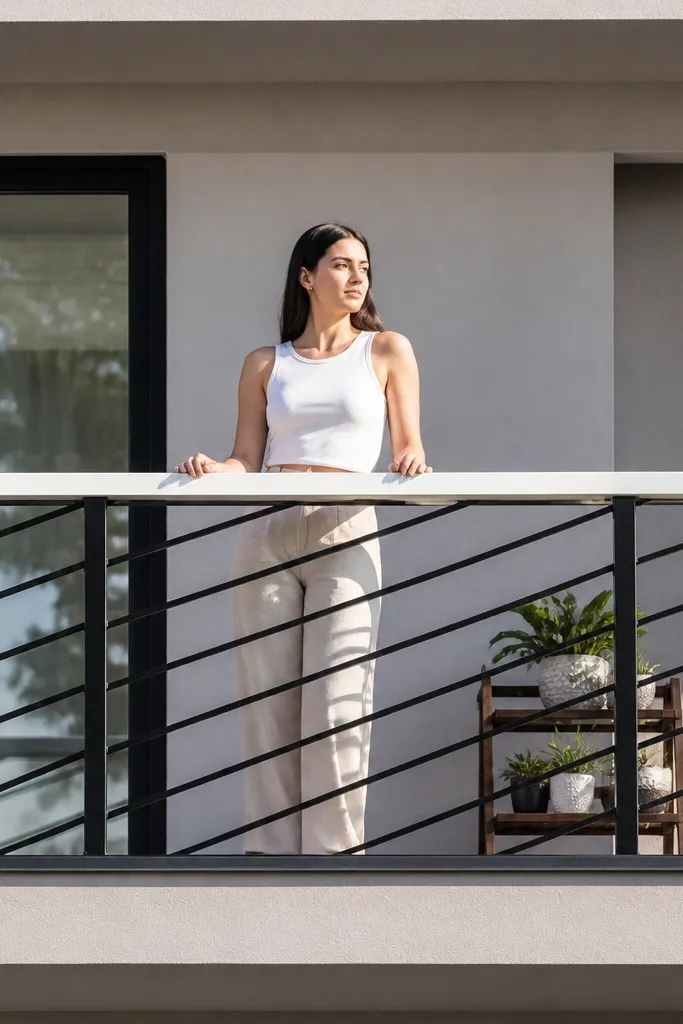
This is a high-contrast design that reads modern and graphic. The white top rail acts like a clean underline, while black diagonal infills add movement and hide small spacing imperfections. It photographs well because the pattern frames the balcony opening and creates a strong silhouette. Use it when your exterior is mostly neutral and you want the railing to add a bold design element.
Install white posts and a horizontal top rail, then add diagonal infill panels between posts. Use pre-cut diagonal strips or a single sheet panel that you cut and mount so the diagonals stay consistent. Finish edges with trim so the diagonal pattern looks contained and the top line stays smooth.
Keep diagonals centered in each section; off-center diagonals look crooked immediately.
Don’t use thin, flexible infill strips; they bow and ruin the geometry.
29. Stainless Steel with Minimalist Flat Bars
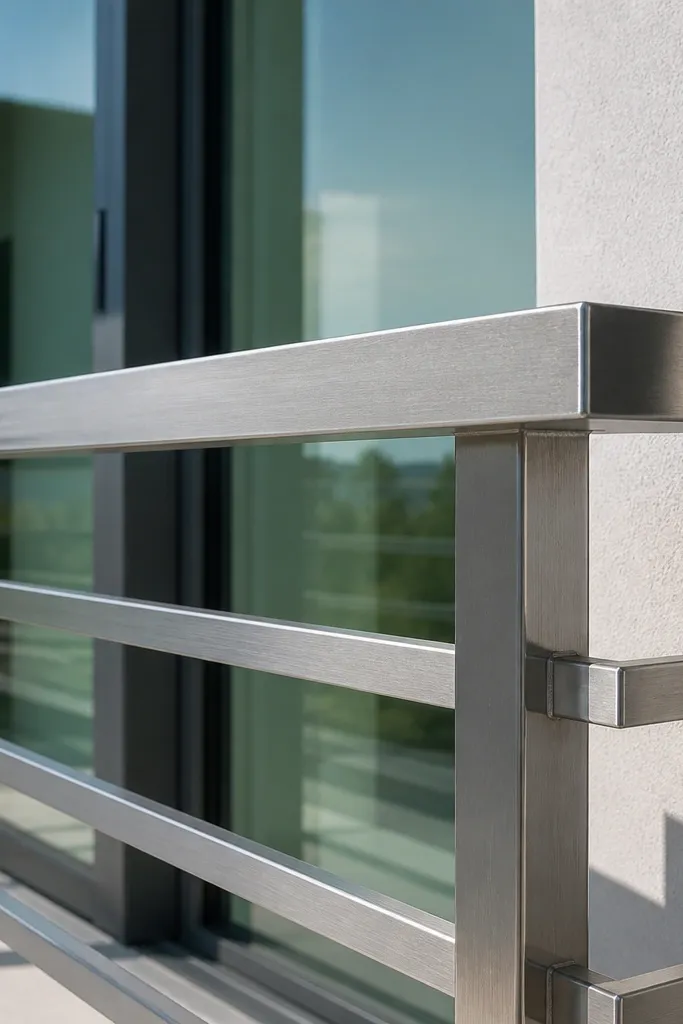
Stainless steel looks sharp and clean, especially with minimalist flat bars. The trick is controlling reflections: keep the finish satin brushed, not mirror-polished, so it doesn’t glare. Flat bars create a streamlined look that pairs well with modern glass doors and clean architectural lines. This design is photogenic because it has few visual interruptions.
Install stainless posts and top rail, then attach flat bar balusters using concealed brackets for a clean face. Space bars evenly and keep them all the same height to prevent visual gaps at the ends. Finish by tightening hardware and polishing lightly with a stainless-safe cleaner to remove smudges without turning it glossy.
Use concealed brackets — visible screws break the minimalist line.
Avoid mirror polish; it creates harsh reflections that wash out in photos.
30. Black Metal Frame with Frosted Window Film Panels
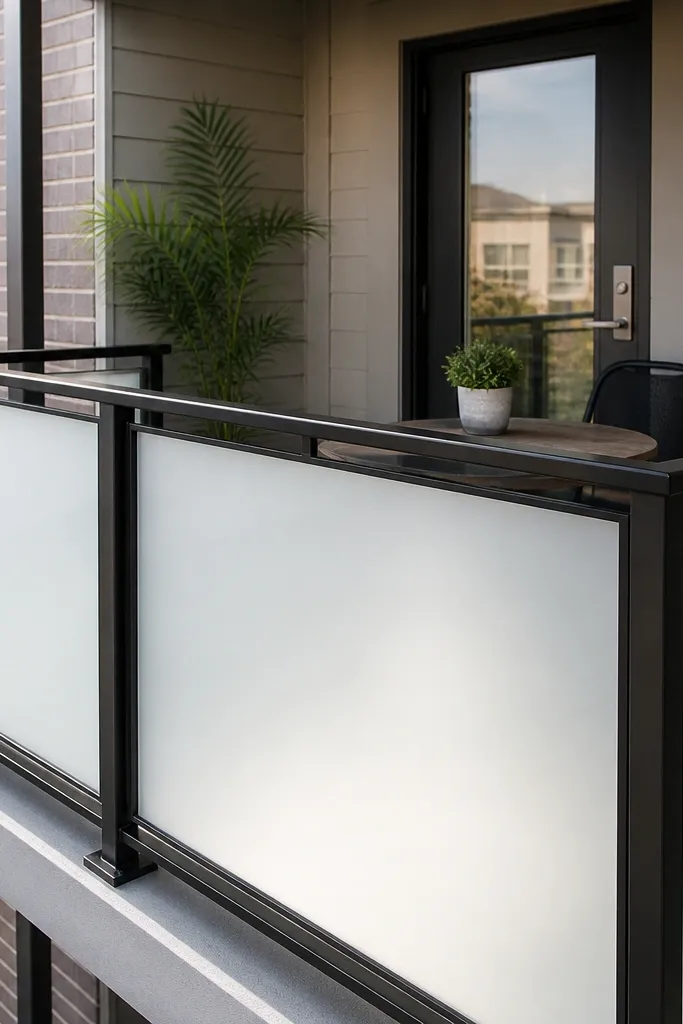
Frosted window film gives you privacy without replacing the entire infill system. It looks soft and uniform in photos, especially when the film is applied smoothly with no bubbles. Pair it with a black metal frame and you get a modern, low-drama privacy screen. This design works well for renters or DIYers who want a fast makeover on an existing railing.
Editor's noteApply film in mild temperatures — too cold makes it stiff, too hot makes it stretch unpredictably.
If you have existing clear panels, clean the glass thoroughly and let it dry completely. Apply outdoor-rated frosted film using a spray solution and a squeegee, then trim edges with a sharp blade. Reinstall or mount the film-backed panels into a black frame, then add a top cap that covers the panel edges so the look stays tight.
Skip thisDon’t apply film over dust; grit creates permanent specks that show up in bright sun.



