
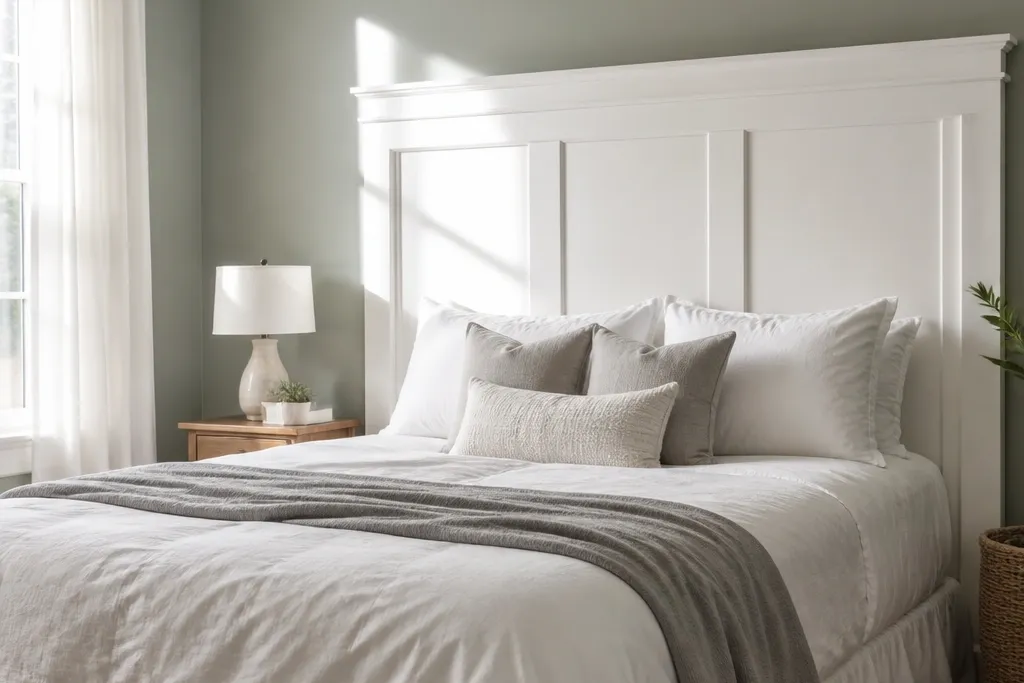
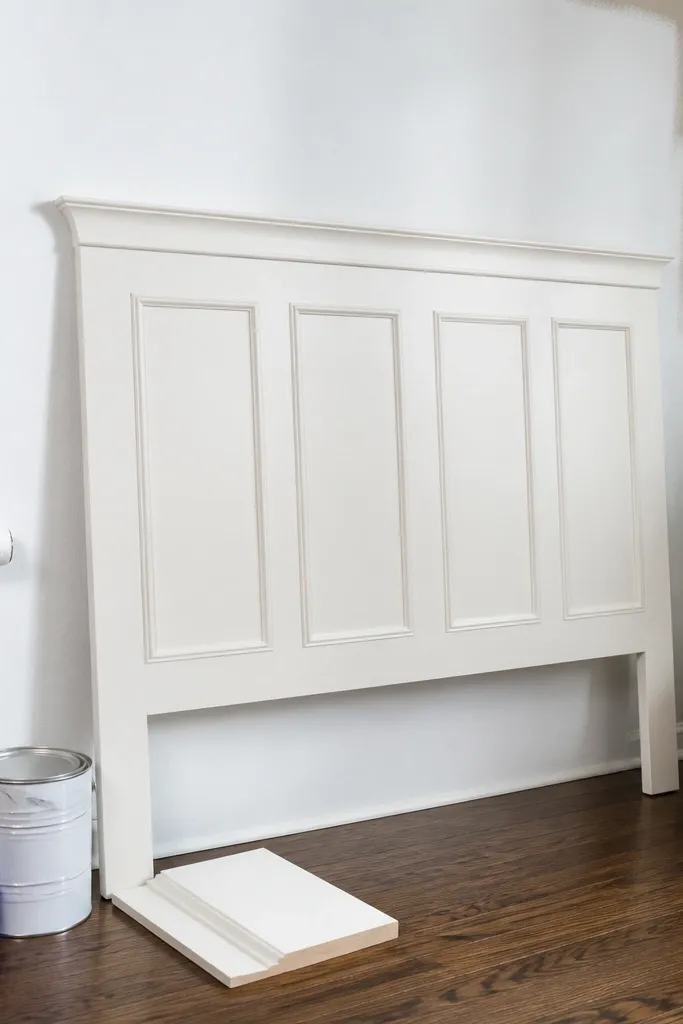
1. Board-and-batten white headboard with recessed grooves
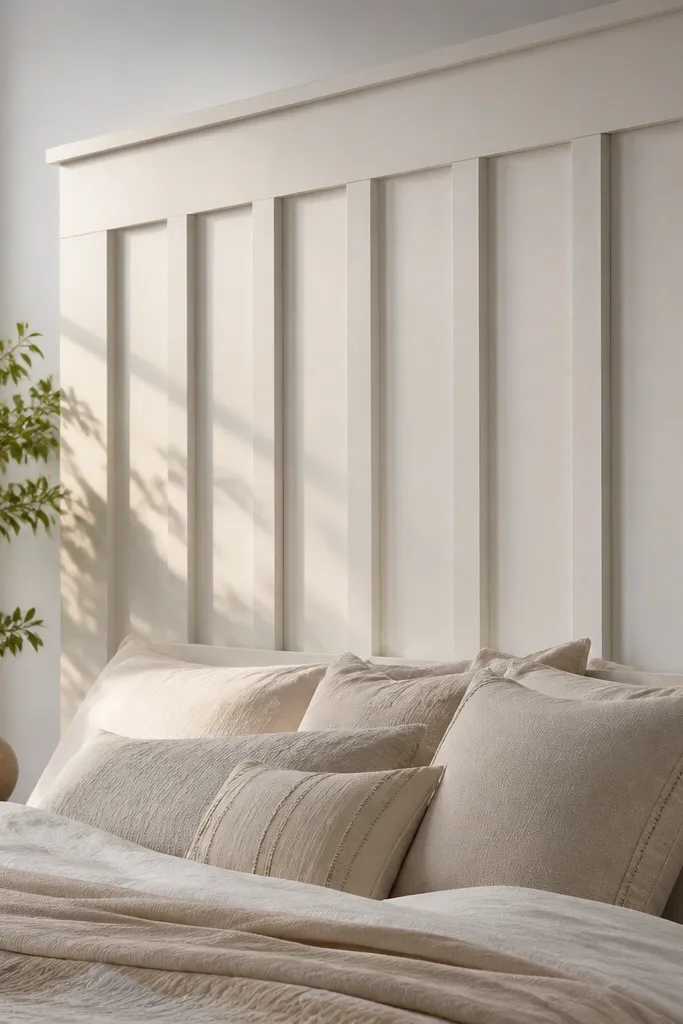
This look is clean, tall, and easy to photograph because the shadow lines create depth even when the color is plain white. Recessed grooves stop the headboard from looking like a flat sheet, which is the biggest problem with “just paint it white” ideas. Use a semi-matte finish so it reads crisp without reflecting every ceiling light. It works especially well in apartments and rental rooms where you want a dramatic focal point without committing to a full wall makeover. Skill level is beginner-friendly if you’re comfortable with a miter saw and measuring boards.
Editor's noteDry-fit the battens with painter’s tape first so your spacing stays even before you commit to nails.
Start by building a simple rectangle frame from 1x3 or 1x4 boards, sized to your target width and height (queen often looks great around 60-65 inches wide and 52-56 inches tall). Add vertical battens using 1x2 ripped boards spaced about 1/2 inch apart, then deepen the look by using a router or dado blade to create shallow recessed grooves on the battens' faces. Prime with stain-blocking primer, fill nail holes, sand to 220 grit, then paint with a cabinet-grade white in semi-matte. Mount using cleats behind the frame or a French cleat so the panel sits straight.
Skip thisDon’t skip primer if the base is stained or glossy — white paint will show through.
2. Square-panel shaker headboard in soft matte white
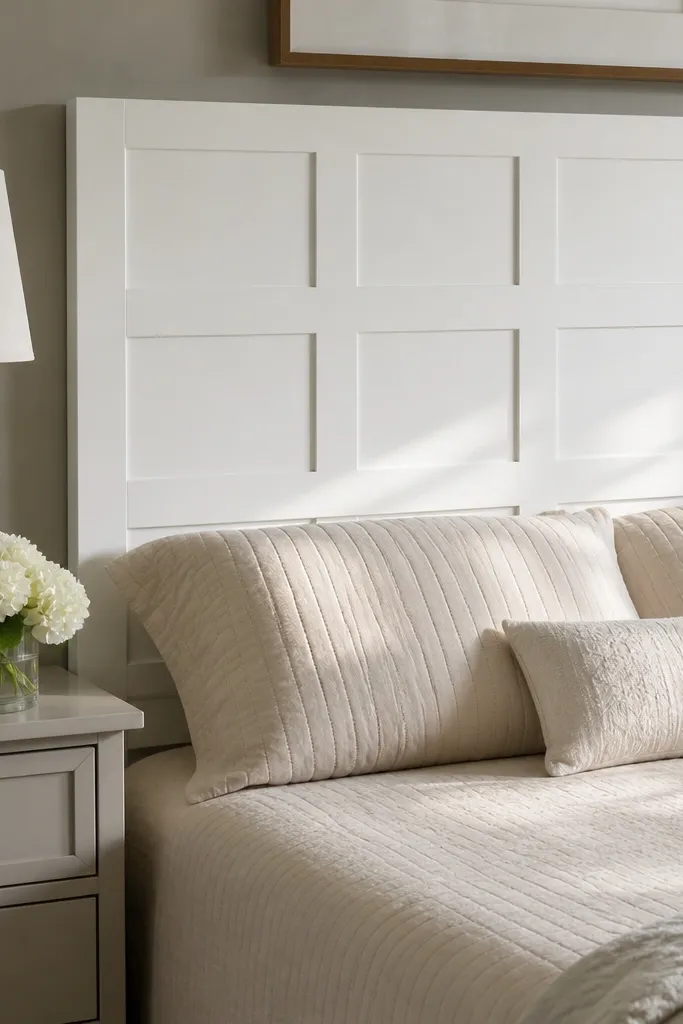
Shaker-style panels give you that tailored, built-in look without feeling fussy. The square grid creates a rhythm that makes the white look intentional, not accidental. Soft matte white hides small surface flaws and makes the headboard look more expensive in real rooms with mixed lighting. This is a strong pick if your bedroom already has wood tones, because the white frames the furniture instead of fighting it. Build time is moderate because you’re cutting multiple panel pieces, but it’s straightforward carpentry.
Cut a frame from 1x3 lumber and add rails and stiles to form a grid of squares (for example, four to six squares across depending on your width). Use flat panel inserts from 1/4 inch plywood or MDF for a smooth, paint-ready surface. Glue and nail the grid together, then fill all seams and nail holes with wood filler. Prime with stain-blocking primer, sand, then paint two coats of cabinet paint in soft matte. Finish by mounting to the wall with two studs or heavy-duty anchors plus a back cleat.
Use a foam roller for the final coat; it gives smoother coverage than a brush on panel edges.
Don’t make the squares tiny — very small panels look busy and cheap once painted.
3. Wainscot-style white headboard with chair-rail trim
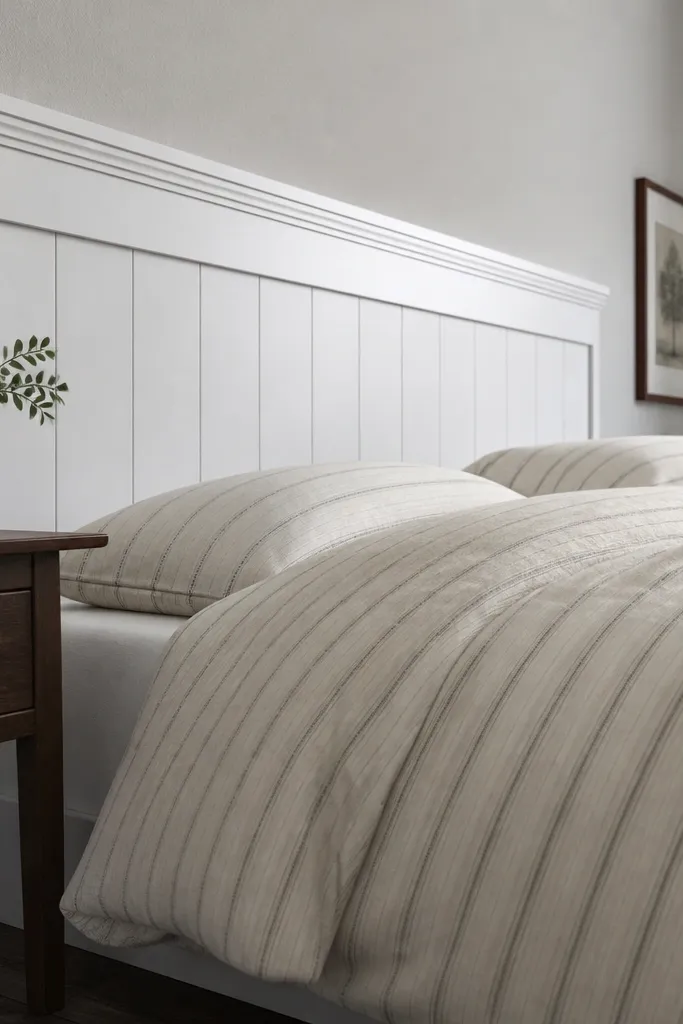
If your bedroom needs structure, wainscot styling does it fast. The horizontal chair-rail trim creates a strong line that makes the whole wall feel finished, and the vertical panels keep it from looking like a plain board. White paint here looks extra fresh because the trim catches light differently than the flat panels. This idea is great for rooms with traditional furniture or any space that already has chair-rail molding somewhere else. DIY difficulty is moderate because trim alignment has to be tight.
Build a rectangular backing frame from 1x3 boards to the size you want, then attach vertical panel strips (1x2 or 1x3 ripped pieces) to create sections. Add a chair-rail trim piece across the middle and another thinner trim cap near the top for a layered look. Use 1/4 inch MDF or plywood for the panel faces if you want a perfectly smooth finish. Prime, sand, and paint with semi-matte white. Mount with a French cleat so the trim doesn’t get knocked out of alignment.
Cut trim 1/16 inch longer and sand to fit; it’s easier to fix a tiny gap than a big one.
Avoid painting trim before you caulk — hairline gaps show up instantly in white.
4. Tall arched-top white headboard with laminated ribs
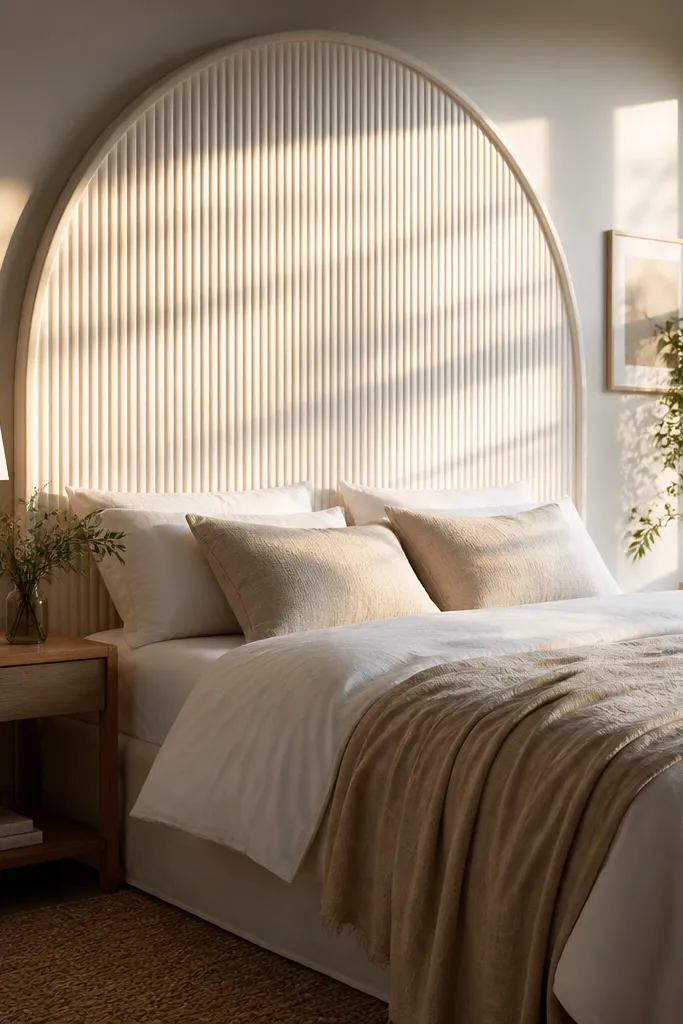
An arched-top headboard adds softness to a bedroom without turning it into a tufted foam blob. The ribs create a subtle texture that looks good in photos because light bends across the curves. This works best when you want a statement but don’t want heavy upholstery. Choose a crisp white finish so the arch reads clearly instead of blending into the wall. It’s a step up from flat panels because you’re working with curved pieces, but you can still pull it off with lamination and patience.
Cut a plywood backer to your headboard outline, then build the arch by laminating thin strips (like 1/8 inch or 1/4 inch) over a template. Screw or clamp the ribs in place, then attach vertical rib faces to the backer so they create consistent spacing. Sand the ribs smooth along the curvature, then fill edges and caulk all seams. Prime with stain-blocking primer, paint with semi-matte cabinet paint, and add a 1x2 top rail for a clean finish line. Mount to the wall with a hidden cleat at the back center.
Use a scrap MDF template for the arch and trace it twice; one crooked template ruins the whole symmetry.
Don’t rush sanding curves — scratches show more on white than on dark paint.
5. White slat headboard with angled gaps

This is the “modern airy” version of a slatted headboard. The secret isn’t just slats — it’s the angled gaps that create thin shadows, which makes white look dimensional. It’s a great fit for small bedrooms because the headboard visually “lets light through” instead of blocking it. If your room has a lot of straight lines (dresser, shelving, window trim), this keeps the vibe cohesive. DIY difficulty is medium because spacing has to be consistent across the full width.
Editor's noteMark slat spacing using a jig: a scrap board with the exact spacer thickness glued to it saves hours.
Create a rectangular backing frame, then cut vertical slats (like 1x2 ripped to width) to your headboard height. To get angled gaps, bevel the edges of slats slightly (for example 10-15 degrees) or use spacers that create a consistent wedge. Attach slats to the back frame so the bevel faces create a shadow line. Prime and paint with a smooth foam roller coat, then lightly sand between coats for a crisp finish. Mount using two wall cleats or a French cleat centered behind the frame.
Skip thisAvoid wide gaps — wide shadows in white look uneven and messy.
6. White tuft-free linen-look panel headboard

If you want the soft look of upholstery but hate tufting, tuft-free panel upholstery is the answer. A linen-look fabric over foam makes the white feel cozy instead of stark, and it hides wall imperfections behind the bed. The clean border gives it a tailored finish that reads “designed,” not DIY-covered. This works well in bedrooms with warm lighting or wood floors where pure white paint can feel too cold. Skill level is moderate because you’re cutting fabric precisely and stretching without wrinkles.
Editor's noteUse a fabric iron on low through a thin cloth to remove minor surface ripples before final stapling.
Start with a rigid core panel (like 1/2 inch MDF) cut to your headboard size. Add foam (about 1 inch thick) and a layer of batting so the fabric has a soft surface. Wrap linen-look fabric around the back, pull tight, and staple on the underside so the front stays wrinkle-free. Add a simple fabric-wrapped border using thinner foam and a strip of fabric to frame the edges. Finish by mounting the upholstered panel to a wall cleat or directly to studs with a secure back rail.
Skip thisDon’t skip batting — foam alone makes fabric look stretched and uneven.
7. Oversized white boucle headboard with simple channel lines
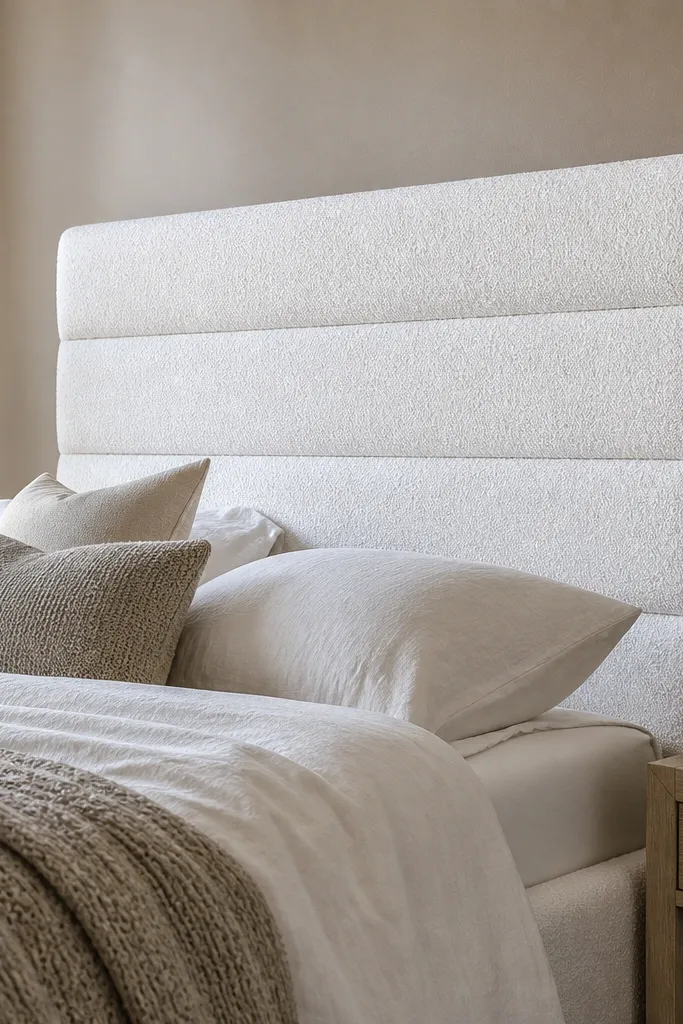
Boucle texture makes white look expensive because the fabric catches light in tiny highlights instead of reflecting glare. Keep the design simple with straight channel lines (no deep tufting) so it stays fresh, not fussy. This is a top pick for bedrooms that already have neutral bedding and need a tactile focal point. It also works when your wall behind the bed is plain — the fabric texture becomes the decoration. DIY difficulty is medium-high because you must align channels cleanly.
Editor's noteBuy slightly more fabric than you think — boucle has nap and you want matching alignment across seams.
Make a backing panel from plywood or MDF and add 1-1.5 inches of foam plus batting. Create channel lines by marking where you want horizontal lines, then stitch or staple fabric-wrapped strips across the front to form shallow channels. Stretch boucle over the foam carefully; boucle hides minor seams but shows major tension issues. Trim edges with a fabric-wrapped border strip for a crisp frame. Mount to the wall using a strong back cleat and check level before you staple the final edge.
Skip thisAvoid pulling too tight — boucle can distort and look warped along the channels.
8. White faux-brick panel headboard using thin MDF tiles
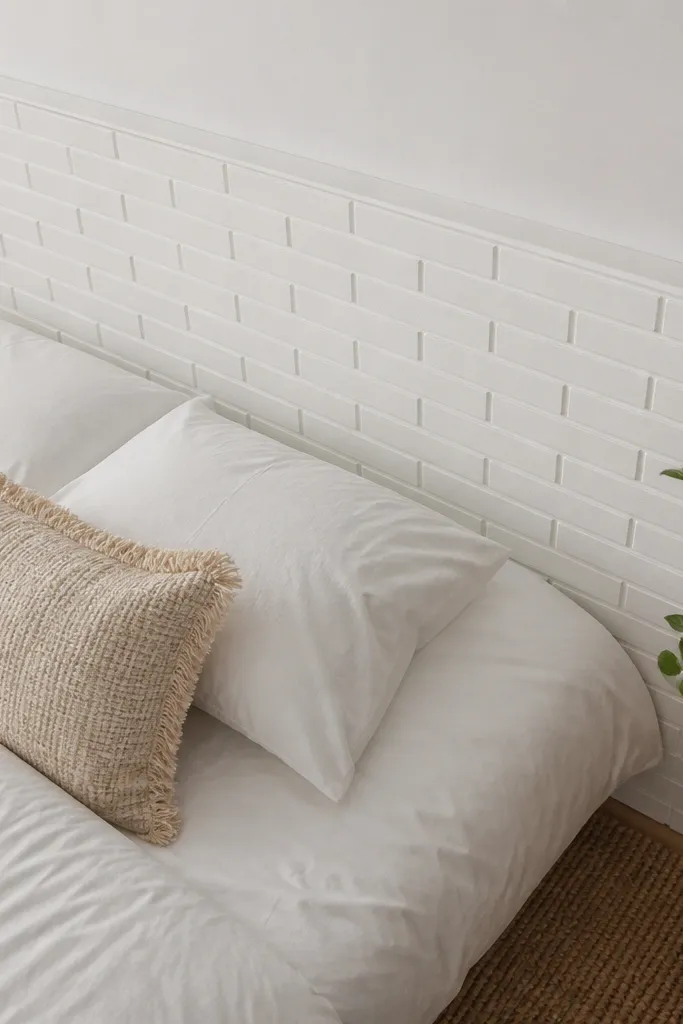
This is a playful option that still reads clean and modern because the bricks are shallow and painted the same white. The texture adds depth without needing wood grain or dark contrast, which keeps your room looking airy. It’s photogenic because overhead light creates mini shadows in the grout lines. Great for a bedroom that feels too plain or too smooth. Build time is moderate since you’re laying tiles neatly.
Editor's notePaint the panel before installing trim so you can roll into the brick grooves without missing spots.
Use a pre-cut panel base (like 1/2 inch MDF) cut to your headboard size. Attach thin faux-brick sheets or individual thin MDF brick pieces with wood glue, keeping grout lines consistent (use a spacer strip or printed template). Fill seams lightly with spackle and sand smooth so the surface looks intentional. Prime with bonding primer, then paint with semi-matte white in two coats. Seal with a clear matte topcoat if you want easier cleaning around pets or dust.
Skip thisDon’t use glossy paint — it makes the grout lines look dirty instead of crisp.
9. White ribbed metal headboard look using wood slats and dry brushing

This gives you that cool ribbed metal vibe, but DIY-friendly. The ribbed look comes from evenly spaced slats, and the finish comes from dry brushing a slightly off-white over a base white to create highlight texture. It looks amazing under warm lamps because the ribs catch light and stop the headboard from looking flat. Choose this if your room has modern hardware or black accents and you want the headboard to match the “metal” feel without buying metal. Difficulty is medium because finishing matters as much as building.
Editor's notePractice the dry-brush technique on a scrap board so you control how much contrast shows.
Build a simple rectangular backing and attach vertical ribs using thin strips (like 1x2 ripped) spaced about 3/8 inch apart. Prime and paint the entire surface in a base white, then let it cure. For the rib highlight, dry brush a second shade (like pure white mixed with a touch of gray) onto the rib faces only, then lightly blend with a dry cloth. Seal with a matte clear coat to keep the surface consistent. Mount with a back rail and confirm the panel is square before the final coat.
Skip thisAvoid heavy second-coat coverage — you want subtle highlights, not stripes.
10. White farmhouse frame headboard with reclaimed look boards
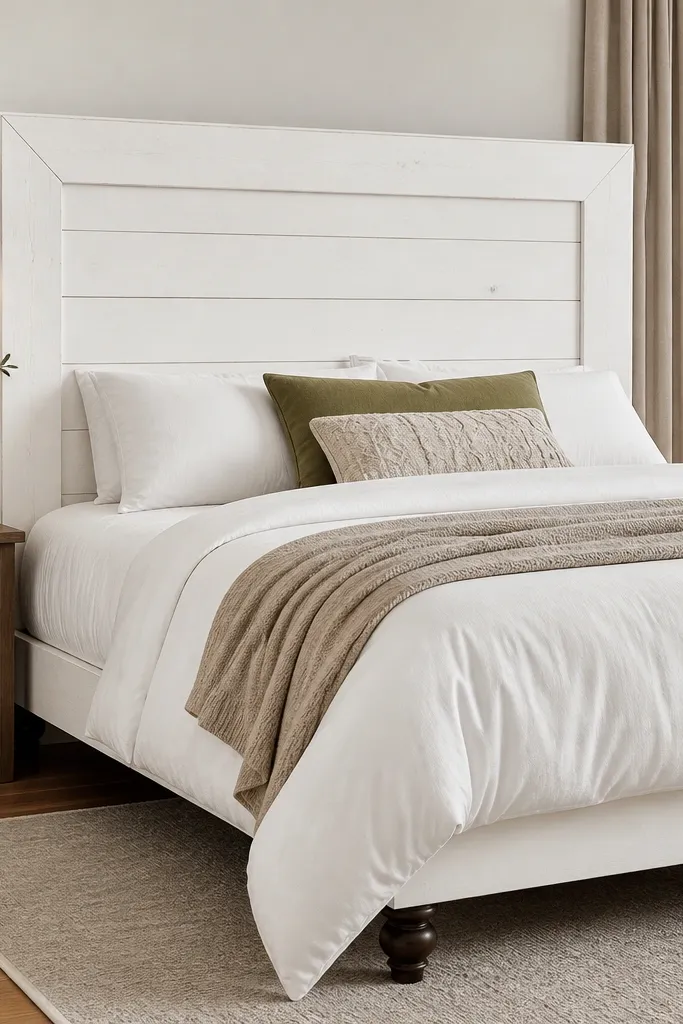
Farmhouse frame headboards look right in almost any bedroom because they create a bold outline around a simpler center. The key for fresh-white ideas is using a bright, even white on the frame while keeping the inside panel slightly smoother so it doesn’t look muddy. You can get the reclaimed look without actual reclaimed wood by using uniform boards with light distressing and then sealing. This works best when your bedding has texture like cable knits or linen. Skill level is beginner-friendly if you stick to straight cuts.
Build a thick outer frame from 2x2 or 1x3 boards and add a flat backing panel in the center (use 1/4 inch plywood). Apply a stain-blocking primer, then paint the frame and center panel the same white for cohesion. For a reclaimed vibe, lightly scuff edges with sandpaper before the final coat and seal with matte clear. Add a back cleat or cleat-on-studs mounting hardware. Finish by checking the edge alignment and filling any visible gaps with wood filler.
Distress after the first topcoat, not before — it gives you cleaner edges and less blotching.
Avoid random dents — controlled edge distress looks intentional.
11. White acrylic-style headboard using layered plexi and standoff spacers
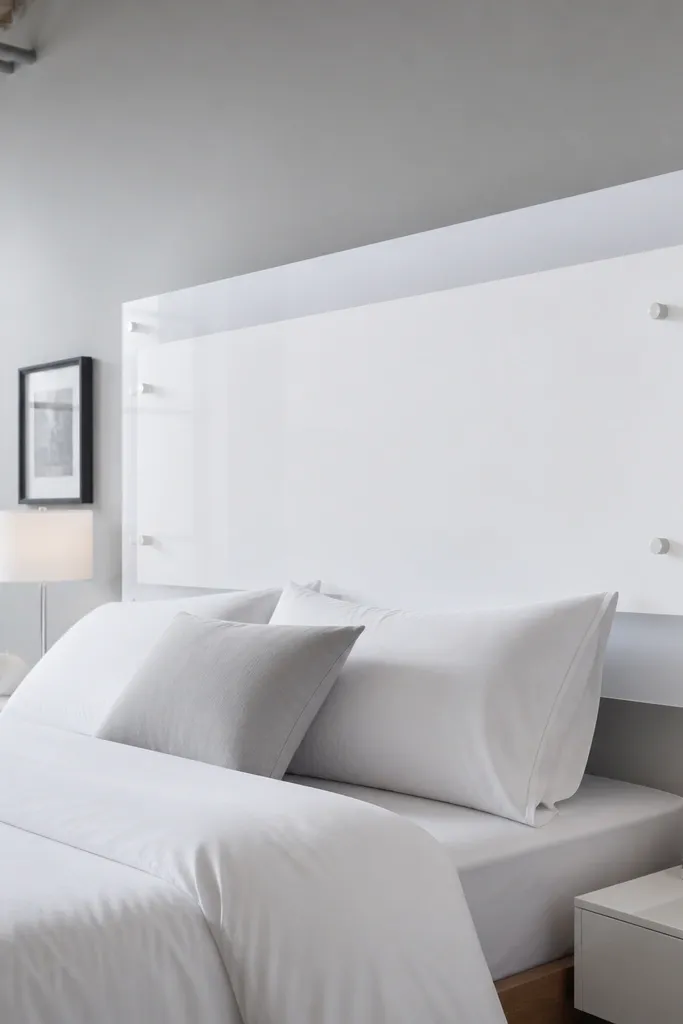
This is a modern white headboard idea that looks light even when it’s big. The layered look comes from clear or frosted panels held off the wall with standoffs, so you see subtle depth behind the white surface. It’s great for rooms with small floor space because it doesn’t visually crowd the wall. You need to be comfortable with hardware and drilling, but the build is still doable. The result photographs like a design store piece.
Cut a backing board the size you want and drill mounting points aligned with studs. Add frosted acrylic or clear acrylic panels in layers, held with standoff spacers so they sit a few inches off the backing. Spray the acrylic surfaces with a white paint designed for plastics or use frosted white acrylic sheets. Attach the layers with screws through standoffs, then cover screw heads with matching caps. Mount to the wall with a French cleat or direct stud screws and keep the panel level as you tighten.
Use painter’s tape to mark drill points — it prevents sliding and reduces cracking risk.
Don’t overtighten screws — acrylic can spider-crack if pressure is too high.
12. White geometric lattice headboard with shadow-box back
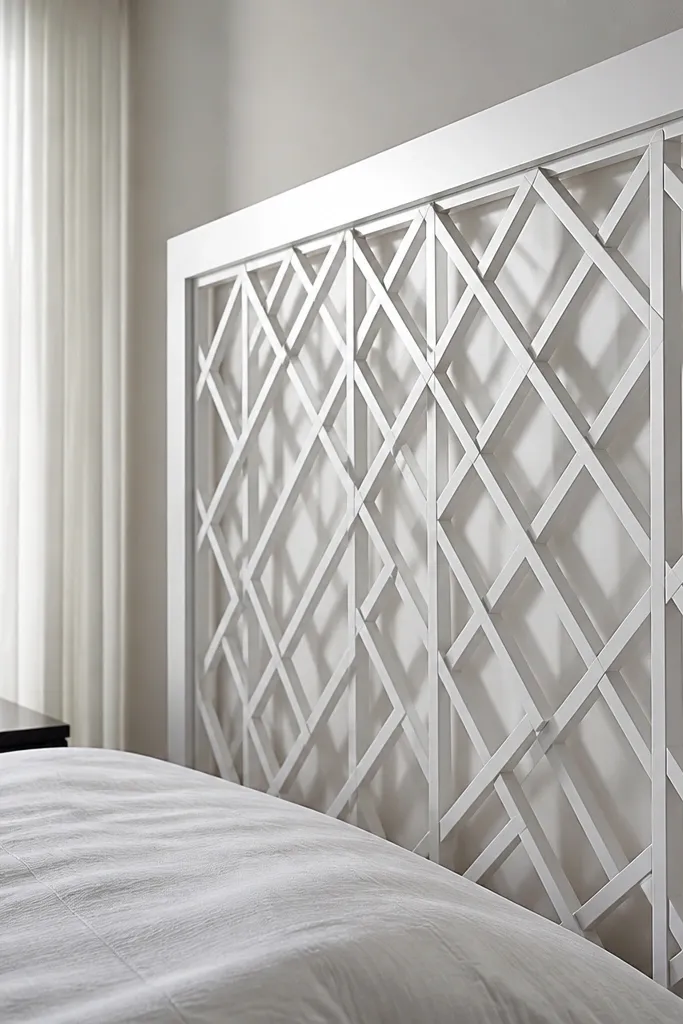
Geometric lattice makes white look like art because the lines create a pattern of shadows. The shadow-box back adds depth so it doesn’t read as flat wall decor. This is a strong choice if your room is mostly plain — lattice gives structure without needing dark contrast. It also looks great with sheer curtains because the pattern echoes the airy feel. DIY difficulty is medium since you’re measuring angles and keeping the grid straight.
Build a box frame from 1x2 lumber, then attach a back panel (like 1/4 inch plywood) so the headboard looks dimensional from the side. Cut lattice strips and arrange them into a diagonal pattern, keeping spacing consistent with spacers. Glue and nail the lattice to the front frame, then fill nail holes and sand. Prime and paint with semi-matte white; consider spraying for the smoothest finish on the thin strips. Mount using a sturdy back rail and two stud anchors.
Mark a centerline and build outward so the lattice stays symmetrical across the bed.
Avoid thin strips without support — they flex and the pattern gets uneven.
13. White slipcovered headboard frame with clean piping

A slipcovered headboard looks fresh because the fabric surface stays smooth and tailored, and piping frames the shape so it reads intentional on camera. White fabric can feel risky, but the trick is choosing a tight weave and adding a washable cover if you can. This style works best when your bedding is also neutral, because the headboard becomes the main texture. It suits DIYers who want a softer look without complex upholstery shaping. Difficulty is medium because you’re sewing or using fabric-friendly techniques.
Build a simple headboard frame from wood and cover it with foam and batting to create the shape. Wrap with a fitted inner cover that grips the corners, then add an outer slipcover that you can remove. Add piping at the edges using pre-made piping cord and fabric strips, pin it in place, and sew along the piping line. Prime and paint any exposed frame parts before covering. Mount the frame with a back cleat so the slipcover doesn’t pull or sag when installed.
Use a zipper at the back edge so you can remove the cover without wrestling fabric off the corners.
Avoid loose slipcovers — wrinkles in white look sloppy fast.
14. White faux-leather headboard with horizontal seams
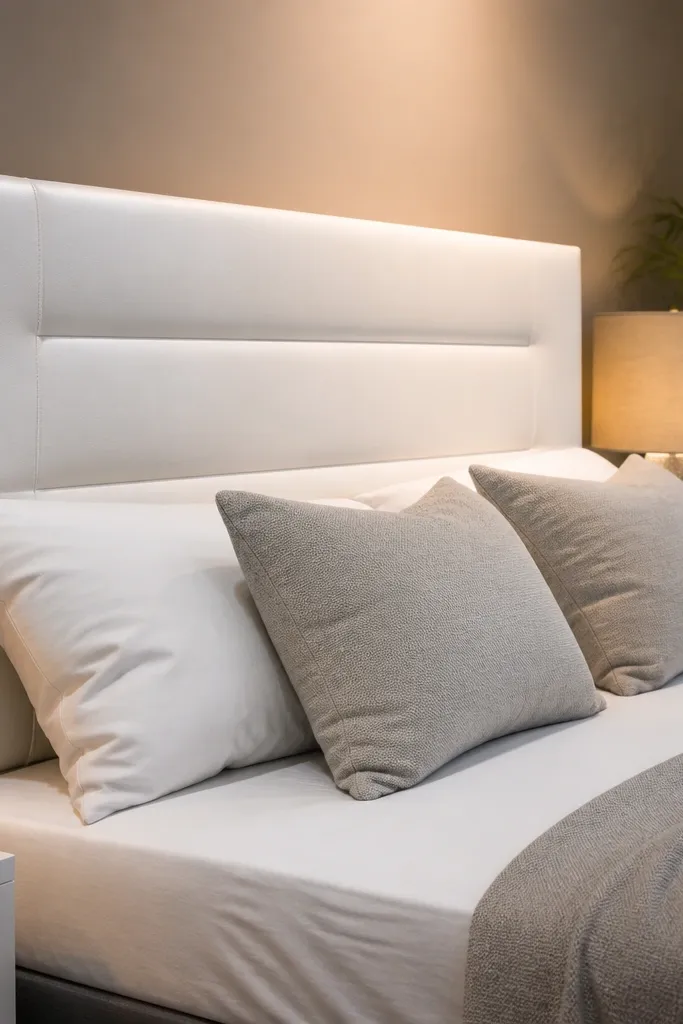
Faux leather in white looks modern and sleek, and it cleans up better than fabric. Horizontal seams keep it from looking like a flat vinyl sheet; they also help the surface lay smoothly. This is a great pick for kids' rooms, guest rooms, or any place where spills happen, because you can wipe it down. If your room has black or brushed-nickel hardware, this headboard ties it together. Skill level is medium because you need to cut and stretch material without warping.
Editor's noteUse a sharp blade and cut in one direction; faux leather tears if you saw it back and forth.
Build a rigid backing panel and add thin foam (about 1/2 inch) so the faux leather doesn’t look overly padded. Create horizontal seam lines by adding thin batting and using stitched channels or by installing seam strips on the front before wrapping. Wrap the material tightly and staple on the back, then trim the edges cleanly with a fabric or faux-leather border. Prime and paint any exposed wood before covering so you don’t see bleed-through. Mount using a back rail and check the front is flat and wrinkle-free under daylight.
Skip thisDon’t use thick foam — it makes faux leather pucker along seams.
15. White painted cane webbing headboard with a solid frame
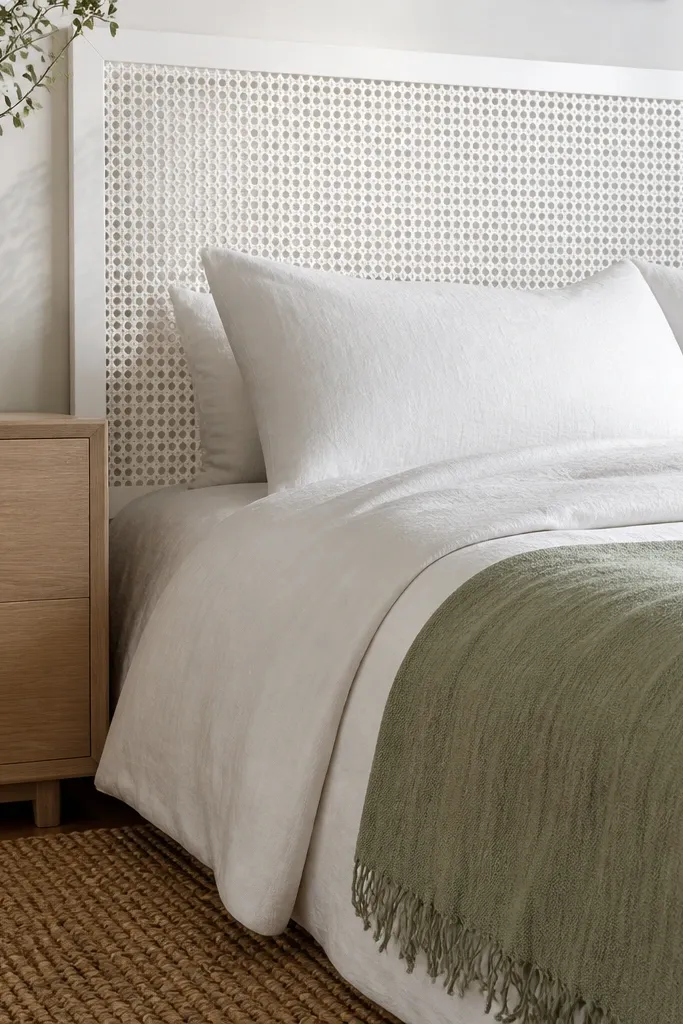
Cane webbing brings a breathable, light pattern to a bedroom, and when you paint it white it still keeps the texture. The open weave creates soft shadowing, so the headboard looks airy instead of bulky. This is ideal if your room feels heavy or cluttered and you want something that looks intentional but not thick. Use a solid frame so the webbing stays tight and doesn’t sag. DIY difficulty is medium because you’re working with delicate material and keeping tension even.
Editor's notePaint in thin coats — thick coats can clog the weave and make it look muddy.
Build a sturdy frame from 1x3 or 1x4 boards with a back ledge for the webbing to sit on. Install cane webbing by stretching it across the opening and stapling it to the back ledge, pulling tight as you go. Paint the cane and frame with a flexible primer and paint made for surfaces that need to flex slightly. Let it cure fully before mounting so the webbing doesn’t shift. Finish by sealing lightly with a matte clear if you want better stain resistance.
Skip thisAvoid overstretching — cane can warp and distort the pattern.
16. White reclaimed-style pallet board headboard with even spacing
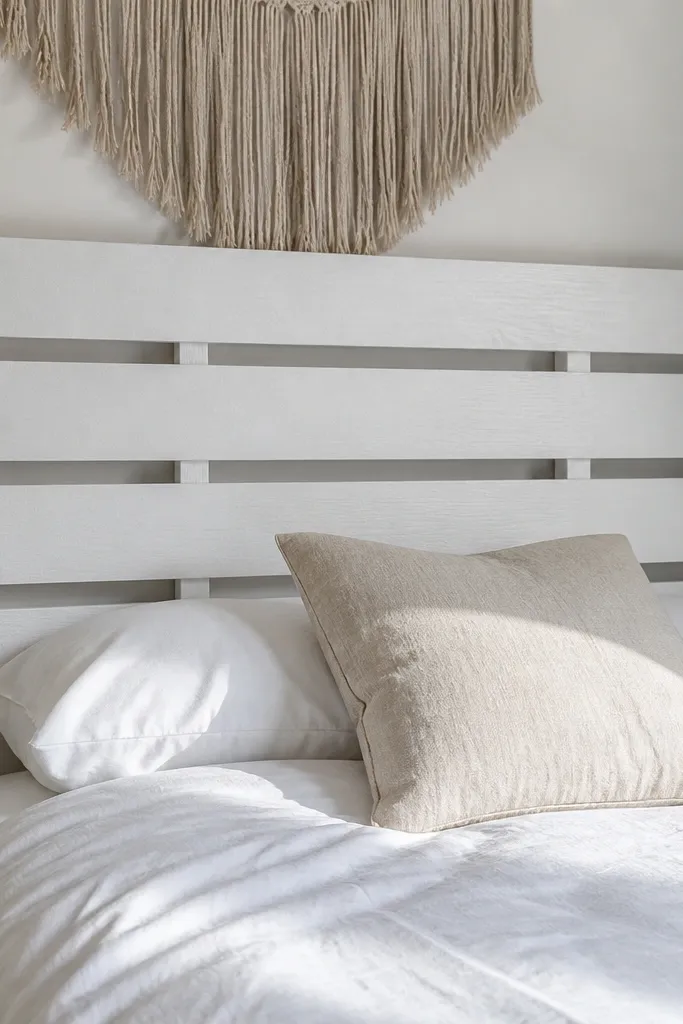
Pallet-style boards look great when you keep the spacing consistent and the finish smooth. The trick to fresh white is sealing and priming properly so knots and stains don’t bleed through. This gives you a farmhouse texture without the chaos of random plank sizes. It’s also one of the most budget-friendly options because you can source boards cheaply and cut them to match. Skill level is beginner-friendly as long as you measure and keep the board thickness consistent.
Cut boards to the same width and sand them flat so the surface stays even. Prime with stain-blocking primer on every board — knots need extra attention. Assemble the headboard on a backing frame with consistent spacing (aim for 1/4-3/8 inch gaps). Paint two to three coats of cabinet-grade white, sanding lightly between coats for smoothness. Mount with a back cleat and add corner braces if the panel is wide.
Pre-stain the knots with a tinted primer if you see yellow bleed after the first coat.
Don’t leave rough board faces — white shows dents and saw marks instantly.
17. White framed mirror-headboard look using MDF panels and faux glass
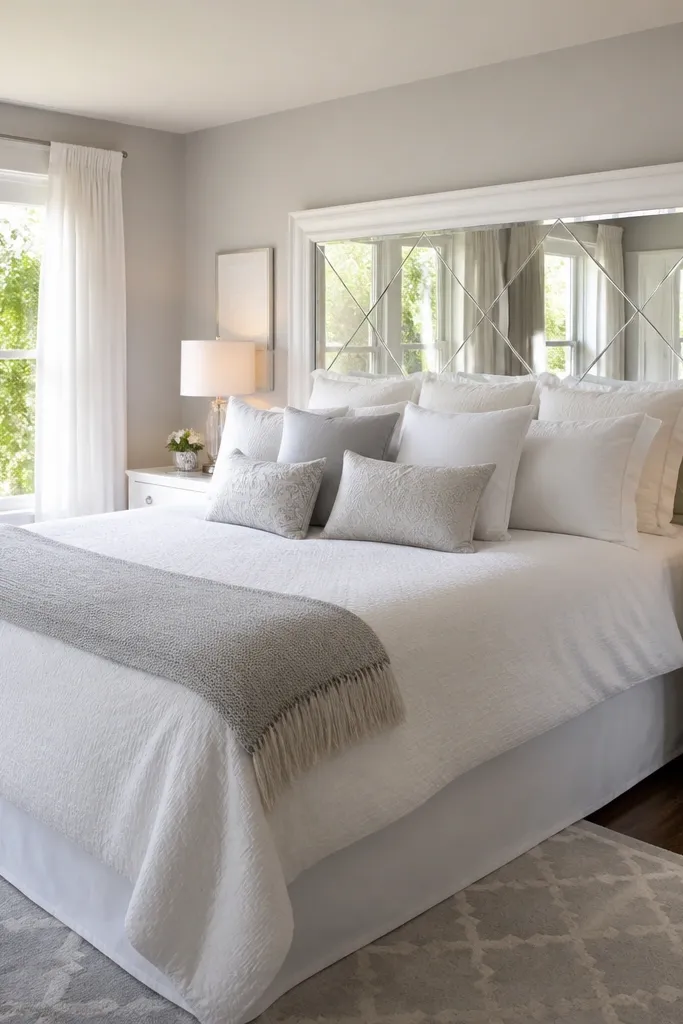
If you want brightness without painting the whole wall, a mirror-like center panel does the job. White framing keeps it fresh and clean, and the reflective center bounces light back into the room. This is a strong option for small bedrooms because it visually expands the wall behind the bed. You can make it DIY-safe by using acrylic or a reflective film instead of real glass. Skill level is moderate because you’re handling reflective materials carefully.
Build a wood frame around a backing panel sized to your bed width, then cut an acrylic panel or apply reflective film to a rigid backing. Add internal trim pieces so the mirror section is recessed and looks like a designed frame. Paint the frame with semi-matte white and let it cure before attaching the reflective center. Seal screw holes and use plastic-safe adhesives if you’re bonding the reflective surface. Mount with a cleat and confirm the frame is level so the reflective area doesn’t look tilted.
Use museum-style reflective film if you want a softer reflection that hides fingerprints.
Avoid glossy white paint on the frame if you have strong overhead lights — it can glare.
18. White fabric-wrapped channel panel headboard with removable cover
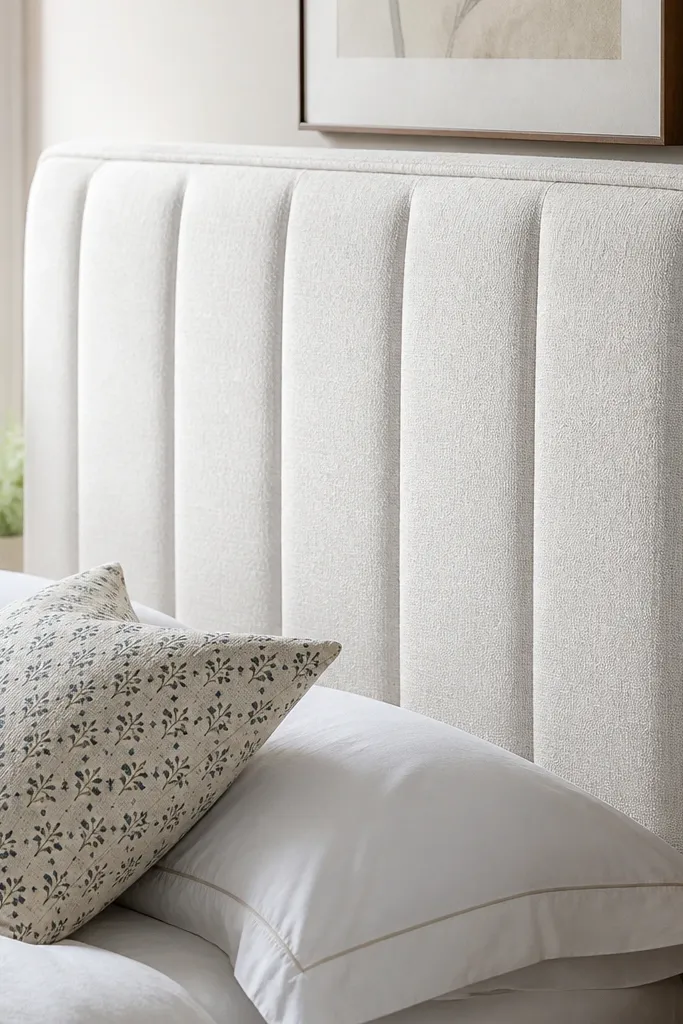
This is the practical version of a designer channel headboard. Shallow channels create texture and depth in white, and the removable cover keeps it looking fresh even after the inevitable dust and spills. You get the tailored look without permanent upholstery that’s hard to clean. It’s best for guest bedrooms or kids' rooms where you want the look to stay clean longer. DIY difficulty is medium-high because you’re building a frame and making a cover system.
Build a rigid headboard core from plywood and add foam and batting, then mark shallow channel lines. Create channels by sewing fabric-wrapped strips to the inner cover or by stapling narrow batting strips along the line positions before wrapping the outer cover. Make the outer cover with a zipper at the back so you can remove it for washing. Add a fabric-wrapped border to hide seams and staple lines. Mount to the wall with a back cleat so you can remove the cover without lifting the whole headboard.
Choose a white fabric with a tight weave and dye-stabilized finish so it doesn’t yellow quickly.
Don’t skip reinforcement at the zipper area — thin fabric tears under repeated removals.
19. White floating slat headboard with hidden wall bracket
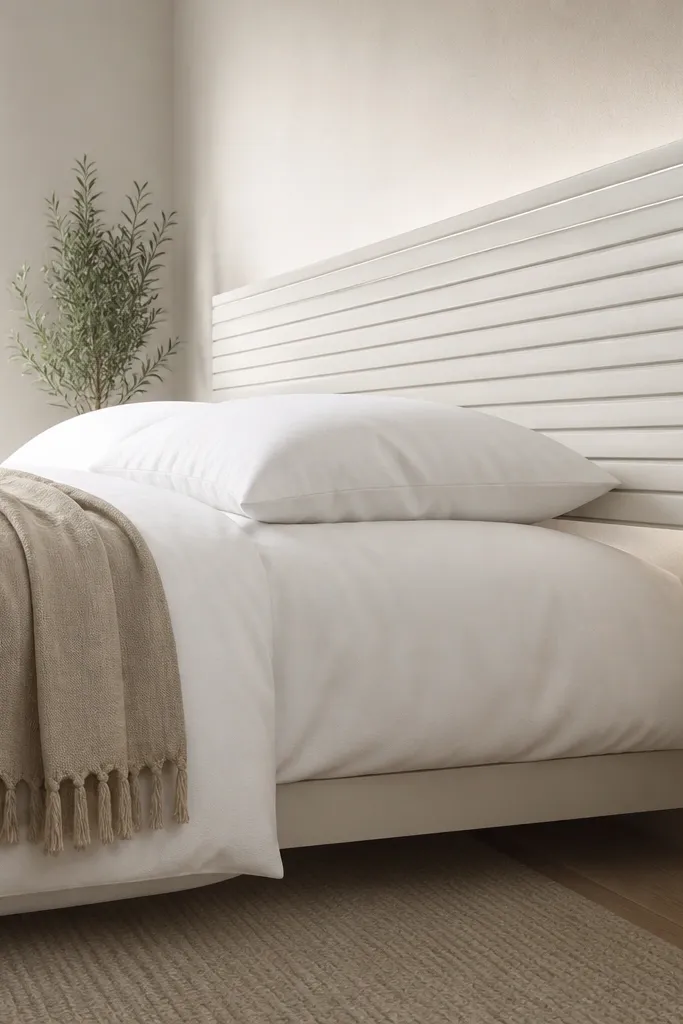
Floating headboards look expensive because there’s a visible gap between the headboard and the wall. That gap makes the white look lighter and adds shadow depth, which is exactly what “fresh white headboard ideas” should do. Use slats so you get the airy texture, and keep the frame hidden so the design stays clean. This works best when your wall is smooth and you want the headboard to look like it’s part of the architecture. DIY difficulty is medium because you’re aligning brackets.
Build a slim frame that holds slats, then add a back rail that lets you mount with hidden brackets. Install two wall brackets into studs at the right height, then attach matching brackets to the headboard back so it hangs level. Add spacer blocks behind the headboard to keep an even gap (about 1 inch looks right for most bedrooms). Prime and paint the entire headboard, then install slats if you haven’t already. Once it’s hung, touch up edges and check that the gap is consistent across the width.
Use a laser level or long level for the bracket height — small errors show up when the headboard floats.
Avoid mounting into drywall only — the floating gap needs real stud support.
20. White rattan-look woven headboard on a painted frame
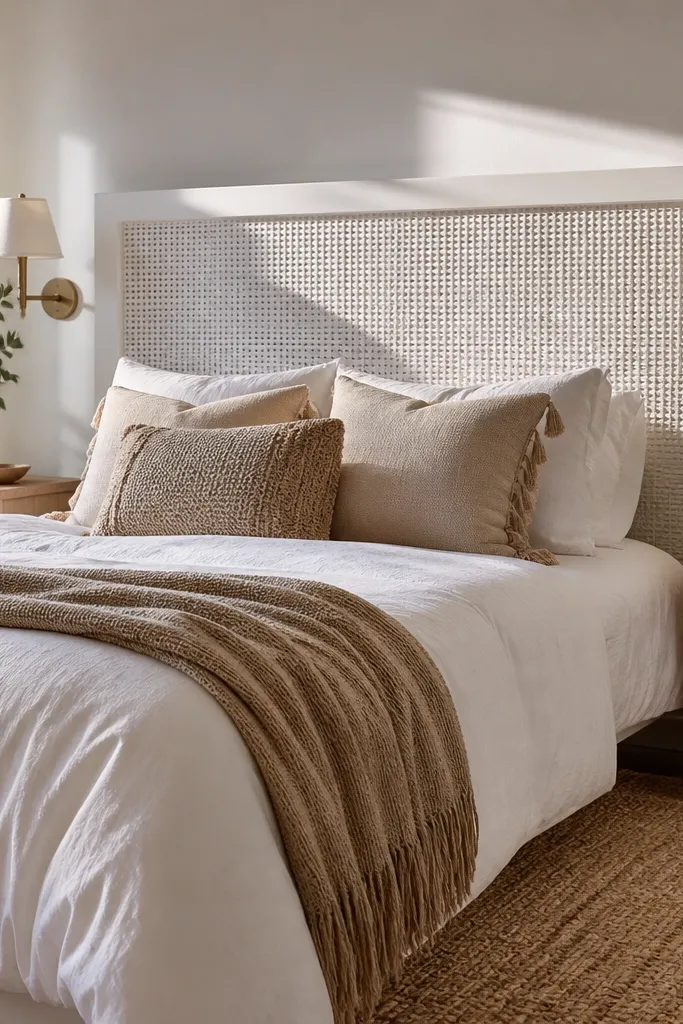
Woven rattan-style panels make white feel warm instead of sterile. The pattern gives you visual texture and keeps the headboard from looking like a flat slab. It’s a great choice if your room has natural materials like jute rugs, wood nightstands, or wicker baskets. Painting the frame white keeps the look fresh and cohesive with bedding. Difficulty is medium because you need to secure the weave so it stays tight and doesn’t sag.
Editor's noteUse a staple gun with thin staples and keep tension even by stapling opposite sides in sequence.
Build a rectangular frame from 1x3 boards and add an internal ledge so the woven panel sits securely. Cut or buy a rattan-style sheet panel sized to the opening, then stretch it and staple it to the back ledge. Prime the frame and paint it in semi-matte white; if the woven panel is already a light color, you can paint it lightly too, but test a scrap first. Seal if you want easier wipe-down. Mount using a back cleat and make sure the frame stays square while you tighten.
Skip thisDon’t let the weave sit loose — loose weaving looks wrinkled and cheap in white.



