
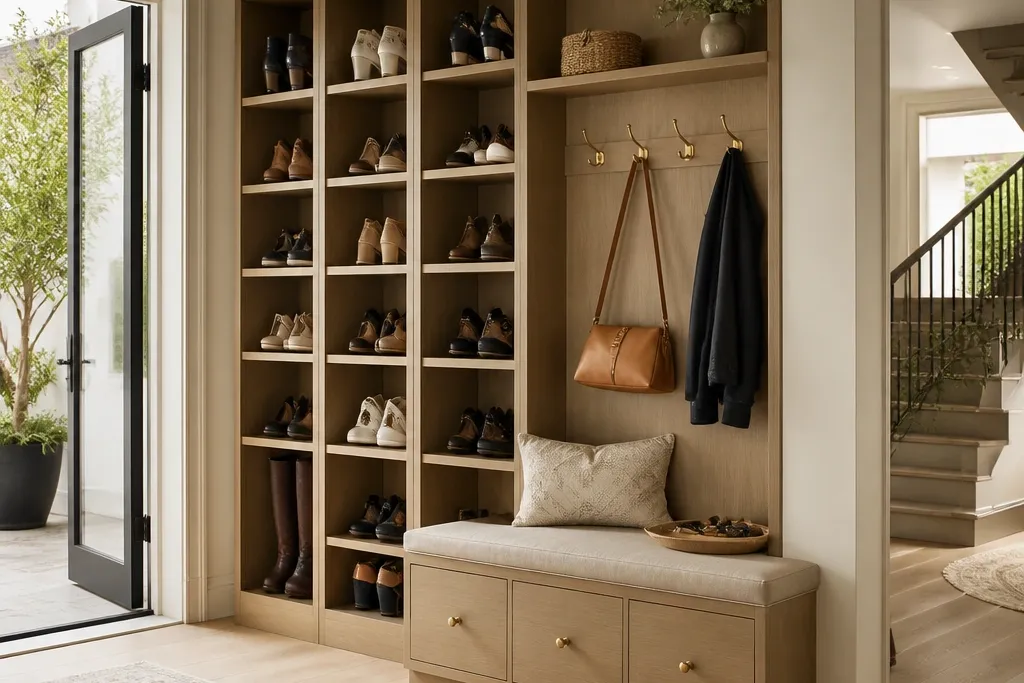
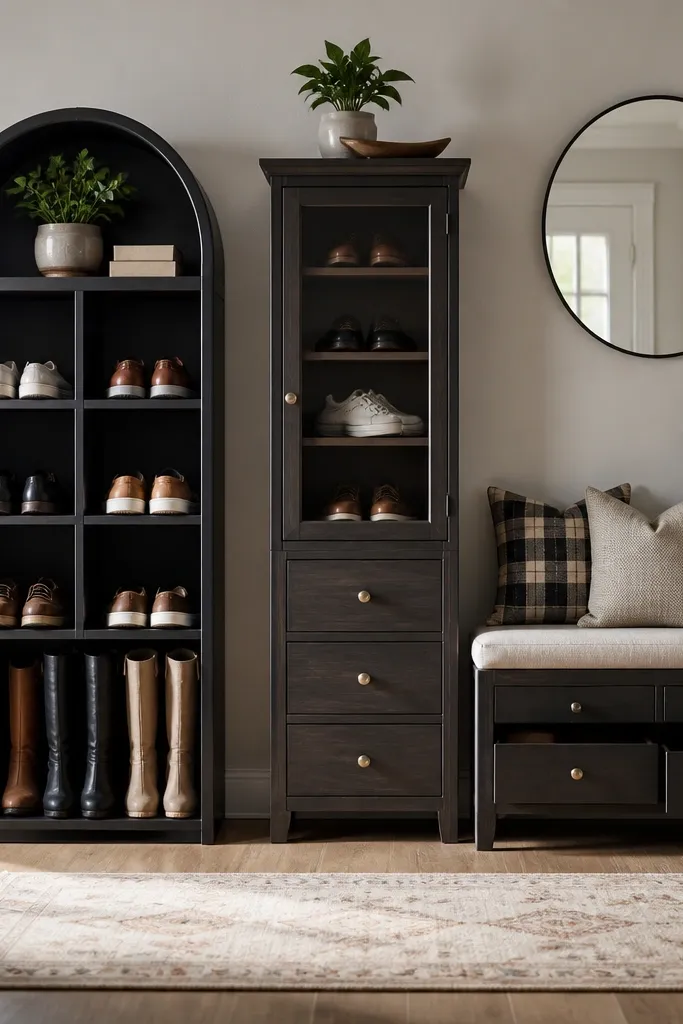
1. Walnut slat bench with hidden pull-out shoe drawers
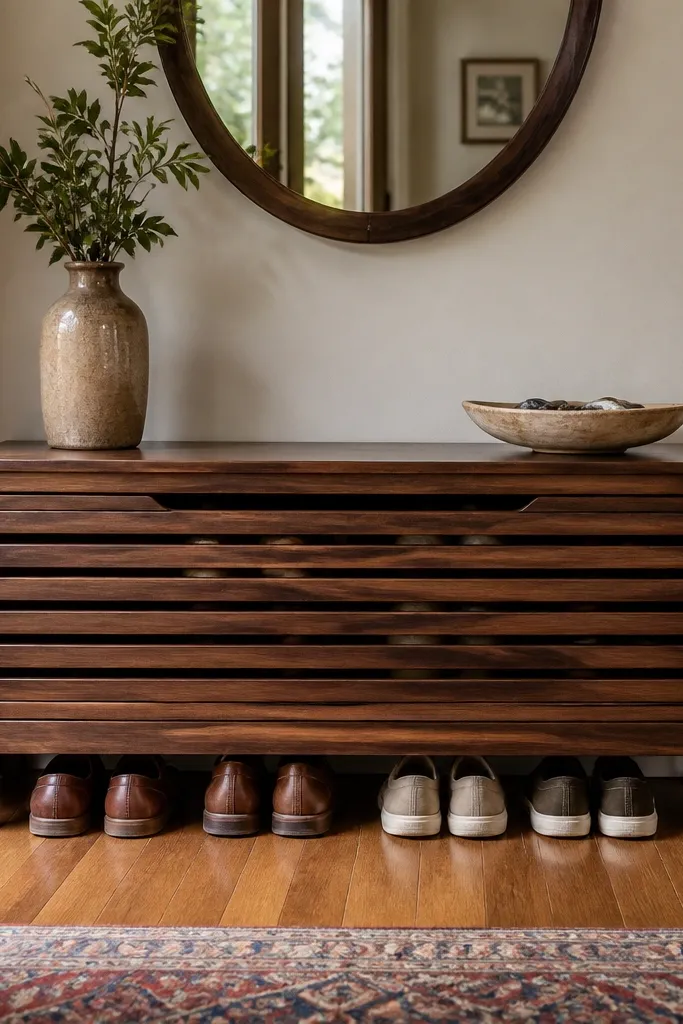
This design gives you a grand entrance look because the visible part reads like furniture, not storage. The top is a clean bench surface with slats that catch light, while the shoes disappear into pull-out drawers. It’s ideal when you want a calm foyer view during the day, but you still need fast access when you’re heading out. Use it for 12-20 pairs depending on drawer height. The walnut-stained plywood keeps it warm against tile or dark floors, and matte finish avoids glare from entry lighting.
Build a rectangular bench frame from 3/4-inch plywood with a center brace so the top doesn’t bow. Cut two to four drawer boxes with 1/2-inch bottoms, then install full-extension drawer slides inside the frame; set drawer height to fit your tallest shoe plus about 1/2 inch clearance. Add a slatted face panel on the front so it looks like a bench, then attach the slatted panel to the bench frame, not the drawers. Finish with stain, then 2-3 coats of water-based polyurethane or a hardwax oil, sanding lightly between coats.
Editor's noteDry-fit the drawer slides with one shoe you actually own so the clearance feels right.
Skip thisDon’t mount slides to thin MDF — it chips and loosens the first time you slam a drawer shut.
2. Tall arched-side cubby rack in white oak with black grid doors
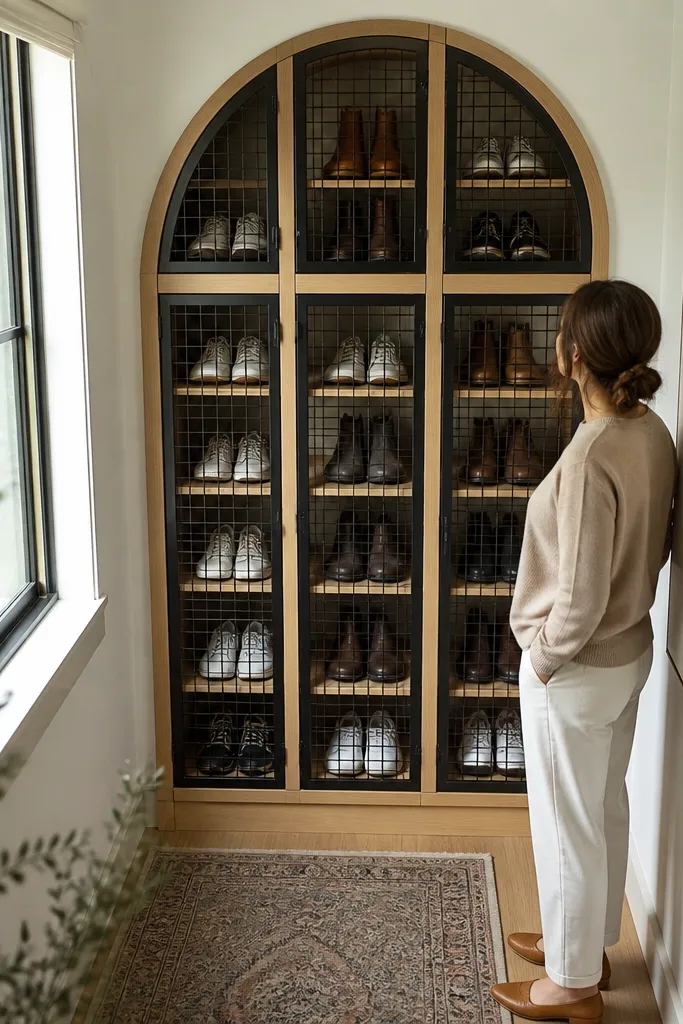
If your foyer is narrow but tall, this is the “grand entrance” move. The arched side profiles look custom and soften the structure, while the black grid doors keep the shoes from turning into visual clutter. It handles a mix of sneakers and boots because you can set cubby heights in rows. This looks best in entryways with a console table nearby since the door grid echoes typical metalwork. Expect capacity around 18-28 pairs depending on cubby sizing.
Cut two side panels from 3/4-inch plywood with an arched profile; trace the arch using a flexible curve or a shop-made template. Build a back frame and divider grid using 1/2-inch strips, then screw in cubby shelves so you can adjust heights by moving shelf pins. Add door frames from 1x2 lumber, then attach black wire-grid mesh or a pre-made metal grid panel to the door. Install hinges with a consistent reveal, then finish the oak with stain and matte topcoat.
Editor's noteUse shelf pins and adjustable holes so you can reconfigure cubbies when shoe sizes change.
Skip thisSkip glossy paint on the doors — it reflects foyer lights and makes the rack look cheap.
3. Ribbed cane panel cabinet with flip-down shoe compartments
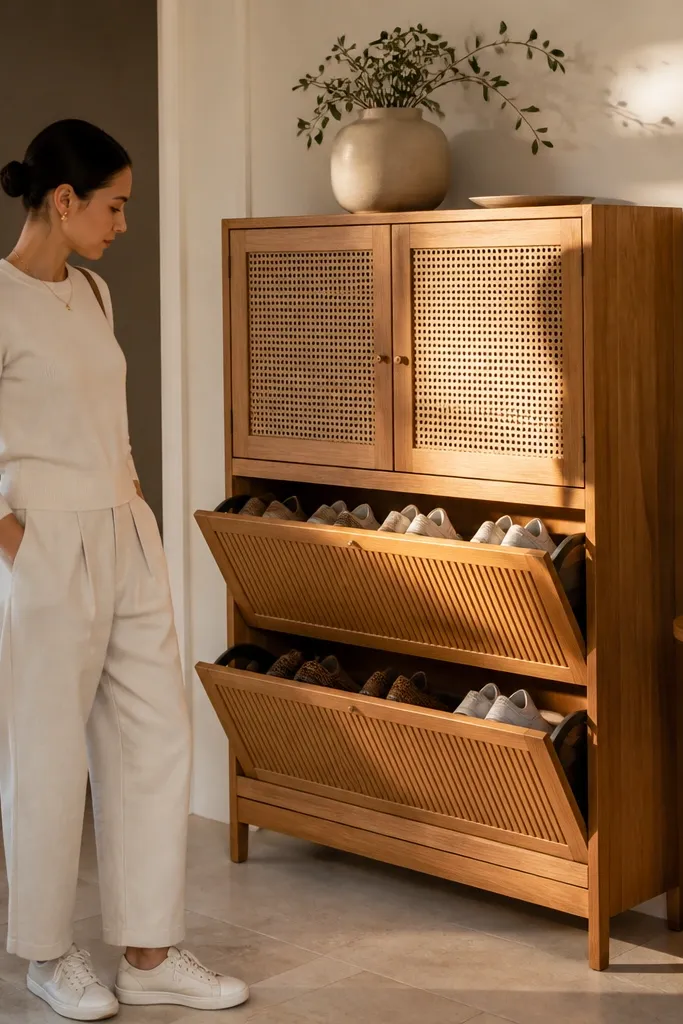
This one looks like a designer cabinet because the cane panel texture adds depth without adding clutter. The flip-down compartments keep shoes tucked away, so the foyer stays neat even when you toss things in quickly. It’s perfect for apartments where you want storage with a lighter, airy feel. You can size compartments for flats, sneakers, and mid-height boots. The best part is the front reads decorative even when it’s closed.
Build a cabinet box from 3/4-inch plywood and add internal dividers so each compartment has a fixed footprint. Install flip-down hinges rated for cabinet doors, then add a cleat inside each compartment to support the shoe when the door is open. Use cane webbing or rattan cane panel sheets for the cabinet door front; attach with trim strips so it stays tight and flat. Finish the cabinet with paint or a light stain, then seal the cane edges so they don’t fray.
Editor's notePre-drill hinge holes and use screws that bite into the plywood — hinge failures show fast on flip-down doors.
Skip thisDon’t make compartments too deep for flats — the shoes slide and you lose the clean look.
4. Slanted boot rack with galvanized steel top rail
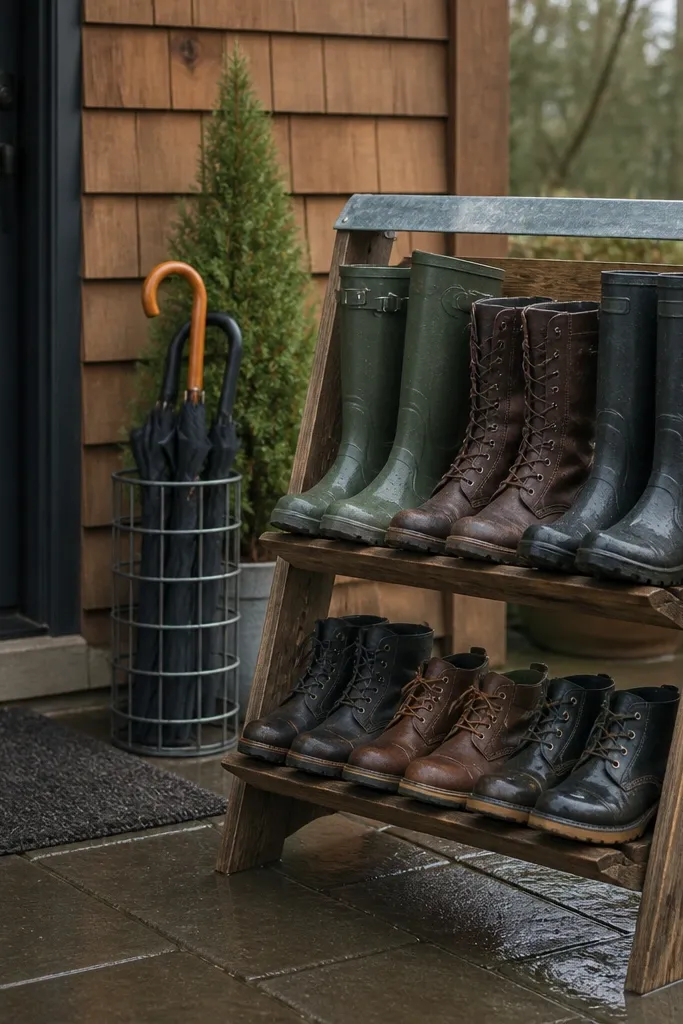
Boot storage usually looks bulky. This design stays sharp because boots sit on angled shelves with a galvanized steel top rail that looks intentional and industrial-chic. It’s the best choice when your foyer gets wet boots and you need them to dry without crushing. The angle also keeps boots visible enough for quick grabs, but not messy like open stacks. It fits foyers with 14-20 inch depth and gives you room for 6-12 boots plus a few pairs underneath.
Build two side rails from 2x2 wood and cut angled shelf supports so each shelf sits around 25-35 degrees. Screw slats or 3/4-inch boards across the supports with small gaps so air moves. Add a galvanized steel top rail along the front edge for a clean line and extra protection from scuffs. Sand edges smooth, then seal the wood with a clear exterior varnish if the rack sits near entry moisture.
Editor's noteCut shelf gaps at least 1/4 inch so boots don’t trap moisture against the wood.
Skip thisDon’t use flat shelves for tall boots — the shafts crease and the rack looks crowded fast.
5. Floating wall shoe shelves with hidden toe-kick baskets
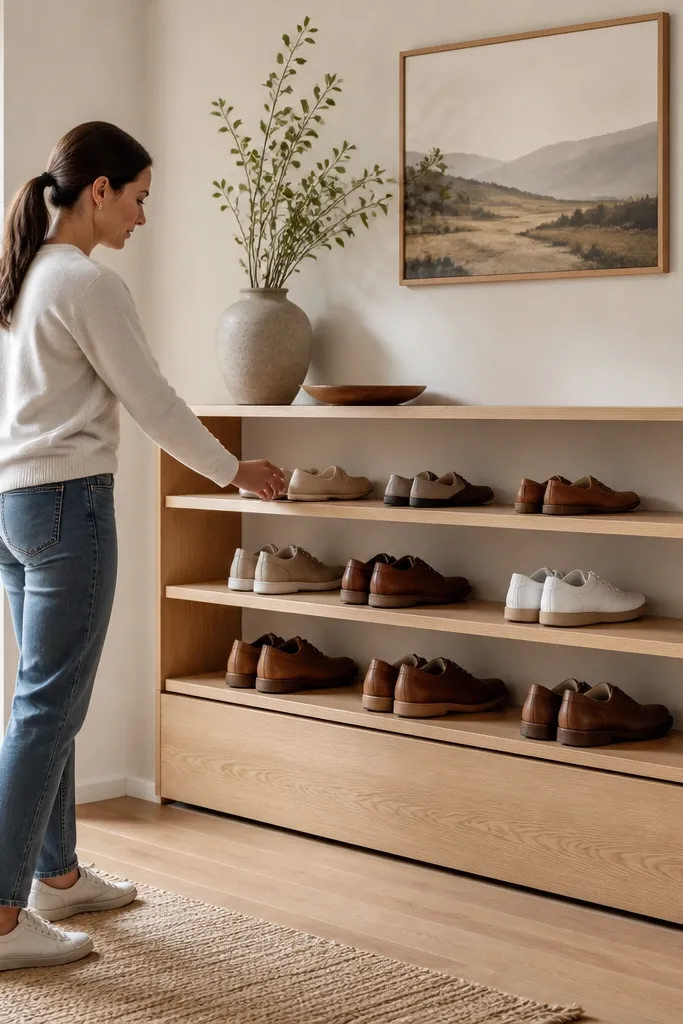
If you want a foyer that looks open, floating shelves beat bulky cabinets. This design keeps shoes off the floor while still hiding the mess with baskets tucked behind a toe-kick panel. It’s great for small entries where you don’t want a rack taking up floor space. You can space shelves for low-profile shoes and store accessories in the baskets. The look is clean and architectural, especially when shelves are the same width and finish as your baseboards.
Install a level ledger board into studs at the height you want the shelves to float from, then mount shelf rails using heavy-duty brackets. Cut shoe shelves from 3/4-inch plywood and paint or stain them to match the entry. Build a toe-kick panel below using a simple frame and attach it with concealed screws so you can access the baskets. Add wire baskets sized to slide in and out on rails or cleats, then route cables or cords away from the area if you have a bench light.
Editor's noteUse a laser level or long level for the first shelf; every shelf depends on that one line.
Skip thisDon’t mount into drywall only — floating shelves pull loose and the look collapses.
6. Black steel frame with oak slat shelves and hinged side gate
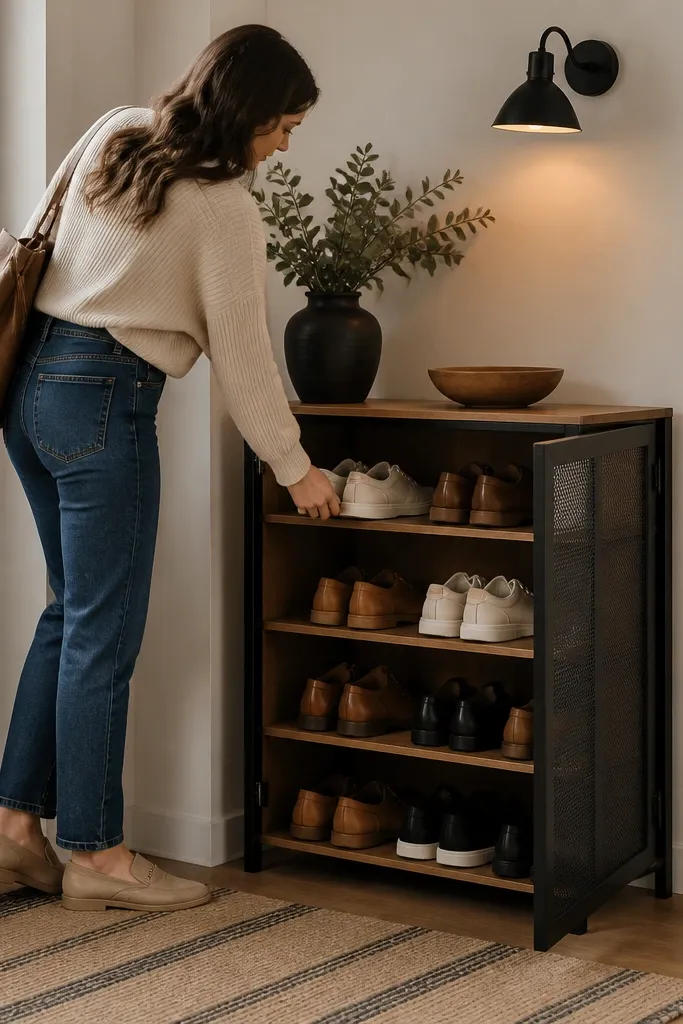
This is a “grand entrance” look because the steel frame is crisp and the oak slats add warmth. The hinged side gate lets you open one side for quick access without flipping the whole unit, so it works in tight corners. It’s also good when you want shoes lined up but still want some airflow. Choose this if your foyer has black fixtures, a dark console, or a modern front door. It holds about 10-18 pairs depending on shelf count and spacing.
Cut and square a steel frame using pre-cut steel stock or metal angle, then weld or bolt corners with gussets for rigidity. Add oak slats across each shelf with evenly spaced gaps and rounded edges so shoes don’t snag. Mount the hinged side gate with a latch so it closes flush and doesn’t swing open. Finish the wood with oil or matte sealant, then powder-coat or use pre-powder-coated steel parts for durability.
Editor's noteRound every wood edge that touches shoes; sharp corners scuff leather and look worn quickly.
Skip thisSkip wide gaps between shelves if you store sneakers — they topple and the rack looks messy.
7. Corner ladder shelf shoe rack with removable bins
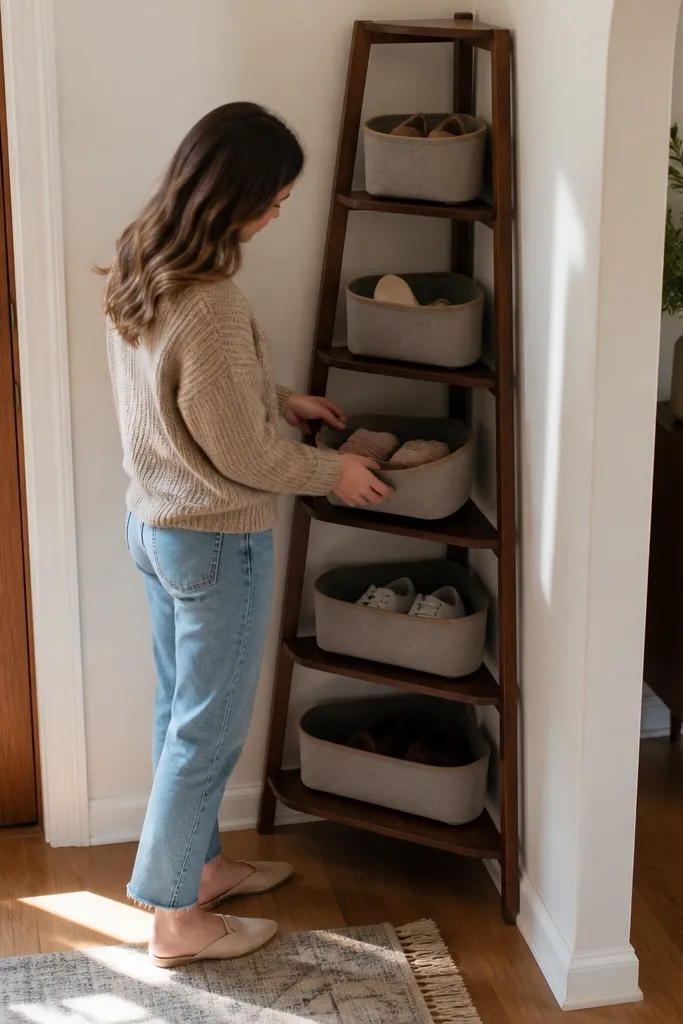
Corners are where foyers look worst because clutter has nowhere to go. A ladder-style corner rack uses vertical space and creates a visual rhythm that reads intentional. Add removable bins so you can hide smaller items like socks, insoles, and shoe polish. This design looks good with mid-century or scandi entries because the open frame keeps it light. Capacity is around 14-24 pairs depending on bin size and shelf spacing.
Build a ladder frame with two side rails and evenly spaced rungs from 2x2 or 1x3 lumber. Anchor the frame into studs or use a wall cleat for safety so it doesn’t tip. Add shelf platforms on each rung using thin plywood or slats, then place removable fabric or plastic bins that fit snugly. Finish the frame with stain and a matte topcoat, and use rubber feet to protect floors.
Choose bins with front cutouts so you can grab shoes without pulling everything out.
Don’t put bins that are too deep — they hide the shoes and the rack stops looking neat.
8. French cleat organizer with vertical shoe slots
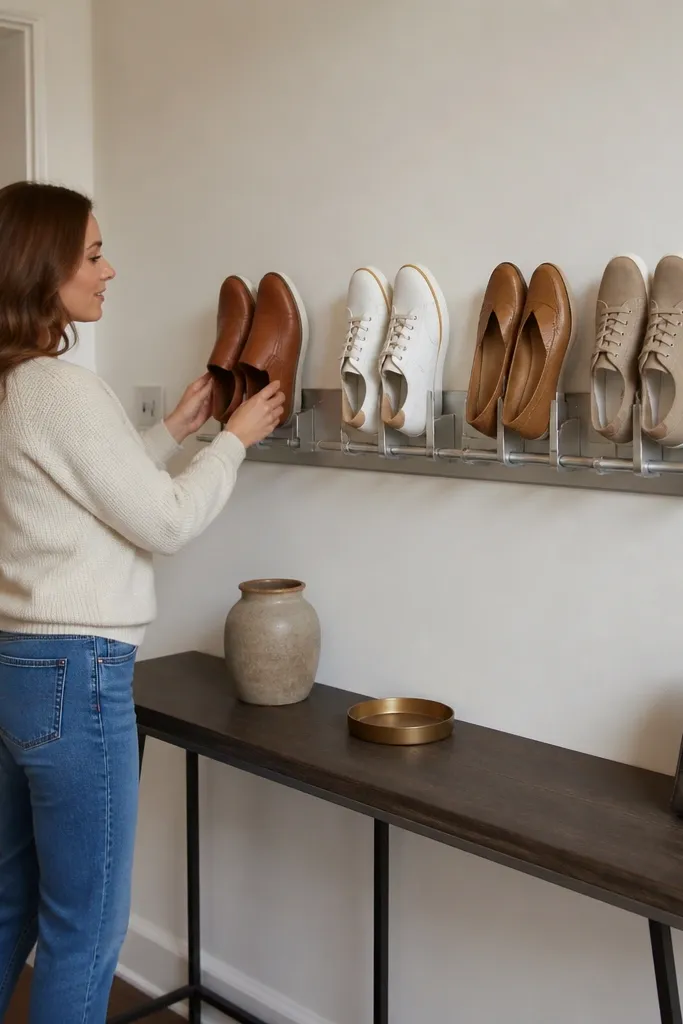
This is for people who hate clutter but love a clean wall. Vertical slots store shoes upright so they take less visual space and dry faster than closed cabinets. A French cleat system lets you remove the rack for cleaning or reconfiguring later. It looks best in foyers with a blank wall and a console table, because it reads like built-in storage. You can fit 10-20 pairs depending on slot width and height.
Mount a French cleat ledger into studs at your desired height, then attach matching cleats to a back panel made from 3/4-inch plywood. Cut vertical slot dividers from 1/2-inch plywood and space them so each slot is slightly wider than your shoe width. Add a bottom shelf for traction and a top cap for rigidity. Seal the surface with paint or stain, then install a small lip at the bottom of each slot so shoes don’t slide out.
Editor's noteTest slot width with the widest shoe you own, not the average pair.
Skip thisAvoid open slots without a bottom lip — shoes slide and the wall looks chaotic.
9. Two-tone bench with rattan drawer fronts
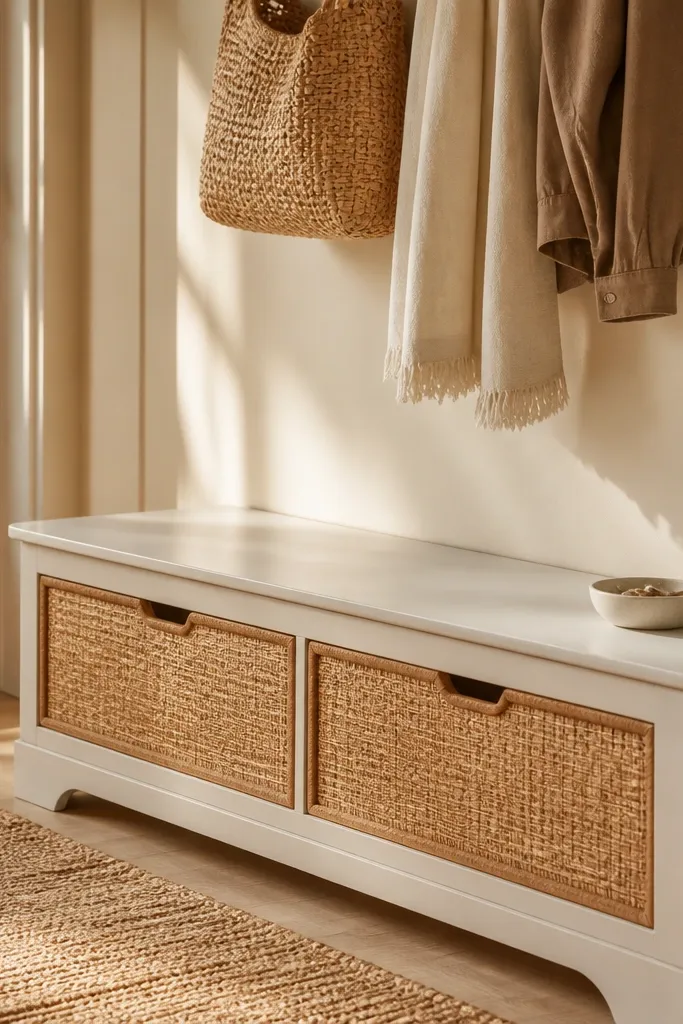
Two-tone furniture makes an entry look styled, fast. This bench hides shoes in drawers, then uses rattan fronts so the storage still feels light. It’s a great option for foyers that already have warm textures like woven baskets or cane-framed mirrors. The drawers keep everything organized and the rattan adds that “designer” texture without needing complicated joinery. Plan for 10-18 pairs depending on drawer height and how many drawers you build.
Build the bench base with 3/4-inch plywood, then add three or four drawer openings. Use 1/2-inch plywood drawer boxes and install soft-close slides inside the base. Cut drawer fronts from a frame and attach rattan or cane panel sheets, then paint or stain the frame parts in a second color. Finish the bench top and frame with durable topcoat, and seal drawer edges so rattan doesn’t snag.
Editor's noteIf your foyer is bright, choose matte paint for the bench frame; gloss shows every fingerprint.
Skip thisDon’t skip drawer slides rated for the drawer weight — rattan fronts make people pull harder.
10. Reclaimed wood pallet-style rack with steel corner braces
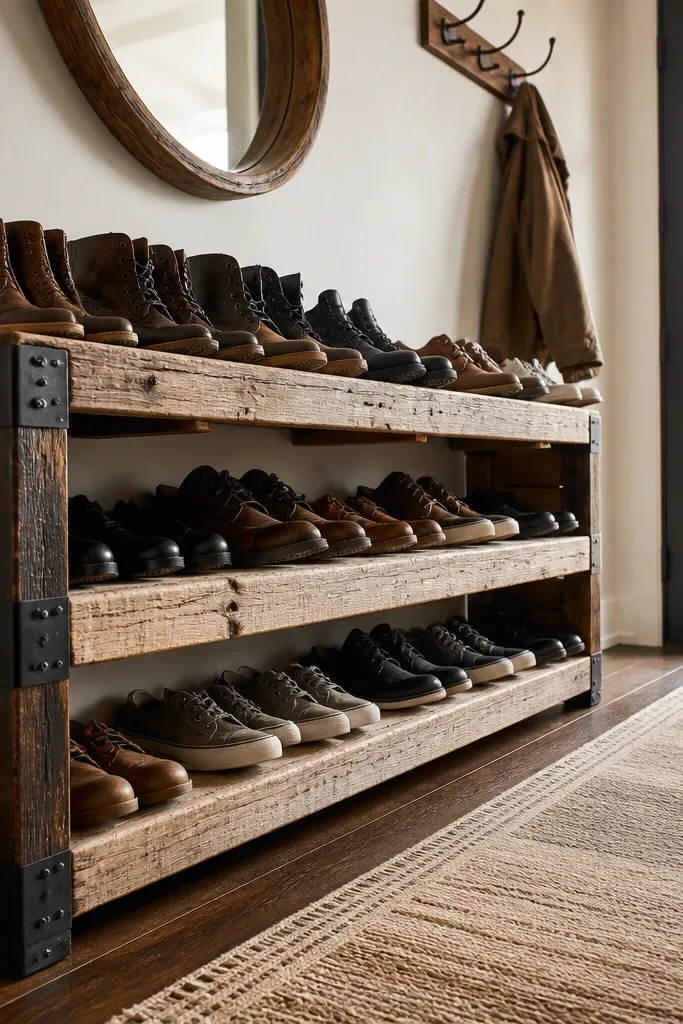
This design looks grand because the structure feels solid and aged in a controlled way, not messy. Reclaimed wood gives character, but steel corner braces keep it crisp and prevent the “pallet pile” look. Use this when you have a rustic entry and want shoes to sit in neat rows with a strong frame. It works well for 12-24 pairs when you add multiple cubbies. The open cubbies also let air circulate when shoes are damp.
Cut reclaimed boards into consistent rails and dividers, then plane or sand to remove rough edges where shoes touch. Build a rectangular frame and add steel corner braces for squareness. Create cubbies by screwing dividers at fixed spacing, and add a simple back rail to keep the structure from racking. Seal reclaimed wood with a clear protective finish or stain + topcoat so the color stays even.
Pick one dominant board color tone and ignore boards that look too different; the rack looks “designed” instead of random.
Don’t leave rough board edges inside cubbies — shoes scuff and the rack looks worn fast.
11. Slim 12-inch depth shoe rack with glass-front upper doors
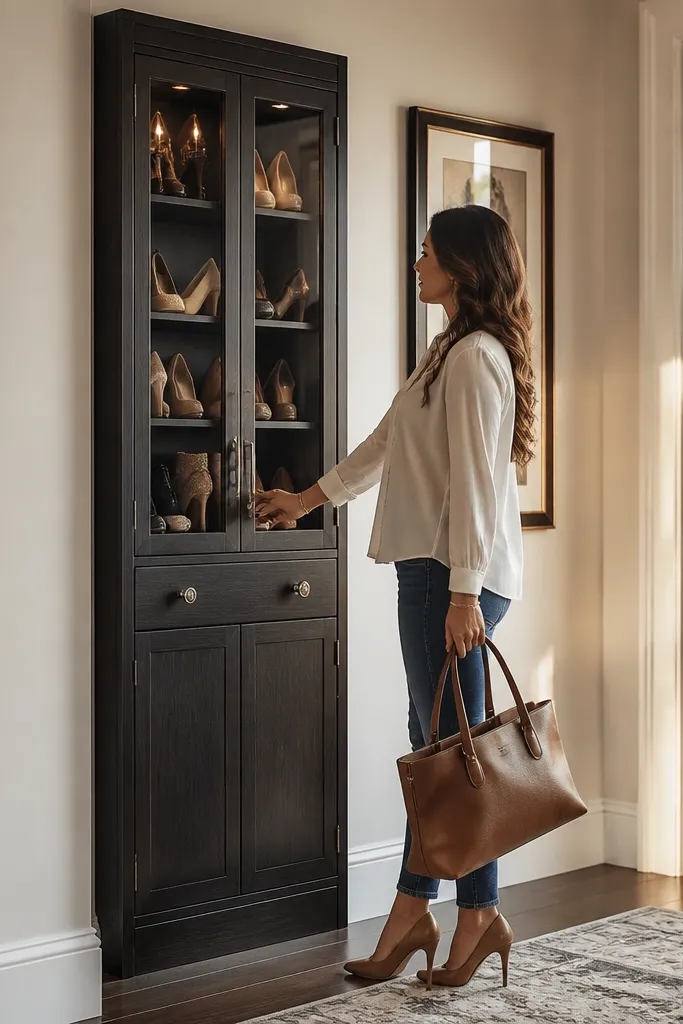
For narrow foyers, this is the “keep it grand” solution. The top section has glass-front doors so you can display a few pairs neatly, while the bottom hides the rest. Glass makes the entry feel brighter and more finished, especially if you have a chandelier or wall sconce that reflects light. Keep the glass doors consistent in height and spacing and it reads like a cabinet. This design fits footprints as small as 12-14 inches deep.
Build a slim carcass from 3/4-inch plywood with a 12-inch depth, then divide it into upper and lower sections. Add shelves inside the upper section and hinge glass doors on a frame made from 1x2 lumber. Use wood panels for the lower section so shoes stay hidden. Install soft-close hinges and add a gasket or felt strip to prevent rattling, then paint or stain the frame and seal the wood.
Editor's noteUse frosted or lightly textured glass if you don’t want to see shoe clutter through the door.
Skip thisAvoid crystal-clear glass without organization — scuffed toes show and the foyer looks messy.
12. Hexagon cabinet with staggered shoe cubbies
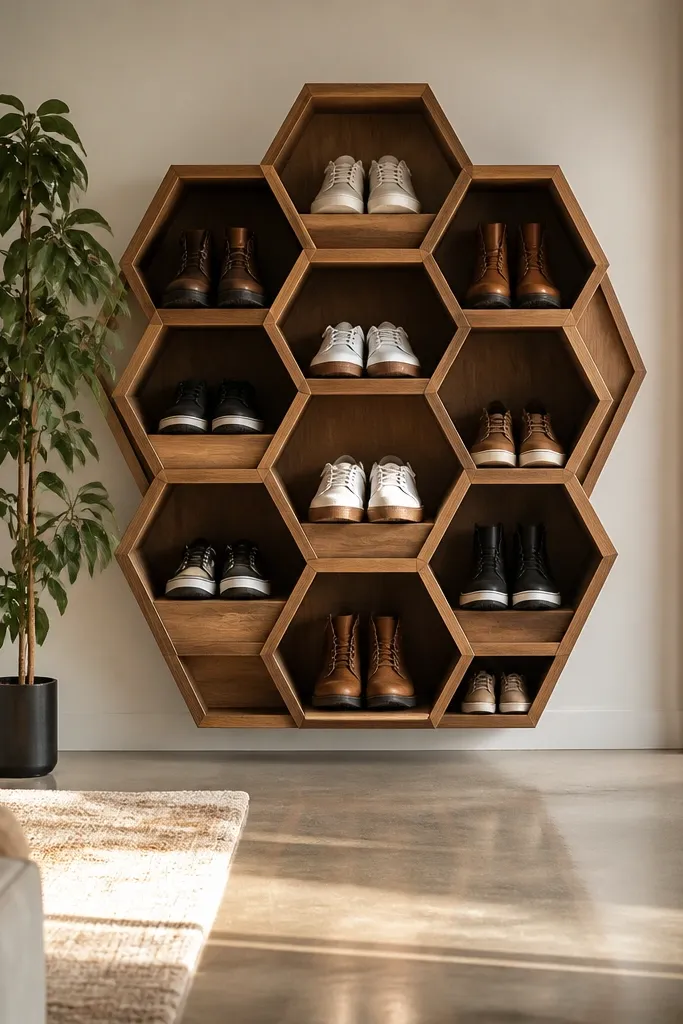
A hexagon cabinet is visually different, which is exactly what makes a foyer rack feel like a statement piece. The staggered cubbies let shoes sit at different angles, so the opening pattern looks intentional rather than like a box grid. It also helps with mixed sizes because you can vary cubby heights without making everything look uneven. This one works best in foyers with a corner or a place where the cabinet can be seen from two angles. Capacity lands around 16-22 pairs.
Start by drawing a hexagon carcass layout with consistent side widths, then cut 3/4-inch plywood panels to match. Build internal dividers in a stagger pattern so the cubbies alternate left-right heights. Add a solid back and a simple base for stability, then attach a front frame that holds small door panels or open cubbies with trim. Finish with paint or stain and add corner edge banding to protect from scuffs.
Editor's noteSand and round the cubby edges; hex openings show every chip and scratch.
Skip thisDon’t go too shallow on cubbies — shoes lean forward and the staggered look collapses.
13. Matte black metal slat rack with linen slip covers
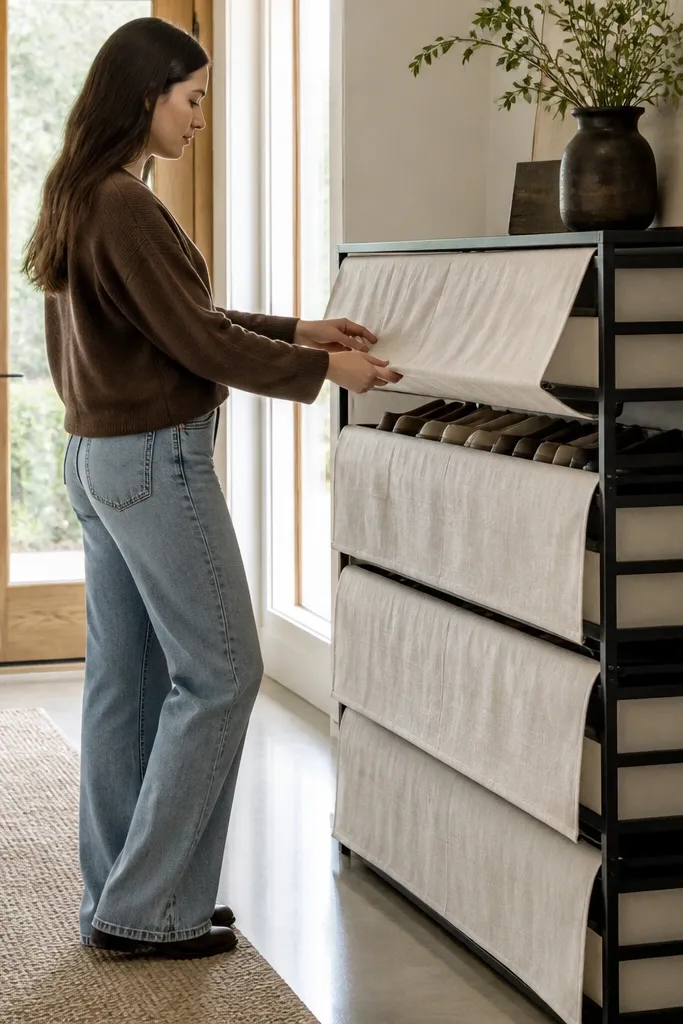
This is a clever way to get both air flow and a clean front. The metal slat rack looks modern and airy, while linen slip covers hide shoes and absorb visual mess. If your foyer has lots of hard surfaces, the linen softens the look without making the storage bulky. You can remove and wash covers, which matters when shoes get muddy. It holds about 10-18 pairs depending on cover size and how many rows you build.
Build a metal frame or buy a metal shelving frame and reinforce it with diagonal bracing. Add wood slats or metal shelf bars at consistent heights for shoe alignment. Sew or cut linen slip covers with simple elastic at the bottom so they stay smooth; attach small Velcro tabs so covers don’t shift. Paint or powder-coat the frame matte, then seal any wood slats with a clear matte finish.
Editor's noteUse thicker linen and line the backside so the fabric doesn’t sag when it gets damp.
Skip thisSkip thin fabric — it clings to shoes and shows every shape.
14. White painted cabinet with brass toe-kick and open side shelves
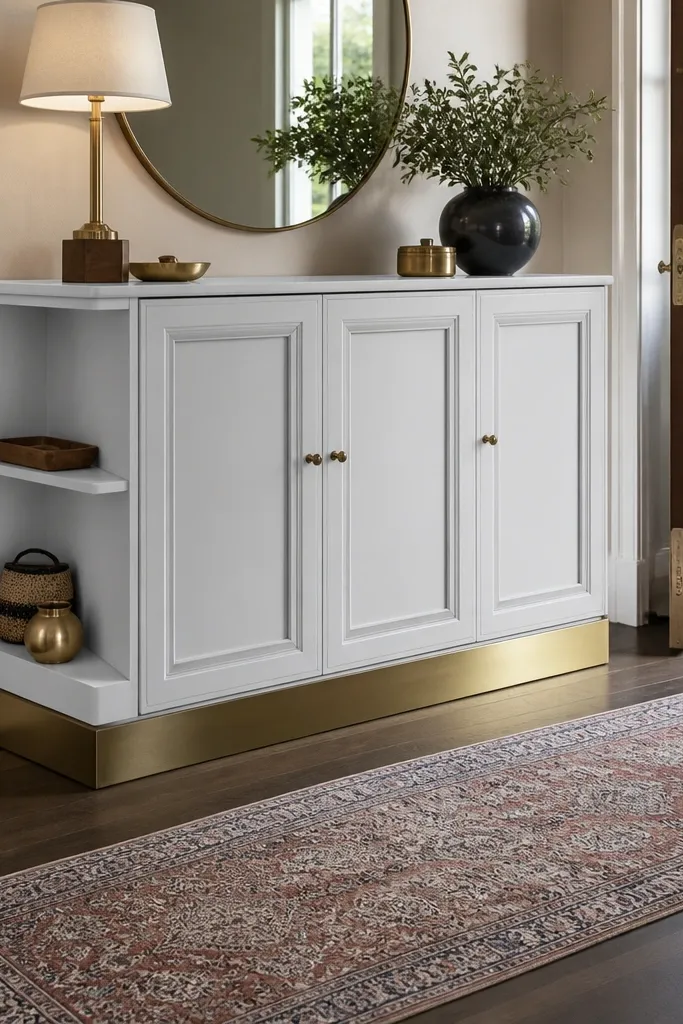
This design is “grand entrance” in a traditional way. White paint keeps it bright and clean, the brass toe-kick adds a polished line at floor level, and open side shelves give you a place for everyday styling items like a small tray. The mixture of closed storage and open display keeps the foyer functional without looking cluttered. It’s great for entryways that already have brass hardware on doors or lighting. Capacity is around 12-20 pairs depending on shelf count.
Build a cabinet box from 3/4-inch plywood and add two or three interior shelves with fixed heights. Install cabinet doors with a simple shaker style and add a brass toe-kick trim along the bottom front edge. Create open side compartments by leaving one side shelf section uncovered and adding vertical dividers for shoe spacing. Paint with a durable cabinet enamel and finish with a clear topcoat so it wipes clean.
Editor's noteMatch the brass tone to your light fixtures — warm brass looks best over white paint.
Skip thisDon’t use cheap hollow-core door slabs — they dent and look off against a crisp painted cabinet.
15. Walnut and black grid shoe tower with swing doors
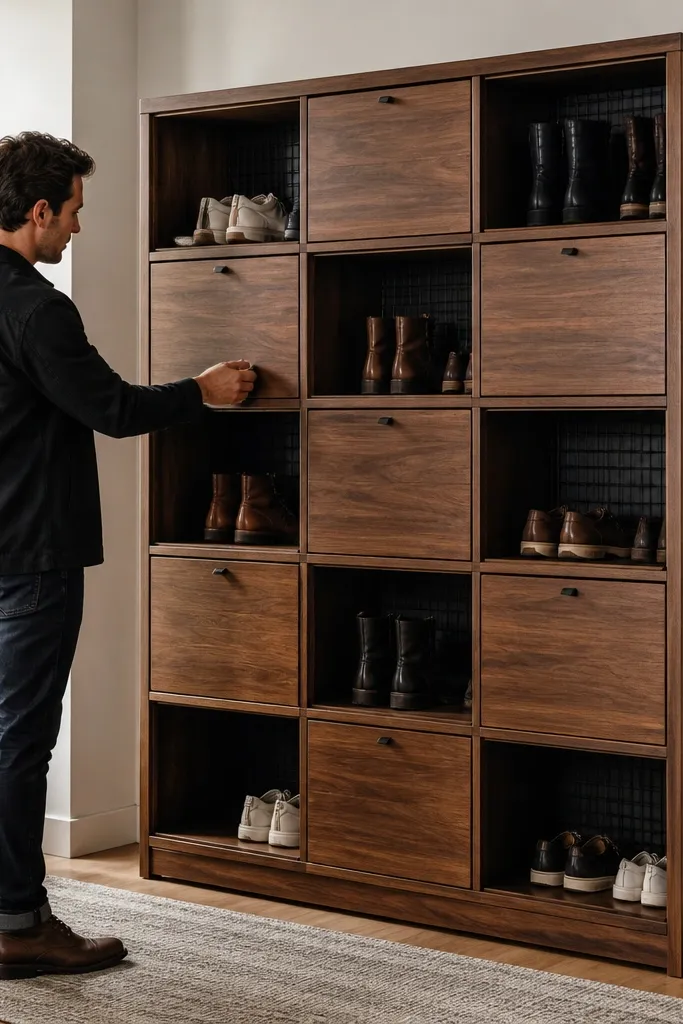
A shoe tower reads upscale because it’s tall, framed, and organized. The black grid backing makes shoes look intentionally placed, while swing doors keep everything tidy when the entry is busy. This is a strong pick when you want vertical storage without sacrificing style. It handles both boots and sneakers by varying shelf spacing and using deeper bottom compartments for larger pairs. Plan on 20-30 pairs depending on shelf count.
Frame the tower from 3/4-inch plywood panels and add internal shelves with adjustable holes so you can reconfigure. Install a black grid panel behind the shelves using standoffs so it stays flat and straight. Build swing doors with a simple frame and attach hinges to the tower frame, then add a soft-close latch. Finish with walnut stain and matte topcoat, then seal the edges near door openings.
Use a magnetic catch for the doors so they close flush and look clean from across the foyer.
Avoid uneven shelf spacing — the tower looks “off” instantly when the grid and shoes don’t line up.
16. Cased-in under-stair shoe rack with lighting strip and vent slats
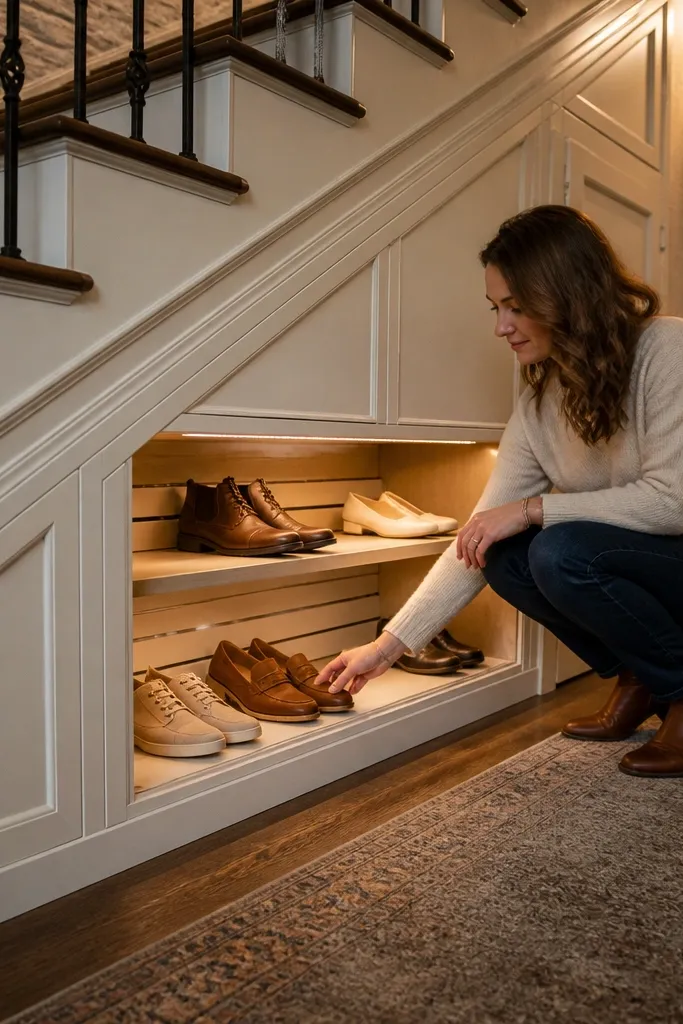
Under-stair space can look like wasted volume. A cased-in rack turns it into built-in storage that looks like it belongs in a custom home. Vent slats keep shoes from trapping odor, and a subtle light strip makes the entry feel finished at night. Use this when your foyer has stairs immediately next to the entry and you want the rack to disappear into the architecture. Capacity depends on your under-stair dimensions, but most builds fit 20-35 pairs.
Frame the inside walls with 1x3 or 2x2 lumber, then skin it with 1/2-inch plywood for a clean case. Add vent slats on shelf fronts and install adjustable shelves so you can fit boots and sneakers. Wire a low-voltage LED strip with a concealed switch and route the cable through a safe channel away from heat. Add doors or a slatted front panel, then finish the case to match trim paint.
Editor's noteUse a low-voltage LED strip with a diffuser so you don’t see bright dots through slats.
Skip thisDon’t skip ventilation — closed under-stair storage turns into a smell trap.
17. Glass-top bench with shoe cubbies and mirrored back panel
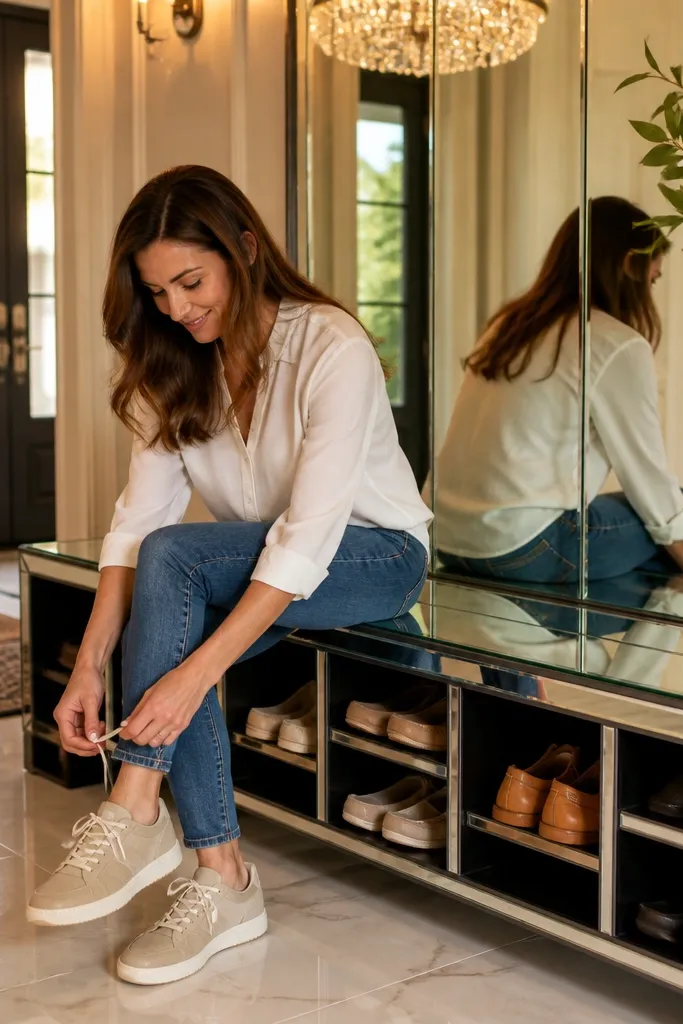
A glass-top bench makes the foyer look larger and more expensive because it reflects light and hides dust less visibly than dark surfaces. Pair it with hidden shoe cubbies and a mirrored back panel, and the whole unit reads like a boutique display. This design is great for small foyers where you want light bounce and a polished look. It also helps the rack feel “grand” even with a compact footprint. Expect around 10-16 pairs depending on cubby sizing.
Build a bench base from 3/4-inch plywood and create cubbies inside with dividers spaced for your shoe widths. Install a mirrored back panel behind the cubbies using mirror mastic or clips designed for mirrors. Use a tempered glass top cut to size and add a frame to hold it securely. Seal all wood edges, then add non-slip pads under the bench so it doesn’t shift on smooth floors.
Choose a frosted edge on the glass top frame if you want safer handling and less glare.
Don’t use thin mirror panels — they warp and the reflected grid looks crooked.
18. Open frame shoe rack with woven rope backing
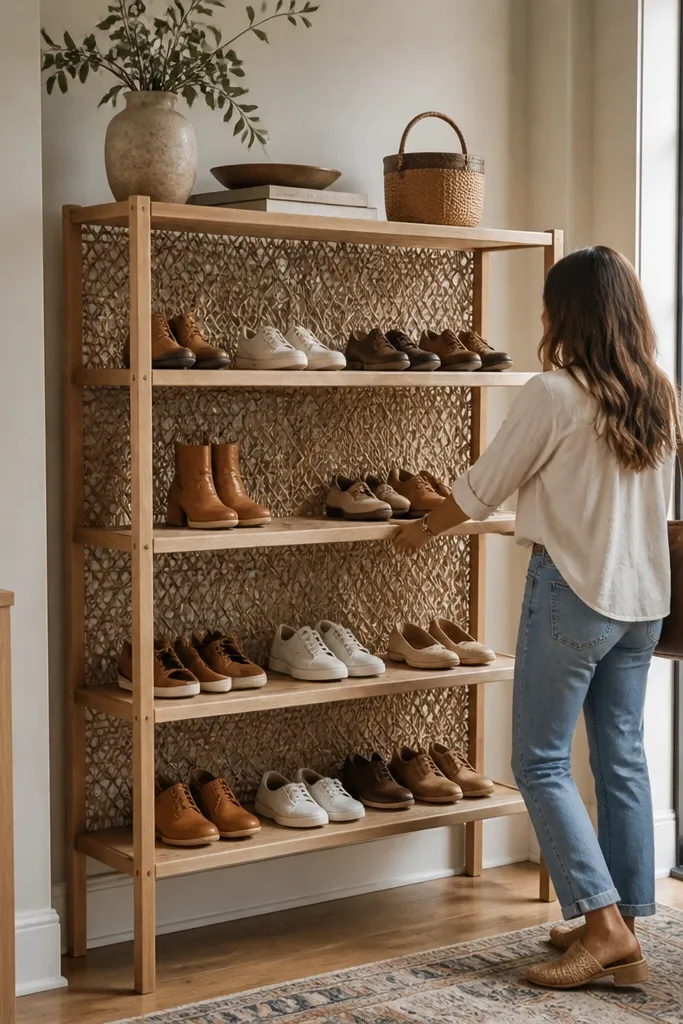
If your foyer needs texture, rope backing is a strong visual trick. The open frame keeps air moving, and the woven rope gives a warm, handmade look that still reads neat because the shoes sit behind a consistent pattern. This works well in beachy, modern farmhouse, and boho entries that have natural materials. It’s not for people who need fully hidden storage, but it does look intentional. Capacity is roughly 12-18 pairs depending on shelf count.
Build the frame from 2x2 or 1x3 lumber and add cross braces so it stays square. Install rope backing by stretching rope between cleats or evenly spaced hooks on the back frame; keep tension consistent so it forms a clean grid. Add shelves from plywood or slats with rounded edges for comfort. Finish the wood with a clear matte sealant or a light stain, then secure all rope ends with knots and hidden fasteners.
Editor's notePre-stain the rope if the foyer gets sun; it keeps color even and reduces fading patches.
Skip thisDon’t use slippery rope — shoes slide into the rope lines and the front looks messy.
19. Built-in look shoe cabinet with shaker doors and tall narrow columns
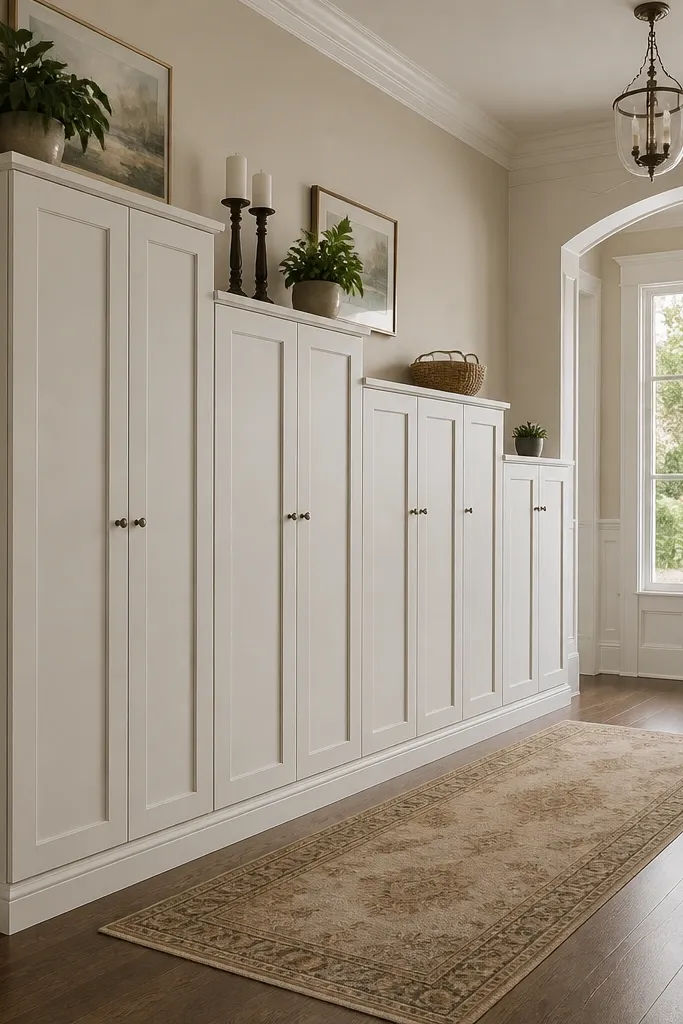
This is the safest way to make a shoe rack look like it belongs in a custom foyer. Tall narrow columns with shaker doors create vertical order, and the closed fronts keep the entry tidy. It’s perfect when you want a classic look, especially with traditional trim, chair rails, or crown molding. By varying column heights, you can fit boots above and flats below. Capacity lands around 16-26 pairs depending on door and shelf layout.
Build the carcass from 3/4-inch plywood and divide it into tall columns using 1/2-inch dividers. Add adjustable shelves with a pin system or fixed shelves if you have consistent shoe sizes. Make shaker doors using 1x3 frames with raised panels, then install hinges aligned for equal reveals. Paint with cabinet paint, then attach toe-kick trim and finish with a durable clear topcoat.
Editor's noteUse a 1/8-inch reveal around doors for that crisp built-in look.
Skip thisDon’t hang doors without shimming — misalignment makes the whole cabinet look handmade in a bad way.
20. Pegboard-backed shoe rack with custom hooks and closed base drawers
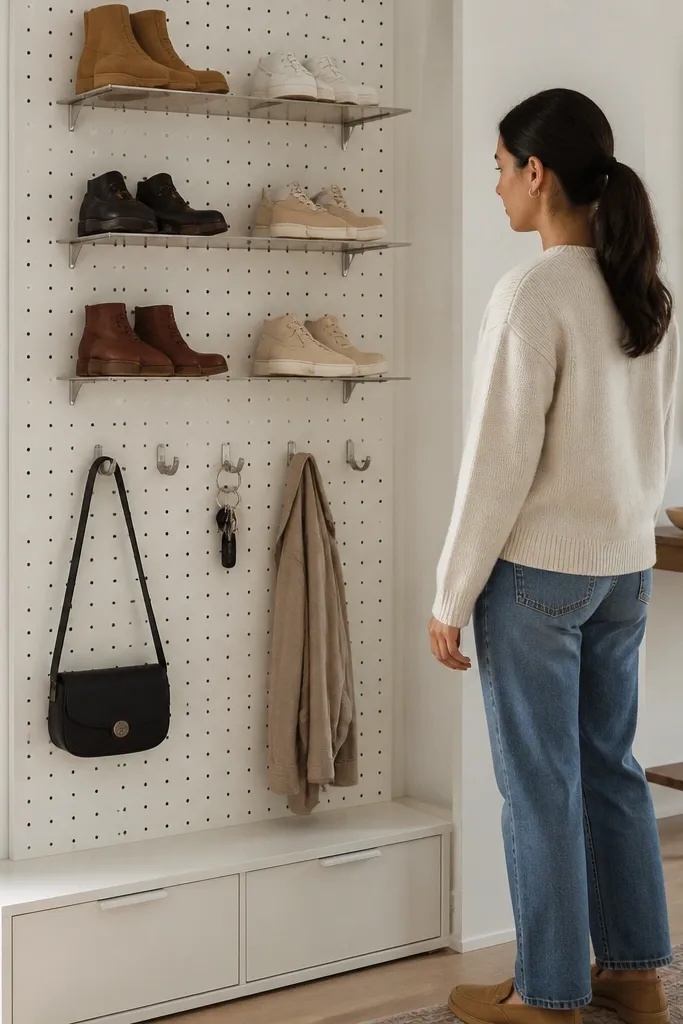
Pegboard backing turns shoe storage into a styling wall. You get a neat grid behind the shoes, plus hooks for items like boot hangers, key rings, and small bags. The closed drawers at the base keep daily clutter hidden, so the foyer stays clean. This works best for people who want to see what they own and grab quickly. It looks best when the pegboard is painted the same color as your entry trim and the hooks match your hardware.
Build a base cabinet from 3/4-inch plywood with drawers and soft-close slides. Mount pegboard to a back panel and secure it to studs, then attach the pegboard panel behind the base. Add horizontal shelf ledges for shoes and use heavy-duty hooks for hanging items. Paint the pegboard and frame with a cabinet-grade finish, then seal it so it wipes clean.
Editor's noteUse hooks rated for weight and space them so shoe heels sit flat without bending straps.
Skip thisDon’t overload hooks — bent hooks make the pegboard look messy even if everything is “organized.”



