
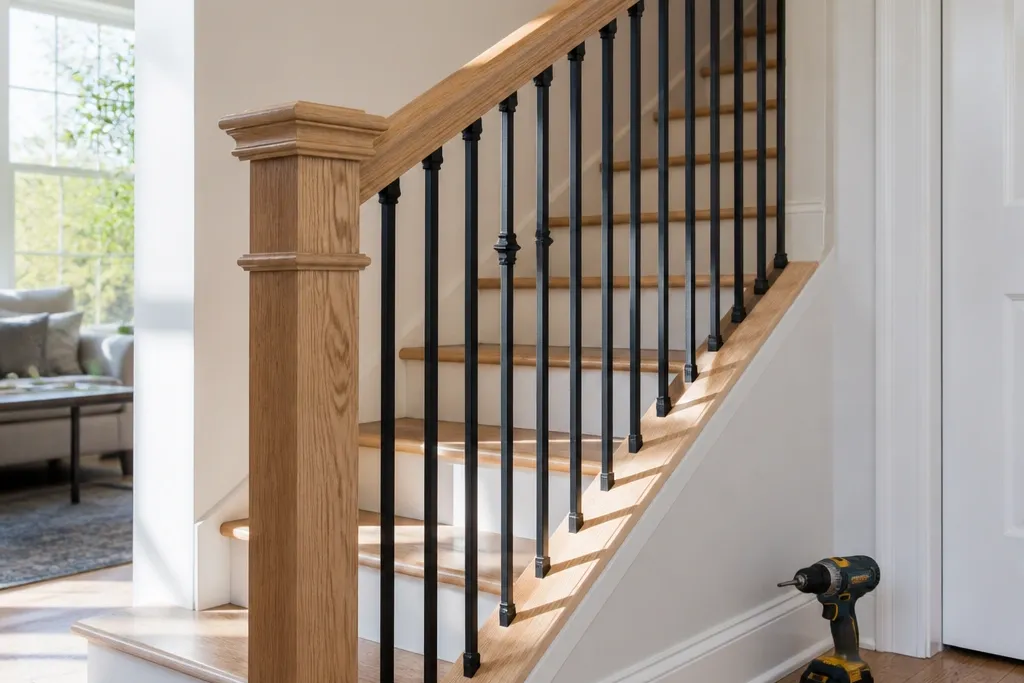
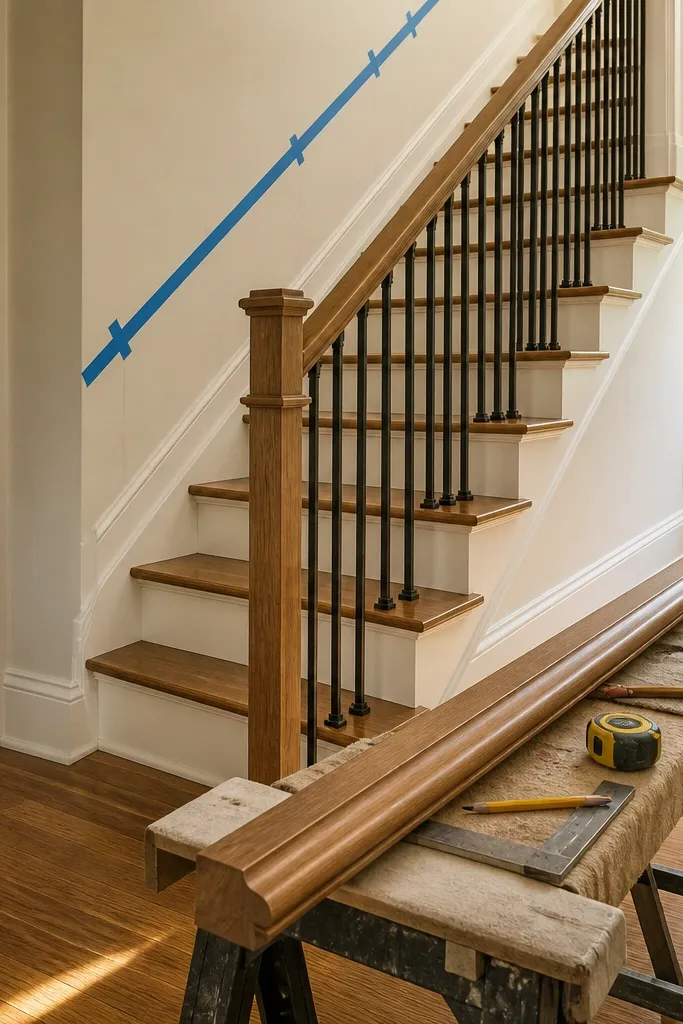
1. Powder-Coated Black Picket Rail with Wood Handrail
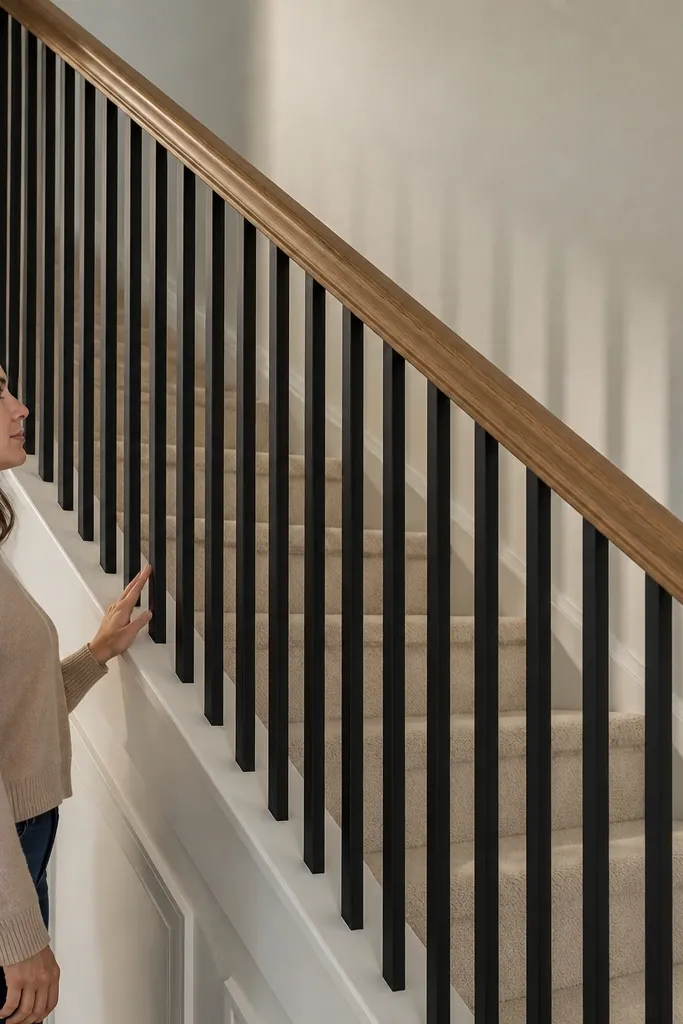
This look is clean and graphic because the pickets are identical and the handrail adds warmth. The contrast reads “designed” even when the stair itself is simple. Use powder-coated black metal for the balusters so the finish resists scuffs from shoes and vacuum brushes. Pair it with a stained or clear-finished wood handrail so the top line feels smooth and inviting. It’s beginner-friendly because metal pickets usually mount to brackets in a repeatable pattern, and you can keep your spacing consistent with a simple jig.
Editor's noteMake a spacing jig from scrap plywood with the exact picket spacing you want; clamp it to the rail and mark faster.
Start by measuring the stair run along the slope and cut your wood handrail to match the length, then sand to 180 grit and stain or clear-finish. Install the posts first, plumb them, and mark baluster positions on a straight line between posts using a tape measure and square. Attach the metal brackets to the stair side or posts, then snap or screw the pickets in place. Finally, run the handrail along the brackets, pre-drill holes, and tighten with wood screws, then touch up any exposed fasteners with matching paint.
Skip thisDon’t mount balusters first — align the posts and handrail height before you lock the spacing.
2. Natural Oak Handrail with White Square Balusters
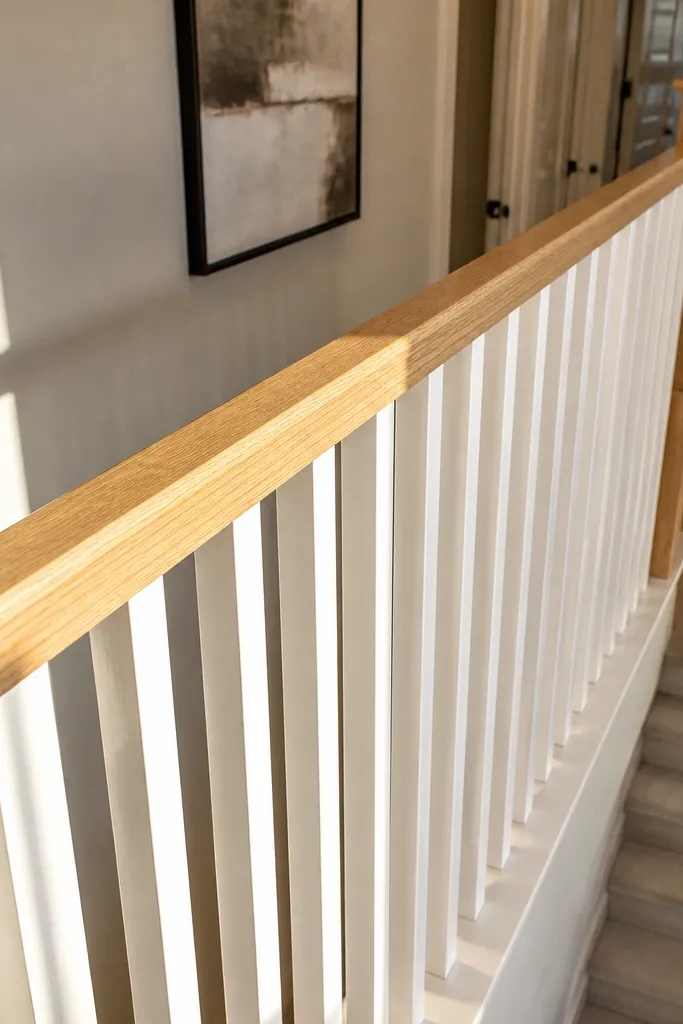
White square balusters look crisp and traditional, and the natural oak handrail keeps it from feeling cold. This combination photographs well because the verticals stay uniform and the warm wood top line catches light. Choose balusters that are straight and pre-finished or paint-ready so you don’t spend hours sanding edges. The look works in entryways, hallways, and stair landings where you want bright, clean lines. It’s also one of the easiest ways to get an “all-new” look without replacing the entire stair framing.
Sand the oak handrail lightly, then apply a clear finish or a wipe-on stain in a warm tone, and let it cure fully. Paint square balusters with a durable trim paint (semi-gloss or satin) and let them dry before installation. Mark your baluster spacing along the rail line between posts, then pre-drill mounting holes to prevent splitting. Install balusters one by one, keeping each face square, then attach the handrail with countersunk screws from underneath or through the bracket plates.
Paint balusters off the stairs on sawhorses so you get smooth, even coats without drips.
Skip glossy paint on everything — it highlights bumps and brush marks on square baluster edges.
3. Stained Wood Turned Balusters with Matching Newel Caps
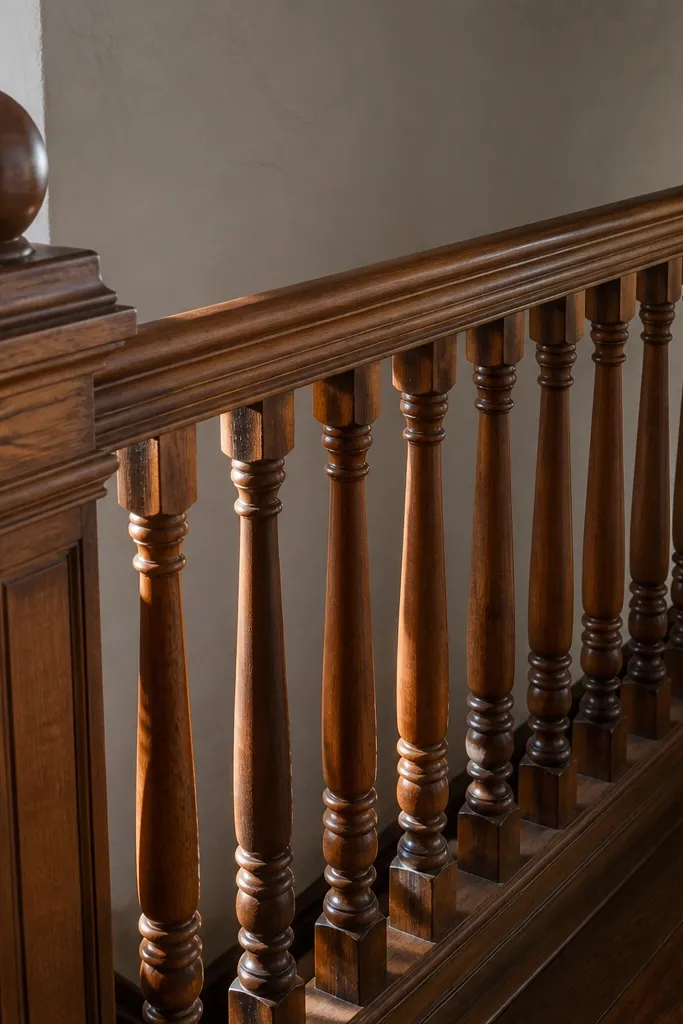
Turned balusters add instant elegance because they catch shadows and create a richer texture than flat pickets. When the newel caps match the handrail stain, the railing looks intentional instead of patched together. This is a great “stunning” upgrade for older homes where you want the stairs to feel finished and cohesive. Pick a stain tone that matches your floor or trim undertones, then keep the hardware simple so the wood detail stays the star. Beginner difficulty is moderate, mostly because you must keep turned balusters aligned and handle consistent spacing.
Editor's noteDry-fit three balusters at a time and sight down the row before you commit to the rest.
Start by choosing a stain tone and finishing the handrail and balusters before install; turned pieces look better when you can stain evenly and wipe consistently. Mark baluster center positions between posts with a consistent spacing measure, then drill mounting holes at the correct depth so balusters sit flush. Install newel posts first, then attach the turned balusters, checking alignment at both the top and bottom. Finish by fitting newel caps securely and then mounting the handrail on top, making sure the top line is straight along the stair slope.
Skip thisDon’t rush stain — inconsistent drying time creates blotches on turned profiles.
4. Cable Railing with Walnut Handrail
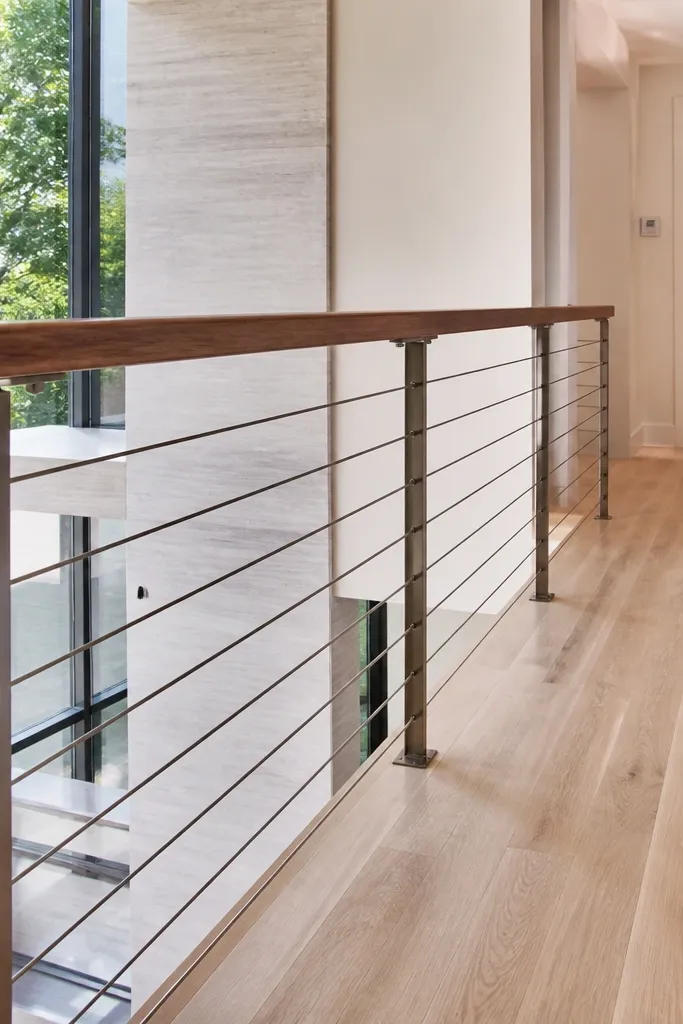
Cable railings look modern and airy while still reading sleek in photos. The trick is that cables create clean horizontal lines, and a walnut handrail adds a warm, premium top detail. This look is good for open-concept homes where you want the railing to feel light instead of bulky. It also hides small stair framing imperfections better than rigid panels because the cable hardware can be tensioned. For beginners, it’s doable if you’re careful with measuring and you follow the kit’s spacing rules exactly.
Editor's noteUse painter’s tape to mark cable heights on the posts; it prevents you from re-measuring mid-install.
Pick a cable kit that includes posts, cable ends, tensioners, and the correct cable diameter. Install posts first and confirm they’re plumb, then mark cable hole locations at a consistent height using the kit’s diagram. Thread cables through the hardware, set them at the marked length, and tension using the tensioner tool included in the kit. Mount the walnut handrail last, aligning it to the cable line so the visual rhythm stays straight.
Skip thisDon’t tension cables before all runs are threaded — you’ll fight alignment and end up with uneven cable lines.
5. Clear Acrylic Panels with Minimal Metal Posts
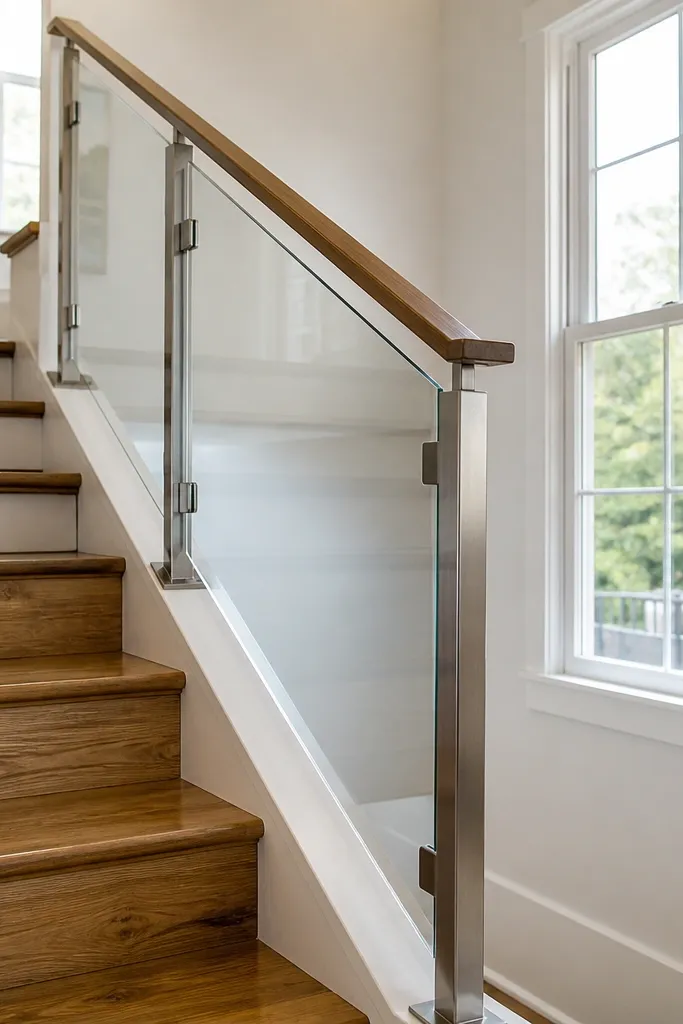
Clear panels make a stair look bigger because they don’t block sightlines. The minimal metal posts keep the design sharp, and the handrail gives you something warm to hold. This is a photogenic choice because the railing reads like a clean frame rather than a grid of balusters. Use clear acrylic panels made for railing so they’re impact-rated and designed for mounting hardware. For beginners, assembly is easier than glass because acrylic is lighter and easier to cut or fit with the right tools, but you still need clean, square mounting.
Editor's notePlan your panel dimensions before you cut anything — measure the opening width in two spots because stairs are rarely perfectly square.
Install slim metal posts first, spacing them according to your panel size and kit instructions. Mark where the acrylic panels sit and use the included brackets or channel rails to support edges. Cut panels if your kit allows it, then dry-fit them so you can confirm there’s no bowing. Finally, attach the handrail on top, and tighten mounting hardware without over-torquing so the panels don’t stress.
Skip thisSkip sandpaper on acrylic — it can haze the surface; use the kit’s recommended cutting and finishing method.
6. White Shiplap Wall Rail with Hidden Mount Handrail
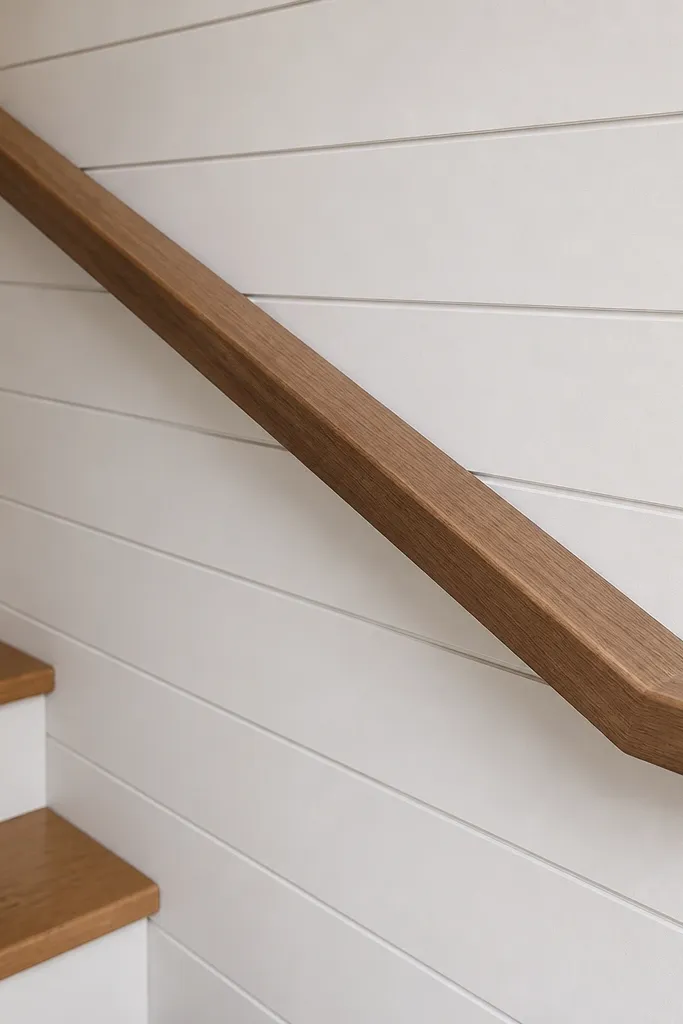
If your stairs have a wall side, a shiplap wall and a simple handrail is one of the best “looks great in photos” upgrades. The shiplap gives texture, the handrail gives function, and the hidden-mount brackets keep the line uninterrupted. This works especially well in small hallways because it cleans up clutter and makes the wall feel finished. It’s beginner-friendly because you’re mostly building a wall surface and mounting a single rail line, not wrestling lots of balusters.
Editor's noteUse a laser level or a long straight board to keep the bracket line true — stair walls amplify small errors.
Install shiplap panels on the stair wall side, starting from a level reference line and nailing into studs where possible. Apply caulk at seams and paint the shiplap with trim paint for a smooth look. Choose a wall handrail system with concealed brackets, then mark bracket locations at the correct height along the stair slope. Mount the rail, then check the line by sighting from the bottom and adjusting any bracket that’s off.
Skip thisDon’t mount brackets only to drywall anchors; use studs or a solid backing strip.
7. Dark Walnut Stain with Brushed Nickel Balusters
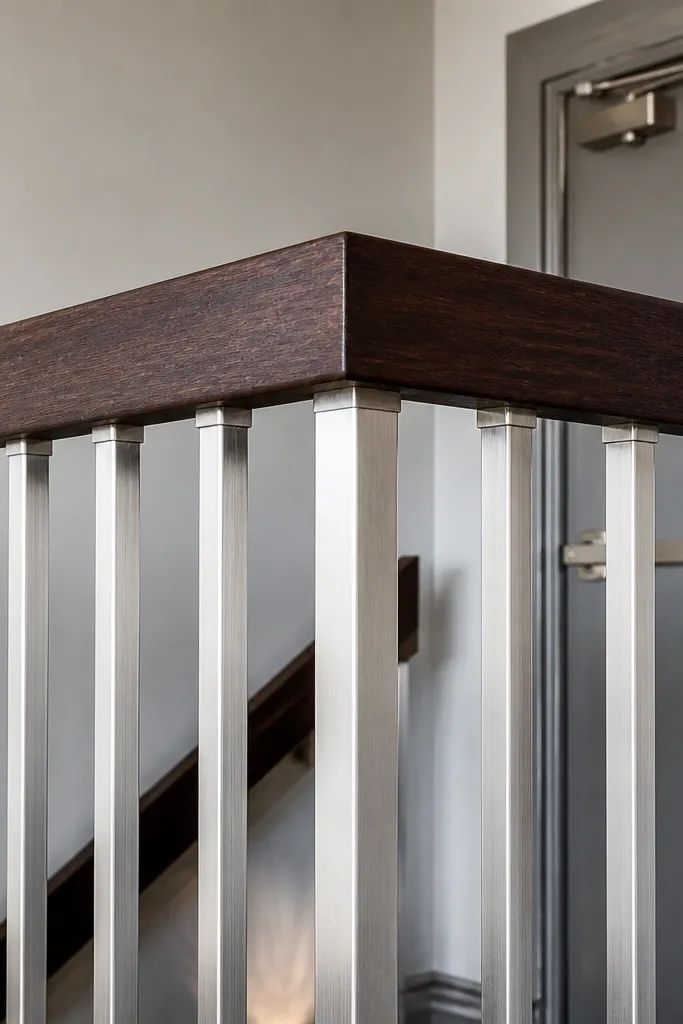
This combo looks upscale because walnut reads deep and warm, while brushed nickel keeps the hardware light and modern. The key aesthetic is contrast: dark top line plus reflective metal verticals creates a crisp pattern. It’s a strong choice when your home has nickel door hardware, light fixtures, or faucets. This railing is photogenic because the metal catches highlights without looking harsh like chrome. Beginners can handle this if the balusters mount to brackets with clear spacing instructions.
Editor's noteUse painter’s tape to mask the handrail while you install metal balusters so you don’t scratch the finish.
Finish the walnut handrail with a stain that matches your undertone and seal it with a clear coat for durability. Prime and prep your metal balusters if they’re not pre-finished, then attach them to brackets mounted to posts. Mark baluster spacing on a guide strip, then transfer marks to the mounting line to keep everything consistent. Install the handrail on top with pre-drilled holes and countersinks so screws don’t split the wood, then wipe away any fingerprints before final coat cures.
Skip thisAvoid mixing metals (like oil-rubbed bronze with brushed nickel) on the same railing — it reads messy fast.
8. Terracotta Tiles on Stair Wall with Matching Handrail
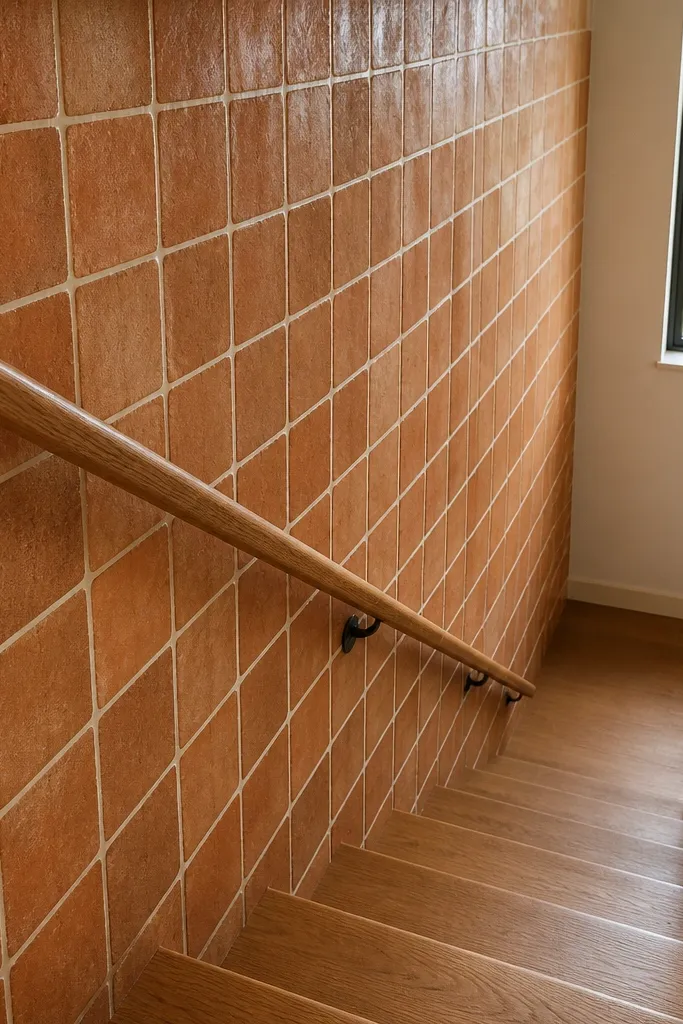
If you want the railing to look stunning without complicated balusters, make the wall side do some of the visual work. Terracotta tile on the stair wall creates warm color and texture, and a matching handrail ties the whole look together. Keep the balusters simple and straight so the tile stays the hero, and the railing reads clean instead of busy. This is a great option for renovations where the stairs need a “feature” and the railing is the easiest place to frame that. Beginner build is manageable because you’re mostly finishing the wall and mounting a straightforward handrail.
Editor's notePick grout color before you buy the handrail finish — warm grout and walnut look great together, cool grout can clash.
Tile the stair wall first, starting at a level line and dry-fitting pieces so edges look intentional. Use grout and sealant rated for tile wetness and cure time, then paint or finish your handrail. Choose a basic picket or square baluster system for the open side, and mount posts plumb before installing verticals. Install the handrail at the correct height and use matching fasteners so the line looks continuous and tidy.
Skip thisDon’t tile and then install railing without planning clearances — tile thickness can change bracket fit.
9. Matte White Balusters with Textured Plaster Wall Backdrop
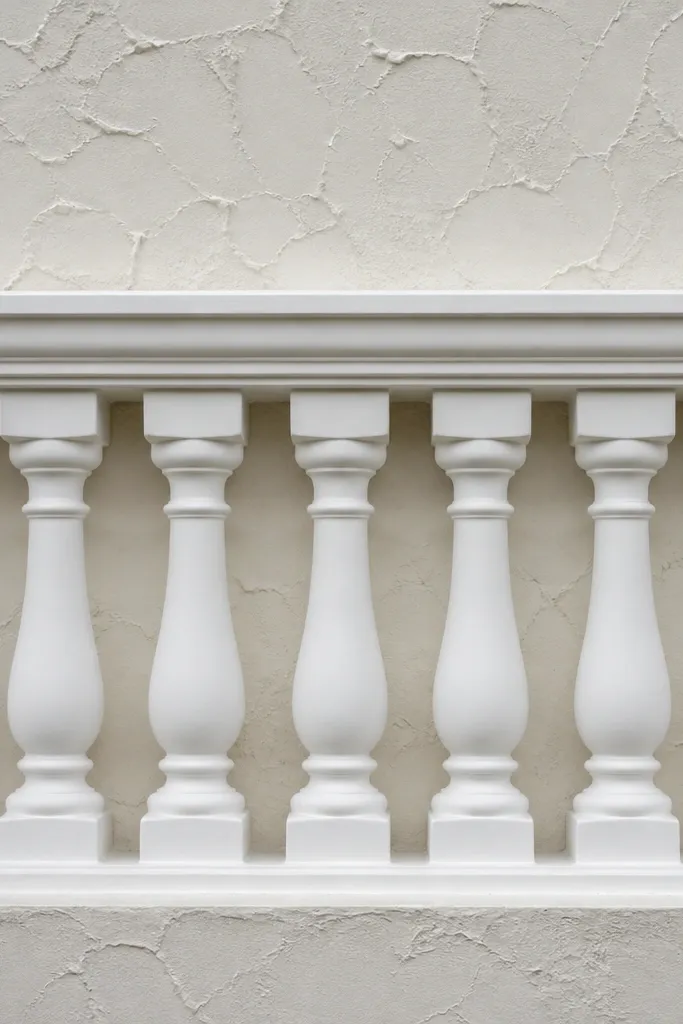
Matte white balusters photographed against a textured wall look soft and high-end. The texture behind them adds depth, while matte paint hides minor imperfections in the balusters and keeps the railing from looking plastic. This is a smart pick for modern farmhouses and minimal interiors where you want a clean railing but not sterile. A simple handrail, either painted white or stained light oak, keeps the top line calm. It works best when your wall surface already has texture or you’re willing to add a plaster-style finish.
Editor's noteUse foam sanding blocks on painted wood to keep edges crisp without sanding through the paint.
Finish your wall texture first so the railing height and spacing marks come from a stable surface. Paint balusters with matte or eggshell trim paint and let them cure before installation. Mark baluster spacing with a guide strip and pre-drill so painted wood doesn’t chip. Install balusters into posts or mounting blocks, then mount the handrail and clamp it in place while you drive screws.
Skip thisDon’t use high-gloss paint — it makes every tiny roller line show in hallway light.
10. Black Metal Spiral Brackets with Natural Rope Detail
This is a rustic-industrial look that still reads clean if you keep it controlled. Black metal spiral brackets give shape, and rope detail adds texture without adding clutter. The rope is what makes it photogenic, but the real win is the repeatable bracket pattern that keeps the line straight. Use rope or cord meant for indoor use and choose thickness that looks proportional to the balusters. It’s beginner-friendly because you can mount brackets to posts and then route rope between them.
Editor's notePre-cut rope pieces with 2-3 inches extra, then trim after you see the final tension.
Pick a bracket set that’s designed for railing or at least sized for the cord you’re using. Install posts first and mark bracket positions so the brackets line up at consistent heights. Mount brackets with screws into structural points, then cut rope to length for each run and secure ends with hardware clamps or eyelets. Finish by tying the rope to tension it lightly, then check the line from the hallway so it doesn’t sag.
Skip thisSkip thin rope — it looks stringy and cheap against thick metal brackets.
11. Herringbone Wood Infill Panel at the Side Stair Wall
If you want “stunning” without doing balusters all the way across, herringbone infill panels on the side wall make the railing read like a design element. The handrail stays simple, while the panel gives a pattern that catches light and looks great in photos. This works best on a stair that has a wall side or a partial railing section where you can frame a panel. Use real wood strips or a pre-made panel kit so you don’t fight tiny pieces. Beginners can do it if they keep the panel size small and focus on straight mounting.
Build or buy a herringbone wood panel sized to fit the opening between posts, leaving a small gap for expansion if it’s solid wood. Sand and seal the panel so the finish matches your handrail tone. Mount the panel to the wall or inside the railing frame using construction adhesive rated for wood plus screws through the backer. After the panel is secure, install the handrail on top, then add trim pieces to hide raw edges.
Use a painter’s tape border around the panel opening; it keeps adhesive from squeezing into the herringbone lines.
Don’t rush glue squeeze-out — dried adhesive ruins the crisp look of the diagonal pattern.
12. Two-Tone Railing with Painted Balusters and Stained Handrail
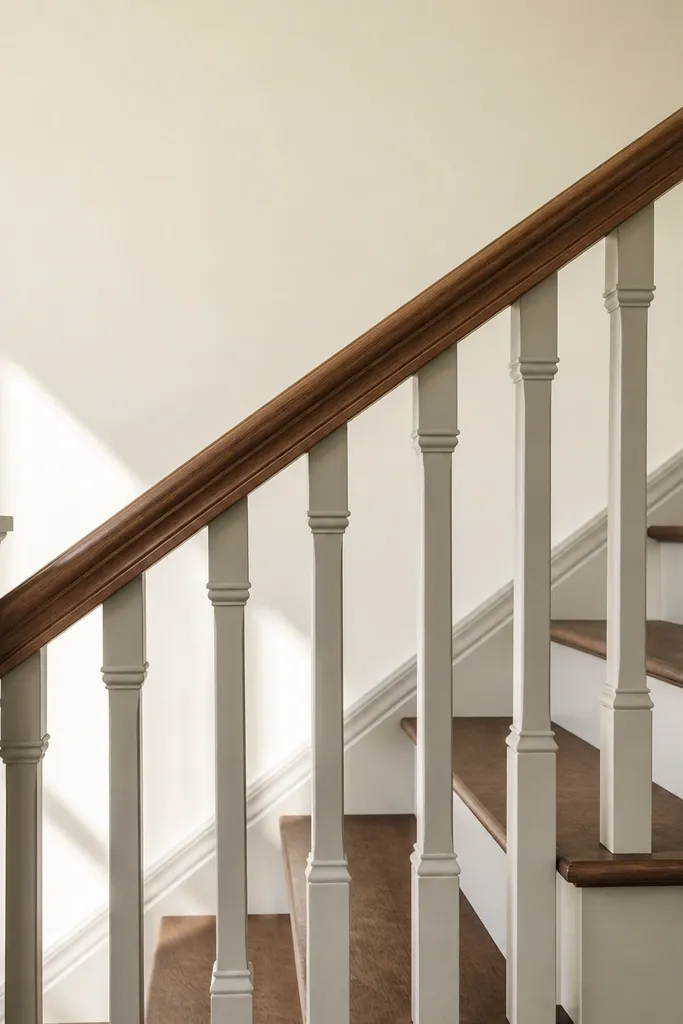
Two-tone railings look designed because the eye reads a clear top line and a separate vertical pattern. The safest, most photogenic version for beginners is stained handrail plus painted balusters in a light neutral or a soft color that matches your walls. This makes the railing look intentional even if your stair layout is simple. It’s also practical: you can repaint balusters later without refinishing the handrail. Keep the hardware consistent so the look stays clean.
Editor's noteChoose paint sheen based on light: satin for hallways with glare, semi-gloss for higher-traffic areas that need easier cleaning.
Pick a baluster material that takes paint well, like primed wood spindles or metal pickets with pre-primed surfaces. Paint balusters and posts in your chosen color and let them cure fully. Stain and seal the handrail, sanding to 220 grit before finish. Install posts, mount balusters using your spacing guide, then attach the handrail with pre-drilled holes so the stained wood stays smooth and doesn’t split.
Skip thisAvoid using two-tone without matching trim — the railing will look disconnected from the room.
13. Glass Panel Inserts with Brushed Black Aluminum Frames
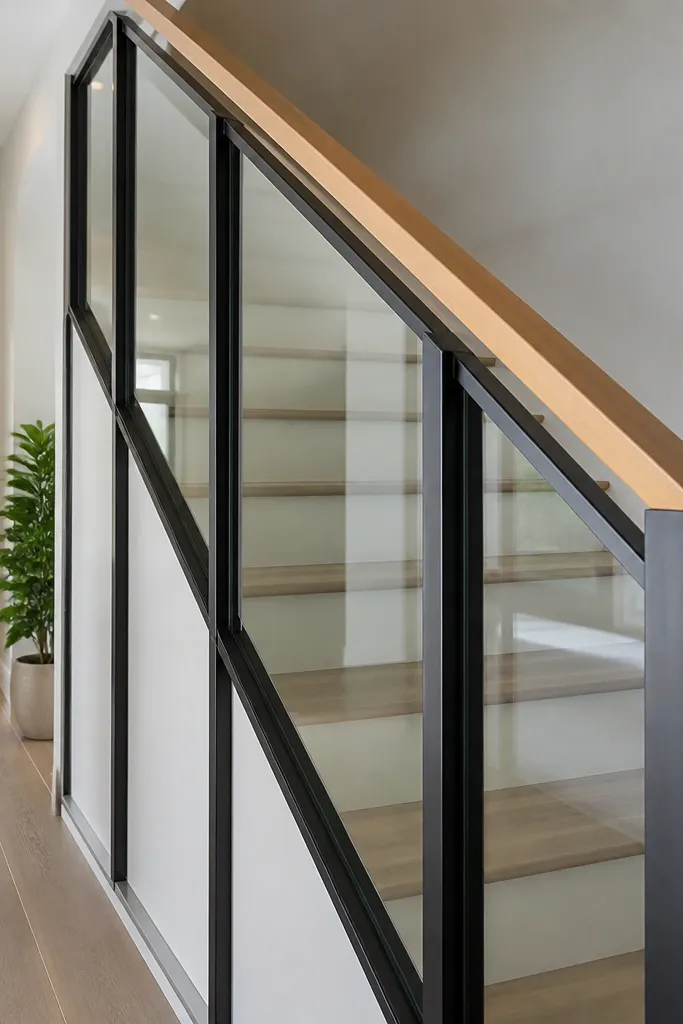
Glass inserts make the railing feel light and architectural. Brushed black aluminum frames keep it modern and hide fingerprints better than shiny finishes. This look is stunning because the glass reflects hallway light and makes the stair feel less bulky. Use tempered glass designed for railing so you’re not guessing about thickness and safety. Beginners can pull it off with a kit that includes the frame and mounting hardware, which keeps the spacing and alignment sane.
Buy a glass railing kit with pre-sized panels and frames, then confirm your opening dimensions before installation. Install posts and anchor points first, then dry-fit frame sections to check that the glass sits evenly in the frame. Insert tempered glass panels following the kit’s gasket instructions, then tighten frame screws evenly. Finally, mount the handrail and wipe the glass clean with a streak-free cleaner before the finish cures.
Use a foam gasket and don’t overtighten screws — uneven pressure can cause frame marks around the glass edges.
Don’t swap glass thickness mid-project; frame spacing is built around specific panel dimensions.
14. Vertical Slat Railing with Clear Finish and Black Caps
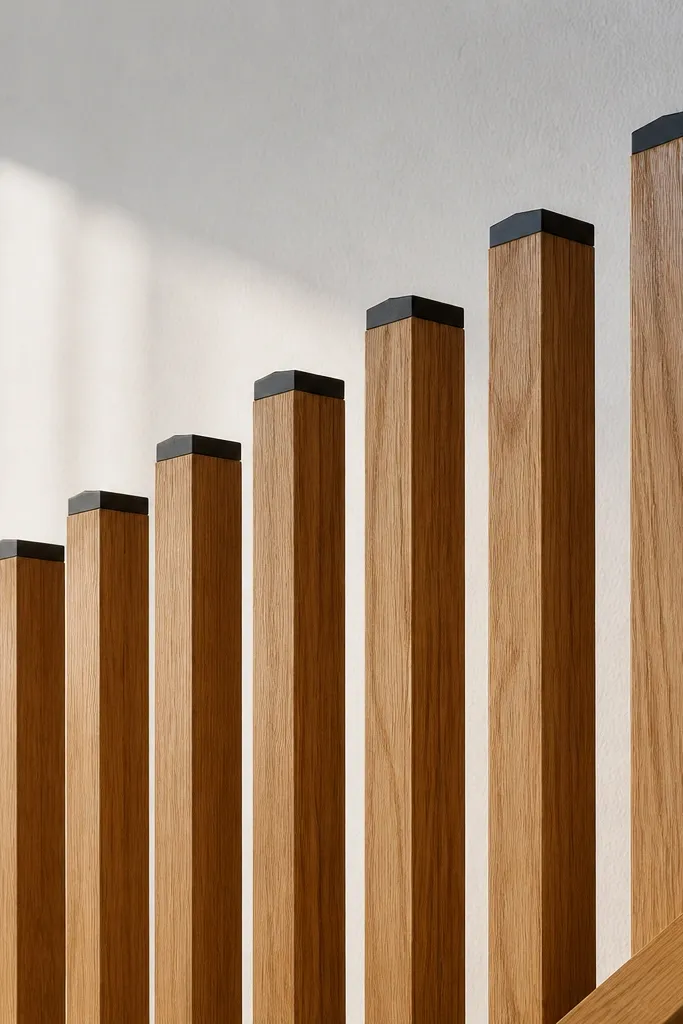
Vertical slats give a calm, modern look, and clear finish makes the wood grain the star. Black caps on posts or slat ends add a sharp, graphic detail that pops in photos. This is a great alternative to traditional balusters when you want fewer “lines” cluttering the stair view. Beginners like it because slats are flat and easier to keep straight than turned balusters. The look stays stunning when you use consistent slat widths and keep the gaps uniform.
Cut slats to a consistent width and length, then sand each face to 180-220 grit. Apply a clear finish with a satin sheen so the wood doesn’t look plastic under hallway lighting. Install posts, then mark slat centerlines using a guide strip for consistent spacing. Attach slats using concealed fasteners or screws through the backer so the front stays clean. Add black caps at the top of slats or on post ends, then mount the handrail last.
Spray or brush the clear coat in thin layers and sand lightly between coats; it keeps the grain crisp.
Skip wide gaps — they make the pattern look unfinished and show unevenness between slats.
15. Matte Black Metal Scroll Balusters with Simple White Rail
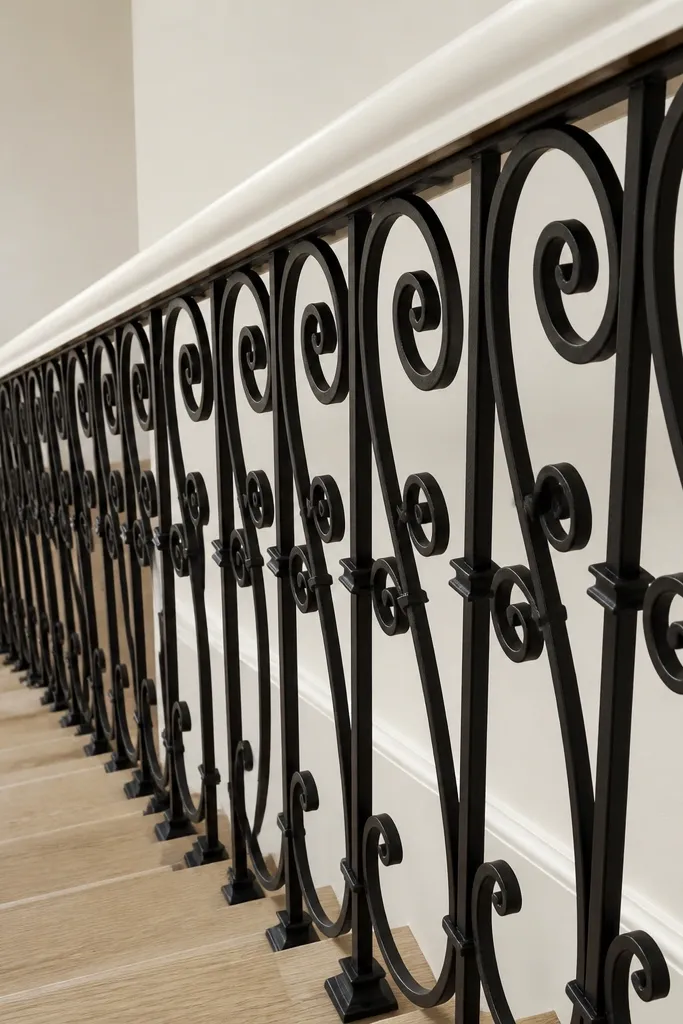
Scroll balusters add movement and a classic feel, but the look stays clean when everything else is simple. Matte black metal keeps the scrolls sharp instead of ornate, and a white handrail softens the contrast for a bright entry. This railing photographs well because the scrolls create shadow lines that are visible even in low light. It’s a good beginner option because the metal pieces are consistent and pre-made, so you’re not cutting turned profiles yourself. You still need careful spacing, but the pattern does the work for you.
Editor's noteUse a level and a straightedge on the front face while you tighten each baluster to prevent twist.
Mount posts first and paint or prep them in the same white as your handrail. Mark baluster positions between posts using a spacing guide, then install the scroll balusters with the included mounting plates. Install the handrail on top, pre-drilling holes into the wood so it doesn’t split. Finish by tightening all hardware and checking the line from the bottom of the stairs for any leaning pieces.
Skip thisDon’t use glossy black — it reflects light glare and makes the scroll pattern look messy.
16. Rattan Wrapped Handrail with White Painted Balusters
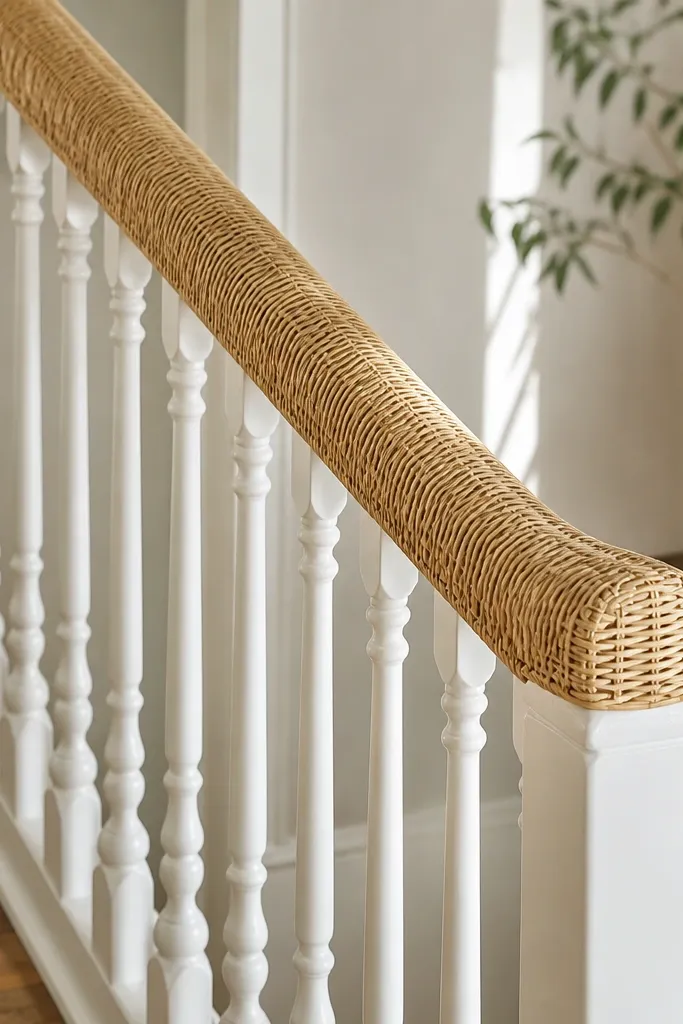
A rattan-wrapped handrail adds texture and warmth that looks great in lifestyle photos. Keep the balusters painted white and straightforward so the railing doesn’t look busy; the handrail becomes the focal point. This is a beginner-friendly way to change the feel of stairs without replacing everything, especially if your existing handrail is straight and solid. It also hides minor surface imperfections because the wrap covers small dents and scratches. The look is best in rooms with natural light and warm neutrals.
Editor's noteWrap in sections and pull tension evenly — uneven tension creates visible waves.
Start by sanding the existing handrail lightly so the wrap adheres evenly. Apply a thin adhesive or wrap tape designed for handrails, then wind rattan tightly from one end to the other, keeping the weave level. Trim excess and secure the ends with end caps or hidden fasteners. Paint new or existing white balusters, then install them with consistent spacing. Finish by sealing the rattan lightly with a clear indoor finish so it resists scuffs.
Skip thisSkip thick adhesive blobs under the wrap — they create lumps you’ll feel and see.
17. Reclaimed Barnwood Handrail with Black Steel Pickets
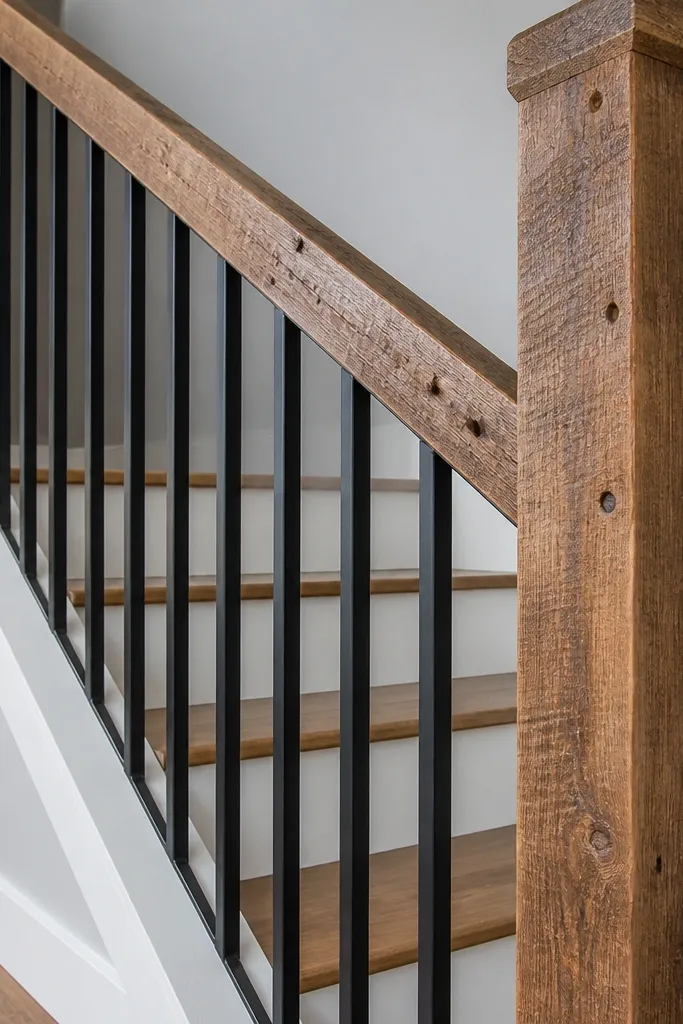
Reclaimed barnwood on the handrail looks stunning because it adds character without needing ornate balusters. Pair it with black steel pickets for a modern contrast: rough texture on top, clean geometry on the verticals. This combo works in entryways that need warmth and visual texture, especially if your floors are wood or your walls are neutral. For beginners, it’s manageable because you can buy or prepare a handrail plank and let the finish do the “aged” look. Just keep the steel pickets consistent so the railing doesn’t turn chaotic.
Select a barnwood handrail plank that’s straight enough for the stair run, then plane or sand high spots so it sits flush. Seal it with a clear matte or satin topcoat, then install black steel pickets using bracket mounts. Mark spacing with a jig, pre-drill mounting holes, and attach pickets one by one to keep the pattern straight. Mount the handrail on top last, using countersunk screws or handrail brackets so the wood stays stable.
If the barnwood has deep checks, fill only the ones that catch your hand — leave cosmetic cracks for the look.
Don’t use warped reclaimed wood — it looks great at first and then pulls the handrail line crooked.
18. White Laminate Handrail with Clear Acrylic Baluster Guards
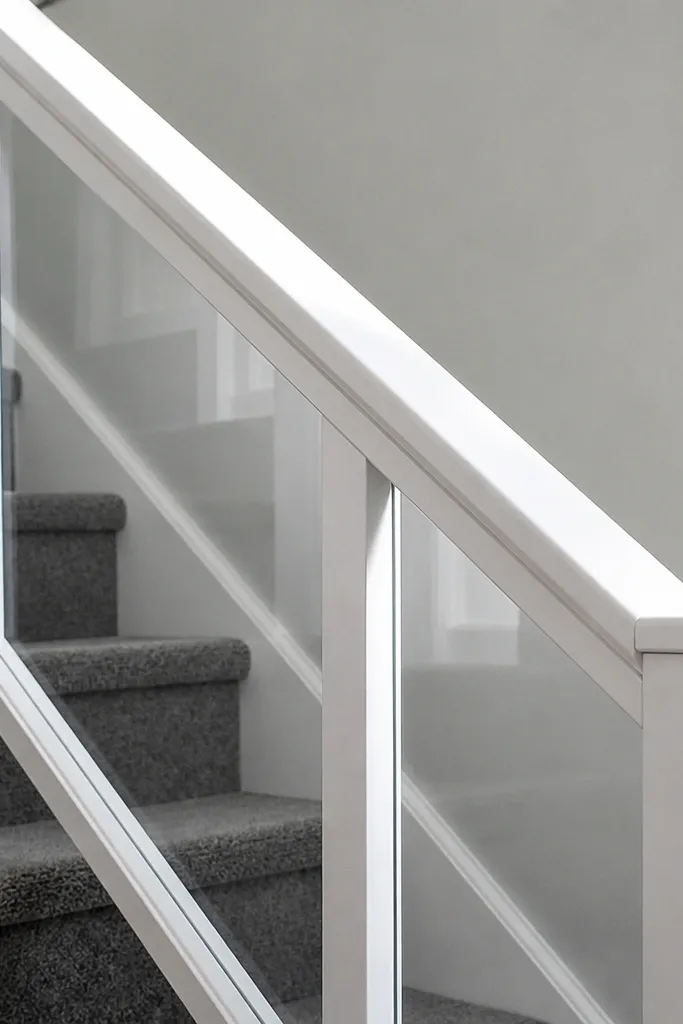
This is a “clean and protected” railing look that also helps with durability. White laminate or painted wood on top stays easy to wipe, while clear acrylic guards protect high-touch areas and keep the vertical pattern looking neat. It’s photogenic because the clear parts don’t add visual clutter — the railing reads light, not bulky. This works well for busy households, rentals, or staircases with kids where scuffs happen. Beginners like it because the install is mostly mounting guards and a handrail, not building complex baluster shapes.
Editor's notePre-drill acrylic holes with a proper bit and use gentle pressure — cracking usually comes from forcing the bit.
Install your base balusters or pickets first and confirm spacing, then measure guard panel lengths needed between posts. Cut acrylic guards to size using the right blade for plastics, then test-fit with small gaps for movement. Mount guards using the included brackets or fasteners through pre-drilled holes so acrylic doesn’t crack. Install the white handrail on top, then tighten everything and clean acrylic with a streak-free plastic cleaner.
Skip thisAvoid installing acrylic without gaps — trapped stress can cause clouding over time.
19. Two-Post Corner Frame Railing with Matching Wall Trim
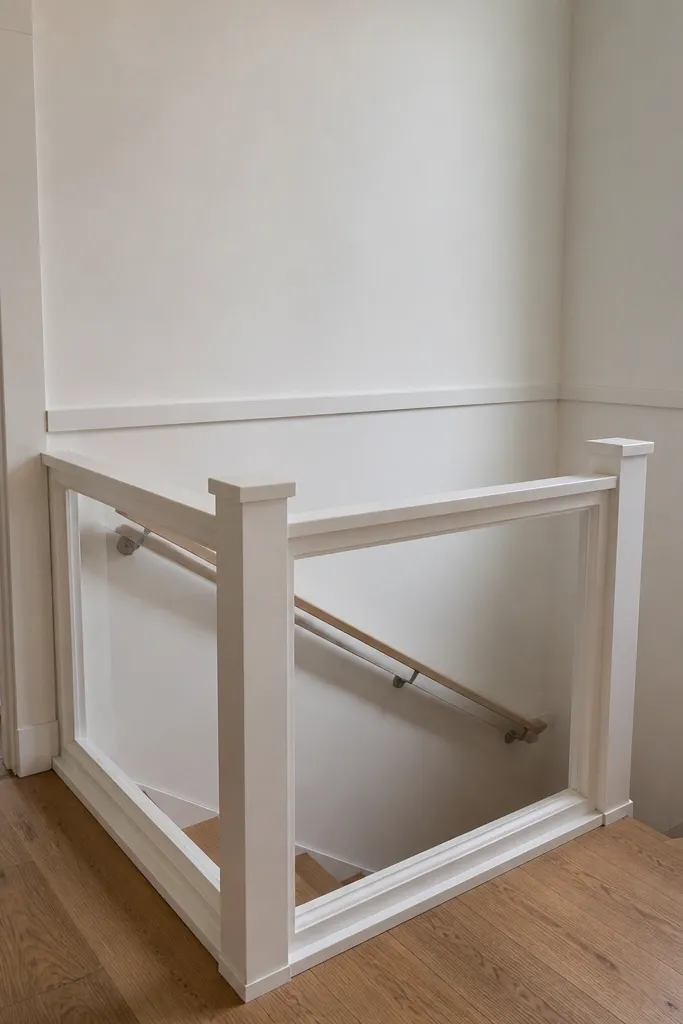
Corner stair sections can look unfinished because the rail line changes direction. A two-post corner frame solves that visually by creating a clean “picture frame” around the stair turn. When you match the wall trim to the handrail color, the railing looks built-in rather than added later. This look is stunning in hallways because the corner becomes the focal point. It’s beginner-friendly because you can use standard posts and a handrail that’s cut to the corner angle, then fill the straight sections with simple balusters or pickets.
Start by installing corner posts with a firm anchor into framing, then plumb them carefully. Use a template board to mark the handrail angle for the corner turn and cut handrail pieces to meet cleanly. Add trim pieces along the wall line so the railing sits inside a frame shape. Then fill straight sections with the same baluster type and spacing you used on the corner. Mount handrails last and check the line where the two runs meet — tiny gaps show up fast in photos.
Use a scrap cardboard template for the corner angle; it’s faster than re-measuring the stair every time.
Don’t rely on filler to hide corner gaps — paint and trim will still show the mismatch.
20. Rope-Style Woven Baluster Railing with Painted Posts
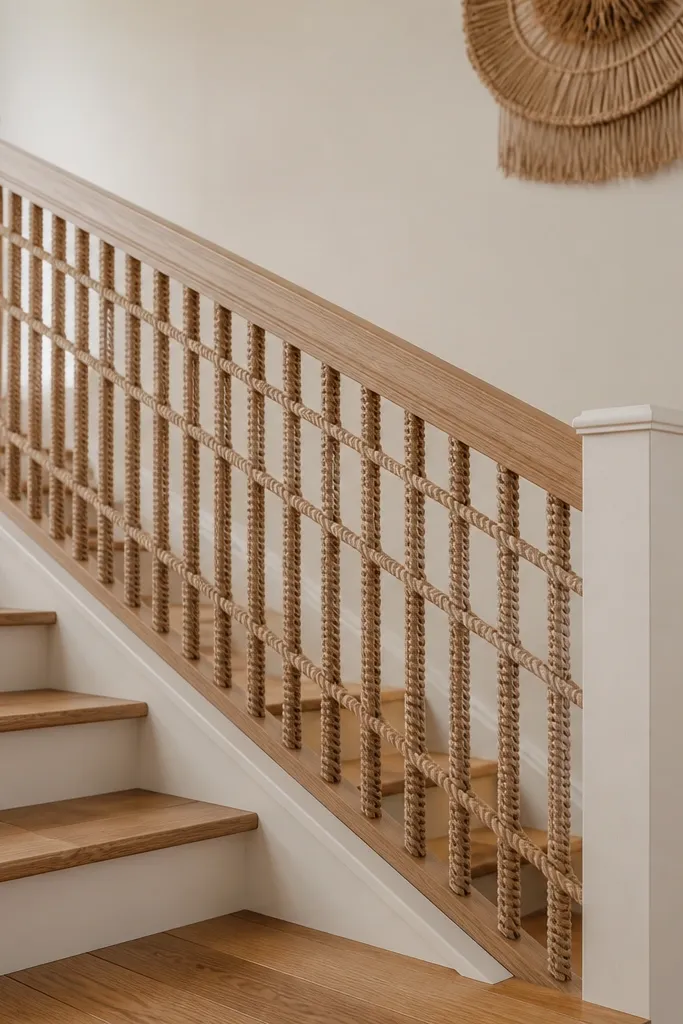
A woven rope baluster pattern gives a warm, coastal or boho feel that still looks tidy when the tension is consistent. The reason it looks stunning is the repeating weave creates a subtle texture grid instead of random rope loops. Paint the posts in a solid neutral so the rope pattern stays the focal point. This is a beginner-friendly option if you’re comfortable measuring and keeping tension even. It also makes a stair feel more inviting because rope looks softer than metal.
Editor's noteTension the rope with a small ratcheting strap while you tie off so each run sits at the same tightness.
Paint and seal posts first, then mark attachment points where rope will weave between posts. Pre-cut rope lengths for each “string” and secure the first end with eye hooks or tension cleats at one side of the post. Weave rope through the marked points, keeping tension tight and consistent, then secure the other end with the same hardware style. Repeat the vertical or horizontal runs until the pattern matches across the entire span, then mount the handrail on top for a clean grip line.
Skip thisDon’t mix rope thicknesses in one run — it creates a lumpy pattern that reads messy.
21. Stair Railing with Built-In LED Strip Under Handrail
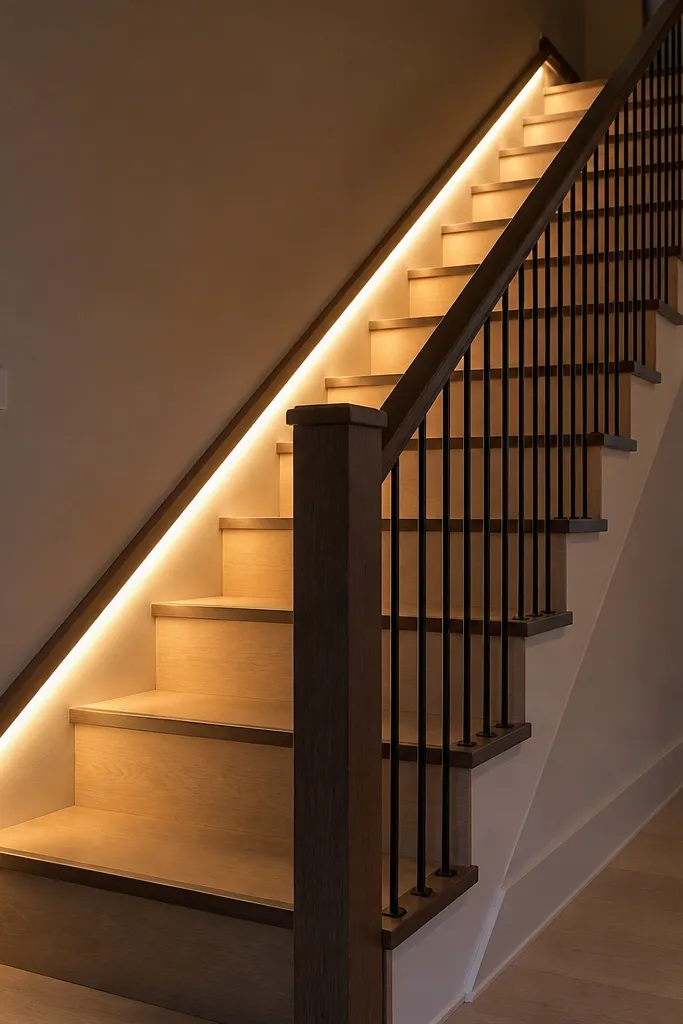
Lighting is the easiest way to make a basic railing look stunning at night, and it photographs beautifully in real life too. Put a slim LED strip under a handrail lip and keep balusters simple so the glow is the star. This is a strong choice for hallways without great overhead lighting because the handrail becomes a visual guide. For beginners, the build is simpler than it sounds if you use a pre-made LED channel kit and a dimmer switch. The look is clean because the light line stays straight and hides the LED points.
Choose an LED strip kit with an aluminum channel meant for under-handrail mounting, plus a dimmer and power supply sized for your run length. Install the channel first along the underside of the handrail, then route wiring through the handrail or through the post base using a low-profile chase. Mount the handrail and connect power, then test the lighting before final tightening. Use simple balusters or pickets so the glow doesn’t compete with heavy pattern. Finish by hiding the power connection inside the post or a small access cover.
Use a warm white LED (around 2700K) so the glow looks inviting, not blue.
Skip the diffuser channel — bare LEDs create hot spots and the railing looks cheap.
22. Matte Natural Linen Shade Wall with Matching Handrail Color
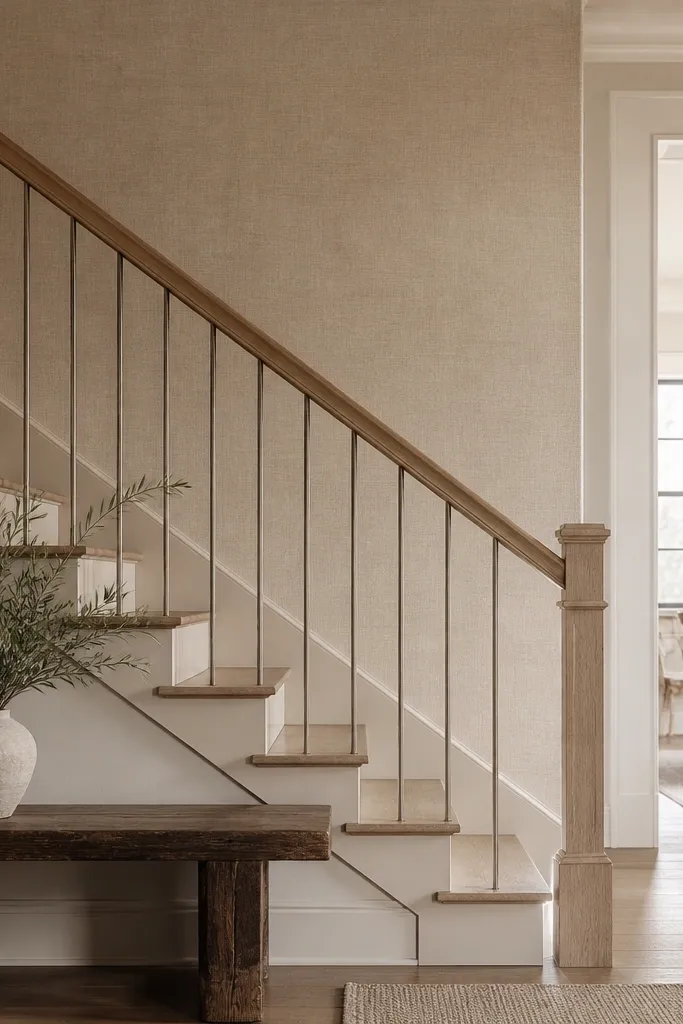
This look is about pairing the railing with a softer backdrop so it reads calm and premium. Matte linen-toned walls (paint or textured finish) make a handrail in a warm neutral color look intentional, and minimal balusters keep the whole stair from turning busy. It’s stunning because the railing blends into the room while still defining the stair line. For beginners, this is a design-first approach: you’re not building fancy balusters, you’re choosing a wall finish that makes even simple pickets look polished. It works best when you control the color temperature of the room lighting.
Editor's noteChoose a handrail finish with satin sheen; it looks smoother in hallway light than matte.
Paint or texture the wall in a warm neutral linen tone and let it cure fully so you don’t scuff it during railing install. Install posts and mark baluster spacing using a guide strip, then mount simple square or picket balusters in a matching light neutral. Sand and finish the handrail in a warm tone that matches the wall undertone, then mount it at the correct height with pre-drilled holes. Check spacing and alignment by sighting along the stair from the landing and adjust any baluster that looks off.
Skip thisAvoid cool-gray walls with warm wood — the mismatch reads “unfinished” in photos.
23. Stair Railing with Paneling Insert and Chamfered Handrail
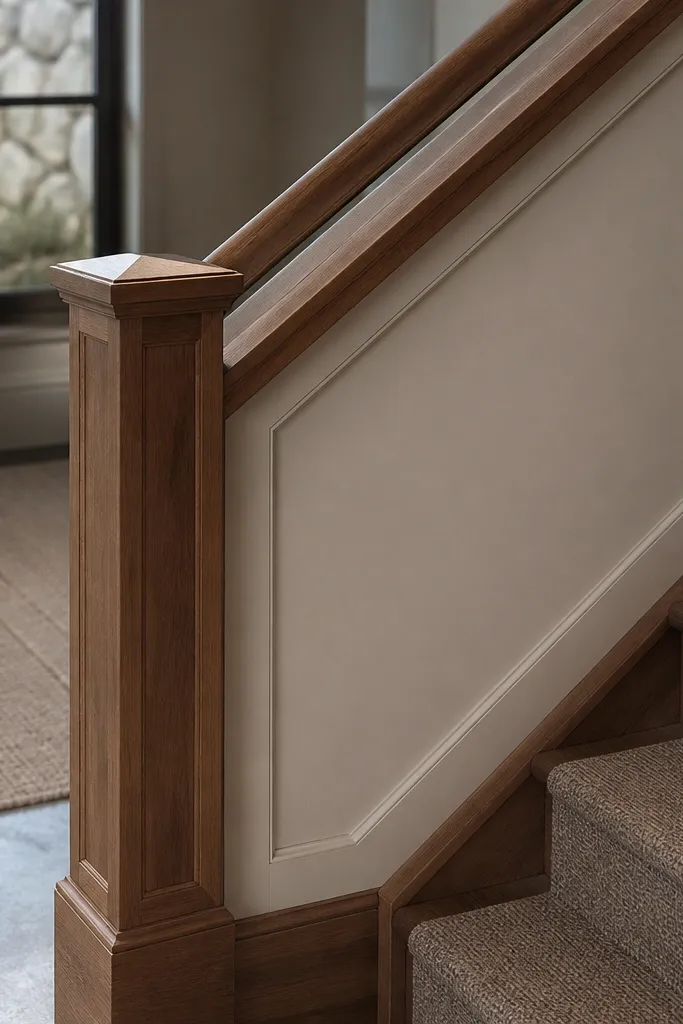
A panel insert adds weight and structure, and a chamfered handrail adds a clean shadow line that looks sharp. This is a “solid” look that works great for basements, entry stairs, and homes where you want a more traditional feel but still modern craftsmanship. Keep the panel simple with straight lines and a matching finish so it looks built-in. Beginners can handle this because the panel is one large piece, not dozens of balusters, and the handrail chamfer is a style detail that hides minor surface imperfections. It’s stunning because the geometry is bold and easy to read.
Editor's noteCaulk only seams you want to disappear; too much caulk creates a thick bead that looks sloppy.
Build the panel insert first from plywood or MDF with a face veneer, then sand and prime it and paint or stain to match your handrail. Install posts and a backer frame, then fit the panel into the opening with a small gap for movement. Secure the panel using screws through the backer so the front stays clean. Install the chamfered handrail on top, pre-drill holes, and tighten evenly. Finish by caulking panel seams lightly and touching up fasteners.
Skip thisDon’t skip a backer frame — a panel without support will flex and look uneven over time.
24. Slim Black Metal Frame with White Infills on Short Stair Sections
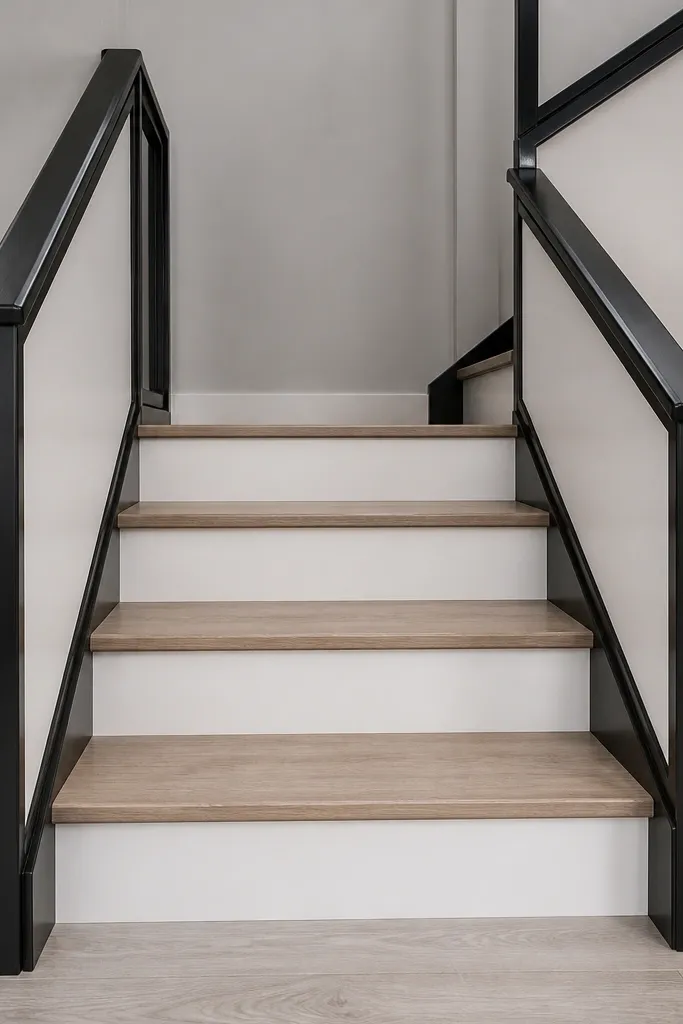
Short stair sections look best with a framed design because it prevents the railing from looking like it stops mid-thought. A slim black metal frame gives a crisp outline, and white infills keep the interior bright and clean. This look is photogenic because you get a modern border effect that reads intentional even in small hallways. Beginners can build it using framed panel kits or by mounting rectangular infills into a metal outline. It’s a good approach when you want the look of glass or panels without the complexity of full glazing.
Editor's noteUse a magnet level on the frame to check alignment at each corner — stair angles magnify small twists.
Pick infill material that takes paint well, like primed wood panels or pre-made panel boards, and cut them to your frame opening size. Install slim black metal frame posts and rails first, keeping everything level along the stair slope. Drop or screw infills into the frame using the kit’s clips or pre-drilled screw points. Then mount the handrail on top, aligning to the frame line so it doesn’t float. Touch up paint at screw heads and verify the frame corners sit square.
Skip thisAvoid oversized infills — tight fit is good, but forcing panels warps the frame look.
25. Warm White Stacked Picket Rail with Rounded Handrail
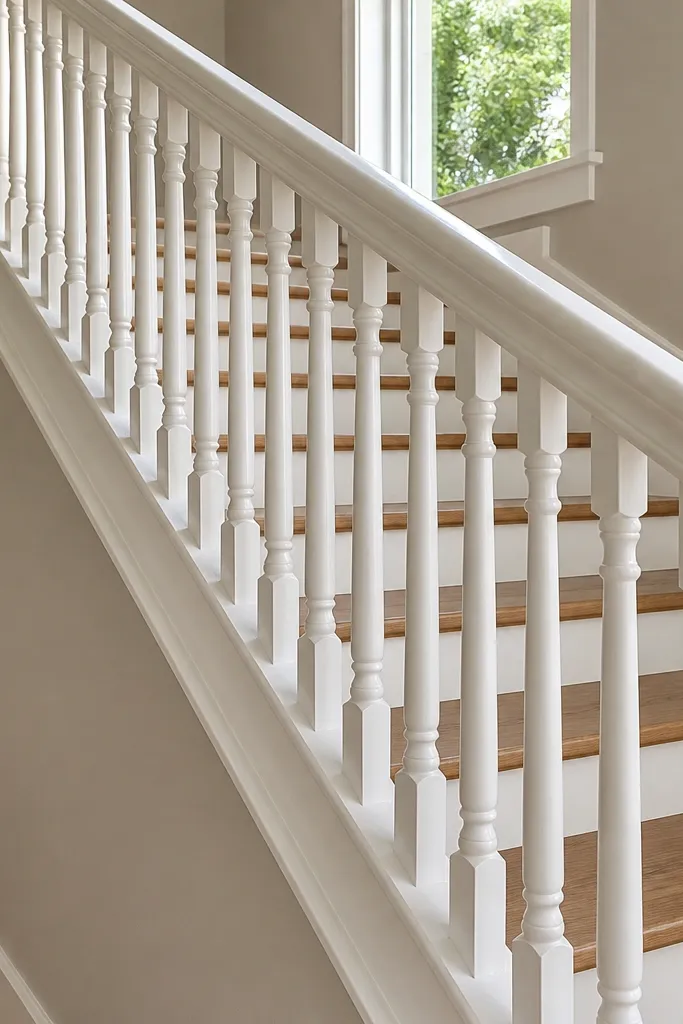
Stacked pickets with a rounded handrail feel friendly and polished, especially in warmer color schemes. The rounded handrail catches light smoothly, and the warm white pickets create a soft, consistent pattern. This is a beginner-friendly look because pickets are uniform and the rounded handrail hides tiny alignment issues along the top line. It’s stunning in entryways where you want the railing to feel welcoming instead of rigid. Choose materials that are easy to wipe clean and finishes that resist scuffs.
Editor's noteDry-fit the handrail once before final fastening; it prevents the “off by a hair” look that shows up in photos.
Choose a rounded handrail profile and sand it if needed, then paint or stain to your warm white tone. Install posts and mark picket locations with a spacing guide, then mount pickets using the manufacturer’s brackets or pre-drilled holes. Keep the pickets plumb and tap them into place before tightening screws. Attach the handrail on top, pre-drilling and countersinking so the finish stays smooth. Finally, inspect every picket line by sighting from the landing and adjust any that lean.
Skip thisDon’t paint over unprimed wood — warm white shows uneven absorption and patchiness.



