
1. Limestone-look cladding with narrow vertical slats
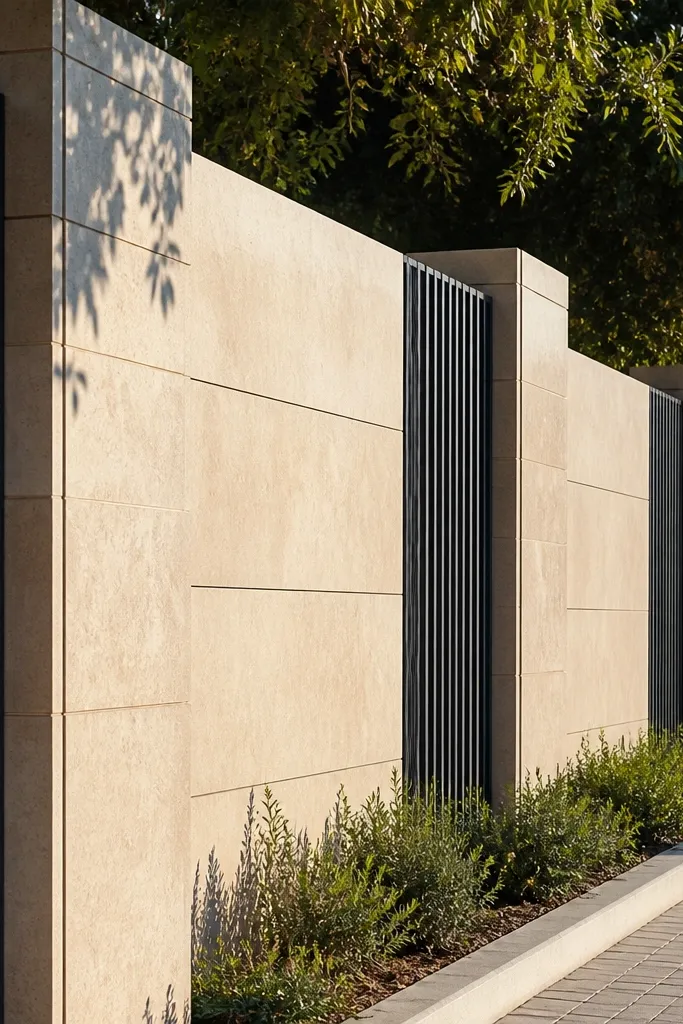
This is the cleanest modern combo when you want privacy without a heavy blocky feel. The main wall is clad in limestone-look panels in a light warm tone, then you add thin vertical slats in dark metal or dark fiber cement between piers. The slats break the surface and create a shadow line that looks expensive from a distance. Build it if you want a calmer, minimal boundary that still looks designed, not like painted masonry.
Start by laying out your pier centers so the slats land in straight vertical lines across the wall length. Fix a base layer of exterior-grade cement board or a proper mortar bed, then install the limestone-look cladding panels with exterior adhesive and stainless/galvanized mechanical fixings. Finally, mount the slats onto the pier faces using angle brackets, then finish the top with a flat coping stone or precast cap and seal the coping joints with exterior-grade sealant.
Dry-lay the cladding panels first to avoid tiny sliver cuts near corners.
Avoid thin cladding over loose blockwork — it will pop and crack at panel edges.
2. Exposed aggregate bands with smooth plaster panels
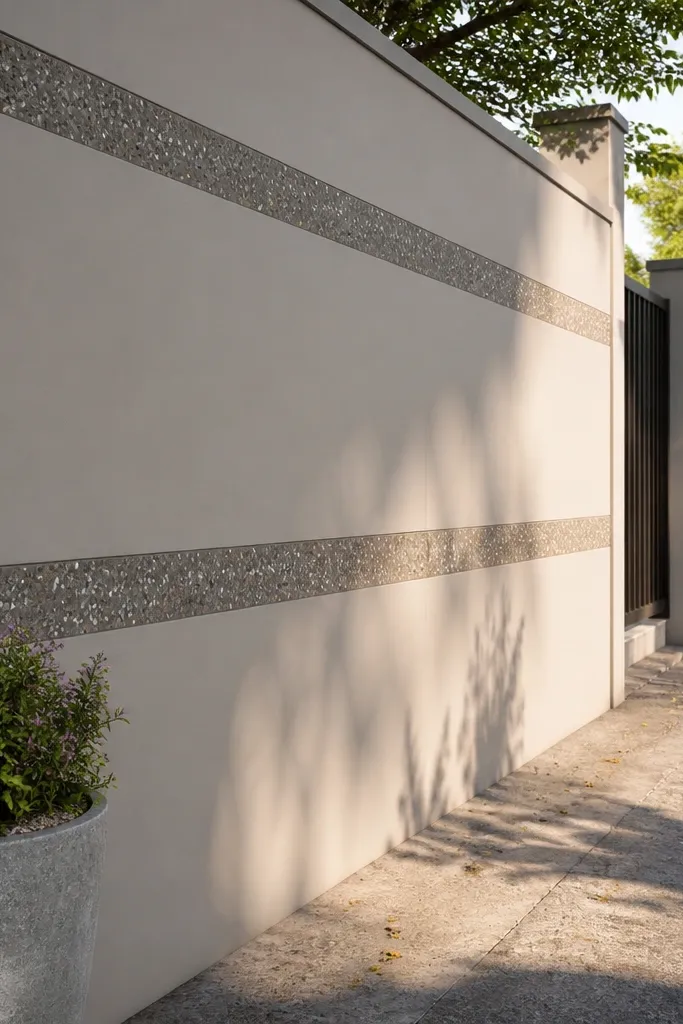
This idea looks modern because it mixes textures in a controlled way. You keep large sections smooth plaster for a refined face, then add two or three horizontal exposed aggregate bands that catch sunlight and hide minor wall imperfections. The band placement also helps visually “stretch” a long boundary. Use it when you want a design that photographs well even in overcast weather.
First, plaster your wall in smooth layers and mark band lines with chalk so every section lines up. Pour or apply exposed aggregate in band widths like 200-300 mm, using a template to keep edges crisp. After curing, seal the aggregate lightly and paint the smooth plaster with an exterior weatherproof paint in a light neutral tone, then add a coping cap and seal the top seam.
Use painter’s tape + a rigid straightedge to get razor-clean band edges before the aggregate sets.
Don’t paint over dusty aggregate — it kills adhesion and creates patchy sheen.
3. Brick header pattern with recessed square panels
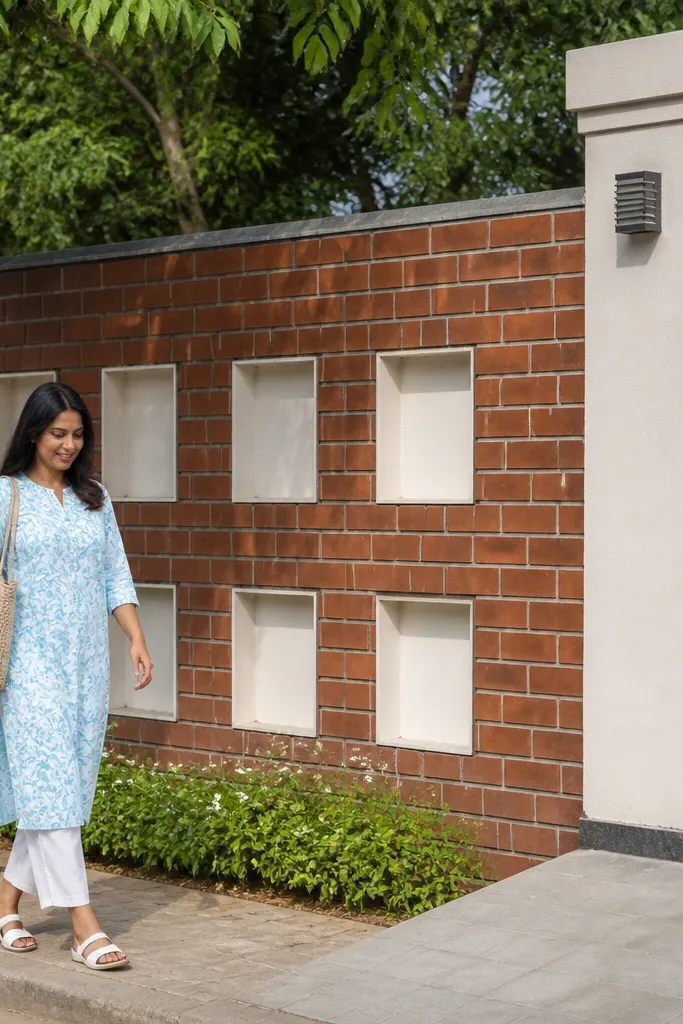
Start by setting out panel centers with a grid, for example 600 mm spacing both ways, so the squares repeat across the length. Build brickwork as normal, then form the recesses by leaving framed voids using plywood boxes during construction. After the masonry cures, plaster the recess faces smooth, then finish with brick-compatible exterior paint or clear sealer and install a coping cap with sealant at every joint.
If you like warmth, this is one of the best-looking exterior compound wall ideas for modern Indian homes. The wall face uses a brick header pattern for texture, and you cut recessed square panels at regular intervals so the wall has depth. Recesses cast shadows that make the boundary look sharp even when the lighting is flat. It suits homes with earthy palettes, and it hides minor unevenness because the recess geometry does the visual work.
Skip thisSkip shallow recesses — if the void is too tight, it won’t throw shadows.
Editor's noteChoose one recess depth like 60-80 mm and stick to it; mixed depths look messy fast.
4. Powder-coated metal screen between masonry piers
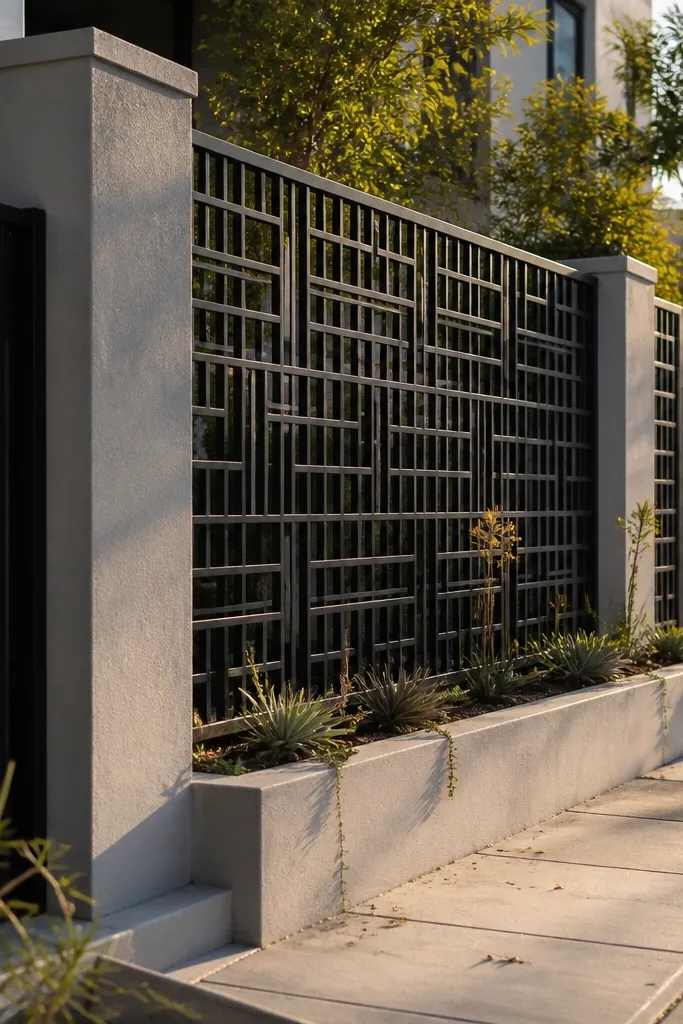
First, build piers with consistent thickness, and align them with your gate posts — same spacing, same width. Then fix metal screen sheets or laser-cut panels onto steel frames anchored to the piers using expansion anchors and anti-rust washers. Finish with a straight coping, and seal the anchor points with exterior anti-corrosion coating before painting any exposed metal edges.
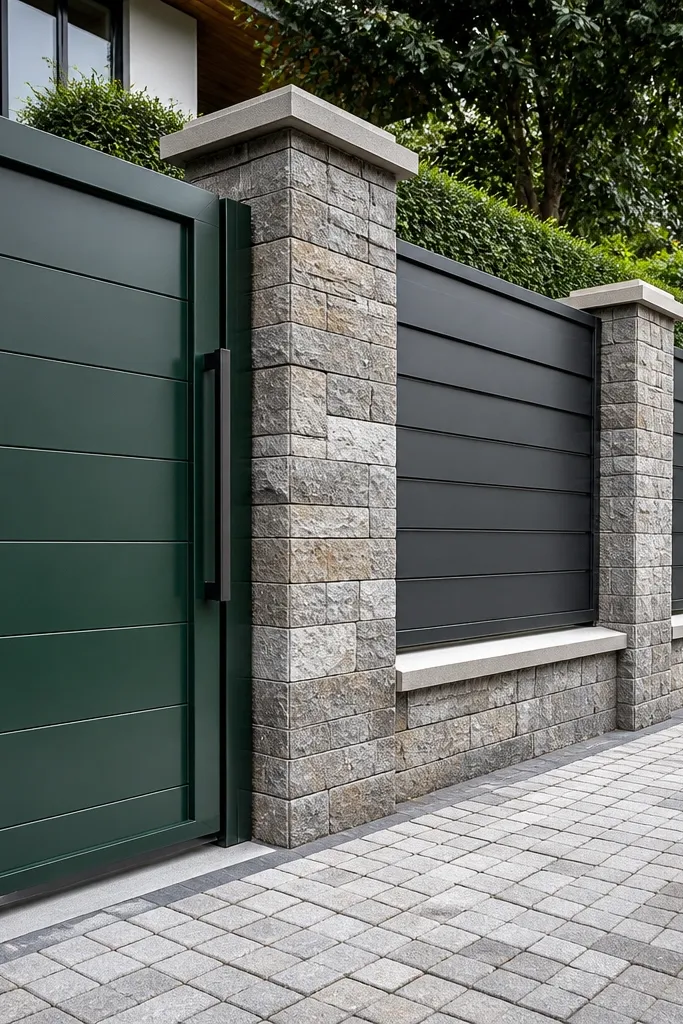
This is the “modern and airy” option that still gives privacy. Masonry piers handle structure and visual rhythm, while a powder-coated metal screen in charcoal or deep green keeps the wall from feeling like a solid barrier. The result looks crisp from the gate and along the street, and it also reduces wind load compared to fully solid panels. Choose it if you want a contemporary look without spending on full stone for every surface.
Skip thisDon’t attach metal directly to plaster — moisture tracking will leave rust stains.
Editor's noteGet the screen cut with a 10-15 mm gap from the wall surface so it doesn’t stain the masonry over time.
5. Cement concrete fins with vertical rhythm
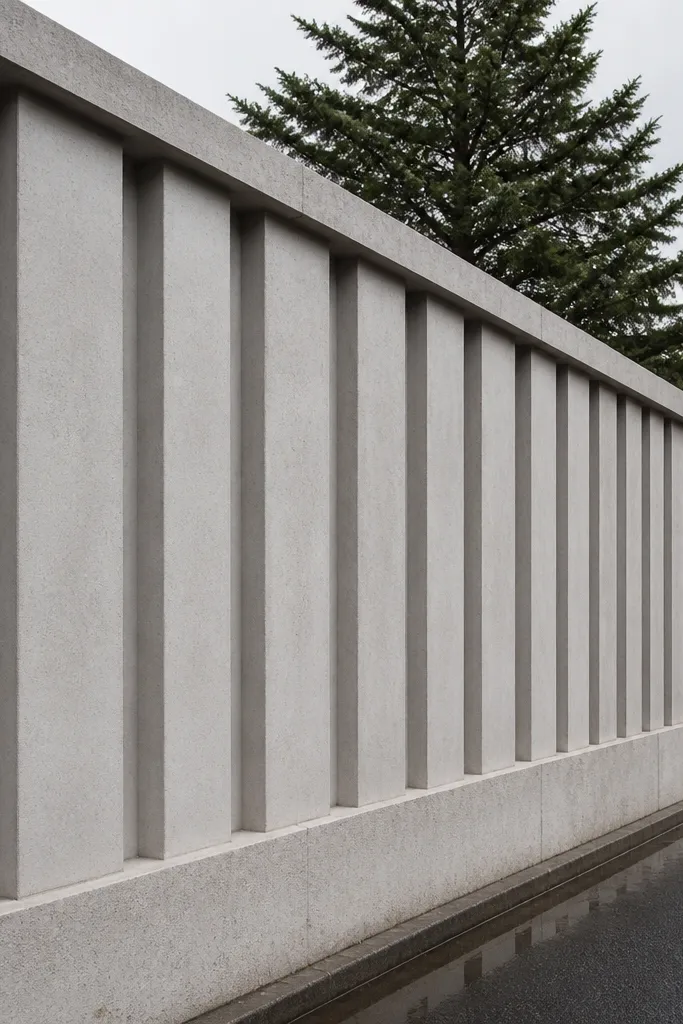
Concrete fins give you modern geometry without relying on decorative stone. The fins create strong vertical lines that look great in photos, especially when the wall top projects slightly. They also let you keep most of the wall solid for privacy while adding visual interest. This idea suits larger boundary lengths where you want a repeating pattern that doesn’t depend on expensive cladding.
Start by deciding fin thickness and spacing, like 90 mm thick fins spaced 300-400 mm apart. Build the wall core, then cast or build fin forms using shuttering so each fin is straight and aligned. After curing, smooth only the fin faces that will be visible and finish with exterior texture paint or exposed aggregate on the fins. Finally, install a projecting coping and seal the top edge with exterior sealant.
Use a laser line or long straight level to keep fin alignment perfect from one end to the other.
Avoid random fin spacing — it looks like a repair wall rather than design.
6. Half-height solid wall with tall glass paneling
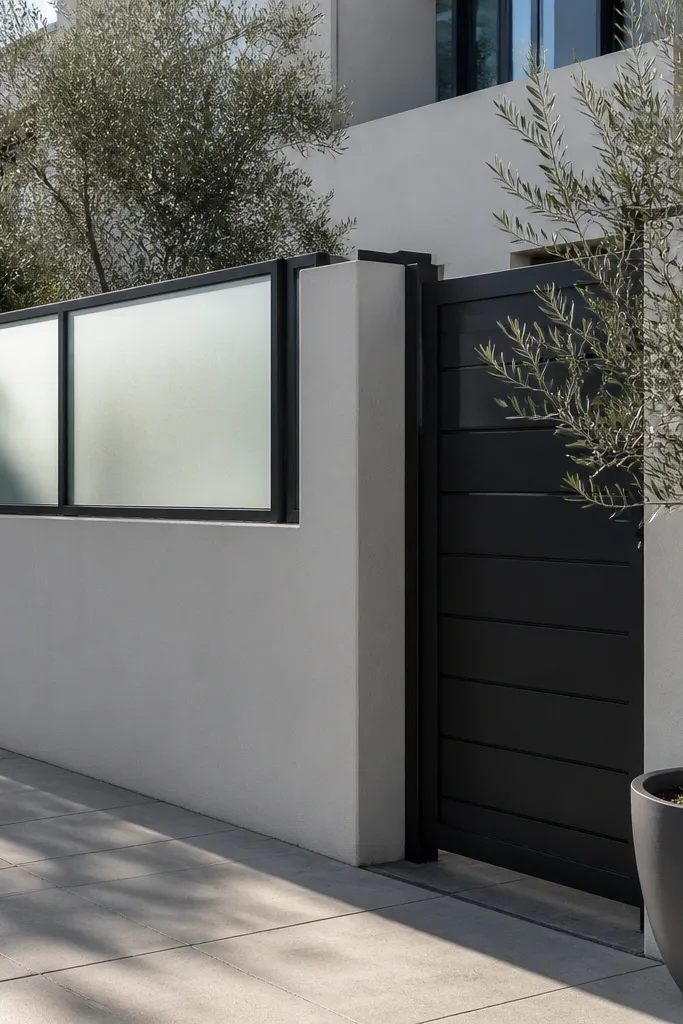
If your local rules allow, this is one of the most photogenic modern exterior compound wall ideas. The solid lower section gives privacy and strength, then the tall glass panels keep the boundary from feeling heavy. Use tinted or frosted glass for privacy while still letting light move through. This works best on streets where you want a clean, upscale look without blocking everything.
Build a solid base wall, for example 900-1200 mm high, with reinforced top beams for mounting. Fix aluminum or steel frames to the reinforced beam using anchor bolts, then install laminated glass panels with rubber gaskets to prevent rattling. Finish the top with a neat cap and apply exterior sealant around the frame edges. Check that the glass has drainage gaps so water doesn’t sit in the frame.
Pick frosted film or etched patterns that repeat across all panels for a uniform look.
Don’t use unlaminated glass — it’s a safety and durability problem for a boundary.
7. Stone mosaic inserts in a dark plaster field
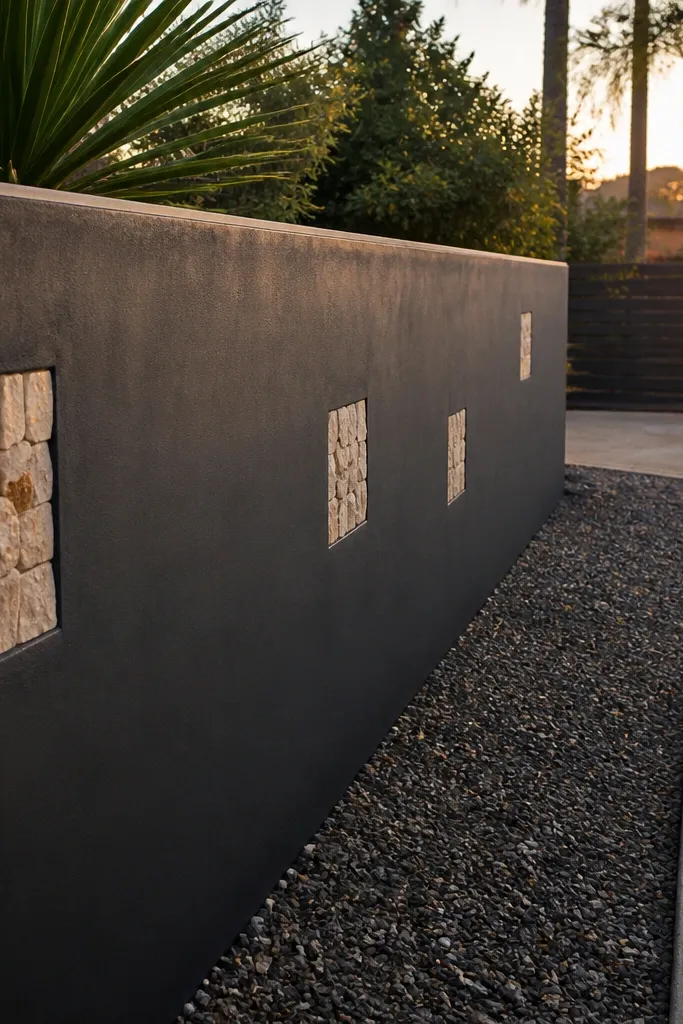
This idea looks modern because it uses one bold background color and small controlled highlights. Use dark charcoal or deep gray exterior plaster as the field, then add stone mosaic inserts like 200-300 mm square patches at intervals. The tiny stone pieces catch light and make the wall look detailed up close and clean from far away. It suits homes with dark doors, modern windows, or a monochrome exterior palette.
First, plaster the whole wall and paint or finish it with exterior dark masonry paint or textured plaster. Mark a simple grid for mosaic inserts, then cut recesses where the insert will sit so it stays flush. Fix the mosaic using exterior tile adhesive, grout with exterior-grade grout, and seal the mosaic surface. Finish the top with coping and seal around every insert edge to prevent water getting behind the mosaic.
Keep mosaic inserts to one size and one spacing rhythm so it reads as design, not random decoration.
Skip grout sealing — water absorption stains the dark plaster around inserts.
8. Vertical slat timber-look panels with metal edges
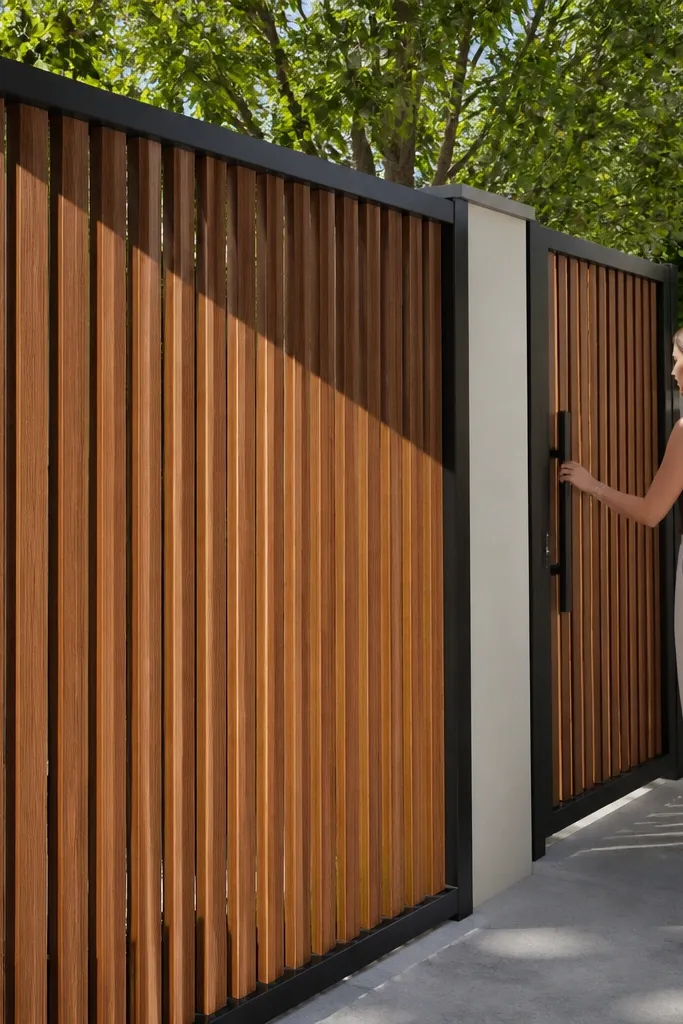
Install horizontal rails first — steel angle or aluminum channels anchored into masonry piers. Then mount the timber-look slat panels onto the rails using screws with weatherproof washers, keeping a consistent gap between slats like 10-15 mm. Finish the top with a metal or stone coping that covers the rail line, then paint any exposed metal with exterior powder coating or primer + topcoat system.
You get the warmth of wood visuals without the maintenance headache of real timber. Timber-look slat panels in exterior-rated fiber cement or composite look great when framed with dark metal edges. The slats create vertical movement, and the metal trim makes the whole wall feel sharp and modern. This is a strong option for a front boundary where you want a friendly look but still want privacy.
Skip thisDon’t leave rail ends exposed — water collects and rust shows through.
Editor's noteChoose slats with factory pre-finished coating; field painting shows streaks faster outside.
9. Patterned breeze-block wall with plastered borders
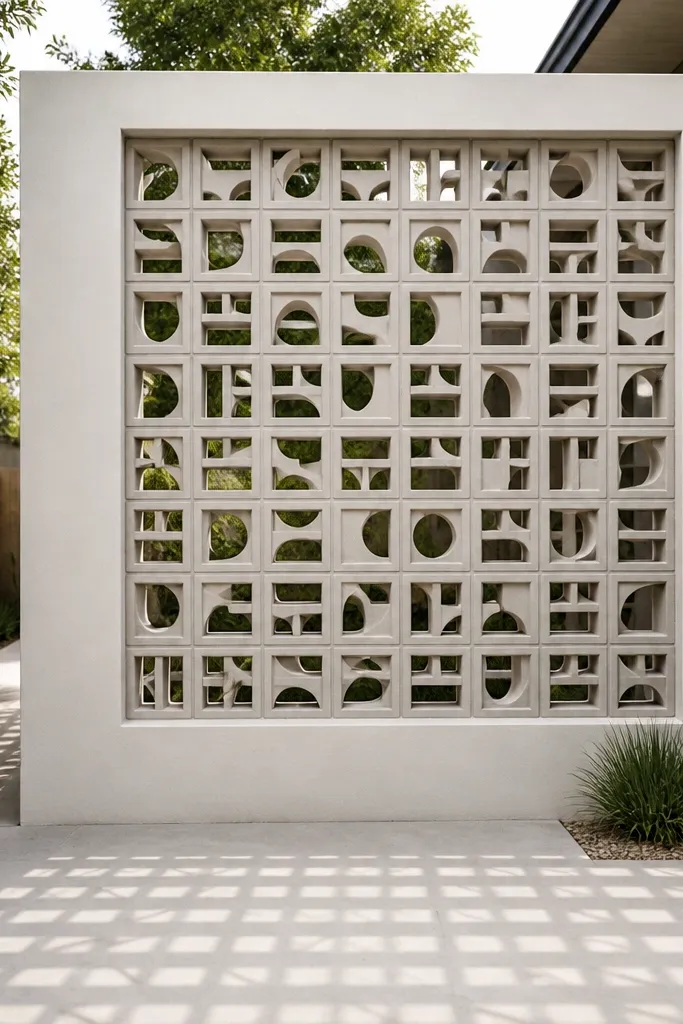
Breeze blocks are underrated for modern compound walls because they create a built-in light pattern. Use them in a repeating arrangement, like alternating block orientations or a checker band, and surround them with smooth plaster borders so the wall looks intentional. The wall still has airflow and partial privacy, and the pattern reads well from street distance. This is a good pick for hot climates where you want less heat buildup behind the wall.
Start with a layout that repeats — for example, a central band of breeze blocks with solid plaster sides. Build solid borders using reinforced masonry so the breeze block rows stay straight. Mortar-set the breeze blocks with consistent joints, then plaster only the border areas and paint with exterior finish. Add a reinforced coping beam on top and seal the interface between coping and border plaster.
Choose breeze blocks with a consistent face texture; mixed textures look uneven after a year.
Avoid thick, messy mortar joints — they make the pattern look sloppy.
10. Monolithic white wall with dark horizontal bands
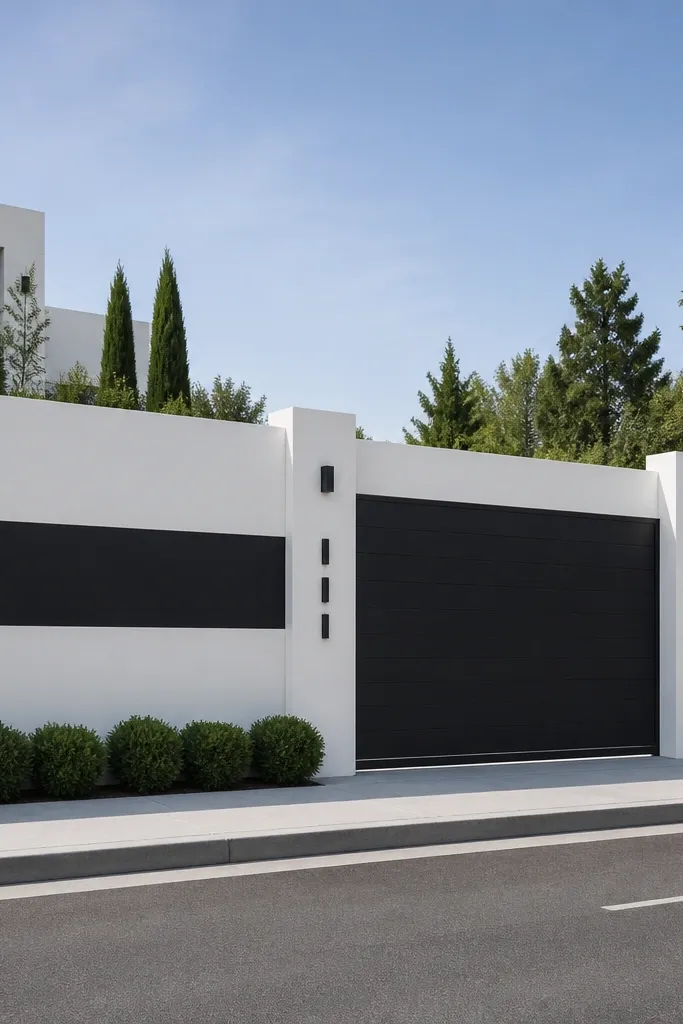
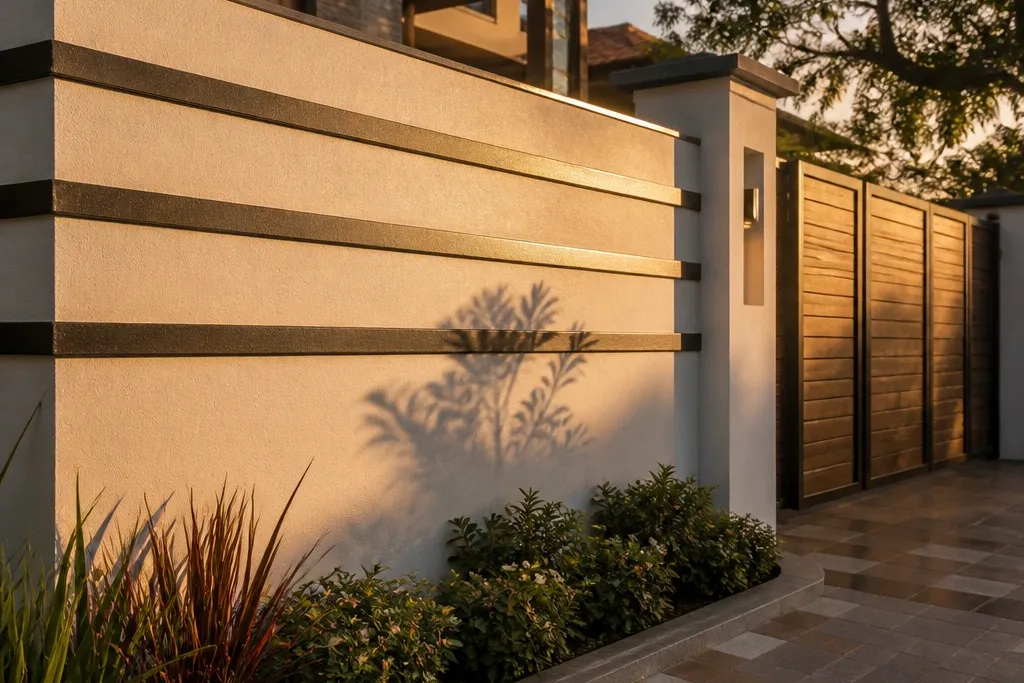
This is the simplest modern look that still looks premium. You keep the wall face smooth and white, then add two or three dark horizontal bands that run uninterrupted from corner to corner. The bands create proportion and make the wall feel designed without heavy decoration. It works especially well when your house has white walls, gray windows, or a dark gate.
Plaster and finish the wall with a smooth base coat, then apply exterior primer. Mark band positions and apply dark bands using cement-based exterior paint or a thin cladding strip system. Keep band thickness consistent, like 120-180 mm, and add a thin shadow gap by using a strip of foam gasket or spacer before painting edges. Finish with a straight white coping and seal the top line.
Use a laser level to mark the band lines — one crooked band ruins the clean look.
Don’t skip primer on smooth plaster — the paint chips at edges faster outdoors.
11. Exposed brick face with vertical limewash panels

This idea leans modern but still feels warm and human. Keep the brick face clean and uniform, then add tall vertical limewash or off-white plaster panels at intervals. The contrast gives you depth and a refined finish without using stone everywhere. It suits homes with brick, wood, or neutral landscaping, and it photographs beautifully in golden hour light.
First, clean and finish brickwork so the face is uniform — remove loose mortar and brush off dust. Then mark panel stripes, build temporary guides, and apply vertical limewash-style exterior plaster panels with a consistent width like 250-400 mm. Let the plaster cure fully, then seal lightly with a breathable exterior sealer so it doesn’t chalk. Finish the top with a stone coping and seal the wall cap to stop water tracking down the brick.
Keep panel edges sharp with masking tape only if your surface is dust-free; otherwise use a thin straight trowel guide.
Don’t paint over dirty brick — the finish peels in patches.
12. Herringbone brick pattern with centered vertical feature
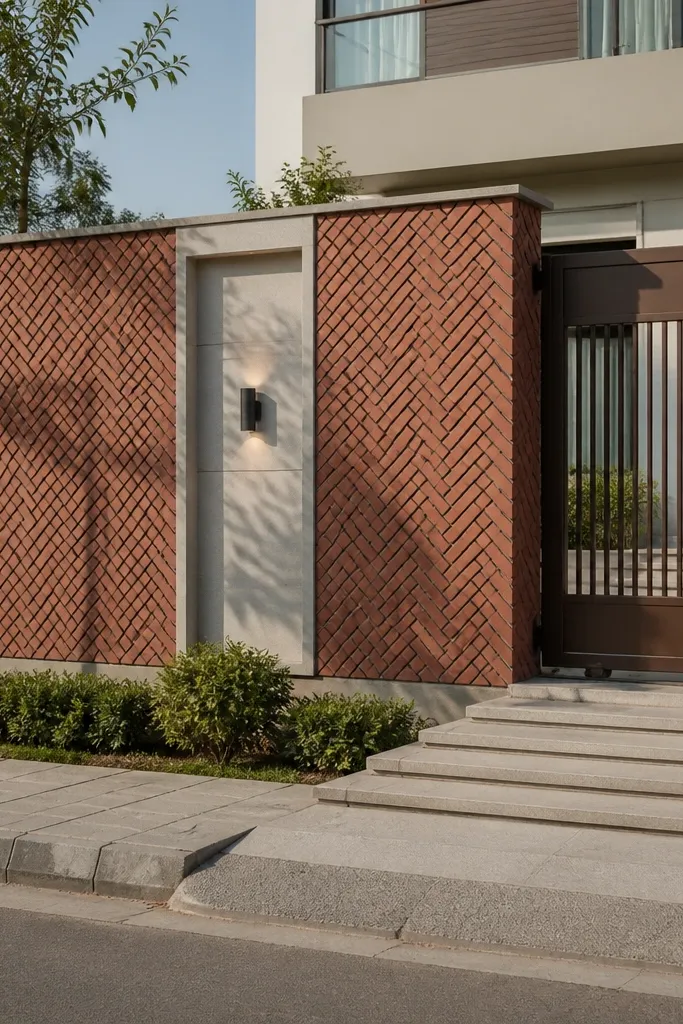
Start by setting out the herringbone grid using chalk lines and small spacers for consistent joint width like 8-10 mm. Lay the bricks in a herringbone pattern across the wall face, keeping cuts minimal at corners. Then reserve a central strip width for the feature panel and finish it smooth with exterior plaster or cladding. Add a dark coping and seal joints to keep water from entering the brickwork.
Herringbone reads premium because the pattern has direction. Build the whole wall face in a consistent herringbone layout, then add one centered vertical feature panel in a contrasting finish like smooth plaster or stone. That feature anchors the design and makes long walls look intentional. This works best for front boundaries where you want one strong focal rhythm near the gate.
Skip thisAvoid mixing brick batches with different shades — herringbone exaggerates color mismatch.
Editor's noteDry-fit the first 2-3 rows to confirm the pattern lands clean at the ends before you commit to full height.
13. Recessed LED channel lines under coping
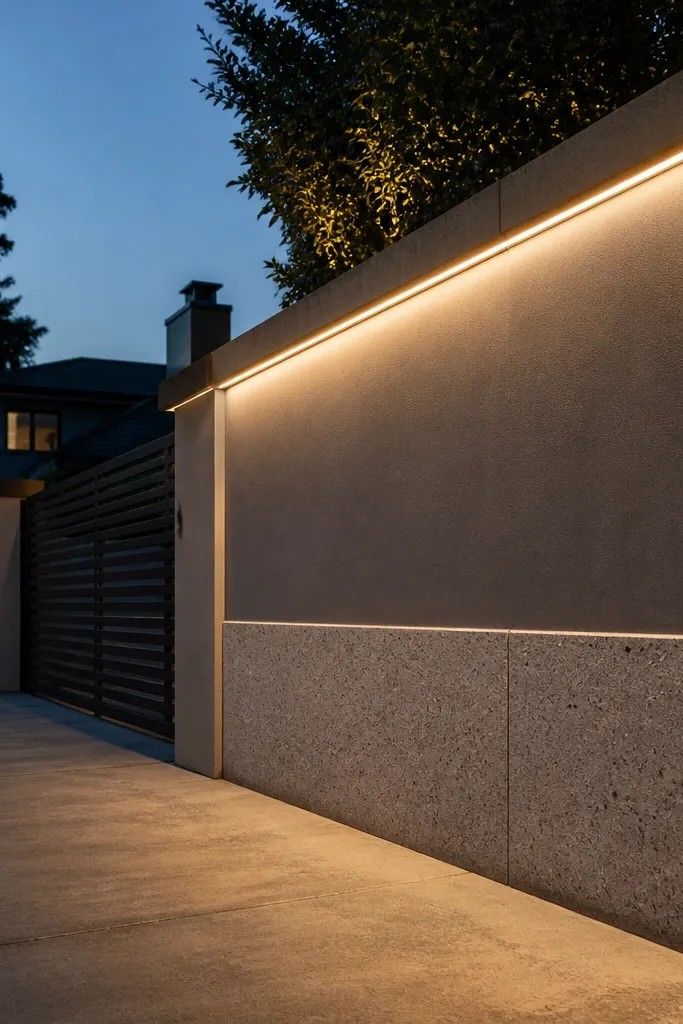
Light makes a compound wall look modern even when you don’t add expensive cladding. This idea hides LED strip channels in the coping line, so you get a thin glow that traces the wall and highlights textures below. Use it with neutral finishes like smooth plaster + light aggregate bands or stone cladding so the glow looks clean, not washed. It suits homes where the entrance is visible at night.
Plan the lighting layout before final finishing. Install a continuous aluminum LED channel under the coping beam with a clear diffuser cover and connect wires to a protected junction box inside a small access panel. Finish the wall face first, then mount the LED channel so it sits flush with the coping underside. Finally, seal the coping edges, test the LEDs, and apply a proper weatherproof rating for outdoor use.
Use warm white LEDs around 2700-3000K so the glow looks architectural, not bluish.
Don’t run LED wiring through unprotected gaps — water ingress will kill the strip.
14. Raked plaster with horizontal shadow grooves
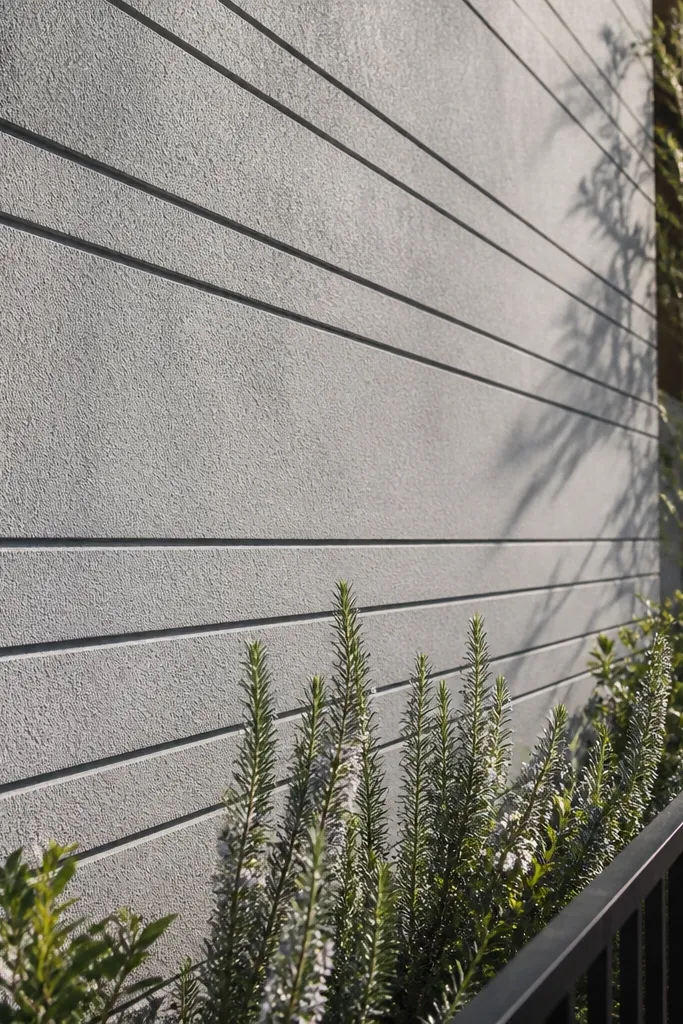
If you want a modern look without stone or metal, raked plaster is a strong move. You create a subtle texture across the whole face, then add thin horizontal shadow grooves that break the surface. The grooves cast fine lines of shade, so the wall looks detailed from street distance. This works well on medium-height walls and on long boundaries where you need consistent texture coverage.
Apply a base coat of exterior plaster, then use a raking tool or comb to create the texture uniformly across panels. Mark groove lines and cut shallow grooves during the right curing stage so the plaster holds edges cleanly. After curing, apply exterior primer and paint in a light neutral tone to keep the texture readable. Seal the top coping line and any groove edges that might absorb water.
Keep groove depth shallow, about 5-8 mm; too deep makes it look damaged after a few seasons.
Don’t paint before full cure — trapped moisture causes peeling and patchy sheen.
15. Stone tile vertical strips on a solid base
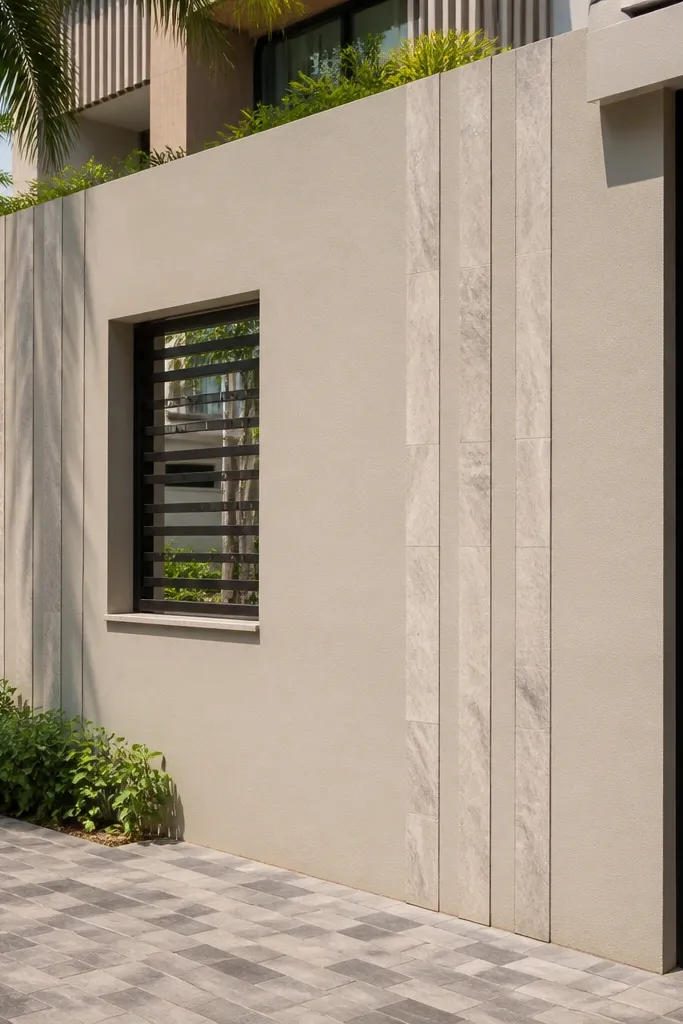
Vertical strips make a boundary look taller and more modern. You keep most of the wall as a smooth, solid base, then add vertical stone tile strips that line up with windows or the main gate design. The stones add durability and a premium look without covering the entire wall. This is a great option when you want photogenic texture but still need to control cost.
Build and plaster the wall base first, then mark the strip width and spacing, like 200-300 mm wide strips with equal gaps. Use exterior tile adhesive rated for outdoor use and fix stone tiles flush to the plaster surface. Grout with exterior-grade grout and seal the stone if it’s porous. Finish with coping and seal all movement joints around tile edges.
Use a chalk line and level to align strips — vertical misalignment shows immediately in photos.
Avoid cutting stone without sealing edges — unsealed cuts absorb water and stain.
16. Terracotta panel inserts with thin black mortar lines
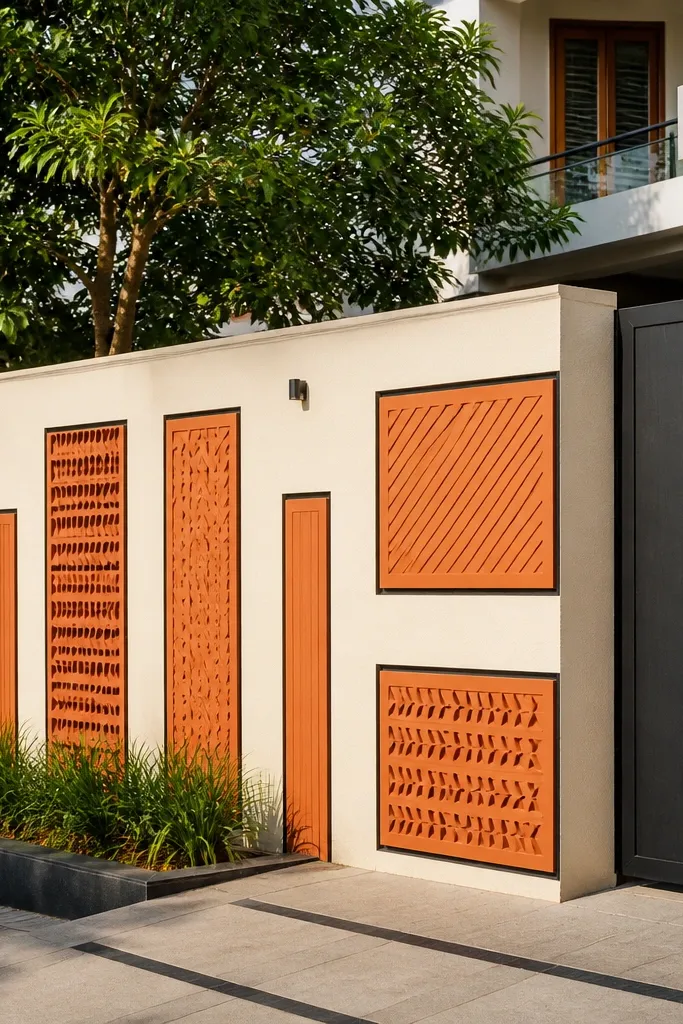
Terracotta inserts give you a modern warm pattern, especially when the mortar lines are intentionally dark and thin. The wall face stays light, and terracotta panels appear like designed modules. The black lines create crisp geometry that reads well from the street. Choose this if your home exterior has beige, cream, or light gray and you want the boundary to look crafted.
Start with a light base plaster finish and apply exterior primer. Mark modules, then install terracotta panels or terracotta-look tiles in recessed frames so the panel edges are clean. Use a thin dark grout or colored exterior mortar for the lines, keeping joint width consistent like 3-5 mm. Seal the terracotta and finish the top with coping that overhangs slightly to protect the panel edges.
Make one test panel first and check color in daylight before doing the full wall.
Don’t use interior grout — it cracks and stains quickly on outdoor walls.
17. Precast concrete panel wall with geometric cutouts
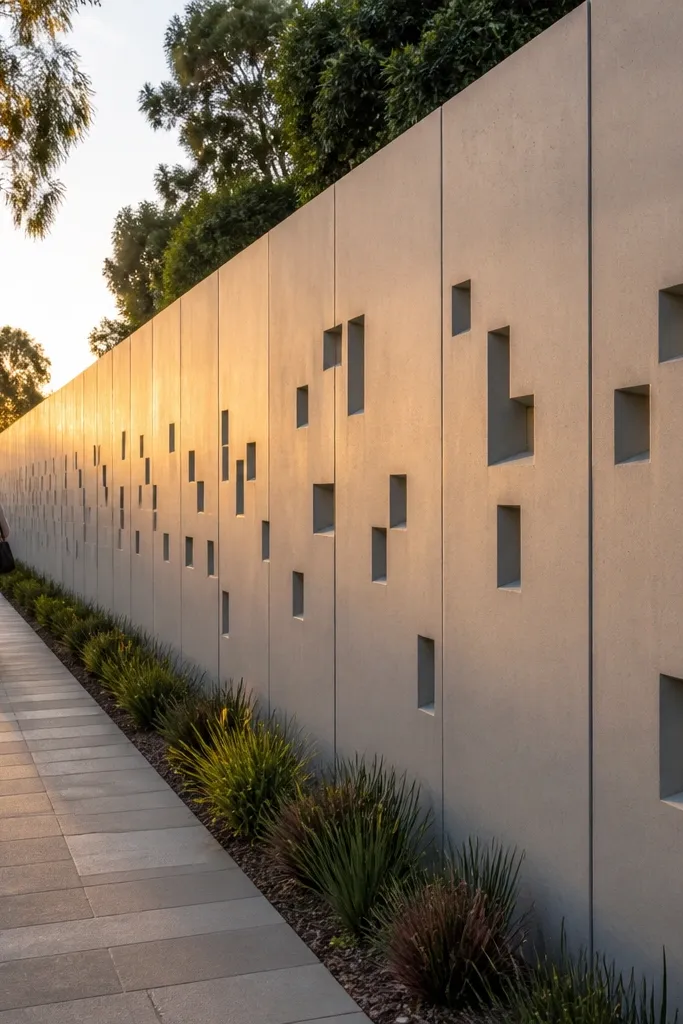
Order or fabricate precast panels to match a grid you set on-site. Build the wall skeleton with reinforced vertical posts and a top beam, then anchor panels onto the posts using embedded plates and bolts. Seal panel joints with exterior-grade sealant and apply a protective coating if needed for water resistance. Finish with coping and ensure the cutouts have slight slope/drainage so water doesn’t sit inside.
Precast panels let you get sharp geometry without complicated brickwork. Use panels with repeating geometric cutouts like rectangles or small squares, and keep the surrounding wall smooth. The cutouts create shadow shapes that look modern in daylight and even better at dusk. This works well for longer stretches where you want consistent patterning and faster construction.
Skip thisDon’t ignore drainage inside cutouts — water pooling causes staining and algae.
Editor's noteAsk for panels with chamfered edges — they hide small alignment gaps at joints.
18. Sandstone-look texture paint with metal corner bands
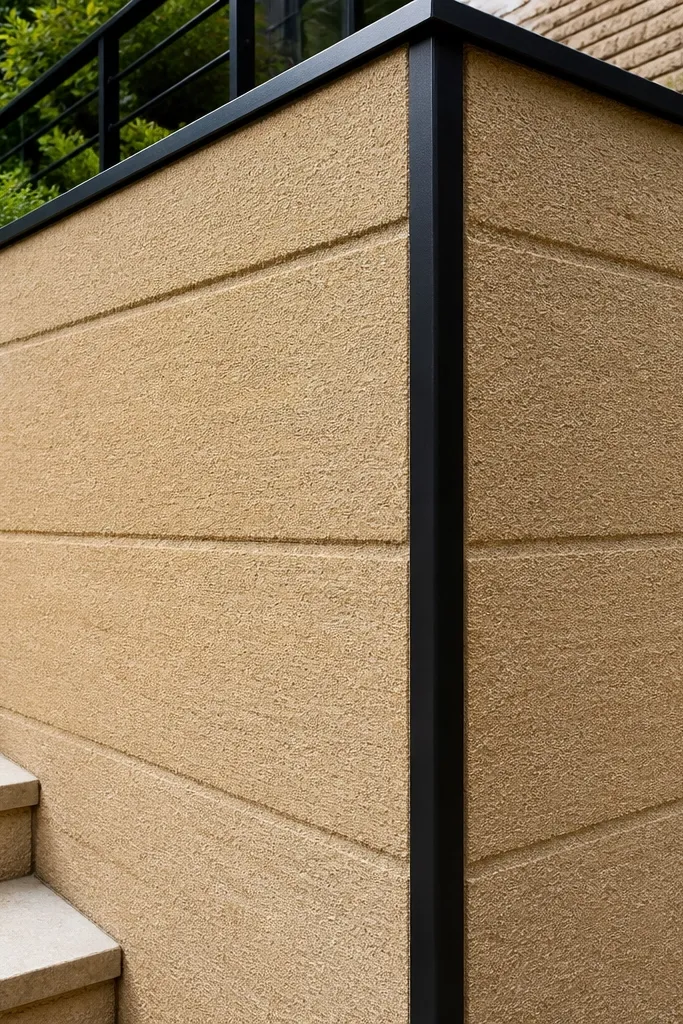
Start by repairing cracks and smoothing the wall face. Apply an exterior primer, then roll on sandstone-look texture paint in two passes for even texture. Install metal corner bands by anchoring into the masonry using expansion screws and exterior sealant under the band edges. Finish with a coping cap or check the existing coping and reseal the top seam.
If you want modern without masonry demolition, this is a smart upgrade. A sandstone-look texture paint gives you depth and hides small surface issues, while thin dark metal corner bands make the boundary look engineered. The corner bands act like design framing, so even a plain wall becomes visually structured. It suits budget-conscious renovations where you’re upgrading an existing boundary.
Skip thisAvoid painting over chalky old paint — it will peel under the new texture.
Editor's noteUse a roller with a consistent nap length; changing roller type changes texture density and shows in photos.
19. White tiles on piers with dark panels between
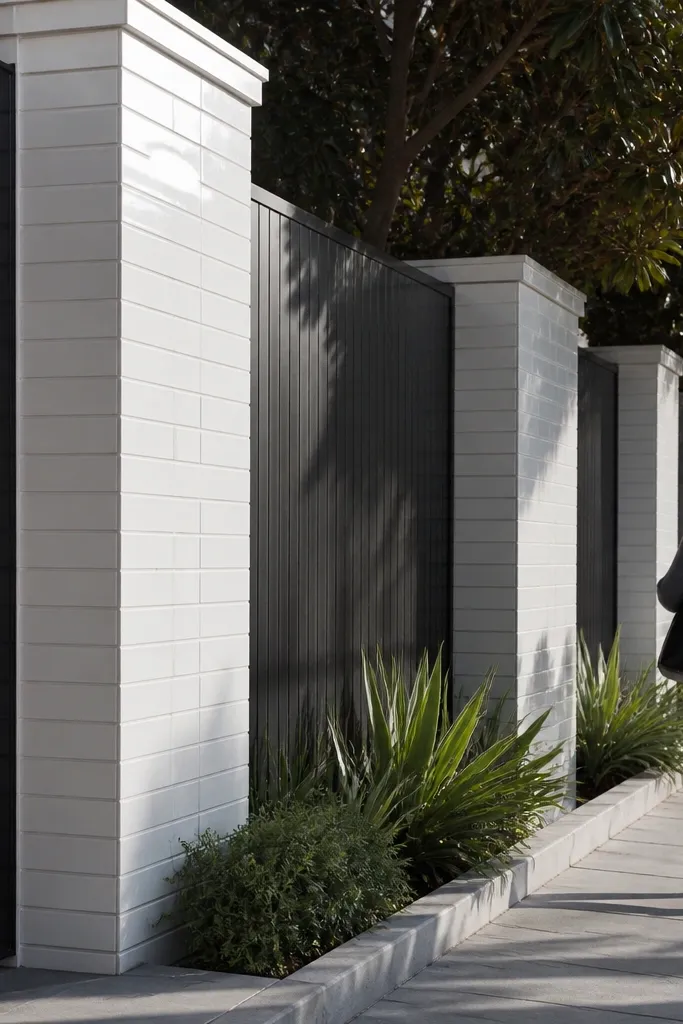
This is a modern high-contrast look that reads clearly from far away. White tiles on the piers add crisp lines and durability, while the dark panels between them create a clean separation. It’s a strong choice for urban streets where you need the wall to pop without heavy ornament. The combination also keeps maintenance manageable since you can spot-clean tile areas easily.
Build and reinforce piers first, then tile only the visible pier faces using exterior tile adhesive. Between piers, install dark panels — either fiber cement boards, metal sheets, or dark cladding strips fixed to a simple frame. Grout and seal tile edges, then paint or coat the dark panels if the manufacturer requires it. Add coping and seal all perimeter joints between panels and masonry.
Keep the tile size consistent across all piers; mixed tile formats show seams quickly.
Don’t grout without sealing — white tile grouts stain around water exposure points.
20. Stacked stone veneer with clean mortar joints
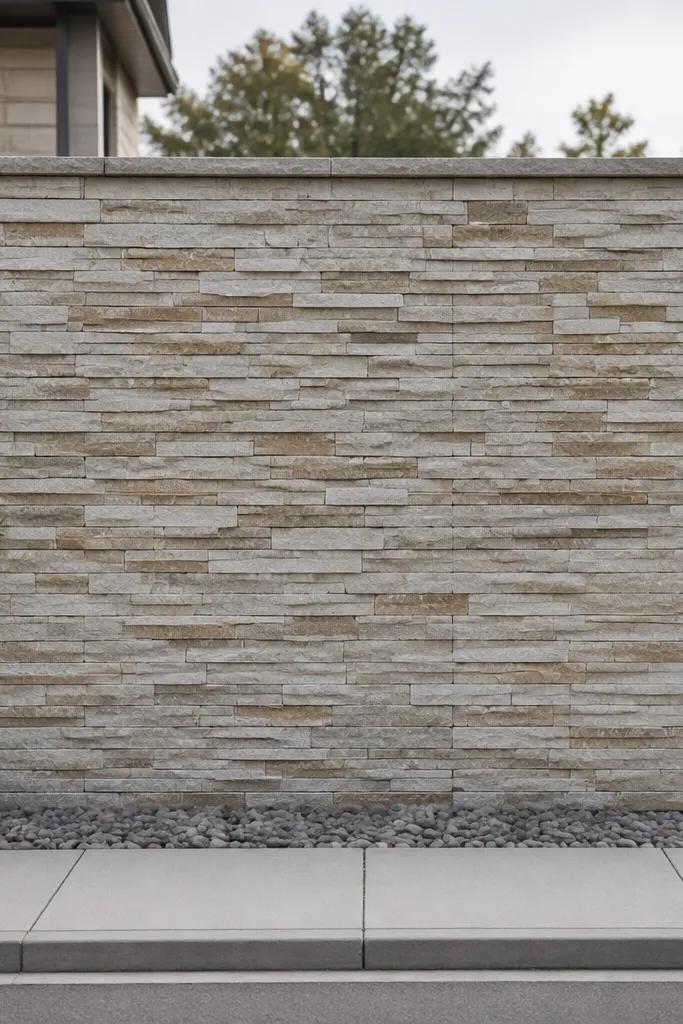
Stacked stone veneer creates the most “designed” look with minimal thickness. You get natural texture and depth, and it photographs well because the stone faces catch light from multiple angles. Keep mortar joints clean and consistent so it doesn’t look rustic or messy. This is a solid option for front boundaries where you want a premium feel without building a full-thickness stone wall.
Prep the wall with a bonding agent and install wire mesh if the surface is smooth. Apply exterior stone veneer adhesive and set the stacked stone pieces from the bottom row upward, keeping joint width consistent. Use a grout bag or pointing tool if you want straight mortar lines, then seal the stone once cured. Finish with a coping cap and seal the top to prevent water from seeping behind the veneer.
Use spacers or a consistent joint template so the pattern aligns across panels.
Avoid wet stacking stone on a hot day — adhesive skins over and stones won’t bond.
21. Geometric perforated metal sheets with patterned light gaps
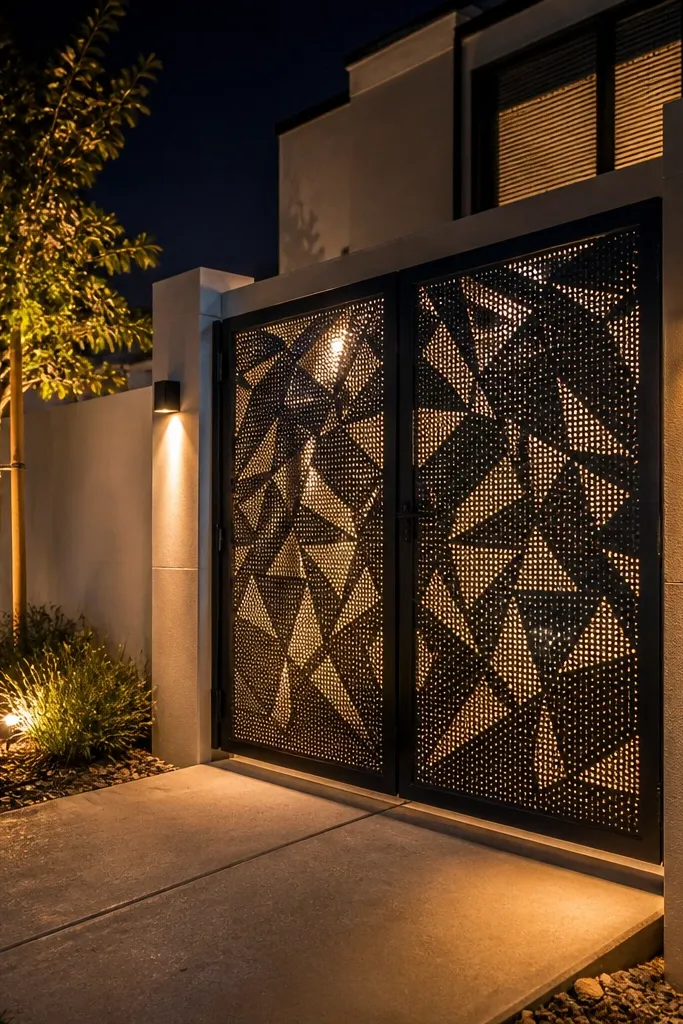
Perforated metal gives you modern geometry and a light-and-shadow effect that looks sharp at night. Use it inside a solid border frame made of masonry or precast, so the perforated section stays clean and protected. The hole pattern can match your gate grille design, tying the boundary together visually. This works best when you want a techy modern look without heavy cladding.
Build a rectangular frame with reinforced borders and anchor points at regular intervals. Mount perforated metal sheets onto the frame using galvanized screws and neoprene washers. Seal edges and prime any cut metal to prevent rust, then install a coping cap over the top of the frame. Add warm exterior lights aimed slightly upward so the perforations cast crisp shadows.
Pick a hole pattern with enough spacing so the wall doesn’t look like random rust — geometry should read from distance.
Don’t skip anti-rust primer on cut edges; those spots fail first.
22. Shadow-box wall with recessed horizontal timber-look slats
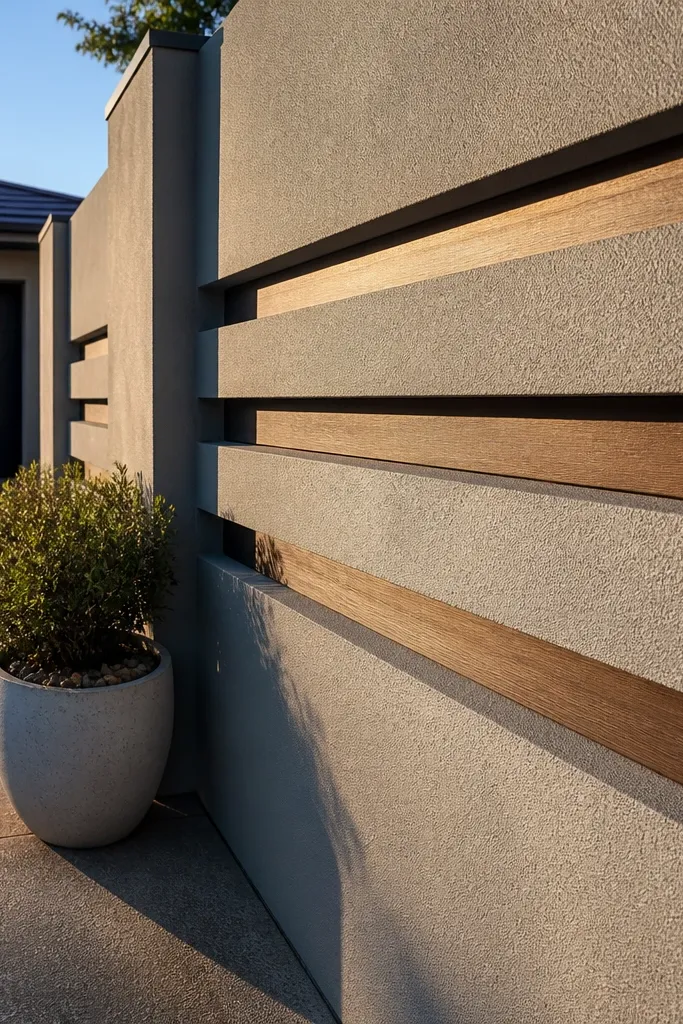
This idea is all about depth. You build a grid of recessed horizontal channels so the slats sit inside the wall, not on the surface. The result is a modern shadow-box look that feels architectural and clean from every angle. Use it when you want a contemporary boundary that still feels warm, and when your street view shows the wall from slightly above.
Mark a grid on the wall face, then build shallow channel frames using exterior-rated cement board strips or small steel rails. Mount horizontal timber-look slat panels inside the recess so they sit 20-30 mm back from the wall face. Seal the recess edges with exterior sealant so water can’t get behind the slats. Finish the top with a coping that covers the channel openings and keeps the slats dry.
Use pre-gapped slats so you keep airflow and avoid warped appearance after rain.
Avoid flush mounting without a back gap — trapped moisture ruins slats.
23. Two-tone plaster panels with stepped top coping
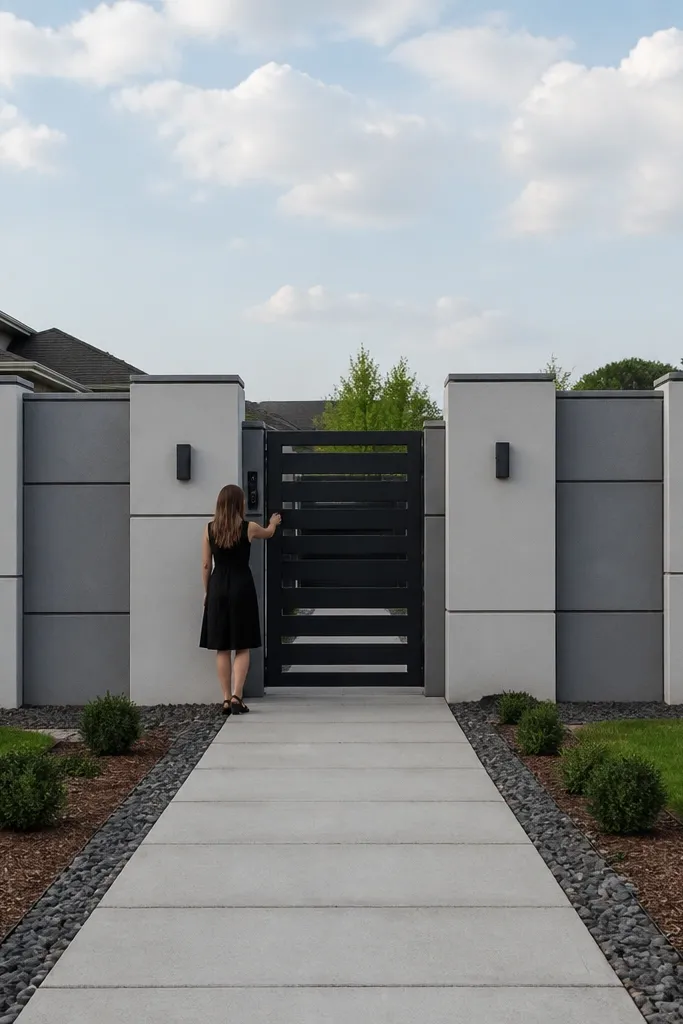
Two-tone plaster looks modern when the panels are crisp and the top line has shape. Use alternating light and medium gray panels, separated by thin shadow gaps or clean reveal lines, then finish with a stepped coping that creates a rhythmic top edge. This makes the wall look intentional and adds a strong silhouette from the street. It works well for medium-to-long boundaries where you want an organized look.
Plaster the wall and apply primer, then mark panel boundaries with a level and straightedge. Apply base paint first, then mask panel edges and paint the second tone with careful tape lines or by using pre-installed trim strips as guides. Create reveal lines by placing thin spacers before painting or by using thin exterior edging strips. Finally, install a stepped coping system and seal every joint along the top.
Do a small corner test to confirm the paint contrast holds in daylight, not just under indoor lighting.
Don’t rely on freehand tape — crooked panel edges ruin the whole design.
24. Dark stone base with light upper cladding
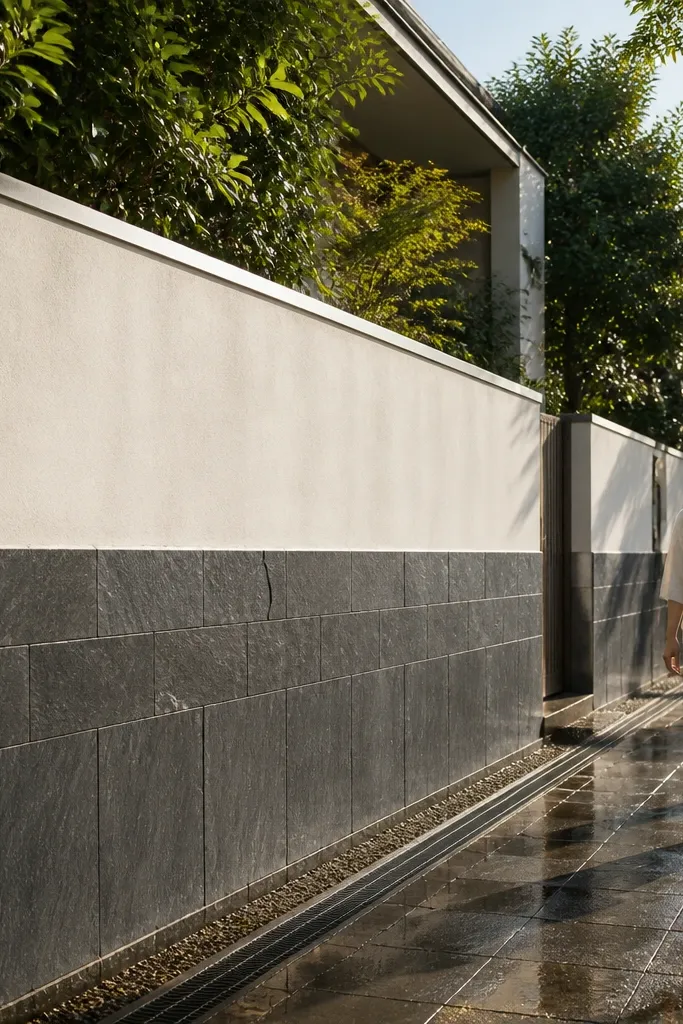
Start by building a reinforced base wall line, then apply dark stone cladding up to a height like 500-700 mm. Above that, install a lighter cladding finish like limestone-look panels or light fiber cement boards. Keep the transition line perfectly level; use a laser line and straight edge while fixing cladding. Finish with coping and seal the cladding edges so water doesn’t seep into the backing layers.
This is a smart proportion trick. A dark stone base hides splash marks and makes the wall look grounded, while a lighter upper cladding keeps it bright and modern. Split finishes also make the boundary feel taller because your eye reads the top portion as a clean block. Choose this if your site has dust, rain splash, or muddy water near the wall.
Skip thisAvoid mixing shiny and matte finishes in the same band — it looks accidental.
Editor's notePick a stone with a matte finish for the base — it hides water spots better than glossy stone.
25. Ribbed porcelain panels with shadow-line base plinth
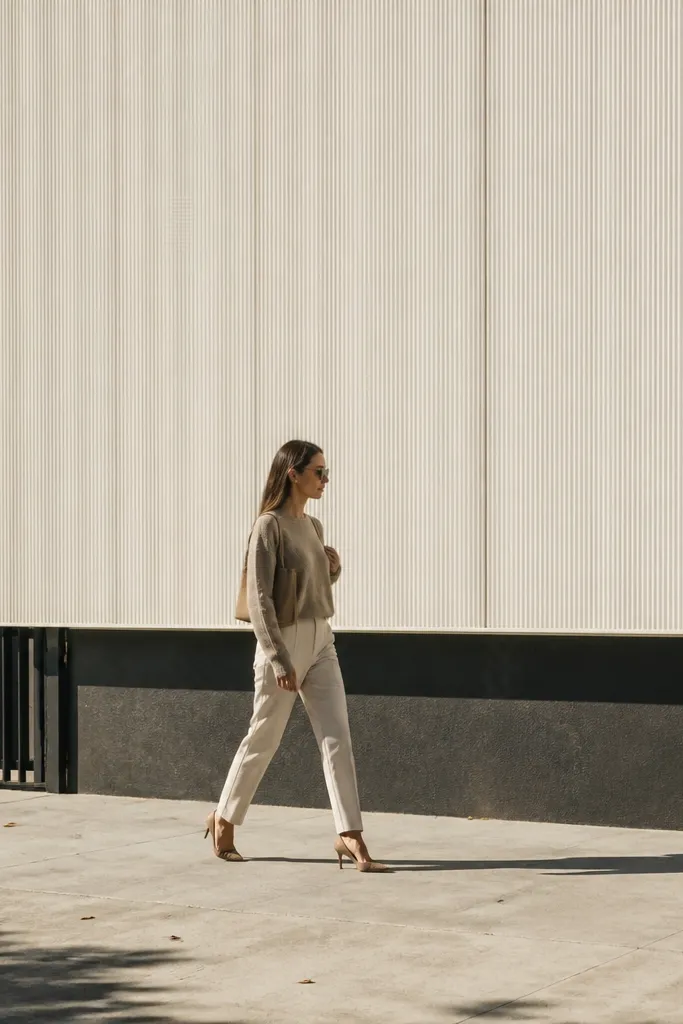
This wall idea gives you that modern, gallery-like look without relying on expensive stone. Ribbed porcelain panels catch light differently across the day, so the wall stays interesting even in plain daylight. The dark base plinth makes the whole thing feel grounded and hides the messy lower area where water splash happens. You get a clean, straight finish line thanks to a shadow gap that separates the base from the panels. It suits driveways, side boundaries, and front compound walls where you want a high-end face with low maintenance. Skill level is mid — you’re doing careful alignment and anchoring, not complex masonry, and it usually takes a weekend for layout plus a couple of days for fixing and grouting.
Start by building a straight, level base plinth frame — use 100x50mm treated timber templates or a simple metal angle guide, then cast or brick a 450-600mm high plinth depending on your site splash zone. Set a 10-15mm shadow-line gap at the top of the plinth using a foam backer rod or a PVC spacer strip so the porcelain doesn’t touch the base. Fix galvanized steel battens or a stainless rail grid to the wall substrate at 400-600mm vertical spacing, then check diagonals so the panel ribs stay perfectly parallel. Install 8-10mm thick ribbed porcelain panels with a compatible exterior adhesive, leaving a 3-5mm joint width for grout. Finish with exterior-grade grout and seal the top edge with a thin flashing strip or waterproof sealant line to keep water out of the joint.
Dry-lay the first row and mark a reference line before you mix adhesive. Ribbed panels show misalignment fast, and correcting it after bonding is painful.
Skip thin, flexible interior tile adhesive — exterior porcelain needs a product rated for freeze-thaw and water exposure.



