
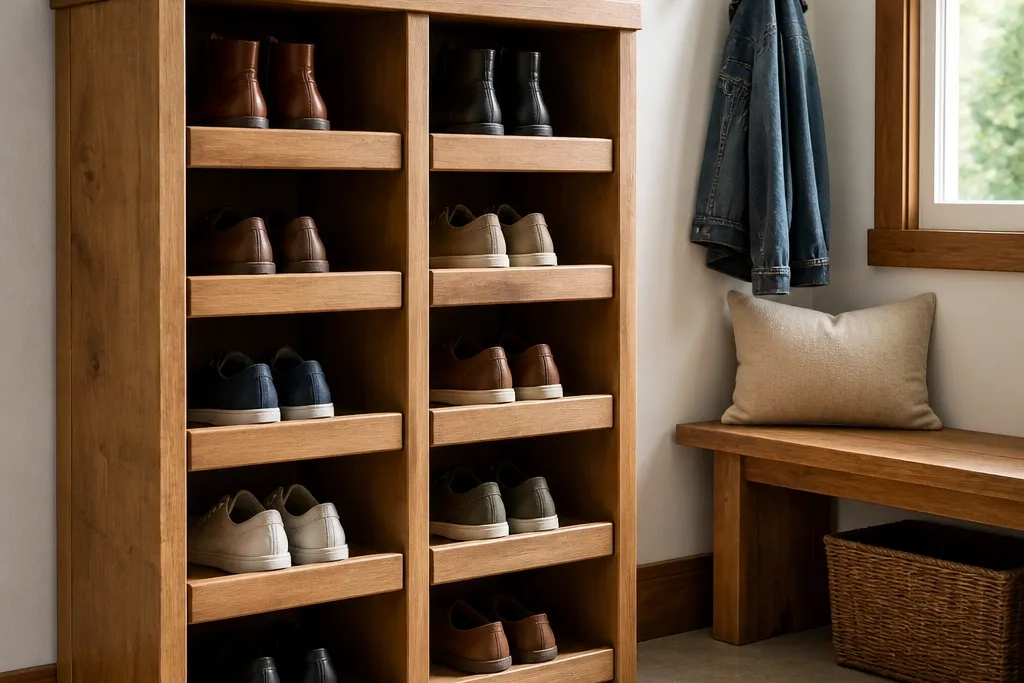
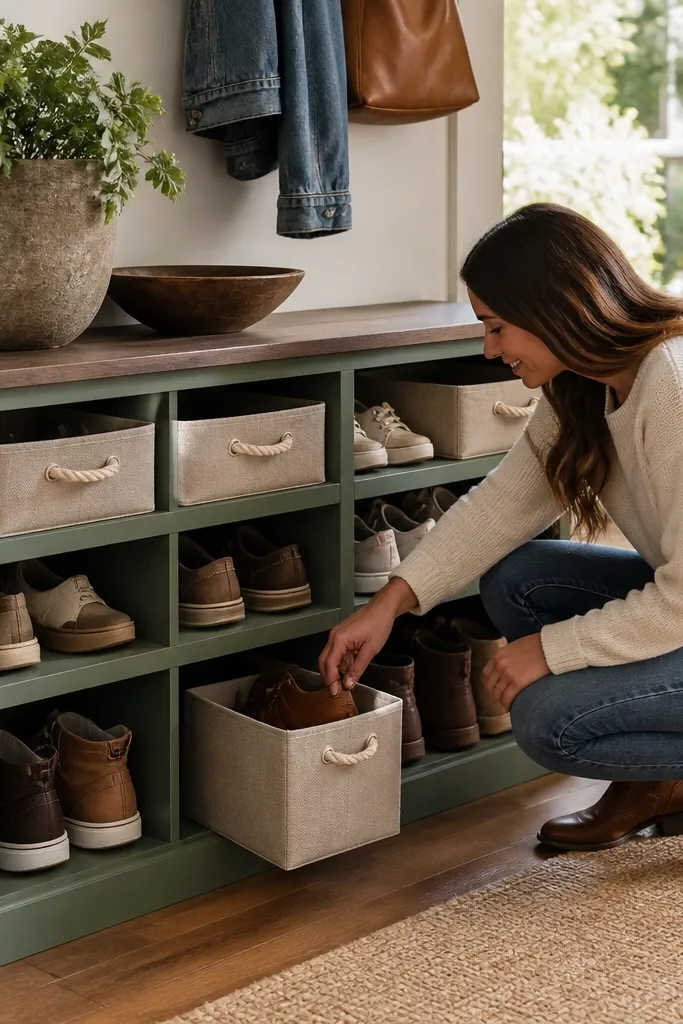
1. Slatted Walnut-Look Shoe Bench with Vent Slots
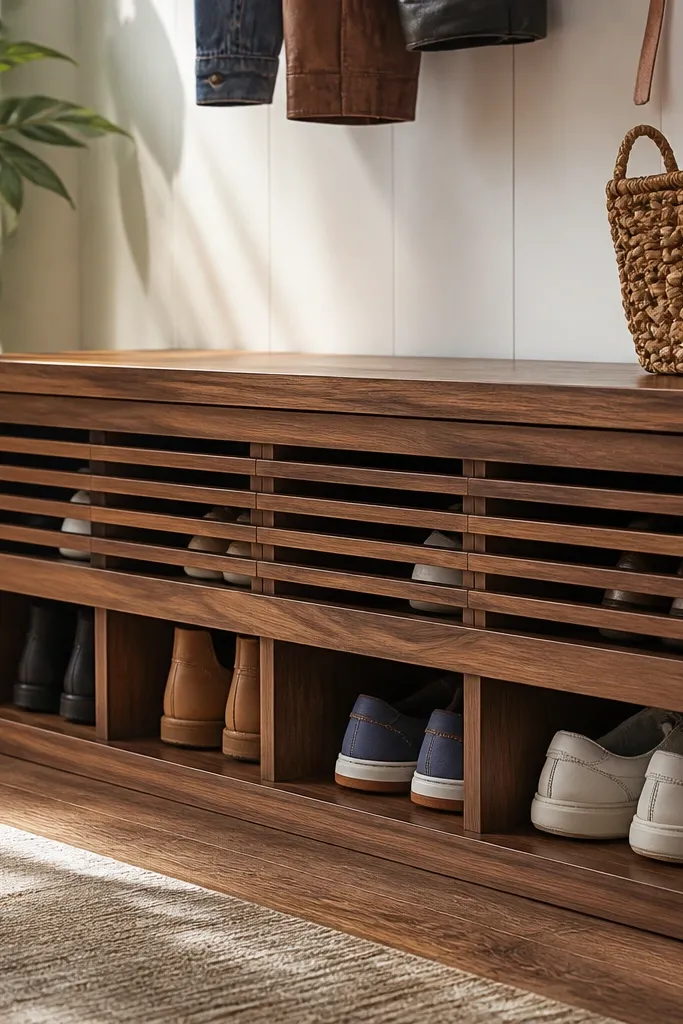
This is the entryway rack that reads like furniture, not storage. The slatted front hides the view of messy shoes just enough, while the vent gaps keep air moving so sneakers don’t trap moisture. Build it as a bench with shallow cubbies underneath and a solid top you can use to sit while putting on boots. A medium walnut stain (or walnut-look paint) makes the whole thing feel cozy even in a small hallway. Expect a clean, warm silhouette that photographs well because the lines are consistent from floor to top.
Cut a bench frame from 3/4-inch plywood or dimensional lumber and keep the top depth around 12 inches. Build three to four cubbies underneath using internal dividers that match your most common shoe size; 6.5-7.5 inches per cubby width works for most adult sneakers. Add a slatted front panel using 1x2 slats with 1/4-inch gaps, then attach it with small spacers so the gaps stay even. Finish by sealing all faces and edges with polyurethane or a water-based clear coat and add rubber feet under the bottom frame.
Editor's noteStain the slats before assembly so the gaps look even and you don’t miss edges.
Skip thisDon’t close the front with solid panels if you deal with wet shoes — it traps odor.
2. Rope-Handle Entryway Cubby Rack in Two-Tone Paint
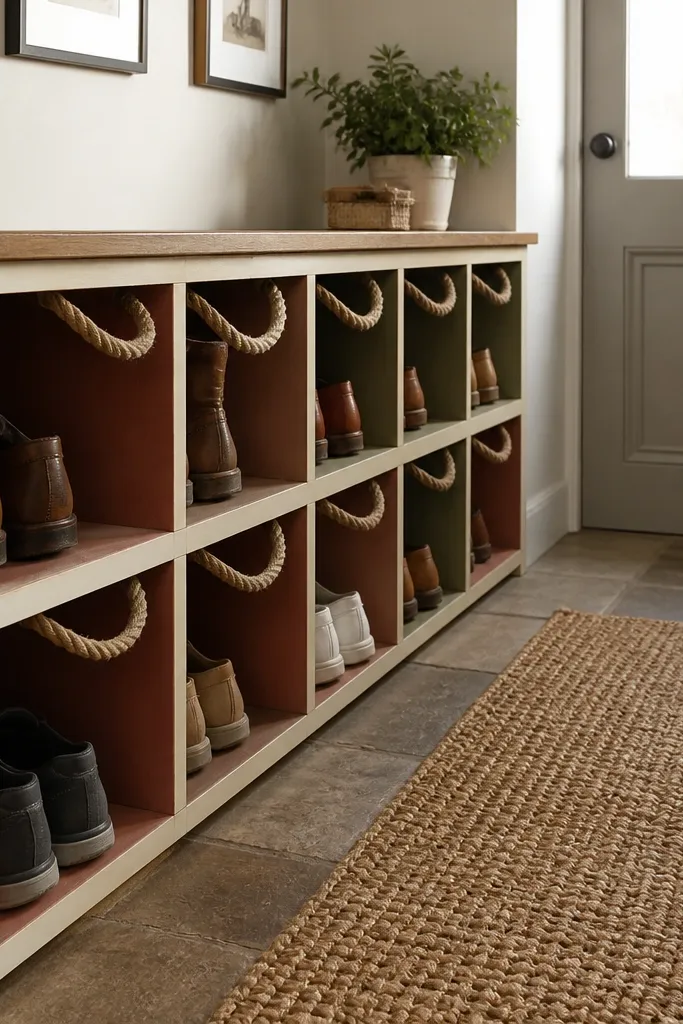
If your entryway feels cold, this one brings softness without looking childish. Each cubby has a rope handle so you can grab a pair and drop it back quickly, which keeps the rack from becoming a jumble. Two-tone paint — warm cream for the frame and muted clay or sage for the cubby interiors — makes the whole storage look cozy instead of utilitarian. It’s also great for households where different people have different shoe habits because cubbies force a clear “home” for each pair. The rope detail reads handmade and looks good in close shots.
Start with a plywood carcass sized to your wall space; for a narrow hallway, aim for 24-30 inches wide and 16-20 inches tall. Divide the interior into 2-4 vertical cubbies using 1/2-inch plywood dividers so each compartment is about 7-9 inches deep for sneakers. Drill two holes per cubby side and install rope handles by tying secure knots or using small eye bolts with rope wrapped cleanly. Paint the frame one color, paint the cubby backs another color, then seal with a matte clear coat.
Editor's noteUse painter’s tape to mask the cubby edges so the two-tone lines stay sharp.
Skip thisSkip glossy paint — scuffs and shoe marks look harsher on shine.
3. Floating Ladder Shelf with Boot-Ready Slanted Slots
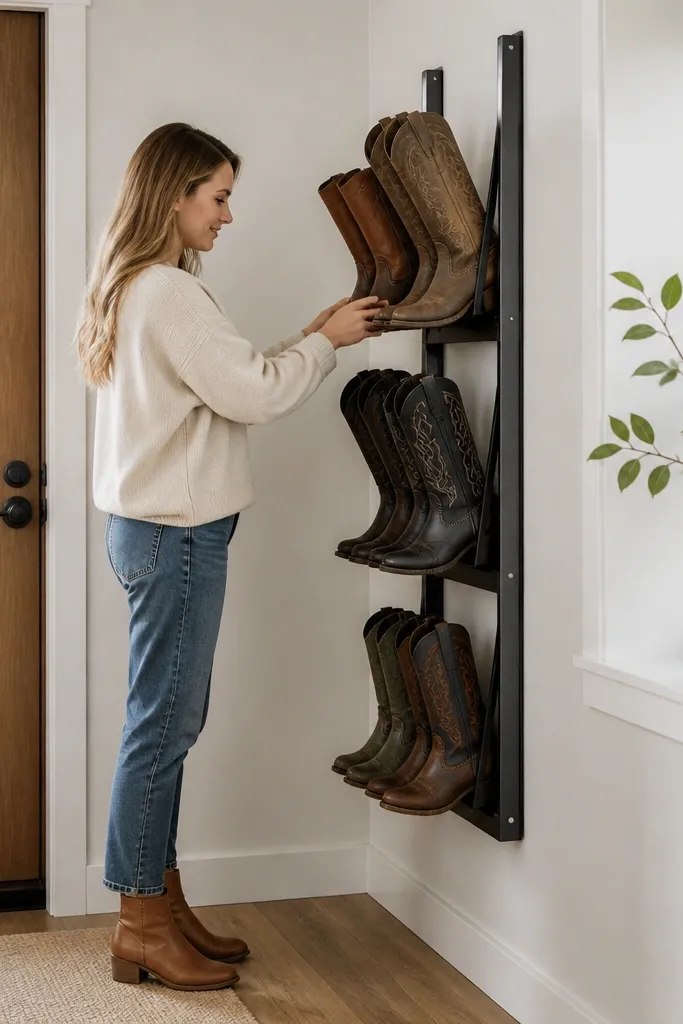
This rack makes a narrow entryway feel taller and cleaner because it’s wall-mounted. The ladder sides create a built-in frame, and the slanted slots prevent boots from collapsing backward. It’s a strong choice if floor space is tight or if you want shoes off the ground quickly. The look is airy, and the slant lines are visually satisfying — they guide the eye and keep footwear from looking scattered. It’s also flexible: you can scale it to hold 6 pairs or 10 by adjusting slot count.
Build two ladder rails from 1x3 lumber and set them apart so you have 10-12 inches of usable depth. Create slanted slot supports from 1/2-inch plywood cutouts angled slightly upward toward the back; a 10-15 degree tilt keeps boots from falling. Attach the rails to studs with a ledger and heavy-duty screws, then install slot supports between rails spaced for your shoes (about 7 inches vertical per slot for sneakers, 9-10 for boots). Sand, stain, and seal all wood surfaces to protect from scuffs.
Editor's notePre-drill all screw holes — ladder wood splits fast near the ends.
Skip thisDon’t mount into drywall only — you need studs or a proper anchor system.
4. Pegboard + Tray System with Color-Coordinated Bins
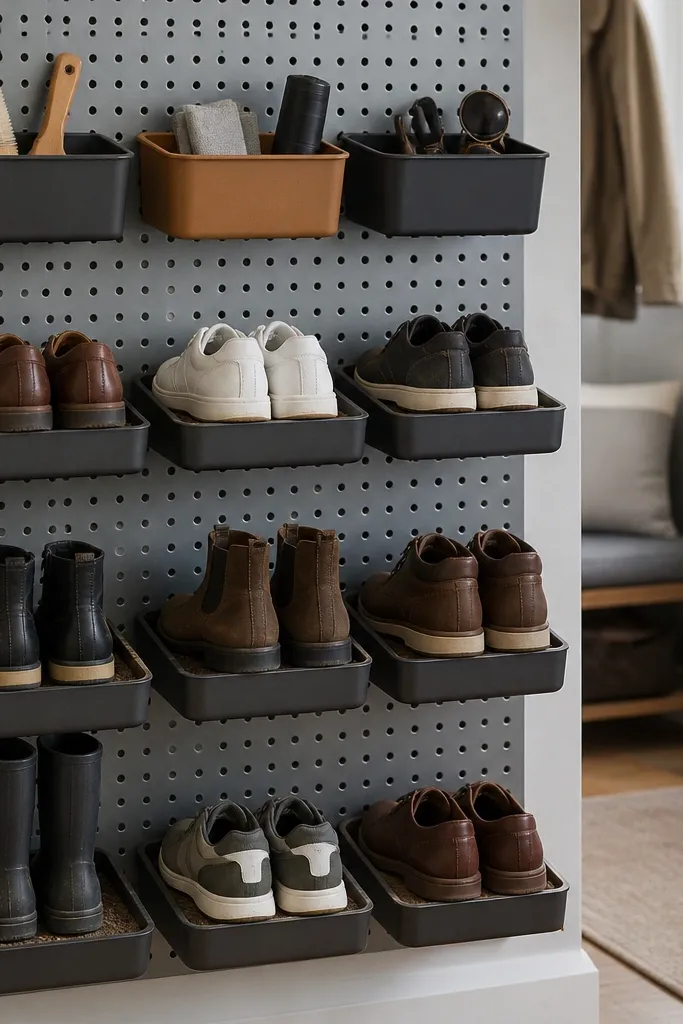
Pegboard looks playful but still tidy when you control the layout. The trays catch grit and keep shoes from sliding around, and the bins give you a visual “grid” so the entryway doesn’t look chaotic. Choose bins in one color family — warm tan, natural wicker, or matte black — and you get a consistent, cozy look. This system is also great for small apartments because it uses vertical wall space and keeps the floor clear. It’s photogenic because the grid lines are crisp and the bins look intentional.
Mount a pegboard to studs at a comfortable reach height, then add a bottom tray rail using a level so all trays line up. Install 2-4 shallow shoe trays and add bin hooks or small shelf brackets under each tray zone. Use bins with rigid sides so they don’t slump and hide the shoe shape. Seal any raw pegboard edges with clear coat, then add a wipeable mat on the bottom if you get muddy soles.
Editor's noteLabel the bins with removable fabric tags so the system stays neat without permanent marks.
Skip thisDon’t use flimsy bags as bins — they collapse and make the whole wall look messy.
5. Cedar-Faced Shoe Rack with Removable Front Slats
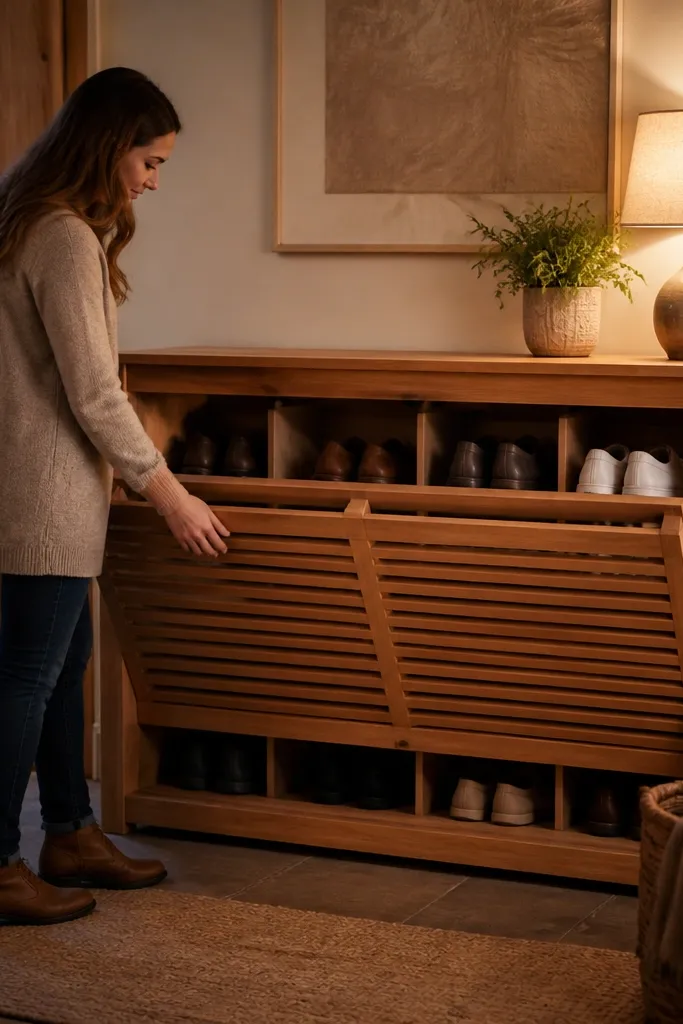
Cedar makes this rack feel cozy in a way paint can’t. The removable slats let you control how much you want to hide the shoes, and they also make cleaning easier because you can pull the front panel off. The wood tone warms up entryways, and cedar has a natural scent that helps with shoe odor when paired with ventilation. This design works especially well for families because you can open it up for quick cleaning after rainy days. The cedar face also looks great in photos because it has visible grain and soft texture.
Build the main carcass with 3/4-inch plywood, keeping compartments 8 inches wide and 12 inches deep. Install a back panel with ventilation gaps (leave 1/2-inch spacing between a back brace and the back) so air circulates. Cut cedar slats to cover the front, but mount them on removable cleats so you can slide them out. Finish with a clear cedar-friendly sealer and add a bottom drip tray or tray shelf for wet shoes.
Editor's noteSeal the cedar slats lightly so they still look warm but don’t absorb grime.
Skip thisDon’t skip a tray — wet soles will streak the lower panel.
6. Bookshelf-Style Narrow Shoe Tower with Fabric Pullouts
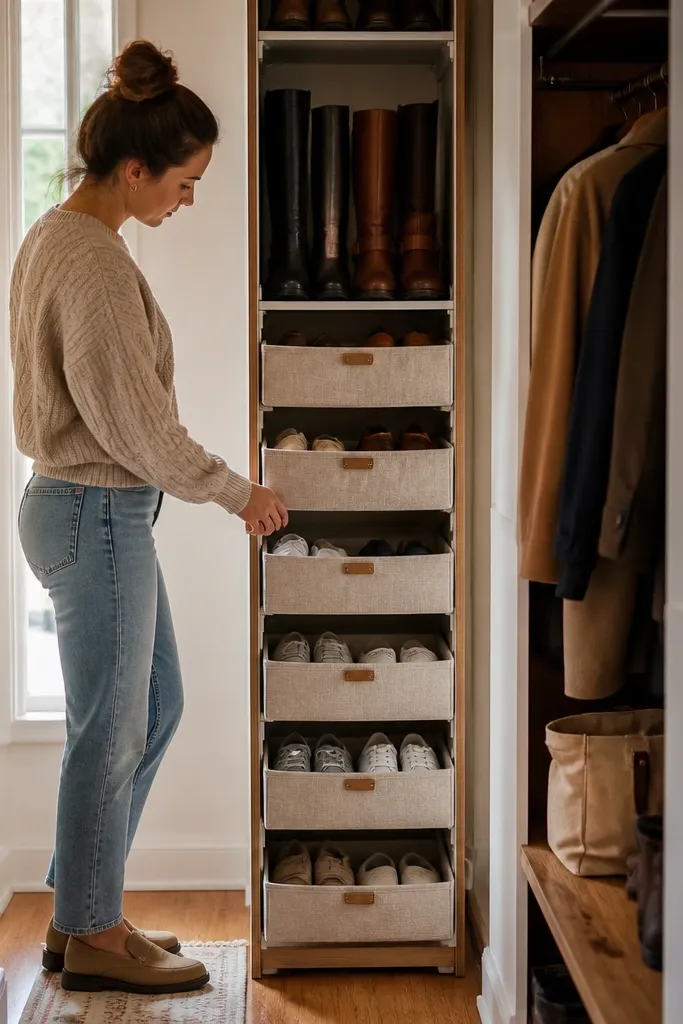
This is for anyone who hates bending down to find shoes. A narrow tower uses vertical space so the entryway stays tidy and you can keep pairs organized by height. Fabric pullouts soften the look and make the rack feel cozy, especially if you choose linen-texture bins in oatmeal or sand. The tower shape also frames the entryway visually so it feels designed, not cramped. It works well in apartments, condos, and slim hallways where depth is limited.
Build a tall carcass from 3/4-inch plywood with an overall width of 18-20 inches and depth of 12 inches. Divide into 5-7 shelves spaced 8 inches apart for sneakers and 10 inches for boots; leave the bottom shelf a bit taller for storage of boot brushes. Add rails so pullout bins slide smoothly — use 1x2 cleats and small drawer slides if you want it to glide. Install a front face frame and add stop blocks so bins don’t fall forward.
Use bins with rigid board bottoms so they keep their shape and stay tidy when partially filled.
Don’t make shelves too tight — you’ll jam shoes in and the tower will look messy fast.
7. Reclaimed Door Shoe Rack with Hanging Shelf Rail
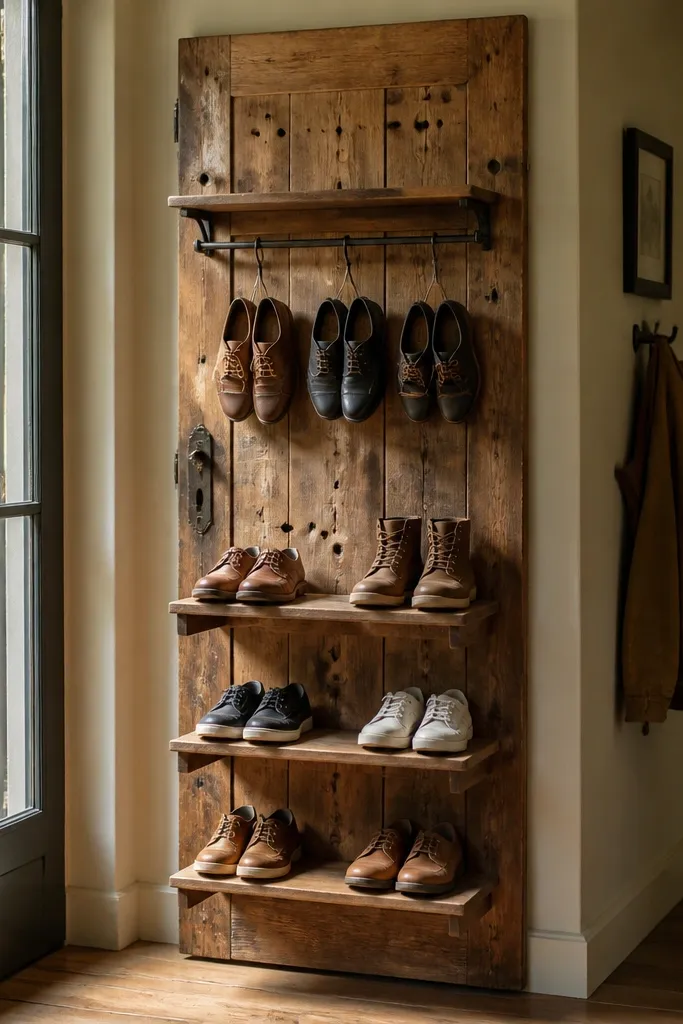
Upcycling a door gives you instant character and a cozy, lived-in look without needing fancy joinery. Use the door as the back panel, then attach shallow shelves and a rail to create shoe tiers. The old hardware holes can become a pattern for mounting, which makes the build look intentional. This idea works for entryways that need a statement piece — the door adds texture and depth to the wall. It’s especially photogenic because the grain and panels create natural visual interest.
Clean and sand the door, then cut shelf supports from 1x3 lumber sized to the door width. Mount the door to the wall studs with a sturdy ledger and angle it slightly if it’s heavy and you want easier access. Attach 3-5 shelves using screws into the supports, leaving 9-10 inches between tiers for boots and taller sneakers. Finish with a matte clear coat and add a small drip tray under the lowest shelf.
Remove any loose paint flakes before sealing — they’ll show through under clear coat.
Don’t mount it too high — if the top tier is unreachable, shoes end up in random piles.
8. Round-Corner Shoe Rack with Wicker Baskets Inserts
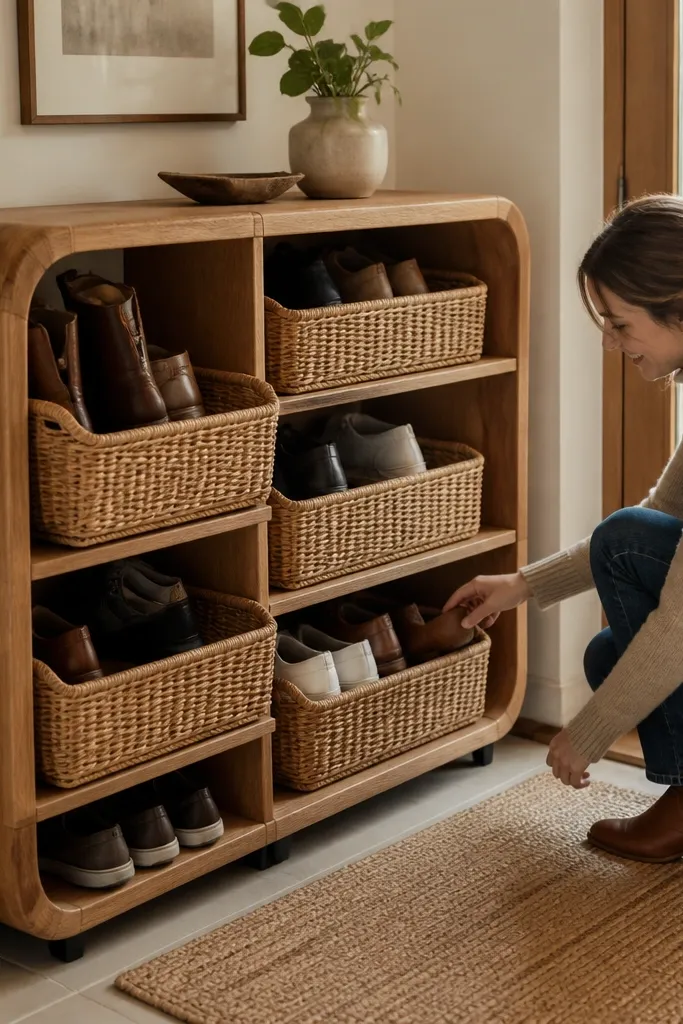
This build is cozy because it softens the entryway. Rounded corners keep it from looking boxy, and wicker baskets make storage feel warm and natural. Use baskets for shoes that don’t need a rigid shape so you can toss in pairs quickly. The baskets also hide scuffs and make the rack look tidy even when the shoes are slightly messy. It’s a good choice for homes where the entryway also serves as a landing spot for bags, leashes, and coats.
Use plywood for the base frame and cut rounded corners with a large circle template so corners don’t chip. Build 4-6 basket openings and set them so baskets fit with a 1/2-inch gap for airflow. Install thin cleats inside each opening to support the basket lip, then seal the wood frame edges. Add a bottom tray shelf and finish with a satin clear coat for easy wipe-down.
Measure your baskets first; buy them before you cut openings so the fit is perfect.
Skip tight fits — wicker needs airflow or it turns musty.
9. Mid-Century Slatted Bench with Tapered Legs
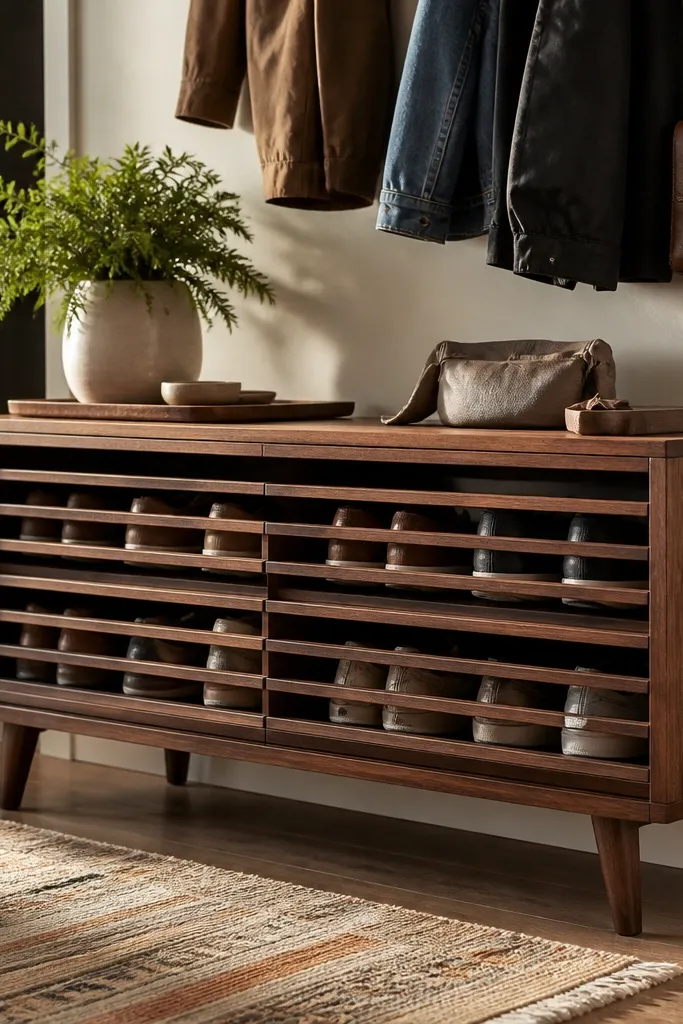
If you want cozy but not farmhouse, this is the look. Tapered legs and slatted panels give you a mid-century vibe that instantly makes the entryway feel styled. The slats hide shoes partially and let air move, so it works for everyday use without turning into a smell trap. It also gives you a comfortable place to sit while tying shoes, which makes the rack feel practical and pretty at the same time. The visual payoff is clean lines and warm wood that doesn’t look bulky.
Cut a bench top frame from 1x3 or 2x2 lumber and build a slatted front panel with 1-inch slats spaced 1/4-inch apart. Use 2x2 tapered legs or purchase tapered leg blanks, then attach with corner blocks for strength. Build two or three compartments underneath with internal dividers so each pair has a home. Sand smooth, then apply a stain and finish that dries matte — polyurethane satin or hardwax oil.
Use small rubber bumpers under the slats to reduce squeaks and rubbing.
Don’t leave the bench top unfinished — shoe scuffs transfer fast.
10. Hanging Boot Rack from a Curtain Rod and Pegs
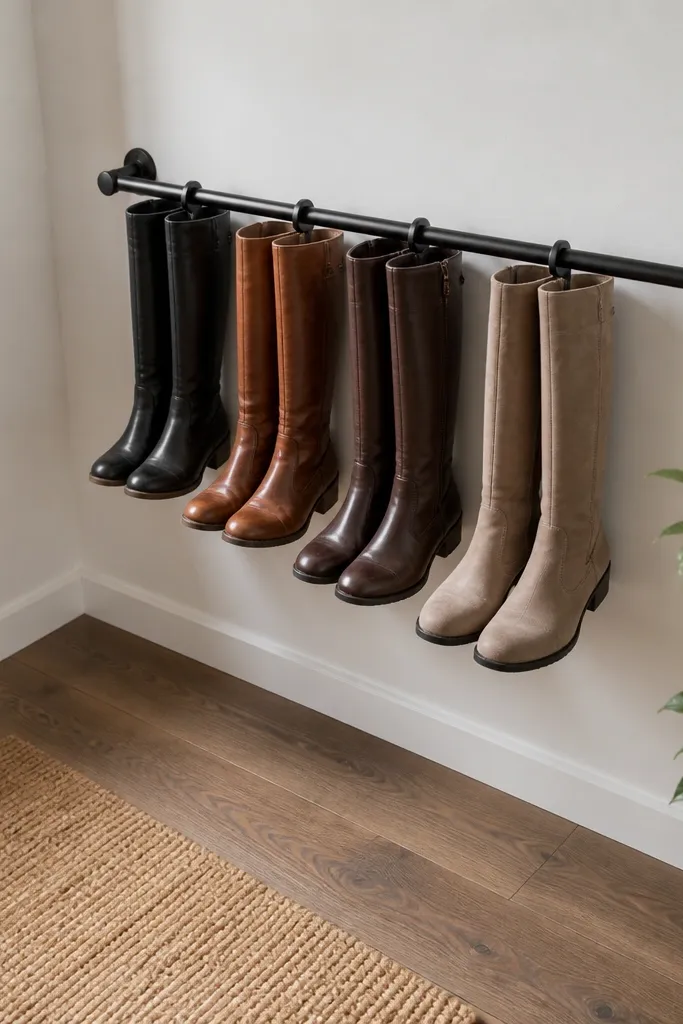
This is a small-space hack that looks surprisingly neat. Instead of storing boots flat, you hang them by the shaft so they keep their shape and show off the pair. A curtain-rod-style metal bar with pegs gives you a consistent rhythm, which keeps the entryway from looking like a pile of legs. Use it for boots and tall shoes only, then pair it with a small bench for sneakers if you need both. The metal and warm wood combo reads cozy and modern at the same time.
Mount two sturdy brackets into studs and install a metal rod at about 60 inches from the floor. Add pegs or hooks spaced 6-8 inches apart, depending on boot width, and place them on a wooden backing board for warmth. Hang boots by inserting the shaft over pegs while keeping the toe pointed down. Add a small drip tray on the floor with a wipeable liner.
Wrap pegs with felt tape where leather touches so you don’t scuff boots.
Don’t hang wet boots directly without airflow below — add a tray and let them dry.
11. Sliding Barn-Door Shoe Cabinet with Vent Louvers
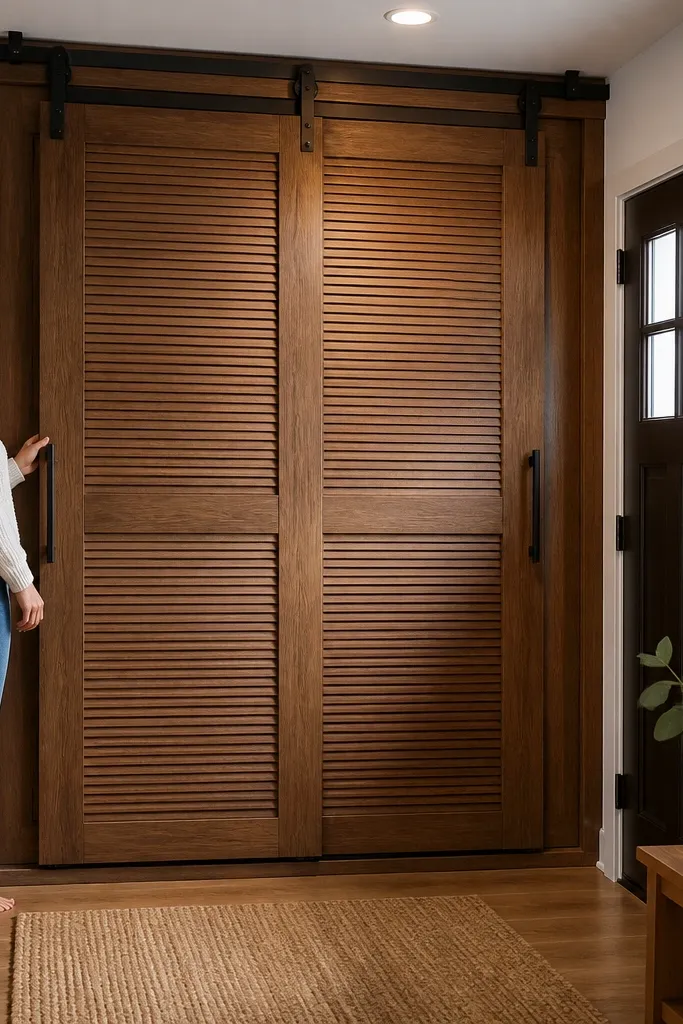
Closed storage makes an entryway feel finished, and this one looks like a real cabinet. The sliding barn door hides shoes completely, so even a messy week doesn’t show. Vent louvers inside the cabinet keep airflow moving, which matters if you store shoes right after coming in from rain or snow. The warm wood door and matte hardware give you a cozy feel without the clutter. It also solves the “open rack looks messy” problem for people who hate visual chaos.
Build a cabinet carcass from 3/4-inch plywood sized for your entryway; for 6 pairs, aim around 30 inches wide, 18 inches tall, and 14 inches deep. Add internal shelves or angled racks, leaving a 1/2-inch gap between shelves for airflow. Install vent louvers on the back or side panels using a small vent kit or cut louvers from thin slats. Mount the barn door hardware to a header board, then attach the door and add a soft-close bumper.
Editor's noteUse a light-colored interior panel so you can see where shoes go and keep it tidy.
Skip thisDon’t seal the cabinet like a box — zero ventilation turns into odor.
12. Corner Triangle Shoe Rack with Stacked Slanted Supports
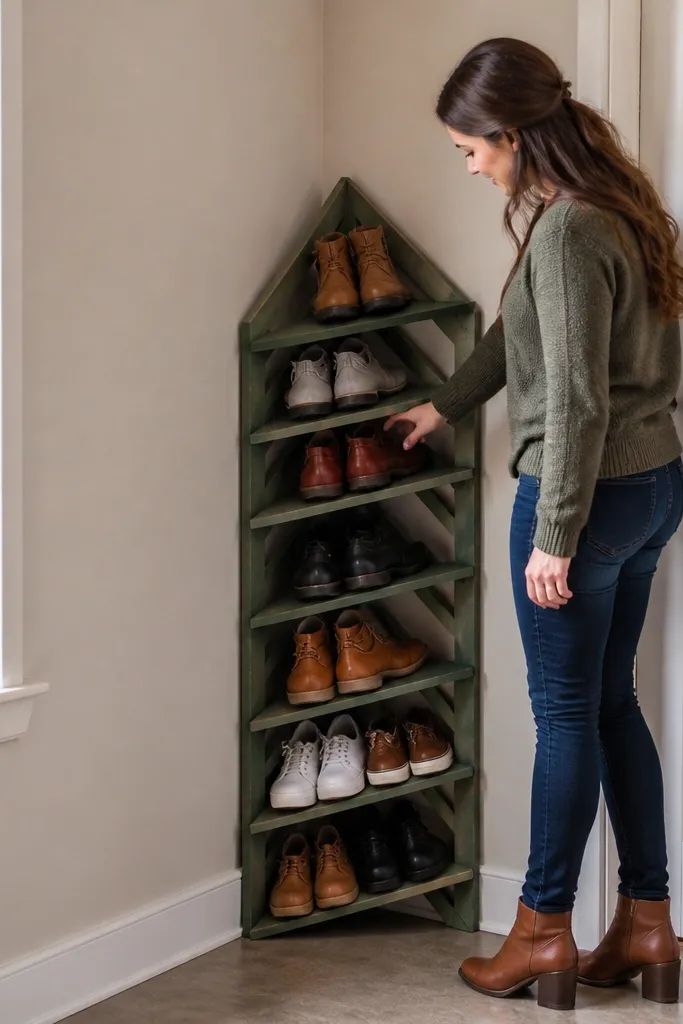
Corners are wasted space, and this rack turns them into a tidy entryway feature. The triangle footprint fits where a normal rack won’t, and the slanted shelves keep shoes from falling forward. It’s a smart choice if your entryway has a tight corner near a door or closet. The look is clean because the geometry stays consistent, and the slants create a gentle diagonal rhythm that looks good in photos. You’ll get organization without eating up hallway width.
Measure your corner and build a right-triangle frame with plywood; keep one leg depth around 12 inches. Cut slanted supports from 1/2-inch plywood so each shelf tilts slightly upward toward the back. Space shelves so sneakers sit flat and boots sit on a higher slanted tier; 8-10 inches between shelf planes works. Seal the wood and add a wipeable base panel or tray at the bottom to catch dirt.
Editor's notePre-fit each shelf support before you screw it in — small angle errors show in the final look.
Skip thisDon’t make shelves perfectly horizontal — shoes slide and the rack looks messy.
13. Concrete-Look Floating Shelf with Drop-Front Shoe Trays
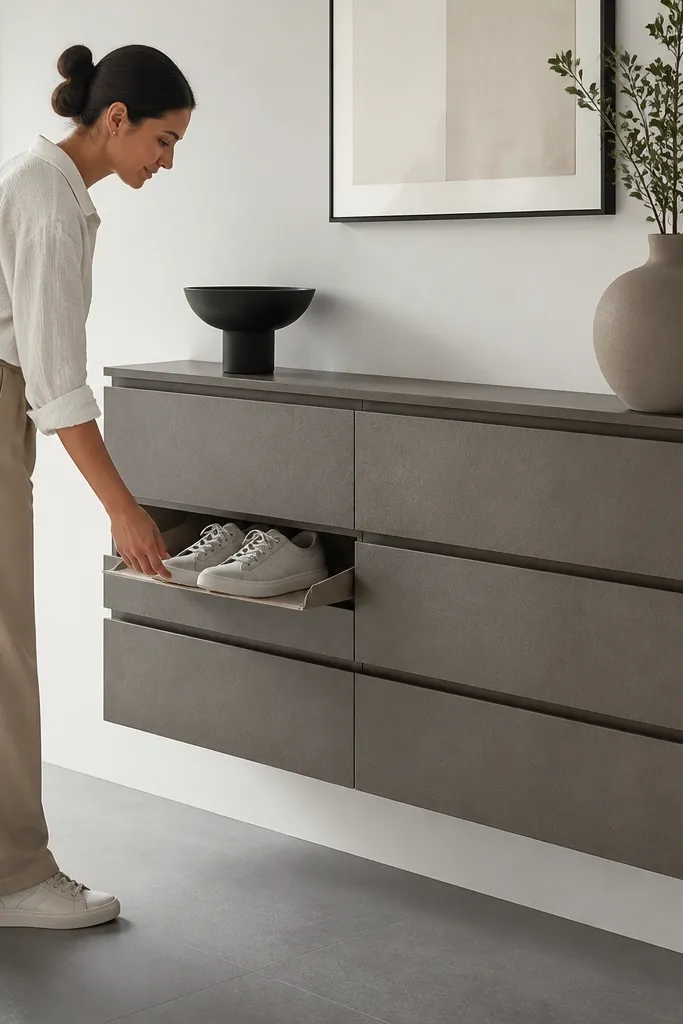
This is for people who want a modern, cozy entryway without rustic wood. A concrete-look finish hides scuffs and looks clean, while the drop-front trays keep shoes contained. Instead of open cubbies, you get a front that covers shoes until you open it, so the entryway stays tidy even if you leave shoes there briefly. The floating shelf also reduces floor clutter and makes the wall look organized. It’s photogenic because the trays create neat repeating shapes.
Build a wall-mounted shelf box from 3/4-inch plywood with a depth of 10-12 inches. Create drop-front trays using thin plywood panels hinged at the sides, and set the tray openings so each panel covers the shoe view. Install a French cleat or heavy-duty wall rail into studs for the floating shelf. Finish the shelf and tray faces with a concrete-look paint system, then seal with a scuff-resistant clear coat.
Add felt bumpers to the tray fronts so they close softly and don’t chip the finish.
Skip cheap hinges — sagging trays ruin the clean look.
14. Macramé-Style Rope Shelf with Wooden Pegs
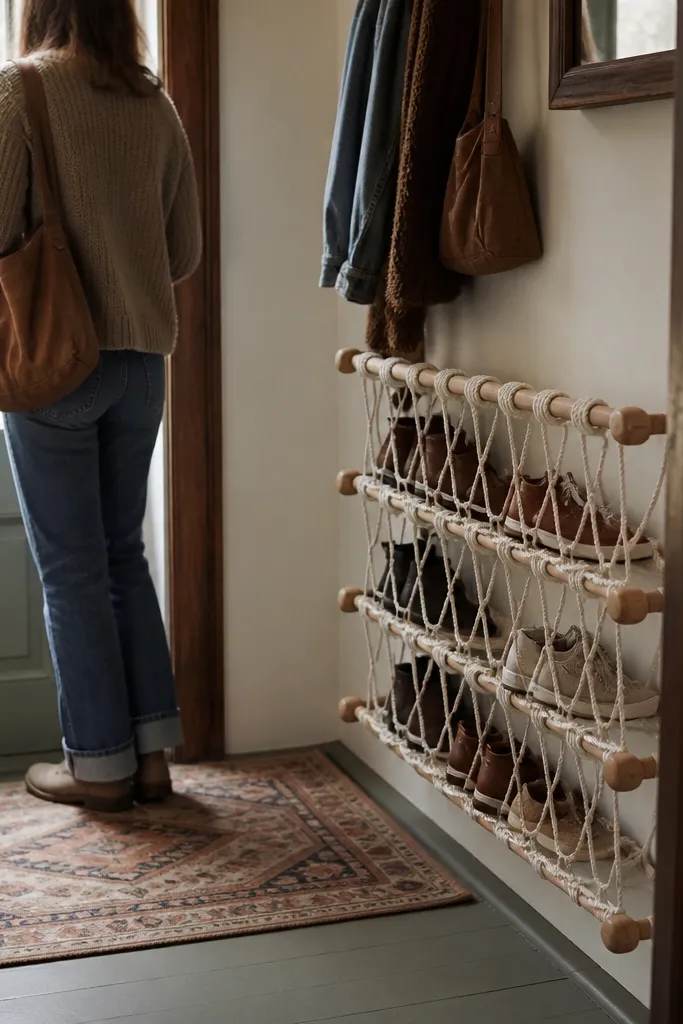
This one looks cozy because it’s textile and airy, not boxy. Rope shelving creates a soft visual texture and lets you see the shoe shapes without a cluttered grid. Use it for smaller shoes like flats, kids sneakers, or house slippers. The wooden pegs keep pairs separated so they don’t tangle. It’s a great entryway add-on if you already have a main rack and want a “grab fast” zone that looks warm and handmade.
Build a simple wooden plank frame and drill evenly spaced holes for pegs, then sand and seal it. Use strong rope (cotton macramé cord or braided rope) anchored to two ceiling studs or wall studs with rated hardware. Thread rope through the frame holes and knot securely so the shelf hangs level. Add wooden pegs that stick up 1-2 inches to separate pairs, then hang the shelf at about 48 inches high.
Editor's noteUse a level every time you tie knots — rope shelves drift fast.
Skip thisDon’t hang heavy boots on rope — keep this for lighter shoes.
15. Wipe-Clean PVC Slat Rack with Matte White Frame
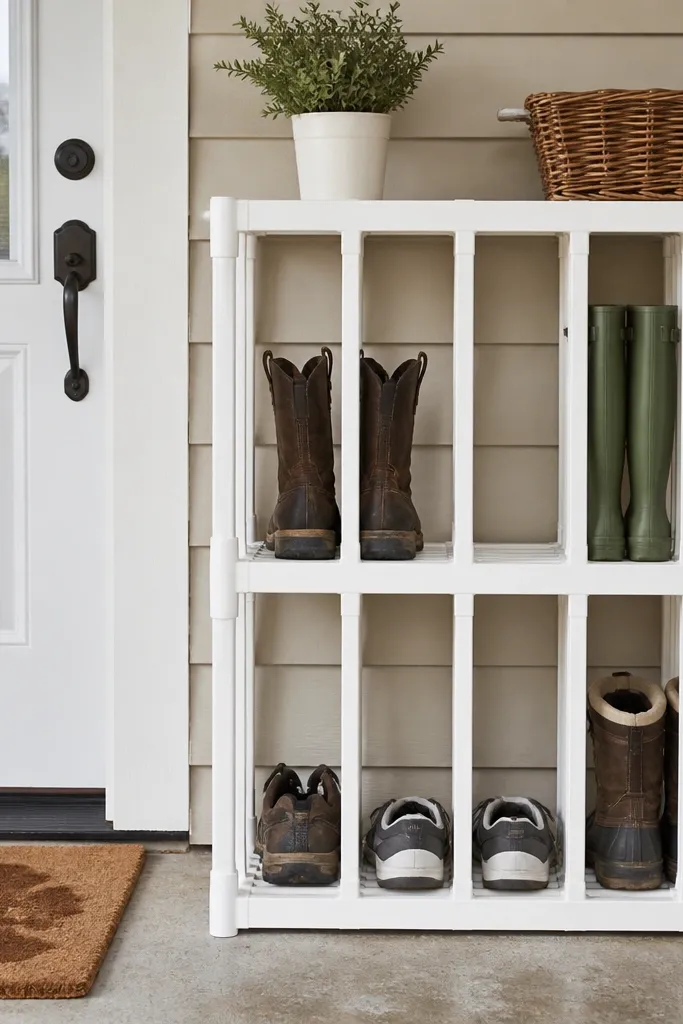
This is the “muddy weather” version of cozy. PVC slats wipe clean in seconds, so your rack stays looking fresh even when you bring in rain boots. Matte white framing keeps it bright and warm, and the open compartments make it easy to see where each pair goes. The slats also add texture, so it doesn’t look sterile. If your entryway gets tracked with salt or dirt, this design keeps the mess off your floor and off your furniture.
Build a frame from 1x3 lumber or 3/4-inch plywood and keep internal depth around 12 inches. Cut PVC slats to span each compartment and space them 1/2 inch apart so shoes dry. Screw PVC slats into the frame with plastic-safe screws and seal cut ends. Paint the frame matte white, then seal with exterior-grade clear coat for easy wipe-down.
Use a damp microfiber cloth with mild soap — PVC finishes stay clean without harsh cleaners.
Don’t use glossy paint — scuffs and dirt show more than matte.
16. Recessed Shoe Rack Behind a Wall Niche Door
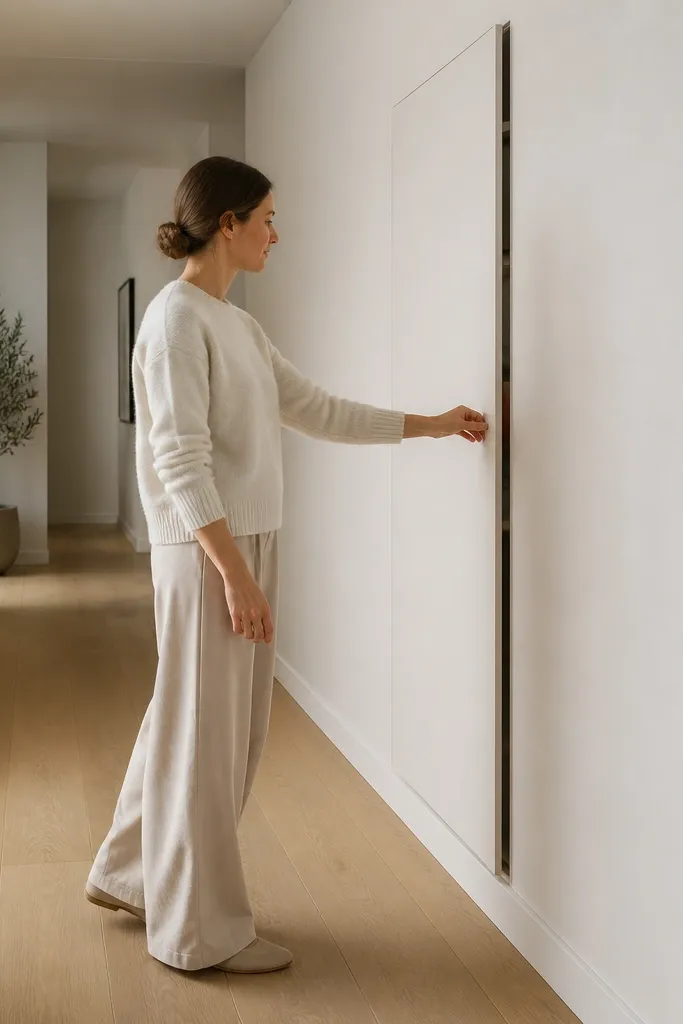
Recessed storage is the cleanest way to keep an entryway tidy because shoes disappear completely. A niche door also lets you hide the rack when guests come over, which is the fastest way to make a hallway look “done.” It’s cozy because the door matches your wall finish and blends in. The key is airflow: build the rack with slatted sides or small vents so shoes can dry. This idea is best for homeowners or anyone doing a remodel, but you can mimic it with a freestanding cabinet placed like a niche.
Frame a niche with 2x4s or plywood boxes sized for 4-6 pairs; keep depth 12-14 inches and leave 1/2-inch gaps for ventilation. Install shelves or angled supports so shoes sit without crushing. Add a door with a simple frame and small vents or slats on the inside edges. Finish the door to match the wall and use a wipeable floor tray inside the niche.
Use a removable bottom tray for wet shoes so you don’t have to clean the whole niche.
Don’t build a sealed niche — shoes need airflow or they smell.
17. Cordless LED Shoe Rack with Fabric Dust Covers
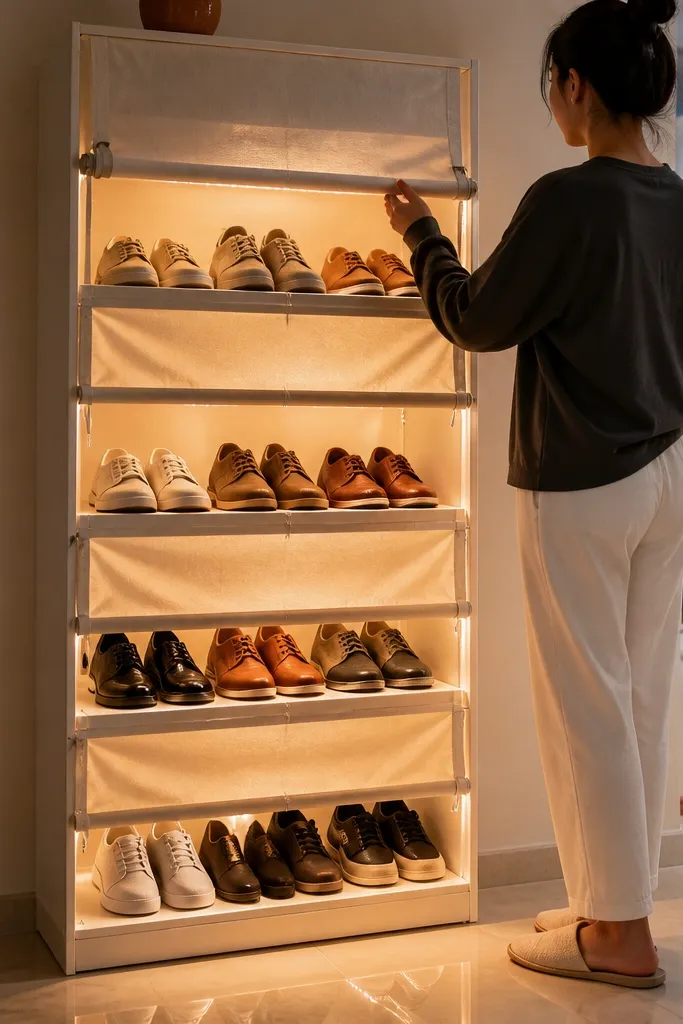
This is how you make shoe storage feel cozy at night. Add warm LED strips under shelves or along the inside edges so shoes look inviting and easy to grab. Fabric dust covers keep the front looking smooth and tidy while still letting air pass if you use breathable fabric. The result is an entryway that looks styled even when it’s dark outside. This option is best if you already have a basic rack and want to upgrade the look without rebuilding everything. It’s also great for families because covers reduce the visual temptation to pile random pairs.
Build or use an existing shoe rack with open cubbies and add a warm LED strip (2700K) under the top shelf. Route power using a cordless battery pack or a concealed USB power setup inside the frame. Hang fabric covers on simple Velcro strips or small magnets so the covers lift easily. Choose breathable cotton or linen fabric and hem the edges so it looks neat, then seal the rack surfaces where shoes touch.
Editor's noteUse dimmable LEDs so the entryway doesn’t look like a workshop.
Skip thisDon’t use heavy blackout fabric — it traps moisture.
18. Barnwood-Color Shoe Rack with Metal Grid Front
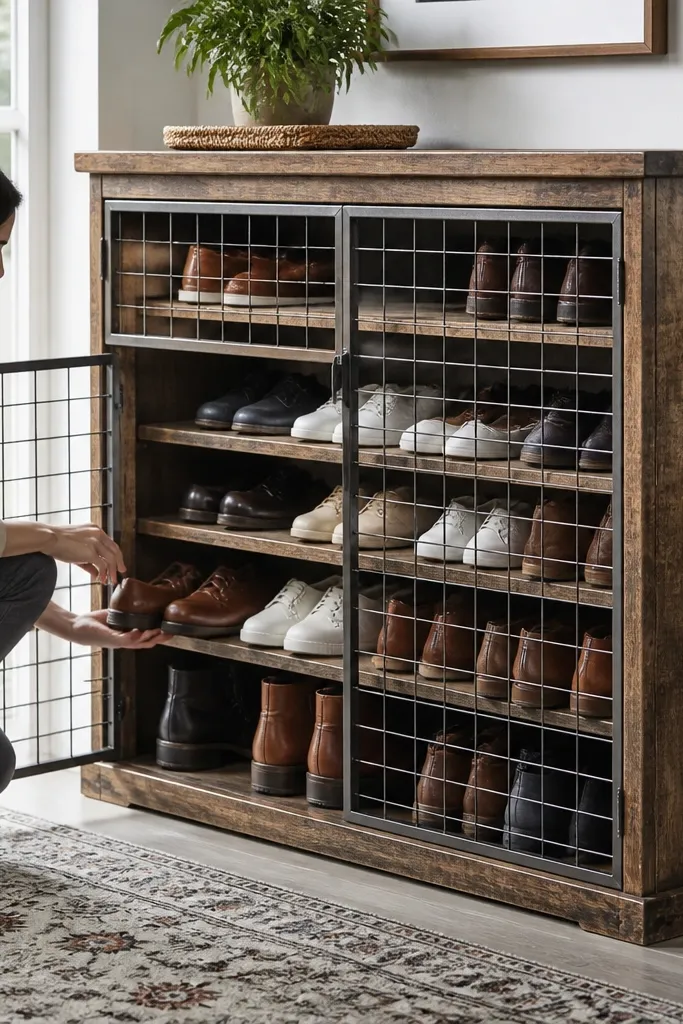
This one mixes cozy wood and an industrial grid, which looks great in modern entryways. The metal grid keeps shoes visible enough to stay organized, but it also adds structure and prevents random stacking. The wood base warms the look, and the grid front is easy to wipe. It’s photogenic because the grid creates a clean pattern and the wood grain adds texture. This design works well if you like open racks but want them to look intentional.
Build a rectangular frame from 1x3 lumber and stain it barnwood color using a medium-dark brown stain. Add internal dividers to create 6-8 compartments, keeping each compartment width around 7-8 inches. Cut a metal grid panel to size and attach it with small screws and spacers so it sits off the wood slightly. Finish the wood with a satin sealant and add a bottom tray.
Editor's noteUse a magnet-friendly grid or removable grid panel so you can clean behind it.
Skip thisDon’t skip internal dividers — a frame without dividers turns into a shoe pile.
19. Stacked Tray Shoe Rack with Magnetic Door Latches
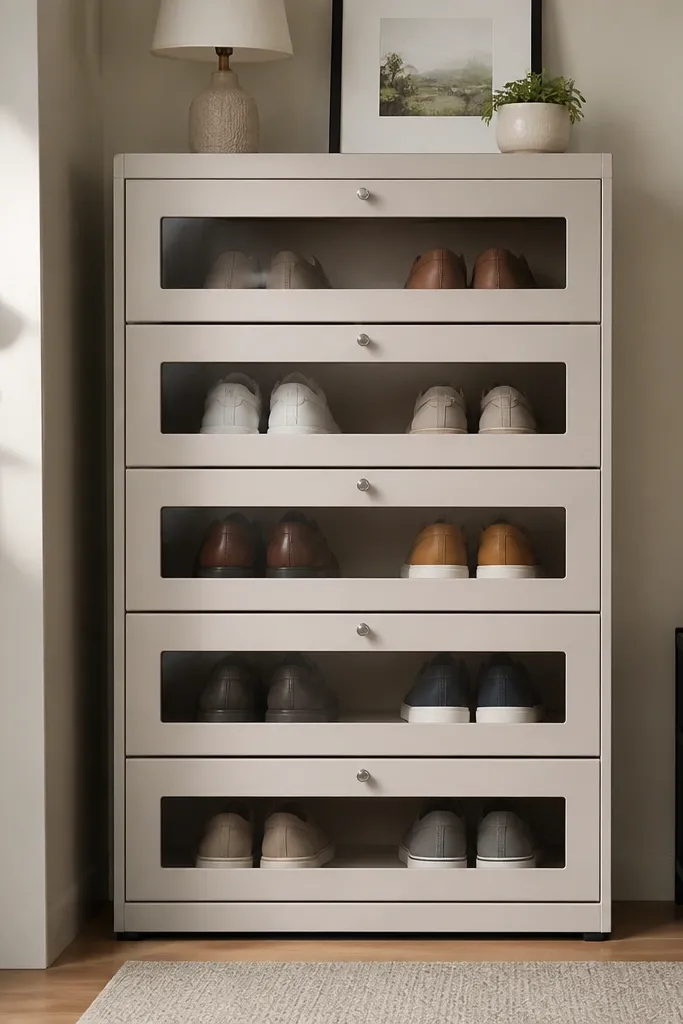
This rack makes shoes look tidy because each pair sits in a tray that’s contained and aligned. The small magnetic-latched doors keep the view clean, especially if you have guests or a busy family schedule. It also helps with smell because doors can be opened for airing. The stacked trays create strong, readable lines, which is exactly what makes entryway storage look good in photos. It’s a solid DIY for people who want a closed look but don’t want a full cabinet build.
Build a plywood frame with 3-4 stacked tray bays and keep depth around 13 inches. Create trays from 1/2-inch plywood or thin slats, leaving small gaps for airflow. Add hinged front doors using European-style small hinges or simple butt hinges and attach magnets so doors close tight. Seal all wood contact points with clear coat and add a removable bottom drip tray.
Editor's notePaint the tray bottoms a light color so you can spot dirt and wipe quickly.
Skip thisDon’t use heavy doors without ventilation — you’ll forget to air shoes.
20. DIY Bamboo Roll-Up Mat Rack with Removable Side Rails
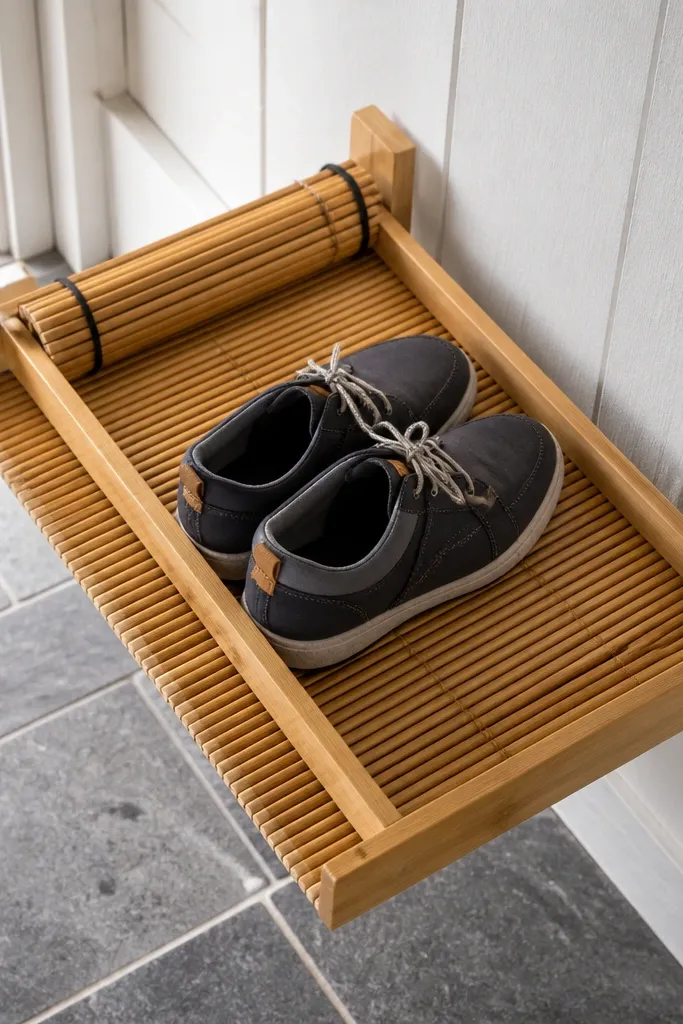
A roll-up mat rack is cozy because it looks soft and natural, not like hard storage. It’s also practical when you deal with muddy soles because the mat surface is easy to hose off or wipe. Side rails keep pairs from sliding, and the roll-up feature makes cleaning simple. This idea is photogenic because the bamboo texture reads warm, and the rack stays visually calm even when it’s busy. It suits entryways where shoes often come in wet and you want a quick reset.
Build a shallow base frame from 1x3 lumber and add two removable side rails using simple brackets or thumb screws. Cut a bamboo mat or bamboo slat roll to fit the base, then secure it to a roller tube or attach with ties so it can roll up. Install rails so shoes rest against them and stay separated. Finish the wood frame with a water-resistant clear coat and add a bottom liner to protect the floor.
Editor's noteUse a mat with slats spaced for drainage, not a solid weave.
Skip thisDon’t use a non-draining base — damp stays trapped under the mat.



