
1. Painted plywood panel with a "gallery" border
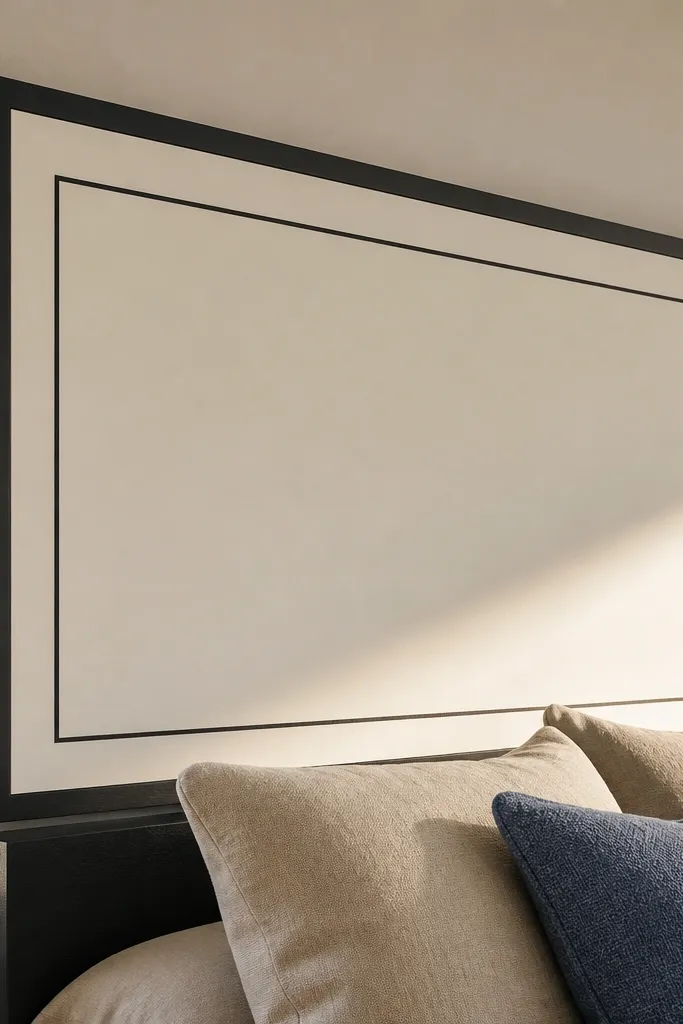
This is the fastest way to get a headboard that looks intentional without upholstery. A thick plywood panel gives you a solid, straight silhouette, and the border line makes it read like a custom piece. Paint it in a matte or eggshell finish so it doesn’t glare in photos. Pair a crisp border color like deep charcoal or navy against warm off-white for a clean, modern frame around the bed. Skill level is beginner-friendly: you’re basically cutting and painting, then mounting.
Step 1: Cut 3/4 in plywood to your target size, usually 60 in wide for a queen and 48 in for a twin, then choose a height around 44-50 in. Add a border by screwing thin MDF strips or trim pieces around the perimeter, keeping the inside opening centered. Step 2: Sand smooth, fill screw holes, then prime and paint the main panel and border in two colors. Step 3: Locate studs, pre-drill, and mount with 2-1/2 in screws through the backer using cleats or a French cleat for easy alignment. Finish by touching up edges and checking the level from both sides.
Editor's noteUse painter’s tape for the border line and pull it while the paint is still slightly tacky for razor edges.
Skip thisDon’t mount it with drywall anchors — it makes the whole look feel wobbly.
2. Upholstered foam headboard with knife-edge trim
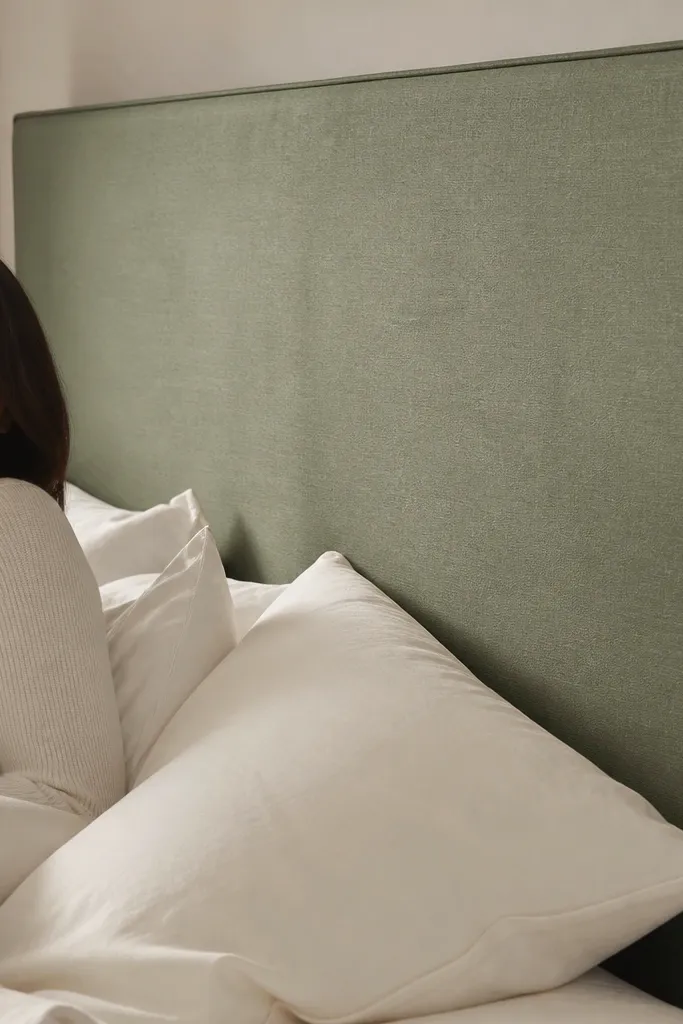
If you want the most “real furniture” look for the least skill, this is it. A foam layer under fabric makes the surface look plush and expensive, and knife-edge trim keeps the perimeter crisp instead of puffy. Choose a medium-weight upholstery fabric, not thin drapery — it won’t sag and wrinkle. This headboard gives your bed a comfortable backrest and makes the room feel warmer because fabric absorbs light. It’s beginner-friendly with basic stapling and careful measuring.
Step 1: Cut a rigid backer board like 1/2 in plywood to size, then add foam using 1-2 in upholstery foam on the front. Wrap the foam smoothly, then staple fabric to the back with even tension, pulling from the center outward. Step 2: Add knife-edge trim by sewing or attaching piping-like trim along the perimeter so the corners stay sharp. Step 3: Mount using a cleat system or two sturdy brackets hidden behind the backer, securing into studs with screws. Press the fabric cleanly into corners and trim excess so the back lays flat.
Staple in short bursts — lift and re-tension when needed so you don’t get diagonal puckers.
Skip lightweight fabric; it will show foam bumps and looks lumpy.
3. Vertical slat pine headboard with warm stain
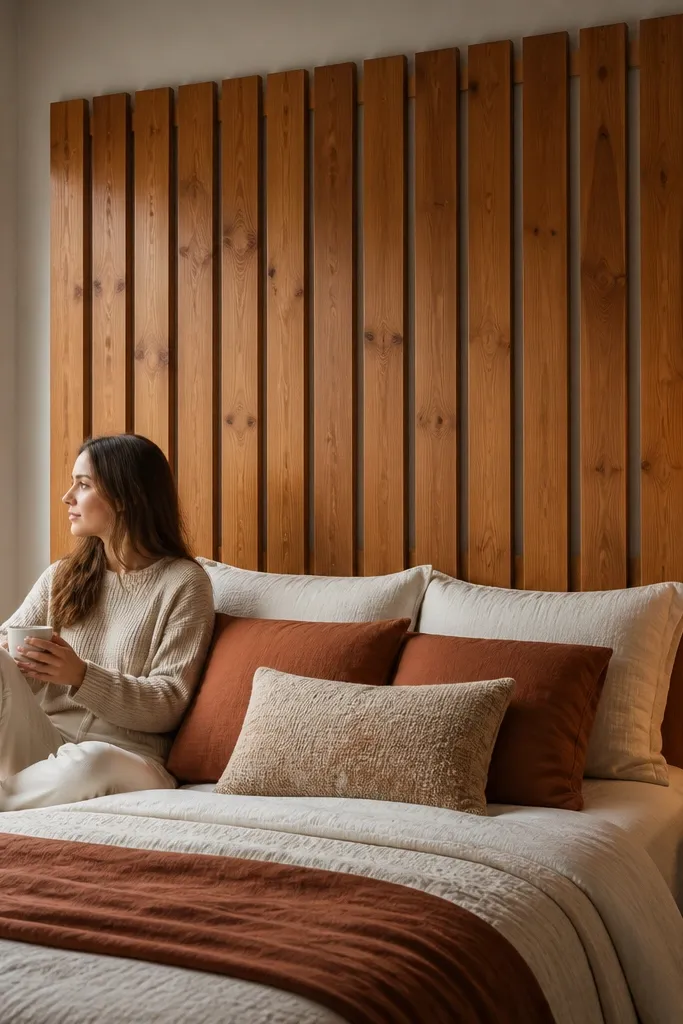
Wood slats give you instant texture and a high-end look without complex joinery. Vertical lines visually stretch the bed area, and a warm stain makes the slats look like they belong in a boutique hotel. This design is also forgiving: slight gaps between slats still look intentional. It’s great for renters because you can mount it with a wall cleat and remove it later. Beginner build, because it’s mostly cutting strips and screwing them onto a back frame.
Step 1: Build a simple back frame from 1x2s, sized to your headboard width and height, and add cross supports so the slats don’t flex. Cut slats from 1x3 boards ripped to uniform widths, then space them evenly with spacers like 1/4 in blocks. Step 2: Stain the slats before assembly if you want faster cleanup, then screw them onto the frame from the back. Step 3: Seal with a matte polyurethane for a photo-friendly finish that doesn’t glare. Mount into studs with a French cleat or two horizontal cleats at the top and mid.
Editor's noteSand slats to 180 grit and apply stain in the same direction every time so the tone stays consistent.
Skip thisDon’t skip sealing; raw wood scuffs fast and looks worn in photos.
4. Reclaimed door headboard with arched detail

A reclaimed door headboard looks like you sourced it from a vintage shop, even when you build it yourself. The wood grain and existing panel details add depth, and the arch shape makes it instantly more decorative than a flat board. This works especially well if you want a cozy, farmhouse-meets-modern vibe. It also hides wall imperfections because the door panel sits proud and covers more surface area. Beginner-friendly if you keep the project to a simple cut and secure mounting.
Step 1: Find a door panel or old door slab that fits your bed width, then decide whether to keep the existing hardware holes or fill them with wood plugs. If you want the arch, trace the arch on the top and use a jigsaw to cut a clean curve, then sand smooth. Step 2: Mount it with two wall cleats or lag screws into studs through the back rails, not through the face. Step 3: Clean, then finish with a clear matte sealer or a dark stain plus satin topcoat so the grain shows without shine. Add a small trim strip along the sides if the door edge looks rough.
Fill dents and screw holes with wood filler and sand flush before staining so the finish looks even.
Avoid high-gloss finishes; they highlight imperfections and glare under lights.
5. Macramé and dowel headboard wall frame

This is for the bedroom that needs softness without building a heavy structure. A wooden dowel rail with macramé panels creates a layered look that reads cozy and artsy in photos. It’s also light and easy to mount, which matters if your wall is tricky or you don’t want to wrestle with large boards. Pick neutral cords like natural cotton or oat, then add a second texture like a slim wood rod at the bottom edge. Skill level is beginner-friendly: tie-off and hang, then straighten.
Step 1: Choose a dowel sized to your bed width minus 2-4 in on each side, then attach two hanging brackets into studs. Step 2: Use pre-made macramé panels or sections, then tie them evenly along the dowel with consistent spacing and knot tension. Step 3: Add a second dowel at the bottom if your pieces need weight to hang straight. Finally, adjust the panel lengths so the lowest point lands around pillow height.
Lay everything on the bed to check symmetry before you hang — it’s faster than fixing knots in midair.
Don’t mix cord thicknesses; thin and thick cords create uneven volume.
6. Fabric-covered battens with a padded top rail
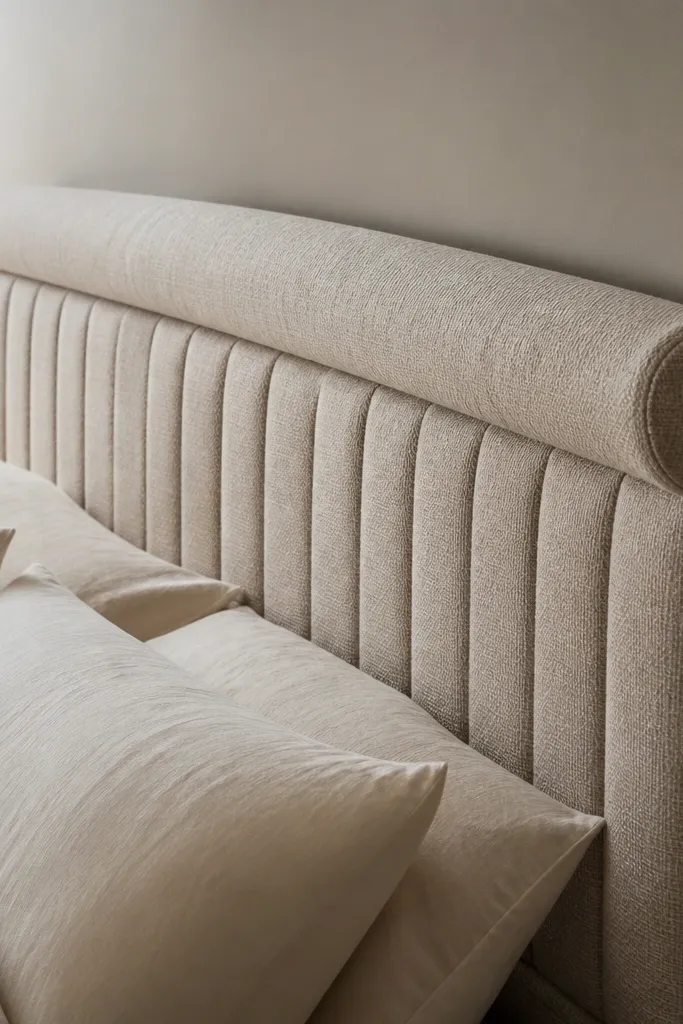
This is a clean “designer” look that hides the fact you’re using simple materials. Wooden battens create vertical structure, while a padded top rail makes the headboard feel soft against your pillows. Cover the battens in fabric so the whole piece looks upholstered, not like a DIY wood panel. It works in modern bedrooms because the lines are straight and the surface is one consistent color. Beginner build with basic stapling and careful alignment.
Step 1: Cut a backer frame from 1x3 or 1x2 and add vertical battens spaced 2-3 in apart, then cut a thicker top rail from 2x2 lumber or stacked boards. Step 2: Wrap each batten with fabric by stapling to the back side and pulling tight, then wrap the top rail with foam and fabric like a small ottoman. Step 3: Mount the whole assembly to studs using a cleat or L-brackets so the headboard sits flat. Finish by trimming fabric edges neatly along the backer frame.
Editor's noteUse a staple gun with a consistent staple size so the fabric doesn’t show ripples around each batten.
Skip thisDon’t skip a backer; loose battens warp and look crooked.
7. Recessed panel headboard with 1x2 grid
A recessed grid gives you depth without needing fancy tools. The 1x2 framework makes clean squares that read modern and architectural, and it looks great in both bright and low light. Paint the recesses one color and the frame another for a subtle two-tone effect. This headboard also works well if you don’t want fabric or stain maintenance. It’s beginner-friendly: cut, screw, fill, sand, paint.
Step 1: Build an outer rectangle frame and then attach 1x2 grid pieces to create square recesses, keeping spacing even. Use 1/2 in backer plywood so the grid stays rigid. Step 2: Prime, then paint the recess field color, let it cure, and paint the frame color last for crisp edges. Step 3: Mount using a French cleat behind the backer, screwing into studs. Check the face for drips and fix any edge bleed with a small angled brush.
Editor's noteUse foam roller for large areas and a small angled brush only at grid edges so you don’t get streaks.
Skip thisDon’t eyeball square spacing — uneven grid lines show immediately in photos.
8. Cane webbing headboard with rattan panels
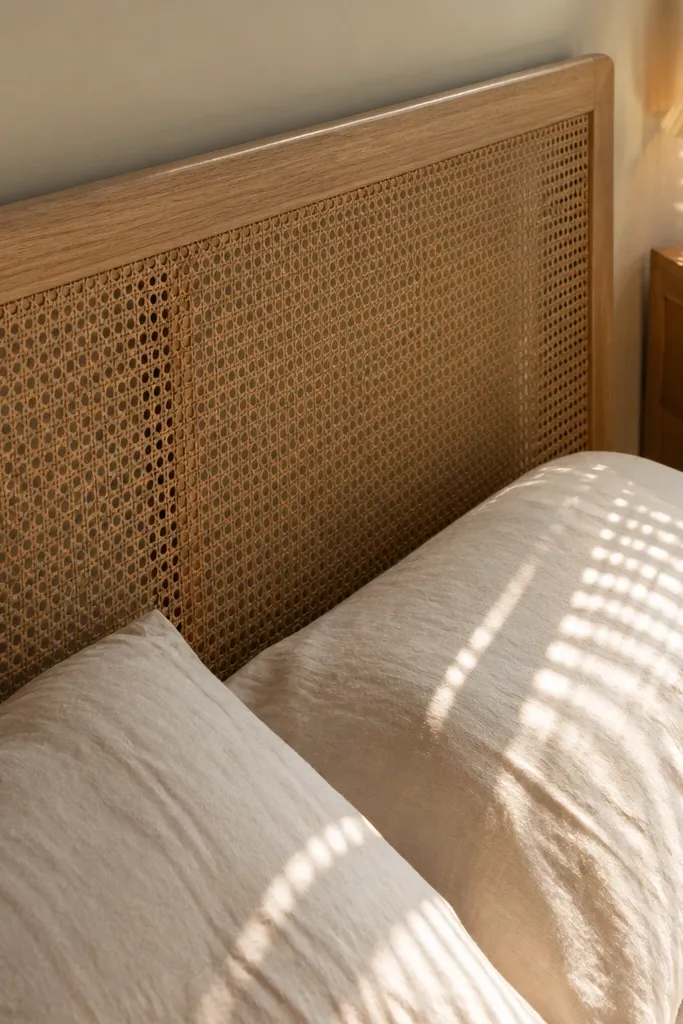
Cane webbing looks airy, expensive, and it adds a breathable texture that’s hard to fake with paint. This headboard works especially well in small rooms because the pattern doesn’t feel heavy. You build it with a simple wood frame, then stretch cane or rattan sheet over it. The lightness makes it photogenic — you get shadow patterns on the wall when the room light hits. Beginner-friendly if you can measure and staple straight.
Step 1: Build a wood frame from 1x2 lumber sized to your headboard, then add two horizontal support rails to prevent sag. Step 2: Cut cane or rattan sheet to overlap the frame by a few inches, then stretch and staple on the back, working from the center to corners. Step 3: Trim the back cleanly and mount into studs with cleats or brackets. Finish the frame with a light stain or whitewash and a matte clear coat.
Soak cane sheet in water for 10-15 minutes before stretching if it fights you — it relaxes and tightens as it dries.
Don’t over-stretch; too tight can warp the frame.
9. Thick felt panel headboard with button-like tacks
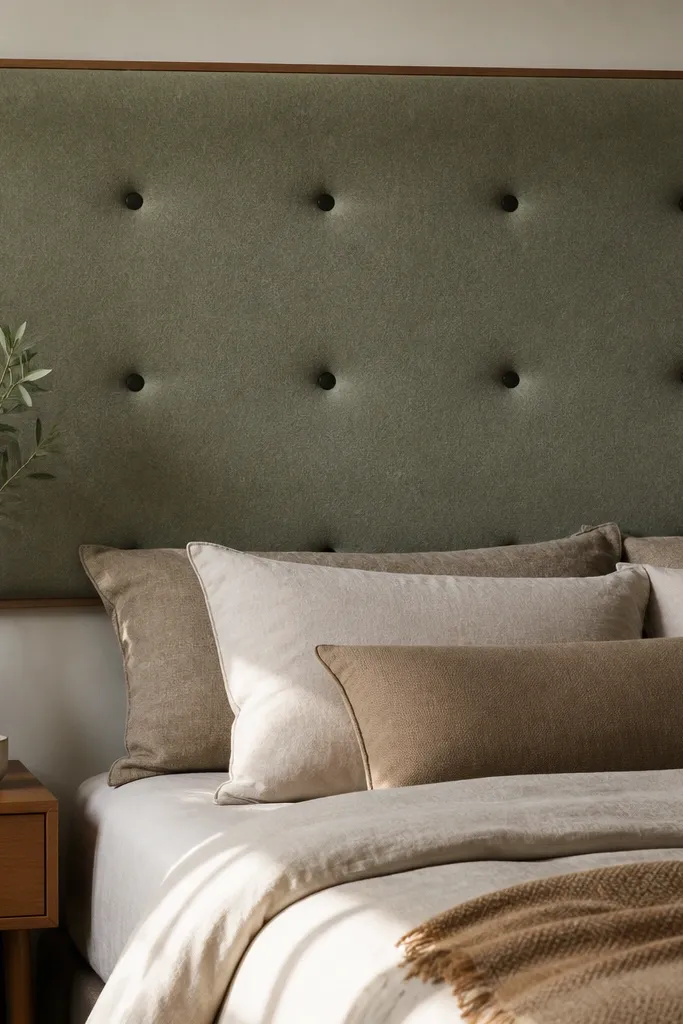
Thick felt makes a headboard that looks soft and modern without sewing a full upholstery job. It’s also forgiving over small wall bumps because felt hides imperfections better than fabric on foam. The subtle tack pattern keeps it from looking like a simple sheet. Choose a muted color like sage, clay, or charcoal so it looks calm and adult. Beginner-friendly because cutting felt is easy and mounting is straightforward.
Step 1: Cut a rigid backer board and wrap it with thick felt, stapling the felt to the back with consistent tension. Add a second layer if you want extra thickness for a plush look. Step 2: Mark tack positions with painter’s tape squares, then install decorative upholstery tacks through the felt into the backer. Step 3: Mount with a cleat into studs and keep the top edge perfectly level. Trim the back edge so it doesn’t bulge.
Use a small measuring square to keep tack rows level — felt shows misalignment quickly.
Avoid fuzzy felt that sheds; it looks messy and pills fast.
10. 3D wall molding headboard using foam blocks
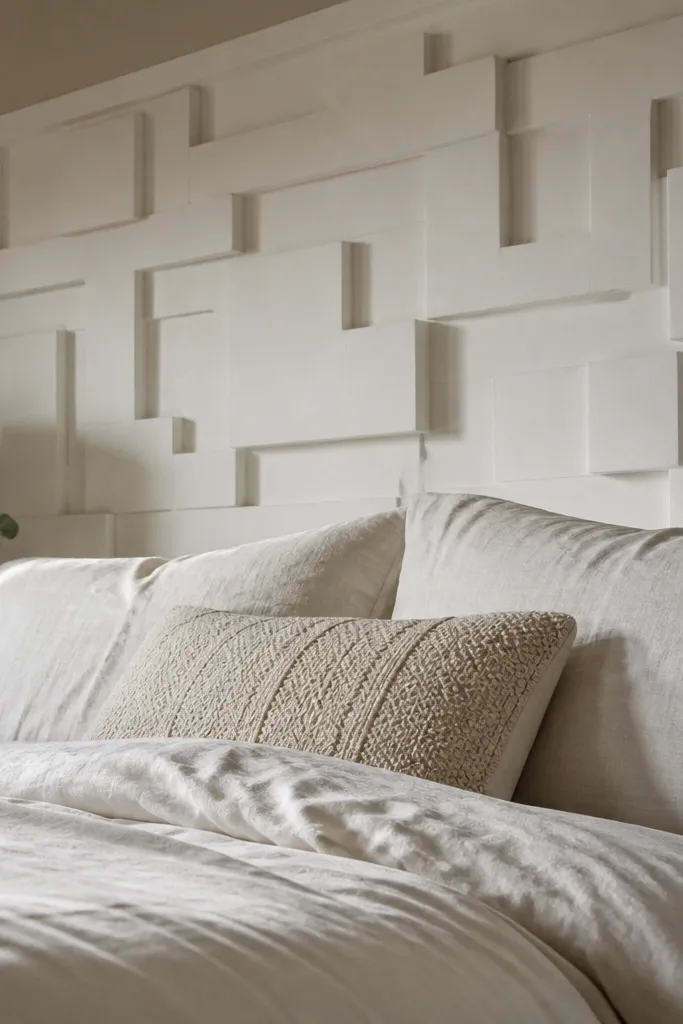
If you want a dramatic look with minimal woodworking, use foam wall molding blocks. You get a raised pattern that catches shadows and looks expensive, and you only need to glue and paint. Off-white with a subtle satin finish is the cleanest choice because it shows the relief without glare. This headboard is great for people who hate stain mess and don’t want upholstery. Beginner build: assembly is glue, putty, and paint.
Step 1: Create a flat backer panel from plywood or MDF, then plan a geometric layout like a staggered brick pattern or a centered square. Step 2: Glue foam molding pieces onto the backer using construction adhesive, then fill gaps with lightweight spackle and sand smooth. Step 3: Prime and paint in one main color, then add a second color to edges only if you want contrast. Mount into studs with a cleat so the relief stays centered and doesn’t sag.
Editor's notePress molding pieces with a straightedge while adhesive sets so the pattern stays level.
Skip thisDon’t skip priming; foam can soak paint unevenly.
11. Barn door style headboard with sliding rail look
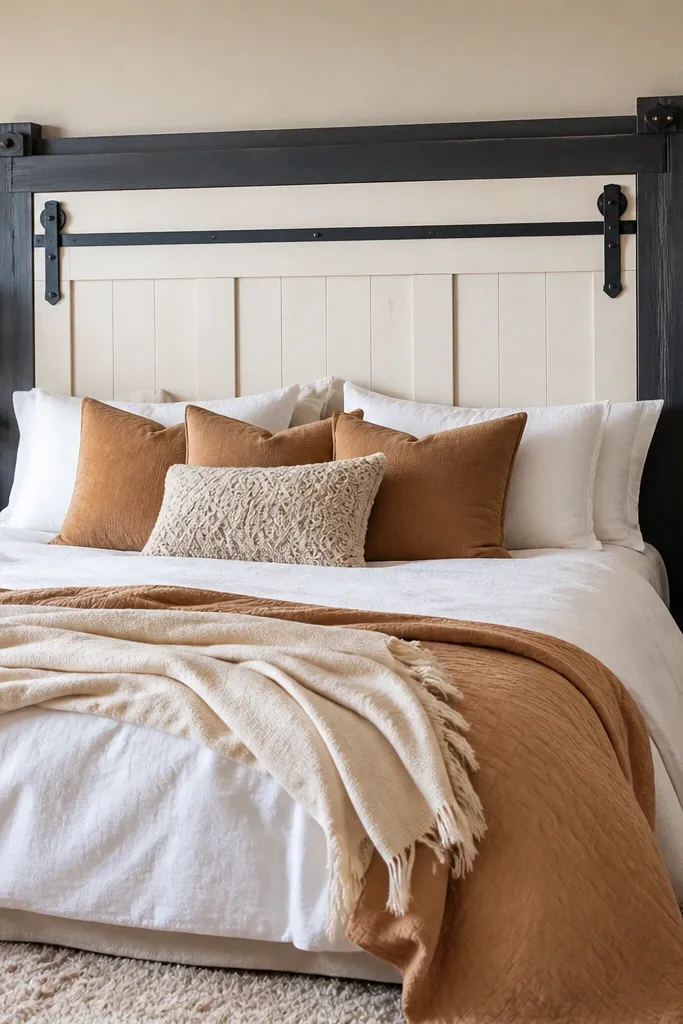
This design gives you instant character because it looks like a built-in door panel. The trick is using a simple panel construction and adding a rail detail at the top and sides so it reads as a barn door even if it’s just painted plywood. It’s photogenic because the hardware-style accents create a focal point. Choose a warm gray or deep green paint to keep it from reading “crafty.” Beginner-friendly because it’s mostly board assembly and paint with a few metal-looking details.
Step 1: Build or cut a flat headboard panel from plywood, then add side trim and a top rail using 1x2 boards for the barn-door feel. Step 2: Add faux hardware: install short black metal brackets and a rail bar across the top edge, screwed into the frame. Step 3: Prime and paint the whole piece, then finish with matte clear. Mount with a cleat into studs and keep the rail centered above the bed.
Editor's noteUse matte black hardware paint or buy pre-finished matte brackets so the metal doesn’t look shiny in photos.
Skip thisAvoid glossy paint; it makes the faux hardware look cheap.
12. Oversized linen tufted headboard panel
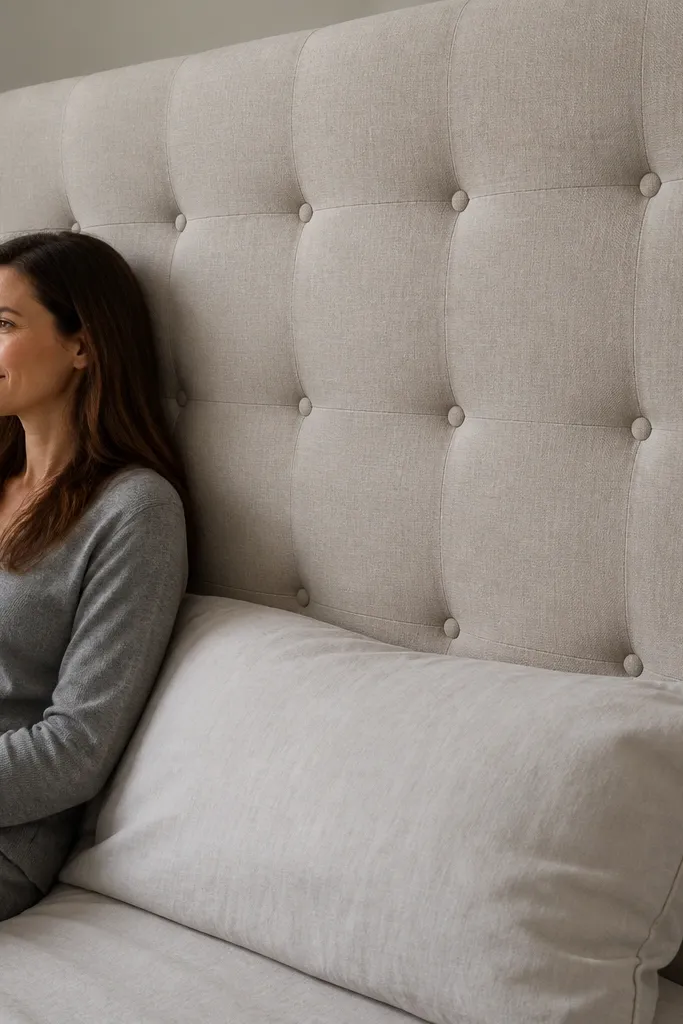
Tufting makes a headboard feel like a real upholstered bed frame, even when you build it as one panel. Linen looks best for this because the texture hides minor DIY seams, and the tufting lines give structure. Keep tufting subtle: fewer buttons look cleaner than a dense pattern. This project is good for a neutral bedroom that needs a focal wall. Beginner-friendly if you use a simple foam-and-backer method and tie tufts with upholstery thread.
Step 1: Cut a plywood backer, attach foam, then wrap with linen fabric, leaving extra fabric at the back for securing. Step 2: Mark tuft points, drill small holes through the backer at those spots, then pull upholstery thread through and knot at the back to create the indent. Step 3: Attach buttons by covering them with fabric or using simple fabric-covered buttons, then mount with a cleat into studs. Trim excess fabric and staple tightly along the back perimeter.
Editor's noteUse a straight ruler to mark tuft points; crooked tuft rows ruin the “store-bought” look.
Skip thisDon’t over-tighten tufts; it distorts the fabric and makes waves.
13. Shiplap-style headboard with staggered boards
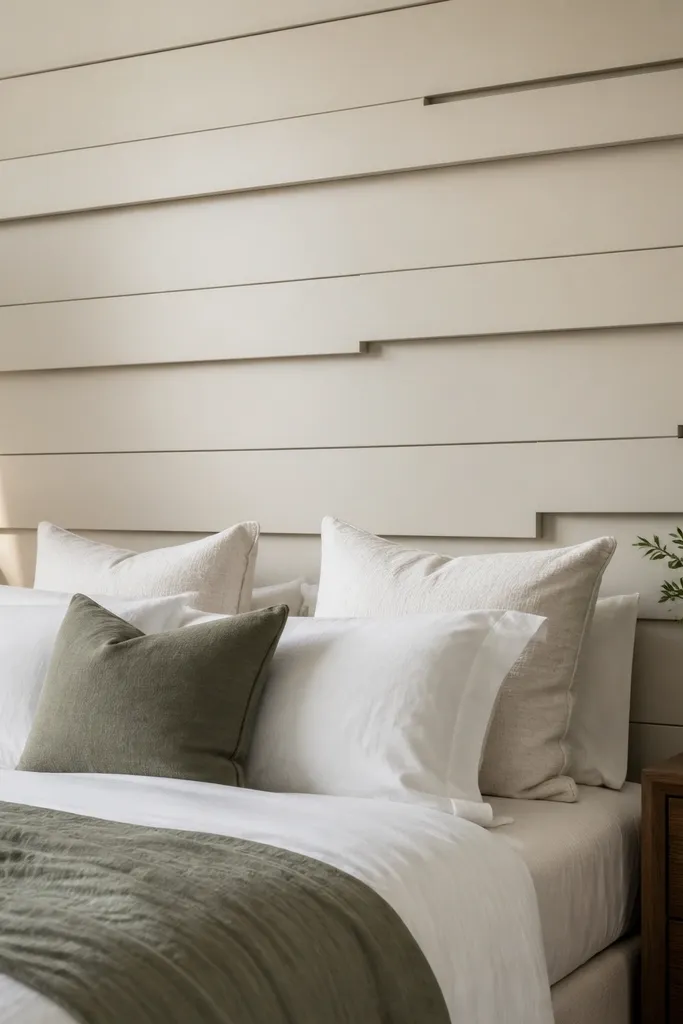
Horizontal shiplap brings cottage warmth, but staggered boards make it feel more modern than perfectly uniform planks. The look is photogenic because the board seams create repeating shadows. White or soft greige works best because it pairs with almost any bedding color. This headboard also covers the wall edge mess and makes the bed look anchored. Beginner-friendly since you’re basically building a flat wall panel.
Step 1: Build a back frame from 1x3s, then attach horizontal boards with small spacers so the seams stay consistent. Use boards ripped to uniform widths, then sand edges so the seams look clean. Step 2: Prime and paint with a satin finish for durability. Step 3: Mount into studs with a cleat at the top, and add two small center supports so the panel doesn’t bow. Let it cure fully before you hang bedding so you don’t scuff fresh paint.
Editor's noteUse a brad nailer if you have one; it keeps the board faces clean and reduces visible holes.
Skip thisDon’t nail too close to board edges; it can split and ruin alignment.
14. Oversized woven cane panel with dark wood frame
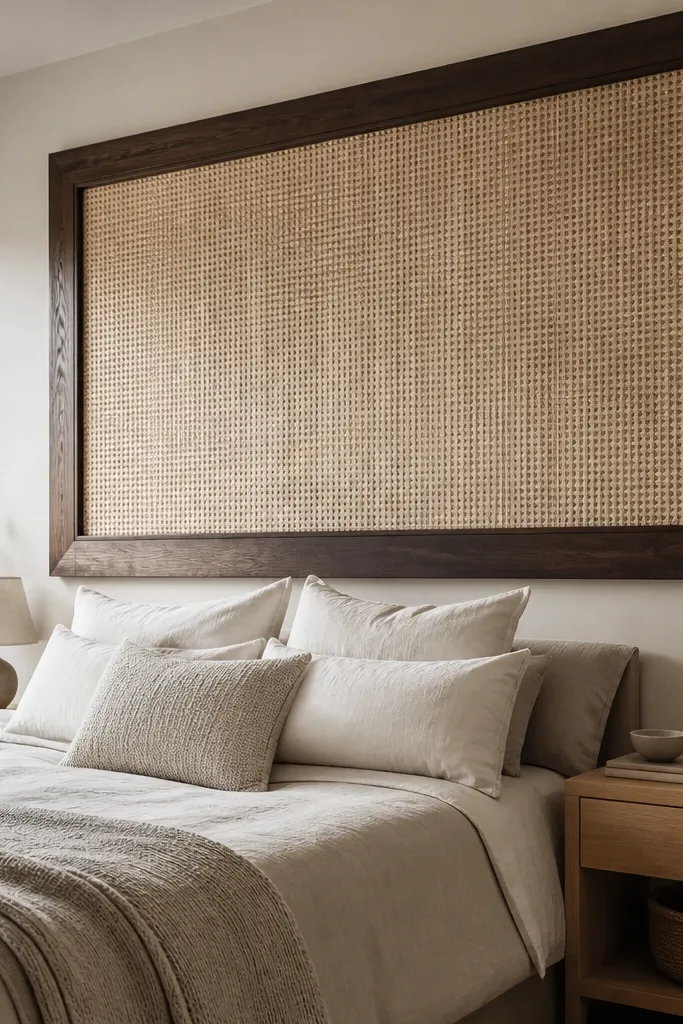
This is the “statement texture” option. A woven cane panel in a dark frame reads bold, and the weaving creates visual depth even from across the room. The dark frame makes your nightstand colors pop because it adds contrast near the bed. It also works well in small rooms because the pattern is airy, not bulky. Beginner build with a frame, stretching material, and a clean finish.
Step 1: Build a simple rectangular frame from 1x2 or 1x3 lumber, then add one or two crossbars behind to prevent sag. Step 2: Cut cane sheet to overlap and staple it to the back, pulling tight and trimming flush. Step 3: Stain the frame dark, then seal with matte clear to keep the wood from looking glossy. Mount into studs with a cleat so the panel stays flat and doesn’t twist.
Editor's noteSpray a thin coat of clear sealer on the frame only after the cane is fully stretched so you don’t stain the weave.
Skip thisDon’t use a light, warm stain with dark bedding; the headboard can blend and lose contrast.
15. Folded fabric accordion headboard on a rod
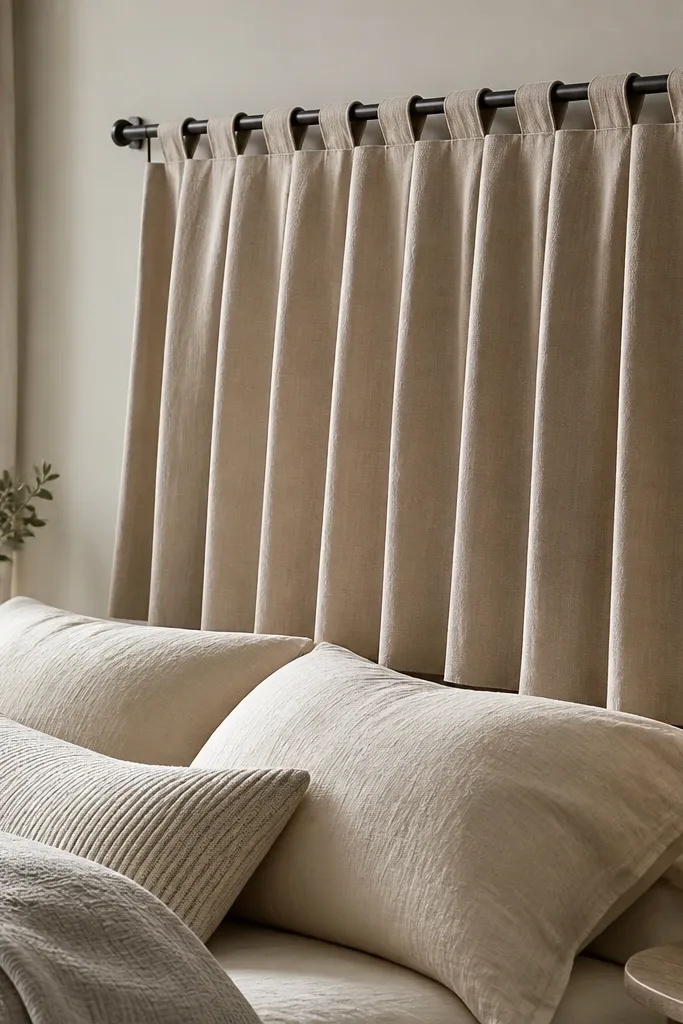
Accordion folds look tailored and expensive because the folds create a repeating pattern, not a flat sheet. Mount a top rod to studs, then attach fabric strips so the folds fall evenly across the width. This is great if you want a headboard that changes the room vibe just by switching fabric colors. It’s also easy to remove for washing if you use a removable tie system. Beginner-friendly with basic sewing or even strong fabric ties.
Step 1: Sew or tie multiple fabric strips to a top rod so each strip folds in an accordion pattern, spacing folds evenly. Choose medium-weight fabric like cotton canvas or linen blend so it holds creases without collapsing. Step 2: Add a bottom rod or tension cord to keep folds uniform at the bottom edge. Step 3: Mount the top rod into studs and adjust the hang so the lowest fold lands around pillow height. Steam the folds lightly before mounting for crisp lines.
Mark fold points with painter’s tape on a table first; it’s the fastest way to keep repeat spacing.
Avoid stretchy jersey; it won’t hold fold shape and looks sloppy.
16. Board-and-batten headboard with fabric backing
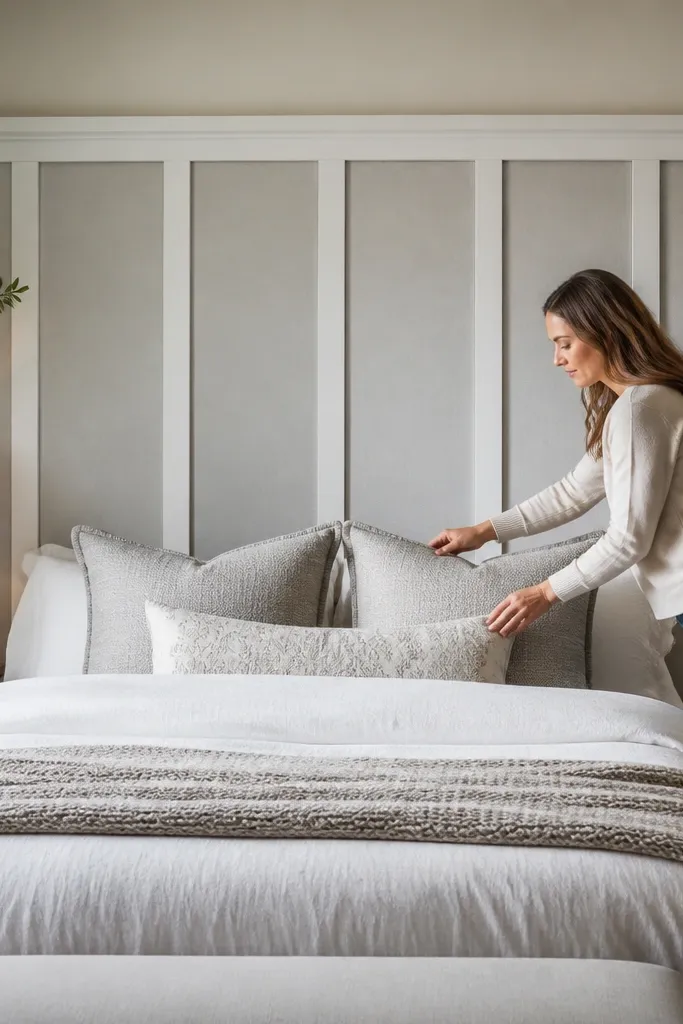
Board-and-batten is one of the cleanest ways to get architectural texture, and adding fabric behind it makes it softer and quieter. The wood battens create strong vertical lines, while the fabric backing gives a smooth surface so the wall doesn’t show through. Paint it in crisp white or a soft warm gray for the most flattering look. This is a great option if you want structure but still want a cozy vibe. Beginner build with straight cuts and simple stapling.
Step 1: Build a back frame, then attach vertical battens on top of a taut fabric backing stretched across the frame. Staple fabric first, then screw battens so the fabric stays smooth under the wood. Step 2: Fill nail holes, sand, and paint everything with a durable paint like cabinet paint or trim paint in satin. Step 3: Mount with cleats into studs, and add a center support if your width is more than 60 in to prevent bowing.
Stretch fabric tight like upholstery; slack fabric shows under the battens as ripples.
Don’t use thin fabric; it will telegraph wrinkles through the battens.
17. Leather-look vinyl headboard with channel stitching
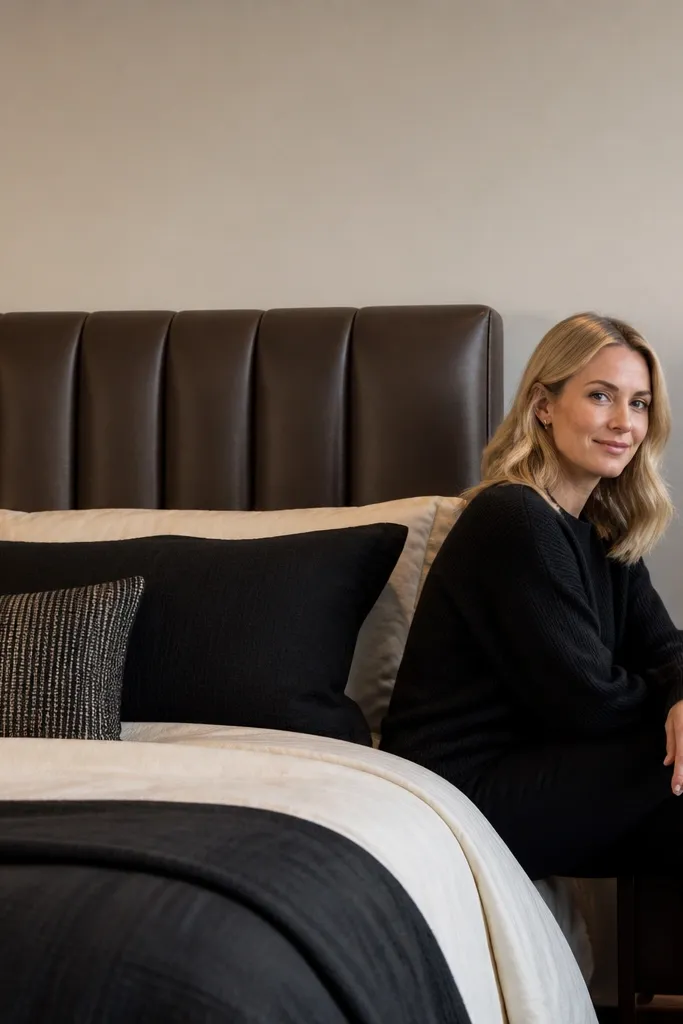
Channel stitching makes vinyl look like a tufted upholstered headboard, but the material wipes clean and looks sharp. A leather-look finish is photogenic because it catches light in a controlled way, especially in matte black or deep brown. This headboard works well in homes with kids or pets because it’s easier to keep tidy than linen. Beginner build with careful stapling and simple channel lines. You’ll get a sleek, modern backrest.
Step 1: Cut a backer board and foam pad, then wrap with vinyl, stapling to the back with tight tension. Step 2: Mark channel lines, then stitch or use upholstery pins to create channels by pulling fabric/vinyl tight into shallow indents. Step 3: Add a perimeter border strip for a tailored edge, then mount with cleats into studs. Finish by trimming excess vinyl and sealing any raw edges on the back.
Editor's noteUse a walking foot or hand-stitch for cleaner channel lines; vinyl shifts under a normal presser foot.
Skip thisAvoid glossy vinyl; it can look plasticky under overhead lighting.
18. No-sew faux headboard using framed fabric panels
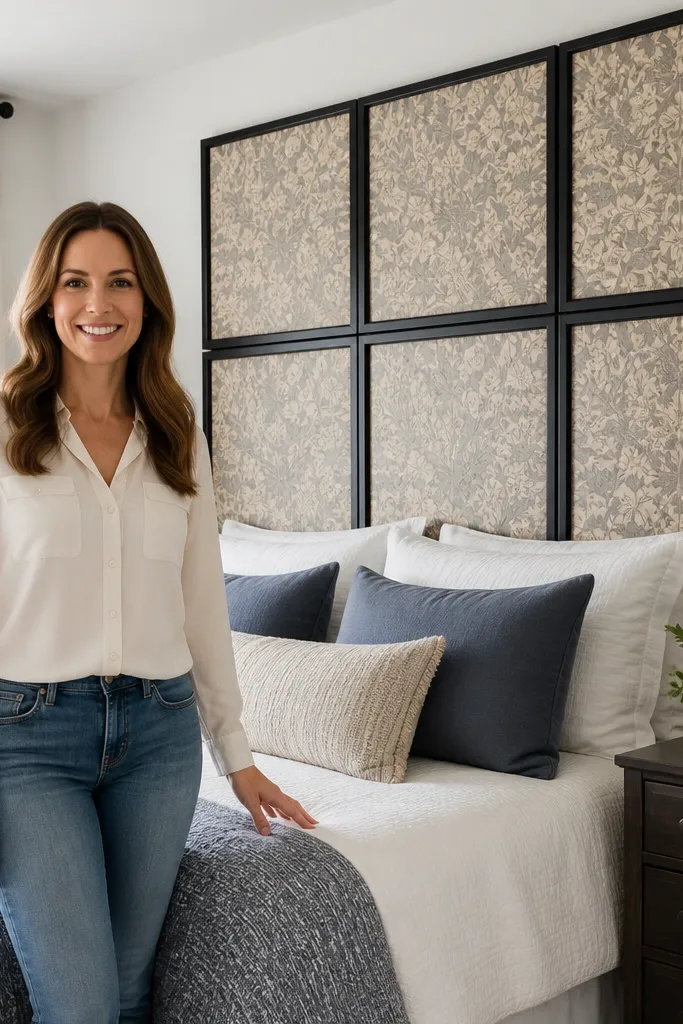
This is the easiest beginner-friendly headboard ideas option that still looks premium. Instead of upholstering a full padded piece, you frame fabric panels and mount them like a gallery wall — but scaled for a bed. It looks curated because the frame edges are straight and fabric stays taut. Pick one fabric and repeat it across two or three panels for a clean rhythm. Works for renters because mounting can be done with wall brackets and removed later.
Step 1: Build simple picture-frame style frames from 1x2 boards, then cut fabric to wrap around the back and staple it tight. Step 2: Create matching panels, usually 20-24 in tall each, then arrange them side-by-side to hit your target height. Step 3: Mount with French cleats on the back of each frame or a single cleat rail that holds them aligned. Level each panel and check the seams where they meet.
Editor's noteUse fabric with a stable weave so it stays taut after stapling; thin prints sag.
Skip thisDon’t use stretchy fabric; it puckers at the corners and looks messy.
19. Tube-style rope headboard with wood uprights
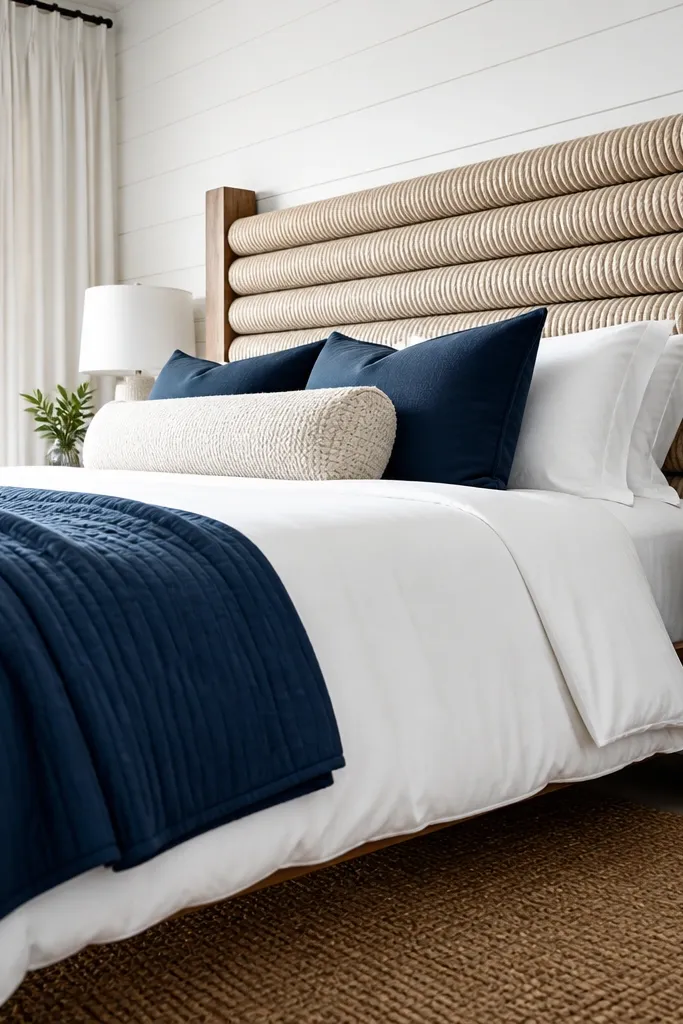
Rope wrapped on vertical uprights creates a coastal-meets-modern texture that looks handcrafted but still clean. The rope adds depth and shadows, and the upright structure keeps it from looking like a random knot wall. Choose thick natural rope and a simple stained frame so it reads intentional. This headboard is also light enough for beginner mounting and doesn’t require power tools beyond basic cutting. Great for a bedroom that needs warmth without heavy wood.
Step 1: Cut a back frame and add two or more vertical uprights spaced evenly across the width. Step 2: Wrap rope around each upright in tight coils, then glue or tack the rope at the back side to keep it from slipping. Step 3: Fill the front evenly so coils align, then mount into studs with cleats. Finish the rope ends by tucking and securing on the back where they won’t show.
Pre-measure rope length per upright and cut a few extra; running short makes the spacing uneven.
Don’t wrap too loosely; loose rope sags and looks unfinished.
20. Rustic picture frame headboard with woven backing
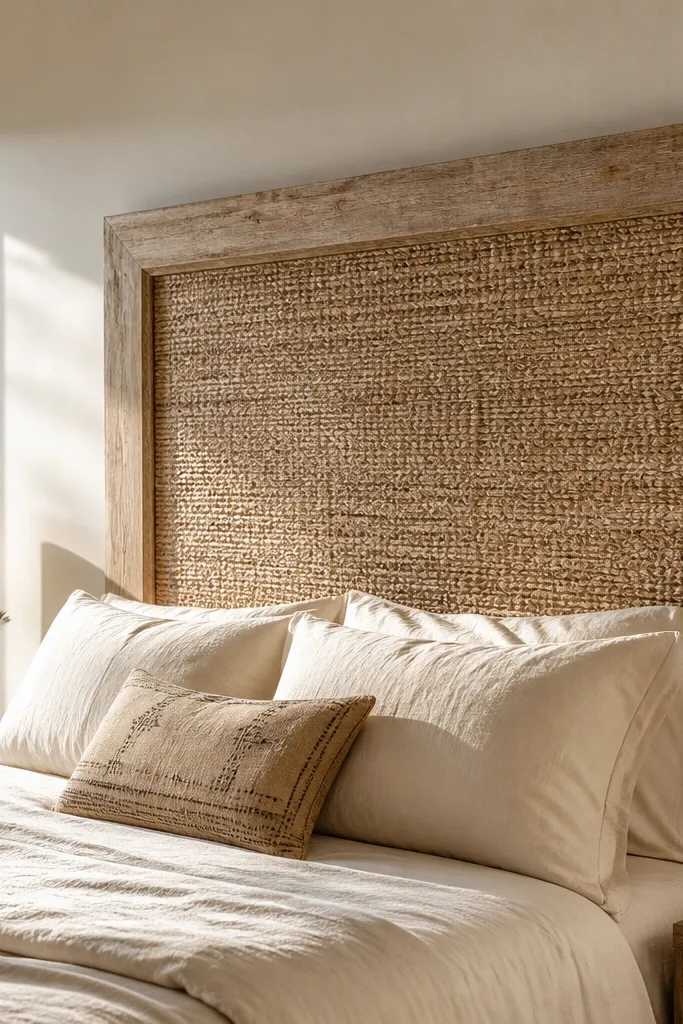
A picture-frame style headboard is a clever way to get a big focal piece without complex upholstery. The outer frame gives structure, and woven backing like jute mat or cane sheet gives texture that looks layered. If you keep the frame simple and the backing warm, the whole piece reads cozy and designed. This option is beginner-friendly because you’re building one frame and stretching one material. It also makes the wall look finished even if your paint isn’t perfect.
Step 1: Build an outer frame from 2x2 or 1x3 boards, then add a mid support if your width is large. Step 2: Stretch woven backing over the inside opening and staple it to the back of the frame, pulling tight and smoothing as you go. Step 3: Stain or paint the frame, then seal with matte clear. Mount with a cleat into studs so the frame hangs straight and doesn’t rotate.
Editor's noteSand the frame edges to soften them; sharp edges make rustic frames look harsh.
Skip thisAvoid glossy clear coat; it highlights imperfections and glare.
21. Reversible peel-and-stick wallpaper headboard panel
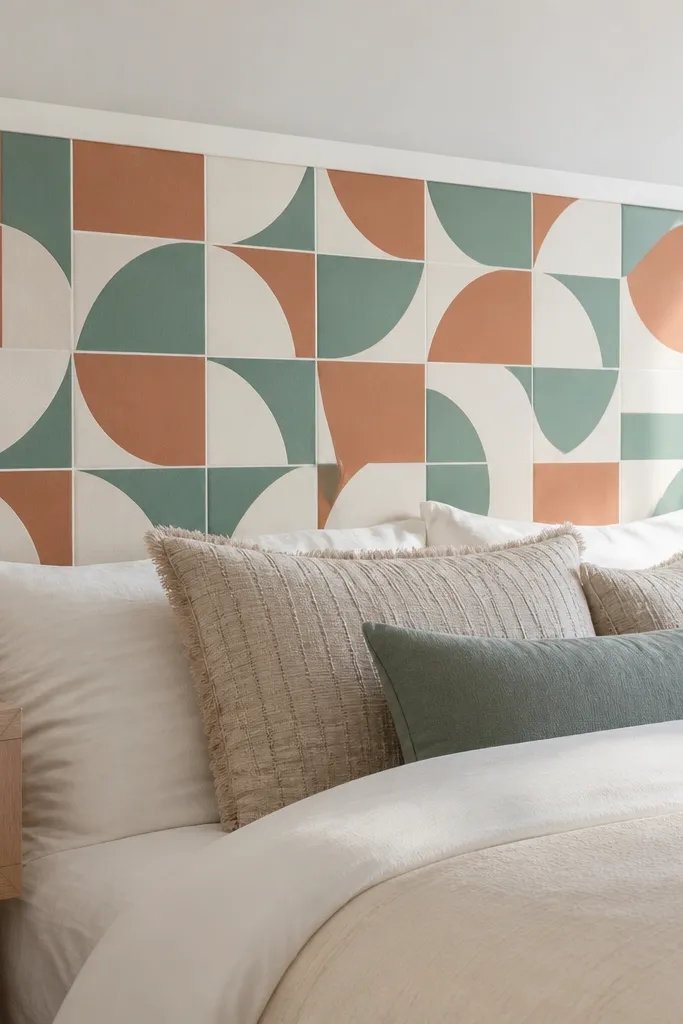
Wallpaper can make a headboard look like you decorated the whole room at once, but you need it on a flat, controlled surface. This idea uses a smooth panel with peel-and-stick wallpaper, then a painted border so it looks custom instead of like a temporary sheet. The look is bold and photogenic, especially with geometric patterns or botanical prints in muted tones. It’s beginner-friendly and reversible — swap the pattern later without sanding and repainting the whole wall. Great for renters who want impact.
Step 1: Cut a smooth panel like MDF to size and paint it the exact border color you want, then let it dry fully. Step 2: Apply peel-and-stick wallpaper starting from the center, smoothing outward with a plastic squeegee to avoid bubbles. Step 3: Add a trim border around the edges using thin MDF strips, then mount the finished panel with a cleat into studs. Seal the wallpaper edges with a clear matte edge sealer if the product allows it, so the corners don’t lift.
Cut wallpaper slightly oversized and trim with a sharp utility knife against a metal straightedge for clean edges.
Don’t apply wallpaper directly to textured drywall; bumps show through and ruin the look.
22. Pallet wood headboard with modern horizontal rails
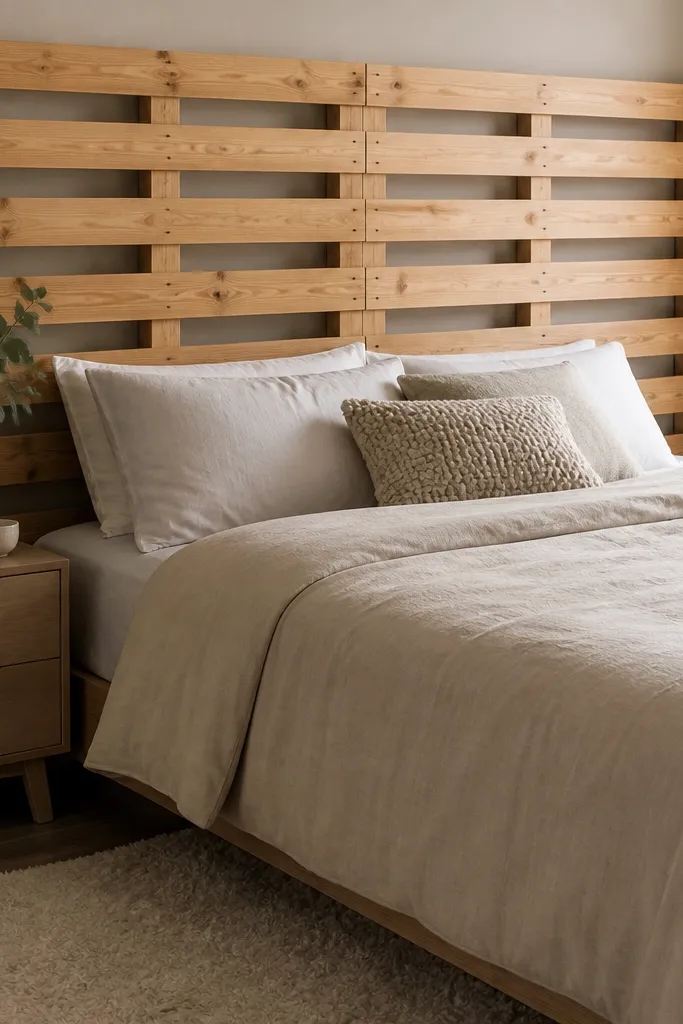
Pallet wood can look amazing when you stop treating it like rustic clutter. The trick is cleaning it up and using it as a structured surface with modern horizontal rails or a simple repeating pattern. A light stain or whitewash keeps the color from turning muddy, and it photographs well with neutral bedding. This headboard also gives you a chunky, grounded look that makes the bed feel heavier and more “placed.” Beginner build if you focus on straightening boards and using a solid backer.
Step 1: Disassemble pallets or use reclaimed boards, then sand thoroughly to remove splinters and smooth faces. Step 2: Build a back frame and attach pallet boards horizontally in a consistent order, using spacers to keep gaps even. Step 3: Add two horizontal rails at the top and bottom for structure, then stain or whitewash and seal with matte. Mount into studs with cleats and add a center support if the width is wider than 60 in.
Editor's noteSort boards by color before attaching so the headboard has a planned gradient instead of random blotches.
Skip thisDon’t skip sanding and sealing; raw pallet wood scratches and looks rough fast.
23. Folded wood veneer headboard with 2-tone paint blocks
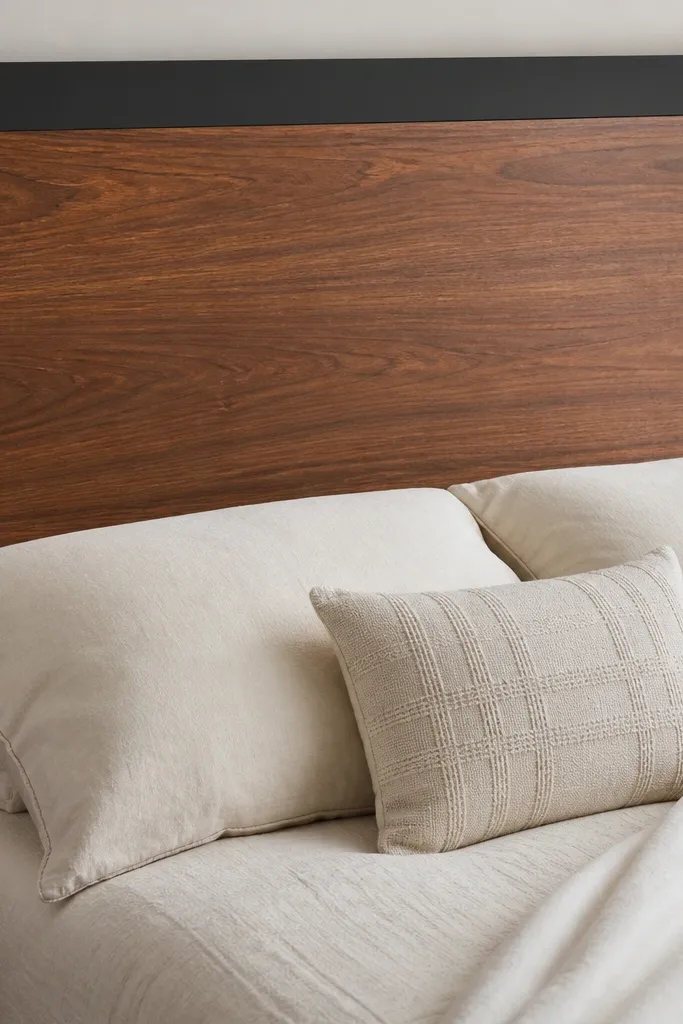
This design looks designer because it combines warm wood veneer with crisp painted blocks. The veneer gives texture and depth, while the painted sides create a clean frame that makes the bed look styled. It’s also a smart way to avoid complex carving — veneer does the heavy visual lifting. Choose a wood tone like walnut or natural oak, then pair with matte paint in off-white or charcoal. Beginner-friendly if you can cut veneer and adhere it neatly.
Step 1: Cut a backer panel and mark two painted side blocks and a central veneer area, leaving a consistent border gap. Step 2: Apply veneer to the center using contact adhesive or veneer glue, then trim edges with a sharp knife and sand lightly. Step 3: Paint the side blocks, then seal everything with matte clear for the veneer and paint-safe topcoat. Mount with a cleat into studs and keep the seams aligned at the centerline of the bed.
Use painter’s tape as a guide for the veneer edge so you don’t get glue squeeze-out into the paint area.
Don’t rush veneer trimming; jagged edges look obvious next to matte paint.
24. Soft channel headboard using pre-made foam sheets
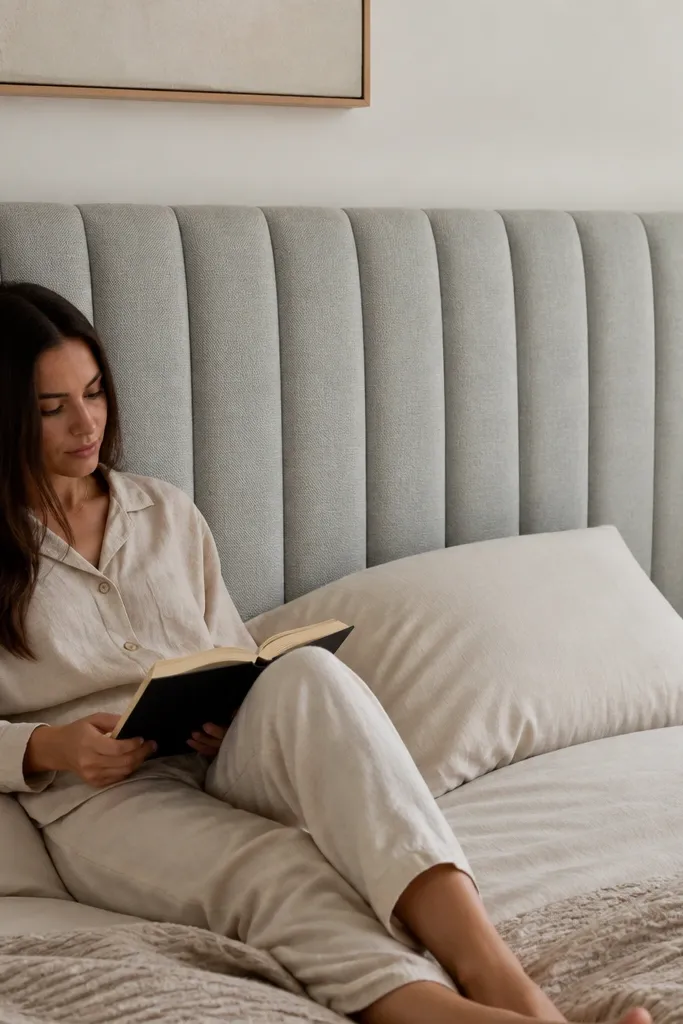
This gives you a cushy upholstered look without buying expensive upholstery foam kits. Pre-made foam sheets let you cut consistent shapes, and channel lines create structure that reads high-end. Keep it in one solid color so the channels are the visual feature. This headboard works in bedrooms that need comfort for reading in bed. Beginner build with cutting, stapling, and a simple fabric wrap.
Step 1: Cut foam sheets to your headboard size and stack them to reach about 1-2 in thickness on top of a backer board. Step 2: Wrap with fabric and staple to the back, then create channels by sewing or using upholstery ties at marked intervals. Step 3: Add a perimeter border strip, then mount into studs with a cleat or heavy brackets. Tighten fabric evenly so channels look straight across the panel.
Mark channel points with removable chalk and test one channel on scrap fabric before committing.
Avoid uneven foam thickness; channels will look lumpy on the surface.
25. Linen-wrapped pegboard headboard with brass hooks
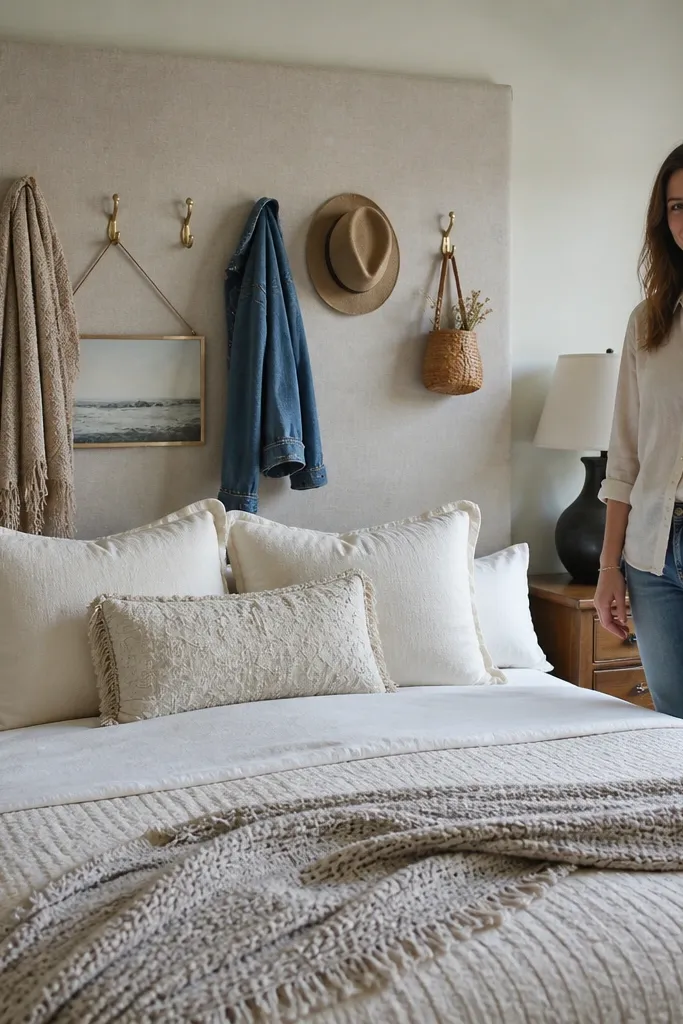
This one changes the whole wall fast because it looks intentional from across the room, not “DIY-ish.” The pegboard gives you a clean grid texture that reads as modern, and the linen wrap makes it soft against your pillows. You also get real function: hang a throw, a robe, or a couple of bags on brass hooks so the bedside area stays tidy. It’s beginner-friendly because the hardest part is stretching fabric evenly, not building a complicated frame. Plan on about a weekend for measuring, wrapping, and mounting. It fits bedrooms that want a neutral, tailored look with a practical storage moment.
1) Cut 1/2 in thick pegboard to your headboard size (a common starting point is 60 in wide x 26-28 in tall for a queen, then adjust to your bed). Lightly sand the pegboard edges, then wipe it clean. 2) Wrap the front with linen upholstery fabric (about 2-3 in extra on every side). Staple fabric to the back using a staple gun, pulling tight in small sections so the grid stays straight; trim excess and fold corners like you’re wrapping a gift. 3) Mount it to the wall with a French cleat or two heavy-duty wall cleats behind the corners so it hangs flat and doesn’t sag; add brass cup hooks into the pegboard holes after mounting. Finish by ironing the linen on low heat with a press cloth to remove wrinkles.
Use a straightedge and painter’s tape as a guide line while you staple so the fabric tension stays even across the top and sides.
Don’t mount pegboard with just small screws at the corners — it will bow and look uneven once the fabric is stretched.



