
1. Painted Cube Shoe Rack with Front Rails
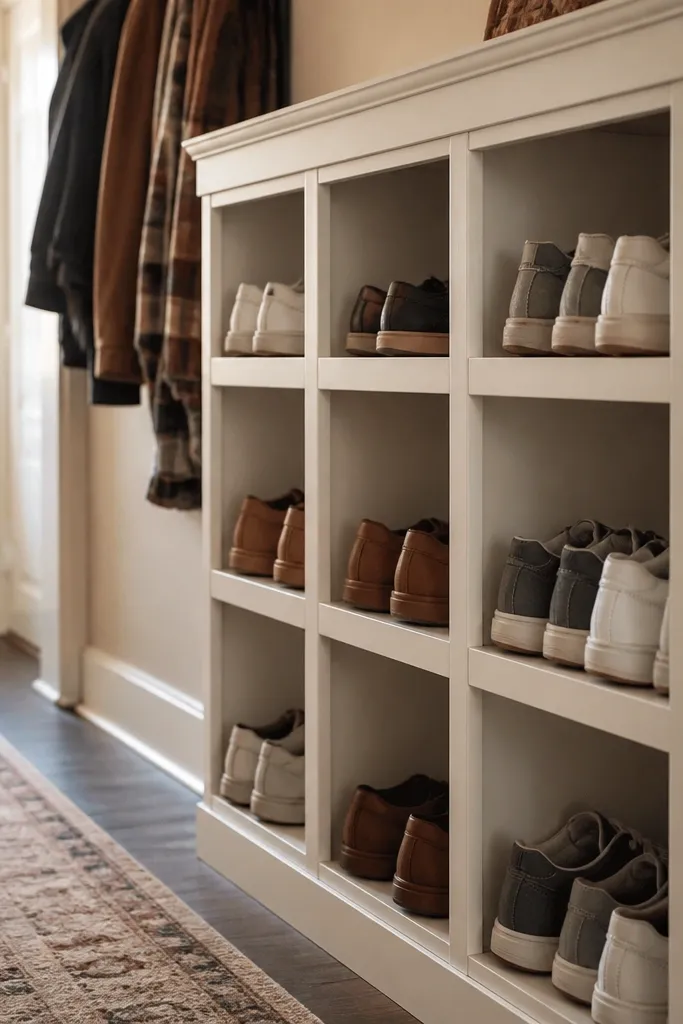
This design looks clean because it reads like a set of cubes, not open shelves. The front rails give you a clear “frame” line, so the rack looks finished even if the back isn’t perfect. Paint is the secret weapon for a good-looking shoe rack design on a budget: it hides small cut variations and makes the whole piece look crisp. Use a matte finish so it doesn’t glare under hallway lights. This rack fits entries, dorm rooms, and closets where you want shoes out of sight but still easy to grab.
Start with a 1x12 board and cut three shelf sections at the length you want (for a compact rack, 24 inches long works well). Cut two side panels and add three internal dividers so you get even rows. Build the frame first: glue and screw the side panels to the shelf rails, then add dividers with glue and small screws. Sand light areas, fill tiny gaps with wood filler, and prime if you’re painting (especially if the wood is knotty). Finally, paint two thin coats and let it cure overnight before loading shoes.
Tape the front rail edges before painting. It keeps corners sharp and reduces messy brush cleanup.
Don’t skip priming — bare wood and knots will drink paint and look patchy.
2. Walnut-Color Stain Slat Rack with Dowels
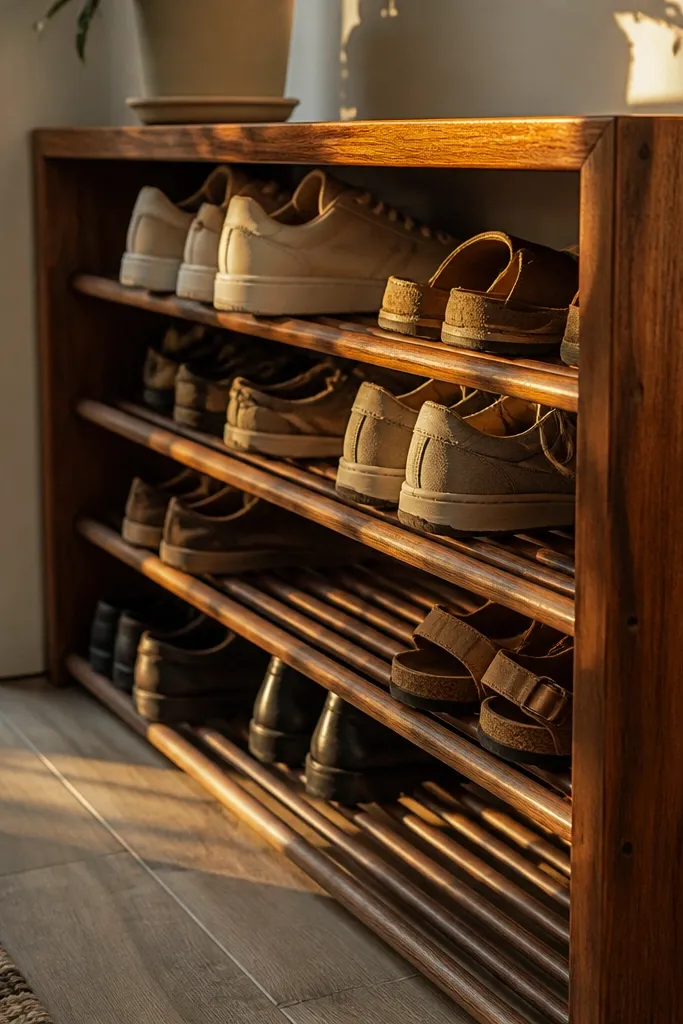
If you want a rack that looks warm and intentional, stain plus dowel dividers is the easiest path. The dowels make each row feel light and organized, so shoes don’t look like a pile. This design is also functional: the dowels let air move around the shoes, which helps if you store them between wears. The dark walnut-color finish makes the wood look expensive without needing expensive wood. It’s a great match for entryways with wood floors or neutral walls.
Cut two side rails and three horizontal shelves from 1x12, then cut four to six dividers from scrap 1x2 or thin strip wood. Drill evenly spaced holes in the shelves for dowels — mark with a spacing jig so every row lines up. Dry-fit the dowels first to confirm they slide in without forcing. Glue dowels into the shelves, assemble the frame, and clamp while the glue sets. Sand to 150 grit, wipe off dust, apply stain in thin coats, then seal with a clear matte or satin coat.
Editor's noteUse a scrap board as a drilling guide so your dowel holes stay perfectly perpendicular.
Skip thisDon’t varnish over stain without sanding between coats — the surface can turn sticky and uneven.
3. Two-Tier Bench Rack with Shoe Slots
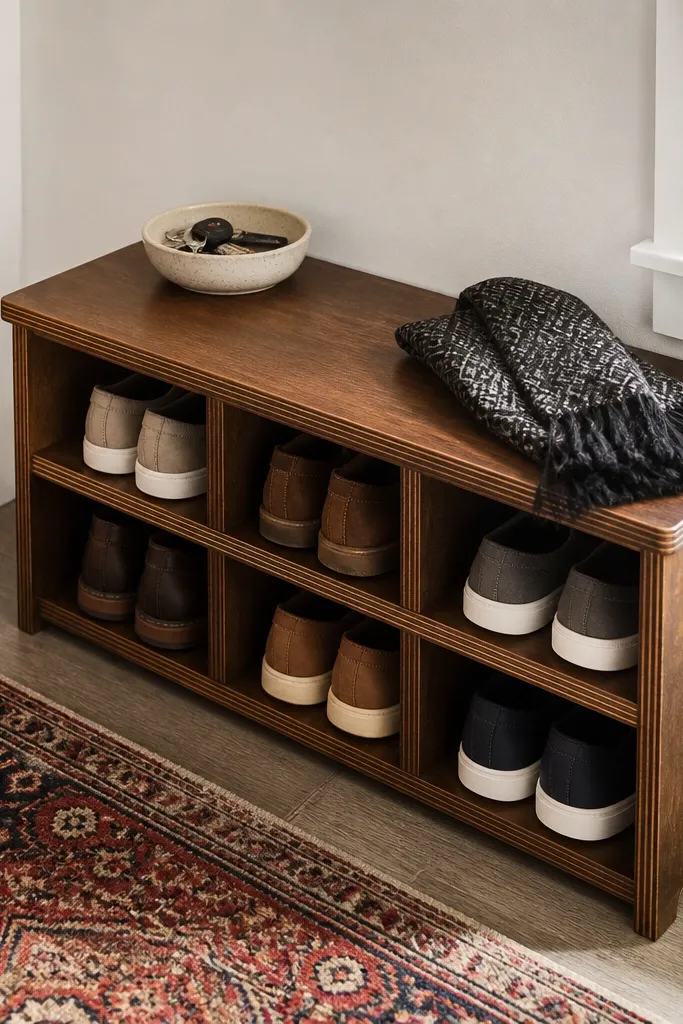
This one looks like furniture because the top reads as a bench. You can drop keys, a bag, or a folded scarf there, and the shoe slots keep everything from spilling. The aesthetic comes from the slot lines: they’re straight, evenly spaced, and visible from the entry. It also fixes a common problem: shoes sliding off open shelves. The slots give each pair a place to sit, so the rack stays neat even when you’re rushing.
Pick a length like 30 inches and cut a base frame from 1x6 or 1x4 scrap to keep costs down. Build a top surface panel from 1x12 or plywood offcut, leaving a front lip if you want extra grip. For slots, cut thin dividers (about 1-1/2 inch wide) that create 4 to 5 inch openings — dress shoes fit; sneakers need the wider option. Assemble the base, attach the top, then add dividers and a back brace so it doesn’t rack. Sand edges, then paint the top and stain or paint the slot dividers to create contrast.
Cut your slot dividers 1/8 inch longer than you think. Tight fit looks cleaner and stops wobble.
Don’t make slots the same width all the way through — use slightly wider openings for sneaker pairs.
4. Corner Lean Rack with Angled Back Support
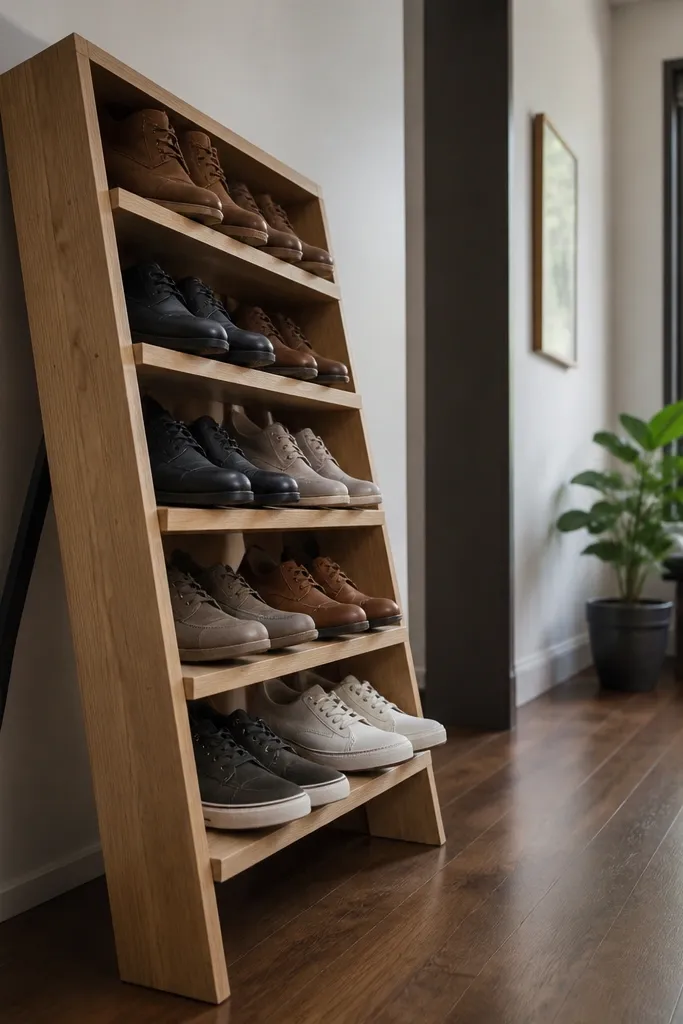
Corner racks look good because they use negative space instead of crowding a hallway. This design leans slightly, which makes shoes easier to see and grab. The angled back support hides the “why is this wobbling” problem and makes the rack look intentional. It also works well for slim spaces where a straight shelf eats your walking path. Finish it in a warm stain or paint it a soft off-white to match walls.
Cut two side pieces that form the lean angle — a simple way is using a triangular support block at the back. Build three shallow shelves from 1x12 cut to fit the corner width. Use a backing strip or a diagonal brace to anchor the shelf angles so they don’t drift. Attach shelves to the side pieces with glue and 1-1/4 inch screws, then add a back stop strip near the wall. Sand and finish like a normal shelf — two coats of paint or stain + clear coat.
Editor's notePre-drill every screw hole. Corner wood tends to split along the grain if you rush.
Skip thisAvoid skipping a back stop strip — without it, shoes pull the rack forward over time.
5. Staggered Ladder Rack with Two Sizes of Spacing
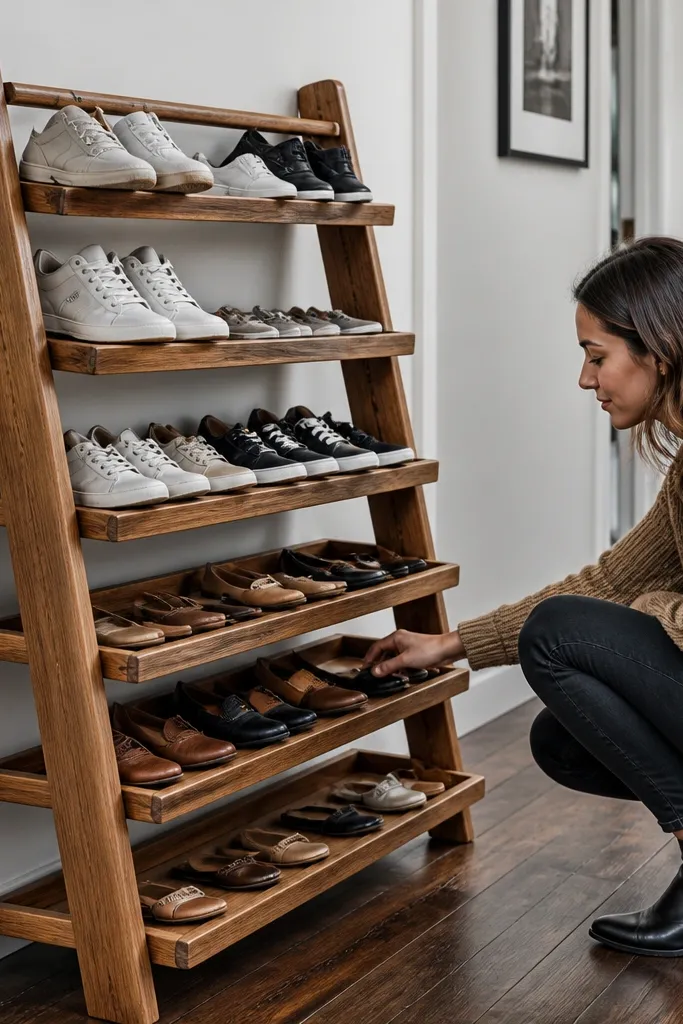
A ladder-style rack looks modern fast, and staggered shelves make it feel designed instead of DIY-ish. The trick is mixing spacing: one set of shelves uses tighter gaps for flats and sandals, while the wider gaps handle sneakers. Staggering also creates a rhythm that looks great in photos because each shelf line catches light differently. This is a good-looking shoe rack design choice if you want your shoes visible but still organized. It also makes grabbing a pair quick since everything sits at a slight angle.
Cut two long side rails from 1x6 or 1x8 scrap, then mark ladder rungs at two different spacings: about 4 inches for flats and 6 inches for sneakers. Cut rungs from 1x4 strips so they don’t look chunky. Assemble using wood glue and screws through the rails into the rung ends, checking square as you go. Add a top cap strip to tie the look together. Sand edges, then stain and seal or paint with a contrasting top color for a cleaner ladder silhouette.
Editor's noteClamp a straight scrap board along your marks before drilling — it keeps rungs aligned when you’re working one-handed.
Skip thisDon’t use the same spacing everywhere. If sneakers don’t fit, the whole rack looks messy in real use.
6. Vertical Slat Rack with Lift-Out Tray Bottom
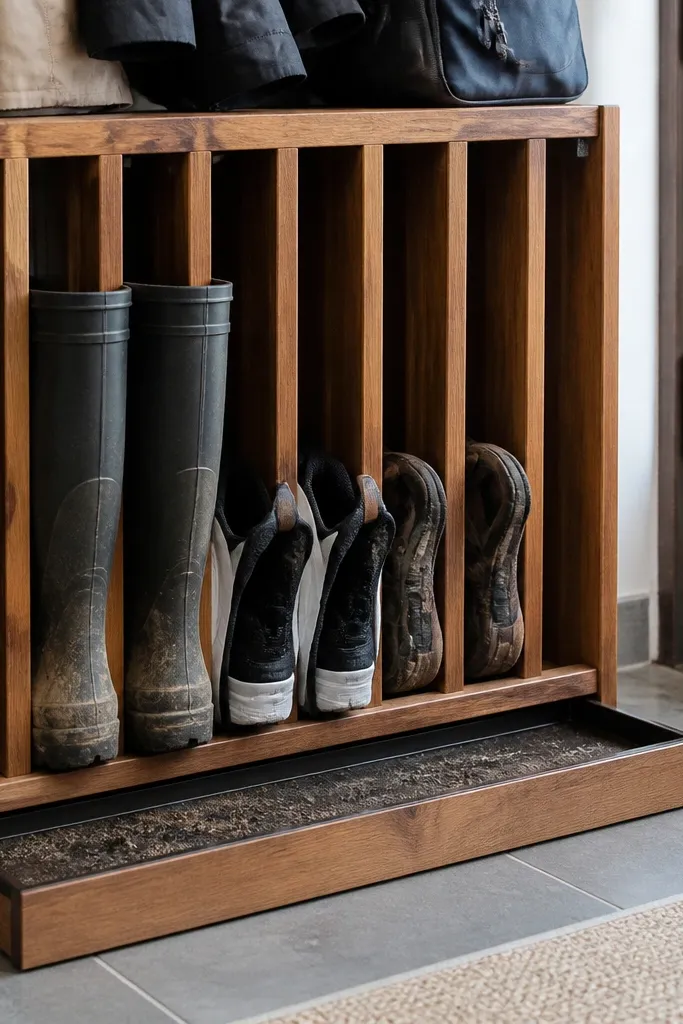
Vertical slats look sleek and keep shoes from tipping, and the removable tray bottom fixes the dirt problem. You get a clean front face that hides the mess while still letting shoes dry. This design is especially good if you store boots or athletic shoes with wet soles. The tray makes cleaning easy without moving the whole rack. It looks good because the slats create consistent lines and the bottom tray gives a tidy base.
Build two side frames from 1x6 and cut a back panel strip if you want extra stiffness. Add vertical slats from thin 1x2 strips spaced about 2-1/2 to 3 inches apart so shoes sit securely. For the bottom tray, cut a shallow panel and attach small cleats on the side frames to hold it like a drawer. Assemble slats with glue and brad nails or screws, then sand and finish. Finish the tray with a semi-gloss topcoat so it wipes clean.
Use the tray cleats as your measuring reference for slat height. It keeps the whole front face level.
Don’t leave slats too far apart. Wide gaps let shoes lean and ruin the clean look.
7. Over-the-Door Style Rack with Side Frames and Shelf Lip
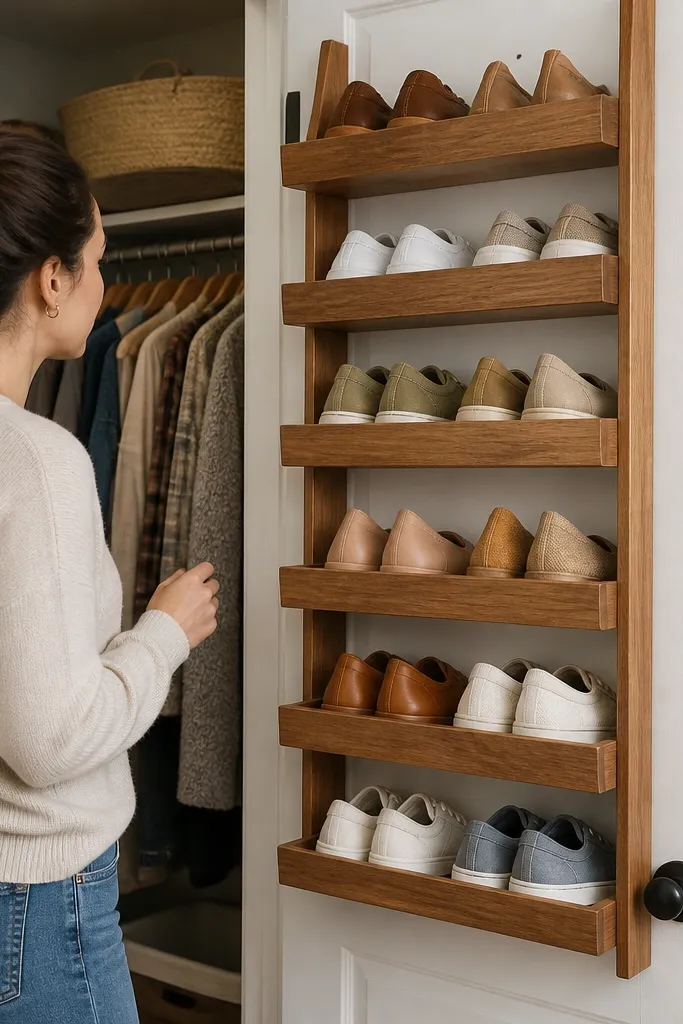
This is the “no floor space” option that still looks tidy. The shelf lip keeps shoes from sliding forward, and the side frames make it look like a real product instead of a hack. It’s ideal for renters because it doesn’t require heavy mounting into walls. The look is all about edges: crisp lip lines, straight sides, and consistent shelf spacing. If your entryway is tight, this design keeps shoes accessible without crowding the floor.
Cut two side frames from 1x6 and add a top lip strip that hooks over the door edge. Build three shelves from 1x12 cut to fit between the side frames, then add front stop strips to prevent sliding. Assemble with glue and screws, then add a small back brace so the shelves don’t sag. Sand everything smooth, then paint or stain for a clean finish. If you’re using it on a door, add felt pads on the contact points to protect the finish.
Measure your door thickness and edge clearance before cutting the top lip. A 1/4 inch mistake makes it wobble.
Don’t rely on friction alone. Felt pads protect the door but won’t stop movement under load.
8. Slim Bench Rack with Hidden Cable-Style Back Braces
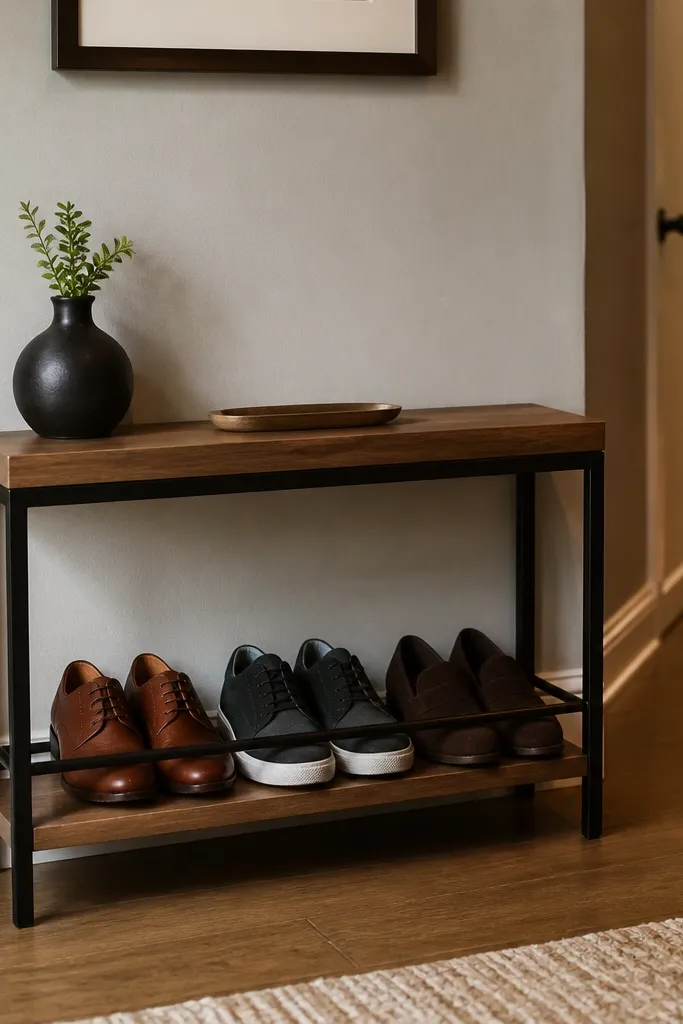
This rack is built to look light and sleek while still handling real shoe weight. The front stays clean — no visible messy braces — because the support is hidden at the back. It’s a smart pick for narrow hallways where bulky supports ruin the look. The “bench” top gives you a flat surface, and the front shelf edges keep shoes from falling forward. If you’re after a good-looking shoe rack design that doesn’t look like a storage project, this is the move.
Use 1x12 for the top and shelves and 1x3 or 1x2 for hidden back braces. Build a simple rectangular frame, then mount shelves inside it with consistent spacing (5 inches for sneakers and flats mix). Install the back braces first so the shelves are supported from behind — glue and screw from the brace into the shelf ends. Add a front edge strip (about 3/4 inch) to stop shoe slip. Sand, then paint the front and stain the top for contrast if you want a more designer look.
Editor's noteClamp a straight edge along the front while screwing shelves. It keeps the shelf faces perfectly aligned.
Skip thisDon’t leave the top untrimmed. A rough top edge makes the whole rack look unfinished.



