

1. Screwed Crate Stack
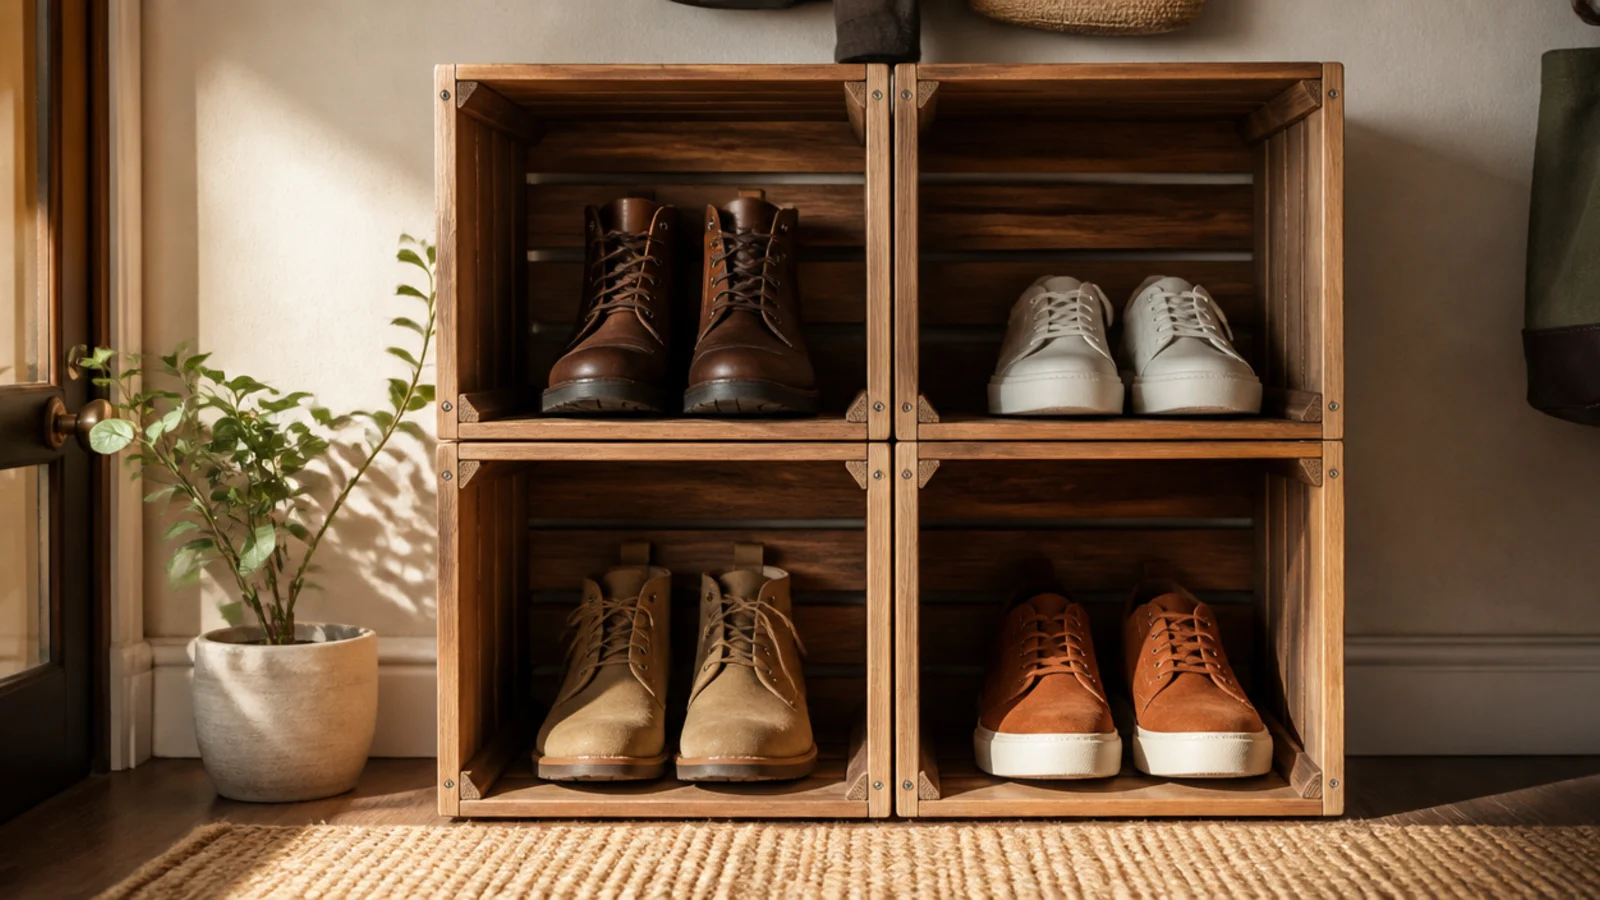
This is the easiest real build on the list and needs no cutting. You screw store-bought craft crates together into a block of cubbies, then seal them. It suits a total beginner and adapts to any wall by adding or removing crates.
Editor's notePre-drill the screw holes with a bit slightly smaller than the screw so the thin crate slats do not split.
Sand four crates to 220 grit. Lay them in a two-by-two block and screw the touching sides together with 1-inch wood screws, two per joint. Screw the top back crate to the wall or add a strap if it is tall. Wipe on a clear matte sealer or paint two thin coats, and slot a pair into each cubby heel-first.
Skip thisDo not rely on glue between crates; shoe weight and daily grabbing pull glued-only joints apart within weeks.
2. Cinder Block and Board Rack
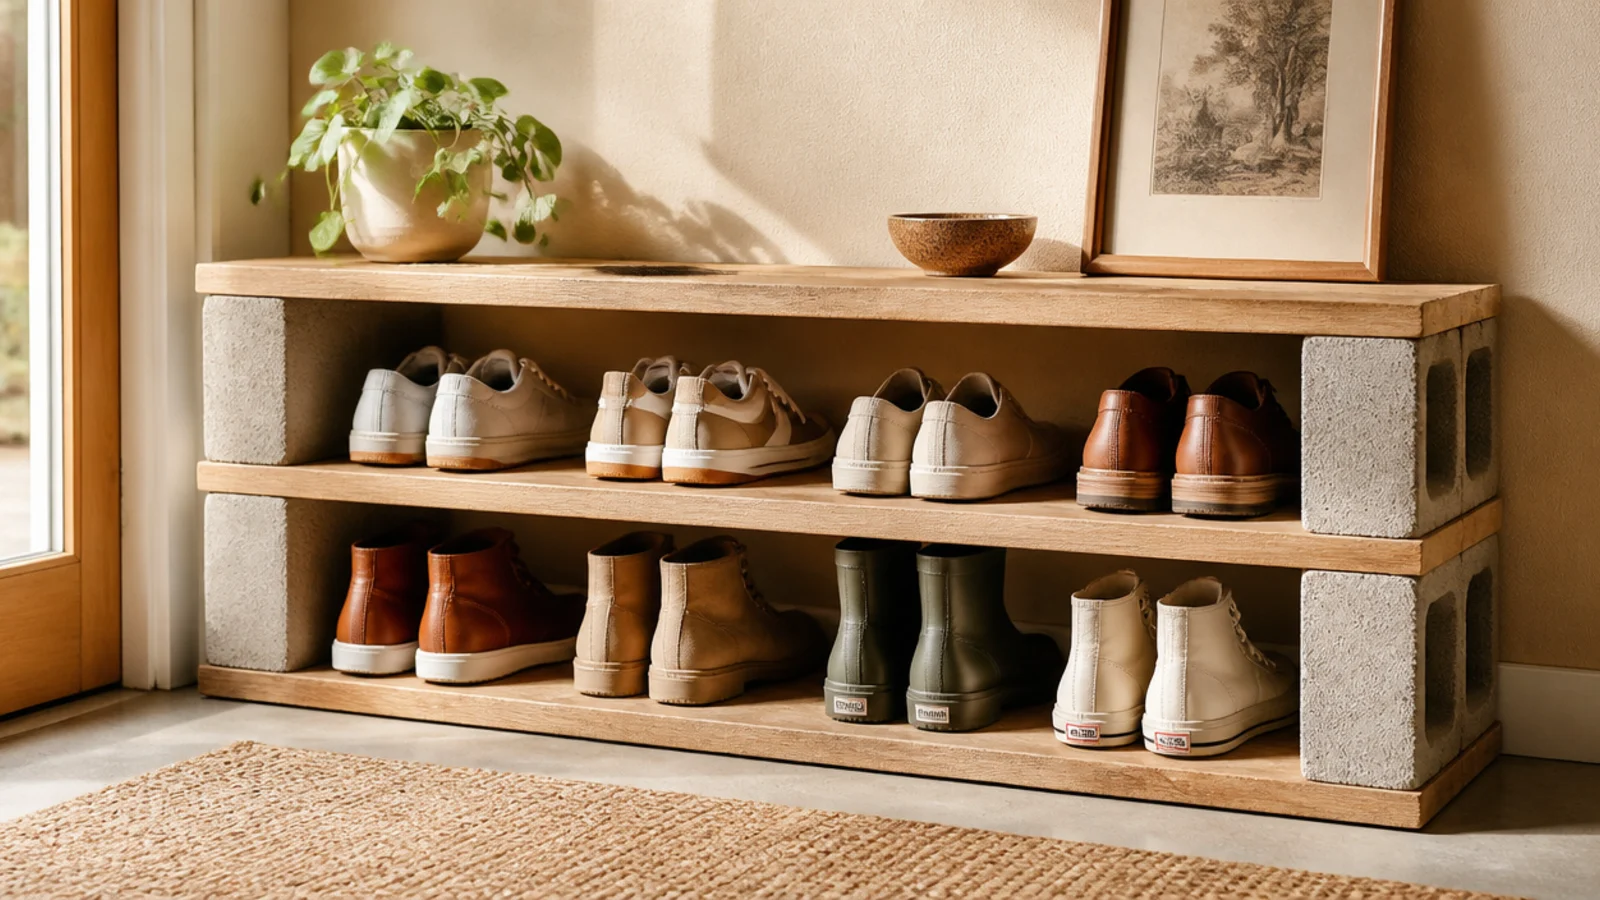
Cinder blocks and boards make an industrial, no-fasten rack for almost nothing. You stack blocks and lay boards across to make shelves. It suits a garage, basement, or industrial-style entry and takes ten minutes.
Stand cinder blocks on end at each side and lay a sanded, sealed board across the top to form a shelf; stack a second layer of blocks and another board for a second tier. Keep the boards from overhanging the blocks by more than a few inches. Dab construction adhesive between blocks and boards if it will get bumped. Paint the blocks one color for a cleaner look.
Turn the blocks so their open holes face out and you gain small extra cubbies for flip-flops and sandals.
Do not stack it more than two levels without gluing the blocks; unsecured block towers shift and can topple.
3. Copper Pipe Shoe Rack
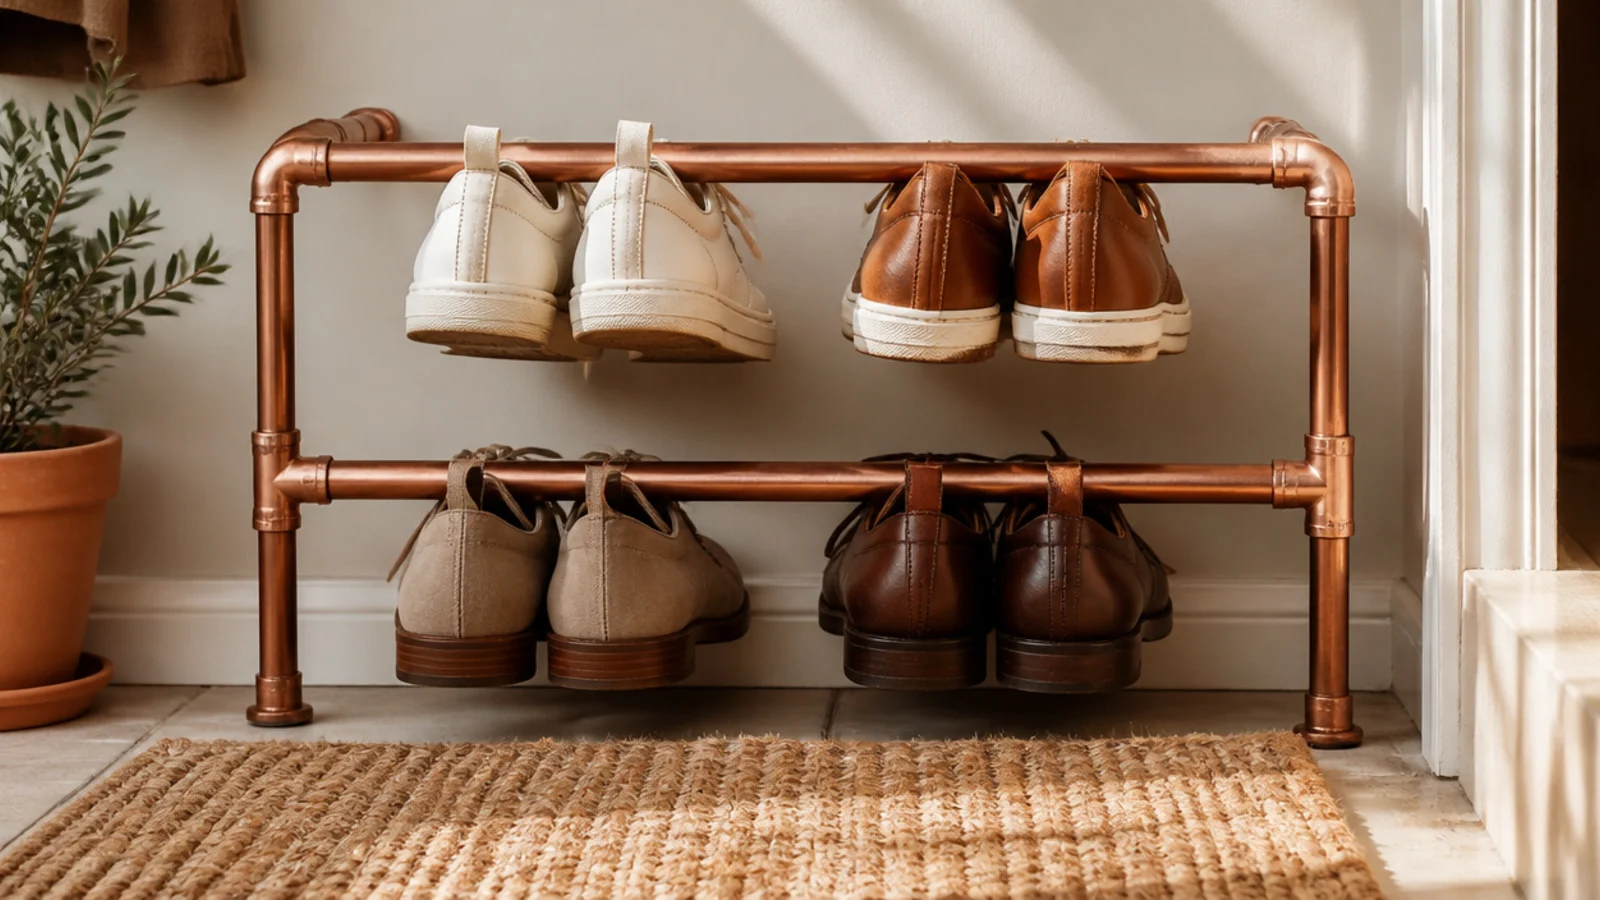
A copper pipe rack looks boutique but is just pipe and push-fit fittings. Shoes rest across parallel rails by their soles. It suits a modern or industrial entry and comes apart if you move.
Editor's noteLeave the copper unsealed and it develops a warm patina over time; wax it if you want to keep the bright shine.
Cut half-inch copper pipe to length with a pipe cutter (rails about 24 inches, legs about 12). Assemble a rectangular frame with copper elbows and tees, adding two horizontal rails a few inches apart per tier. Press the joints firm; add a drop of adhesive if you want it permanent. Buff the copper with a cloth and rest shoes across the rails toe-out.
Skip thisDo not use thin decorative tubing for the legs; only real half-inch pipe holds a loaded rack without bowing.
4. Rope and Dowel Ladder Rack
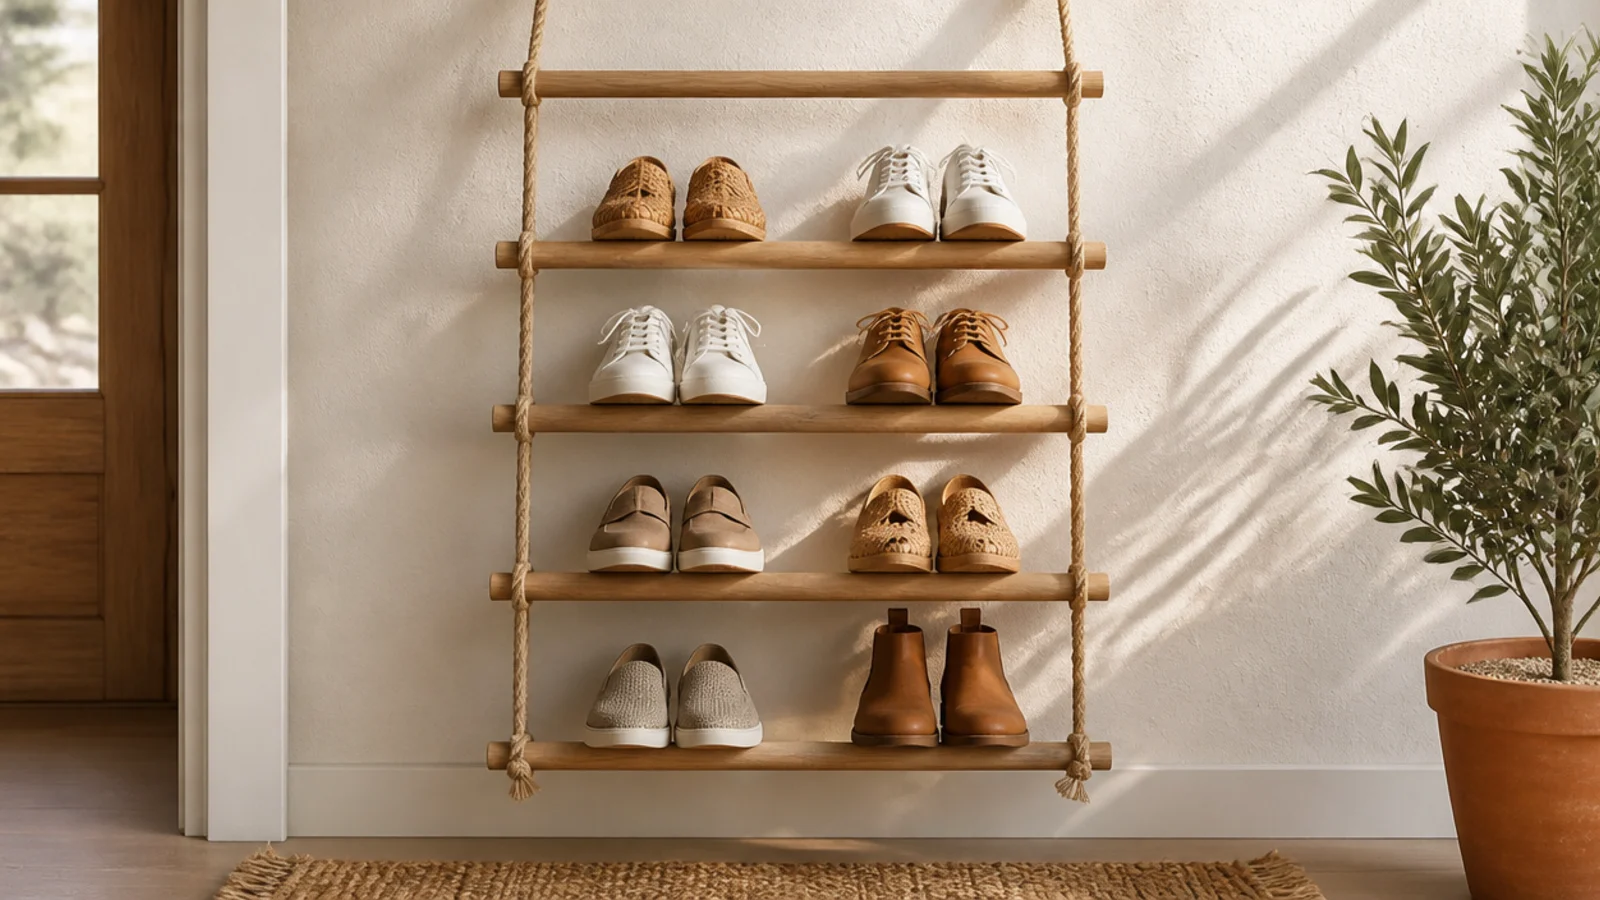
A hanging ladder of dowels strung on rope makes a light, boho rack that costs a few dollars. Shoes rest on the dowel rungs. It suits a small wall and adds warm texture without heavy furniture.
Editor's noteKnot the rope tight against each dowel so the rungs cannot slide down and bunch up under the weight of shoes.
Cut wooden dowels to equal lengths (about 18 inches) and drill a hole near each end. Thread two lengths of sturdy rope through the holes, tying a knot below each dowel to set even spacing of about 6 inches. Hang the top loops on two wall hooks screwed into studs. Rest shoes across pairs of rungs and seal the dowels first so they do not mark shoes.
Skip thisDo not hang it from a single hook; two anchor points into studs keep it level and stop it swinging into the wall.
5. PVC Honeycomb Rack
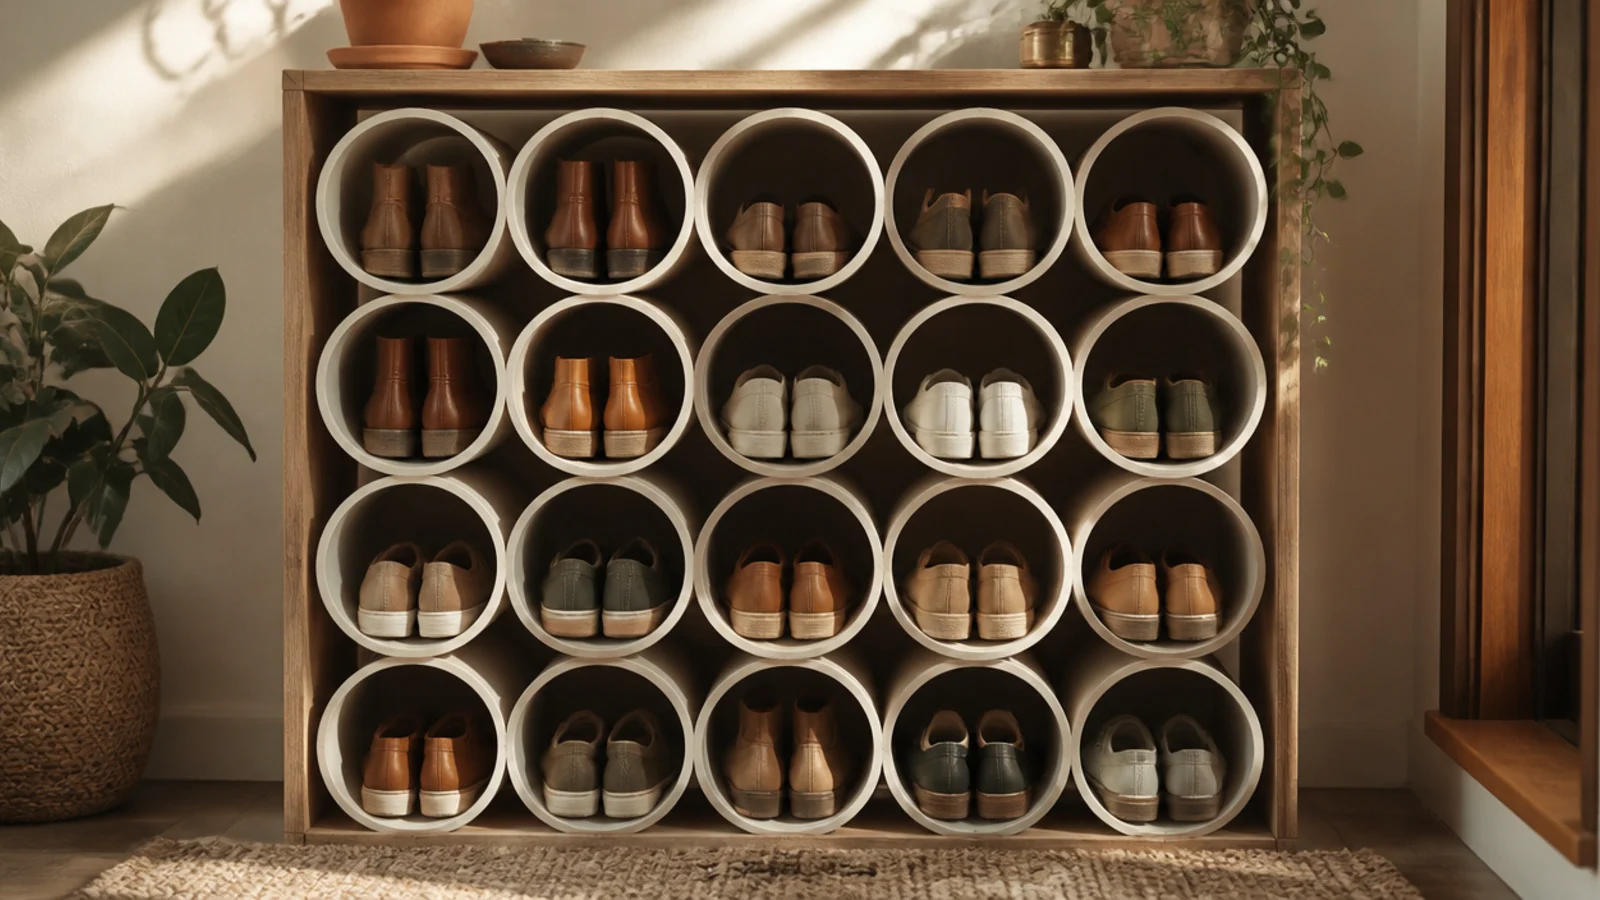
Cut PVC pipe glued into a honeycomb makes a modern cubby rack for pocket change. Each tube cradles a pair. It suits flats, sneakers, and sandals and looks sharp painted a single color.
Cut 4-6 inch wide PVC pipe into 10-12 inch lengths with a hacksaw, then sand the cut ends smooth. Glue the tubes together in offset rows with PVC cement and let it cure. Set the block into a simple wood frame or a cube shelf for support. Paint the whole thing one color and slot a pair into each tube.
Wipe the outside of every tube with acetone before gluing so the cement grips and the joints do not pop apart.
Do not skip sanding the cut ends; raw PVC edges are sharp and shred socks and shoe leather.
6. Repurposed Bookshelf Rack
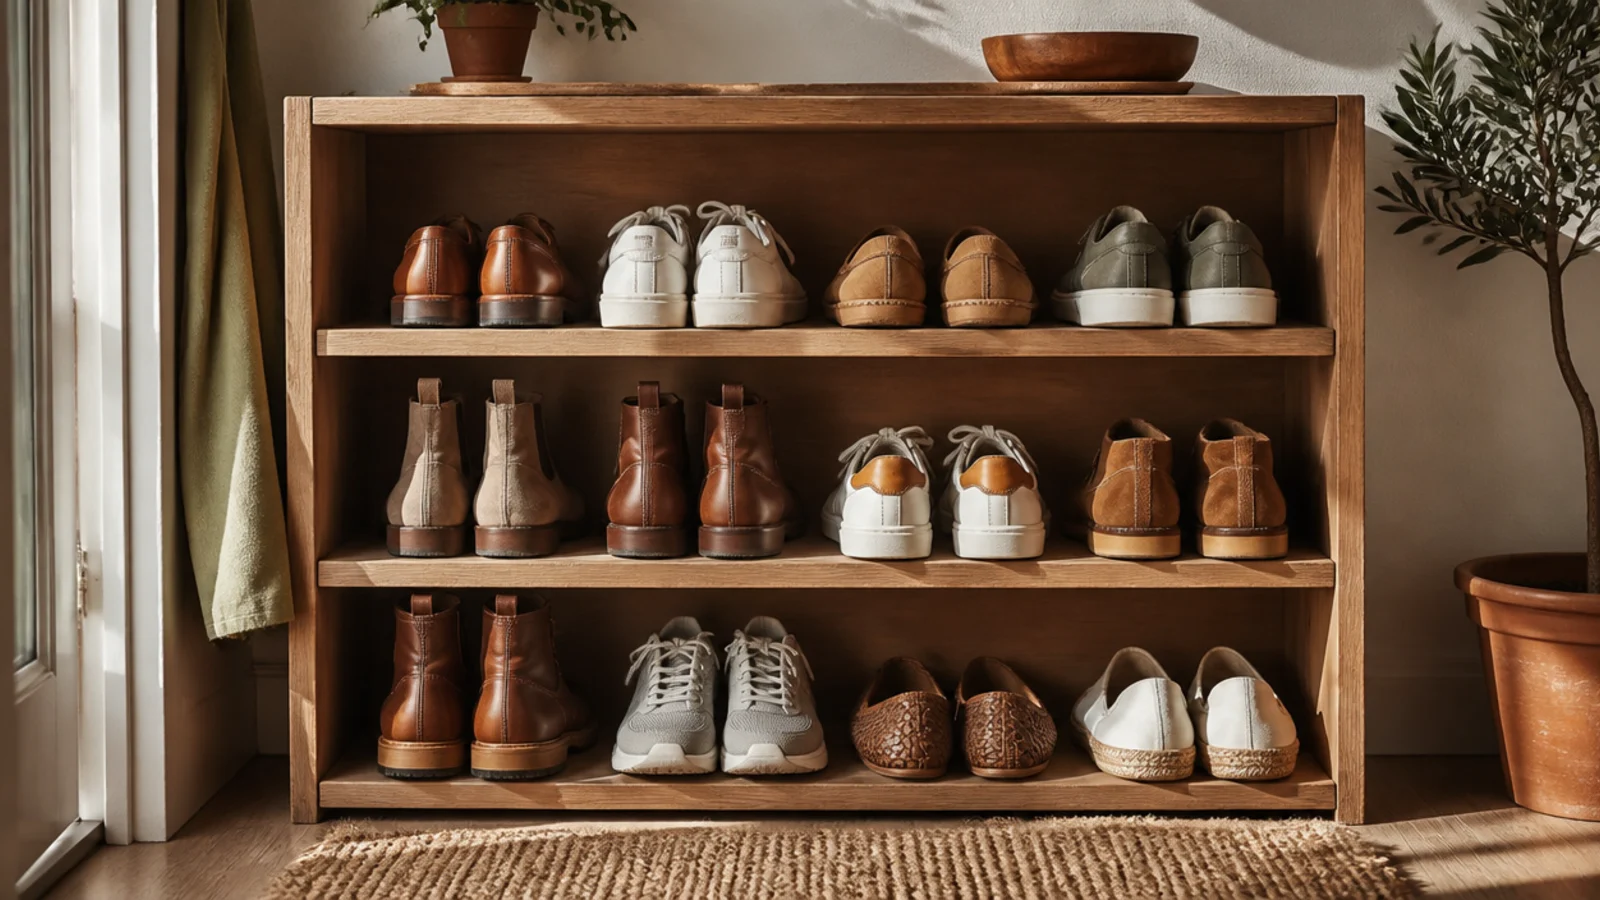
An old bookshelf becomes a shoe rack by re-spacing the shelves for shoe height. It suits anyone with a spare shelf gathering dust. Reusing it costs nothing and keeps furniture out of the landfill.
Empty and clean a short bookshelf. Move the adjustable shelves to about 6-7 inch spacing for shoes, or lay the unit on its back for wide low cubbies. Sand and repaint or reseal the surfaces so shoe grit wipes off. Anchor a tall unit to the wall and line the shelves with pairs toe-out.
If the shelves are fixed too far apart, add a thin removable middle shelf of scrap board to double each bay’s capacity.
Do not use a flimsy particleboard shelf without reinforcing it; sagging shelves are the classic bookshelf-rack failure.
7. Pallet Wall Rack
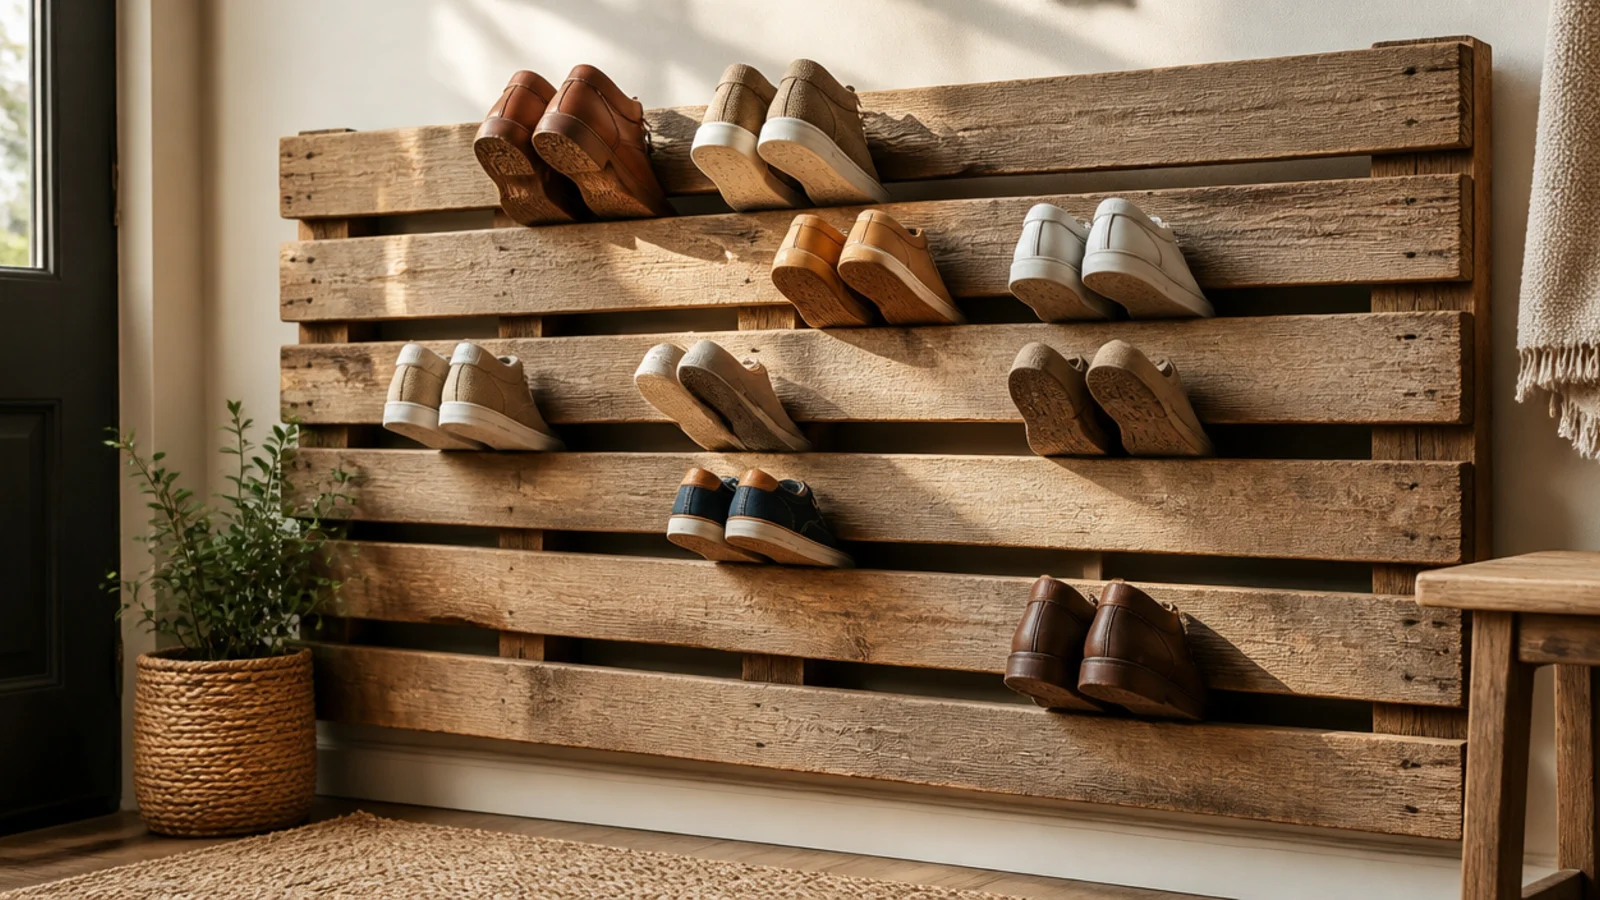
A reclaimed pallet mounted on the wall gives you a rustic slotted rack for free. Shoes tuck into the gaps between slats. It suits a casual or industrial space and is a satisfying upcycle.
Editor's noteCut the pallet down to half height for an entry; a full pallet is often too tall and looks bulky on a wall.
Choose a heat-treated (HT-stamped) pallet, pry off any broken slats, and sand it thoroughly. Seal it so it does not shed splinters, then mount it to the wall through the frame into studs. Add a small angled block behind each slat gap so shoes tilt outward. Slot pairs toe-first into the gaps.
Skip thisDo not use a pallet stamped MB (methyl bromide); only heat-treated pallets are safe to bring indoors.
8. Hairpin-Leg Plank Rack
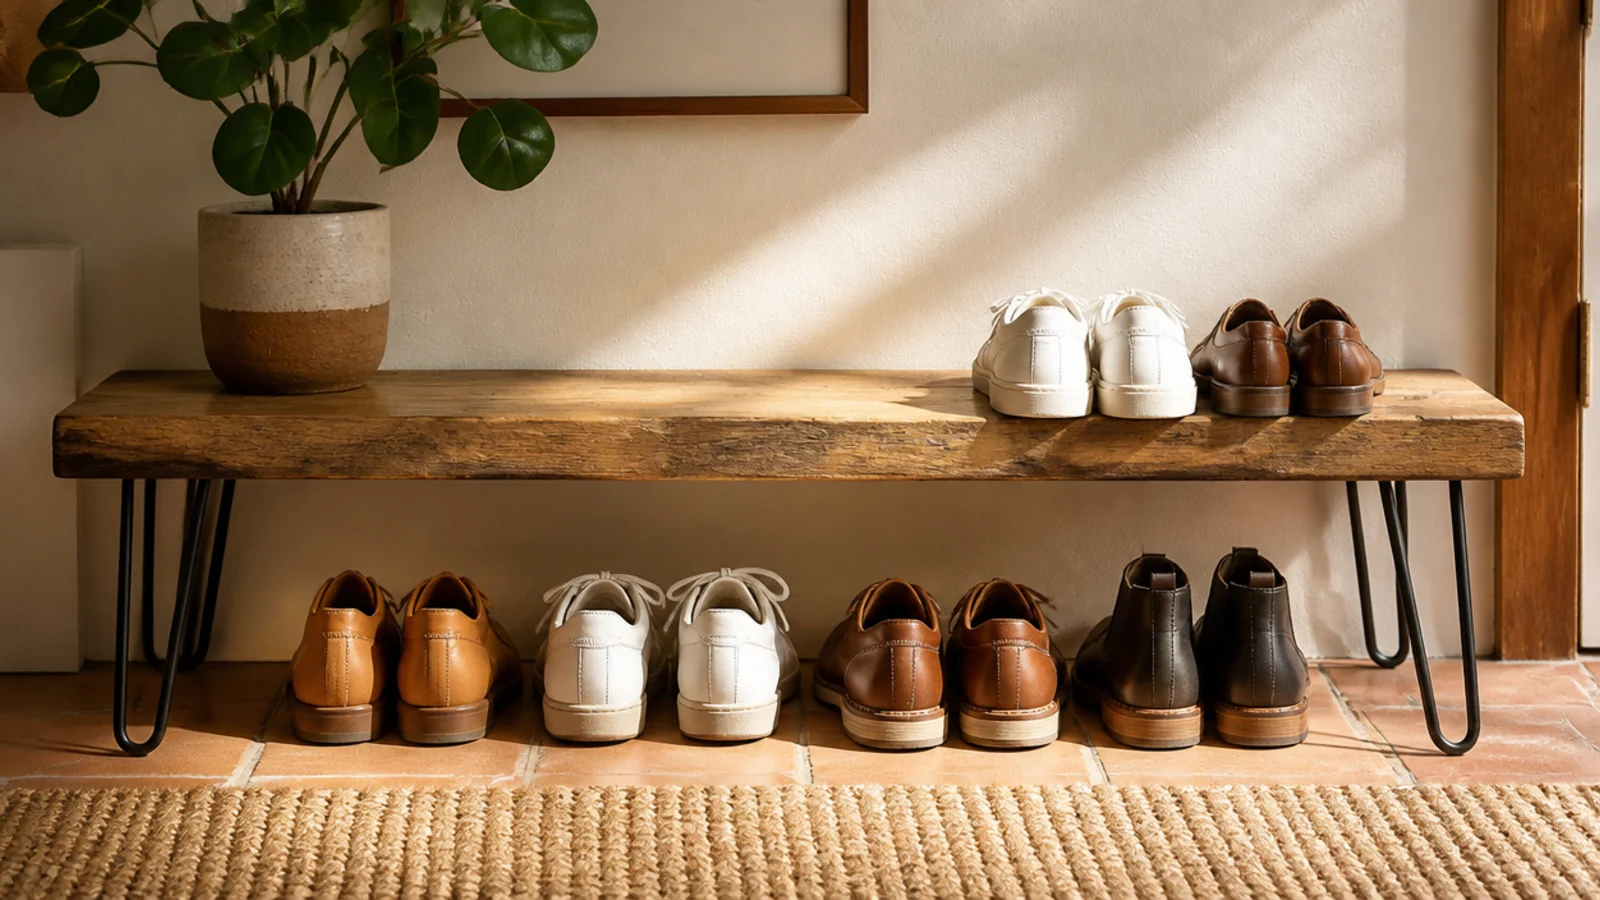
A thick plank on four hairpin legs makes a mid-century bench you can sit on with shoes stored beneath. It suits a modern entry and is the most polished build here for the least effort. The legs do the design work.
Buy a solid board or glued panel about 36 inches long and sand it to 220 grit; stain or seal it. Screw four hairpin legs to the underside corners with the included screws, checking it sits level. Set daily shoes on the floor beneath and use the top as a seat. A second thin shelf on lower brackets doubles the storage.
Position the legs an inch or two in from each corner so the bench looks intentional and the legs do not splay when you sit.
Do not use a warped or thin board; it flexes under weight and the hairpin legs make any bow obvious.
9. Tension Rod Between Studs
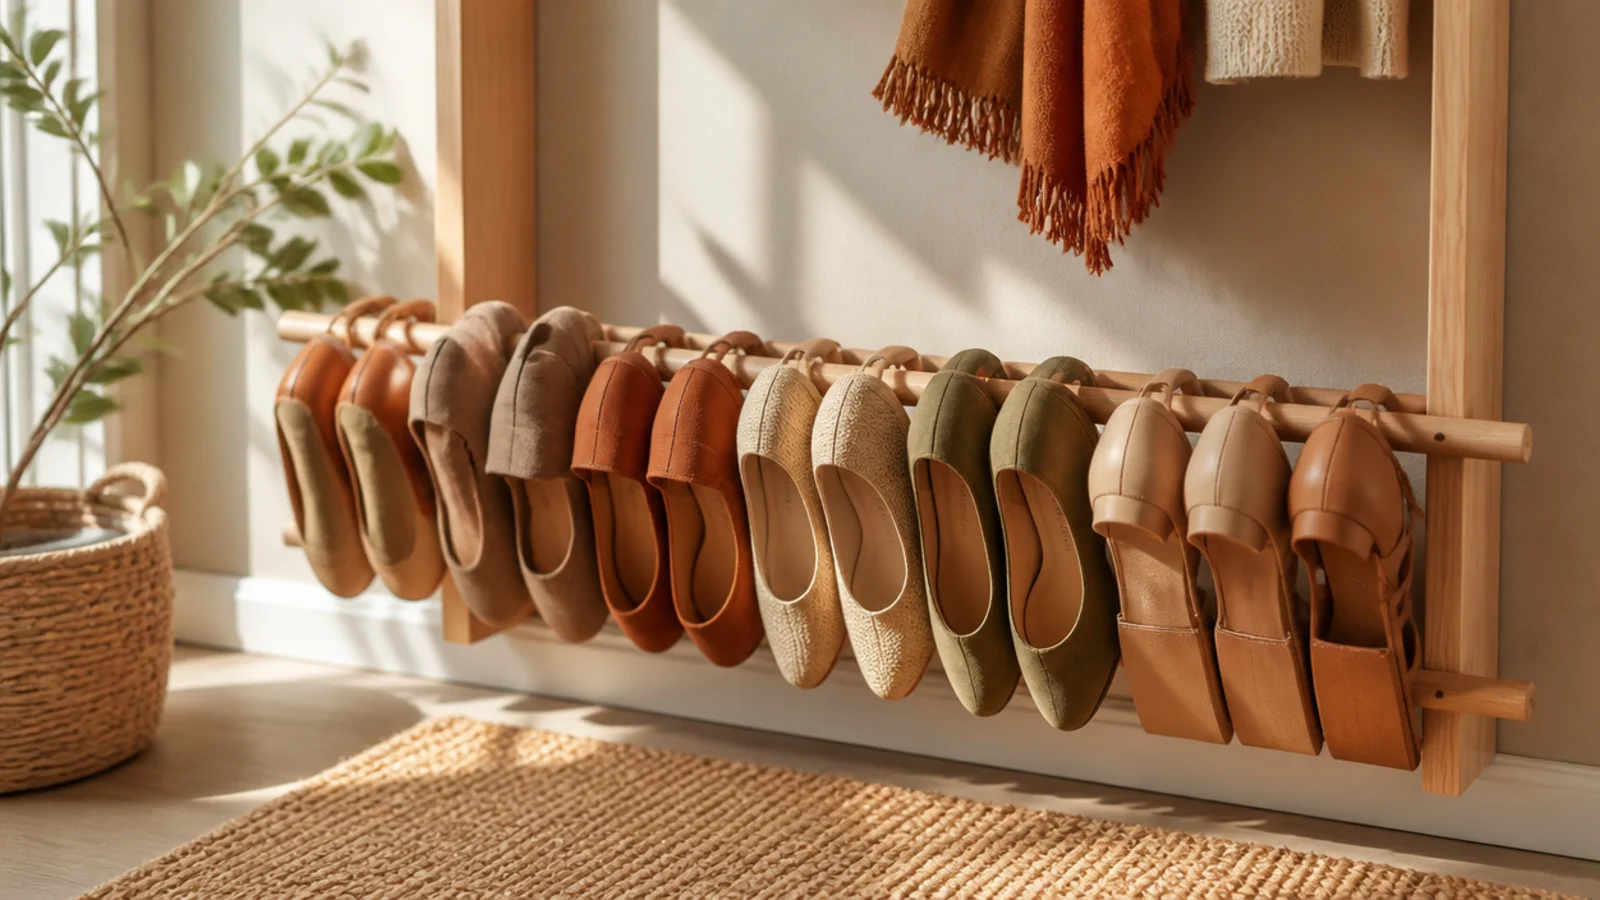
Two dowels wedged or screwed between closet studs make a hidden heel rack for free. Heels hook over the front rod. It suits a closet with exposed or reachable studs and uses truly dead space.
In a closet, fix two dowels or lengths of pipe horizontally between the side walls or studs, a few inches apart and a few inches off the floor. Set the front rod slightly lower so heels tilt toward you. Screw the ends into the studs or use tension for a no-drill version. Hook heels and wedges over the front rod, soles resting on the back.
Space the two rods so the sole rests on the back rod while the heel catches the front — about three inches apart works for most heels.
Do not hang heavy boots on this; the rods and their anchors are sized for light heels and sandals only.
10. Wine Crate Cubbies
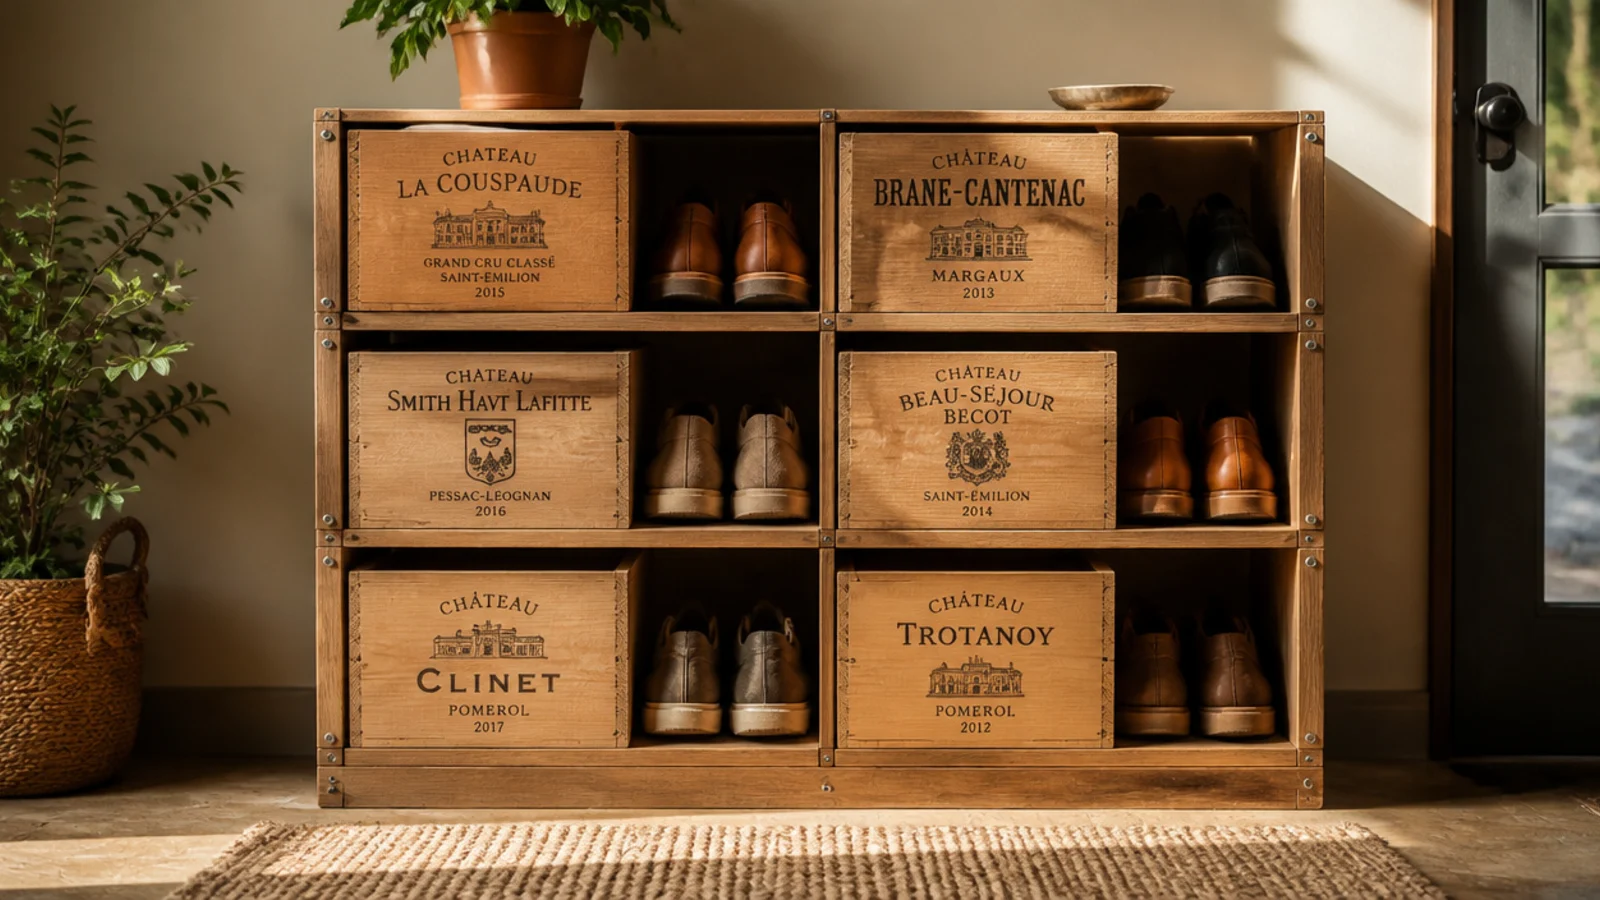
Wooden wine crates make characterful cubbies with printed ends for a vintage look. Each crate holds a pair or two. It suits a wine-country or rustic style and is cheap or free from a wine shop.
Ask a wine shop for spare crates, then sand and seal them. Screw them together into a stack or grid through the touching sides, and secure the top to the wall. Keep the printed ends facing out for the branded look. Slot shoes in heel-first and stand one on end for taller boot slots.
Line each crate bottom with a wipeable mat or cork so grit and damp do not soak into the thin crate wood.
Do not stack them high unscrewed; wine crates are lightweight and a loose stack shifts when you pull a pair out.
11. Cube Shelf Shoe Hack
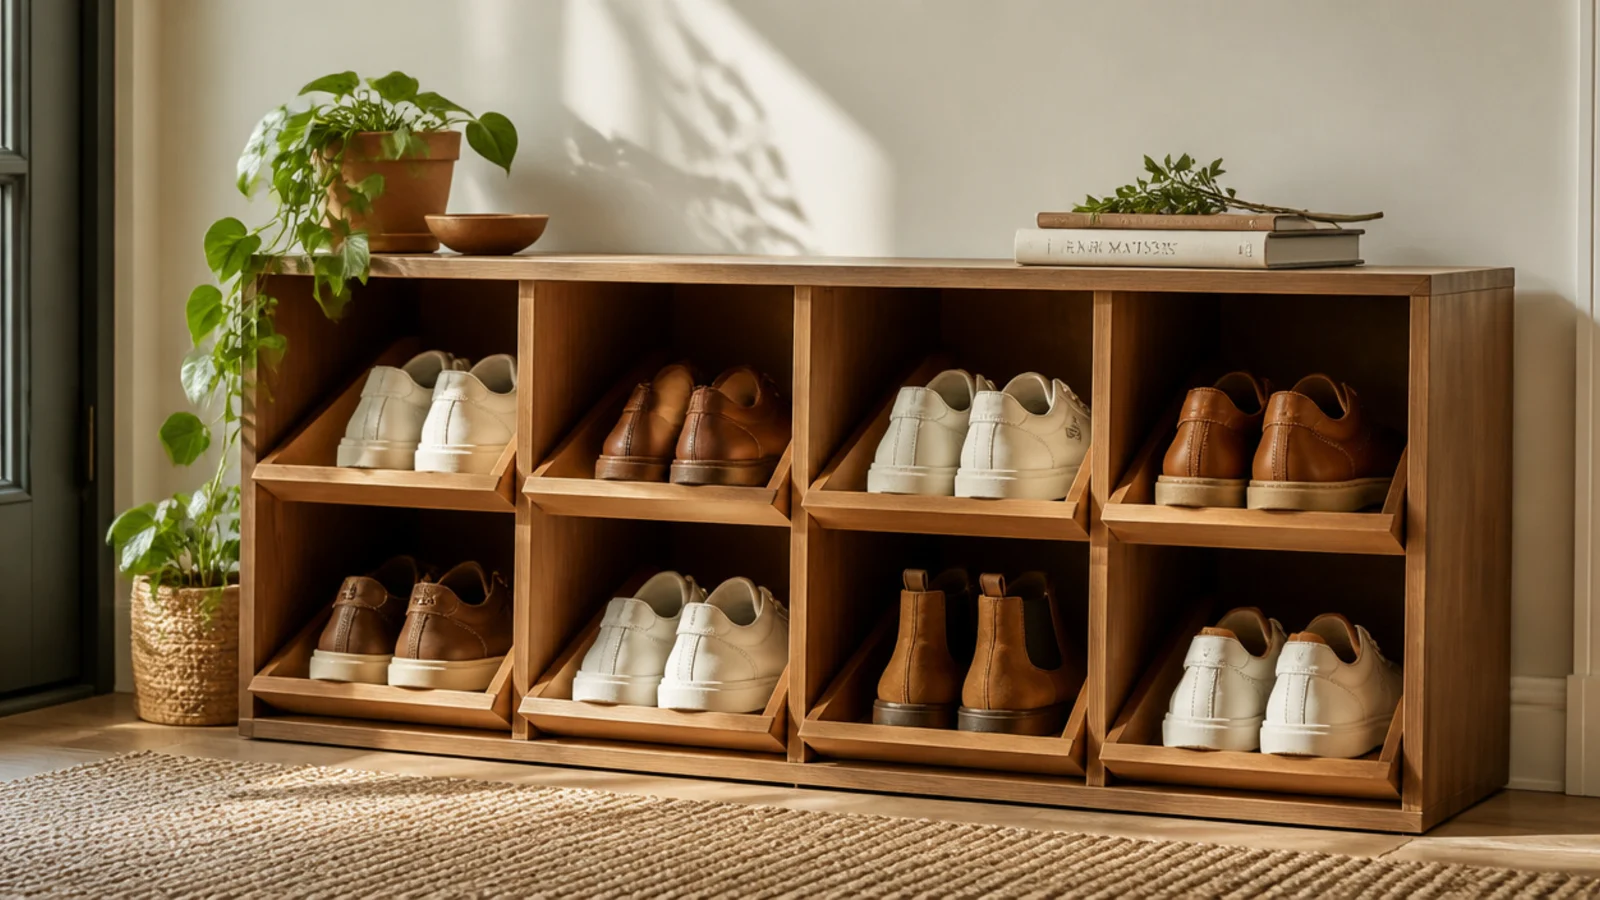
A cheap flat-pack cube shelf becomes a tailored shoe rack with simple angled inserts. Each cube then holds a pair tilted to show the toe. It suits anyone who wants a lot of cubbies fast.
Editor's noteMake the angled inserts removable so you can pull them out and use the cubes for boots or bins when your needs change.
Assemble a cube shelf and lay it on its side if you want low, wide cubbies. Cut triangular inserts of scrap board or foam board to sit in each cube at an angle so shoes tilt forward. Slot a pair per cube against the insert. Anchor a tall unit to the wall and add fabric bins to lower cubes for small shoes.
Skip thisDo not overload each cube with three or four pairs; the shelves sag and the tidy grid look disappears.
12. Rain Gutter Shoe Rack
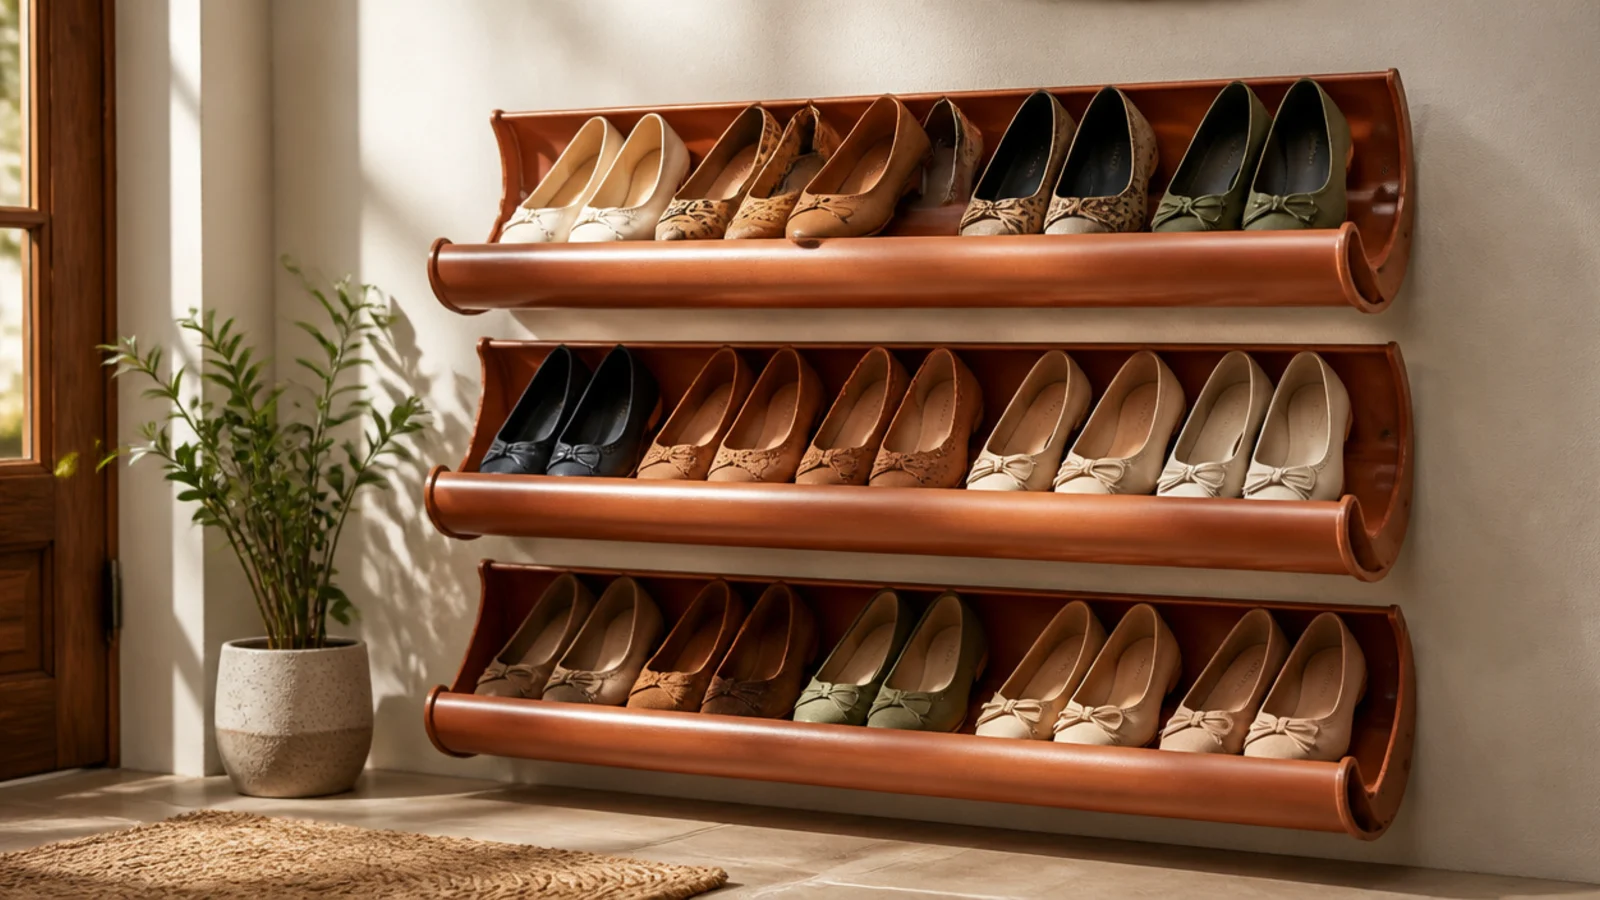
Vinyl rain gutter mounted in rows makes a super-cheap rack where shoes rest in the channel. It suits flats, sandals, and kids' shoes and is nearly free per foot. The rounded channel cradles shoes neatly.
Editor's noteAngle the gutter with the open side tilted slightly up toward the wall so shoes settle back instead of sliding forward.
Cut vinyl gutter to your wall width with a hacksaw and cap the ends. Screw the gutter brackets into studs in level rows, spaced about 7 inches apart, and clip in the gutter lengths. Rest flat shoes and sandals in each channel. Wipe the vinyl clean and add end caps so nothing slides off the ends.
Skip thisDo not use it for heavy boots or heels; the light gutter is meant for flats and will flex or pop its brackets under weight.
13. Rope Sling Shoe Rack
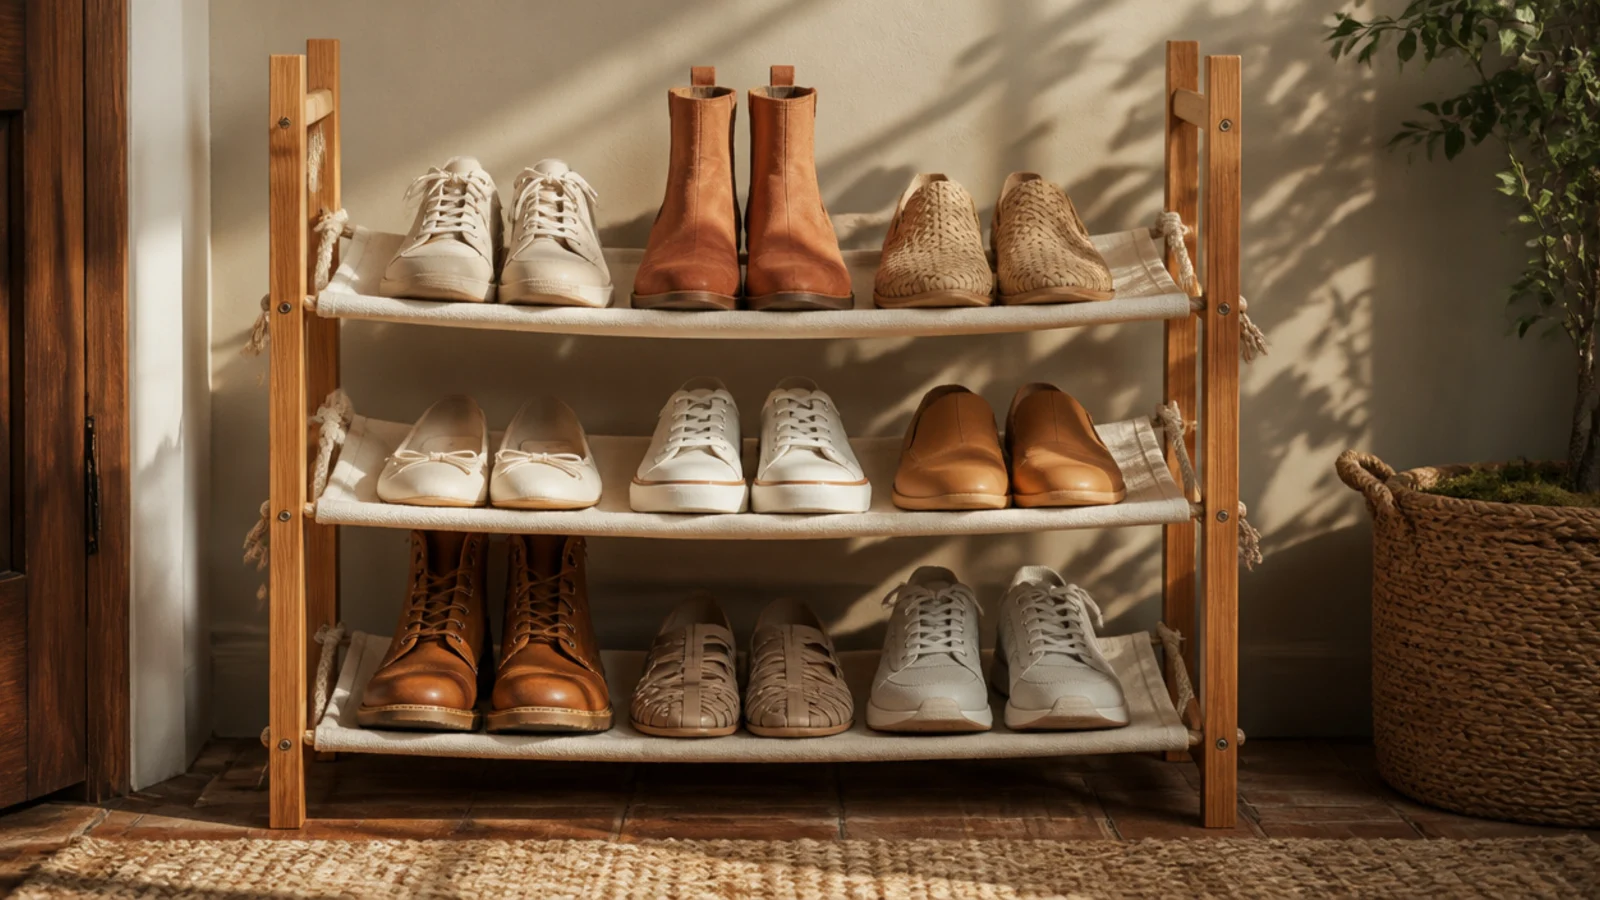
A simple frame strung with rope or canvas slings makes a soft, hammock-style rack for light shoes. Each sling holds a pair. It suits a boho or kids' room and is light enough to hang or lean.
Editor's noteUse canvas strips instead of thin rope for kids' shoes; the wider sling cradles small shoes without them slipping through.
Build a rectangular wood frame or reuse an old picture frame. String rows of rope or strips of canvas between the two long sides, tensioned to form shallow slings about 6 inches apart. Rest a pair of light shoes in each sling. Seal the frame and hang it on two wall hooks into studs or lean it against the wall.
Skip thisDo not load heavy shoes into rope slings; they stretch and sag over time, dumping the shoes on the floor.
14. Old Ladder Repurposed Rack
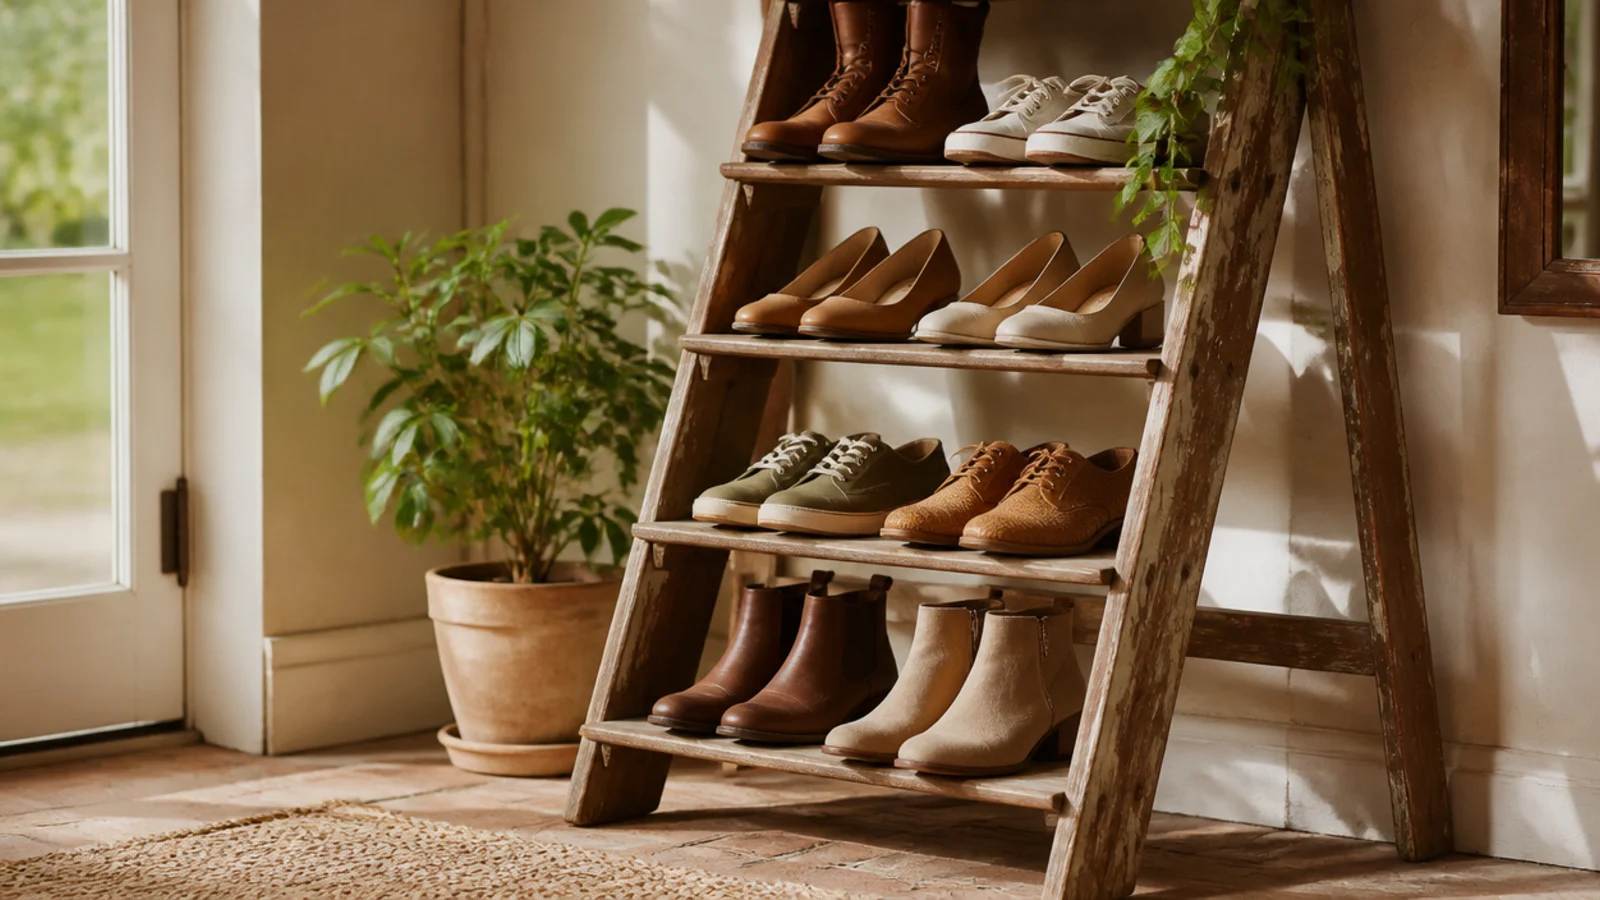
An old wooden ladder becomes a tiered rack by laying boards across the rungs. It suits a farmhouse or vintage entry and reuses something headed for the trash. The A-frame gives you several angled tiers at once.
Clean and sand a sturdy wooden step ladder and seal it. Open it and lay sanded boards across matching rungs on each side to make flat shelves, screwing them down so they cannot slip. Strap the top to the wall for safety. Line each board shelf with shoes, heaviest on the lowest.
Cut the boards a couple of inches longer than the rung span and notch them around the uprights so they lock in place.
Do not use a rickety or cracked ladder; if it was unsafe to climb, it is unsafe as loaded furniture — check the joints first.
15. Molding Heel Rail
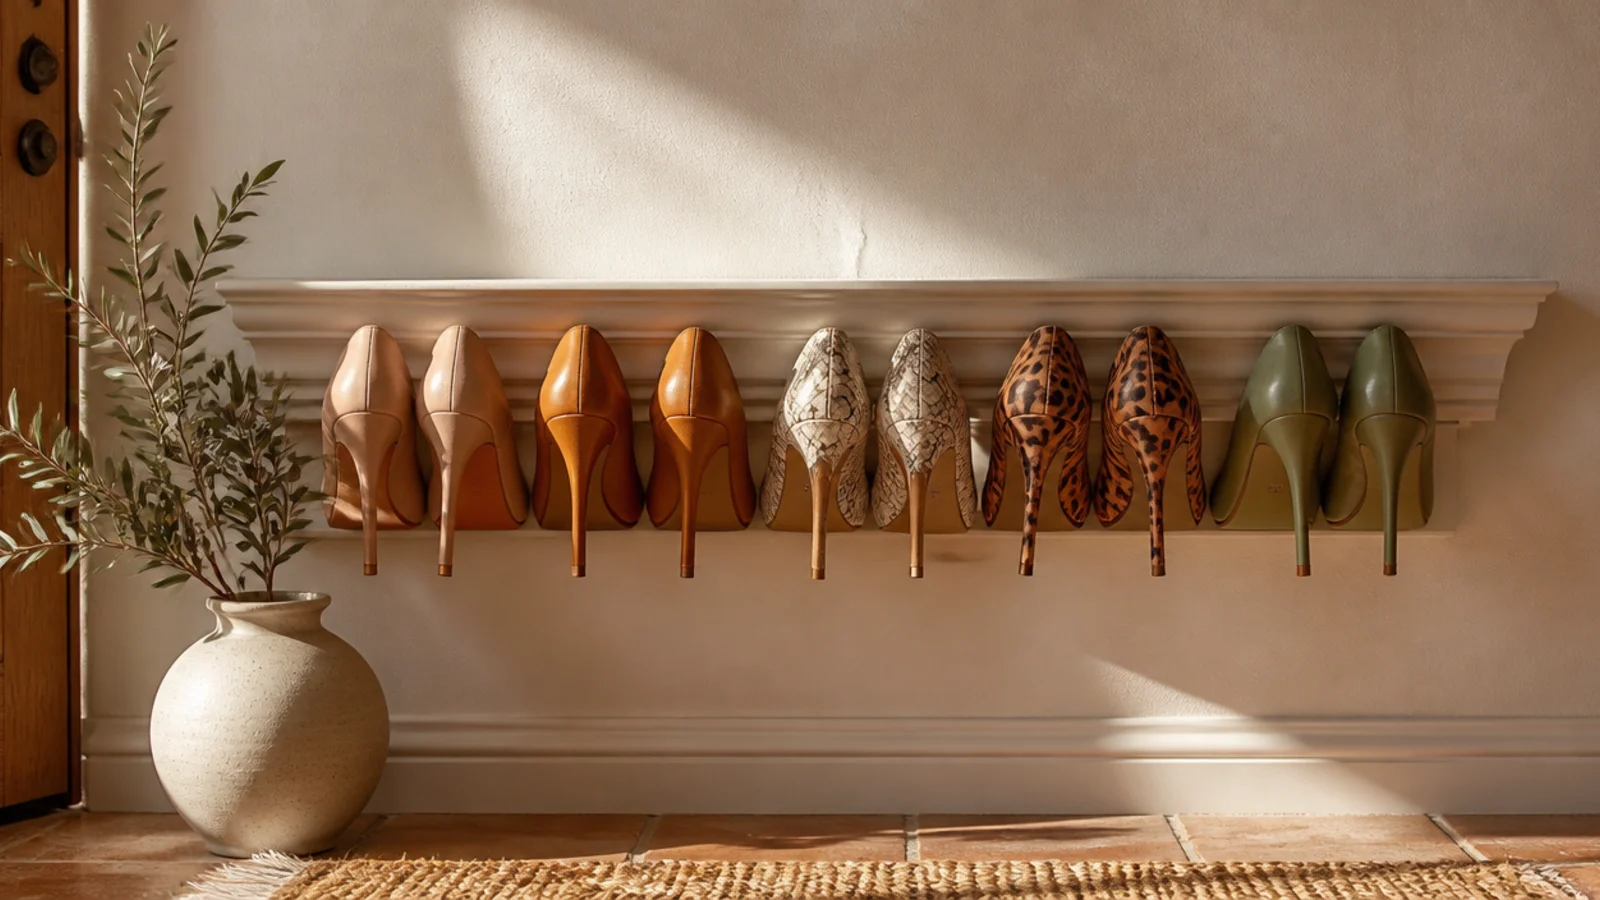
A strip of crown molding mounted lip-up makes a near-free wall rail for heels. Each heel hooks over the molding’s curved edge. It suits a bedroom or closet wall and stores heels beautifully with almost no depth.
Editor's noteRun two rails one above the other about 10 inches apart to double your heel storage on the same stretch of wall.
Cut a length of crown molding to your wall width and sand it. Mount it to the wall with the decorative lip facing up, screwed into studs or with rated anchors, at about hip height. Paint or seal it to match the wall. Hook each heel over the lip so the shoe hangs flat against the wall in a row.
Skip thisDo not try to hang flats or sneakers on it; only shoes with a real heel catch on the molding lip.



