

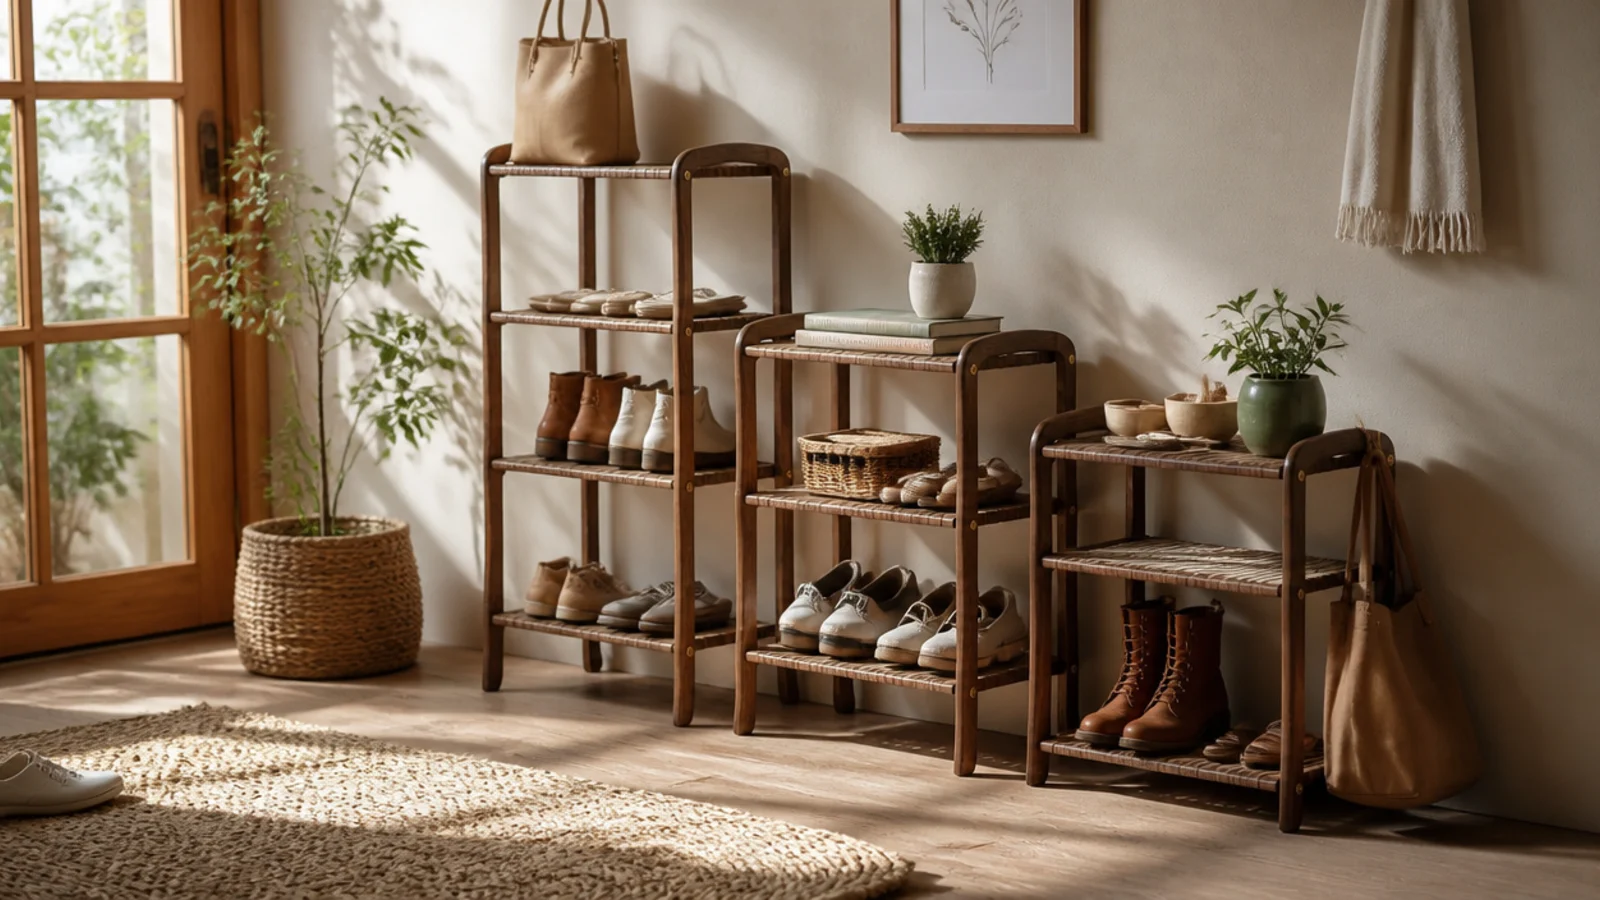
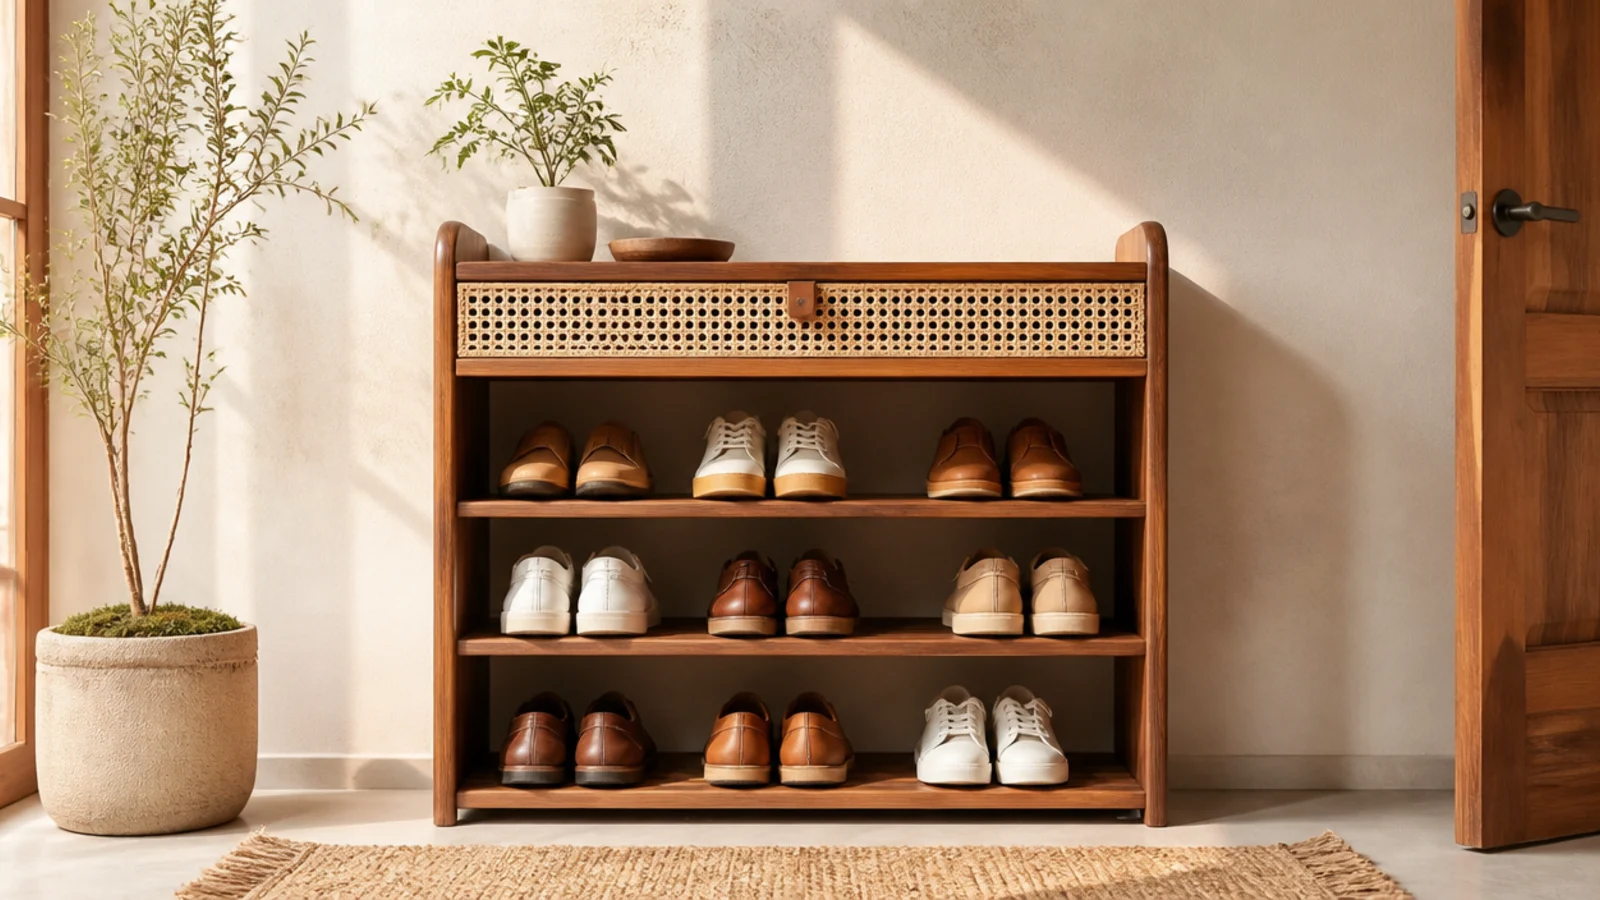
1. Slim Two-Tier Metal Rack
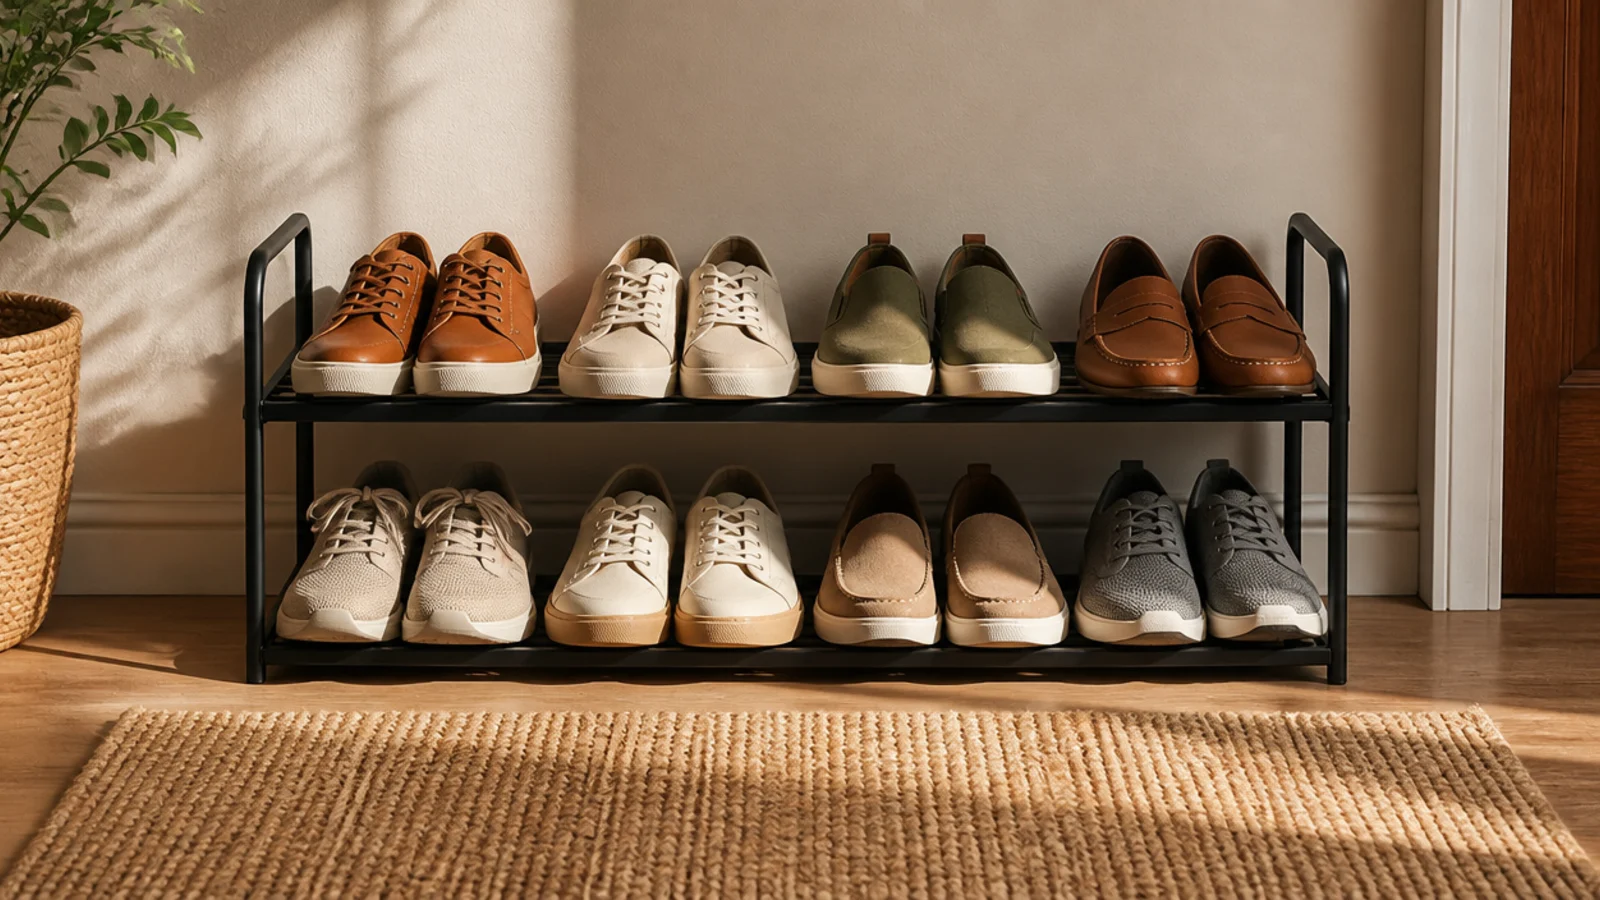
This is the simplest starting point and the one I recommend first for a tight hallway. A slim two-tier metal rack is usually 24-28 inches wide and under 10 inches deep, so it hugs the wall and holds four to six daily pairs. It needs no tools and no wall, which is why it suits renters and beginners.
Measure your wall width and pick a rack 2-3 inches narrower so it does not crowd a doorway. Assemble it (most snap together in under ten minutes with no tools), then set it against the wall with the tiers angled so heels sit back and toes face out. Keep the top tier for the most-worn pairs. Add small felt pads under the feet so it does not scratch the floor when you nudge it.
Buy the version with tilted wire tiers, not flat ones — the tilt lets shoes overlap slightly so you fit more pairs in the same width.
Do not overload it past its tier count; a slim metal rack stacked two-deep looks messy and tips forward when you pull a pair off.
2. Over-the-Door Shoe Organizer
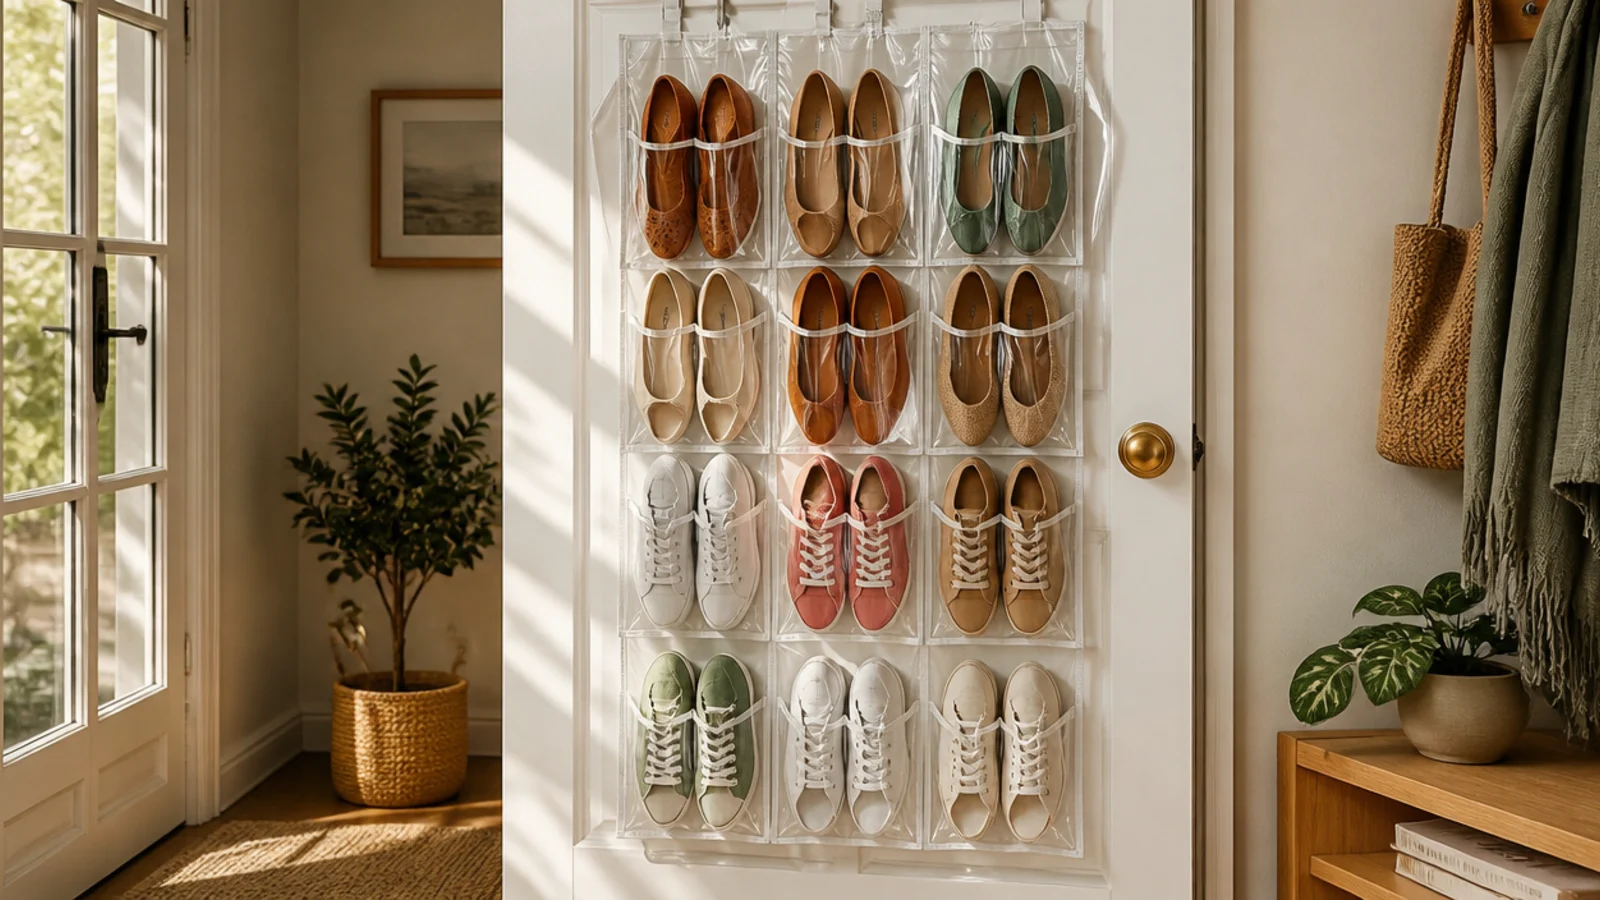
When the floor is full, the back of a door is the biggest empty surface in a small home. A pocketed over-the-door organizer holds 12-24 pairs and costs very little. It suits flats, sneakers, and kids' shoes best; tall boots do not fit the pockets.
Measure your door height and pick an organizer that clears the floor by a few inches. Hang the metal hooks over the top edge of the door, then push the door closed to check it does not catch on the frame — trim the hooks with pliers or bend them slightly if it rubs. Load heavier shoes in the lower pockets so the whole thing hangs straight. For a tidier look, choose a fabric-front version over clear vinyl.
Editor's noteSlip a self-adhesive hook-and-loop strip near the bottom corners and stick the panel to the door so it stops swinging when you open and close it.
Skip thisDo not use it on a hollow door with heavy boots; the weight can bow the door over time — keep it to lightweight everyday shoes.
3. Under-Bench Basket Row
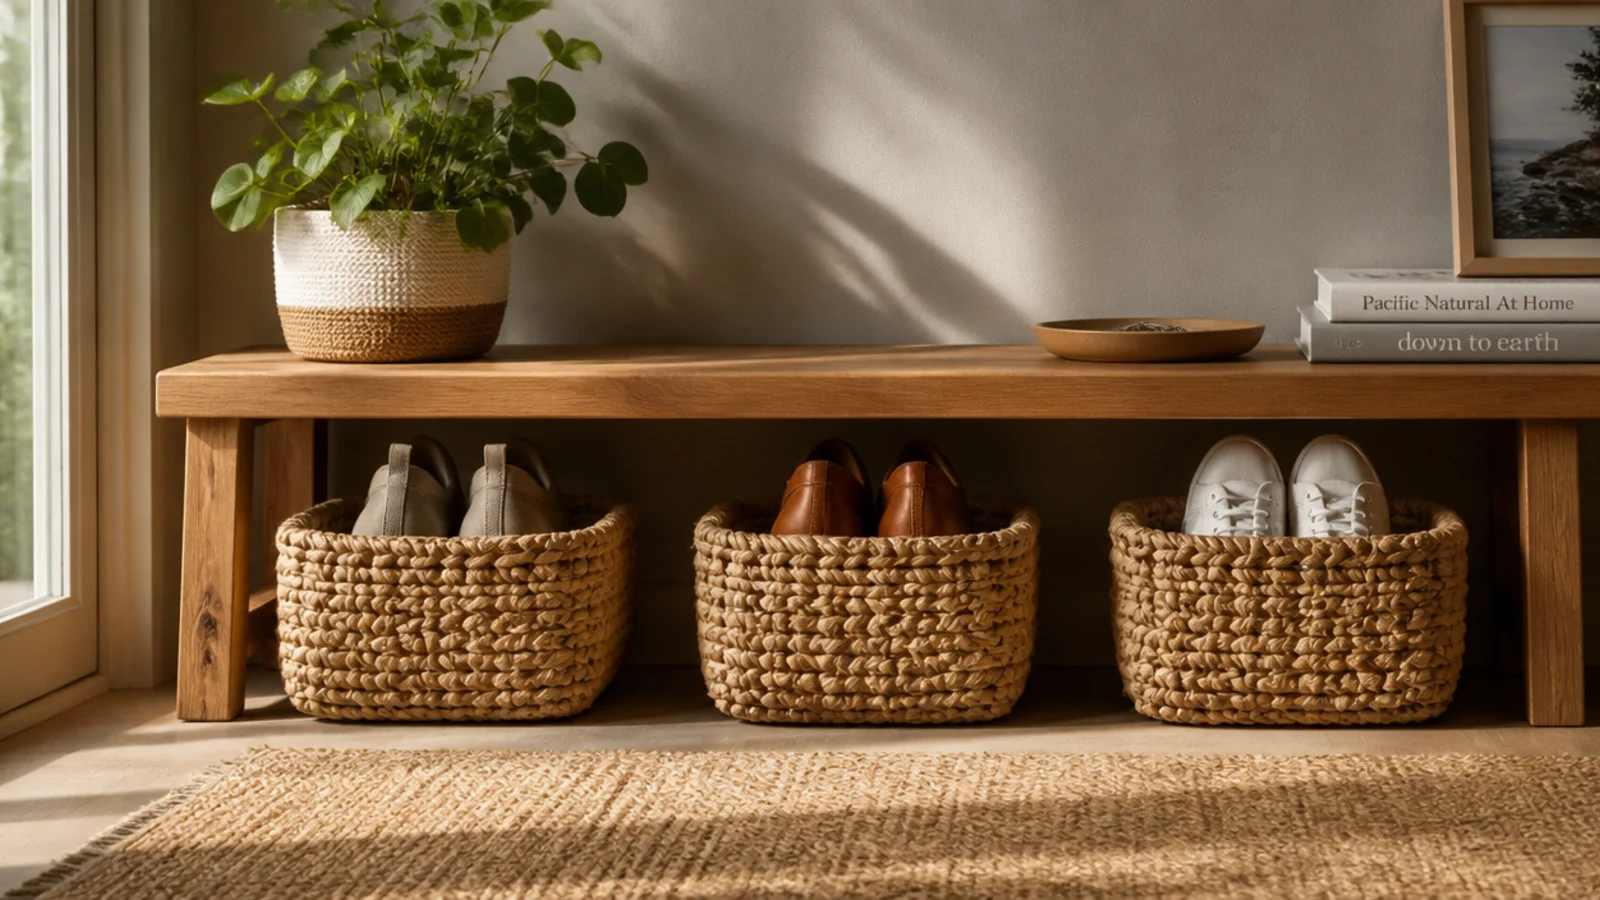
A slim bench with baskets underneath gives you a place to sit and hidden storage in one footprint. It suits an entryway where an open rack would look cluttered. The baskets hide the jumble and you can pull one out to dig through it.
Choose a bench 14-18 inches deep so baskets fit beneath the seat, and measure the clearance under the seat before buying baskets. Line up two or three woven or fabric baskets in the gap, one per person or one per shoe type. Assign each basket a category — daily sneakers, flats, kids — so shoes get sorted as they come off. Add a cushion on top and the bench earns its space twice over.
Pick baskets a half-inch shorter than the under-seat gap so they slide in and out without catching.
Do not buy baskets deeper than the bench; overhanging baskets you keep bumping with your feet get pushed out of line fast.
4. Leaning Ladder Shoe Rack
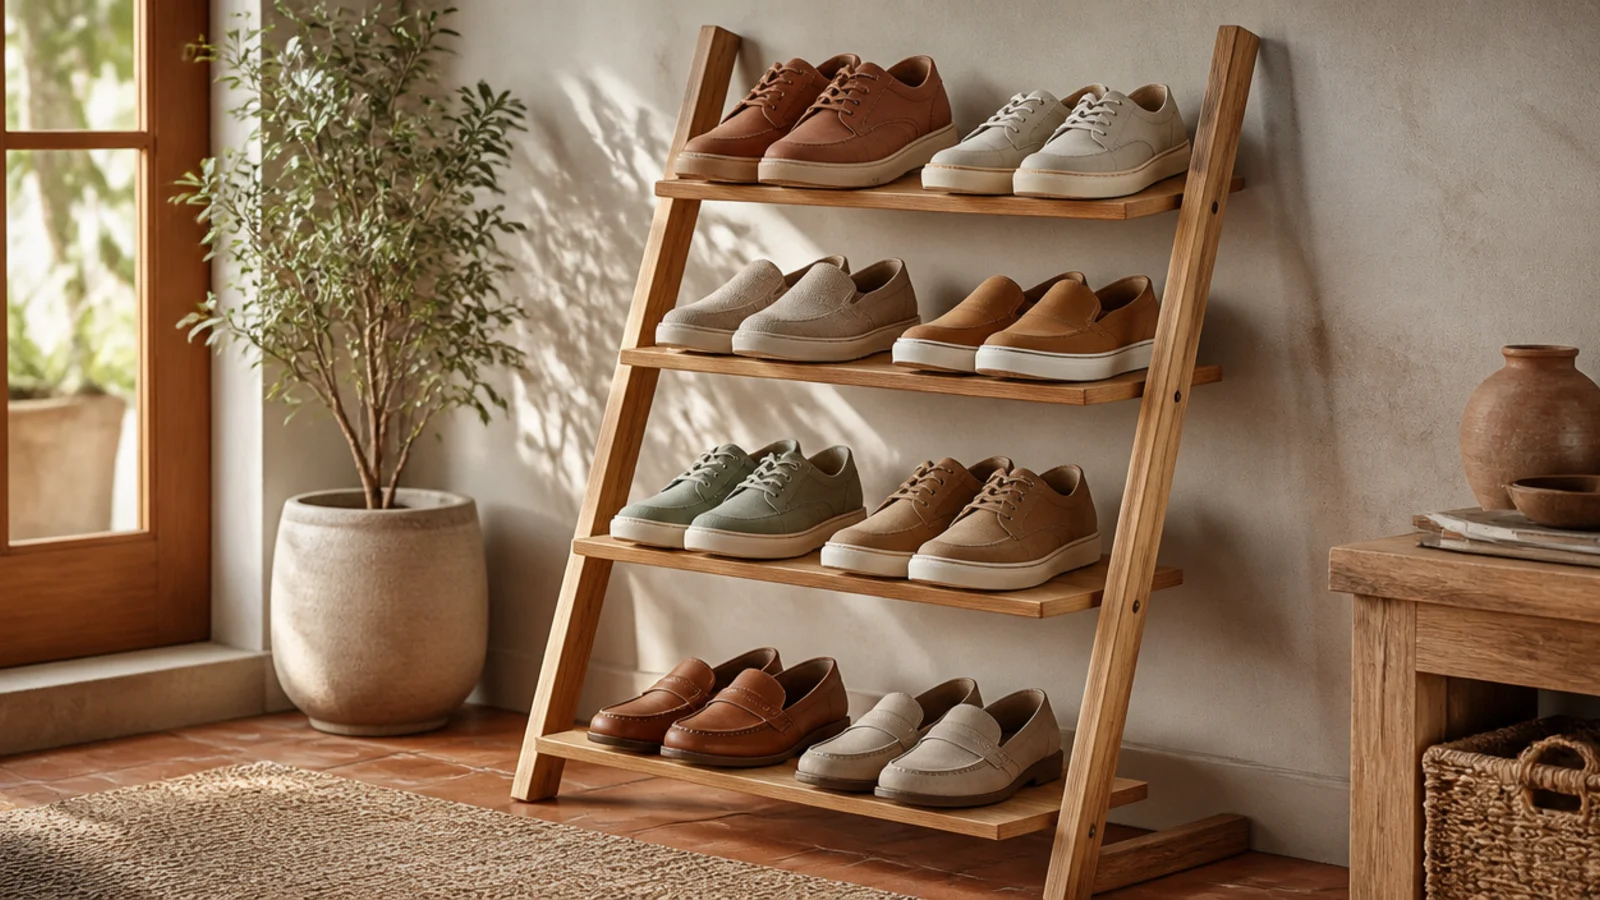
A leaning ladder rack uses vertical height instead of floor width, so it fits a narrow strip beside a door. The angled rungs let shoes rest toe-down, taking up almost no depth. It looks light and open, which keeps a small entry from feeling boxed in.
Set the ladder against the wall at a gentle lean so the rungs tilt back and shoes stay put. Because it leans, anchor the top to the wall with a small strap or hook so it cannot slide — especially important with kids around. Place heavier shoes on the lower rungs to keep it stable. Give each rung a pair or two, no more, so the open look stays.
Editor's noteRub a bit of beeswax or a felt pad where the ladder meets the wall so it grips instead of sliding on paint.
Skip thisDo not load the top rungs heavy; a top-heavy leaning rack can walk away from the wall and tip.
5. Stackable Clear Shoe Boxes
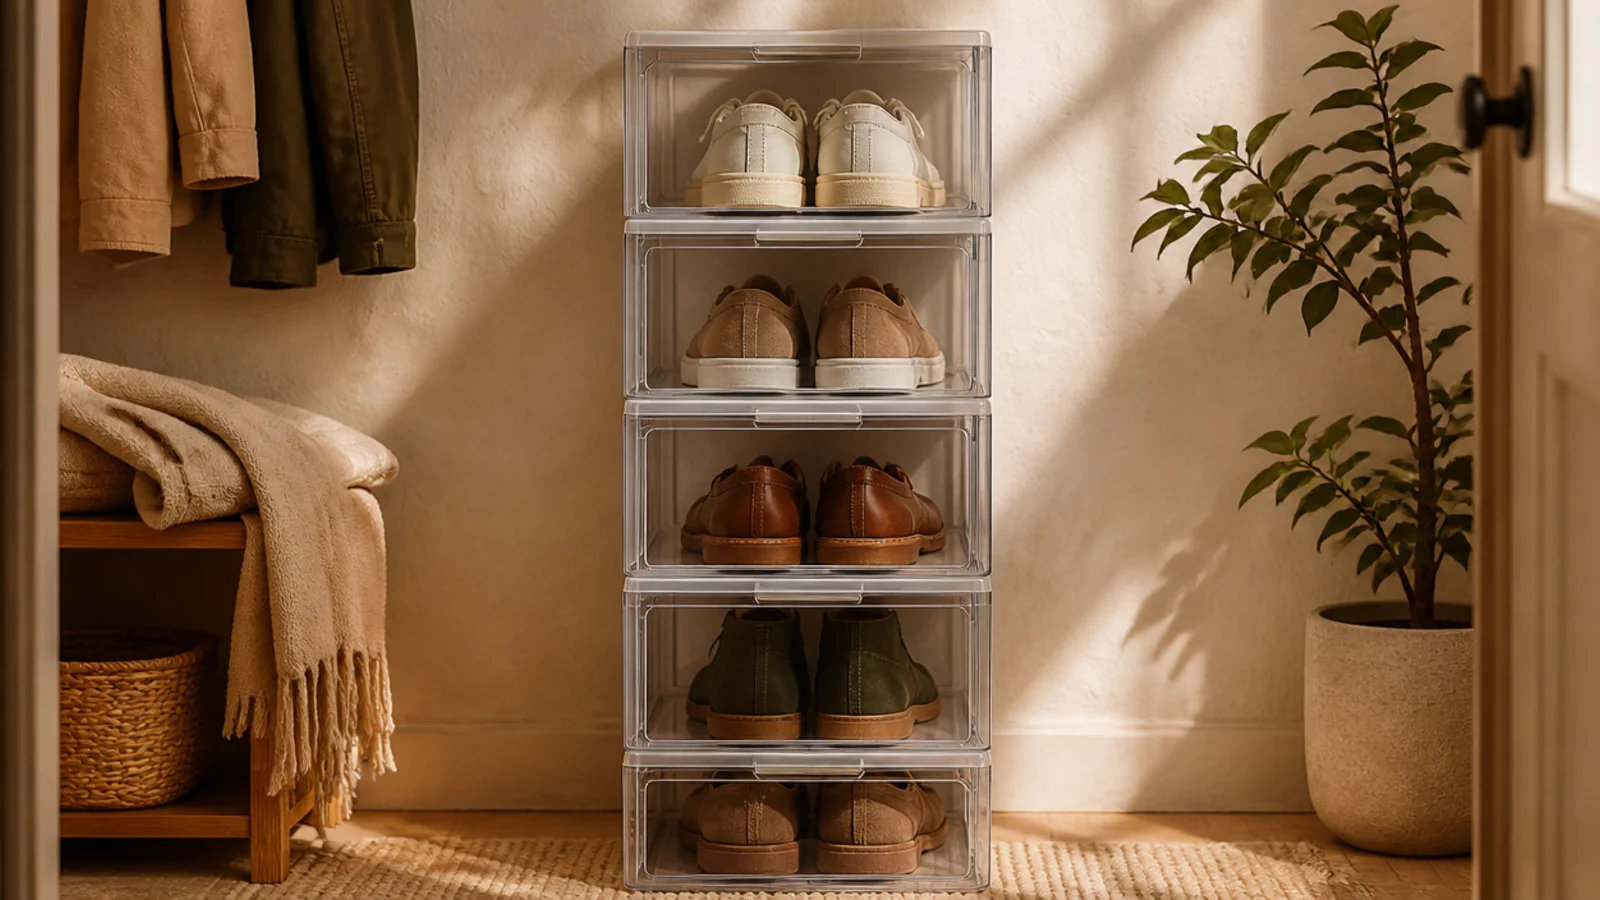
Clear stackable boxes turn a closet floor or corner into a dust-free shoe wall. Each pair gets a protected box you can see into, which suits nicer shoes and seasonal storage. They stack as high as your space allows and adapt to any width.
Buy drop-front boxes so you can grab a pair without unstacking the column. Measure your tallest everyday shoe and pick a box height that clears it — most fit sneakers and flats; boots need the tall version. Stack them against a wall, heaviest at the bottom, and label the fronts if the shoes look alike. Wipe each box out once before use so shoes go into a clean space.
Choose boxes that interlock at the corners; loose stacks slide apart when you open a lower drawer.
Do not stack them higher than you can reach comfortably — a tower you need a stool for stops getting used.
6. Tension-Rod Closet Rack
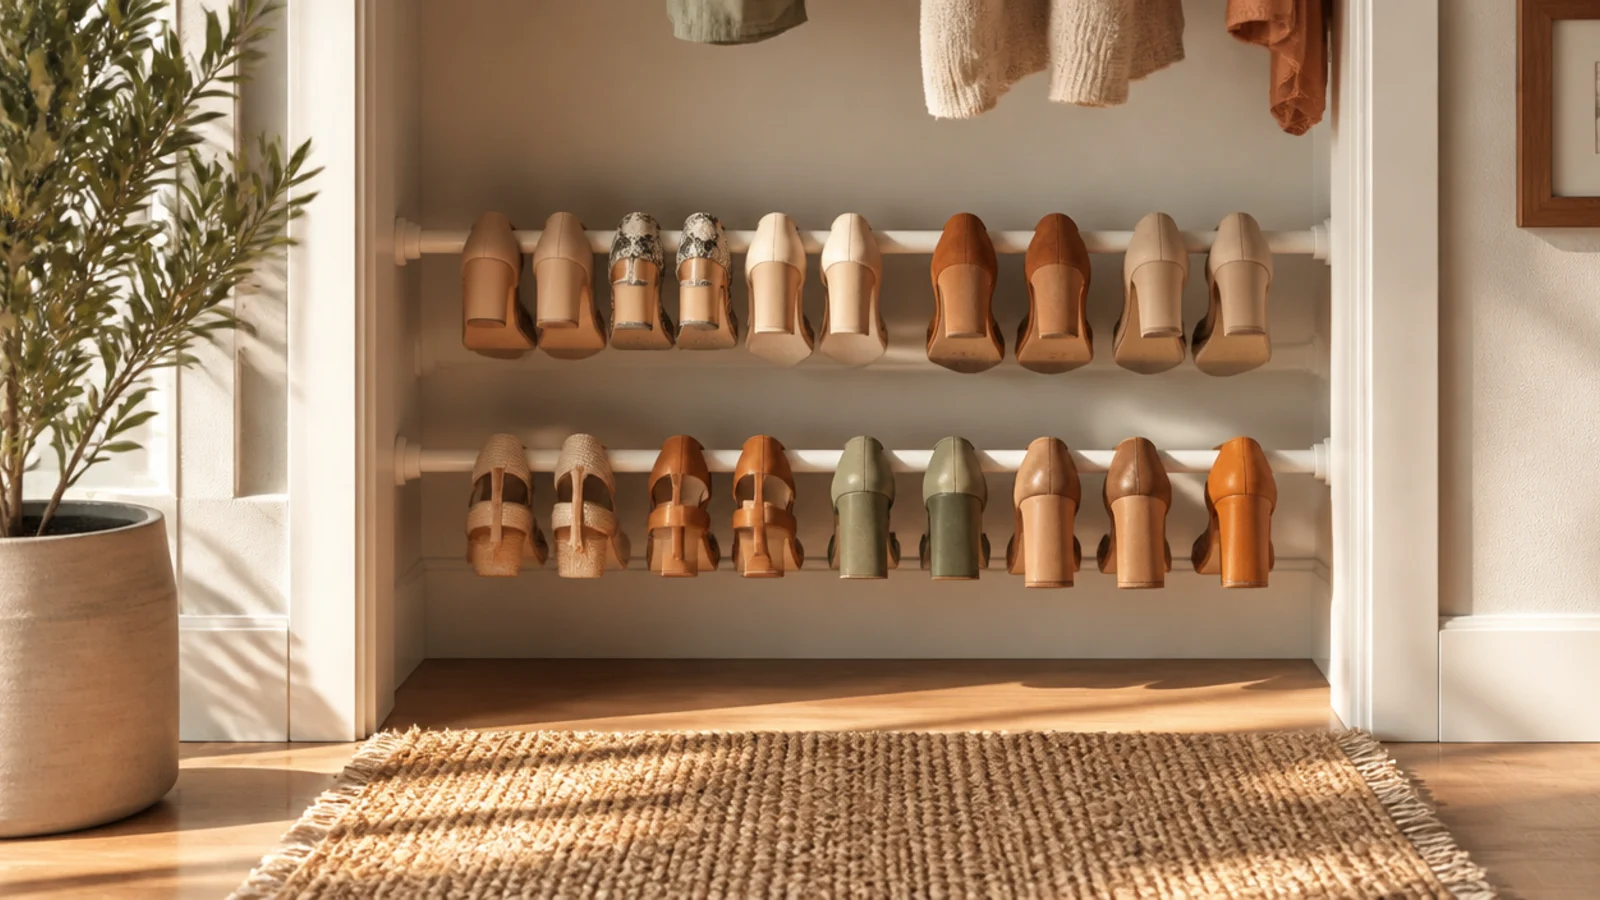
A pair of tension rods turns dead closet height into a hanging rack for heels and sandals, with zero drilling. The shoes hook over the rods by their heels, so they take almost no floor space. It is a renter-friendly trick that costs a few dollars.
Mount two spring-tension curtain rods across the closet a few inches apart and a few inches above the floor. Set the rods so heels hook over the front rod and rest their soles on the back one. Test the tension by tugging down before loading — re-seat the rods if they slip. This works best for heels and wedges; flat shoes need a shelf or bin instead.
Editor's noteSet the front rod slightly lower than the back so shoes tilt toward you and are easy to lift off.
Skip thisDo not hang heavy boots on tension rods; the weight pulls the rods loose and dents the closet walls.
7. Floating Angled Wall Shelf
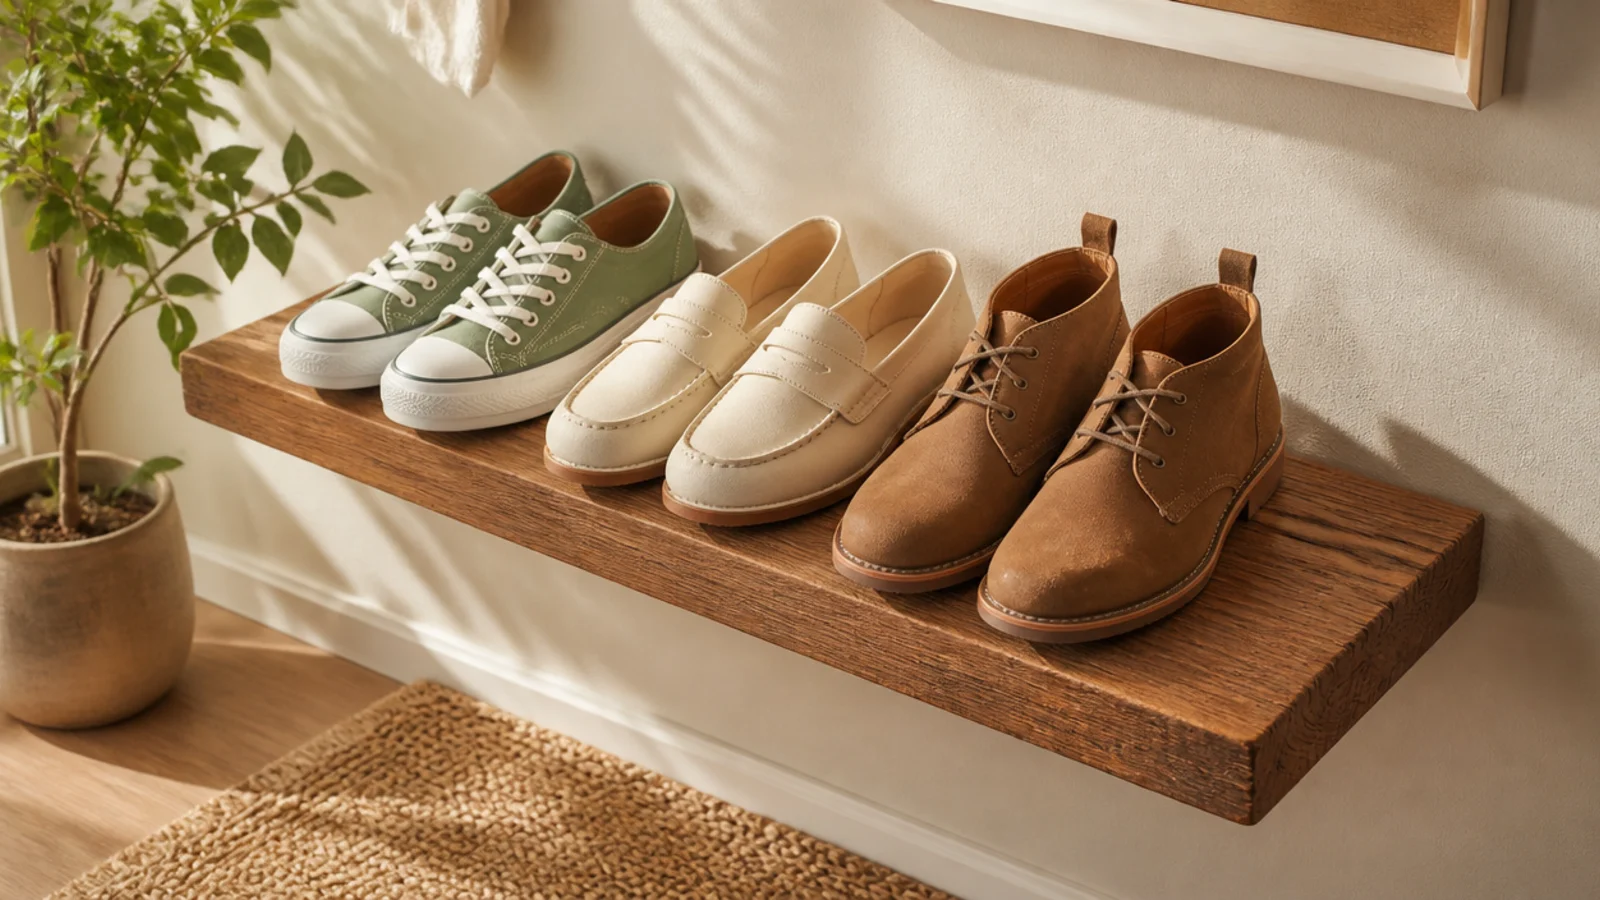
A single angled shelf mounted off the floor keeps the ground clear for cleaning and makes a small entry feel bigger. The slight tilt holds shoes in place and shows them off like a display. It suits a few favorite everyday pairs rather than a big collection.
Find the studs with a stud finder and mount the shelf brackets into them, or use rated drywall anchors. Set the shelf at a slight downward tilt toward the wall (a lip or a shallow angle) so shoes do not slide off. Mount it 10-14 inches off the floor so a second row of shoes can sit on the ground beneath. Level it before final tightening so shoes do not drift to one end.
Add a thin wooden lip along the front edge; it stops shoes sliding and hides scuffs on the shelf face.
Do not mount it into drywall alone without anchors — a loaded shelf pulling out of the wall takes a chunk of plaster with it.
8. Wooden Crate Stack
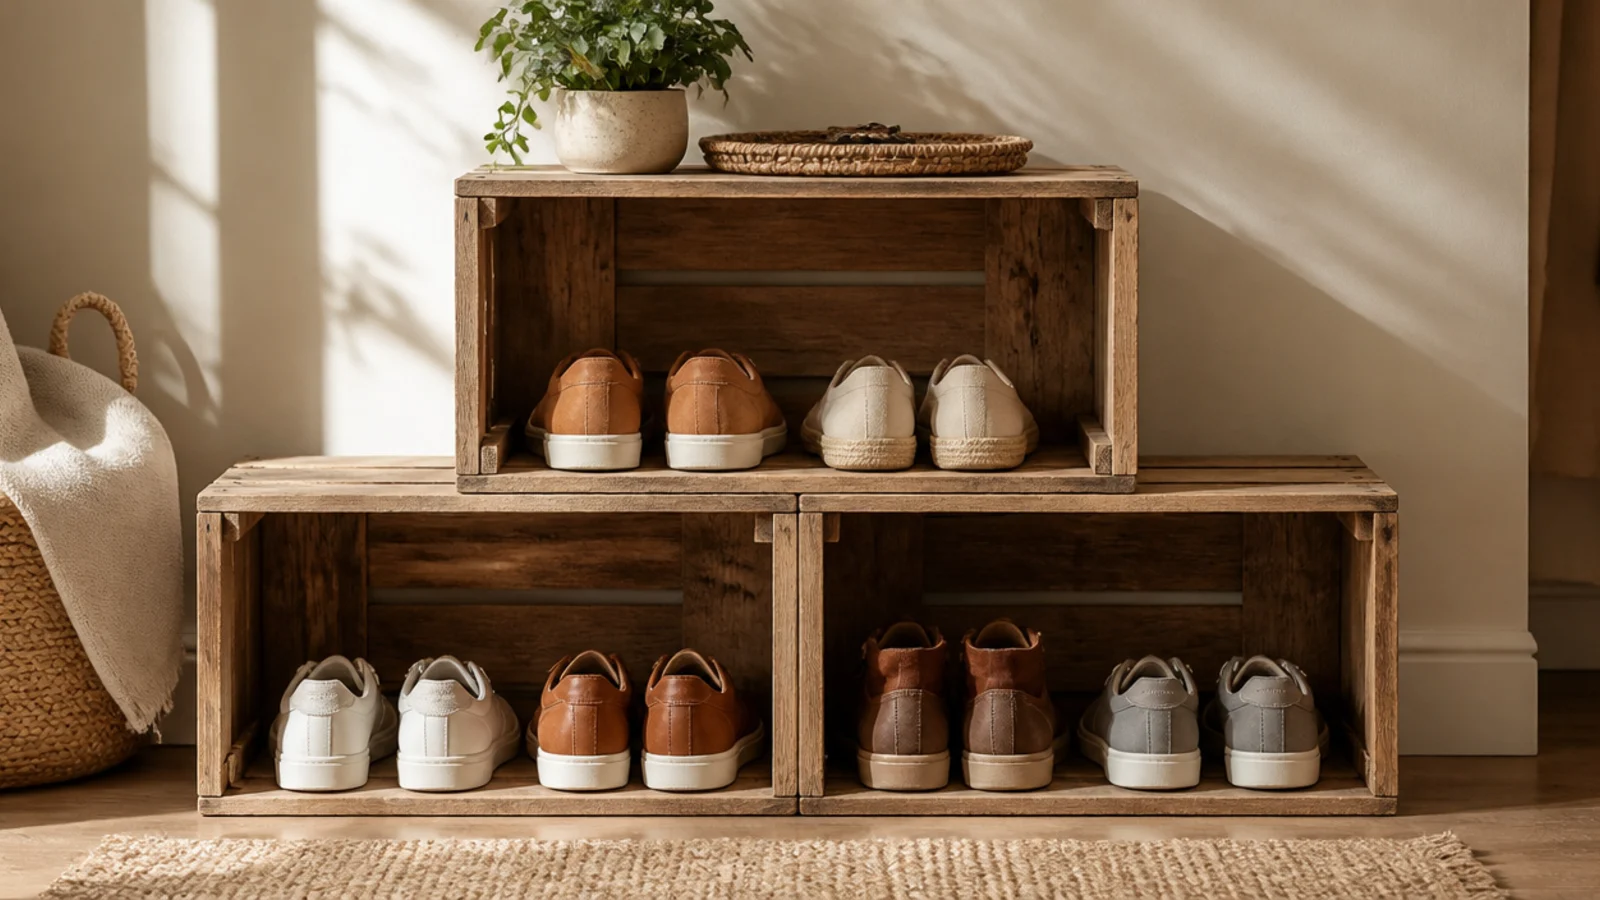
Stacked wooden crates make a cheap, flexible cubby rack that you can rearrange to fit any wall. Each crate holds a pair or two and the open fronts let you grab shoes fast. It suits a casual or farmhouse entry and costs very little from a craft store.
Sand the crates smooth so they do not snag socks, then arrange two or three in a stack or a short pyramid. Screw the crates to each other through the touching sides with short wood screws so the stack cannot topple, and strap the top crate to the wall if it is tall. Set them opening-out and slot shoes in heel-first. A coat of clear matte sealer keeps them from shedding splinters.
Editor's noteStand one crate on its end to make taller slots for boots and the rest flat for everyday shoes.
Skip thisDo not stack raw, unsecured crates more than two high; loose towers wobble and dump shoes when bumped.
9. Flip-Out Wall Cabinet
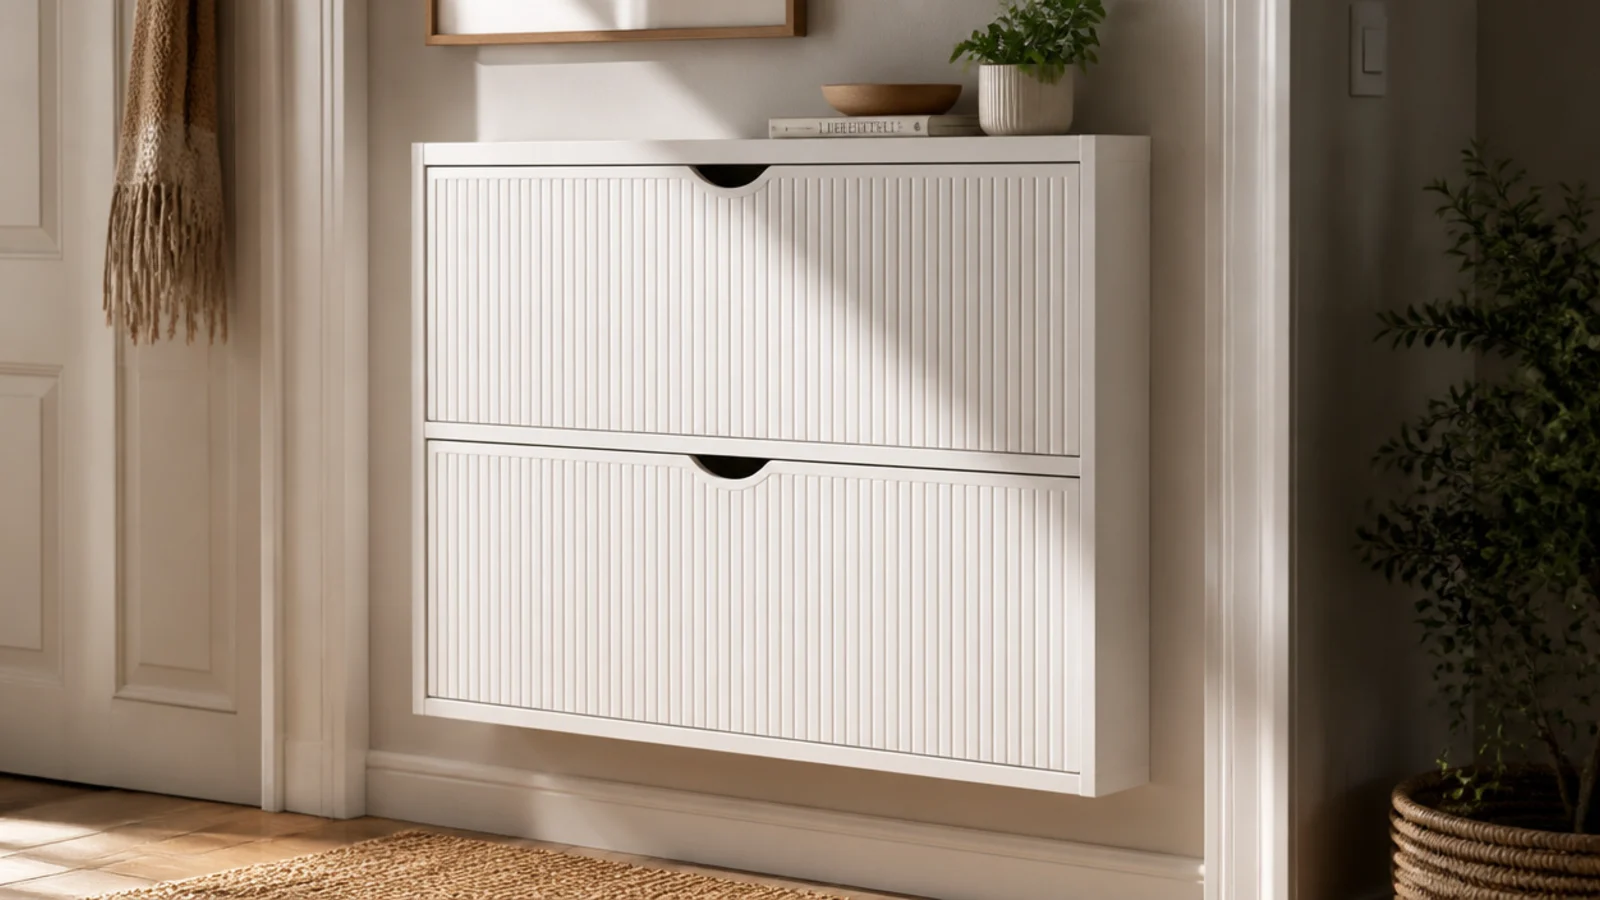
A slim flip-out cabinet mounts flat to the wall and holds shoes behind tilting doors, so the floor stays completely clear. Each unit is only 6-8 inches deep, which suits a hallway too narrow for any floor rack. Closed fronts hide the shoes for a clean look.
Mark the mounting holes with a level, find studs or use heavy-duty anchors, and screw the back panel flush to the wall. Each flip-down compartment holds two to three pairs stood on edge. Stack two units for more capacity, keeping the lower one at a comfortable reach. Because shoes store on edge, this suits flats and sneakers better than bulky boots.
Mount the bottom unit about 6 inches off the floor so you can still sweep or vacuum underneath.
Do not skip finding a stud or using proper anchors; these hold real weight and pull straight off drywall without them.
10. Rolling Under-Bed Tray
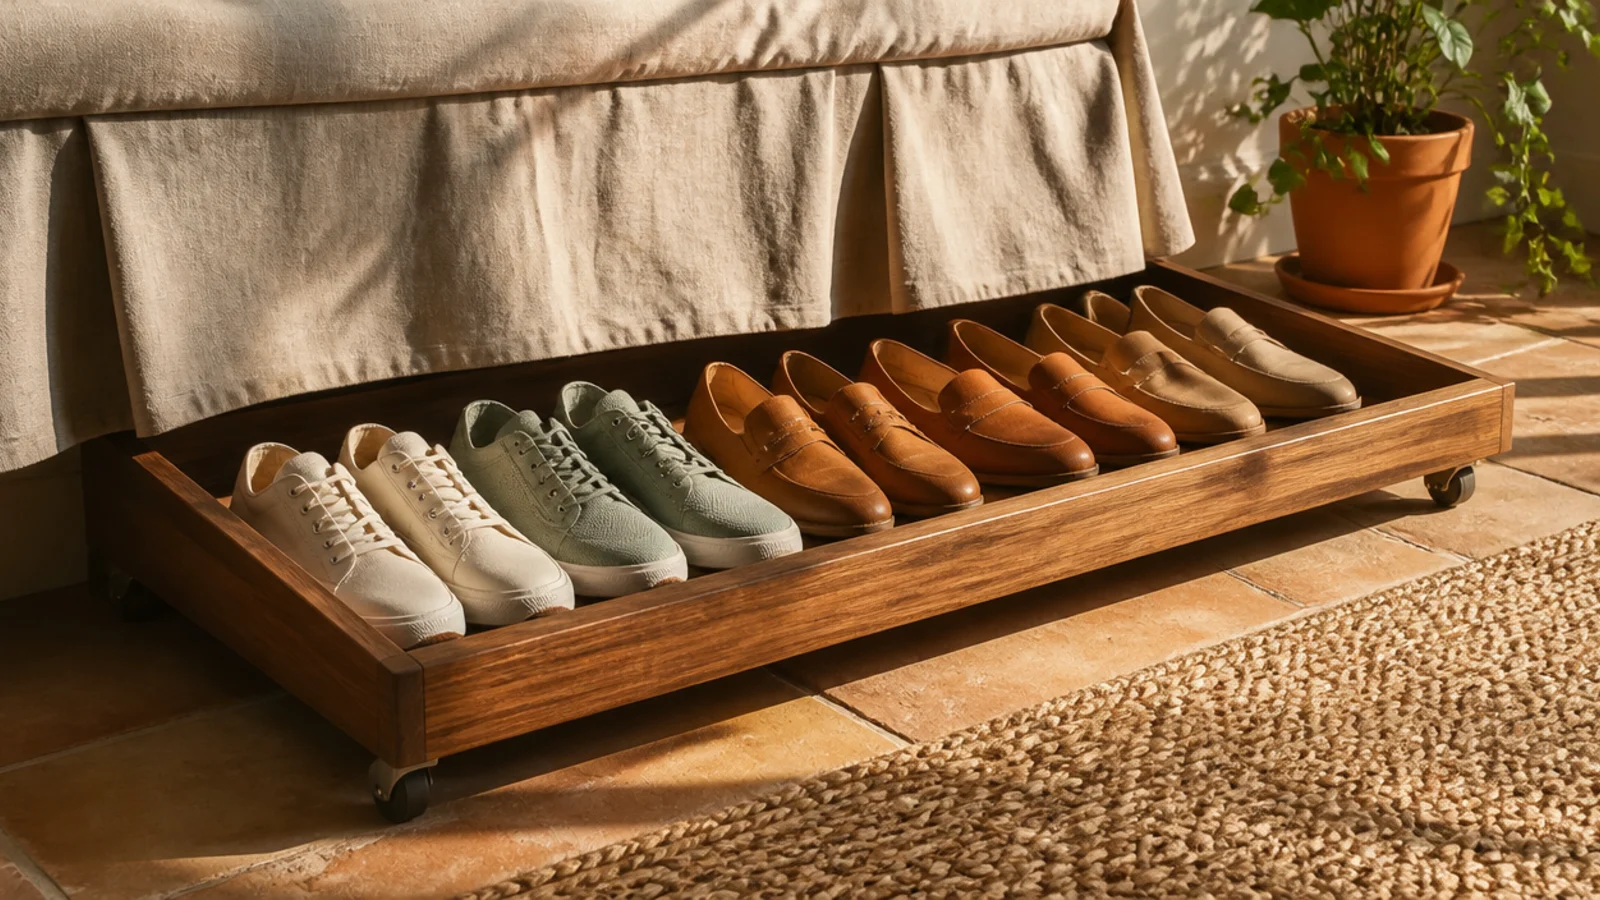
The space under a bed is the largest empty surface in most bedrooms, and a rolling tray turns it into a hidden shoe drawer. It suits overflow and off-season pairs you do not need daily. One tray holds six to eight pairs and slides out of sight.
Measure the clearance under your bed frame and pick or build a tray shorter than that gap on casters. Line the pairs up in a single layer, toes facing the same way so you can scan them. Add a lid or a fabric cover if the underside collects dust. Roll it out to choose, then push it back so nothing shows below the bed skirt.
Put a strip of tape or a handle on the front edge so you can hook it out with a foot instead of bending down.
Do not skip the casters on carpet; a plain box drags and snags, so no one bothers pulling it out.
11. Cube Grid Organizer
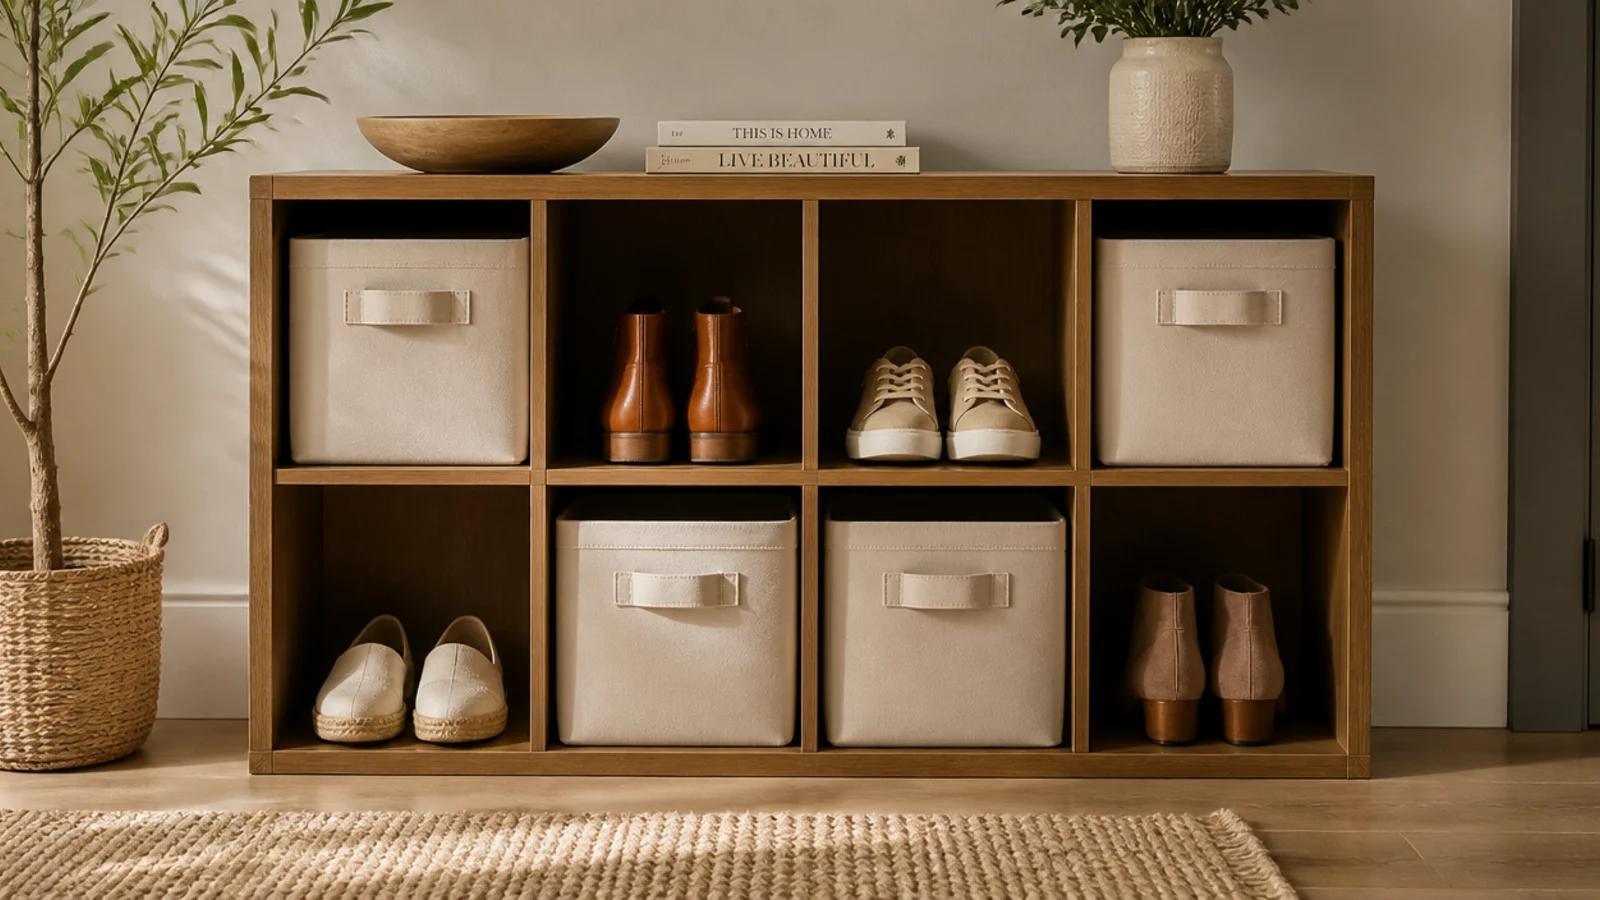
A cube grid shelf gives you a mix of open cubbies and bin-able compartments, so you can hide some pairs and display others. It suits a family entry where different people need their own square. Each cube holds one to two pairs or a fabric bin of small shoes.
Assemble the grid (most are flat-pack with cam locks) and stand it against a wall; anchor the top to the wall with the included strap so it cannot tip onto a child. Assign each person a column of cubes. Drop a fabric bin into the lower cubes for kids' shoes and leave upper cubes open for daily pairs. Keep one cube empty as a drop spot for the shoes you just took off.
Turn the grid so its longer side is horizontal and low; a wide, low unit is more stable and doubles as a bench-height surface.
Do not build it tall and narrow in a home with kids — vertical cube towers tip forward if a child climbs them, so anchor it.
12. Corner Tiered Rack
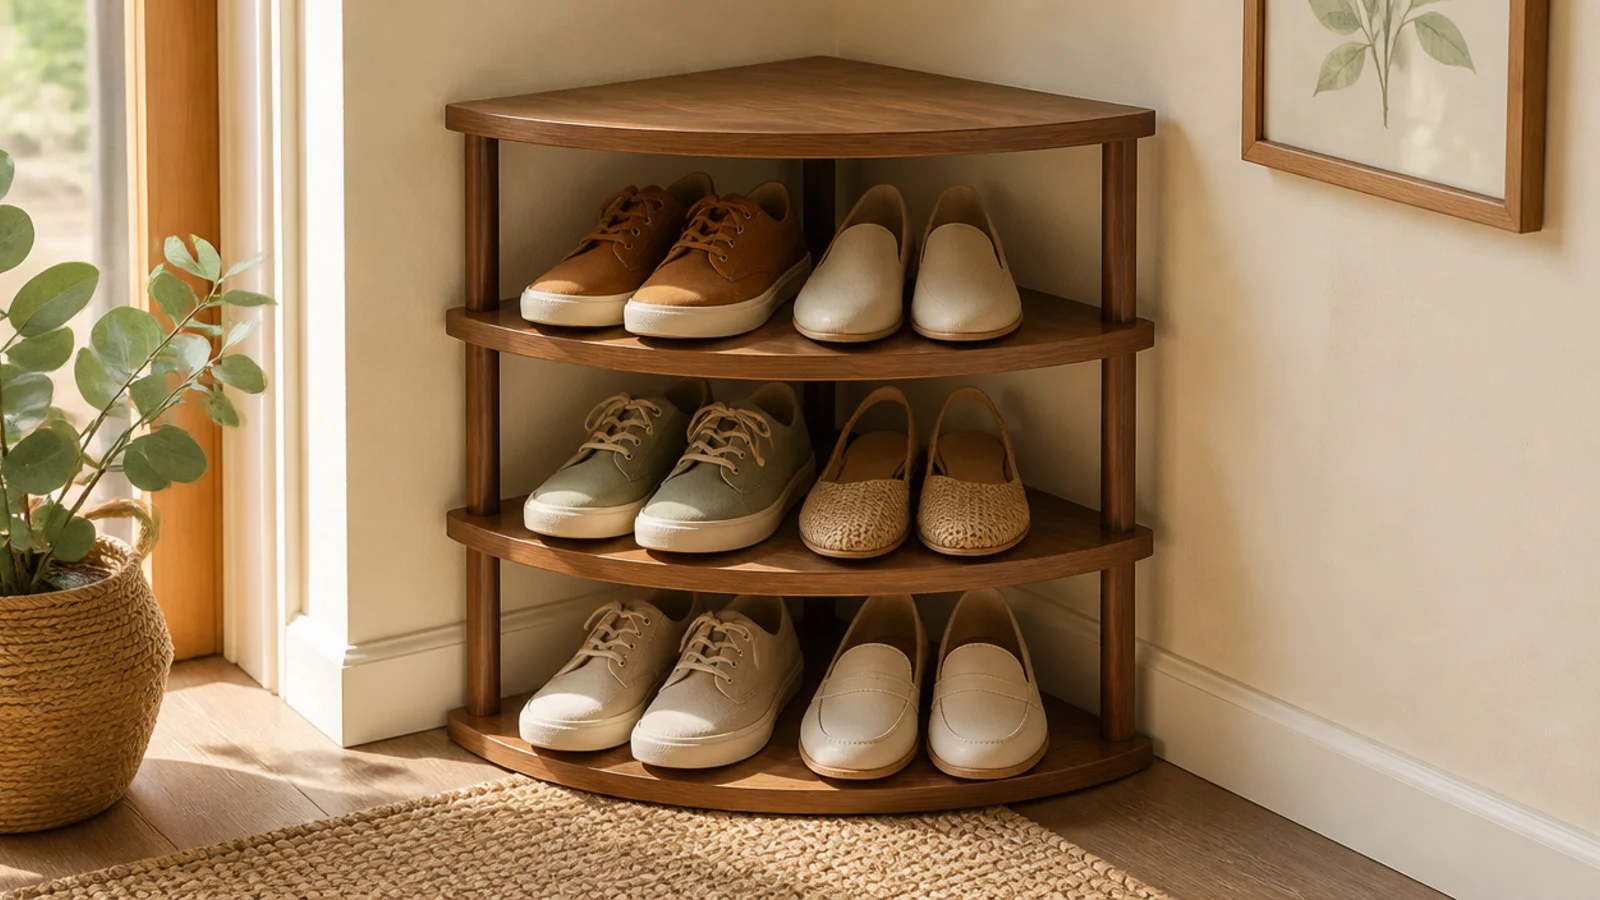
A wasted corner can hold a surprising number of shoes on a triangular tiered rack. It fits where a straight rack leaves an awkward gap and keeps the middle of the room open. This suits the corner just inside a front door.
Measure both walls of the corner and pick a rack whose triangular tiers fit within them without blocking a door swing. Slot it snugly into the corner and check it sits level on the floor. Load the widest bottom tier with the biggest shoes and the narrow top with flats. Because it fills a corner, it holds more than its footprint suggests.
Look for a corner rack with a rotating or fan-out top tier so you can reach shoes tucked deep into the angle.
Do not force a square rack into a corner and lose the triangle of space behind it — a corner-shaped rack uses that gap.
13. Wall Rail for Flats and Sandals
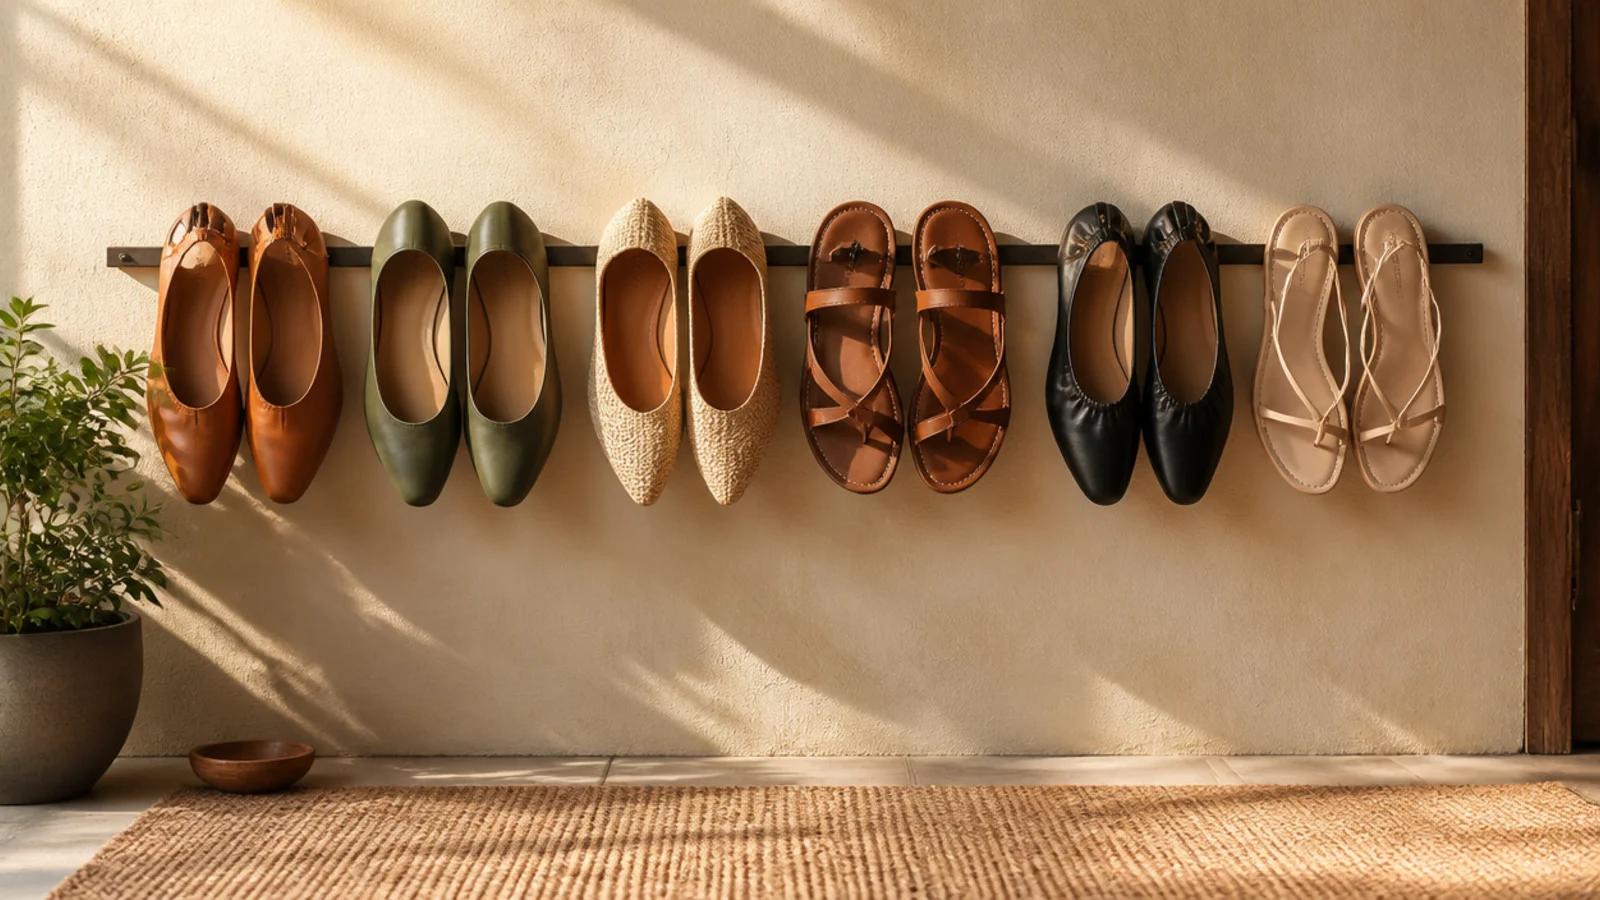
A thin metal rail mounted on the wall holds flats and sandals hooked over it by their heels, taking up almost no depth. It suits a wall too shallow for any shelf and turns shoes into a light display. Best for flat, lightweight footwear.
Mount a slim rail or a length of moulding on the wall at about hip height, into studs or with anchors. Hook flats and sandals over the rail by their back edge so they hang flush to the wall. Space them a couple of inches apart so they do not scuff each other. Add a second rail below for more pairs if the wall allows.
Editor's noteA strip of crown moulding turned so its curved lip faces up works exactly like a heel rail and looks built-in.
Skip thisDo not try to hang sneakers or boots; only shoes with a defined heel or back edge hook over a rail cleanly.
14. Storage Bench with Cushion
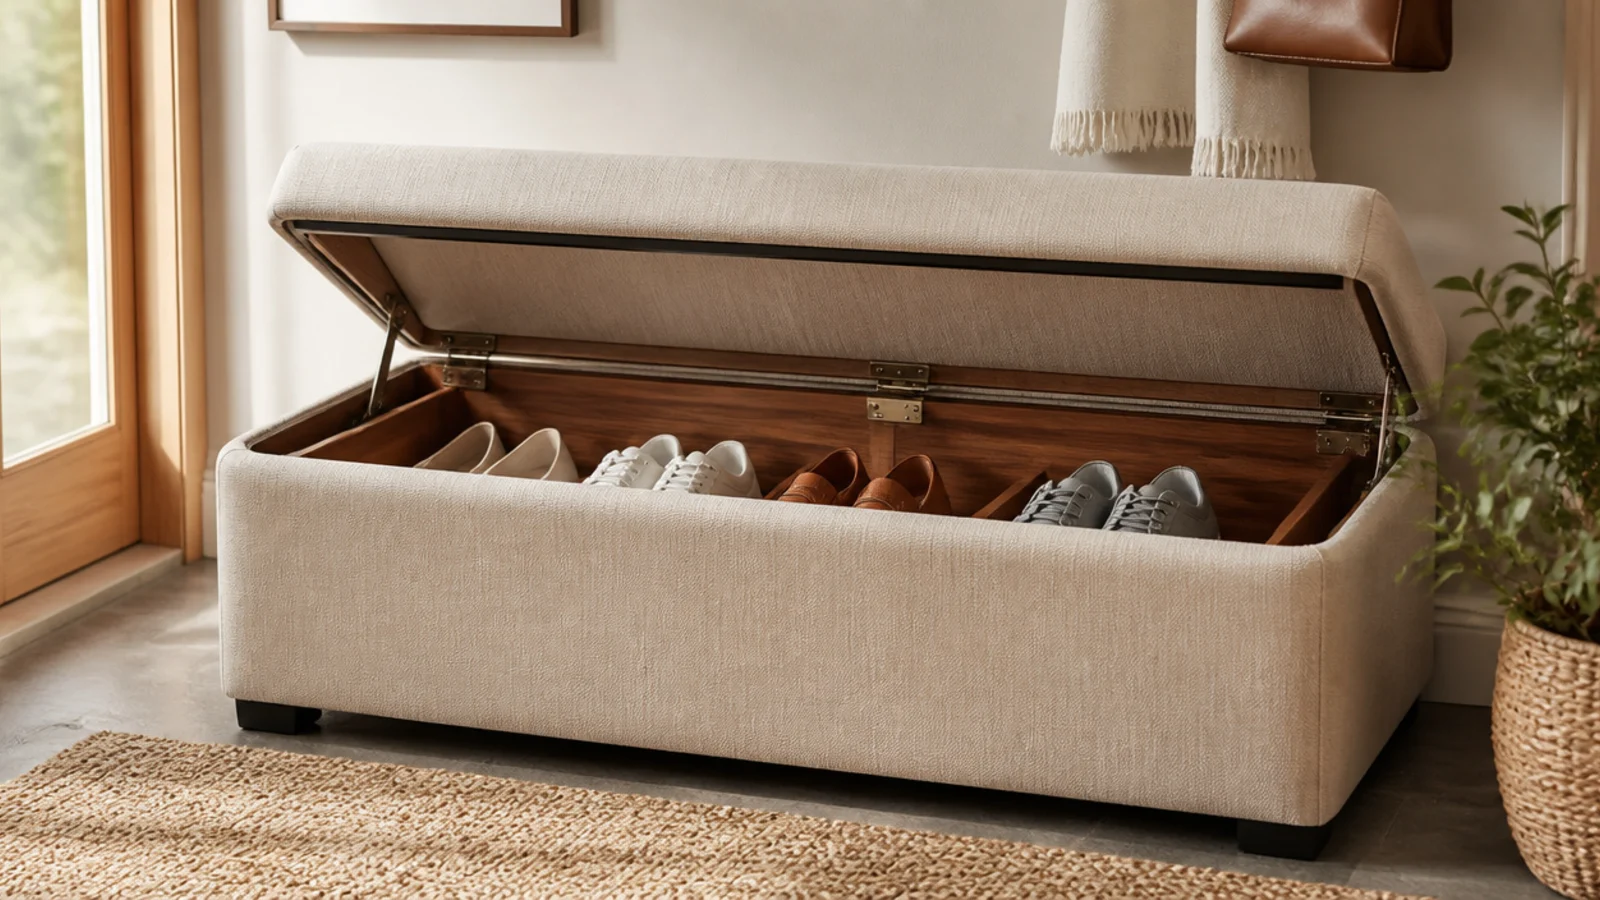
A lift-lid bench hides shoes completely inside the seat and gives you somewhere to sit while you put them on. It suits an entry where you want zero visible clutter. The closed lid keeps the whole thing looking like furniture, not storage.
Pick a bench 15-18 inches deep so shoes fit inside without crushing. Set it against the wall where you naturally sit to change shoes. Store pairs on their sides or in a shallow tray inside so they slot in neatly. Add a cushion on top and it reads as a seat first, storage second — the tidiest option for people who hate seeing shoes.
Drop a boot tray or a washable liner inside the bench so wet or muddy shoes do not stain the wood.
Do not stuff it so full the lid will not sit flush; an overfull bench that gaps at the lid loses the clean furniture look.
15. Rotating Vertical Shoe Tower
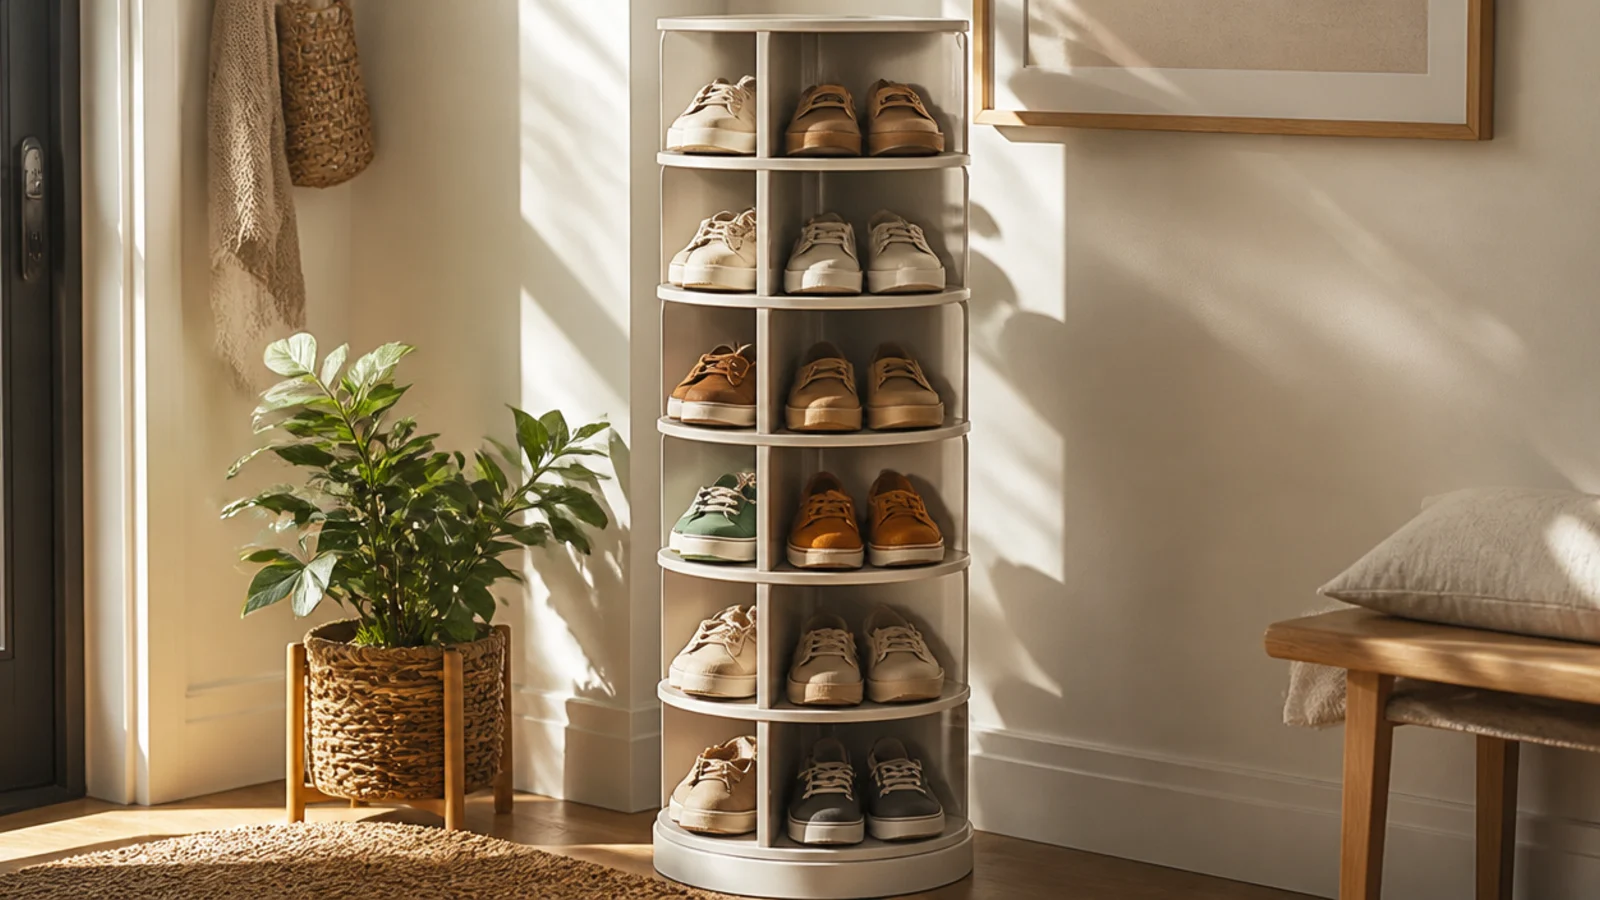
A rotating tower stacks pairs vertically around a spinning pole, so it holds a lot of shoes in a tiny circular footprint. It suits a closet corner or the end of a hallway where floor space is scarce but height is free. You spin it to reach the back pairs.
Assemble the pole and clip the round tiers on at heights that match your shoe types — more space between tiers for boots, less for flats. Stand it in a corner and level the base so it spins smoothly. Load pairs evenly around each tier so it does not lean. Spin to browse; the vertical stacking means a two-foot footprint can hold 20-plus pairs.
Editor's notePut your least-worn pairs on the lowest and highest tiers and daily shoes at eye level so the spin pays off.
Skip thisDo not overload one side; an unbalanced tower spins unevenly and can tip, so distribute weight around each tier.
16. PVC Pipe Cubbies
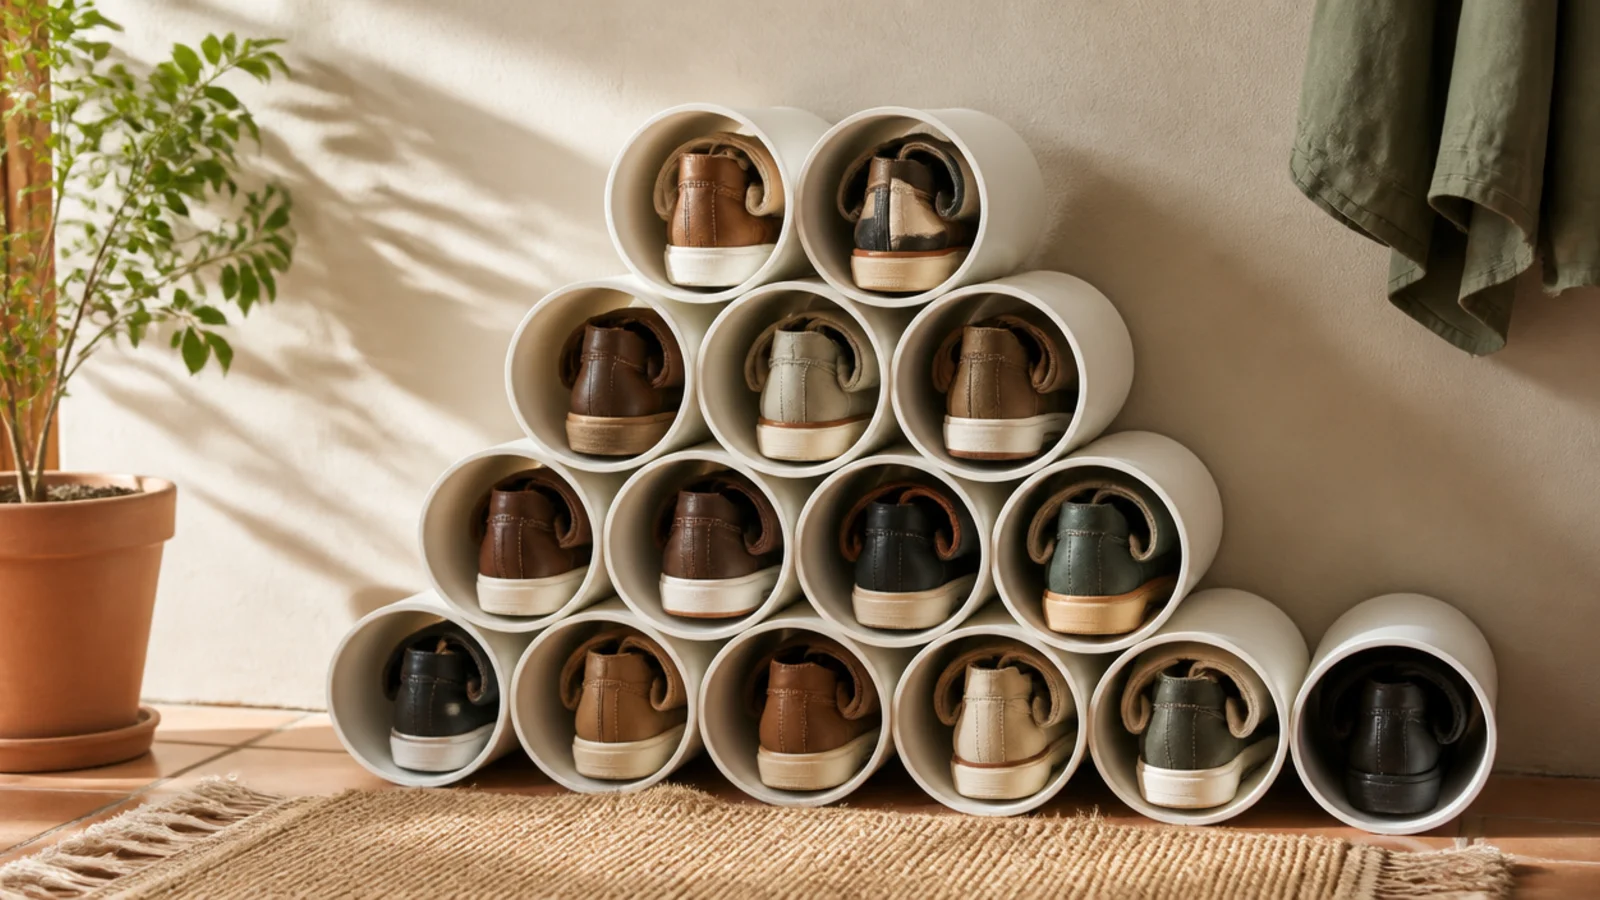
Short lengths of wide PVC pipe bundled together make a honeycomb of shoe cubbies for almost nothing. Each tube cradles one pair, and the round shape suits flats, sneakers, and flip-flops. It is a genuinely cheap DIY that looks surprisingly modern painted.
Cut 6-inch-wide PVC pipe into 10-12 inch lengths with a hacksaw (or buy pre-cut), sand the cut edges smooth, and wipe them clean. Glue the tubes together in a block with PVC cement or strong adhesive, then let it cure fully. Set the block on a shelf or inside a cube and slot a pair into each tube. Paint the whole block one color for a finished look.
Editor's noteBundle an odd number per row and offset the rows like a honeycomb; it is more stable and looks intentional.
Skip thisDo not skip sanding the cut ends; sharp PVC edges snag socks and scratch shoe leather every time you reach in.
17. Slanted Bamboo Rack
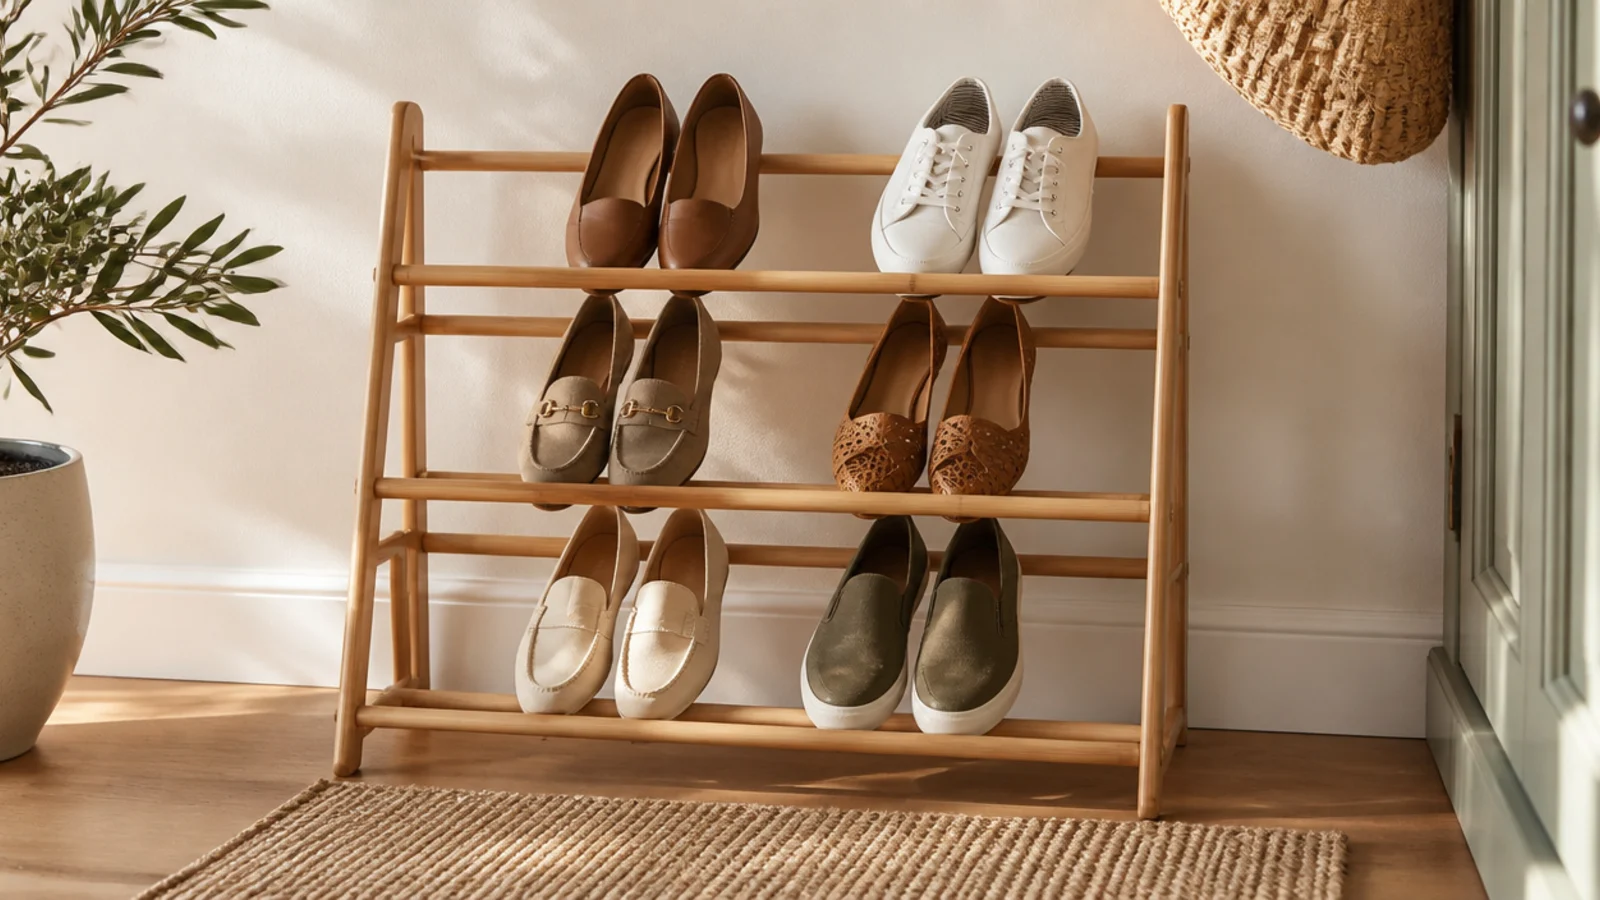
A bamboo rack with slanted dowel tiers holds shoes toe-down, so it is shallower than a flat rack and keeps mud off the floor. The light wood suits a bright, natural entry. It is inexpensive, sturdy, and assembles fast.
Assemble the dowel tiers so each one slants downward toward the wall, letting shoes rest toe-first between the bars. Set it against the wall and check the slant holds shoes without them sliding out. Put heavier shoes low and lighter flats up top. Because the shoes tilt, the whole rack can sit as little as 8 inches from the wall.
Editor's noteOil the bamboo once a year with a little mineral oil so it does not dry out and crack in a warm hallway.
Skip thisDo not set the tiers too steep; an over-slanted rack lets shoes slide off, while too flat wastes the space-saving tilt.
18. Basket Trio on Wall Hooks
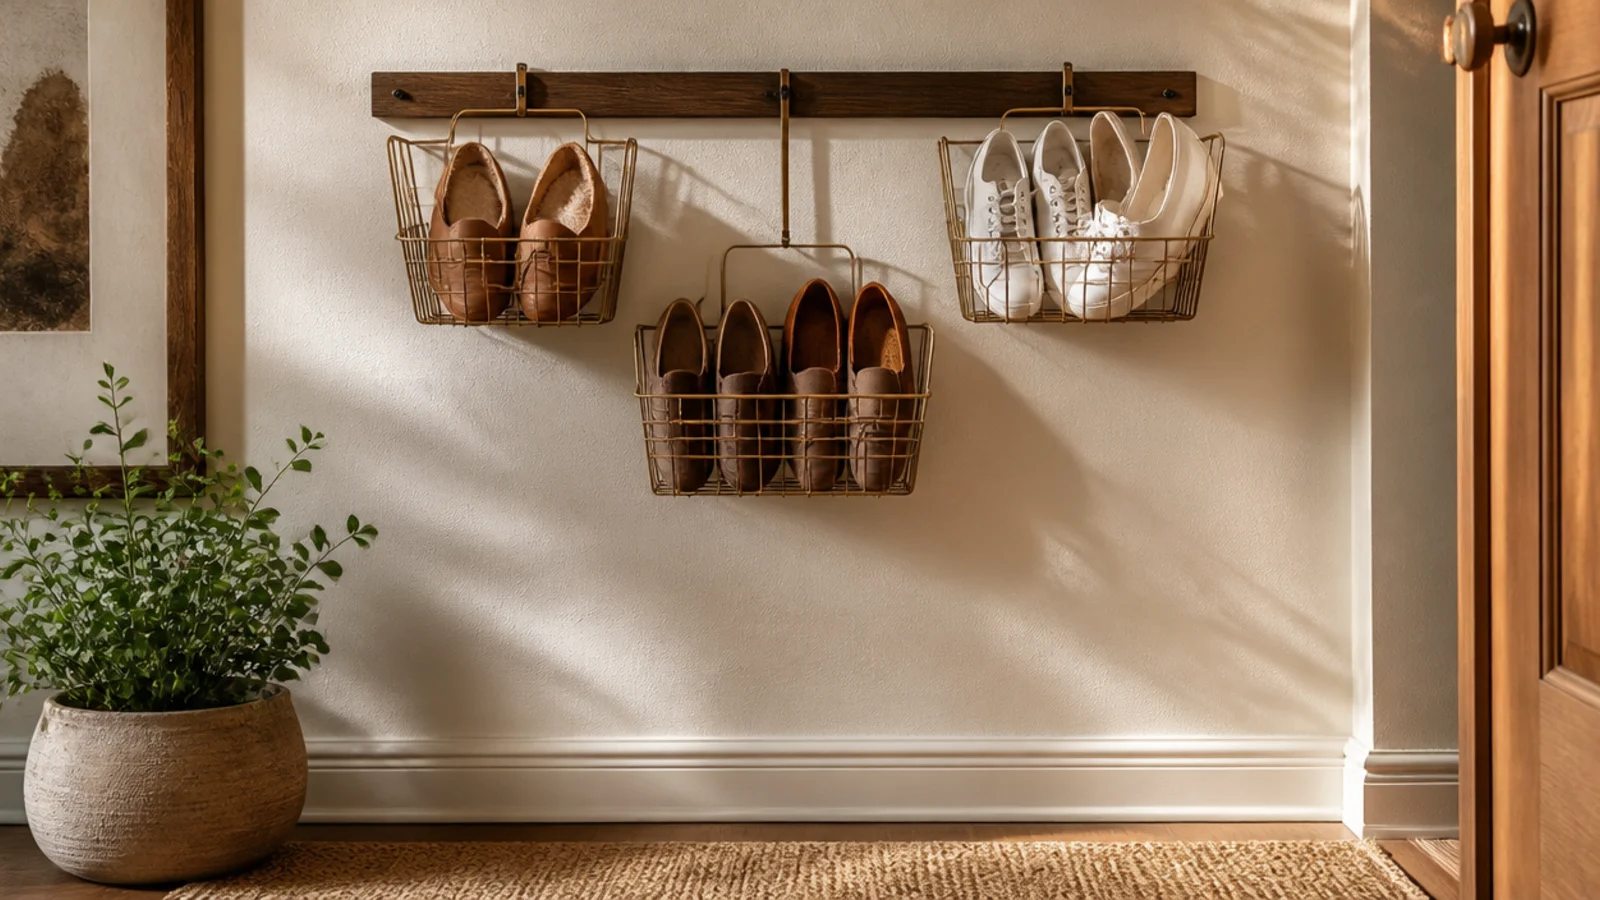
Wire or fabric baskets hung on wall hooks lift shoes off the floor into grab-and-go bins. It suits kids' shoes and casual pairs that do not need lining up. Hanging them keeps the floor clear for sweeping.
Mount a wall rail or individual hooks into studs at heights that suit who uses them — low for kids, higher for adults. Hang one basket per person or category and drop shoes straight in. Choose baskets with a flat back so they sit against the wall instead of swinging. Keep each basket to a few pairs so it does not sag or overflow.
Label each basket with a small tag so everyone drops their shoes in the same spot without thinking.
Do not hang deep baskets too high; shoes at the bottom of a high basket get forgotten and never worn.
19. Mini Mudroom Cubby Bench
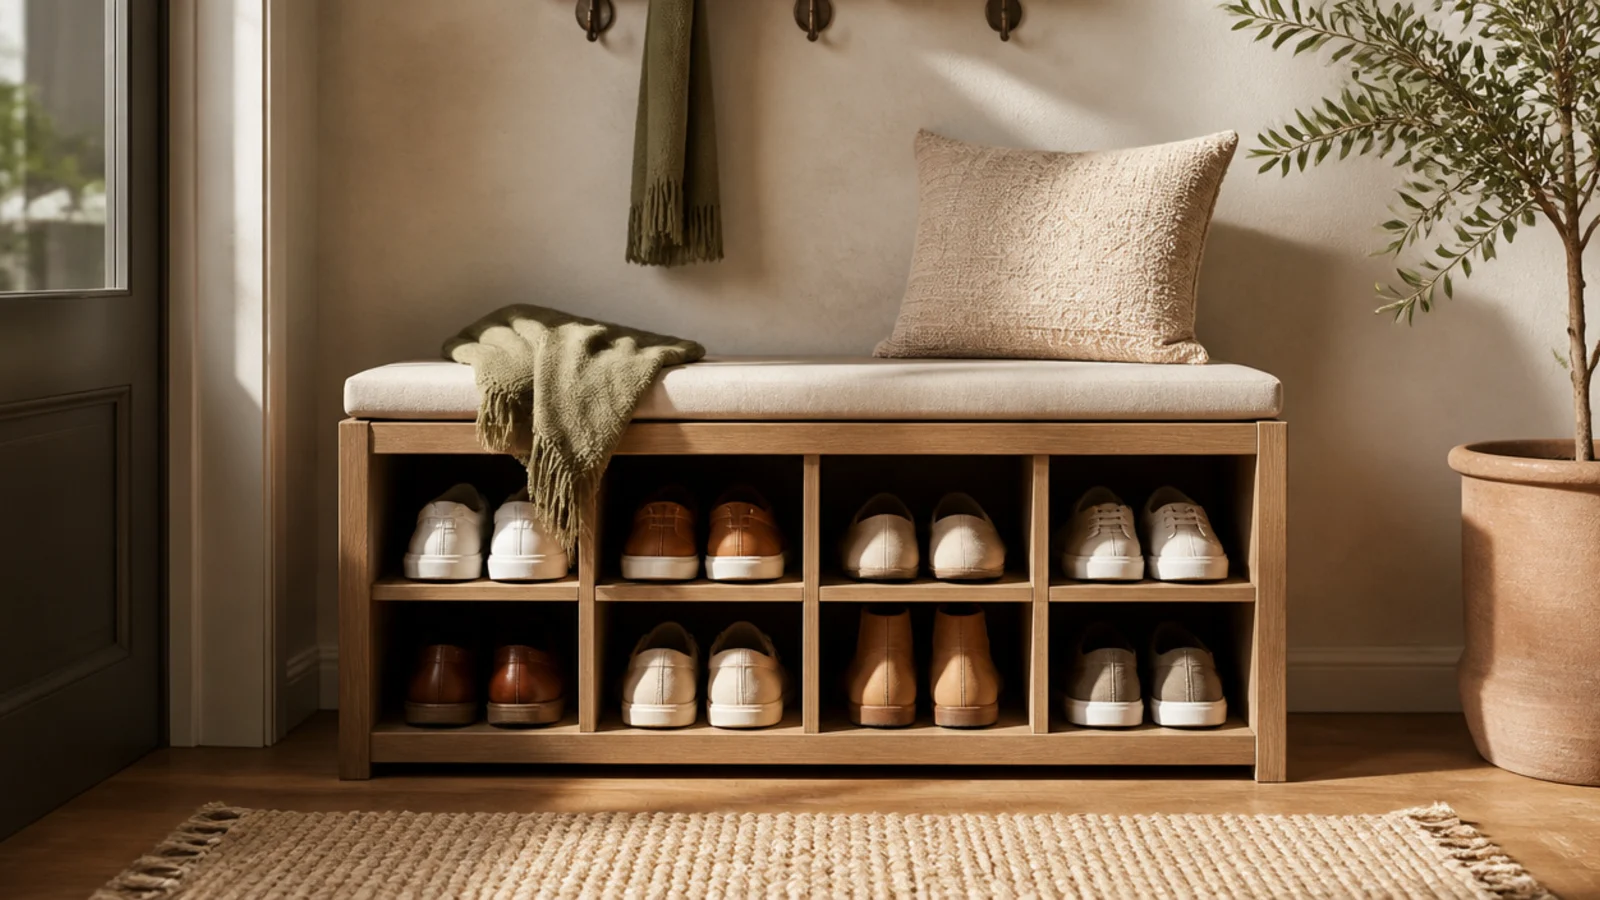
A small bench with open cubbies underneath and hooks above turns a few feet of wall into a mini mudroom. It suits the spot right inside a door where coats and shoes both land. Everything has a home, so the pile-up by the door stops.
Choose or build a bench 16-18 inches deep with two or three open cubbies below the seat. Set it against the wall and mount a row of hooks above it at coat height, into studs. Give each person a cubby for shoes and a hook for a coat or bag. Sit on the bench to change shoes, then tuck them into the cubby below — the whole routine happens in one spot.
Editor's noteSlide a shallow boot tray into each cubby so wet shoes drip onto a wipeable surface, not the wood.
Skip thisDo not mount the hooks too high above the bench; hooks out of easy reach get skipped and coats end up on the seat.
20. Toe-Kick Shoe Drawer
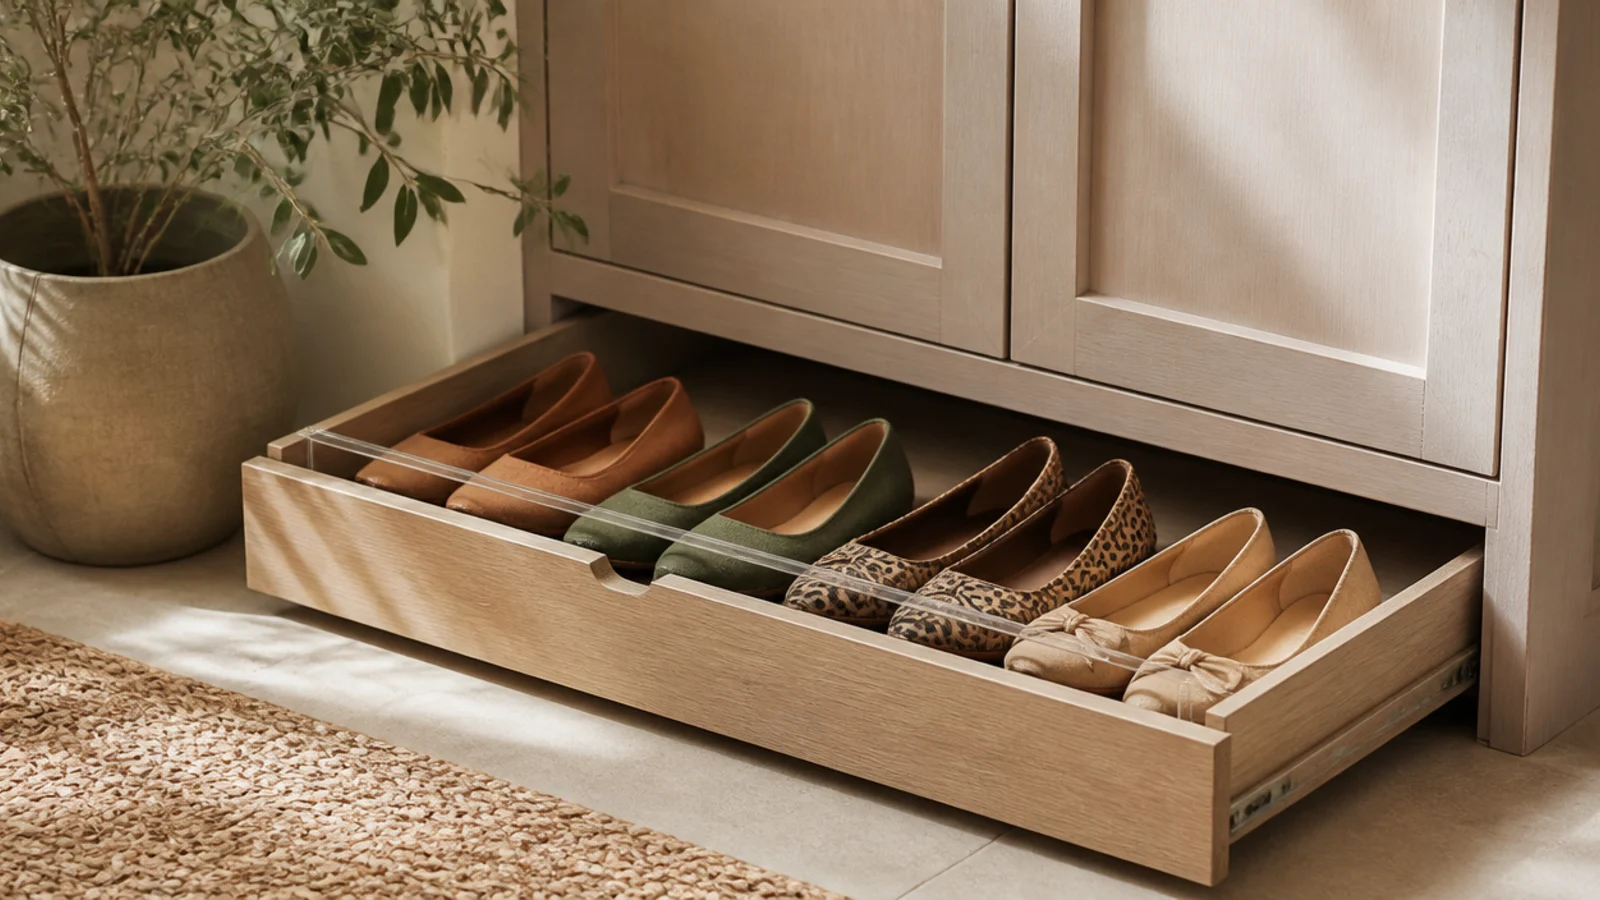
The empty gap beneath low cabinets — the toe-kick — can become a hidden shoe drawer that is completely invisible when closed. It suits flats and slippers stored right where you kick your shoes off. This is the most space-clever option for a home with cabinetry.
Measure the toe-kick height and depth; most are about 3-4 inches tall and deep enough for flats laid flat. Fit a shallow slim drawer or a ready-made toe-kick drawer kit into the gap, secured to the cabinet base. Store flats, slippers, and sandals lying flat inside. Nudge it shut with your foot and the storage disappears entirely.
Add a touch-latch so a light push opens and closes the drawer without a handle breaking the clean cabinet line.
Do not try to fit anything bulkier than flats; the toe-kick is too shallow for sneakers or heels, so keep it to slim shoes.



