
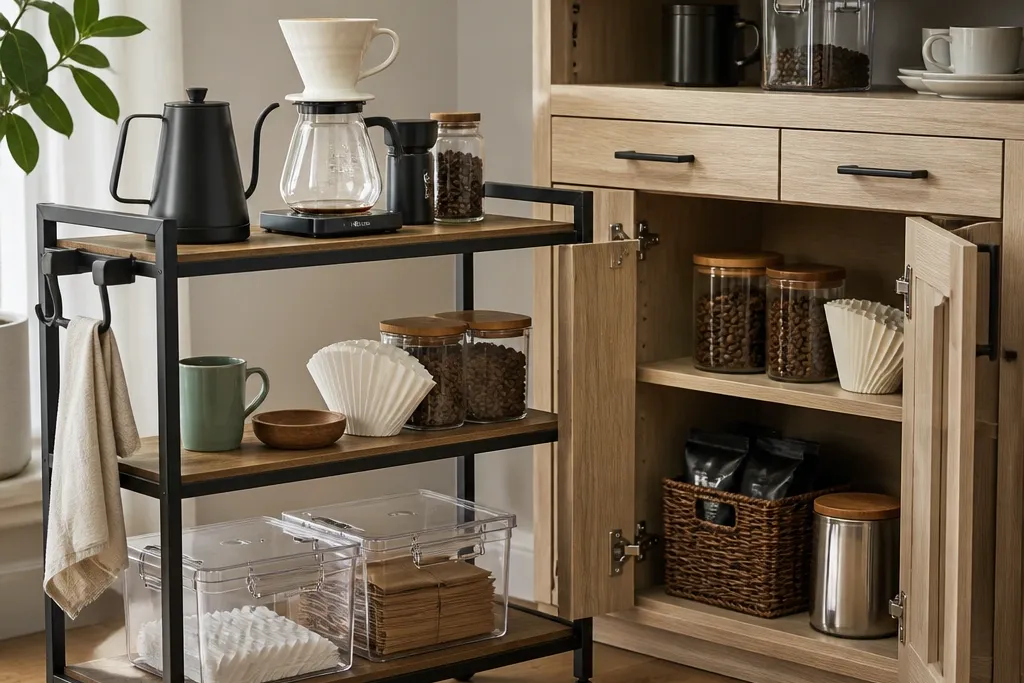
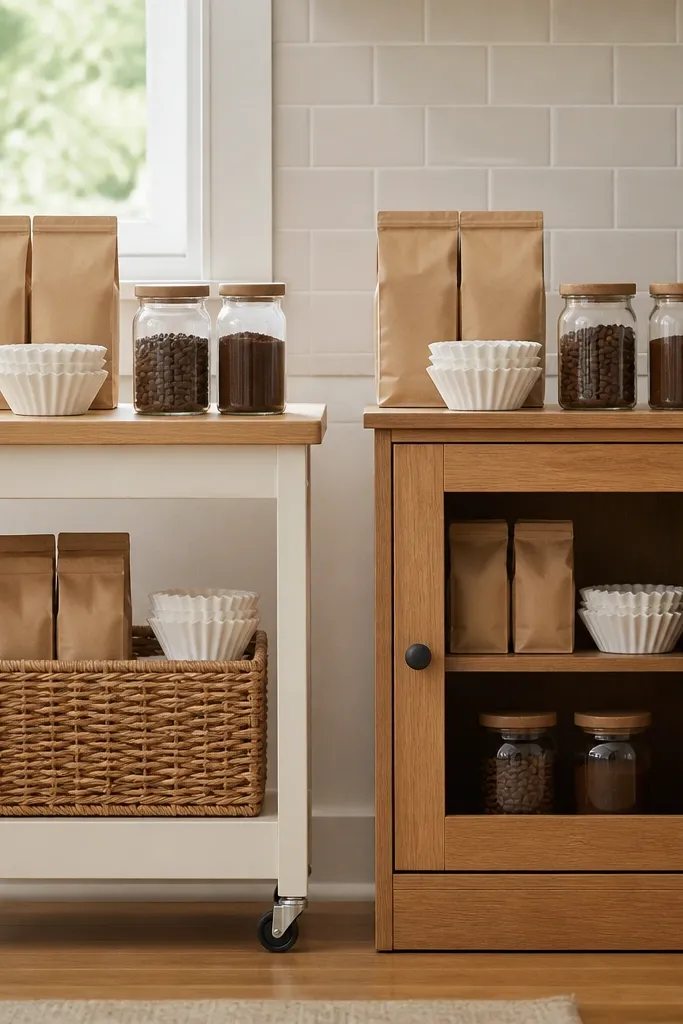
1. Rolling cart with a removable tray for the brewer
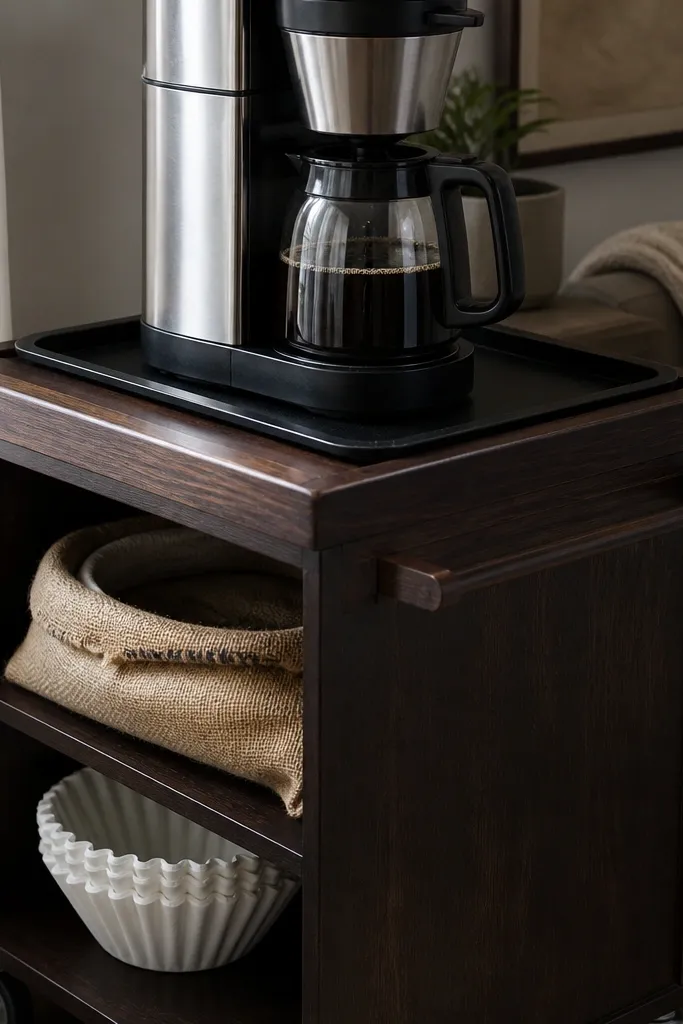
This is the cart build I recommend when you want coffee to feel like an appliance, not a science project. The removable tray gives you a dedicated, wipeable spot for your brewer and catches drips without staining the cart top. You can keep beans and filters in open shelves below, then slide the tray off when you clean. It looks intentional even if you use store-bought shelves — the key is making the top surface and drip zone separate.
Start with a rolling cart frame that has at least two shelves and a flat top with a lip or ledge. Cut a tray panel from 1/2 in plywood or a thin sheet of baltic birch, then seal it with two coats of polyurethane; add a small raised edge so drips stay put. Mount a simple cleat system to the cart top so the tray sits level and lifts out. Finish by adding two shelf bins for filters and grounds plus one small basket for daily tools like a scoop and thermometer.
Use a silicone mat on the tray instead of relying on paint — it’s faster to wipe after messy days.
Don’t mount a brewer directly to a cart top without a drip plan; you’ll end up with sticky stains.
2. Pegboard side cart with mug hooks and a scoop bin
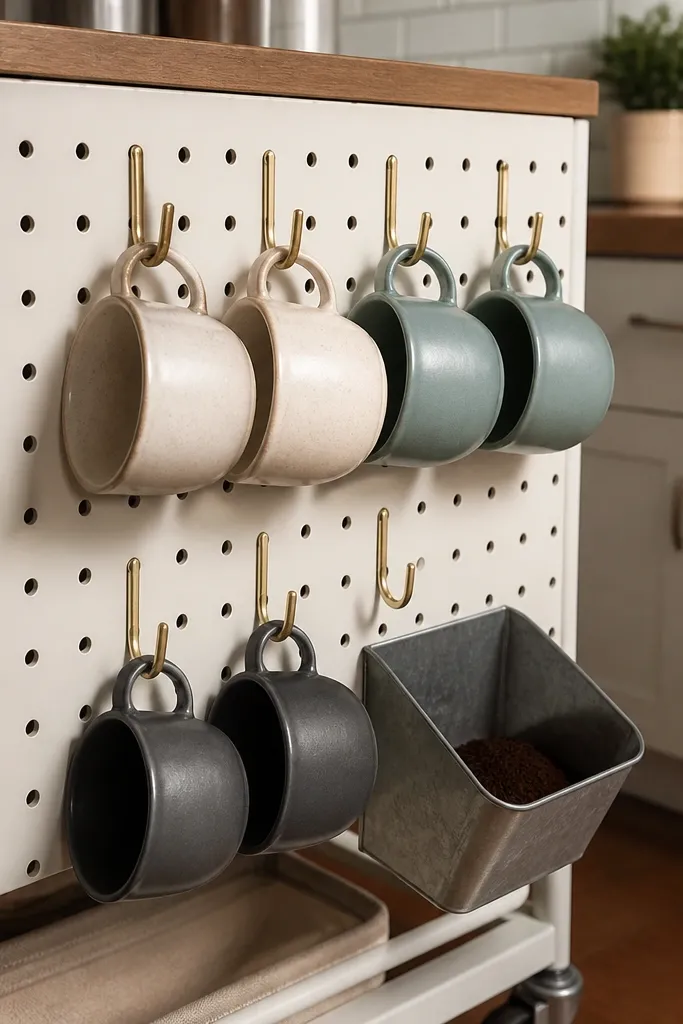
If your coffee setup is mug-heavy, this design solves the “where do the tools go?” problem fast. A pegboard side turns the cart into a vertical storage wall without adding bulky drawer units. Hooks keep mugs visible and easy to grab, while a small scoop bin stops grounds from wandering onto shelves. The result is a cart that looks organized even when your counter is busy.
Buy a rolling cart with at least one solid side panel or flat area where you can attach pegboard. Cut pegboard to fit, then screw it into the cart frame using wood screws and washers for grip. Add mug hooks and two smaller pegboard holders for a scoop and a mini brush. For the scoop bin, mount a small wire basket under the pegboard edge so it sits above the shelf and doesn’t scrape when you move the cart.
Editor's notePre-drill the pegboard holes with a scrap first so you don’t crack it when tightening screws.
Skip thisSkip cheap plastic hooks; they bend under mug weight and make the whole side look messy.
3. Open-shelf cart with wine rack for cups and an under-shelf bin
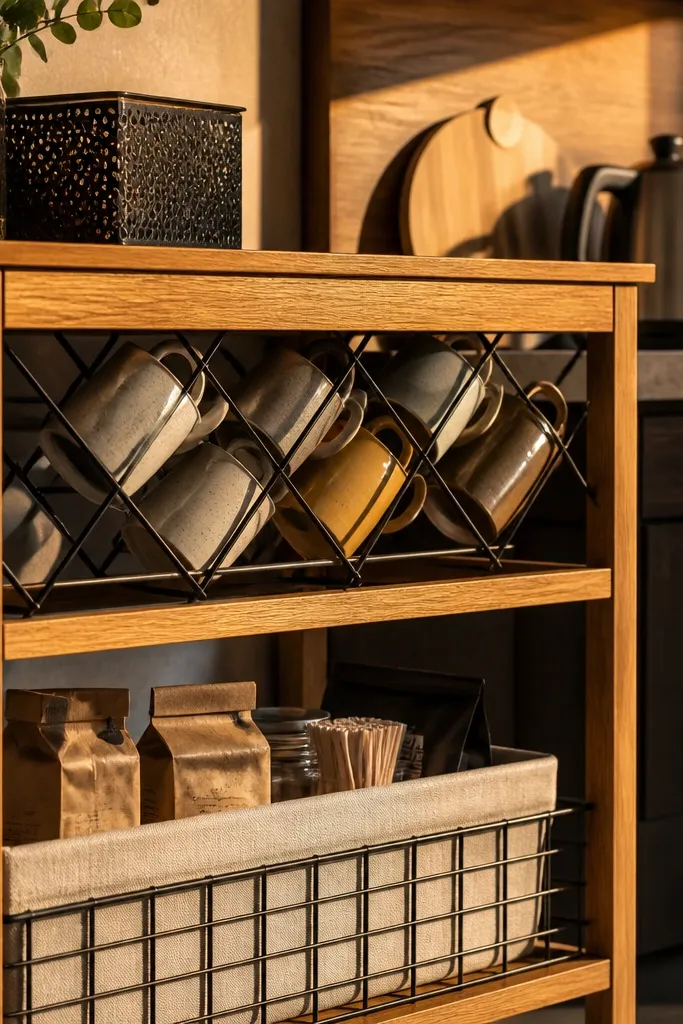
This build is for people who want visibility and fast grabbing. A wine rack section holds cups at angles so you can see what you actually have, and it stops cups from stacking crooked. The under-shelf bin keeps coffee bags, filters, and stir sticks contained. It’s a clean look because everything has a “home” and you can keep the counter clear.
Use a cart with two open shelves or add a third shelf using 1x lumber and shelf brackets. Mount a metal or wood wine rack across the top portion, securing it with screws into the shelf supports. Place a lidded bin under the wine rack shelf area for supplies that you don’t want out. Finish the wood with matte poly so it doesn’t show scuffs from daily use.
Editor's noteChoose a wine rack with wider slots for mugs; narrow slots chip ceramic edges.
Skip thisDon’t leave bins open if you store sugar or flavored syrups there; spills travel.
4. Cart with a drop-down side table for cups and prep
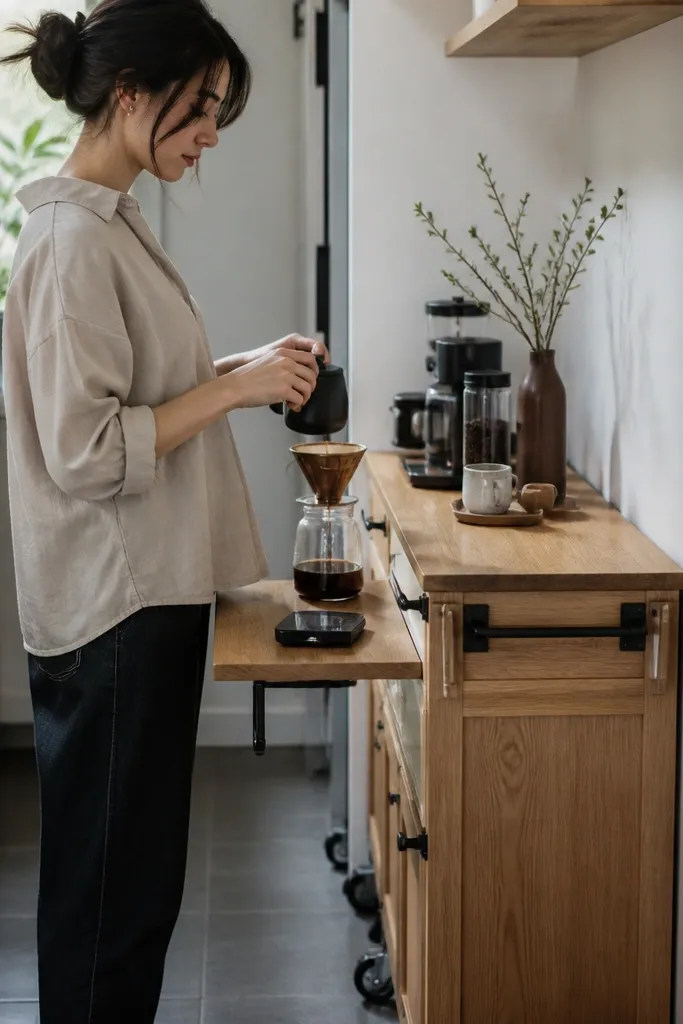
This is a smart cart idea when your counter is tight. The drop-down side table gives you a real prep surface for weighing beans, assembling filters, or setting a cup while you steam milk. When you’re done, it folds up and keeps the cart from crowding the walkway. It’s also easy to wipe because the side table can be finished like a small tabletop.
Pick a cart with enough frame strength on one side to mount a hinge. Cut a side table top from 3/4 in plywood, then round the front edge and seal with poly. Attach a heavy-duty piano hinge to the cart frame and the side table, and add a simple latch or magnetic catch so it stays level when down. Add a small drawer organizer on the lower shelf for packets and a separate bin for used filters.
Editor's noteAdd a rubber bumper where the table meets the cart frame so it doesn’t rattle.
Skip thisDon’t use a lightweight cabinet hinge; it will sag after repeated use.
5. Cabinet with open cubbies for mugs and a closed drawer for syrups
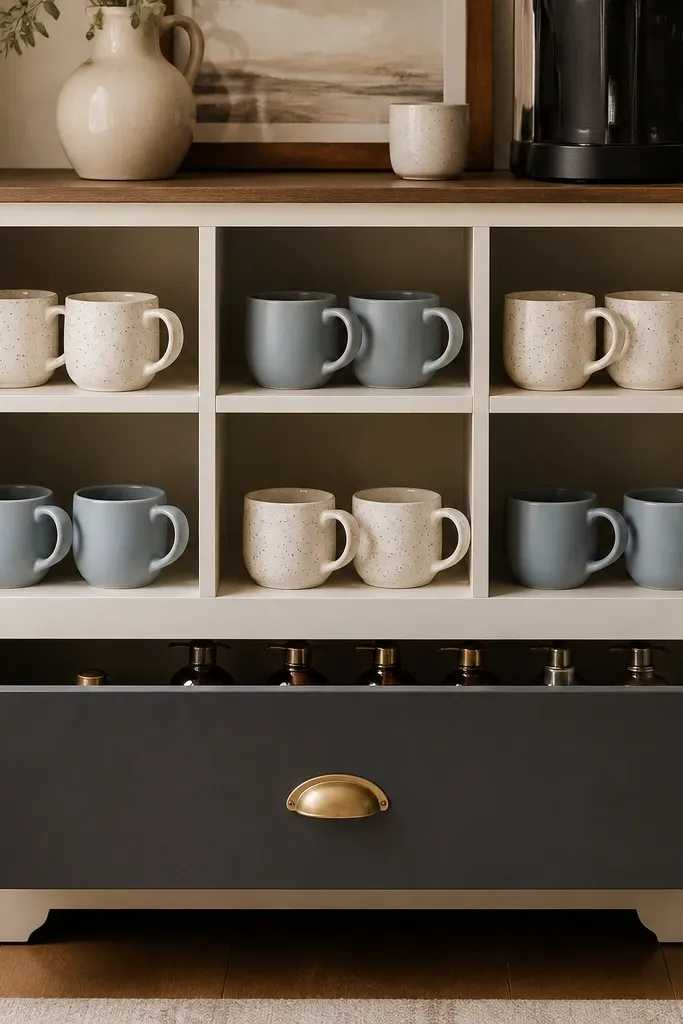
This cabinet design solves a common mismatch: mugs look good out, but syrups and extra supplies look chaotic. Open cubbies keep your daily mugs visible and easy to grab, and a closed drawer hides sticky bottles and backup items. You also get protection from dust since doors or drawers close around the mess. If you want a tidy coffee corner that still feels personalized, this is the direction.
Use a small base cabinet or build a box with 3/4 in plywood sides, then install interior shelves to create 2-3 open cubbies. Add a shallow drawer for syrups and packets using side-mount drawer slides; a drawer depth of 12-14 in works well for most bottles. Install a door on the outer face if you want full closure, or keep the cubbies open and just use a drawer for mess control. Finish the cabinet with paint plus a sealed topcoat on the top surface where the brewer sits.
Use a drawer that opens fully; half-opening drawers turn into “stuff storage” fast.
Don’t make the cubbies too narrow; mug handles and spoons need clearance.
6. Cabinet with pull-out bin for grounds and a sealed top panel
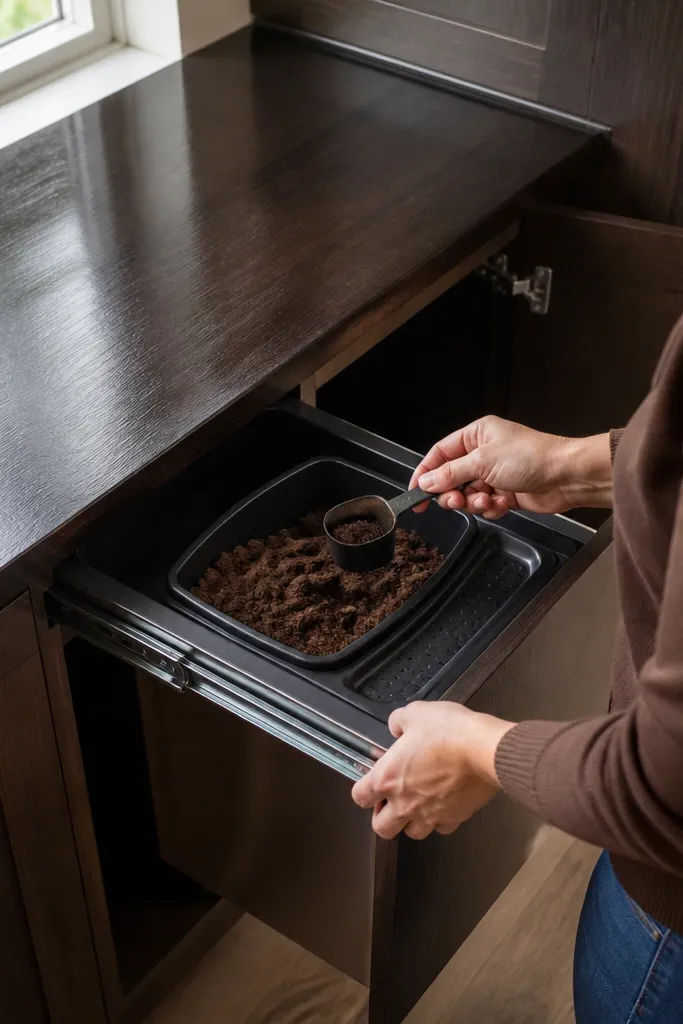
If grounds and rinse water are your biggest mess, this cabinet layout fixes the workflow. A pull-out bin makes cleanup a single step instead of carrying a bin across the room. The sealed top panel protects the cabinet surface from heat and drips — coffee stations get wet even when you’re careful. This is best for a dedicated brew spot where you don’t want open clutter.
Build or buy a cabinet with a bottom compartment that can hold a pull-out bin; target a bin size around 10-12 in wide and 14-18 in deep. Install drawer slides for the bin so it pulls out smoothly and doesn’t tip. Create a top panel from sealed plywood or a thin solid-surface sheet, then fasten it to the cabinet top so drips can’t soak into raw wood. Add a small drip-catching tray on the top panel and silicone mat if you use a brewer that leaks.
Editor's noteLine the bin with a waterproof liner or removable tray so you can clean without scrubbing wood.
Skip thisAvoid bare plywood inside the bin; it stains and smells.
7. DIY cabinet from a pre-made base with a custom coffee shelf top
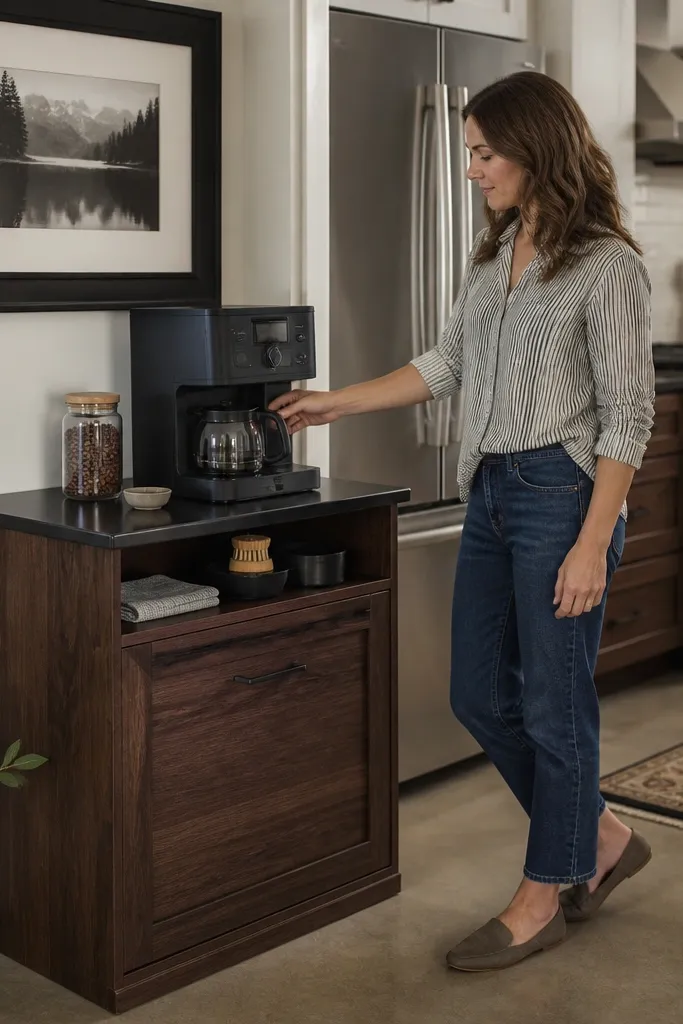
This is the “best finish for the least carpentry” route. You buy a pre-made base cabinet for the box and leveling, then build only the parts that make it a coffee station: the top shelf layout, the tool storage zone, and the drip-safe surface. The cost stays closer to cart territory than full custom cabinetry, but you still get that cabinet look. It also works well in rentals if you can keep the cabinet and remove it cleanly.
Start with a standard cabinet base that matches your space; choose one with adjustable shelves so you’re not stuck. Build a custom top insert from 3/4 in plywood to create a dedicated brewer zone and a side landing for cups. Add a small rail or ledge so small tools don’t slide off when you open the drawer. Finish the insert with paint and a sealed coat, then install baskets or dividers on the interior shelves.
Editor's noteUse self-leveling cabinet shims during installation so the doors and drawer don’t bind later.
Skip thisDon’t skip sealing the custom top insert; that’s where spills land.
8. Cabinet with sliding door to hide everything fast
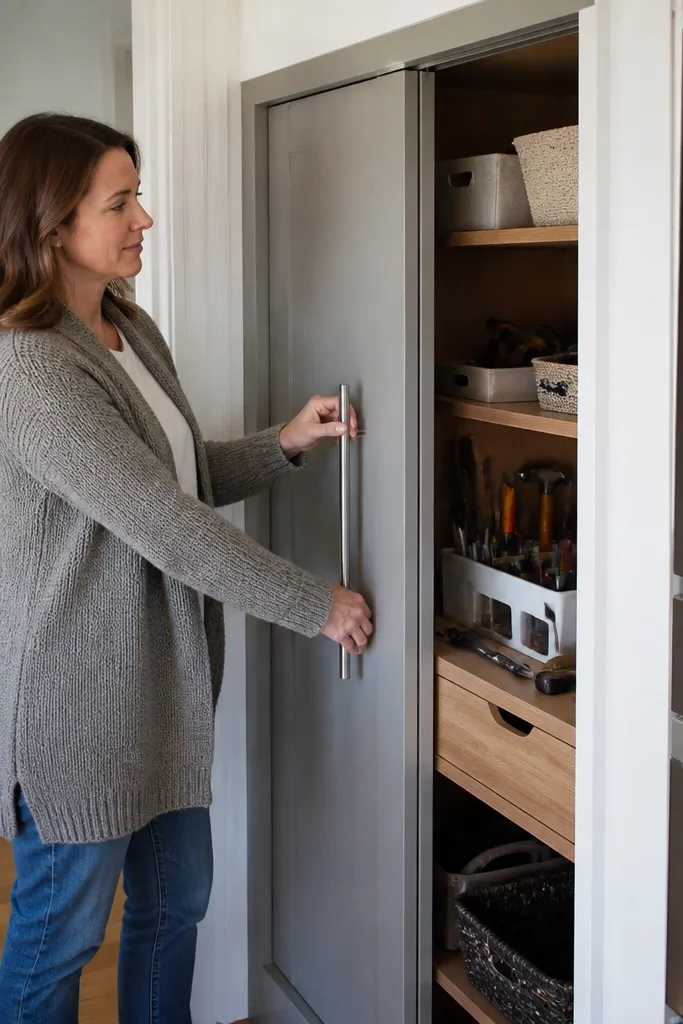
A sliding door is the cabinet move when your coffee station sits in a tight corner. Swing doors take space and bump into chairs or nearby appliances. With a sliding door, you keep the clean look without needing clearance for door swing. Pair it with open interior shelves and one drawer for daily tools, and you get quick access plus instant visual cleanup.
Build a cabinet box or use a base cabinet, then install a sliding door track system on the top or side. Make sure the door overlaps the opening by at least 1 in so you don’t see clutter gaps. Inside, set one shelf for mugs and a second shelf for filters and beans; add a small drawer organizer for spoons, thermometer, and cleaning tablets. Seal the cabinet top and add a drip tray so the door hides everything but the mess stays contained.
Editor's noteUse felt bumpers on the door edge so it doesn’t chip the cabinet face.
Skip thisDon’t mount the track to thin wood; reinforce the track area so it doesn’t shift.
9. Cart with faux cabinet doors that hide supplies
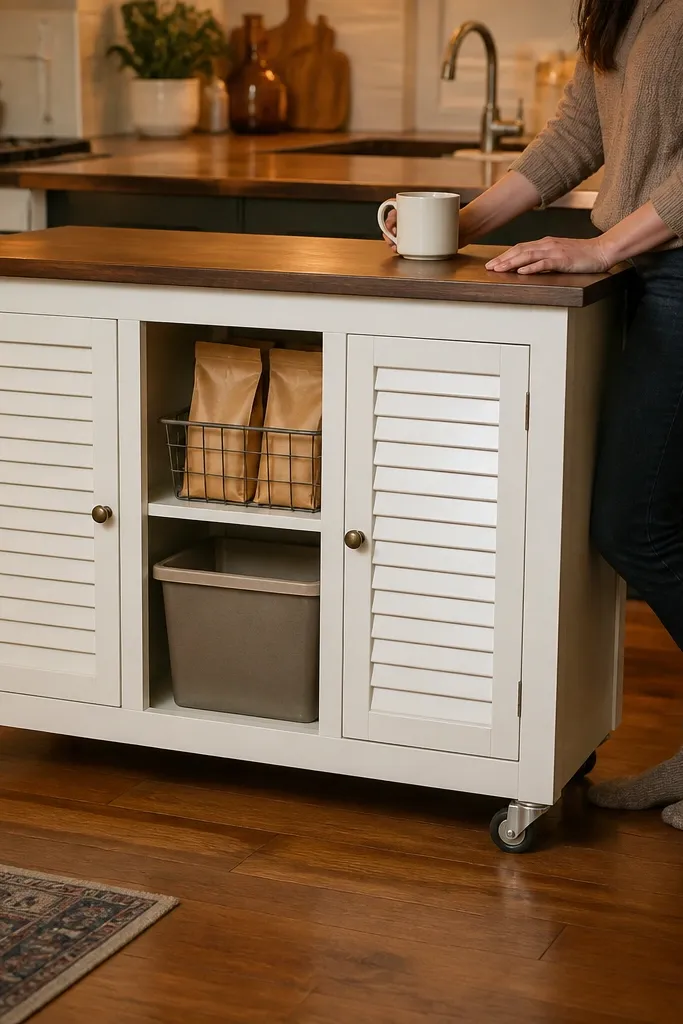
This is a cart build for people who want the cabinet look but don’t want the cabinet cost. By adding front doors over bins, you hide the messy stuff while still keeping the mobility. You get the best of both worlds: open storage behind doors and the ability to move the station when you rearrange your kitchen. The build also makes the station look custom even if you start with a basic cart frame.
Start with a rolling cart that has open shelves where bins can fit. Add hinged doors using lightweight cabinet hinges and flat panel material sized to cover the front openings; leave a small gap for smooth movement. Put lidded bins inside so spills don’t soak into shelf surfaces. Finish the cart with paint or stain, then seal the top where the brewer sits.
Use magnetic catches instead of cheap latches; they close quietly and keep doors aligned.
Don’t hinge doors directly to thin wire shelving; mount the hinges to wood backing strips.
10. Cabinet with built-in mug shelf lip and drip rail
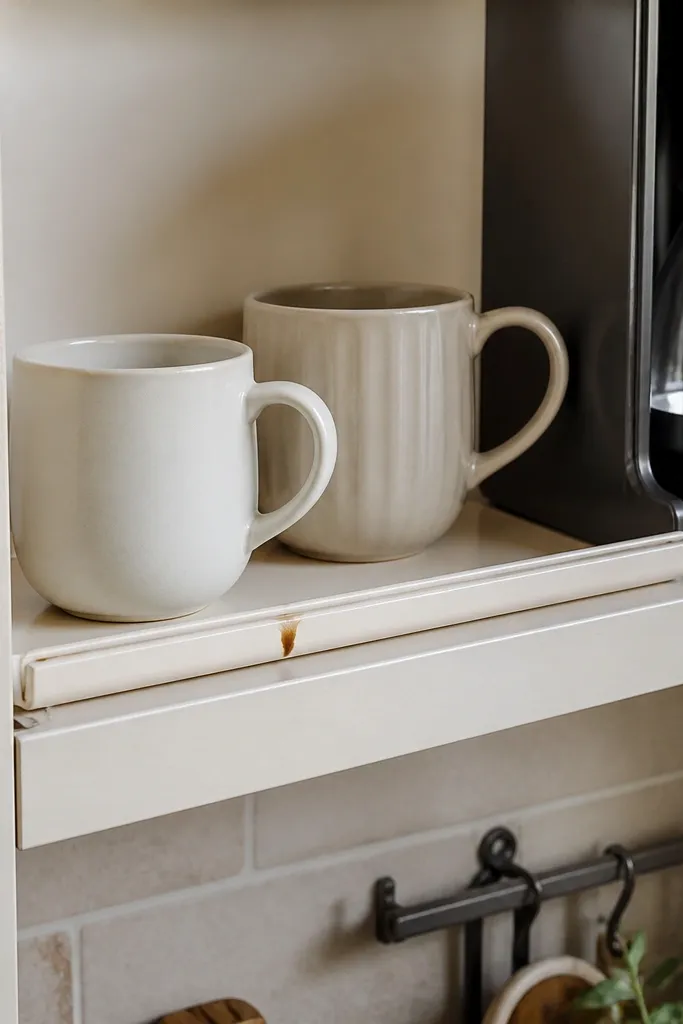
This cabinet idea focuses on preventing drips from becoming damage. A mug shelf lip keeps cups from sliding forward, and a drip rail catches accidental splashes before they hit the interior. It’s a practical design for people who use a pour-over or any brewer that spills during setup. The station stays tidy because cups don’t crowd the edge and liquids have a clear path to the catch area.
Build a cabinet with a top shelf overhang or add a small ledge under the top surface. Install a metal drip rail or make one from a sealed wood strip with a shallow channel, then place a removable catch tray under it. Add mug storage on the shelf lip area using a rail or angled shelf supports, keeping at least 1/2 in clearance for handles. Seal all surfaces near the drip zone with a non-porous finish.
Editor's noteMake the catch tray removable with two small handles so you can empty it without mess.
Skip thisSkip the drip rail and you’ll spend more time wiping than brewing.
11. Cart with drawer unit for tools and open shelf for beans
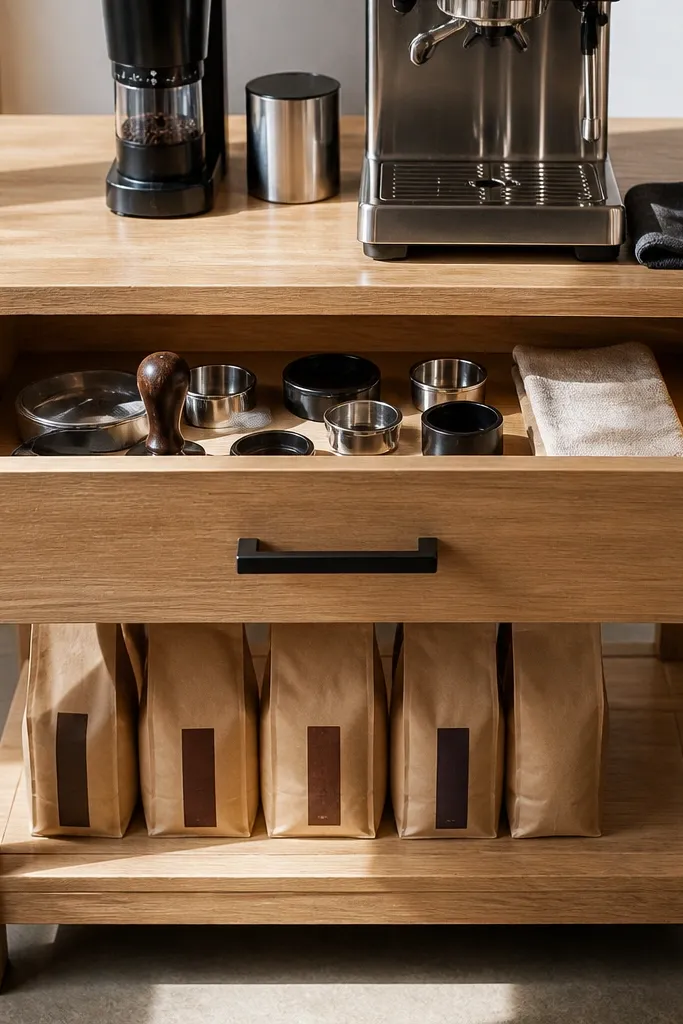
This design keeps your daily tools from living loose in baskets. A small drawer for grinders accessories, filters, and cleaning tools makes the cart feel like a real station, not storage. Beans and bagged supplies stay visible on an open shelf so you can see what’s running low. It’s a strong choice for people who brew multiple drinks and need different tools close by.
Choose a cart frame with enough height to mount a shallow drawer front; drawer depth around 10-12 in works well for most tool sets. Build the drawer box from 1/2 in plywood, then install full-extension slides. Mount the drawer so it sits above the shelf where beans will go. Seal the drawer interior with a coat of paint or poly and add dividers inside for filters and paper goods.
Add a drawer liner that grips lightly so small items don’t slide when you move the cart.
Don’t make the drawer too deep; you’ll stack tools and lose the quick-grab benefit.
12. Cabinet with glass-front upper shelves for coffee display
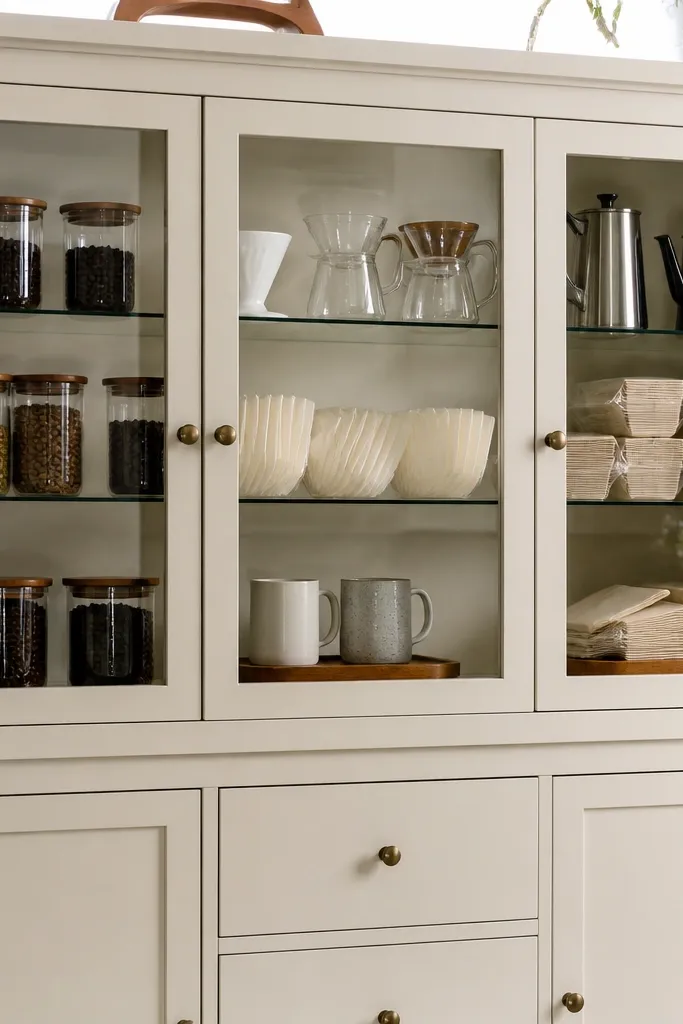
If you want your coffee station to look good even when you’re not using it, glass-front shelves do it without exposing everything. Keep beans, filters, and a couple of mugs visible, while lower storage stays closed for syrup backups and cleaning supplies. This design makes the station feel intentional and keeps you from overbuying because you can see what you already have. It also works well in dining-adjacent kitchens where you want the station to read like decor.
Build a cabinet frame with two sections: an upper shelf area with glass panels and a lower area with doors or drawers. Use thin glass or acrylic inserts sized to fit the frame openings, then secure with trim strips so edges are protected. Install adjustable shelves inside the glass section so you can change spacing for different jar heights. Finish with paint, then seal the top surface and place a drip-safe mat where the brewer sits.
Use removable shelf liners inside the glass area; they protect surfaces and make cleaning faster.
Don’t use glass without edge protection; chipped corners look bad and can be unsafe.
13. Cart with vertical organizer for syrups and tea packets
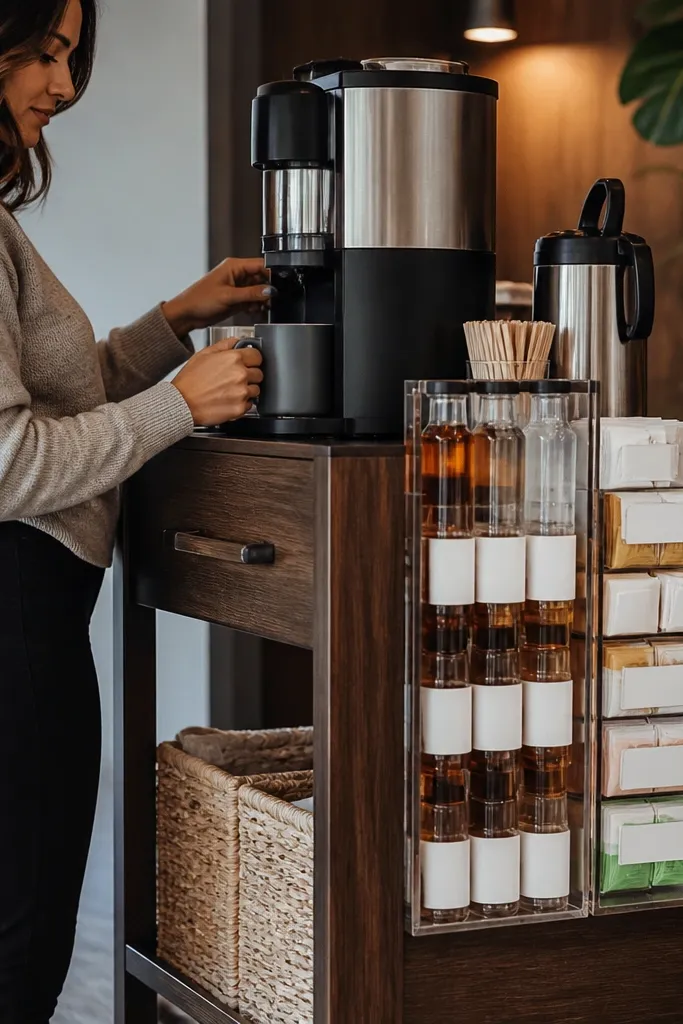
This one is for people who stock a lot of flavors and keep losing bottles behind mugs. Vertical organizers stop “bottle pile” chaos and make it easy to see what you can grab. Put syrups and tea packets in narrow slots, then keep the brewer and cups on the top. The cart stays compact because vertical space is doing the heavy lifting. It’s also easy to adjust later when you add new flavors.
Build a vertical organizer panel from plywood or thin board and cut slots about 2.5 in wide for syrup bottles and 1.5-2 in wide for tea packets. Screw the organizer to the side of the cart or inside a lower shelf section where it won’t wobble. Add a small lip at the bottom of each slot so bottles don’t slide out when you move the cart. Finish with sealed paint so spills wipe off without staining.
Add a clear acrylic front strip if you want visibility without dust buildup.
Avoid slots that are too tight; you’ll crack labels and bottles trying to pull them out.
14. Cabinet with countertop extension for latte cups and a landing shelf
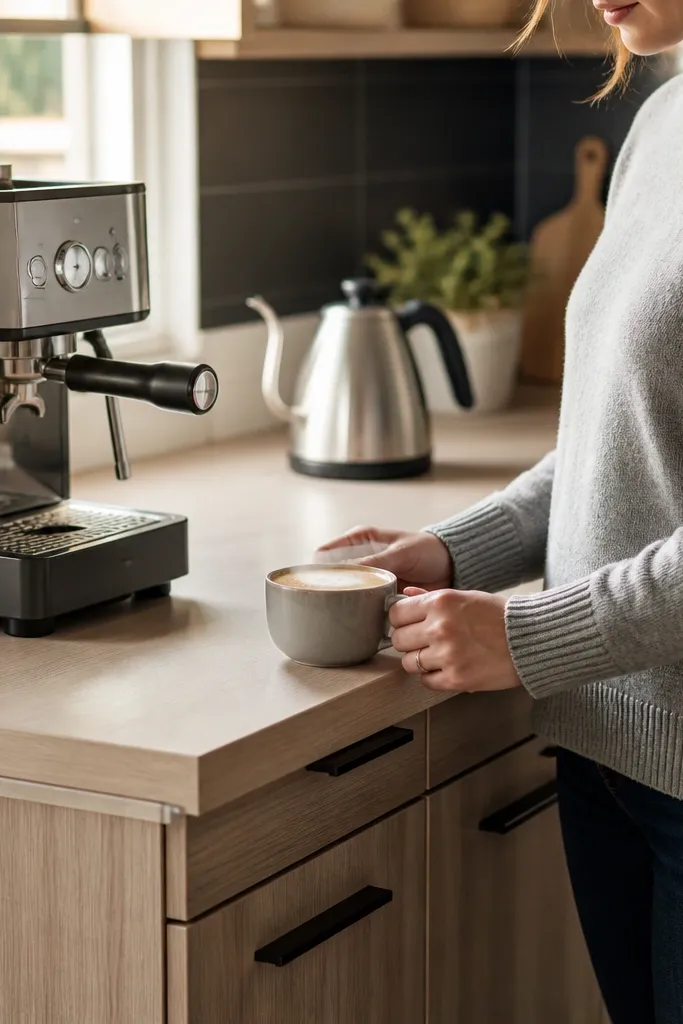
This cabinet layout fixes the most annoying coffee station issue: there isn’t enough flat space for cups while you brew or steam. A countertop extension gives you a landing shelf for latte cups, which keeps them away from the brewer zone. It also helps with workflow — you can place a cup, then move it to the drip tray area without juggling everything on the same surface. It looks more custom because the station has a “counter” feel, not just a storage box.
Start with a cabinet that fits your wall space, then build a countertop extension using 3/4 in plywood supported by brackets under the overhang. Keep the extension depth around 6-10 in so it’s useful but doesn’t feel bulky. Install an interior shelf or small drawer under the extension for tools. Seal the countertop extension with two coats of polyurethane and add a removable drip tray on the brewer side.
Editor's noteUse angled support brackets so the extension doesn’t flex when you set down heavier mugs.
Skip thisDon’t extend the top without support; it will sag and crack finishes.
15. Cart with modular bins and a labeled reorder shelf
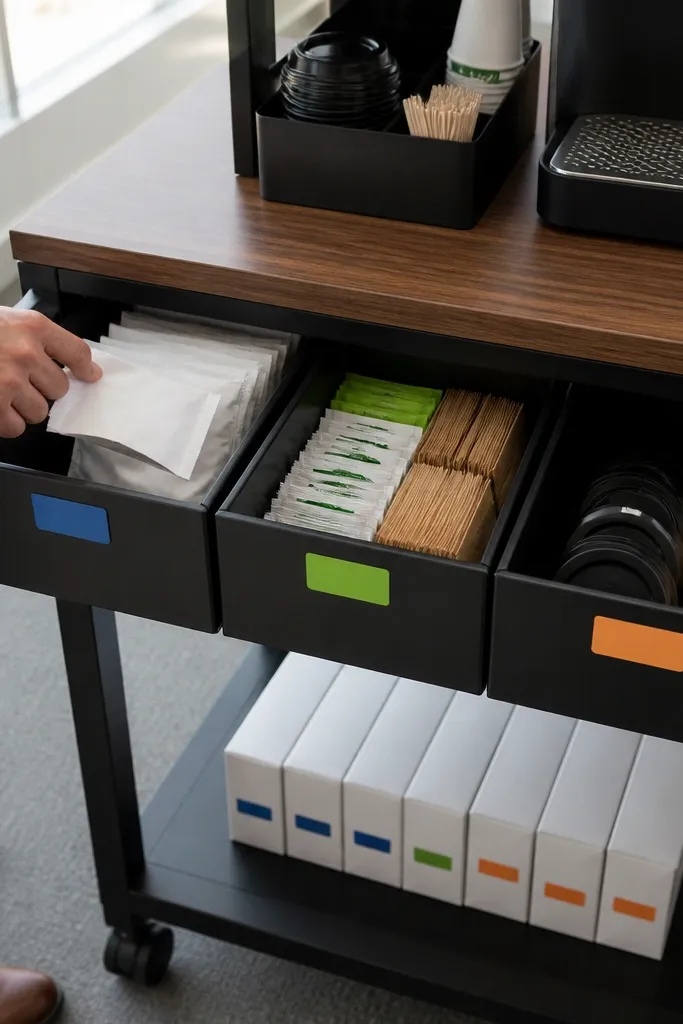
This is the cart build for people who want less decision-making. Modular bins keep filters, sweeteners, and accessories separated, and a labeled reorder shelf stops “we’re out of filters” surprises. The station stays clean because everything is in a bin, not scattered across the top. It also makes refills easier because you can see levels at a glance. If you like a system more than a design project, this works.
Choose a cart with at least two shelves; measure the shelf widths and buy or build modular bins that match those dimensions. Install a small shelf divider panel on one shelf and label it with a simple list for reorder items like filters, beans, and cups. Add a small tray on top for daily tools so your workflow doesn’t touch the bins. Finish the cart top with a sealed coat and keep a silicone mat under the brewer area.
Editor's noteUse removable labels on bins so you can change categories when your routine shifts.
Skip thisSkip bin lids if you store anything sticky; dust and spills turn into residue.



