
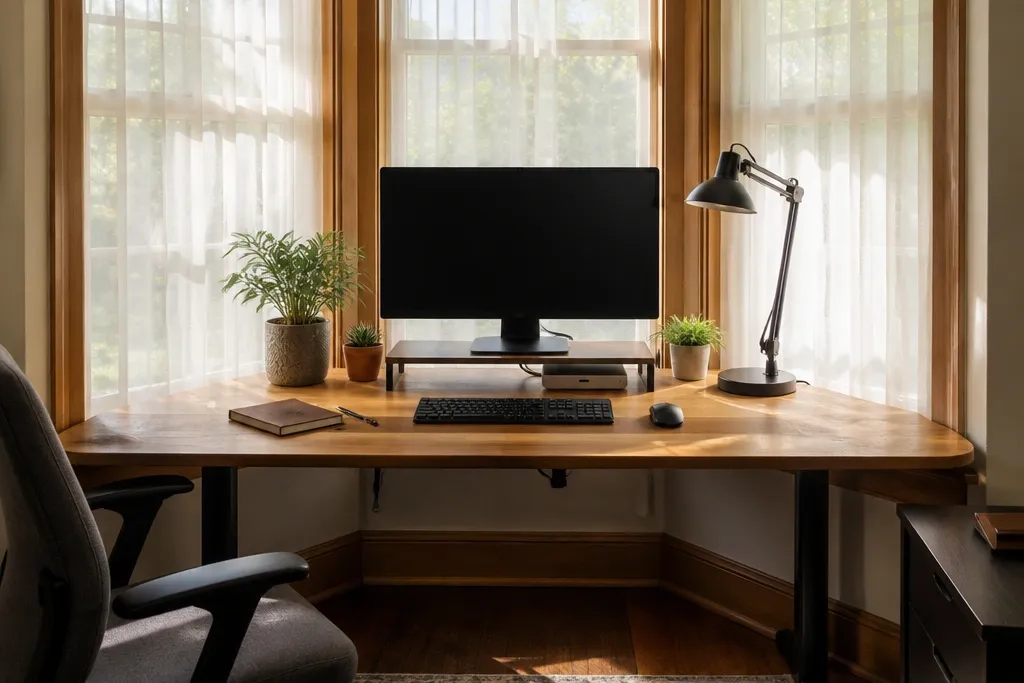
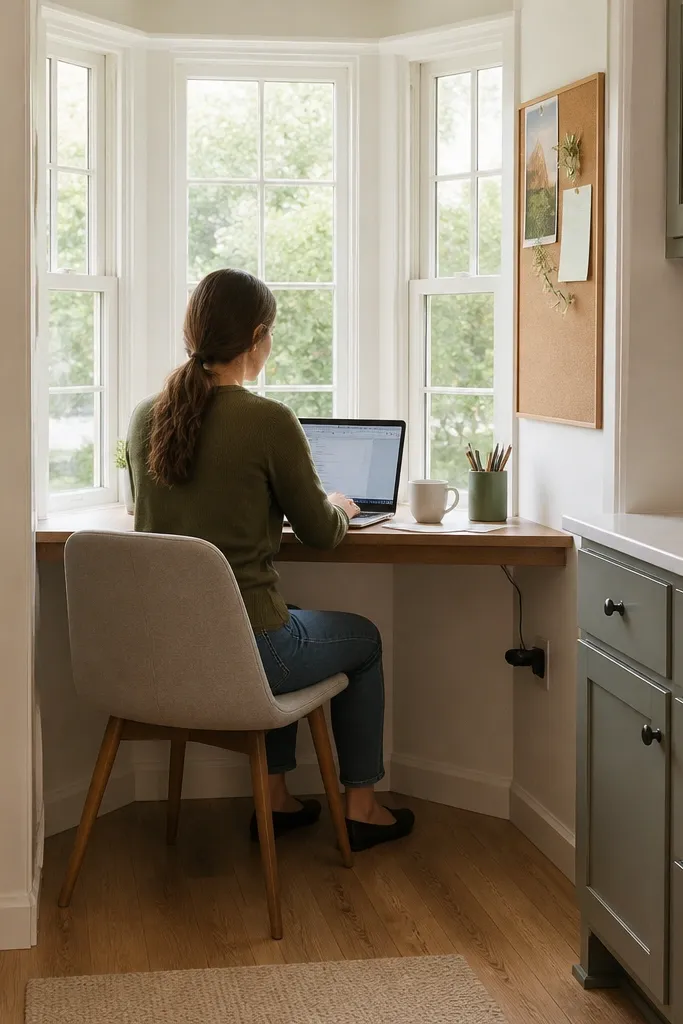
1. Floating oak shelf desk with slim black legs
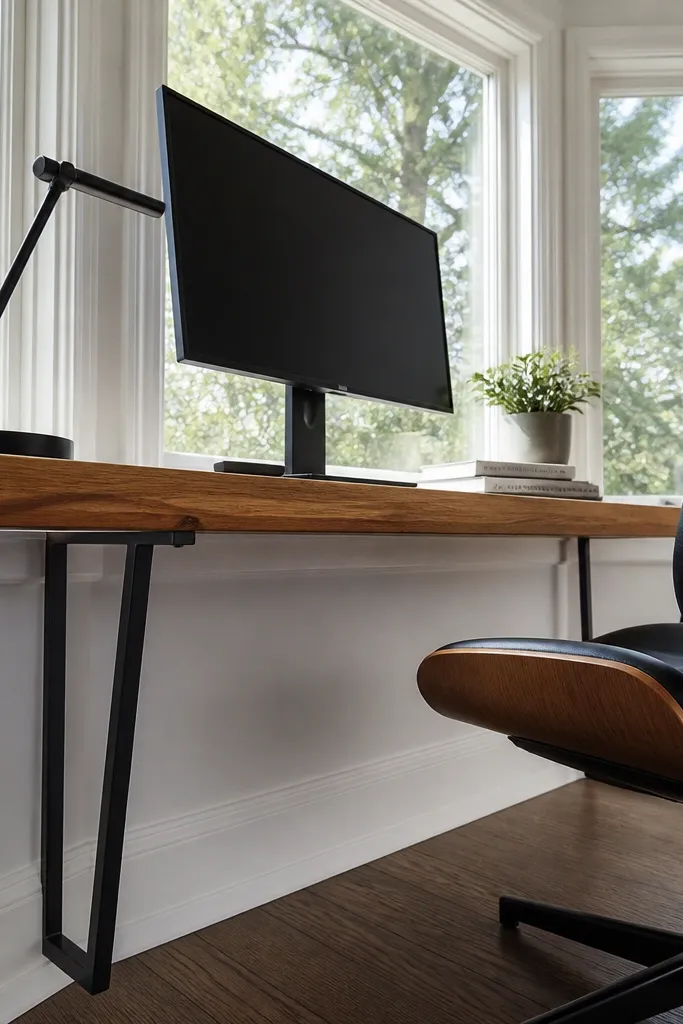
This one looks sharp because it keeps the bay airy. A floating oak shelf gives you a real work surface without bulky base cabinets, and the slim black legs ground it visually. It also photographs well because the lines stay clean — you see wood, then the window, then the dark leg accents. For beginner-friendly Bay Window ideas 2, it’s one of the easiest to build: you’re essentially hanging a shelf and adding support. Use it for laptop work, writing, and light desk tasks where you don’t need deep drawers.
First, measure the bay seat width along the straight edge you want to work from, then buy an oak shelf cut to that length (or cut it to fit). Install a ledger board level across the bay wall using a laser or long level, then mount the shelf with heavy-duty shelf brackets into studs. Add two or three slim legs under the shelf at the outer third points so the top doesn’t sag. Finish with sanding, then wipe-on satin polyurethane for a smooth, matte look that won’t glare.
Pre-drill bracket holes and mark stud locations with painter’s tape so you don’t fight the bay angle mid-install.
Don’t mount only into trim or drywall — shelves need stud support or you’ll get a bouncy desk.
2. Window-seat desk with hinged top and hidden storage
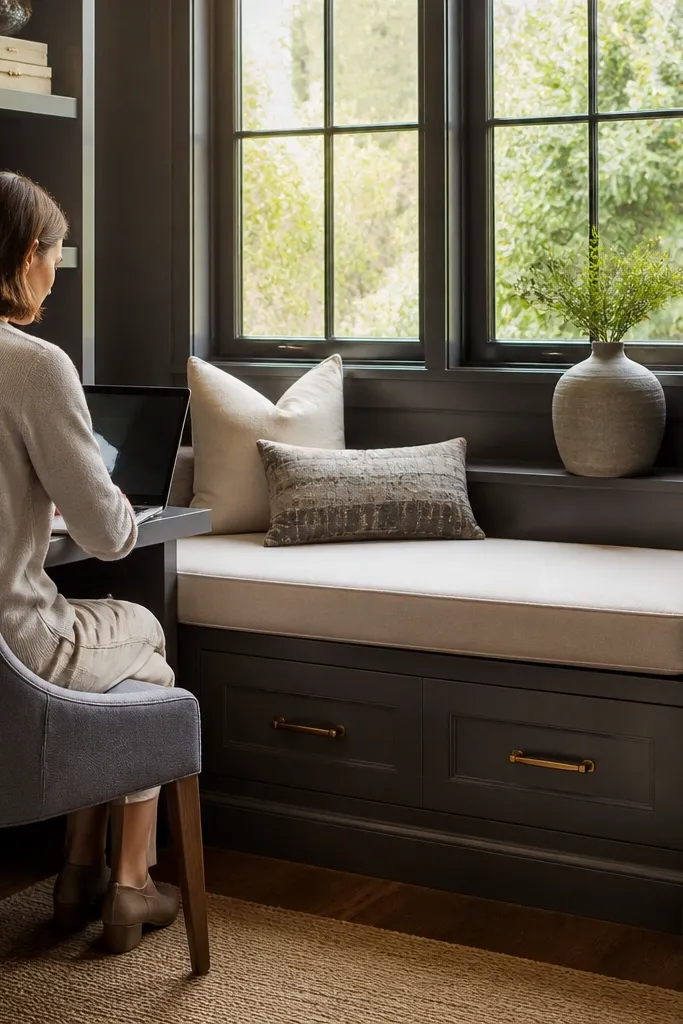
This setup turns the bay seat into a workstation that looks tidy even when you’re not using it. The hinged top lets you close the mess — papers, charger, and pens disappear — which keeps the corner looking “designed.” It’s also practical: you get storage directly under the work surface, a big win in small rooms. Visually, the seat reads as one continuous bench, so the bay doesn’t look like it has random furniture shoved in it. Beginners like it because the build is mostly framing panels and a hinge system, not complex joinery.
Start by building a simple box frame that matches the bay seat footprint, using 3/4-inch plywood sides and a base panel set level. Attach a hinged work top using a piano hinge or two heavy concealed hinges, then add a soft-close lid support so it doesn’t slam. Mount a back stop panel inside the seat so the top stays steady when open. Paint the frame a warm off-white, then stain the top for contrast; add a magnetic latch to keep it shut.
Use a closed-cell foam strip on the underside of the lid to prevent rattle and protect the finish.
Skip flimsy hinges — cheap hinges sag and the lid will drift out of alignment.
3. Drop-leaf desk tucked into the bay trim
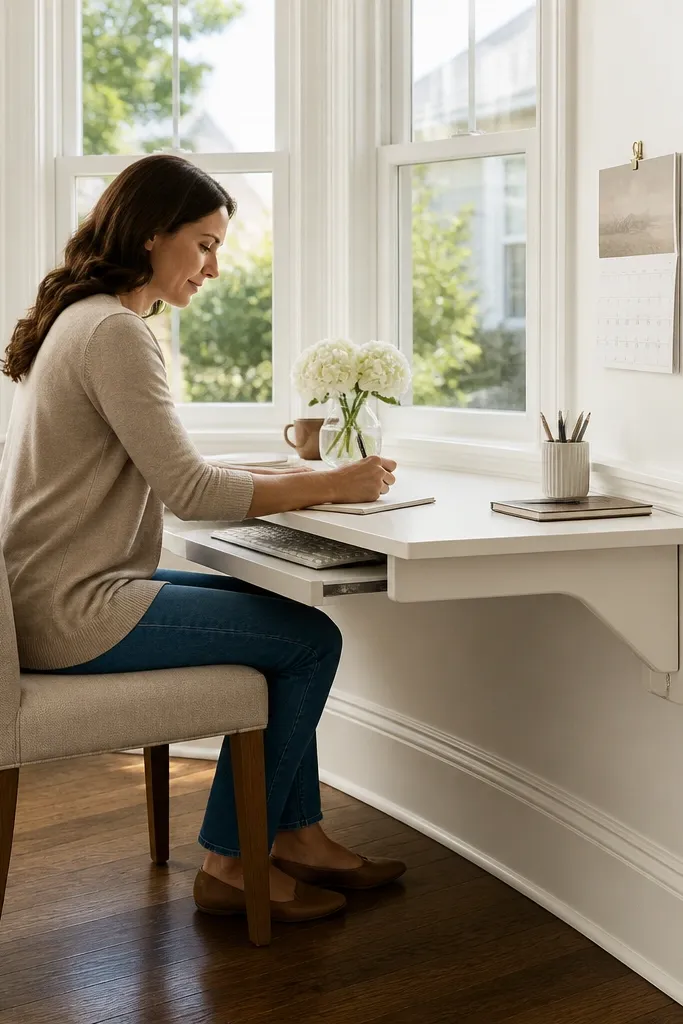
Drop-leaf desks are underrated for bays because the leaf can fold away, letting the window stay visually open. When it’s down, you get a straight, usable writing line; when it’s up, the bay looks like a clean corner, not a workstation. The aesthetic is crisp because the desk blends into the trim line. This fits people who work in bursts — planning, studying, journaling — and want a corner that doesn’t dominate the room. It’s beginner-friendly Bay Window ideas 2 because you’re working with standard hardware and simple framing.
First, choose the leaf size based on your bay’s straight wall stretch, usually 24-30 inches per leaf for a comfortable writing zone. Mount a sturdy support rail under the trim line into studs, then attach the drop-leaf hardware to the rail and leaf. Add a center support leg that swings down when the leaves are extended; it keeps the surface rigid. Seal with paint or stain, then install a small cable channel on the wall so cords don’t hang across the work area.
Install the leaves with the bay’s angle in mind by using a spacer board so the underside clears the window trim when folded.
Avoid mounting the support hardware only with anchors — use studs or the leaf will twist.
4. Butcher-block top over two matching cabinet bases
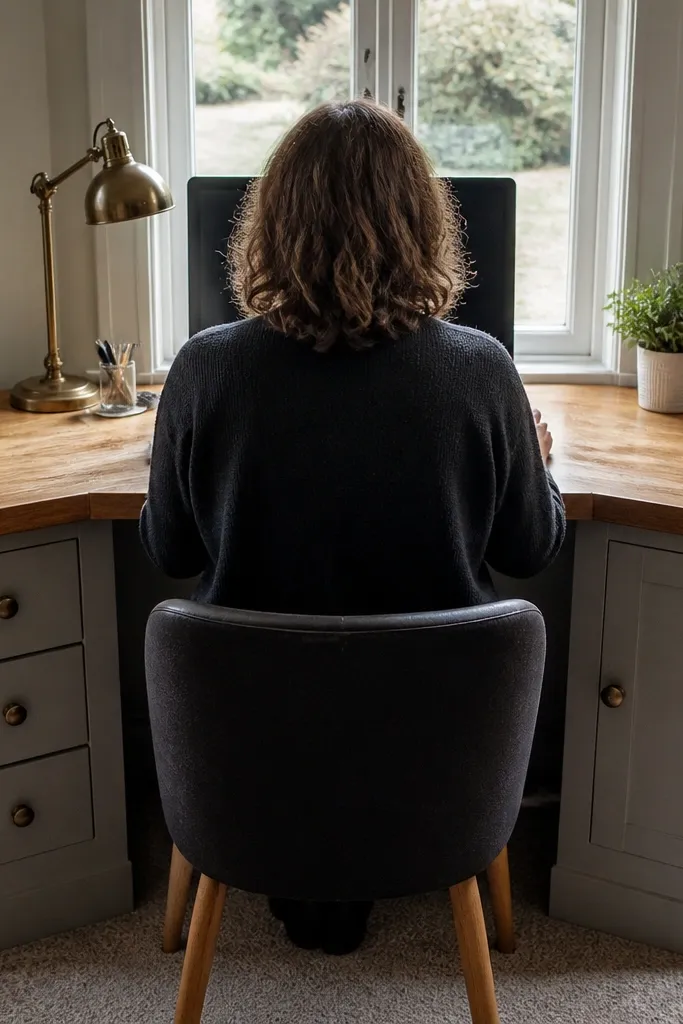
Cabinet bases give you the most “real desk” feel, and butcher-block makes it look warm instead of boxy. The trick for bay windows is spanning the angle with one continuous top, so the workstation reads as a single piece. You get drawers for supplies, plus a strong surface for a monitor and lamp. This is ideal for home offices because you can store everything and keep the bay looking calm. Beginners can build it with store-bought cabinets and a cut-to-fit top, which keeps the project manageable.
Start by selecting two cabinet bases that fit the bay corners and leave a small gap for the top overhang, often 1-2 inches. Level each base carefully using shims, then cut the butcher-block to span the total width with the overhang you want. Attach the top with corner blocks or cleats under the overhang so it doesn’t shift. Seal the butcher-block with mineral oil or a food-safe finish if you use it for snacks, then add a back panel for cord control.
Use a thin foam gasket between cabinet tops and the butcher-block to prevent squeaks.
Don’t skip shimming — unlevel bases make the top look crooked even if your cut is perfect.
5. Matte painted built-in look with a continuous floating desktop
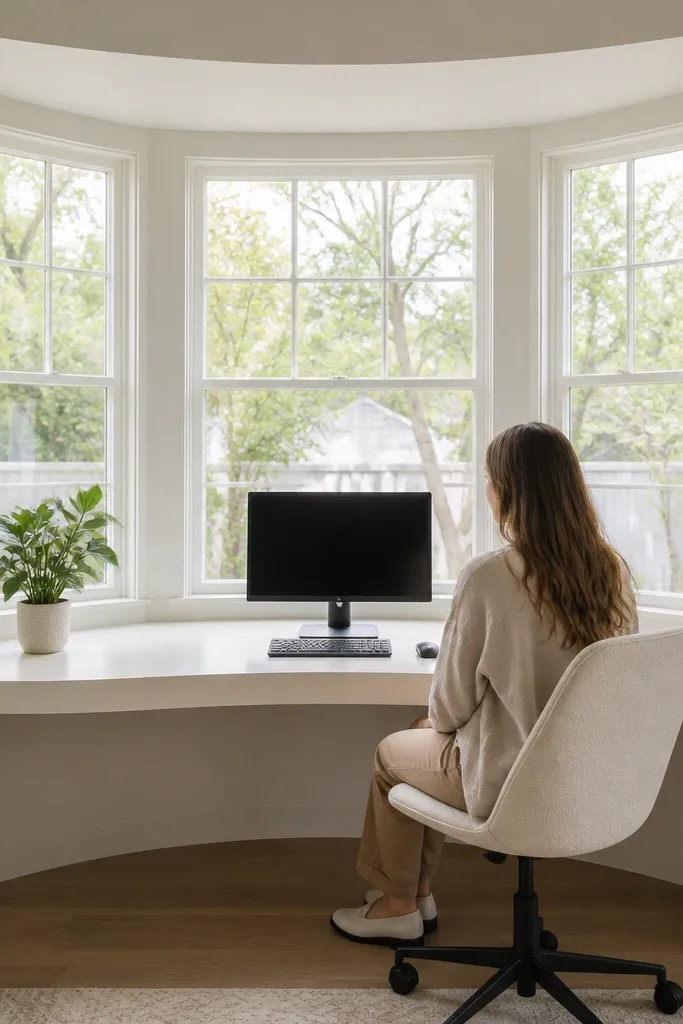
First, build two simple side supports or install a ledger board on studs where the desktop will land. Cut a desktop panel to span the bay and add an edge banding strip (or wrap the edge with solid wood) so it looks finished. Paint in thin coats with a bonding primer, then a durable cabinet paint in matte or satin; let each coat cure fully. Add a cable raceway behind the desktop and a small lip to keep devices from sliding.
This is a visual trick: you make the bay look built-in by painting everything the same color and keeping the desktop line continuous. The desktop can be a thick melamine board or plywood skin with edge banding, then painted to match trim. It’s beginner-friendly Bay Window ideas 2 because paint hides small gaps and gives you that “custom” feel without advanced carpentry. It’s also great for people who want a clean, modern workspace with minimal clutter. The matte finish reduces glare and looks crisp in daylight.
Skip thisDon’t use flat wall paint — it scuffs and looks patchy where hands and chairs touch.
Editor's noteSand between coats with 220 grit and wipe with a tack cloth so the matte paint doesn’t get rough spots.
6. Corner angle desk with L-bracket support and cable spine
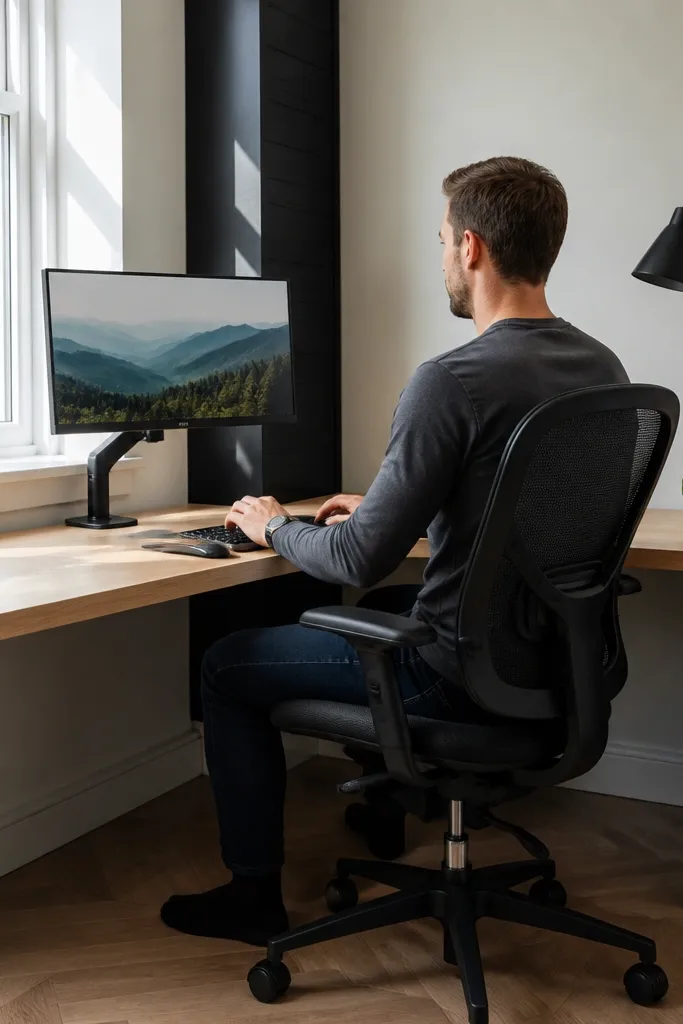
If your bay has two windows and you want a desk that hugs the angle, an angle desk with L-bracket support looks clean and stays stable. The cable spine is the secret for a polished look: it’s a vertical panel behind the desk that hides charging bricks and routes cords neatly. This setup keeps the front edge clear, so it looks “designed” instead of DIY clutter. It’s beginner-friendly because L-brackets and a single desktop panel are straightforward. It’s best for laptop + monitor setups where you want easy cable management.
Start by cutting a desktop panel sized to cover the bay angle, then mark where the straight work edge will sit. Install L-brackets into studs at the correct height, using a level and spacer blocks to match the bay angles. Mount the cable spine panel behind the desk with standoffs so cords don’t get crushed; add a cable tray at the bottom. Finish with a wipe-on stain and topcoat, then attach a small power strip inside the spine using a Velcro strap so it stays accessible.
Drill a wire pass-through hole with a grommet before you mount the desktop to save yourself from pulling cords through blind gaps.
Avoid mounting the cable spine flush to the wall — it traps heat and makes cord routing messy.
7. Rattan-trim writing ledge with cork board back wall
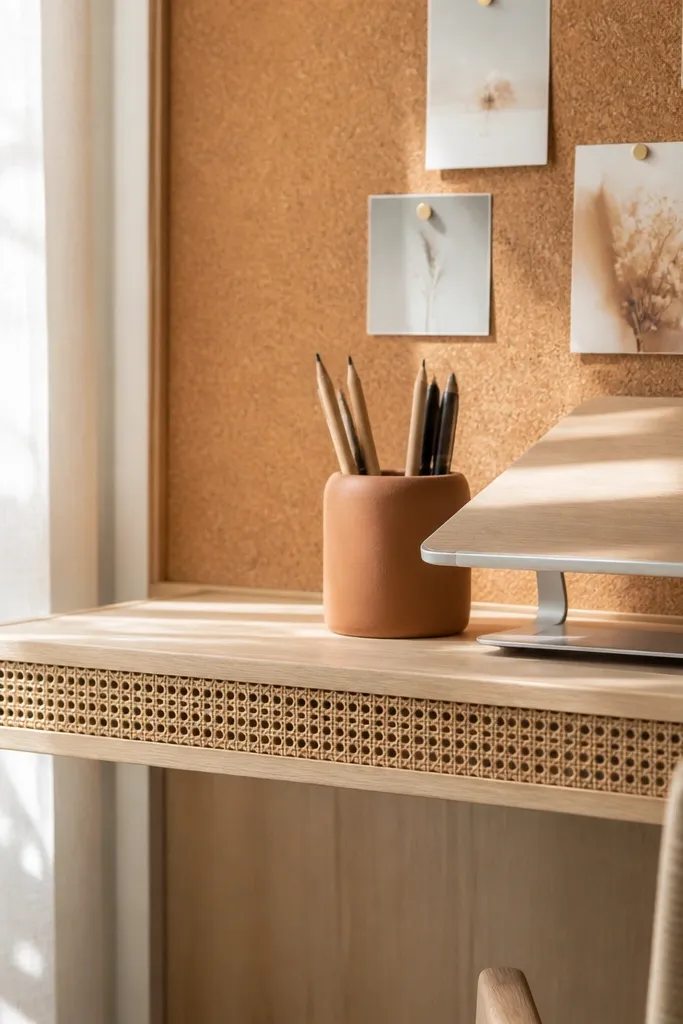
First, cut or buy a narrow ledge board, around 10-14 inches deep, and add a rattan trim strip along the front edge using wood glue and small brads. Mount a cork board panel on a lightweight backing board (like 1/2-inch plywood) so it’s flat, then attach it to the wall into studs. Install the ledge with heavy-duty shelf brackets under the ledge line. Seal the wood with matte clear coat, then add a small ledge lip to stop notebooks from sliding.
This is a photogenic desk setup for creative work. The writing ledge is narrow and airy, and the rattan trim adds texture without bulk. Behind it, a cork board gives you a functional backdrop for notes and pinned references, so the bay looks styled even when you’re working. For beginner-friendly Bay Window ideas 2, it’s a smart build because you’re mounting a ledge and panel — no heavy furniture needed. It’s perfect for planning, budgeting, sketching, and any work where you need a visual wall.
Skip thisSkip glossy varnish on the ledge — glare from the window will make your notes harder to read.
Editor's noteUse cork tiles with a smooth backing rather than fluffy cork sheets — it looks cleaner and pins hold better.
8. Floating desk shelf + under-shelf task light
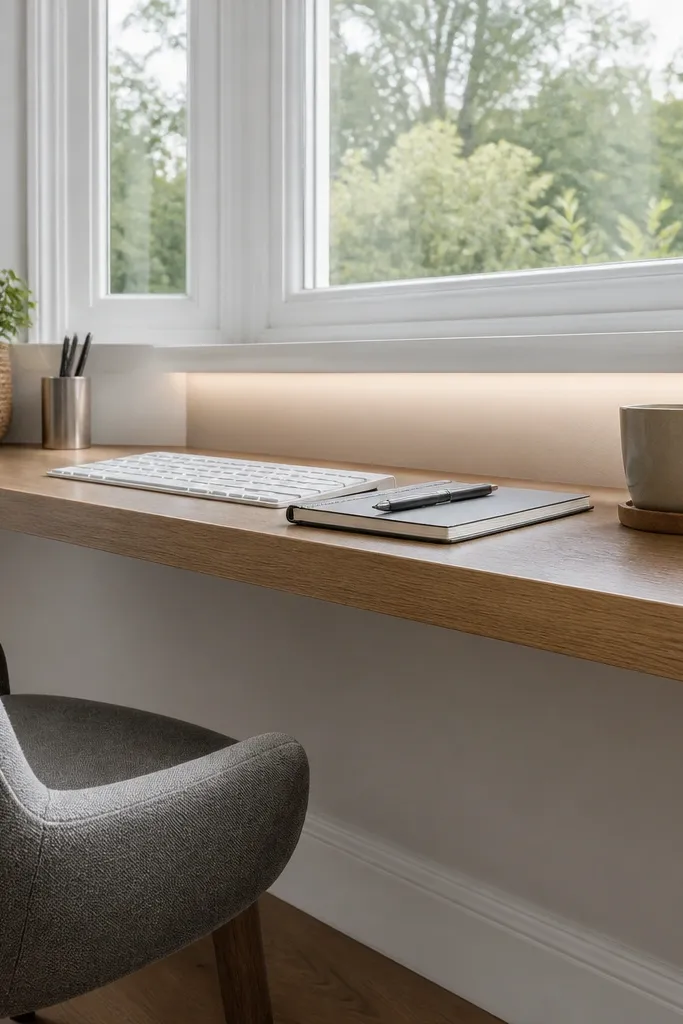
Start by installing the shelf brackets into studs at your chosen height, keeping the top surface level across the bay span. Mount a 12V LED strip under the shelf with an aluminum channel so it looks even and doesn’t snag. Route the wire to a plug-in transformer placed in a nearby cabinet or behind a wall panel. Finish the shelf with satin topcoat, then add a cord cover strip from the transformer to the outlet so the wiring stays hidden.
This desk looks professional because the lighting becomes part of the design. A floating shelf keeps the space open, and an under-shelf LED light strip makes the work area bright without a bulky lamp. It’s especially good for bays because you can aim light down toward the keyboard area instead of washing the window. This is beginner-friendly Bay Window ideas 2 because you’re wiring a simple light strip and mounting a shelf, not building cabinetry. It’s ideal for computer work at night and for winter daylight when the bay feels dim.
Skip thisDon’t mount the LED strip without a diffuser — you’ll see bright dots and it looks DIY.
Editor's notePick a 4000K LED strip for neutral white — it reads better for screens than warm-only lighting.
9. Reclaimed door slab desk with two console supports
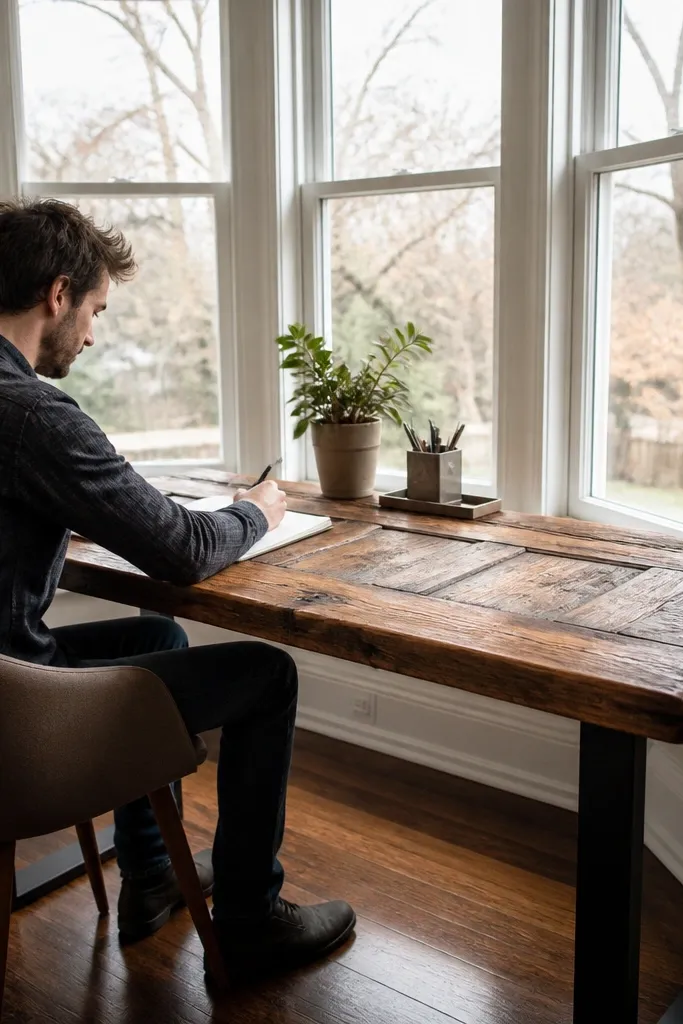
This one is all about texture and character. A reclaimed door slab gives you natural panels and thickness, which makes the desk look expensive even when it’s DIY. In a bay window, the slab’s grain plays nicely against the glass and trim, so the whole area looks like a studio. It’s beginner-friendly Bay Window ideas 2 if you choose a ready-to-finish slab and focus on leveling and mounting. It’s best for laptop work or writing, because the uneven door surface gives a tactile look but isn’t always ideal for a keyboard tray.
Find a door slab already planed and dry, then sand progressively from 120 to 180 grit to flatten high spots. Mount two console supports (or metal hairpin legs) into studs or a strong wall plate so the slab doesn’t twist. Use wood screws with countersinks so the metal legs sit flush. Seal with a clear matte finish; add felt pads where it contacts the supports to stop vibration.
Pre-fit the slab and mark leg locations with painter’s tape before drilling — door slab thickness varies by piece.
Don’t skip sealing — reclaimed wood can keep absorbing moisture and can warp near the window.
10. Slim desk with drawer unit on one side and open shelf on the other
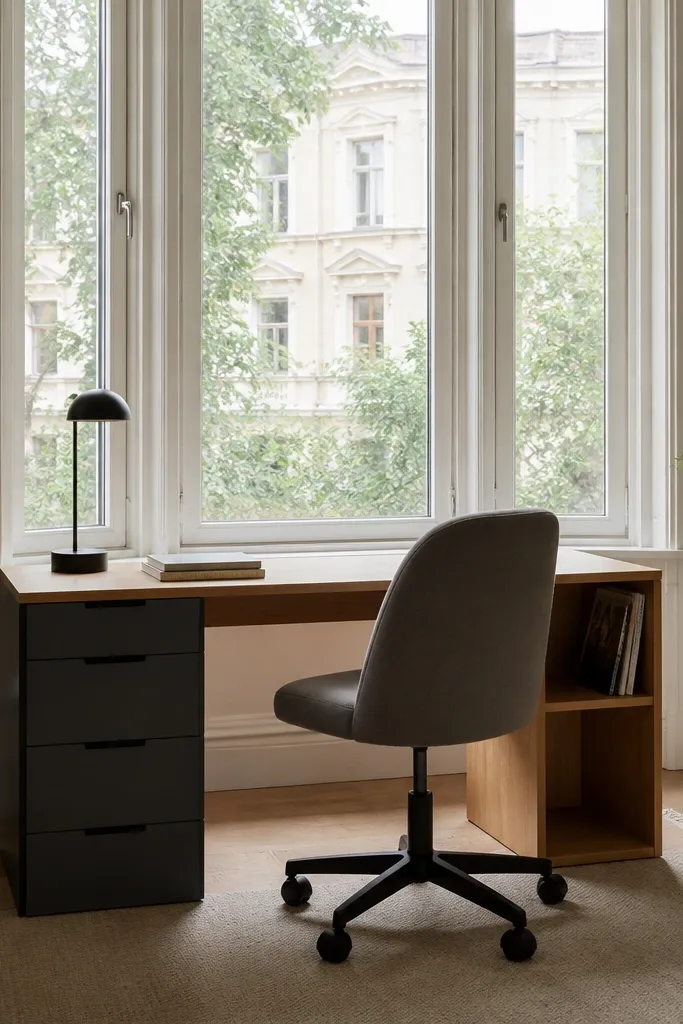
This layout balances storage and light. One side has a drawer unit for supplies, and the other side is open shelving so the bay still feels bright. Visually, it creates asymmetry that looks intentional, and it’s easier than building a full matching cabinet across the bay. It’s beginner-friendly Bay Window ideas 2 because you can use a small prefab drawer base plus one shelf unit and top them with a single desktop. It’s ideal for people who work with lots of paper or cables and want them contained.
Start by placing a drawer base on the straight work side, leaving enough depth for your keyboard and chair clearance. Install a matching open shelf unit on the other side, anchored into studs. Cut a desktop to span between them, then add a back cleat so it can’t shift. Seal the desktop and add a small cable grommet near the drawer base so cords disappear into the unit.
Keep the drawer face and desktop finish in the same color family — it makes the asymmetry look designed instead of random.
Avoid oversizing the drawer base — if it blocks the bay angle view, the corner looks cramped.
11. Chalkboard-painted desk back panel with peg rail
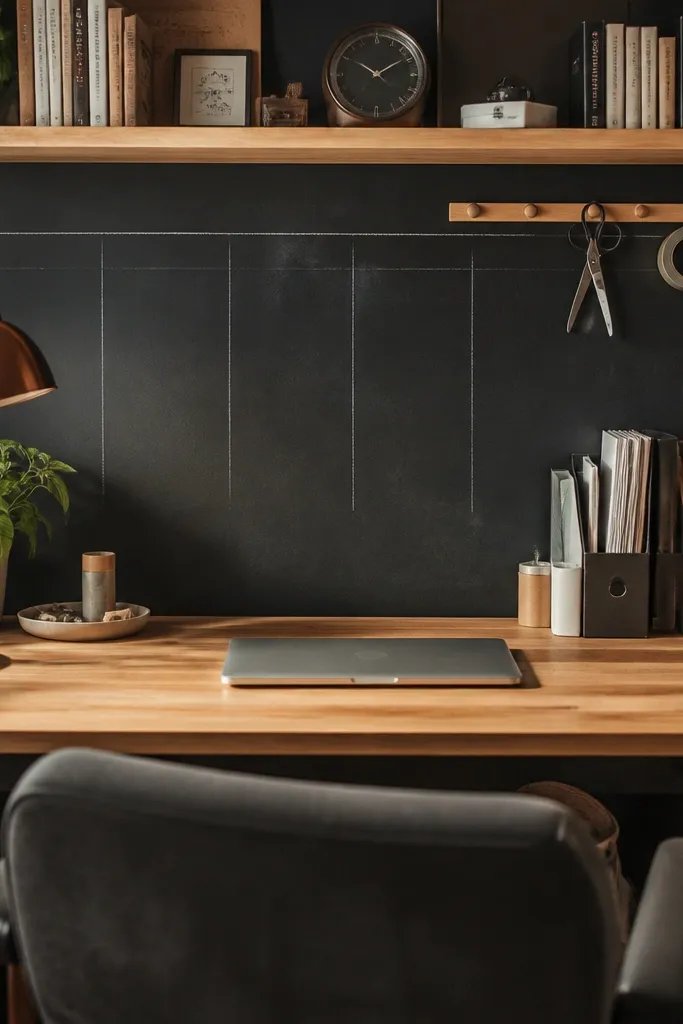
First, cut a plywood panel to fit the wall area behind the desk, then prime and paint with chalkboard paint in two to three thin coats. After curing, season the board by rubbing chalk all over and wiping clean. Mount the panel into studs at the desk height line, then install a peg rail below it and screw in small hooks. Finally, build the desk as a simple shelf or tabletop with brackets, and route cords behind the chalkboard panel using a cable clip strip.
A desk back panel makes the bay feel like one cohesive workstation. Paint a panel with chalkboard paint so you can write daily tasks and keep it readable from your work position. Add a peg rail under it for small items like scissors, tape, or a hanging pen cup. This is beginner-friendly Bay Window ideas 2 because you’re painting one panel and mounting rails — no complicated carpentry. It’s great for planners, students, and anyone who wants the window desk to look styled even when papers are messy.
Skip thisDon’t mount the panel too high — if it sits above eye level, you’ll stop using it.
Editor's noteUse matte chalkboard paint, not a glossy “whiteboard” look — glossy reflects window light and ruins readability.
12. Round-window-seat desk with curved edge trim
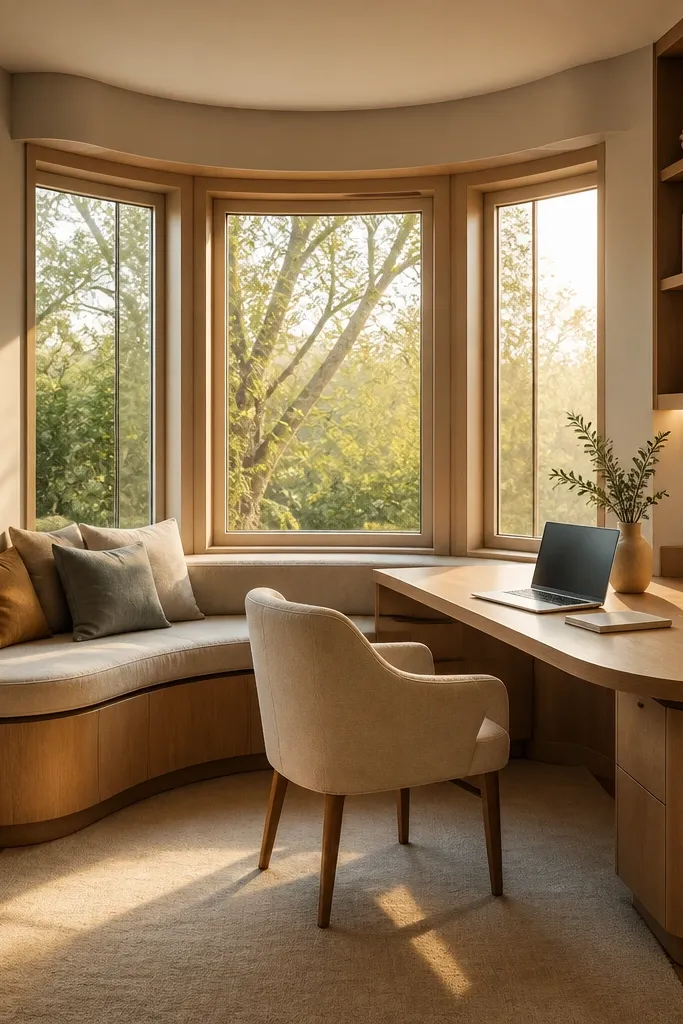
If your bay has a rounded feature or you want a softer look, a curved-edge desk top makes the whole corner feel calmer. The rounded trim hides the “DIY cut line” and makes the desk look like it belongs with the window. Pair it with a warm stain and a light chair, and the bay becomes a photo-friendly work nook. Beginner-friendly Bay Window ideas 2 works here because you can buy pre-made rounded edge molding and apply it cleanly. This setup is best for writing, reading, and laptop tasks where comfort matters.
Start by building a straight-edged desktop base from plywood, then route or sand the top edge slightly for a smooth transition where the trim will sit. Install curved edge trim using wood glue and a few finishing nails or screws from underneath where they won’t show. Mount the desktop to a ledger board or cabinet base, and keep the front edge aligned with your chair seat height. Finish with stain plus two light coats of satin topcoat for a smooth, wipeable surface.
Dry-fit the trim segments and mark overlaps before gluing so the curve doesn’t kink at the corners.
Don’t use thick trim that raises the edge too much — it makes the desk feel awkward at keyboard height.
13. Pegboard workstation with cable bins under the desk
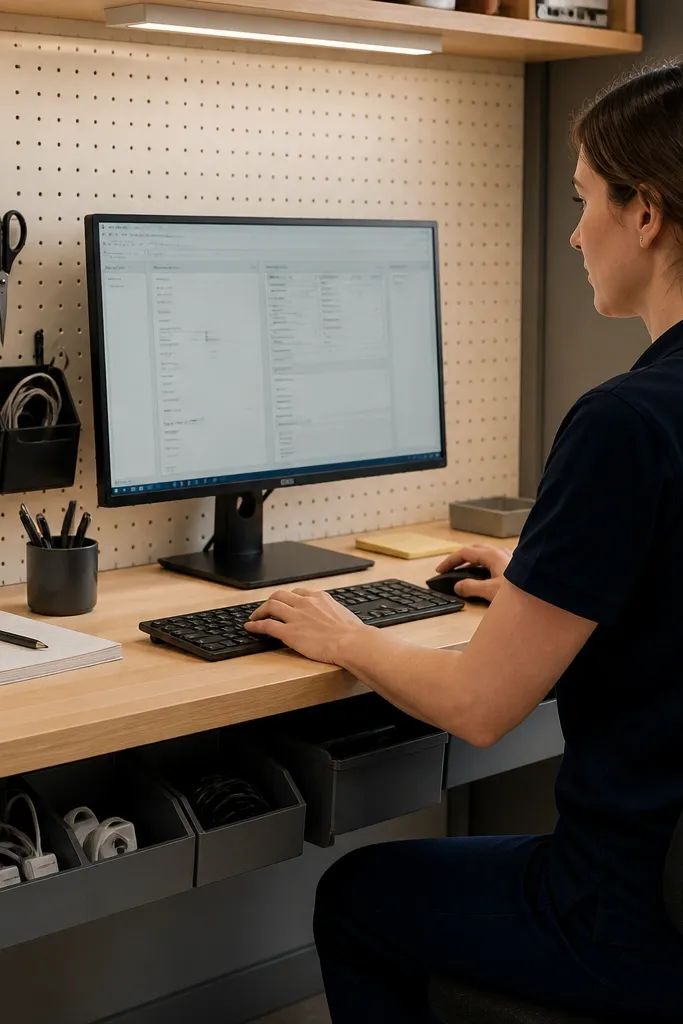
First, install a pegboard sheet on the bay wall into studs, ideally with a standoff frame so the pegboard sits flat. Add hooks for a pen cup, small shelves, and a cable holder. Build or mount a desk surface on brackets or a cabinet base, then attach a couple of under-desk cable bins using screws into the underside. Finish the desk with a wipeable topcoat and paint the pegboard frame in the same color as your trim for a unified look.
A pegboard turns the bay desk into a functional wall, so you’re not relying on floor furniture to look busy. It looks great on camera because the tools create organized visual texture. Under the desk, add small bins for charging cables and accessories so the floor stays clean. This is beginner-friendly Bay Window ideas 2 because pegboard is modular and forgiving — you can drill and adjust until it looks right. It’s best for makers, crafters, and anyone who needs quick access to supplies while working.
Skip thisDon’t hang heavy items only from the pegboard — anchor the heaviest hooks into studs or use reinforced mounts.
Editor's noteUse labeled bins for chargers and adapters so the desk stays tidy for weeks, not days.
14. Linen slipcover seat desk with hidden storage tray

This is for when you want the bay desk to feel like a reading nook that happens to work. A slipcovered cushion makes the corner look soft and expensive, and the hidden tray keeps work items from spilling out. The tray can slide over the seat surface when you need it, then tuck away so the bay looks calm again. Beginner-friendly Bay Window ideas 2 works because you’re building a simple tray and using ready-made cushion covers. It’s best for laptop use and writing sessions where you want comfort more than rigid ergonomics.
Start by measuring your bay seat top so the tray fits with a small gap for clearance, usually 1/4-1/2 inch. Build a shallow plywood tray with a lip and sand it smooth; finish the tray with stain and a durable topcoat. Add a non-slip mat underneath so it doesn’t slide on fabric. Place a cushion slipcover on the bench and use a storage latch or Velcro straps to hold the tray when it’s tucked away.
Choose a slipcover fabric with a matte weave (linen-look or cotton canvas) so it doesn’t reflect window glare.
Skip glossy vinyl cushion covers — they look shiny in photos and feel hot near windows.
15. Tall narrow desk cabinet with fold-down top
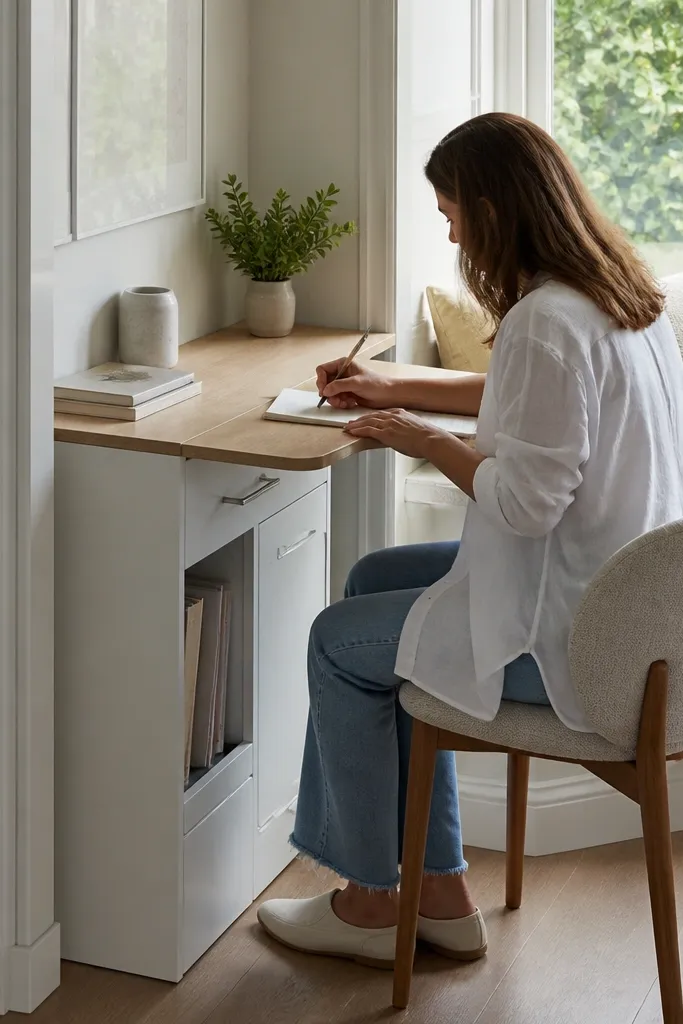
A tall narrow cabinet is a great bay trick when you don’t want the desk to spread into the room. The fold-down top gives you a working surface only when you need it, while the cabinet stays visually slim. This keeps the bay looking light and gives you vertical storage for paper, files, and tech accessories. It’s beginner-friendly Bay Window ideas 2 because you can build the cabinet frame from plywood and use a simple hinge mechanism. It’s best for small home offices and apartments where every inch matters.
First, build a narrow cabinet frame sized to the wall width where it won’t block the window view, usually 12-16 inches deep. Install a fold-down top panel with a heavy hinge and a support leg or stay that locks the top level when open. Add shelves inside and a back panel with a cable pass-through hole. Paint the cabinet to match trim, then finish the fold-down top with stain or a durable laminate for a smooth wipe surface.
Add a magnetic catch and a soft-close hinge so the top closes quietly and stays aligned.
Don’t make the fold-down top too thin — it will flex and wobble when you type.
16. Window-bay desk with built-in monitor stand and drawer runner
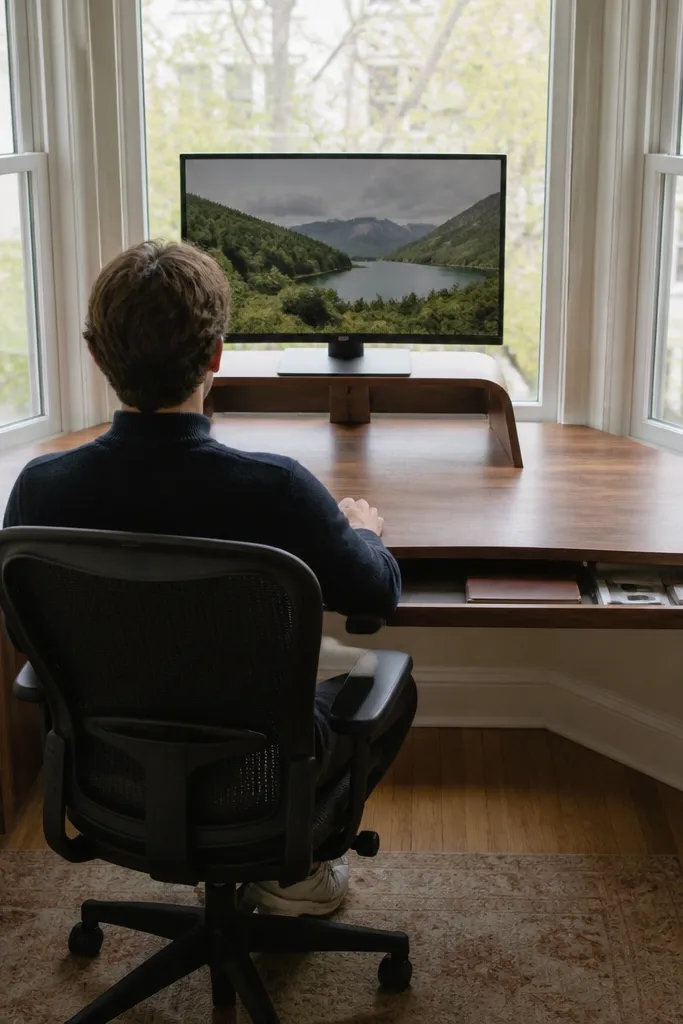
Start by building a desktop from 3/4-inch plywood and mark where the monitor stand will sit, keeping the top of the stand around eye level when you’re seated. Build the monitor stand as a separate box panel with a slight rear lip so the monitor doesn’t slide, then screw it down from underneath. Install a shallow drawer unit under one corner with a drawer slide, using a scrap cleat to keep it square during installation. Finish with stain or paint and add a cable hole behind the stand for a neat cord route.
This idea solves a real workflow problem: monitor height and keyboard clearance in a bay. By building a monitor stand into the desk surface, you get consistent eye level and you avoid stacking books or cheap risers that look messy. A small drawer runner keeps chargers and notebooks close without cluttering the bay floor. This is beginner-friendly Bay Window ideas 2 because it’s basically a desktop plus one built-in platform and a simple drawer box. It’s best for anyone who uses a desktop monitor and wants a clean, intentional look.
Skip thisAvoid placing the stand too close to the window — it can trap glare and reflections on the screen.
Editor's noteTest monitor height with a temporary cardboard riser first, then commit to the final stand measurements.
17. Two-tier bay desk: writing surface above, storage shelf below

A two-tier desk makes the bay feel taller and gives you a storage rhythm that looks good in photos. The upper writing surface is where your hands work; the lower shelf holds books, folders, and a small lamp, so the desk doesn’t look empty. This works well when you don’t want a deep desk pushing into the room. Beginner-friendly Bay Window ideas 2 because you build two simple levels and anchor them securely into studs. It’s best for study, reading, and admin tasks.
First, plan your chair height and choose an upper desk height around 28-30 inches from the floor for most seated work. Mount a strong ledger for the upper surface into studs, then install the top panel with brackets. Add the lower shelf at a comfortable reach height, usually 10-14 inches below the upper desk, and anchor it with shelf brackets. Finish both surfaces the same color family and add a slim cable channel along the wall behind the lower shelf.
Use matching shelf brackets on both tiers so the design looks intentional instead of random hardware.
Don’t put the lower shelf too low — it forces you to bend and the bay desk stops feeling comfortable.
18. Desk with slatted wood panel back for airflow and style
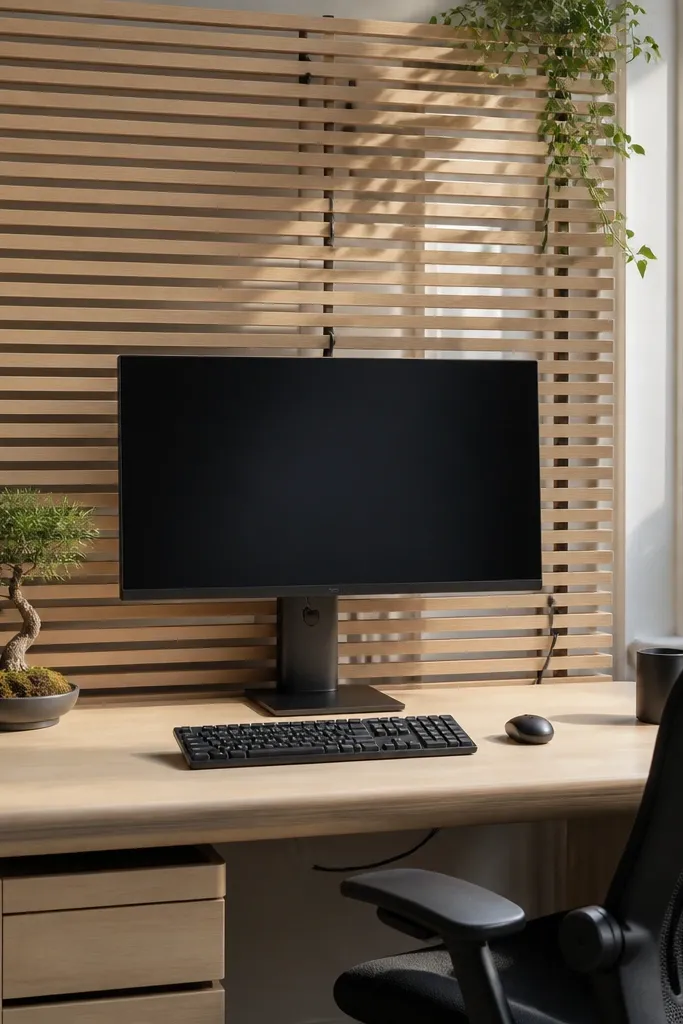
A slatted wood back panel gives you that “furniture” look and it helps with cable routing without a bulky cover. The slats create visual texture behind the monitor area, so the bay doesn’t look like blank wall plus desk. It also helps keep cords from sitting flat against the wall, which can reduce tangles when you adjust positions. This is beginner-friendly Bay Window ideas 2 because you can build the slat panel from thin boards and attach it to a simple back frame. It’s ideal for a home office where you want a calm, modern look.
Start by building a rectangular back frame from 1x2 lumber, sized to the bay wall area behind the desk. Cut thin slats (like 1x2 ripped down) and space them evenly, then screw them into the frame. Mount the slat panel using standoffs so cords can run behind it, then attach a cable pass-through grommet near the monitor. Build the desk surface with brackets or a cabinet base and finish everything with satin stain and clear coat.
Paint the back frame the same color as the wall and stain only the slats — it hides the frame and makes the panel look lighter.
Don’t use wide slats without spacing — the panel can look heavy and swallow the window light.
19. Glass-front display desk cabinet with writing top
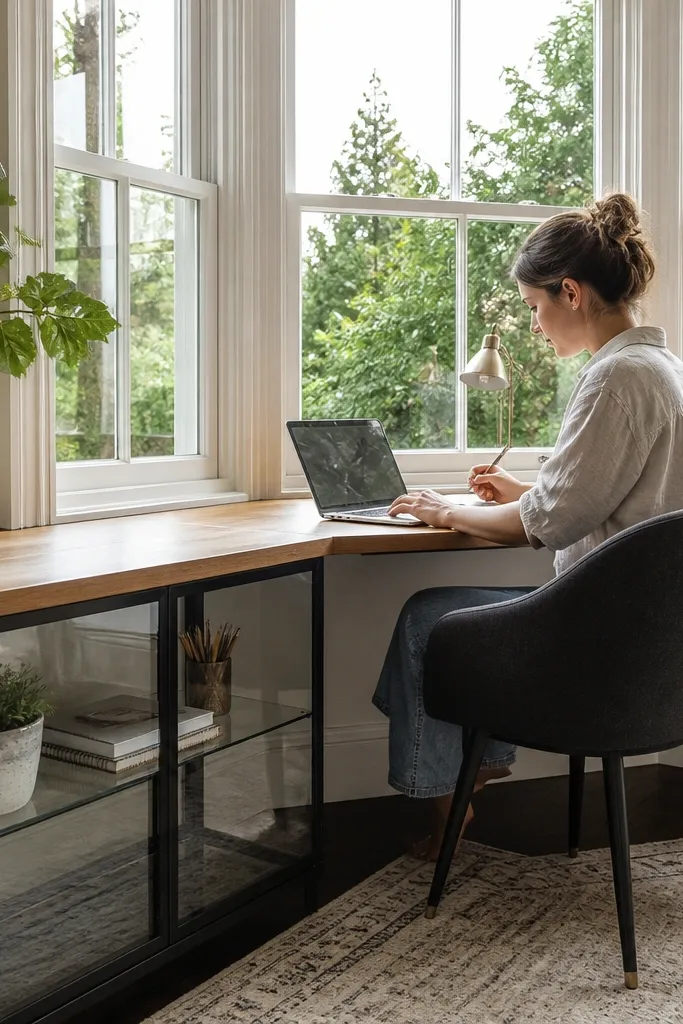
If you want the bay desk to look styled even when it’s not “work time,” glass-front storage is a strong move. You can display neat items — a notebook stack, a small plant, a tidy pencil cup — while keeping the writing surface clear. The writing top gives you function, and the glass keeps the bay bright instead of blocking it. Beginner-friendly Bay Window ideas 2 can use store-bought glass-front cabinets topped with a custom desktop. It’s best for people who like a curated look and want the desk corner to feel like furniture.
Start by choosing a glass-front cabinet base that fits the bay corner and can be leveled into studs. Top it with a cut-to-size desktop slab, then add a simple back panel to hide cords. Install a drawer or organizer tray inside the cabinet so small items don’t clutter the shelves behind glass. Seal and finish the top with a durable clear coat so spills wipe clean.
Use clear glass with a subtle tint or frosted pattern if your window gets harsh sun — it reduces glare on the cabinet contents.
Skip fully open shelves under glass — dust shows fast and the bay starts looking messy.
20. Reversible laptop tray desk with rolling chair clearance
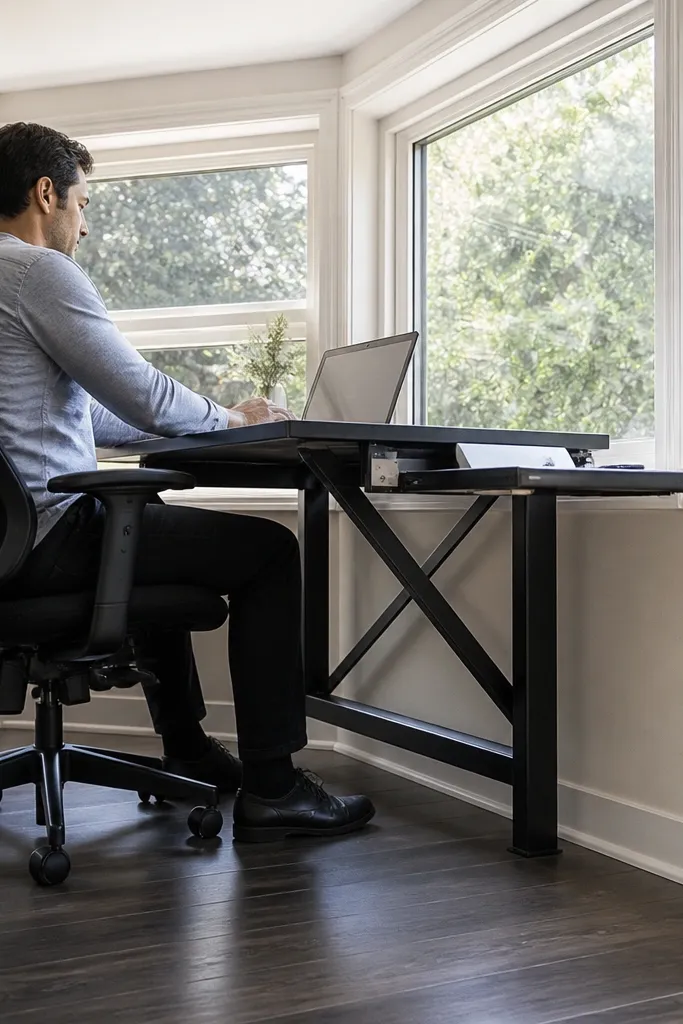
First, build a support frame with a straight front edge, then mount it into studs at a height that keeps your elbows around 90 degrees when seated. Create a reversible tray using two thin boards with different finishes: one matte for laptop grip, one smooth for writing. Add a hinge or bracket system that flips the tray securely and locks it in place. Finish with a clear coat on the writing side and add a small cable channel on the frame.
This is a smart bay desk idea when you want a clean look and a flexible work surface. A reversible laptop tray sits on a support frame, so you can use it for laptop work and flip it to a writing surface when you need paper. The key is chair clearance — bays often trap you behind the angle, so you design the desk to leave a straight path. Beginner-friendly Bay Window ideas 2 because it’s mostly a tray build and a stable frame mount. It’s ideal for small desks in bedrooms or hall offices.
Skip thisAvoid mounting the frame too close to the window — the tray will feel cramped and glare will hit your screen.
Editor's noteTest chair clearance with painter’s tape lines on the floor — rolling chairs need a straight bite through the bay corner.
21. Built-in bookshelf desk hybrid with closed lower drawers
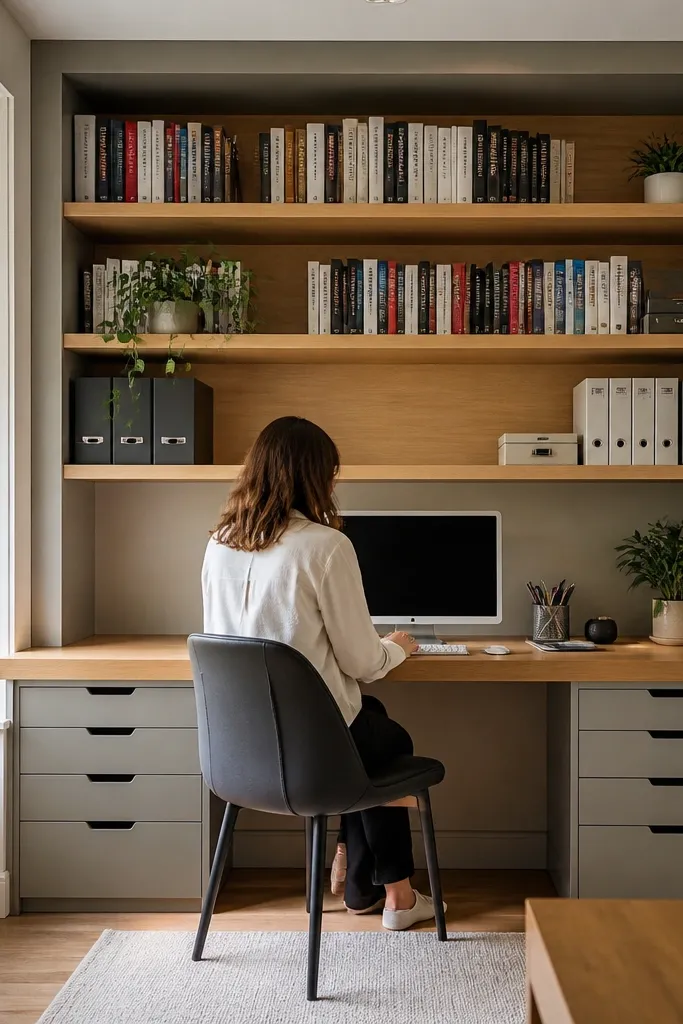
Start by laying out a bay-width frame made from 3/4-inch plywood, splitting it into a top bookshelf zone and a lower drawer zone. Install the frame into studs and add a level ledger for the desk surface. Build drawers with store-bought drawer boxes or simple plywood boxes with slides, then attach a desktop panel on top. Finish the shelves and drawers with paint or stain, and add a back panel behind the desk to hide cords.
This hybrid is the most “office built-in” looking option without going full custom. The shelves give you vertical organization and a photogenic backdrop — books, binders, and storage baskets look good in a bay. The closed drawers keep the desk area from looking cluttered, which matters because bay windows pull attention. Beginner-friendly Bay Window ideas 2 because you can build it from panel sections and shelf pins with basic tools. It’s best for home offices that need both display and storage.
Skip thisDon’t leave the lower area open — paper stacks will show and ruin the clean look.
Editor's noteUse adjustable shelf pins so you can resize the interior as your storage changes.
22. Cable-managed standing desk conversion on bay seat
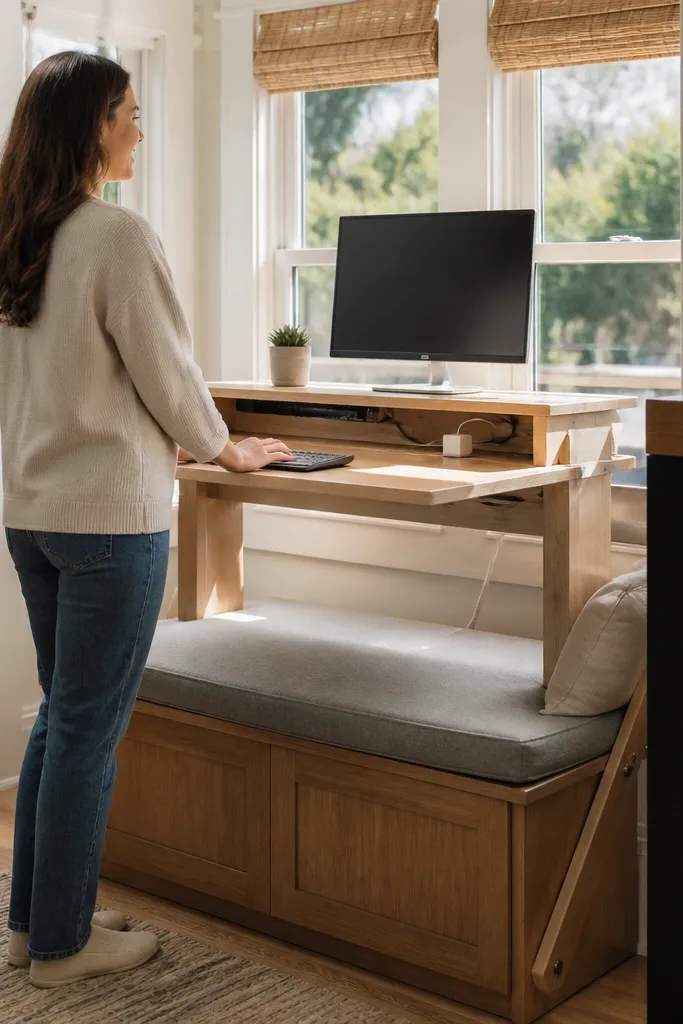
First, measure your bay seat height and decide your standing desk height target, then build a platform that raises the work surface to match. Use plywood platform panels with a stable underside frame, then attach a top surface with corner cleats. Install a cable tray on the underside and add a grommet near where the power strip sits. Finish with a durable topcoat and add a simple footrest if needed for comfort.
Standing desks in bays look amazing when they’re built cleanly, and they feel great if you work on spreadsheets or long calls. This idea uses the bay seat as the base and adds a raised desktop platform that gives you standing height without blocking the window. Cable management is built into the underside so cords don’t hang and snag. Beginner-friendly Bay Window ideas 2 because you can use a platform build and standard hardware. It’s best for people who want a bright, active work zone without a full desk frame.
Skip thisDon’t place the power strip where you can kick it — bays are narrow and standing desks get bumped.
Editor's noteUse a matte desktop finish so screen glare stays low when you stand near the window.
23. Thermal liner desk backdrop with framed fabric panels

First, build a simple rectangular frame from 1x2 boards sized to the area behind the desk. Attach insulation board or thermal liner to the back, then staple fabric over it tightly and evenly. Mount the frame into studs at desk height, then add a small cable raceway along the side. Build the desk as a shelf or tabletop and keep the top finish matte so the fabric backdrop stays the visual focus.
This one is for cozy aesthetics and better temperature comfort near windows. A framed fabric backdrop behind the desk hides cords and gives you a soft, styled background that looks good in photos. Use thermal curtain liner or insulation board behind the fabric so the bay feels less drafty when you work. Beginner-friendly Bay Window ideas 2 because you’re building a fabric frame, not complicated carpentry. It’s best for laptops, reading, and writing — basically work where you want a warm, quiet corner.
Skip thisAvoid stretchy knits — they ripple when stapled and look sloppy around the corners.
Editor's noteChoose medium-weight linen-look fabric with a tight weave so it doesn’t sag and looks crisp when framed.
24. Slim rolling cart desk with bay-side power strip
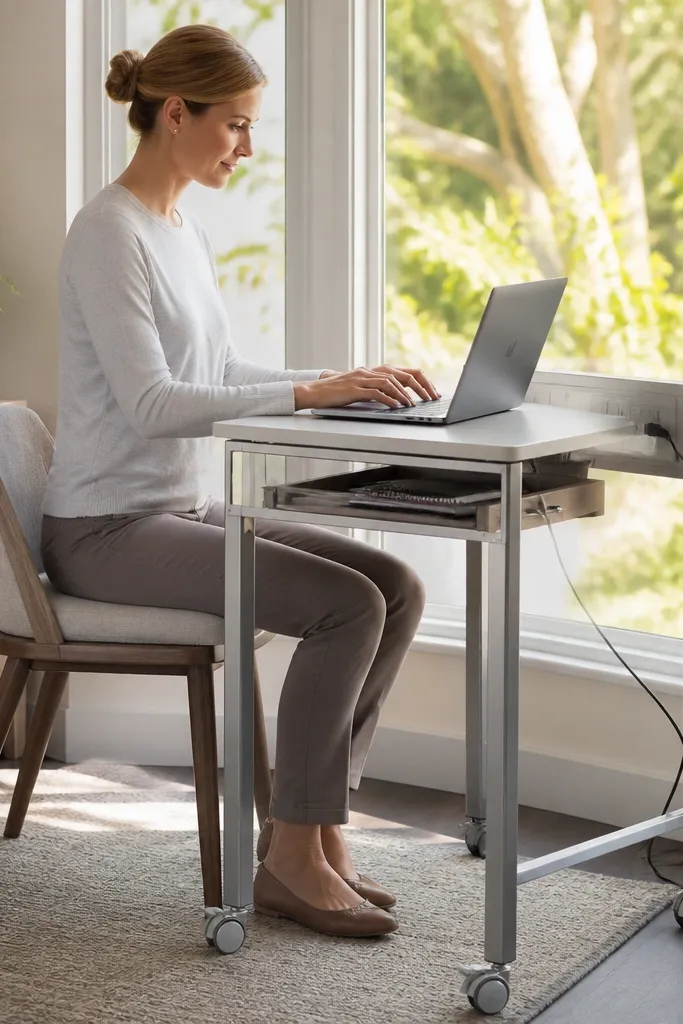
First, pick a cart with two shelves and a top surface around 16-18 inches deep so it doesn’t feel cramped. Place the cart so the top aligns with your bay’s straight work line, then mount a small power strip on the wall behind the cart with screws into studs. Add a cable clip strip on the wall so cords run straight down. Finish the cart by swapping in a removable tray liner or adding a wood top insert sealed with matte clear coat.
This is the “I need function fast” bay desk idea that still looks good. A slim rolling cart gives you a desk surface when you need it, and you can tuck it away so the bay looks open. The visual upgrade is a bay-side power strip mounted behind a small panel, so cords don’t drape across the room. It’s beginner-friendly Bay Window ideas 2 because it requires minimal tools and no heavy carpentry. It’s ideal for renters, guest offices, and anyone who works at a desk occasionally.
Skip thisDon’t rely on loose extension cords — use a wall-mounted strip and keep the cart plug connection short.
Editor's noteUse caster wheels with a soft tread so the cart doesn’t scratch the floor when you roll it back under the bay.
25. Corner window desk with arched mirror above for light bounce
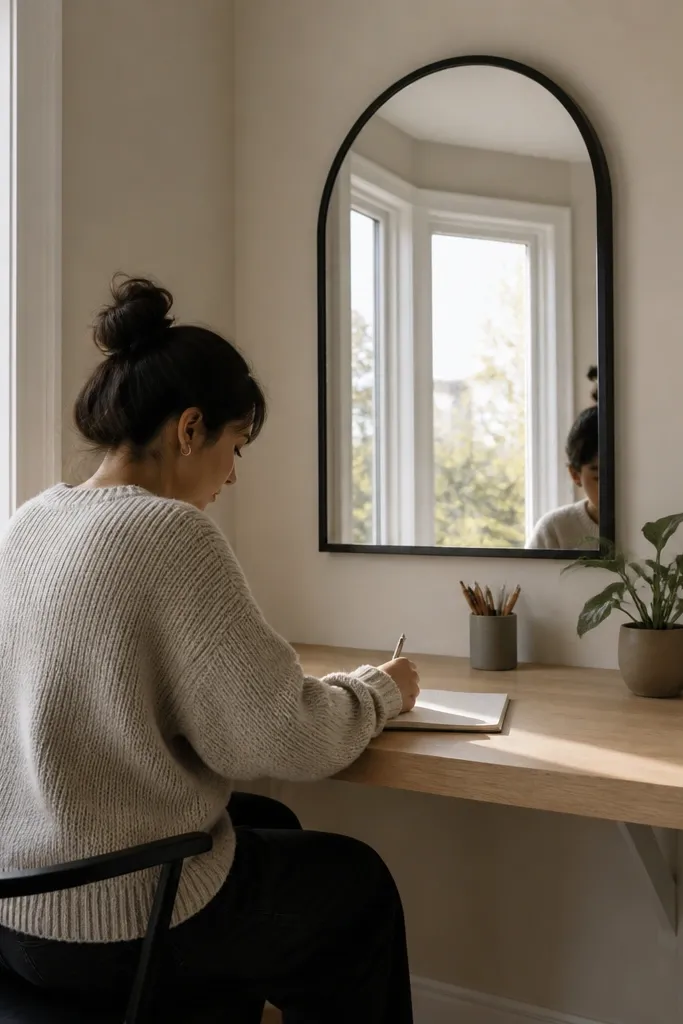
First, mount the desk surface at your chosen height, keeping the front edge straight for comfortable keyboard placement. Then choose an arched mirror sized so it sits centered above the desk, typically 20-30 inches wide depending on bay width. Use mirror mounting hardware and anchor into studs, not just drywall. Add a slim shelf or ledge below the mirror for small items, and run cords down behind the desk with a cable cover strip.
A mirror above the bay desk makes the whole area feel brighter and more styled without adding more furniture. The arched mirror shape works well with bay geometry because it visually echoes the curve of the bay angles. Pair it with a clean desk top and simple storage, and the mirror does the “aesthetic heavy lifting” by reflecting light onto your work surface. Beginner-friendly Bay Window ideas 2 because you’re building a desk and adding one wall-mounted piece, not complex joinery. It’s best for darker rooms or offices that need a brighter focal point.
Skip thisAvoid placing the mirror directly opposite the window so it reflects harsh light into your screen.
Editor's noteUse a matte desk lamp or no lamp at all — the mirror already adds brightness and glossy surfaces can glare.



