
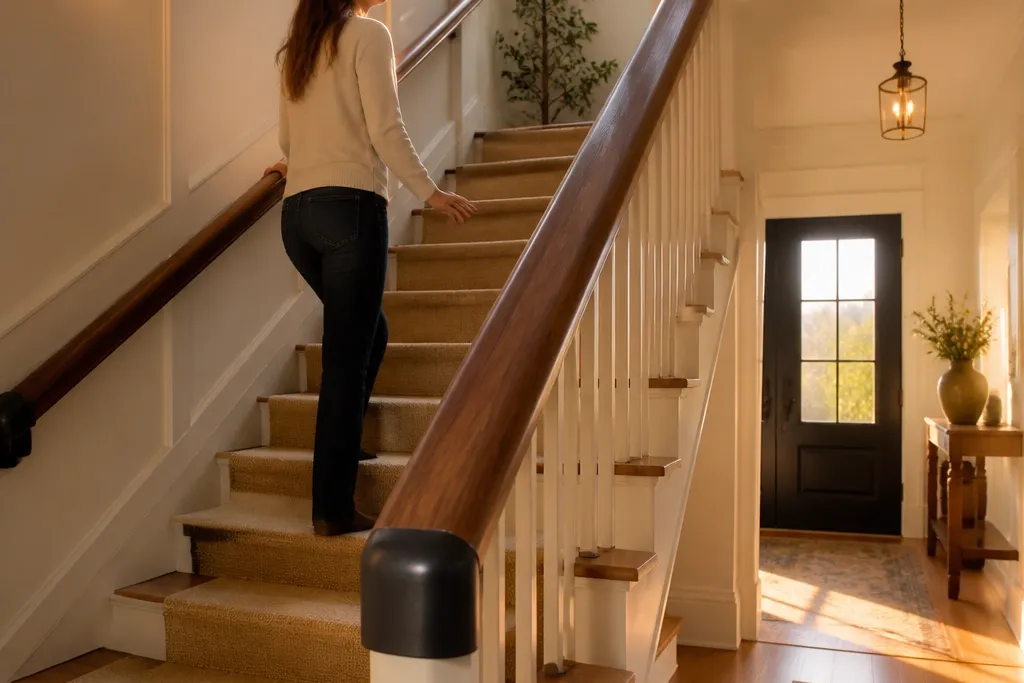
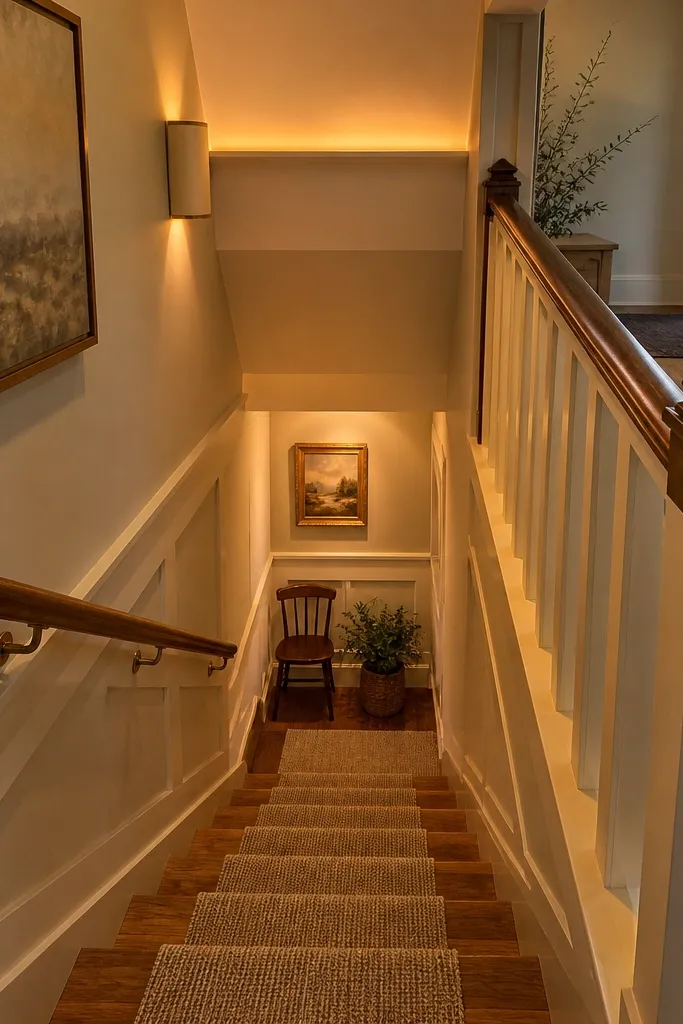
1. Walnut-stained solid wood handrail with matte black end caps
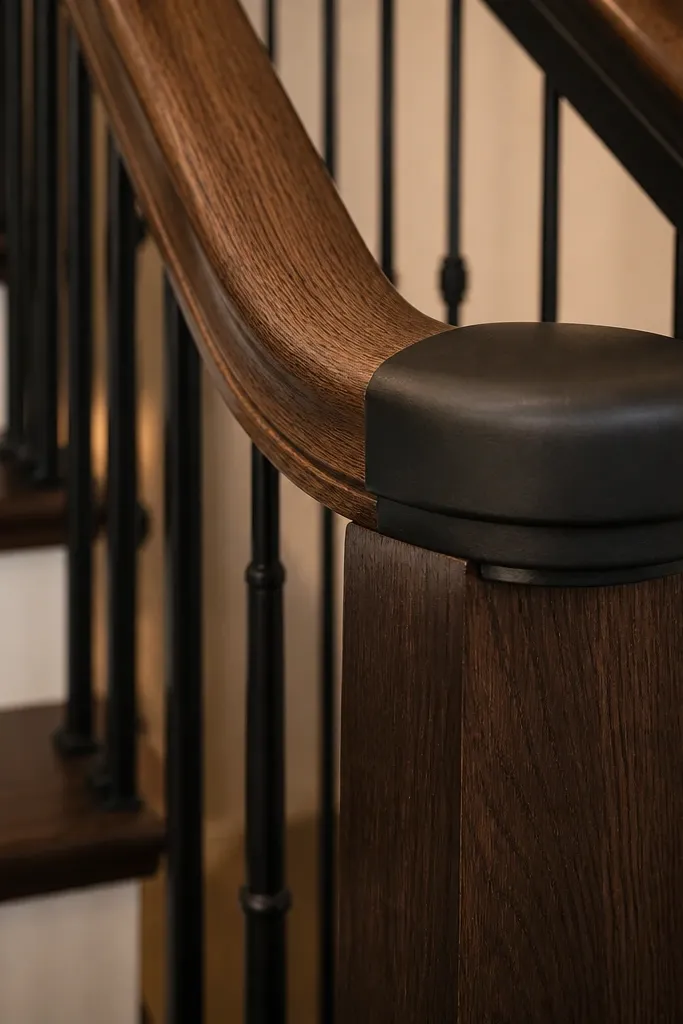
A walnut-stained handrail reads warm because the stain keeps the grain visible and doesn’t go too gray. The trick is pairing it with matte black end caps (or a black post) so the rail looks designed, not painted-over wood. Choose a handrail with a comfortable rounded profile; a flat-top rail feels harder to grip and looks less inviting. This setup works in modern farmhouses, warm contemporary homes, and any staircase that currently looks “builder grade.”
Start by removing the old handrail and sanding the new or existing rail to 120 grit, then wipe clean. Apply walnut stain in thin coats, let it sit per label, and wipe off evenly so you don’t get dark edges. Finish with a matte clear topcoat built for hand contact, then install the rail and add matte black end caps or brackets at each end and at turns.
Editor's noteUse a foam brush for stain edges and a lint-free cloth for wiping — it keeps the grain from looking blotchy.
Skip thisDon’t use high-gloss clear coat on a handrail; it shows fingerprints and looks colder.
2. Light oak handrail with white painted balusters for a cozy contrast
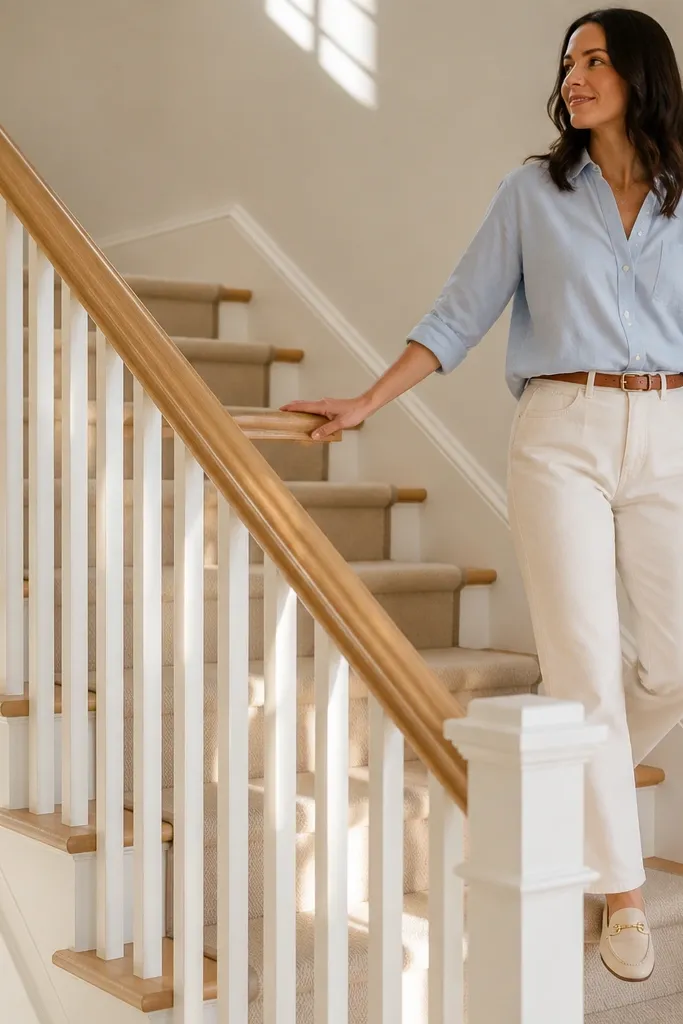
Light oak plus crisp white balusters creates a warm, airy look that still feels grounded. The handrail carries the warmth, while the white balusters keep the stair from feeling heavy or dark. This is a great move if your walls are off-white or your trim is white, because the contrast looks intentional instead of accidental. It’s also easier to keep clean: white balusters hide minor scuffs better than dark paint.
Sand and prep your oak handrail, then stain to a light natural oak shade and seal with a matte topcoat. Paint balusters with a cabinet-grade enamel in white, using a small angled brush for smooth coverage. Reinstall and check spacing from the bottom step; adjust baluster placement before the final tightening so gaps look even.
Editor's noteSpray-paint balusters if you can, but brush just the ends — you’ll get fewer streaks.
Skip thisSkip glossy white paint; it reflects light and makes the rail area feel harsh.
3. Rope-wrapped handrail on wood posts for a nautical-cozy vibe
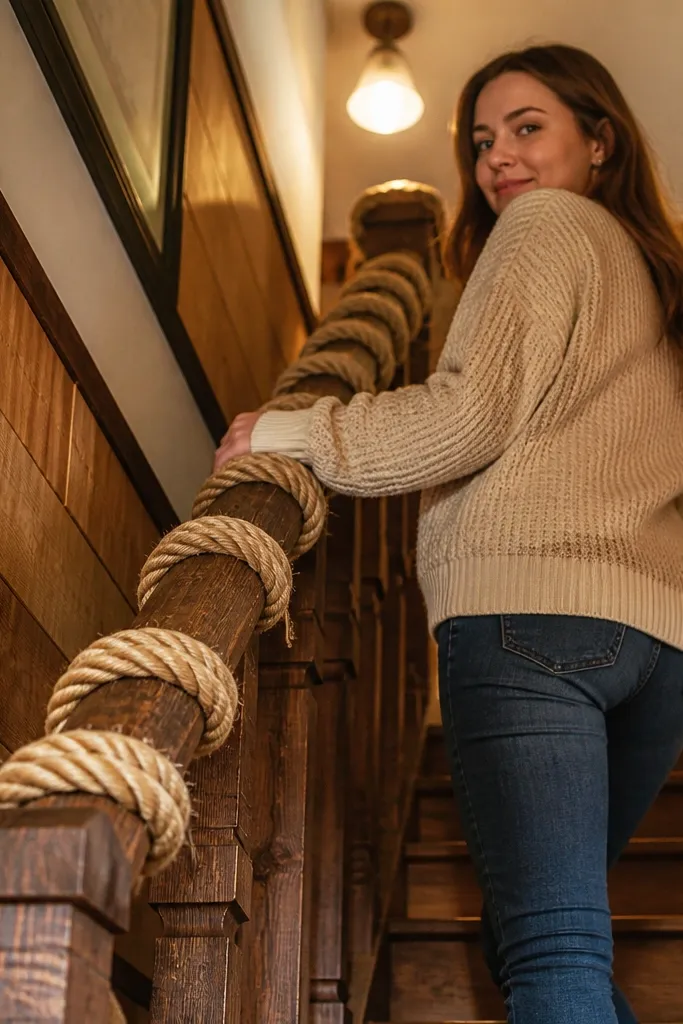
Rope wrapping adds texture you can see and feel, which is why it reads cozy even in bright rooms. Use a thick, twisted rope in natural tan or warm cream, and keep the posts in stained wood so the whole system looks cohesive. The look works especially well on stairs with farmhouse beams, shiplap, or warm wood paneling. It’s also a low-stress aesthetic upgrade when your existing balusters are plain.
Wrap the handrail with jute or cotton rope starting at one end, using a strong wood glue or contact adhesive along the underside seam first. Keep each turn tight and overlap slightly so there are no gaps, then secure the rope ends under the end cap. Install the wrapped rail and seal the rope with a clear, matte rope-safe sealer if the area gets heavy touch.
Editor's noteDo a test wrap on scrap first — rope thickness changes spacing and how tight the turns look.
Skip thisDon’t wrap over a glossy rail; rope grip looks uneven and can snag later.
4. Cane-web balusters with a wood handrail for instant warmth
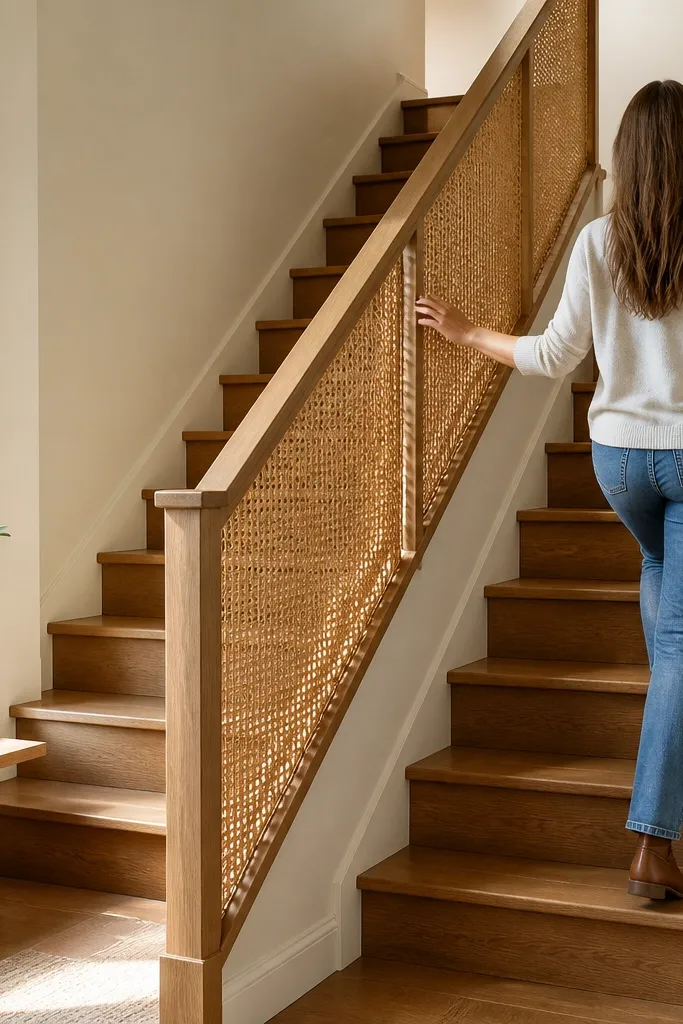
Cane-web panels between posts look warm because the weave softens the harsh lines of a staircase. Pair it with a simple wood handrail and you get a “designed” look without clutter. This works best when your stair has a straight run and you can keep panel edges aligned — the weave pattern is what sells it. It’s also great for homes that feel too modern and need texture.
Measure the opening widths between posts and cut cane-web panels to fit, leaving a small gap for expansion. Attach panels with thin trim pieces or a concealed spline so the edges look crisp. Finish by sanding the handrail, staining, and sealing with matte clear so the wood and cane read warm together.
Editor's noteUse a straightedge jig for the first panel edge; the rest will line up faster than you think.
Skip thisSkip stretchy cane without a rigid frame; it warps and the weave looks crooked.
5. Shaker-style wood panel inserts between balusters
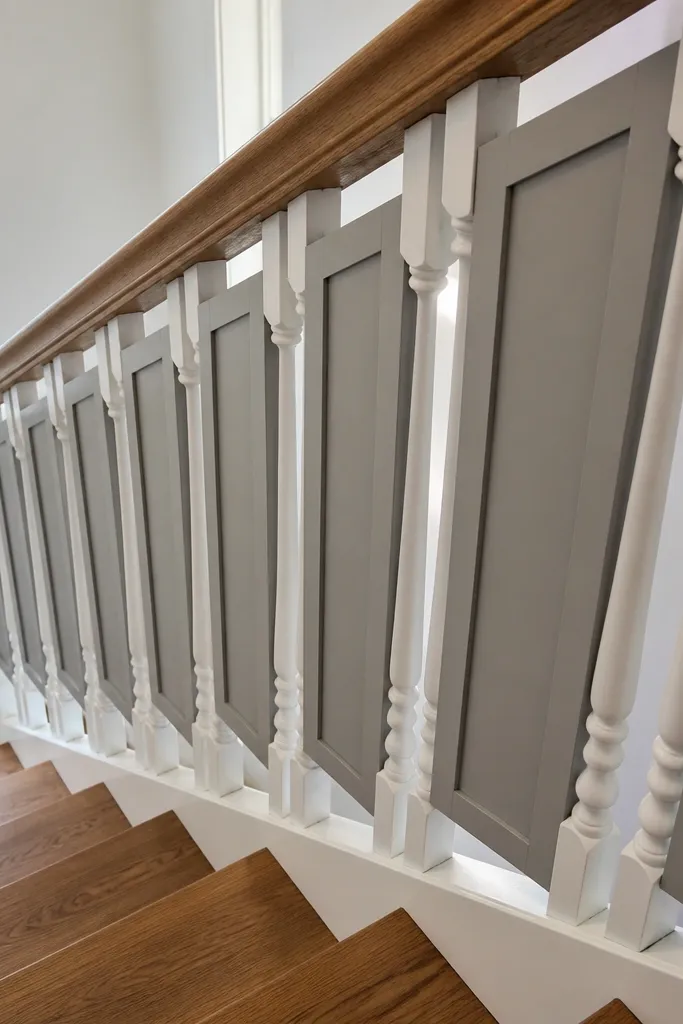
Panel inserts turn a basic baluster layout into something architectural. The warm part is the handrail — keep it wood and matte — while the panels can be painted white or a warm gray. Shaker-style rectangles create a clean rhythm that photographs well from the landing angle. This is a strong option if your staircase currently feels too open or drafty visually.
Remove a few balusters or build a simple frame that fits between posts. Cut 1/2-inch plywood or MDF strips into rectangle panel sections, then add thin trim pieces to form the Shaker look. Paint panels, let cure fully, then reinstall with a wood handrail stained and sealed on top.
Editor's noteDry-fit every panel before paint — you want perfect rectangle alignment, not “close enough.”
Skip thisDon’t use thin, bendy board for panel inserts; it telegraphs waves between posts.
6. Vertical wood slats with a rounded handrail for a Scandinavian feel
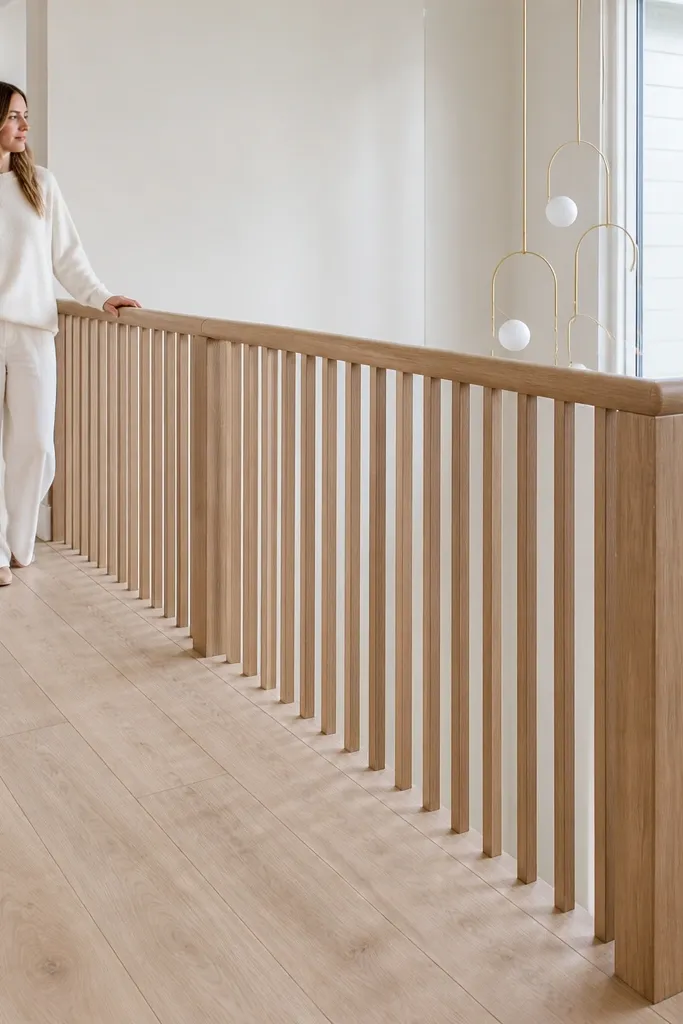
Vertical slats look cozy because they create warm, continuous lines rather than lots of small shapes. Use light wood — natural oak or ash tone — and keep the handrail rounded and smooth. The result feels calm and inviting, especially in rooms with pale walls and light floors. It’s also a smart way to cover a wide span without complex joinery.
Rip slats from 1x material into consistent widths, then sand all faces to 150 grit for a smooth feel. Install slats using a concealed screw method from the back or inside edge so the front stays clean. Finish the handrail with a light stain and matte topcoat, then attach end brackets and check alignment from both sides.
Editor's noteMark slat spacing with a tape template and a small clamp; it speeds up repetition and keeps it straight.
Skip thisSkip wide slat gaps; they make the rail look unfinished rather than airy.
7. Matte black metal balusters with a thick oak handrail
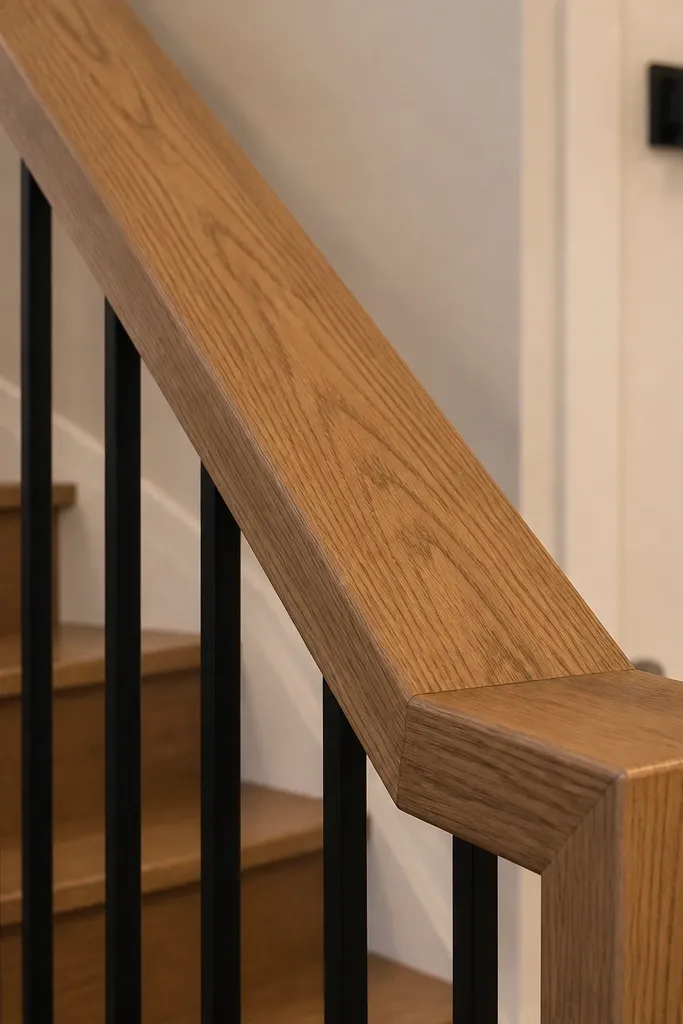
If your house already has black hardware or light fixtures, matte black metal balusters instantly look cohesive. The cozy part comes from the thick oak handrail: more wood mass equals more warmth in the picture. This combo reads custom even when the balusters are pre-made because the handrail ties everything together. It’s great for industrial-modern interiors that still need a softer touch.
Choose balusters with a consistent profile (simple round or slim rectangular) and install them to match your existing post layout. Mount the oak handrail by aligning bracket positions before drilling — mark twice. Stain oak to a warm tone (not gray-brown), then seal with matte clear so the wood doesn’t look shiny next to metal.
Editor's noteUse a laser or long level to verify the handrail slope; small deviations look obvious in photos.
Skip thisDon’t leave metal hardware unpainted if it’s glossy; shiny black makes the stair feel colder.
8. Woven fabric paneling behind balusters with a wood rail
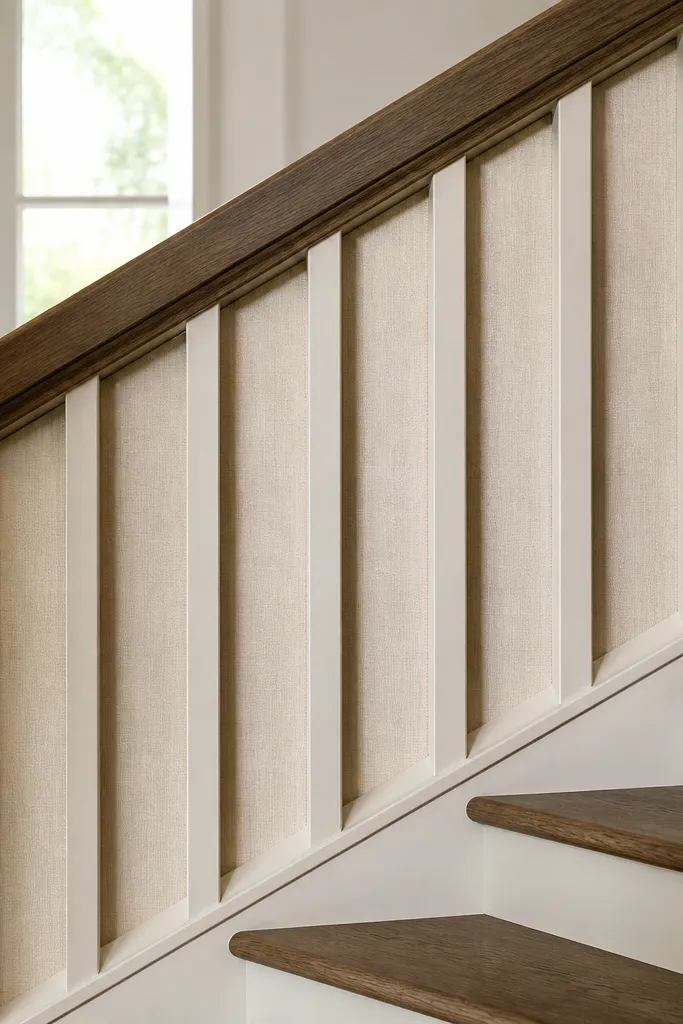
Fabric-backed sections soften a staircase visually and make it feel cozy even when the rail is simple. Use a stiff backing frame (thin plywood) and staple a woven fabric like linen blend or textured cotton in warm cream. Then mount the panel behind or between balusters so the fabric doesn’t sag. The look is especially good for nurseries, reading corners, and bedrooms where you want softness.
Build a shallow frame from thin strips to fit the opening, then cut fabric with enough overlap for stapling. Stretch fabric evenly and staple to the back, pulling tight on the corners to avoid wrinkles. Install the frame behind balusters, then add a stained wood handrail with a matte finish for contrast.
Editor's notePre-wash fabric so it shrinks before you install it; otherwise it puckers later.
Skip thisSkip thin, slippery fabric; it wrinkles and looks sloppy from the landing.
9. Two-tone rail: stained wood top with painted bottom rail
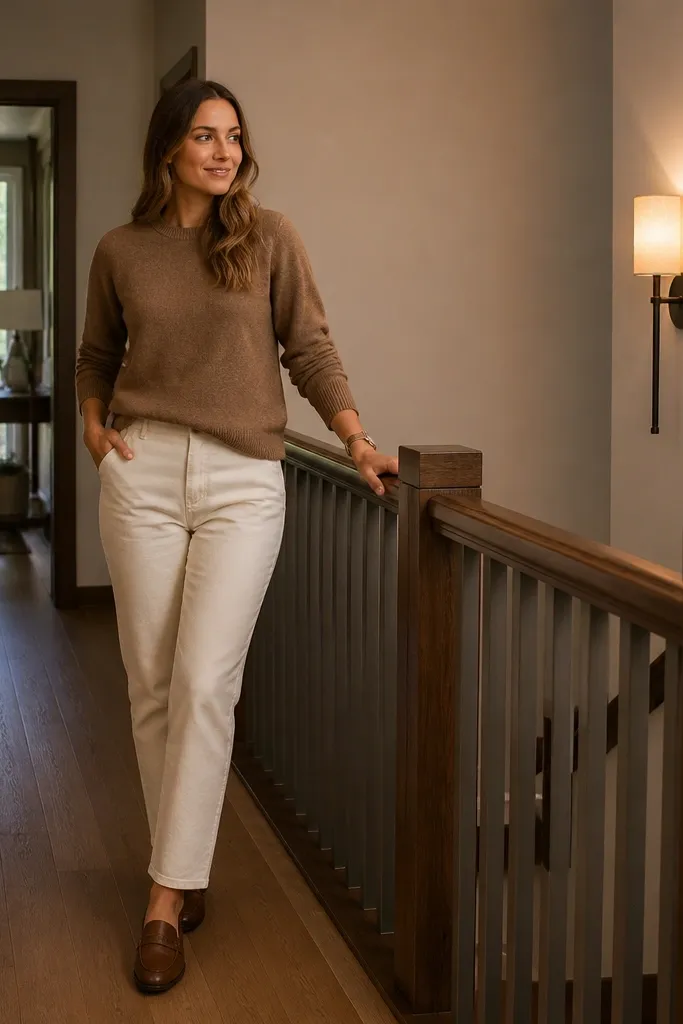
Two-tone rail systems look designer because they separate the visual weight of the handrail from the base. Keep the handrail stained wood for warmth, then paint the lower rail (if you have one) in a warm gray or deep greige. The contrast makes the staircase feel intentional and gives you room to match wall color without losing the cozy wood feel. This works well in hallways where you want the rail to read clean but not plain.
Sand and stain the handrail first, seal it matte, and let cure fully. Paint the lower rail with a durable enamel; scuff sand and wipe with deglosser so it sticks. Reinstall, then add matching brackets so the two-tone line stays straight from step to step.
Mask the top edge carefully with painter’s tape and burnish it down for a sharp line.
Don’t rush paint cure; touching too soon causes soft edges and smears.
10. Solid wood box rail panels for a warm, enclosed look
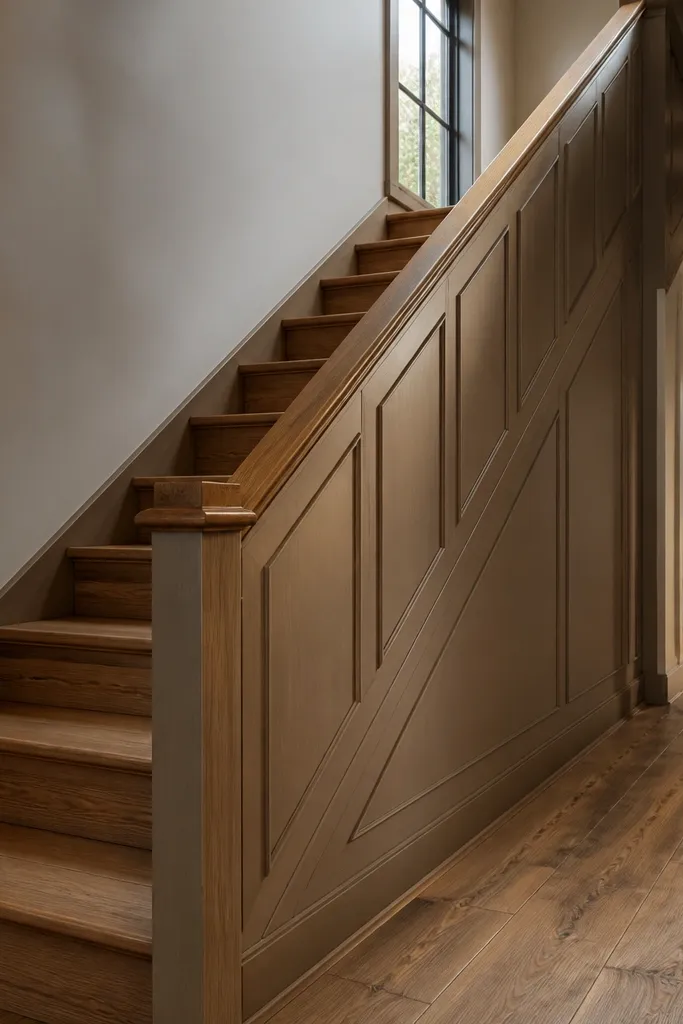
If your current staircase feels too open or echo-y, a box rail panel setup makes it feel wrapped and cozy. A solid wood panel with routed grooves or simple rectangles gives you that warm “built-in” look. This is also the safest visual option because you can hide the mess of cables and gaps behind a clean front. It’s best for wider stairs and homes that want a more traditional warmth.
Measure the rail height between posts and build panel boxes using 1/2-inch plywood or solid boards with a frame behind it. Route or cut shallow grooves for decorative lines, then sand smooth and stain. Install panels onto the rail frame, add a matching handrail on top, and finish everything with matte clear.
Editor's noteUse pocket-hole screws for the internal frame — it keeps the outside clean.
Skip thisSkip rough sanding inside corners; they catch stain unevenly and look blotchy later.
11. Beaded board skirt with a simple wood handrail
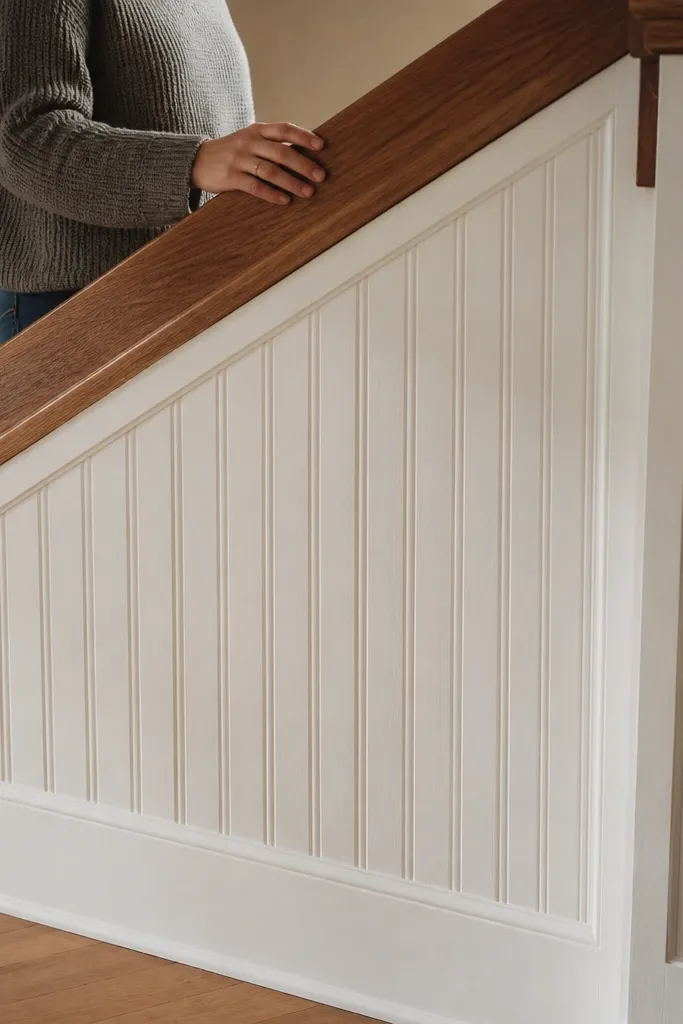
Beaded board adds cozy warmth because the tiny grooves catch light softly. Pair it with a simple handrail in oak or walnut stain and the result looks farmhouse without turning into a theme. This is a great fix when you want to cover the underside railing area or add visual warmth below a spindled section. It photographs well because the bead texture shows depth from the side.
Cut beaded board panels to fit the underside space and test fit for straight lines at the ends. Install with construction adhesive plus small finish nails, then caulk seams for a smooth look. Stain and seal the handrail, then attach it and paint trim edges to match your wall color.
Editor's noteCaulk the bead-board seams lightly; heavy caulk fills the grooves and kills the texture.
Skip thisDon’t skip sealing beaded board; unsealed wood can look darker in patches after a few weeks.
12. Handrail with a live-edge wood cap and clean metal posts
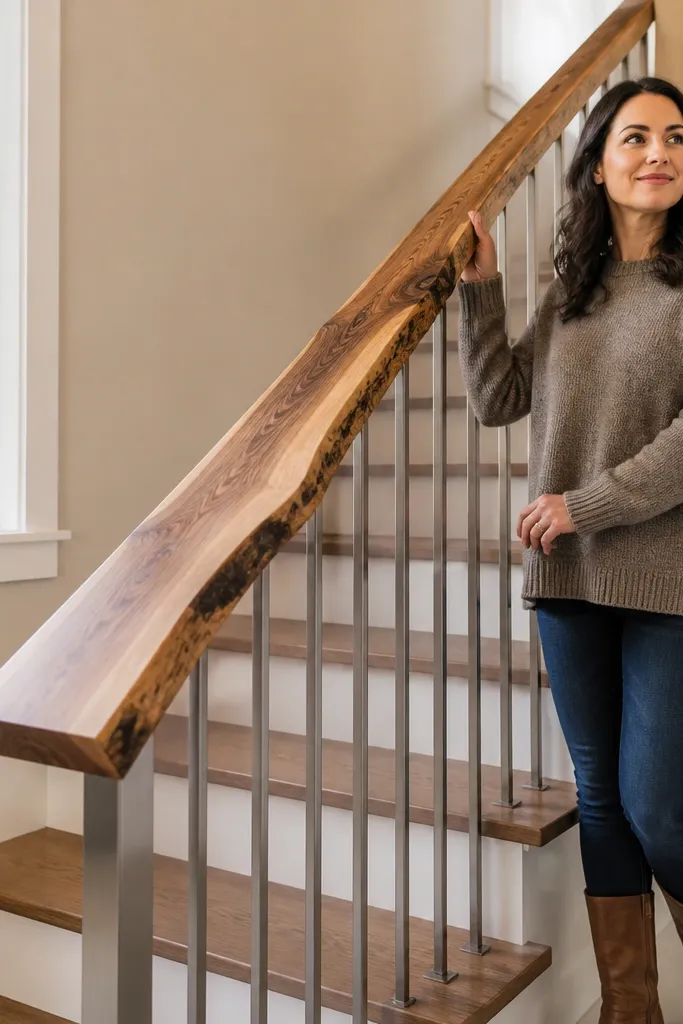
Live-edge wood on a stair rail looks warm because it shows natural variation and depth. Keep the metal posts clean and straight so the live-edge piece feels intentional, not chaotic. This is a top pick if you want one “hero” element that makes the whole staircase look custom. It works best with warm neutral walls and floors, where the organic edge can stand out without clashing.
Choose a live-edge slab that matches your rail length and thickness, then plane/sand to remove sharp edges. Mount a straight metal post line, then attach the slab as a cap using hidden brackets or threaded inserts so screws aren’t visible. Finish the wood with a matte clear protective coat, and sand the contact areas to a smooth feel.
Editor's noteRound the underside edges where hands pass; it feels better and prevents splinters.
Skip thisDon’t leave the live edge raw; it catches dirt and looks darker in high-touch zones.
13. Chunky rounded handrail with a paneled wall track behind
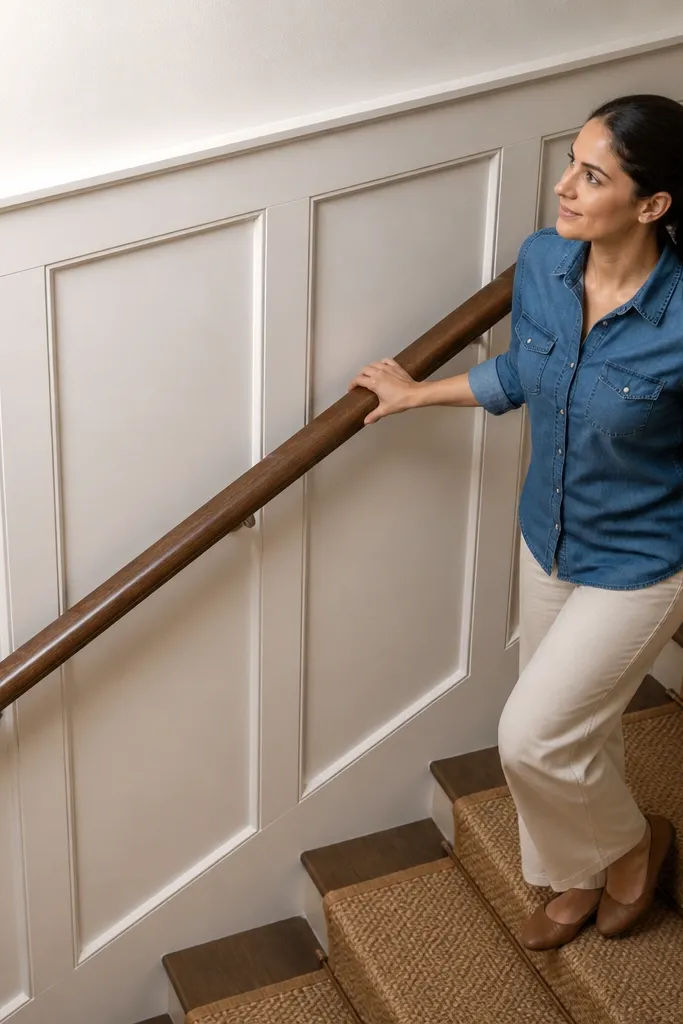
A chunky rounded handrail looks cozy by itself, but it becomes truly photogenic when the wall behind it has a subtle panel track. The panel lines guide your eye and make the rail look built-in rather than mounted to drywall. Use a simple 1x4 or plywood paneling strip system painted warm white, then stain the handrail in a medium oak or walnut tone. This is a smart option for narrow hallways where the rail is the main visual.
Install a wall track panel system first with 1x4 strips spaced for a clean rhythm, then paint it and let it cure. Sand your handrail to 150 grit, stain in a warm tone, and seal matte clear. Mount the handrail brackets into studs where possible, then attach the rail and check the height consistency along the run.
Editor's noteUse a consistent handrail height reference point from the first post; stairs hide small errors until you see them.
Skip thisSkip mounting brackets into drywall only; it rattles and looks loose after a few weeks.
14. Twisted spindle balusters with a warm stain rail
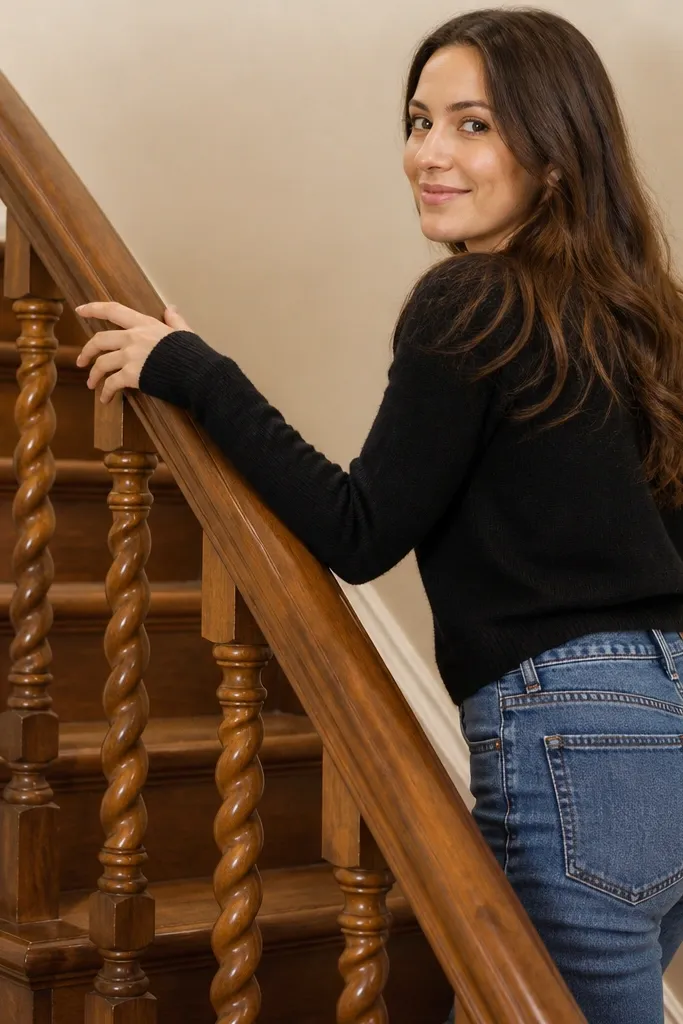
Twisted spindles add a cozy, traditional texture that still looks fresh when paired with a modern matte rail finish. Choose spindles in matching wood (oak or poplar) and keep the stain tone consistent across handrail and spindles. This style photographs beautifully because the twist catches light along the baluster’s curve. It’s best when your staircase has classic lines and your home isn’t trying to be ultra-minimal.
Buy or cut twisted spindles to your required lengths, then dry-fit them between posts. Stain all spindles and the handrail together to keep the tone match, and seal after staining. Install balusters from the bottom up, then attach the handrail last so you can fine-tune alignment at the top.
Editor's noteUse painter’s tape on spindles during install to protect stain edges from scuffs.
Skip thisDon’t mix stain tones between spindles and handrail; even slight differences look like a repair.
15. Matte white rail with warm wood grip strip
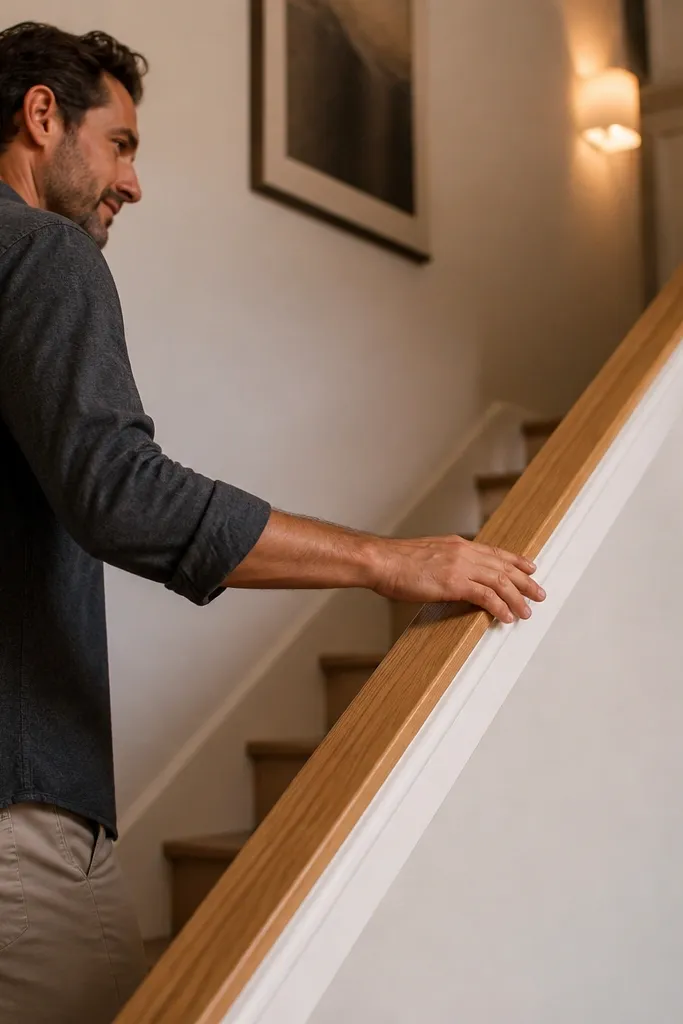
This is a clever way to keep a bright staircase while still getting cozy warmth where your hand touches. Paint the main rail in matte white, but add a separate warm wood grip strip on top. The wood strip gives you comfort and warmth without making the entire railing look heavy or dark. It’s ideal for homes with white walls and lighter flooring that still needs a warmer touch.
Sand and prime the painted rail surface, then apply matte white enamel and let it cure. Cut a wood strip to the hand contact width, stain it to a warm oak or walnut tone, and seal matte clear. Attach the strip with screws from underneath or concealed brackets, then finish edges with small trim pieces so the join looks clean.
Editor's noteMake the wood strip slightly wider than you think; narrow strips feel awkward on bare hands.
Skip thisDon’t attach the wood strip directly to glossy paint; adhesion fails and the strip lifts.
16. Leather-wrapped handrail accents on a wood base
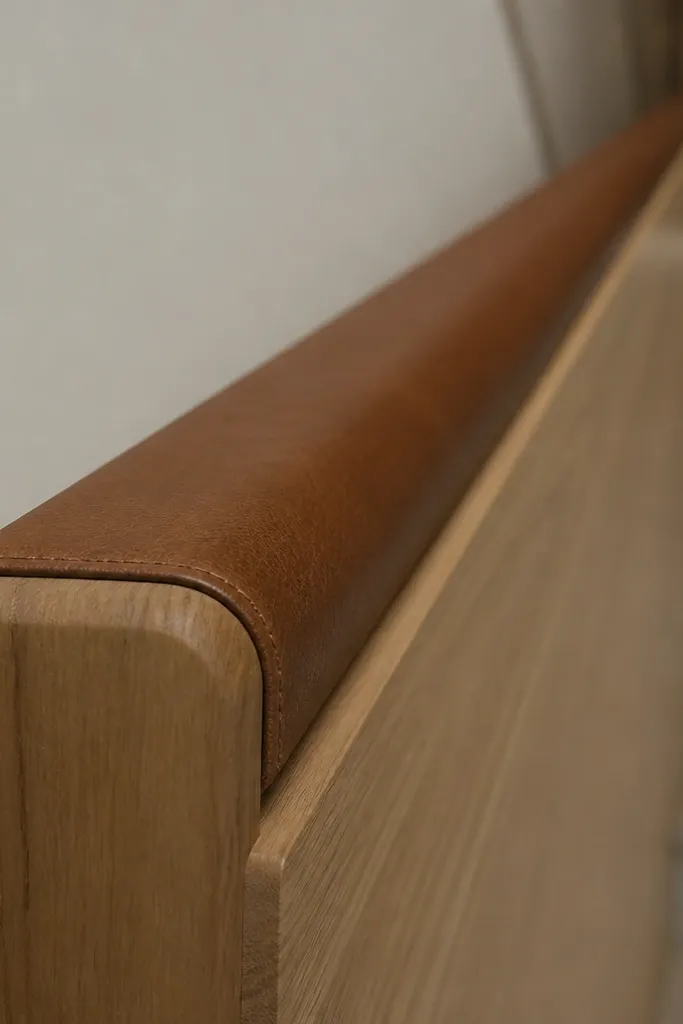
Leather accents add warmth and a “soft touch” look without covering the whole rail. Choose a narrow wrap strip in saddle brown, cognac, or dark chocolate and apply it to the top edge or a specific section where hands land. This reads cozy even in minimalist interiors because leather has a natural matte sheen and visible texture. Pair it with a warm wood rail so the materials match.
Start with a smooth wood handrail finished matte clear. Cut leather strips to size, punch holes if you’re using hidden screws, or use contact cement for a clean seam. Wrap tight, align the seam on the underside, then trim edges and seal the leather with a matte leather conditioner for protection.
Editor's noteUse a heat gun gently to shape leather around curves — it reduces wrinkles at the seam.
Skip thisSkip thick leather; it makes the rail feel chunky and uncomfortable to grip.
17. Glass panel infill with a warm wood frame and matte hardware
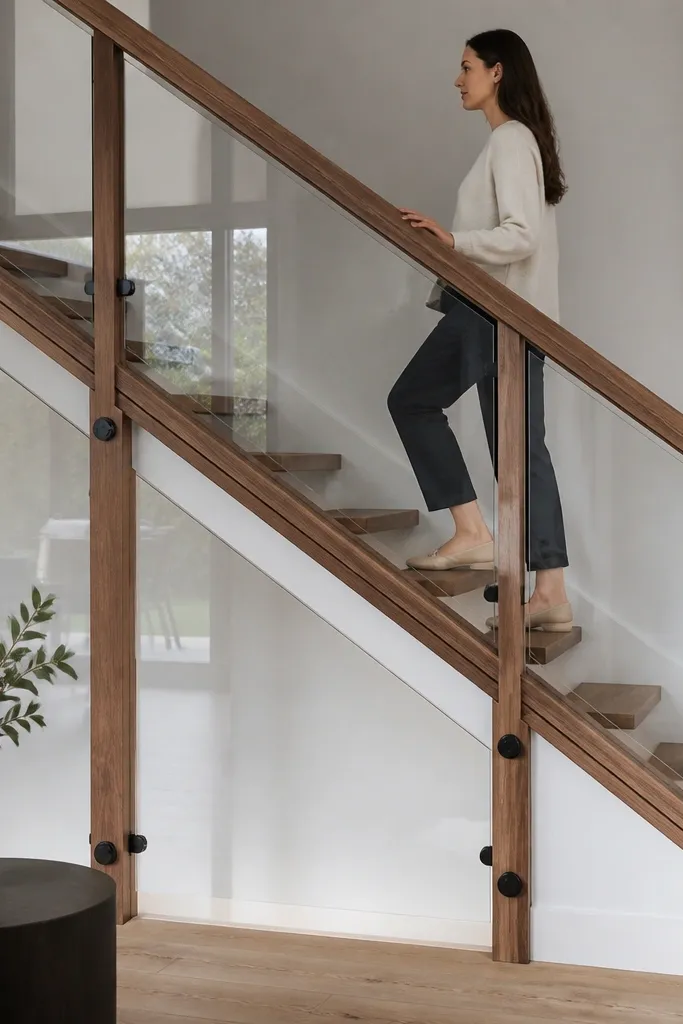
Glass can look cold, but it stops looking that way when you add a warm wood frame and matte hardware. The glass keeps the staircase open and airy, and the wood frame brings the cozy warmth back. Use clear glass or lightly frosted glass for privacy depending on your layout. This option looks high-end in photos because the wood outline defines the rail cleanly while light passes through.
Build a wood frame around each glass opening using 1x material, then sand smooth and stain to match your handrail. Install matte brackets and set glass panels with a rubber glazing gasket so the fit is snug without rattling. Finish by sealing the wood frame with matte clear and tightening hardware after the glass is seated.
Editor's noteMeasure glass width and height twice and dry-fit frames before staining so you don’t trap a bad dimension.
Skip thisDon’t use bare glass contact with wood; it chips and sounds hollow when people touch the rail.
18. Herringbone wood baluster pattern with a continuous handrail
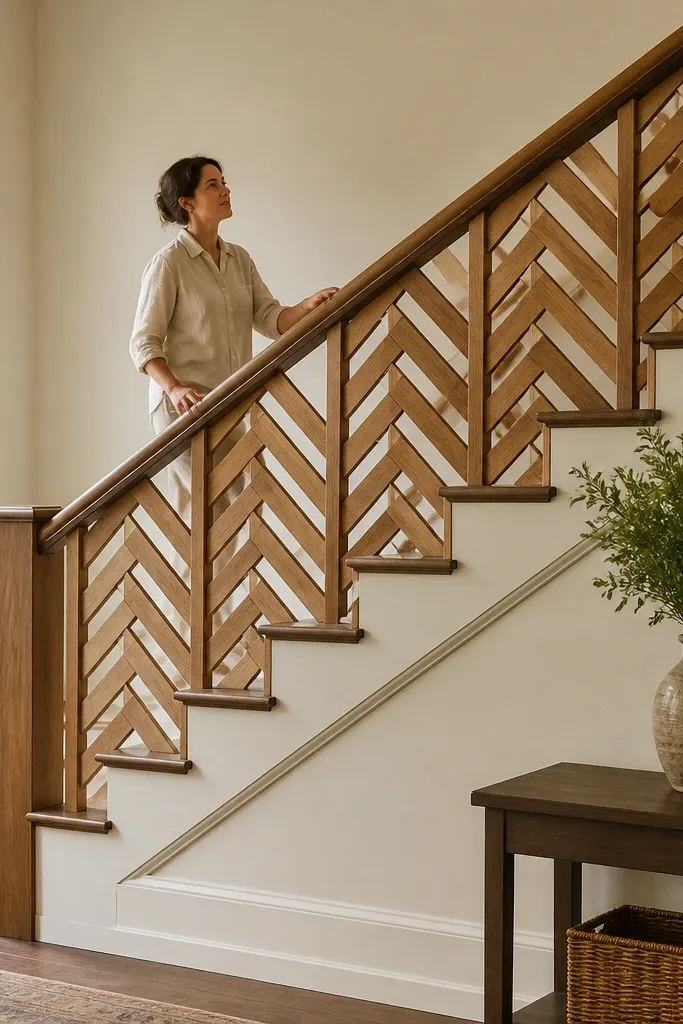
A herringbone baluster pattern looks cozy because it adds a warm, directional texture — the pattern guides the eye up the stairs. Keep the handrail simple and continuous so the herringbone doesn’t look busy. This is a high-impact DIY option when you want the railing to be the focal point. It works best if your staircase has enough space that the pattern is visible from the landing.
Plan your pattern on paper first: decide the small block width and spacing so it fits evenly between posts. Cut small strips (for example 1/2-inch) and assemble them into a panel-like grid that you can mount as infill. Sand, stain everything together for consistent tone, then install panels between posts and cap the top with a continuous handrail.
Editor's noteUse a scrap jig to keep strip angles consistent; one off-angle strip makes the pattern look sloppy fast.
Skip thisDon’t try to cut every angle freehand; the herringbone will drift and look uneven.
19. Macramé rope panels between posts for a boho-cozy look
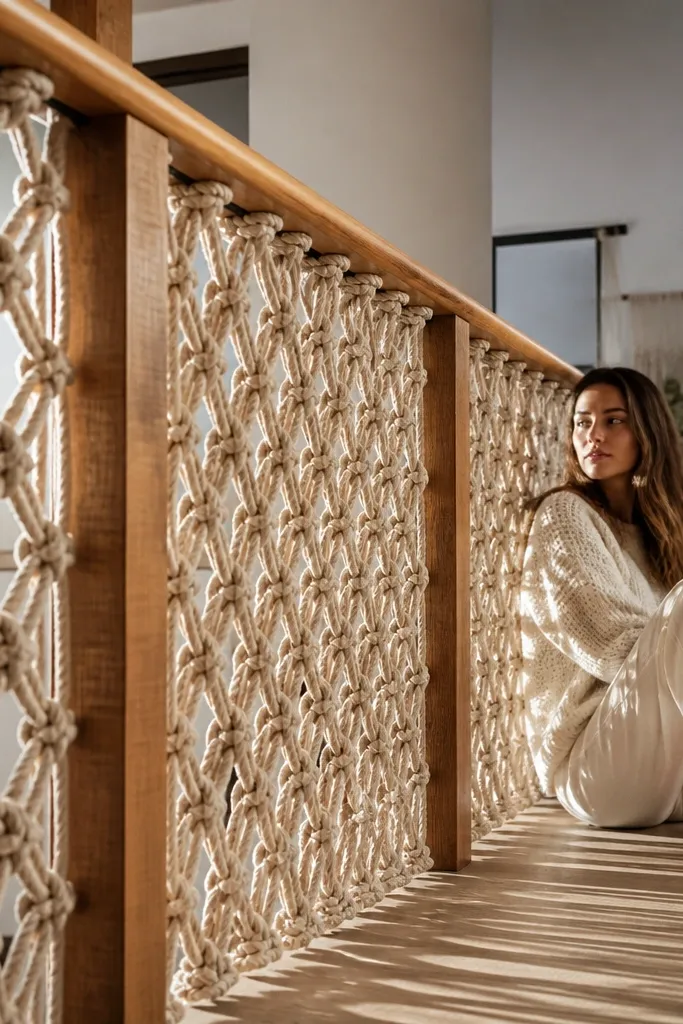
Macramé brings softness and a warm handmade vibe that still reads clean when you use a consistent knot pattern. Use neutral rope colors like natural tan or cream, and keep the panel height aligned so it looks intentional. This style is photogenic because the knots create depth and shadow — especially in morning light. It suits cottages, warm modern boho, and homes with lots of natural textiles.
Cut rope lengths based on your opening height plus extra for trimming, then tie a consistent macramé pattern on a temporary board jig. When the panel looks right, mount it between posts with a top and bottom wooden dowel bar so it hangs straight. Add a stained wood handrail on top, seal it matte, and trim rope ends clean.
Blow-dry the finished panel lightly and let it set — it helps the knots relax into even spacing.
Skip mixed rope thickness; uneven strands make the panel look messy.
20. Slim reclaimed wood rail with a metal rod baluster grid
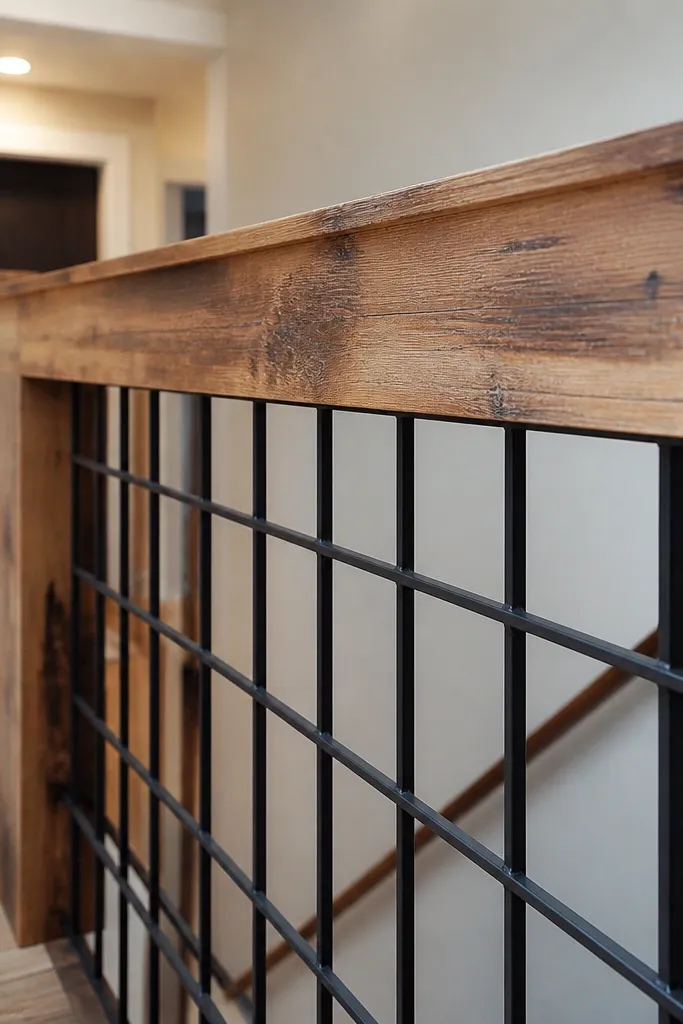
Reclaimed wood reads cozy because it shows real wear and varied grain — it looks warm even when you keep the design minimal. Pair it with slim metal rod balusters for a clean grid that doesn’t clutter the staircase. This combo works well in industrial-meets-warm spaces because the wood does the softening and the metal keeps it sharp. It’s also easier to maintain visually because the rods are easy to line up.
Select a reclaimed board for the handrail and sand it down to remove splinters while keeping grain character. Seal it with matte clear so the surface feels smooth and doesn’t snag. Install metal rods using a pre-measured spacing template, then mount the handrail brackets to posts and attach the wood rail last.
Editor's noteUse a single clear topcoat system across the whole run so the sheen stays consistent from step to step.
Skip thisDon’t leave reclaimed wood with deep pits; hands catch on rough spots and it looks unpolished.
21. Bow-front wood rail brackets with a warm stain and simple spindles
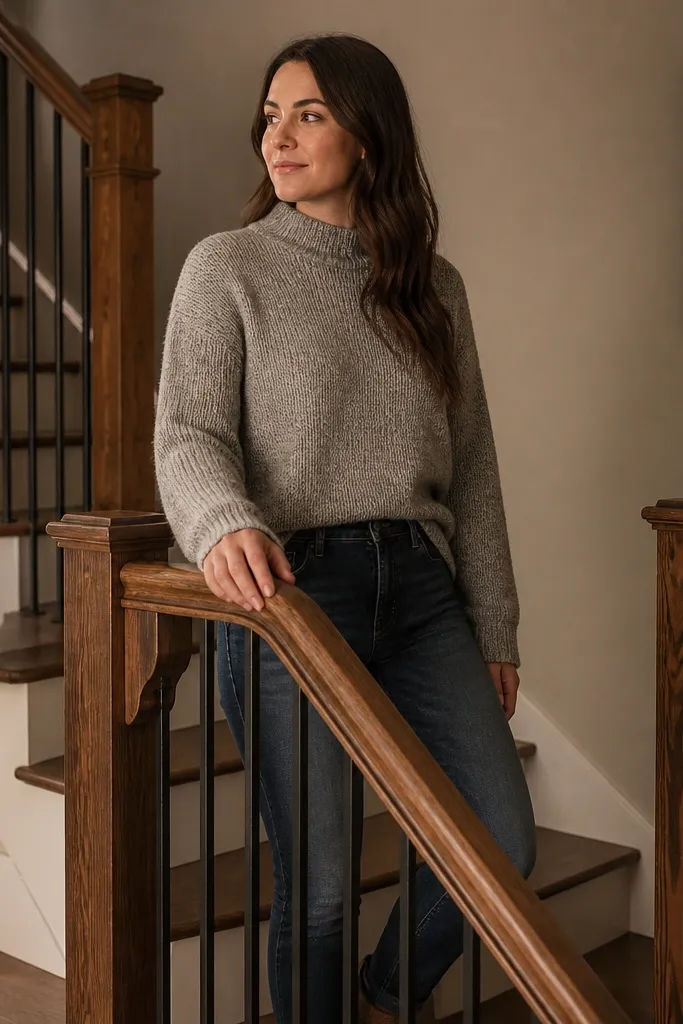
If your staircase feels plain, the fastest visual upgrade is adding shaped brackets where the handrail meets the posts. Bow-front brackets look cozy because they soften the geometry and frame the rail like trim. Keep the balusters simple (straight wood or matte metal) so the brackets do the talking. This style photographs nicely from the side because the bracket curve creates a shadow line that reads warm and dimensional.
Install bow-front wood brackets at the posts using screws into studs or solid blocking. Stain the brackets and handrail together for matching tone, then seal matte. Add simple balusters between posts at even spacing, and attach the handrail so it sits centered over the brackets.
Editor's noteUse a cardboard template for bracket placement; it keeps the curves aligned across turns.
Skip thisSkip mismatched bracket tone; even a small color difference shows up in photos.
22. Rounded bottom rail with warm wood and painted balusters
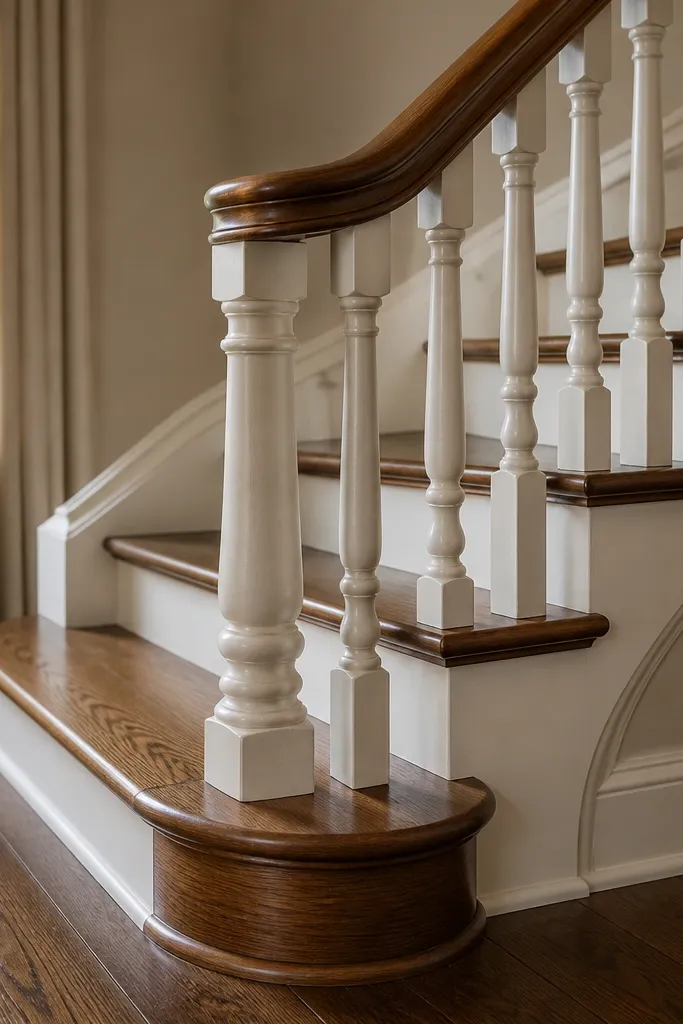
A rounded bottom rail makes the whole stair feel finished, especially when your balusters are painted. The warm wood at the bottom anchors the look and gives the staircase a cozy “frame” effect. Use a warm stain on the bottom rail and keep balusters in a matching paint color to your trim or wall. This works great in homes where the rail area looks too airy and you want more visual weight without going fully enclosed.
Install the bottom rail supports first so the curve stays consistent along the run. Cut and sand the bottom rail wood, stain in a warm tone, and seal matte clear. Paint balusters and reinstall them, then add the top handrail in a matching wood tone so the top and bottom rails look like one system.
Editor's noteDry-fit the bottom rail with shims before staining; you want a smooth curve with no twist.
Skip thisDon’t stain the bottom rail before confirming bracket alignment; small misalignment looks obvious once it’s finished.
23. Warm cork wall panel backing behind balusters
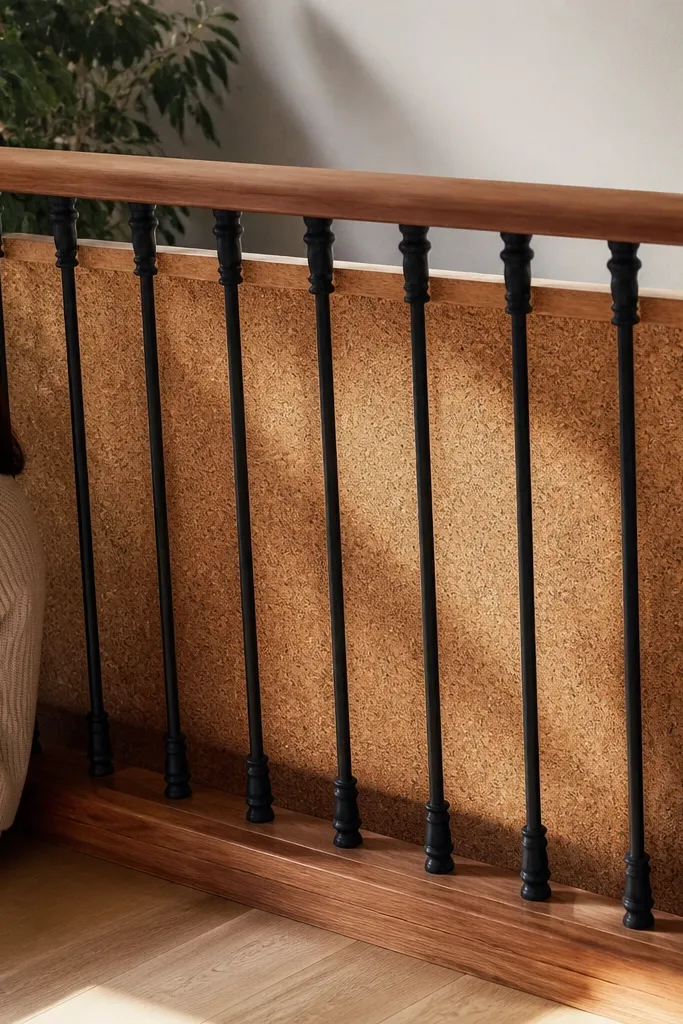
Cork backing makes the area behind the balusters look warm and intentional, and it also dampens the echo that staircases can create. Use a cork sheet in a honey or tan tone and mount it behind a baluster section or under an open rail. Pair it with a simple wood handrail in oak or walnut stain to keep the look cohesive. This is a great option for apartments or entryways where you want warmth without major carpentry.
Measure the backing area and cut cork sheets to fit, leaving a small gap for trim. Attach cork to the wall or backing strips with construction adhesive rated for cork, then trim edges clean. Install or reinstall balusters over the cork backing, then finish with a matte-stained handrail mounted into studs or solid backing.
Editor's noteSeal cut cork edges with a thin clear coat so they don’t shed fibers near touch points.
Skip thisSkip mounting into studs where the handrail brackets land; cork alone won’t hold hardware.
24. Stair railing with a built-in wood shelf for plants
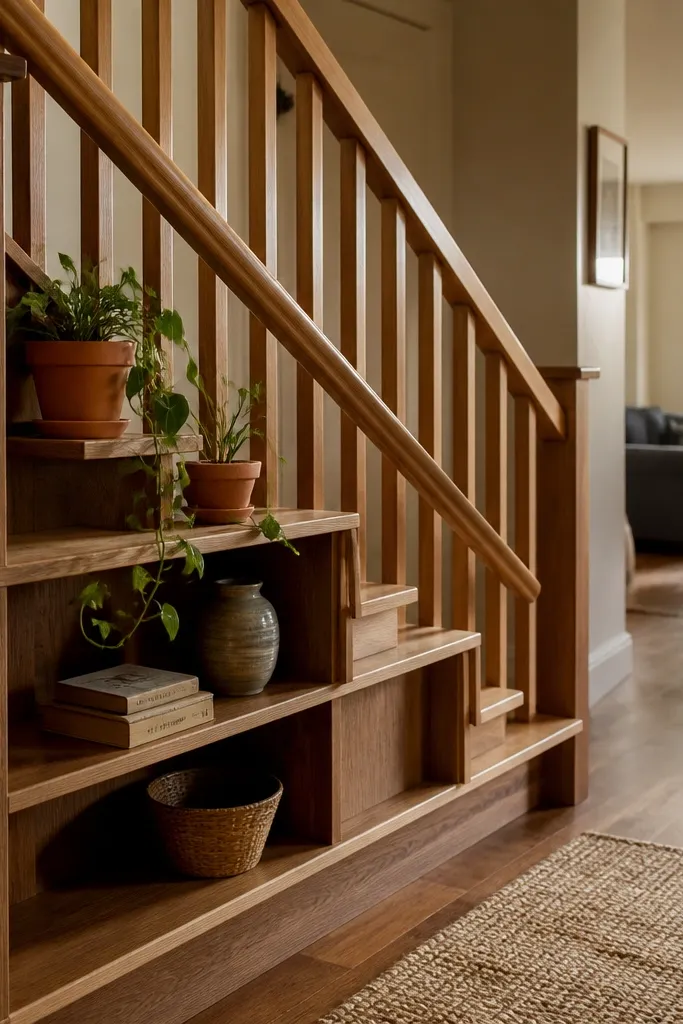
A built-in shelf on the stair rail makes the space feel lived-in and cozy, and it gives you a place for warm-toned decor like terracotta pots. The look is photogenic because the shelf creates a horizontal line and a small vignette you can style seasonally. Use a stained wood shelf with matte finish and keep the balusters simple so the shelf becomes the focus. This works best on landings or straight runs where people can naturally pause and look.
Decide shelf depth (about 3 to 4 inches looks right for a rail) and mark bracket locations along the posts. Build a shelf panel from 3/4-inch plywood, sand smooth, stain warm, and seal matte clear. Install shelf brackets into studs or solid blocking, then add balusters and mount the handrail so the shelf edge lines up under it.
Editor's noteUse felt pads under small pots so the shelf doesn’t get scratches and looks clean longer.
Skip thisDon’t make the shelf too deep; it blocks sightlines and makes the staircase feel cramped.
25. Textured plaster wall rail track with warm wood handrail
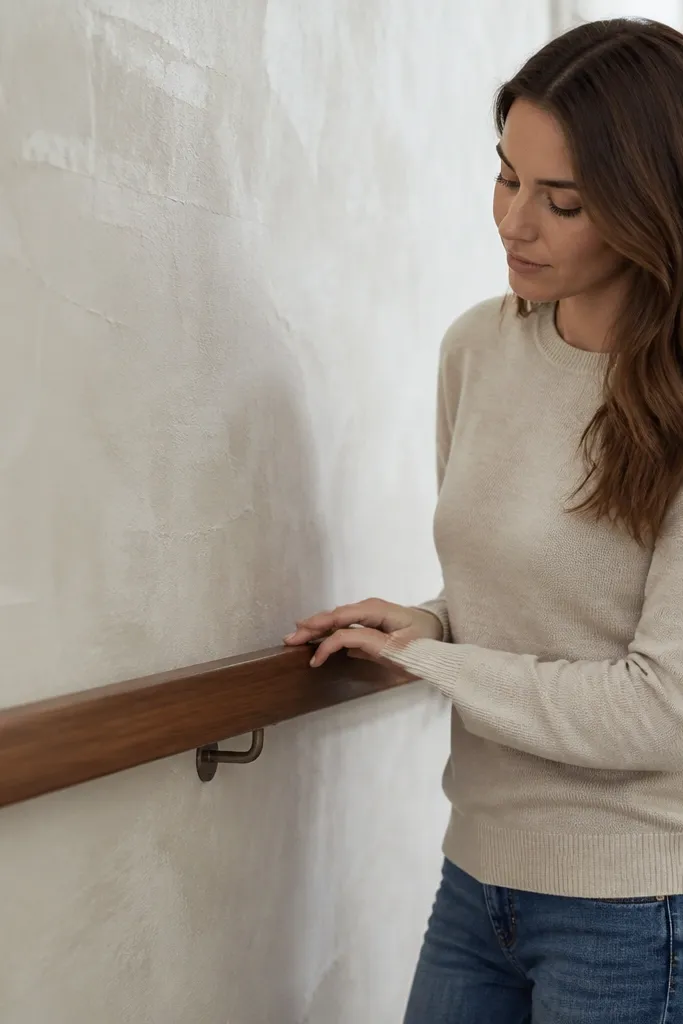
A textured wall track behind the rail adds warmth even if your balusters are simple or minimal. Choose a plaster finish look (lime-wash style or smooth trowel with light texture) in a warm off-white, then mount a warm wood handrail on top. The texture catches light softly and makes the staircase feel cozy without changing every component. It’s a strong option when you’re renovating the wall anyway or have a blank wall beside the stairs.
Apply the textured plaster finish to the wall section near the rail, then let it cure fully. Install a wood mounting cleat into studs, sand and stain the handrail, and seal matte clear. Attach the handrail brackets to the cleat so the rail feels solid and doesn’t flex, then finish edges with trim where needed.
Editor's noteTest paint/plaster colors next to your flooring; warm undertones can look different after curing.
Skip thisSkip mounting into studs; textured walls hide weak anchors and the rail will loosen.



