
1. Tall vertical panel columns around a window
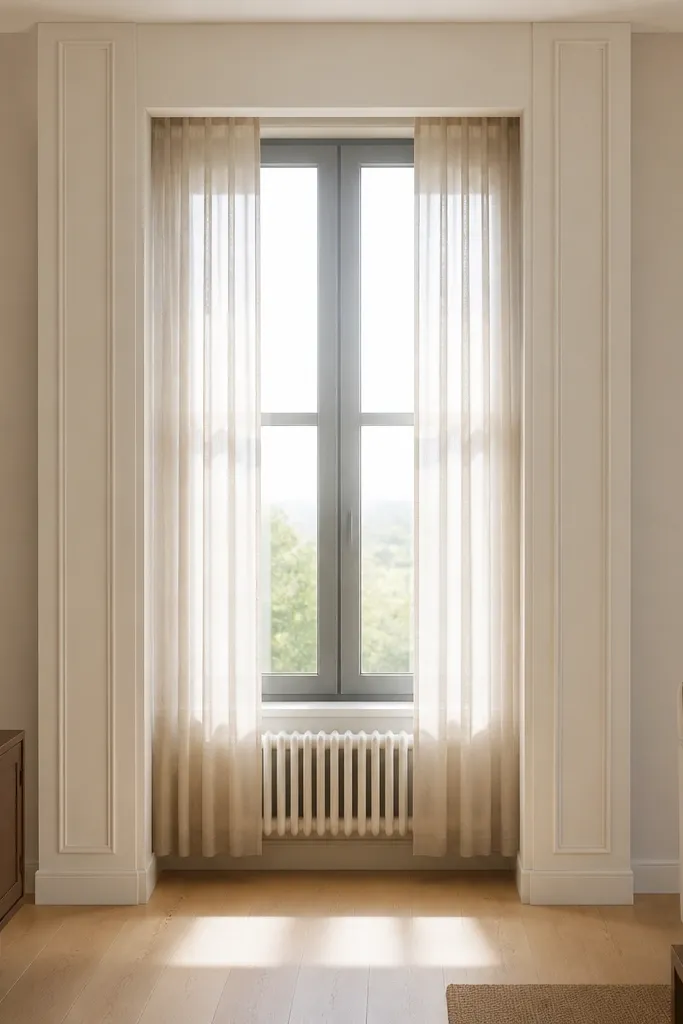
This is the “designer framing” look without the expense of built-ins. You build a few tall rectangles that hug the window area, and the moulding creates a soft frame that makes the glass feel anchored. It also adds height to the room because the lines run up and down, which is what most cozy rooms need. Use a slightly warm white paint and keep the moulding shadow gap consistent so the edges look crisp, not chunky.
Measure the window width and mark panel centers so the columns balance left to right. Cut vertical stiles and top/bottom rails from straight stock, then dry-fit around the window trim to confirm clearances for blinds or caulk lines. Install the base pieces first, then add the inner rails to form rectangles; keep a 1/8-1/4 in gap between pieces. Caulk seams, fill nail holes, prime, and finish with satin paint so the moulding catches light gently.
Use a laser level for the vertical lines — a tiny tilt is obvious once the moulding is painted.
Avoid using thin strip moulding here; the columns need width to read as columns, not decorative lines.
2. Simple square grid panels for a cozy TV wall
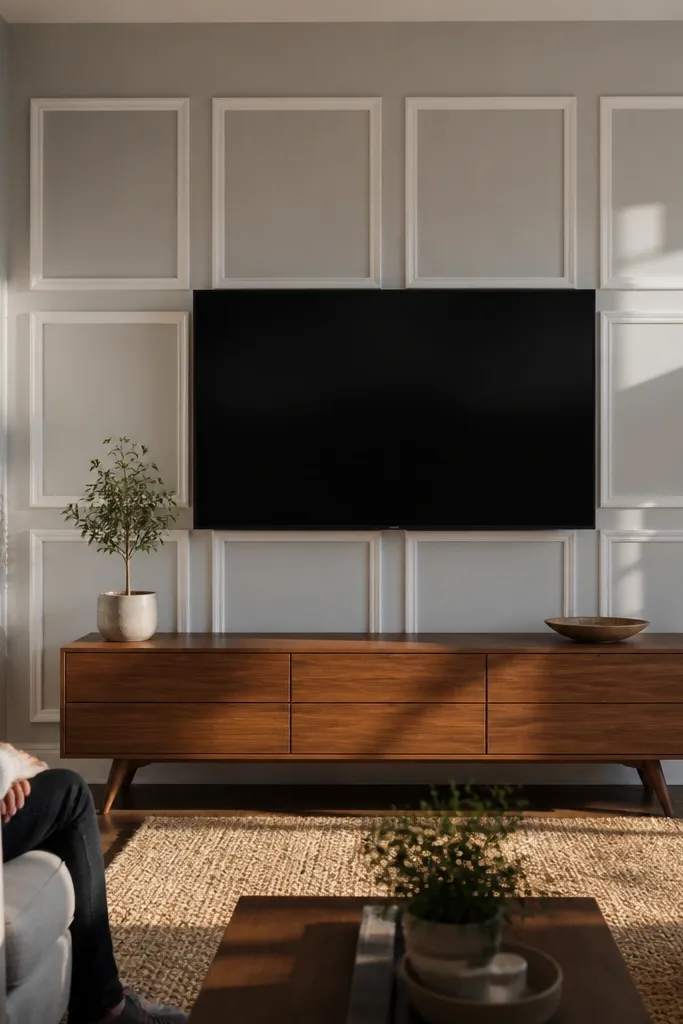
A square grid makes a TV wall feel styled instead of “blank wall + TV.” The pattern hides minor wall imperfections because the eye reads the grid lines, not the paint texture. It also looks cozy because squares feel grounded and symmetrical. Keep the squares medium-sized so the wall doesn’t turn into a busy checkerboard.
Pick a starting size for your squares — try 10-12 in wide panels with 1/8 in gaps between rails. Mark a level boundary around the TV area, then lay out the grid with a chalk line and tape measure. Install the perimeter rails first, then frame each square by fastening the sides and middle rails. Fill seams with painter’s caulk, sand lightly, prime, and paint in a warm off-white.
Do a dry layout on painter’s tape before cutting anything; adjust one row to make the outer panels look centered.
Don’t let the outer panels end up too narrow; resize the grid so the edges match the center rhythm.
3. Picture-frame moulding with an inset center rectangle
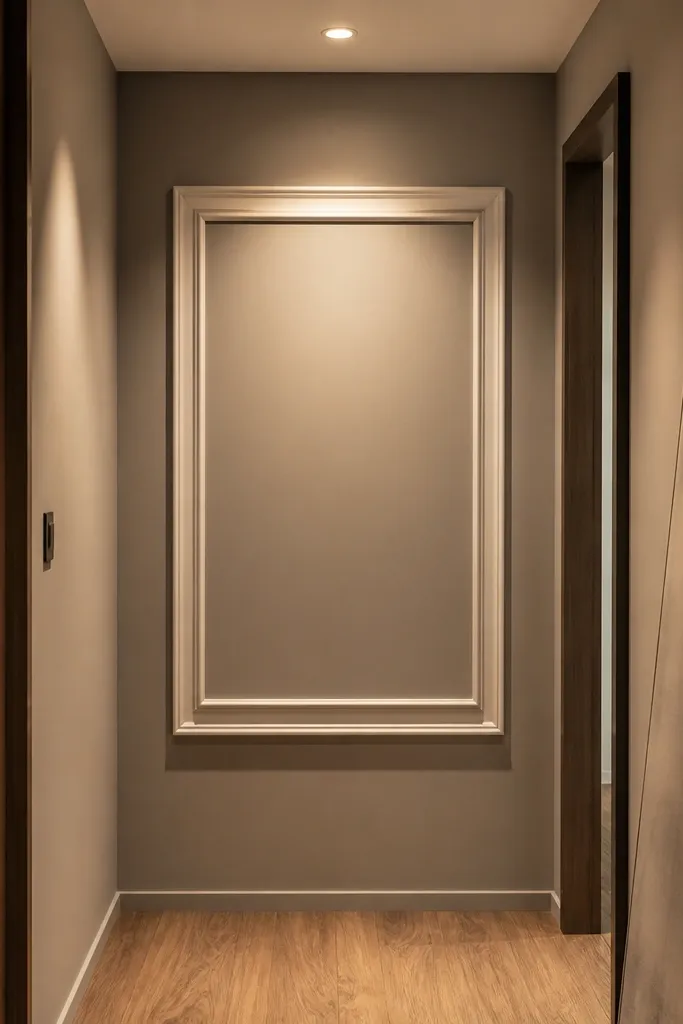
This is the calm, cozy look that works in hallways, bedrooms, and dining rooms. A picture-frame panel adds structure without a full grid, and the inset center gives you a place for wall art or a subtle focal point. It’s photogenic because the frame catches light at the corners, and it reads clean even in low light. Choose one big frame for small rooms or two staggered frames for longer walls.
Decide your frame size based on wall width; for a common hallway, a 24-36 in wide frame looks right. Cut an outer rectangle and an inner rectangle that leaves a consistent border width, like 3-4 in. Install the outer frame first, then add the inner rails to create the inset opening. Caulk joints, fill nail holes, prime, and paint; if you want extra cozy depth, paint the frame a shade darker than the wall.
Label your pieces by side (top-left-right-bottom) before assembly so you don’t mix up corners.
Don’t skip priming — raw MDF edges soak paint and can look blotchy around the frame.
4. Wainscoting-style lower wall panels
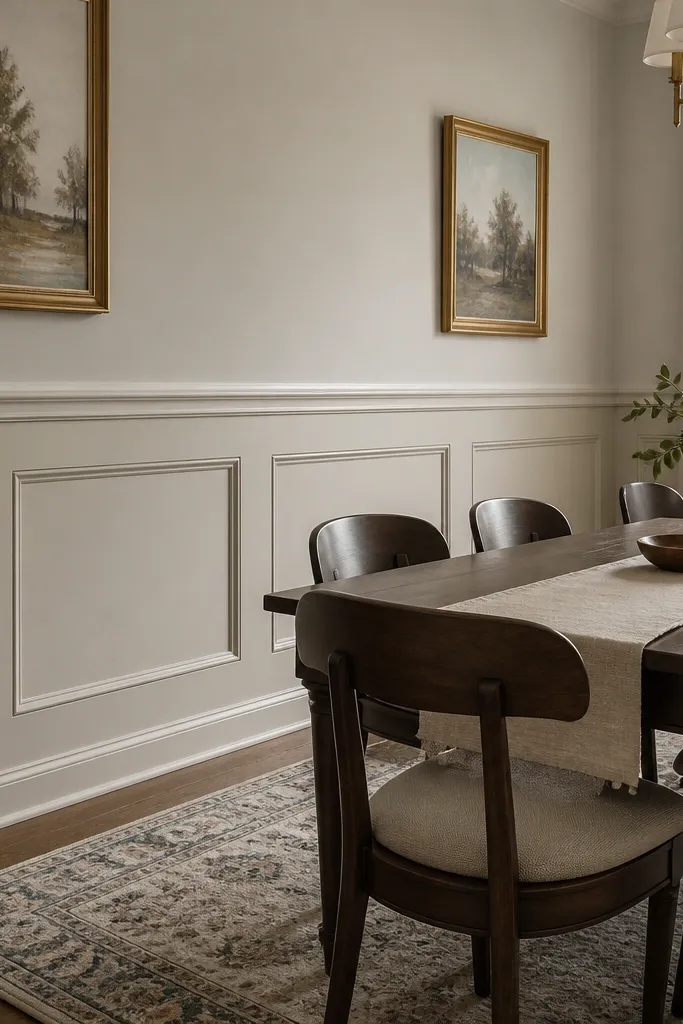
Wainscoting-style panels make a room feel cozy and finished fast, especially in living rooms and dining areas. The lower band grounds the space visually, and the chair-rail line gives your wall a built-in rhythm. Keep the top half simple so the moulding doesn’t fight with curtains or wall art. This style is also practical — it hides scuffs in the lower zone.
Set a chair rail height first, often around 32-38 in from the floor depending on ceiling height. Install a horizontal rail level line, then add vertical or small rectangular panels under it. Use pre-cut panel sizes like 12x24 in sections, or build custom rectangles that match your wall length. Prime and paint the moulding and wall together; if you want the classic look, paint panels slightly darker or in a satin finish.
Editor's noteUse a scrap board as a spacing gauge so every vertical panel gap stays consistent.
Skip thisAvoid making the panels too tall; if they hit near the chair rail too quickly, the wall looks top-heavy.
5. Arched-top panels for a soft, cottage vibe
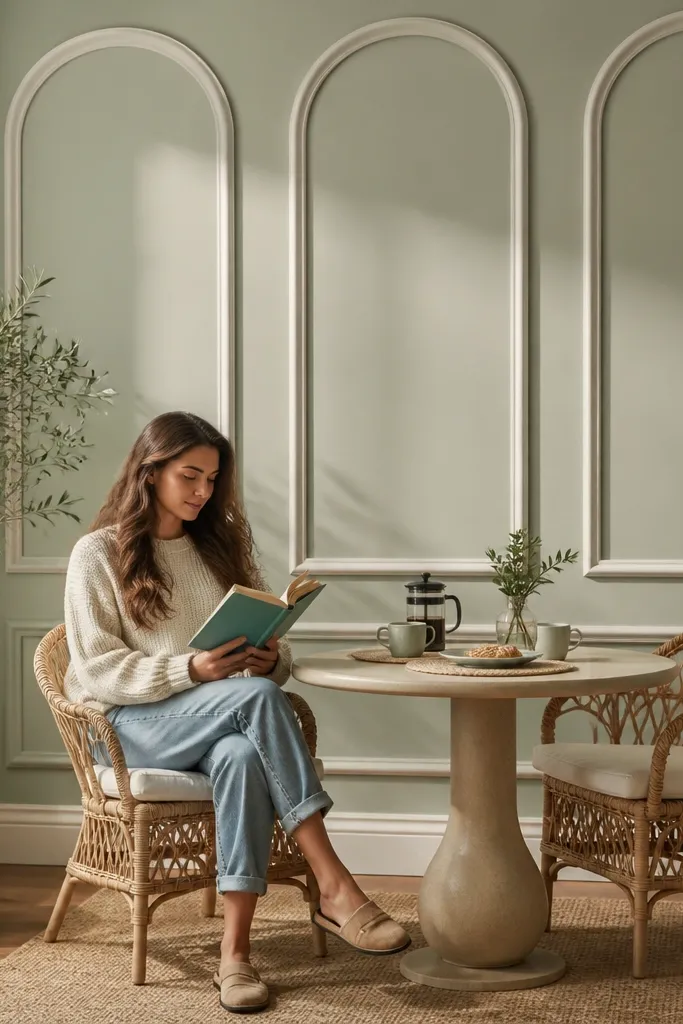
Arched-top moulding panels add softness without going fully decorative. The gentle curves look cozy and welcoming, and they photograph well because arches create shadows that feel dimensional. Use this idea on one wall — a bedroom accent or breakfast nook — so the arches feel intentional. Keep the arch height modest so the wall doesn’t look like a theme room.
Plan your base rectangle width, then set an arch radius for the top. A practical starting point is a 12 in wide panel with a 6-7 in arch rise, scaled to your wall. Cut the arch pieces from MDF or flexible trim, then assemble the rectangle with a straight base rail. Install the bottom rails first, then mount the arched tops, keeping the same shadow gap across all panels. Caulk and fill, prime thoroughly, and paint in warm white for a soft look.
Editor's noteIf cutting arches from rigid trim feels fiddly, use MDF strips and build the arch from multiple short curved segments.
Skip thisDon’t make the arches too tall; they start looking theatrical instead of cozy.
6. Half-round moulding band with vertical side panels
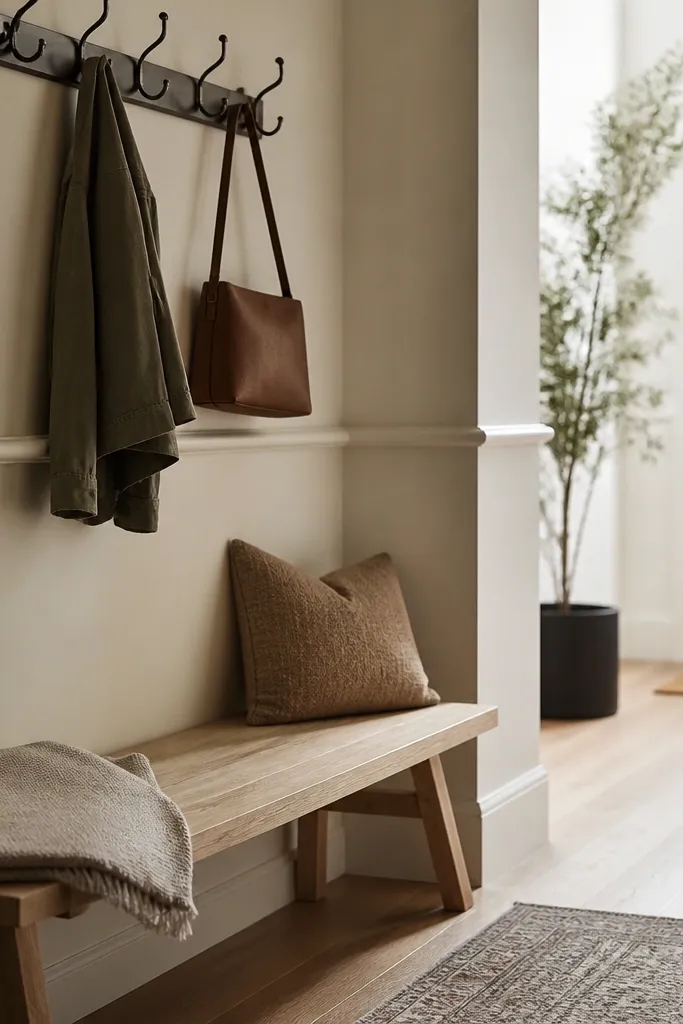
This pattern is a cozy compromise between decorative and clean. The half-round band adds a rounded highlight that looks warm in daylight, while the vertical panels keep the wall structured. It’s great for entryways because it gives the eye a clear path when you walk in. Choose one band height and stick to it — consistency is what makes it feel custom.
Mark the band line level and decide how wide the band should be, usually 6-10 in tall depending on wall size. Install the vertical side panels first so they frame the band area, then attach the half-round moulding along the band line. Use a miter saw for the ends and caulk the radius transitions carefully. Finish by filling nail holes, sanding, priming, and painting satin to make the curved edge catch light.
Use painter’s tape to mask a clean paint edge where the band meets the wall before you caulk.
Avoid rushing the caulk at the curved transitions; uneven caulk lines show after paint.
7. Diagonal checker panel accent in one corner
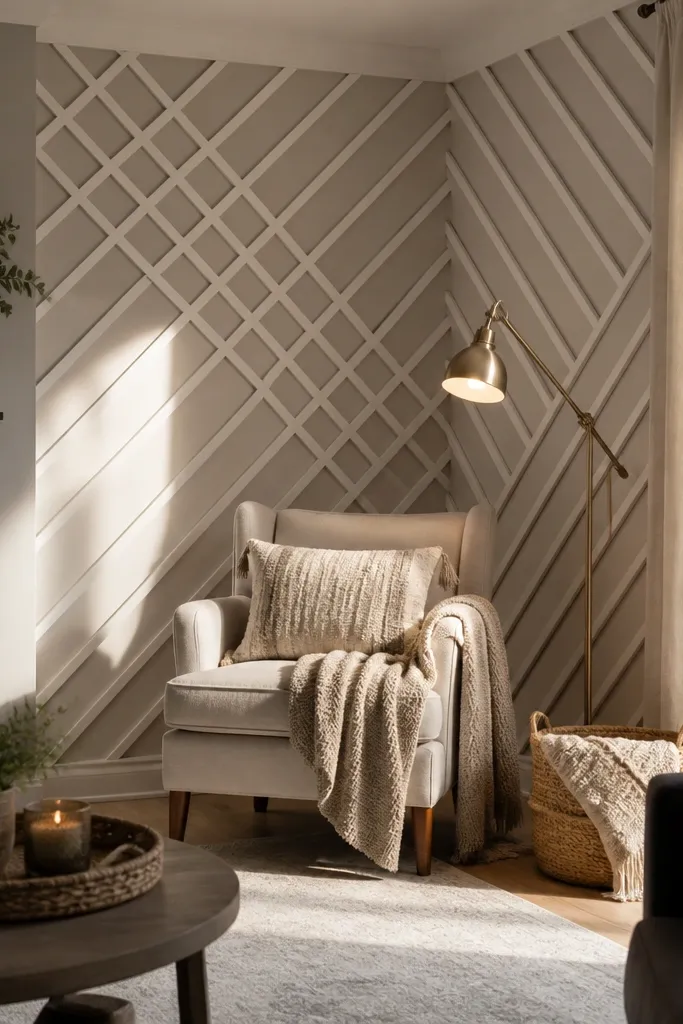
Diagonal panels add energy without covering the whole room. By limiting the pattern to one corner or behind a chair, you get a cozy, gallery-like accent that still feels livable. Diagonals also hide small wall irregularities because the eye tracks the pattern. Keep the diagonal spacing tight enough that it reads as a designed panel area, not scattered lines.
Pick a section size like 36x36 in and mark a square boundary on the wall. Frame the perimeter with straight moulding, then lay diagonals with a chalk line to create equal rhombus shapes. Cut diagonal rails and install them in sequence, starting from the center intersections outward. Caulk, fill, prime, and paint — for extra depth, paint the inner panel surfaces one shade and the moulding another.
Cut test pieces for the diagonal angles on cardboard first, then transfer to wood to avoid wasted moulding.
Don’t run diagonals across a full wall — the pattern gets busy fast.
8. Floating rectangle panels with a deeper shadow gap
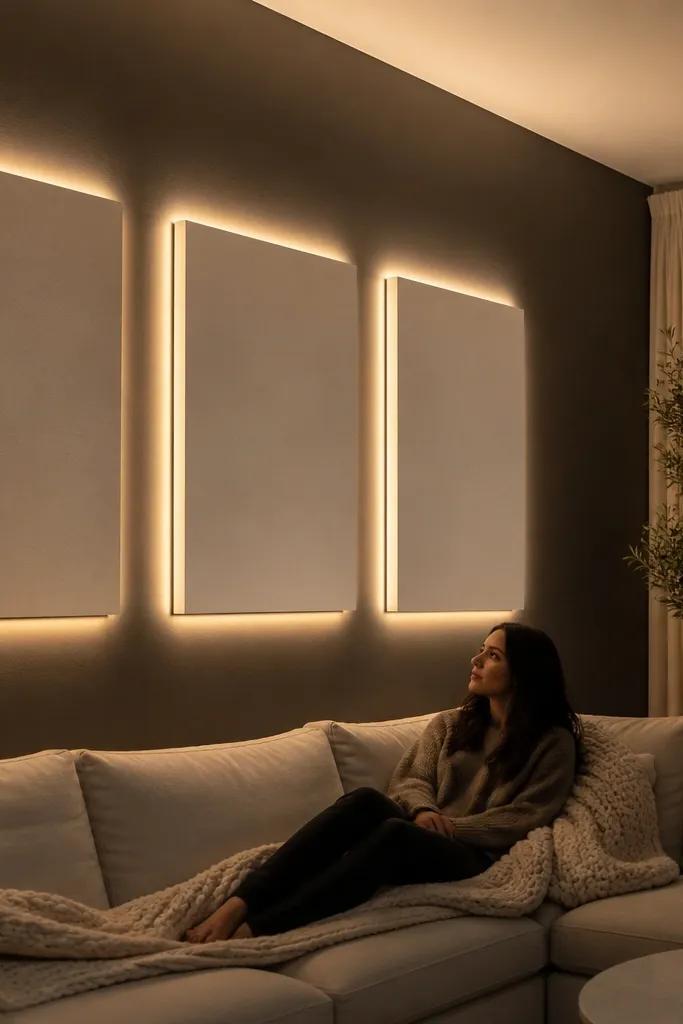
If you want cozy but also dramatic, build floating rectangles with a slightly deeper reveal. The shadow looks like your panels are mounted on a subframe, which creates real depth in photos. This is especially good in living rooms with soft lighting because the shadows glow at night. Use a consistent spacing method so every rectangle casts the same shadow thickness.
Plan your rectangle size first, like 16x24 in panels stacked in a clean row. Mark the wall and install small spacer strips or shims where the moulding will mount to create a consistent gap, aiming for about 1/4 in shadow space. Attach the moulding frames to the spacers, then add inner rails if you want double lines. Sand edges, caulk gaps between moulding and wall, prime, and paint with satin so the shadow stays sharp.
Editor's noteMeasure the gap with a feeler gauge or scrap shim — eyeballing the spacing looks off after paint.
Skip thisAvoid overfilling the shadow gap with caulk; it can smear and flatten the depth.
9. Crown-moulding grid for a ceiling-to-wall cozy look
This style pulls the room together by extending moulding structure up toward the ceiling. You create a grid of small rectangles that starts at the wall and climbs a bit, making the space feel taller and more finished. It looks cozy because the pattern is small and continuous, like gentle wallpaper without paper. Keep it to one wall so it doesn’t overwhelm the room.
Choose a grid height like 24-30 in and mark a straight line where the pattern ends. Use small moulding profiles, like 1x2 boards or MDF casing strips, and cut consistent rectangle frames. Install the top boundary first near the ceiling, then build downward with vertical and horizontal rails. Caulk joints, fill holes, prime, and use a satin paint that matches the ceiling tone for a cohesive look.
Use a long straightedge to check the wall for bumps before you mount — uneven walls show through small panels.
Don’t use this pattern on walls with heavy texture unless you plan to skim-sand first.
10. Corner-to-corner frame wall for a modern cozy vibe
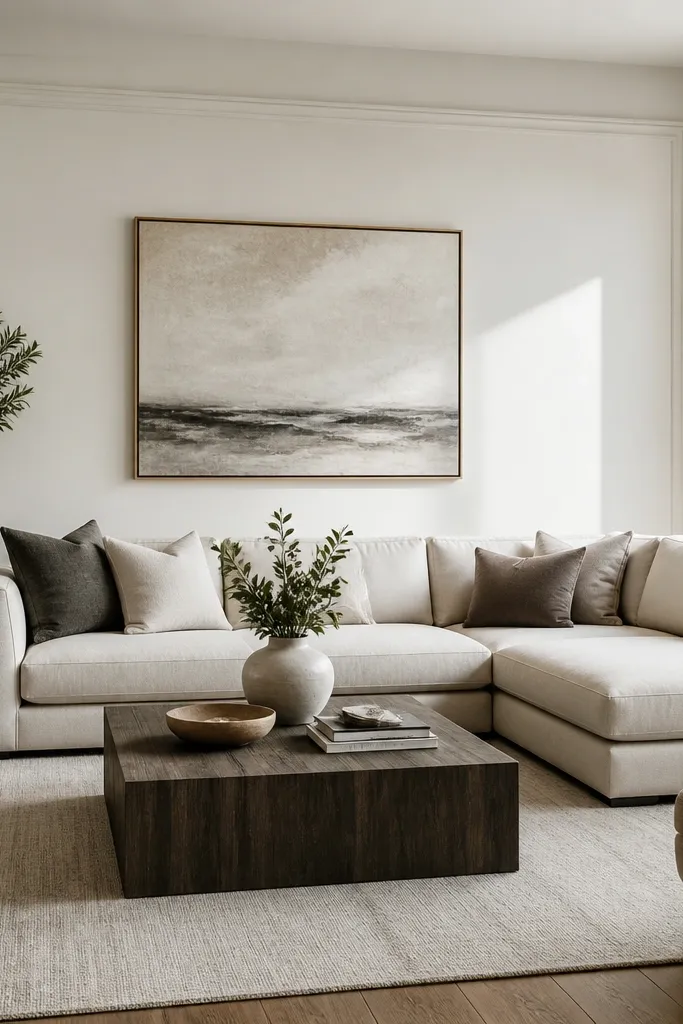
A big corner-to-corner frame makes the whole wall feel designed, especially in modern rooms that still want warmth. The clean rectangle edges create a calm boundary for a sofa wall or bedroom headboard space. It’s photogenic because the frame lines are bold and easy to read. Keep the moulding color close to the wall for subtle cozy contrast, or go slightly darker for a stronger look.
Measure the wall and decide your border width, like 6-8 in from each side for the inner inset. Cut an outer frame rectangle, then cut an inner rectangle to create the border. Install the outer frame first, then mount the inner rails, keeping everything level and square. Fill and caulk, prime, and paint; for a crisp finish, mask edges and apply two thin coats.
Editor's noteSquare up the rectangle by measuring diagonals — adjust before you nail the last corner.
Skip thisAvoid corners that are too close to outlets or switches; plan clearances so you don’t end up cutting ugly notches.
11. Bookcase-style grid panels with vertical slats
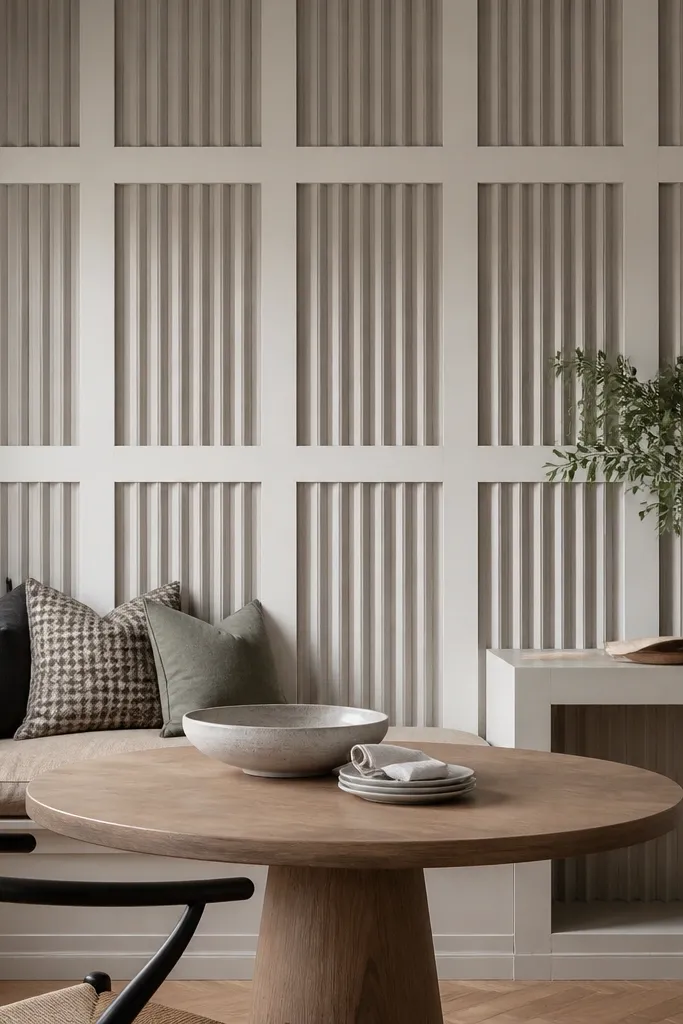
This gives you that built-in bookshelf vibe even when you’re not adding shelves. The vertical slats create cozy vertical rhythm, and the framed rectangles keep it tidy. It’s great for living rooms where you want texture but you don’t want clutter. Use it behind a bench or in a dining nook so the pattern feels intentional and not random.
Start by marking a rectangle zone on the wall, like 48-72 in wide and 30-36 in tall. Install top and bottom rails for the zone, then add vertical slats at consistent spacing, like 3-4 in on center. Add horizontal rails to form framed rectangles between slats. Caulk seams, fill holes, prime, and paint satin; for a cozy look, consider painting slats and frames the same color and letting the shadow do the work.
Editor's noteUse spacers made from scrap trim to keep the slat spacing identical across the whole wall.
Skip thisDon’t space slats too wide — the wall looks unfinished instead of designed.
12. French-door style panels for a hallway wall
Door-frame moulding panels look cozy because they mimic architectural details you already recognize. In a hallway, that familiarity makes the wall feel purposeful and warm. You can build one large “door” panel or stack two smaller ones. It also hides the awkwardness of long blank hall walls by giving them clear structure.
Choose the number of panels first, then mark their outer frames with painter’s tape. Cut vertical jamb pieces and matching top rails, then add an inner rectangle to create the “glass” area look. Install outer frames, then the inner rails, keeping the same border width across all panels. Caulk, fill, prime, and paint; if you want extra depth, paint the inner opening one shade brighter than the frame.
Editor's noteCheck the panel height against your hallway light fixtures so the top rail doesn’t collide visually.
Skip thisAvoid mixing panel sizes in a narrow hallway — keep everything consistent so it reads clean.
13. Layered double-frame panels for extra depth
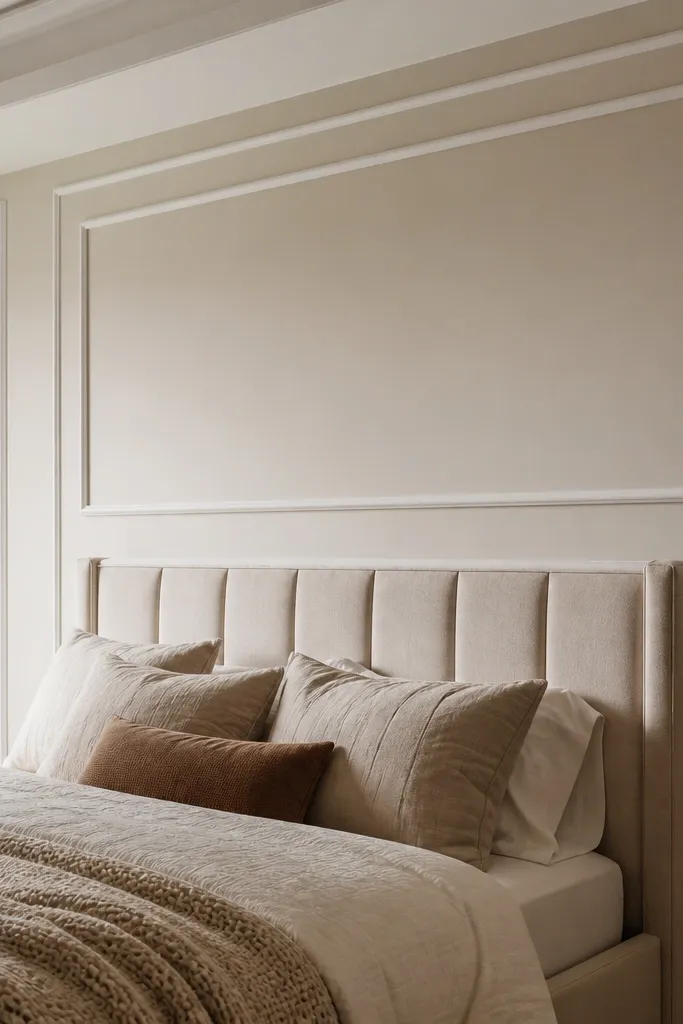
Layered double frames look cozy because they create multiple light edges, almost like a picture mat. This style is more work than a single frame, but it pays off in photos because the shadows are richer. Use this in a bedroom or dining room where you want a stronger focal wall without adding furniture. Keep the inner frame border narrow so it looks intentional, not cluttered.
Pick your panel size, like 18x24 in, and decide border widths — outer border 4 in, inner border 2 in works well. Cut the outer frame pieces and install them first, then cut and install the inner rectangles. Use a consistent miter method and keep corners tight with painter’s caulk. Prime all surfaces, then paint; for depth, paint inner frames a slightly different shade or use the same color with a satin finish that catches light.
Editor's noteDry-fit nested frames on the floor first so the inner opening lines up perfectly when mounted.
Skip thisAvoid making the inner border too thick; it can look heavy and reduce the cozy feel.
14. Herringbone-inspired moulding on a single wall strip
Herringbone moulding reads cozy because the angled lines feel playful and textured, not flat. Keep it contained to a single strip behind a sofa or along a stair landing so it doesn’t become a wallpaper replacement. The pattern is photogenic because the shadows move as the light changes through the day. Use a warm neutral paint so the pattern looks soft instead of harsh.
Mark a strip width like 18-24 in and install a top and bottom boundary rail. Cut small moulding pieces for angled segments, aiming for consistent angle cuts (commonly 45 degrees) to form repeating V shapes. Start from the center and work out to keep the pattern symmetrical. Caulk seams, fill nail holes, prime, and paint in two coats; mask the edges carefully for crisp lines.
Editor's noteMake one perfect template for your angled pieces and trace it every time — speed comes from consistency.
Skip thisDon’t try to herringbone a full wall — the amount of cutting and aligning will show in the final look.
15. Riser-style panels for a stairwell landing
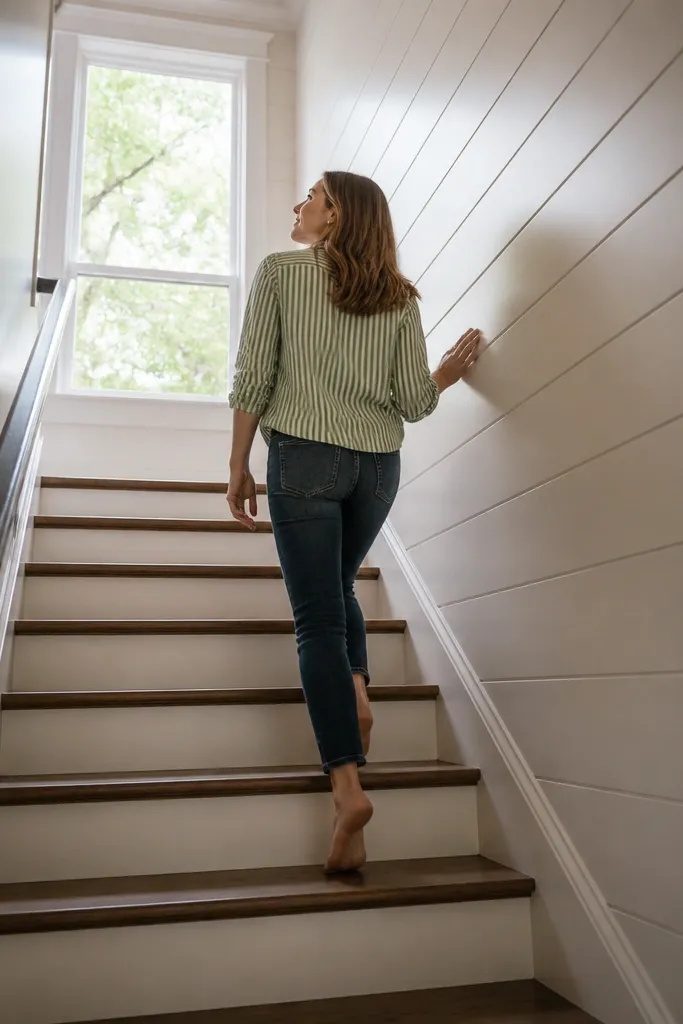
Riser-style panels give stairwell walls a built-in, cozy “steps” rhythm. The stacked rectangles soften the vertical space and make the landing feel more intentional. This is one of those styles that photographs well because it creates a clear pattern that matches how people move. Keep panel heights consistent so it looks architectural, not random.
Measure the landing wall height and decide how many rows fit cleanly, like 3-5 stacked rectangles. Install a horizontal rail baseline for the first row, then add vertical rails to frame each section. Build each row with the same rectangle height, and keep a 1/8-1/4 in shadow gap. Caulk joints, sand, prime, and paint satin; if the stairwell is narrow, use a light paint to keep the pattern airy.
Use a level and a story stick for each row height so you don’t chase measurements up the wall.
Avoid placing the pattern too high under the ceiling — it can make the landing feel boxed in.
16. Beaded-board style panels with a modern frame
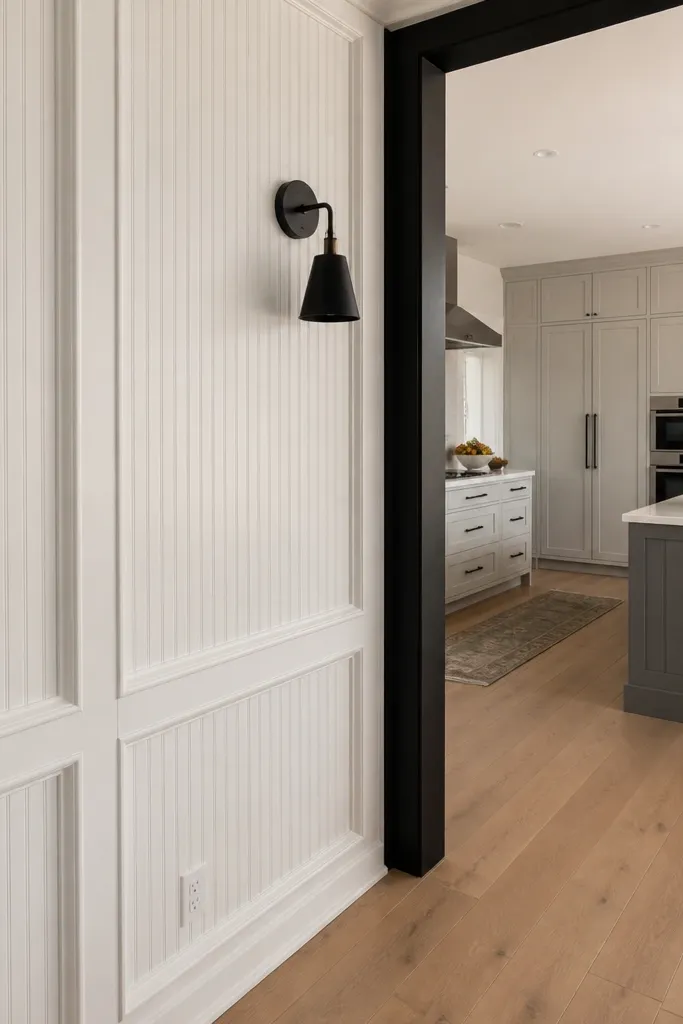
Beaded-board texture brings instant cozy because it reads like classic interior woodwork. The trick is pairing it with a modern flat frame so it doesn’t feel overly country. The beaded lines cast tiny shadows that look warm in daylight, and the frame keeps the layout clean. This works great in kitchens, entryways, and small dining nooks where you want texture without clutter.
Pick your panel zone size and install a flat perimeter frame with 1x2 or casing trim. Then add beaded board strips inside the frame, fastening at the edges and keeping the bead lines straight. Use caulk at the frame-to-board junctions and fill fastener holes. Prime the wood (or MDF beaded board), then paint satin; warm white hides texture shadows in a flattering way.
If your wall has bumps, shim behind the bead board so the texture stays straight across the whole panel.
Avoid leaving raw edges of bead board unprimed — they soak paint and look uneven.
17. Octagon-inspired moulding blocks in a grid
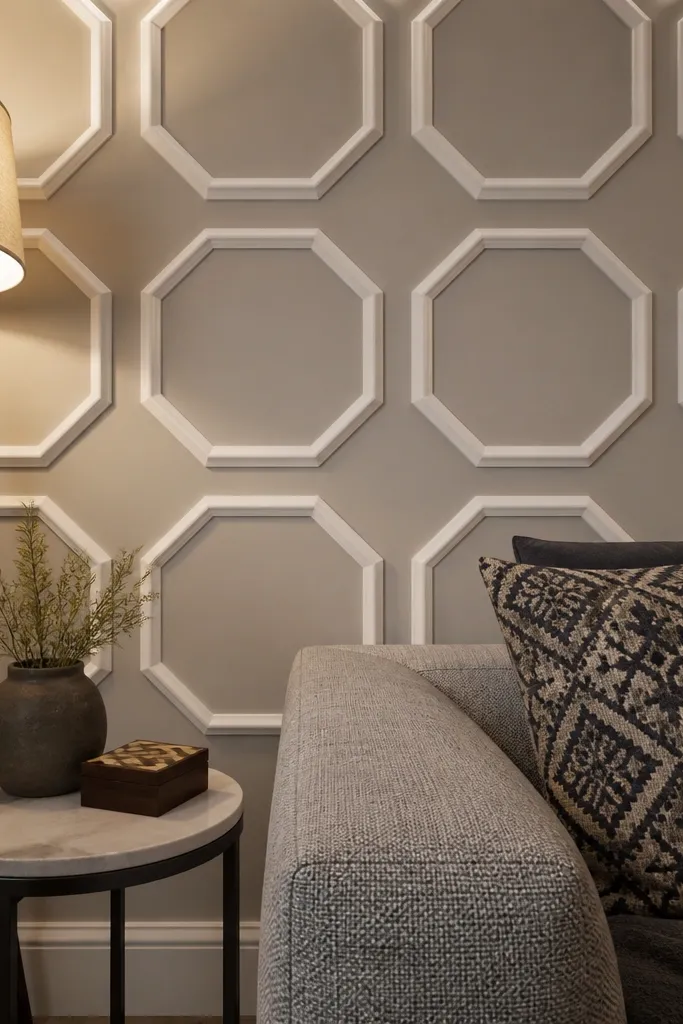
Octagon-inspired blocks give you a cozy vintage flavor without going full ornate. They are photogenic because each block creates multiple shadow angles that pop under side lighting. Use this pattern on one wall where you want something special but not busy. Keep the surrounding spacing consistent so the blocks look intentional and repeatable.
Create a layout grid first and decide your repeating unit size, like 16-20 in blocks. Build each block using corner pieces cut at angles to form an octagon shape, then add small straight rails between blocks to connect the pattern. Install the perimeter rails, then assemble blocks in rows so alignment stays consistent. Caulk seams and sand smooth, prime, and paint satin; use a warm neutral so the geometry feels soft, not sharp.
Cut a single octagon template and test-fit it against one unit before you cut the rest.
Avoid making the octagon points too thin; narrow points snap or look fragile after painting.
18. Single large rectangle over a couch with a wide border
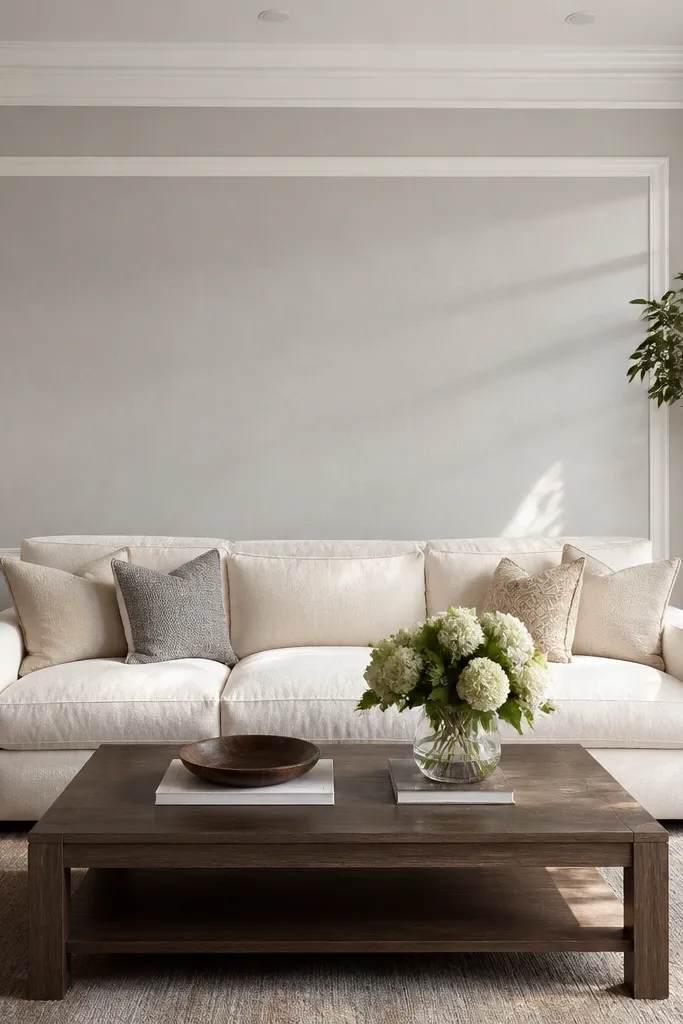
This is the easiest way to get a big “feature wall” look without building dozens of panels. A single large rectangle with a wide border creates a cozy focal point that makes the wall feel finished even when you don’t hang art. It’s also forgiving if your wall isn’t perfectly flat because the border reads as one clean shape. Paint the border slightly darker than the wall for warmth and depth.
Measure the couch width and choose a panel width about 60-75% of it so it looks balanced. Mark the rectangle center and install outer rails first, keeping them level. Add inner rails to create the inset opening, aiming for a consistent border thickness like 5-7 in. Caulk edges, fill nail holes, prime, then paint with two thin coats and careful masking for sharp lines.
Editor's noteUse a long spirit level or laser so the top and bottom rails line up — it’s the first thing your eye checks.
Skip thisAvoid centering based only on the couch; center on the wall features like windows or door trim.
19. Staggered small rectangles for a cozy gallery wall effect
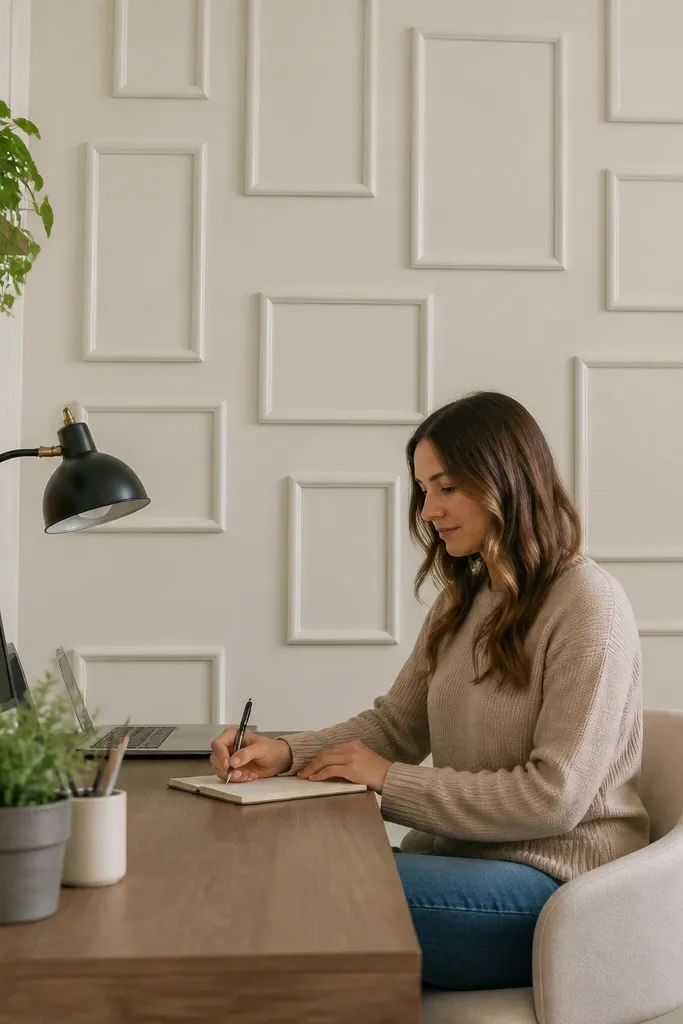
Staggered small rectangles look cozy because they mimic the feeling of a gallery wall, but with clean architectural edges. You get visual interest without needing frames, hooks, or rearranging art. This style is great for renters because you can keep it shallow and focused on one wall. It also works well in offices and reading nooks where you want calm structure with texture.
Pick a cluster area, like 36x60 in, and decide your rectangle size, such as 8x12 in or 10x14 in. Mark a stagger pattern so the rows offset by half a rectangle width. Install the perimeter frames for the cluster, then fasten each rectangle frame with consistent spacing gaps. Caulk and fill, prime, and paint satin; for an extra cozy look, paint the rectangles one tone and the border another tone.
Editor's notePlan your stagger so no rectangle ends up directly above an outlet or switch — the pattern will look accidental otherwise.
Skip thisAvoid using too many different rectangle sizes; stick to one size so it reads as moulding, not collage.
20. Corner arch frame with a small inner reveal
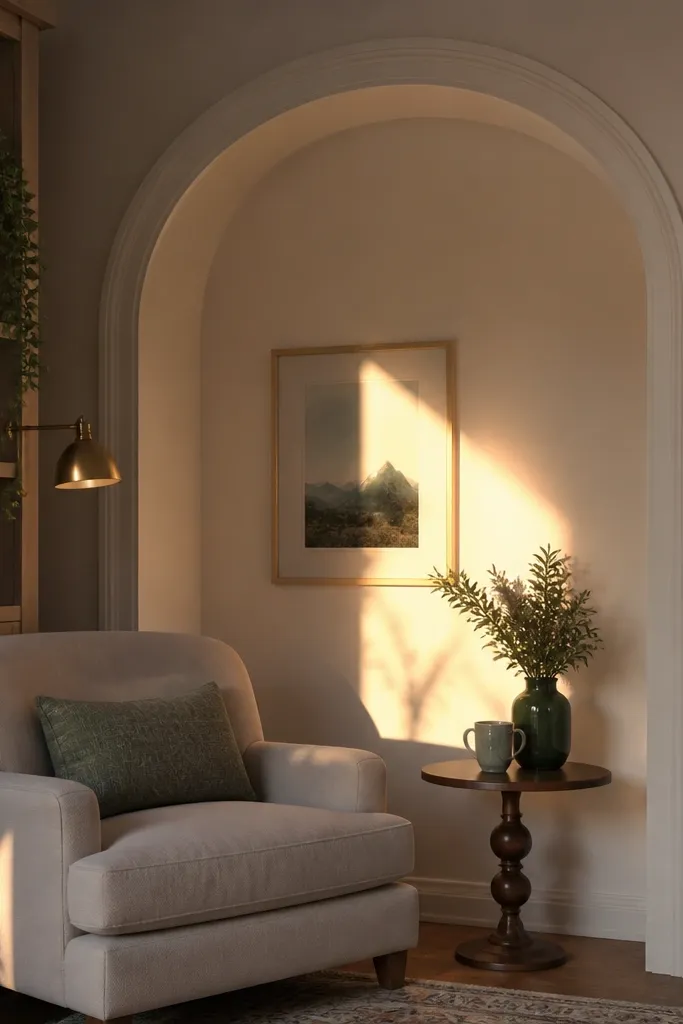
This one is cozy and clever: you frame a corner like it’s a little alcove. It works in bathrooms, reading corners, and entry nooks where a full feature wall feels like too much. The arch shape adds softness, while the inset reveal gives you a sense of depth. It’s photogenic because corners add shadows naturally, and the arch amplifies that effect.
Choose the corner wall zone and mark an outer arch with a practical radius so the arch doesn’t look tiny — often 10-14 in wide per side. Build the outer frame with mitered sides and a curved top from MDF strips or pre-made curved trim. Add a smaller inner rectangle or rounded inner opening so you get the inset reveal. Install, caulk, fill, prime, and paint satin; use warm white for the wall and a slightly deeper tone for the frame if you want contrast.
Editor's noteUse flexible MDF or kerf-cut strips for the arch so you don’t fight cracking at the curve.
Skip thisDon’t rush the curve alignment at the corner; even a small mismatch shows after paint.
21. Small scale panel strips for textured, cozy nooks

This is for people who want cozy texture but don’t want a heavy pattern. Small scale panels create a quilt-like look when the moulding is painted and lit properly. It’s ideal for narrow spaces like laundry rooms, reading corners, or small bedroom walls where a big grid would feel overwhelming. Keep the moulding narrow but still substantial enough to cast a shadow — that’s what makes it cozy instead of flat.
Pick a small panel size like 6x10 in and use slim casing or MDF trim that’s wide enough to hold a clean edge. Mark a straight perimeter, then lay out rectangles with equal gaps. Install the perimeter rails, then add the inner rectangle strips in a consistent order: sides first, then top/bottom. Caulk seams lightly, prime, and paint satin; two thin coats prevent streaky coverage on texture edges.
Editor's noteIf your wall is textured, use a caulk line as a gasket and press the moulding firmly so it sits evenly.
Skip thisAvoid tiny 1/4 in spacing — it can look like accidental cracks rather than designed shadow lines.
22. Shadow-line panel wallpaper look using foam moulding

Foam moulding gives you that crisp panel look with less weight and less wall prep stress. If you want cozy wall moulding ideas that are beginner-friendly, this is one of the smartest ways to get sharp lines without heavy carpentry. It’s also great for textured walls because foam trim can bridge minor bumps when installed carefully. Keep the design simple: a grid or large rectangle so the foam edges look intentional.
Clean the wall and remove loose paint, then mark your layout with pencil and painter’s tape. Use foam moulding strips, cut with a sharp utility knife or fine saw, and install with adhesive made for trim. Start with the perimeter, then build inner rectangles, keeping a consistent 1/8 in shadow gap by using scrap spacers. Fill small seam gaps with caulk designed for foam, sand lightly if needed, prime if the product calls for it, then paint satin.
Press with a flat tool and hold each piece for the adhesive’s recommended time so seams don’t open later.
Don’t use heavy wood glue or thick caulk that squeezes into the shadow line and dulls the definition.
23. Bevelled-edge panel frames for a softer light effect
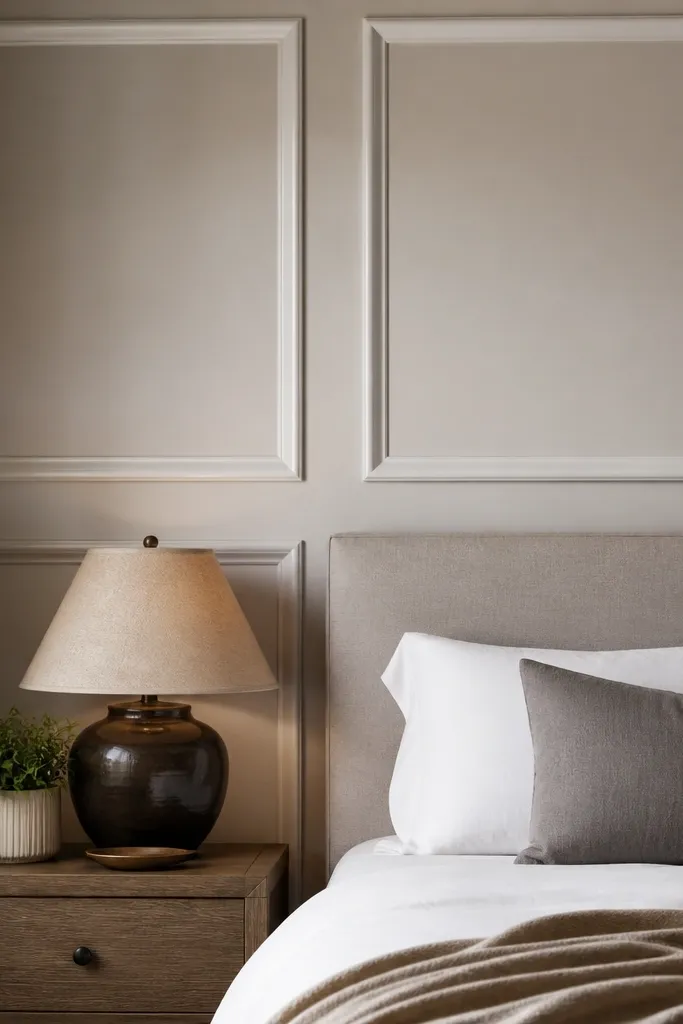
Bevel-edged moulding frames create a cozy look because the light reflects more gradually than flat edges. The result is a softer highlight line around each panel, which looks great in bedrooms and living rooms where you want calm. This style is also forgiving — if your cuts are slightly imperfect, the bevel hides it better than square profiles. Use it for a small grid or a single big frame.
Choose a bevel profile moulding and plan your panel sizes so the bevel edge stays visible from typical viewing distance. Mark the layout and cut miters for corners, then dry-fit to check the bevel alignment. Install the outer frames first, then add inner rails if you’re doing double rectangles. Caulk seams carefully, fill nail holes, prime, and paint satin; use light coats so the bevel texture doesn’t get filled in.
Editor's noteIf the bevel catches paint unevenly, thin your first coat slightly and don’t overload the surface.
Skip thisAvoid thick paint buildup on the bevel; it can round the edge and make the shadow line disappear.
24. Moulding bands at eye level with vertical accents
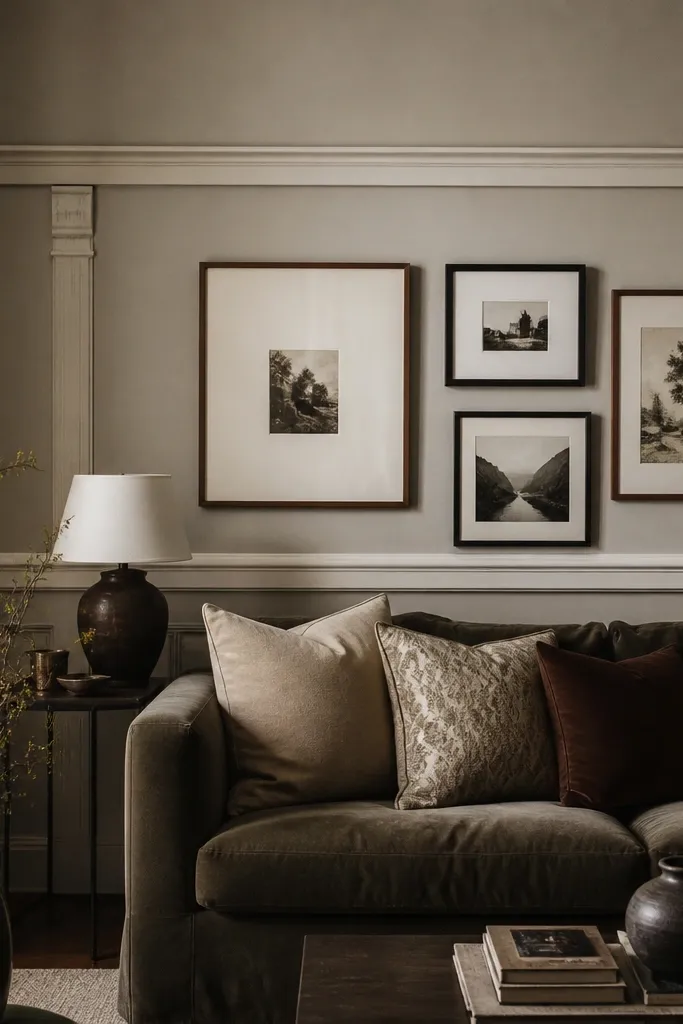
Two horizontal bands with vertical accents create a cozy, structured look that works in rooms with lots of furniture. The horizontal lines give calm organization, while the vertical pieces add warmth and keep the wall from feeling like stripes. It’s particularly photogenic in offices and living rooms because it frames seating and artwork without needing a full panel wall. Keep the bands at eye level and let the rest of the wall stay plain.
Mark two horizontal lines at a comfortable height, commonly around 40-48 in and 60-70 in depending on your wall and furniture. Install horizontal rails, then add short vertical accents between them at equal spacing, like 12-18 in apart. Frame the ends so the pattern looks finished at corners. Caulk, fill, prime, and paint satin; if you want extra cozy depth, paint the vertical accents a touch darker than the rails.
Editor's noteMeasure from the floor to your first band, not from the ceiling; it’s easier to keep level across the room.
Skip thisAvoid placing the bands too close together — it turns into a busy stripe wall instead of a cozy structure.
25. T-shaped vertical panel frames for a clean cozy look

T-shaped frames are a clean way to get movement on a wall without turning it into a dense grid. Each vertical strip gets a crossbar that creates a cozy architectural rhythm, especially behind a reading chair or console. It looks sharp in photos because the T intersections create strong shadow corners. This style is also efficient to build since you repeat the same module across the wall.
Decide your module width, like 14-16 in, and mark a repeating column layout. Cut vertical strips and a consistent crossbar length for each T. Install all vertical strips first, then add crossbars at a fixed height from the floor or top rail. Add small inset rectangles if you want, then caulk seams, fill nail holes, prime, and paint satin.
Make a jig for crossbar placement using a scrap board with marks so every T lands at the same height.
Don’t vary the crossbar height; mixed heights read sloppy, not cozy.



