
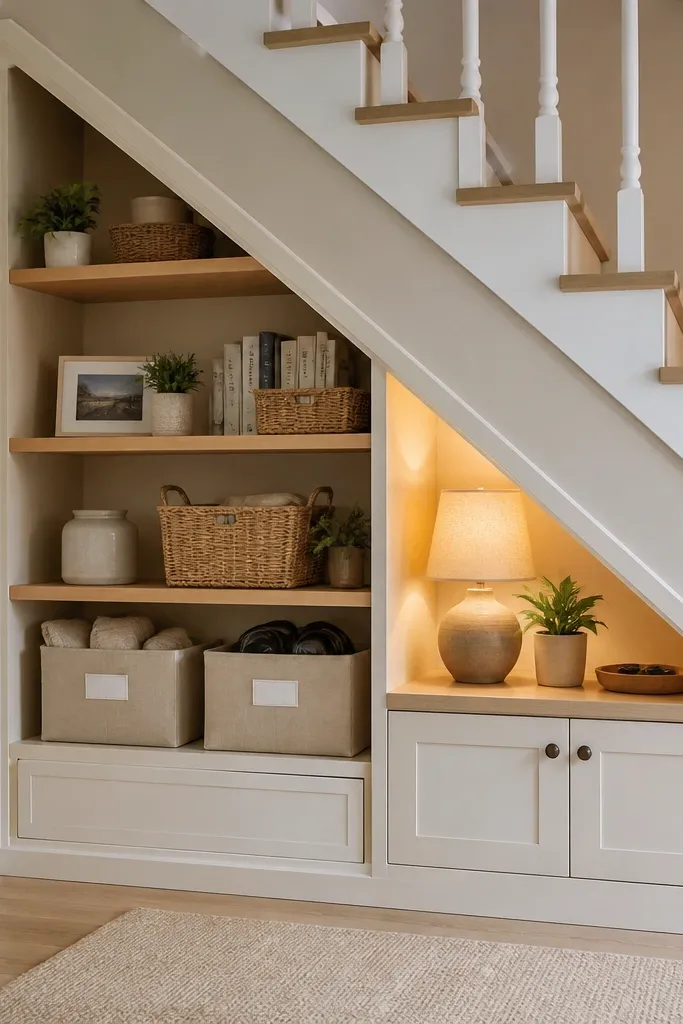
1. Shaker door cabinet with a hidden vacuum garage
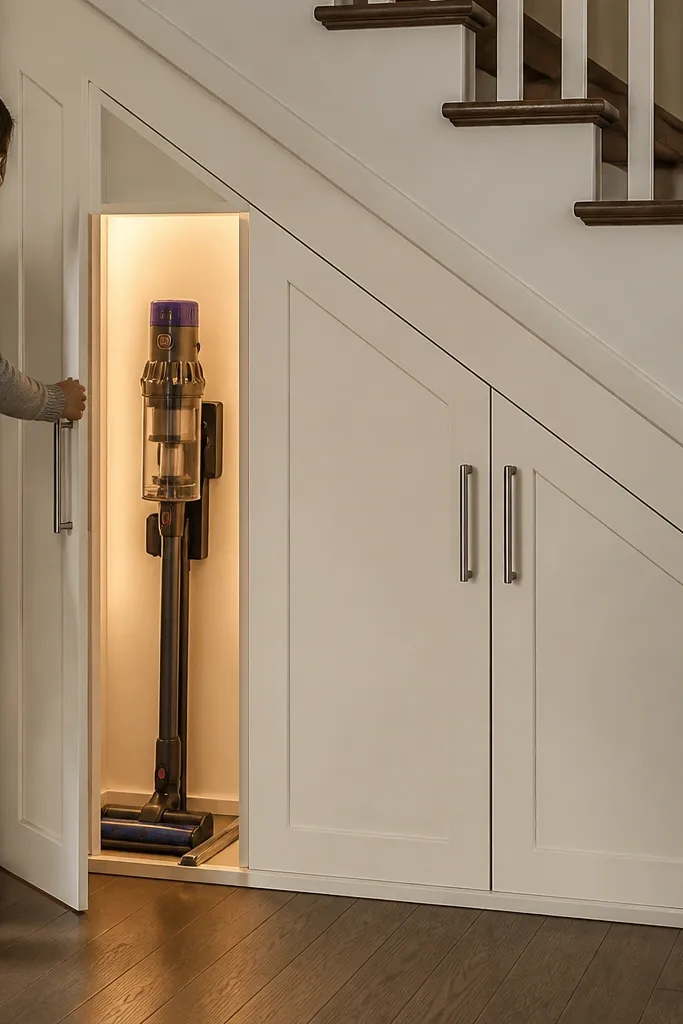
This is the cleanest way to make under-stairs storage feel intentional. You build a shallow cabinet face with shaker-style doors, then dedicate the deepest pocket to a vacuum stand that slides out. The look stays tidy because the mess stays behind flat panel fronts. For a cozy feel, paint the doors a warm white or soft greige, and use brushed nickel or matte black pulls so the hardware doesn’t look harsh. Skill level is medium because you’re aligning doors and building a pull-out, but the payoff is a built-in look that photographs well.
Start by cutting a cabinet case from 3/4-in plywood to the measured width and depth, then add a top and bottom cleat so the shelves don’t bow. Install a pull-out tray using full-extension drawer slides, sized so the vacuum head clears the door when the tray opens. Frame the front opening with 1x2 trim, then hang shaker doors with adjustable hinges so you can fine-tune the gaps. Finally, add a simple strap or rubber bumper inside the tray so the vacuum handle doesn’t rattle against the wood.
Use a scrap spacer to set consistent door gaps before you drill hinge holes.
Don’t mount the vacuum tray too low — you’ll lose clearance for the door swing.
2. Bench-style shoe cubbies with a cushioned lid
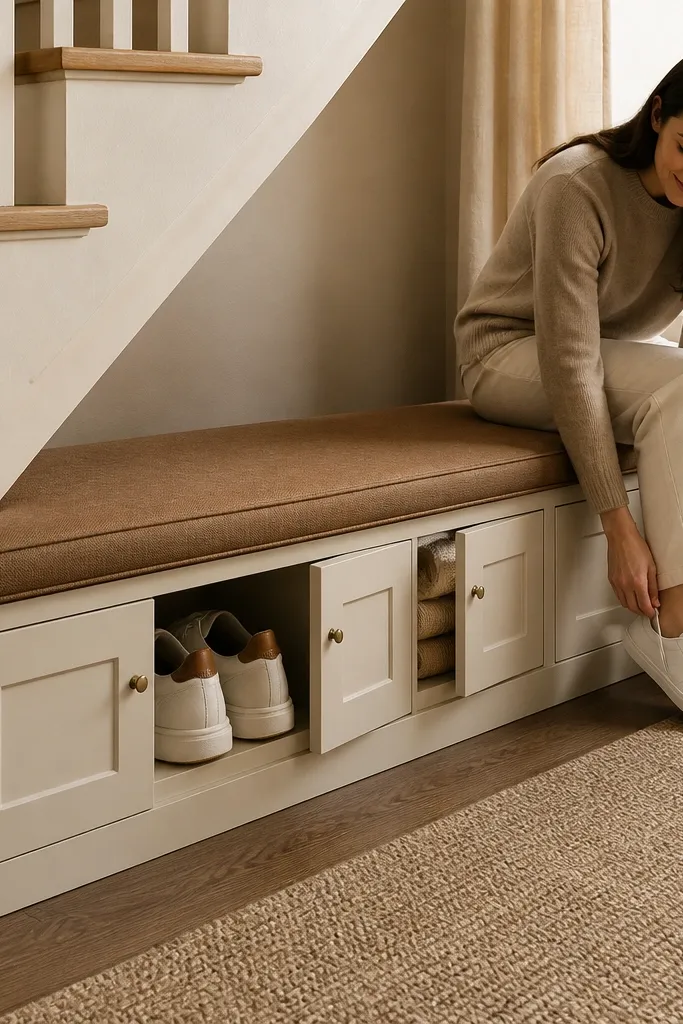
Shoe storage under stairs looks cozy when it reads like furniture, not a utility closet. Build shallow cubbies with individual doors or a single front panel, then add a top cushion so the space becomes a landing spot. The cushion makes the whole run feel warm and lived-in, and it also gives you a practical place to sit while you swap shoes. Use medium-tone wood or a painted finish with a fabric that matches your entryway. This works best in foyers or hallways where you need fast access and a tidy “first impression.”
Measure the height under the lowest slope and decide your cubby height, aiming for 6-8 inches for sneakers and 8-10 inches for boots. Build a case from plywood, then add vertical dividers so each cubby is the same width for a neat rhythm. Install small cabinet hinges for each door, and add a front lip trim so doors align even if the underside isn’t perfectly square. For the cushion, cut foam to the top size, wrap with upholstery fabric, and staple to a thin plywood top panel screwed to the cabinet.
Line the cubbies with a thin rubber mat so shoes don’t scuff the wood and so you can wipe up grit.
Skip tall cubbies without dividers — they collapse into a messy stack.
3. Open shelving with framed edges and matching wicker baskets
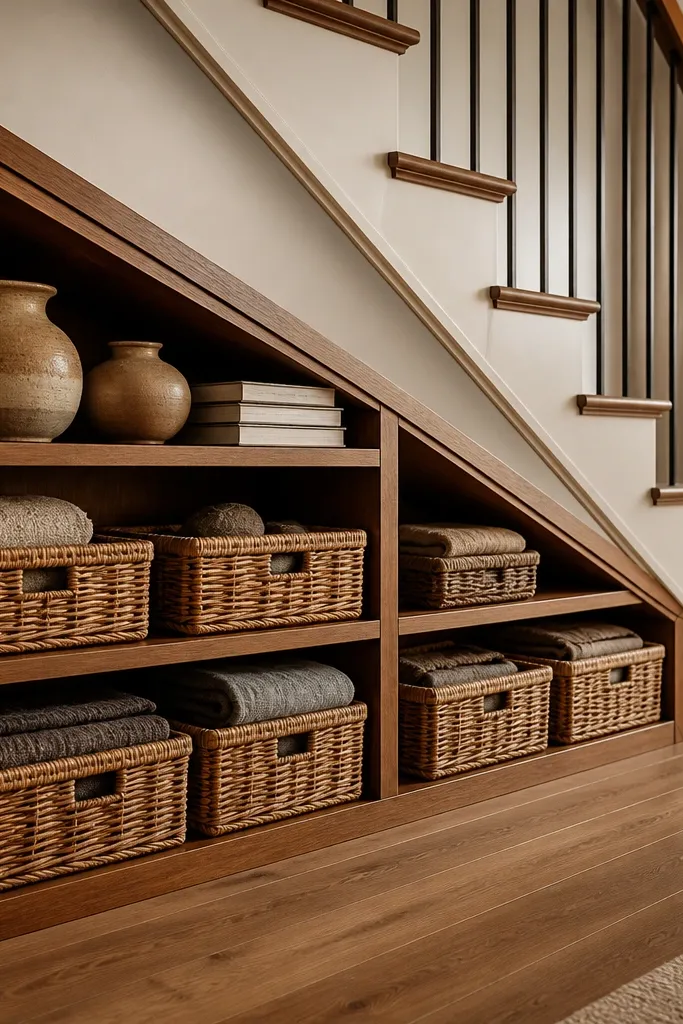
Open shelving under stairs can look cozy instead of chaotic if you build a frame and repeat the same storage style. The frame makes the shelves feel architectural, while the matching baskets hide the random items that usually make open storage look messy. Keep the shelf depth tight, around 10-12 inches, so baskets don’t protrude and ruin the clean lines. Paint the shelf frame the same color as your walls or choose a warm wood stain so it looks inviting in daylight. This is great for board games, kids' books, craft supplies, or seasonal items you want to grab fast.
Build a rectangular shelf frame using 1x3 trim around the opening, then attach 3/4-in plywood shelves inside the frame. Space shelves so baskets fit snugly — measure your basket height and leave 1/2 inch clearance for easy pull. Sand edges smooth, then prime and paint the frame or stain and seal it with a satin topcoat. Place baskets first, then adjust shelf heights by temporarily setting the basket in each spot and checking how it sits against the front trim.
Use the same basket height across all shelves; it makes the whole run look intentional.
Don’t leave open shelves bare — without baskets or bins, under-stairs storage looks like leftovers.
4. Pull-out pantry drawers for dry goods and snacks
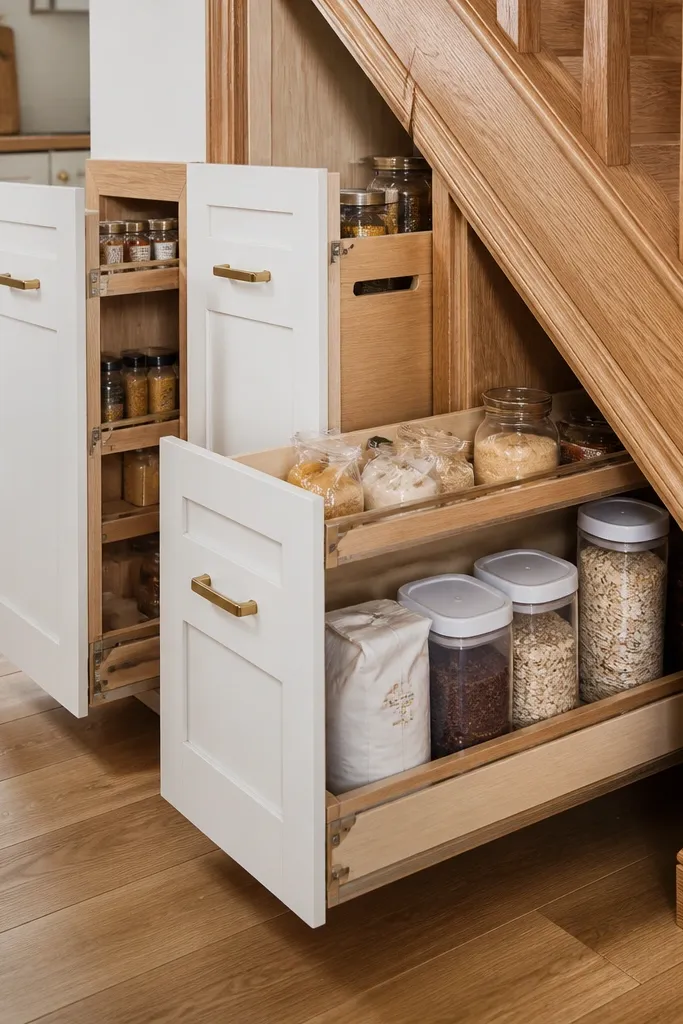
Determine how many drawer widths fit across the opening, then cut a plywood case with a fixed back panel to keep it square. Install full-extension slides at the right height, using a level and a straight edge to keep everything aligned. Build each drawer box from 1/2-in plywood with a front panel faced to match your finish, and add a bottom shelf for sturdiness. Apply a durable finish like water-based polyurethane and add drawer pulls before you load with food items.
If your under-stairs space is deep enough, pull-out drawers look amazing and make the storage actually usable. Drawer fronts hide the clutter of snacks, baking supplies, and small pantry items. The cozy part is the order — labels, consistent drawer widths, and a warm finish that matches your kitchen. This setup works best when the depth is at least 18 inches so the drawer slides don’t force you into shallow, awkward compartments. Expect a clean, photo-ready look because everything lines up.
Skip thisSkip cheap slide brands — misaligned slides make drawers look crooked fast.
Editor's noteLabel with removable painter’s tape first, then commit to final label placement once you see what you actually reach for.
5. Counter-height craft desk under stairs with storage drawers below
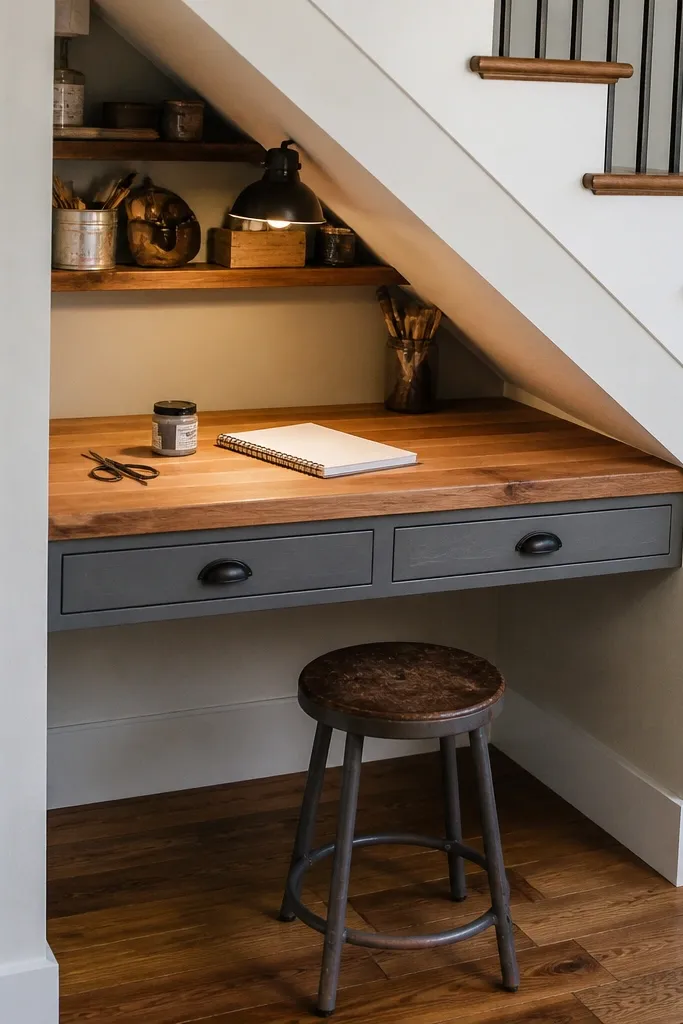
This one turns the odd under-stairs angle into a dedicated craft zone with a cozy, focused vibe. Use a desk-height top so you can sit comfortably, then build storage drawers beneath for paper, scissors, paint, and extra supplies. It looks good because the top surface reads like furniture, and the drawers keep the clutter out of sight. Choose a warm laminate or sealed wood top and match drawer fronts so the whole run looks designed. Best for craft rooms, home offices, and kid activity areas that need a tidy staging spot.
Cut the main cabinet frame to the available width, then build a top deck at desk height, usually 30-32 inches from the floor to the top surface. Add 2-3 drawers with matching widths so the face looks clean, using drawer slides rated for the drawer weight you’ll load. Install a backer panel against the wall to cover gaps and strengthen the unit. Finish the top with a hard-wearing clear coat, then add a small backsplash strip to prevent splashes from catching in seams.
Add a cable notch and a simple power strip mounting under the top if you plan to use a lamp or printer.
Don’t set the desk top too high under the slope — you’ll hit the underside when you sit.
6. Ladder shelf with books and baskets plus a "drop tray"
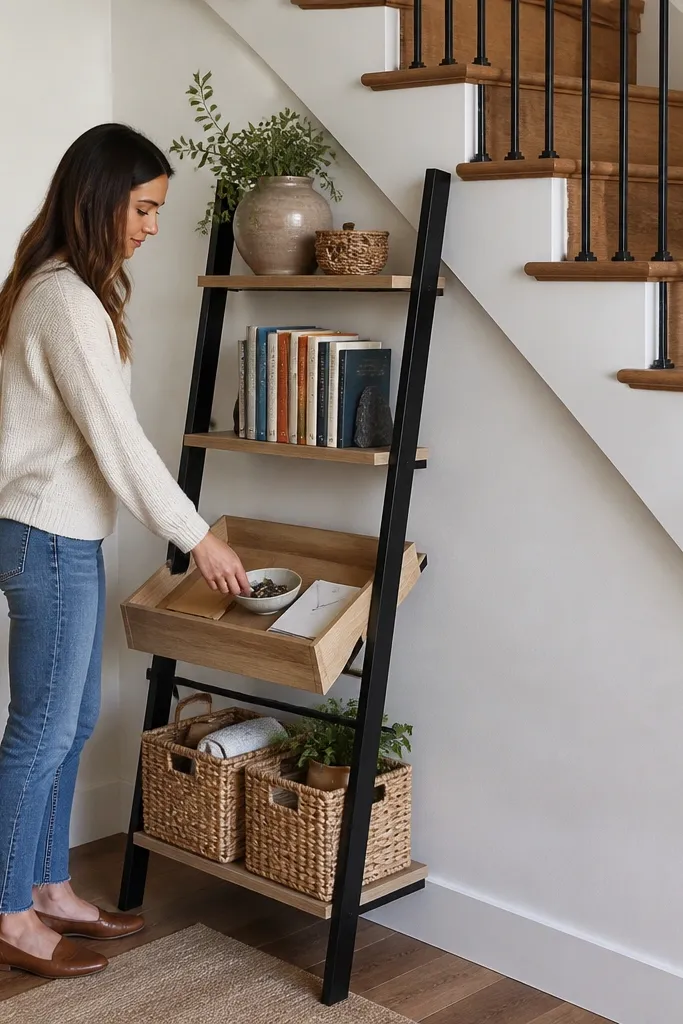
If you like the look of open storage but want it to stay tidy, build a ladder shelf with a front drop tray. The ladder frame creates vertical lines that look modern and cozy at the same time. The drop tray catches mail, keys, and small items so the floor doesn’t become the storage. Put books on the shelves and keep baskets for accessories, so everything has a place and a consistent visual rhythm. This setup fits best in entryways or hallways where you want quick access and a clean visual line.
Use side rails cut from plywood or hardwood, then cut 1x2 or 1x3 rungs spaced to fit book heights. Add a front drop tray using a shallow plywood panel with a raised 1/2-inch lip on the back edge. Secure the ladder rails to the wall with structural screws or anchor hardware, then attach rungs to keep it square. Finish with stain or paint, then seal the drop tray top so you can wipe it down.
Pre-drill all rung holes — ladder shelves twist when you drive screws without pilot holes.
Avoid overloading open shelves — too many mixed-height items kills the cozy look.
7. Hidden pet food storage with a lift-up door and feeder rail
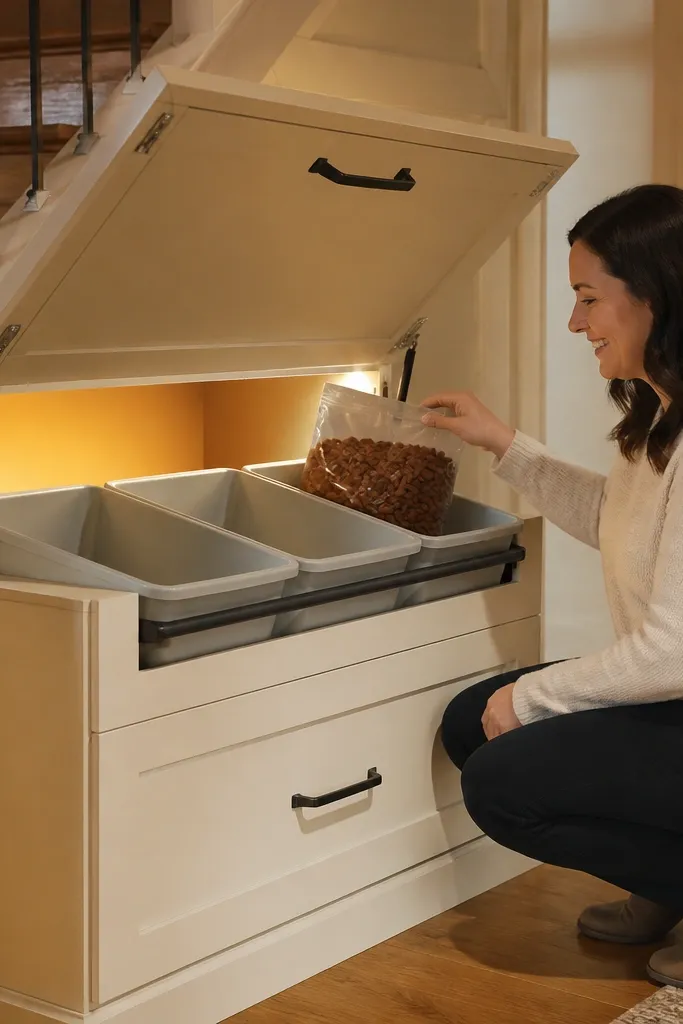
Build a cabinet box from plywood and leave the back open enough to access plumbing if needed, then install a lift-up door using gas struts or a simple hinge with a support arm. Mount a rail on the inside wall so the feeder scoop and small accessories hang in a fixed spot. Use two removable bins sized for your food bag or can volume, then add a front strap or bungee so bags don’t tip. Seal any interior surfaces you’ll wipe often with a satin topcoat.
Pet storage under stairs looks surprisingly cozy when it’s built like a cabinet, not a bin pile. Use a lift-up door for the pet-food pocket and install a feeder rail or stop so scoops and bags don’t slide. The front stays clean, and the interior stays organized with removable bins. Choose a warm paint color and use simple round knobs so it looks like furniture. This works well for small dogs and cats, especially in homes where you want pet supplies out of sight but still reachable quickly.
Skip thisDon’t store food in open bags inside the cabinet — moisture and pests ruin the look fast.
Editor's notePut the bins on a removable shelf board so you can pull everything out for cleaning.
8. Tall vertical storage with sliding doors for cleaning supplies
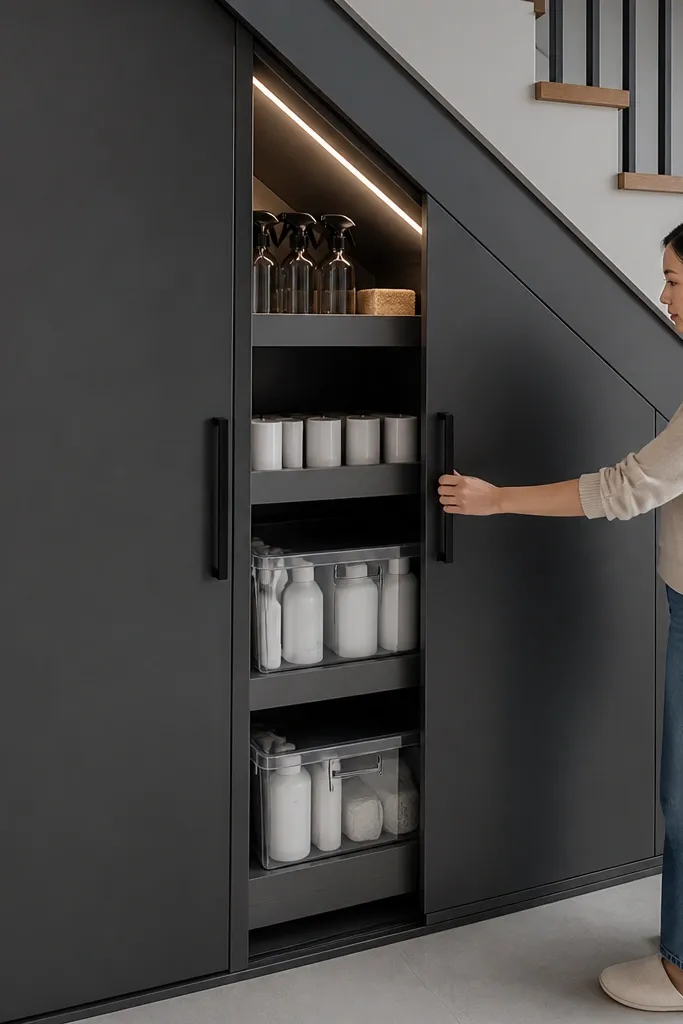
Frame the opening with 1x2 trim, then build a tall cabinet case with a fixed middle shelf for height control. Install a track system rated for the door weight, making sure the track is level so the door slides smoothly. Add pull-out caddies using small drawer slides or simple hooks and rails, then attach a back panel to prevent items from falling into the wall gap. Hang the sliding door panels and test the travel before you add stops.
Cleaning supplies look best behind sliding doors because you get the tidy front without swinging doors that fight the low ceiling. Build one tall compartment and keep the inside organized with caddies for spray bottles, sponges, and extra refills. The sliding doors also create a sleek, modern look that feels calm and cozy. Pick a door finish that matches your baseboards or existing cabinetry. This is a great solution for narrow under-stairs spaces where you can’t fit a deep swinging door.
Skip thisAvoid heavy doors on flimsy tracks — sag makes the front look sloppy.
Editor's noteMark the track holes with painter’s tape templates so you don’t drill misaligned holes in the trim.
9. Barn door style cabinet under stairs for coats and umbrellas
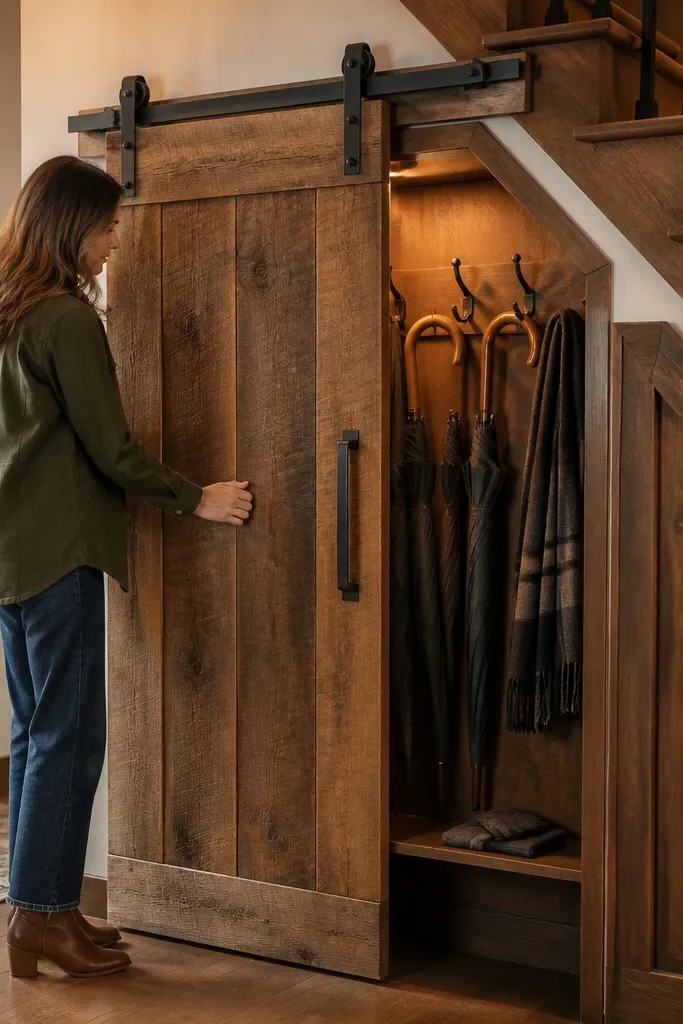
A barn door instantly makes under-stairs storage look like a design choice. Use it for coats, umbrellas, or a small entry catch-all. The inside can be simple — a row of hooks for umbrellas and a shelf for folded items — but the front looks warm and cozy because the door has character. Choose a reclaimed wood look or a smooth painted door with visible grain. This works especially well if your entry has farmhouse or transitional styling.
Build a cabinet box sized to the opening and install hooks on a backer panel at two heights for umbrellas and hats. Mount a barn door track above the stairs opening, ensuring you leave enough clearance for the door to swing fully without scraping. Add a door panel cut to cover the opening with 1-2 inches of overlap on each side. Seal and finish the door, then install a simple stop block to prevent the door from sliding too far.
Use a soft-close floor guide so the barn door doesn’t slam at the end of travel.
Don’t mount hooks too close to the floor — wet umbrellas make a mess if they hang low.
10. Mirrored cabinet front for a bright, cozy entry
Build a cabinet case from plywood and frame the door opening with 1x2 trim for a clean reveal. Install mirror panels using glazing clips or mirror-safe adhesive rated for glass, and use spacers so the mirror doesn’t contact the wood directly. Add one interior shelf board fixed with adjustable supports for flexibility. Finish the cabinet doors and frame with paint or stain, then test the door swing and alignment before securing all hardware.
Mirrors make under-stairs storage feel less heavy and more inviting, especially in narrow entries with limited light. Build a closed cabinet with mirrored door panels so the space reflects light and looks bigger. Keep the interior tidy with a single shelf and a few matching bins so the reflection doesn’t reveal clutter. For cozy, choose an antique mirror look or a warm gold frame rather than shiny chrome. This solution is great for storing hats, scarves, and small seasonal items where you want a clean front and a little brightness.
Skip thisDon’t use mirrors without proper clips — direct contact can crack the glass over time.
Editor's noteUse mirror edging tape or trim so the edges look crisp and don’t chip during installation.
11. Curtain-shrouded storage with a rod and pretty fabric
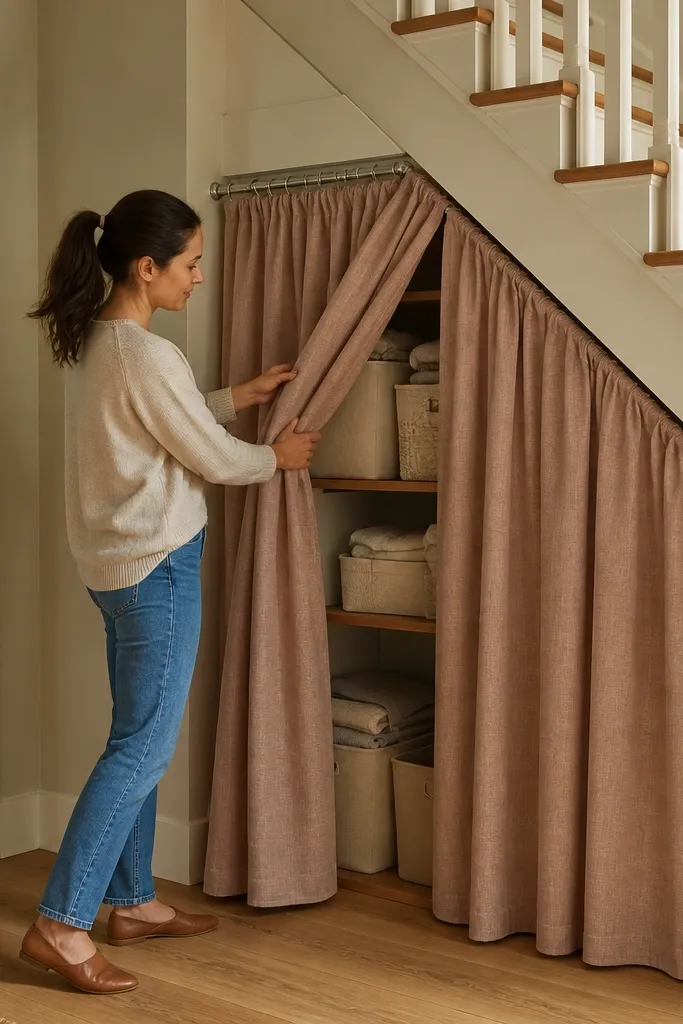
Build a simple open shelving base from plywood and trim, then mount a tension rod or fixed curtain rod across the front opening. Choose fabric wide enough to gather 2-3 inches per side for a full look, then hem the bottom with a weighted hem tape. Install curtain rings or a track so the fabric opens and closes smoothly. Add a neat valance strip at the top if the rod area looks unfinished, then steam the fabric flat before hanging.
Curtain storage is cozy because it softens the hard geometry under the stairs. It also gives you flexibility if you’re still figuring out what you store — fabric hides the contents and you can re-organize without rebuilding doors. Pick a fabric that matches your room palette and use a rod mounted to the trim so the curtain drapes evenly. This works best for shallow storage runs where doors would be awkward and where you don’t need airtight containment. It’s also the quickest way to make under-stairs storage look finished.
Skip thisSkip thin, clingy fabric — it shows the shape of items and looks sloppy.
Editor's noteUse blackout-lining fabric behind a pretty outer fabric for a smoother drape and better hiding power.
12. Color-blocked drawer fronts with a consistent frame
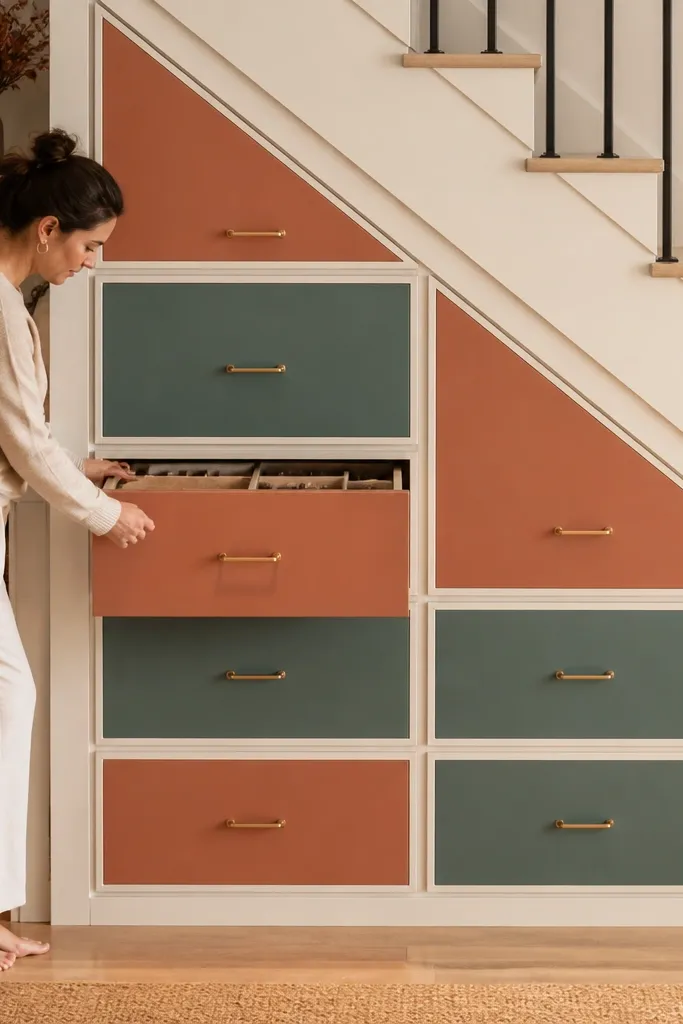
Cut the cabinet frame first from plywood and install internal dividers so drawers have equal widths. Build drawer boxes to fit, then spray or brush paint the drawer fronts in your chosen colors after sanding and priming. Attach drawer fronts and pulls only after you confirm the drawer sits flush in the opening. Add the final outer frame trim around the unit for a clean edge, then mount the whole assembly to wall studs or solid blocking.
This is for people who want Cozy Under Stairs Storage Ideas to look like decor, not a beige box. Build a drawer bank under the stairs, then use two complementary colors on the drawer fronts while keeping the frame a neutral. The color-blocking draws the eye and makes the space feel planned and photogenic. Choose matte paint for a softer look and consistent sheen across all drawer fronts. This suits craft supplies, kid toys, or small household items where drawers keep everything contained.
Skip thisDon’t mix too many colors — three shades max looks intentional, more looks like leftovers.
Editor's noteTape off drawer fronts with painter’s tape strips and paint in two passes so edges stay sharp.
13. Pegboard back for "grab and go" tools and mail
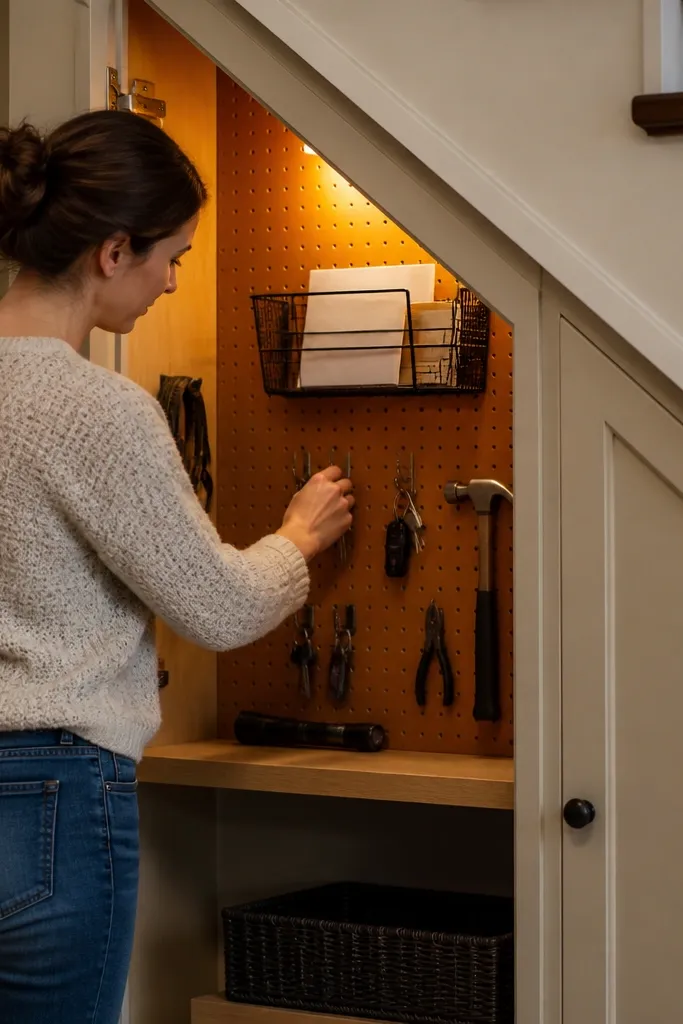
Build a shallow case with a plywood backer and two front shelves, leaving enough clearance for pegboard thickness. Cut pegboard to fit, then pre-mark hole spacing and attach with screws so it sits flat. Install mail trays and hooks based on your items, then add a small bottom shelf for a basket that catches small clutter. Paint the frame and seal the pegboard if you want wipe-clean durability.
Pegboard inside under-stairs storage makes it look organized because hooks and shelves create visible order. Build a cabinet shelf base, then install pegboard on the back with a small grid of hooks for mail trays, keys, and lightweight tools. The cozy look comes from using a warm pegboard finish or painting it a soft tone and adding a trim frame around the opening. Use small baskets on the shelves for accessories so everything has a defined spot. This is perfect for entryways that need a daily landing zone.
Skip thisDon’t overcrowd the board — leave empty space so the layout still looks calm.
Editor's noteKeep hook spacing consistent by using a single pegboard hole pattern for all accessories.
14. Roll-out trash and recycling pull bins with a toe-kick
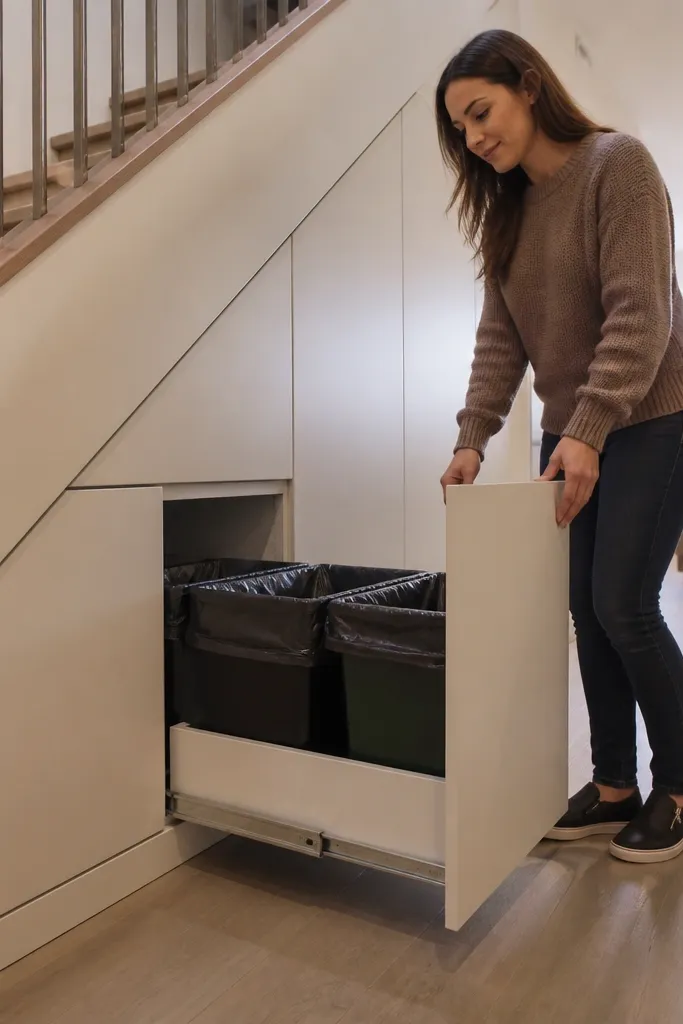
Garbage storage under stairs can look surprisingly cozy if you hide it behind clean panels and give it a proper toe-kick. Use pull-out bins mounted on slides so you can roll them out for cleaning, then close them with a front panel that matches your trim. The toe-kick makes the build look furniture-like instead of like a utility box. This works best when the under-stairs space is deep enough for a standard pull bin setup and when you want the floor area to stay open. Choose matte paint or stained wood so the front doesn’t look glossy and harsh.
Build a cabinet case with a fixed back panel and a bottom platform for bin slides. Mount slide hardware according to the bin manufacturer’s bracket spacing, then test-fit the bins before you attach the front panel. Add a toe-kick panel at the bottom to cover the gap between cabinet and floor. Finish the cabinet front with paint, then attach the bin access door or a pull panel that aligns with the front trim.
Add a drip tray behind the bins if you store wet waste bags — it keeps the interior clean.
Avoid leaving bins exposed to the front opening — odors and mess show up fast.
15. Window-seat style storage with hinged top and storage bins
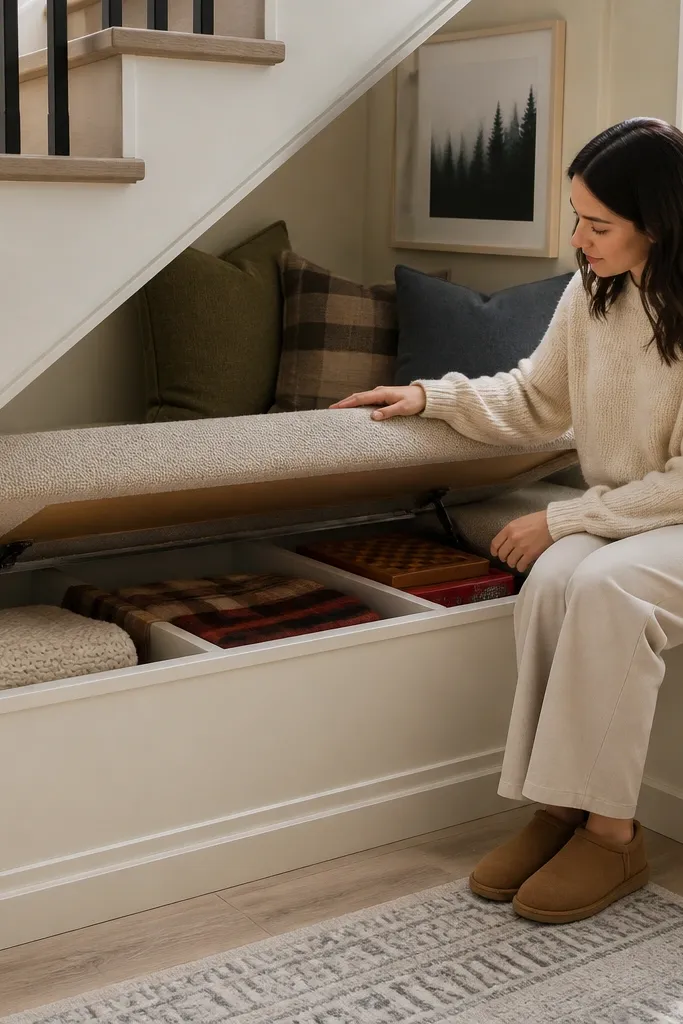
A hinged top turns under-stairs storage into a comfy seat, and it instantly reads cozy in photos. Inside, you use storage bins for blankets, board games, or seasonal items, so the seat stays clutter-free. The look works because the front face is smooth and furniture-like, while the top cushion adds warmth. Choose a fabric with a durable weave and add piping for a finished edge. This solution fits living rooms and reading nooks where you want a small “hang out” spot.
Build a base cabinet from plywood with a hinged lid sized to the opening, then add internal cleats so the bins sit below the lid line. Install a lift hinge or piano hinge along the back edge of the lid, plus a lid support strut if the top is heavy. Cut foam for the seat cushion, wrap with fabric, and staple to a thin plywood panel screwed to the lid. Add child-safe stops if kids use it, and seal any exposed wood surfaces inside.
Use uniform bins with handles so you can lift them out without snagging on the hinge edge.
Skip a proper lid support — a heavy top that drops is a safety issue and ruins the look.
16. Stained wood cubbies with a warm reading nook shelf
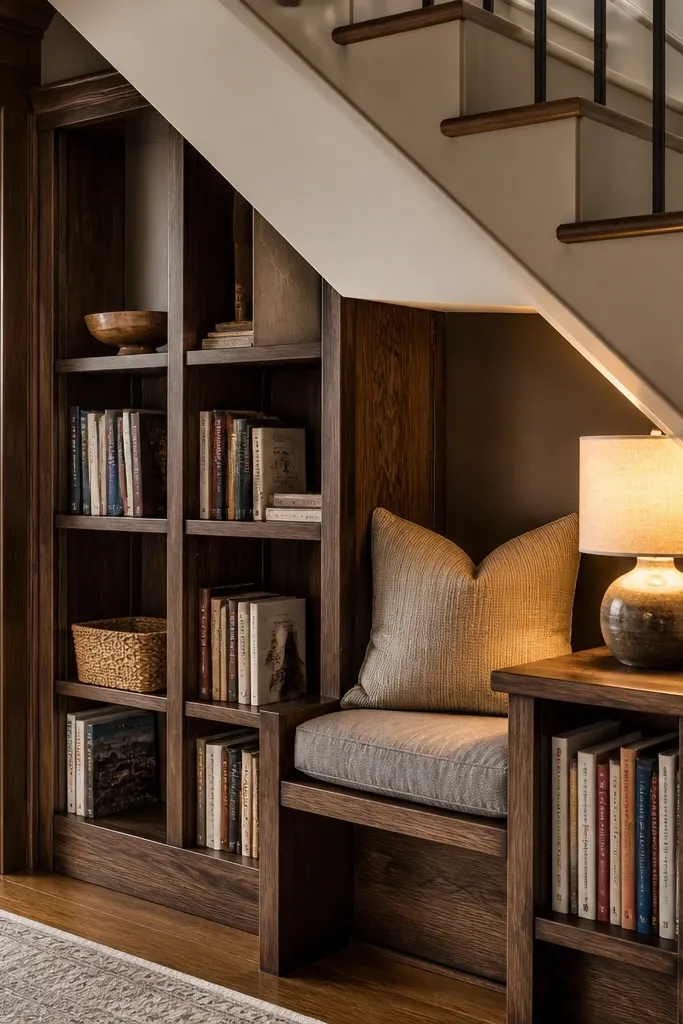
Cut side panels and shelves from 3/4-in plywood, then stain after assembly so you can reach edges. Add internal dividers so cubbies stay square, and use a backer panel for stability. Install the front reading shelf with a slight lip so books don’t slide forward. Seal with satin polyurethane, then add a simple wall cleat so the unit doesn’t rack under load.
Stained wood makes under-stairs storage feel cozy without adding visual clutter. Build cubbies of equal height, then add a narrow reading shelf at the front where you can place a lamp and a stack of books. The warm stain tone makes the wood grain look rich and inviting, and the cubbies keep items contained. This project looks best with consistent joinery lines and a clear satin topcoat so it doesn’t look plasticky. Great for living rooms, family rooms, or any spot where you want storage to also feel like decor.
Skip thisDon’t skip sealing — stained wood without a topcoat scuffs and looks tired fast.
Editor's noteSand to 180 grit before staining — it keeps the grain even and prevents blotchy patches.
17. Sliding barn-style pantry doors in a warm wood finish
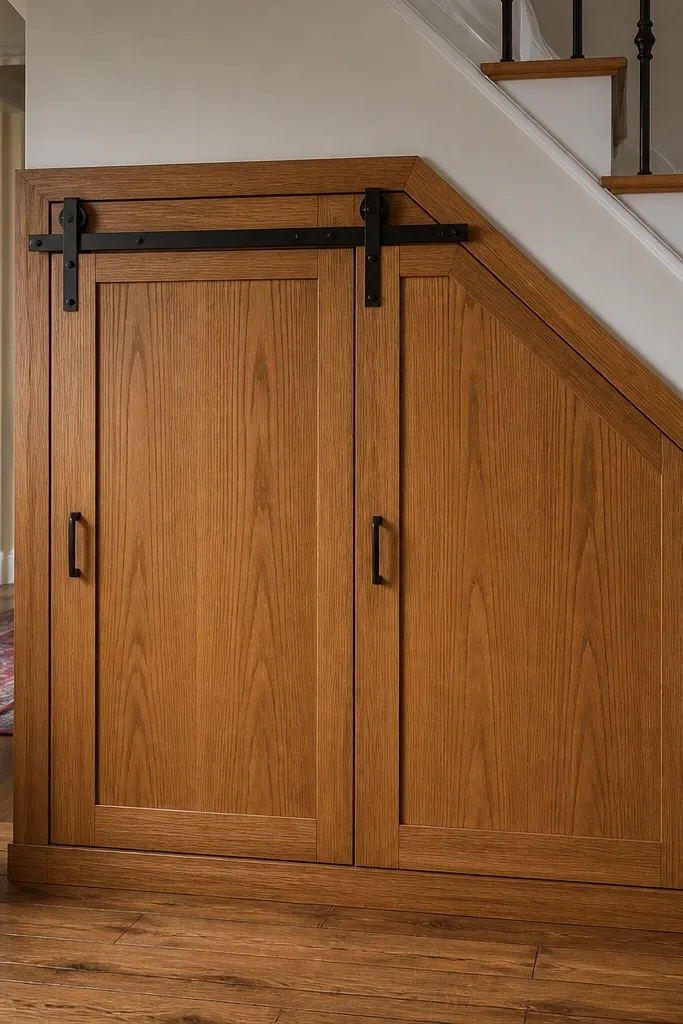
If you want a cozy look and full closure, sliding barn-style doors are the sweet spot. Build a pantry unit under the stairs with multiple shelves, then cover it with a door panel that slides along a track. The warm wood finish gives it that lived-in feel, and the sliding motion keeps the front clean even in narrow hallways. This is best for families who need storage that hides mess but still has easy access. It looks great with black metal track hardware and matching shelf trim.
Build the pantry case first with 3/4-in plywood and add 2-4 shelves spaced for your items. Install a track above the opening, then measure and cut a door panel that overlaps the opening by 1 inch on each side. Attach door hardware to the panel and add a stop block so it doesn’t slide too far. Finish the wood with stain and a satin clear coat, then mount the shelves and test the door travel with the shelves fully loaded.
Use a magnetic catch on the door edge so it closes quietly and stays aligned.
Avoid tracks that are too short — the door will drift and gaps will show.
18. Built-in charging station with cable channels and a closed top
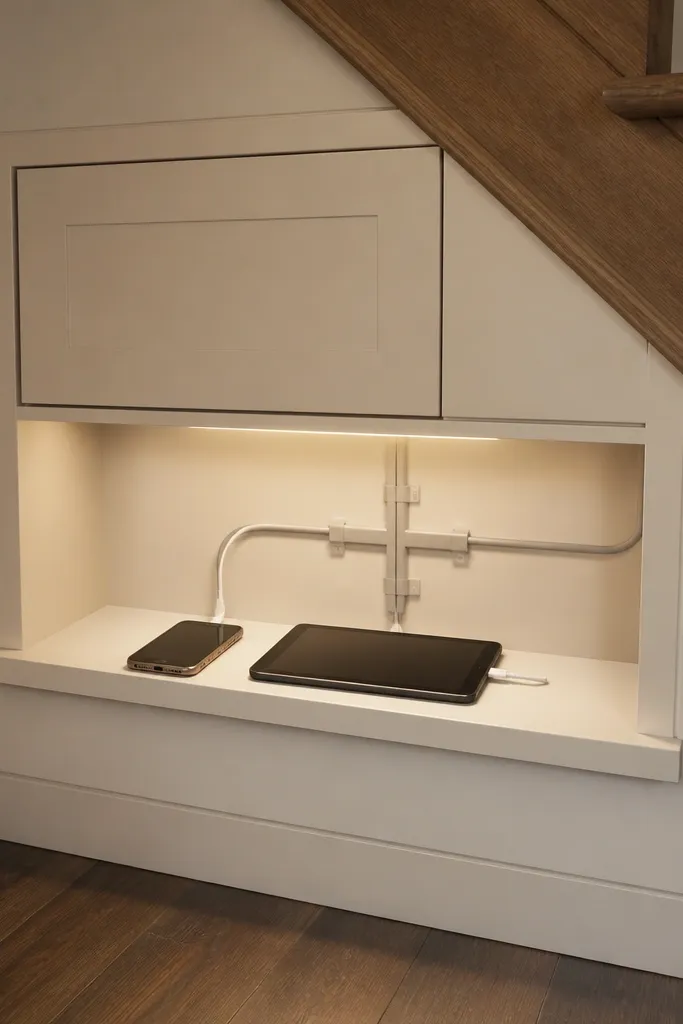
A charging station under the stairs looks cozy when it hides the cords and keeps devices organized. Build a shallow cabinet with a closed top compartment for chargers and a small open ledge or drawer for phones and tablets. Cable channels on the back wall keep everything neat, and a closed front keeps the tech clutter out of sight. This works best in entryways or kitchens where you want devices off the counter but still reachable. Make the front match your trim so the tech setup looks like built-in furniture.
Build a shallow cabinet case with a back panel that includes cable pass-through holes lined with grommets. Install a small interior shelf for chargers and a front drawer or ledge for devices, leaving space for charging cables to route through the channels. Mount a power strip inside the cabinet and secure it with a bracket so it doesn’t sag. Finish the cabinet face with paint or stain, then add a small door latch to keep the tech compartment closed.
Use a cord slack loop inside the cabinet so cables don’t get pulled tight when you open the drawer.
Don’t route cables through raw holes — sharp edges chew cords.
19. Rolling library cart inside under-stairs rails
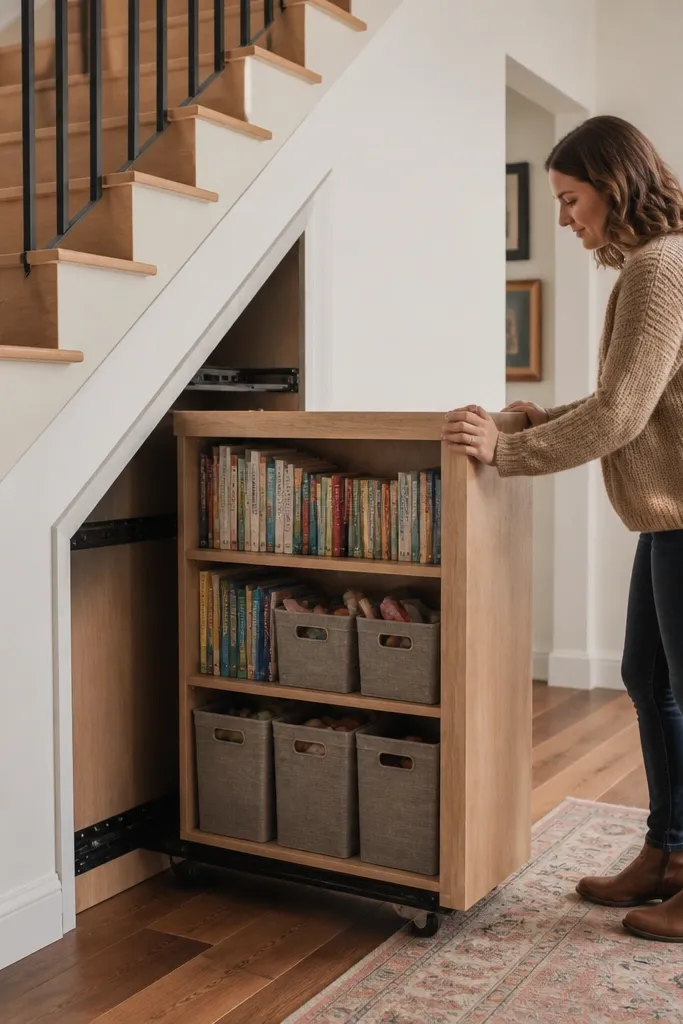
This is a smart-looking way to use under-stairs depth without building complex doors. You install fixed rails on each side of the under-stairs space, then a rolling cart slides in and out. When it’s pushed back, the front looks clean; when it rolls out, you get full access to books and storage bins. The cozy look comes from using a cart finish that matches your woodwork and adding a fabric-lined basket for softer texture. This works well when the space is too awkward for standard cabinets but deep enough for rail-mounted rolling storage.
Install two parallel rails made from 1x2 or 2x2 wood, level and square to the opening. Build a cart frame from wood and attach wheels rated for the cart weight, then test-fit so the cart rolls smoothly without rubbing. Add shelves on the cart with a fixed spacing that matches your bins and book sizes. Finish with stain or paint, then add a simple stop block at the back so the cart doesn’t roll too far into the void.
Use hard rubber wheels for quieter rolling and less floor scuffing.
Don’t skip a stop block — without it, the cart will drift and look uneven.
20. Corner-like under-stairs cabinet with curved toe-kick for softness
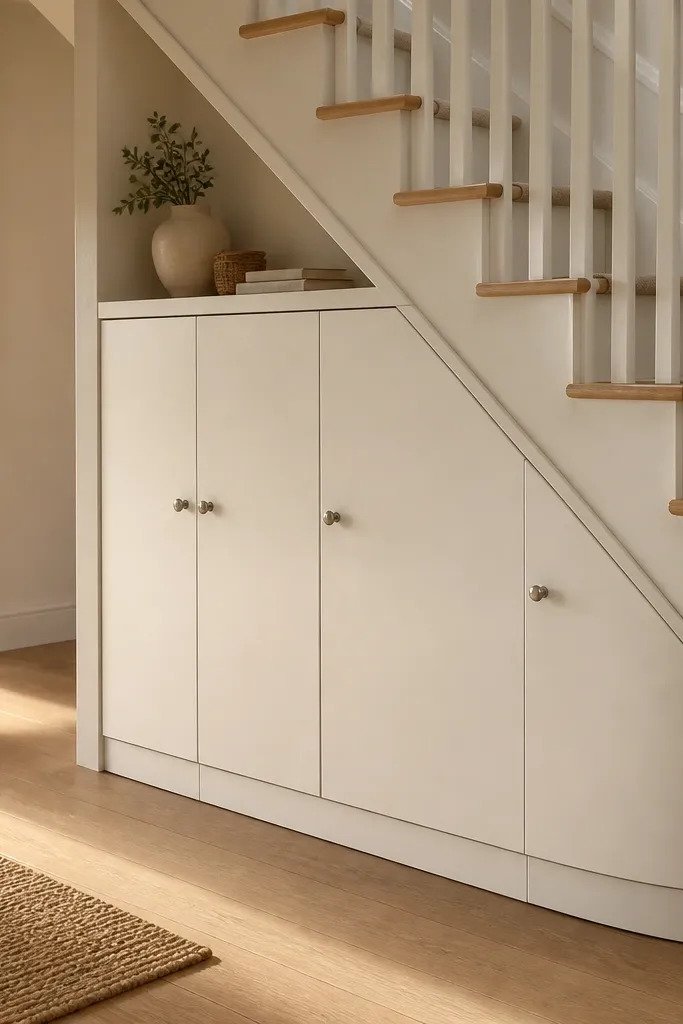
Hard angles under stairs can make storage feel harsh. A curved toe-kick softens the bottom line and makes the whole run look more furniture-like and cozy. Build a standard cabinet with doors, then add a rounded toe-kick panel cut from plywood or MDF. Paint everything the same color and use simple pulls so the curved detail becomes the design feature. This is a strong choice for living rooms and hallways where you want storage to blend in visually and look good from multiple angles.
Build the cabinet case and install the doors first, keeping the base perfectly aligned. Cut a toe-kick panel from 1/2-in plywood and shape it by laminating thin strips or using a pre-made radius template, then screw it to the base. Sand smooth and fill any gaps, then paint with primer and two finish coats. Add a small rubber bumper at the base edges to prevent chips and give a cleaner contact line with the floor.
Use a flexible sanding block on the curve; it keeps the radius smooth without flat spots.
Don’t try to curve thick solid wood — it cracks and the finish looks uneven.



