
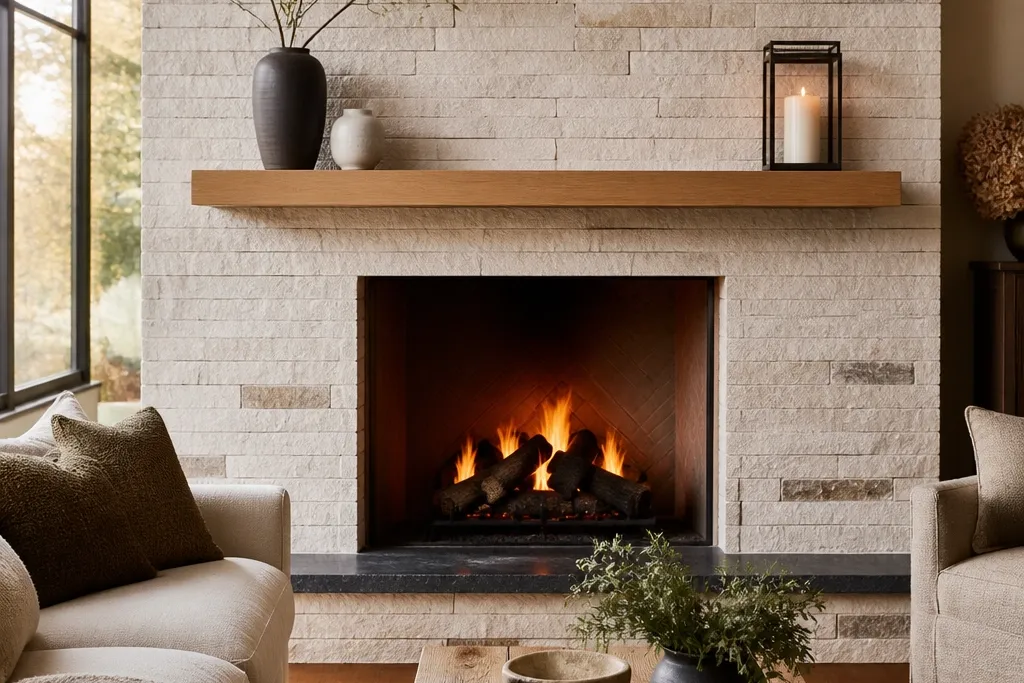

1. Cream Travertine Full-Height Surround with Black Hearth
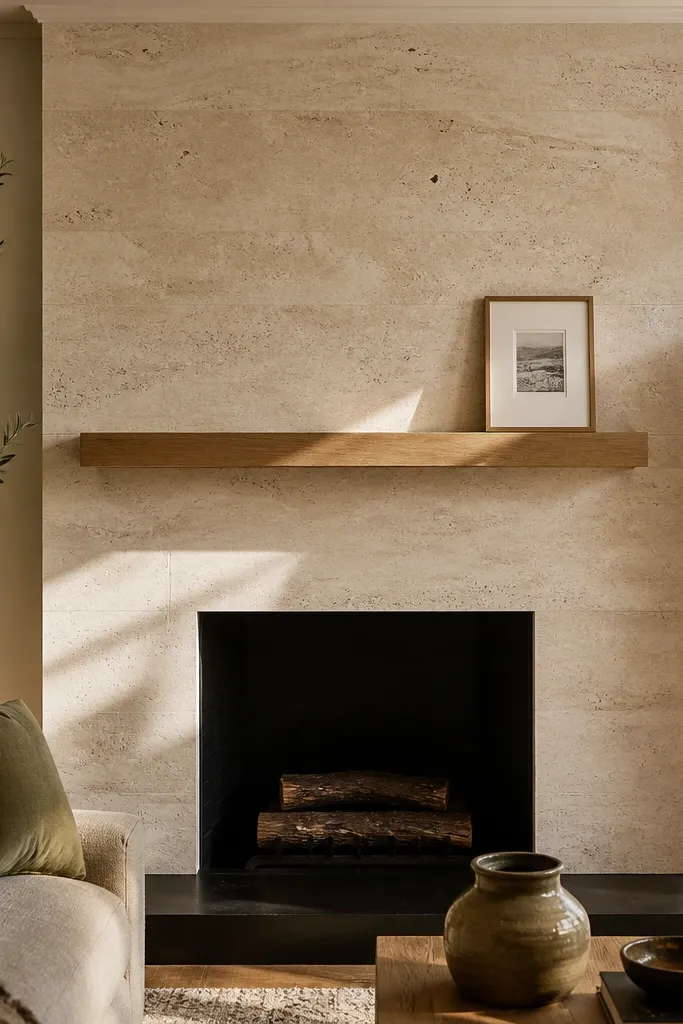
This design makes the fireplace feel built-in and warm because travertine’s natural pits and veining add texture without needing extra decor. Go full-height up to the ceiling line so the white stone doesn’t look like a patch. The black hearth grounds the center and stops the light stone from washing out the room. Finish the mantel in a medium oak or walnut stain so the warm undertones match the stone. It’s a great fit for living rooms with beige sofas, natural wood floors, and warm bulbs.
First, pick travertine tiles or thin-slab panels and dry-lay a test strip across the firebox width to map the veining direction. Set the surround using a white or light-gray thinset, then use sand-colored grout so the mortar lines look soft instead of stark. Frame the hearth with a black stone or tile (slate or porcelain in a matte finish) and keep the hearth projection around 1 to 2 inches past the firebox edge. Finally, seal travertine if your product calls for it, and add a mantel that’s 7 to 10 inches deep.
Editor's noteDry-lay 10 to 15 tiles and flip any that pull the veining too loudly; you want a balanced rhythm, not one loud streak.
Skip thisAvoid bright white grout that creates harsh grid lines against travertine’s texture.
2. White Quartzite Stacked Ledger with Light Sand Mortar
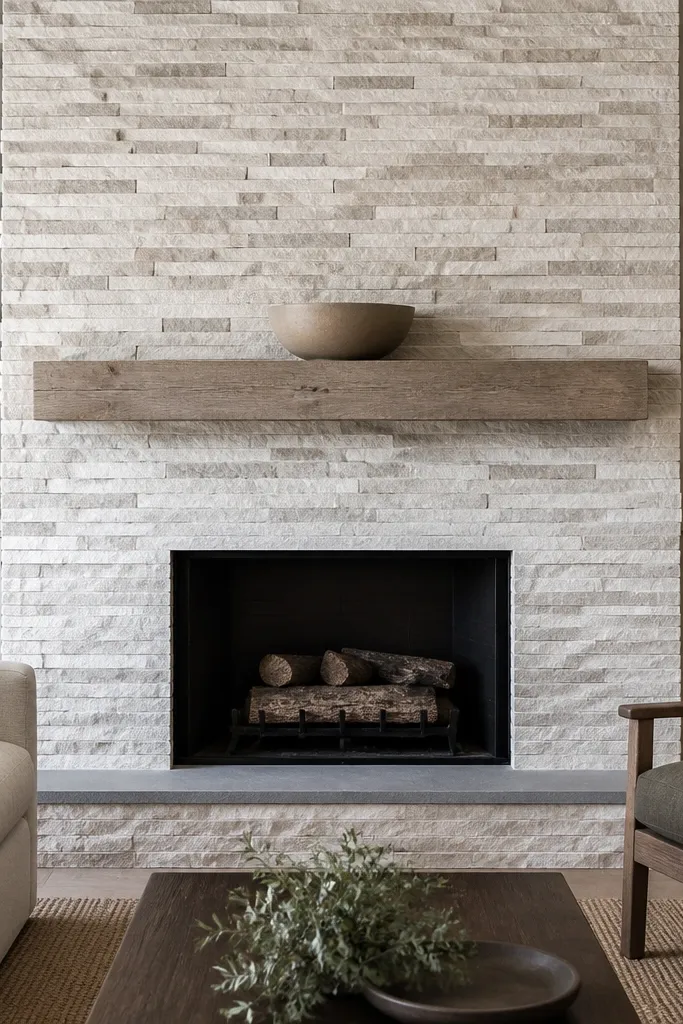
Stacked ledger stone reads modern and crisp, and quartzite gives you that “clean white” look without feeling cold if you choose pieces with warm gray movement. The key is the mortar color: light sand keeps the lines subtle so the stone stays the star. Add a simple mantel in white oak or a warm painted finish to keep it cozy, not showroom. This style works well in open-plan spaces because the vertical stacking makes the fireplace look taller and more intentional. It also photographs well because the joints create a tidy grid.
Start by choosing ledger strips that are consistent in thickness and cut them to fit the firebox opening with a 1/8 inch reveal for a neat edge. Mix thinset and set the bottom course straight using a level line as your guide, then stagger joints by at least 2 inches between rows. Use sand-colored grout or mortar (not bright white) and tool it lightly so joints look filled but not smeared. Seal quartzite if the manufacturer recommends it, especially if you’re using a wood mantel nearby where soot and dust can collect.
Editor's noteTape off a straight reference line on the wall before you start — one crooked first course ruins the whole stacked look.
Skip thisDon’t rush the dry-fit; inconsistent ledger heights make the grid look messy fast.
3. Honed White Marble Surround with Matte Black Insert
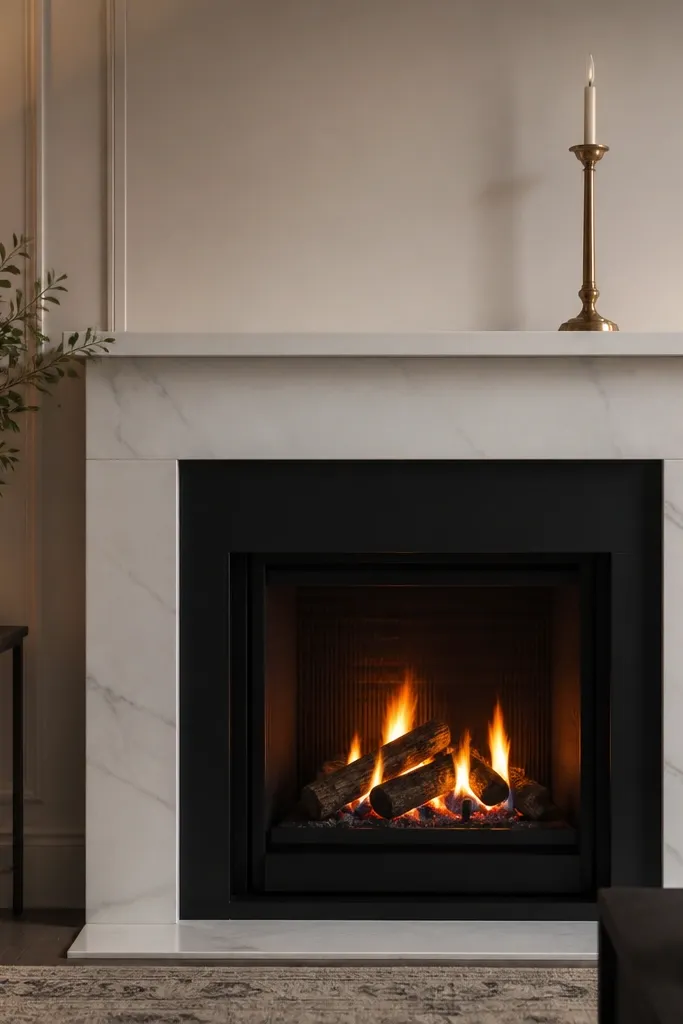
Honed marble is the move if you want “luxury cozy” without glare. The matte surface softens reflections, so the room feels calm instead of stark. Pair it with a matte black firebox insert or surround frame to create crisp contrast that reads warm, not sharp. Keep the mantel slender and light — think painted white oak or a pale wood — so the marble doesn’t feel like it’s floating. This is best for rooms with neutral walls, black picture frames, and warm white lighting.
Choose honed marble slabs or large-format tiles, then plan your layout so you have fewer cuts around the corners. Install with a cement-based thinset rated for stone and keep a consistent 1/16 to 1/8 inch joint width. Use a matching light-gray grout so the joints don’t look like chalk lines. Add a matte black metal insert or surround frame, then caulk the edges with a paintable stone-safe sealant for a clean finish.
Use a marble-safe sealer only after the grout cures fully, then wipe off haze right away with a microfiber cloth.
Avoid glossy marble or polished finishes if your room has bright overhead lighting; it can feel harsh.
4. White Limestone with Oversized Mantel Shelf and Sconces
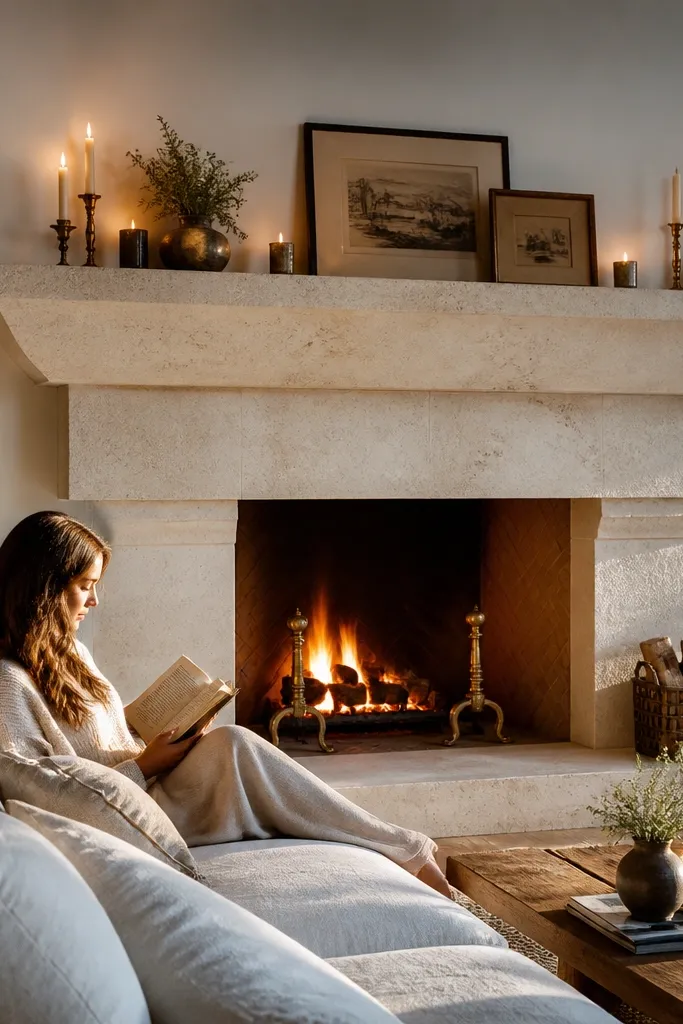
If you want cozy that looks styled in photos, this is it: limestone texture plus a wide mantel gives you real surface space for decor. Choose limestone that leans warm white with gray-beige specks, and keep the surround in a simple rectangle so it looks clean. The oversized shelf matters because it lets you place candles, books, and a large frame without it looking crowded. Add two matching wall sconces to create layered light that makes the stone glow. This works especially well in dining-living combos where you want the fireplace to look like part of the room’s design, not an afterthought.
Build or install a mantel with a finished size that’s about 1 to 2 inches deeper than normal decor needs, typically 9 to 11 inches. Install white limestone tile with a level ledger line, then grout with a light warm gray to keep joints soft. Mount sconces after the stone is done so you can center them to the mantel height and keep cords hidden. Finish by sealing limestone if your product requires it, then add a heat-safe decorative fire screen if you have an open hearth.
Editor's noteBefore mounting sconces, use painter’s tape to mark the light centerline at eye level and check it against the mantel height.
Skip thisDon’t make the mantel too narrow; narrow shelves force clutter and kill the cozy look.
5. Two-Tone White Stone: Firebox in Warm White, Hearth in Slate Gray
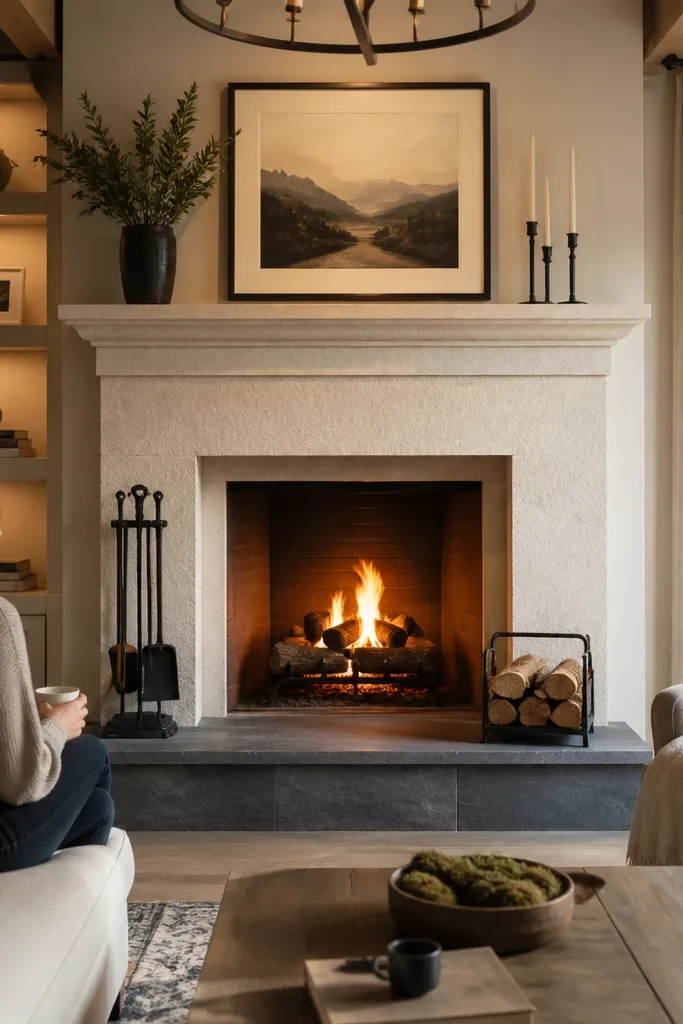
Two-tone stone is one of the fastest ways to make a white fireplace feel cozy instead of flat. Keep the firebox surround in warm white stone, then switch the hearth to slate gray so the base looks heavier and more grounded. Add black accessories like a poker set or a matte black log rack to tie the darker tone into the room. This style is forgiving if your walls are cool gray — the hearth corrects the temperature. It’s also great for families because slate-gray surfaces hide smudges better than pure white.
Start by installing the warm white surround first, using warm gray grout so the joints blend with the stone’s undertones. Then plan the hearth as a separate material zone, with a clean transition line at the edge of the firebox opening. Use slate-gray tile in a matte finish and keep cuts tight where the hearth meets the stone surround. Seal any porous stone sections and caulk the perimeter where stone meets drywall to prevent dust and drafts.
Editor's noteChoose a hearth tile with a little natural texture; smooth slate-look porcelain can look too plastic and less cozy.
Skip thisAvoid using two pure whites; the transition will look like a mistake instead of a design choice.
6. White Brick-Style Stone with a Floating Mantel
Brick-style stone gives you a cozy, lived-in rhythm while still reading clean when it’s white. The floating mantel keeps the look airy — you get the warmth of stone texture without making the fireplace feel bulky. Choose a white with a slight gray tint so it doesn’t look like paint. Style the mantel with one tall object and one tray so the floating shelf looks intentional. This works best in smaller rooms where a huge mantel would crowd the wall.
Use brick-pattern tiles or stacked bricks made for fireplaces and install them with staggered joints like real brick. Keep mortar joints consistent and use a light gray grout that matches the stone’s undertone. Mount the floating mantel using a ledger and hidden brackets behind the stone — verify you’re fastening into studs or proper anchors. Finish by painting or sealing the mantel surface, then add a heat-safe gap between the mantel and the firebox area as required by your system.
Editor's noteDry-fit two courses at the height of the mantel so you can align the brick lines with the mantel edges.
Skip thisDon’t anchor a floating mantel to drywall alone; it will sag and ruin the look.
7. White Tile Fireplace with Wooden Beam Mantel and Hearth Pad
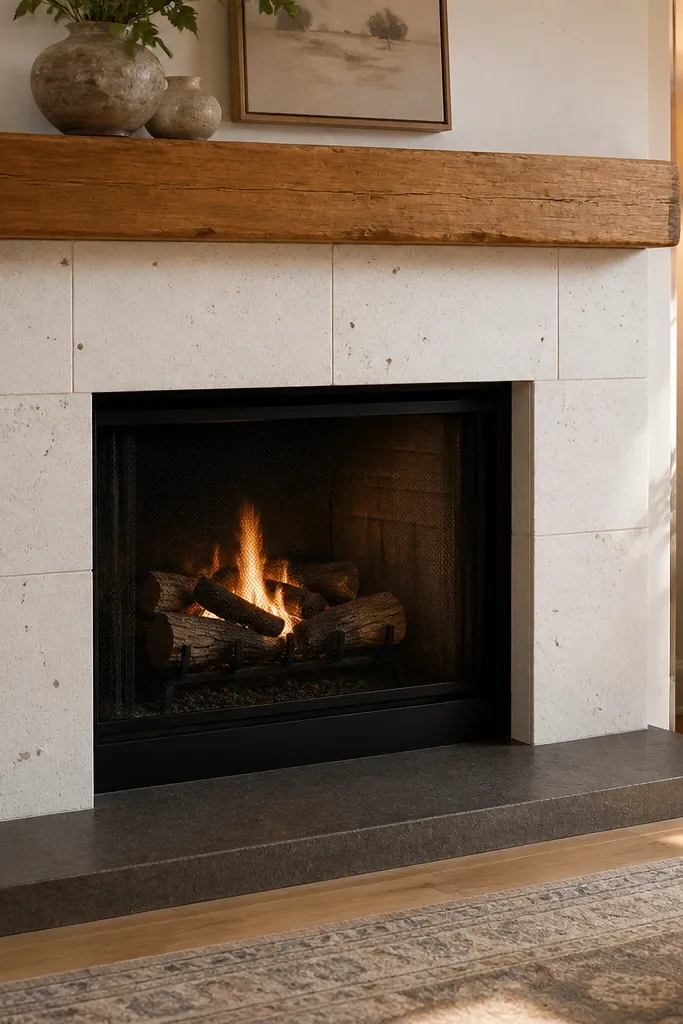
This is the “cozy cabin but clean” formula: crisp white tile on the surround, then a thick wood beam mantel that adds warmth and weight. The hearth pad in a darker material makes the fireplace feel finished at the bottom. Go for off-white tile with subtle speckling so it looks handmade, not sterile. The wood beam should have visible grain and a matte finish so it doesn’t reflect the TV light. Great for rooms with warm floors, neutral walls, and simple seating.
Install white tile in a classic layout around the firebox, keeping grout lines thin so the surround looks smooth. Use warm gray grout and use spacers so the lines stay straight across corners. Build or mount a wood beam mantel with a depth around 8 to 12 inches, then sand and apply a matte clear coat or stain. Add a hearth pad using dark porcelain or stone, cut to extend 1 to 2 inches beyond the firebox edge. Caulk the perimeter where tile meets wall surfaces to prevent grime from collecting.
Editor's notePick tile with slight texture and use a matte grout — it hides dust and soot better than glossy finishes.
Skip thisAvoid ultra-gloss tile if your room has bright ceiling lights; it reads cold quickly.
8. White Stone with Arch Cutout Surround and Rounded Hearth
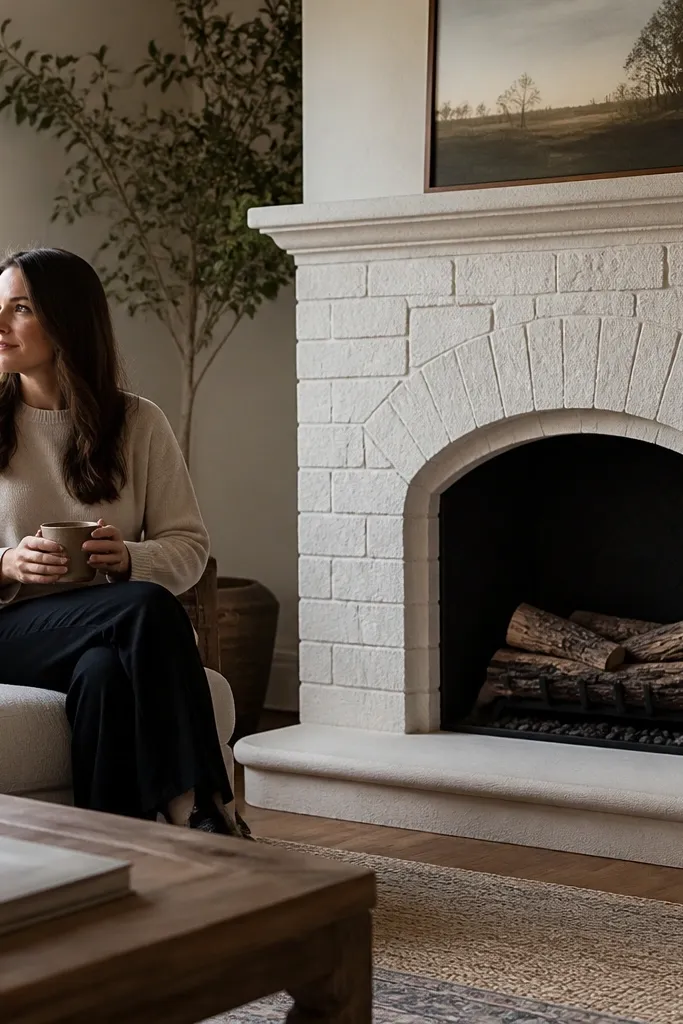
Curves make stone feel softer, and this arch cutout design does that without adding clutter. Use white stone veneer in a flatter pattern so the arch reads clean, not busy. A rounded hearth edge adds a gentle finish that looks cozy in person and in photos. This style works well for traditional rooms that still need a modern cleanliness. Pair it with warm, rounded decor — like ceramic vases and a thick knit throw — so everything matches the softness.
Frame the arch opening by marking your centerline and transferring the arch template onto the wall. Install stone veneer starting with the inner edge of the arch, then work outward in manageable sections so cuts follow the curve. Keep grout consistent and use a warm light gray joint color so it blends into the stone. Build or tile the hearth with rounded trim pieces at the front edge, and check clearance around any heat source or insert. Seal the veneer if it’s porous and wipe any haze after grouting.
Editor's noteUse a flexible angle finder to check the arch symmetry from both sides; small asymmetry is obvious once the stone is up.
Skip thisAvoid sharp, squared hearth corners with an arch surround; it breaks the cozy softness.
9. White Marble-Look Porcelain Panels with Thin Black Trim
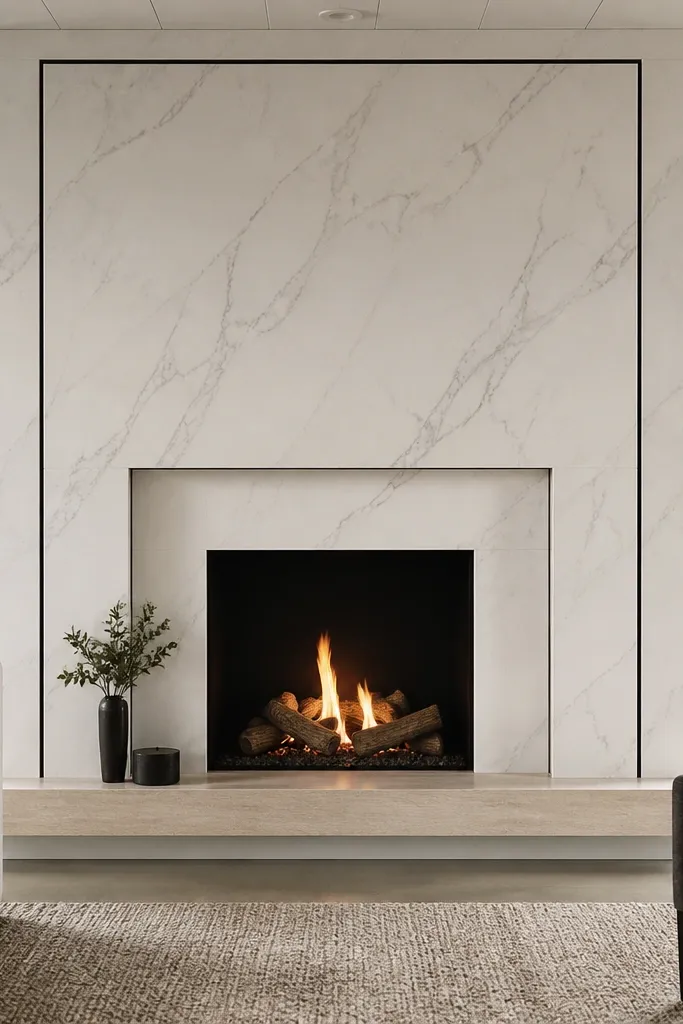
If you want the look of white marble but with easier maintenance, marble-look porcelain panels are the smart move. The panels give you big, photogenic surfaces with fewer grout lines, and the thin black trim creates a clean border that feels designed. Keep the trim slim — about 1/2 inch — so it doesn’t overpower the stone look. This design is great for modern rooms and for people who don’t want to deal with porous stone sealing. It also photographs well because the marble pattern is controlled and consistent.
Choose marble-look porcelain that’s rated for wall applications and plan your panel sizes to minimize seams across the main face. Install with a thinset suited for porcelain and set panels with a consistent spacing strategy so seams are even. Add thin black trim pieces along the edges using a waterproof adhesive rated for tile and stone, then grout the panel seams with a matching light gray. Finish with caulk at the perimeter so dust doesn’t collect in gaps.
Editor's noteDry-fit panels on the floor first and line up the marble veining so it flows through the main center area.
Skip thisAvoid thick black trim; it turns a cozy fireplace into a heavy frame.
10. White Stone Surround with Built-In Shiplap Niches
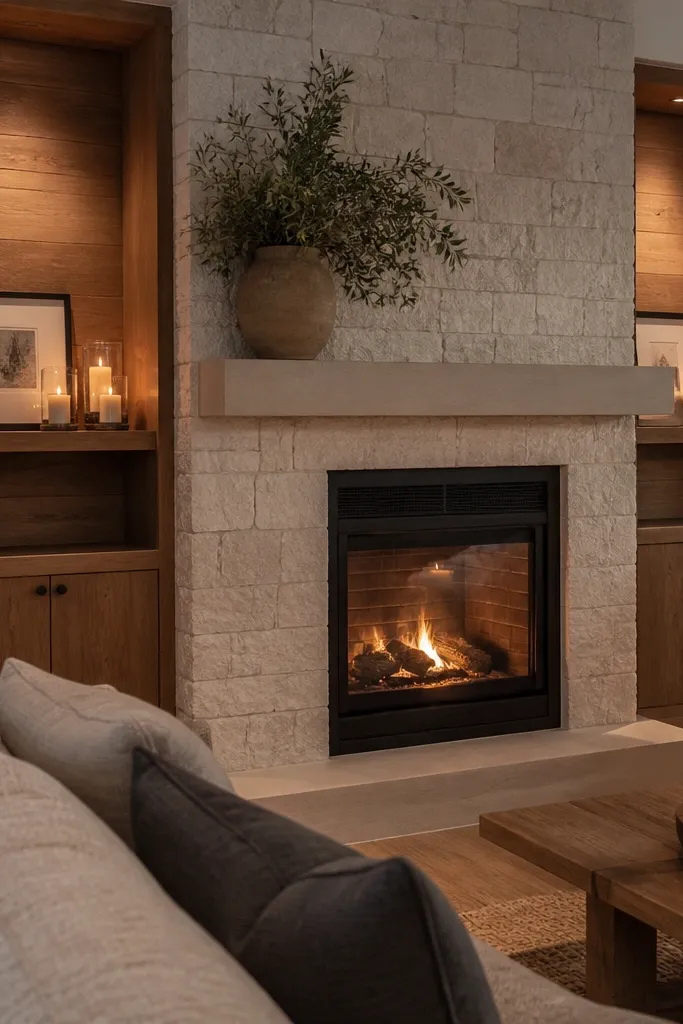
This is cozy because it adds storage and styling space without cluttering the mantel. White stone on the main surround stays bright, while shiplap niches bring in warm wood texture. The niches also give you natural “shadow pockets” that look great in photos — they hold decor like candles, framed prints, or a small plant. Choose shiplap in a warm white or natural pine, then finish with a satin clear coat so it doesn’t look glossy. Works in family rooms where you want the fireplace wall to do more than sit there.
Frame the niche boxes first so you have solid backing for both stone and wood. Install shiplap on the niche walls, then mount the white stone veneer around the niches with tight cuts at the transitions. Use light sand grout and keep joint lines consistent so the stone looks intentional next to wood grain. Add a small backer board where needed behind the stone to prevent flexing, then seal porous areas. Finish by painting the shiplap and making sure your decor fits without blocking vents or clearances.
Editor's noteUse a spacer board to keep niche openings level so the stone border doesn’t look like it’s drifting.
Skip thisDon’t stack heavy decor in the niches right against the heat source clearance area.
11. White Stone Fireplace with Stacked Hearth and Taller Log Storage Column
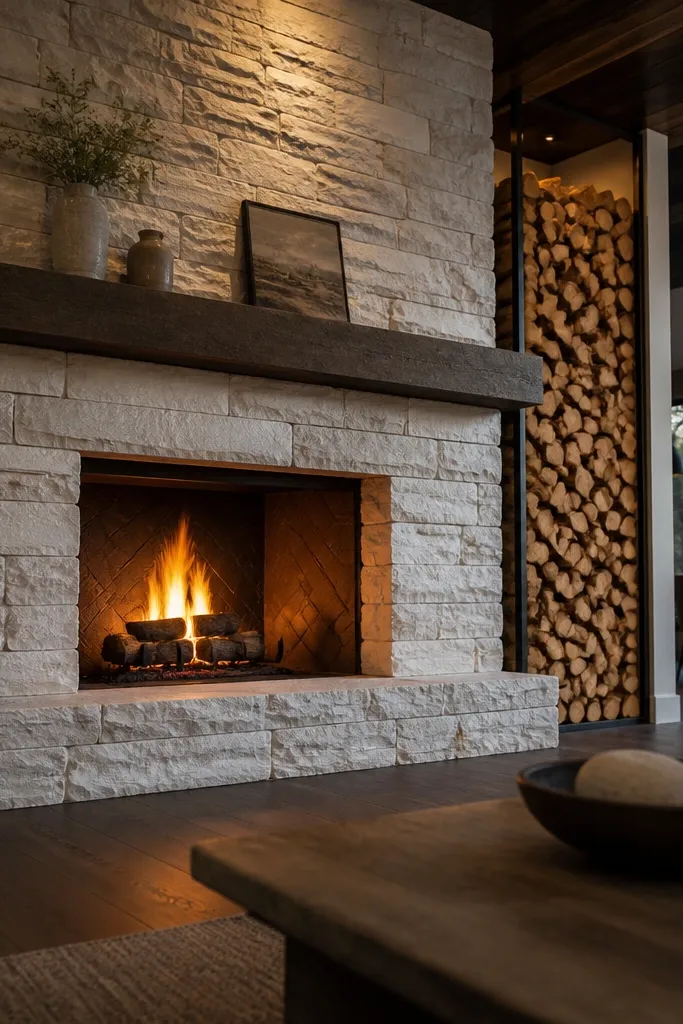
Tall log storage next to the fireplace makes the whole wall look functional and designed. The white stone stays the backdrop, and the vertical storage column adds structure so the room doesn’t feel empty around the insert. Choose stone with a matte finish and a slightly warm tone so it reads cozy even with a lot of white surface. Add a log rack in black metal and keep the logs stacked neatly for that clean line look. Great for colder climates or rooms with a lot of wood tones and neutrals.
Plan the fireplace plus storage layout on paper: decide how wide the column should be relative to the firebox opening, aiming for a balanced proportion. Install the white stone surround first, then build the hearth base with a stack of stone tile or a hearth platform that extends 1 to 2 inches forward. Fit a vertical log storage column using a black metal rack or build a faux-stone column frame that’s safe and heat-cleared. Seal stone surfaces and add a heat-safe screen if you have an open fire. Keep grout lines tight so the column looks straight and crisp.
Use a level and a laser line for the storage column; a few millimeters of drift show up immediately next to white stone.
Avoid mixing glossy stone with black metal if your room has bright lights; it can look too shiny and less cozy.
12. White Stone with Corner Wraparound to Create a "Room Divider" Look
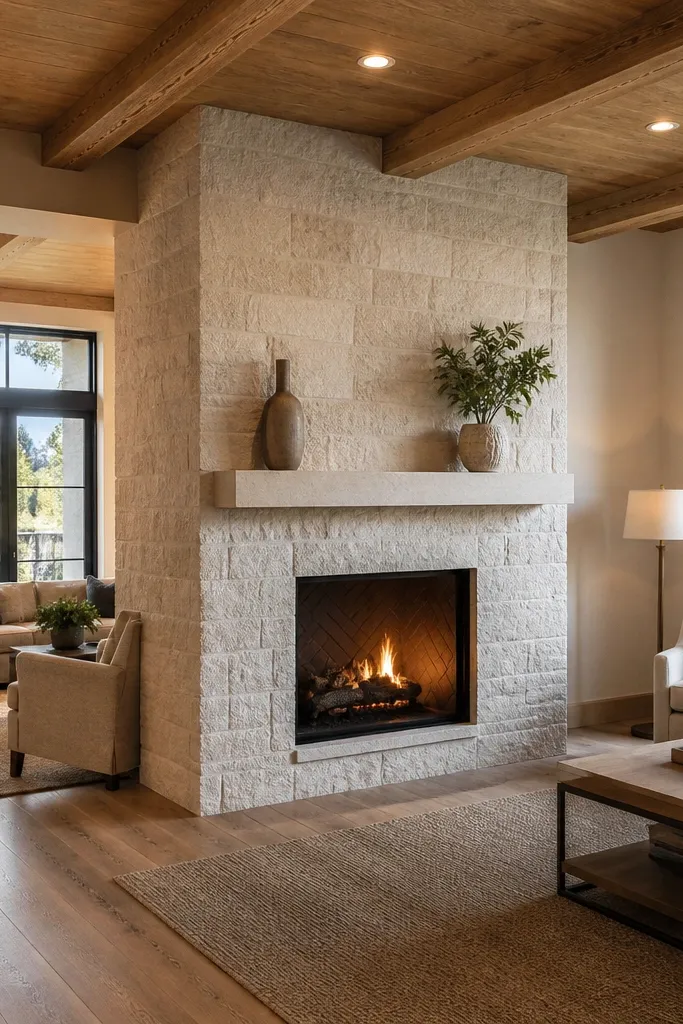
Wraparound stone makes a fireplace feel bigger and more architectural, especially when your room layout corners the focal point. By extending the stone surround slightly onto the adjacent wall, you create a natural frame that makes seating areas feel pulled together. Keep the mantel simple and add fewer decor items so the stone wrap does the work. Choose a warm white stone and use matching grout so the corner seam disappears. This looks great in open living rooms where the fireplace isn’t centered on a single wall.
Measure the corner: decide how many inches you want the surround to wrap, typically 6 to 12 inches onto the adjacent wall. Install the stone on the primary wall, then continue onto the side wall while keeping joint spacing consistent across the corner. Use a corner-trim method or carefully cut stone pieces so edges align cleanly. Add the mantel after the stone is fully cured, centered on the main face, and keep the mantel depth around 7 to 9 inches. Finish with caulk where stone meets drywall to keep the corner clean.
Editor's noteUse corner pieces if your veneer system has them; they look cleaner than trying to mirror cuts on every block.
Skip thisAvoid wrapping with a different grout color on the side wall; it will scream “two installs.”
13. White Stone Firebox with Recessed Picture Frame Niche Above
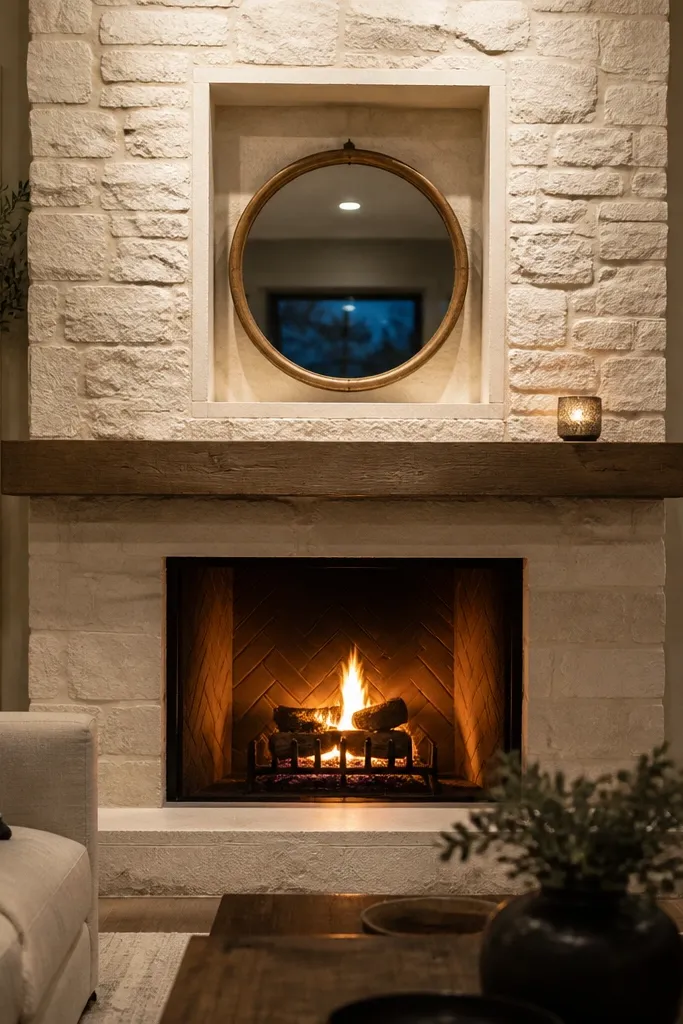
A recessed niche above the firebox adds a “picture frame” moment that makes the fireplace wall look styled even when the mantel is empty. Use white stone on the main surround and a clean frame border around the niche so it looks deliberate. The niche can hold art, a mirror, or a simple clock, which creates a cozy focal point at eye level. It works especially well in rooms where you don’t want a lot of mantel clutter. Keep the frame color warm — painted cream or light oak — so the white stone doesn’t feel icy.
Build the recessed niche opening before stone goes up, using framing boards and drywall or cement board. Install stone veneer on the surrounding area, then finish the niche border with a thin trim or a separate panel material that matches the stone color story. Use light sand grout and keep the niche border seam tight. Add a heat-safe mantel or shelf below, and mount the art or mirror after everything is sealed and dry. Seal stone if needed and caulk the niche edges to keep dust out.
Editor's noteChoose a niche depth around 2 to 3 inches so art sits back and doesn’t glare under lighting.
Skip thisAvoid a niche that’s too shallow; it makes the frame look flimsy and the art reads flat.
14. White Stone with Dark Wood Mantel and Oversized Mirror
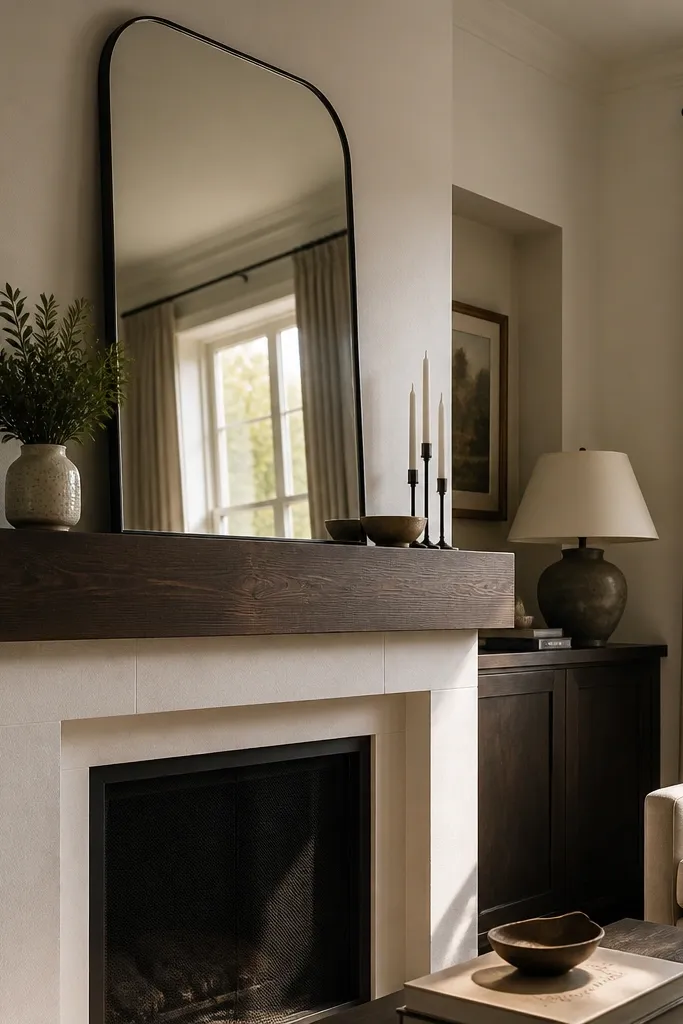
This combo is cozy because it adds warmth through the mantel and creates bounce light with the mirror. White stone gives the bright base, while a dark wood mantel (walnut or espresso stain) anchors the look and keeps it from feeling washed out. The oversized mirror above adds visual depth and makes the wall feel taller. For the stone, pick warm white pieces with subtle gray-beige movement so the mirror doesn’t reflect harsh glare. This style is a strong choice for rooms with beige walls and dark furniture.
Install your white stone surround with even spacing and warm gray grout, then let it cure fully. Mount a thick dark wood mantel with hidden brackets and a level check across the entire length. Hang an oversized mirror centered above the mantel, leaving a consistent gap so it doesn’t feel glued on. Add a hearth mat or tile in a darker tone, and place a heat-safe screen if needed. Seal stone if porous and wipe any grout haze before you mount the mirror.
Use a picture hanging template and mark stud locations before you buy the mirror mount hardware.
Avoid tiny mirrors; they look lost over white stone and make the fireplace feel unfinished.
15. White Stone Fireplace with Vertical Fluted Mantel Facade

Fluted wood or MDF paneling around the mantel area makes the fireplace look custom without needing complex stone work. White stone stays clean and bright, while the fluted facade adds cozy texture that reads “soft architecture.” Choose a cream paint finish with a satin sheen so it doesn’t shine like plastic. This is a good pick for people who want white stone but don’t like the look of stacked ledger lines. It also helps if your room has plain walls and needs some vertical visual interest.
Build a mantel surround frame first, then attach fluted panel sections to the facade areas around the mantel opening. Install white stone veneer around the firebox, then grout with light warm gray joints. Paint the fluted facade after stone is sealed and fully cured, using primer rated for MDF or wood. Mount the mantel shelf on top of the facade with sturdy brackets and confirm clearance from the heat source. Finish by adding a hearth base in a matte charcoal or medium gray to balance the cream facade.
Paint two thin coats and let each coat dry fully; thick coats fill flute grooves and look flat.
Skip high-gloss paint; it catches light and makes the facade look less cozy.
16. White Stone with Narrow Vertical Columns Flanking the Firebox
Narrow stone columns framing the firebox give you a tall, symmetrical look that feels elegant and cozy at the same time. The columns create a visual “throne” effect, so your mantel decor looks intentional rather than accidental. Keep the columns slimmer than you think — about 4 to 6 inches each — so the surround stays light. Use white stone with consistent texture and grout that matches the warm undertone. This style works well in rooms with symmetrical furniture and simple wall art.
Plan the layout with symmetry: mark centerline of the fireplace and measure equal widths for each column. Install the main surround first, then add the narrow columns using veneer pieces cut to size and a tight reveal at the edges. Use warm sand grout and keep joint lines aligned so the columns don’t look like separate add-ons. Add a mantel shelf that spans across both columns, and keep the shelf depth around 7 to 9 inches. Seal porous stone and caulk the edges where the columns meet the wall.
Use a spacer for column thickness so the grout lines stay consistent across the whole frame.
Avoid making the columns too thick; it turns the fireplace into a bulky block.
17. White Stone Half-Wall Fireplace with Built-In Seating Nooks
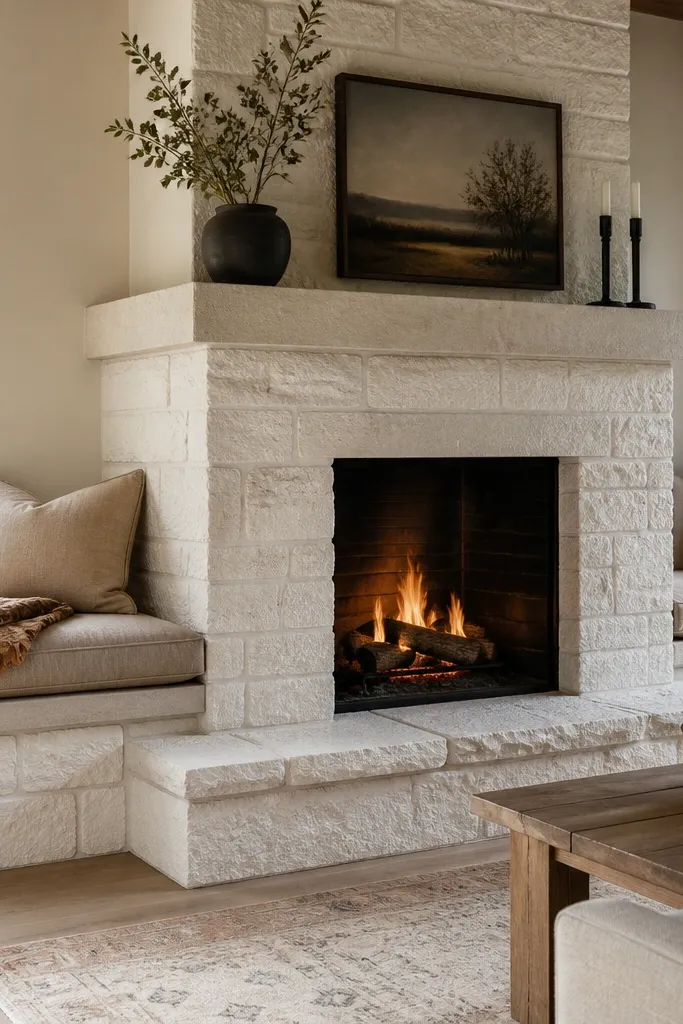
A half-wall fireplace changes the whole feeling of a room. Instead of a tall focal point, it creates a cozy “hearth zone” you can lean toward, especially when you add built-in seating nooks. White stone on the half-wall keeps it bright and clean, while the built-in benches bring comfort and warmth through upholstery or cushions. Choose durable fabric in a warm neutral, and keep the stone grout warm gray for a softer look. This design fits living rooms with space for seating and people who want the fireplace to be part of daily comfort, not just decoration.
First, build the half-wall framing with insulation and proper clearances for your fireplace system. Install white stone on the front face and around the firebox opening, using a ledger line to keep the stone level. Add stone or tile on the top edge of the half-wall if you want a finished look and easier cleaning. Build the seating nooks on either side with plywood bases, then add cushions sized to fit the nook depth. Seal stone and caulk transitions where stone meets wood or drywall.
Editor's noteUse removable cushion covers in warm neutrals; you want the cozy look without worrying about spills and dust.
Skip thisAvoid leaving raw framing edges visible under the stone; it ruins the clean, cozy finish.
18. White Stone Fireplace with Soft Gray Grout and Candle Sconce Rail
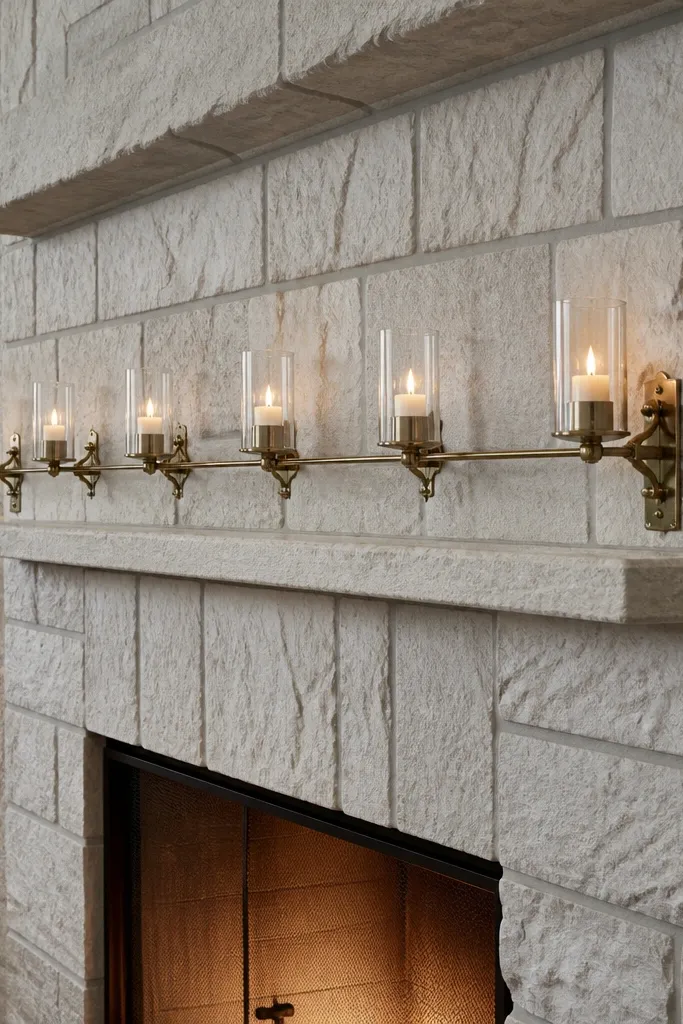
This design is about making the fireplace look cozy even when you’re not lighting the fire. Soft gray grout gives the stone a calm, tailored look, and a candle sconce rail adds warm light that flatters the stone texture. Choose sconce metal in aged brass or matte black and keep candle holders evenly spaced. The result is photogenic because the light creates depth shadows in the stone joints. It works well for apartments and small rooms where you need style with minimal decor clutter.
Install white stone veneer with consistent spacing, then grout using a soft gray mortar that blends with the stone rather than contrasting hard. Mount a sconce rail above or along the mantel line using a stud finder and secure anchors. Add candle sconces with heat-safe holders, and keep wiring and outlets hidden behind the mantel if you’re using electric candles or lighting. Finish by sealing stone and wiping any haze from grout before installing the rail so everything looks crisp.
Editor's noteSpace candles so the brightest flame sits near eye level when you’re seated — it reads cozy in real rooms, not just photos.
Skip thisDon’t use bright white grout with a lot of lighting contrast; it makes the whole wall feel harsher.
19. White Stone with Wide Herringbone Hearth Extension
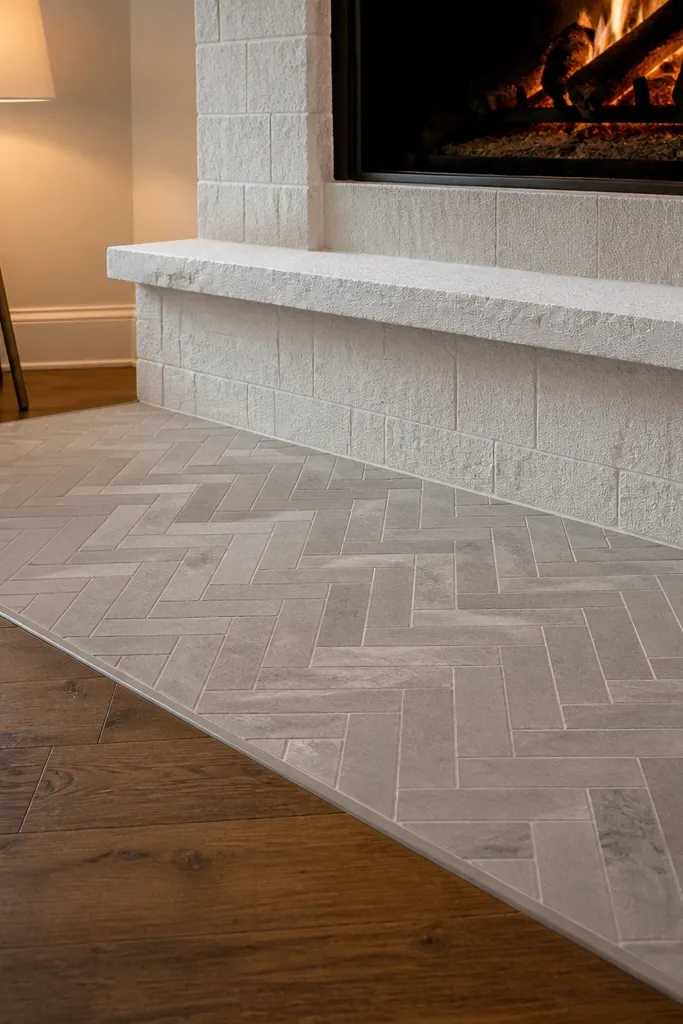
Herringbone on the hearth is one of those design moves that makes a fireplace look finished. White stone on the vertical surround stays light, while the hearth extension in a gray herringbone pattern adds motion and coziness underfoot. The angled pattern catches light differently as you move, so the fireplace feels more alive. Pick herringbone tiles in medium gray with warm undertones, and keep the layout straight and centered. This works great in rooms with hardwood floors where you can see the hearth clearly from the seating area.
Install the white stone surround and grout with warm gray so it blends naturally. Then plan the hearth extension dimensions so the herringbone pattern is centered on the firebox opening — measure the total width and divide by tile size plus spacing. Lay herringbone in a clean grid: start from the centerline and work outward, keeping the angle consistent. Use a matte tile finish and grout in a matching warm gray. Seal porous tiles if needed and caulk perimeter edges to prevent grime buildup.
Editor's noteMark the hearth centerline with chalk and test-fit 3 tiles before you commit to thinset — alignment is everything here.
Skip thisAvoid mixing glossy and matte finishes on the hearth; it looks patchy and less cozy.
20. White Stone Surround with Wainscot-Style Paneling Below
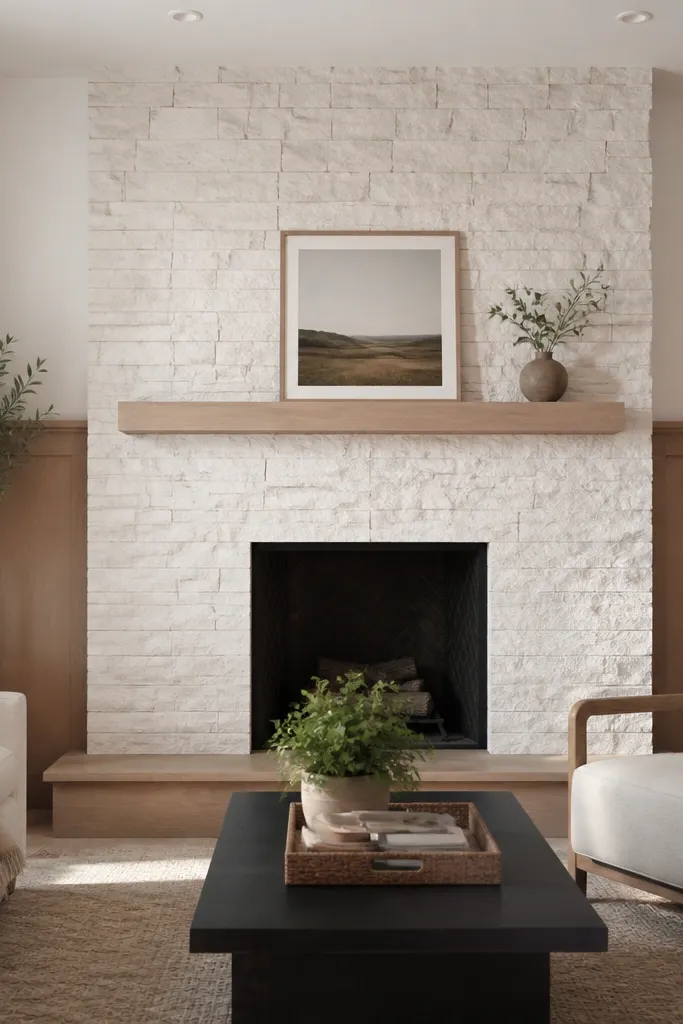
This one makes the fireplace wall feel like it belongs in a home you’ve lived in for years. White stone goes on the firebox area, and wainscot-style paneling below adds a cozy, traditional frame. Keep the paneling in warm white or light oak, and use chair rail height that matches your room proportions. The stone stays bright, while the lower panels add visual softness and reduce the “all white” look that can feel cold. It’s perfect for rooms with dining furniture, classic molding, or patterned rugs.
Install wainscot paneling first to the correct height using measured spacing and a level guide. Then install white stone veneer above the paneling line, keeping joint lines clean where stone meets wood trim. Use warm gray grout and caulk the top edge so dust doesn’t collect. Add a mantel shelf anchored into studs above the stone surround. Paint or finish the trim in a warm white satin, and seal stone if it’s porous.
Editor's noteMatch your wainscot panel spacing to your existing trim spacing so the whole wall looks cohesive.
Skip thisAvoid placing the stone grout lines directly over panel seams; it creates a weird visual break.
21. White Stone Fireplace with Basket-Style Mantel Shelf and Floor Logs
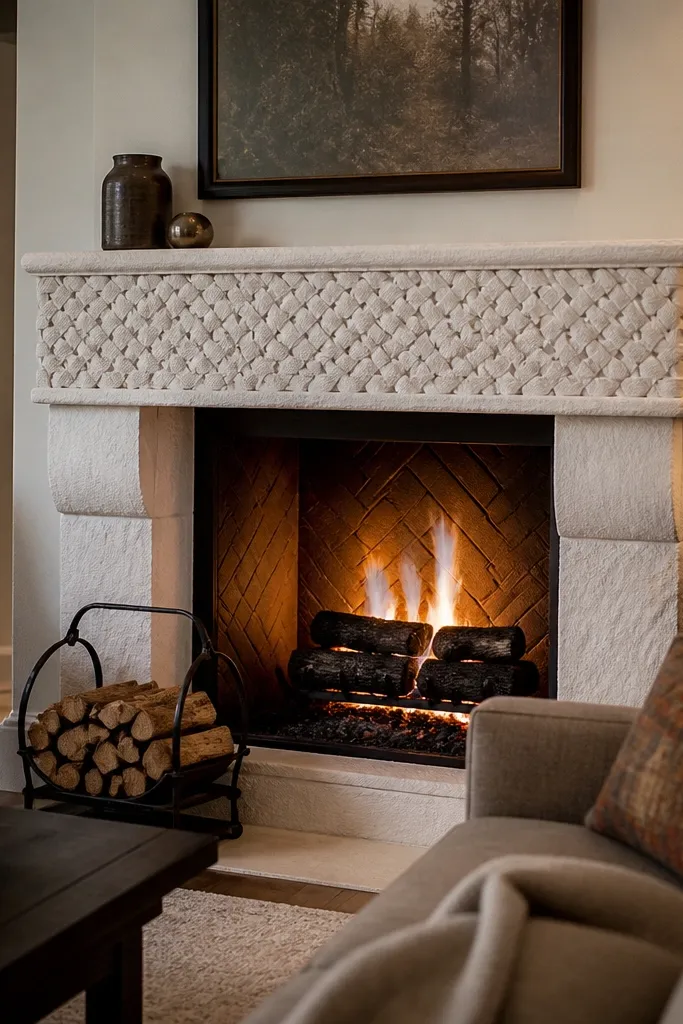
If you want cozy that looks lived-in but still clean, pair white stone with a mantel shelf that has a basket-weave texture or a subtle carved edge. The texture adds warmth without adding clutter. Keep your firewood area tidy: a floor log basket in black metal or dark wood makes the base feel intentional. This design is photogenic because the stone’s light tone contrasts with the darker wood logs. It suits farmhouse-leaning interiors, modern rustic rooms, and spaces where you like natural textures.
Install your white stone surround with a consistent joint width and warm sand grout to keep it soft. Choose a mantel shelf with a textured front edge or basket-style carving, then seal it with a matte finish so it doesn’t shine. Add a log basket or log rack beside the fireplace and keep the logs stacked so the top line is level. Finish by installing a heat-safe screen and sealing stone surfaces so soot wipes up easily.
Editor's noteTreat logs like decor: cut them to similar lengths so the basket looks neat.
Skip thisAvoid messy, uneven log stacks; they make white stone look less cozy and more chaotic.
22. White Stone Fireplace with Dark Stone Vertical Backer Behind Insert
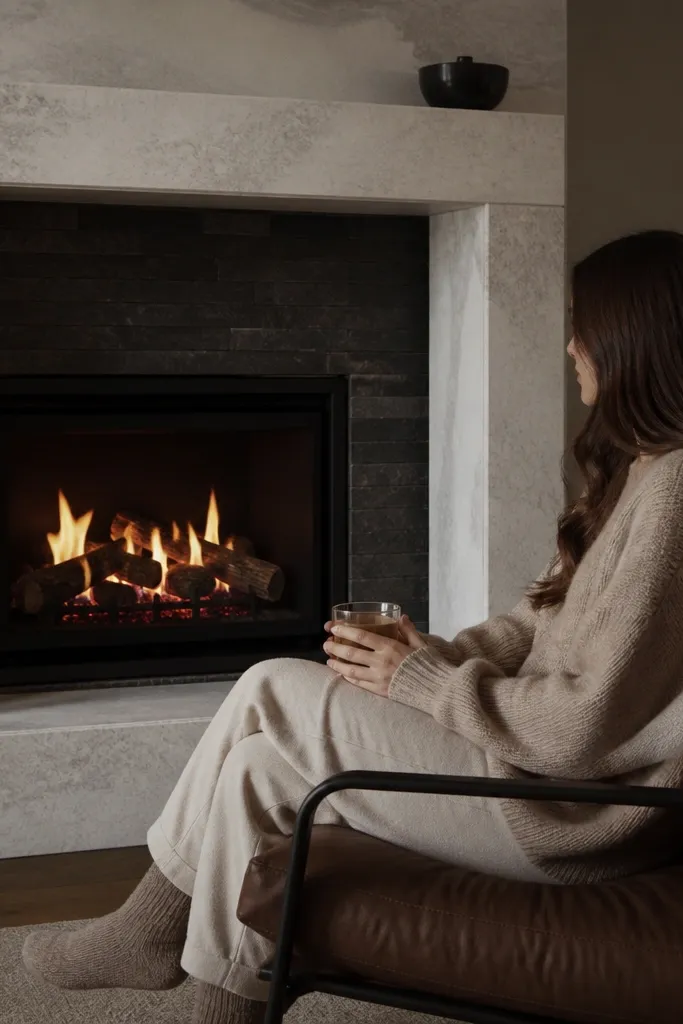
A dark backer behind the insert makes the firebox look deeper, and that depth reads cozy. The white stone frames the insert like a picture, but the dark layer adds contrast that makes the flames stand out. Choose dark stone like slate or charcoal tile with a matte finish so it doesn’t reflect harsh light. This is a strong choice for rooms with mostly light furniture because it keeps the centerpiece grounded. It also helps visually if your insert is visually bulky — the dark backer makes it look intentional.
Install the white stone surround first, leaving an opening where the insert sits. Then install a dark vertical backer panel behind and around the insert area using heat-safe cement board and a slate/charcoal tile finish. Use thinset rated for tile over cement board, and keep grout lines minimal in the backer area. Add a matte black trim around the insert if your system allows, then grout the stone surround with warm gray. Seal porous dark stone if required and wipe any installation haze.
Editor's noteChoose a dark backer with subtle texture; flat dark panels look like a sticker behind the insert.
Skip thisAvoid glossy dark tile; it reflects flames and can look harsh instead of cozy.
23. White Stone Fireplace with Tall Window-Style Side Panels
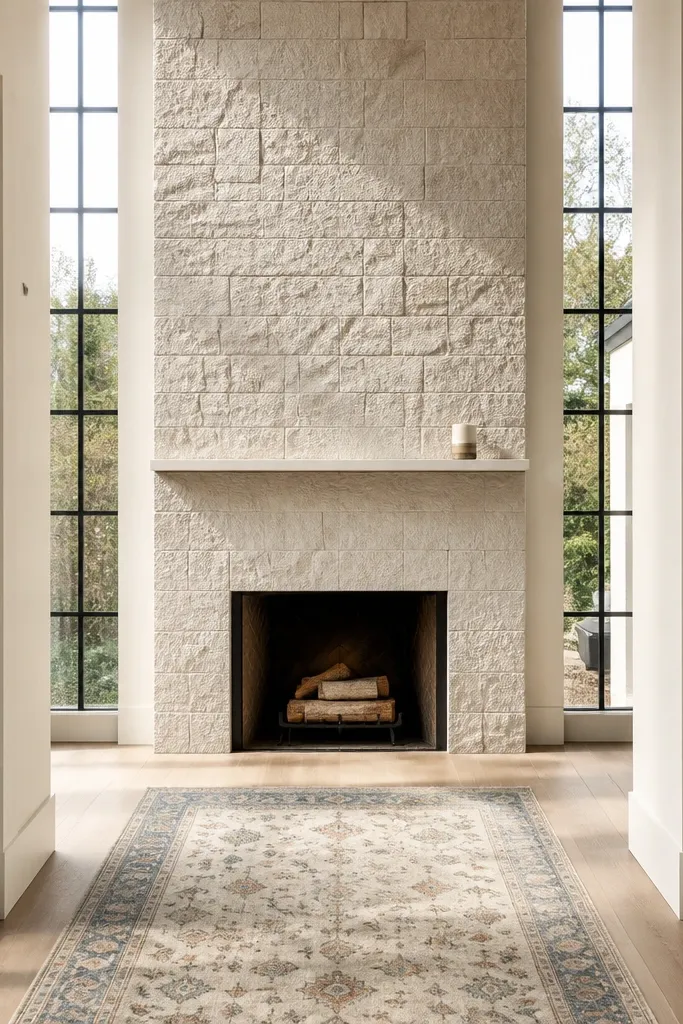
Tall side panels make the fireplace wall look more architectural and cozy, especially if the fireplace is in a hallway or between openings. Use white stone with a consistent texture, then add narrow trim lines to mimic window frames on the sides. This gives you vertical structure and makes the fireplace look taller without adding more stone volume. Keep the mantel simple and choose decor that’s tall and narrow so the proportions stay right. Works well in narrow living rooms and transitional spaces where you need visual height.
Mark the layout for side panels on the wall first, including the width of each panel and where trim lines will land. Install white stone veneer on the main surround and extend it to cover the side panel areas, keeping cuts aligned with your trim plan. Install slim trim strips in a warm painted finish, then grout stone with a warm gray color. Mount a mantel shelf centered across the main face, and use decor that doesn’t spread wider than the side panels. Seal stone after grout cures and caulk the trim edges.
Editor's noteUse a laser level for the trim lines — slight tilt shows instantly on window-style geometry.
Skip thisAvoid thick trim; it makes the side panels look heavy and less cozy.
24. White Stone Fireplace with Recessed Mantel Lighting Channel
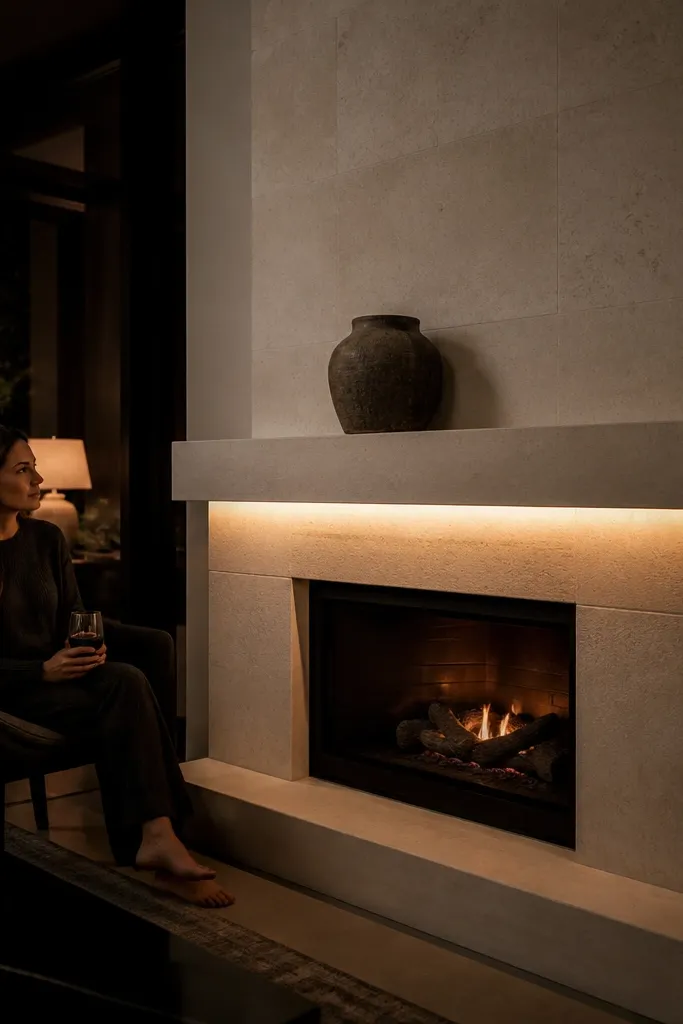
This is cozy at night. A recessed lighting channel under the mantel makes the white stone glow softly and makes the whole wall feel warmer without adding clutter. Choose warm LED strips at 2700K and diffuse them with an aluminum channel so you don’t see a bright line. Keep the stone finish honed or matte so the light spreads instead of reflecting sharply. This design looks amazing in rooms with dark furniture because the glow adds depth and makes white stone feel inviting rather than bright.
Plan the mantel build first: install a recessed channel ledge under the mantel where the LED strip will sit, leaving a small lip to block direct visibility. Install the white stone surround with warm gray grout, then mount the mantel after stone is cured. Run low-voltage wiring to a concealed power supply, and connect a dimmer if you want control. Use a diffuser cover over the LED strip, then test brightness before closing the channel. Seal stone and finish the mantel surface with matte paint or clear coat.
Editor's noteSet the LED strip back about 1/2 inch from the mantel edge so the glow washes the stone, not your eyes.
Skip thisAvoid 5000K cool LEDs; they make white stone look sterile fast.
25. White Stone Fireplace with Full Mantel Wrap and Matching Side Table Nooks
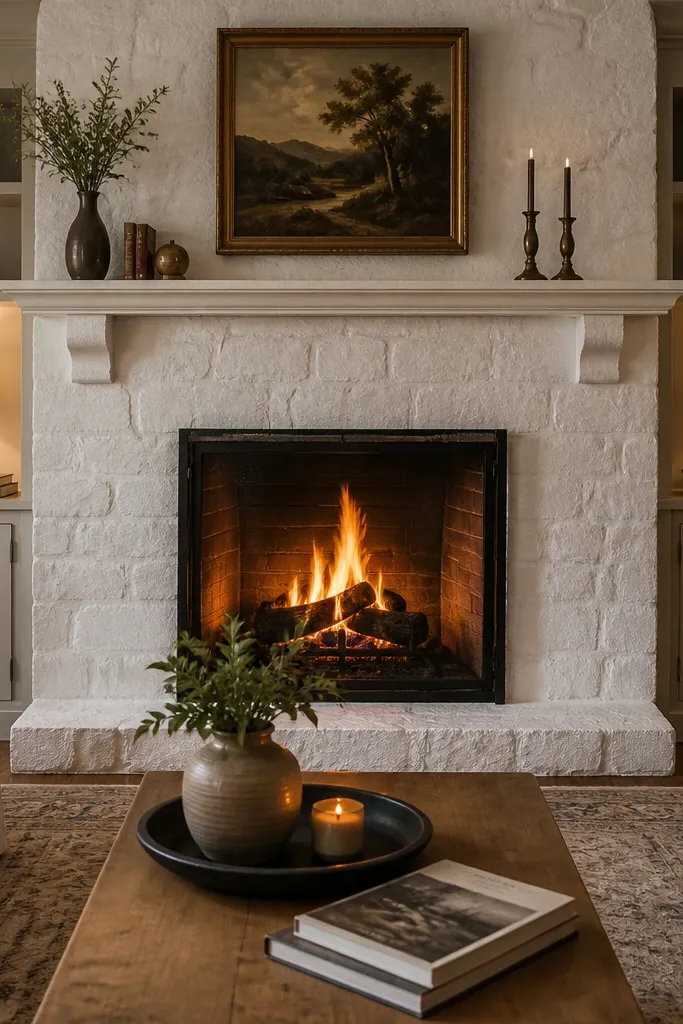
A mantel wrap that continues onto the sides makes the fireplace look custom, and matching side table nooks turn it into a functional wall you’ll actually use. White stone stays bright and cohesive, while the side nooks add symmetry and give you spots for lamps, books, or a small tray. Keep the side nooks the same finish as the mantel so the whole wall reads as one piece. This style is great for living rooms where you want a cozy hearth area without building a big media console next to it. It also photographs well because the geometry frames the center.
Build or install a mantel surround that wraps beyond the firebox edges, then add side nook frames at the same depth as the mantel. Install white stone veneer around the firebox and wrap areas, matching grout color across all sections. Use a consistent stone tile size so seams don’t look random at the transitions. Finish the mantel and nook surfaces with a matching stain or painted finish, then mount lamps or decor that fit the niche size. Seal stone if needed and caulk all perimeter seams for a clean finish.
Editor's noteUse the same tile batch for the wrap sections; small shade shifts are more obvious on side geometry.
Skip thisAvoid mixing stone finishes between the main surround and wrap; the wall will look patchy.



