
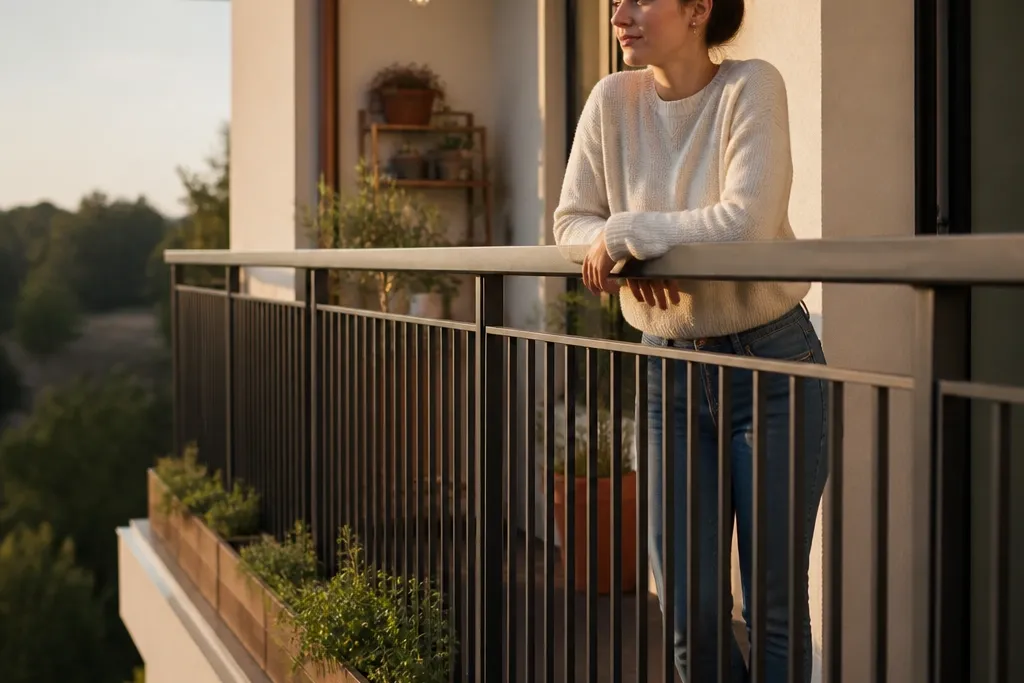

1. Matte charcoal vertical bars with a thick top rail
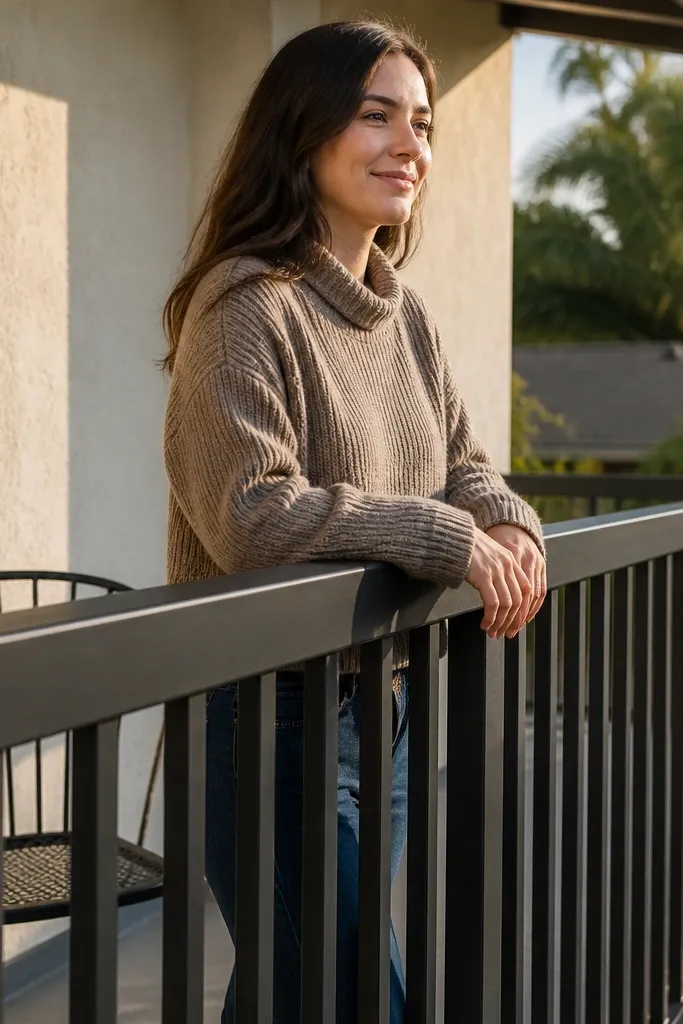
This is the easiest “cozy steel balcony railing designs” look to nail because the pattern is simple and the finish does the heavy lifting. A matte charcoal powder coat hides minor weld texture better than gloss and makes thin bars feel softer. The thick top rail (about 2 in) makes the whole railing look intentional, not like leftover hardware. Use this when your balcony has small planters or a narrow walkway — it won’t visually fight your decor. It also photographs clean from inside your apartment because the verticals create a calm, even rhythm.
Start by building a rectangular frame from steel tube for the top rail and posts, then add vertical bars at a consistent spacing you can mark (for example, 2 in center-to-center or whatever your code requires). Tack the verticals in short sections, re-check the line with a straightedge, then finish weld. Grind welds flush enough to smooth the surface, wipe with acetone, and prime before powder coat or spray-on metal primer if you’re painting. Finish with end caps on the posts so the edges look crisp.
Editor's noteUse a laser level or a long straightedge to keep the verticals dead parallel before you commit to full welds.
Skip thisDon’t space bars by “eye” — small inconsistencies show up immediately in photos.
2. Bronze-brown powder coat with leaf-like scrolls
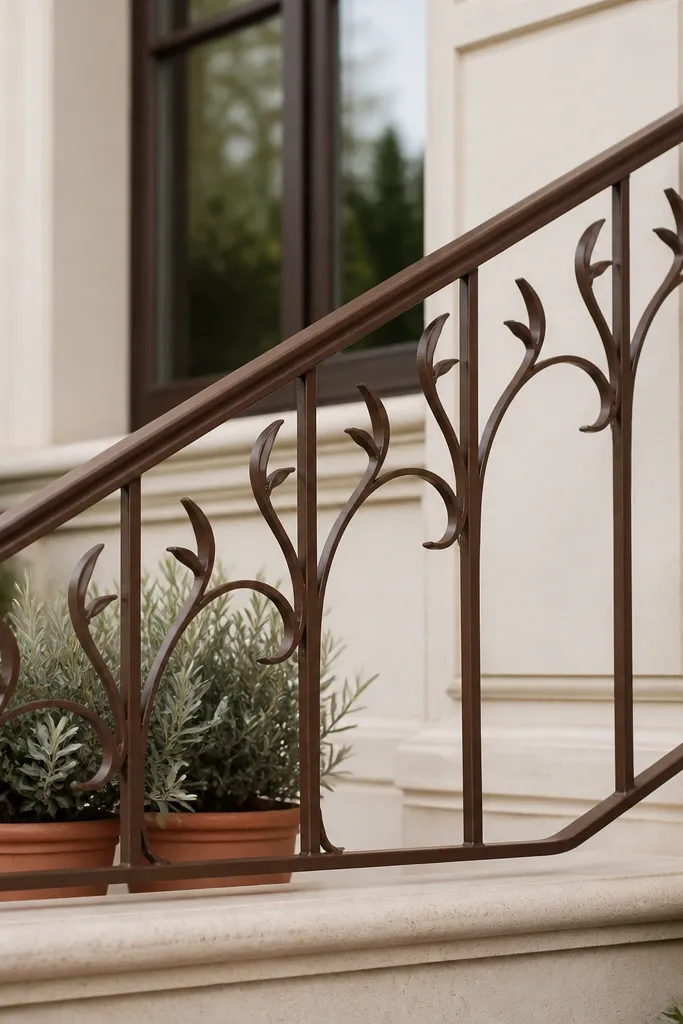
Leaf-like scrolls add warmth because they break the hard geometry without turning the railing into a complicated wrought-iron copy. Bronze-brown powder coat reads softer than black and looks great with planters, warm wood furniture, and cream walls. Keep the scrolls small and repeat them evenly so the pattern feels cohesive. This works well for balconies with string lights or hanging plants, because the scrolls catch light in a gentle way. It also makes the railing feel “handcrafted” even if you’re using off-the-shelf scroll inserts.
Choose a base frame with posts and a top rail, then install vertical bars behind or around the scroll inserts. Position the scroll pieces at a consistent height band (for example, mid-rail only) so you don’t crowd the top rail. Tack each scroll insert, test for symmetry from both sides, then weld the insert points. Grind, prime, and coat with bronze-brown powder coat or a durable exterior metal paint system, then add clear or satin topcoat if your paint line recommends it.
Editor's notePick one scroll size and repeat it — mixing sizes makes the railing look busy instead of cozy.
Skip thisSkip oversized scrolls; they block views and make the rail look heavier than it is.
3. Black steel grid with a warm wood handrail strip
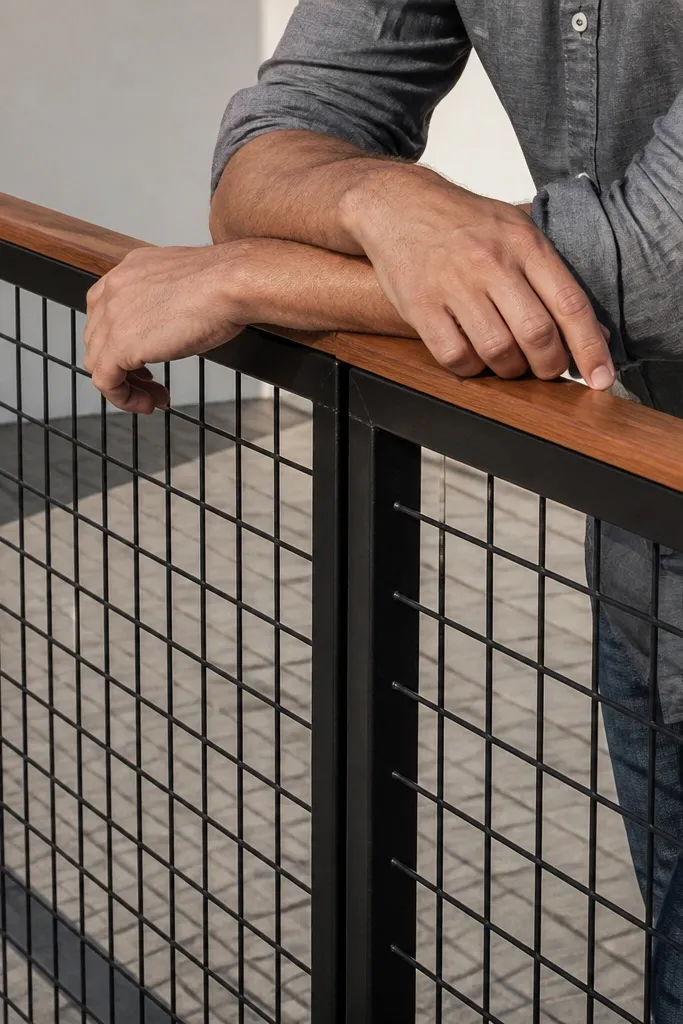
This design looks modern and cozy because the wood handrail strip adds warmth right where your hand goes and where the eye lands. The steel grid gives structure and clean lines, while the wood strip softens the overall impression. Choose a narrow strip (about 1 to 1-1/4 in thick) that sits flush on the top rail so it doesn’t wobble. This is a great choice for balconies that already have wood tones — teak-look outdoor chairs, light decking, or tan planters. It also makes the railing feel less cold than all-metal options.
Build the steel frame and top rail first, then weld a grid inside using square bar or flat bar at consistent spacing. Leave the top rail surface flat enough to accept the wood strip, and drill small countersunk holes or use welded tabs for mounting. Install the wood strip with exterior screws or bolts and a small bead of exterior-rated sealant between wood and steel. Sand edges, then finish the wood with an outdoor oil or spar varnish rated for exterior use, and paint or prime the steel before coating.
Seal the underside of the wood strip before assembly so moisture doesn’t creep under the edges.
Don’t use untreated pine — it will warp and pull the strip away from the steel.
4. Soft arc waves made from 1/2 in flat bar
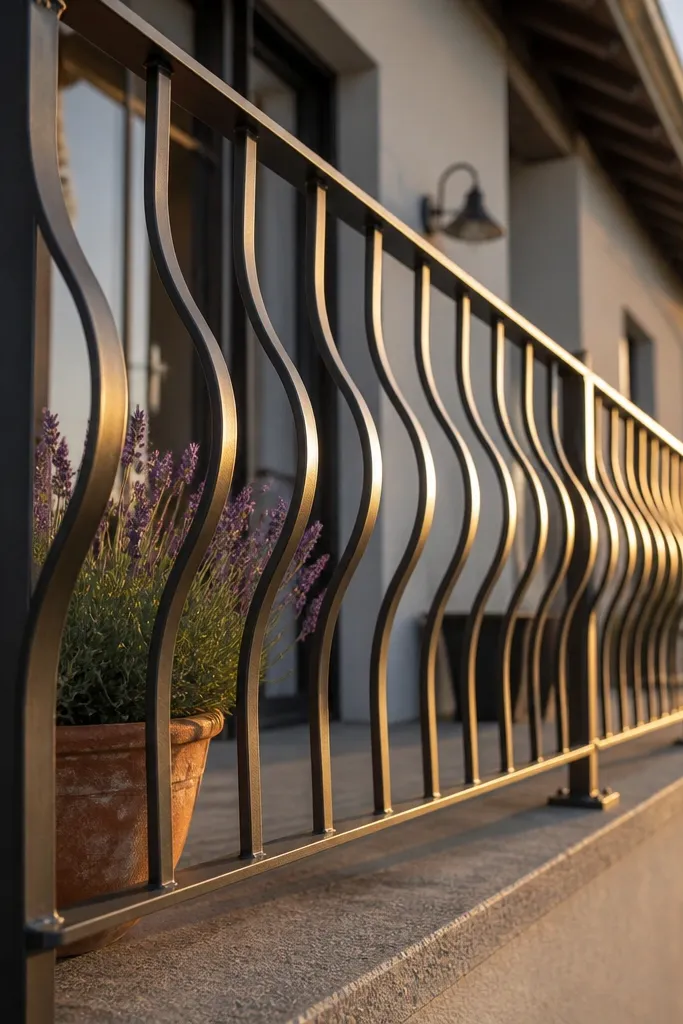
Arc waves look cozy because curves read friendlier than straight bars, and they create movement when light hits them. Using 1/2 in flat bar keeps the wave shape bold without becoming bulky. Keep the wave height consistent — even a small difference makes the pattern look sloppy. This design is perfect if your balcony is narrow and you want the railing to feel softer at the edges. It also looks great with sheer curtains or light-colored outdoor textiles because the curves contrast nicely.
Start by making a template for the arc spacing and height using scrap plywood. Cut and bend flat bar into repeating arcs, then weld them to a straight top rail and bottom frame so the arcs align across the run. Tack every arc first, check spacing with a tape measure, then weld in short sections to avoid warping. Grind, prime, and powder coat or paint in a matte finish to keep the waves from looking glossy and harsh.
Editor's noteBend arcs in batches and label them so the pattern stays identical across the full balcony run.
Skip thisDon’t weld all arcs at once; the heat can twist the frame and ruin the wave symmetry.
5. Two-tone black posts with warm copper vertical accents
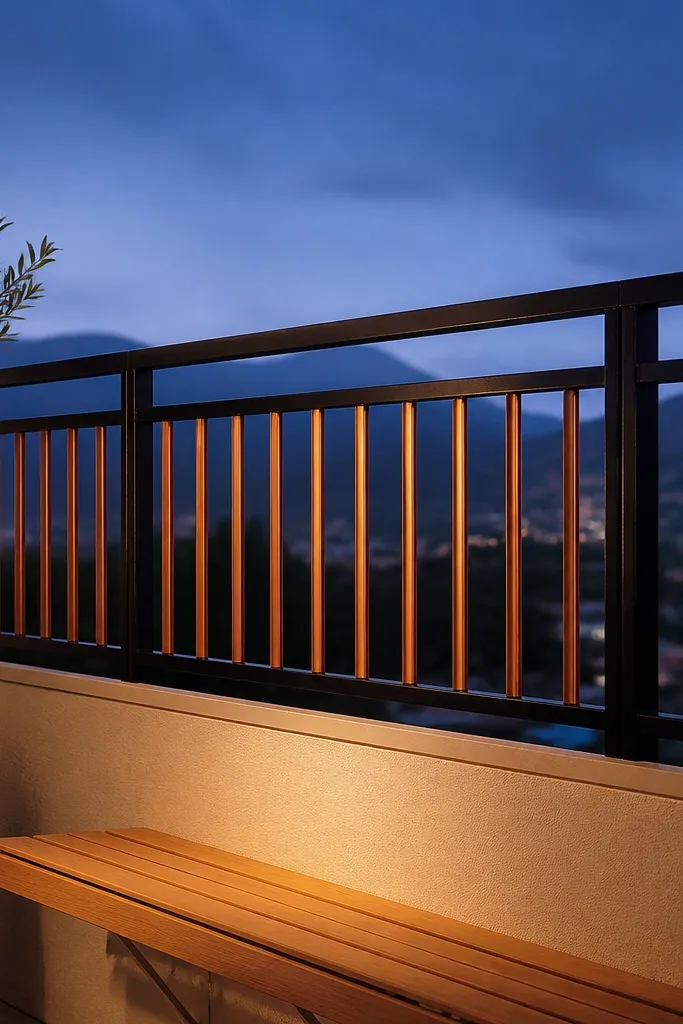
Two-tone railings look expensive without needing ornate metalwork. The trick is to keep it controlled: black frame for structure and copper-colored vertical accent bars for warmth. Copper accents catch light differently than black, which makes the railing feel cozy even in shade. This works well on balconies with potted plants or terracotta planters, because the copper note ties into warm ceramics. It’s also a good option if you want the pattern to feel subtle from far away but interesting up close.
Build the main frame in black-finish steel tube and posts, then install larger vertical bars in black. Add slimmer copper-tone accent bars on a consistent interval (for example, every third vertical space) and weld or bolt them to the grid. Grind and prep both metal tones, then coat the black frame and copper accents separately so the colors stay clean. If you’re painting instead of powder coating, use a dedicated metal primer for each finish and let the coat cure fully before installing.
Editor's noteMask the copper accents carefully with painter’s tape so you don’t get messy overspray edges.
Skip thisDon’t mix too many accent bars; one consistent interval looks intentional.
6. Rope-style twisted steel with a matte finish
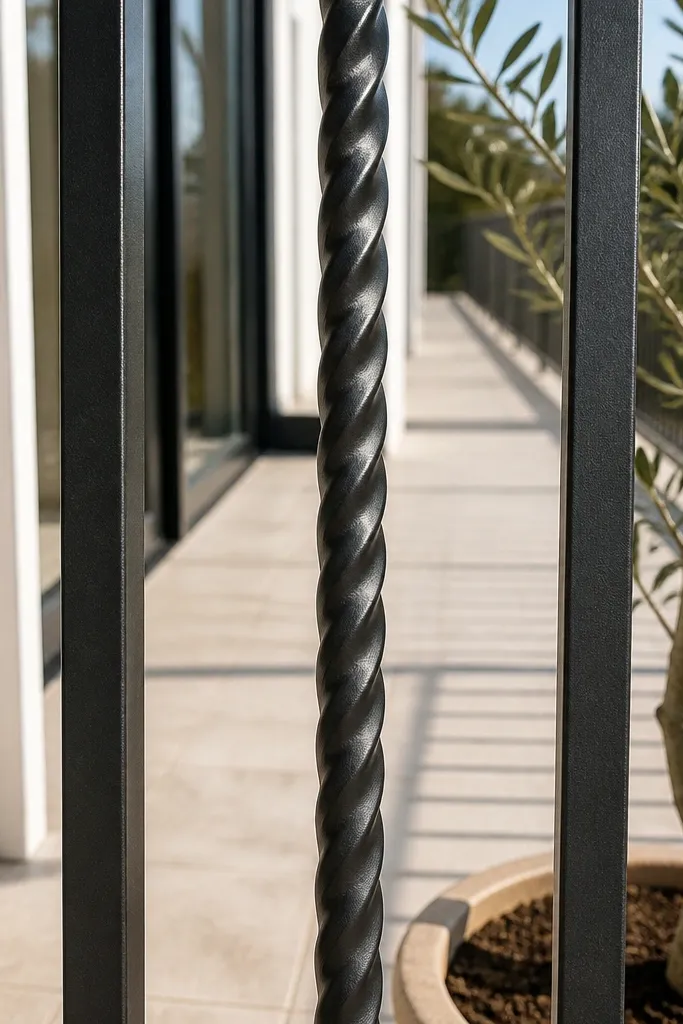
Twisted steel reads cozy because it looks like a craft detail, not a flat industrial bar. The “rope” twist also creates a soft highlight line that changes as you move, which looks great in balcony photos. Keep the twist section centered between posts and keep the rest simple to avoid visual clutter. This design works best when your balcony has a cozy seating area — it visually supports the overall vibe. It also hides small surface imperfections if you grind and prime properly.
Use twisted steel elements (pre-formed if you can) sized to fit between posts, then weld them into a simple top rail and bottom frame. Space the twisted sections so each one aligns with the posts, and tack in place first to confirm straightness. Weld the ends, grind the joints, and prime the entire railing before coating. Finish with matte black powder coat or matte exterior paint, then add post caps to clean up the ends.
Editor's noteCheck twist alignment from two angles; a slight rotation looks wrong in photos.
Skip thisAvoid mixing twist sizes; it makes the railing look accidental.
7. Herringbone pattern in flat bar for a warm geometric look
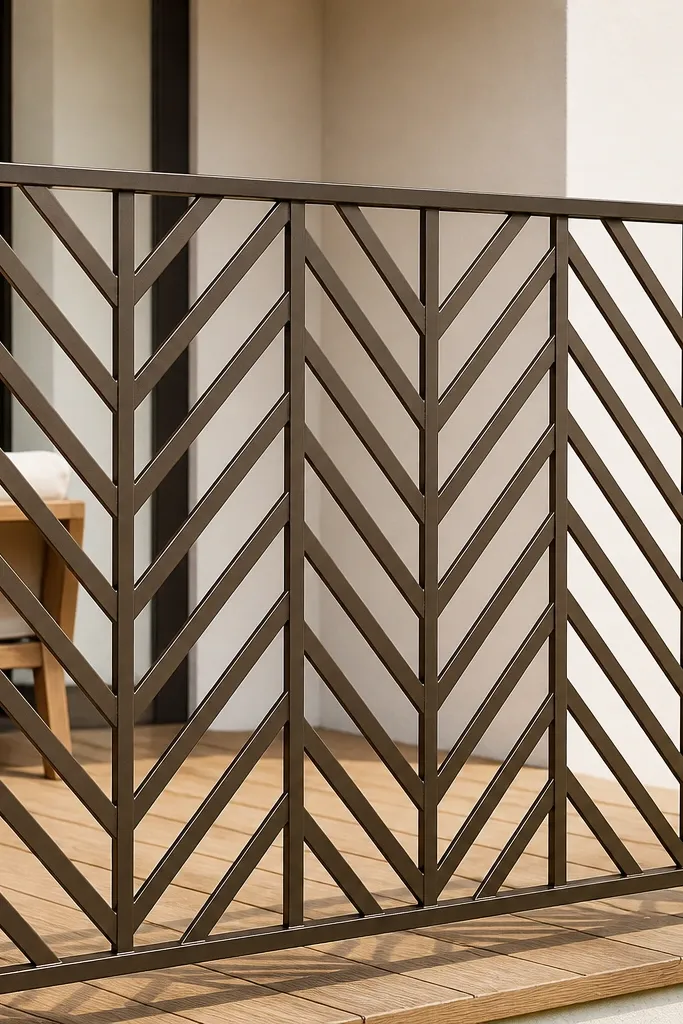
Herringbone is cozy because it’s geometric but not rigid. The diagonal repeat creates visual warmth and keeps the railing from feeling like a cage. Use flat bar so the pattern looks crisp and the edges catch light cleanly. This design is great for balconies that need a focal point — a single strong pattern reads well even if the rest of the balcony is simple. It’s also a good pick if you want privacy without blocking all airflow since the pattern still has openings.
Build the outer frame from steel tube, then mark a grid inside for the diagonal flat-bar runs. Cut flat bar pieces so each segment meets at the same angle, then tack them in place following your markings. Once the first row is perfect, work row by row so the pattern stays aligned. Weld, grind smooth, prime, and powder coat in matte charcoal or black for a cozy look.
Make one perfect “starter corner” and copy it; that’s how you keep herringbone straight.
Don’t skip dry layout before welding — herringbone errors compound fast.
8. Minimal horizontal slats with a rounded top rail
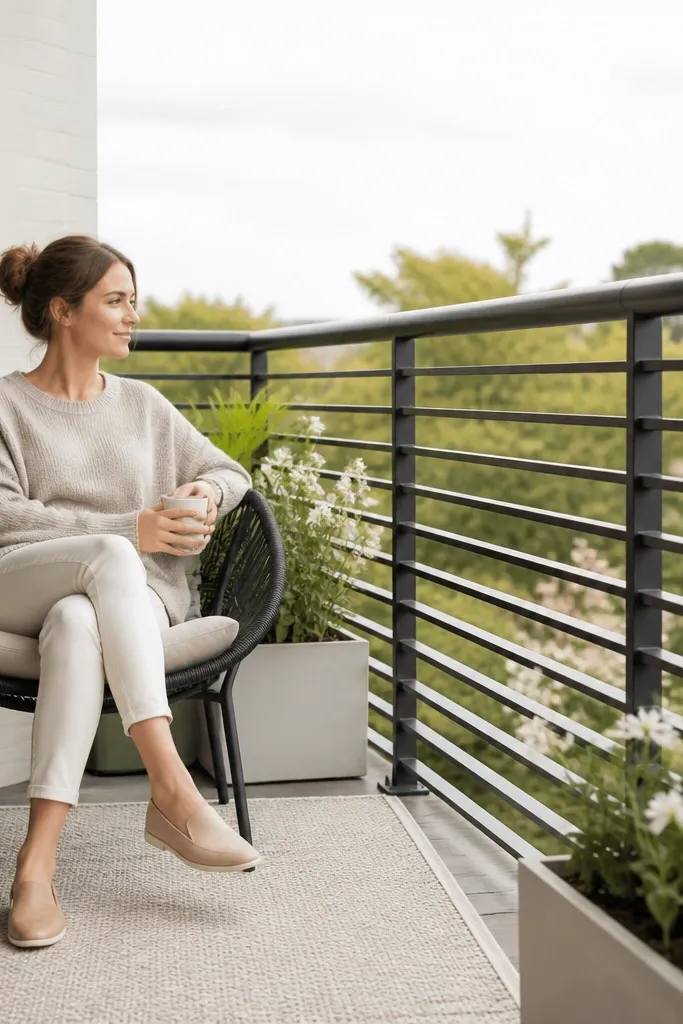
Horizontal slats feel cozy because they visually lower the railing’s intensity and read like a modern fence rather than a barrier. A rounded top rail is key — it softens the silhouette and looks good in close-ups. Keep slats thin and evenly spaced so you get airflow and a clean look. This design is perfect for balconies with plants and soft textiles because it doesn’t compete with them. It also looks great when you add a matching gate or matching planter brackets.
Frame your railing with posts and a rounded top rail tube, then weld thin horizontal slats across the frame. Mark the slat spacing with a jig so every bar sits at the same distance. Tack first, check level across the run, then weld. Grind the welds, prime, and paint or powder coat matte black so the slats blend into a smooth, cozy finish.
Editor's noteUse a scrap spacer block to keep slat spacing identical along the whole balcony run.
Skip thisDon’t make slats too thick; thick slats look industrial and less cozy.
9. Sunburst center panel with vertical side bars
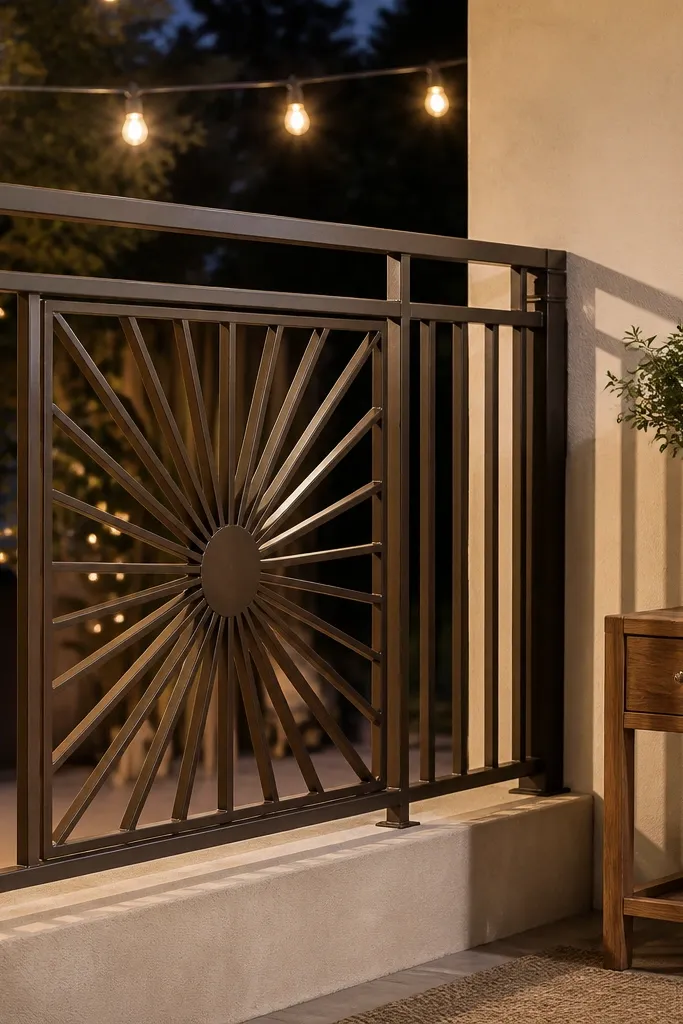
A sunburst panel is a cozy “wow” detail because it adds a warm, directional pattern without covering the whole railing. The idea is to keep the rest simple: vertical side bars and a clean frame, then a single sunburst center. This makes the railing look designed in photos and gives you a focal point behind string lights. Choose a matte finish so the sunburst doesn’t look shiny and harsh. It’s a strong option for balconies with one main seating spot.
Build your main frame and side vertical bars first, then cut and weld the sunburst rays into a center panel section. Keep the rays narrow and repeat them evenly around a center ring made from a small tube or flat bar. Tack the sunburst panel into the frame, align it carefully, then weld and grind. Prime and coat the entire railing in matte charcoal, and add end caps so the center panel edges look clean.
Make a paper template of the sunburst so the ray angles stay consistent before you cut steel.
Don’t crowd the sunburst too close to the top rail; leave a clear margin for readability.
10. Diamond grid with a warm satin bronze finish
Diamond grids feel cozy because they create a soft, repeating pattern that reads like woven texture. Satin bronze is the secret finish here — it’s warmer than black but still hides weld lines better than gloss. Choose a grid size that gives privacy without turning the balcony into a cage; smaller diamonds reduce visibility but can feel heavy. This look works well with light-colored walls and cream planters. It also looks great from outside because the pattern catches subtle reflections.
Construct a rectangular frame, then weld diagonal bars to create diamonds inside the frame. Use a jig or marked spacer blocks to keep the diamond width consistent across the run. Tack, check alignment diagonally and horizontally, then weld. Grind and prime thoroughly, then coat in satin bronze powder coat or a two-part exterior satin system, and finish with post caps.
If you’re painting, use a primer made for metal and let it cure fully before topcoat; it prevents chalky spots.
Avoid uneven diamond spacing; it makes the pattern look cheap instantly.
11. Matte black verticals with rounded spacer rings

Ring spacers add cozy detail without going full decorative. The rings soften the vertical lines and create little highlight points that look good under balcony lighting. This design is also practical if you want to control spacing precisely because the rings can act like repeatable markers. Keep the rings consistent in size and place them at the same height band for a clean look. It suits balconies that already have simple decor and need a small upgrade. It’s also a good choice for DIY beginners because the geometry is straightforward.
Install vertical bars in your frame with marked spacing. Slide or weld small ring spacers onto the vertical bars at predetermined intervals, then tack each ring so it sits perpendicular. Once everything is aligned, weld the ring attachment points. Grind welds smooth, prime, and coat in matte black, then add post caps and a clean top rail.
Use identical ring stock and cut-to-length pieces so the rings don’t vary in diameter.
Don’t let rings slide during tacking; clamp them to keep them centered.
12. Wavy verticals made from bent rebar-style rod
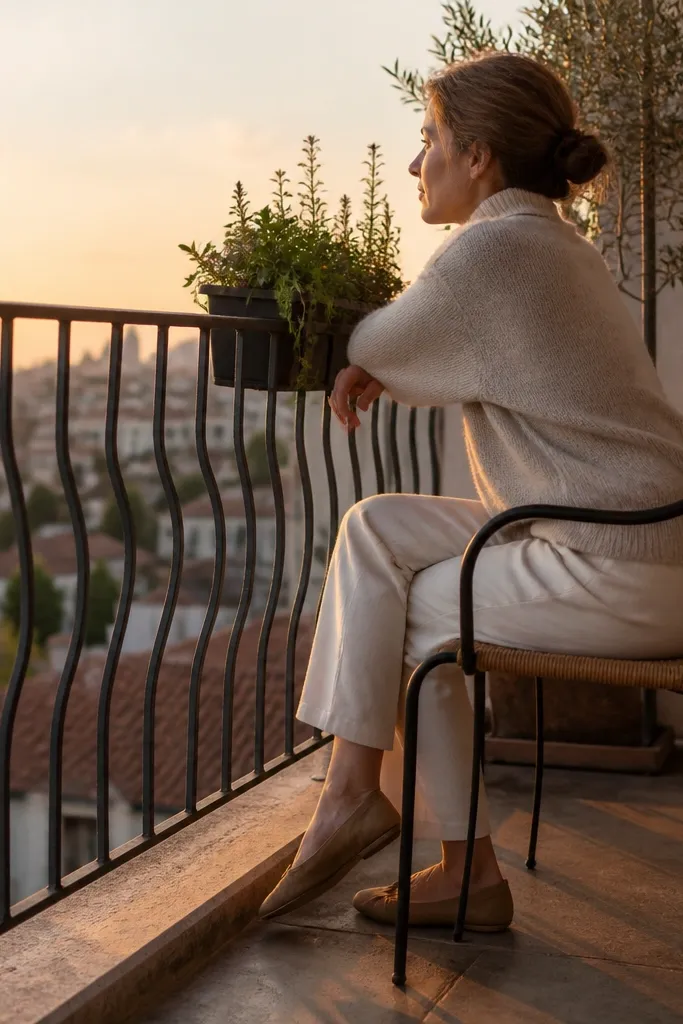
Gentle wavy verticals feel cozy because they add organic movement while staying airy. The look is different from fully curved waves because the verticals still read as vertical — it’s a calmer aesthetic. Use a rod size that matches your frame strength and don’t go too thin or it will look delicate and flimsy. This works nicely for balconies with plants or a garden theme because it feels natural. It also photographs well when the railing is lit from the side.
Build the top rail and post frame, then mark where each wavy rod attaches. Use a template to bend each rod to the same wave profile and length, then tack rods in place one by one. Check the line and wave height across the run before full welding. Grind, prime, and coat in matte charcoal so the rod texture looks intentional rather than rough.
Editor's noteMake a bending jig from plywood with nails to hold the rod while you shape it.
Skip thisDon’t bend rods freehand; small wave differences make the railing look uneven.
13. Candle-sconce style vertical brackets with warm bulbs
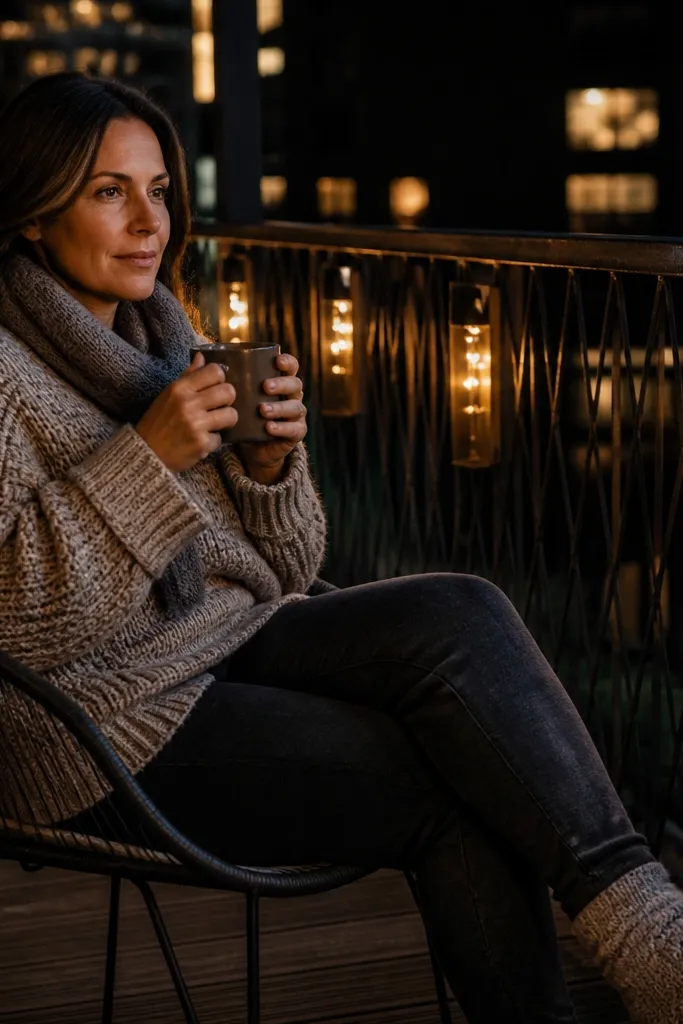
Lighting brackets attached to the railing instantly make it feel cozy at night, and it looks good in photos because the light frames the pattern. The design here uses simple vertical bracket shapes mounted at regular intervals, then you add warm bulbs or string lights behind them. Keep the steel finish matte black or dark bronze so the lights glow without a harsh reflection. This is ideal for balconies where you want ambiance more than privacy. It also lets you keep outdoor cords tidy by routing them through the railing posts.
Build the railing frame and vertical bars first, then weld or bolt on decorative bracket tabs along the inside face. Plan bracket spacing so the light strands sit evenly, then drill small holes for cord routing if you’re running power. If you’re using battery lights, you can keep wiring minimal. Prime and coat the entire railing, then mount the lights after curing so you don’t damage the finish.
Use warm LED bulbs around 2700K and dimmable controls; cool white makes steel look colder.
Don’t mount lights directly on bare metal — the heat and vibration can ruin the coating.
14. Geometric half-panel with a clear top rail
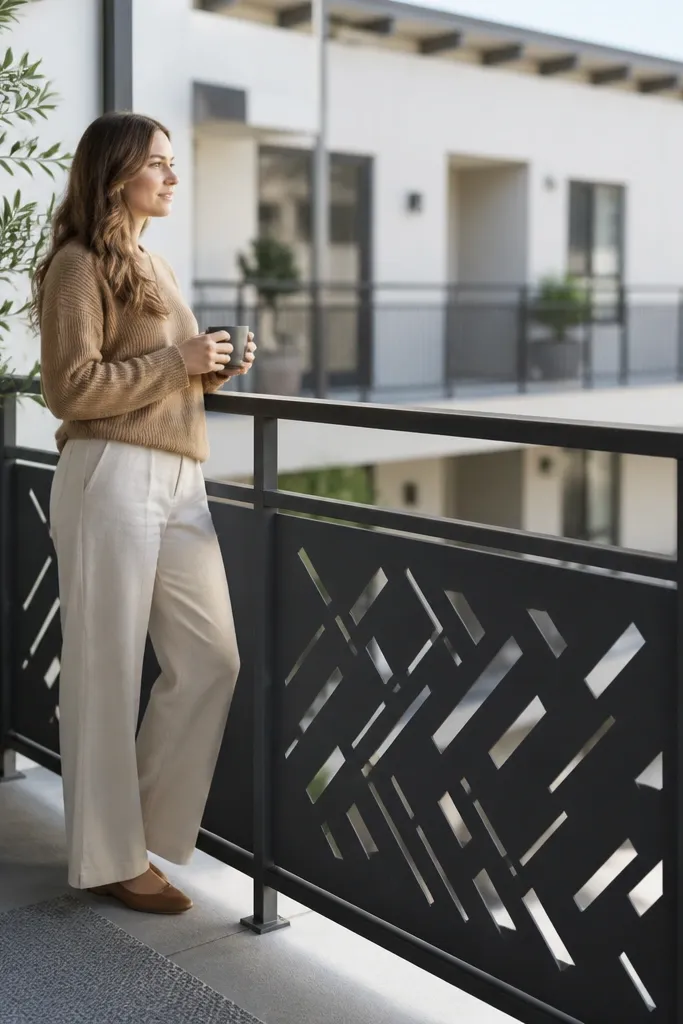
This is a cozy design because it gives you privacy where you want it and openness where you don’t. The half-panel geometry creates a strong look without making the whole railing visually dense. Keep the top rail area open — it makes the balcony feel less boxed in. This works well on balconies that face a walkway or neighbors, where you want coverage at waist height but still want airflow. It also pairs well with planters because the railing doesn’t swallow the view.
Frame your railing and install posts and a solid top rail. Build a half-height panel section using flat bar geometry like small rectangles or a simple grid, then weld the panel into the lower area only. Leave the upper area open with vertical bars or a minimal horizontal. Grind, prime, and coat matte charcoal, then install end caps and check all panel edges for sharpness before finishing.
Editor's noteUse rounded edges on the panel frame so you don’t create a snag point for clothing or planters.
Skip thisDon’t fill the entire railing with geometry; it looks heavy and less cozy.
15. Art deco vertical fan pattern with matte black finish
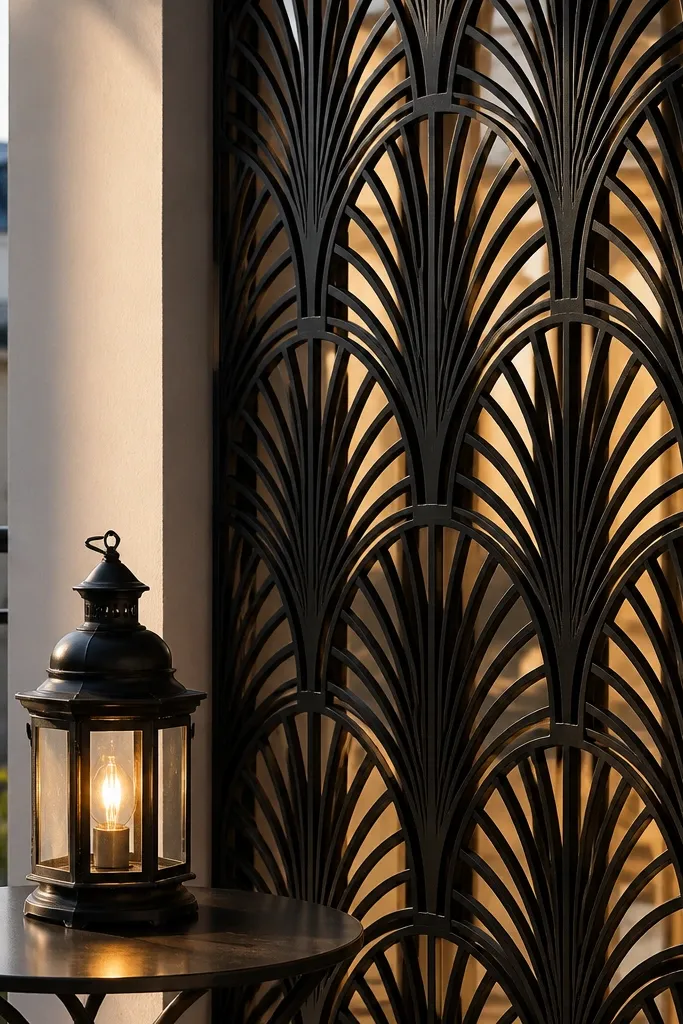
Art deco fans make steel feel cozy because they’re symmetrical and warm-looking without being “rustic.” The repeating fan pattern creates a rhythm that reads upscale from a distance. Matte black keeps it modern, while the fan shapes add an old-world softness. This design works especially well on balconies with vintage decor, black metal patio furniture, or geometric outdoor rugs. It’s also a good option if you want a statement railing but don’t want actual wrought-iron curls.
Start with a frame and vertical posts, then design fan-shaped pieces using flat bar cutouts or welded segments. Install the fan shapes in the center sections, keeping spacing consistent across the run. Tack in place, check that the fans align with the posts, then weld the seams. Grind, prime, and coat in matte black, and add smooth top rail end caps for a crisp edge.
Editor's noteMake a single fan pattern template and trace it onto steel so every fan matches.
Skip thisDon’t make fans too wide; wide fans can look like a fence panel rather than a railing.
16. Rounded rectangle openings with solid top rail
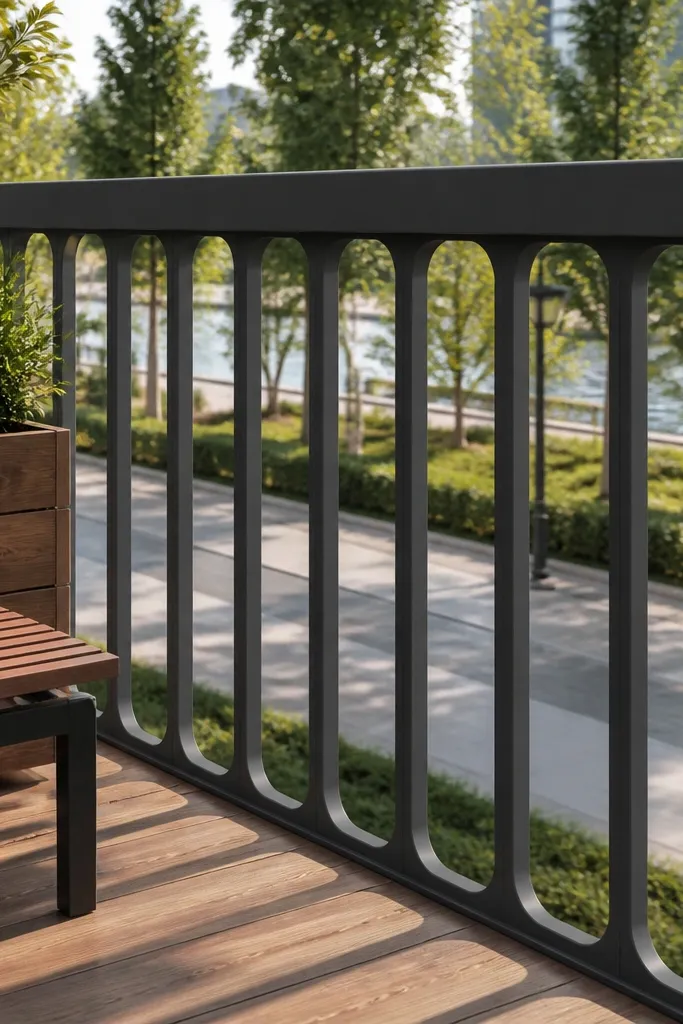
Rounded rectangle openings feel cozy because the corners soften the geometry. This looks modern and friendly, and it’s easier to build than it looks if you use pre-cut or carefully cut steel. The solid top rail makes it look sturdy and finished, which matters for the “cozy” vibe. This is ideal for balconies with clean, minimal decor — it adds pattern without making the space feel busy. It also photographs well because the openings create a grid-like frame for the background.
Build the outer frame and posts, then mark a grid for the rounded rectangles. Weld in inner border strips to create the rounded corners, or use bent flat bar sections to form the curves. Tack each opening frame, check alignment with a tape measure, then weld. Grind smooth, prime, and coat in matte charcoal, then add post caps and a clean finish on all edges.
Editor's noteUse a consistent radius for the corners so the openings look uniform across the whole balcony.
Skip thisDon’t leave sharp edges on the inner borders; they feel rough and catch paint.
17. Vertical bars with a curved bottom kick plate
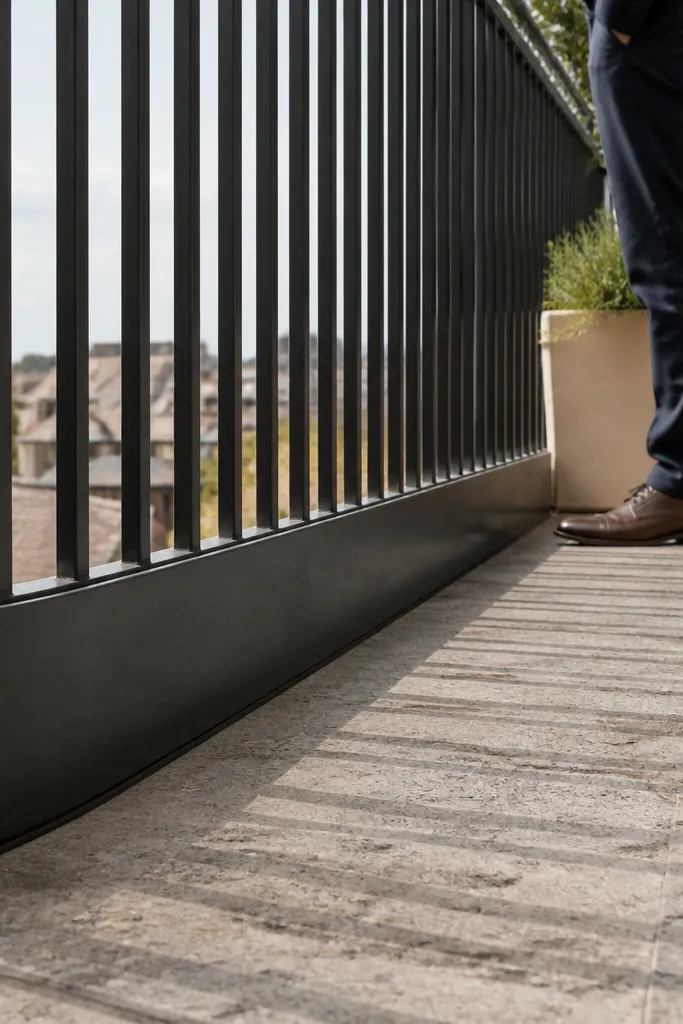
The curved bottom kick plate adds cozy character because it visually grounds the railing and softens the bottom edge. Vertical bars keep airflow and visibility, while the bottom curve makes the whole piece look custom. This design works well when your balcony has a solid wall or planter ledge near the bottom — the curve visually transitions. It’s also easier than full decorative scrollwork, so it’s DIY-friendly. The result looks polished from street level because the bottom line is clean and intentional.
Build your top rail and posts first, then install vertical bars at consistent spacing. Add a bottom kick plate from steel sheet or a bent flat bar strip, shaped to match the balcony run. Tack the kick plate along the bottom edge, check the curve with a string line, then weld. Grind and prime the entire railing, coat in matte finish, and seal any sheet edges so water doesn’t sit in seams.
Bend the kick plate slightly oversize, then trim to fit after tacking so the curve stays fair.
Don’t skip sealing seams on the kick plate — trapped moisture ruins coating fast.
18. Staggered verticals with gentle offset for privacy
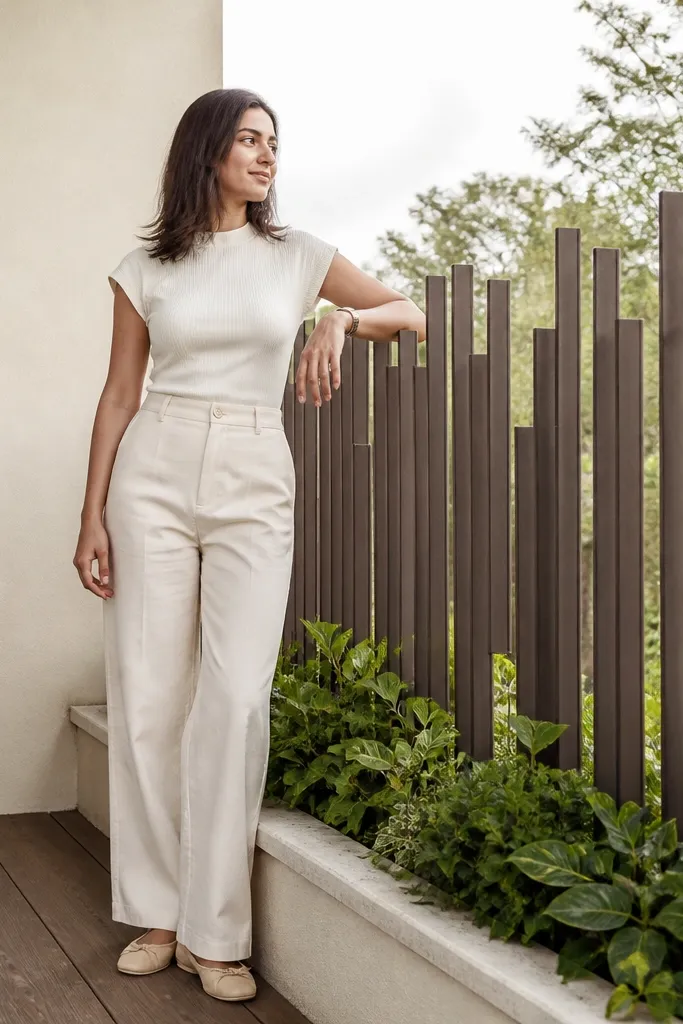
Staggered verticals feel cozy because they reduce direct sightlines without turning the railing opaque. The pattern looks intentional and adds depth, which makes the balcony feel more private and comfortable. Keep the offset small and consistent — think “soft blur” not “solid screen.” This design works well for balconies facing neighbors or streets where you want some privacy while still keeping airflow. It’s also a great option if you want a modern look but don’t want a full grid.
Frame the railing, then plan your vertical bar pattern so bars alternate left-right by a fixed offset distance. Mark the attachment points on the frame and tack bars in place according to the stagger plan. When the run is aligned, weld the bars to the frame, grind, prime, and coat matte charcoal or dark bronze. Use end caps and check that the top rail is level so the stagger doesn’t look like a mistake.
Editor's noteUse a simple offset jig made from scrap steel blocks so every bar gets the same shift.
Skip thisDon’t change the offset mid-run; it reads like uneven spacing.
19. Tall arched openings with interior vertical bars
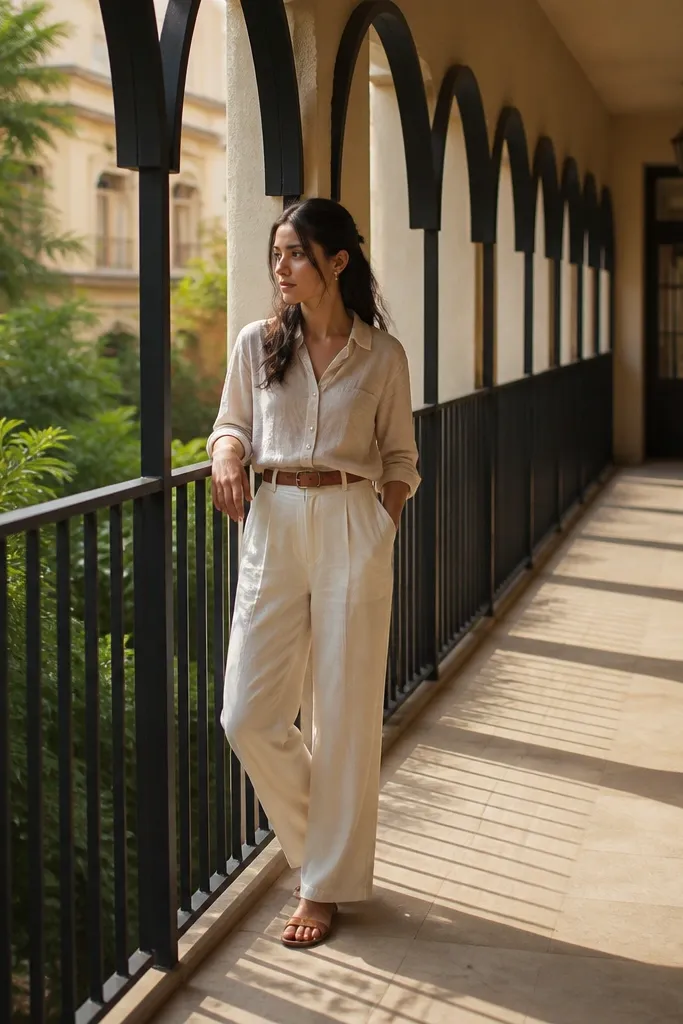
Tall arched openings look cozy because arches soften the harshness of straight railings and create a friendly silhouette. Add interior vertical bars so the railing still feels structured and safe. This design works well for balconies with higher ceilings or longer runs because the arches create a strong vertical rhythm. It also looks great with hanging plants — the arches frame the greenery. Choose matte black or dark bronze to keep the arches looking warm rather than glossy and cold.
Build the outer frame with posts and a top rail, then create arch ribs from steel tube or bent flat bar. Weld the arch ribs into an evenly spaced set, then add vertical bars inside each arch panel. Tack everything, check the spacing between arches, then weld and grind. Prime and coat in matte finish, and add smooth end caps and corner reinforcement where the arches meet the posts.
Editor's noteUse the same arch template for every opening and clamp it during tacking for repeatable curves.
Skip thisDon’t make arches uneven; one slightly off arch makes the whole railing look unplanned.
20. Open lattice rectangles with rounded corners
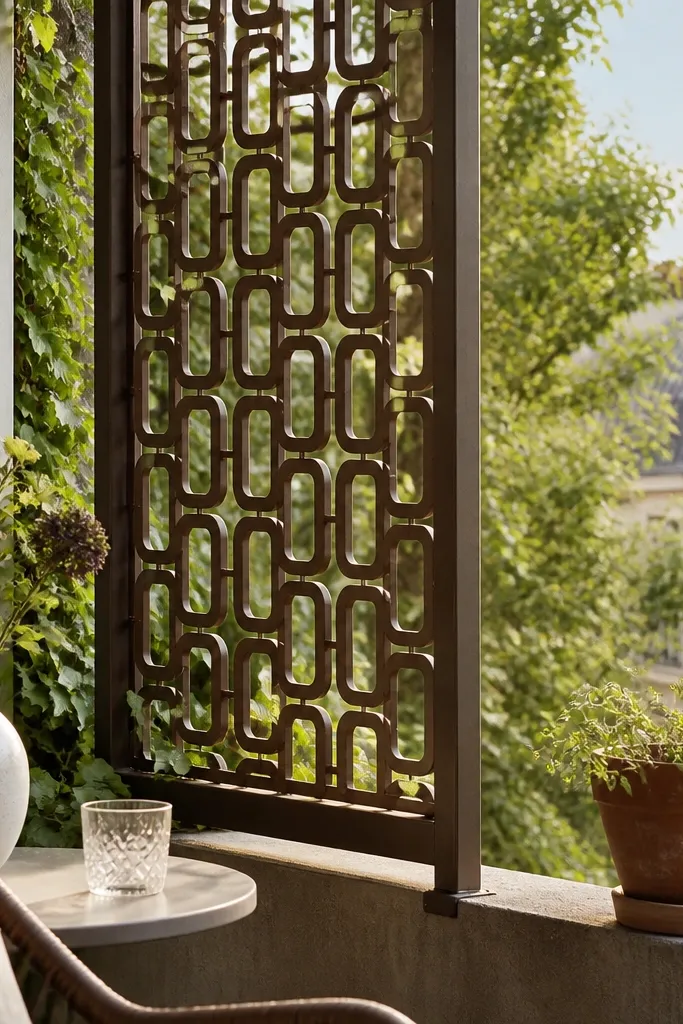
Open lattice rectangles feel cozy because they create a breathable pattern that still looks decorative. Rounded corners keep the geometry friendly and reduce the harsh “cage” impression. This is a good choice if your balcony is small and you want the railing to look lighter while still giving visual interest. It also photographs well because the lattice frames the background. Pair it with warm outdoor lighting or neutral cushions for an inviting look.
Frame the railing with posts and a top rail, then mark a rectangle grid inside. Weld border strips for each rectangle and add cross pieces to form the lattice, keeping corner radii consistent. Tack the lattice sections first, then weld after you confirm alignment and spacing. Grind welds smooth, prime, and coat matte charcoal, and add post caps so the lattice edges look clean.
Editor's noteMake corner radii with a bending form or consistent cut method so the rounded corners match every rectangle.
Skip thisDon’t over-tighten the lattice spacing — too small openings look crowded and less cozy.
21. Small circle accents on vertical bar grid
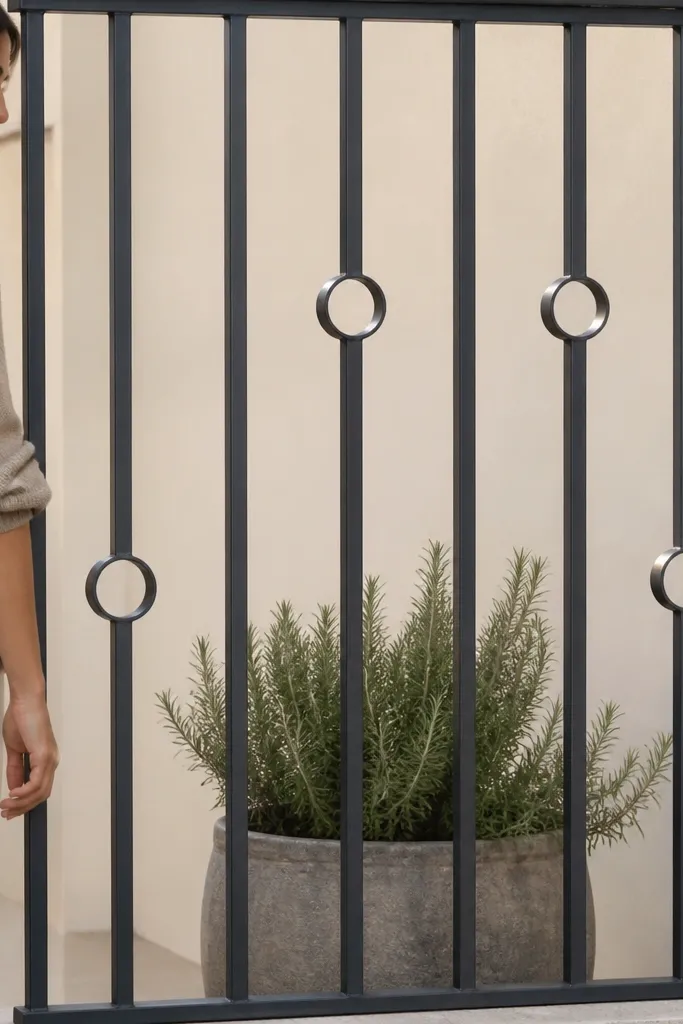
Small circle accents give you a cozy, playful pattern without turning the railing into a “theme” piece. The circles read like dots, which softens the vertical bars and adds sparkle as light hits the edges. This design works well if you want the railing to be visually interesting but still not heavy. It also pairs nicely with modern planters and minimal decor because the pattern is small and controlled. Keep the circle size consistent for a clean, designed look.
Build the vertical bar grid in your frame, then add circle accents at a fixed interval. Weld circle rings or short ring segments onto selected vertical bars, keeping them at the same height band. Tack first, check the pattern from inside and outside, then weld and grind smooth. Prime and coat matte black or dark bronze, and install post caps for a finished look.
Use ring stock with the same inner diameter so circles don’t look lopsided after coating.
Avoid random circle placement; it should repeat like a pattern, not decoration.
22. Bold top rail with vertical pickets and decorative knots
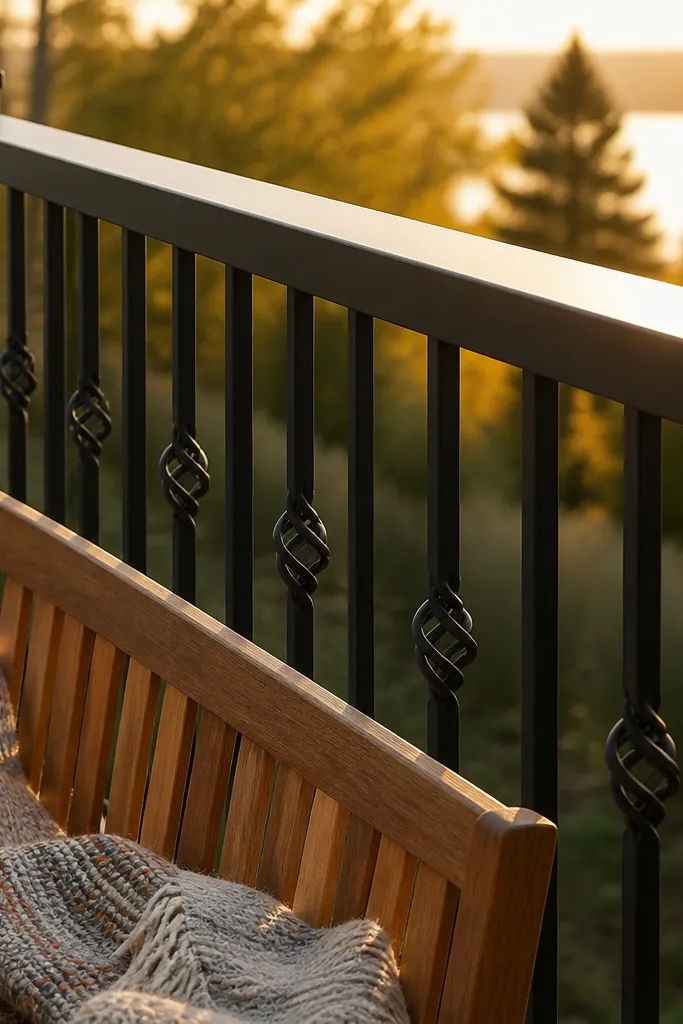
If you want cozy but still sturdy-looking, go tall pickets with a bold top rail and small knot-like decorative elements. The knot details add warmth and a handcrafted vibe, while the tall pickets keep the railing clean and safe. Choose a matte finish so the knot shapes look soft rather than shiny. This design suits balconies where you have a railing-facing seating area and want the metal to look good even when plants aren’t in bloom. It also gives a nice focal line at the top of the balcony.
Frame the posts and create a thick top rail using steel tube. Install vertical pickets at consistent spacing, then attach knot-like decorative pieces between pickets at evenly spaced intervals. Tack each knot, align it so it sits centered between pickets, then weld. Grind, prime, and coat in matte charcoal, then add end caps and check that the top rail edges are smooth to the touch.
Sand the top rail edges before coating so your hand slides smoothly and the coating doesn’t thin on sharp corners.
Don’t use tiny knot pieces; they get lost and look like manufacturing defects.
23. Matte dark bronze verticals with recessed panel inserts
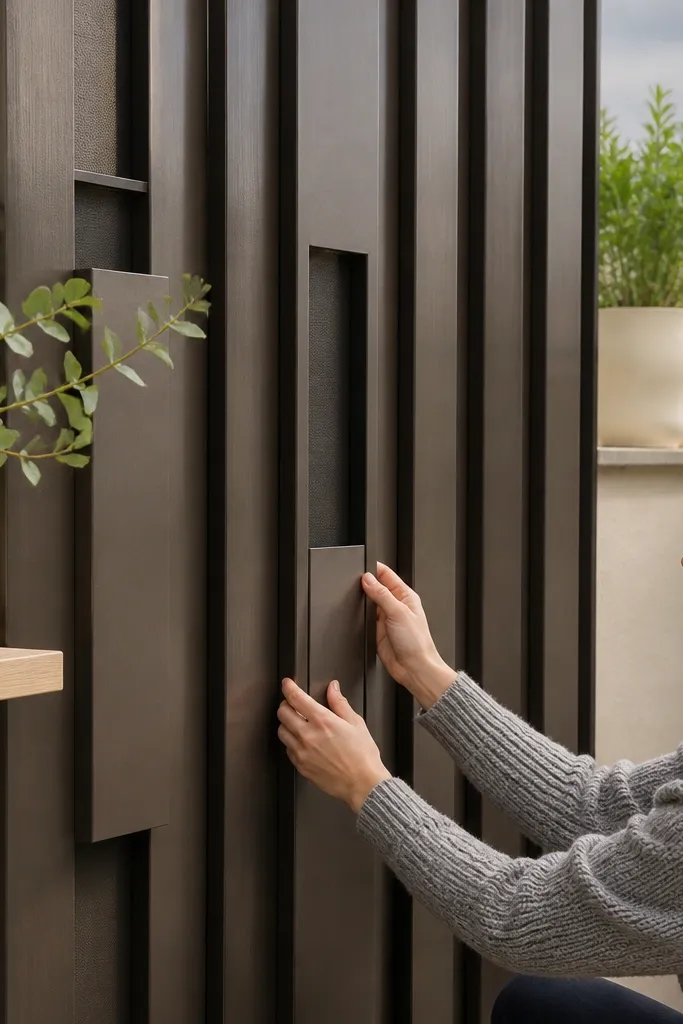
Recessed panel inserts make steel look cozy because they add depth, like a built-in wall feature. Dark bronze powder coat warms up the whole piece, and the recessed panels give you a place to mount small planters or attach fabric wind screens later. Keep the recessed panels simple: small rectangles or a low-height section so it doesn’t feel heavy. This design works well for balconies that need both style and partial privacy. It also photographs nicely because the recess creates shadows that read as texture.
Build the frame and vertical bars first, then weld recessed insert frames inside selected sections. Use sheet steel or thin flat bar to create the recess, leaving a clear border around each insert. Tack inserts into position, check the depth consistency along the run, then weld and grind. Prime and coat in dark bronze, and seal any cut edges so the recess doesn’t trap moisture.
Editor's noteUse spacers when welding recessed frames so the recess depth stays identical everywhere.
Skip thisDon’t make recessed panels too deep; deep recesses collect water and grime.
24. Curved half-moon cutouts in a charcoal steel frame
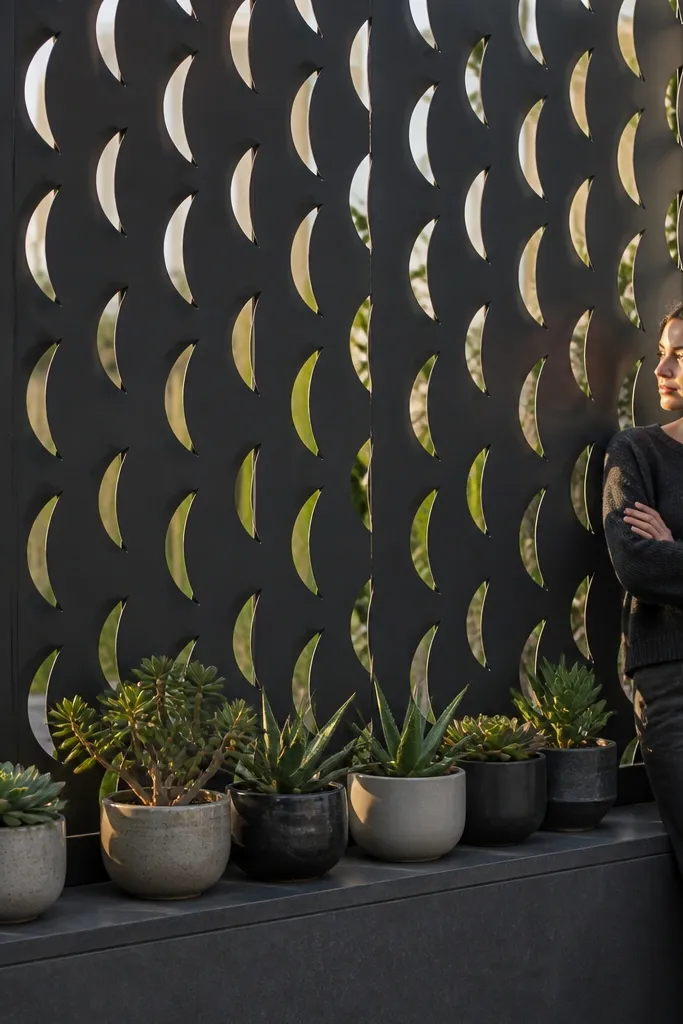
Half-moon cutouts look cozy because they’re soft and rhythmic, like a pattern you’d see in a handmade screen. The cutouts also reduce visual weight — the railing looks lighter than a solid grid. Use a charcoal matte finish so the cutouts cast gentle shadows instead of hard reflections. This design works great when your balcony has a balcony door and you want the railing to frame the view. It’s also photogenic because the negative space shows up clearly in daylight.
Frame the railing with steel tube and posts, then mark a repeating pattern of half-moon openings on the panel area. Cut the openings using a jigsaw with metal blade for sheet sections or plasma/angle grinder for thicker parts, then test fit. Weld the panel frame back into the railing, grind edges smooth, and prime before coating. Powder coat charcoal matte, and add end caps to keep the edges clean and safe.
Deburr cut edges thoroughly — it makes the coating smoother and prevents tiny rust points.
Avoid uneven half-moon spacing; it ruins the rhythm that makes this look cozy.
25. Welded chevron center band with plain sides
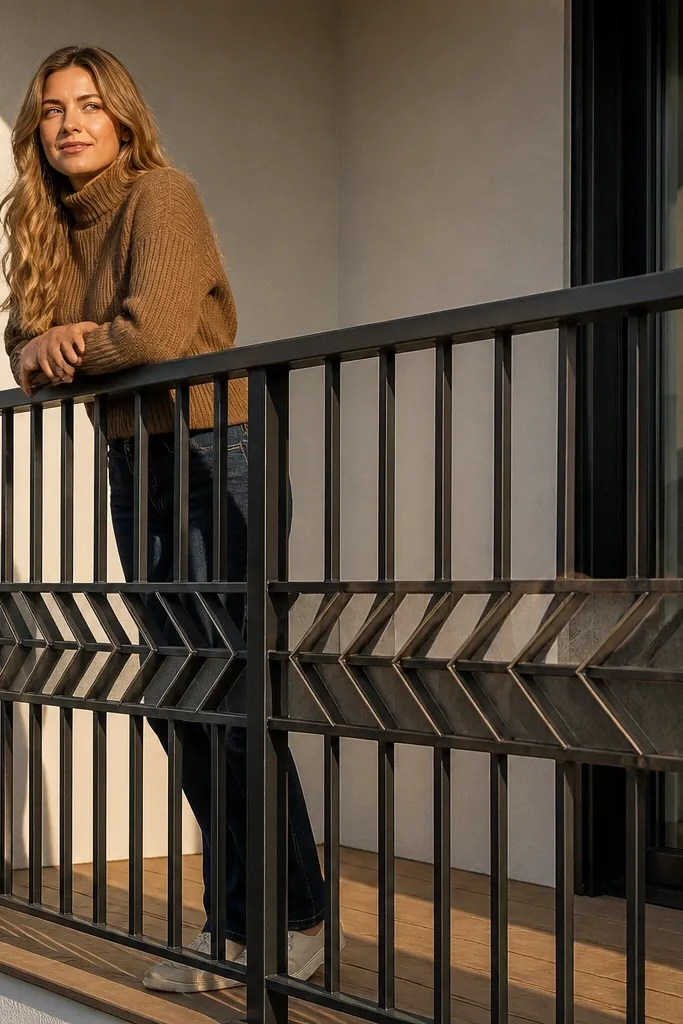
A chevron center band makes the railing feel cozy because it adds a warm diagonal pattern without covering the whole run. Keep the sides plain with vertical bars so the chevron reads as a design feature, not clutter. Matte finish keeps it modern and soft. This works well on long balconies where you want one visual anchor in the middle. It also pairs nicely with striped outdoor cushions or rugs because the diagonals echo the fabric pattern.
Build a standard frame and install simple vertical bars on the posts. Create a center band panel by welding chevron pieces from flat bar, then tack and align it to the frame. Once it’s centered and level, weld the band fully, grind the joints, and prime. Coat matte black or dark bronze, and make sure the center band edges are clean so the chevron looks sharp in photos.
Editor's noteMark the chevron peaks and valleys before welding; diagonal patterns drift if you skip measurements.
Skip thisDon’t weld the chevron band off-center — it draws the eye to the mistake immediately.



