
1. Front-Lip Shelf Stops for Sliding Boxes
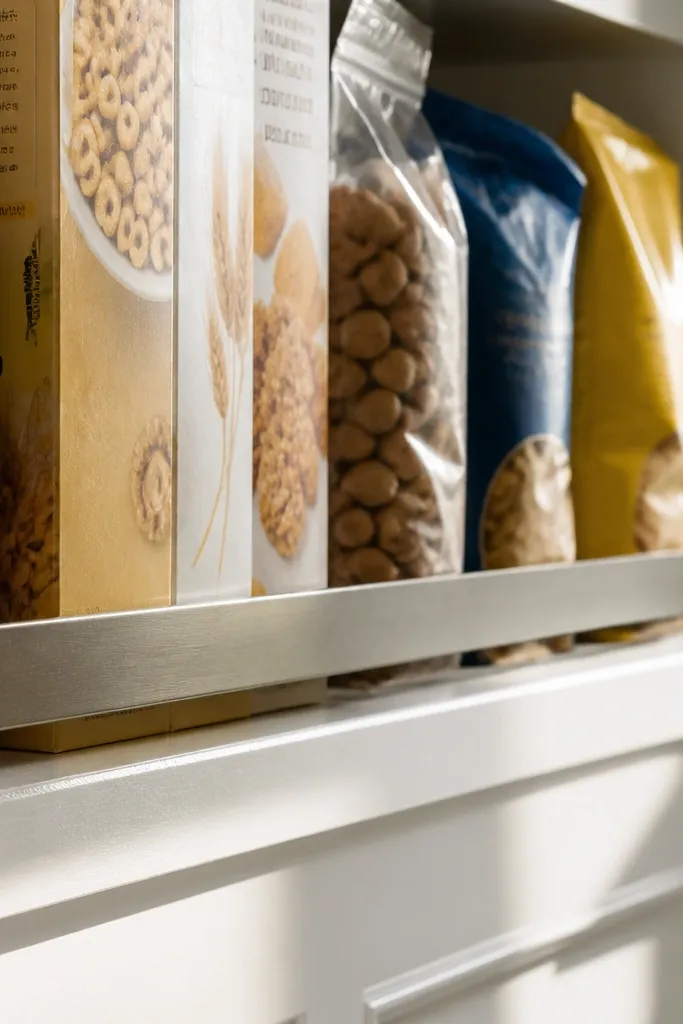
Start by measuring the shelf depth and buying or cutting a strip of hardwood or thick plastic (about 3/4-inch tall) to act as a stop. Cut it to the inside width of the shelf and pre-drill holes so you don’t split the wood. Attach using wood screws into the shelf front edge or into a backing strip you add under the shelf lip. Then add a small felt pad or rubber strip where the items meet the lip so boxes don’t scrape and slide less. Finally, wipe the shelf clean and test with your heaviest items before loading everything.
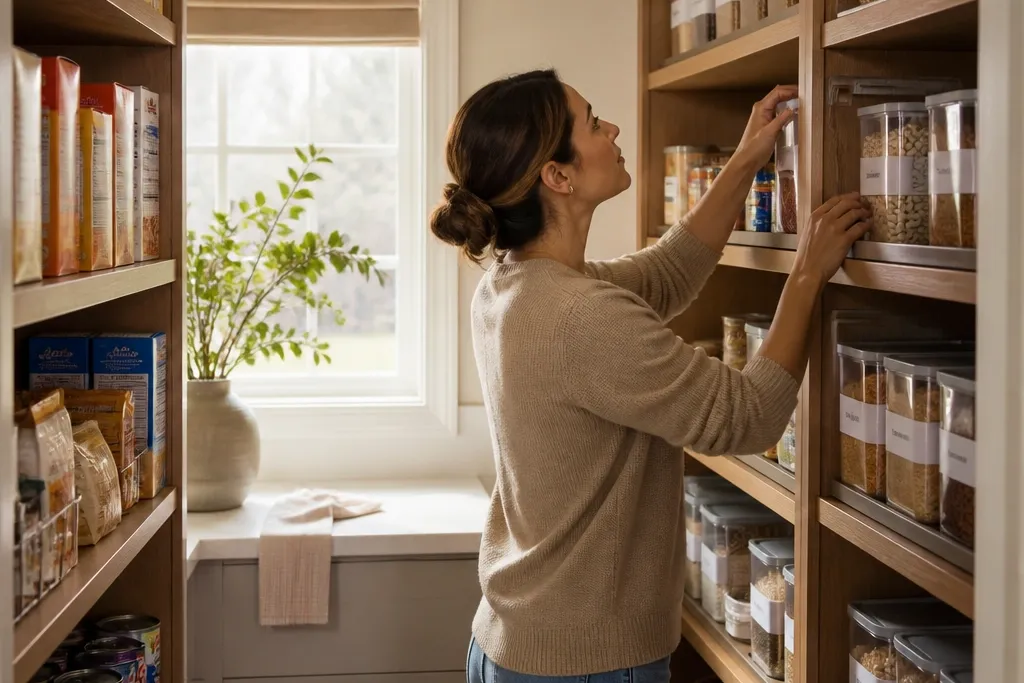
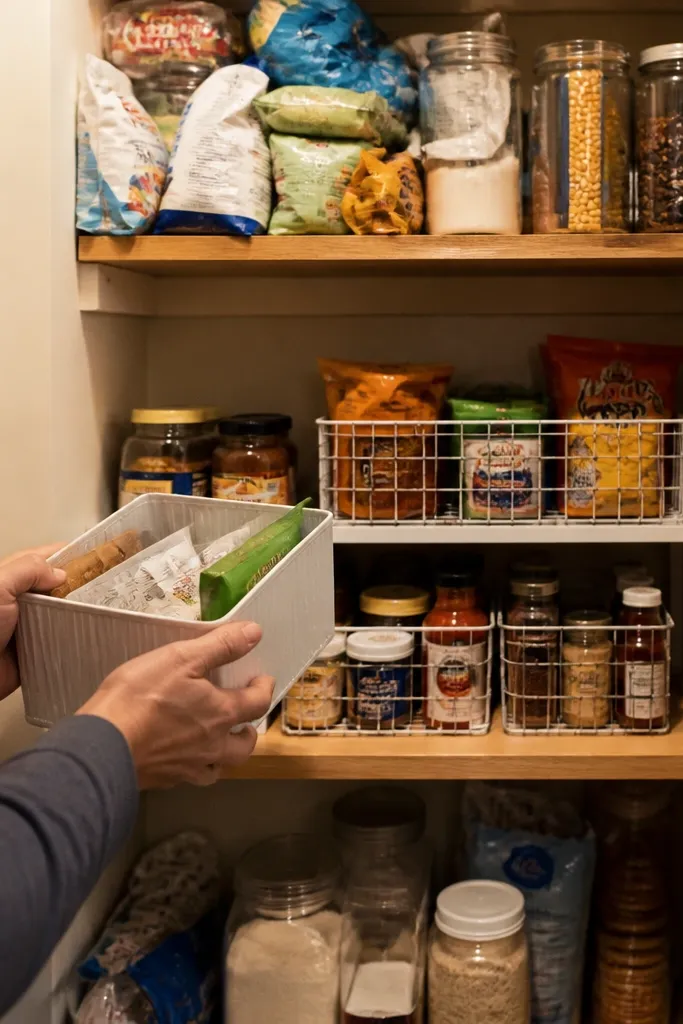
This is the easiest “before and after” fix when your pantry looks chaotic because everything migrates forward. A front lip creates a physical boundary, so cereal boxes, snack bags, and cans land in the same spot every time. The after looks calmer because items line up at the same depth instead of collapsing into a messy pile. Use this when your shelves are strong but your contents keep creeping — it’s a low effort change with a big visual payoff. Skill level is beginner, and the build takes about an afternoon.
Skip thisDon’t rely on friction tape alone; it peels and your “after” becomes “before” again.
Editor's noteIf your shelves are particle board, screw into a thin backing strip first — screws into raw edges strip fast.
2. Two-Height Zone Shelving (Eye-Level Snacks, Upper Back-Up)
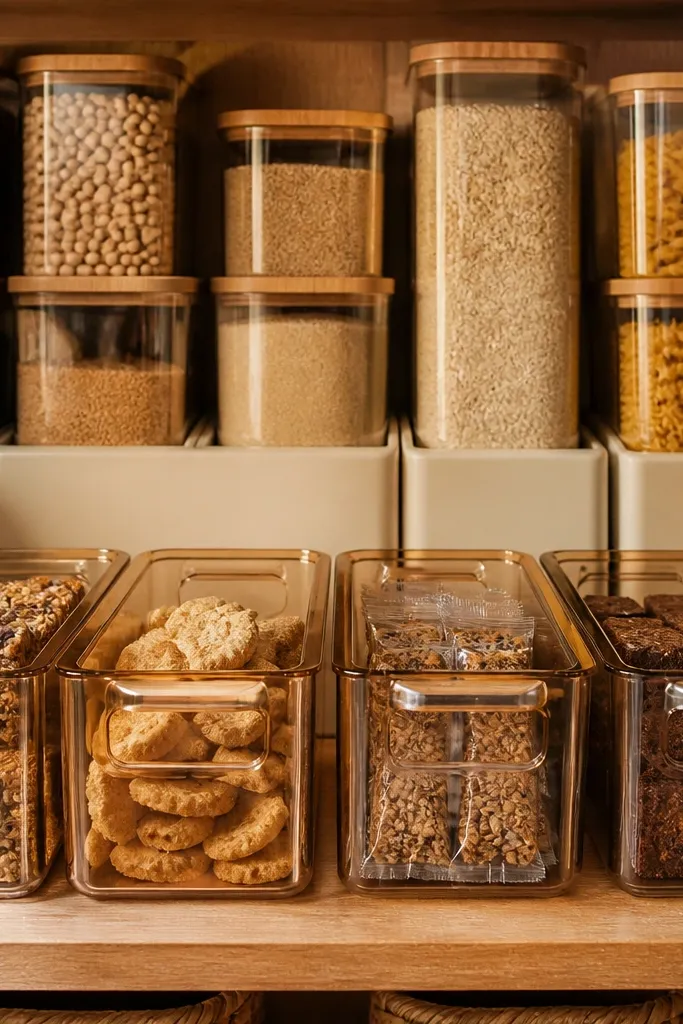
When your shelf heights are inconsistent, you end up with random stacks that don’t fit and you lose the ability to grab items quickly. A two-height zone layout forces repetition: one zone for grab-and-go items at a comfortable height, and another zone for bulk backups stored deeper or higher. The after looks cozy because each shelf has a pattern you can scan in seconds. This works best for small pantries where every inch matters and you don’t want tall towers. It’s a moderate project because you’re adjusting shelf placement, but it’s straightforward.
Start by emptying the shelf and measuring the clear height between shelves at two points because many pantries aren’t perfectly level. Pick a lower bin height you can reach without bending — aim for a bin top around 48-54 inches from the floor. Move shelf pegs or brackets to create a lower zone that fits your main bin height plus 1/2 inch clearance. Then add a second zone above for larger containers or bags, keeping the depth consistent. Load the lower zone with what you use weekly and the upper zone with overflow so your daily routine never touches the backup pile.
Use one bin height for the lower zone across all shelves so your labels line up and your brain stops recalculating.
Don’t set shelves based on what fits one container; set them based on the container you use most.
3. Canned Goods Row Divider with Can-Width Grooves
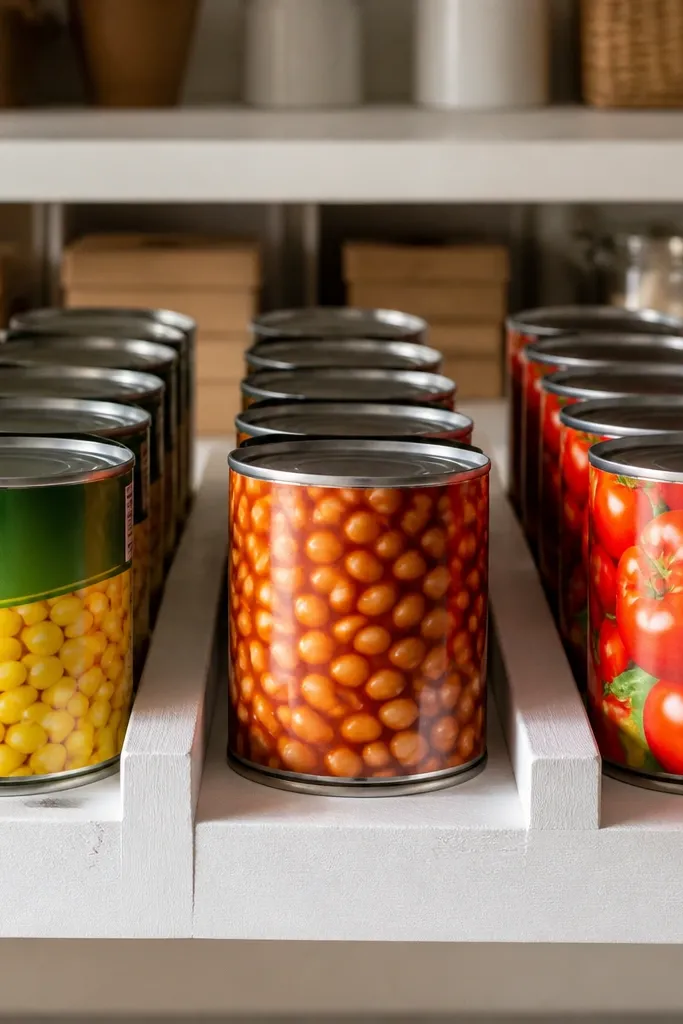
Start by choosing your can width standard — measure one can and write down the widest diameter including the label. Cut a divider strip from 1/2-inch thick plywood or MDF into a height that matches your shelf spacing. Mark and cut shallow grooves or add vertical dividers spaced so one can sits per lane with a 1/8-inch gap for easy removal. Attach the divider strip to the back edge of the shelf or screw it into a thin backing rail so it’s stable. Then test with a few cans and adjust groove spacing if labels rub or cans snag.
Cans turn messy fast because they roll and stack unevenly. A row divider made to can width creates lanes, so every can faces forward and stays in place when you pull one out. The after looks intentional because the shelf reads like a neat row, not a leaning tower. This project is great for small pantries where you store canned soup, beans, and tomatoes on the same shelf. It also reduces “digging” because you can grab from the lane you need.
Skip thisDon’t make lanes too tight; labels catch and you’ll eventually stop using the system.
Editor's noteAdd a thin strip of rubber under the divider so cans don’t rattle every time you open the door.
4. Wire Shelf to Flat Tray System (No More Falling Snacks)
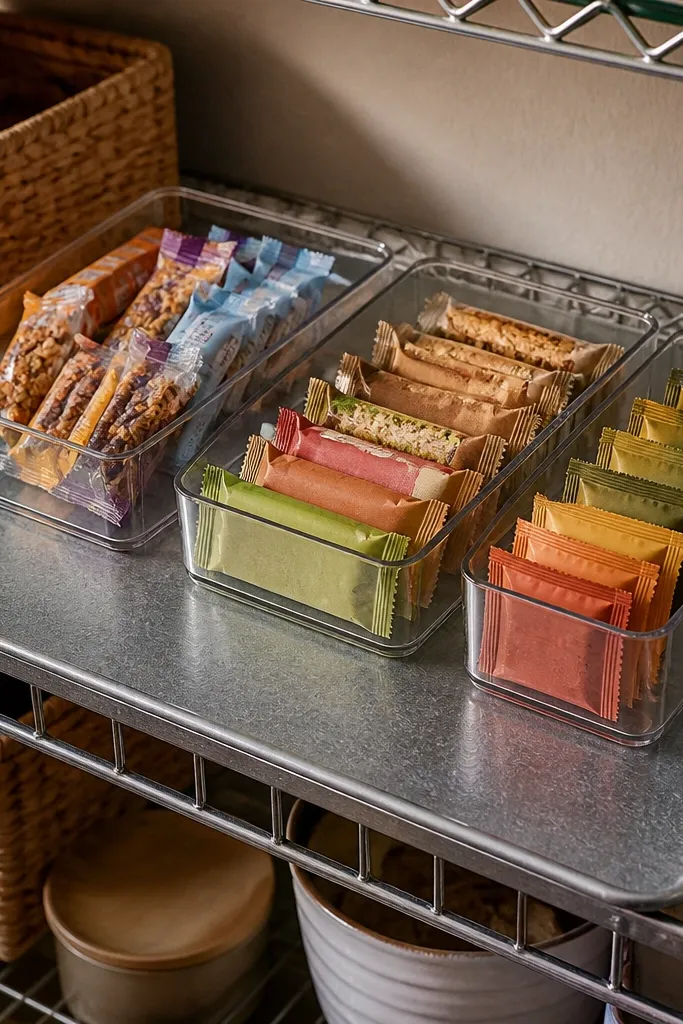
Measure the wire shelf footprint and cut rigid boards or use pre-cut shelf liners that won’t bend (plywood 1/4-inch thick works well). Seal raw plywood with two coats of polyurethane or a wipe-on water-based finish so spills don’t soak in. Place the tray on top of the wire shelf and secure with small corner brackets or shelf-safe adhesive pads. Add a front lip if items still creep. Then put your most-used items in shallow bins that sit fully on the tray so nothing hangs over the wire.
Wire shelves look open, but they’re a mess for small items like packets, snack bars, and loose baking ingredients. The after is calmer because you stop the tiny stuff from slipping through and you get a clean surface for bins and trays. Flat trays also make your shelf look more uniform, which reads “cozy” even when you have a lot of items. This is a practical move for DIYers because it upgrades what you already own instead of replacing the whole shelf. Skill level is beginner, and you can do it in a couple hours.
Skip thisDon’t skip sealing; one sauce spill turns plywood into a permanent stain.
Editor's noteUse a matte finish on the tray so labels don’t glare under kitchen lighting.
5. Clear Lid Bin Stacking with Label Bands
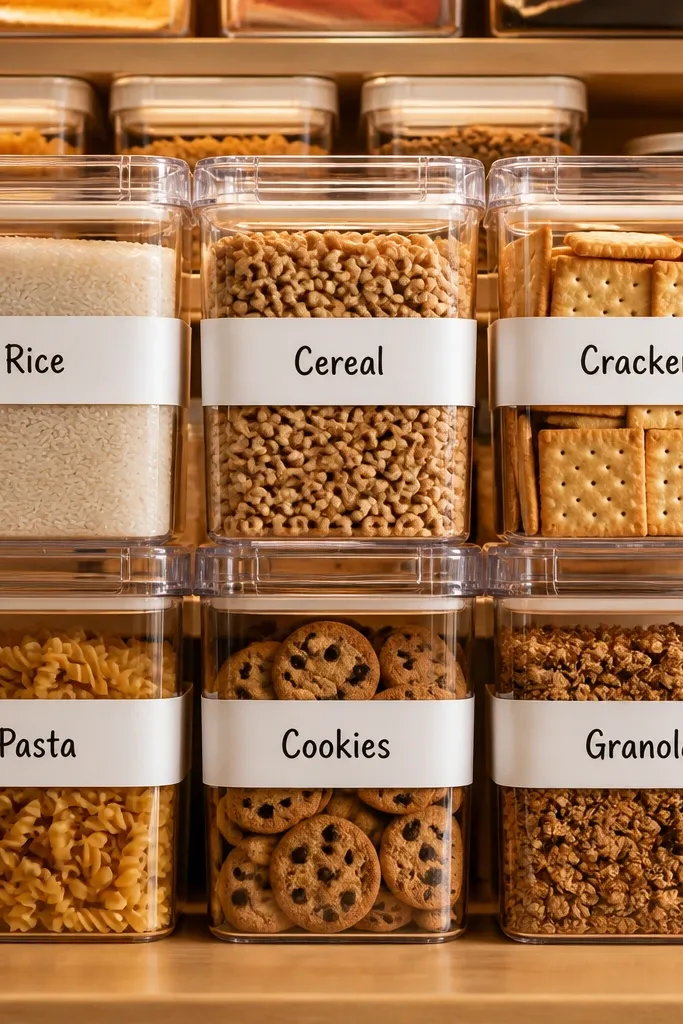
Start by choosing bins with matching dimensions and lids that lock or sit flush, then measure shelf depth to ensure the bin doesn’t stick out past the door hinge area. Print or buy labels on a label strip paper that’s sized for the bin front (aim for 2.5-3 inches tall). Apply label bands at one consistent height using a template card so every bin aligns. Stack bins by weight: heavier items in the bottom stack, lighter items on top. Finally, add a small “stop” under the bin using non-slip shelf liner so bins don’t slide when you pull one.
Clear-lid bins create instant before-to-after clarity because you can see what’s inside without opening everything. Label bands make it consistent: the label sits at the same height and faces the door, so you don’t hunt. The after looks cozy because the pantry becomes a set of repeatable shapes instead of mixed packaging. This works best for pantry items that come in bags or mismatched containers like rice, oats, and baking chips. The build is easy if you already have bins and just need a better system.
Skip thisDon’t use handwritten labels on glossy plastic bins; the ink smears and you’ll end up relabeling.
Editor's noteIf your labels fade, use vinyl label tape and a clear laminate top strip.
6. Pull-Out Basket Track for Deep Shelves
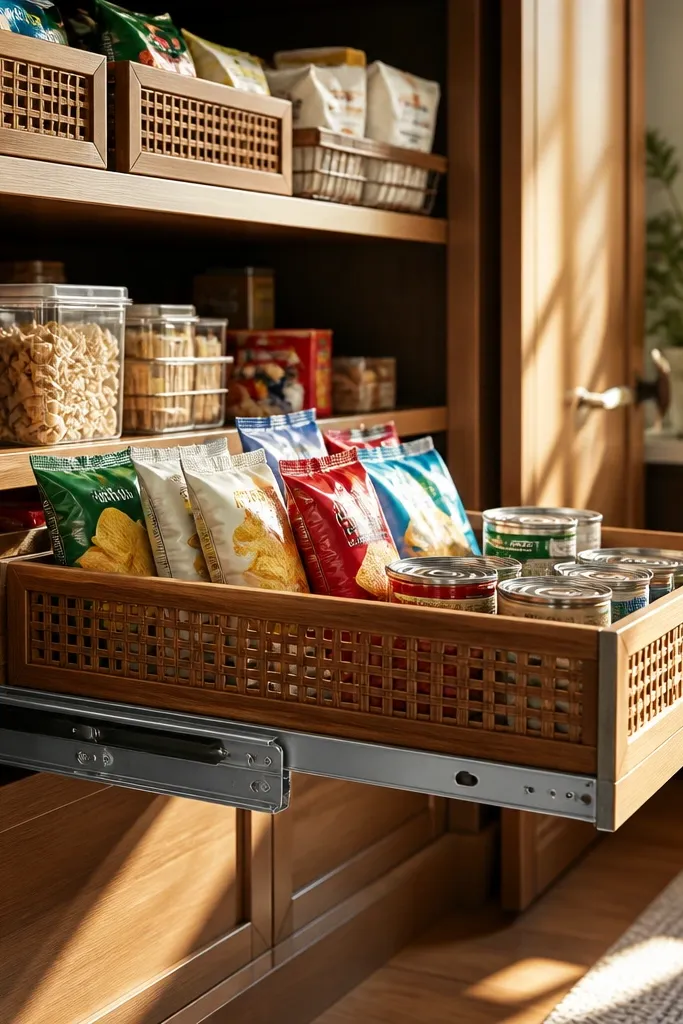
Deep shelves are the enemy of cozy because items end up in the back and you only reach for what’s visible. A pull-out basket track fixes that by bringing everything forward on one smooth motion. The after feels calmer because you can see your options and you stop buying duplicates you forgot. This is the right move when your pantry depth is 14-18 inches and your current shelves are hard to reach. It’s a DIY mid-level project because you’re mounting tracks, but the result is worth it.
Choose a drawer slide system rated for the basket weight (soft-close is nice but not required). Measure the shelf inner width and cut a simple base board for the basket to sit on, leaving 1/4-inch clearance. Mount the slide rails to the shelf sides using a level so the basket travels straight. Attach the basket or wire frame to the base board with screws so it can’t flex. Test the motion empty first, then load light items before you trust it with heavier bags.
Mark the slide position with painter’s tape and check alignment twice; crooked tracks make the basket bind.
Don’t mount tracks to thin shelf sides without reinforcing — screws pull out with repeated use.
7. Lazy Susan Turntable for Corner Chaos
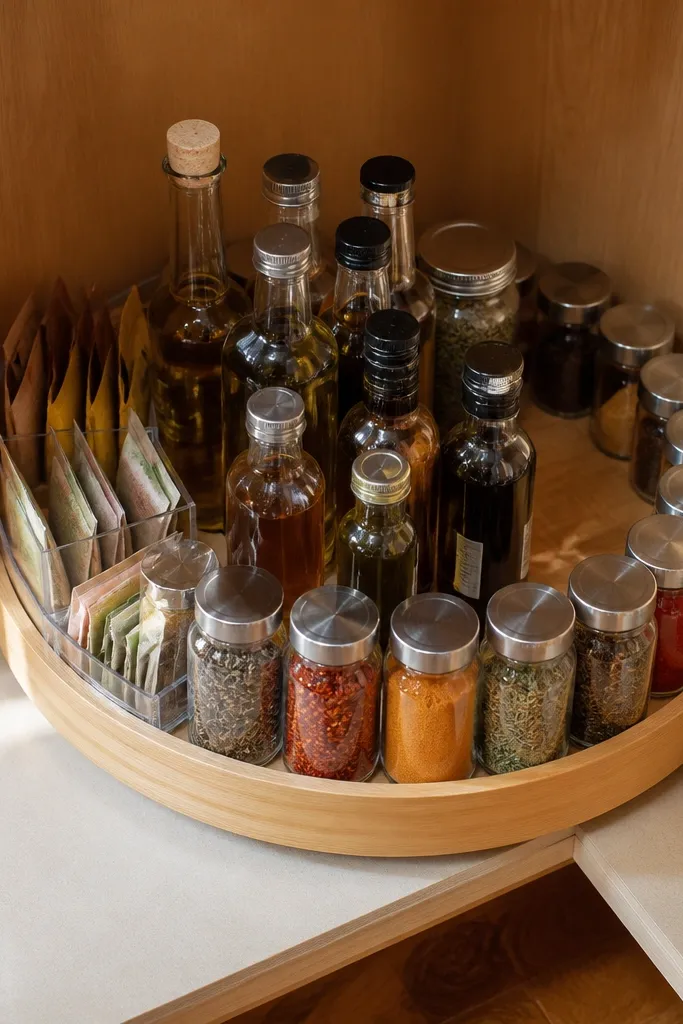
Measure the corner shelf opening and pick a turntable diameter that fits with at least 1 inch clearance from the door and side walls. Remove the shelf surface or add a mounting plate so the turntable sits level. Use a non-slip mat under the turntable to keep it from sliding when you spin it. Arrange frequently used items on the outer ring and backups closer to the center. Then label the lid or bottle front so you can scan at a glance.
Corners are where pantry organization dies — bottles tip, spices get buried, and the same items sit untouched. A lazy Susan turns the corner into a usable landing zone, so you can reach without digging. The after looks cozy because the corner becomes a neat circle of labels instead of a pile. This works best for small pantries that have a corner shelf or a tight right-angle space. It’s a quick upgrade with a big visibility improvement.
Skip thisDon’t store tall bottles on the edge; if they lean, they block rotation.
Editor's noteUse a shallow turntable for spices and oils; deep ones force you to reach too far.
8. Under-Shelf Curtain Divider for Bags and Wraps
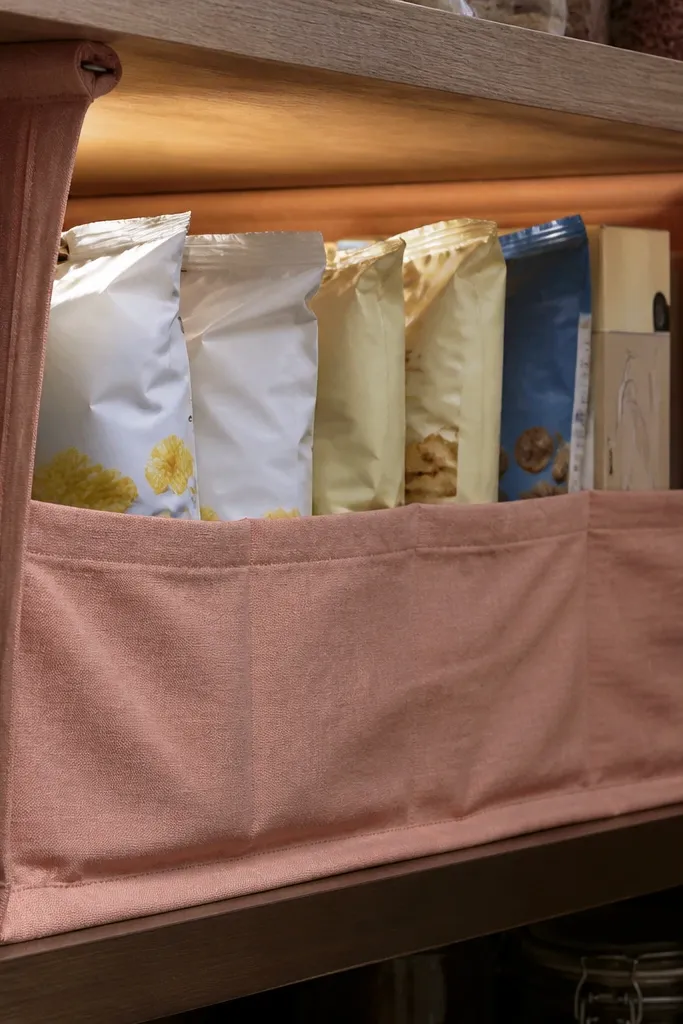
Measure the underside width and cut a divider panel from thick fabric like canvas or a durable plastic sheet with a hemmed edge. Attach it with Velcro strips or small screws and brackets to the underside of the shelf above the bags. Leave a small gap at the bottom so bags slide into the pocket without bunching. Use a stiffener strip at the top edge so the divider stays straight. Load bags with the open side facing out so you can grab without pulling everything forward.
If your pantry has flat bags like chips, zip bags, or parchment, they fall over and ruin the look. An under-shelf divider makes a pocket that keeps them upright and contained. The after looks tidy because you stop the “bag avalanche” at the front and you get a clean line under the shelf above. This is a smart solution for small spaces where you don’t have room for rigid dividers. Skill level is beginner and the cost is low.
Skip thisDon’t use thin material that sags; sagging dividers collapse and you’re back to chaos.
Editor's noteAdd a label tag on the pocket edge so you know what belongs there without opening the door twice.
9. Cookie Sheet Pull-Out for Baking Backups
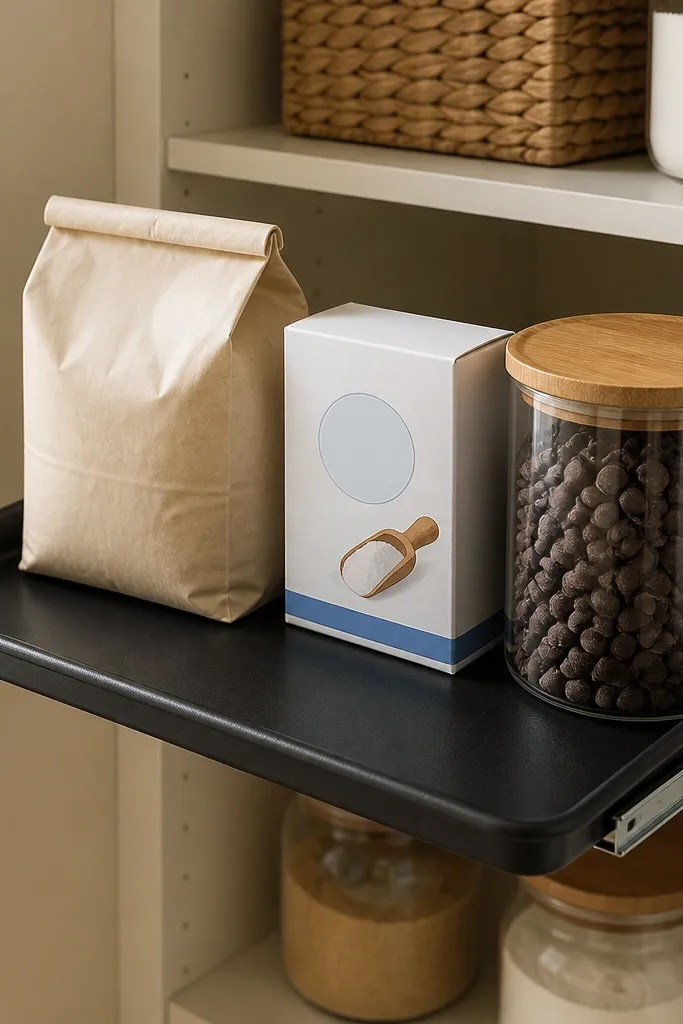
Measure the shelf opening and buy a flat tray that fits with 1/2-inch clearance on each side. Add drawer slides to the shelf sides or install a simple rail system using metal angle brackets. If you’re using slides, screw them level, then test with the tray empty. Drill small holes or add a non-slip mat on the tray surface so bags don’t slide. Organize by type — keep dry baking staples together and sprinkles/chips in smaller bins on the same tray.
Baking items are the worst for clutter because they come in boxes, bags, and odd sizes. A pull-out flat tray like a sized cookie sheet gives you a “landing zone” that keeps everything in one plane. The after looks cozy because the shelf becomes organized by category, not by whatever box arrived last. This is great for small pantries where you want to store flour, sugar, sprinkles, and baking chips without building a full drawer. It’s beginner friendly and takes about a weekend if you do it carefully.
Skip thisDon’t overload the tray; a heavy tray makes slides bind and the system stops getting used.
Editor's noteUse a non-slip shelf liner on the tray so paper bags don’t shift when you pull it out.
10. Adjustable Shelf Racks with Numbered Peg Holes
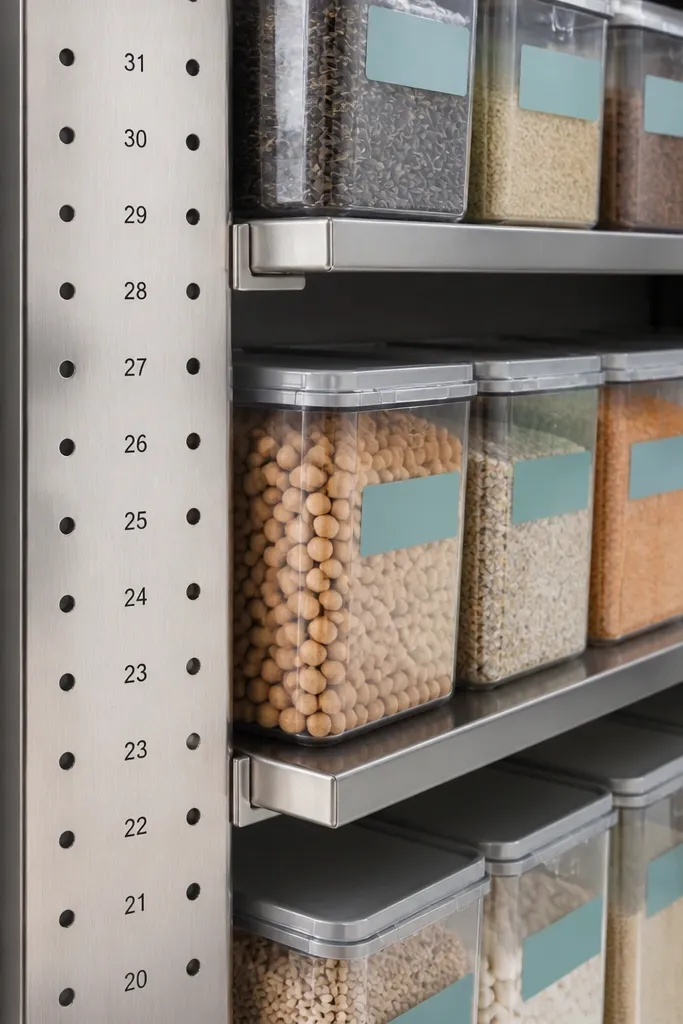
Start by checking if your pantry uses peg rails or brackets. If it does, add a simple numbering system: label peg positions with painter’s tape and a marker so you can set the same height again. Move shelves to fit your main bins first, then lock them in place. If your pantry uses fixed shelves, install an adjustable rail system using a level and matching screw locations. Load light items first to test clearance with the door, then move heavier items last.
If you keep changing products, fixed shelf spacing turns into clutter because bins don’t match and you end up stacking. Adjustable shelf racks fix that by letting you set heights for your actual containers, then repeat them. The after looks consistent because every shelf has the same container height pattern. This is especially useful for DIYers who restock often and hate re-measuring every time. It’s a moderate project, but it saves you from future “before” mess.
Skip thisDon’t guess peg placement; a 1/2-inch difference creates a cascade of bins that don’t fit.
Editor's noteMark the shelf positions with a tape strip under the shelf so you can set height even if you remove bins for cleaning.
11. Staggered Bin Layout for Small Depth Shelves
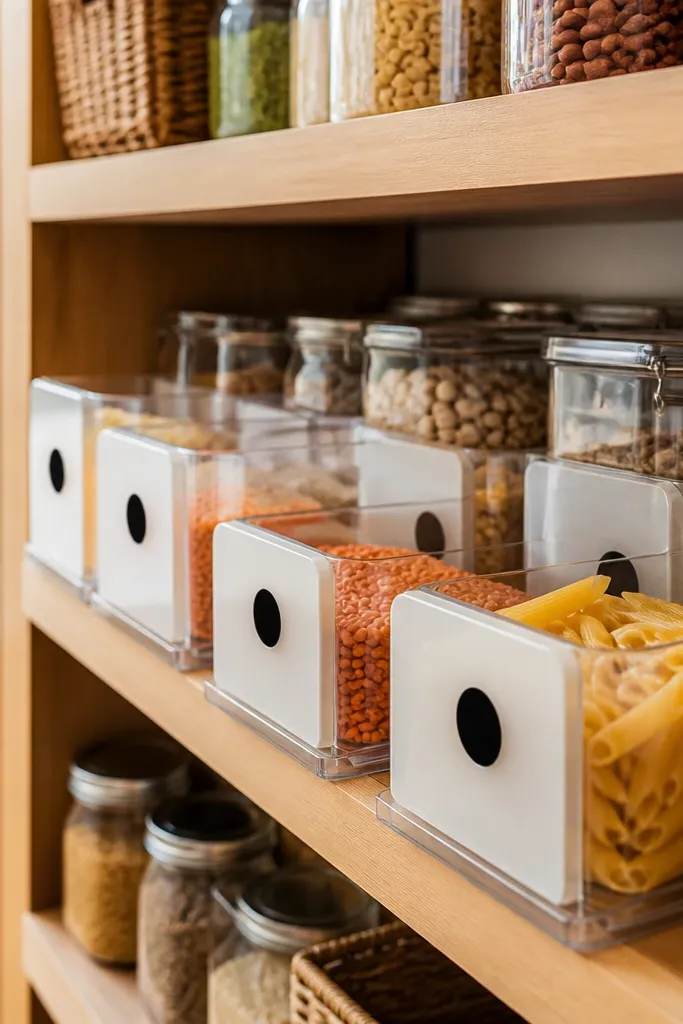
When shelves are shallow, people cram bins in a single row and lose access to the back row. Staggering bins — one slightly forward, the next slightly back — gives you a clear reach path without needing a pull-out system. The after looks cozy because you can see front labels, and the bins don’t fight for space. This is the best approach when you want a DIY fix that doesn’t require tracks. Skill level is beginner; the “build” is mostly measurement and bin choice.
Measure shelf depth and pick bins that leave at least 1 inch clearance between the front bin and the back bin. Place the front bin so its label faces the door and sits near the front lip. Put the back bin 1-2 inches farther back, then add a stop strip or non-slip liner so it stays put. Keep one category per stagger row — for example, snacks in the front row and baking ingredients in the back row. Finally, do a “door open test” — pull one item from each bin with the door open and confirm nothing catches.
Use uniform bin front edges so labels align even when bins are staggered.
Don’t stagger randomly; uneven offsets make bins tip and labels end up unreadable.
12. DIY Spice Drawer Shelf Insert (Magnetic Strip + Labels)
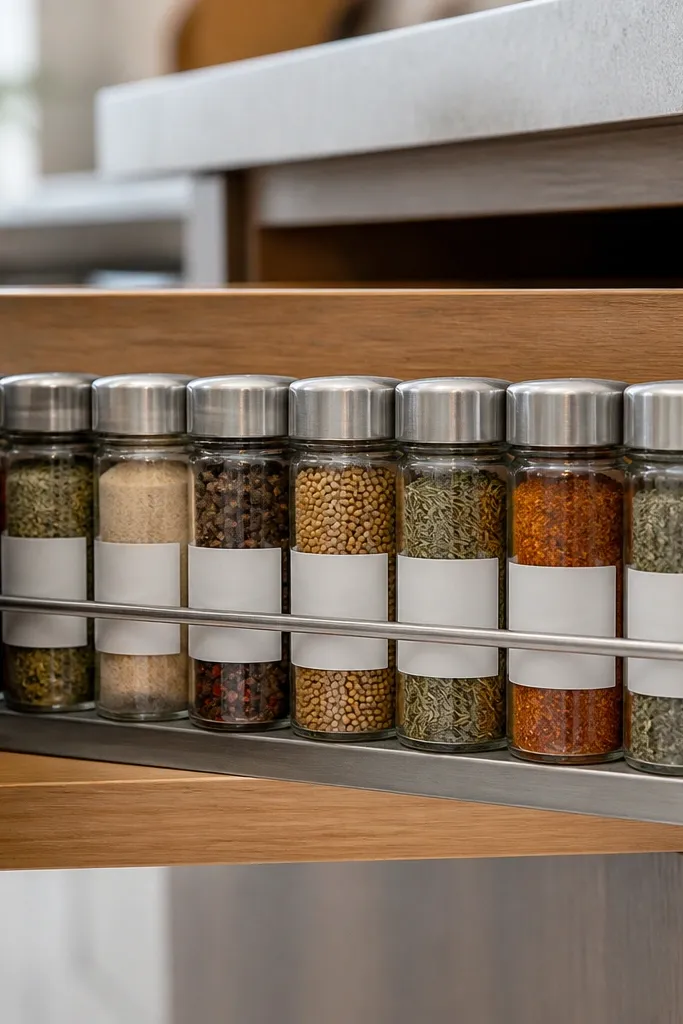
Spices look tidy until you try to use them. Then they slide, labels face sideways, and you end up with duplicates because you can’t find the one you need. A shelf insert with a magnetic strip or metal rail holds jars upright and keeps labels facing forward. The after looks cozy because spices become a mini system with consistent spacing. This works best for small pantries where spices live on a shelf instead of a drawer. It’s a DIY-friendly project and the build time is short.
Pick jars that have metal lids or add metal rings to match your chosen jars. Cut an insert base from 1/2-inch plywood or a thick plastic sheet to fit the shelf depth. Mount a metal strip or magnetic rail along the back edge so jars snap into position. Add a front label strip with the same height for every jar, using waterproof labels if your pantry gets humidity. Arrange jars by cooking frequency, not by alphabet, so the front row is what you reach for weekly.
Use a label template with the same font size for every jar so scanning stays fast.
Don’t mix jar types without testing magnet strength; weak hold means jars fall when you pull one out.
13. Stackable Clear Canisters with Size-Front Planning
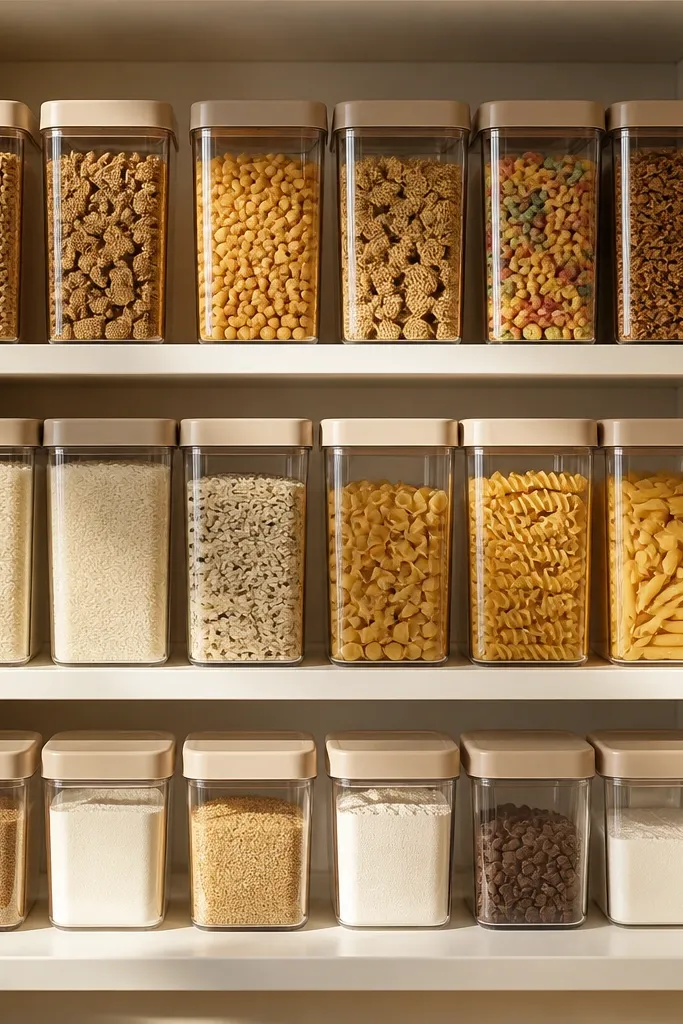
Measure shelf depth and choose canisters with a footprint that leaves at least 1/2-inch clearance from the back and sides. Plan your stack order: heavier items on the bottom, lighter on top, and keep tall items away from the door edge if it swings into the shelf. Fill canisters with dry goods, then wipe rims so lids sit clean. Label the front with the product name and a short date marker if you rotate stock. Place canisters in a straight grid and use non-slip matting so they don’t shift when you pick one up.
If your pantry has mixed packaging, it looks messy even when the shelves are “clean.” Stackable clear canisters fix that by turning everything into matching shapes and visible contents. The after looks cozy because the front row is uniform and you can see levels at a glance. This is best for dry goods like cereal, rice, pasta, and flour mixes when you already have a shelf depth that fits canisters. It does take some planning, because canisters only look good when they line up.
Skip thisDon’t buy canisters first; buy after you measure shelf depth and how many you want per shelf.
Editor's noteUse a single label system across all canisters so you don’t end up with different label sizes that break the look.
14. Labeled Under-Shelf Basket for Cleaning Supplies and Extras
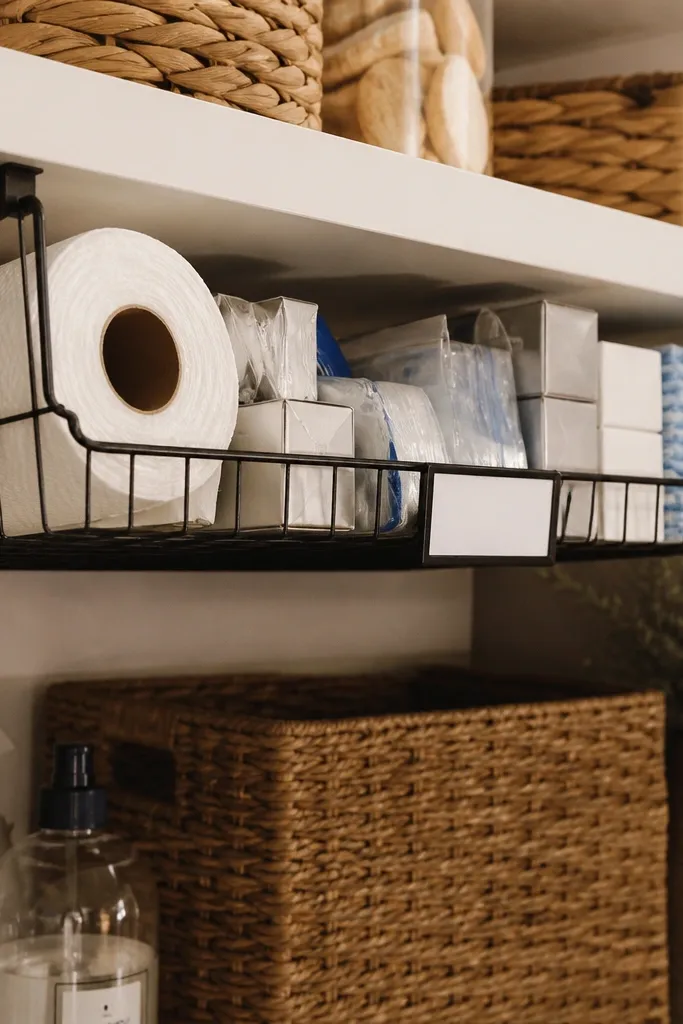
People fill shelves with everything and forget there’s space under the shelf lip. An under-shelf basket adds a hidden but easy-access zone for extras like paper towels, foil, zip bags, and cleaning refills. The after looks cozy because you reclaim shelf space for food items you actually use daily. This works when your pantry has enough vertical clearance between shelves for a basket to hang. It’s an easy DIY that improves function without changing your whole layout.
Measure the vertical gap between shelves so the basket clears when the door opens. Choose a basket with a flat back and sturdy frame so it doesn’t sag. Install two mounting brackets or small shelf clips to hold the basket under the shelf above, keeping it level. Add a labeled bin inside the basket so you can separate categories and keep the basket from turning into another pile. Load it with items that you don’t need multiple times per week, then label the basket front so you know what’s inside without digging.
Use a basket liner or a washable cloth so spills don’t stain your shelf underside.
Don’t hang the basket too low; you’ll hit it when reaching and you’ll stop using it.
15. Shelf Backing Panel for Cleaner Lines and Easier Styling
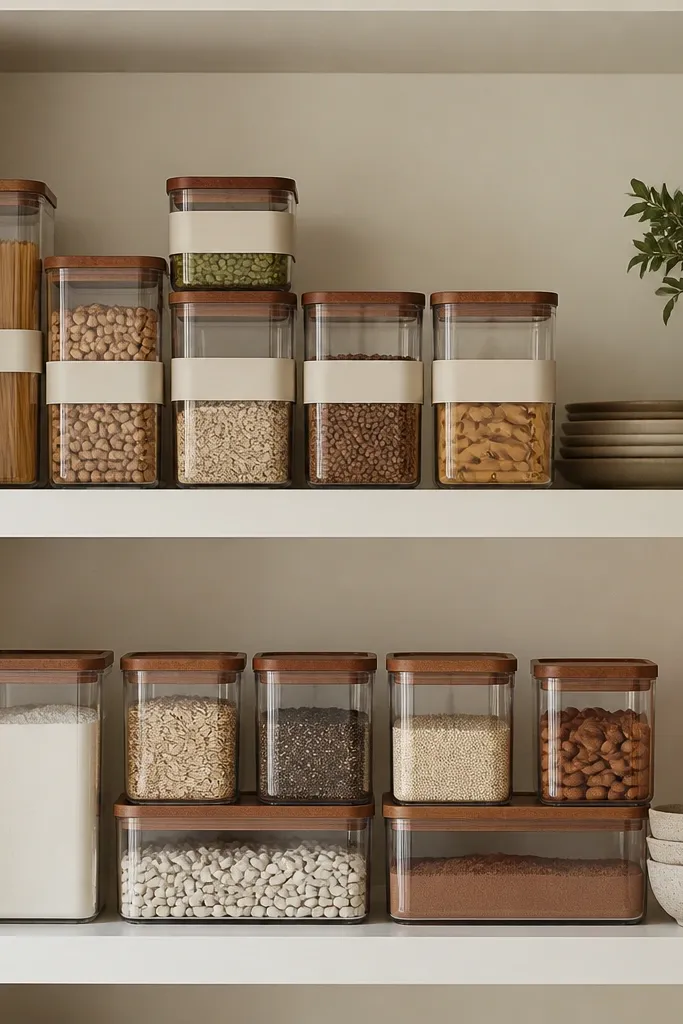
Measure the inside back of your shelf area and cut a backing panel from thin plywood or peel-and-stick paneling that won’t warp. Seal or prime if using plywood, then attach with construction adhesive and a few small screws at the edges. Paint or finish the backing in a light neutral so it doesn’t make your pantry look darker. After backing is installed, place bins and canisters in a single repeat pattern and keep label faces toward the door. Clean the shelf front edge so it looks crisp against the new backdrop.
If your pantry looks busy, it’s sometimes because the back wall is showing — shelves look cluttered even when items are neat. A backing panel creates a consistent background, so labels and containers stand out instead of competing with bare wood or messy walls. The after looks cozy because the whole shelf reads like one clean block. This is best for small pantries with visible shelf backs, unfinished drywall, or scuffed surfaces. It’s a beginner project and it also protects the wall from drips.
Skip thisDon’t use glossy backing; it reflects kitchen light and makes labels harder to read.
Editor's noteChoose a backing color that matches your pantry lighting; warm white paint prevents a gray cast on labels.



