
1. Shadow-box header trim that makes the track vanish
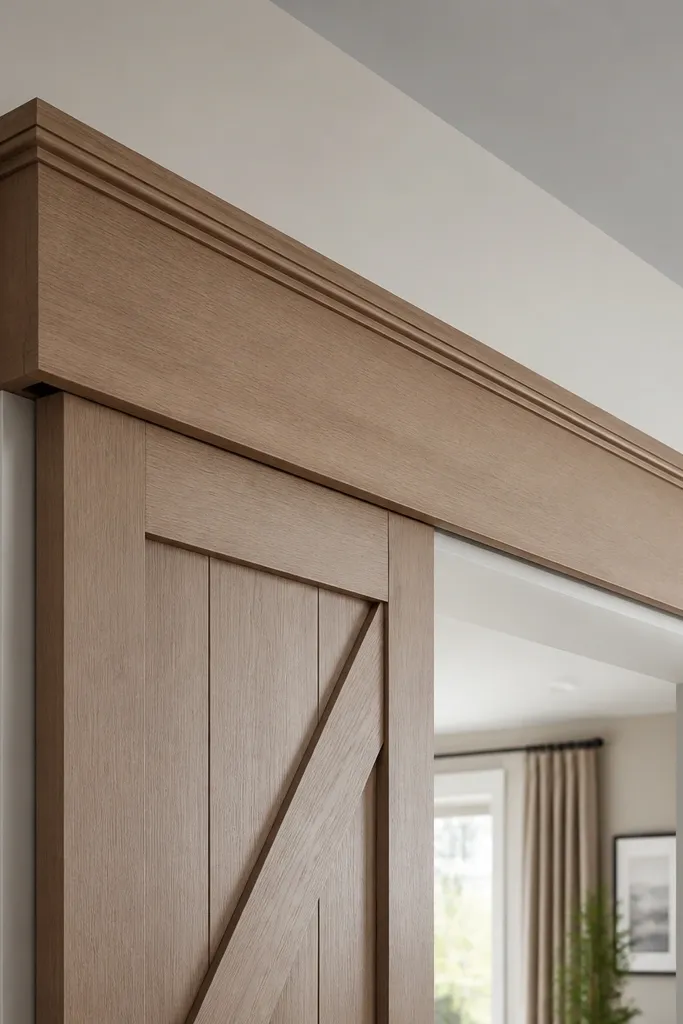
Measure the opening width and the track length, then add 1-2 inches of overhang on both sides so the trim fully covers the rail ends. Build a simple box frame from 1x3 or 1x4 boards (or 3/4-inch MDF strips), and leave a 1/8-inch shadow gap between the box and the wall-facing piece. Install the main top board first with screws into studs or solid blocking, then add side pieces, and finally attach a flat front face board that hides the track. Caulk the seams, fill nail holes, and finish with a matte paint or stain + clear matte topcoat.
A sliding door looks cozy when the top area reads like architecture, not a metal rail. A shadow-box header trim covers the track and creates a deliberate gap line that your eye reads as finished carpentry. Use it when you can see the rail above the opening or when the wall looks bare around the door. The warm look comes from a wood or MDF frame finished in a matte stain or paint, plus a shadow line that makes the trim look crisp in photos. This project is a mid-level DIY — it needs accurate measuring and a straight install, but it doesn’t require advanced joinery.
Skip thisSkipping the shadow gap makes the top look flat and cheap, especially under indoor lighting.
Editor's noteDry-fit the header before final screws and slide the door once to confirm nothing scrapes the trim.
2. Linen panel sliding door insert with a soft "gallery" frame
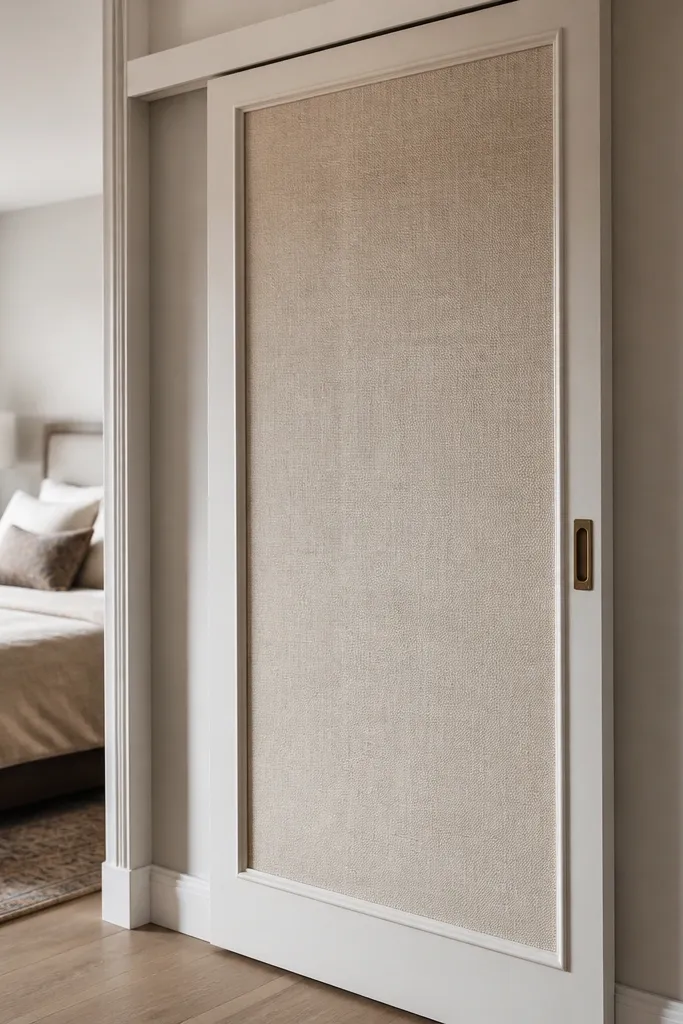
If your door is plain, a fabric insert changes the vibe instantly. Linen gives that cozy, light-catching texture without making the door look bulky. The trick is framing the fabric inside a rigid border so it hangs straight and doesn’t sag or wrinkle like a loose curtain. This idea works in bedrooms, home offices, and hallways where you want the door to soften the room. Skill level is beginner-friendly if you can staple or glue fabric to a panel and keep edges tidy. It’s also a great choice when you want an aesthetic upgrade without changing the track.
Remove the door panel if it’s easy, or measure the visible insert area and cut a rigid backing board (MDF or 1/4-inch plywood) to fit. Stretch linen tightly over the backing and staple or use spray adhesive along the back edges, then trim the fabric flush. Build a frame around the insert using 1x2 trim boards, and attach the frame to the door with wood glue and small brads or screws. Finish by painting or staining the frame and sealing the fabric edges so they don’t fray.
Pre-wash linen and iron it — it keeps the texture consistent once installed.
Using a thin, stretchy fabric leads to sagging and uneven wrinkles when the door moves.
3. Beadboard wrap-around door face for instant cozy texture
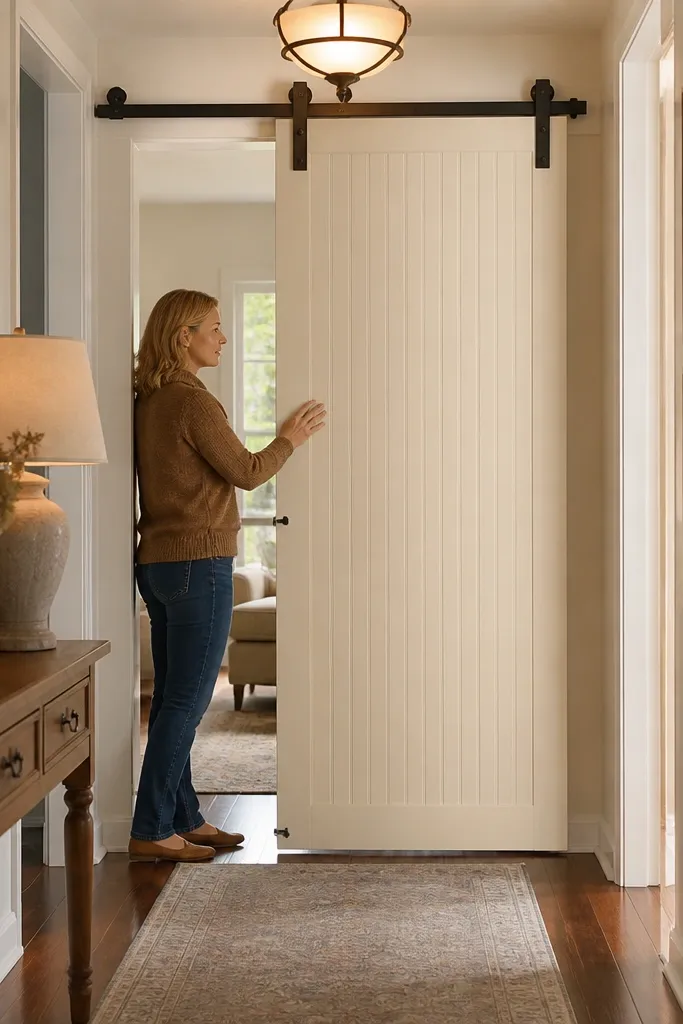
Measure the door face height and width, then cut beadboard panels (or a beadboard sheet) so the seams land where the door frame already has structure. Attach beadboard to the door with construction adhesive plus brad nails or screws every 8-10 inches, keeping edges aligned. Add trim strips around the perimeter using 1x2 or 1x3 boards to create a framed look. Fill nail holes, caulk seams, and paint with a matte finish for the soft shadow effect.
Beadboard reads cozy because it adds small shadows across the surface. It also hides minor dents or unevenness in the existing door face, which matters more than people think. You get that “cottage built-in” look without changing the mechanism. This works best on doors with a flat face where you can attach paneling or a new skin. It’s a solid weekend project for most DIYers because beadboard planks are forgiving and easy to cut. The result looks warm in both daylight and lamp light.
Skip thisFastening only at the edges can cause panel lift when the door slides and flexes.
Editor's noteUse a small foam roller for paint — it reduces streaks in the bead grooves.
4. Arched top trim that turns a basic opening into a feature
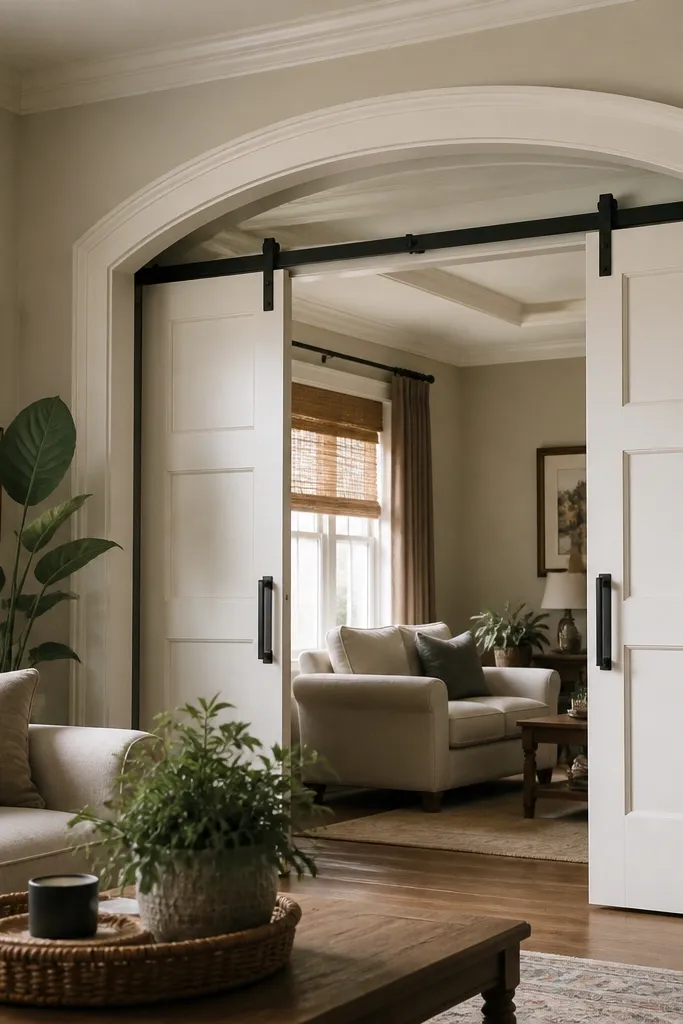
A straight opening can feel harsh, especially with sliding doors that move horizontally. Adding an arched top trim makes the doorway feel softer and more decorative, which is what “cozy” usually means in practice. You’re not changing the door — you’re changing the frame language. This is ideal for living rooms and dining rooms where you want the door to look intentional. The look is photogenic because the arch catches light along the curve. It’s a mid-skill project because you need a clean arc and straight mounting points.
Choose a radius that fits your width — a good starting point is an arch height of about 8-12 inches depending on opening size. Create a template from cardboard, then trace onto 3/4-inch MDF or laminated plywood for rigidity. Mount the arch to a header board or directly to the wall framing, then add side trim boards that meet the arch cleanly. Prime, caulk at the seams, and paint matte to reduce glare.
Use scrap MDF to test the curve first; it saves you from wasting your final sheet.
Cutting the arch freehand without a template leads to wobbly lines that show in every photo.
5. Matte black track cover with wood slat side panels
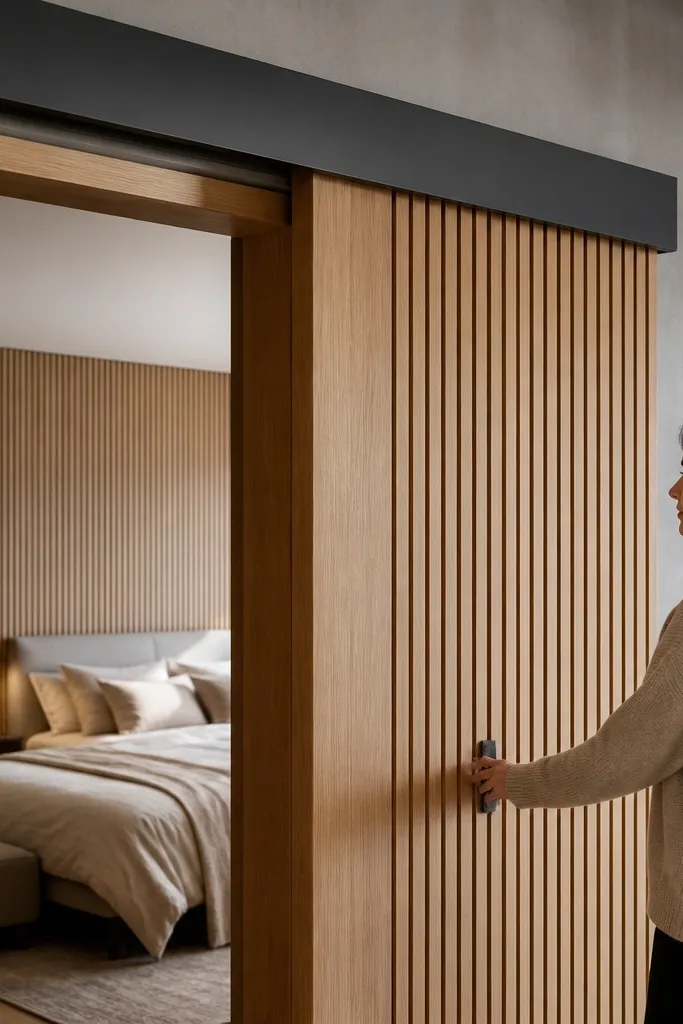
The track is the biggest visual interruption, so hiding it is half the battle. A matte black cover keeps the hardware looking designed, while wood slat side panels add warmth and depth. This combination looks modern-cozy instead of farmhouse-only. It works when you have enough wall space beside the opening to mount side panels without blocking trim or outlets. Build time is moderate, and the result looks sharp from multiple angles. The slats create a striped shadow pattern that reads cozy even when the room is neutral.
Measure the track length and build a cover box from 1x3 boards with a thin backing panel (1/4-inch plywood or hardboard) so it’s rigid. Paint or powder-coat the cover matte black, then mount it to studs above the door. Add two side slat panels on either side of the opening using 1x2 slats spaced 1/2 inch apart, anchored to a backer frame. Seal slat edges and finish in a warm stain or paint.
Pre-paint slats before assembly; it avoids messy brush lines in the grooves.
Mounting slats directly to drywall without anchors makes them loosen over time.
6. Woven rattan panel door insert behind a framed border
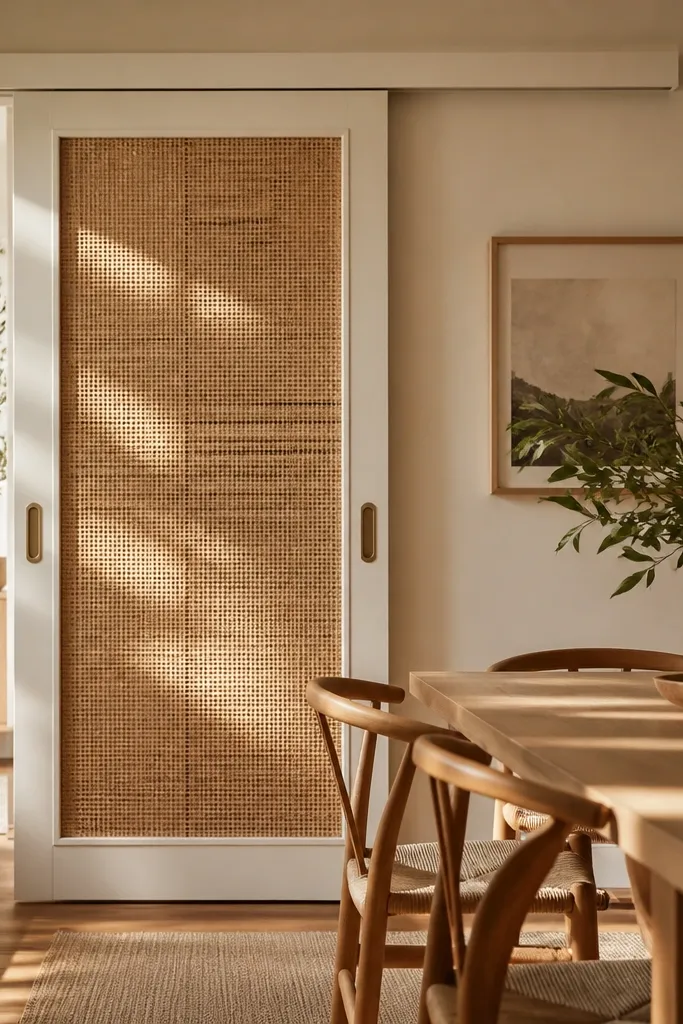
Rattan adds cozy texture and airy warmth, and it photographs beautifully because it creates tiny highlights. The key is using a framed border so the weave looks intentional and stays flat. This idea is best for doors that are too solid-looking and feel heavy visually. You can keep privacy decent by using a denser weave, but it will always let some light through. Skill level is beginner to intermediate because the insert needs a rigid backer. The overall look is light, warm, and welcoming without turning into a boho mess.
Cut a rigid backing board to the insert size, then cut rattan panel material to fit with a 1-2 inch margin. Stretch and attach the rattan to the back using staple or small finishing pins, then trim the edges. Build a border frame using 1x2 trim and attach it around the insert with wood glue and brads. Finish the border in a warm white or light oak tone, and seal with a matte clear coat on wood only.
Pick rattan with a consistent pattern — mismatched weaves look chaotic once installed.
Attaching rattan directly to the door without a rigid backing makes it sag as humidity changes.
7. Cedar plank door skin with a warm, matte stain
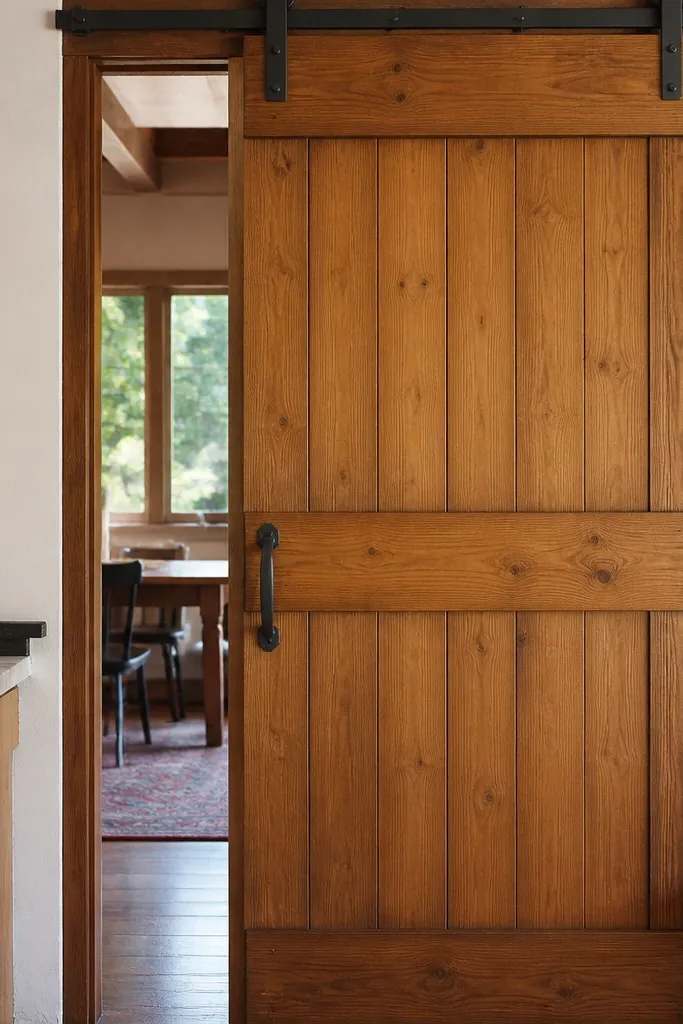
Measure the door face, then plan plank widths so seams land evenly. Cut cedar boards (or thin cedar veneer panels if you want lighter weight) and dry-fit them with consistent spacing for expansion — 1/8 inch per seam is a safe starting point. Glue planks to the door using construction adhesive and pin them with finishing nails, then fill small gaps with matching wood filler. Stain with a matte cedar tone and seal with a matte clear topcoat so it doesn’t glare.
Wood planks make a sliding door look like it belongs to the room instead of sitting on it. Cedar is especially cozy because it has a warm color and a subtle grain that looks good under natural light. This works when you want a durable, tactile surface and you don’t mind a more rustic-leaning look. It also hides small imperfections better than paint alone. This project takes longer than fabric or trim covers because you’re covering the whole face, but the payoff is big. It suits entryways, living rooms, and bedrooms where you want warmth on a large vertical surface.
Skip thisSkipping spacing can cause boards to buckle when humidity changes.
Editor's noteSand the planks to 150-180 grit before staining — it makes the grain look smoother.
8. Vertical shiplap side frame with centered door panel
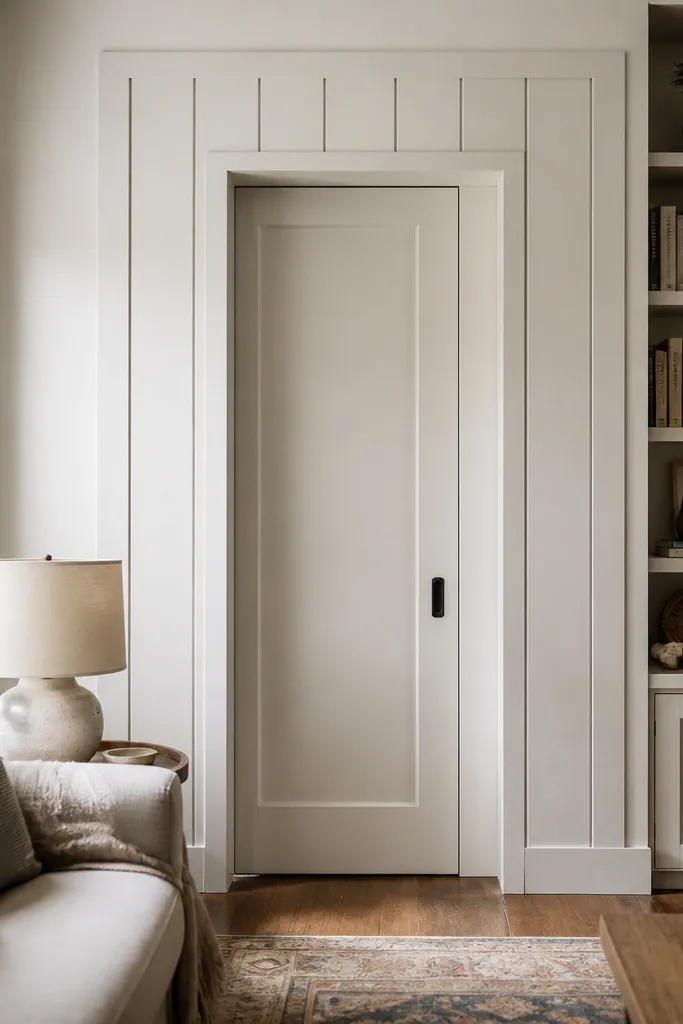
Measure the opening and decide how much shiplap should overlap — 1-2 inches on each side looks intentional. Install a level backer frame using 1x3s anchored to studs, then attach vertical shiplap boards starting from the bottom. Center the door panel visually, then add trim boards to frame the inner opening. Caulk nail holes, sand flush, and paint matte so the groove shadows stay soft.
Shiplap is cozy because it creates crisp shadows and a strong sense of structure. Framing the opening with vertical shiplap makes the door area look like a built-in niche, even when the door itself is basic. This idea works when your wall around the opening is flat drywall and looks unfinished. You get a photogenic, texture-forward look that still feels clean. Skill level is intermediate because you need straight alignment and consistent board spacing. It’s also a good choice if you want the door to visually “belong” to the wall.
Skip thisUsing glossy paint kills the cozy shadows in the grooves.
Editor's noteUse a speed square to keep every board line straight; shiplap mistakes show fast.
9. Curtain-track hidden behind a fabric valance over the sliding door
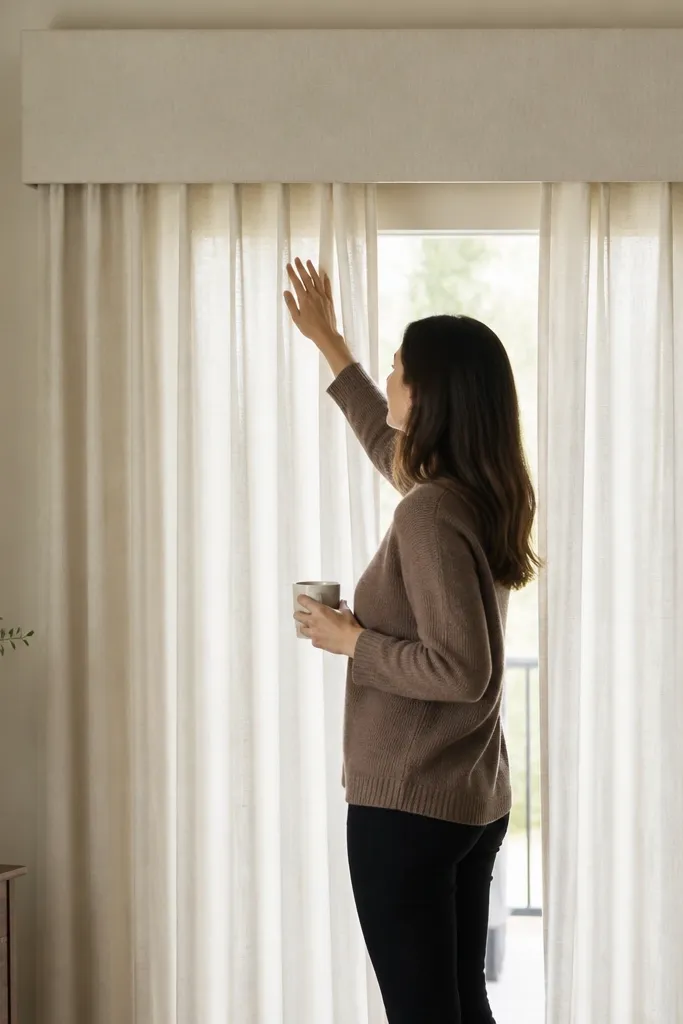
Mount a small ceiling or soffit curtain track above the sliding door opening, leaving enough clearance for the door to move. Build a valance board from 1x4 or 3/4-inch MDF sized to cover the track — add 2 inches beyond each side of the opening. Attach fabric to the valance using Velcro or stapled hems on the back side, then hang your curtain panels on the track. Finish the valance in matte paint and add a simple trim lip if you want a cleaner edge.
This is a cozy trick: you make the door feel like part of the room’s soft fabric layers. A fabric valance hides the top hardware and also gives you an excuse to add texture, like linen or textured cotton. The curtain can be purely decorative or functional for privacy, depending on how you mount it. This looks best when the door is in a living space and you want the “window treatment” vibe. It’s beginner-friendly if you can mount a track and attach fabric to a board. The result is warm, layered, and camera-friendly.
Skip thisMounting the valance too low can let the curtain brush the moving door edge.
Editor's noteUse blackout lining behind sheer fabric if the room needs privacy at night.
10. Faux paneling with 1/4-inch plywood lattice for a cottage look
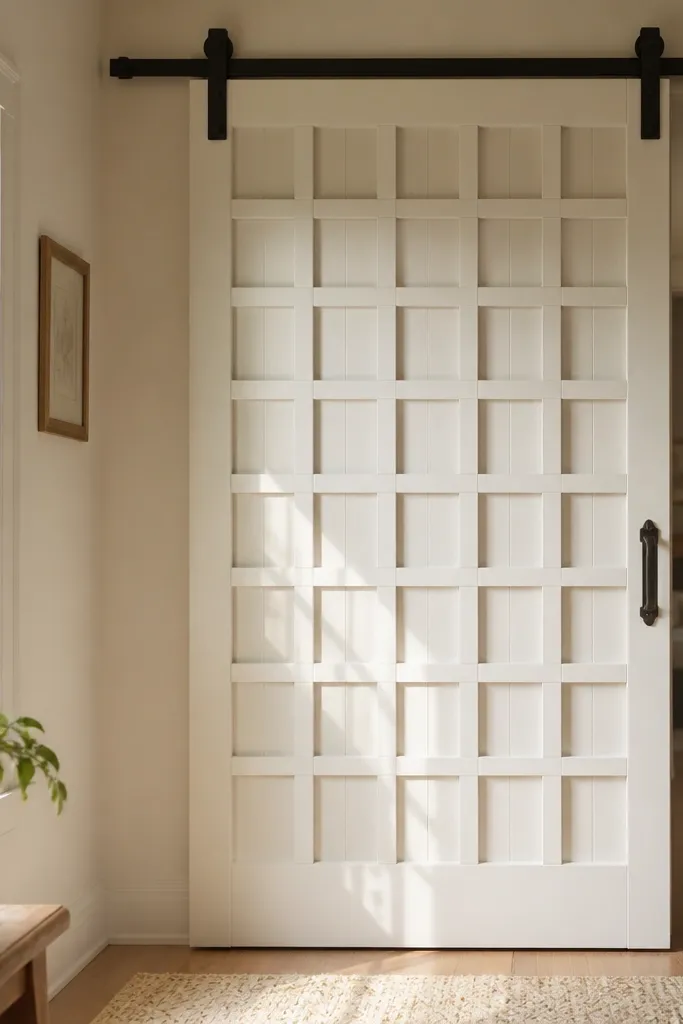
Cut a 1/4-inch plywood panel to the door face size, then prime and paint it a base color. Cut lattice strips (1x2 or 1/2-inch strips) and lay them out with even spacing — 1/2 inch gaps look good at typical door sizes. Glue and pin the strips onto the base panel, then attach the whole panel to the door with adhesive and brads around the perimeter. Caulk edges and finish with matte paint so the lattice looks crisp instead of shiny.
Cozy doesn’t always mean fabric. A lattice pattern adds charm and breaks up the flatness of a sliding door face. This works when you want a cottage look but don’t want the maintenance of real lattice framing everywhere. It also helps hide slight door warping because the panels create visual structure. The look is photogenic because light catches the grid lines and makes the door area feel detailed. Skill level is intermediate due to cutting consistent lattice strips. It’s a great option for hallways where you want the door to look decorative even when closed.
Skip thisSkipping primer on plywood leads to blotchy paint and uneven grid lines.
Editor's noteUse a spacer stick for every strip so the gaps stay uniform across the whole panel.
11. Wainscoting style board-and-batten frame around the opening
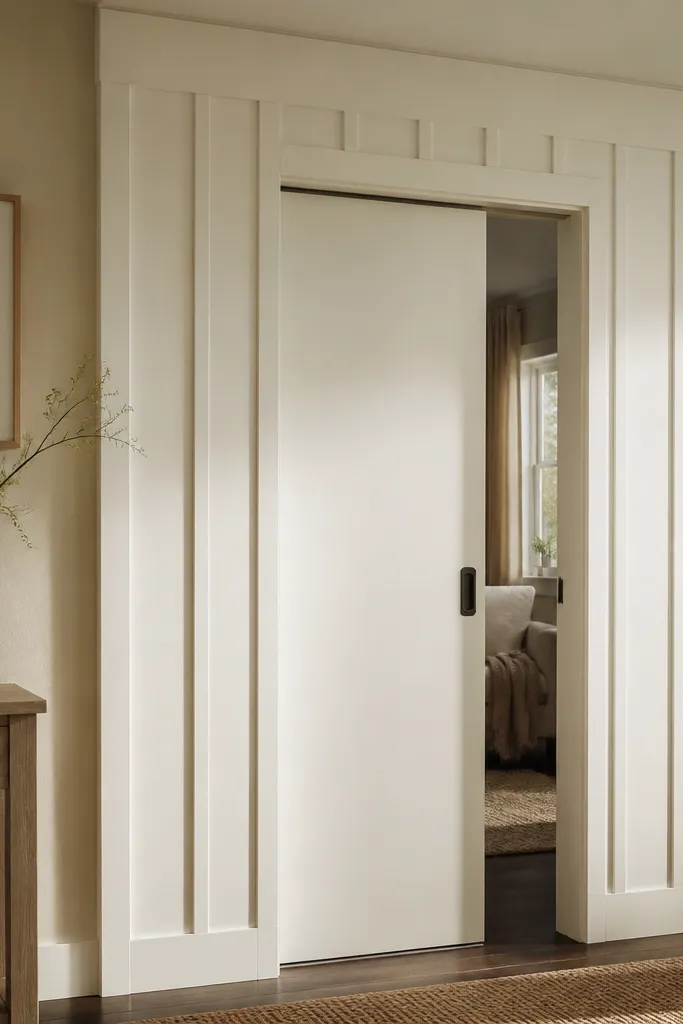
Measure the opening and cut two side boards and a top board sized to cover the wall area around the door. Add a flat panel base on the wall area (1/4-inch MDF or plywood) so battens have something to land on. Attach battens (1-inch strips) vertically with even spacing, then add a bottom rail if your wall height allows. Prime, caulk, and paint matte; finish door edges with matching trim so the frame looks continuous.
Board-and-batten reads cozy because it creates vertical rhythm and a clean, traditional frame. Wrapping the opening with a wainscoting-style border makes the sliding door area look like it came from a renovation plan. This works when you want the doorway to feel “finished” even if the door itself is simple. Skill level is intermediate because you’ll need accurate cuts and consistent spacing on battens. The finish matters — matte paint with a slight satin on trim reads warm instead of plastic. It’s also a strong choice for entryways and dining rooms where you want structure.
Skip thisTrying to attach battens directly to uneven drywall without a backer causes gaps and crooked lines.
Editor's noteMark stud locations before you cut anything; it saves time when you’re fastening battens.
12. Barnwood-look peel-and-stick shiplap on the door face
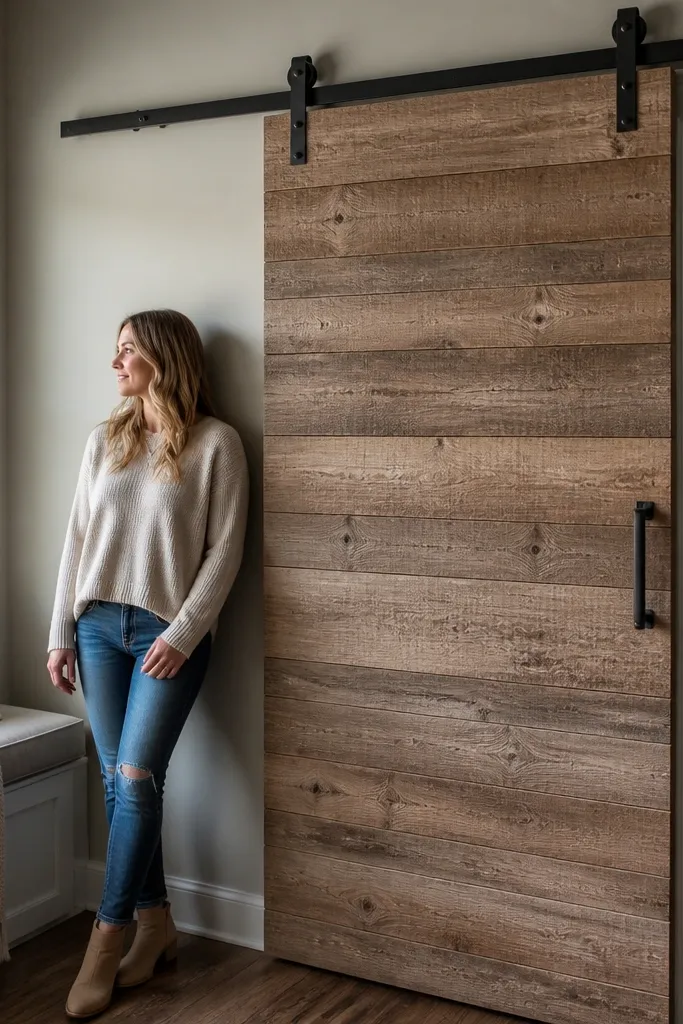
Clean and degrease the door face thoroughly, then let it dry completely so adhesive bonds. Measure the door face and plan the plank layout so seams land evenly across the height. Apply panels from the top down, smoothing with a plastic squeegee to remove bubbles. Trim edges with a sharp utility knife, then seal the perimeter lightly with trim caulk if the product allows it.
If you want cozy fast, peel-and-stick shiplap can give you the look of real wood without the cutting and nailing. It’s best for doors that have a flat surface and don’t move around much during installation. The aesthetic is warm because the texture and grain pattern create shadows. This is a good option for renters or anyone who doesn’t want to rebuild the door. Skill level is beginner. The result is a photogenic wood texture that makes the door feel intentional.
Skip thisApplying over dust or glossy residue leads to lifting at the corners.
Editor's noteUse a straightedge and light pencil marks on the door — shiplap alignment looks off even when it’s only 1/8 inch.
13. Felt-covered acoustic panel overlay for quiet and cozy
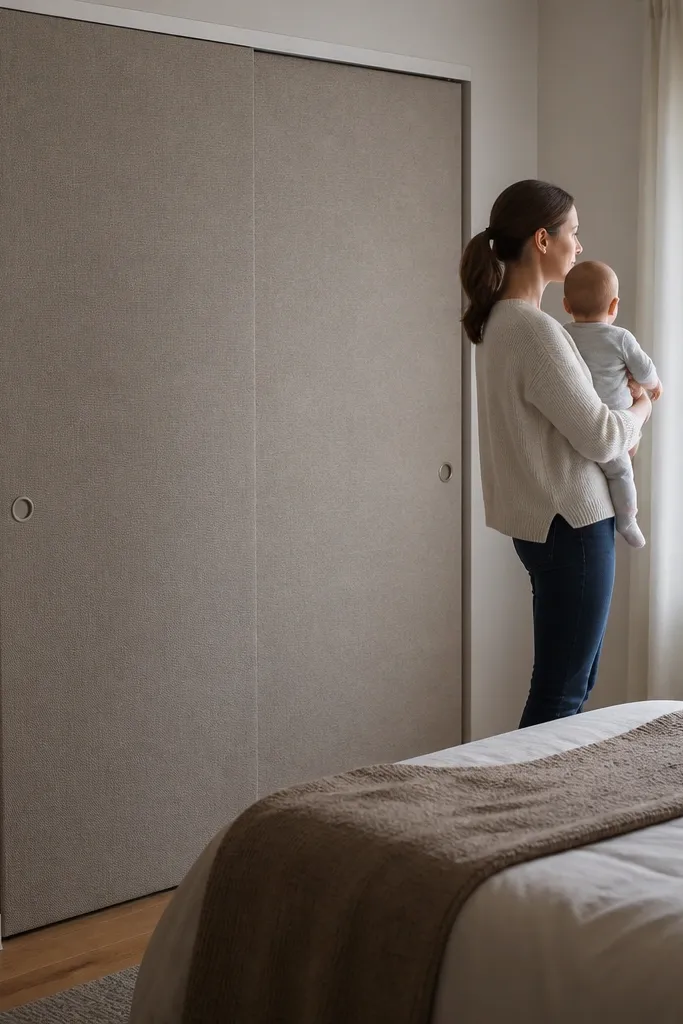
Cut 1/2-inch MDF or foam board to the insert size and wrap it with felt using spray adhesive on the back side. Build a frame from 1x2 trim to cover the felt edges and hide any uneven seams. Attach the framed felt panel to the door with screws through the frame into the door, or with heavy-duty adhesive strips if the door surface is smooth. Seal the frame with matte paint so the felt stays the star.
A sliding door can make a room feel echoey because it often has a hard, flat surface. Felt panels add warmth and visual softness while also cutting down sound. The look works because felt has a matte, cozy texture that hides small scuffs and makes the door look like part of the decor. This is best for bedrooms, nurseries, and home offices. Skill level is beginner to intermediate because you’re basically building a framed felt insert. It’s also easy to swap colors later.
Skip thisUsing thin felt that shows the backing through it makes the panel look cheap.
Editor's noteChoose felt thickness around 1/4 to 1/2 inch for a premium look without making the door too heavy.
14. Matte white beadboard with warm brass pulls for a soft glam look
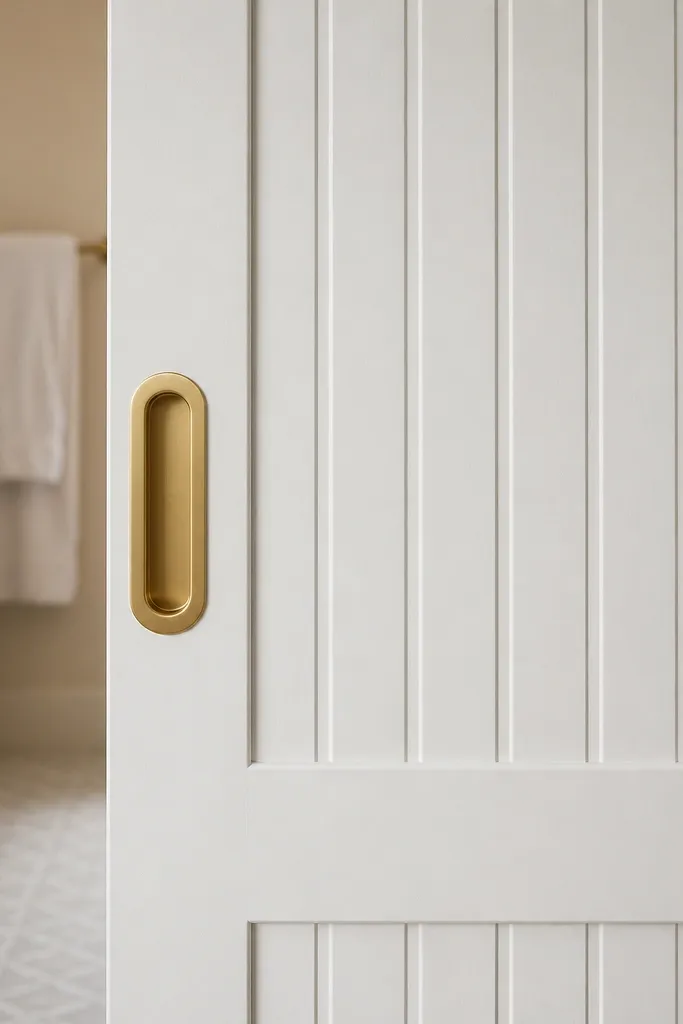
Cover the door face with beadboard or beadboard-style paneling, then frame it with trim boards for a finished edge. Choose brass pulls sized to the door — for most doors, a 5-7 inch pull looks right visually. Mark pull placement by holding the door in the open position and aligning the pull with your eye line. Install pulls with threaded inserts or backing plates so they don’t strip into MDF over time, then paint everything matte white.
Brass hardware plus a matte white textured surface is cozy in a way that still feels clean. The beadboard adds the texture, and the brass pulls catch light softly instead of reflecting harsh glare. This idea is great when you want the door to look like a design detail, not a utility piece. It works in kitchens, bathrooms, and bedrooms where you want warm contrast. Skill level is beginner because you’re mostly replacing or adding the pull hardware and skin. The visual payoff is high because pulls are where people’s eyes land when the door is open.
Skip thisOvergloss paint on beadboard makes the grooves look muddy in photos.
Editor's noteUse a cotton cloth to buff brass after installation so it doesn’t look dull from fingerprints.
15. Rope-wrapped vertical posts on the sides for a cozy coastal vibe
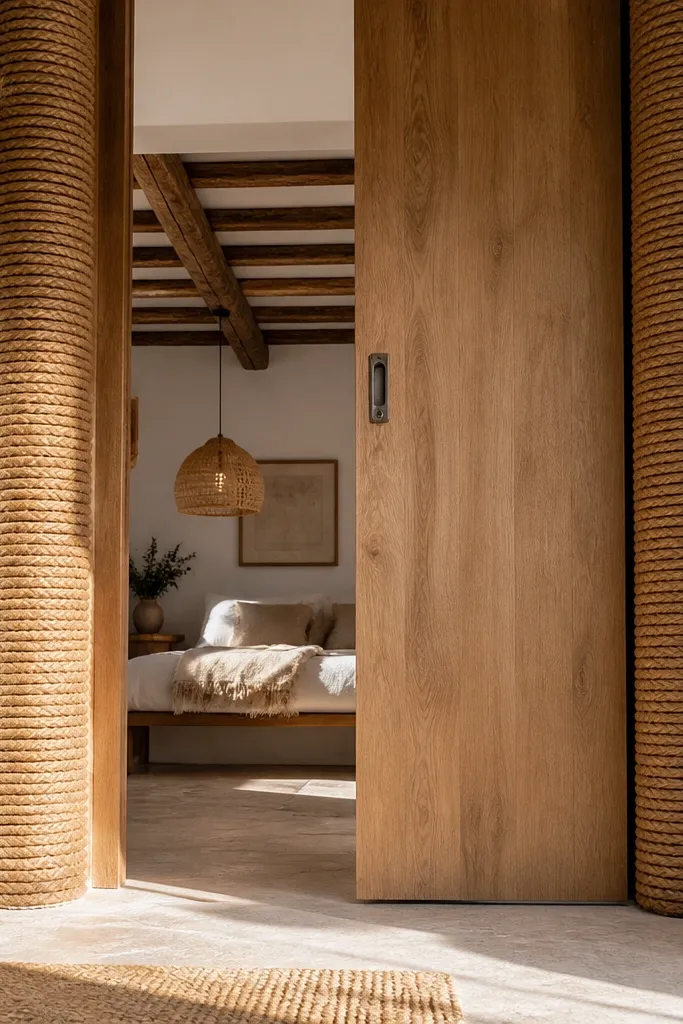
Pick two vertical post dimensions that match the scale of your door — 4x4 inch posts look right with most openings. Build or buy post boxes, then sand and seal them so the rope grips. Wrap sisal or jute rope tightly from bottom to top, using hot glue or contact adhesive in small sections, and keep the rope lines touching with no gaps. Finish the rope ends with a final glue band and add a simple top cap board that ties the posts together.
Rope-wrapped posts turn the door opening into something styled instead of plain. The rope texture reads warm and casual, and it gives you a “frame” around the sliding door that’s easy to photograph. This works best when you have enough side wall to mount two vertical posts and when your door hardware is already fairly simple. Skill level is intermediate because it takes patience to wrap evenly and secure the rope cleanly. It’s also a good choice for entryways, mudrooms, and beach-house themed rooms. The look is cozy without relying on fabric panels.
Skip thisWrapping too loose makes the rope look uneven and collapses when touched.
Editor's noteSpray the rope lightly with a mist of water before wrapping — it tightens as it dries.
16. Vertical curtain panels behind glass-style door frame
Build a grid frame from thin trim strips, creating squares sized to the door — 6-10 inch squares look good. Attach the frame to the door face, then staple or sew curtain panels behind the grid so they hang straight. Use curtain rods or tension wires behind the frame for even spacing, then trim panel lengths to end about 1 inch above the floor or baseboard line. Finish the frame in a matte white or warm wood tone, and add a simple pull handle to match.
This idea gives you the look of a decorative door without committing to a full glass install. You build a grid frame and hang vertical curtain panels behind it, so the door stays soft and cozy. The grid makes it photogenic because it creates strong lines, while the fabric keeps the room warm. Use this when you want a light, airy look but still want privacy and softness. Skill level is intermediate because you’ll build a frame and keep curtain spacing even. It also helps if your existing door face is unattractive and you want to cover it quickly.
Skip thisUsing heavy drapery fabric on a door that moves often makes it bunch at the edges.
Editor's noteMeasure curtain lengths with the door closed so the panels don’t swing unevenly with travel.
17. Hidden storage shelf above the sliding door with warm lighting
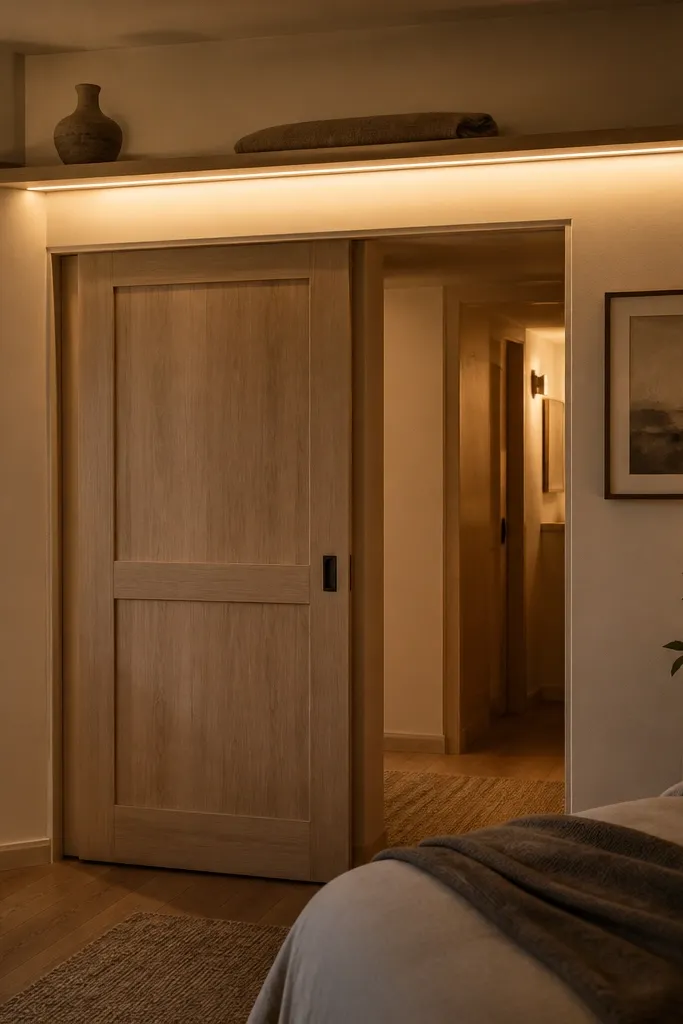
You can make a sliding door feel cozy by giving the top area a purpose and a gentle glow. A hidden shelf above the track cover creates a warm visual focal point and disguises the hardware with a clean underside. Add warm LED strip lighting under the shelf and you get that “soft evening room” look instantly. This works in living rooms and bedrooms where you can use extra display space. Skill level is intermediate because you’re building a shelf and wiring LEDs safely. The result is very photogenic because the light defines the door area.
Build a shelf box from 1x4 or 3/4-inch plywood with a front face that covers the track, and mount it to studs. Install warm LED strips (2700K) under the shelf with a diffuser channel so you don’t see bright dots. Route wiring to a switched outlet or existing low-voltage driver location, then test before closing everything up. Add a small lip or decorative molding so items don’t slide forward, and finish with matte paint.
Use a diffuser channel — it makes the lighting look like a soft wash instead of bare LEDs.
Skipping a diffuser makes the shelf look industrial and harsh in photos.
18. Matte wood slat door face with offset gaps for depth
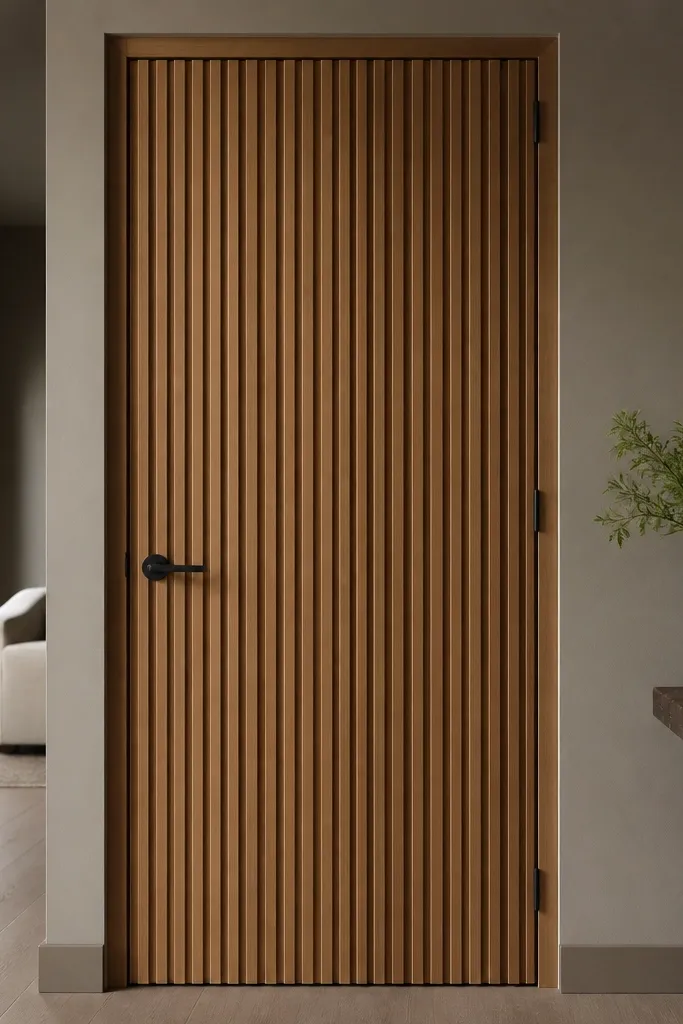
A full slat door face looks cozy because it creates depth and shadow without needing fabric. If you offset the slats — even slightly — the door looks more handcrafted and less like a store-bought panel. This works when you want airflow and a decorative look, and when your door face is flat enough to mount slats. Skill level is intermediate because you need consistent spacing and careful alignment. The photogenic part is the shadow rhythm, especially under warm bulbs. It’s also durable if you use a matte finish that hides fingerprints.
Measure the door face and plan slat count so you have a balanced outer frame. Cut slats (like 1x2 or 3/4-inch thick strips) and lay them out on the door with spacing — try 3/8 to 1/2 inch gaps. Attach slats to a backer frame or directly to the door face with glue and brads, then alternate the starting offset by one slat width for a subtle stagger. Sand lightly, stain or paint matte, and seal with a matte clear coat.
Use a single spacer thickness between slats so shadows look even across the door.
Overstaining glossy topcoat — it reflects light and makes the slats look wet in photos.
19. Twisted rope pull and matching trim for a cohesive cozy detail
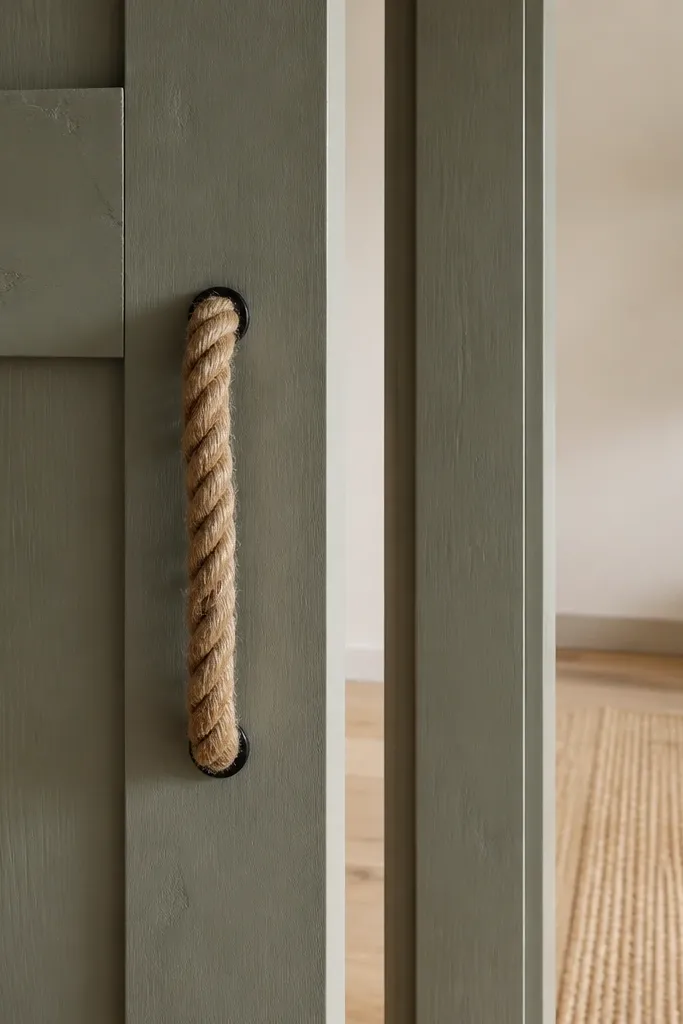
Hardware details are where cozy shows up. A twisted rope pull looks warm, softens the industrial feel of sliding tracks, and makes the door feel handmade. Pair it with matching trim on the door edge or frame so it looks intentional. This idea works when your door already has a decent face but the pull feels generic. Skill level is beginner because it mostly involves mounting a rope pull and adding a small trim piece. It’s also a low-dust upgrade that makes the door feel more inviting immediately.
Pick a rope pull design that has a sturdy internal core or mounting plate so it doesn’t stretch. Mark the pull location on the door panel — align it with existing hardware height if there’s a mark. Install mounting screws with washers so the load spreads, then wrap or cover the base area with trim or a small wood rosette. Finish the rope by sealing the base area so it doesn’t fray at the mount point.
Use a thicker rope (around 1 inch) for a look that reads substantial from across the room.
Attaching rope to thin door skins without a backing plate — it loosens quickly.
20. Matte ceramic tile surround on the opening for a warm, clean look
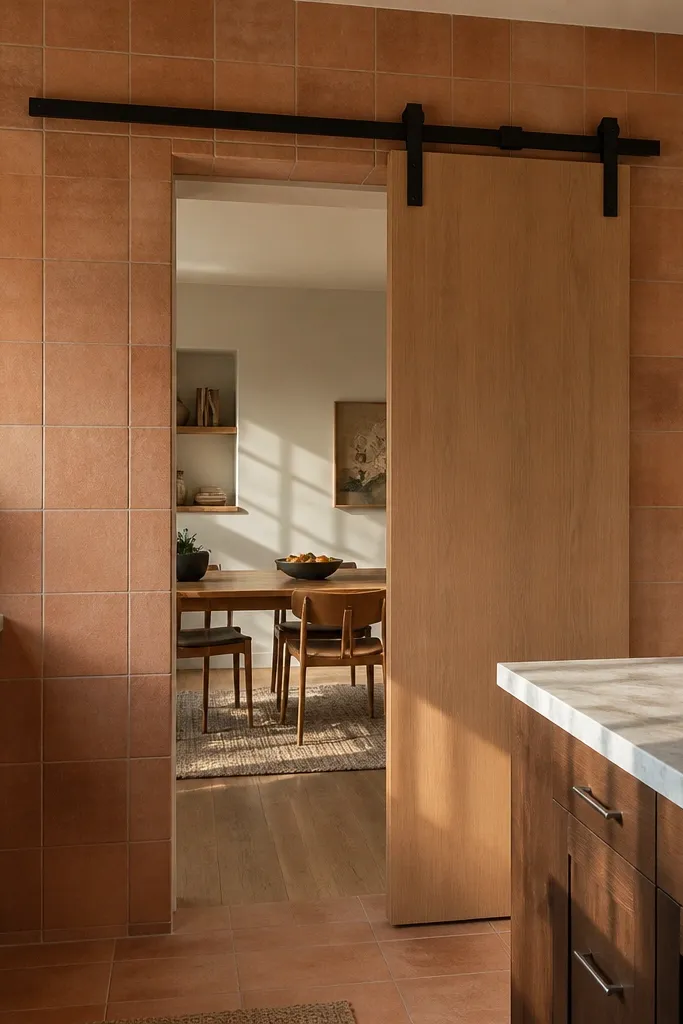
Tile can feel cozy if you pick matte finishes and use it as an accent border, not a full wall. A tile surround around the opening makes the door area look designed and clean, especially in kitchens, entryways, and mudrooms. The texture and micro-shadowing from grout lines look warm rather than sterile when the color is soft and the tile is matte. Skill level is intermediate because you’re tiling a vertical surround and need a straight layout. It’s photogenic because it creates a crisp frame that stands out against painted walls.
Choose a small-format matte tile in a warm neutral and plan a border width of 2-4 inches around the opening. Remove any loose trim, then find studs and install a flat backer board if the wall is rough. Dry-fit tiles and spacers to map cuts, then set tiles with thinset starting from the center and working outward. Grout after curing, then seal grout and paint surrounding wall trim in a matte finish.
Use painter’s tape guide lines for each tile row to keep grout lines straight.
Using glossy tile — it reflects light and makes the doorway feel colder.
21. Louvered wood panel behind a thin frame for airflow and coziness
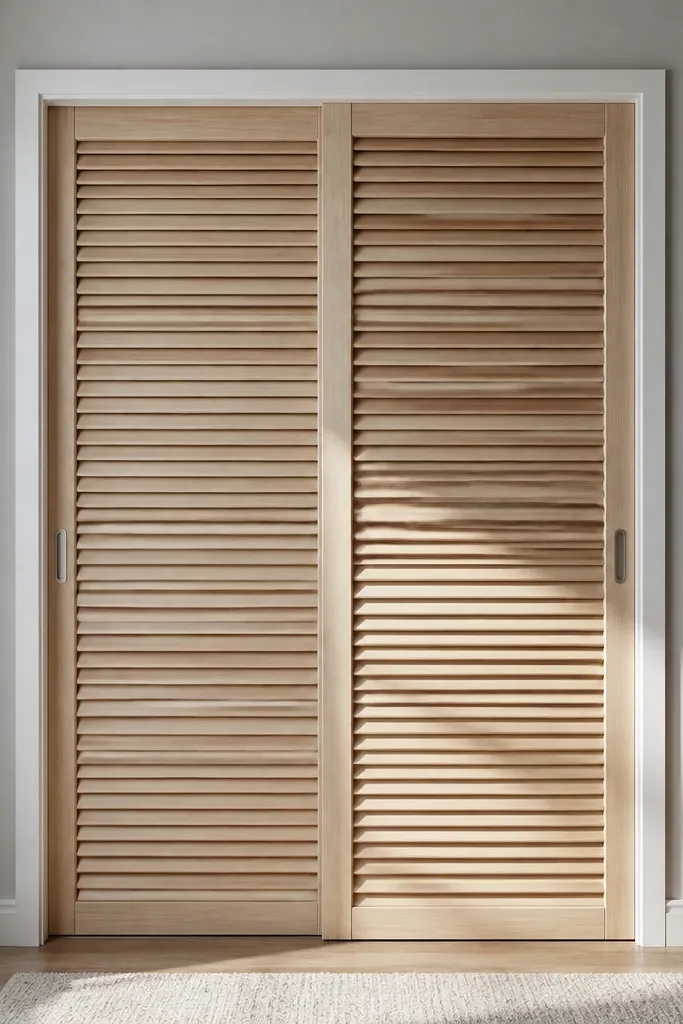
Louvers add cozy texture while still letting air move, which is great for closets, laundry areas, and rooms that need ventilation. A thin frame keeps the louver look light instead of heavy. This idea is visually striking because the slats create repeating lines that read well in photos. It also hides the gap behind a sliding door because the louver panel covers it with consistent structure. Skill level is intermediate since you’re cutting and mounting louvers evenly. The finish matters — matte stain keeps it warm and not plasticky.
Build or buy a thin frame matching your door insert size, then install louver slats across the frame with consistent spacing — 1/2 inch spacing is a good visual starting point. Use small screws or glue points at each slat end to keep alignment. Attach the framed louver panel to the door using brackets or screws through the frame. Finish with sanded matte stain and a clear matte sealer on the wood only.
Pre-finish the frame and slats before assembly; it’s much easier than painting tight gaps later.
Mounting louvers without a level jig leads to slats that look crooked from one side.
22. Woven wall pocket styling that turns the door opening into storage
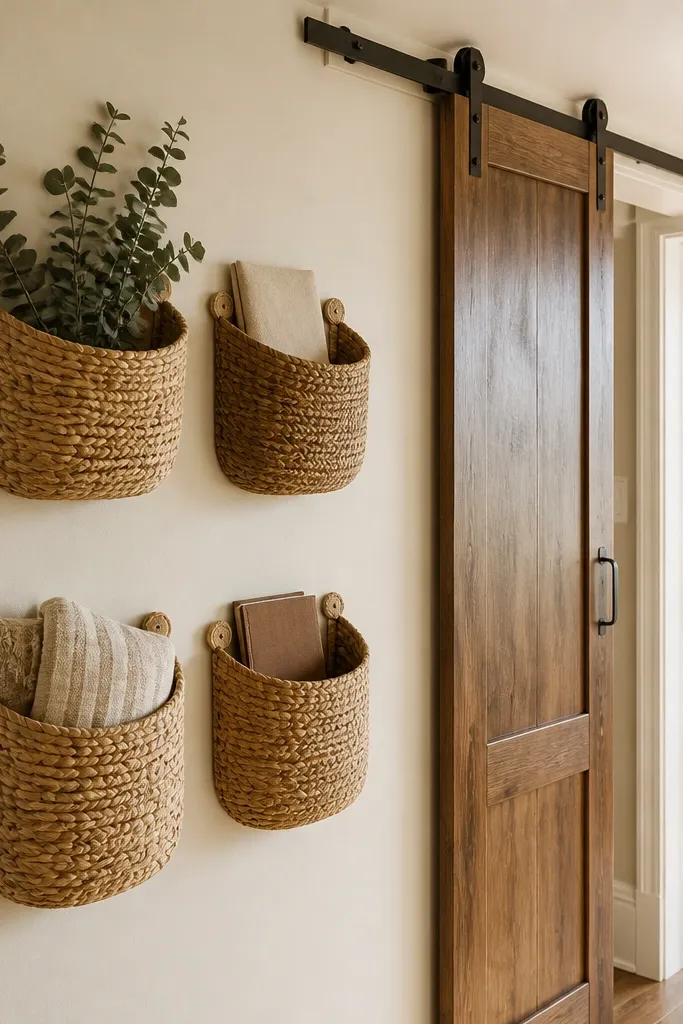
Cozy sliding door ideas don’t have to be only about the door itself. Styling the surrounding wall with woven pockets adds warmth and makes the doorway area feel useful and lived-in. The photogenic part is the texture — natural fibers against painted walls look soft and warm. This works when the door opening sits near a wall surface where you can mount pockets without blocking the door path. Skill level is beginner because it’s mounting organizers, not building complex trim. It’s also easy to update seasonally by swapping inserts.
Choose woven wall pockets with rigid backing so they hang flat, and measure the wall space beside and above the door opening. Mark mounting points at stud locations and install a thin mounting rail or directly screw the backs through the pockets. Place pockets so their edges stay at least 1 inch away from the moving door edge to prevent rubbing. Add a simple wood ledge or trim strip at the bottom so the pocket line looks intentional.
Use identical pocket sizes in a grid — mixed sizes look messy unless you’re going for a true eclectic look.
Mounting pockets too close to the door track — even slight vibration can cause scuffing.
23. Painted faux brick surround for a warm, cozy entry vibe
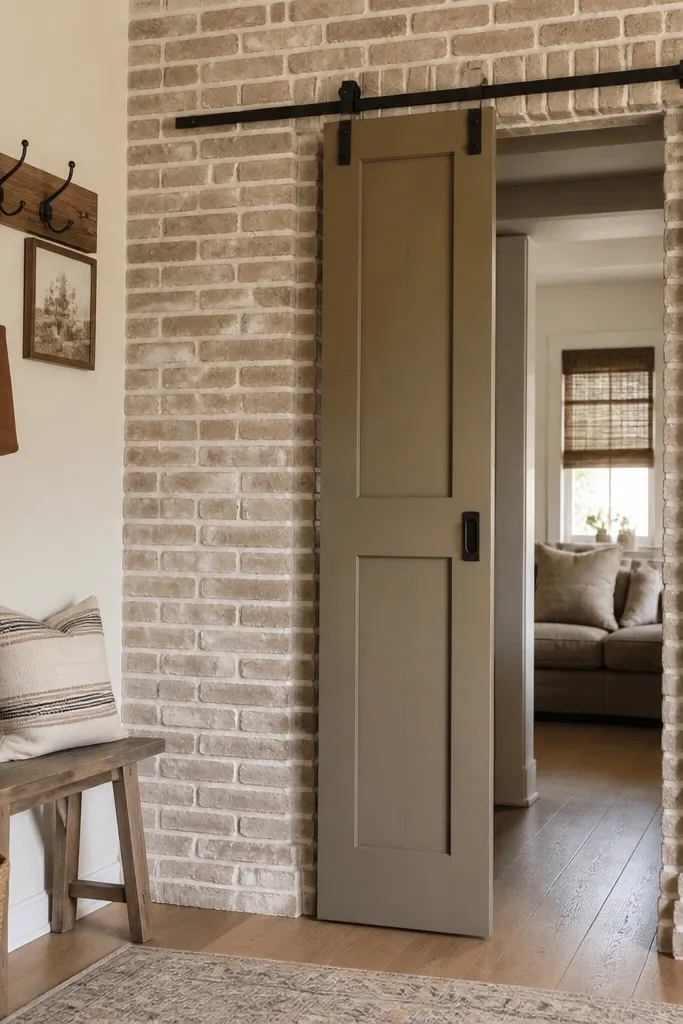
Choose a faux brick stencil kit or make a simple guide with painter’s tape and consistent mortar line widths (about 1/8 to 1/4 inch). Prime the wall, then paint the base color and let it dry fully. Apply brick texture using a stipple brush or stencil technique, then add mortar lines with a contrasting light or warm gray. Seal with a matte topcoat so the texture holds up to touch and cleaning.
Brick texture reads cozy because it adds irregular shadows and warmth, but real brick is heavy and permanent. A painted faux brick surround gives you the look around the opening so the door feels framed and intentional. This is ideal for entryways and hallways where you want character without construction. Skill level is intermediate because you’re doing a pattern, but it’s manageable with the right stencil or guide strips. Finish matters: matte paint keeps the “brick” effect from looking glossy and fake.
Skip thisUsing thick paint layers — they crack and look raised instead of textured.
Editor's noteUse two brush sizes — one for brick blocks and a smaller one for mortar lines so edges look crisp.
24. Matte wood side panels with hidden cable channel for smart home controls
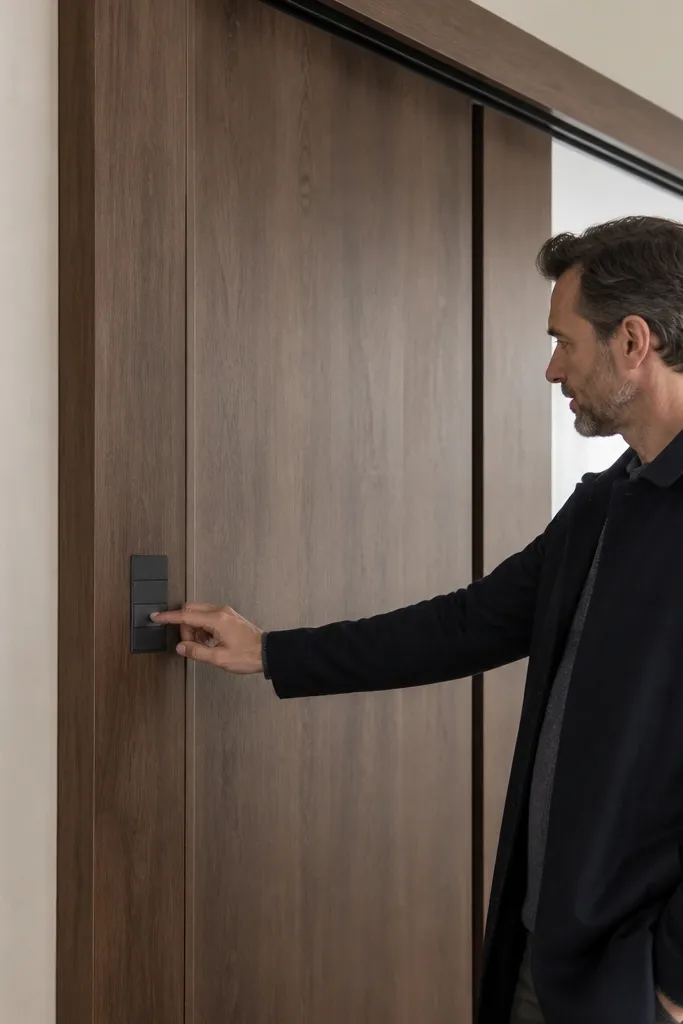
Cozy can be functional: if your sliding door area has switches, sensors, or a small speaker, hiding the wiring keeps it clean and warm. Wood side panels plus a concealed cable channel make the whole setup look designed instead of patched. This works when you have an outlet or switch near the track and you want it to blend into the wall. Skill level is intermediate because you’ll route wiring and fasten panels securely. The aesthetic payoff is clean lines, warm materials, and no visible cords. It’s also a smart upgrade if you plan to add lighting later.
Plan your panel layout so it covers the area around the outlet or switch and still leaves access if needed. Install a cable channel or raceway behind the panel line, then route wires before closing the panel. Cut side panels from 3/4-inch plywood or 1/2-inch MDF, then mount them to studs with screws. Finish with matte paint or stain and add a small trim edge so the panel looks like it belongs to the door frame.
Label wires before you remove any existing switch — it prevents a late-night redo.
Covering outlets without access — you’ll hate yourself later when you need a reset.
25. Faux fireplace mantel shelf above track with warm decor styling
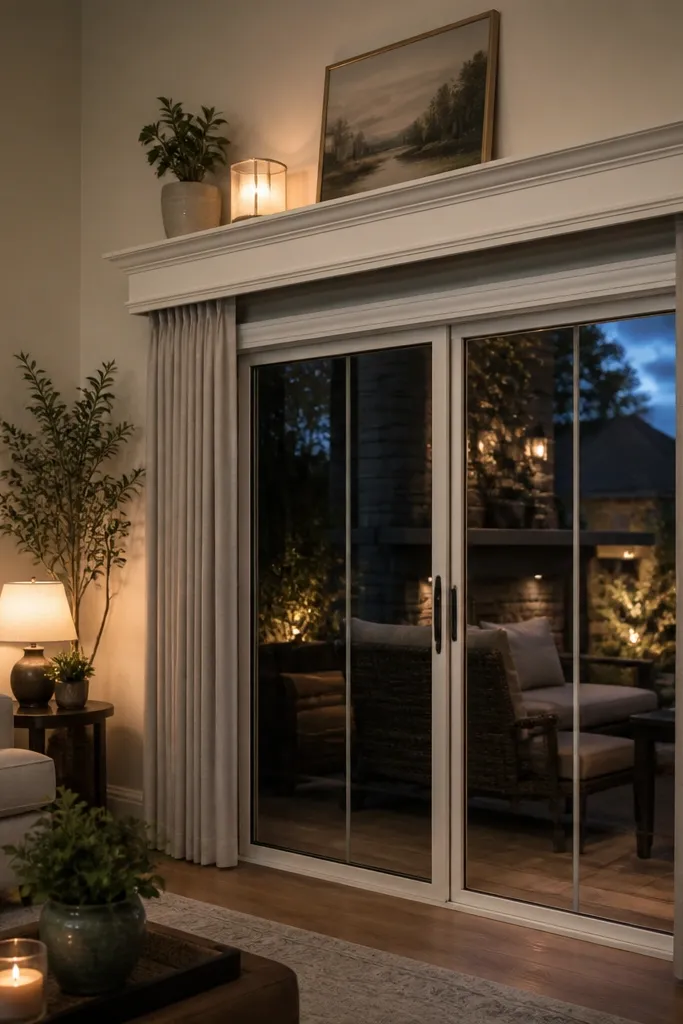
A mantel-style shelf turns a sliding door area into a cozy focal point, especially in living rooms. You hide the track with a mantel header and add decor that looks warm in photos — candles, small planters, or framed art. This idea works when your ceiling height allows a wider shelf and you want the door to feel like part of a larger design moment. Skill level is intermediate because you’re building a boxy mantel and leveling it. The result is dramatic but still homey when you keep finishes matte and colors warm.
Measure from the top of the door opening to your ceiling and decide mantel depth (8-12 inches usually looks right). Build a mantel frame from MDF or plywood, including a top shelf and two side returns that cover the track. Mount it into studs with screws, then caulk seams and sand edges smooth. Finish with matte paint and style with items that don’t block the door travel path.
Keep the decor low — if it sits too high, it blocks the door line and looks cluttered.
Making the mantel too deep — it can overpower smaller rooms and feel heavy.



