
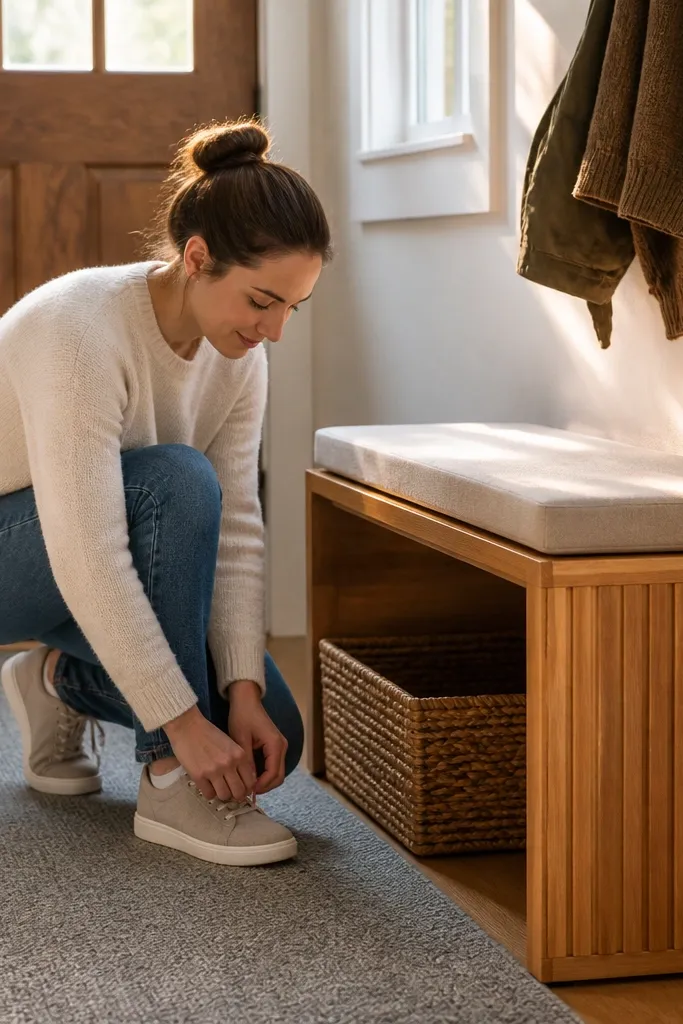
1. Warm Wood Slatted Bench with Lift-Up Shoe Storage
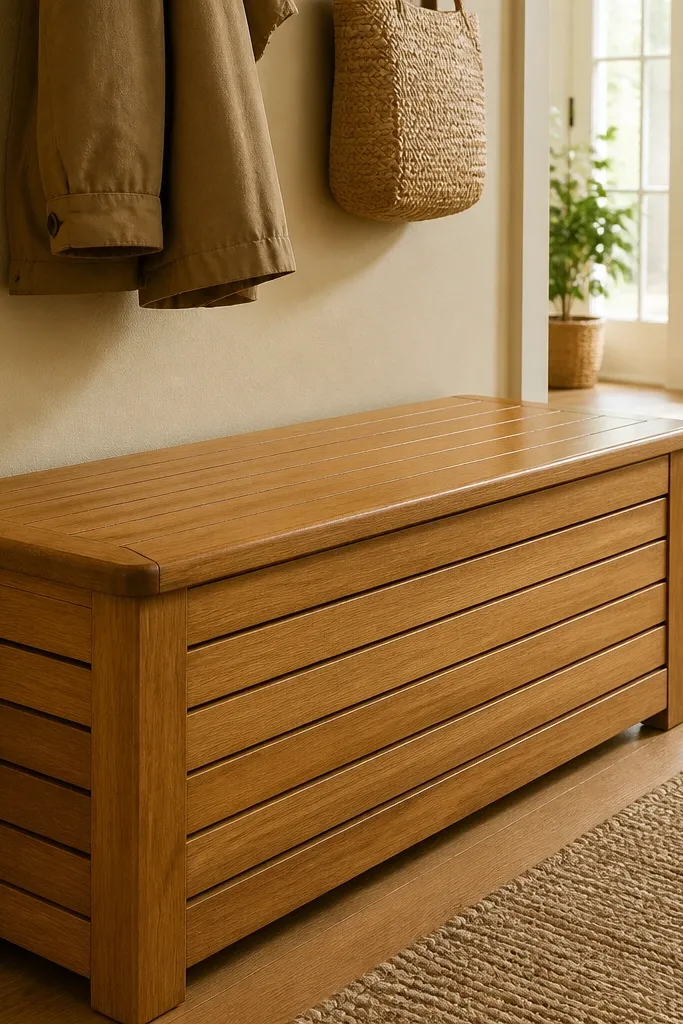
This is the cleanest way to make an entry feel cozy because your eyes land on the bench top, not on shoes. The lift-up lid hides the mess and keeps dust off, while the slatted sides let air circulate so shoes don’t turn musty. Use it when you want a seating spot for lacing up and you’ve got multiple pairs that you rotate through. It also photographs well because the front reads like furniture, not a rack. Plan on one full weekend of carpentry and finish work; it’s beginner-friendly if you’re comfortable with simple box construction and a hinged lid.
Start by building a rectangular base frame from 1x3 or 1x4 boards, sized to fit your entry (a common footprint is about 48 inches wide by 14-16 inches deep). Add slatted “air” panels on the sides using 1x2 strips spaced about 1/2 inch apart, then attach a flat deck top with a piano hinge and a soft-close lid support if you can. Line the inside with a removable tray made from thin plywood or plastic grid so you can pull shoes out without digging. Finish with a warm stain or paint, then add rubber feet to protect floors and a latch to keep the lid shut.
Drill 1/4-inch drainage holes in the bottom tray so any moisture can escape instead of pooling.
Don’t seal the inside surfaces with a glossy finish — trapped moisture makes odor worse.
2. Tall Entry Cabinet with Flip-Down Shoe Doors and Back Venting
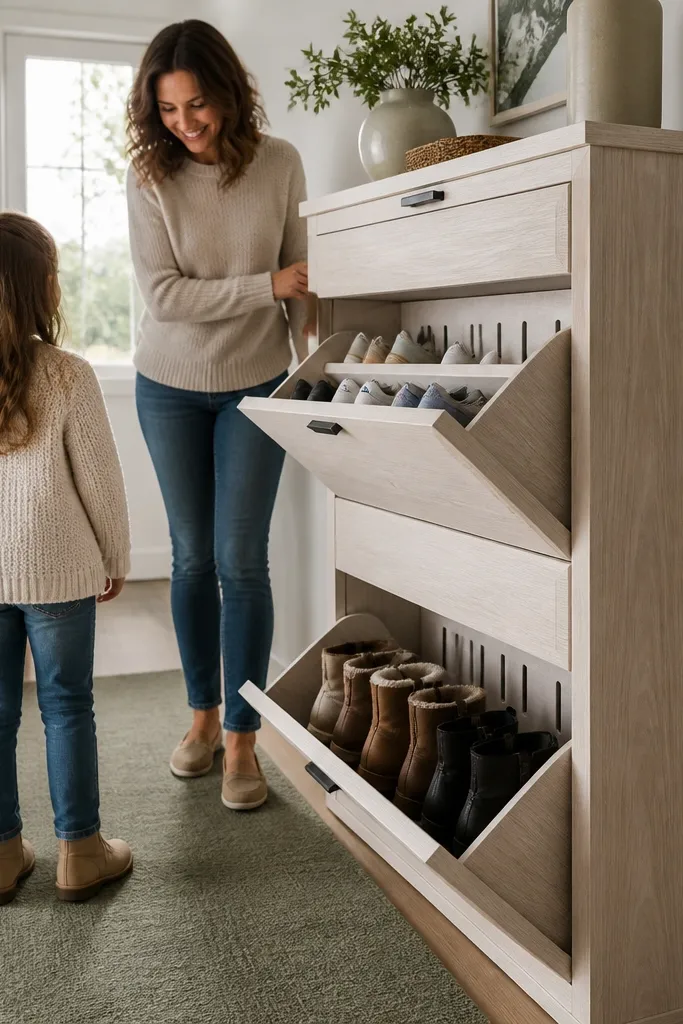
Build a cabinet carcass from 3/4-inch plywood or pre-made cabinet panels, aiming for about 30-36 inches tall and 12-16 inches deep. Install interior shelves with a spacing of roughly 9 inches for sneakers and 11-12 inches for boots, leaving a 2-3 inch void at the back for airflow. Cut doors sized to cover each compartment and mount flip-down hinges so the door swings down and stops cleanly. Add a thin back panel with vent cutouts (for example, a grid of 1-inch holes or a routered slot line), then finish edges with wood filler and stain or paint.
A tall cabinet is the modern fix when your shoes are spreading into the hallway. Flip-down doors keep the entry looking neat, and the cabinet height makes it easy to store a lot without cluttering the floor. It works best for families or anyone with boots plus sneakers, because you can design compartments at two widths and two heights. The back venting is what keeps it from becoming a smell trap. Build this if you want a furniture look that still feels warm — wood tones and matte black hinges make the whole thing feel intentional.
Skip thisDon’t make compartments all the same height — boots need more space or you’ll force awkward stacking.
Editor's noteUse magnetic catches on the doors so they close quietly and stay aligned.
3. Corner Shoe Cubbies with Rattan-Style Fronts
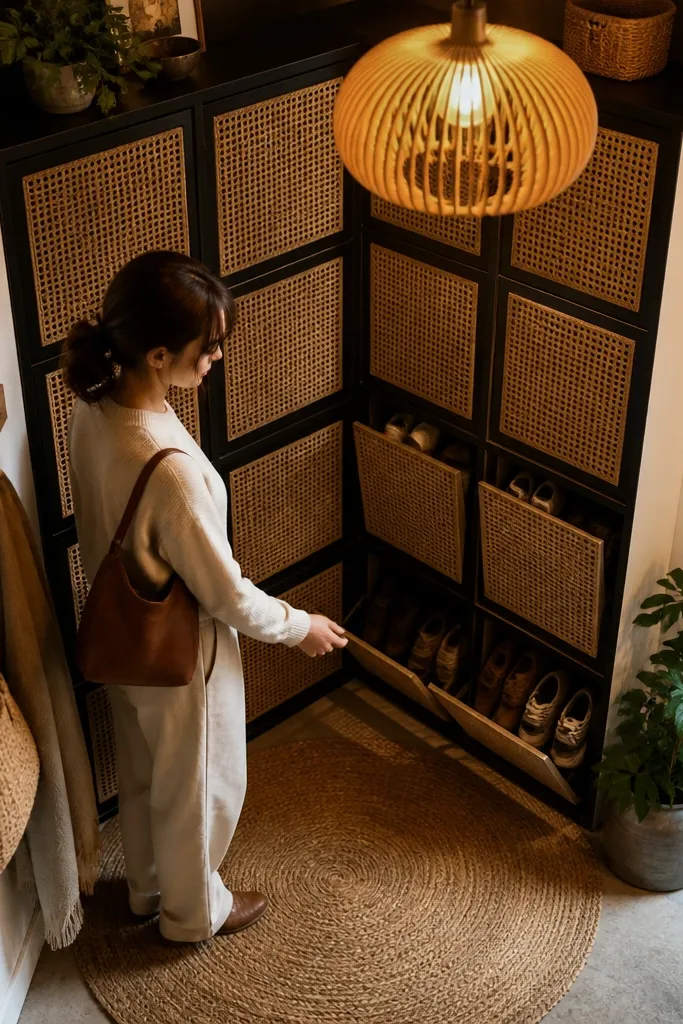
Corner space is where shoe clutter hides, and it’s also where you can make something look designer. These cubbies work because they fit an awkward angle and keep shoes contained in a grid. The rattan-style front material adds warmth and texture, so even open storage looks cozy instead of harsh. Use this when your entry is narrow and you can’t fit a bench, but you still want a tidy visual line. The build is moderate skill since you’ll cut angles or use a corner frame, but the payoff is big for appearances.
Decide your corner size first; a practical setup is 24x24 inches on the wall faces with 10-12 inch cubby depth. Build the back frame from plywood and create a grid with dividers sized to your shoes (typically 8-9 inches wide per cubby). Add a front overlay made from slatted mesh or faux rattan sheet, attaching it with small nails or screws around the perimeter. Mount the cabinet to studs using a ledger rail so it sits level. Sand, fill, and finish the frame, then add felt pads to prevent scuffs on the shoes and wall.
Keep the cubby width consistent so the front pattern looks even — messy spacing shows up immediately in photos.
Don’t use fully closed doors if you store damp shoes there — airflow still matters.
4. Pegboard Shoe Drop Station with Hidden Bins
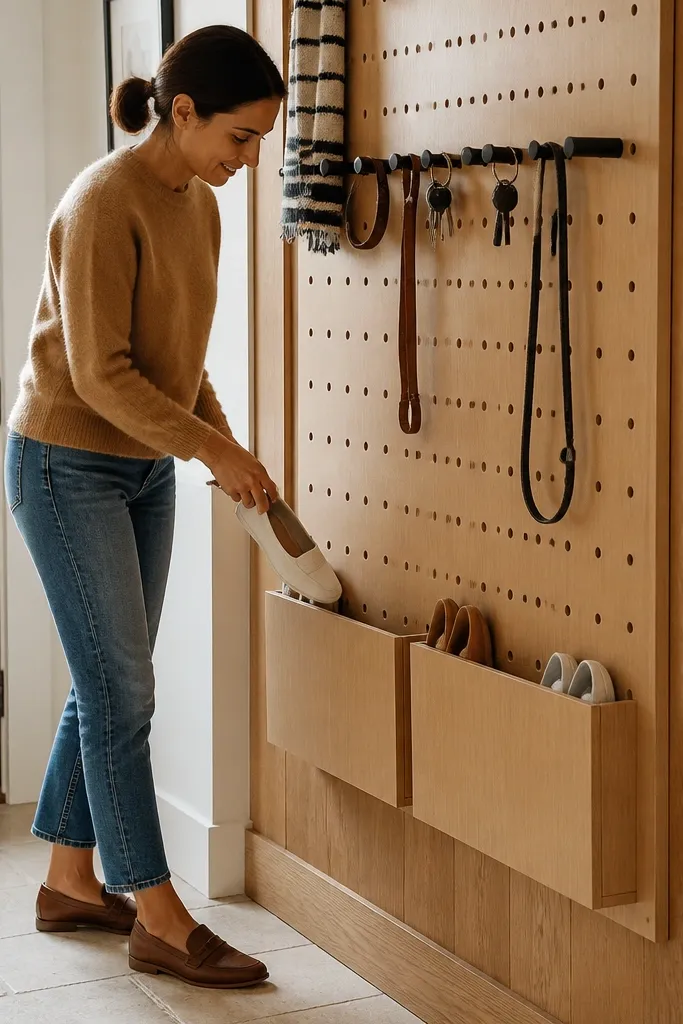
Mount a plywood pegboard panel to studs with a level ledger strip, leaving a bottom space for bins. Add hooks and a small key tray area at about 48-54 inches from the floor. For shoe storage, install two or three shallow cabinet-style bins (about 10-12 inches tall) on a rail under the pegboard or within a boxed frame. Use slats or a vented bin lid so air can move, then finish the wood trim with stain and sealant. Add a simple mat or runner to catch dirt before shoes go into the bins.
This setup is for entries that feel chaotic because shoes and bags land everywhere. The pegboard gives you a clean, modern wall system for hooks, while the hidden bins keep footwear from being visually loud. It’s cozy because you can add a warm wood frame around the pegboard and use matte hooks. This works great for small spaces where a bench won’t fit. Skill level is beginner-friendly if you’re comfortable finding studs and mounting hardware.
Skip thisSkip glossy pegboard paint — it reflects light and makes the whole station feel less warm.
Editor's noteLabel the bins with small fabric tags inside the lid so it stays clean-looking from the doorway.
5. DIY Shoe Rack with Slanted Metal Frame and Wood Shelves
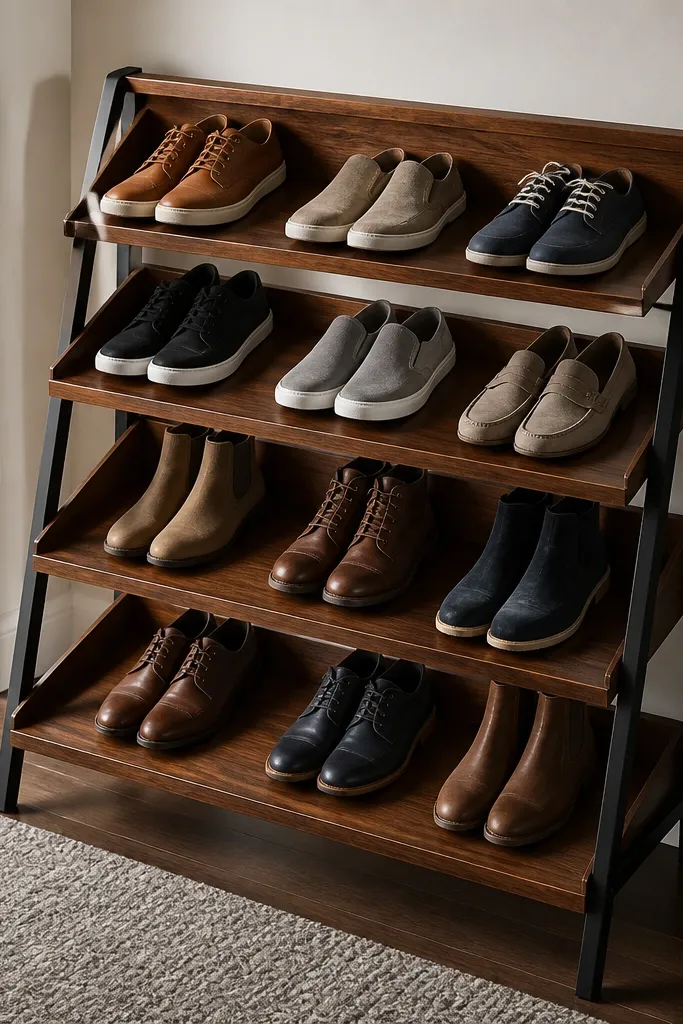
If you want “modern” without hiding everything, a slanted rack looks sharp and also dries shoes better. The angle lets air pass and helps shoes keep their shape by not compressing them flat. Use wood shelves for warmth, and matte metal for clean lines. This is a strong choice for entries where you want shoes visible but still organized — every pair has a slot. It’s a mid-level build because you’ll cut and anchor metal or use pre-cut angle stock.
Build side frames from angle iron or metal L-brackets, set at a 15-25 degree slant. Cut wood shelves to match the rack width (about 14-16 inches deep) and drill drainage slots across the shelf surface. Space shelves so sneakers fit with about 1 inch clearance between pairs; start with 7-8 inches between shelf levels and adjust for your biggest shoes. Anchor the frame into studs or a floor base, then sand and finish the wood with a matte clear coat. Add end caps so shoes don’t snag and to protect the wood edges.
Use shelf liners made from thin rubber or cork to reduce scuffs and stop sliding.
Don’t make the shelves perfectly horizontal — shoes sit in water and odor builds up.
6. Stackable Fabric Drawer Cubes Inside a Closed Cabinet Front
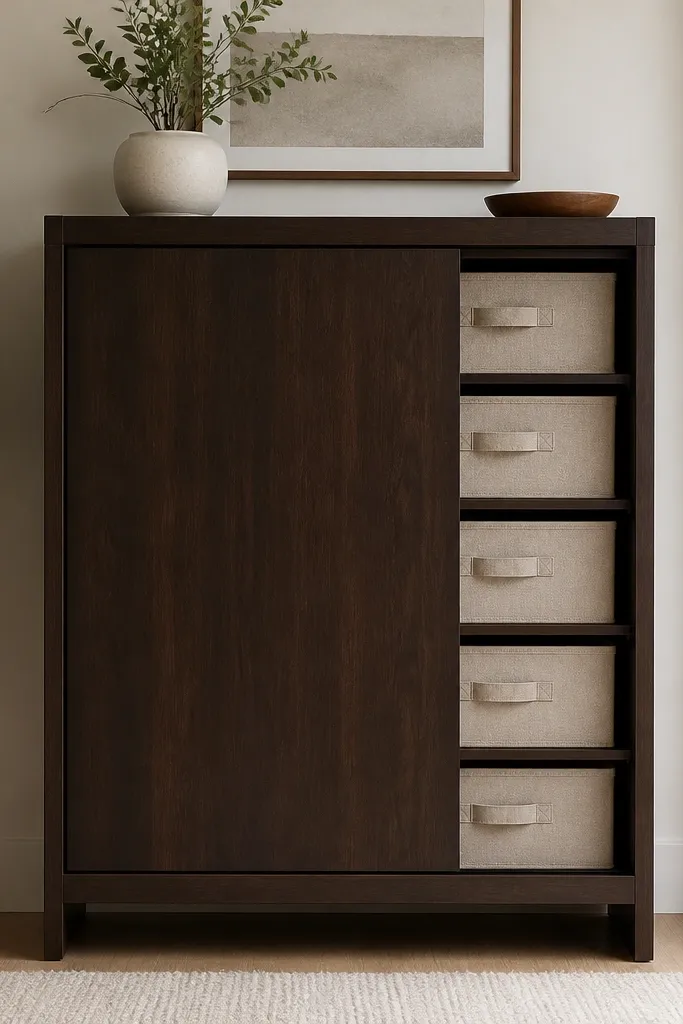
This is a cozy shoe storage trick for people who hate open racks but don’t want heavy carpentry. A closed cabinet keeps the entry looking calm, and fabric cubes make it easy to pull shoes out without wrestling with rigid bins. It also looks good because the front stays smooth — no clutter visible. Put it in a tight hallway corner or under a floating shelf. The build is quick if you already have a cabinet, and it’s very beginner-friendly.
Start with a cabinet or bookcase you can fit to the wall, sized around 30-40 inches tall and 12-16 inches deep. Remove or adjust internal shelves so you have space for fabric drawer cubes about 10-12 inches tall. Slide the cubes in with enough clearance that you can pull them without scraping, then add a thin vent gap behind or between compartments if the back panel is solid. Finish the cabinet exterior by sanding and repainting in a warm neutral (off-white, warm gray, or matte cream). Add a cabinet top accessory like a small tray for keys so the whole thing looks styled.
Choose cubes with breathable sides and open front edges so shoes can dry even when the cabinet is closed.
Don’t use airtight plastic totes for daily shoes — they trap moisture.
7. Floating Shoe Ledge with Woven Basket Bottom Storage
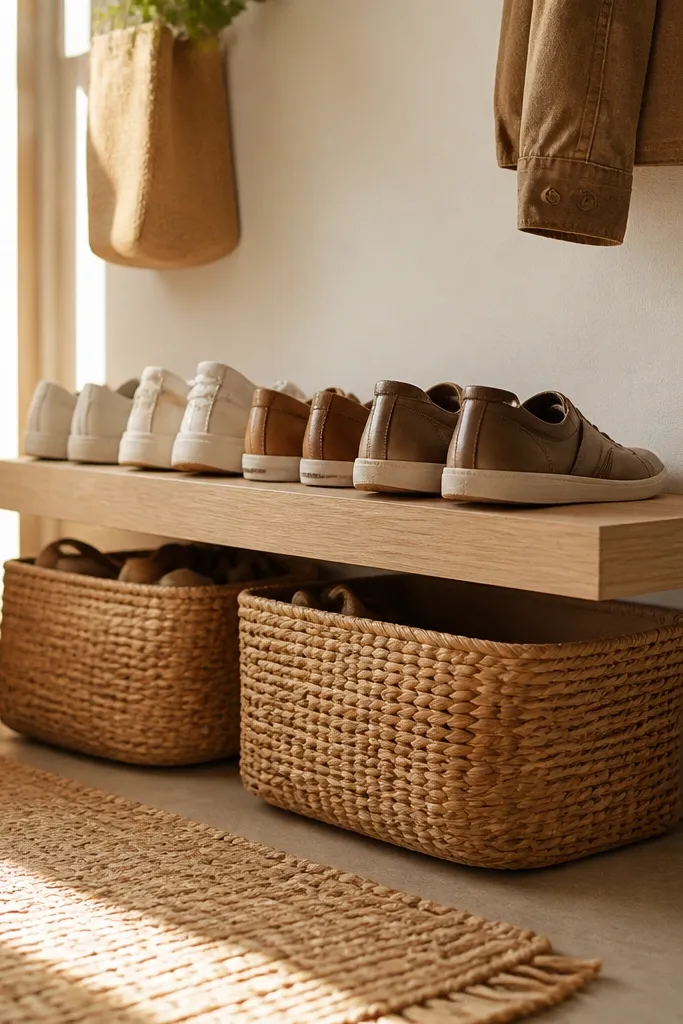
Find studs and mount a 2x4 or 3/4-inch plywood ledge at around 16-18 inches high, leaving a lip so shoes don’t slide forward. Add a second ledge or a simple frame below for basket mounting, spaced so baskets can sit with a small gap for airflow. Use woven baskets sized to your shoes and secure them with a simple wood cleat so they don’t tip. Finish the ledge with a warm stain and matte topcoat. Add a door mat and a small wall hook for bags so the zone reads finished.
A floating ledge gives you a clean, modern line right at the door, and it makes the entry feel lighter because it doesn’t eat floor space. Pair it with woven baskets underneath for a cozy texture that softens the look. This setup works best for 4-6 pairs of daily shoes, not a huge rotation of boots. It’s also great for renters because you can mount to studs and keep the footprint small. Build time is about a day if you measure carefully and use proper anchors.
Skip thisDon’t mount the ledge too high — boots and sneakers won’t sit naturally and will slide.
Editor's noteUse a thin strip of rubber or cork on the ledge lip to stop shoe heel scuffs.
8. Back-of-Door Shoe Organizer with Angled Compartments
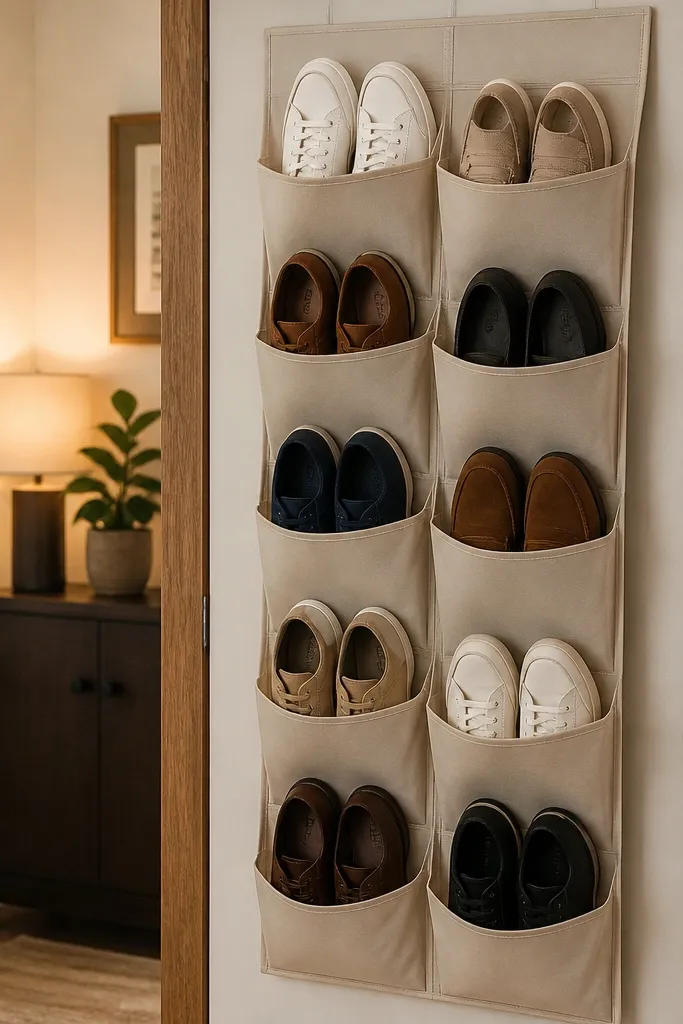
This is the simplest way to clean up an entry when you can’t add furniture. Angled compartments keep shoes from falling flat and make the storage look intentional instead of like a random hanging pocket. It’s a good choice for renters and for small spaces where every inch matters. Keep it cozy by using warm wood trim or a fabric backing instead of all-plastic. This is a quick DIY and mostly about making the compartments feel evenly spaced.
Measure the inside door width and build a shallow frame using 1x2 boards, sized so the organizer doesn’t rub the floor or swing into the entry. Divide the frame into compartments with dividers set at a slight angle, using a backer board to hold the angle. Attach the organizer to the door using heavy-duty hinges or mounting rails that spread the load. Add slats or mesh at the bottom of each compartment for airflow. Finish the wood trim and add a soft felt lining so leather doesn’t scrape.
Use a door stop or bumper so the organizer doesn’t twist when the door opens.
Skip over-stuffing each pocket — shoes should sit with space around the sides.
9. Under-Bench Slatted Drawer System for Sneakers
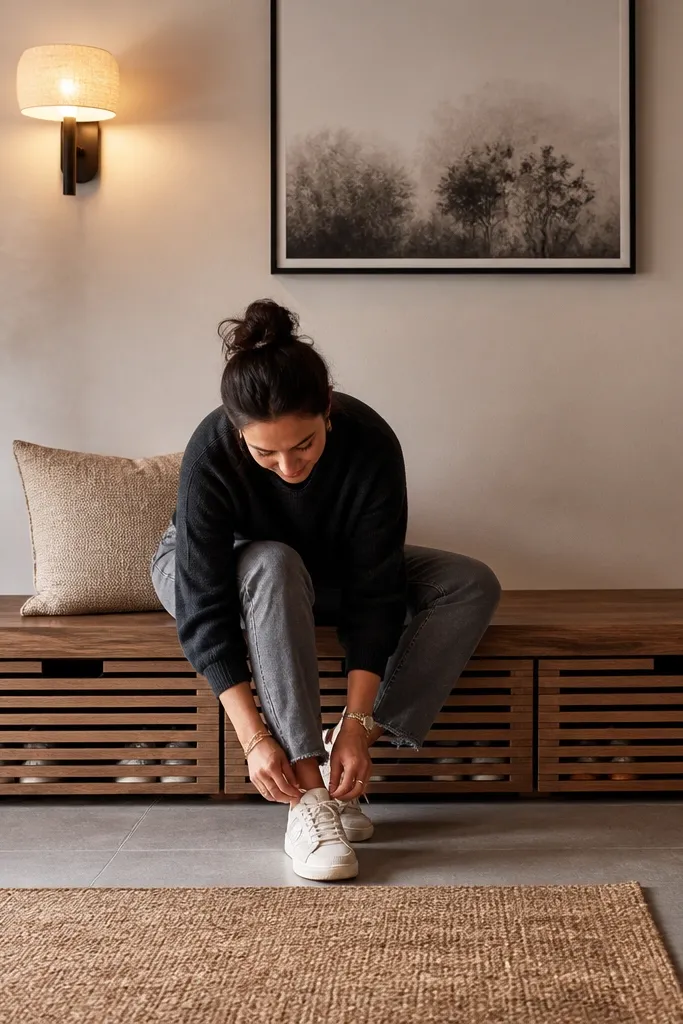
If you like the look of a bench but hate digging through a single open bin, drawers are the fix. Slatted drawer fronts keep airflow moving while still hiding shoes from view. This looks modern because the drawer lines create a neat rhythm, and the slats add texture. It works best for sneakers, flats, and casual shoes that you pick up daily. Build it when you want a clean front and fast grab-and-go access.
Construct a bench base with a front panel that can accept 3-4 drawers, leaving about 10-12 inches of drawer height for sneakers. Build drawer boxes from 1/2-inch plywood and install full-extension slides, then add slatted fronts using 1x2 strips with 1/4-1/2 inch gaps. Line the inside with a removable mat made from cork or thin rubber to prevent scuffs. Add a bench top on top for seating and storage, and seal the drawer edges with paint or stain. Test each drawer for smooth travel and adjust slides before final finishing.
Use drawer stops or soft-close hardware so the drawers don’t slam and loosen over time.
Don’t use solid fronts only — odor shows up fast when shoes stay trapped.
10. DIY Shoe Rack Tower with Adjustable Wooden Dowels
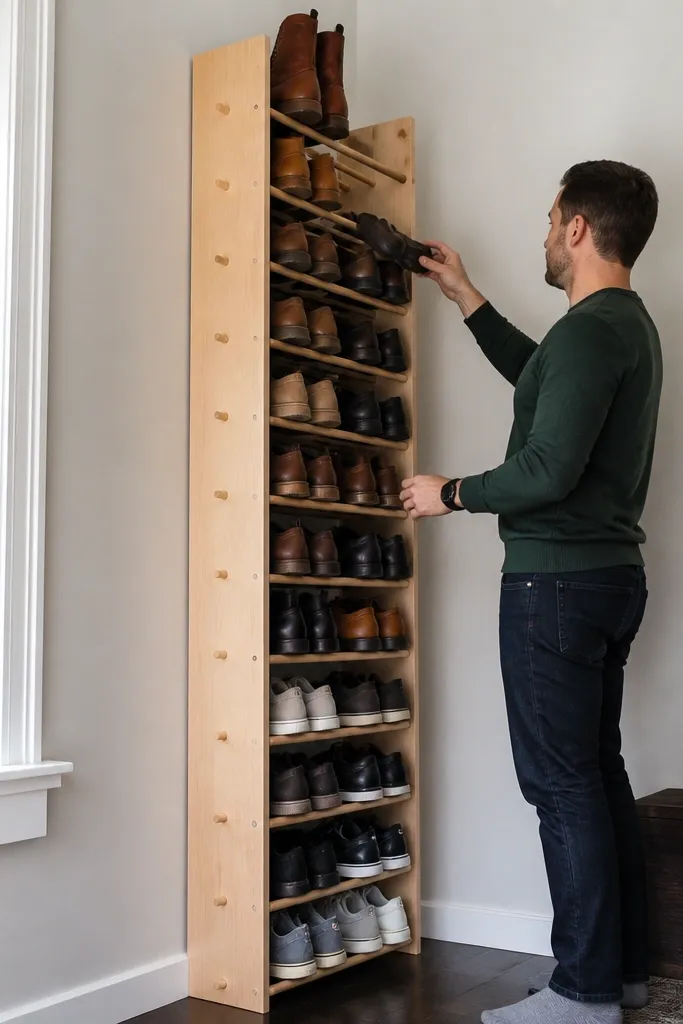
A tall shoe tower with adjustable dowels is clean and visual, especially if you want shoes to stand up instead of pile. Adjustable spacing means you can store everything from low sneakers to taller boots without forcing them into the same slot. The look is modern because the dowels create vertical lines that read tidy. It’s a great pick for entry corners where you can’t mount a lot to the wall. Skill level is moderate because you’ll drill dowel holes and build stable side frames.
Build two side frames from 3/4-inch plywood, about 12-14 inches wide and 60-72 inches tall. Drill a grid of holes into each side for dowels, using a consistent spacing (start around 3-3.5 inches vertically). Cut dowels from hardwood and insert them so shoes sit between dowels without tipping. Add a base panel with a slight overhang and rubber feet so it doesn’t slide. Finish with a matte clear coat or warm stain, then add a back cross brace for stability.
Mark dowel heights with painter’s tape during setup so you can reorganize quickly later.
Don’t skip the back brace — tall towers wobble and scuff the wall.
11. Modular Cubby Wall with Hidden Shoe Trays
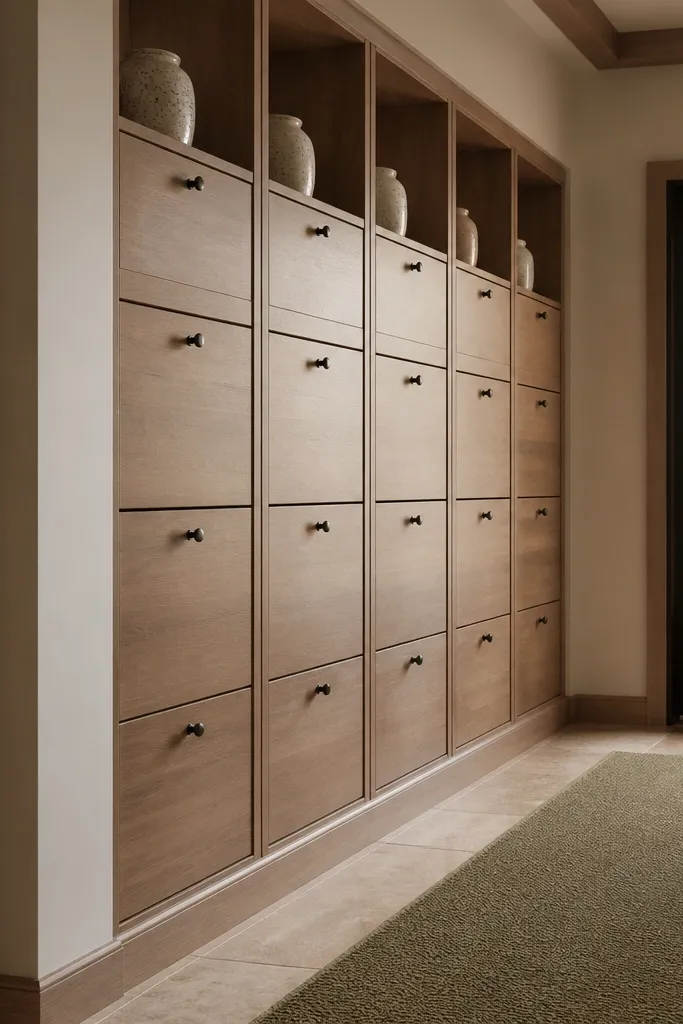
Plan a grid of cubbies sized for your shoes, commonly 10-12 inches wide per slot and 10-12 inches deep. Build each cubby from 3/4-inch plywood and mount to studs with a level frame rail. Install a pull-out tray inside each cubby using drawer slides or simple rolling runners, with a slight lip so shoes don’t fall out. Cover the front with a slatted or solid door panel depending on your ventilation preference. Finish the whole wall with a consistent stain or paint and add matching hardware pulls.
This is the best option for a long entry wall where you want a gallery-like look instead of a clutter zone. Each cubby has a hidden tray that pulls out, so the front stays clean while shoes are stored in a controlled way. The result is photogenic because the cubbies line up like decor. It’s also practical because trays keep shoes off the floor and you can wipe them clean. Build it if you’re comfortable with measuring and repeating the same box design.
Skip thisDon’t make trays flush — a slight lip helps shoes stop and prevents scuffs.
Editor's noteUse a single template for tray dimensions so every unit lines up visually.
12. Open Grid Shoe Shelf with Fabric Dust Panels
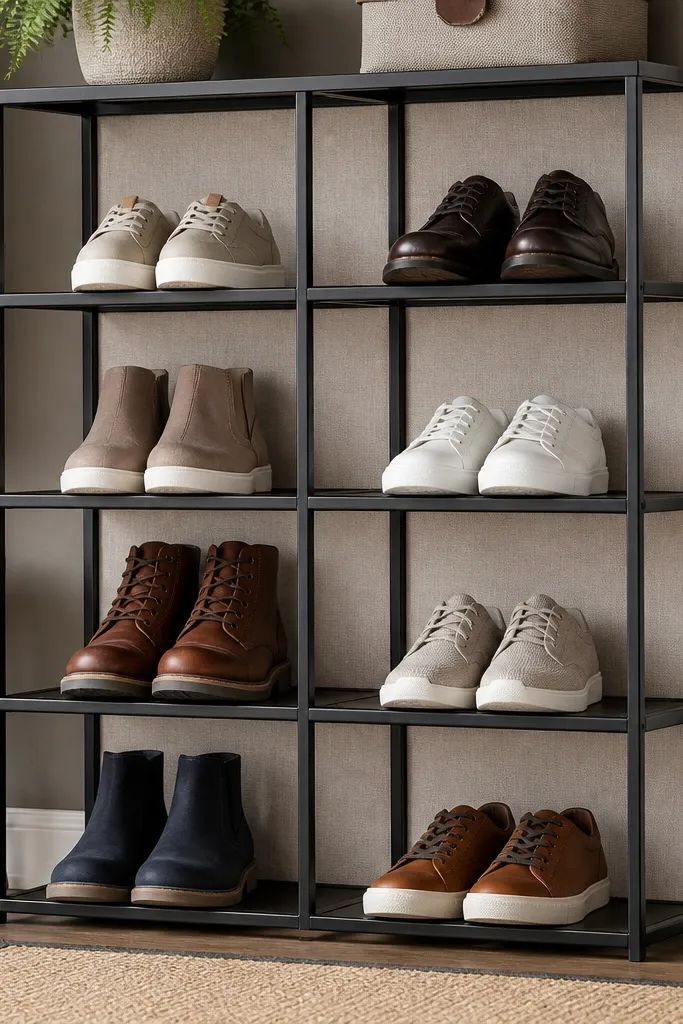
Open shelves can look messy, but you can keep them modern and tidy with fabric dust panels behind the shoes. The grid keeps airflow high, while the fabric behind hides the “side clutter” you see in corners. This is cozy because the fabric adds softness and color warmth. Use it when you want visibility for quick grabs and you don’t want heavy doors. It’s a simple build if you can cut straight boards and make a clean frame.
Build a rectangular frame from 1x3 or 1x4 boards and install horizontal dividers to create evenly spaced slots, about 8-9 inches wide per shoe pair. Add a back panel made from breathable fabric (like canvas or a tightly woven cotton) stretched over a thin frame, leaving a small gap at the bottom for airflow. Secure the fabric so it looks smooth from the doorway, then finish the wood frame with a warm stain. Add a top shelf for a small plant or key tray so the unit reads like decor. If you want extra stability, anchor to studs or the wall using two brackets.
Pick a fabric color close to your wall trim so it blends instead of looking like a screen.
Don’t use thin plastic backing — it makes the whole shelf look cold and cheap.
13. Rolling Shoe Cart with Cork Back Panel
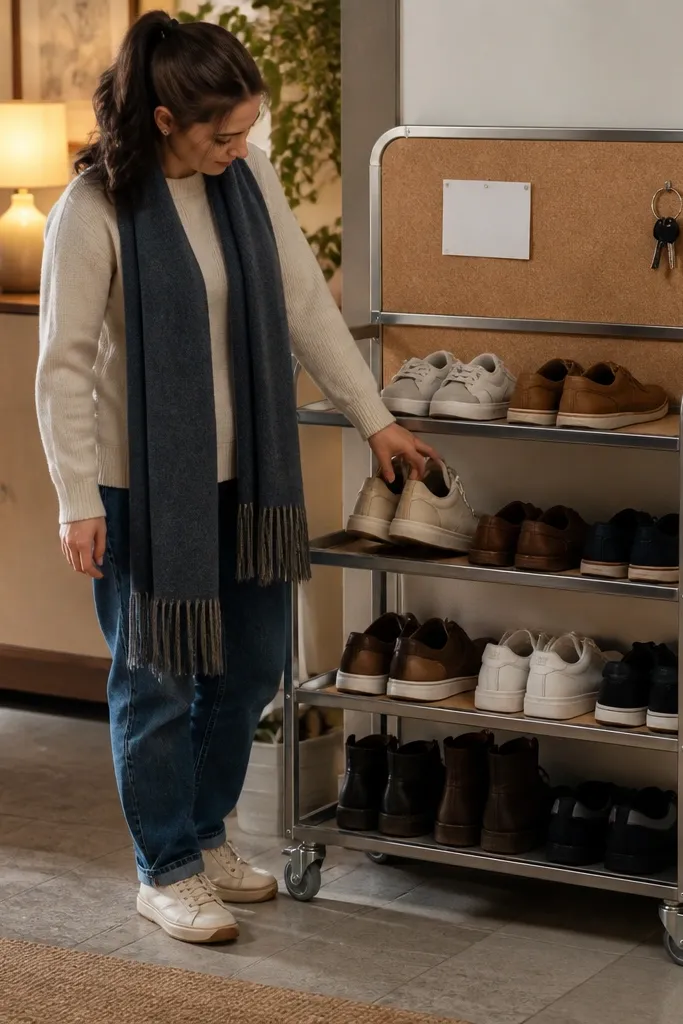
Start with a small metal or wood cart frame with 3-4 shelves, then remove any surfaces you don’t like. Cut cork board to fit the back panel and attach it using adhesive plus small screws around the edges for strength. Add warm wood shelf liners or slatted inserts so shoes don’t slide. Stain or paint the cart frame in a matte finish and replace wheels with ones that roll quietly on your floor type. Add a small tray on top for keys and a hook for a leash or umbrella handle.
A rolling cart is underrated because it solves the “entry mess spreads” problem without permanent installation. Cork on the back adds warmth and gives you a place for a small note, receipts, or a key hook, so the cart looks styled. The shelves keep shoes separated, and the wheels let you clean behind it. This works well in apartments, narrow entries, and spaces where you don’t want to drill. The build is beginner-friendly if you use a ready-made cart base and upgrade the surfaces.
Skip thisDon’t skip liners — shoes scuff shelves and the cart looks worn quickly.
Editor's noteUse wheel locks — a cart that creeps makes the entry feel messy fast.
14. Bench Seat with Flip-Open Top and Side Vent Ledges
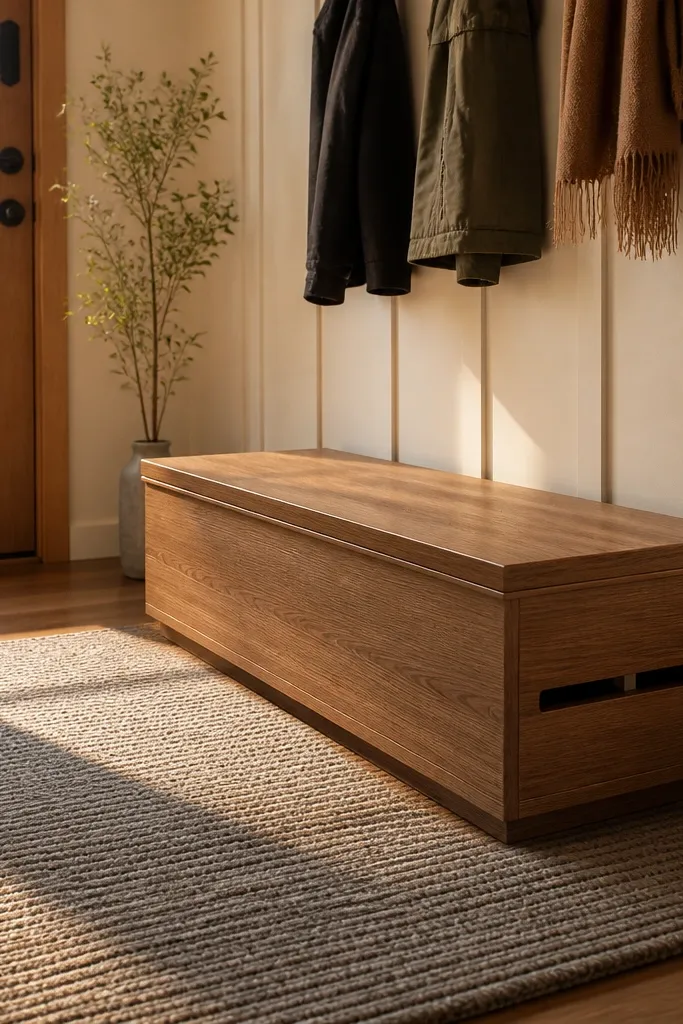
Build a bench box from 3/4-inch plywood and add an internal divider so shoes don’t all fall into one pile. Create a flip-open lid with a piano hinge and a stop block so it opens to a comfortable angle. Add side vent ledges using thin slats mounted to the inside walls, spaced about 1/2 inch apart. Finish the exterior with matte paint or stain, and install a soft latch to keep the lid closed. Add a removable interior liner tray and rubber feet to protect floors.
This bench design keeps the entry looking tidy because the lid flips open and hides shoes completely. The side vent ledges are what make it cozy instead of gross — they let air escape along the sides where moisture collects. It’s a good choice for entries where you want seating and storage but hate the look of a full cabinet front. The build is similar to a lift-top bench, but the side ledges make it feel more intentional and less boxy. It’s best for intermediate DIYers comfortable with hinges and clean joinery.
Skip thisDon’t rely on one big vent hole — moisture needs airflow across the shoe volume.
Editor's noteUse a weatherstrip gasket around the lid edges so the lid closes cleanly without rattling.
15. Wall-Mounted Shoe Frames with Sliding Panels
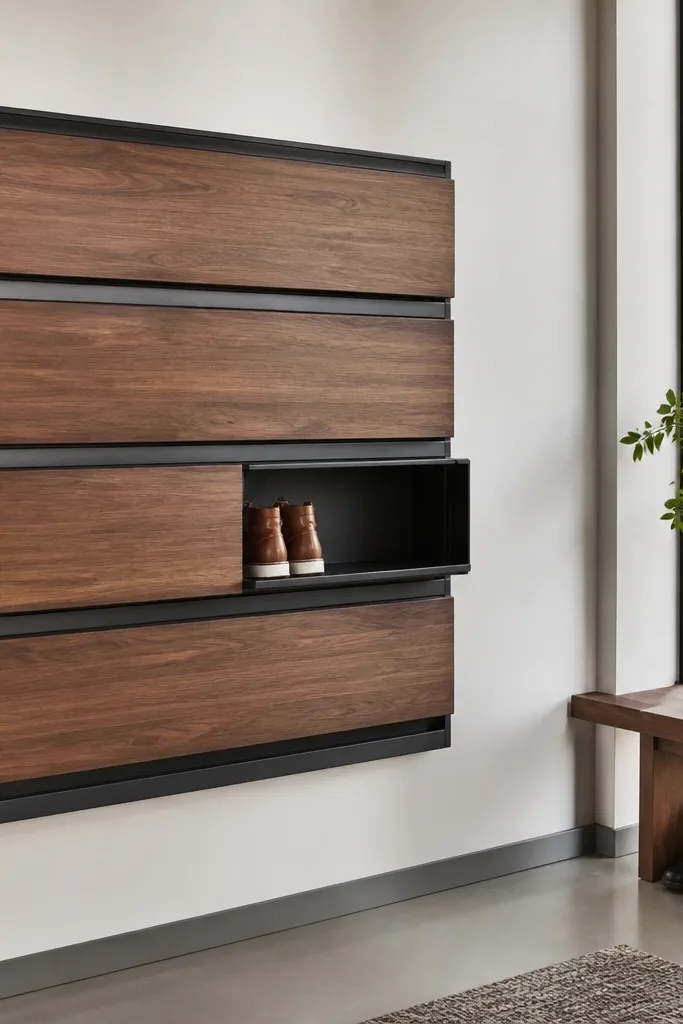
Build a wall frame from plywood strips, sized to fit your shoe count, and mount it to studs with a level rail. Create individual shoe openings using dividers and leave a small gap between dividers for airflow. Install sliding panels on top and bottom tracks, so each panel covers multiple slots. Use slatted or mesh backing behind the panels so shoes dry even when covered. Finish the frame and panels with a warm stain, then test sliding motion before final screws.
Sliding panels make shoe storage feel sleek because you can reveal exactly what you’re using and keep the rest hidden. The wall-mounted frame saves floor space, and the sliding panels create a modern horizontal rhythm. This is especially good for entries with kids' shoes where you want quick access but also want the visual clutter gone. It’s cozy because you can choose warm wood panels and soft-close rails. Build this if you want a furniture-style entry wall and you’re comfortable with rail hardware.
Skip thisDon’t skip clearance at the sides — panels bind when wood expands with humidity.
Editor's noteAdd felt bumpers to the panel edges so it doesn’t scratch and makes the slide feel quiet.
16. Magnetic Shoe Clips on a Wooden Rail with Boot Stands
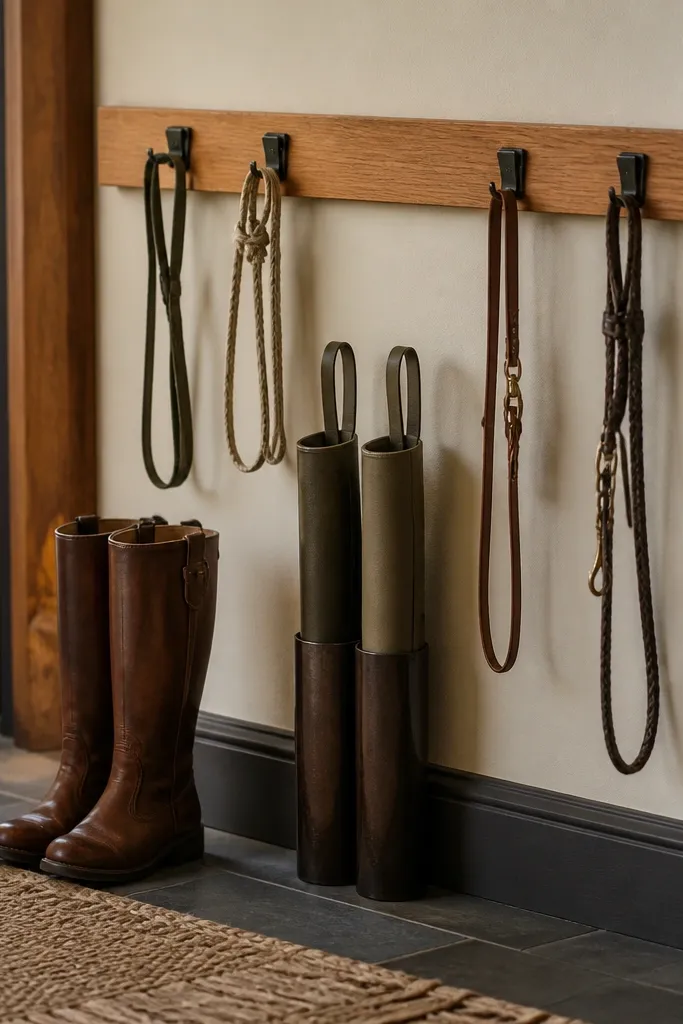
This is a modern “display meets storage” approach for entries where you want shoes to look like gear, not clutter. Magnetic clips hold shoes or straps in place, while boot stands keep tall boots upright without collapsing. It’s cozy because the wood rail warms the look, and the hardware is minimal and matte. Use it for smaller collections or for people who rotate footwear frequently. The build is quick if you’re good at measuring and you source strong magnets and sturdy rail brackets.
Mount a solid wood rail to studs at about 48-52 inches high, using two brackets for stability. Attach magnetic strips or individual magnet plates to clip mounts so shoes stay secure but removable. For boots, add a small U-shaped boot stand bracket beneath the rail or on the floor side with a rubber tip. Add a base tray or mat under the boot stand to catch dirt. Finish the rail with a matte clear coat and tighten all hardware so it doesn’t loosen over time.
Use rubber magnet pads or clear protective sleeves so metal doesn’t scratch shoes.
Don’t use weak magnets for boots — they slide and ruin the whole tidy look.
17. Linen-Lined Shoe Bins in a Shallow Console Drawer
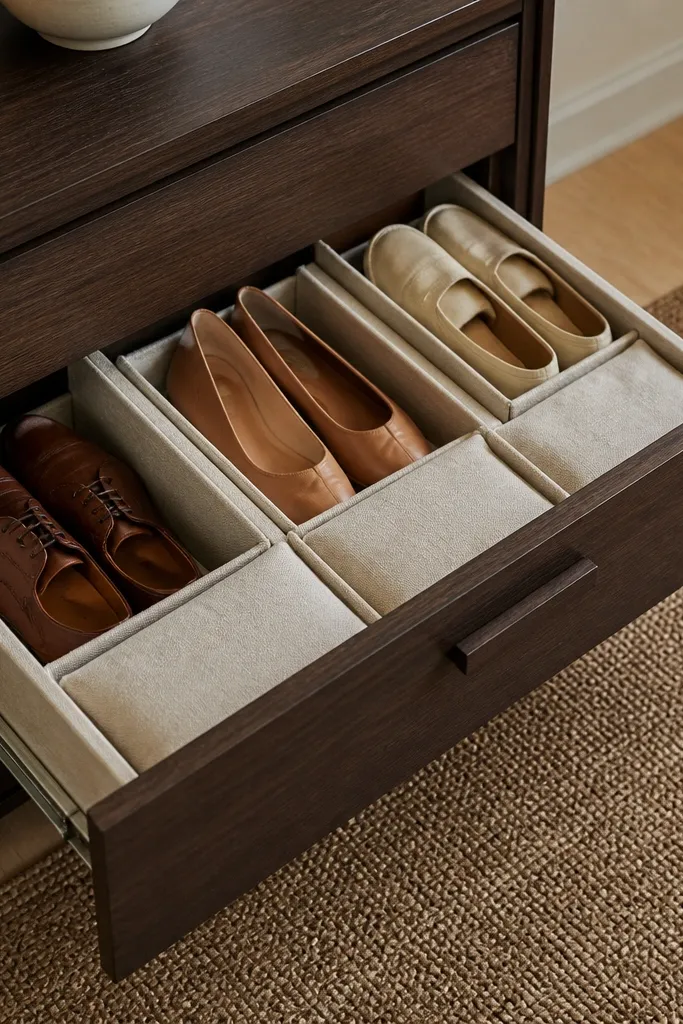
Choose a console or dresser with a drawer that’s at least 18 inches wide and 6-8 inches tall inside. Measure the drawer opening and cut or assemble bins from plywood or buy bins sized for the space. Line the bins with linen or cotton using spray adhesive, then add vent holes on the bin sides so shoes don’t trap moisture. Install a simple divider to separate sneakers from flats, and add a small pull-out tray for small items like insoles or boot brushes. Finish the console exterior with matte paint for a cozy look.
A shallow console drawer looks like furniture, but it hides footwear in a way that feels soft and cozy. Linen lining makes it feel warm and also protects leather from direct contact with plastic. This works best for entries with limited depth where you still want closed storage. The visual payoff is that the drawer front stays clean, and you only open it when you’re getting ready. It’s a beginner build if you have a console or dresser base and you’re customizing the inside.
Skip thisDon’t line the entire bin base with a fully sealed layer — airflow still needs a path.
Editor's noteAdd a thin layer of cork under the linen to reduce friction and noise when sliding bins.
18. Shoe Storage Ladder with Bench-Like Side Rails
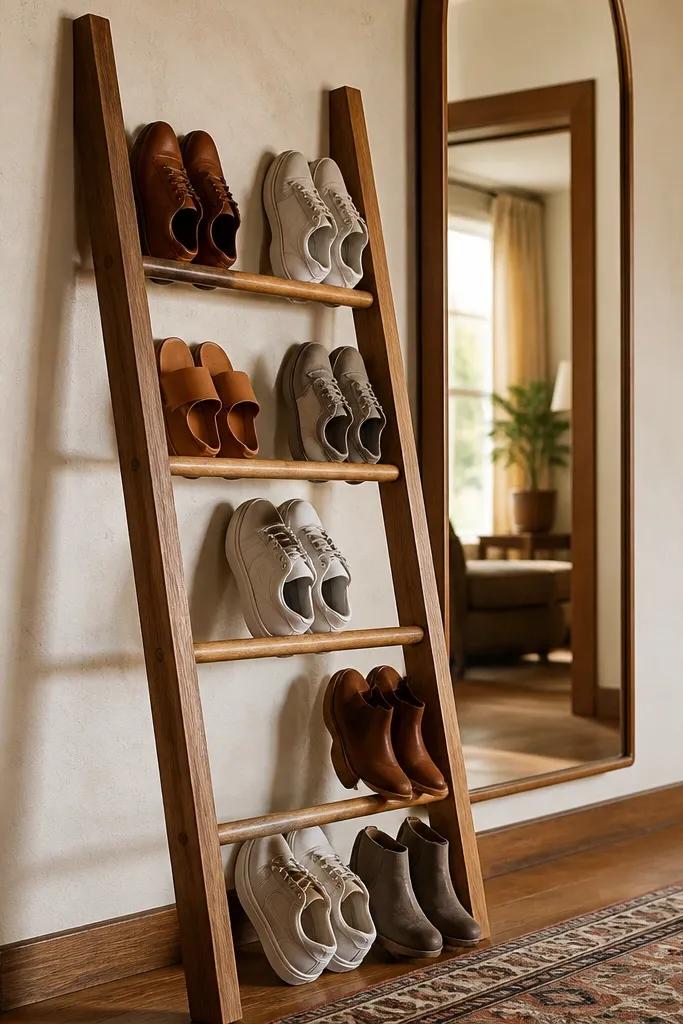
Build two side rails from straight boards and cut rungs at equal intervals, typically 8-9 inches apart for shoes and 10-11 inches for boots if you’re mixing sizes. Use dowels or pocket screws to attach rungs so everything stays aligned. Add a back cross brace for stability and install rubber feet at the base. Finish with a warm stain and a matte topcoat, then add a small fabric runner on the floor behind the base if the rack sits near a wall. Keep the shoe openings consistent so the ladder looks intentional.
A ladder-style rack can look modern and architectural if you build it like a piece of furniture, not a wobbly DIY. Side rails give it a cozy feel and also stop shoes from slipping off the rungs. Use this when your entry has vertical wall space and you want a statement piece that still organizes shoes. It’s photogenic because the lines pull the eye upward. Skill level is moderate, mostly because you need square construction so the ladder looks crisp.
Skip thisDon’t leave rungs uneven — even a small tilt makes the whole piece look sloppy.
Editor's noteSand the corners of every rung — sharp edges make the rack feel harsh instead of cozy.
19. Reclaimed Wood Boot Wall with Slatted Inserts
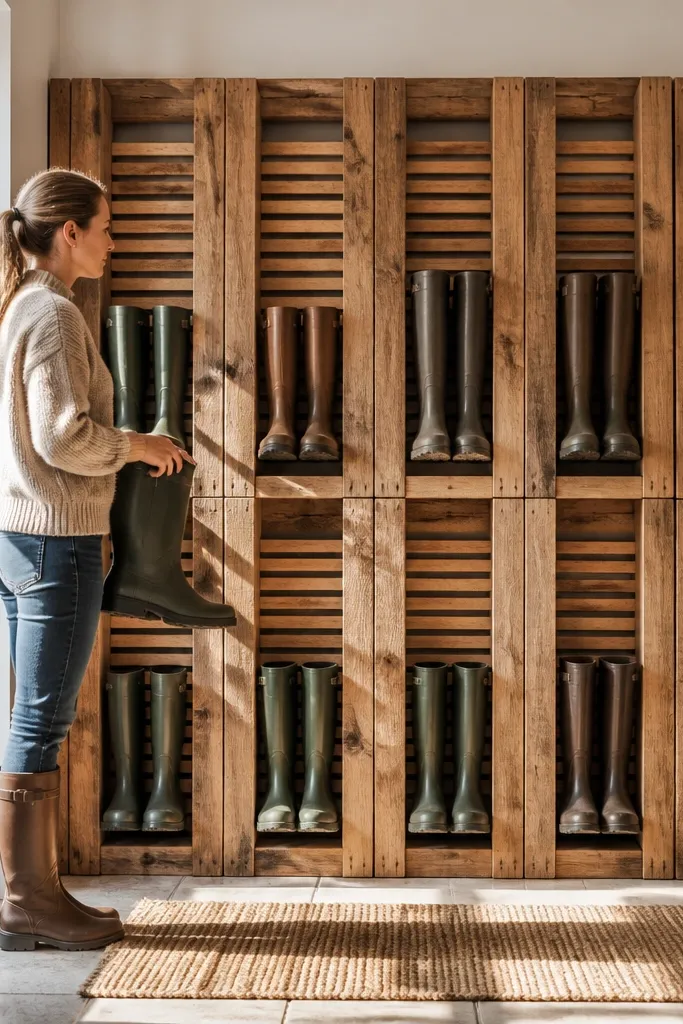
If you like the look of warm wood but want a modern layout, a reclaimed wood boot wall is the move. Slatted inserts keep airflow moving inside each boot slot, and the reclaimed texture adds cozy character without turning into a rustic mess. This works best for entries that already have wood tones or natural materials, and it’s great for tall boots that need upright storage. The build takes time because you’re cutting and spacing reclaimed boards, but the final look is worth it because it reads like wall decor. It’s intermediate DIY due to sourcing and milling wood.
Select reclaimed boards and clean them down, then cut them into a consistent frame grid for your boot slots. Build each slot with slatted inserts spaced about 1/2 inch apart so boots breathe. Mount the frame to studs and ensure the slots are plumb so boots sit straight. Sand thoroughly and use a matte finish to keep the wood cozy instead of shiny. Add a bottom dirt-catching rail or shallow tray so boots don’t scuff the floor.
Use a single stain tone across all pieces — patchy color makes the wall look accidental.
Don’t skip sealing the frame edges — splinters and rough edges ruin the cozy feel.
20. Under-Stair Shoe Drawer Units with Vent Slots
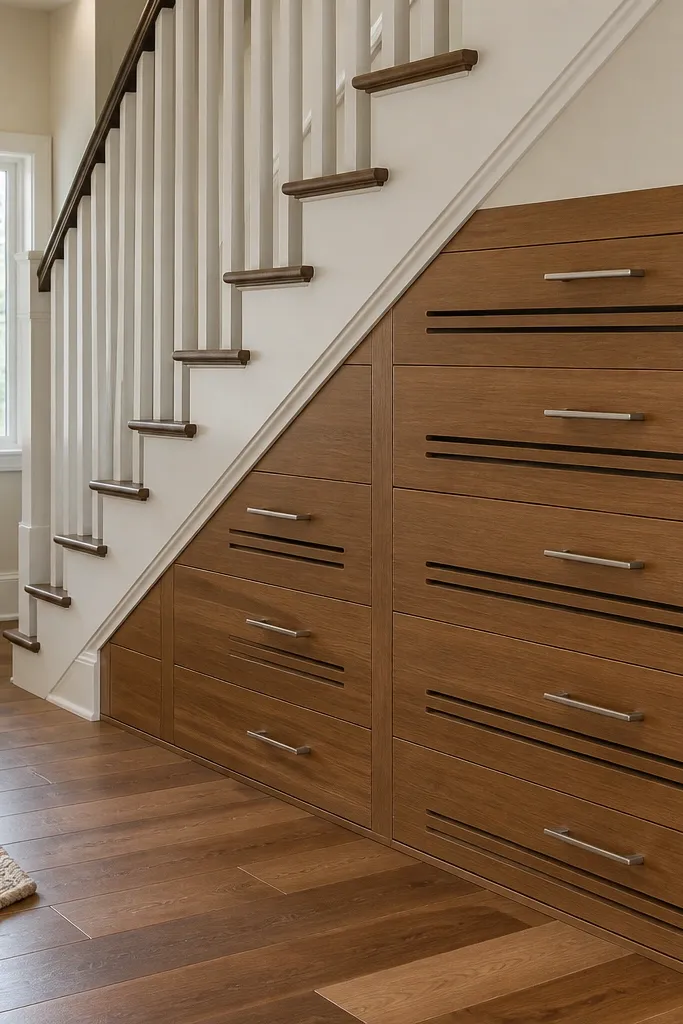
Measure each under-stair compartment and build drawer boxes from plywood, making sure the drawer front sits flush with the opening. Cut vent slots into the drawer back or side panels using a jigsaw, spacing them about 1 inch apart so air moves. Install full-extension slides, then add interior dividers sized to your shoe types. Finish the drawer fronts in a warm paint or stain, and add a simple pull handle that matches your entry hardware. Seal the wood and add a stop block so drawers don’t pull too far.
Under-stair areas are perfect for hidden shoe storage because the space already looks built-in. Drawer units keep everything tidy, and vent slots prevent the damp basement smell that can happen in enclosed areas. This is a great solution when you have an entry landing with awkward angles and no straight wall for racks. The aesthetic stays modern because drawers look like furniture. Build it if you can measure carefully and you’re comfortable installing drawer slides and building to angled dimensions.
Skip thisDon’t make drawers fully sealed — odor gets trapped and transfers to other shoes.
Editor's noteUse a thin removable floor liner inside each drawer for easy cleaning.



