
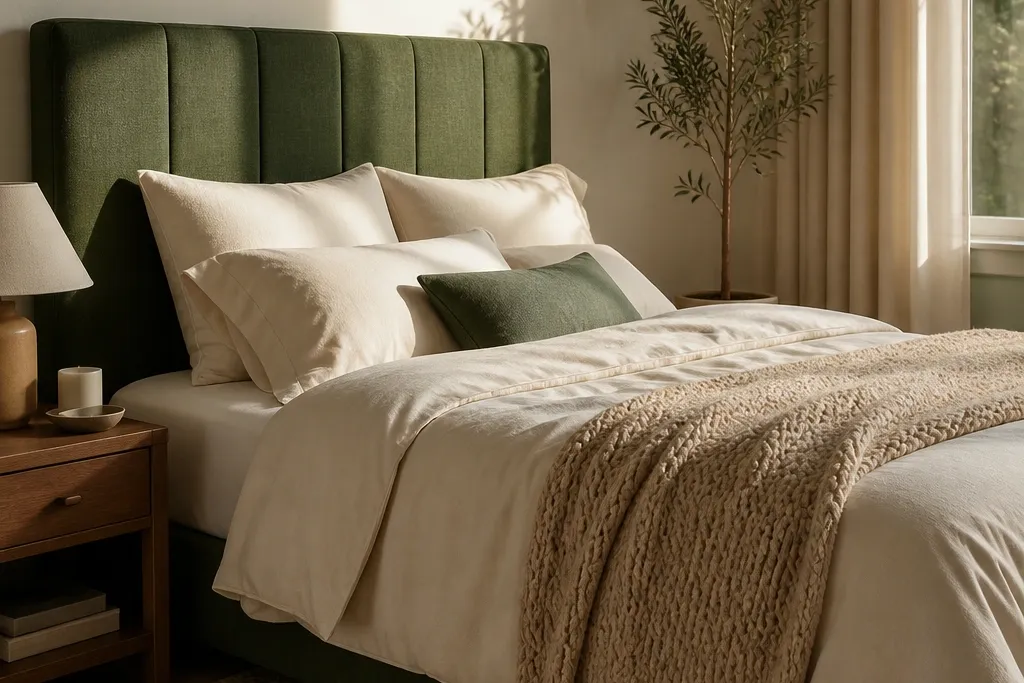
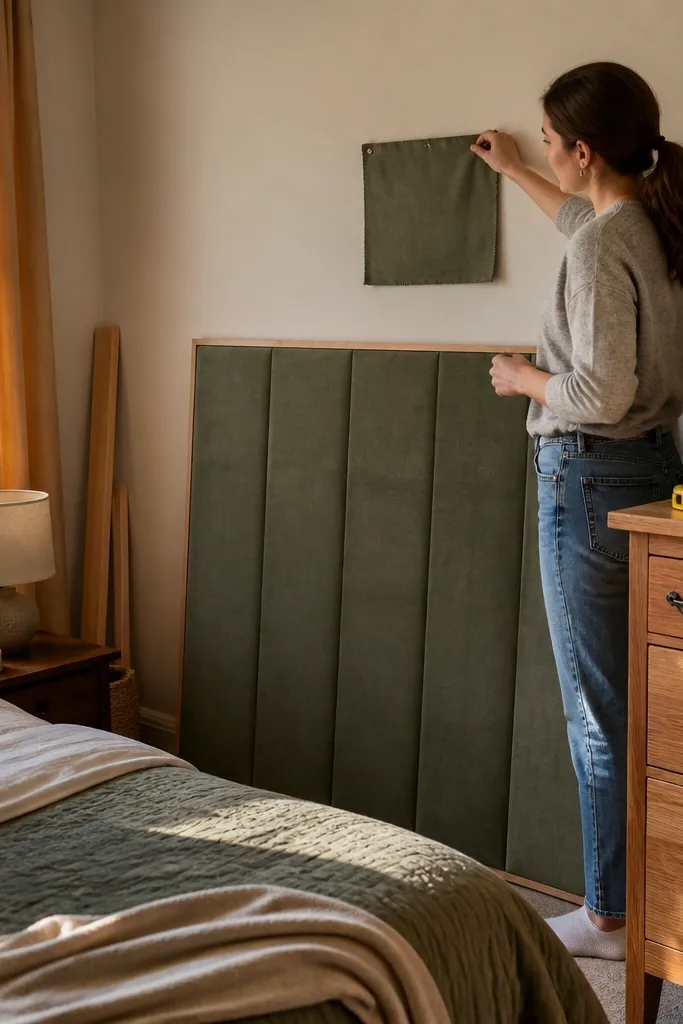
1. Moss velvet panel headboard with nailhead border
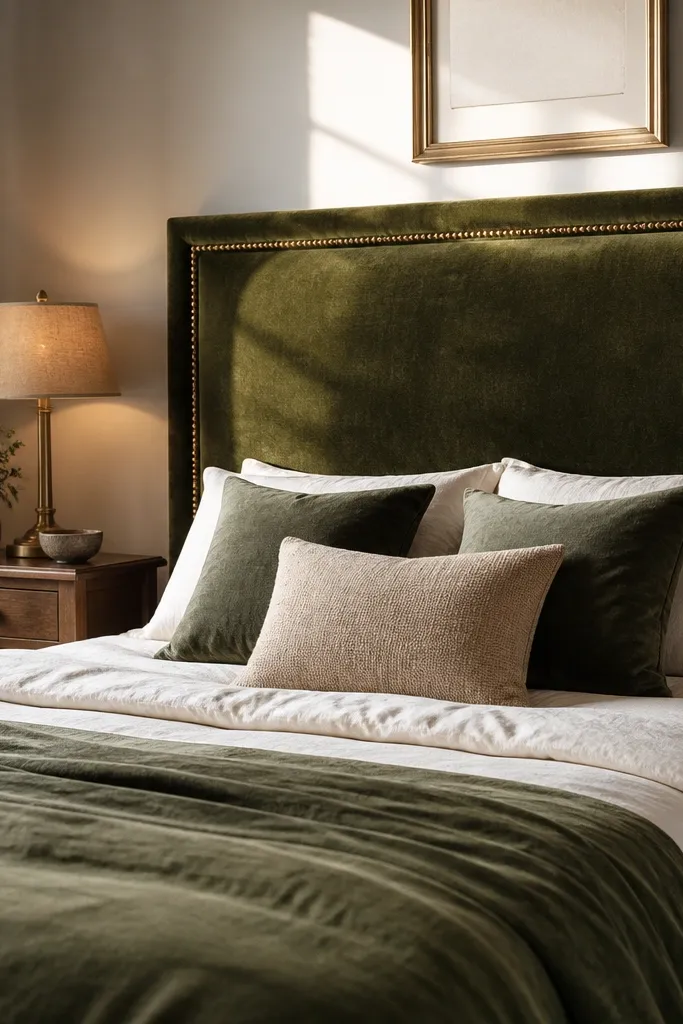
This is the “cozy” version of green: mossy velvet makes the surface look soft and absorbs glare so your bed looks warm in daylight and at night. The nailhead border gives a crisp frame, so the headboard doesn’t melt into the wall. Build it if you want a high-end look without complicated carpentry. It works in bedrooms with white bedding, cream walls, or light oak floors because the green stays the star while everything else feels calm. Skill level is moderate because fabric wrapping needs clean corners, but the materials are straightforward.
Editor's noteUse a staple gun with 1/4-inch staples and pull fabric in small increments so the velvet grain doesn’t twist.
Cut a piece of 3/4-inch plywood to your bed width minus 2 inches (for a centered look) and about 56 inches tall. Wrap it with 2 layers of foam: 1-inch upholstery foam on the face and 1/2-inch batting over that, then pull velvet tight and staple the back. Add a thin strip of MDF or wood trim on the front edge if your corners look bulky, then attach black nailheads in a straight line around the border. Finish by mounting to the wall studs or to a bed frame bracket using 2-inch wood screws.
Skip thisDon’t skip adding foam or your velvet will look flat and shiny instead of plush.
2. Sage tufted headboard with 4-inch channel lines
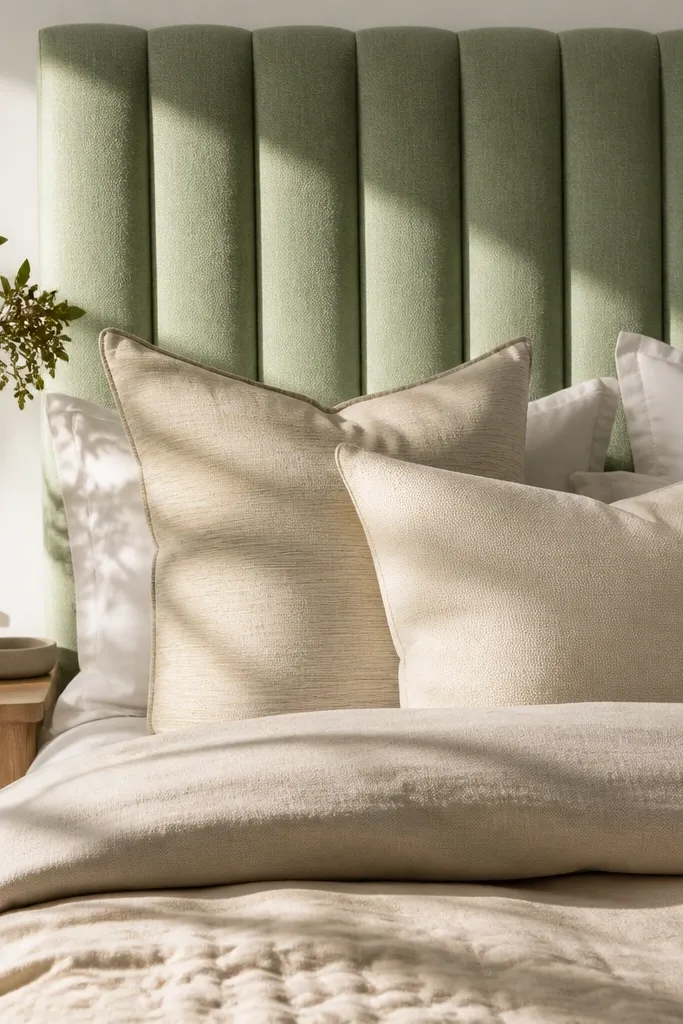
Tufting is the quickest way to make green look dreamy because it creates shadow lines that read as softness in photos. Sage is forgiving and keeps the room feeling airy even when the headboard is large. The 4-inch channel pattern is visually steady — not too busy, not too plain — and it gives you that “hotel bed” depth. This idea suits small rooms where you still want the bed to look styled. It also pairs well with white, oatmeal, and light denim colors on your bedding.
Start with a plywood panel cut to width and height (around 54 inches tall for most beds). Cover with 1-inch foam and batting. Mark vertical channels every 4 inches, then install button-tuft hardware or sew-on channel straps that pull the fabric into channels; keep the lines straight using a level. Wrap and staple at the back, then add a fabric-covered trim strip along the perimeter for a neat edge.
Mark channels with painter’s tape on the foam before you staple fabric — it keeps the pattern aligned.
Avoid stretchy fabric without structure; it will sag between channels.
3. Hunter green scalloped wood headboard with stained edges
If you want cute-dreamy instead of formal-dreamy, scallops do it. Hunter green gives the drama, and stained edges add warmth so the green doesn’t feel heavy. The scalloped silhouette looks good from across the room and close up, which is great for aesthetic photos. This is a DIY-friendly woodworking project if you can use a jigsaw and you’re comfortable with sanding and finishing. It fits bedrooms with warm neutrals, tan bedding, and natural wood nightstands.
Editor's noteUse painter’s tape as a mask edge and press it down firmly so the green paint doesn’t creep onto the stained curves.
Build a frame from 1x2 pine boards sized to your bed width, then add a plywood face. Draw scallops on the plywood using a consistent radius (use a bowl or template) and cut with a jigsaw. Sand smooth, then paint the scallop face hunter green using a bonding primer first. For the stained edges, mask the painted area and apply a gel stain to the curves, then seal with a satin clear coat.
Skip thisDon’t rush sanding; scallops show every wobble in photos.
4. Olive upholstered headboard with rounded top and linen piping
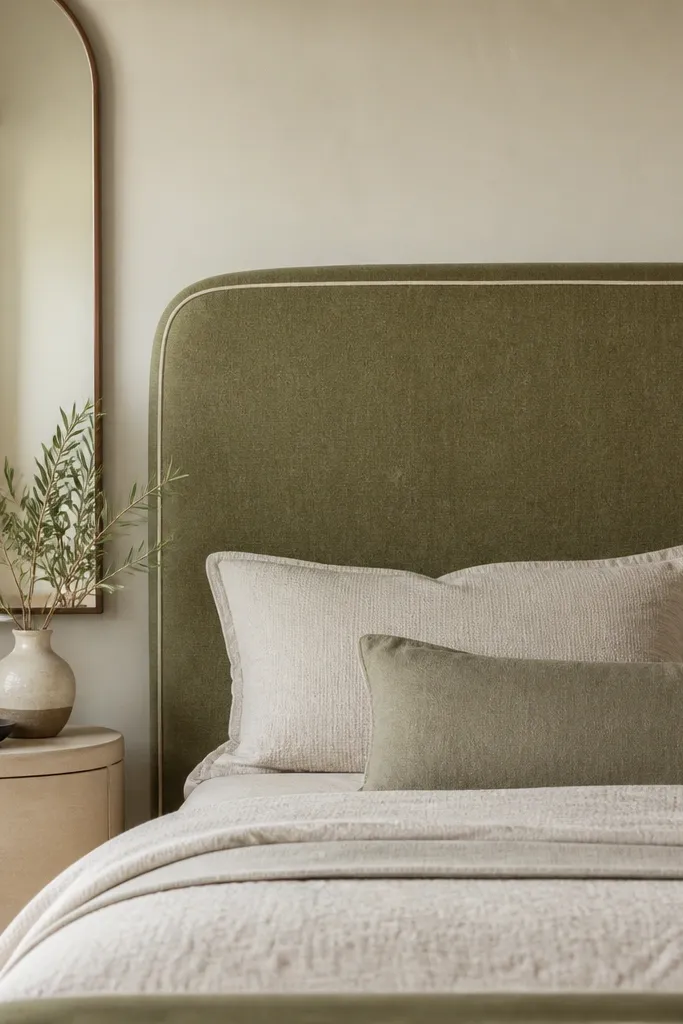
Rounded tops soften a room instantly, and olive green keeps it grounded. Linen piping makes the edges look tailored, which turns a simple upholstery panel into a styled feature. This is a great option if your room already has curved details like arched mirrors, rounded lamps, or rounded nightstands. It delivers a calm, cozy look without the bold contrast of deep hunter green. You’ll get a clean photo edge line because piping creates a crisp border even when your fabric has texture.
Editor's noteBuy pre-made piping cord or make it with matching piping fabric so the cord stays consistent through curves.
Cut plywood to your width and height, then add a curved top using a pre-cut template (foam board is easy to shape as a pattern). Glue 1-inch foam to the front, then add batting for smooth coverage. Wrap olive fabric and run piping along the front seam where fabric meets the edge trim; pin carefully so the piping curve stays even. Staple the back, then mount with French cleats or two wall brackets.
Skip thisAvoid thick, stiff batting under piping; it makes the seam look lumpy.
5. Deep emerald board-and-batten headboard with matte finish
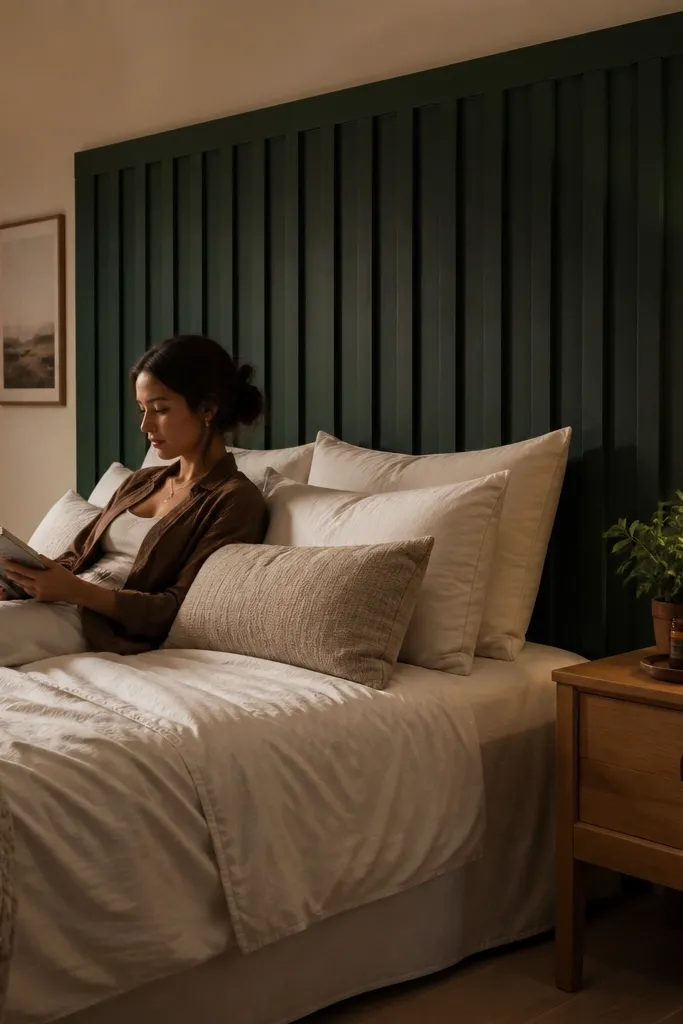
Board-and-batten is crisp structure, and emerald paint makes it feel rich instead of plain. The matte finish keeps it cozy by reducing glare, so it looks soft next to warm bedding. Vertical slats also make the headboard look taller, which helps if your ceilings are standard height and you want the bed to feel more grounded. This works best in rooms with simple decor because the pattern already adds interest. It’s also one of the easiest DIY builds because you can use straight cuts and trim pieces.
Editor's noteUse a speed square to mark batten lines so your spacing stays identical on both sides.
Use 1/2-inch plywood as the base and cut vertical batten strips from 1x2 or 1x3 primed boards. Space the battens evenly across the face, typically leaving 6 to 8 inches between strips depending on your width. Paint the base and battens deep emerald with a bonding primer and 2 to 3 coats of matte paint. Seal with a water-based topcoat so it wipes clean, then attach wall cleats for secure mounting.
Skip thisDon’t use glossy paint; emerald gloss reads cold and shiny.
6. Eucalyptus green fluted panel headboard with fabric face
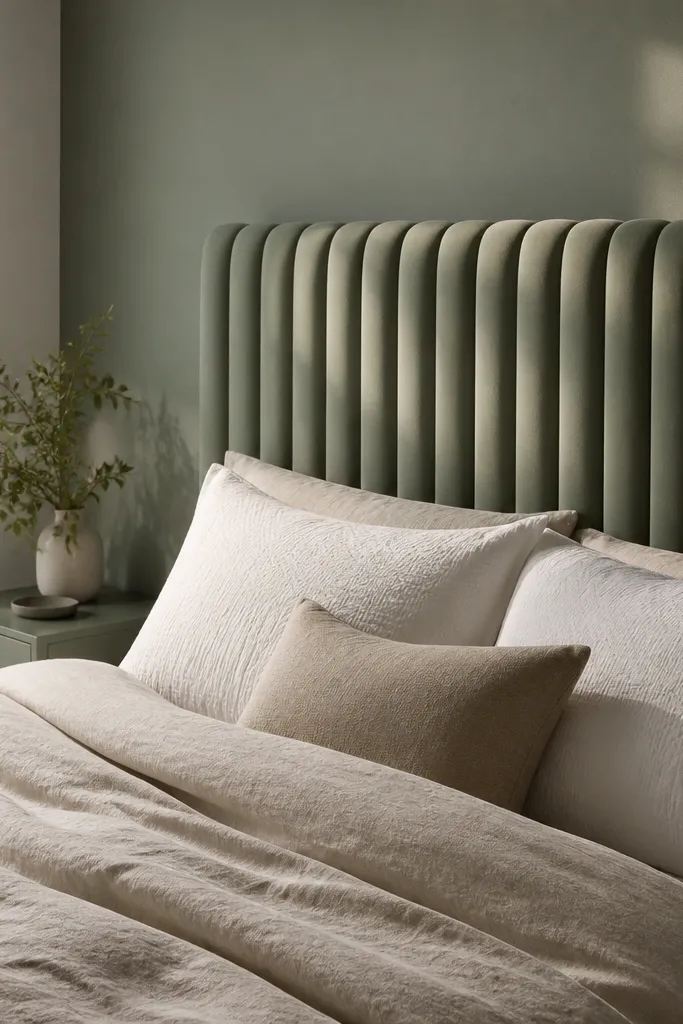
Fluted panels add dimension without looking busy, and eucalyptus green keeps the whole piece fresh. This look is photogenic because the ridges catch light differently across the day. The fabric face is what makes it cozy instead of architectural — you get soft texture with sculpted lines. It’s perfect for modern bedrooms that still want warmth, especially with white bedding and light gray walls. DIY is manageable if you’re using foam strips or MDF flutes attached to a base panel.
Editor's noteIf you use MDF ridges, sand edges smooth before wrapping so fabric doesn’t snag.
Cut plywood to size and cover the surface with batting. Add fluted ridges by gluing thin MDF strips in a repeating pattern or using foam fluting panels if you want less weight. Cover everything with a fabric wrap so the ridges are cushioned, not hard. Paint or dye the fabric edge trim if needed, then staple the back and mount with a cleat system.
Skip thisAvoid skipping batting between ridges and fabric; it turns cozy into rigid.
7. Sage green faux rattan headboard using cane-style panels
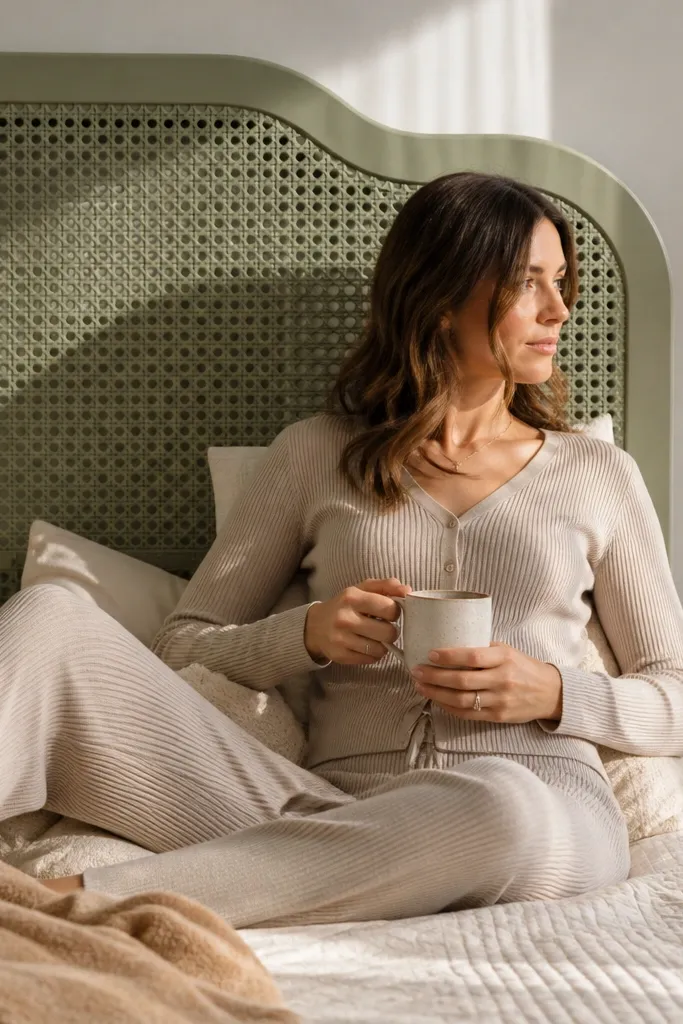
Cane and rattan textures instantly read airy and cozy, and sage green keeps the weave from looking too stark. The woven pattern creates a soft, dappled look that photographs beautifully even in plain rooms. This is a strong choice when you want texture without heavy upholstery thickness. It also works well if you have natural light and want the headboard to look lighter than a solid panel. Skill is low because you’re mostly assembling and painting panels, not building complex curves.
Editor's noteUse a foam roller for paint on the weave; it fills evenly without heavy brush marks.
Buy or cut cane-style panels to your headboard size (plywood base behind them). Paint the plywood base sage green, then attach the cane panels with small finishing screws or heavy-duty wood glue. Frame the edges with thin trim for a clean border. Seal with a clear topcoat so the finish holds up, then mount with wall cleats.
Skip thisDon’t leave the cane unsealed; dust and moisture will dull the color.
8. Olive green quilted headboard with diamond stitch
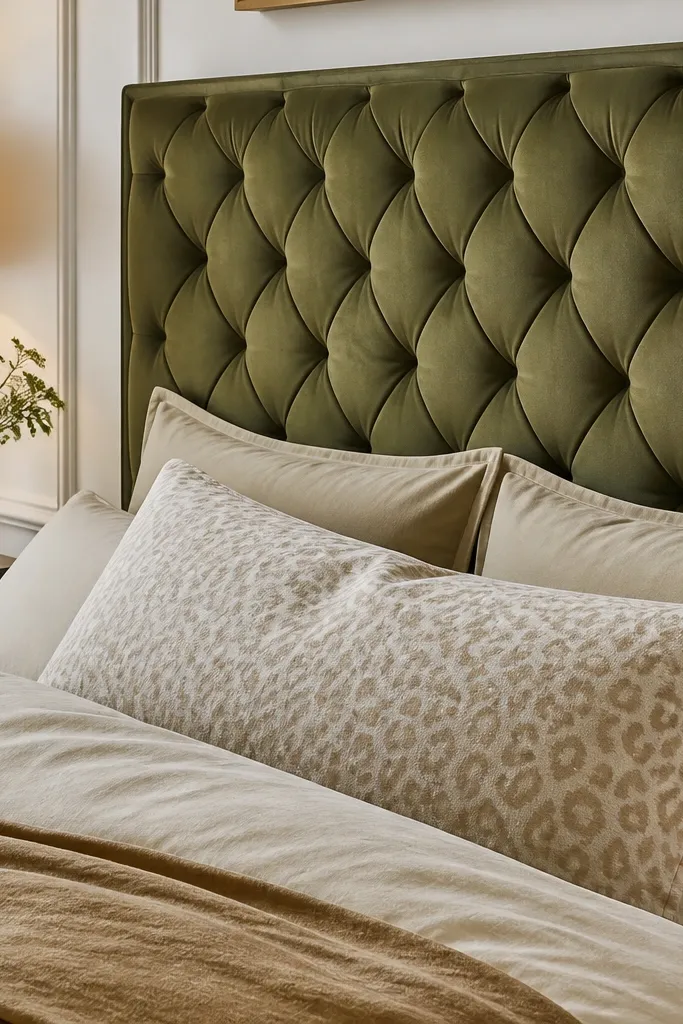
Quilted diamond stitching makes a green headboard look plush and cozy without needing tuft buttons. Olive green stays warm and natural, especially next to beige, cream, and tan bedding. The quilt pattern creates depth while the stitching lines keep the design tidy. This is great if you like cozy textures but don’t want a fully upholstered look that’s too dark or heavy. Build it if you can stitch or you’re comfortable attaching a pre-quilted fabric panel.
Start with a plywood panel sized to your bed width, then add 1-inch foam and batting. Use pre-quilted fabric if you can find it in olive with diamond stitching; otherwise, mark diamond points and sew through fabric and batting before wrapping. Stretch the fabric evenly and staple the back, then add cream piping around the edges. Mount securely using two brackets or a cleat.
Mark your diamond grid with chalk and painter’s tape so the lines stay symmetrical from top to bottom.
Avoid thin fabric for quilting; it will look wrinkled and flatten over time.
9. Emerald green art deco fan headboard panel
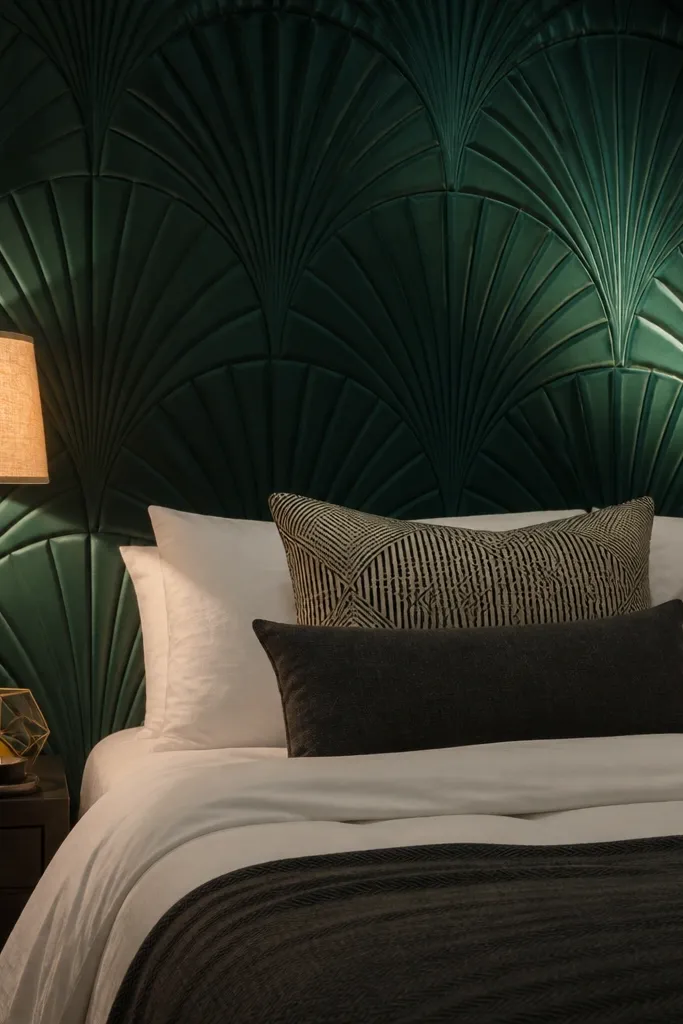
Art deco shapes feel dreamy when the color is bold and the lines are clean. Emerald green makes the fan design look intentional rather than decorative clutter. This headboard looks great in photos because the repeating arcs create a highlight pattern behind your pillows. It’s best for bedrooms that already have geometric decor or black/brass accents. DIY is doable with layered MDF or plywood cutouts and careful painting.
Cut a rectangular backing panel from plywood, then build the fan shape using layered semicircle cutouts from 1/4-inch MDF. Stack layers with wood glue and brad nails, keeping the pattern centered and measured. Sand smooth, prime, then paint emerald green with 2 coats. Add a thin trim frame around the outer edges, then mount to studs.
Use a centerline and measure each semicircle from that mark so both sides match perfectly.
Don’t paint before sanding to a feather edge; fan layers show seams under flash.
10. Soft sage green linen slipcover headboard
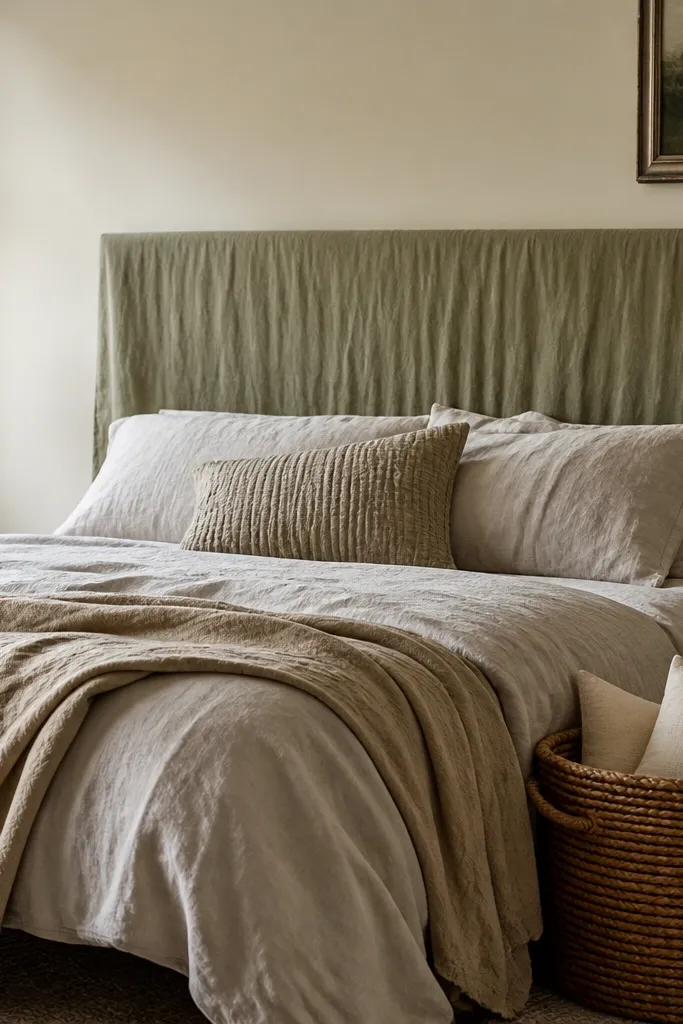
A slipcover headboard is cozy in a different way: it looks relaxed and lived-in without turning messy. Linen in a soft sage tone reads calm and bright, and the drape makes the whole bed feel softer. This is perfect if you wash bedding often and want the headboard to stay fresh-looking. DIY works best if you already have a plain wooden or upholstered frame and you can remove or cover it. The payoff is a headboard that looks styled even when you change your sheets seasonally.
Use an existing headboard frame or build a simple plywood panel base, then wrap with batting so the surface is smooth. Sew or cut a linen slipcover with a front panel and separate side panels that wrap around the back. Use hook-and-loop or hidden snaps along the bottom edge so the cover stays tight. Press seams with an iron on low heat, then attach the cover and mount the frame.
Pre-wash linen and dry it fully before cutting; it shrinks and stops distorting your fit.
Avoid slippery fabric blends; they shift and create wrinkles across the face.
11. Pine frame headboard painted deep green with rounded corners
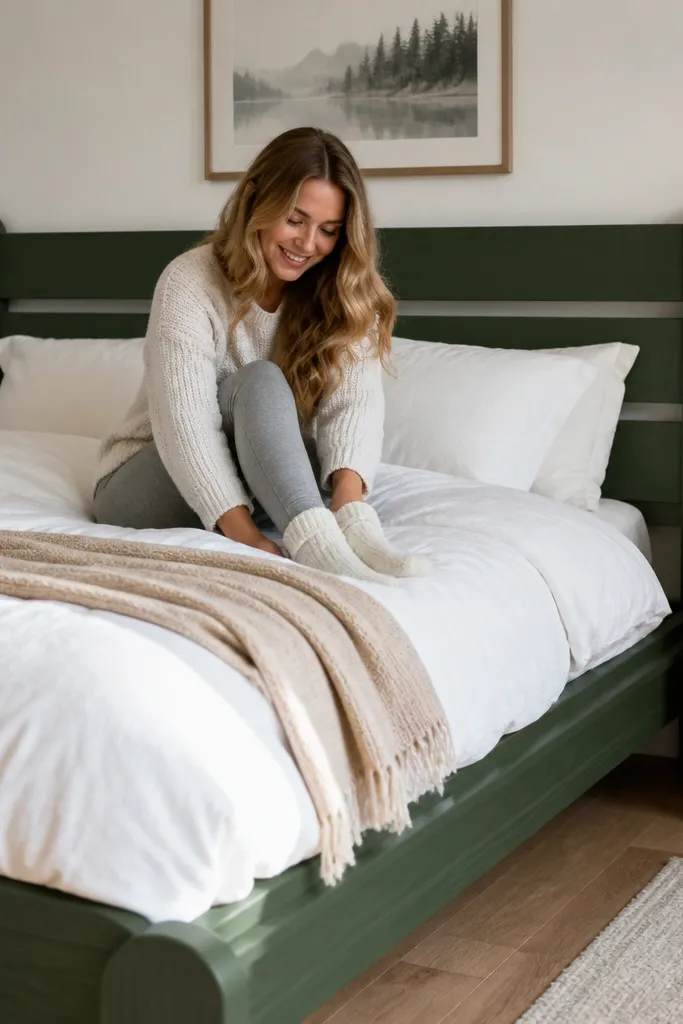
This is the “clean cozy” option: simple pine framing, deep green paint, and rounded corner blocks so it feels friendly instead of boxy. The green is strong, but the rounded corners keep it from looking harsh. It works especially well with white walls and light wood floors because it adds warmth without dominating. If you want a project that looks high-end but takes less time than upholstery, this is your lane. It’s also easier to mount and adjust than a thick upholstered headboard.
Build a rectangle frame with 1x3 pine and add corner blocks cut with a round-over profile (use a router if you have one). Sand, prime with a bonding primer, then paint deep green in thin coats for smooth coverage. Add a thin backing panel if you want a cleaner look from the sides. Mount using a French cleat and confirm stud locations before drilling.
Round-over edges before priming; it prevents paint buildup at sharp corners.
Don’t skip primer on raw pine or the green will look blotchy.
12. Pale green fabric panels with contrasting olive side wings

Two-tone winged headboards look dreamy because they frame your pillows like a picture mat. A pale green center panel keeps the room light, while olive side wings add depth and keep the whole look from feeling flat. This style is great if your bedding is neutral and you want the headboard to bring the color without going fully dark. It also photographs well from the side because the wings create shape even when your bed is made with simple linens. DIY is moderate because you’re building more pieces, but it’s still basically a panel assembly.
Cut three plywood pieces: one center panel (bed width minus 2 inches) and two side wing panels (about 8 to 12 inches wide each). Cover all three with foam and fabric, keeping the pale green for the center and olive for the wings. Add trim along the seam line where center meets wing so the transition looks intentional. Mount the wings at the correct spacing and attach the center panel on top or in front depending on your bracket plan.
Use the same trim color on all edges so the two greens read as a set, not separate projects.
Avoid mismatched fabric textures between center and wings; it makes the color contrast look accidental.
13. Dark green leather-look headboard with vertical channel seams
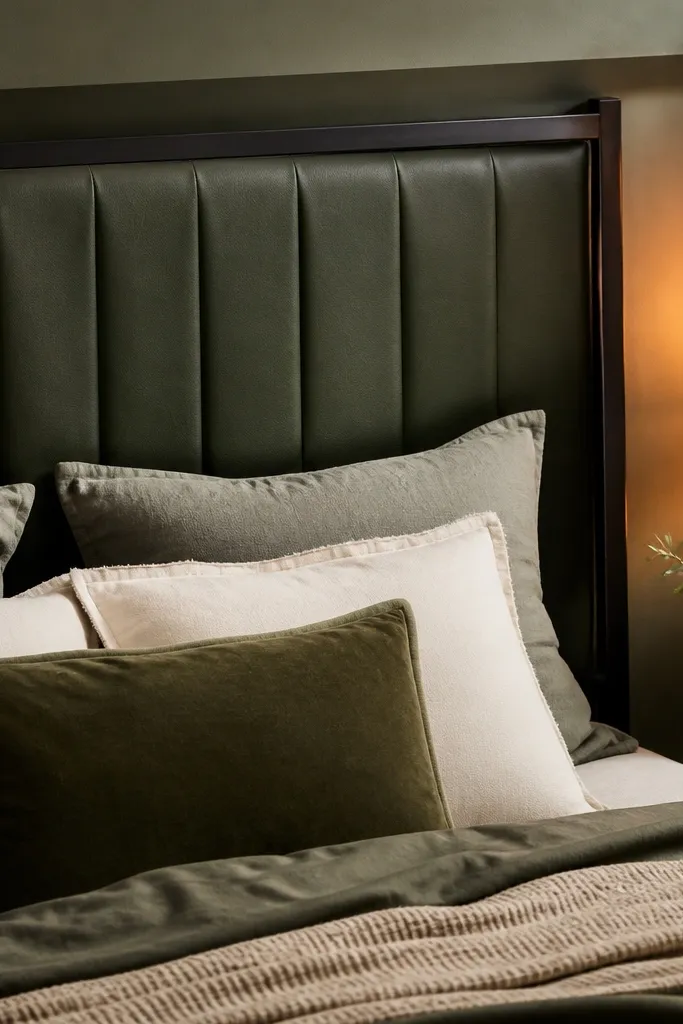
Leather-look fabric brings a cozy-sleek vibe, and dark green keeps it moody without becoming gray. Vertical channel seams make the headboard look taller and give a tailored look that still photographs soft because the material has a subtle sheen control. This is a good fit for bedrooms that already have black metal, dark wood, or warm brass. DIY is doable with plywood and foam because you’re mostly stretching and stitching channels. It’s also easier to wipe clean than velvet.
Cut plywood to bed width and about 58 inches tall. Cover with 1-inch foam and batting, then wrap the leather-look fabric and staple at the back. Mark vertical channels every 3.5 to 4 inches and stitch lines through the fabric into the foam using a heavy-duty needle and upholstery thread. Add black piping around the perimeter and mount to studs with 2-inch screws.
Use masking tape strips as channel guides so your stitching lines stay straight while you sew.
Don’t pull leather-look too tight; it will pucker around channels.
14. Olive green macrame fringe headboard over a rigid frame
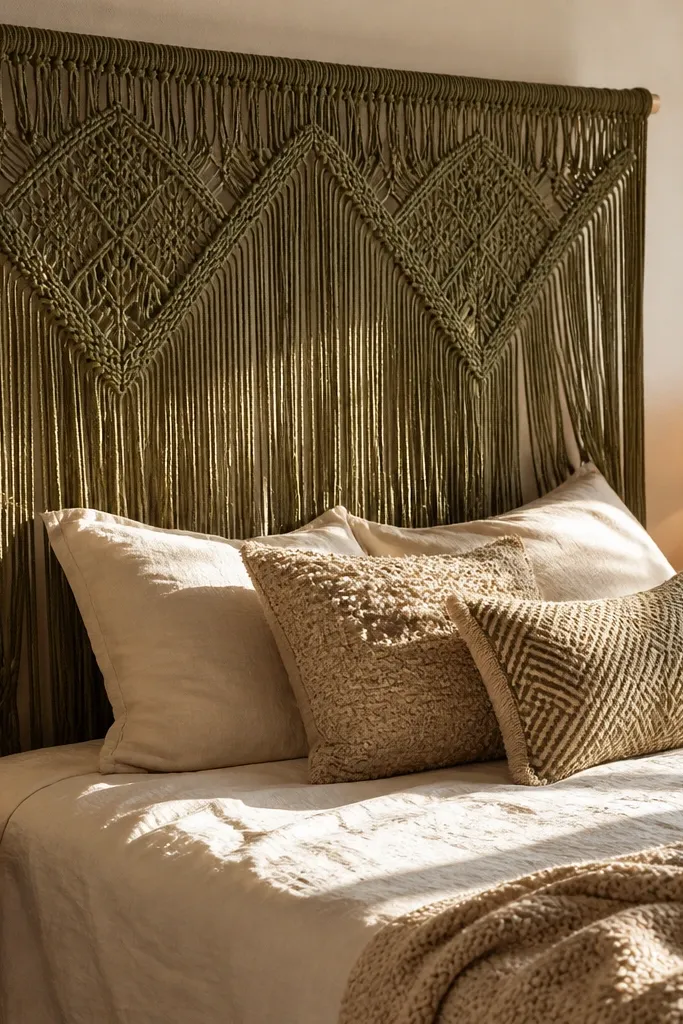
Macrame fringe gives you dreamy softness without upholstery bulk, and olive green makes it feel natural and warm. The hanging texture looks great in photos because it adds movement and shadow patterns behind your pillows. This is a smart choice if you want a headboard that feels airy and you don’t want to trap heat like thick foam. It fits boho-leaning bedrooms, but the rigid frame keeps it from looking messy. DIY is easier than it sounds if you buy a macrame panel or pre-knotted strips.
Build or buy a simple wooden rectangular frame, then sand and stain it warm oak or leave it natural. Attach macrame panels to the frame with strong zip ties or cord knots, spacing them evenly across the width. Trim the bottom fringe to a consistent length, typically 2 to 4 inches below the top of your pillows. Hang the finished headboard on wall anchors or mount it to a cleat so it stays level.
Use a level while attaching the top row so the fringe doesn’t lean in photos.
Avoid thin, lightweight cord that sags; it will look uneven after a few weeks.
15. Emerald green faux leather tufted headboard with brass studs

If you want cozy but still polished, faux leather tufting with brass studs nails it. Emerald green looks rich, and the brass gives you that warm contrast that makes green glow instead of looking flat. Button dimples create a soft, sculpted look that reads dreamy even with plain bedding. This style is best for bedrooms with warm metals or dark wood because it ties the palette together. DIY takes patience because you’re pulling fabric into buttons, but the build is straightforward with a plywood base.
Editor's notePre-drill shallow pilot holes where button hardware goes so you don’t fight the foam later.
Cut a plywood panel to your width and height (around 56 inches tall). Add 1-inch foam and batting, then wrap faux leather and staple at the back. Mark button locations in a grid pattern, then sew buttons through the fabric into the foam using upholstery thread. Add brass nailheads or stud trim along the perimeter for a clean frame, then mount to studs with a cleat.
Skip thisDon’t use fabric that stretches too much; it will distort the button pattern.
16. Sage green painted rattan-look headboard with white trim
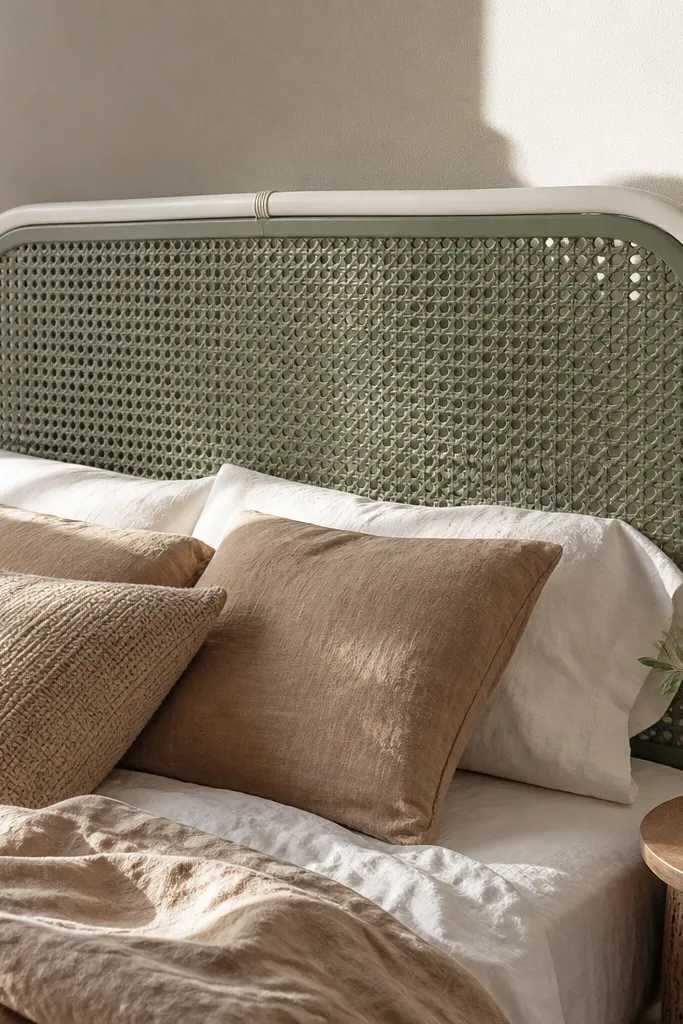
A painted rattan-look headboard gives you airy texture with a clean, modern color that still feels cozy. Sage green plus white trim makes the lattice pop without getting heavy. This works well for small bedrooms because the pattern adds interest while staying visually light. It also pairs with white bedding and natural wood nightstands for a soft, coordinated look. DIY is simple if you start with a lattice panel or build a grid from thin strips.
Make a rectangular frame and install a lattice grid using thin wood strips spaced 2 to 3 inches apart. Sand everything smooth and prime, then paint sage green with a foam roller to avoid brush lines. Add a white trim border around the outer edges to sharpen the look. Seal with a satin clear coat, then mount with wall cleats or bed brackets.
Paint the lattice in two thin coats; thick coats fill gaps and kill the airy effect.
Avoid high-gloss paint; it makes the lattice look shiny instead of cozy.
17. Forest green upholstered headboard with oversized piping and wide border
Oversized piping makes green headboards look expensive because it creates a bold edge line. Forest green is the right choice if your room has lots of white or light neutrals and you want a strong focal point. The wide border keeps the design grounded and prevents the fabric from blending into the wall. This is a great option for bedrooms where you want the bed to look like the centerpiece, even before you add art. DIY is moderate because piping attachment needs careful pinning, but it’s still a plywood-plus-foam build.
Cut plywood to bed width and around 60 inches tall. Cover with 1-inch foam and batting, then wrap forest green fabric and staple the back. Install thicker piping (use a larger cord size) along the perimeter seam, then add a second border layer using MDF strips wrapped in matching fabric or painted trim. Mount using a cleat and verify level before final screws.
Pin piping every 2 to 3 inches on the perimeter so it doesn’t slide when you staple.
Don’t pull the fabric after piping is set; it will distort the edge line.
18. Moss green faux panel headboard with picture frame molding
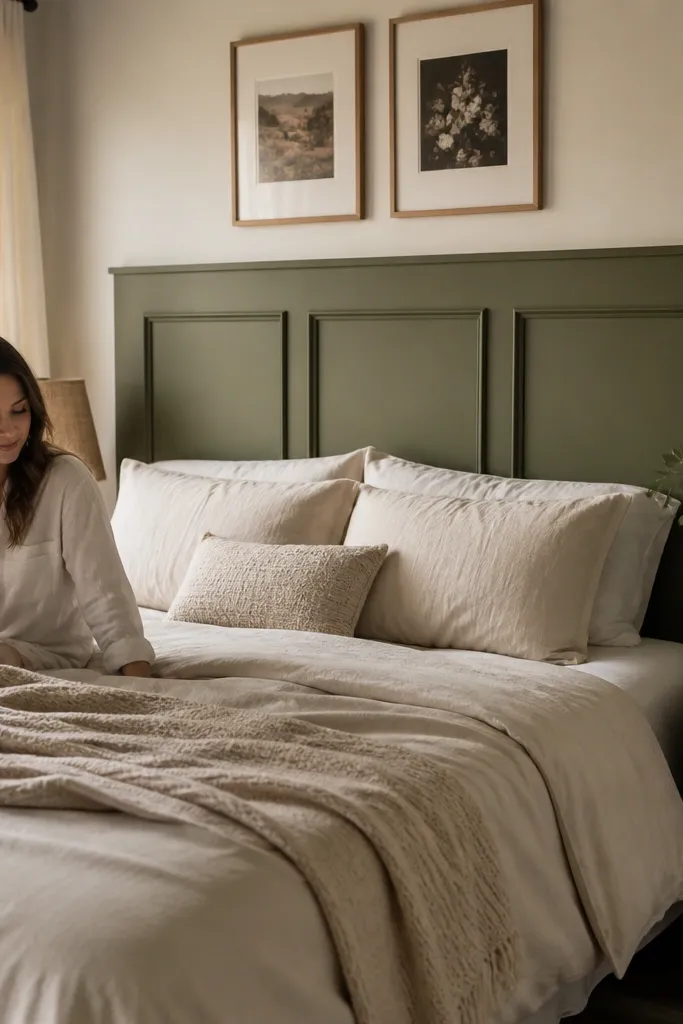
This look is cozy because it adds shape and shadow through molding, not because it’s thick or plush. Moss green in a matte finish looks warm and forgiving, and the picture-frame border makes the headboard feel finished even with simple bedding. It’s ideal if you want DIY carpentry without upholstery and you like a more classic silhouette. The center panel stays calm, so the bed reads clean and dreamy instead of cluttered. This also works great in rental spaces since you can mount it with a cleat and remove later.
Editor's noteUse painter’s tape to mask molding edges so paint lines stay crisp.
Use a plywood base cut to your desired size and sand smooth. Add picture frame molding around the perimeter using miter cuts for corners, then fill nail holes and sand again. Prime and paint moss green in matte, then lightly distress edges with fine sandpaper if you want a soft lived-in look. Seal with a clear topcoat, then mount with a French cleat screwed into studs.
Skip thisAvoid skipping caulk at molding seams; gaps show under matte paint.
19. Eucalyptus green fabric-wrapped slat headboard with airy gaps
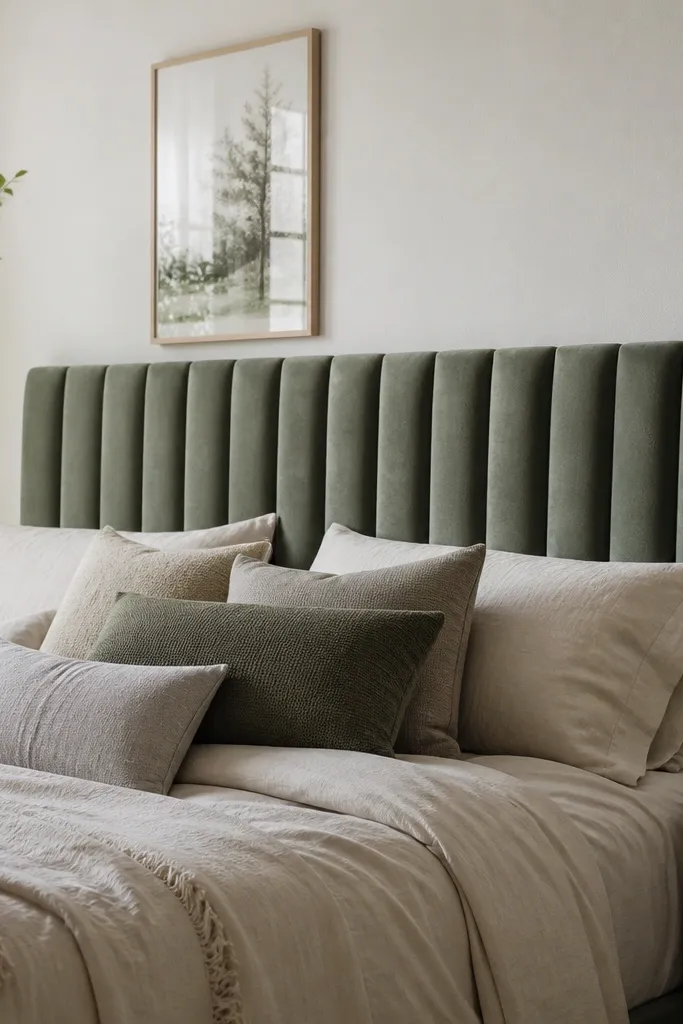
Airy gaps are what make this headboard feel dreamy instead of bulky. Eucalyptus green stays light, and the fabric-wrapped slats create texture that looks soft from across the room. This style is great for rooms that already have a lot going on — it adds interest without filling the entire wall behind the bed. It also photographs well because the negative space creates depth behind your pillows. DIY takes some measuring, but the build is still straightforward with slats and a backing strip system.
Cut a backing panel from plywood and mark vertical slat positions, spacing slats about 2 to 3 inches apart. Build slats from thin wood strips (like 1x2 ripped down) and wrap each slat with fabric and batting using staples on the back. Attach slats to the backing panel using wood glue and screws, then wrap the entire assembly with a thin fabric layer on the back for a clean look. Mount with a cleat and keep the top edge level.
Pre-cut slat fabric slightly larger than the slat so you can pull tight without wrinkling.
Don’t make slats too close together; it kills the airy look.
20. Smoked glass green headboard with brass grid and layered backing
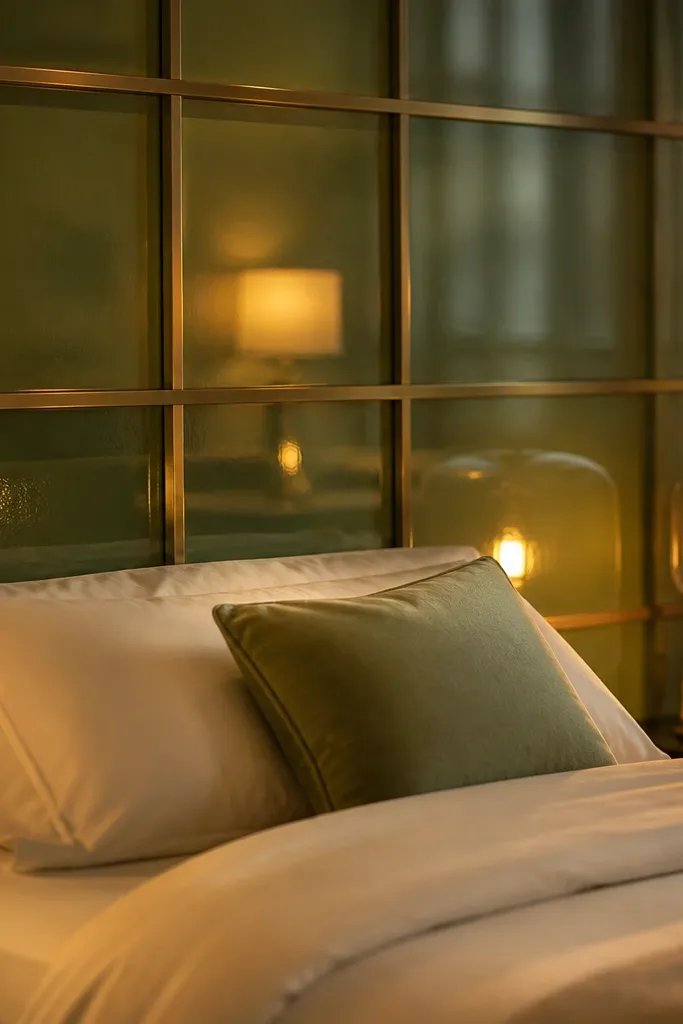
This is the kind of cozy green headboard ideas that feels dreamy because it plays with light. The smoked glass catches lamp glow and turns it into a soft haze instead of sharp reflections. A brass grid frame gives structure, while a muted green backing keeps everything warm and bedroom-friendly. It also fixes a common problem: plain upholstered headboards can look flat in front of bright walls, but this one adds depth without making the room heavy. This build is medium difficulty — you need careful measuring and a steady hand with the frame — and it usually takes a weekend. It works best in a bedroom with warm lighting, light walls, and a bedspread that has texture like cotton, linen, or chunky knit.
Editor's noteUse smoked acrylic instead of glass for this — it stays safer to cut and it reflects light more softly. Dry-fit every panel before you glue anything, and mark the underside of each sheet so you never swap orientation.
1) Build a 3/4 in plywood backer sized to your bed — for a queen, start with 60 in wide and 28-30 in tall. Cut a second layer of 1/2 in MDF the same size, then paint the MDF a muted green like olive spray enamel (matte or eggshell) and let it cure fully. 2) Cut window-style openings in the MDF layer in a grid pattern — for example 5 columns by 3 rows, with 2 in tall glass rectangles and 1/2 in spacing between them — then test-fit smoked acrylic sheets in each opening. Use 3/8 in wide brass picture frame trim or thin brass angle stock to create the grid on top of the painted MDF, fastening it with small screws or brass nails through the trim into the plywood. 3) Seal the edges of the acrylic with clear acrylic cement or edge-safe clear coat so it doesn’t fog, then attach the finished panel to the plywood backer with wood glue and screws from behind. Finish by adding a felt dust barrier on the back and installing two French cleats for wall mounting — keep the top edge about 58 in from the floor for most beds.
Skip thisDon’t mount the headboard flush to the wall if the glass edge is the thinnest part — leave a 1/2 in air gap with spacers so it won’t rub or chip.



