

1. Shiplap-Style Tool Wall with Hidden Cable Channel

This is the cleanest way to make a tool wall look intentional. You get a cozy, farmhouse-leaning look from the long, simple panel lines, but the real win is the hidden cable channel that keeps chargers and cords from looking chaotic. The tool hooks are spaced so each tool has its own “lane,” which makes the whole wall readable from a distance. Use light paint and warm wood trim so the garage feels softer instead of industrial.
Start by cutting your backing panel to fit your wall section and marking vertical grid lines every 12 inches. Install a shallow routed channel or a boxed cable raceway at about 18 inches from the floor, then paint everything before mounting hooks. Finally, attach the hook rail hardware along the grid so each hook lines up with a tool silhouette, and add a small label strip under each lane.
Paint the backing panel first, then mount hooks after the paint cures — it prevents scuffs that ruin the “cozy” look.
Don’t mount hooks randomly; uneven spacing is what makes tool walls look like storage, not organization.
2. Rolling Drawer Bench for Paint, Tape, and Small Parts
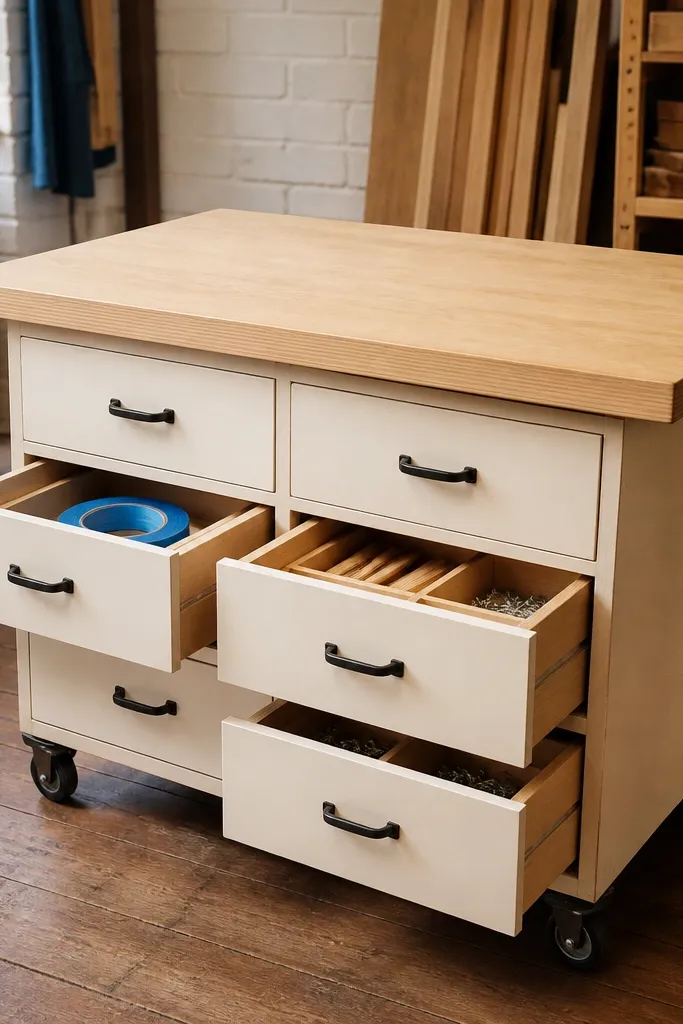
Start with a plywood carcass sized to your space, then screw on a drawer slide set for each drawer opening. Build drawer boxes from 1/2-inch plywood with a 1/4-inch rabbet so the fronts sit flush, and sand edges smooth for a clean look. Add a sealed top panel, then mount four locking casters so the bench stays put while you work.
A rolling drawer bench makes the garage feel controlled because it turns messy small stuff into compartments you can close. The key aesthetic is a light top with matching drawer faces, so the bench reads like furniture, not a pile of boxes. Drawer fronts also let you label clearly, which keeps the space calm during projects. Build it low enough that you can pull it out and still reach into drawers without climbing.
Skip thisSkip flimsy drawer bottoms; 1/4-inch material flexes and makes drawers look crooked.
Editor's noteUse soft-close drawer slides only if your garage is temperature-stable; otherwise go with standard slides and add a rubber bumper.
3. Pegboard Cabinet with Glass-Style Front for "Nice" Supplies
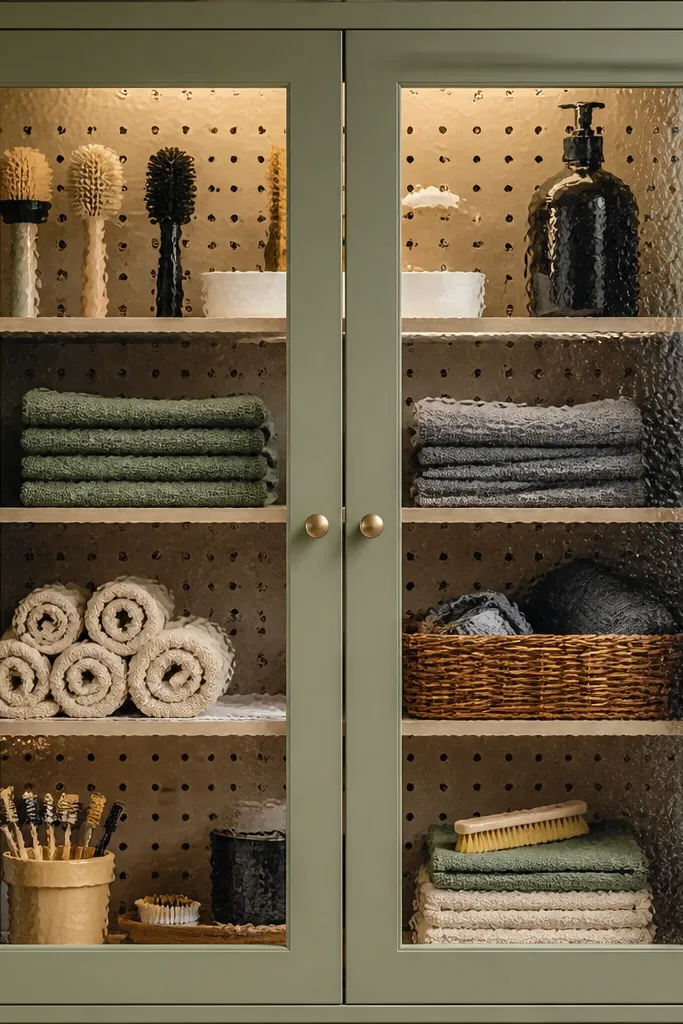
Build a shallow cabinet frame from 3/4-inch lumber, then mount pegboard to the interior back panel using countersunk screws. Attach a door using hinges and a latch; for the front, use polycarbonate sheet cut to size and secured with a trim frame. Install hooks and pegboard organizers before hanging the door, then seal the wood interior with primer and paint for easy wipe-down.
This one is cozy because it displays the supplies you actually want to see, while still hiding the messy clutter behind a door. A pegboard interior gives you flexibility, but the cabinet frame makes it look like a built-in. The “glass-style” front keeps the look light and airy, so the garage doesn’t feel heavy. It’s great for adhesives, drill bits, spray cans, and frequently used cleaning products.
Skip thisDon’t skip a door latch; a constantly swinging door makes the cabinet look sloppy after a few weeks.
Editor's noteSpray paint the hooks and metal parts in the same color as the cabinet so the whole unit looks cohesive.
4. Corkboard + Magnetic Strip Wall for Manuals and Metal Tools
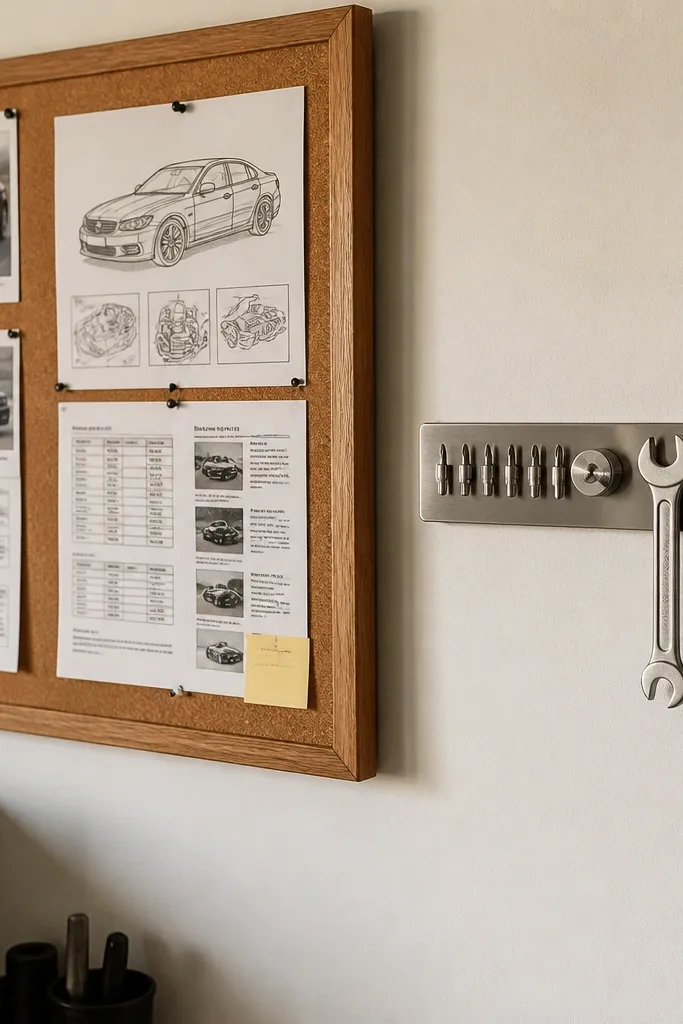
This organizer makes a garage feel calmer because it gives you a single place for “in-between” items — manuals, spare screws, and small metal bits. Cork looks warm and soft against painted walls, and a magnetic strip keeps tiny metal tools from disappearing into bins. The aesthetic win is the clean grid of pinned paper and magnets arranged in lines. It’s best for garages where you tinker and need quick reference while you work.
Mount a cork panel to painted plywood or directly to studs with countersunk screws and spacers so it sits flat. Add a magnetic strip horizontally at about chest height for quick access. Pin labels with lightweight clips, then add small magnetic trays for screws and bits so everything stays visible without cluttering the floor.
Use matte label paper and laminate the label cards; glossy labels glare in garage lighting.
Don’t put heavy tools on cork; cork is for small items and paper, not for impact loads.
5. Vertical Bike Lean Rack with Match-Trim Covers
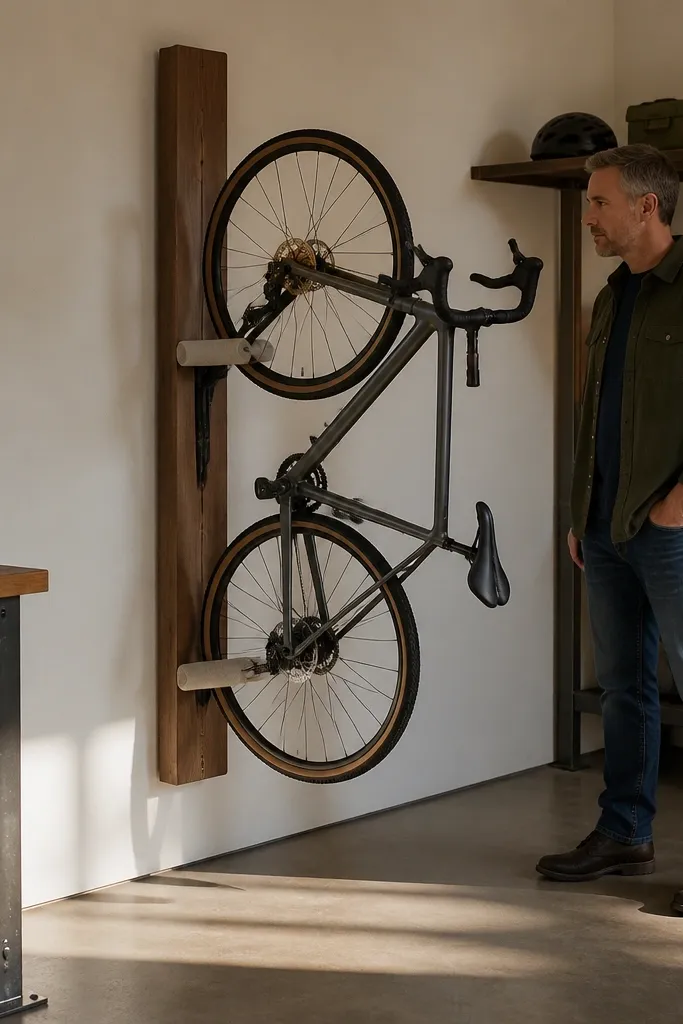
If bikes are always leaning somewhere awkward, this makes the garage look instantly more put-together. A vertical lean rack keeps tires off the floor and gives you a tidy visual line, especially when you cover the wood uprights with matching trim. Cozy comes from padding and warm paint, not from bare metal. Build it with padded contact points so the bike doesn’t scratch and the rack doesn’t squeak.
Start by marking two studs or a solid mounting zone and cutting a pair of vertical uprights that match your bike wheelbase. Add a lower stop block and two padded contact pads sized to your tires, then anchor the uprights using lag screws into studs. Finish by painting the uprights and trimming the edges, then test the fit by leaning the bike into the pads before final tightening.
Wrap the contact pads with closed-cell foam covered in vinyl so you can wipe off grime.
Don’t mount only to drywall anchors; bikes create leverage that pulls racks loose.
6. Sliding Trash + Recycling Station in a Cabinet Frame
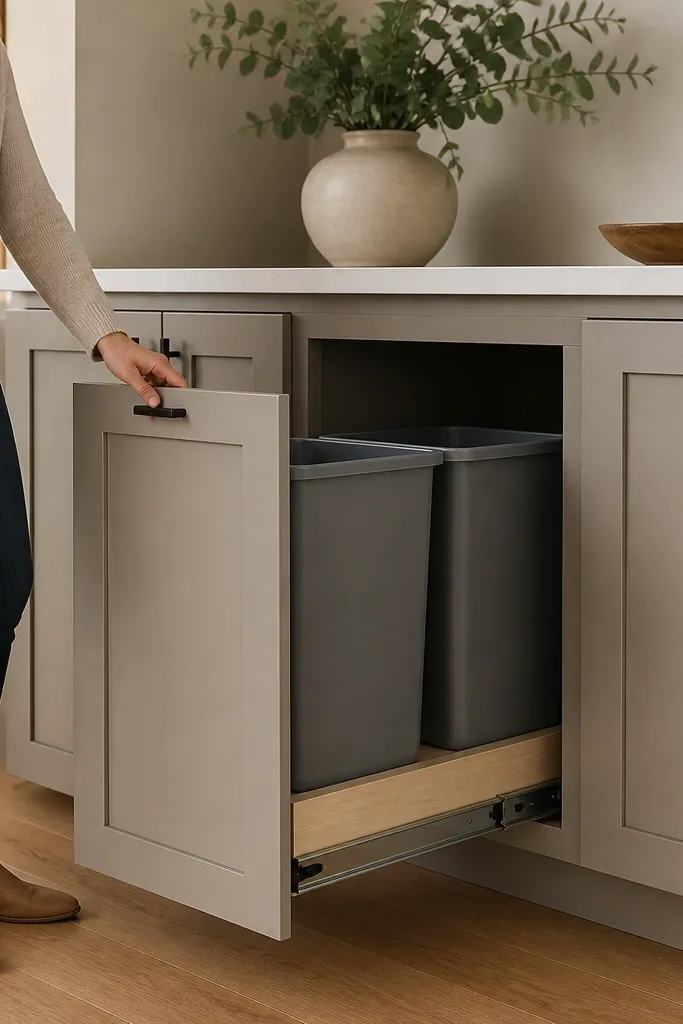
Build a cabinet frame sized to your bin footprint, leaving 1/2-inch clearance on each side for smooth travel. Install drawer slides or heavy-duty side rails, then mount the bin platforms to the slide brackets. Add a simple pull or recessed handle, and finish the cabinet with primer and two top coats for wipe-clean durability.
A clean garage looks like a clean kitchen: trash and recycling disappear. This station hides bins behind a cabinet frame and uses a sliding mechanism so you don’t fight doors when you’re carrying stuff. The cozy part is the matching cabinet finish and minimal hardware — it looks intentional instead of like a hacked bin area. It’s ideal for garages where the bins sit in the open and break the whole color scheme.
Skip thisDon’t skip clearance measurements; bins that bind look ugly fast and wear out slides.
Editor's noteAdd a rubber mat to the bin platform so the bins don’t rattle and scratch the paint.
7. Stacked Linen-Style Storage for Shop Towels and Gloves
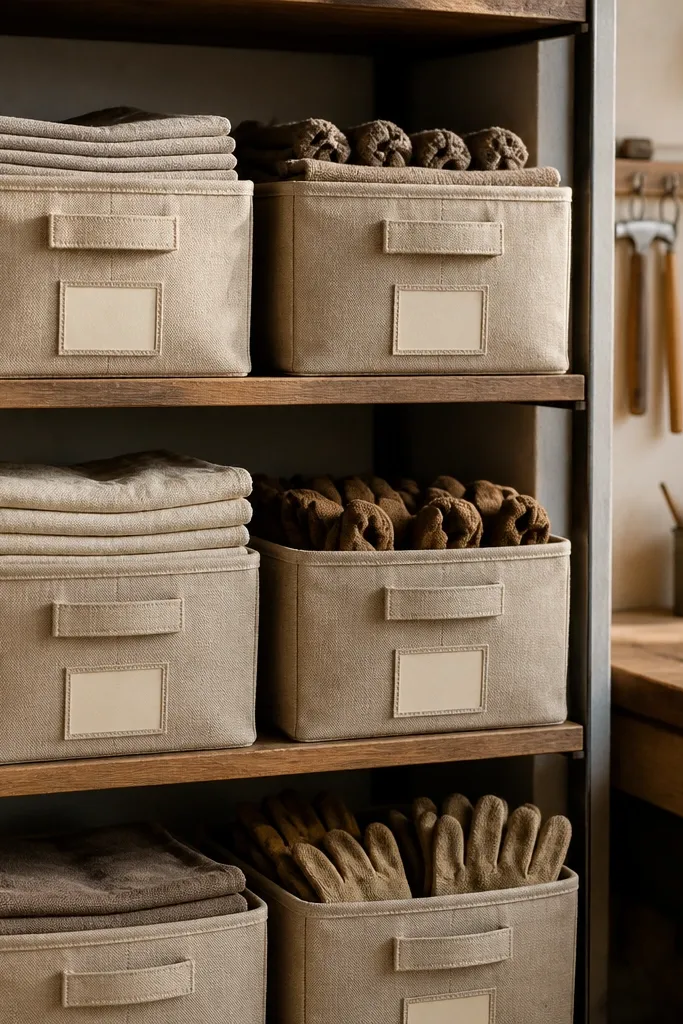
Build a simple shelf unit from 3/4-inch plywood with three to four compartments sized to fit your bins snugly. Add a back rail so bins don’t slide forward, then screw in shelf cleats to set the exact bin height. Add fabric bins with removable lids or drawstrings, and label using adhesive label tabs on the front face of each bin.
This is cozy because it turns everyday garage textiles into a tidy, fabric-forward system. Open shelves look airy, and fabric bins soften the space visually compared to plastic totes. Labeling each bin face keeps you from digging, and the consistent stacked layout photographs beautifully. Use this for shop towels, gloves, rags, and small cleaning accessories.
Skip thisDon’t mix bin sizes randomly; inconsistent heights kill the organized look.
Editor's noteChoose bins in two coordinated colors (for example, sand and charcoal) so the shelves look designed.
8. Wall-Mounted Hose Reel Shelf with Coil Hooks
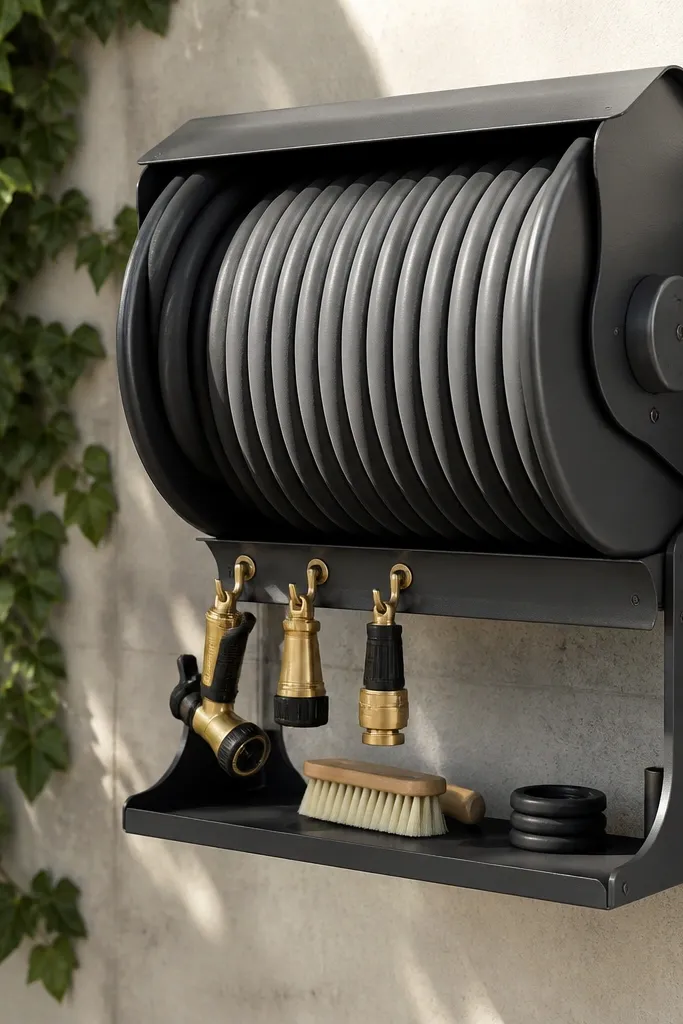
Mount the reel to studs using the manufacturer mounting bracket or through-bolting with washers. Build a small shelf box beneath the reel from plywood, sized to hold spray bottles or nozzle caps. Install two or three coated hooks under the shelf edge for attachments, then run the hose through the reel path and secure the nozzle to a hook.
Garden hoses destroy garage aesthetics because they coil messily and take up floor space. A wall-mounted hose reel with a small shelf turns it into a vertical, tidy feature. The coil hooks keep the nozzle and attachments from dangling, so everything stays in one neat cluster. This organizer also protects your hose by reducing kinks from floor dragging.
Skip thisDon’t mount the reel to weak framing; hose tension pulls it out over time.
Editor's noteAdd a drip tray under the nozzle hook — it prevents water spots and keeps the shelf clean.
9. Hidden Bulk Storage Cabinet for Bulky Bags and Floor Tools
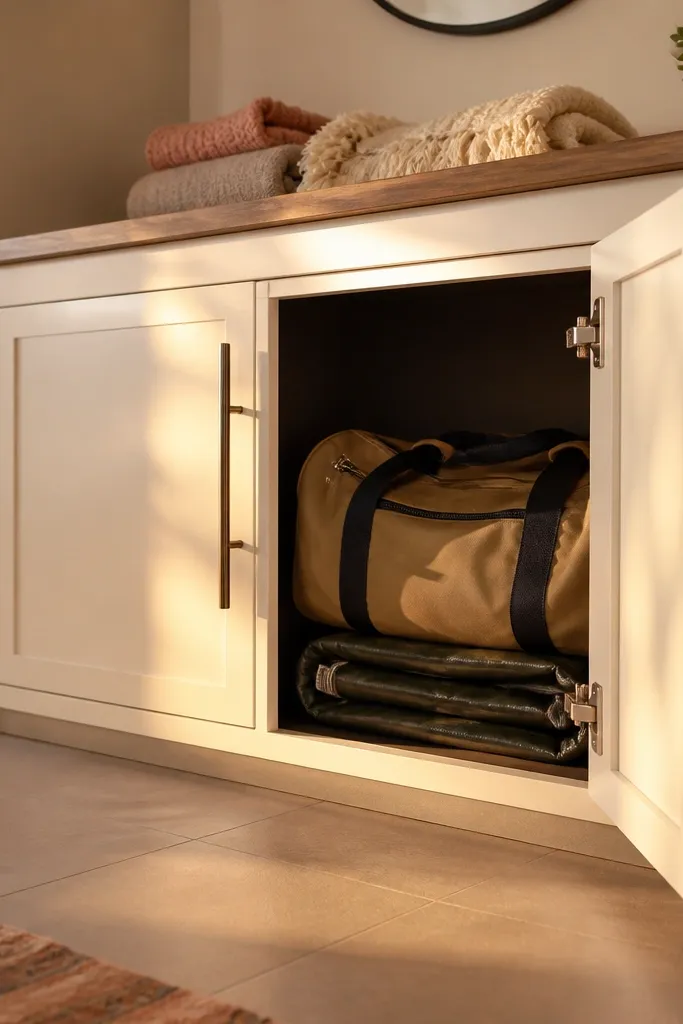
Big items are what make garages feel chaotic, because they sit in the open and block the eye. A hidden bulk storage cabinet cleans up that visual noise, and doors make the space look finished. Go for a lower cabinet with wide doors so you can slide bags and floor tools in without fighting. Use a warm paint color and matching trim so it reads like built-in furniture.
Build a rectangular cabinet frame from 3/4-inch plywood, with a deep interior sized to your biggest bag or floor tool. Install a base platform so the cabinet sits 1-2 inches off the floor for easier cleaning underneath. Add two wide doors, then install a simple shelf or a removable divider inside for flexibility. Finish with primer and two coats, and add magnetic catches so doors stay closed.
Use soft-close hinges if you have kids or frequent door slams; it keeps the finish looking new.
Don’t overload shelves — if the door has to fight for clearance, the cabinet will stop being used.
10. Corner Utility Rack with Fold-Down Bench Surface
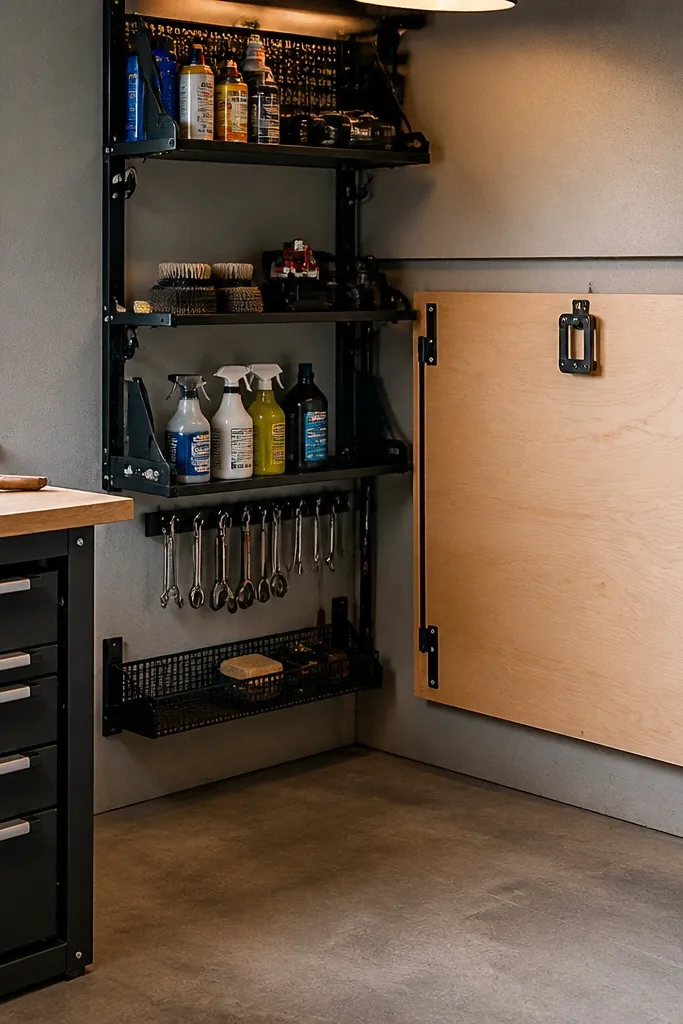
Corners are where garages look messy first. This project uses a corner utility rack plus a fold-down bench so the space becomes a work zone instead of a dead area. The rack holds sprays, brushes, and small tools, while the fold-down panel gives you a place to stage parts without setting them on the floor. It looks cozy because the bench panel and shelves share the same finish and edges stay straight.
Start by building a corner frame from plywood panels cut to fit the corner geometry, then secure it to studs. Add shelves that run along one wall and a vertical rail on the other for hooks. Install a fold-down bench hinge system with a locking prop, and finish the bench panel with a sealed top so you can wipe it after greasy tasks.
Add a simple rubber strip on the bench edge so items don’t slide off when you pull the panel down.
Skip the locking prop; a bench that sags makes the whole corner look unfinished.
11. DIY Storage Cubby Ladder for Seasonal Gear
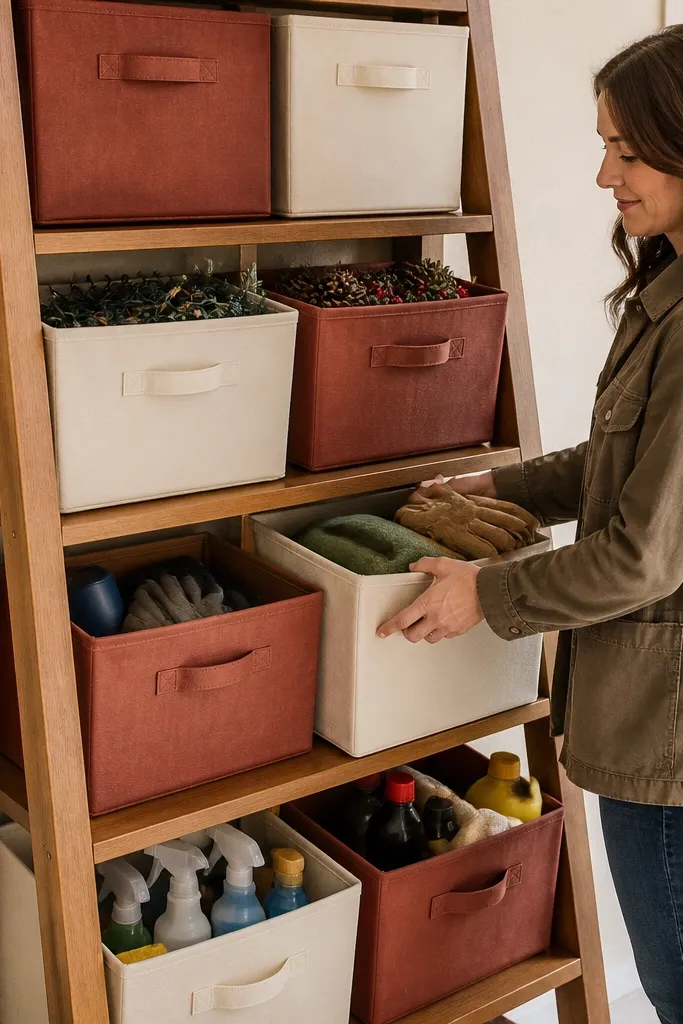
Cut two ladder side rails and several cross pieces to create cubby openings sized to your bins. Assemble with pocket holes or screws, then add a back cleat so the unit doesn’t rack. Sand edges smooth, prime, and paint in your garage palette, then insert bins and label each cubby on the front face. Anchor the ladder unit to studs for safety.
A ladder cubby is cozy because it adds vertical structure and keeps seasonal items visible without dumping everything into one tote. The open cubbies look tidy when you use matching bins and consistent label placement. It’s a strong choice for holiday decorations, camping gear, and extra car care supplies. The look is photogenic because the ladder silhouette creates clean lines against the wall.
Skip thisDon’t make cubbies too small; tight bins jam and you’ll stop using the system.
Editor's noteUse fabric bins with stiff fronts so the cubbies stay crisp instead of sagging.
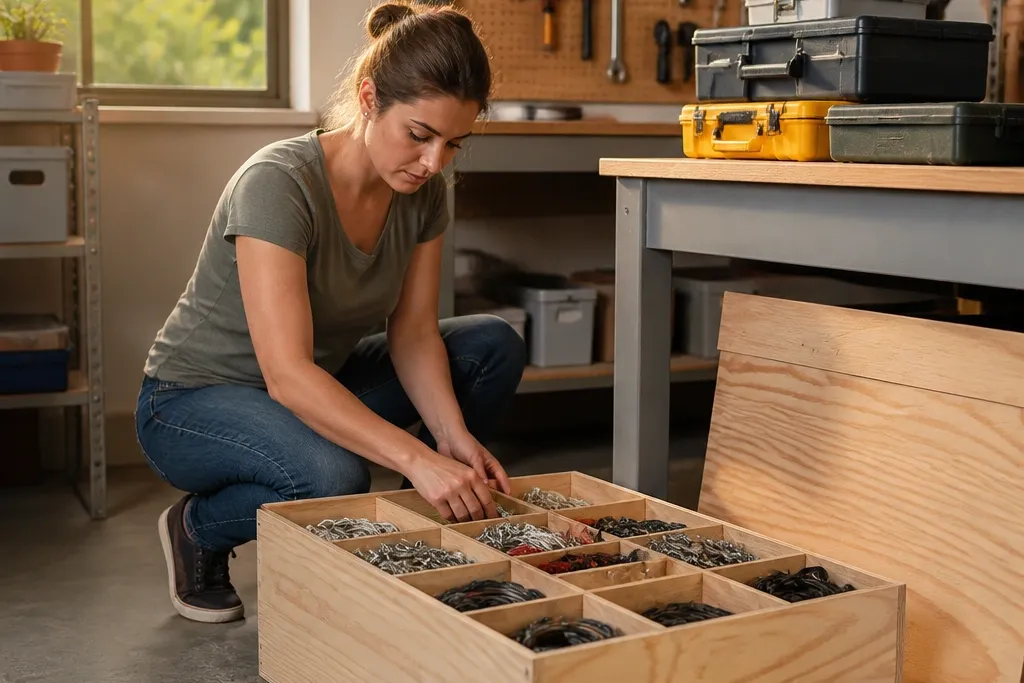
12. Workshop Spice-Style Organizer for Drill Bits and Fasteners
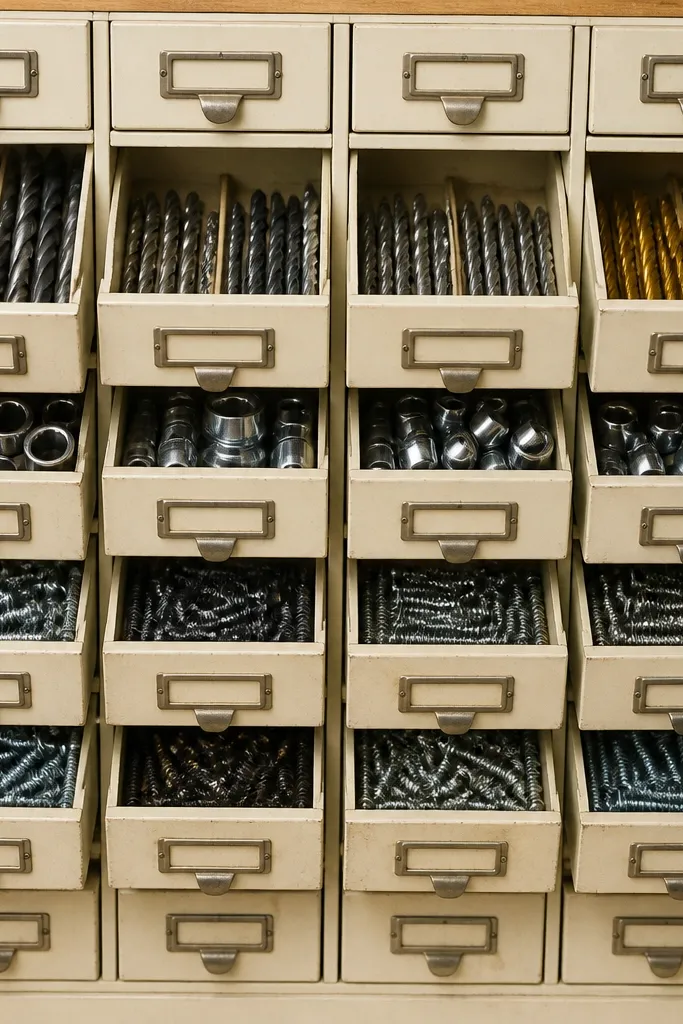
This is the garage version of a tidy pantry: small items stop migrating. A spice-style drawer organizer looks cozy because every drawer front matches and labels align in a clean row. It’s also the most satisfying way to store drill bits, socket sizes, and fasteners because you can see what you need in seconds. Build it on a wall or under a bench where it stays visible, not hidden in a bin stack.
Start by measuring your largest bit or fastener container and designing drawer widths around it, typically 3 to 4 inches wide. Build a shallow drawer bank from plywood with a matching front panel, then install small drawer slides or friction-fit tracks depending on your budget. Label each drawer with printed labels and a clear cover, then mount the whole unit securely to studs. Seal the wood with primer and paint so it wipes clean.
Print labels on matte vinyl and add a clear laminate strip for grease resistance.
Don’t use tiny drawers with no stop; drawers that fall out make the organizer look messy instantly.
13. LED Under-Shelf Lighted Storage for Frequently Used Supplies
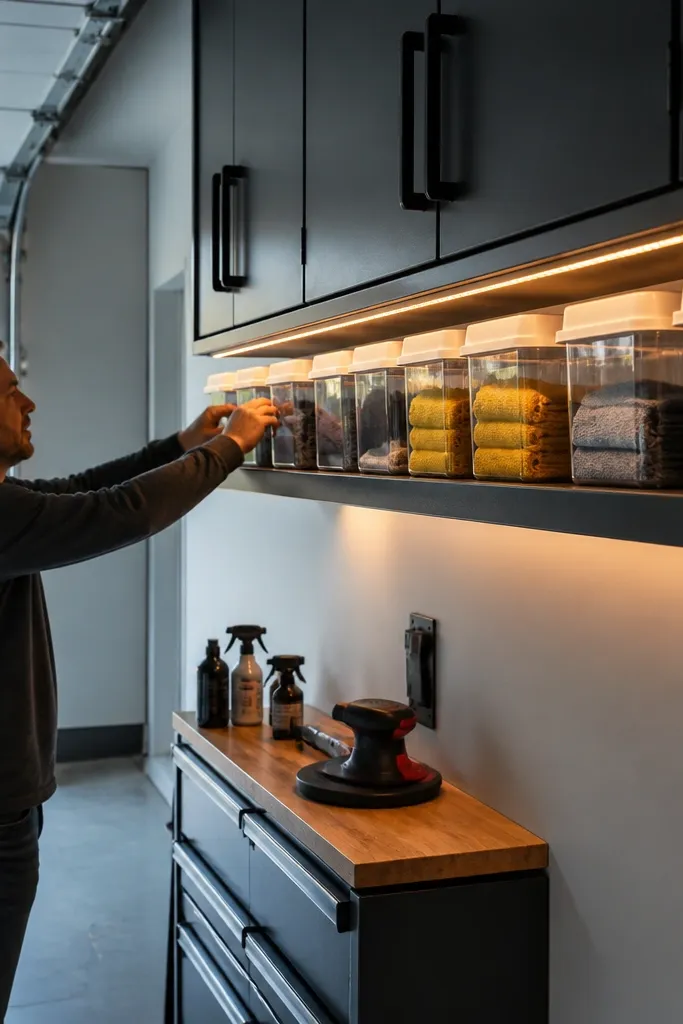
Build or install a wall shelf with a 3/4-inch thick front lip to hide the LED strip edge. Mount a low-voltage LED strip underneath using aluminum channel if you want a crisp line, then wire a switch or plug-in driver behind the shelf. Place bins and small baskets that match the shelf width and label them on the front face. Finish the shelf wood with paint or clear coat so the LEDs don’t highlight rough grain and dust.
Lighting is the hidden ingredient for Cozy Garage Organization Ideas. Under-shelf LEDs make bins look clean and labels readable, so the garage feels calmer even when you’re working. The look is warm and “intentional” because the glow sits under the shelf edge instead of blasting overhead. Use this on a wall shelf setup for spray bottles, rags, and everyday hand tools.
Skip thisDon’t mount LEDs too close to dusty surfaces; dust glare makes the whole setup look unclean.
Editor's noteUse warm 2700K LEDs; cool white makes labels look harsh and makes the garage feel colder.
14. Magnetic Tool Strip + Small Shelf Combo for Hand Tools
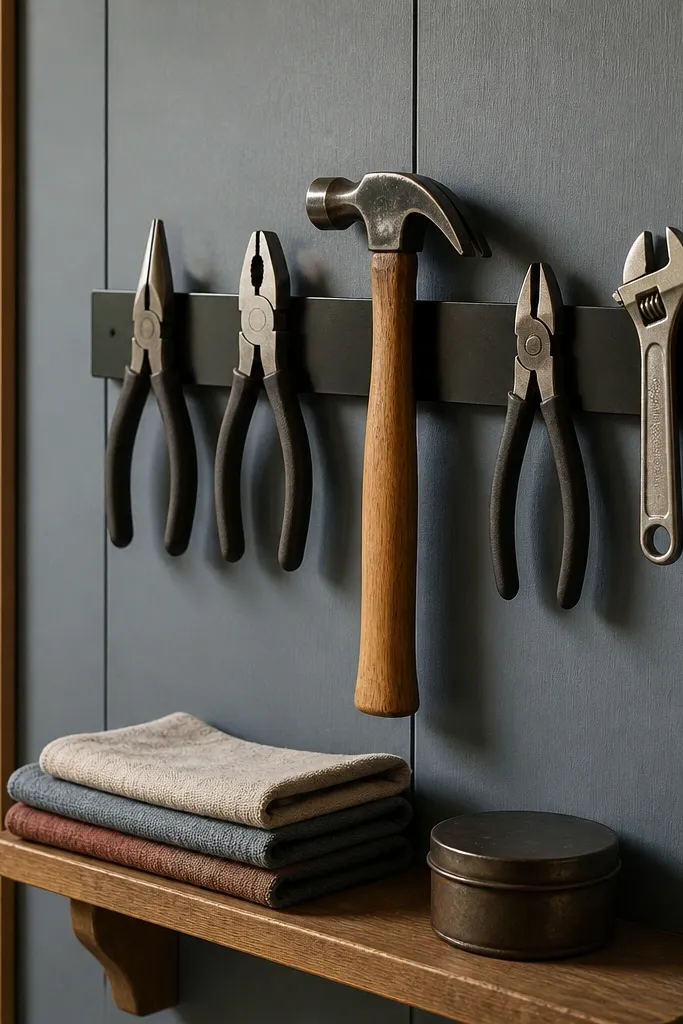
Start by cutting a painted backing board and finding studs or solid anchors behind it. Mount the magnetic strip horizontally at a comfortable reach height, then add a narrow shelf below using brackets or a cleat system. Affix tool holders that match each tool size so handles align. Seal and paint the board, then wipe it down before mounting so dust doesn’t show under the magnet line.
If you want the garage to look neat without a pegboard grid, this combo is the move. The magnetic strip gives a smooth, modern look, and the small shelf catches the stuff that usually falls into pockets and drawers. It’s cozy because the board is painted and the tools sit evenly in a line. Great for hammers, pliers, small hand saws, and frequently grabbed metal tools.
Skip thisDon’t rely on magnets alone for heavy tools; use mechanical supports for anything over a couple pounds.
Editor's noteKeep the shelf depth around 4 to 6 inches so tools don’t crowd and labels remain readable.
15. Wipe-Clean Rolling Bin Cart for Car Wash and Detailing
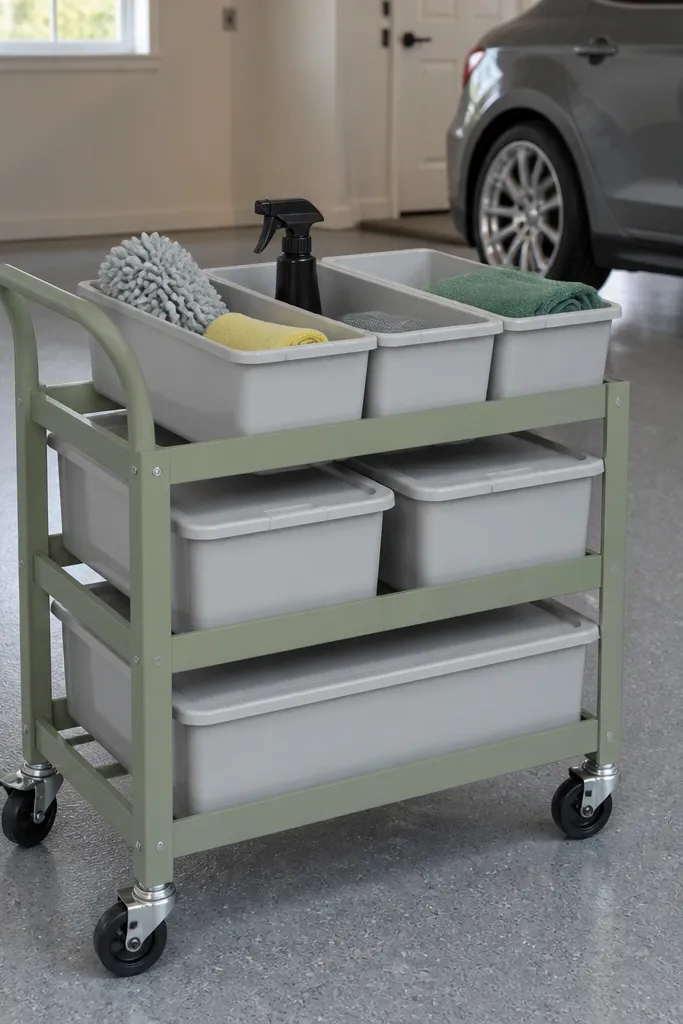
Car wash supplies clutter the garage because they’re wet, messy, and easy to spill. A rolling bin cart makes it easy to move everything together and keep the main garage floor clear. The look stays cozy when you choose matching bins and a painted cart frame that blends into the wall color. This organizer is especially good for detailing sprays, microfiber towels, brushes, and small car tools.
Build a simple cart frame from 2x2 or steel tubing, then mount four locking casters. Add a top shelf for spray bottles and two to three bin compartments sized for your microfiber towel stacks. Use bins with smooth plastic or sealed surfaces, then label each compartment front with a wipeable label. Finish the cart with exterior paint and keep the bin layout consistent so it looks like a designed station.
Use lidded bins for anything that can leak, and add a tray under the bottle shelf for drips.
Skip open piles on a cart; stacks of towels look sloppy fast and defeat the point.



