
1. Ceiling-High Warm White Tile + Matte Black Hardware
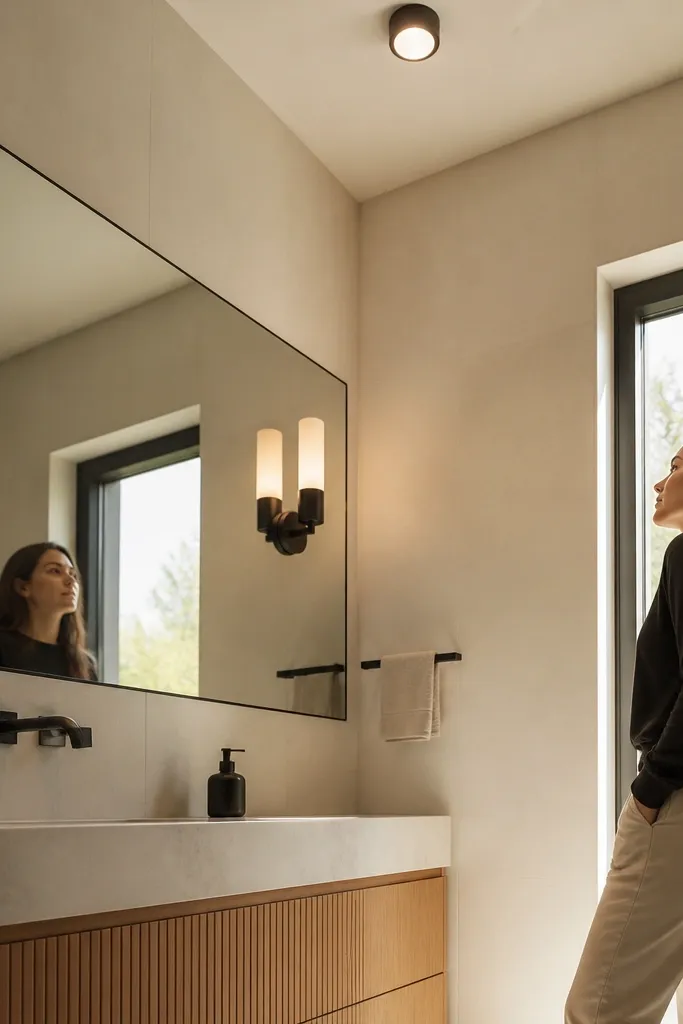
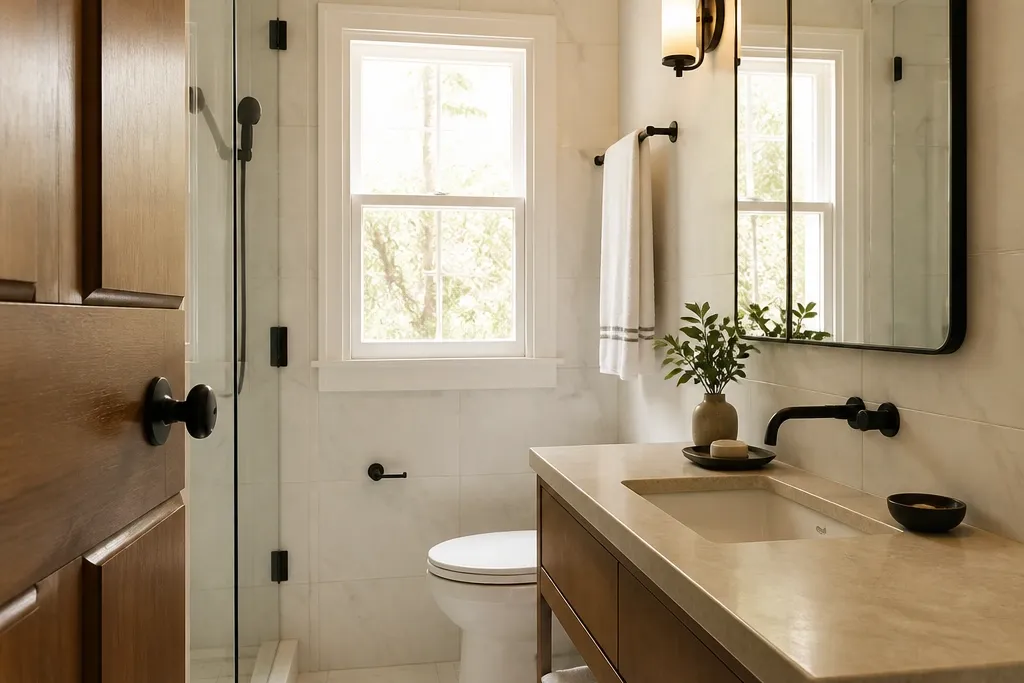
Go tile-to-ceiling with a warm white that leans creamy, not blue. In a small bathroom, this removes the “boxy” line where walls usually stop, so the room reads taller and calmer. Pair it with matte black hardware so the fixtures look intentional instead of random. Add a frameless mirror with a black edge or matching black hardware to keep the lines crisp. This remodel look is cozy because warm white reflects light softly, and matte black doesn’t glare like chrome.
Start by measuring the wall height and plan your tile layout so you end with a full tile at the most visible corners. Waterproof the entire wet zone and install cement board or a waterproof membrane system before any tile goes up. Set the tile with a consistent grout line (use 1/8-in spacers for a clean grid) and keep your line level with a laser. Finish by installing matte black fixtures and caulk all changes in plane (tub/shower edges, corners) with a paintable silicone made for wet areas.
Editor's noteChoose grout in the same tone family as the tile (warm light gray or warm white) so the wall reads smooth in photos.
Skip thisDon’t use bright cool white tile if your lighting is warm — the mismatch makes the whole room look dingy.
2. Smoky Marble-Look Porcelain Floor + Soft Sage Accent Wall
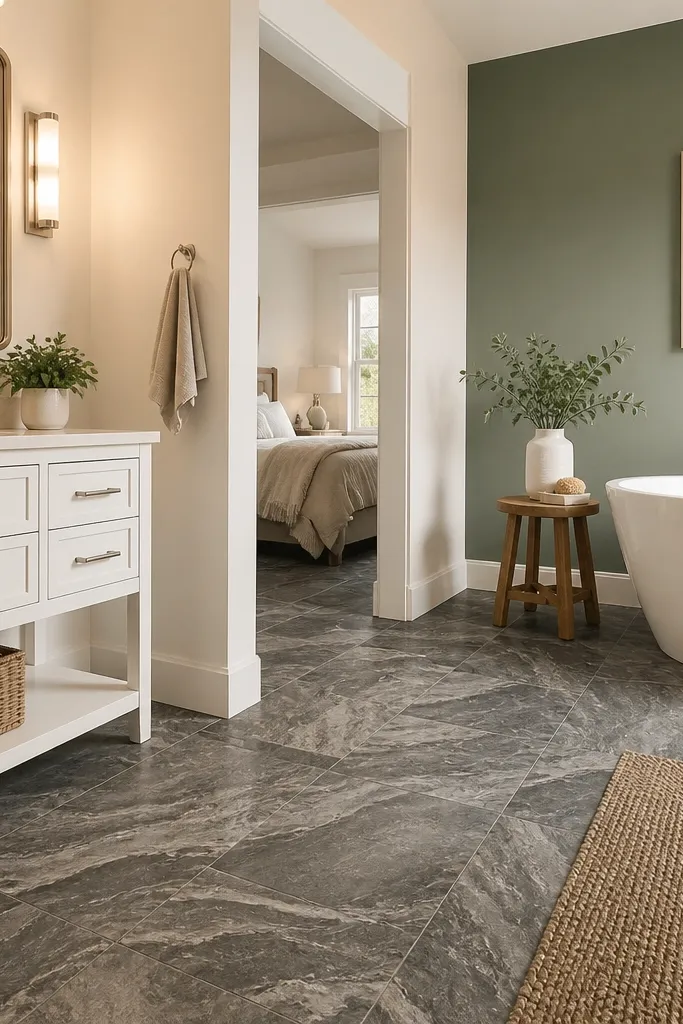
A smoky marble-look porcelain floor adds depth without needing a complex pattern. The key is pairing it with a single soft sage accent wall so you get color warmth without visual noise. Keep the other walls a warm off-white for contrast that makes the room feel bigger. The look reads cozy because the floor has gentle variation, while the accent wall gives a calm color hit near eye level. This works best if you have a vanity centered on one wall and want a “designed” focal point.
Pick a porcelain floor with a consistent lippage rating and dry-lay 2-3 planks to confirm the veining direction works with your room width. Install tile with a thinset suitable for porcelain and use leveling clips if the tile is 12x24 inches or larger. Then paint or tile one wall in soft sage (or use a peel-and-stick tile panel temporarily for planning, then commit to real tile). Finish by installing a vanity light with warm bulbs and a mirror that sits slightly above the faucet line.
Dry-lay the floor first and flip a few tiles — you want a balanced veining spread, not a “big vein” corner.
Avoid sage on every wall — small bathrooms get busy fast.
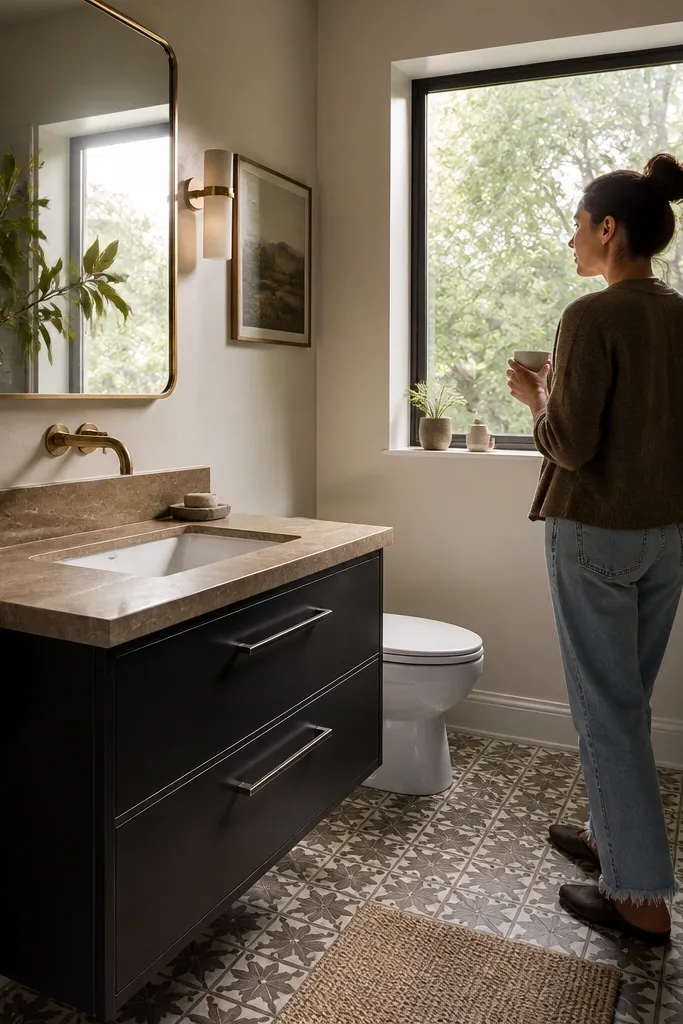
3. Wood-Effect Vanity + Off-White Slab Backsplash Tile
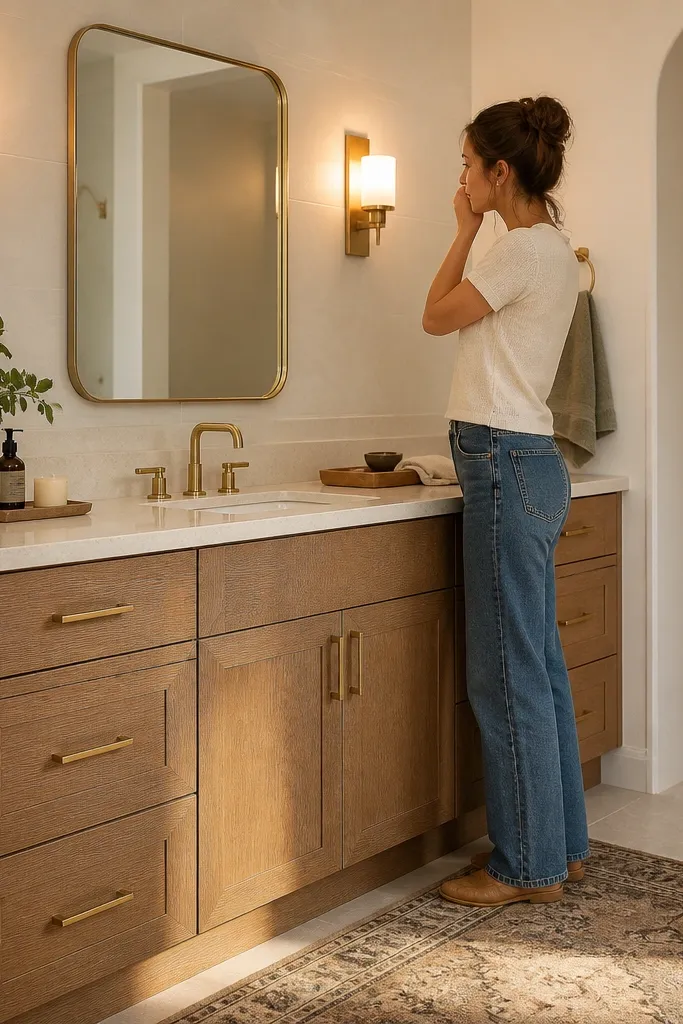
Warm wood-effect cabinetry makes a small bathroom feel like a spa, but it looks best when you keep the wall surfaces calm. Use an off-white slab backsplash tile behind the vanity — either large-format rectangular tiles or a simple stacked mosaic — so the wall doesn’t compete with the wood grain. Choose brushed brass or warm champagne hardware to tie the wood tone together. This remodel is cozy because wood-effect finishes read warm and matte, and the slab look creates a smooth, upscale backdrop.
Measure your vanity depth and confirm you still have at least 30-32 inches of clear walkway in front of the toilet if possible. Install a backsplash that reaches 4-6 inches above the counter, then extend to match the height of your mirror cabinet or mirror frame. Use a waterproof caulk line where the backsplash meets the vanity and wall edges. Finally, mount the mirror so its bottom edge lands around the center of your sink basin, then add a vanity light with diffusers.
Pick a vanity with drawers that open smoothly; shallow doors feel cramped in small bathrooms.
Don’t pair wood-effect with glossy white subway tile everywhere — the mix can look cold instead of cozy.
4. Half-Paneled Walls with Warm Beadboard Look (Waterproof)
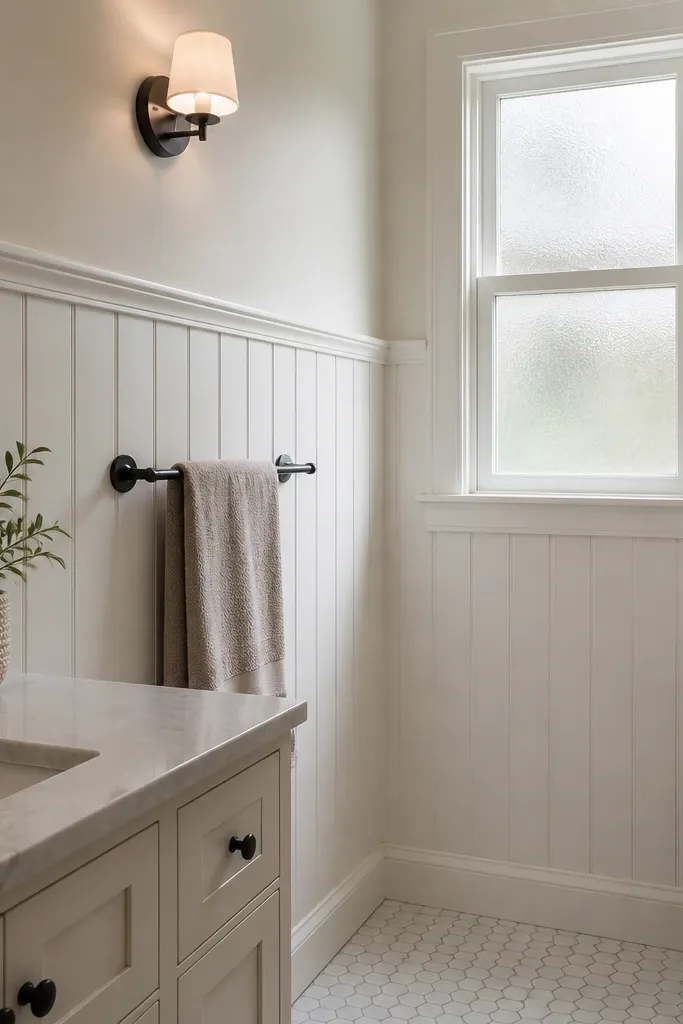
If you like cozy, cottage-leaning bathrooms, half-panel walls give you that “finished” look without covering the whole space in pattern. The secret is using waterproof paneling or a tile system that mimics beadboard so splashes and steam don’t wreck it. Paint the upper section a warm white and keep the lower section slightly darker to create a gentle visual frame. Add a rounded mirror and warm brass fixtures to keep the vibe soft, not sharp.
Choose a waterproof wall panel product rated for bathrooms or tile a beadboard-style wainscot pattern to a serviceable height (usually 36-48 inches). Install backing boards and seal seams with bathroom-rated caulk. Paint upper walls first, then install or tile the lower panel section so you get crisp edges. Finish by adding a slim chair rail or trim piece and caulk every corner before you mount fixtures.
Editor's noteUse semi-gloss paint on the wainscot area; it wipes clean and looks better under bathroom lighting.
Skip thisDon’t use standard drywall paint below splash level — it will blister at seams.
5. Recessed Shower Niche + Warm Greige Tile
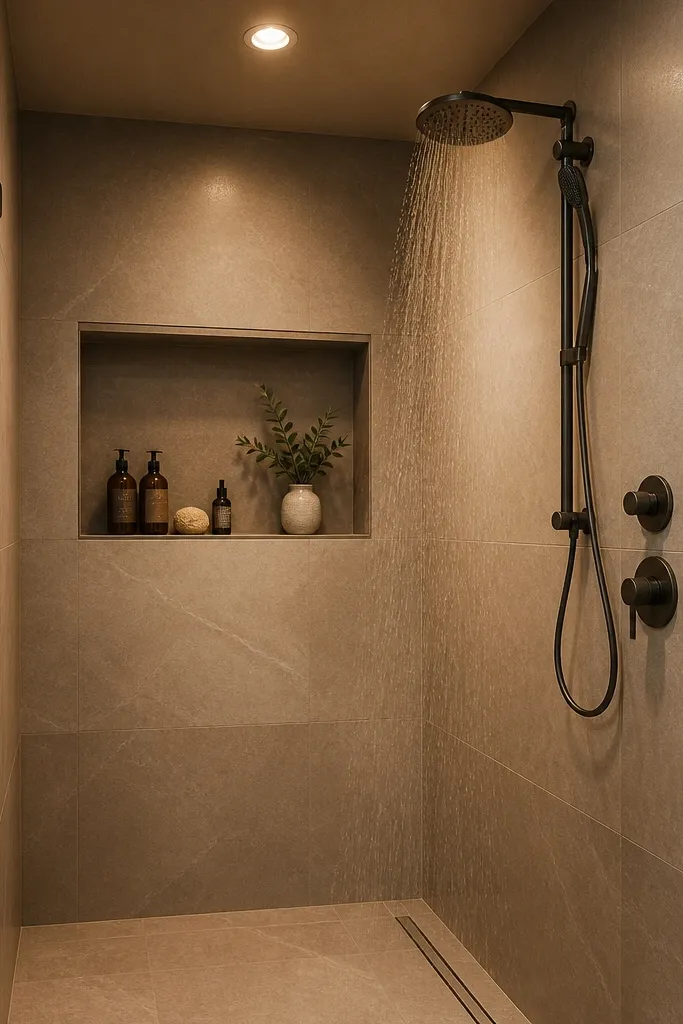
A recessed niche makes a small shower feel organized and intentional, and it looks good in every photo angle. Choose warm greige tile with a matte or satin finish so it doesn’t glare. Keep the niche interior the same tile as the shower wall for a seamless look, or use a slightly darker tone for a subtle frame. This idea works especially well if you have limited counter space and you want your shower products hidden. Cozy comes from the warm neutral and the clean vertical lines.
Plan your niche location before waterproofing — typically 12-18 inches above the shower floor and centered where you reach comfortably. Frame the niche with cement board or a waterproof niche form, then waterproof everything including the niche seams. Tile the walls with a consistent layout and bullnose or schluter-style trim at the niche edges. Install the frameless glass door after the tile cures, so you don’t risk chipping the edges.
Dry-fit niche shelves or create a slight slope to the back so water drains cleanly.
Don’t grout the niche seams like normal wall grout — use the correct grout and sealant system for your tile.
6. Small Bathroom Steam-Shower Look with Microcement Walls
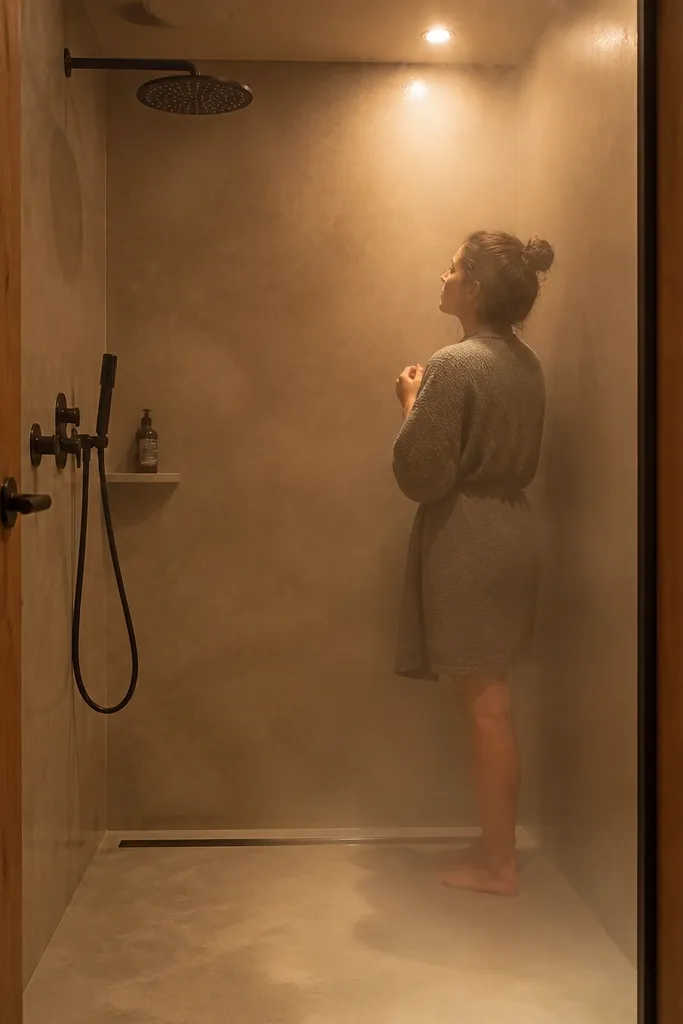
Microcement gives you a seamless, spa-like surface that looks modern and cozy at the same time. In a small bathroom, fewer grout lines means the room reads cleaner and calmer. Choose a soft gray or warm greige microcement so it doesn’t look cold under warm lights. Pair it with a linear drain and minimal hardware so everything stays sleek. This is a full remodel look because it changes the wall finish entirely, and it’s especially photogenic because the surface catches light smoothly.
Prep is everything: remove old coatings, repair the substrate flatness, and ensure the waterproofing system is rated for microcement. Apply primer and microcement layers according to the product schedule, then seal with the recommended topcoat for wet areas. Create consistent thickness and use smoothing tools to avoid ridges. Finish by installing a linear drain and sealing all transitions with the correct wet-area sealant.
Editor's noteControl humidity during cure time — rushing microcement can cause pinholes or weak spots.
Skip thisAvoid painting over microcement with random primers; use the system’s exact products.
7. Oversized Mirror Wall with Backlit Warm Glow
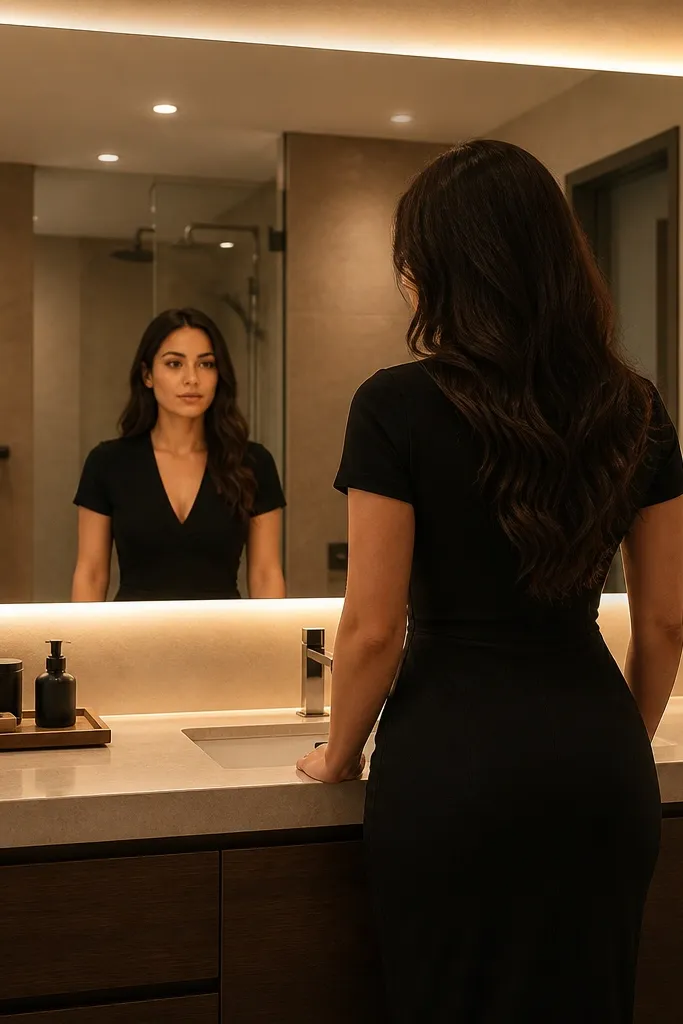
A big mirror wall makes a small bathroom feel like it has more depth. Backlit warm mirrors also do something normal sconces can’t: they light your face evenly without harsh shadows. Keep the wall color light and warm so the glow looks flattering. This remodel idea is cozy because it turns your bathroom into a softly lit space instead of a “spotlit” room. It also hides small layout imperfections by giving your eye a clean reflective plane.
Measure the vanity width and choose a mirror that covers at least the full width of the sink plus 2-4 inches on each side. Install a mirror with an integrated demister if you get fogging, and run power safely to the correct junction box. Use a wall paint that can handle humidity (bathroom-rated), then mount the mirror so it’s centered at eye level. Finish with a slim vanity light only if you want extra brightness; otherwise rely on the backlight.
If your mirror has no built-in defogger, plan for a separate anti-fog pad or you’ll hate it daily.
Don’t mount the mirror too high — the warm lighting will still look unflattering on your face.
8. Matte Porcelain Hex Floor + Tub-to-Tile Wall
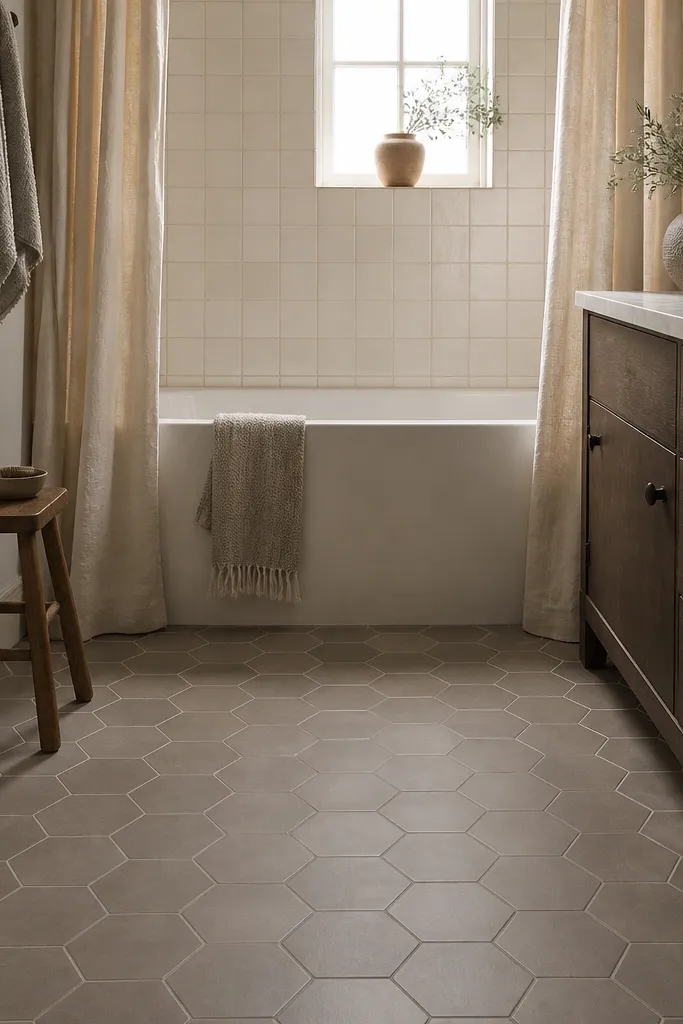
Hex floors are the fastest way to add cozy character in a small bathroom without taking over the whole room. Use matte porcelain hex tiles in a muted tone like warm gray, taupe, or charcoal so they don’t look shiny and slippery. Then tile the tub surround all the way up to the ceiling in a simple neutral to keep the look cohesive. This combination is visually rich but not busy because the pattern is contained to the floor, where it reads as texture. Add a curved shower rod or rounded tub accessories for softer lines.
Plan the hex layout with a dry run so the pattern centers under the vanity and toilet. Install with a flat-substrate check and use a thinset appropriate for your tile format; confirm the tile is rated for floors. Tile the tub surround to ceiling height with a consistent grout line and install waterproof backer. Seal all tub edges and corners with wet-rated caulk, then finish with matching trim or schluter profiles.
Seal grout after cure if your grout is porous; it keeps the hex pattern looking clean.
Skip glossy hex tiles — they look dated fast and show every water spot.
9. Walk-In Shower with Curved Glass and Warm Beige Tile
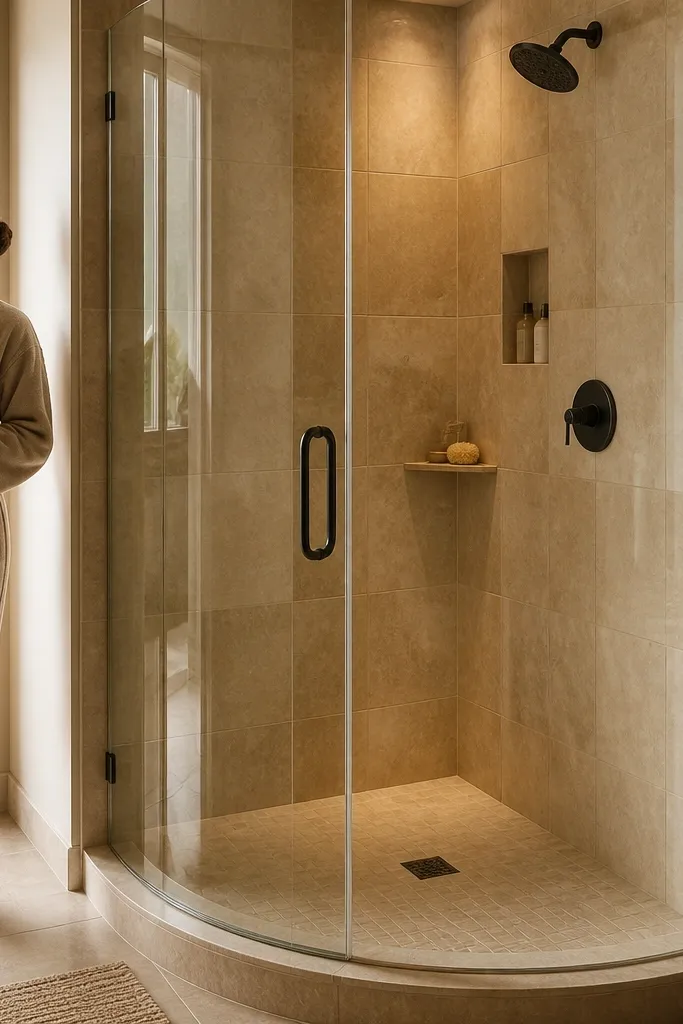
Curved glass makes a small shower feel softer and more inviting. Pair that with warm beige tile and you get a cozy, boutique look that doesn’t feel rigid. Keep the shower floor in the same tone family for a continuous look. This idea works best if you’re doing a full shower rebuild and can choose the door style. It’s photogenic because the glass curves catch light and the warm tile reads smooth and calm.
Choose a shower base or build a waterproof shower pan that matches your drain layout. Install waterproofing, then tile walls and niche areas before you mount the glass. Use a level and plumb reference line for the glass track so doors close cleanly. Finish with warm-toned grout and sealant at all changes in plane.
Order glass with a paper template or have your installer confirm measurements after tile — tile thickness changes the opening.
Don’t pick a beige that’s too yellow; it can make fixtures look dull.
10. Floating Vanity with Deep Drawers and Warm Stone Counter
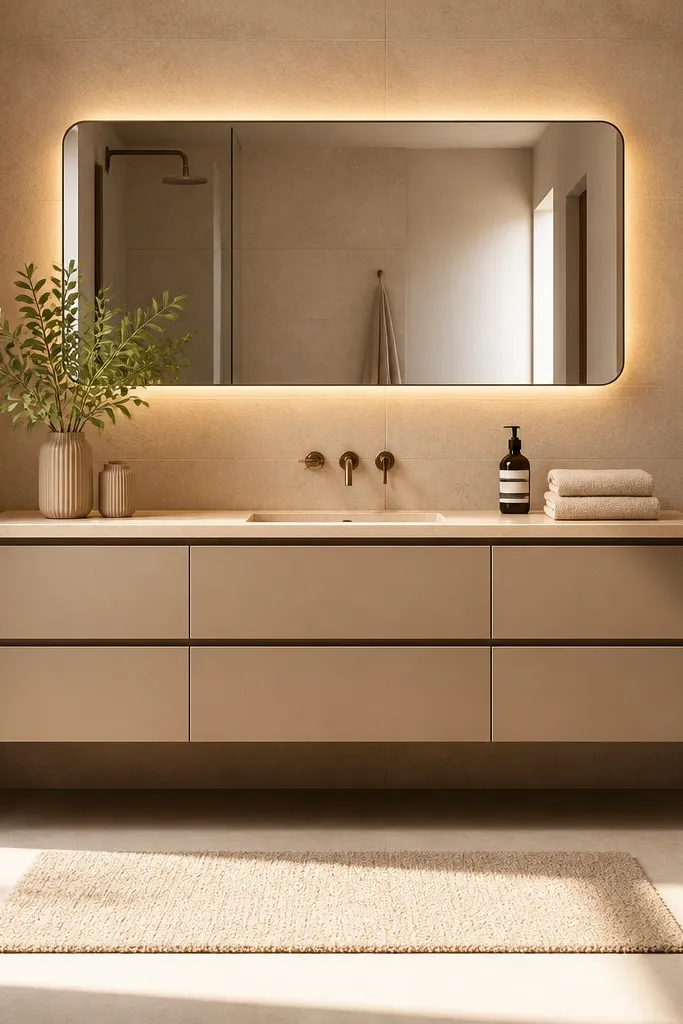
A floating vanity makes the floor look larger because you see less cabinet mass. Deep drawers are what keep it functional in a small bathroom, so you’re not forced into clutter on top. Use a warm stone-look countertop in a honed finish; honed reads cozy and hides fingerprints better than glossy. Pair with a simple wall-mounted faucet or a faucet with a compact footprint. This remodel idea is a clean, modern cozy look that still feels practical.
Find a vanity size that leaves a clear walkway — aim for 30 inches minimum in front of the toilet. Install blocking in the wall studs for the floating unit and use a ledger line to keep it level. Mount the vanity, then attach the countertop with the correct fasteners for your stone-look material. Seal the backsplash to the wall and caulk around the edges so water can’t creep behind.
Editor's noteUse a vanity with drawers that reach full depth; shallow drawer fronts turn into junk drawers in small spaces.
Skip thisDon’t rely on a floating unit without proper wall reinforcement — it will flex and crack caulk lines.
11. Warm Gray Subway Tile with Satin Brass Sconces
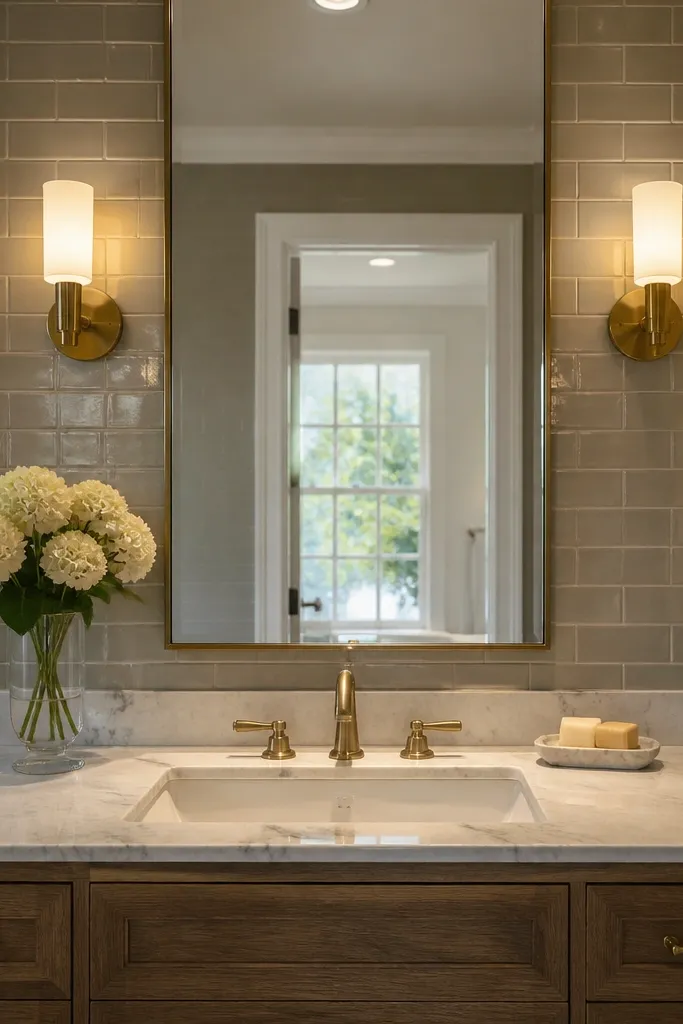
Subway tile can look either cheap or expensive depending on spacing and finish. Choose warm gray subway with a satin sheen and lay it in a clean running bond with consistent cuts. Then add satin brass sconces that sit at the right height so light hits your face evenly. This is cozy because warm gray is forgiving, and satin metal reads softer than chrome. Keep grout warm white or light gray so the tile lines look crisp rather than stark.
Dry-lay the first row at the mirror height and mark your layout so the cuts at corners look intentional. Waterproof the wet wall and install cement board or a waterproof backer system. Tile with a consistent 1/16-in grout line for a refined look, then grout after the tile sets. Install sconces with a dimmer if your bathroom has overhead lighting; test bulb temperature before finalizing.
Editor's noteUse shorter tiles or a proper wet saw for tight corner cuts; uneven cuts ruin the cozy look fast.
Skip thisAvoid high-contrast grout (pure white on cool gray) — it makes the room feel busy.
12. Patterned Floor Tile Only in a 3x5 Zone
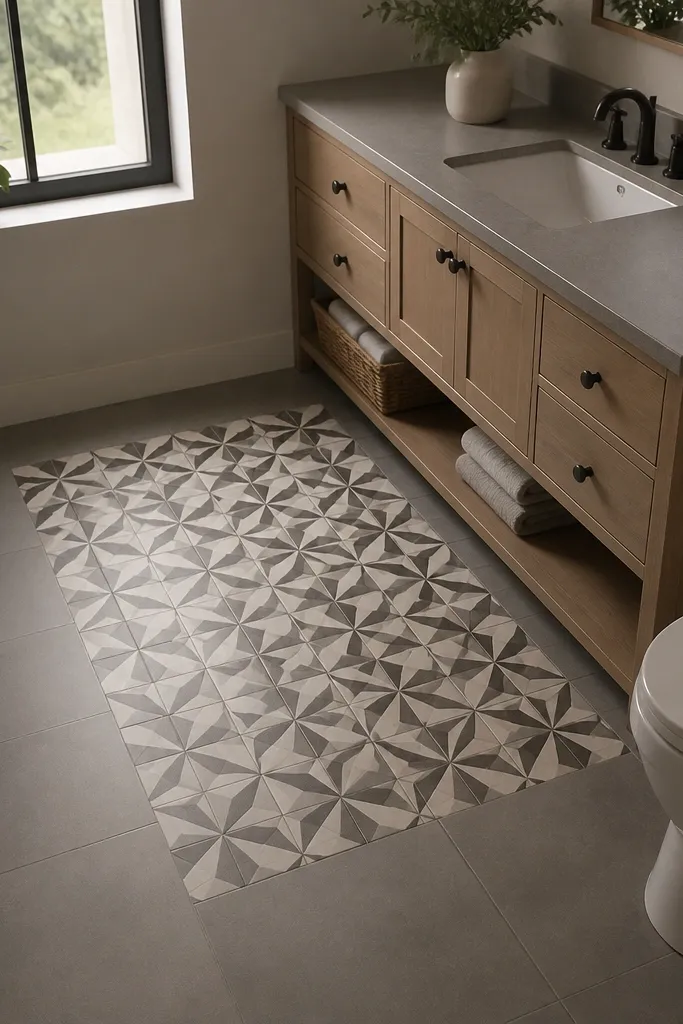
If you love pattern, you don’t need to tile the whole bathroom in it. Put a patterned tile zone where your feet and eye land — usually a 3x5 area in front of the vanity and around the toilet if space allows. Surround it with a simple solid matte tile so the pattern reads like a rug. This strategy looks cozy because it gives you warmth and personality without making the room feel visually loud. It’s also easier to budget and easier to clean because the pattern is contained.
Measure the usable area and decide the tile zone boundaries before you order anything. Install the solid tile first to the boundary lines, then set the patterned tile zone using the same grout width as the surrounding floor. Dry-lay the pattern to align with the vanity centerline. Finish by sealing grout if your pattern tile has a porous finish, and add a non-slip bath mat that matches the floor tone.
Editor's noteChoose a pattern with large shapes, not tiny busy motifs, so it stays cozy in photos.
Skip thisDon’t pick a high-gloss patterned tile; it shows scuffs and water spots immediately.
13. Matte Taupe Wall Paint + Tile Splash Strip
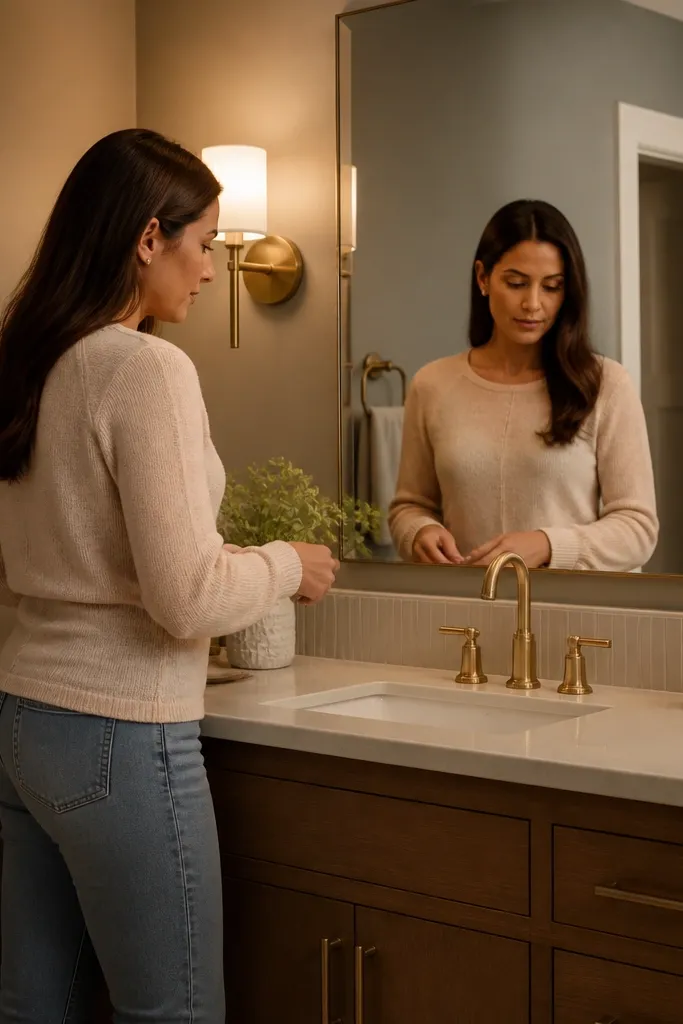
You can get a full remodel look without tiling every wall. Matte taupe walls with a narrow tile splash strip behind the vanity keep the room cozy and modern while making cleaning simple. Use a bathroom-rated paint with a washable finish and keep the tile strip consistent and straight. Then add a large mirror and warm lighting to make the taupe glow instead of look flat. This works well when you want to preserve budget for a better shower rebuild or flooring.
Prep the walls: patch holes, sand smooth, and prime with a bathroom moisture primer. Paint taupe in two coats and let it cure fully before installing tile. Install the splash strip with waterproof backer where needed, using a level and spacers to keep lines straight. Caulk the top and sides of the tile strip with wet-rated silicone before mounting the faucet and mirror.
Editor's notePick taupe with a slight warm undertone, not pink or gray — it should look warm under 2700K bulbs.
Skip thisDon’t use flat paint on walls that get heavy splash; switch to a washable bathroom finish.
14. Shower Ceiling Accent with a Single Statement Tile Band
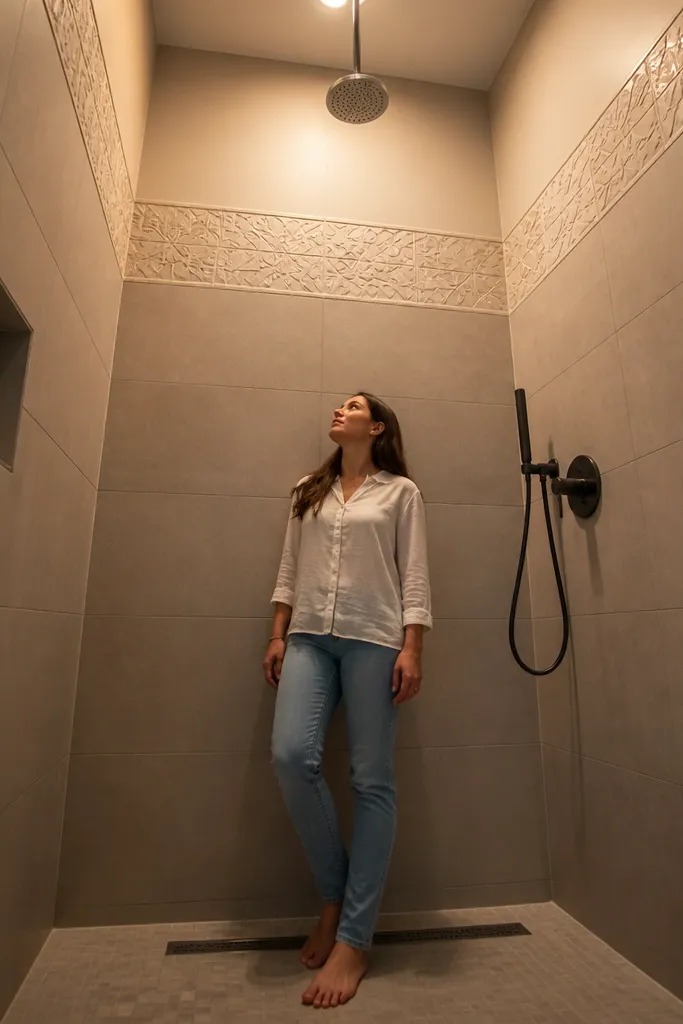
A small bathroom looks designed when you add one statement detail. Put a decorative tile band where the eye catches it — near the top of the shower wall or right under the ceiling line. Keep the rest of the shower tile neutral and matte, so the band reads like a trim, not a pattern explosion. This is cozy because it creates a warm visual rhythm and makes the shower feel like a feature. It’s also great for renters who can’t change everything — you can swap just the band if needed.
Pick a statement tile with a finish that won’t glare — satin or matte. Waterproof the shower first, then tile the neutral field up to the band height. Install the band tiles as a straight line using a ledger board so they don’t drift. Finish with consistent grout, and seal the band edges where they meet the neutral tile and waterproof membrane.
Editor's noteUse the same grout color for the band and field so the band looks intentional, not pasted on.
Skip thisAvoid stacking multiple decorative bands — a small room needs one clean eye-catching line.
15. Toilet Area Wallpaper Look with Vinyl-Safe Panels
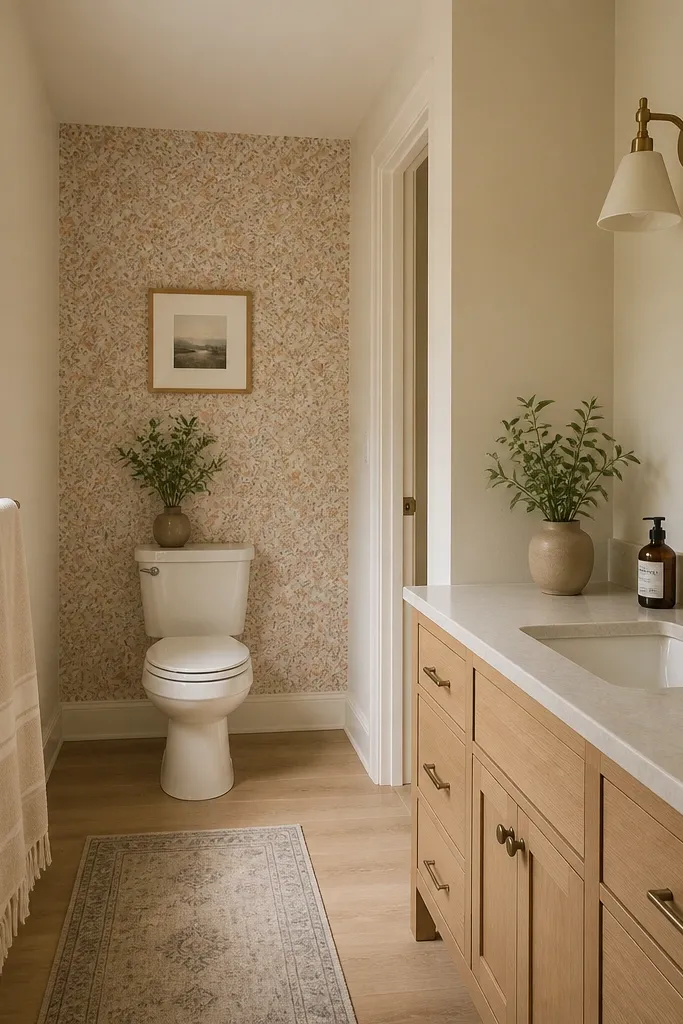
Wallpaper can work in small bathrooms if you treat it like a wet-area material problem, not a decoration problem. Use vinyl-safe wall panels or a wallpaper designed for bathrooms, then limit the pattern to the toilet zone. Keep the rest of the room in warm off-white so the patterned panel becomes the cozy focal point. This idea is photogenic because it adds texture and personality at eye level where people notice it first. It also keeps your remodel from feeling like a full commitment to pattern everywhere.
Remove old paint or prep the wall surface so the panel adhesive bonds well — clean and dry it thoroughly. Apply vinyl-safe panels behind the toilet and up to a safe height above splash zones. Seal edges with a wet-rated trim or caulk and keep the panel seams aligned with your grout or trim lines. Finish by adding a warm mirror and simple lighting so the pattern doesn’t get overpowered.
Editor's noteChoose patterns with warm neutrals and medium-scale shapes; tiny prints look busy in tight rooms.
Skip thisDon’t put standard wallpaper directly in steam zones; use a bathroom-rated product or panels.
16. Herringbone Floor Tile in Warm Charcoal
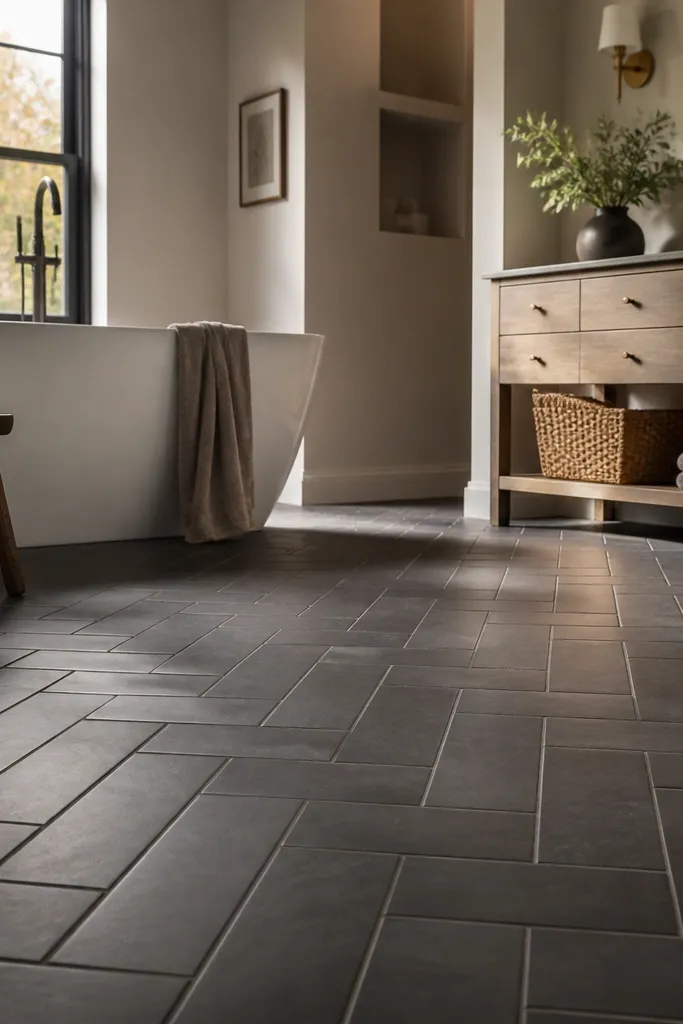
Herringbone reads upscale even in small bathrooms because it creates movement without needing big square footage. Choose warm charcoal or deep taupe in a matte finish so it looks cozy instead of dramatic. Pair it with light warm walls and a simple vanity to keep the room from feeling heavy. This remodel idea works especially well if your bathroom is narrow and you want the floor pattern to pull the eye across the room. It’s visually striking in photos and still grounded.
Plan your start line carefully: dry-lay a few rows to decide where the first cut lands near the doorway. Install herringbone with a tile that has consistent thickness and use spacers to keep the V-lines even. Use a leveling system if your tiles are large-format so the pattern stays flat. Seal grout after cure if your grout is porous, then install baseboards or trim to hide transitions cleanly.
Keep grout a warm light gray so the charcoal doesn’t look dirty.
Skip random herringbone layouts — crooked V-lines look sloppy fast.
17. Curbless Shower with Linear Drain + Warm Light Wall Tile
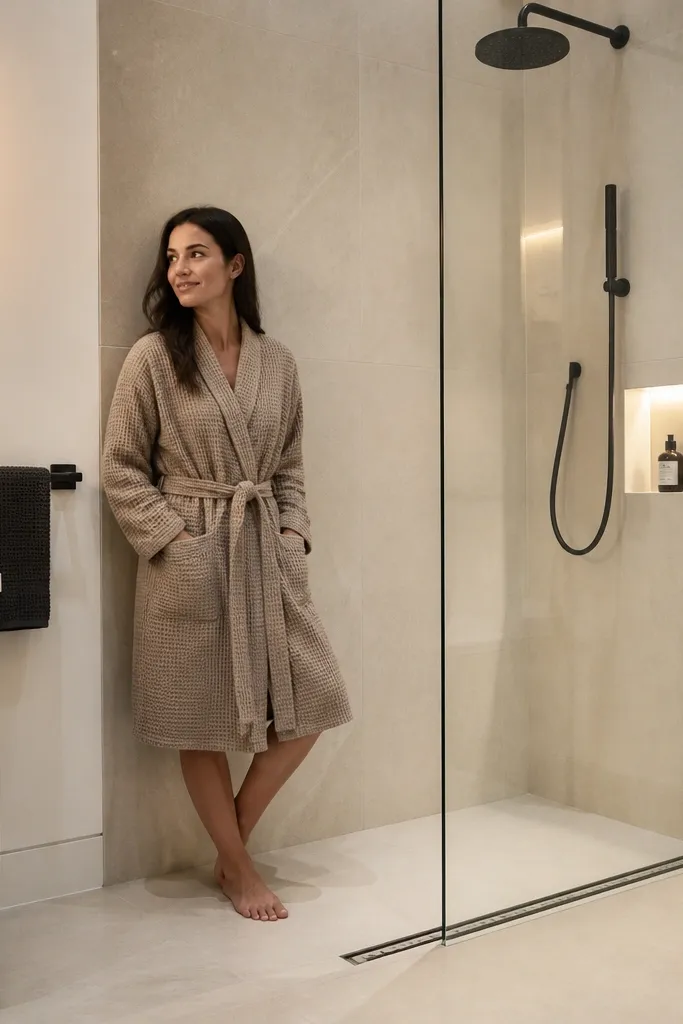
A curbless shower looks modern and cozy because it creates a smooth transition and removes the visual barrier in a small room. The linear drain keeps the floor lines clean, especially when paired with warm light wall tile. Choose a light tile with a matte finish to reflect warm light without glare. This is a full remodel choice because it changes the shower pan build and waterproofing, but the payoff is huge in how the bathroom feels. It reads airy while still looking finished and warm.
Build or buy a curbless shower pan system and confirm the drain placement before you prep floors. Waterproof the entire bathroom wet area as required by your system, then slope the shower floor to the drain. Tile the shower walls and floor, keeping the floor tile format consistent for a clean line. After cure, install the glass door and seal all edges with wet-rated silicone.
Editor's noteUse a shower glass system with good seals; curbless designs show water behavior more than raised pans.
Skip thisDon’t skip testing slope and water flow before tiling; it’s the difference between cozy and frustrating.
18. Wall-Mounted Faucet on a Narrow Vanity with Open Shelf
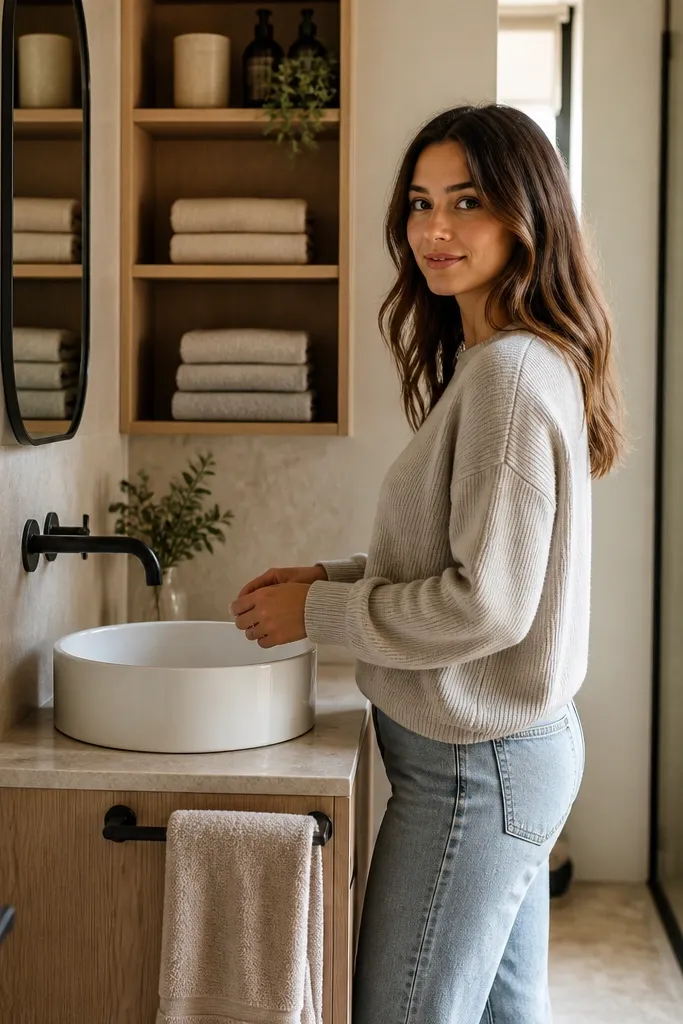
When floor space is tight, a narrow vanity keeps the room from feeling blocked. A wall-mounted faucet keeps the counter visually clear, which makes the bathroom feel calmer. Add an open shelf above or beside the vanity for folded towels so storage is accessible but not bulky. This look is cozy because it balances practical openness with warm finishes like light oak or warm white. Pair with a simple round mirror to soften the geometry.
Choose a vanity width that still leaves clearance to the toilet and door swing. Install a wall-mounted faucet by locating studs and using the correct rough-in valve height for your sink depth. Mount the vanity securely and confirm it’s level before countertop installation. Add the open shelf with proper anchors and finish by caulking around the vanity and plumbing penetrations.
Editor's noteKeep the open shelf decor minimal: two towel stacks and one basket max so it stays cozy, not cluttered.
Skip thisDon’t pick a narrow vanity with no drawers — you’ll fill the counter immediately.
19. Warm White Wall Tile with Soft Textured 3D Accent Behind Mirror
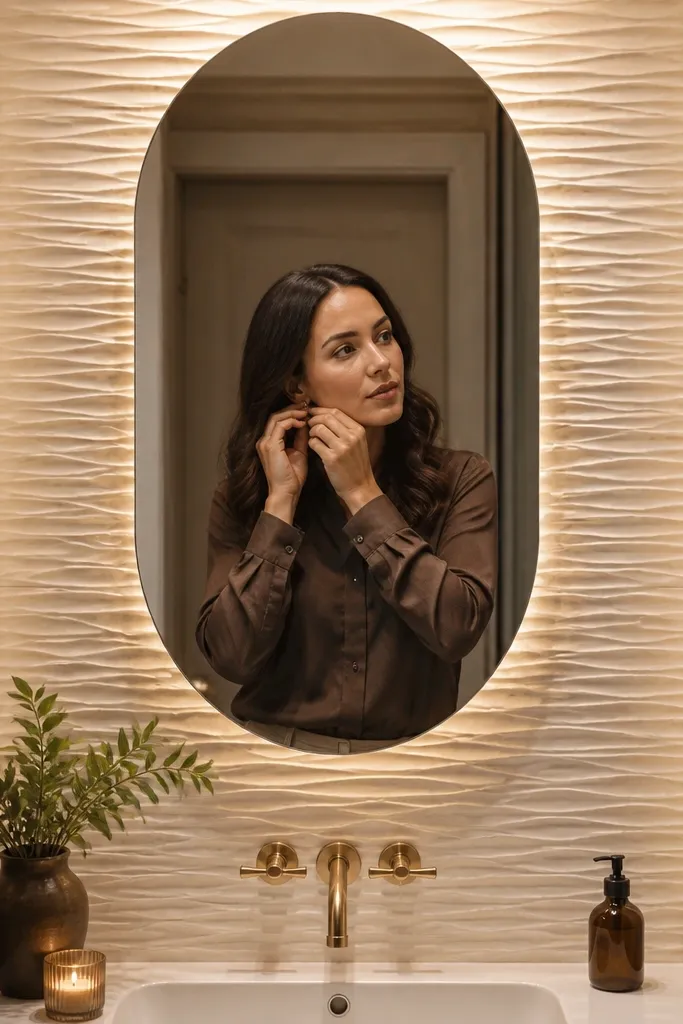
A small bathroom needs one surface that catches light. Use warm white tile as the main wall, then add a subtle 3D textured accent behind the mirror — something like a gentle wave or small relief pattern. The texture creates cozy depth when paired with side lighting from sconces or mirror lights. Keep the texture limited to the mirror zone so the room doesn’t feel busy. This remodel idea is photogenic because the shadow play makes the space look custom.
Pick a textured tile that is rated for bathroom walls and choose a grout color that won’t highlight unevenness. Waterproof and tile the main wall first, then install the textured section as a framed area sized to the mirror. Use a laser level to make sure the textured area is perfectly straight and centered. Finish by installing the mirror and lights so the texture is visible without casting harsh shadows.
Test the texture under your planned lighting by holding it near the wall — you want soft shadow, not strong contrast.
Don’t use a high-contrast textured tile; it reads harsh in small rooms.
20. Matte Cream Vanity Fronts + Black Framed Mirror
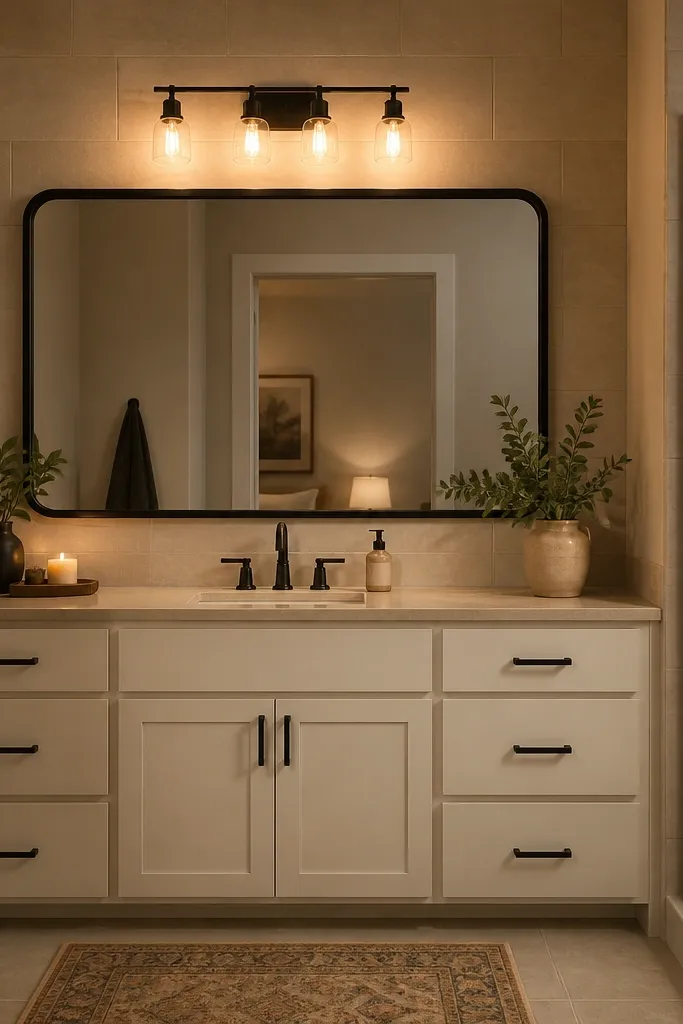
Matte cream vanity fronts look cozy because they’re soft and forgiving, and they hide smudges better than glossy paint. A black framed mirror gives structure without adding bulk. This combo works especially well with simple wall tile and warm grout so the bathroom looks cohesive. Add warm nickel or black fixtures depending on your taste, but keep the metal tones consistent. The result is a small bathroom that looks styled, not stripped down.
Select a vanity finish that is durable in wet areas (bathroom-rated paint or factory finish). Install the vanity on proper wall blocking and level it before mounting the countertop. Choose a mirror frame size that covers the sink center and mounts securely with anchors. Finish by replacing any dated chrome fixtures with either black or warm nickel and install warm bulbs at 2700K-3000K.
Editor's noteIf your mirror has a black frame, match the finish on towel bars and faucet — it reads intentional.
Skip thisAvoid mixing black and chrome in the same plane; it breaks the cozy, designed look.
21. Soft Pink Undertone Tile + Warm Brushed Nickel
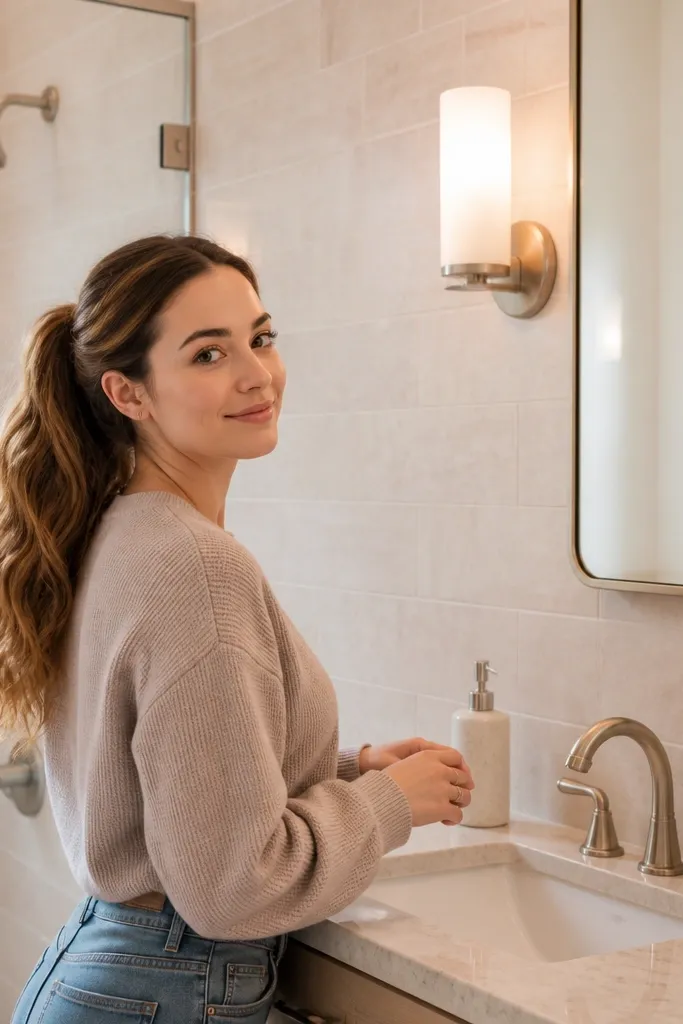
Soft pink undertone tile is a sleeper hit for cozy small bathrooms because it warms skin tones under bathroom lighting. Use it as a tile field on the shower or behind the vanity, then keep grout light and fixtures in warm brushed nickel. This creates a gentle glow that reads flattering and calm. The look is also easy to photograph because the warm undertone reduces stark contrast. If you want cozy but not “pink everywhere,” this is the controlled way to do it.
Choose tile with a pink-beige undertone and confirm the undertone looks warm under 2700K bulbs. Waterproof the wet wall, then tile with a consistent grout line and keep your layout centered on the mirror or shower opening. Install warm brushed nickel fixtures and avoid shiny chrome in the same room. Finish with warm lighting and a neutral bath mat that matches the grout tone.
Hold a sample tile next to your vanity and mirror under the actual bulbs — undertones show up fast.
Don’t pair pink undertone tile with cool blue paint; the mismatch looks sickly.
22. Single-Slab Shower Wall with Large Format Tile and Minimal Grout
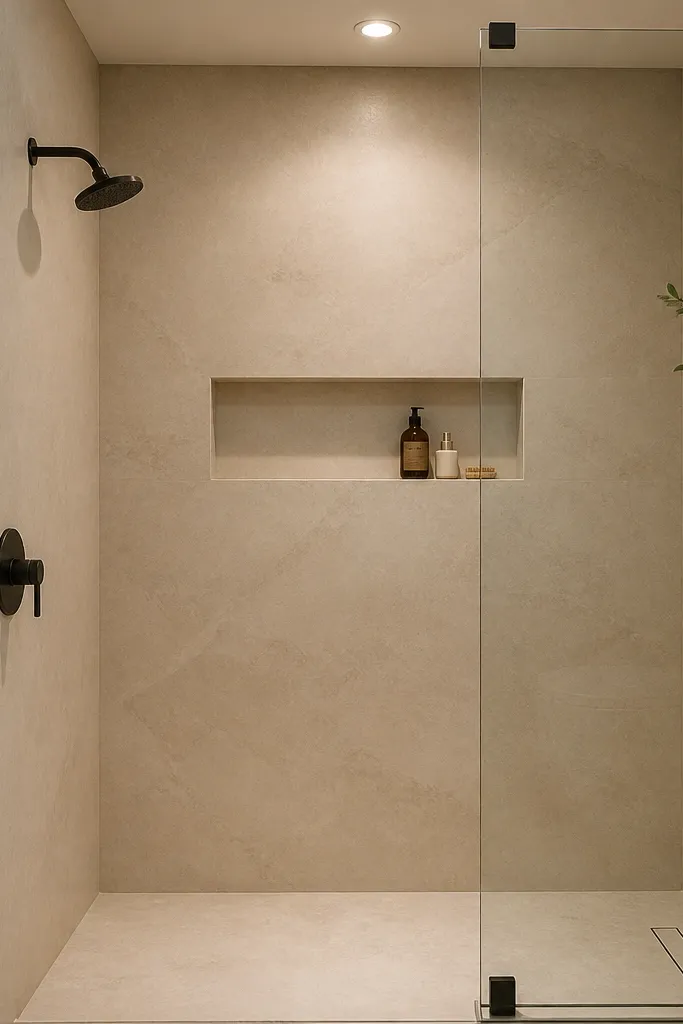
Large-format tile makes small bathrooms feel less busy because there are fewer grout lines to break up the wall. For cozy, choose a matte stone-look or warm off-white with subtle movement. Keep the shower niche simple and use minimal trim so the wall feels like one continuous surface. This is a full remodel look when you’re rebuilding the shower surround, and it’s especially good if your bathroom is narrow and you want the walls to feel smooth. The payoff is clean, upscale calm.
Select large-format tile and check it’s rated for wet areas and appropriate for your shower substrate. Flatten and waterproof the wall, then install cement board or a waterproof membrane system with correct thinset coverage. Layout the tile so you don’t end up with tiny slivers at corners; plan cuts around the shower opening and niche. Grout with the recommended grout type, then seal if your grout system requires it and caulk all movement joints.
Editor's noteUse a grout that matches the tile tone closely — you want the wall to read like a surface, not a grid.
Skip thisDon’t rush leveling; large-format tile shows every wave.
23. Sunlit Citrus Mosaic Shower Floor + Linen Privacy Panel
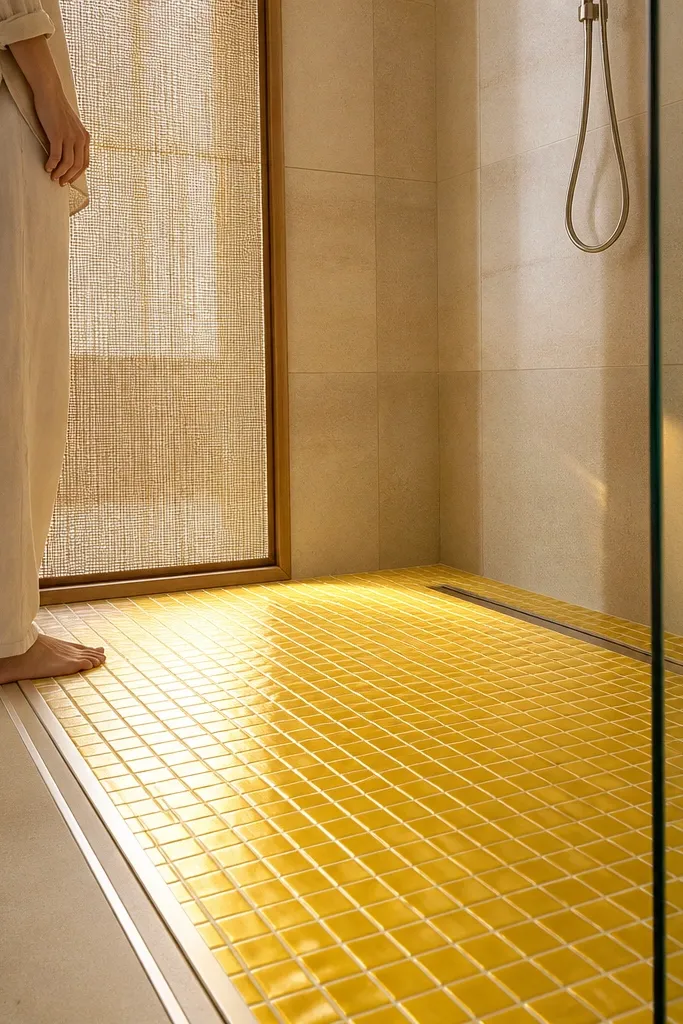
This is a small-bath remodel trick that makes the whole room feel brighter without turning it into a loud color bomb. The shower floor takes the “wow” — a tight grid of sun-yellow mosaic — while the rest of the bathroom stays calm with warm neutral walls. Add a linen-look privacy panel where you need coverage (near the toilet or the shower opening) and the space reads softer, not harsh. It works because the eye lands on one bright surface at knee height, then rests on warm tile above it. This is a DIY-friendly look if you can measure carefully and take your time grouting; plan a long weekend for demo, tile setting, waterproofing, and trim.
1) Waterproof the shower area first, then set a warm base wall tile (choose matte warm white or light beige) and keep the grout lines consistent (1/8 in is a good target for small bathrooms). Use a preformed waterproof membrane system on walls and floor, then install a shower floor slope correctly before any tile goes down. 2) Install a 2- to 3-inch border of sun-yellow mosaic at the perimeter and fill the center with the same mosaic for a clean, even pattern. Use a white thinset for the mosaic so the yellow reads true; back-butter the sheet tiles lightly and press them flat with a grout float. 3) Build the linen privacy panel using a waterproof-rated board or exterior-grade paneling behind a removable frame, then cover it with a vinyl-safe linen-look surface (smooth, wipeable). Seal all panel edges with waterproof caulk and leave a small gap at the bottom for airflow and cleaning.
Editor's noteDry-lay the mosaic sheets on the floor before you start thinset so the grid lines line up with your drain and any curb edges.
Skip thisDon’t grout over any area that isn’t fully cured — uncured membrane and thinset can trap moisture under the grout.
24. Tall Cabinet + Door-Mirror Stripe for a Skinny Bathroom
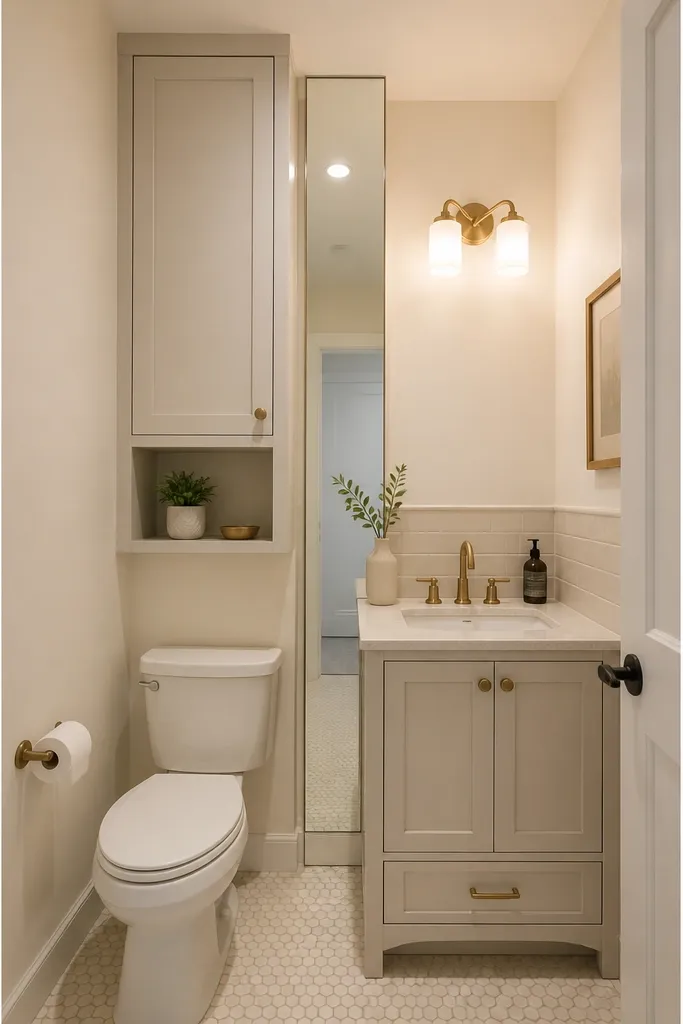
If your small bathroom feels tight because there’s not enough storage, this layout fixes that and makes the room look taller at the same time. A tall cabinet anchored to the wall gives you real storage for backups and cleaning tools, and a vertical mirror stripe breaks up the height in a flattering way. The mirror stripe also bounces light into the darkest corner, which is where small bathrooms usually feel cramped. This works best when the cabinet sits on the same wall as the main light source or opposite the vanity light. Skill level is medium: you’re doing straight carpentry and careful mirror mounting, but you’re not building anything structural.
1) Choose a tall cabinet with doors, not open shelves, in a warm wood tone or painted off-white. Measure the wall height and aim for a cabinet that ends about 6-10 inches below the ceiling if you have crown molding, or flush to the ceiling if you don’t. Use a stud finder and mark studs; install a ledger or temporary level board so the cabinet doesn’t “walk” during mounting. 2) Add a vertical mirror stripe to one cabinet door panel or to a fixed side panel next to it. Use mirror mounting clips or a mirror adhesive rated for wet areas; keep the mirror edge sealed with a thin bead of bathroom-grade silicone. 3) Finish the look with a slim toe-kick and matching trim so the cabinet reads built-in, then caulk the perimeter seams where the cabinet meets tile or wall board. Keep the mirror stripe about 8-12 inches wide so it adds height without looking like a full mirror panel.
Editor's noteUse a laser level to mark the cabinet mounting line — even a 1/8-inch drift makes the mirror stripe look crooked.
Skip thisDon’t mount a tall cabinet directly into drywall with only anchors; use studs or a proper wall bracket system.
25. Matte Black Tub Faucet Rail + Brass-Tone Handheld on a Curved Rail
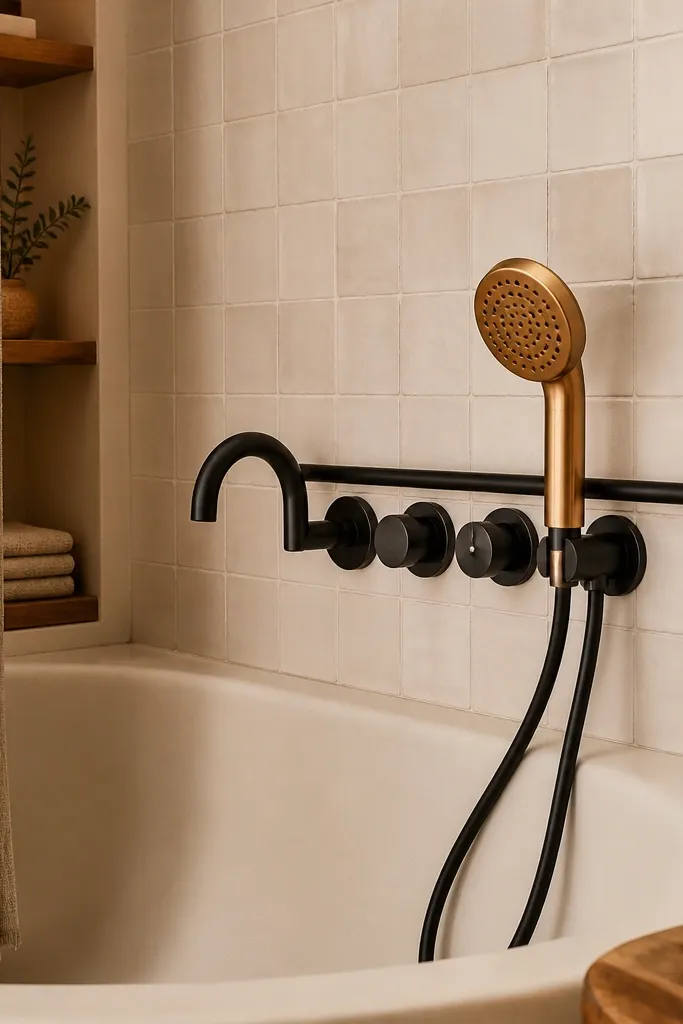
This idea is about making a small bathroom feel designed, not patched, using one strong functional detail. Instead of a separate tub spout and a standard shower head, you install a curved faucet rail that holds the tub controls and a handheld sprayer, all in matte black with a warm brass sprayer head. The rail draws a smooth line across the tub area, which looks better in tight layouts than scattered fixtures. It also fixes real usability: you get better reach for rinsing the tub and cleaning the shower walls. This is a moderate DIY project if you’re comfortable with plumbing rough-in access; budget a full day for fixture swaps and leak testing.
1) Plan your rail placement around your tub rim and plumbing access. Measure from the tub deck to the existing valve controls and spout outlet; choose a rail kit that matches that spacing or includes adjustable mounting positions. Turn off water at the shutoffs, remove the old trim, and inspect the valve for damage; replace any worn cartridges or seals before you install new trim. 2) Install the new matte black rail trim and connect the handheld sprayer line using the included supply hose and gaskets. Tighten fittings by hand first, then snug with a wrench — avoid over-torquing plated parts. 3) Finish the look with a small wall tile splash zone behind the rail and add a brass-tone handheld holder anchored into a waterproofed surface. After everything is sealed, run water for 15 minutes and check all connections and the valve trim for any dampness.
Editor's noteUse plumber’s silicone only where the manufacturer directs trim sealing; for threaded joints, rely on the correct gasket or thread sealant specified for the kit.
Skip thisDon’t reuse old O-rings from the previous fixture — they harden and cause slow leaks behind the trim.



