
1. Walnut-stained floating shelves with black rail supports
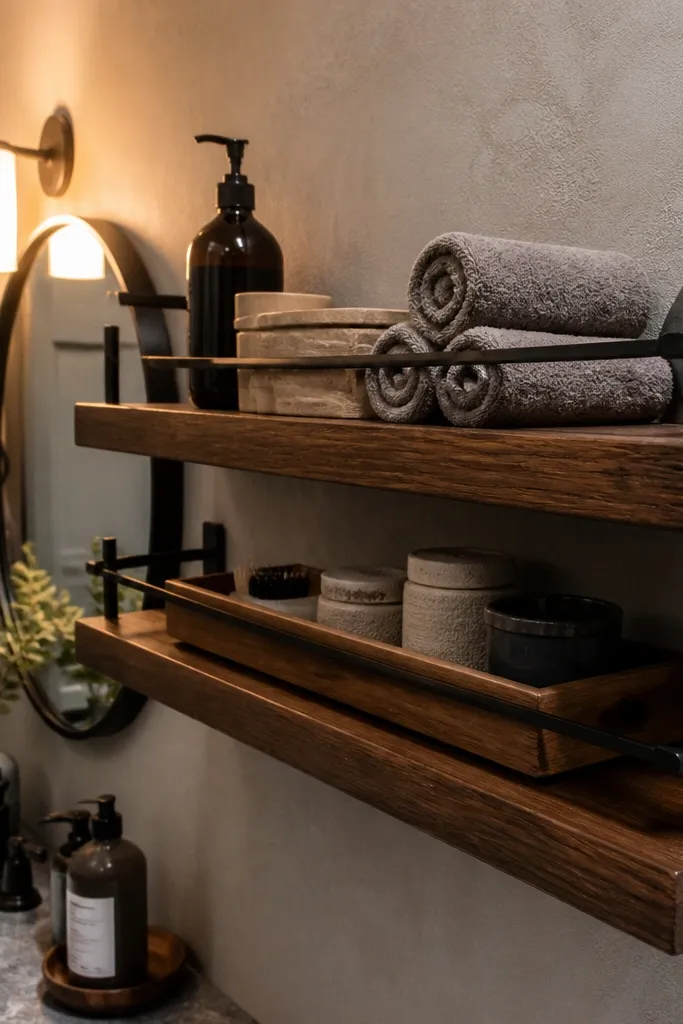
This is the cozy bathroom look that doesn’t feel “dark and heavy.” Walnut stain gives warm tone without turning orange, and the black rail supports keep the shelves visually anchored even when the wall is busy. The rail style also helps with stability for small bathrooms where people bump shelves with elbows. Build these for above-sink storage: bottles sit neatly because the rails keep the shelf level and you get a clean underside in photos. It’s a great choice if you want your bathroom to look styled but still practical for daily use.
Start by cutting 3 shelf boards to the same depth (about 8 inches is a sweet spot for toiletries) and matching lengths that fit your wall span. Seal the boards with a moisture-resistant finish in thin coats, sanding lightly between coats, and pay extra attention to every edge. Install a continuous black rail system or matching rail brackets level at your chosen heights, then screw the shelves to the rails using pilot holes to prevent splitting. Finish by wiping away dust and applying one final topcoat so the surface stays smooth and water-resistant.
Editor's noteUse a level laser for the rail line; a tiny slope shows up fast in a bathroom mirror view.
Skip thisDon’t skip sealing the shelf underside and edges — steam creeps in from all sides.
2. White-painted shelves with a soft oak top edge
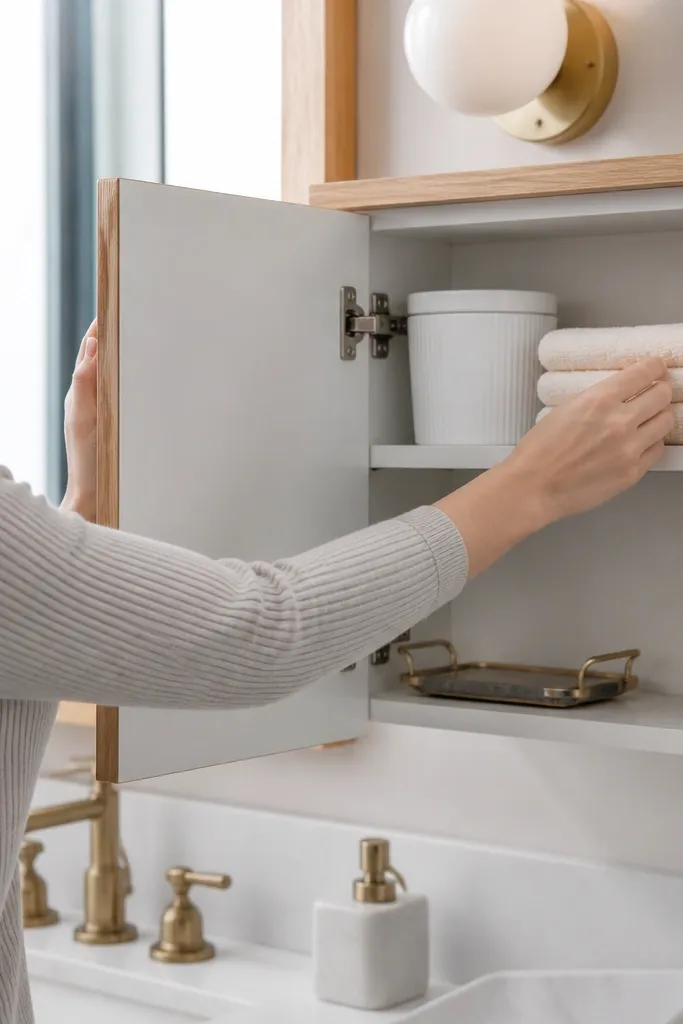
This look is cozy because it blends crisp white with a warm wood edge, so the shelves read “clean” instead of sterile. Painting the shelf body hides minor wall imperfections and keeps the bathroom bright, while the oak edge adds texture that catches light when you open cabinet doors or turn on the vanity light. It’s ideal for renters or anyone who wants a shelf that looks intentional even if the wall has patch marks. Use it for small items like cotton pads, matching jars, and a couple of neatly arranged skincare bottles.
Cut shelves to your target length and a practical depth of 6 to 8 inches. Paint the shelf faces and sides with a bathroom-safe enamel or cabinet paint, then sand and recoat for a smooth finish. For the oak edge, glue a 1-inch oak strip to the front top edge after the paint cures, then clamp while the adhesive sets. Install the shelves with hidden brackets or a rail, and use stainless or coated screws so the underside doesn’t rust.
Edge-glue the oak after the paint cures for 48 hours so the paint doesn’t chip at the glue line.
Don’t paint directly onto rough plywood edges — they’ll drink paint and look patchy.
3. Mocha floating shelves with built-in back lip
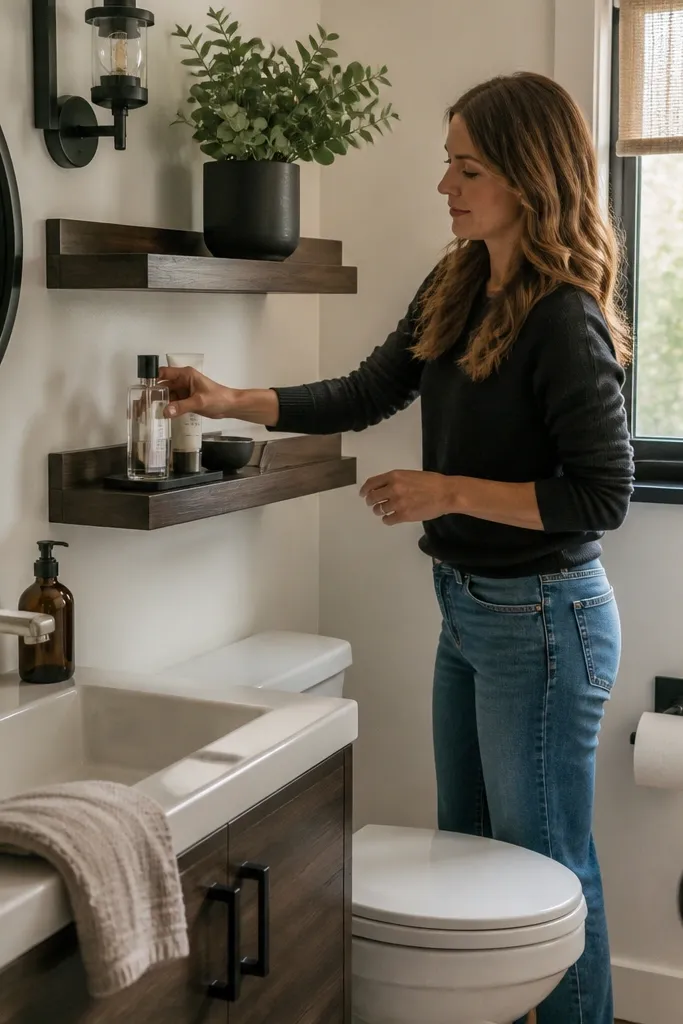
A back lip is a small change that makes the whole setup feel more “designed.” It stops pump bottles, tubes, and spray caps from creeping forward when the bathroom gets humid or when you reach in. The mocha stain gives a warm, coffee-toned look that pairs well with brushed nickel faucets and matte black fixtures. This one is perfect for small spaces because it lets you use a slightly shallower shelf without losing function. It also photographs well because you can style items in a tight row and they stay there.
Build each shelf as two pieces: a flat board plus a back lip strip about 3/4-inch tall. Stain or paint the entire assembly, then seal with a moisture-resistant clear coat, again focusing on the underside and the lip edges. Mark bracket locations on the wall, keep them level, and pre-drill pilot holes to keep the board from splitting. Mount the shelf so the lip faces the mirror and the front edge stays clean and flush.
Editor's noteDry-fit a bottle row on the shelf before mounting to confirm the lip height blocks sliding without hiding labels.
Skip thisDon’t make the lip too tall — it will block visibility and make the shelf feel cramped.
4. Corner floating shelves with a continuous spine
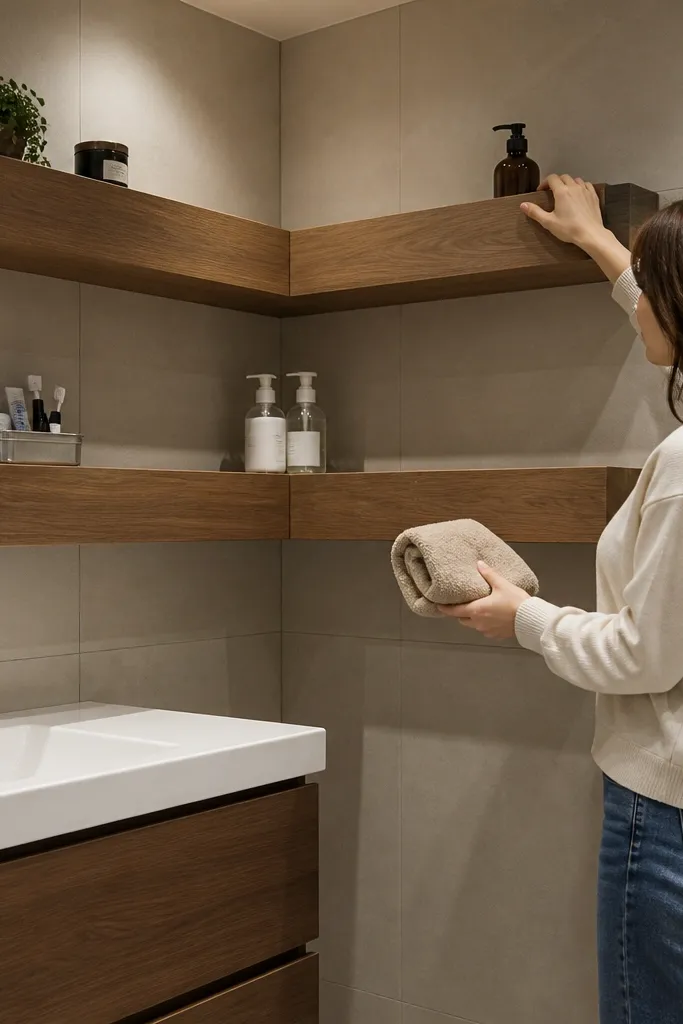
Corners are where small bathrooms hide storage, and a continuous spine makes the shelves look like one intentional piece instead of two mismatched L-shapes. This is cozy because the wood grain wraps across the corner and softens the hard angles. Use it for overflow items like extra hand soap, backup toothpaste, and rolled washcloths. A corner setup also keeps items away from the sink splash zone. In photos, the spine creates a clean visual line that looks custom.
Cut shelf surfaces to fit your corner and add a continuous vertical spine board that runs up the corner seam. Dry-fit the pieces, then pre-seal all faces and edges before installation. Mount the spine first using proper wall anchors, then attach shelf panels to the spine with screws through pre-drilled holes. Level each shelf surface carefully so bottles don’t wobble; finish with a topcoat on any cut hardware holes.
Editor's noteUse a corner template made from scrap cardboard so both shelf edges land flush without gaps.
Skip thisDon’t rely on drywall alone for corner shelves — use anchors rated for the shelf weight.
5. Shower-side floating shelves in tile-safe sealed plywood
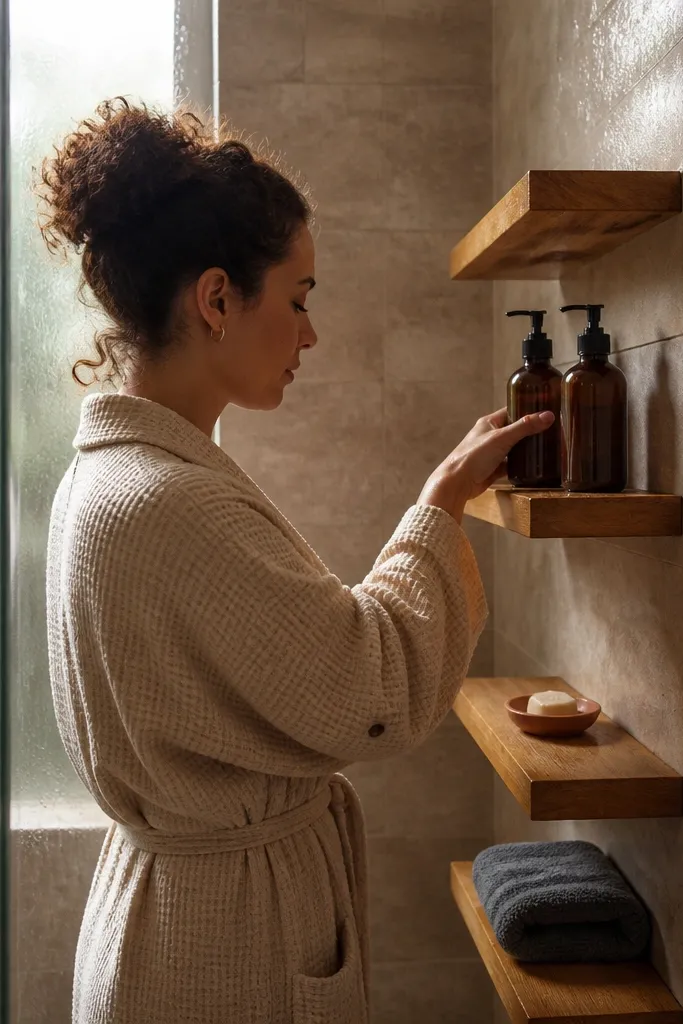
If your bathroom has a shower and a narrow wall gap, this idea makes that wasted strip useful without turning it into a clutter catch-all. The look is cozy because the wood tone matches the rest of the bathroom, but the build is about moisture control: sealed plywood and a finish made to handle steam. Place these near the shower but not inside the direct spray line, so shampoo bottles look tidy and easy to grab. It’s a strong choice if you want functionality that still looks warm and not like a plastic caddy.
Use marine-grade plywood or exterior plywood, and seal all surfaces with multiple thin coats of a bathroom-safe sealer or spar varnish, sanding lightly between coats. Install the shelves with stainless screws and mounting hardware rated for moisture areas, and keep water away from the shelf backing by sealing any gaps between shelf and wall. Cut shelf depth to about 7 to 9 inches so bottles sit stable but don’t crowd the walkway. Apply one extra topcoat after installation so the cut edges around mounting points stay protected.
Editor's noteKeep shelves at least 6 inches away from direct spray so the finish stays clean longer.
Skip thisDon’t mount straight to unsealed drywall near the shower — steam will find the edges.
6. Two-tier floating shelves with matching jars styling line
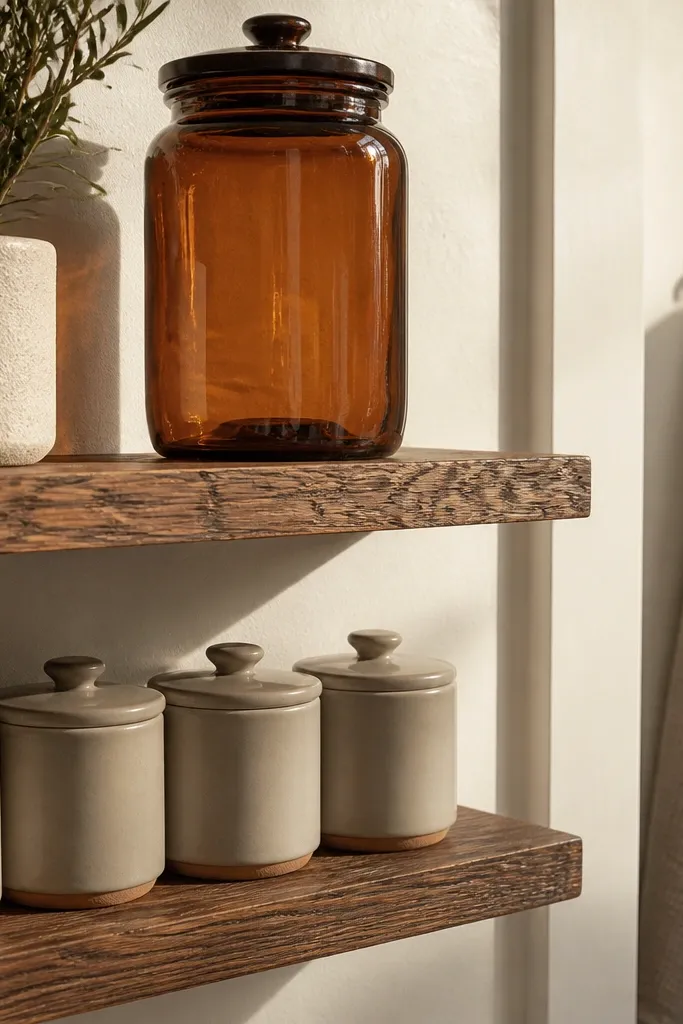
This is the “cozy and tidy” look that reads instantly in photos because everything repeats. Two-tier shelves create a styling line: top shelf holds taller items, bottom shelf holds smaller jars, all in the same color glass or matte ceramic. The shelves themselves don’t need to be fancy; the visual rhythm does the heavy lifting. For small spaces, this doubles storage without widening the shelf run. It works best in front of a blank wall near the sink where you can control what shows.
Choose one shelf depth (8 inches works well) and one length that fits the wall span, then cut two boards to match. Seal and finish both shelves so they look uniform, then mark your bracket height so the second shelf sits about 10 to 14 inches above the first. Mount hidden brackets or a rail system and keep the spacing consistent for a clean stacked look. Style after mounting with matching jars and a small tray or riser to align items.
Editor's notePick jar lids in one finish (black, brushed steel, or white) so the shelves look cohesive even when you change products.
Skip thisDon’t mix random jar sizes without a plan — the shelf will look messy even with clean shelves.
7. Light oak shelves with recessed under-shelf LED strip
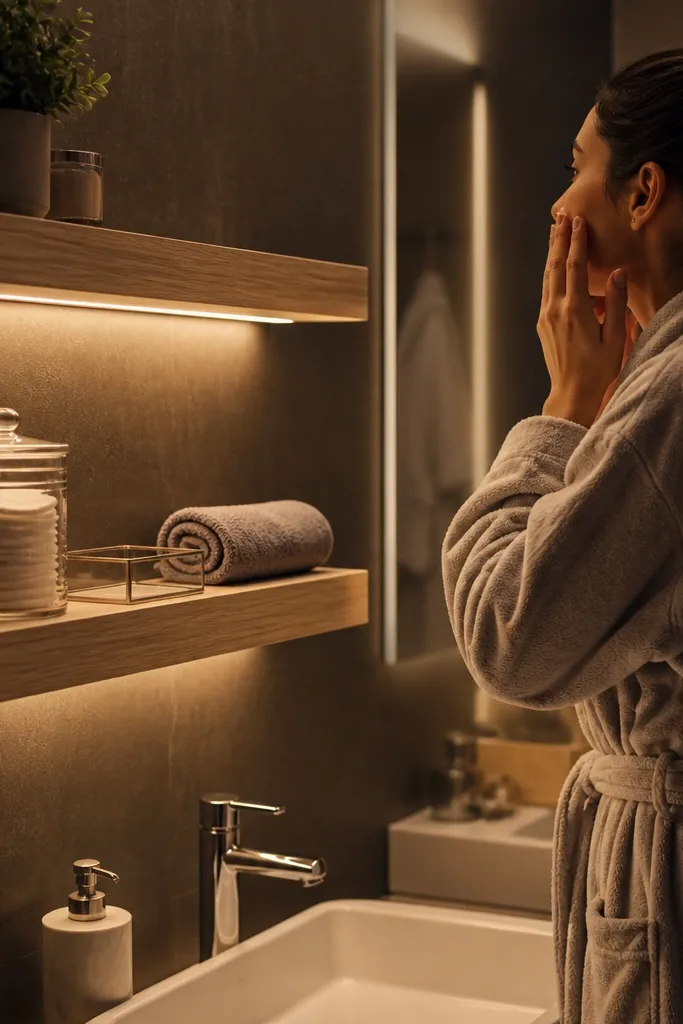
Warm LED glow is the fastest way to make bathroom shelves feel cozy instead of utilitarian. Light oak keeps it bright, and the under-shelf lighting makes the wood grain pop without adding visual clutter. This setup also helps at night when you’re not using overhead lights; toiletries are easier to find. For small spaces, the glow makes the wall feel deeper and more intentional. It’s also photogenic because the light creates a soft shadow line under each shelf.
Use light oak boards or oak-look finished boards and seal with a clear protective topcoat. Route a shallow channel underneath the front edge or use an LED channel strip that sits under the shelf lip. Mount the shelves with hidden brackets, then run low-voltage LED wiring to a driver placed in an accessible junction area. Test the light before final tightening, then seal any wire entry points and finish with a final topcoat if you drilled new holes.
Editor's noteUse 2700K LEDs for bathroom warmth; anything cooler looks clinical fast.
Skip thisDon’t skip a proper LED driver and cable management — loose wires behind shelves look bad and can overheat.
8. Matte black floating shelves with smoked glass front accents
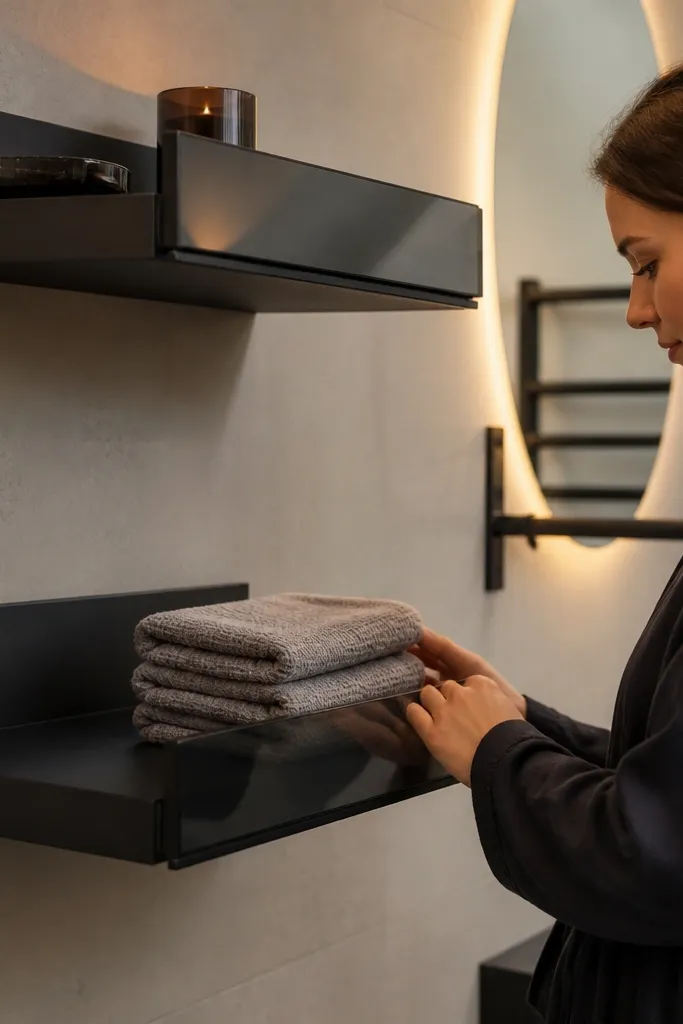
If your bathroom fixtures are matte black, this is a clean, cozy way to match the whole look without turning it into a dark cave. The shelves are matte black for a modern base, and the smoked glass accents add softness by diffusing light. Use these for decorative-but-practical items like a small soap dish, a candle-sized jar, and rolled hand towels. The smoked glass keeps the shelf from looking flat and gives you that “designed” feel even with minimal styling. It’s best for bathrooms with white or warm beige walls so the black stays grounded.
Build or buy matte black-finished shelf boards and decide where the glass accents will go on the shelf front. Cut small recesses or add a thin trim rail to support smoked glass panels, then seal the wood around the recess edges. Install hidden brackets or a rail system behind the shelf boards, using corrosion-resistant hardware. Attach the glass panels with a clear silicone or manufacturer-recommended glass mounting clips, then wipe off any squeeze-out before it cures.
Editor's noteUse a matte black primer and topcoat on all cut edges so the shelf doesn’t show raw wood at the front.
Skip thisDon’t use clear glass — it shows fingerprints and water spots constantly in bathrooms.
9. Double-shelf vanity backsplash look with a continuous top board
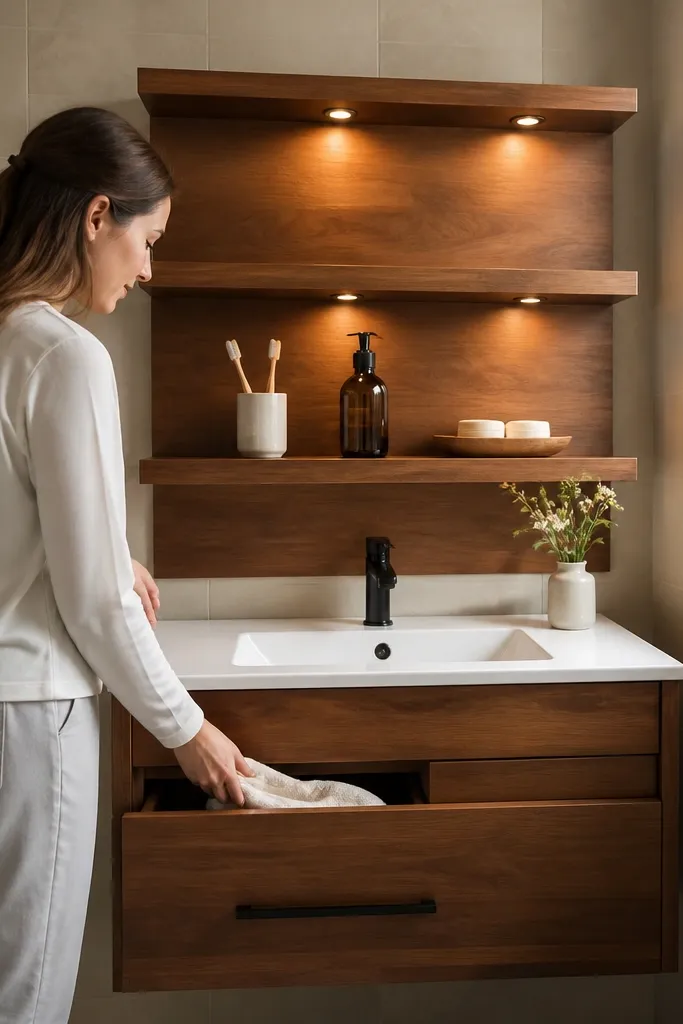
This idea makes a small sink wall look custom by turning it into a backsplash panel with shelves. The cozy part comes from continuity: a continuous top board and matching shelf widths make the wall feel designed rather than patched. It’s great for bathrooms where you can’t mount a cabinet because of space. You get a place for daily items right where you use them, plus a neat zone for backup supplies. In photos, the shelves frame the mirror area and make the sink look intentional.
Measure the sink wall width and cut one continuous top support board if you want the backsplash look, then cut two shelf boards to match that width. Seal all pieces and finish them in a warm tone like walnut or a creamy off-white. Mark bracket positions so the top shelf sits above the mirror line you want, and the lower shelf stays clear of splashes. Mount the continuous support board first, then attach both shelves to it with hidden screws and pilot holes.
Keep the lower shelf edge at least 2 inches above the tallest bottle you plan to store so it never hits when you lean in.
Don’t mount shelves too high — you’ll end up storing less-used items only.
10. Terracotta-stained shelves with off-white bracket backing boards
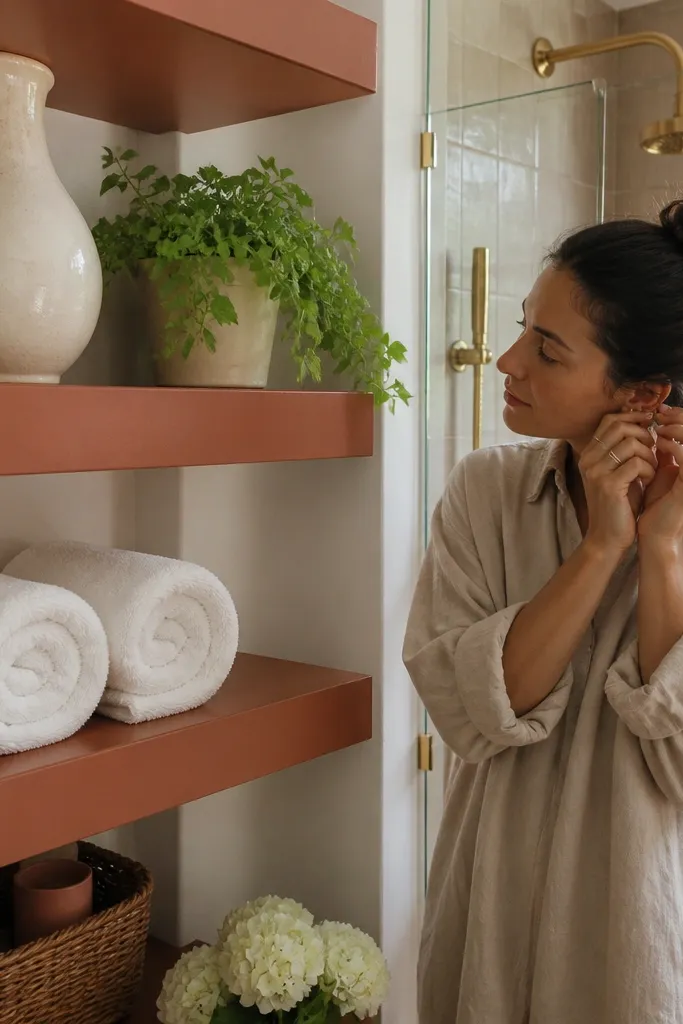
Terracotta tones add instant warmth and make a bathroom feel lived-in in a good way. To keep it cozy instead of rusty, stain the shelves in a muted terracotta brown and paint the bracket backing in off-white so the hardware disappears. This is a great match for bathrooms with warm tile, cream walls, or brass accents. The backing boards also help hide messy wall lines and make the shelves look like part of a built-in unit. Store small towels or a single vase with dried stems for a soft look that doesn’t fight with bathroom lighting.
Stain shelf boards in a muted terracotta-brown tone and seal with a clear topcoat. Build small off-white backing panels that cover the wall behind your brackets, then pre-drill holes for mounting. Mount the backing panels first with anchors, level them, and secure the shelves to the backing using hidden brackets. Finish by sealing the backing edges and touching up any cut spots with matching paint.
Editor's noteChoose backing boards thick enough to cover screw heads so the underside looks clean.
Skip thisDon’t use bright orange terracotta — it can look outdated fast in bathroom lighting.
11. Slim 4-inch deep shelves for above-toilet decor and storage
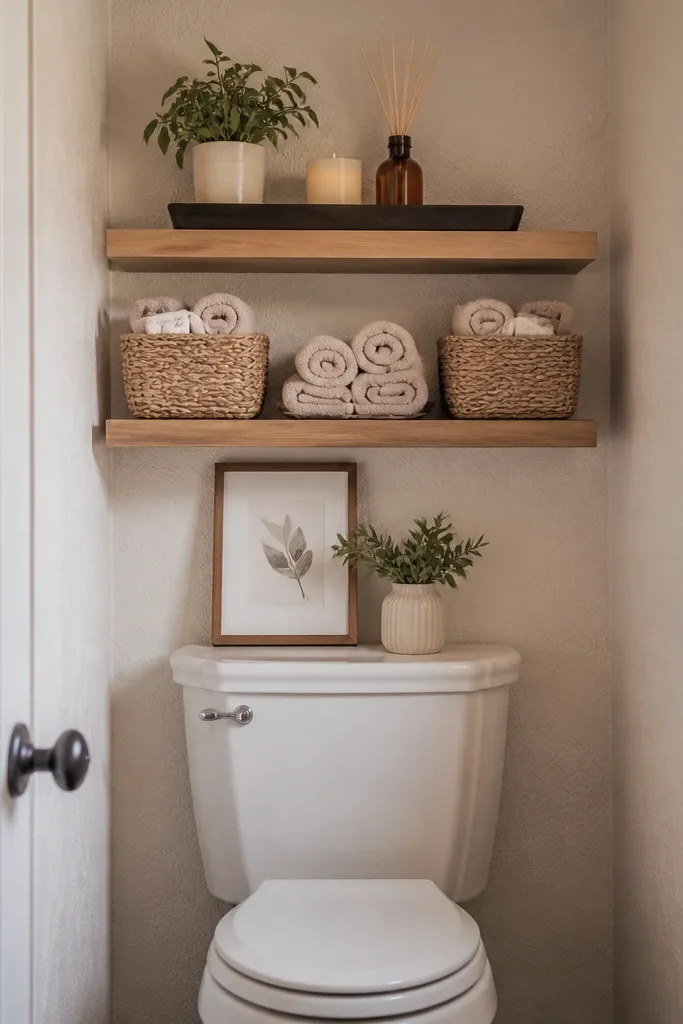
Above the toilet is where small bathrooms need storage without taking up floor space, and slim shelves keep the wall from feeling crowded. A 4-inch depth is enough for rolled washcloths, small bottles, and decor that won’t tip forward. The cozy look comes from styling: use one narrow tray, a couple of matching baskets, and a warm wood finish so it feels like a mini vignette. These shelves are also a good first DIY project because the shelf size is small and mounting is straightforward. Keep them consistent in width for a clean, built-in vibe.
Cut shelf boards to a depth of about 4 inches and choose a length that fits the toilet wall span. Seal and finish with a warm stain or off-white paint, then let it cure fully before mounting. Mark bracket locations higher than you think you need, so you don’t interfere with the toilet tank lid or taller decor. Install brackets or a rail, mount the shelves, then style with a tray and one basket so the items stay aligned.
Use a rubber shelf liner or cut-to-fit felt under the tray so glass doesn’t slide.
Don’t go deeper than 5 inches above a toilet unless you’re sure about clearance — it will look bulky.
12. Floating shelves with woven rattan basket inserts
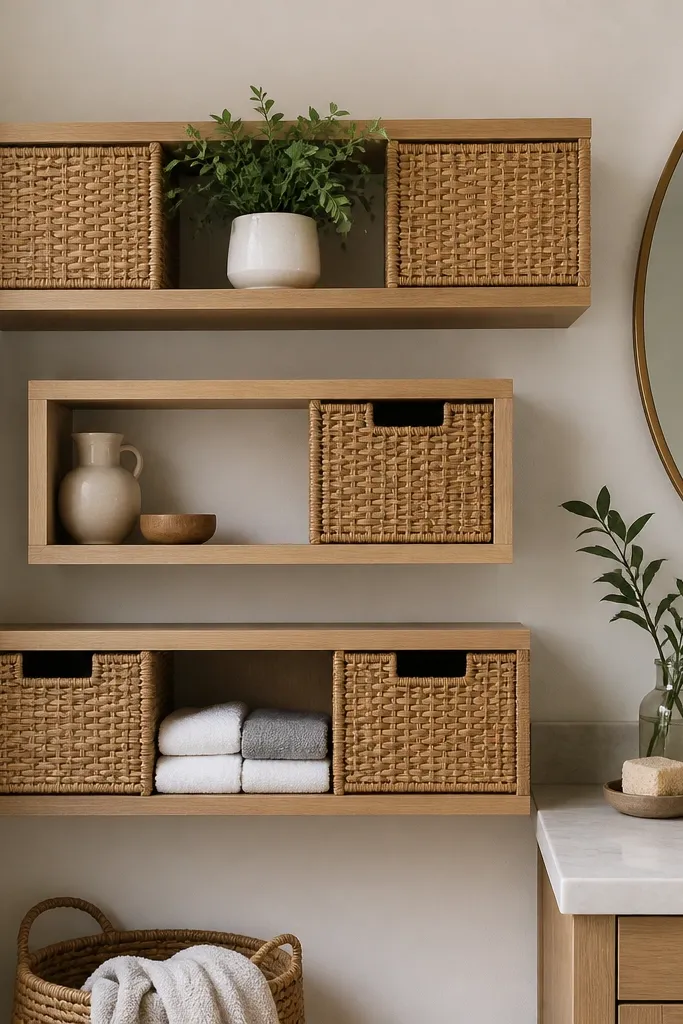
This is cozy in a very practical way: baskets hide clutter while the shelf still looks light and airy. Woven rattan adds warmth and texture that pairs well with neutral walls and natural wood tones. You get the best of both worlds — open shelf visibility plus closed storage for extra soap, spare razors, and hair tools. The shelf looks photogenic because the baskets create a repeated pattern and soften the wood lines. It’s perfect for bathrooms where you don’t want to show every product bottle.
Build shelves with a slightly wider opening or add a front frame so baskets sit recessed instead of floating on top. Choose basket sizes that fit snugly with 1/4-inch clearance on each side so they don’t rattle. Seal the wood, then install hidden brackets so the shelf underside stays clean. Test basket fit before final screws, then add a thin felt strip on the shelf bottom to stop friction and reduce noise.
Editor's noteIf your bathroom is humid, use a clear coat on the wood but keep baskets dry and replace them when they start to fray.
Skip thisDon’t use baskets that are too loose — they slide forward and make the shelf look unfinished.
13. Two floating shelves with vertical beadboard backing for a cottage look
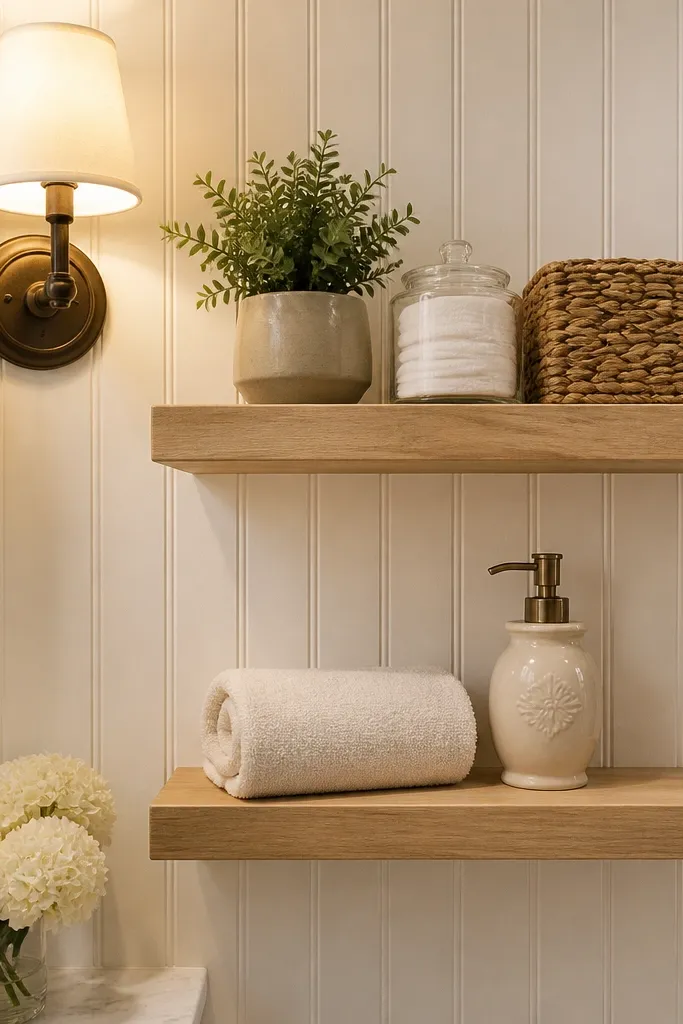
Beadboard backing turns plain floating shelves into a full wall feature. It’s cozy because the vertical grooves break up flat color and make the wall look textured, which reads well under vanity lighting. Keep shelves in warm white or natural oak so the beadboard doesn’t look gray or old. This setup is great for small bathrooms that need a little charm without adding bulky cabinets. Style with a short row of small jars and a single framed print behind the shelves for a balanced look.
Cut a beadboard panel to fit your shelf run and install it level on the wall using panel adhesive plus nails or screws. Seal the beadboard with a bathroom-safe primer and clear topcoat, then add floating shelf brackets on top of the panel framing points. Mount the shelves to the brackets, then caulk small gaps for a clean edge line. Finish by painting the shelf area trim in the same warm white so everything looks intentional.
Seal the beadboard with a satin finish — flat paint shows grime faster in bathrooms.
Don’t mount shelves directly onto beadboard without checking wall studs or panel backing — it can pull away.
14. Rope-edged shelves with a whitewashed finish
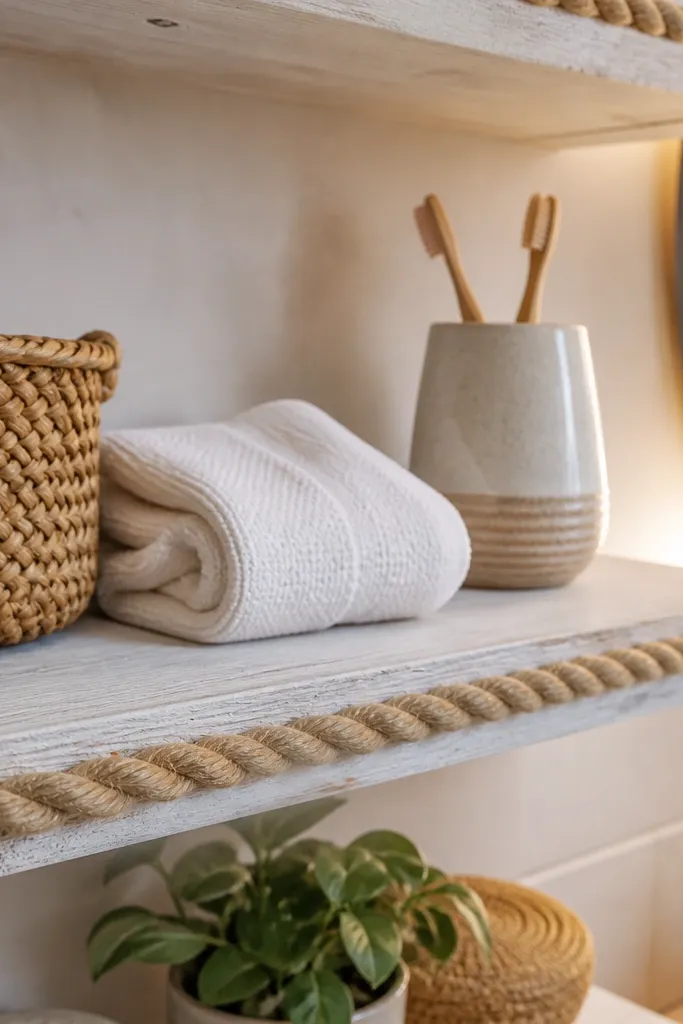
Rope trim is a small design move that makes floating shelves feel handmade and cozy, especially in bathrooms with light walls and natural textures. Whitewashing keeps the wood looking airy, while the rope edge adds texture that catches light from the vanity mirror. Use these for towels, a small basket, or decorative jars — items that look good even when you’re not trying to hide them. This idea works because it gives the shelf a “finished” front without needing bulky trim. It’s photogenic because the rope creates a shadow line along the shelf edge.
Whitewash or stain the boards and seal them, then attach rope trim to the front edge using a strong construction adhesive. Wrap and clamp the rope so it sits evenly, then let it cure fully before mounting. Install floating brackets or a rail behind the shelf, keeping the shelf face clean and free of squeeze-out. Finish by trimming any rope ends neatly and applying a light clear coat to seal the rope where it meets the wood.
Use jute with a tight weave so it doesn’t shed fibers when steam hits.
Don’t skip sealing the rope — unsealed rope gets fuzzy and dark in bathrooms.
15. Weathered gray shelves with brass peg-style supports
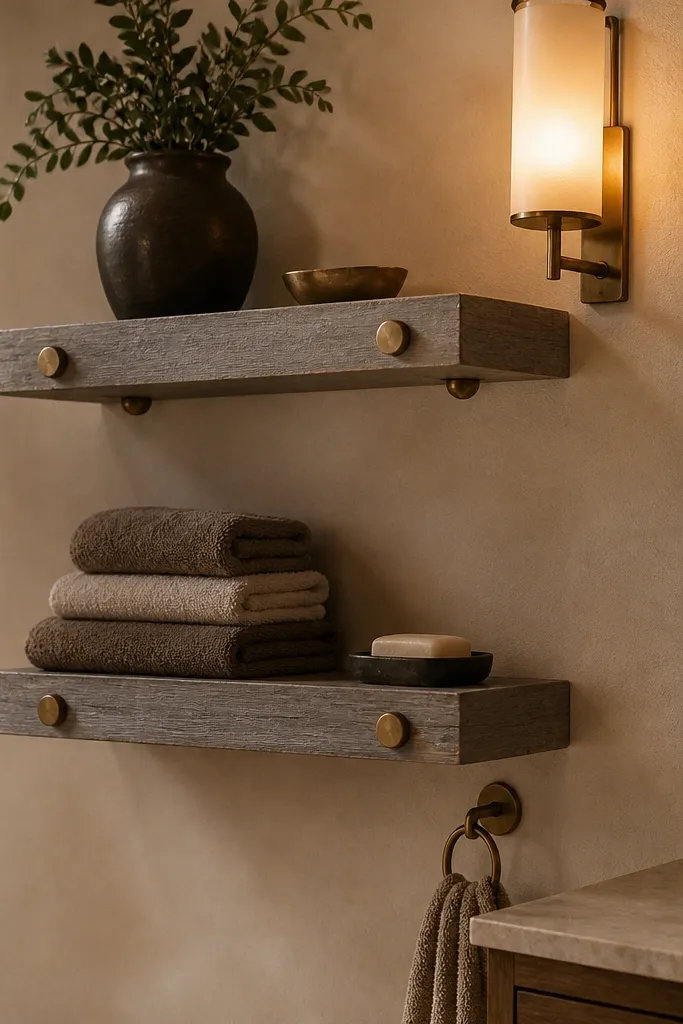
Weathered gray gives a cozy, lived-in look that pairs well with brass faucets and warm lighting. Peg-style supports are visually interesting, and brass makes them feel warm instead of industrial. This is a good option if you want the hardware to be part of the design rather than hidden. Use these shelves for a small stacked arrangement: folded hand towels, a soap dispenser, and a single framed photo or print. The shelf finish matters here because the weathered look hides minor wood grain variation and looks consistent in small spaces.
Apply a weathered gray finish by layering gray stain and then wiping back for a controlled fade, followed by a clear protective topcoat. Install brass peg-style supports at equal spacing so the shelf looks symmetrical. Pre-drill shelf screw holes and attach the shelf boards to the pegs using the manufacturer hardware or hidden screws. Seal around the peg attachment points to protect cut edges from bathroom moisture.
Editor's noteMatch the peg spacing to your shelf length so the pattern looks intentional, not random.
Skip thisDon’t use shiny brass if your fixtures are matte — the mismatch reads messy fast.
16. Staggered-height shelves with a narrow central runner
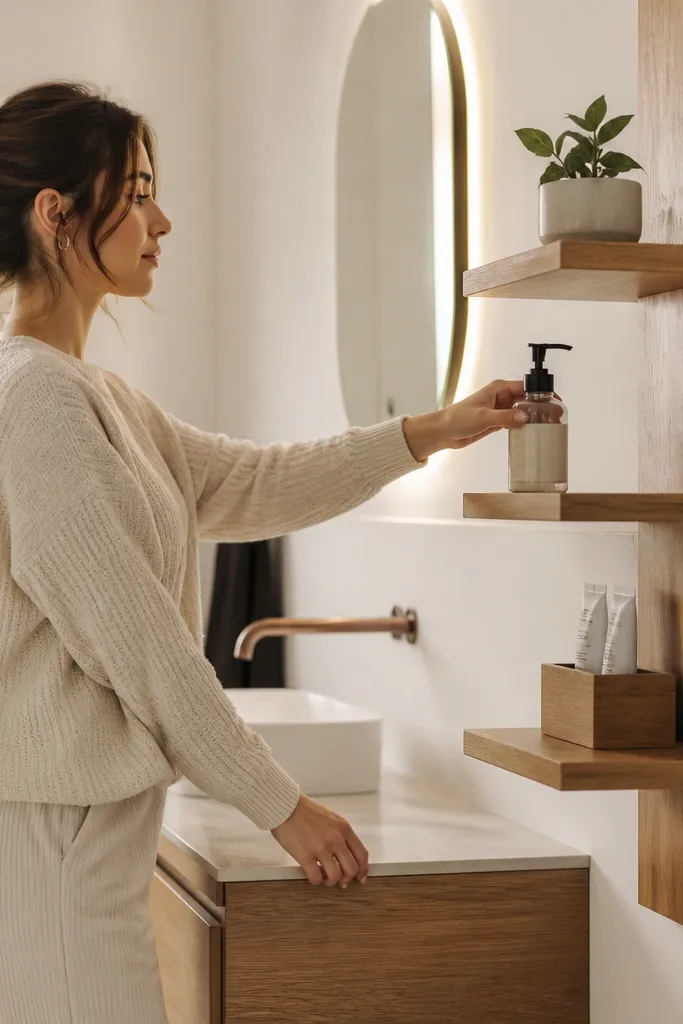
Staggered-height shelves look cozy because they create a rhythm instead of a flat row. Adding a narrow central runner line makes the staggered pieces feel connected, like a single designer set. This is ideal for very small bathrooms where you want storage but also want the wall to feel dynamic. Place items like a small tray, a candle jar, and two matching bottles so the staggered heights look intentional. It’s visually striking without needing extra width.
Cut three shelves to the same depth (about 7 inches) but different lengths or same lengths, depending on your wall. Seal and finish everything first, then mark bracket points with a stagger plan so each shelf has consistent vertical spacing (about 8 to 10 inches). Install a narrow central runner board to anchor the look, then mount each shelf to the runner with hidden fasteners. Finish by checking that all shelf fronts align at their edges so the stagger feels crisp.
Editor's noteUse painter’s tape to map the stagger heights on the wall before cutting anything — it prevents spacing mistakes.
Skip thisDon’t stagger randomly — uneven spacing looks accidental and makes the wall feel smaller.
17. Beige linen-look painted shelves with hidden metal brackets
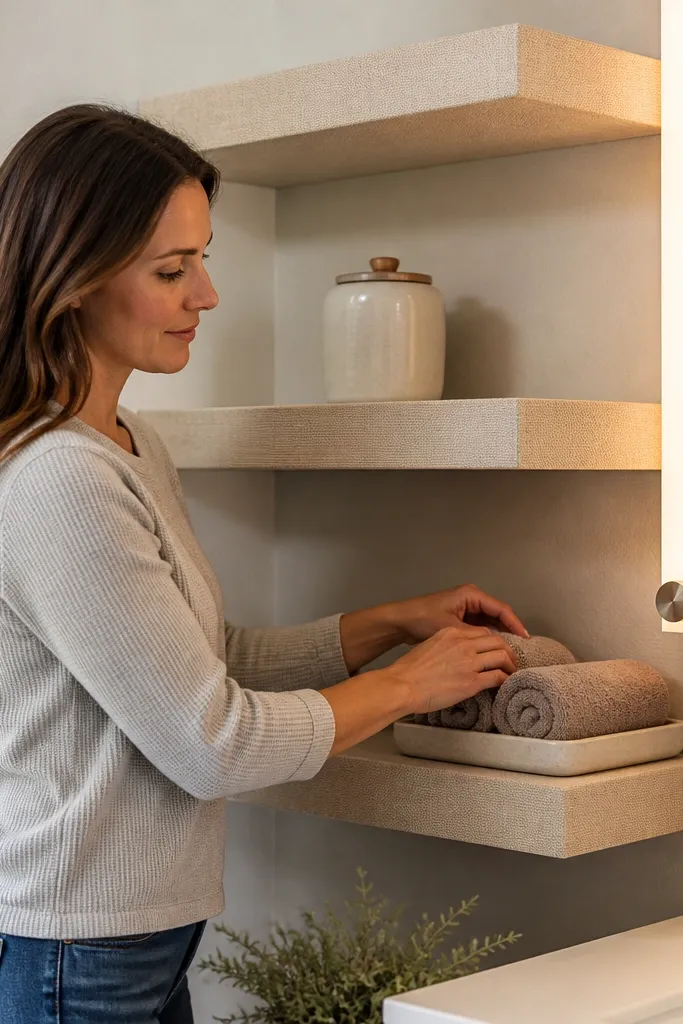
If you want cozy without going dark, beige linen-look paint gives warmth and texture without looking dusty. The key is the finish: a paint technique that dries slightly textured makes the shelves look soft and forgiving in bathroom lighting. Hidden metal brackets keep the underside clean, so the shelf stays the focus. This works great for small bathrooms with white tiles where you need a warm contrast. Style with a matching set of matte ceramic containers for a calm, photogenic shelf line.
Sand the shelf boards and apply a primer, then paint with a cabinet-grade paint in beige. For the linen look, use a stippling or rag-rolling technique lightly so it doesn’t become patchy — keep strokes consistent across the face. After curing, install shelves with hidden brackets and stainless screws, then seal with a satin clear coat that won’t turn glossy. Caulk tiny gaps around bracket entry points so steam can’t work into raw edges.
Editor's noteTest the linen technique on scrap wood because bathroom lighting changes how texture reads.
Skip thisDon’t use flat paint — it scuffs and absorbs moisture around high-touch areas.
18. Curved-front floating shelves for a softer look
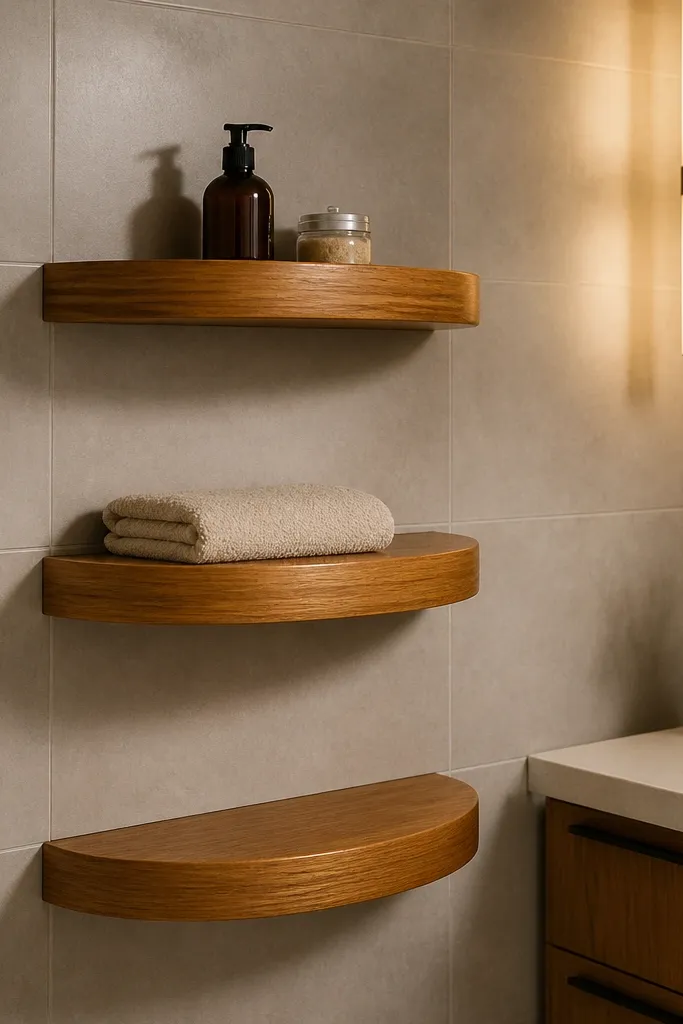
Sharp corners make small bathrooms feel harsher. Curved-front shelves soften the whole wall and look more boutique, especially when you use a warm wood stain like honey oak or walnut. The rounded edge also makes styling easier: bottles and jars sit without catching on a sharp lip, and you get a cleaner, gentler profile in photos. This is a smart choice if you want cozy and safety-minded around kids or tight walkways. It’s also a good DIY challenge that looks worth the effort.
Use a router to round the front edge with a consistent radius, then sand smooth and seal all surfaces. Cut shelves to your chosen depth (about 7 to 9 inches) and finish with a water-resistant topcoat. Install bracket hardware and level the shelf run, then mount the shelves with pilot holes to keep the wood from splitting near the rounded edge. After mounting, inspect the rounded corners for any unsealed spots and add one more thin coat.
Editor's noteRound edges slightly smaller than you think — too much curve makes shelves look shallow and less stable.
Skip thisDon’t skip edge rounding sealing — water collects in any unsealed micro-gaps.
19. Floating shelves built into a slim mirror frame
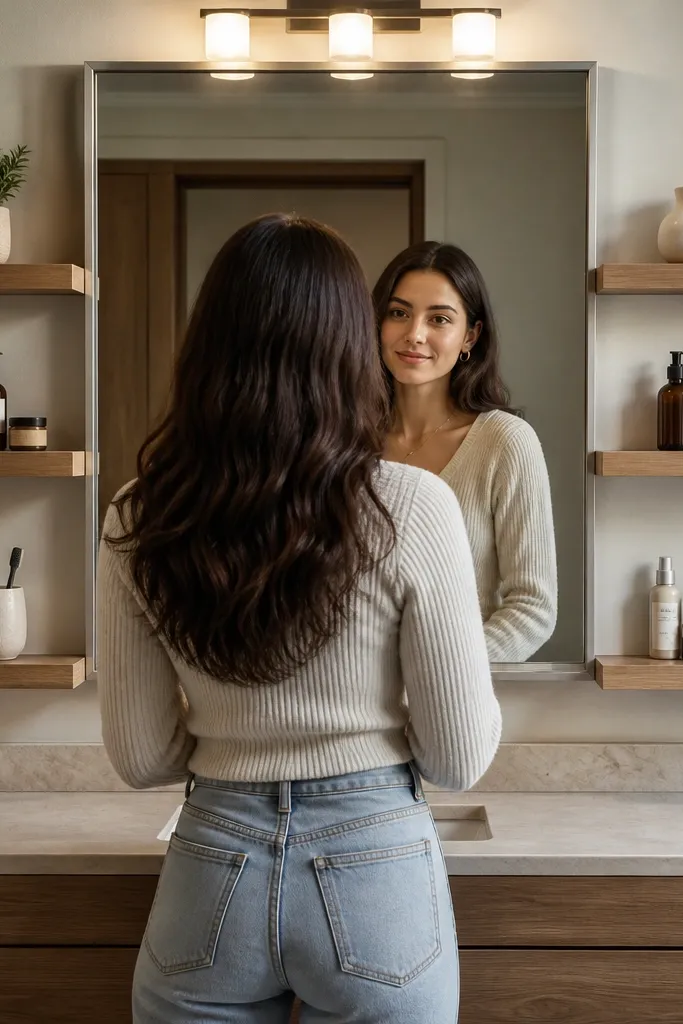
A mirror frame with built-in shelves is the most space-efficient “cozy” upgrade because it uses vertical wall real estate you already own. The shelves on both sides create symmetry, so the bathroom looks intentional even when the counter is busy. This is perfect for small bathrooms where you need storage but also need more light and reflection. Style the side shelves with matching small decor or everyday items so it looks curated, not cluttered. The look is modern-cozy and reads expensive because everything aligns with the mirror.
Choose a mirror size and cut shelf boards to match the side openings, keeping shelf depth around 5 to 7 inches so it doesn’t block mirror coverage. Seal and finish the shelf boards, then attach them to a slim internal frame that supports mounting. Mount the mirror frame to wall studs or strong anchors, then screw the shelves from inside the frame so the underside looks clean. Seal any gaps where the frame meets the wall to protect against moisture and vibration.
Keep shelf depth consistent on both sides so the mirror stays the focal point and the shelves look balanced.
Don’t mount to drywall only — mirror weight plus shelf load needs stud or proper anchors.
20. Tall narrow shelves with staggered mini ledges for toothbrushes
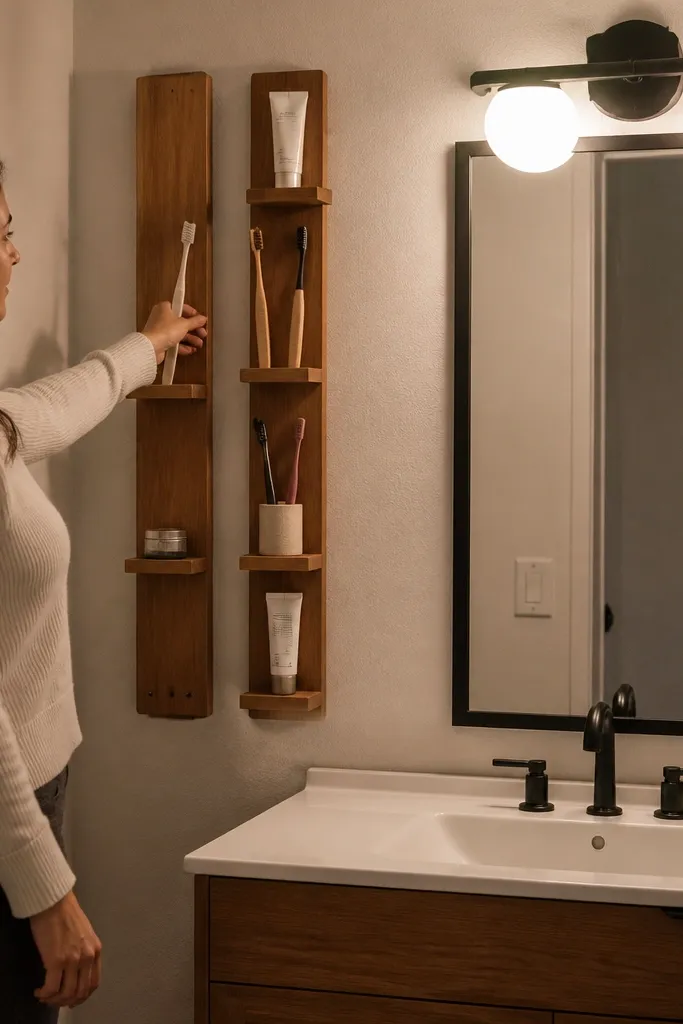
This idea is for bathrooms where counter space is basically gone. Tall narrow shelves with mini ledges let you keep toothbrushes, toothpaste, and small skincare items off the sink while still keeping them easy to grab. The cozy look comes from warm wood and a clean vertical arrangement, which reads organized instead of cramped. It also helps with splash zones because items sit higher and back from the sink edge. In photos, the vertical storage line looks stylish and tidy.
Build a vertical shelf strip with multiple mini ledges, each about 2 to 3 inches tall, and keep the total width narrow (around 10 to 12 inches). Seal every ledge and edge, then mount the unit using brackets or a vertical rail anchored to studs. Arrange ledges so toothbrushes are on one level and toothpaste or small bottles are on another, leaving enough gap to avoid crowding. Finish by adding a small lip or textured liner on each ledge so items don’t slide.
Editor's noteUse a liner with grip texture so tubes don’t slowly creep forward in humidity.
Skip thisDon’t make ledges too shallow — toothbrush bases tip if there isn’t enough surface.



