
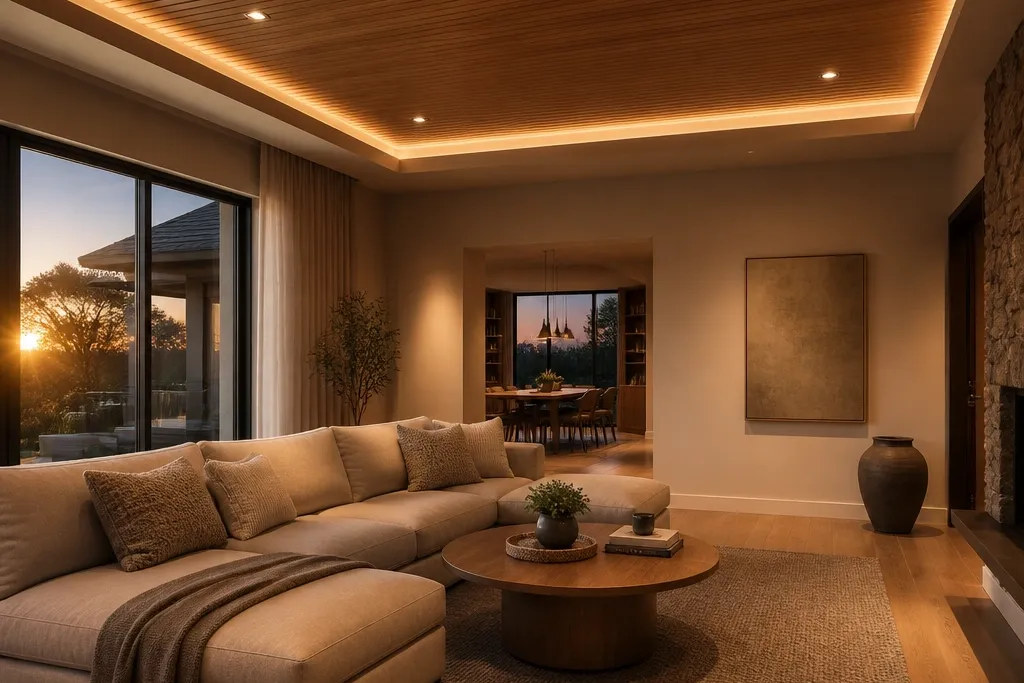
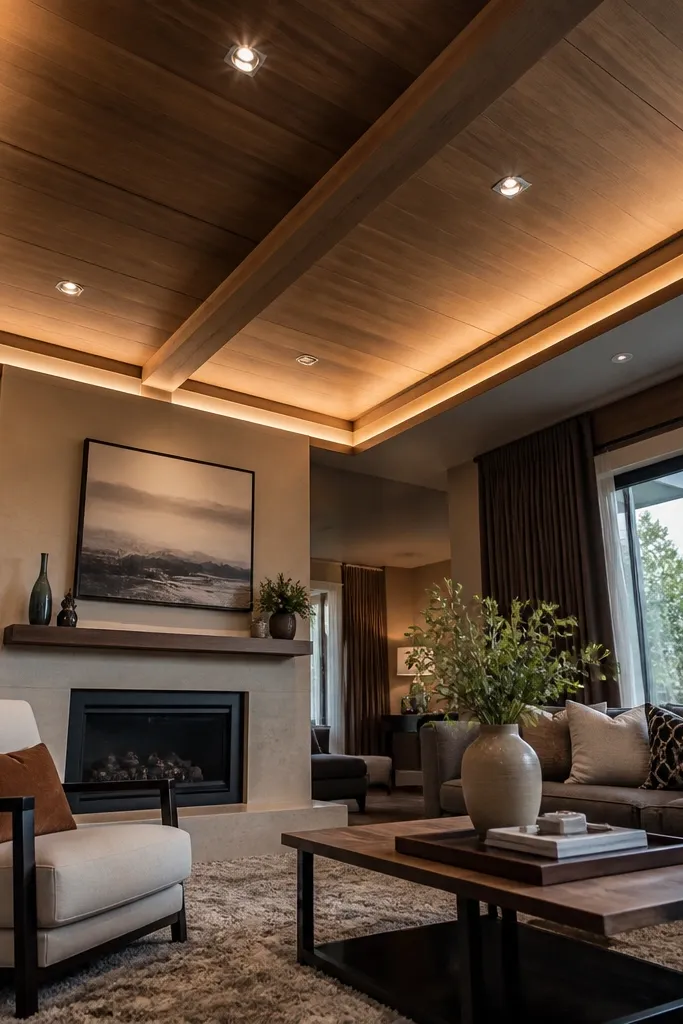
1. Flush wood slat ceiling with a thin perimeter cove
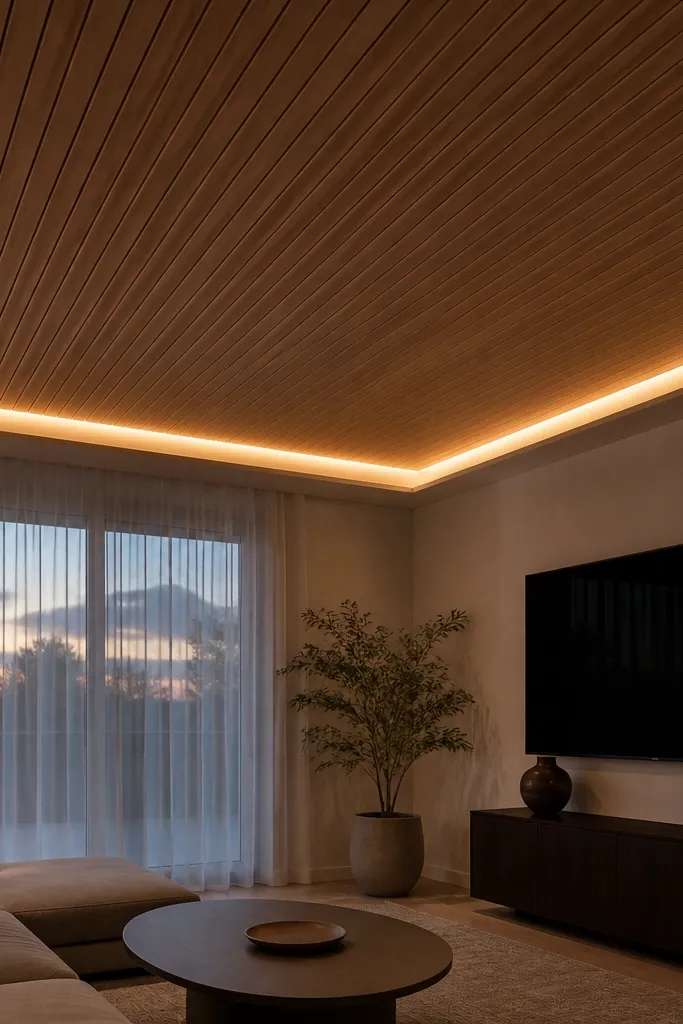
This is the cleanest way to get a cozy False Ceiling Living Room without eating headroom. The flush slats create a warm texture across the entire ceiling, and the thin perimeter cove adds a soft glow that wraps the room. Use wood-tone stain or a wood-look finish so the slats read warm instead of plastic. This look suits living rooms where you want calm lines and a tidy, modern feel that still feels inviting. It’s also one of the fastest wooden false ceiling options because the layout is repeatable.
Start by marking a level reference line around the room at your chosen drop height. Install ceiling battens or metal rails with consistent spacing, then fix the slat backing so every slat lands straight on the grid. Leave a 15-25 mm perimeter gap for the cove, then mount the slats flush to the ceiling plane. Finally, install an LED strip behind the cove (2700K), seal the edge trim, and finish the slats with a matte wood stain or wood-tone paint.
Test-fit three slats in a row before you commit — adjust the rail spacing until the gaps look even.
Don’t run the LED strip where it reflects directly into the room — angle it so light washes the wall, not the ceiling.
2. Central tray ceiling with warm wood panels and recessed downlights
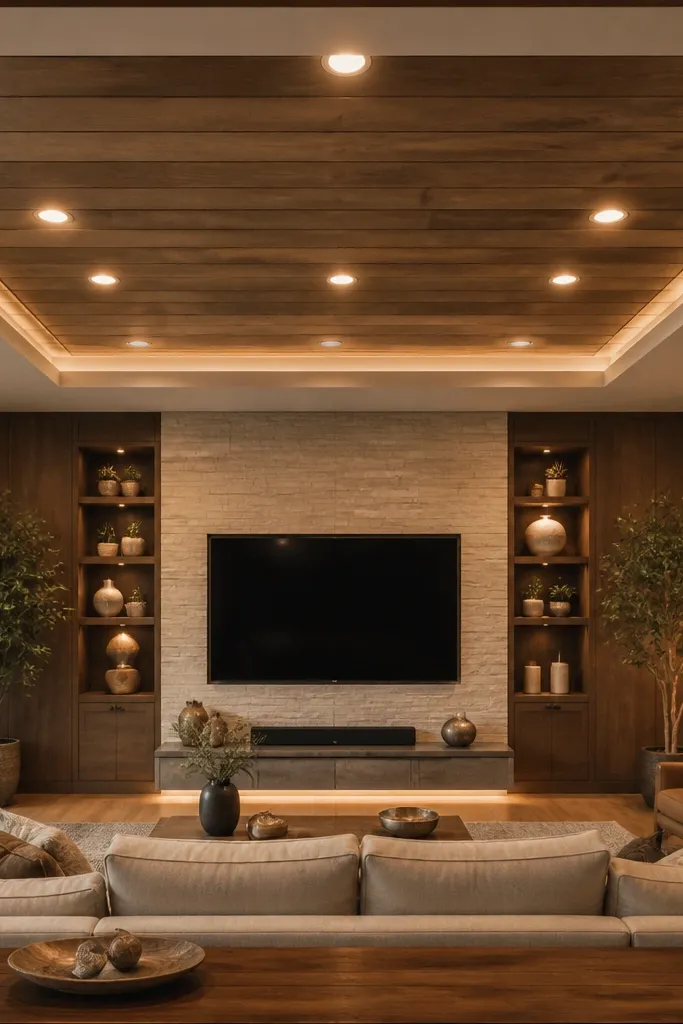
A central tray instantly makes a living room feel “held together.” The wood panels inside the tray give warmth and texture right above your seating, while the recessed downlights keep the glow controlled. Choose a tray that’s about 60-70% of the room’s width so it frames the space without shrinking it. This works great if your living room has a single main light you want to replace with a cleaner, layered look. The result reads cozy because the ceiling draws the eye upward and softens the room’s edges.
Editor's noteUse a cardboard template for the downlight cutouts so you don’t chip panel edges.
Sketch your tray size first: keep the tray border width around 80-120 mm and center it over the main seating area. Build a stepped frame using metal channels or timber battens: one level for the tray perimeter and another for the outer ceiling. Clamp and screw wood panels into the tray frame, leaving a small expansion gap between panels. Recess downlights into the tray panels or mount them through the backing, then finish with a wood stain and install warm bulbs.
Skip thisDon’t make the tray border too wide in a low room — it will feel heavy and reduce headroom.
3. Wood beam false ceiling with a recessed LED channel between beams
Beam styling gives you that cabin-cozy look without needing a full wood ceiling. You install a grid of beam “caps” over a frame, then place LEDs in the channels between them so the glow looks like it’s coming from the architecture. This is visually strong because beams create straight, photogenic lines that help the room feel designed. It suits living rooms with a sofa wall you want to anchor — the beams draw attention upward and center the composition. The glow between beams also hides minor ceiling unevenness.
Editor's noteSpray a thin coat of primer on beam edges before installation — it stops the wood-tone finish from looking patchy.
Set out beam spacing based on your ceiling width: keep spacing consistent, aiming for 400-600 mm between beam centers for a clean rhythm. Build the main frame first, then attach beam soffit boxes using lightweight plywood or pre-primed wood strips. Leave a 20-30 mm recess where the LED strip sits, and install a diffuser so light is even. Finish the beams with stain or paint, then run 2700K LED strips and wire them to a dimmer for mood control.
Skip thisDon’t skip a diffuser — bare LED strips create bright dots and kill the cozy look.
4. Herringbone wood ceiling panels in a shallow drop
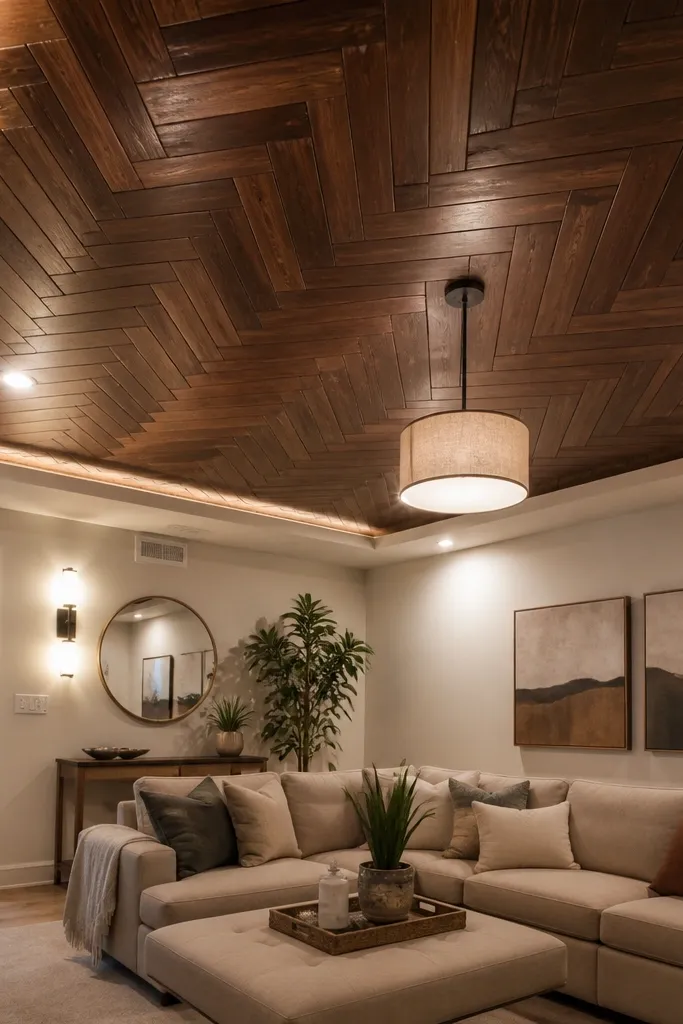
Herringbone reads warm and intentional because the pattern catches light at multiple angles. In a shallow false ceiling drop, it adds cozy character without turning the room into a construction project. The key is keeping the pattern tight and the finish consistent so it looks like a single design, not random planks. This works well for living rooms that already have neutral walls and you want the ceiling to be the hero. It also looks great in photos because the pattern makes highlights and shadows.
Editor's noteDry-lay the first 10 planks on the floor and measure the final width before you cut the rest.
Choose a plywood thickness you can handle easily, like 6-9 mm for the top layer, and build a shallow drop frame around 60-90 mm. Mark a centerline and dry-lay a small section to lock your angle; aim for a 45-degree herringbone with even plank widths. Cut planks, then screw and glue them to the panel backing so the pattern stays aligned. Sand, prime, and finish with a matte wood stain, then install LED spotlights around the perimeter or recessed in the drop.
Skip thisDon’t mix plank widths — even small variation makes the herringbone look messy fast.
5. Wood slat ceiling with alternating recessed strips
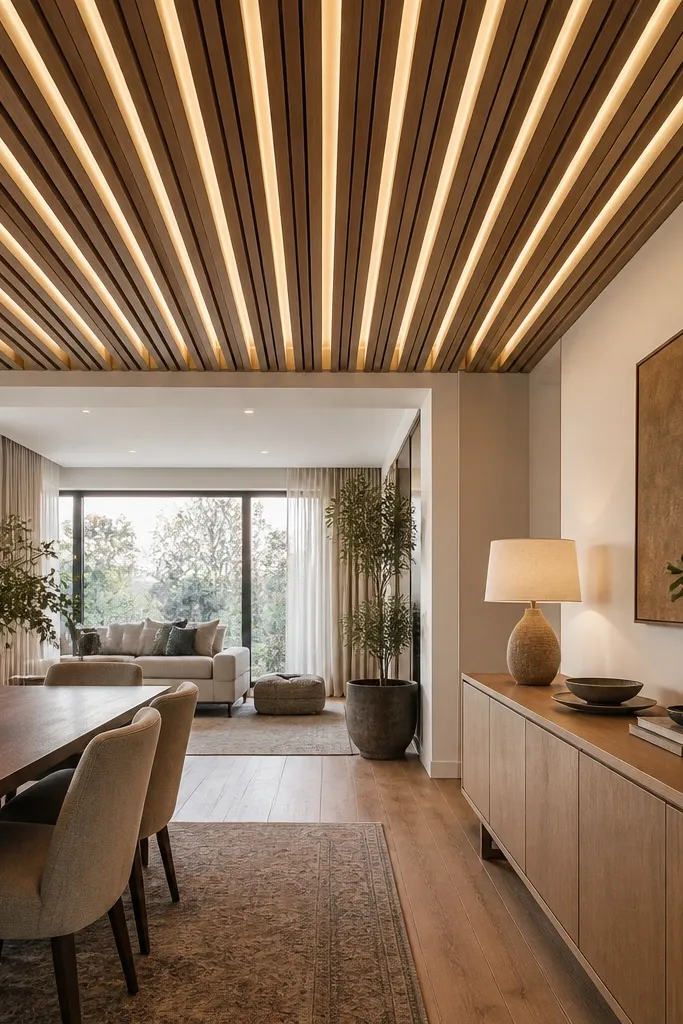
This design creates cozy contrast: wood where you want warmth, recessed strips where you want glow. The alternating pattern makes the ceiling look taller and more dimensional, even in smaller living rooms. It’s also forgiving because the recessed strips hide minor framing differences. Keep the wood slats narrow and evenly spaced so the rhythm looks crisp. This is a great pick if your living room is long and you want the ceiling to visually “organize” the space.
Editor's noteUse the same spacing spacer for every slat — it’s the difference between boutique-looking and DIY-looking.
Plan alternating bands: for example, 50-70 mm wood slats and 80-120 mm recessed light bands. Frame the ceiling with rails, then install backing boards for both the slat and recessed sections. Mount slats flush with the main plane, and create a recessed channel for LEDs with a diffuser. Finish the wood bands with a warm matte stain, then install 2700K LED strips and wire for independent dimming if you want mood control.
Skip thisDon’t place the LED strip too close to the opening edge — it will look harsh instead of cozy.
6. Round medallion ceiling with wood veneer segments
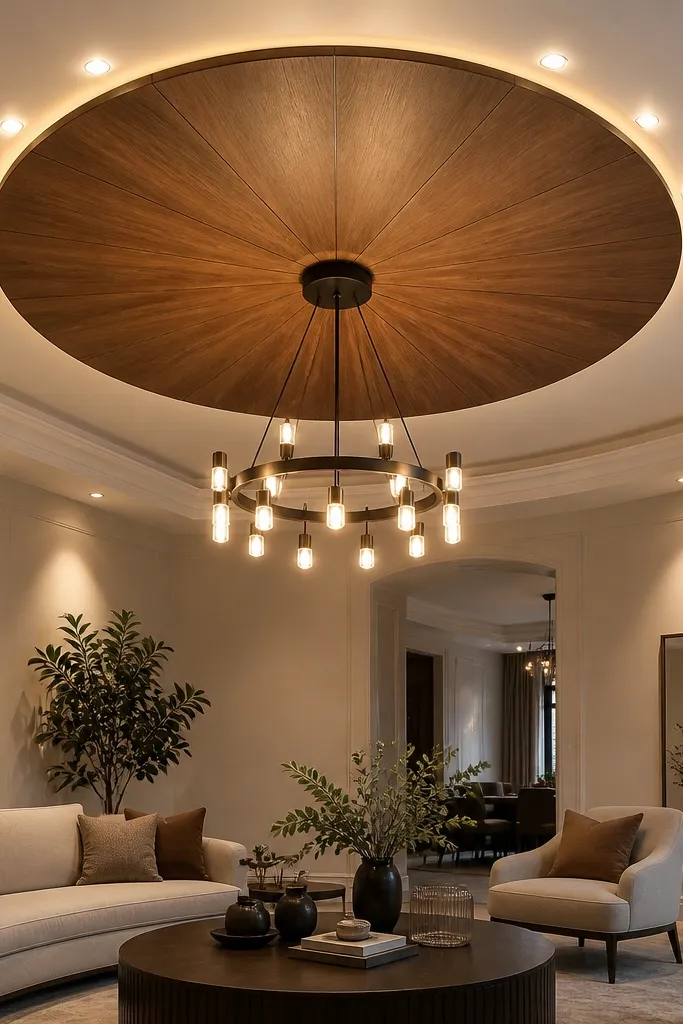
A round medallion gives you instant softness. Wood veneer segments inside a circle read warm, and the circular shape breaks up straight lines in the room. This works especially well if your living room has a round chandelier base or a circular wall feature you want to echo. Keep the medallion centered and add small recessed lights around the outer ring for a cozy glow. The look feels curated because the pattern is intentional, not random.
Pick a medallion size that’s about 50-65% of your main seating area width. Build a circular frame using angled timber strips or bendable plywood for the ring, then cover it with veneer segments cut to match the radius. Create a shallow drop of 50-80 mm for the medallion so it stands out from the ceiling plane. Install recessed ring lights or LED strips behind a diffuser around the circle, then finish with clear matte varnish to protect the veneer.
Trace your circle on cardboard first and test fit it against the ceiling plane and existing fixtures.
Don’t use glossy clear coat — it reflects light and makes veneer look cheap.
7. Tongue-and-groove wood ceiling boards with a dark stain
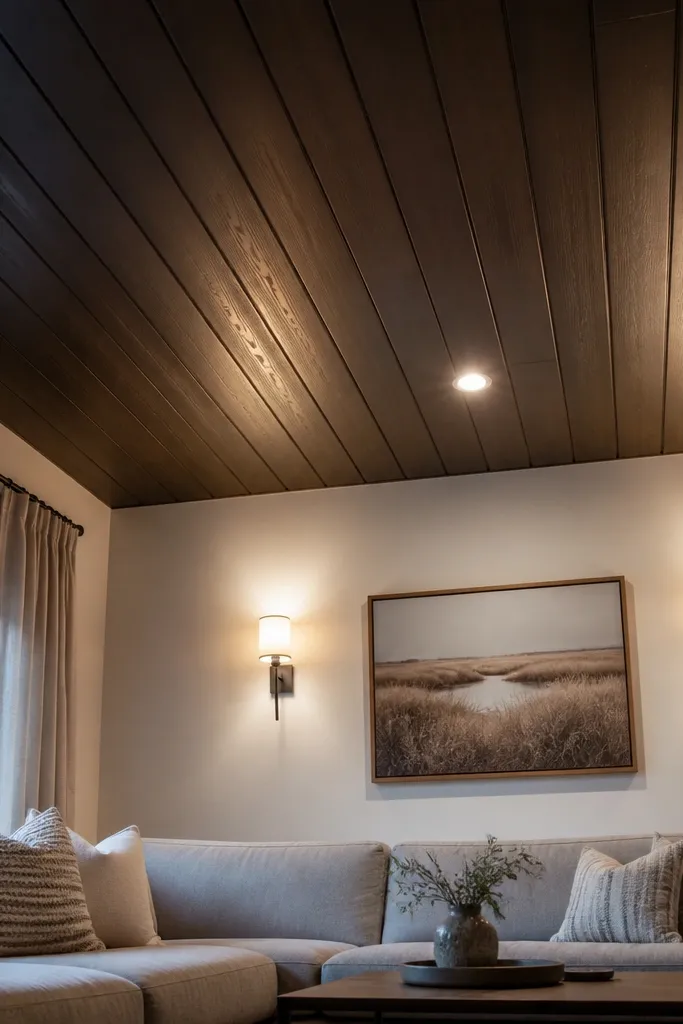
If you want cozy that feels grounded and warm, dark tongue-and-groove boards do it. The grooves hide tiny gaps and make the ceiling look like real built-in wood. Dark stain also makes warm lighting feel richer, so your living room looks inviting even at night. This works best when your walls are light — think warm white, cream, or beige — so the ceiling doesn’t shrink the room. It’s a bold look, but it still reads cozy because the texture is natural and continuous.
Build your frame with strong cross supports so the boards don’t flex. Install tongue-and-groove boards perpendicular to the room’s main sightline so the grooves guide the eye. Use a dark stain in thin coats, then wipe off excess and let it cure fully. Add LED downlights or an LED strip in a shallow perimeter cove, and seal with a matte clear coat if you want extra durability.
Pre-stain the boards edges too — the groove areas blot differently than flat faces.
Don’t skip a solid frame — thin battens cause board sag and visible dips.
8. Wood panel ceiling with a geometric grid and warm backlighting
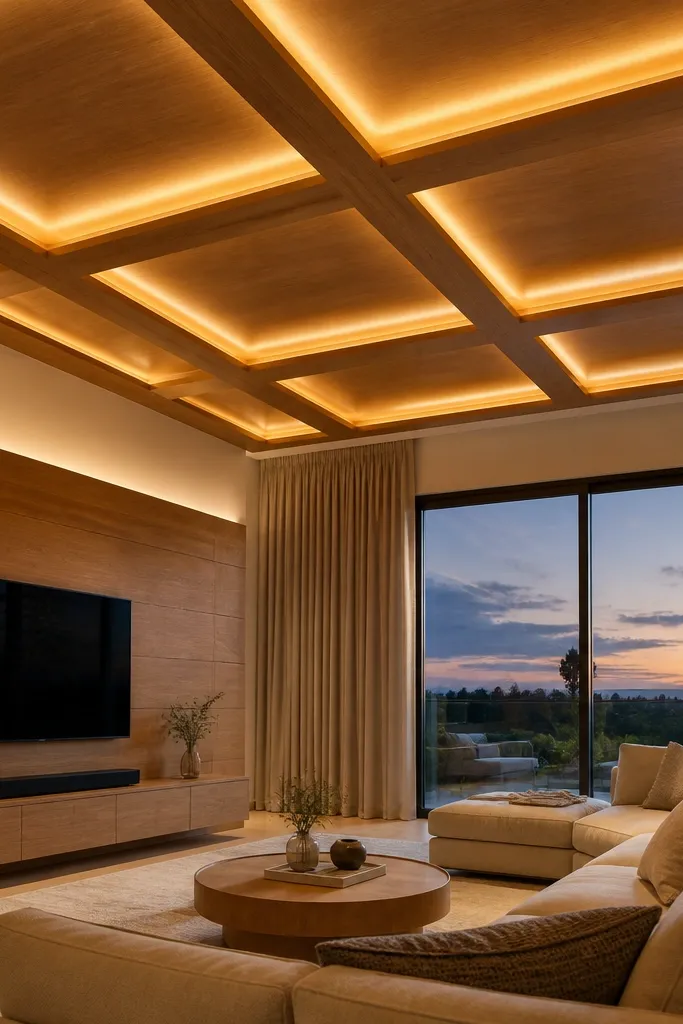
This one is for people who want cozy but also want it to look designed. A geometric grid gives you crisp lines, while backlighting makes the wood sections glow softly instead of looking flat. The trick is to keep the grid proportions balanced; too small and it looks busy, too large and it looks unfinished. This works well in modern living rooms with clean furniture lines. It’s also very photogenic because the backlight creates a halo effect in each section.
Editor's noteUse a diffuser strip that matches the light pocket width; it prevents hotspots in each cell.
Plan a grid with consistent cell sizes, like 300-450 mm squares or rectangles. Build a ceiling frame first, then install backer boards and internal dividers to create the light pockets. Mount wood panels within the grid openings so they sit flush with the front plane. Install LED strips behind the dividers with a diffuser, then finish the wood with a warm satin or matte coating and test brightness before fully sealing.
Skip thisDon’t overload the grid with too many small sections — the ceiling starts to look like false work.
9. Wood slat ceiling with a central wave-shaped LED channel
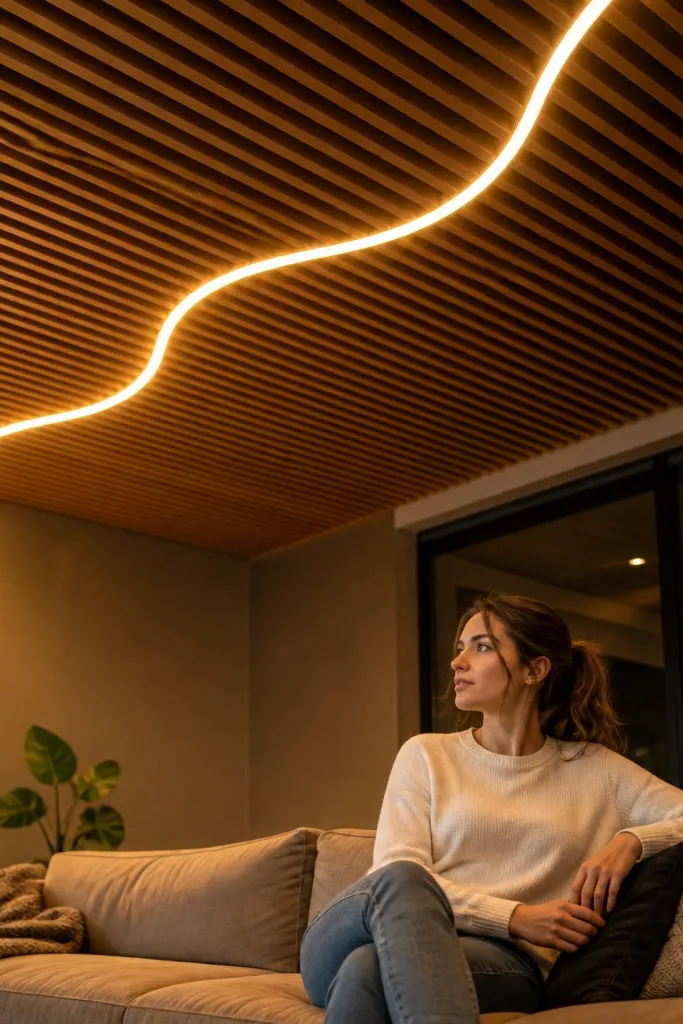
A wave channel makes the ceiling feel softer than straight beams, which is exactly what you want for cozy. The wood slats provide warmth and order, and the wavy LED line adds a gentle, “moving” glow across the room. This is a great choice when you want something more interesting than a standard tray but don’t want heavy carpentry. It also looks good on camera because the wave creates a clear highlight line. Pair it with neutral walls so the ceiling pattern owns the room.
Mark a centerline and draw a wave path with a simple template so the curve is smooth. Frame the ceiling with rails for the slats, then build a narrow recessed channel along the wave path. Install LEDs inside the channel with a diffuser, keeping the light line even along the curve. Mount wood slats flush across the rest of the ceiling, then stain or paint the slats in a warm tone and seal.
Make the wave template out of scrap MDF and trace it twice before cutting the channel frame.
Don’t make the wave too tight in a small room — it turns into a zigzag instead of a gentle curve.
10. Wood-and-plaster ceiling combo with perimeter lighting
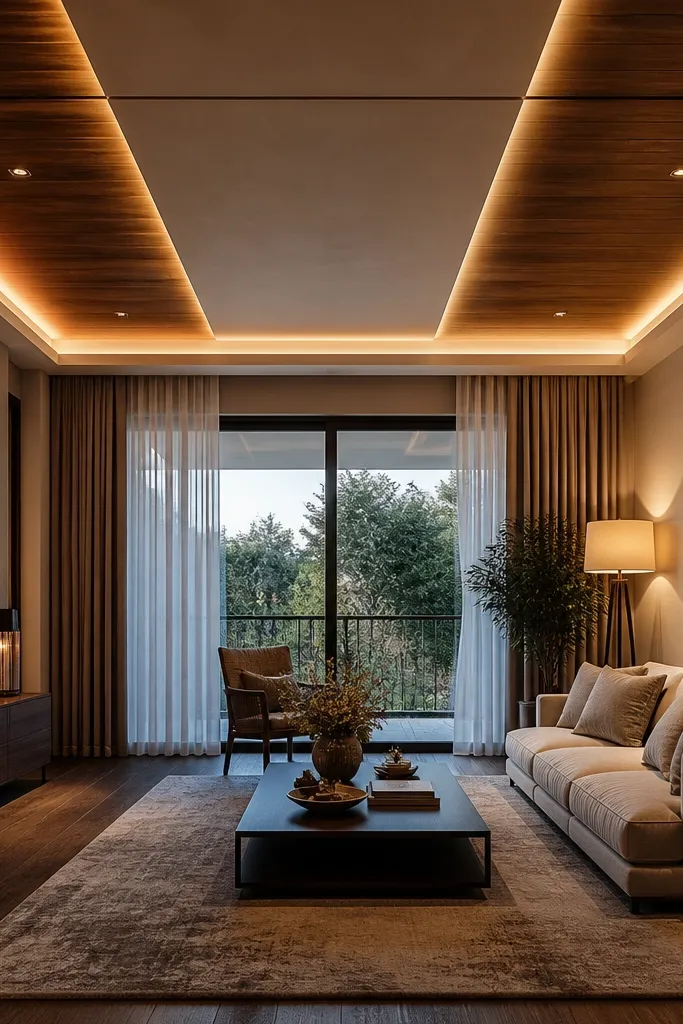
Mixing wood with plaster panels gives you cozy contrast and hides imperfections. The wood areas give warmth and texture, while smooth plaster makes the room feel clean and modern. Perimeter lighting then ties it together by creating a gentle halo around the edges. This is a smart approach if your ceiling has existing unevenness and you want a forgiving finish. It also lets you control where the wood sits so you don’t cover the whole ceiling if you’re nervous about cost.
Editor's noteUse a shadow-gap trim between wood and plaster so the transition looks crisp.
Install a frame for both wood and plaster zones, using two backing types depending on your materials. Decide on a pattern like wood rectangles in the center and plaster around them, or vice versa. Fix plaster boards for the smooth parts and wood panels for the textured parts, then align edges so the trim lines look straight. Add an LED strip in a perimeter channel, finish wood with a warm matte coating, and paint plaster in a warm white.
Skip thisDon’t skip priming plaster — unprimed plaster sucks paint and looks patchy under LED light.
11. Reclaimed-look wood panel ceiling with matte clear coat
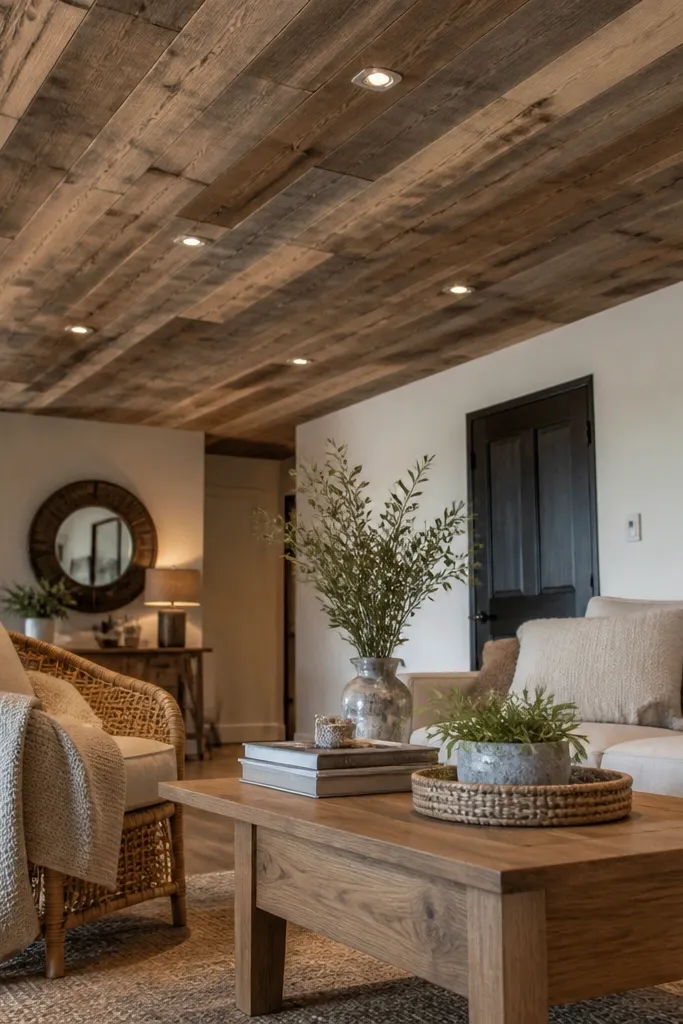
Reclaimed-look panels make a living room feel lived-in and cozy without building a full rustic ceiling from scratch. The beauty is in the variation, but the build should still be tight: consistent board width, clean joints, and a matte clear coat so it doesn’t glare. This works best in cozy living rooms with natural textures like jute rugs, linen curtains, and warm-toned wood furniture. The ceiling becomes a warm visual anchor and hides minor DIY framing errors better than uniform planks.
Editor's noteBefore installing, lay three rows on the floor and pick a mix that balances dark and light boards.
Choose panels with pre-milled edges so the joints align; warped panels cause gaps that show under backlighting. Frame the ceiling and attach a smooth backing, then install the panels in a grid or staggered layout while keeping board width consistent. Sand only lightly if needed, then apply a matte clear coat to lock the tones. Add perimeter LED lighting in a shallow cove to bring out the reclaimed variation without making it look shiny.
Skip thisDon’t use glossy clear coat — reclaimed looks cheap when it reflects hard.
12. Wood veneer ceiling with a light geometric border
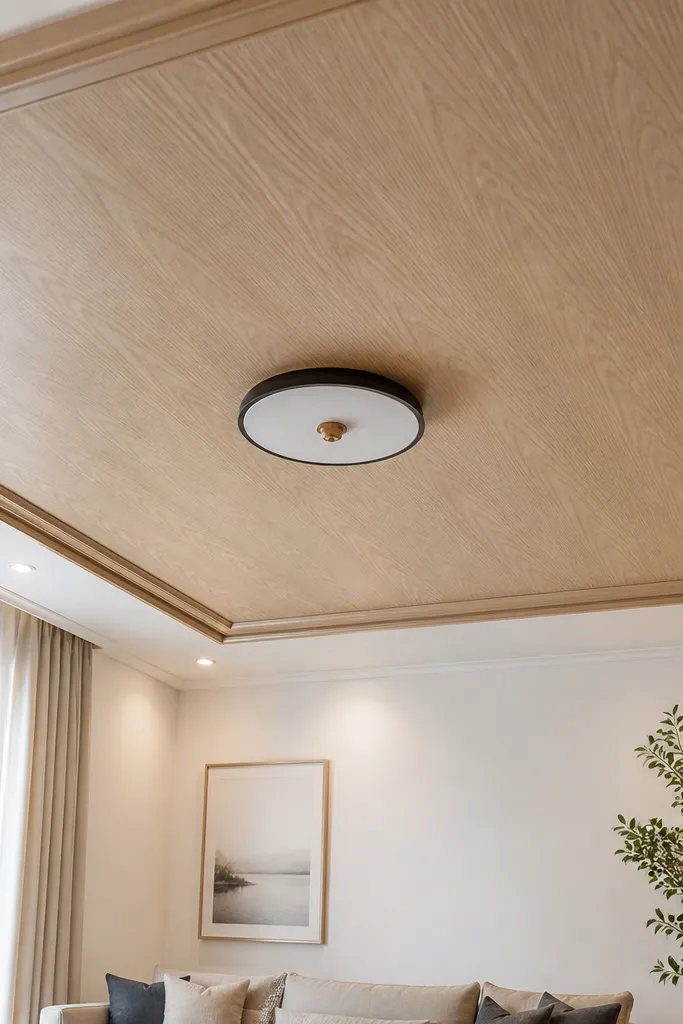
Wood veneer gives you the look of real wood grain while staying lighter than thick solid boards. The geometric border adds structure and keeps the ceiling from feeling flat, especially in rooms with simple wall finishes. This is a good pick if you want cozy but also want a refined, less bulky ceiling. The border can be as simple as a thin frame around a central field, and LEDs behind the border make the glow feel controlled. It looks upscale because veneer grain is the star.
Editor's noteGlue veneer in sections and use a roller — trapped air bubbles show up under LED lighting.
Build a flat false ceiling frame first and cover it with a smooth base board so veneer doesn’t telegraph imperfections. Cut veneer panels to fit the central field, then glue and press them evenly, trimming edges cleanly. Create a thin border frame using strips or trim, then add a shallow recess behind the border for LED strips with a diffuser. Finish with matte clear coat to protect veneer and keep reflections low.
Skip thisDon’t skip a flat backing — veneer follows bumps and makes the border look crooked.
13. Diagonal wood pattern ceiling with warm corner LED
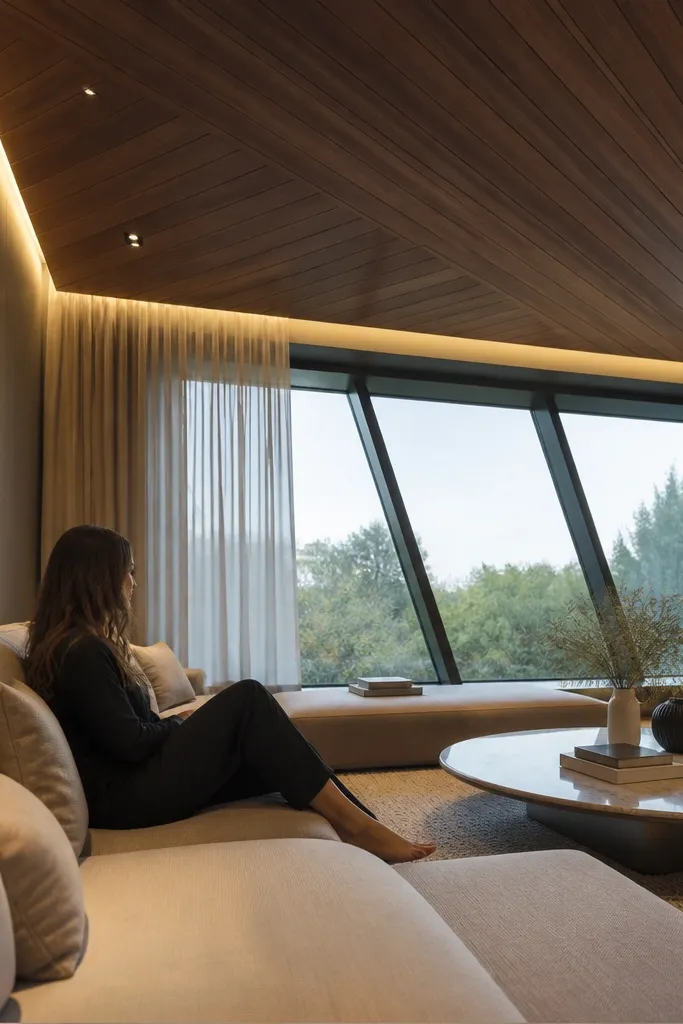
Diagonal wood patterns add motion and warmth. They break the “boxy” feel of standard grid ceilings and make small rooms feel more dynamic without adding extra depth layers. Corner LEDs then soften the edges and make the diagonal pattern glow more evenly. This style is great for living rooms with sharp angles or where the seating faces a corner. It’s also a practical way to hide slight framing misalignment because the diagonal lines visually blend it.
Editor's noteUse painter’s tape to map the diagonal pattern on the floor first; transfer the lines to the ceiling with chalk.
Pick a panel layout that uses consistent widths, then mark diagonal reference lines across your ceiling plane. Frame the ceiling with rails running perpendicular to your diagonal panels so the backing stays solid. Cut panels so the diagonal pattern hits the perimeter evenly, then install with consistent spacing and straight trim lines. Add LED strips in corner channels or a perimeter cove, and finish the wood with a warm stain plus matte top coat.
Skip thisDon’t eyeball diagonal alignment — one crooked line ruins the whole cozy effect.
14. Wood ceiling with slatted perimeter and recessed ceiling cove
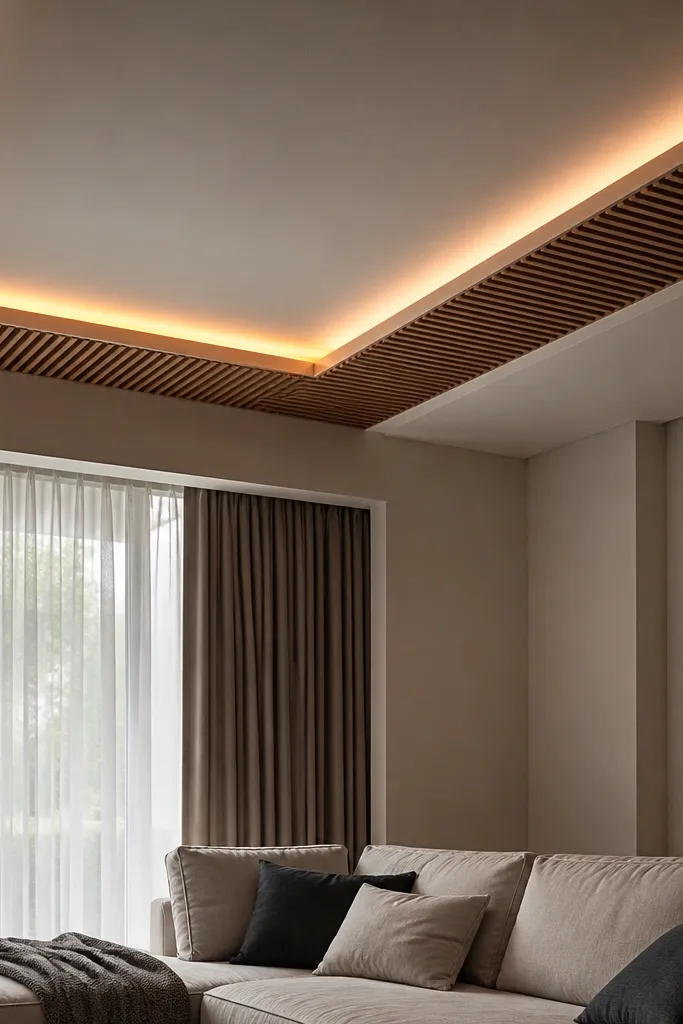
This design focuses on the edges, which is exactly how you make a cozy False Ceiling Living Room feel bigger. Keep the central ceiling plane simple, then wrap the room with wood slats near the perimeter. The recessed cove glow then creates a soft frame around the room, making the ceiling look intentional even if you keep the center clean. It’s a great option for renters who want a striking update without a complex central tray. The look is photogenic because the perimeter glow reads like architecture, not a DIY light strip.
Editor's noteKeep the slat ends aligned to a single starting point — it makes the perimeter look “designed.”
Frame the perimeter first at your chosen drop depth, leaving the center at a flatter level if you want that airy look. Install wood slats along the perimeter frame, keeping the slat height consistent so the edge looks crisp. Build a recessed channel behind the slats for the LED strip and install a diffuser. Finish the slats with a warm tone, then paint the center ceiling in a warm white to make the wood glow pop.
Skip thisDon’t put the LED strip where it shows through the slat gaps — the glow should be soft, not a visible line.
15. Two-tone wood ceiling with light central panels and dark beams
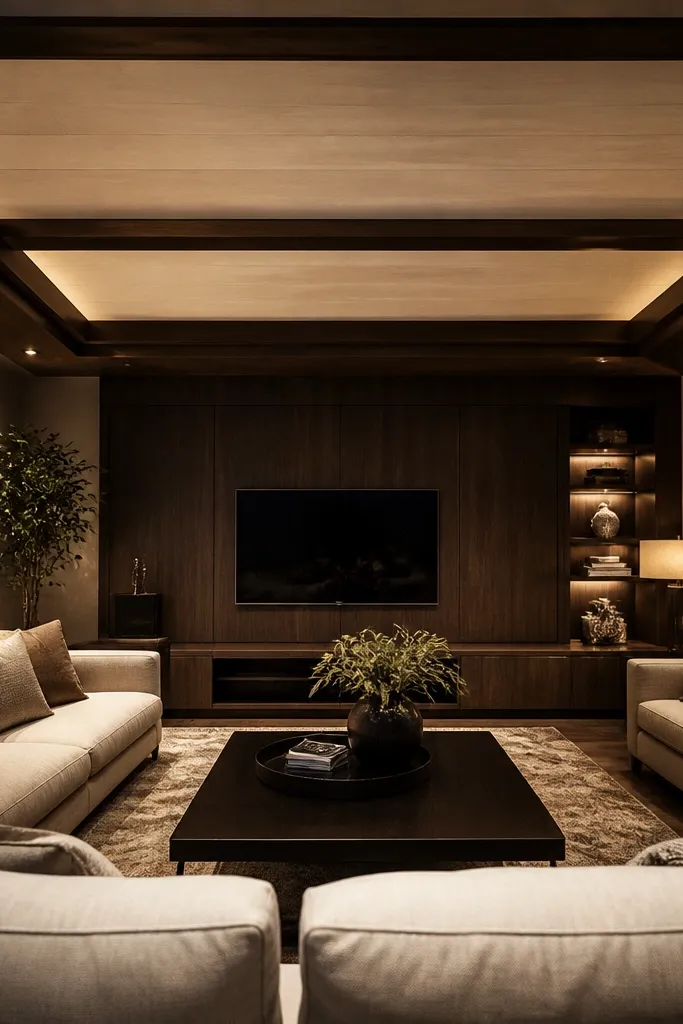
Two-tone wood makes cozy feel layered instead of flat. Light central panels keep the ceiling bright and airy, while dark beams add warmth and contrast above the seating area. This is the best approach when you want the cozy look but your room lacks natural light. The contrast also helps hide small alignment issues because the beams create visual boundaries. It reads modern and warm at the same time, especially with 2700K lighting that makes both tones look natural.
Editor's noteUse the same topcoat sheen on both tones so they age the same under light.
Choose your tones first: a light oak-like finish for the central panels and a walnut-like stain for the beams. Build the frame so beams land over strong backing, then install central panel sheets flush. Add beams as trim strips or soffit boxes, then stain them dark while keeping the central panels light. Install recessed downlights or perimeter LEDs, and seal both tones with matte clear coat to reduce glare.
Skip thisDon’t mix stains with different undertones (one too red, one too grey) — it will look mismatched under warm LEDs.
16. Wood lattice ceiling with open pockets for a soft glow
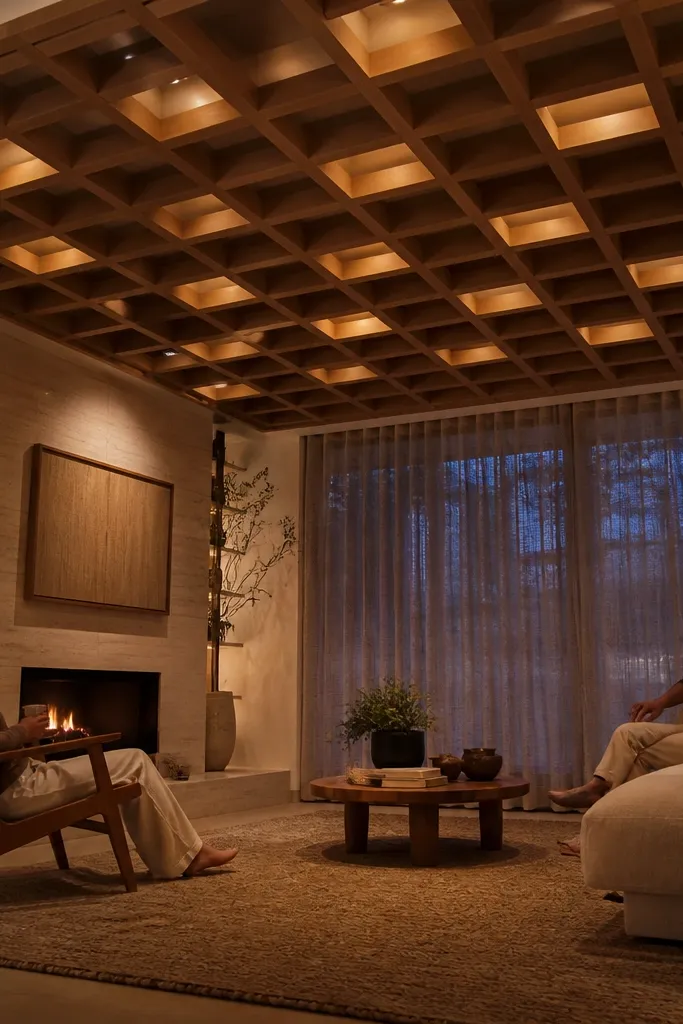
A wood lattice ceiling looks cozy because it breaks light into softer patches. You get warmth from the wood, and the open pockets make the glow feel airy instead of harsh. This is a standout for living rooms that already have plenty of texture — like woven curtains or a textured rug — because the ceiling adds another layer without becoming heavy. The lattice also helps visually hide the linear feel of downlights by spreading the light pattern. It’s photogenic because the geometry frames the room.
Editor's noteUse pre-cut jigs for strip spacing so every pocket is the same size.
Build a solid backing frame first, then create a lattice grid using thin wood strips. Leave open pockets between lattice lines so LEDs can sit behind and shine through. Install LED strips behind the lattice with a diffuser that prevents visible LED dots. Finish the lattice with a warm stain, then secure all joints so the lattice doesn’t flex when you adjust lights access.
Skip thisDon’t skip a diffuser behind the lattice — you’ll see bright points and it won’t look cozy.
17. Wood ceiling with recessed linear light bars
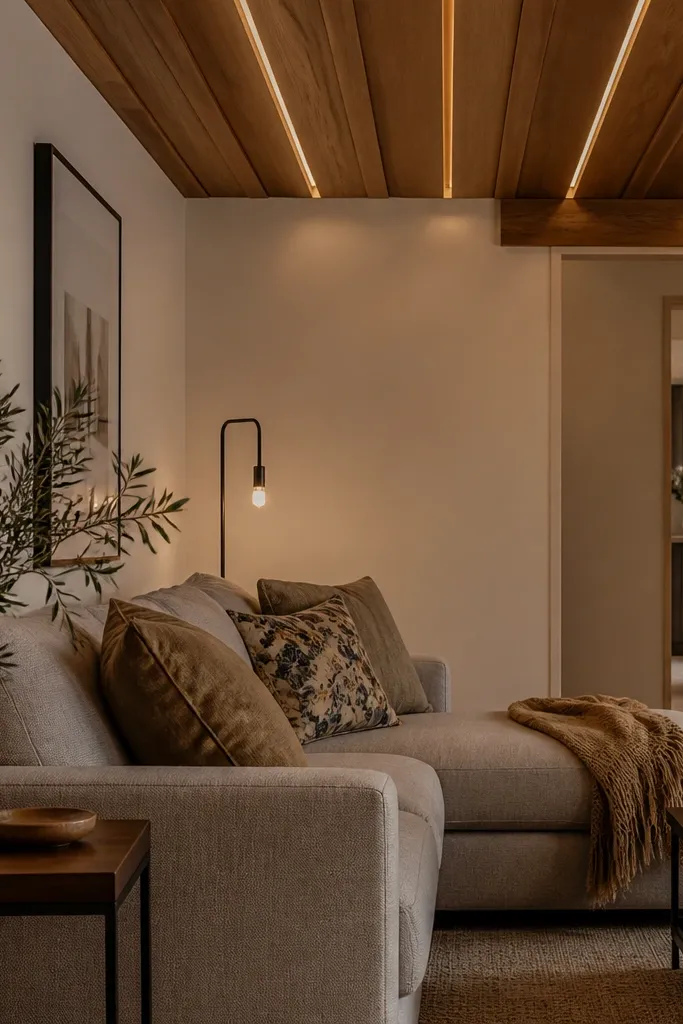
Linear light bars give cozy a modern, controlled look. The wood plane stays warm and matte, while the recessed bars create a soft, even glow across the room. This is ideal if you want a ceiling that looks good from multiple angles, including from the couch where you usually see the ceiling plane. Keep the bars parallel to the longest wall for a clean perspective. The result feels cozy because the light is diffused and consistent.
Editor's noteMake the bar channel depth consistent — uneven depth makes one side look harsher.
Plan two or three linear bars based on your ceiling width, spacing them evenly so they don’t look random. Frame the ceiling with rails, then install backing for the wood plane and separate backing for the recessed bar channels. Cut the wood facing to create the recessed slots, and mount LED strips with diffusers inside each bar channel. Finish with matte wood stain, then test the light distribution before you close the final trim.
Skip thisDon’t use high-lumen LEDs without proper diffusion — it turns into glare.
18. Wood ceiling paneling with a soft border and hidden LED strip
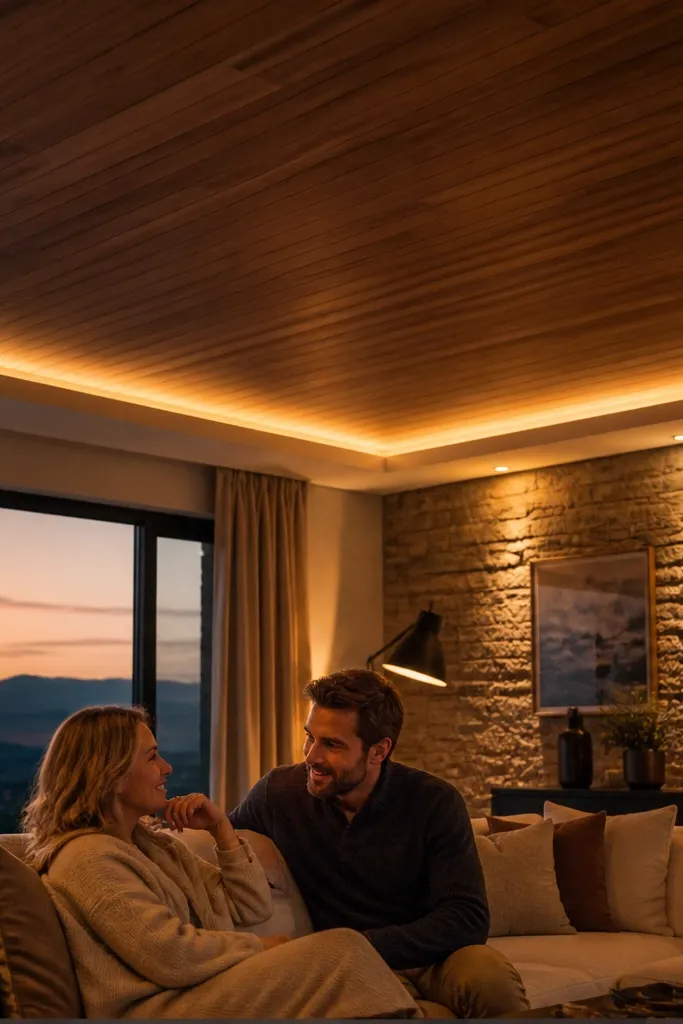
Hidden LEDs are the fastest way to make a false ceiling look professional. This design uses wood paneling across the ceiling, then a thin border that hides the LED strip so you only see glow, not hardware. It’s cozy because the light spreads evenly across walls and ceilings, making the space feel warm at night. This works for both modern and traditional rooms because the paneling style can match your wall finishes. It’s also DIY-friendly because the layout is straightforward.
Install a flat false ceiling frame and cover it with wood panel sheets or slats. Create a perimeter border using trim that leaves a concealed channel behind it for LEDs. Put the LED strip in the channel, add a diffuser, then mount the border trim so the strip stays hidden. Finish the wood with matte stain or paint, and aim the LED glow toward the wall for a soft wash.
Use a dimmer — cozy is a lighting level, not just a ceiling material.
Don’t leave the LED channel too shallow — you’ll see the strip edge and it won’t look hidden.
19. Wood ceiling with stepped center platform and halo LEDs
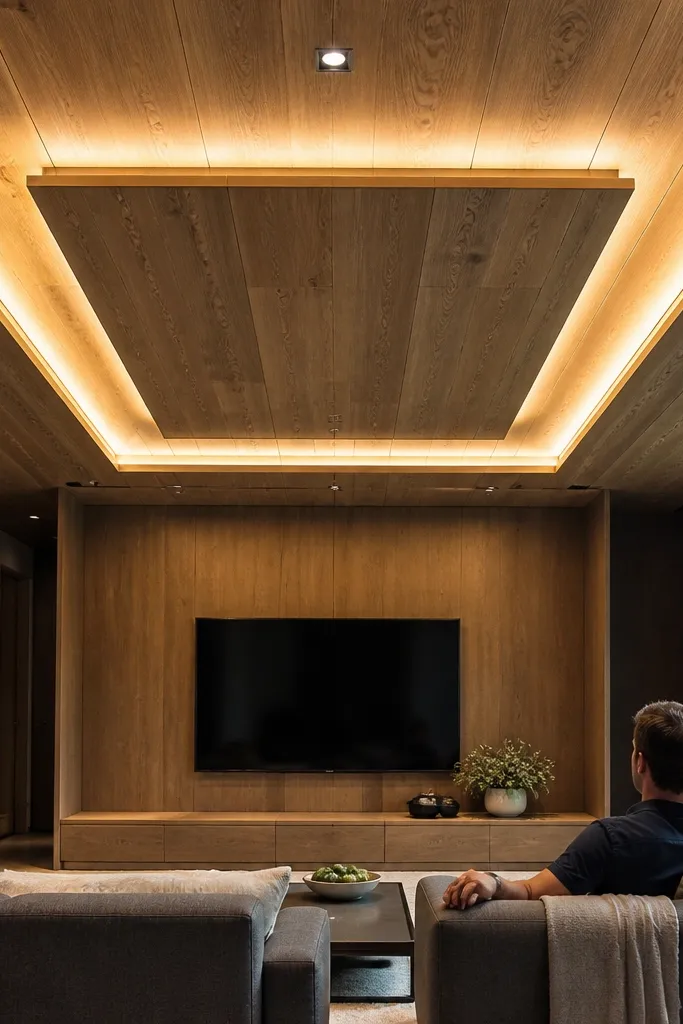
A stepped center platform adds depth without needing complex beam grids. The halo LEDs around the step create that cozy “floating” effect, especially when you sit across from the ceiling and see the glow line. This design suits living rooms with seating arranged opposite a main focal wall. Choose a step that’s not too dramatic — a small drop difference looks more premium than a deep carve. The wood finish makes the step feel warm and intentional.
Editor's noteKeep the step edges sharp with trim — rounded edges can look unfinished under LED light.
Mark a center rectangle or square for the platform that’s about 50-60% of the room width. Build two levels of framing: one for the main ceiling plane and one for the stepped platform, with a step height around 70-120 mm. Cover the platform with wood panels, then install a concealed LED strip in the step recess with a diffuser. Finish with matte wood stain and install your main light through the platform if needed.
Skip thisDon’t place the LED strip where it shines straight down — you want a halo, not a spotlight.
20. Wood ceiling with small square coffers and warm micro-downlights
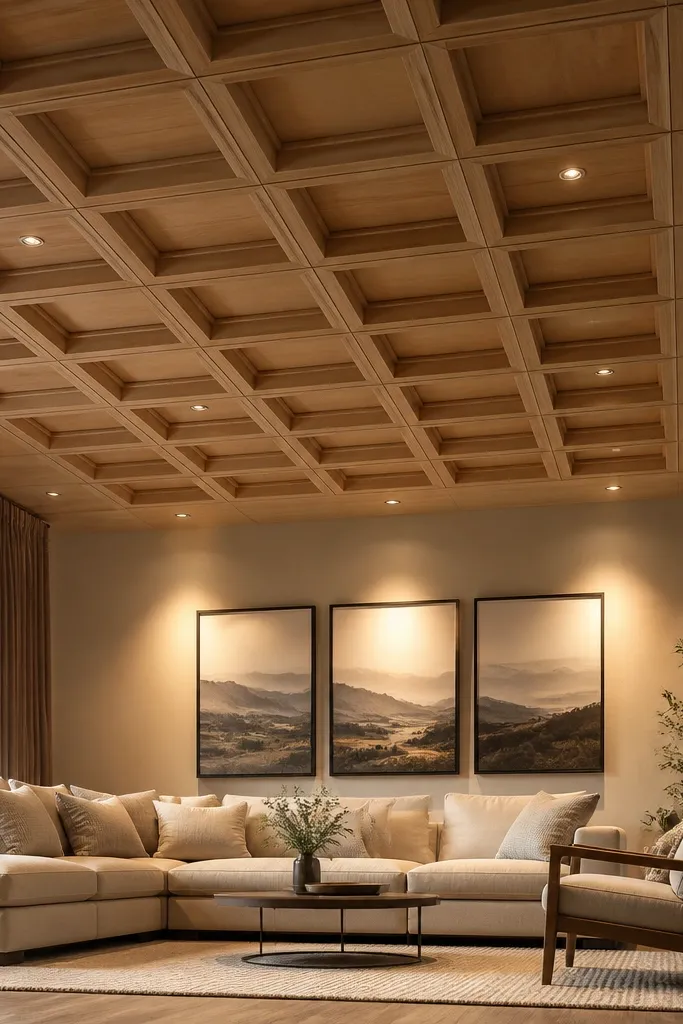
Square coffers make a ceiling feel structured and cozy, like a traditional room with a modern wood twist. Small coffer grids look premium when the spacing is even, and micro-downlights add warmth without overpowering the wood texture. This is a good choice for living rooms that need both light and style. Use warm bulbs so the wood reads golden rather than orange-red. If you want the cozy False Ceiling Living Room look that photographs well from the sofa, this is a strong option.
Editor's noteCut downlight holes on a marked template so the trim rings sit evenly in every coffer.
Decide on coffer size first, like 300-350 mm squares, then build a matching frame grid on the ceiling. Create the coffer recesses by adding internal battens and attaching wood-facing panels to the front plane. Install micro-downlights so each coffer has light coverage without glare; keep spacing consistent. Finish the wood with matte stain and seal, then wire lights to a dimmer if you want evening comfort.
Skip thisDon’t use large downlights in tiny coffers — the scale looks wrong and glare increases.
21. Recessed wood panel ceiling with a soft perimeter LED ring
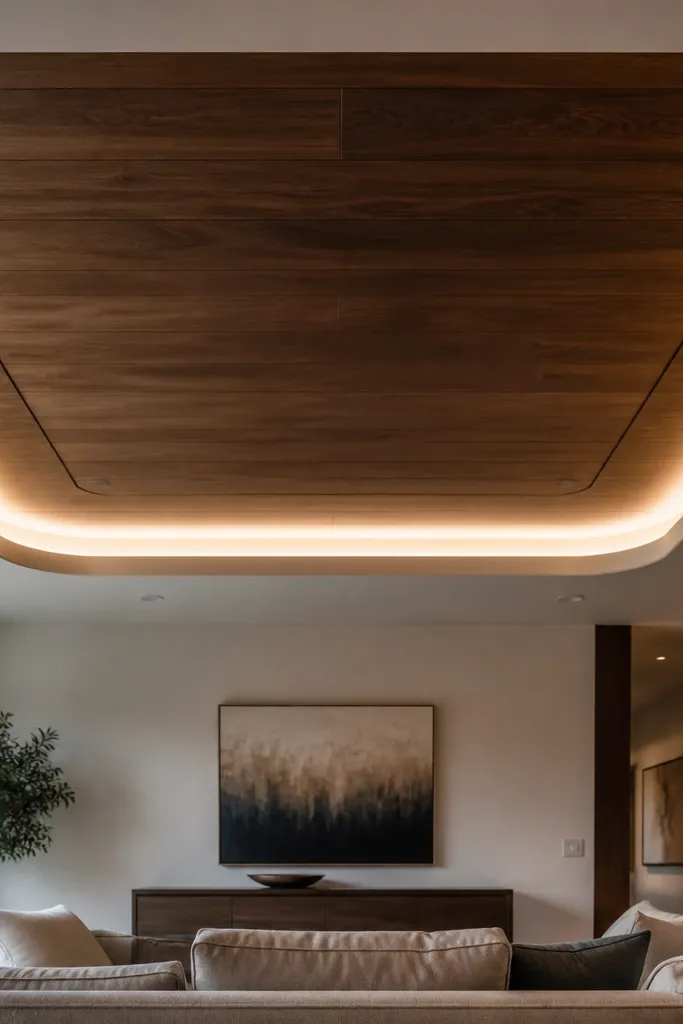
This design feels cozy because it frames the ceiling without heavy beams. Recessed wood panels create shadow lines, and the perimeter LED ring adds a gentle glow that makes the room look warmer instantly. It’s also a great fix for uneven existing ceilings because the recesses hide small variations in the surface plane. Keep the panel layout consistent and symmetrical so it looks designed, not improvised. This style works across many living room styles — modern, Scandinavian, and even warm traditional.
Editor's noteUse foam or rubberized seal strips behind trim to prevent rattles from LED heat expansion.
Build your false ceiling frame and cover the main plane with backing boards. Mark a perimeter recess area and install trim so you create a consistent shadow gap for the LED ring. Mount wood panels into the recessed area, leaving a small gap between panels for clean shadow lines. Install the LED strip in the perimeter ring with a diffuser, then finish the wood with matte stain and seal all edges.
Skip thisDon’t make the panel recess too deep — it can feel heavy in rooms under 8 ft (2.4 m).
22. Wood ceiling with vertical slats in the center and horizontal slats on the edges
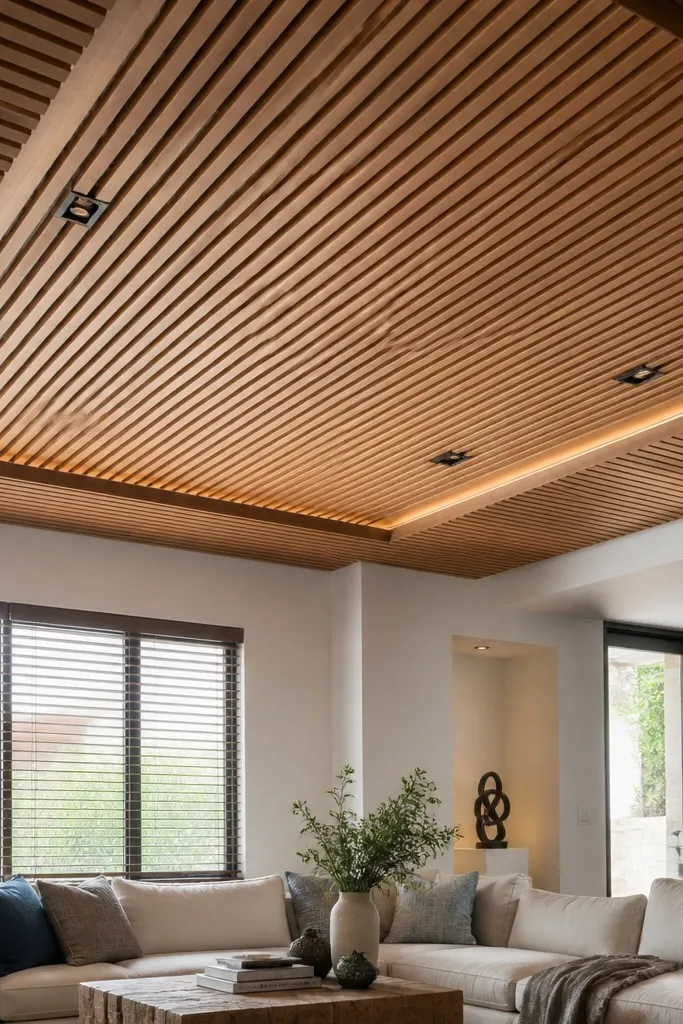
This ceiling plays with direction, which makes it look cozy and intentional. Vertical slats in the center add height and softness, while horizontal slats on the edges keep the perimeter grounded. The mixed orientation also helps hide layout mistakes because your eye reads the pattern, not the grid. This works well in living rooms with a low-to-average ceiling height where you still want a standout ceiling. Finish with a warm stain so both directions share the same cozy tone.
Frame the ceiling with a main grid, then plan a central rectangle or oval-like zone where you’ll run vertical slats. Install horizontal slats along the perimeter first so the border looks straight, then add vertical slats in the center zone. Keep slat spacing consistent and use a trim frame to separate orientations cleanly. Add a perimeter cove LED behind the horizontal slat border, then stain and seal all slats with matte finish.
Align the center slats to a centerline — symmetry is what makes this look expensive.
Don’t let slat gaps vary — mixed orientation makes uneven gaps more noticeable.
23. Wood ceiling with a soft arch border and recessed lights
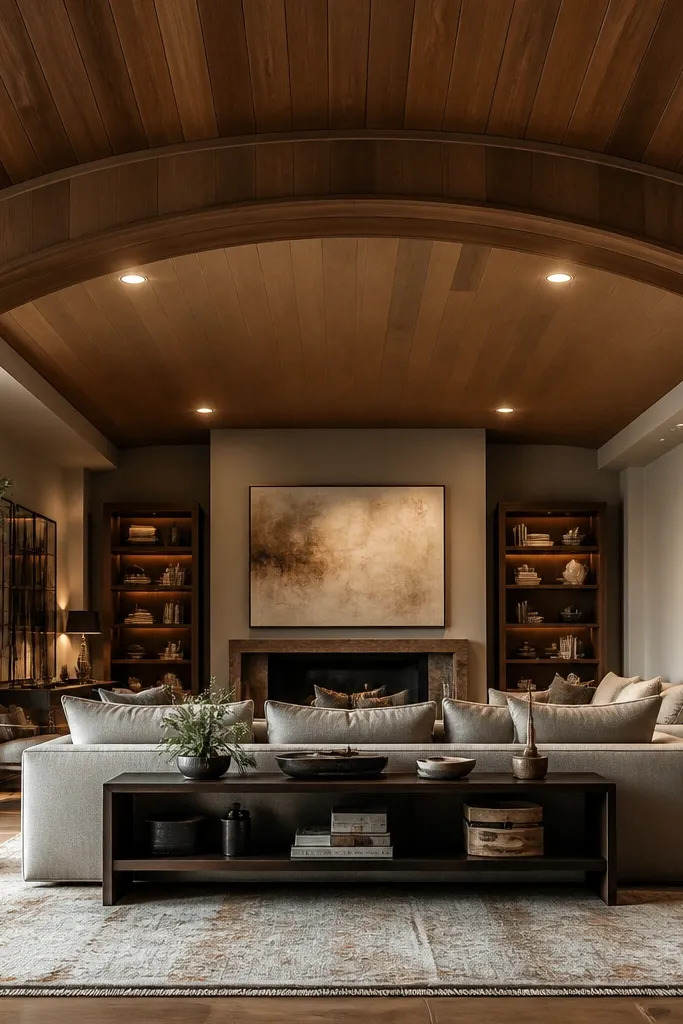
An arch border makes the ceiling feel welcoming. It softens the geometry above a sofa and gives a cozy, slightly traditional vibe without needing heavy carvings. Recessed lights inside the arch keep illumination even and flattering. This looks best when you have a focal seating area centered under the arch, like a sofa and coffee table layout. The arch also frames your ceiling visually, so the room feels less boxy.
Build a flat ceiling plane, then create an arch border using flexible plywood or carefully cut ribs on a frame. Cover the arch border with wood panels or trim strips and keep the arch thickness consistent. Install recessed lights inside the arch area, wiring through the frame before cladding. Finish the wood with a warm stain and add a small perimeter LED if you want extra glow along the border underside.
Cut the arch template in thin MDF and trace it onto the ceiling frame for clean curves.
Don’t make the arch too shallow — it won’t read as an arch and will look like a random trim.
24. Wood ceiling with diagonal timber strips and warm spot wash
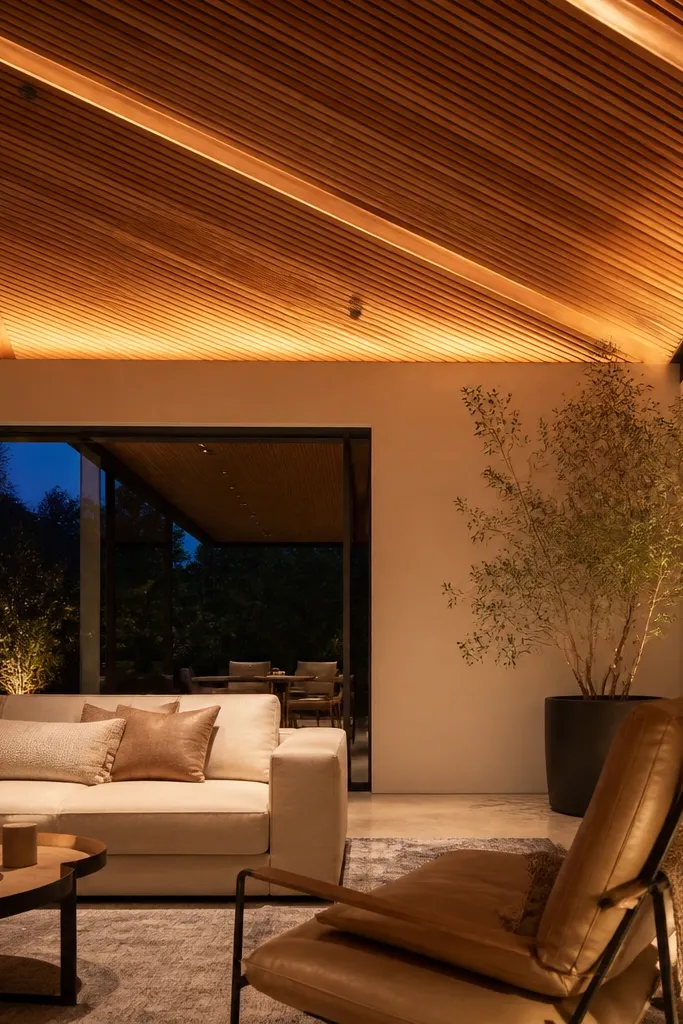
Diagonal timber strips add texture and a sense of movement, which makes a cozy False Ceiling Living Room feel more inviting than a flat ceiling. Pair the strips with a spot wash effect from concealed lighting so the glow follows the wood grain direction. This style works well when you want the ceiling to feel like a design feature, not a cover-up. Keep the strips narrow and evenly spaced, then choose a warm stain that makes the grain read clearly. The room feels cozy because the light is soft and the texture is consistent.
Editor's noteMark strip lines with chalk and a laser — diagonal ceilings punish sloppy layout.
Frame the ceiling with a grid that supports the strip ends and prevents sag. Install diagonal strips across the ceiling plane, using a consistent spacing jig so gaps stay even. Create a hidden lighting pocket along one side or perimeter and aim LEDs toward the wall so the light washes behind the strips. Finish with matte stain and seal, then test the lighting angle before final trim installation.
Skip thisDon’t aim LEDs directly at the wood strips — you want a wash, not visible glare.
25. Wood ceiling with layered rectangular frames and glow inside
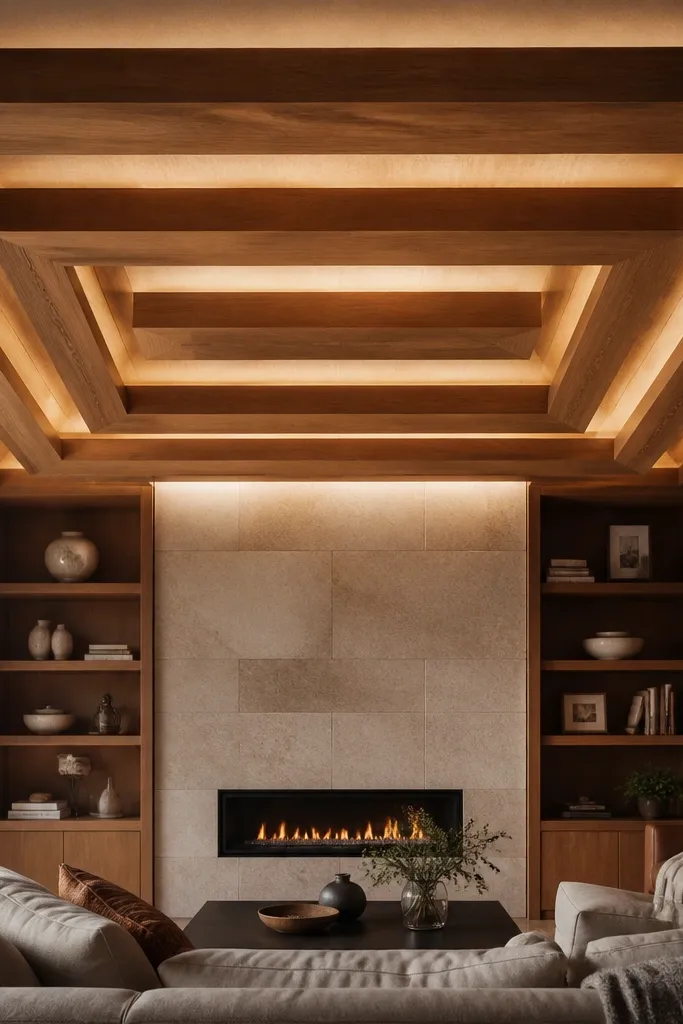
Layered rectangular frames create depth and calm structure. The glow inside each frame makes the ceiling feel like a soft architectural feature, which is the cozy effect you’re after. This style is especially good when you want to hide wiring and keep the ceiling looking clean. It also photographs well because the layered edges create strong shadow lines. Use warm LEDs so the glow looks golden, not blue-white.
Plan nested rectangles so the outer frame width is around 100-140 mm and each inner layer is smaller by consistent margins. Build the frame levels first with metal channels or timber battens, then attach wood panel faces to each layer. Leave light pockets between layers and install LED strips with diffusers inside the pockets. Finish with matte wood stain and seal all edges, then wire lights to a dimmer for easy evening comfort.
Dry-fit the nested frames and use spacers to keep layer gaps consistent across the ceiling.
Don’t stack layers too close together — the glow will look like one thick bar instead of separate depth.



