
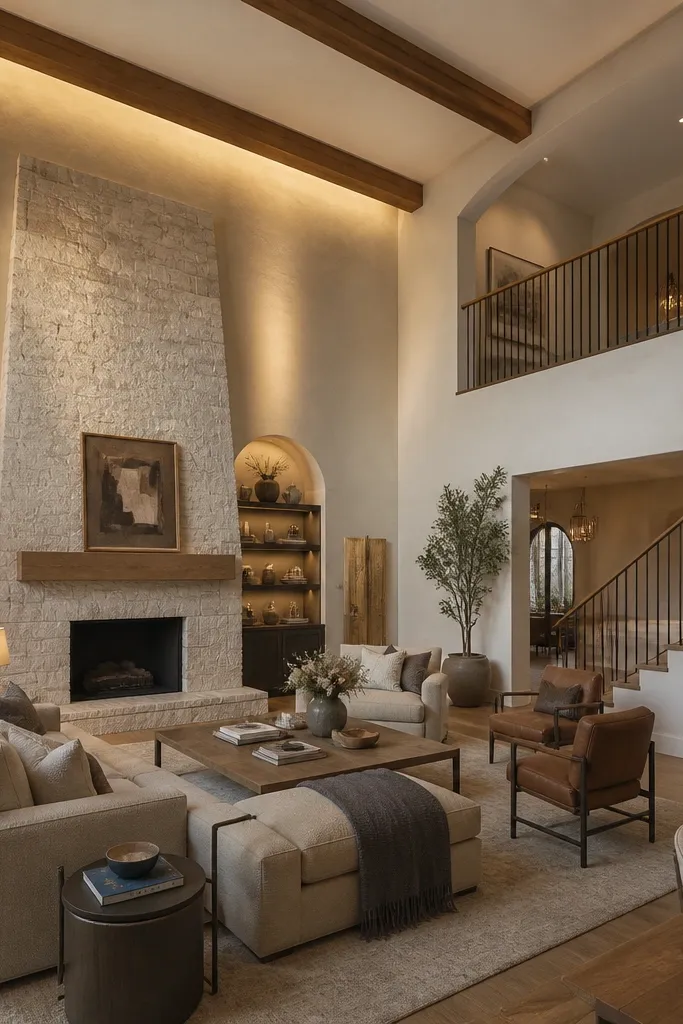
1. Cove soffit halo with warm wall-wash
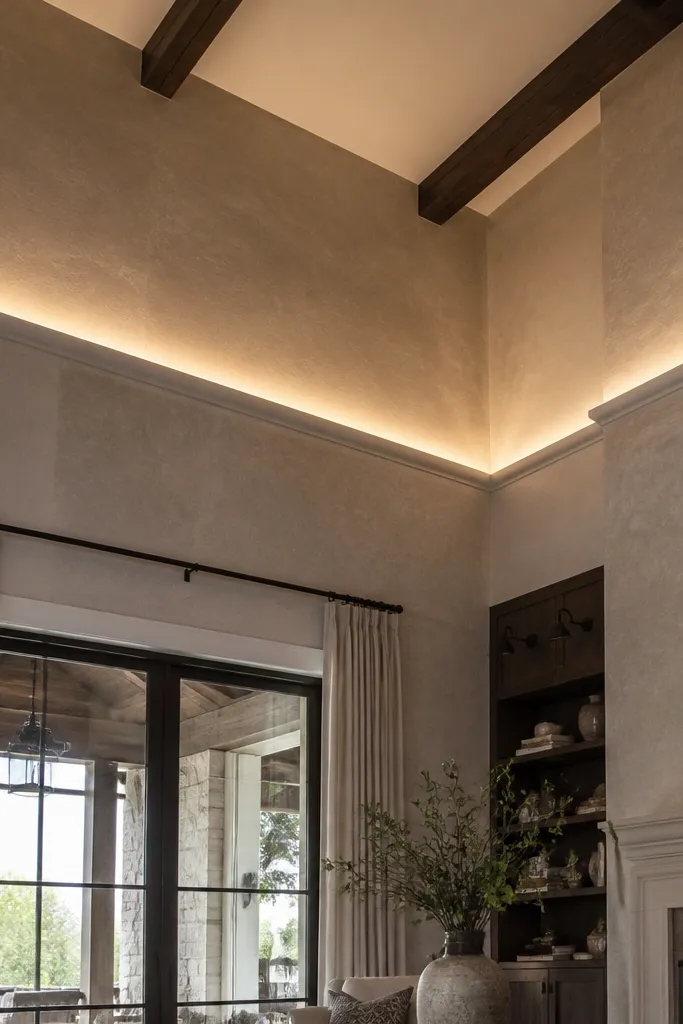
A cove soffit turns a tall ceiling into a soft frame. The glow sits above eye level, so you get warmth without glare, and the walls pick up that light, which makes the whole room feel closer. This is the most reliable “cozy” ceiling solution because the ceiling stops being a flat expanse and becomes a gentle halo. Use it in living rooms where you want a calm, hotel-like atmosphere but still want DIY-friendly build control.
Start by marking a cove line 4-8 in down from the ceiling perimeter. Cut and install a simple box frame from 2x2 furring strips or metal channel, then skin the visible faces with 1/2 in drywall or 1/2 in MDF sheet for a crisp edge. Add LED strip lighting in a diffuser channel, aiming it toward the wall instead of straight down. Finish with joint compound, caulk the seams, then paint the cove and soffit the same off-white as your ceiling for a clean halo line.
Use a diffuser channel and test the LED brightness before you close the soffit — 3000K looks warmer and more forgiving in large spaces.
Avoid putting LED strips where you can see the bare chips — that turns cozy into harsh.
2. Painted wood beam grid with shadow gaps
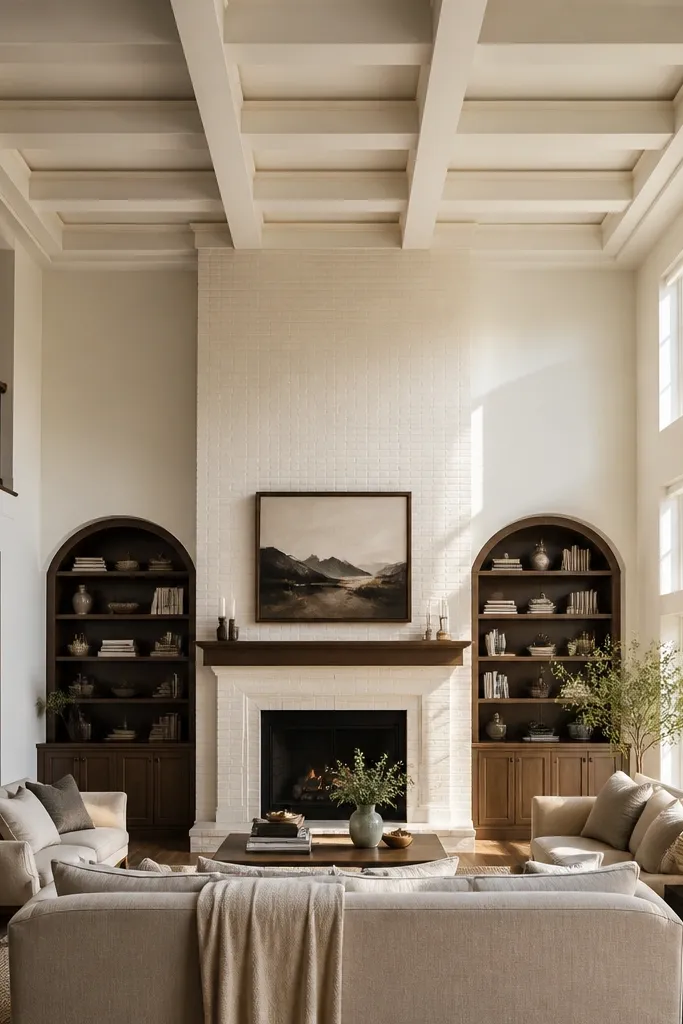
Beam grids give double height rooms an instant sense of structure and rhythm. The trick for cozy isn’t just beams — it’s the shadow gap. When beams sit off the ceiling by a small reveal, the grid looks dimensional instead of flat trim. This works beautifully when your room has a fireplace wall, large windows, or a strong furniture grouping that needs a visual anchor above it.
Editor's noteDry-fit your first beam section and measure to the far wall before you commit — spacing drifts fast on tall ceilings.
Plan your grid spacing first: aim for 24-36 in between beam centers in most living rooms, then adjust to your window and focal wall. Install mounting cleats or furring strips to the ceiling with screws and anchors, then attach 1x3 or 1x4 primed boards as beams, leaving a 1/4 in shadow gap at the top edge. Caulk the edges lightly, sand, and prime so the paint doesn’t show fasteners. Paint beams in a warm white that matches trim — then keep the ceiling a slightly lighter shade for contrast.
Skip thisSkip cheap foam “beam” products when you want crisp shadows; they flatten the look.
3. Classic coffered ceiling panels
Coffers create a ceiling you can actually read from across the room. The recessed squares reduce the visual height and add rhythm, which makes the space feel intentional instead of sky-high. For cozy Double Height Living Room Ceiling Ideas, coffer ceilings are a top pick because they combine structure, shadow, and a finished look that photographs well. This suits living rooms where you want a “designed” feel without relying on lots of ceiling fixtures.
Editor's noteUse a laser level for the grid lines. A small off-square error becomes obvious at double height.
Start with a layout: pick a coffer size that feels balanced — commonly 18-24 in squares for living rooms with 10-12 ft ceilings, and larger for 14-20 ft heights. Build a perimeter frame first from 2x2 furring or MDF strips, then install cross rails to create the recessed grid. Skin recess sections with 1/2 in drywall or MDF, keeping the frame thickness around 2-4 in so it reads clearly. Finish by sanding, priming, and painting everything in two tones — frames slightly darker than the recessed fields.
Skip thisDon’t make the recesses too shallow — if you only go 1/2 in down, the pattern won’t read from the seating area.
4. Wood slat ceiling with staggered planks

Wood slats add warmth even before you add furniture color. A staggered slat layout breaks up the ceiling plane and creates texture that catches light gently. For cozy Double Height Living Room Ceiling Ideas, this is one of the best “feel” upgrades because wood reads warmer than paint and it softens acoustics. It also looks great with modern, Scandinavian, and transitional interiors.
Choose slats about 1x3 in or 1x4 in, with a 1/4-1/2 in gap between boards. Install a grid of ceiling battens (furring strips) across joists, then screw slats to the battens so the ceiling loads are secure. Stagger ends randomly but keep spacing consistent — use a spacer block to repeat the gap. Finish with a warm stain (oak or walnut tones) and a matte clear coat to avoid glare from the tall ceiling.
Pre-finish the slats before installing — it’s faster and gives cleaner edges above your head.
Avoid glossy clear finishes; at double height they can look shiny instead of cozy.
5. Fabric panel ceiling with soft pleats
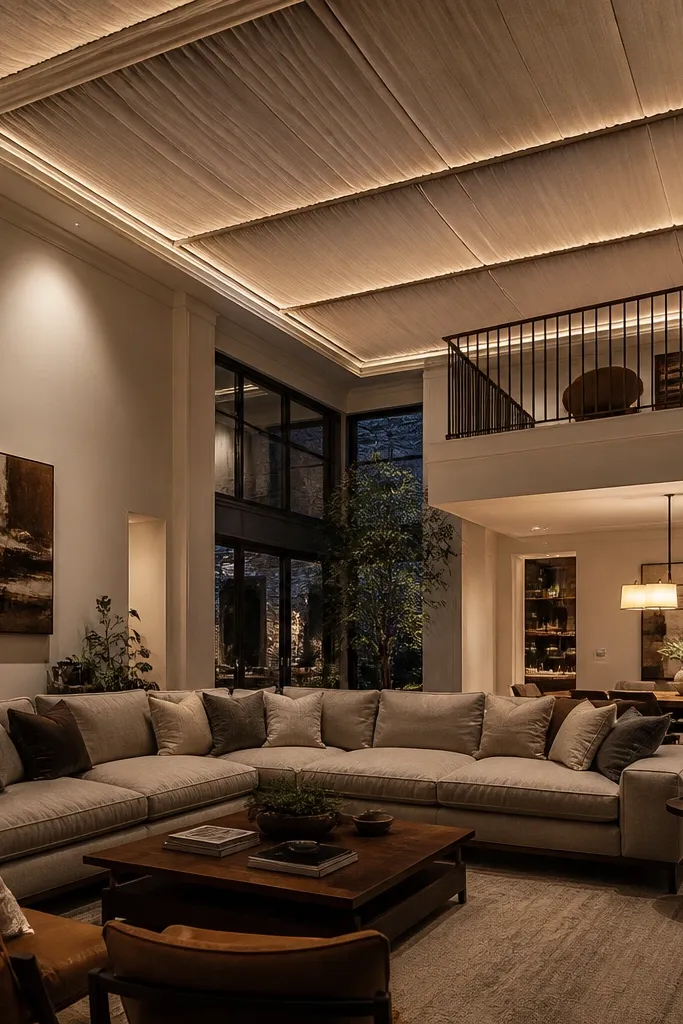
Fabric panels are a cozy cheat code for renters or anyone who doesn’t want drywall dust. Soft pleats break up the ceiling plane and reduce echo, which instantly makes a tall living room feel more comfortable. This also gives you a photogenic look: the fabric catches light in a gentle gradient instead of reflecting it hard. Use this when your priority is comfort and softness, not a permanent carpentry project.
Editor's noteUse a medium-weight linen blend or acoustic fabric; thin sheers look flat and show wrinkles badly.
Install a track or picture-hanging rail system across the ceiling perimeter and midpoints, using anchors rated for your ceiling type. Cut fabric panels with extra width so they can drape and pleat — plan for 20-30% fullness. Sew or add weighted hems so the fabric hangs evenly, then attach to the tracks using Velcro or sewn tabs. Add warm LED strips behind a small perimeter molding so the fabric lights from the side, not from behind you.
Skip thisDon’t hang fabric too tight — tension makes it look like a temporary cover, not a design element.
6. Suspended barrel arch soffit
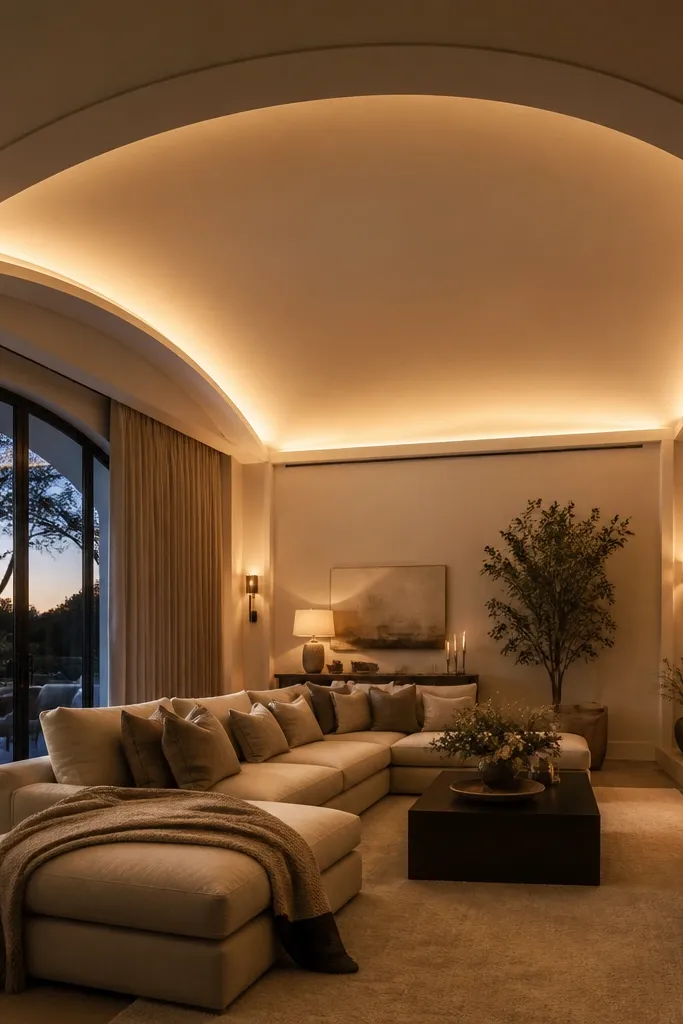
A barrel arch soffit is dramatic without being loud. It pulls the eye inward and downward, which helps a double height room feel like it has a “ceiling moment” over your seating zone. The curvature also softens acoustics and adds a sense of comfort compared with straight lines. This works best when you have a clear focal area — sofa + chairs, fireplace, or a media wall — that you want centered.
Mark the seating focal zone and decide the arch width — keep it about 2/3 the width of the seating arrangement for a grounded look. Build an arched frame using flexible plywood ribs or laminated strips, then connect ribs to ceiling hangers spaced 16-24 in apart. Skin the frame with 1/2 in drywall for the curved surface, then add a small perimeter return to hide the edges. Finish with two coats of paint, then install recessed or surface-mounted warm lights along the arch edge.
Use a matte paint on the arch — it hides small imperfections and keeps the look cozy instead of shiny.
Avoid over-tight radii; if the arch is too small relative to ceiling height, it looks like a weird dome.
7. Two-tone painted ceiling with a recessed perimeter
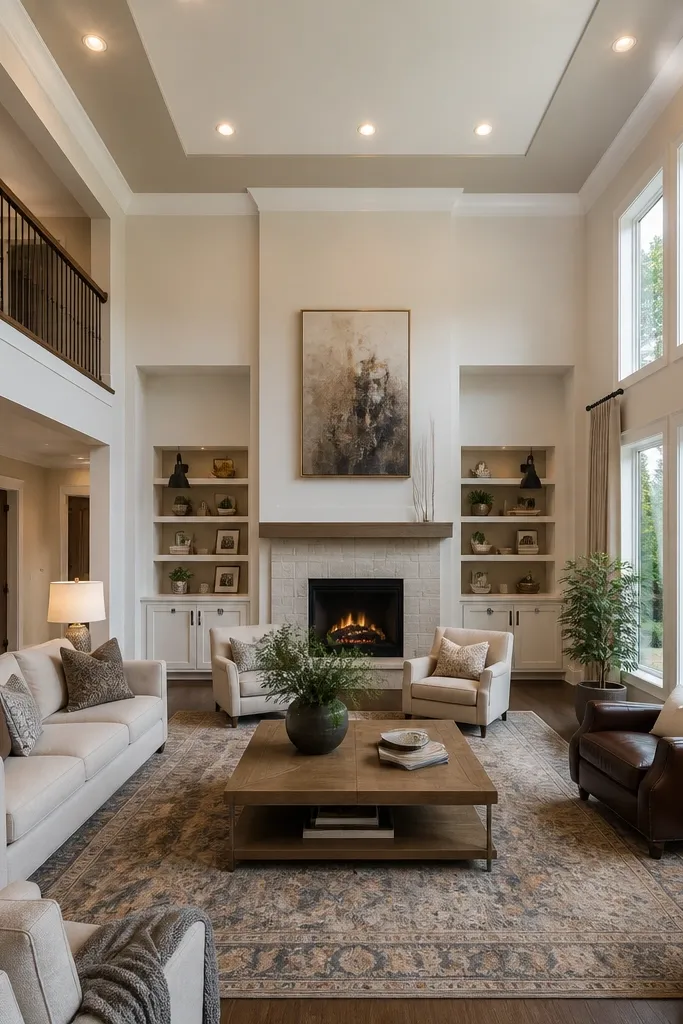
Paint is the simplest way to make a double height ceiling feel designed. A recessed perimeter ring creates a frame, and the two-tone effect gives depth without construction complexity. Choose a darker off-white for the recessed ring and keep the center lighter so the room feels expansive but still warm. This is a smart move when you want cozy Double Height Living Room Ceiling Ideas with minimal dust and you don’t want to commit to carpentry.
Tape and mark a border ring 10-18 in in from the walls, then create a shallow ledge using thin drywall strips or MDF trim if you want true shadow. If you can’t add a ledge, paint can still work — but you’ll need a strong edge line and consistent brushwork. Prime everything, then paint the outer ring first with the darker off-white, followed by the center with the lighter shade. After curing, touch up edges and add a few warm wall-wash lights to support the framed ceiling look.
Use a fine-roller for the center field and cut in with a 2 in angled brush only at the edge — double height shows brush marks.
Don’t pick pure white for one tone and warm white for the other; the mismatch reads cold and uneven.
8. Ceiling medallion + pendant track cluster
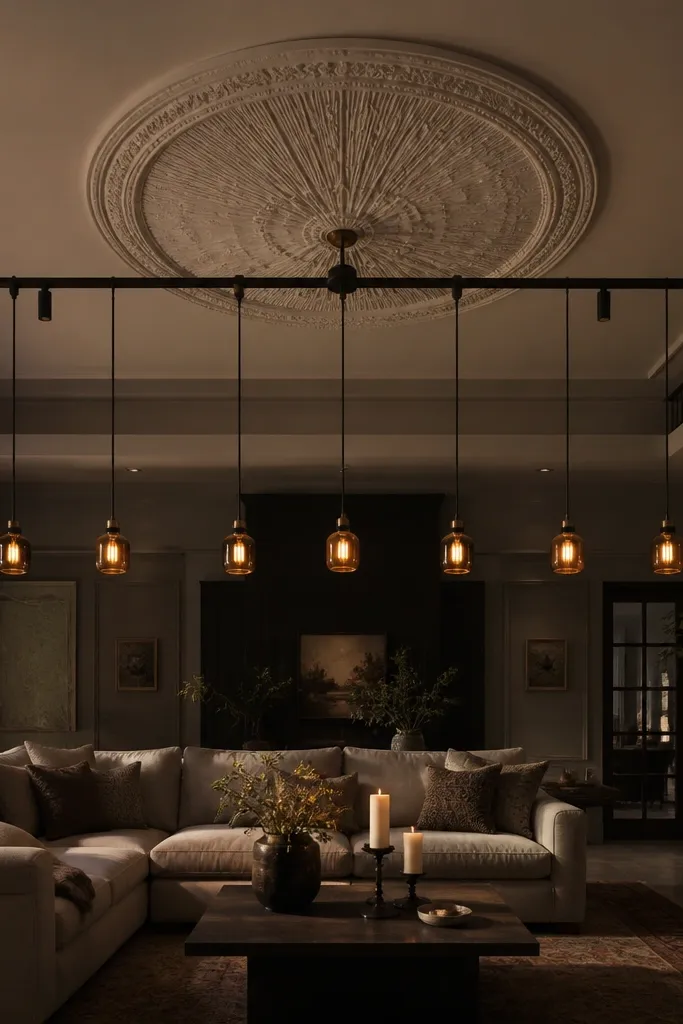
A large ceiling medallion gives you a focal point when your room is tall and the eye keeps wandering. Pair it with a track or small cluster of pendants that hang 24-36 in above the seating. The medallion creates a “center” without needing a full soffit, and the pendants add warmth through layered light. This is best for living rooms where you already have a natural centerpiece — dining table, fireplace hearth, or a seating grouping with a clear center.
Editor's noteChoose a medallion finish that matches your trim — matte plaster or painted MDF looks more cozy than shiny resin.
Pick a medallion diameter that’s believable: 24-36 in for most living rooms, larger if your ceiling is 16 ft+. Mount a lightweight medallion using construction adhesive rated for the material and mechanical fasteners through the ceiling if possible. Install a ceiling track or three-point pendant rig centered on the medallion. Wire for warm bulbs (2700K-3000K) and keep the pendants aligned so the cluster reads intentional, not random.
Skip thisAvoid hanging pendants too high; in double height, they need to be low enough to feel connected to the seating.
9. Panelled ceiling with picture-frame trim
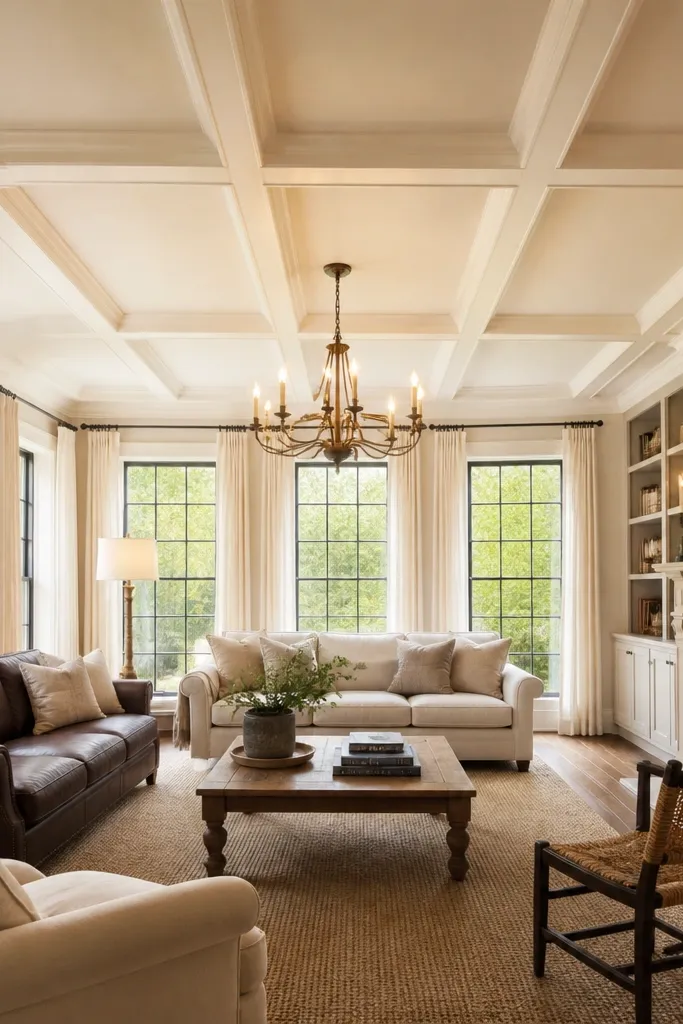
Picture-frame trim makes the ceiling look like it has architecture. It’s cozy because it adds shadow lines and breaks up the ceiling plane into manageable sections. You can scale it to your room by choosing panel sizes that match window spacing. This is a strong choice when you want a traditional-cozy look but still want a DIY-friendly build using trim carpentry rather than full coffer construction.
Editor's notePre-cut mitered corners and dry-fit on the floor. Ceiling corners rarely stay true, and dry-fit saves a lot of patching.
Install a perimeter border first with 1x3 or 1x4 trim strips, then build internal rails to create rectangles or squares. Use 1/4 in spacers to keep consistent shadow gaps — you want visible depth, not flat seams. Attach trim to ceiling using construction adhesive plus finish nails, then fill nail holes with wood filler. Prime and paint with two coats, and add warm lighting from wall-wash fixtures or small recessed cans aimed upward.
Skip thisDon’t rush caulk. Bad caulk lines scream at double height.
10. Recessed ceiling steps with a central rise
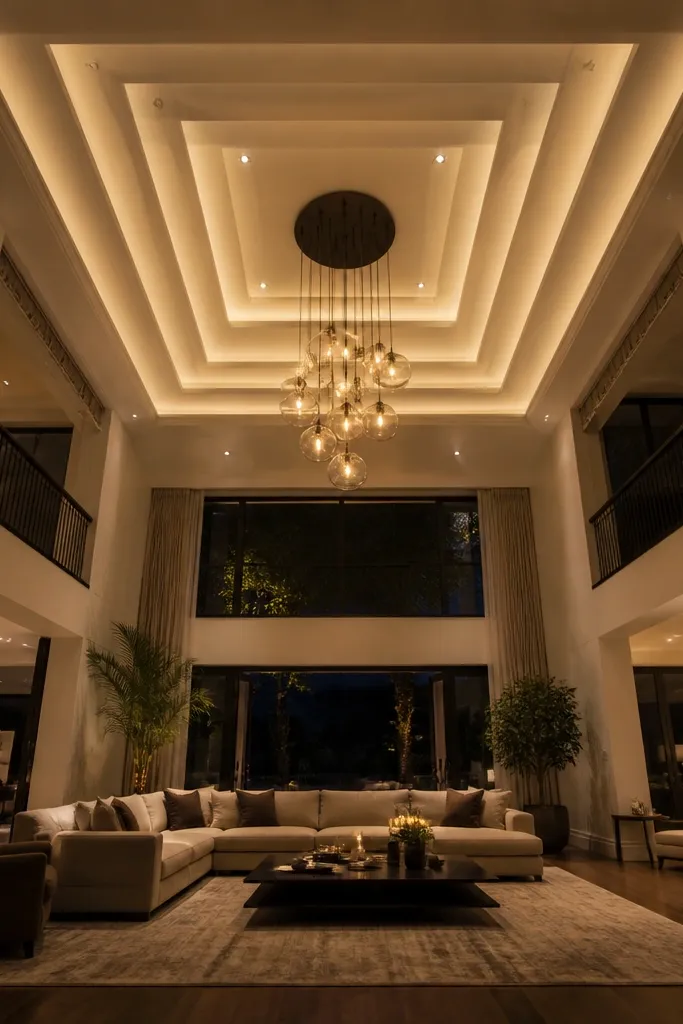
Stepped ceilings create depth like a stage, which makes double height feel structured. A central rise (or a central recessed bowl with steps leading out) gives your seating area a defined “zone” overhead. This works especially well if your living room has a big rug area or a sectional that needs a boundary. The look is clean and modern-cozy — less ornate than coffered designs but still photogenic.
Mark a perimeter and decide the number of steps — two steps usually looks best in living rooms. Build a lightweight ceiling platform using drywall furring and metal channel, keeping step depths around 3-5 in for visible contrast. Skin the steps with drywall, then taper edges with joint compound so corners look crisp. Paint the higher center slightly darker (or lighter — pick one direction and stick with it), then add recessed warm lights aimed at the step faces for shadow texture.
Use a matte paint sheen so the shadows stay soft instead of reflecting like gloss.
Avoid tiny shallow steps; they disappear once you sit down.
11. Wood lattice ceiling with warm lantern wall lights

A lattice ceiling brings pattern overhead, which makes a tall room feel decorated instead of empty. The open grid lets light pass through and creates a cozy, textured glow when paired with warm wall lights or sconces. This is a great option when you want “a lot of look” but you don’t want to fully close the ceiling with solid panels. It also suits rooms with strong style — farmhouse, Japandi, and modern rustic all work.
Editor's notePre-seal stained wood before installation. Ceiling projects are hard to touch up later.
Pick a lattice pattern with spacing around 6-8 in so it reads from the couch. Build a perimeter frame from 2x2 furring strips, then attach lattice pieces with screws into the frame. Sand all edges and apply a stain or paint; matte finish looks best. For lighting, mount wall sconces that cast upward light, and optionally add a small LED strip at the top edge of the lattice frame so you get a glow line.
Skip thisDon’t go too tight with lattice spacing; dense grids look heavy at double height.
12. Ceiling wallpapered panel with framed border
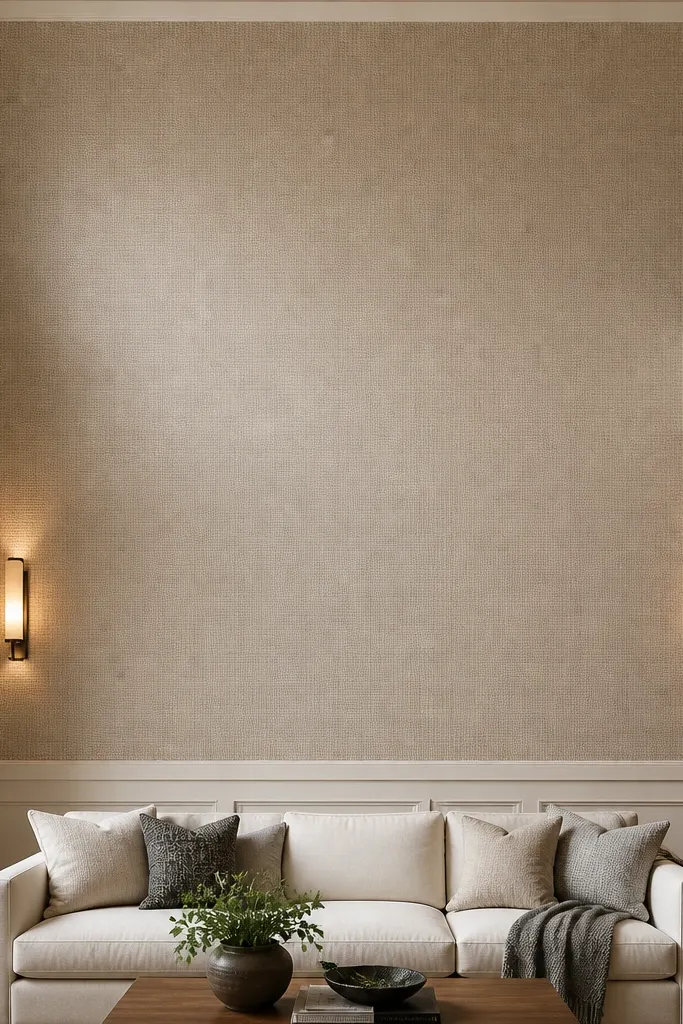
Wallpaper on the ceiling sounds risky, but a framed panel makes it controlled and cozy. The pattern adds warmth and personality while the border keeps it from looking like an accident. Choose a subtle texture pattern (linen-look, small geometric, or tonal florals) so it doesn’t compete with furniture. This idea is perfect for living rooms where you want one signature overhead detail without building a full soffit.
Editor's noteUse a low-sheen paint on the frame so the wallpaper texture stays the visual star.
Pick a ceiling wallpaper that’s rated for walls and can handle humidity changes — then test a small scrap on your ceiling primer. Create a frame using MDF trim strips, and build it about 18-30 in wide centered over the seating. Prime the ceiling surface first, then apply wallpaper inside the frame using smoothing tools to prevent bubbles. Seal with a light clear topcoat if the wallpaper allows it, then paint the frame in a matching off-white and add warm light from a nearby sconce or track.
Skip thisAvoid bold high-contrast patterns; at double height they feel busy instead of cozy.
13. Textured plaster ceiling with limewash look
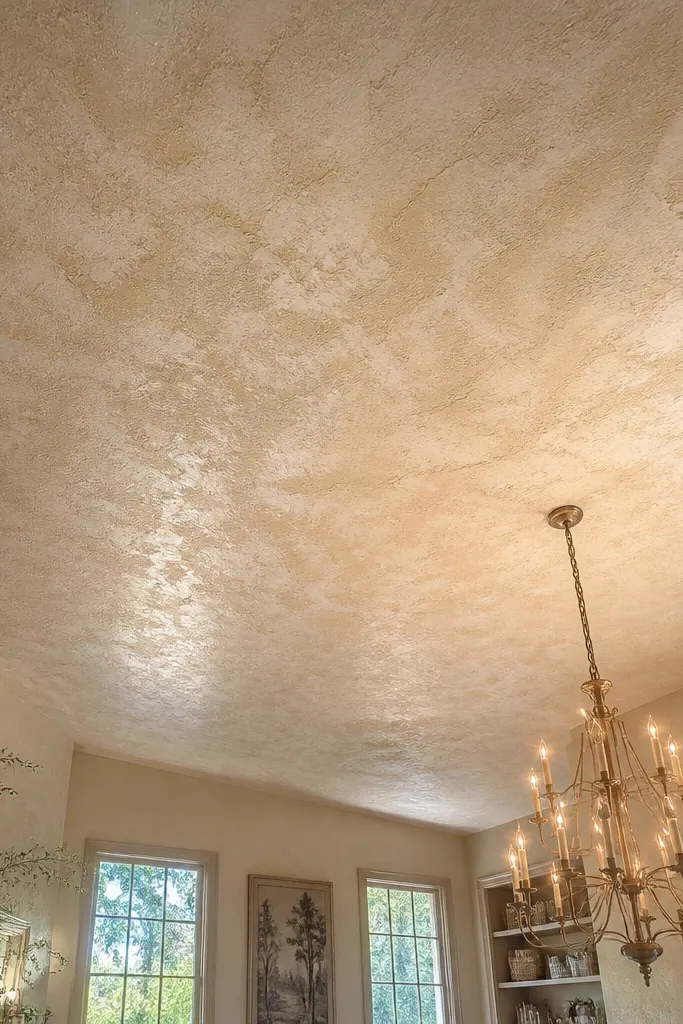
Texture is what makes ceilings feel warm, even if you keep the color simple. A limewash look — with mottling and subtle variation — reduces the flatness that makes double height feel cold. It also photographs well because the light creates depth across the entire ceiling. This works best when your room already has warm materials like wood floors, leather, or upholstered fabrics.
Skim-coat the ceiling with a thin plaster finish base if you need a smooth starting surface, then use a textured plaster or limewash system designed for interior ceilings. Apply in sections so the pattern stays consistent: trowel on, then use a sponge or brush to create micro-variation. Let it dry fully, then seal if the product requires it. Finish with a warm white or soft greige tone, and use warm lighting to bring out the texture — 2700K looks best.
Work in daylight or with consistent bulbs while you apply. Textures look different under different color temperatures.
Avoid trying to cover existing heavy stains without correct stain-blocking primer; they bleed through.
14. Layered lighting cove + recessed cans with baffles
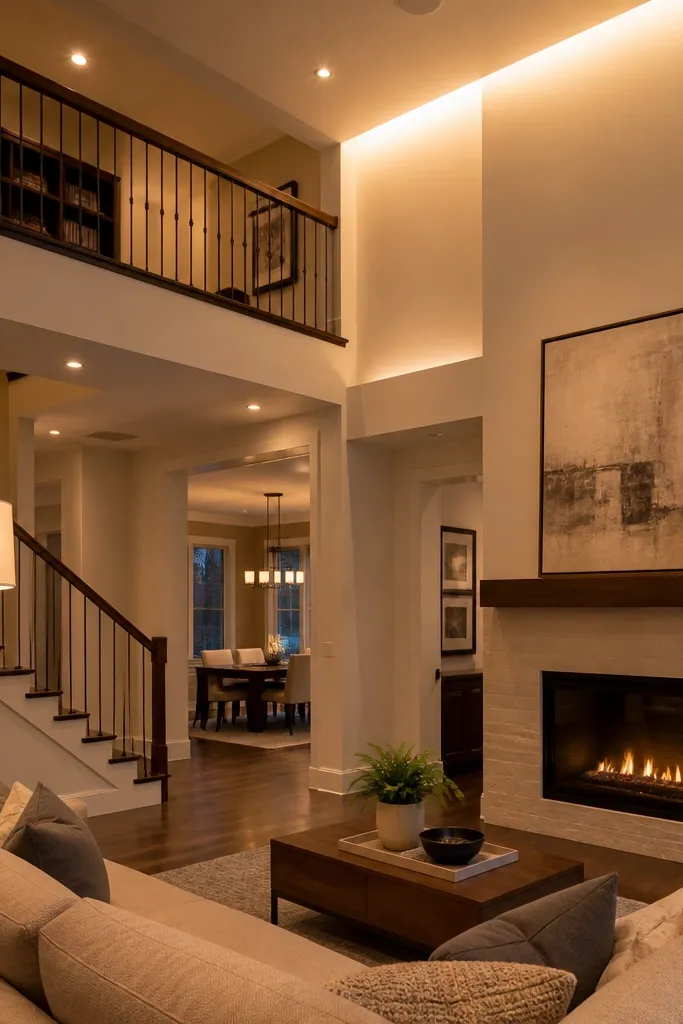
If you’re keeping recessed cans, the cozy upgrade is baffles and layering. A cove glow gives you the halo, while recessed cans with glare control give you task lighting without making the room feel like a warehouse. This combo is good for double height living rooms because the eye gets both soft ambient light and controlled brightness near the seating. It also lets you dim scenes — bright for cleaning, warm for evenings.
Install a perimeter cove or small wall-wash soffit first, then place recessed cans in a grid over the seating zone. Choose baffle trims that reduce direct viewing of the LED source and use 2700K-3000K bulbs rated for dimmers. Wire everything to a dimmer setup with separate circuits if you want true scenes. Finish by painting the cove interior and ceiling in warm whites, then test brightness levels before final trim installation.
Use a diffuser lens and aim for even coverage. Uneven recessed light patterns look harsh at height.
Avoid mixing cool 4000K bulbs with warm cove light; the color mismatch reads cold.
15. Painted faux coffer using ceiling paper strips
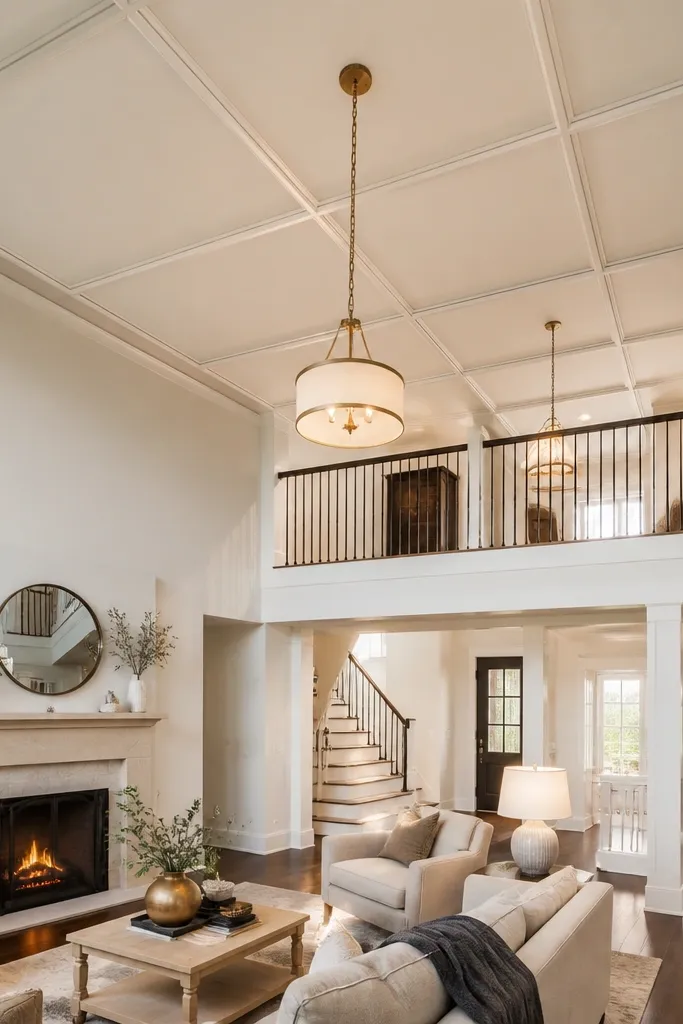
Not everyone wants to rebuild ceilings, but you still want the coffer look. Faux coffer lines made with thin trim strips create shadow and geometry without heavy drywall work. This is a smart option when your ceiling has awkward angles or you want to keep the job light and fast. It gives you cozy Double Height Living Room Ceiling Ideas that look expensive in photos because the eye lands on the pattern.
Editor's noteUse a consistent strip width and spacing. The pattern breaks instantly if the grid drifts.
Measure and plan the grid, then mark lines on the ceiling with a chalk line. Apply thin MDF or foam-free trim strips (about 1/2-3/4 in wide) along the layout, leaving a small consistent gap where you want shadow. Prime, fill seams, then sand so the trim edges look crisp. Paint the ceiling and trim in two tones — trim slightly darker — and add a warm wall-wash light to make the shadows show.
Skip thisAvoid thick trim that covers too much ceiling — it can look like accidental molding rather than a designed coffer.



