
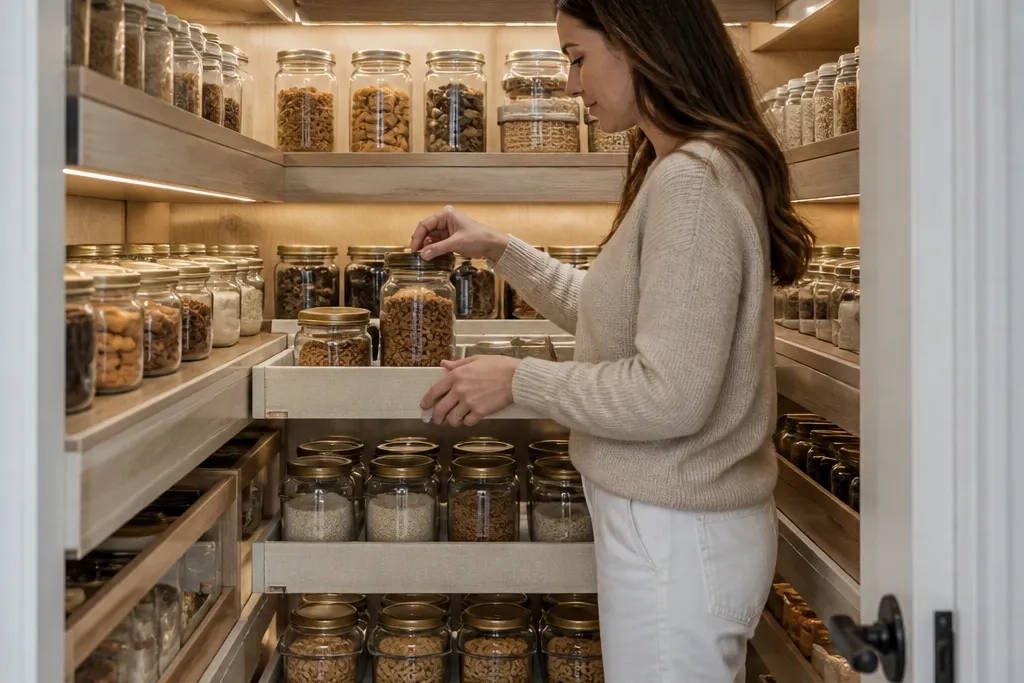
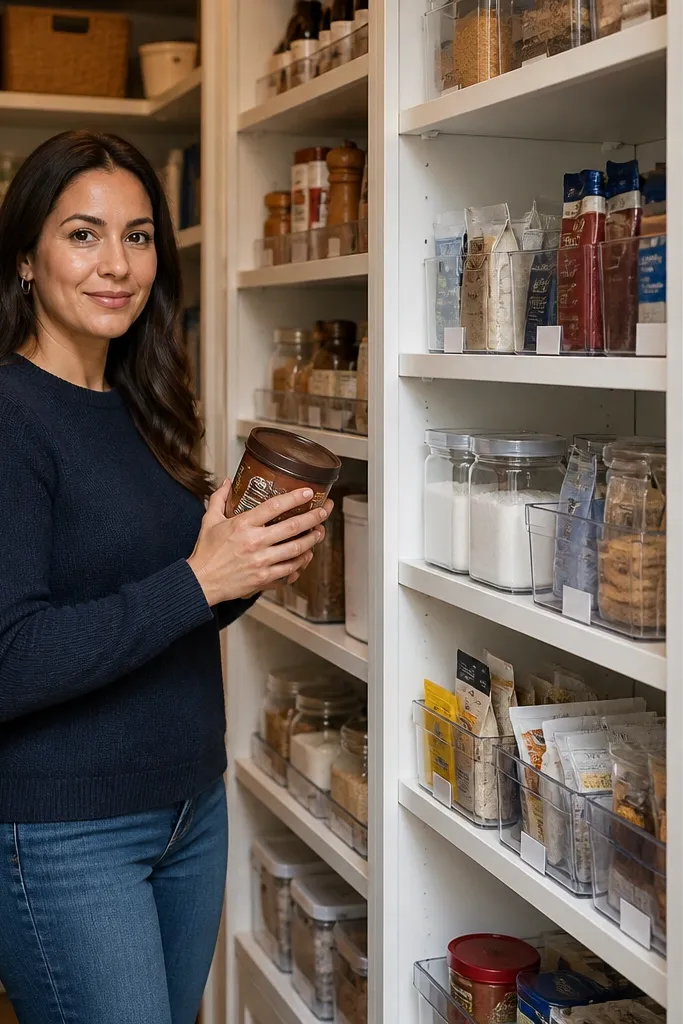
1. Front-Edge Pull-Out Pantry Drawer for Baking Staples
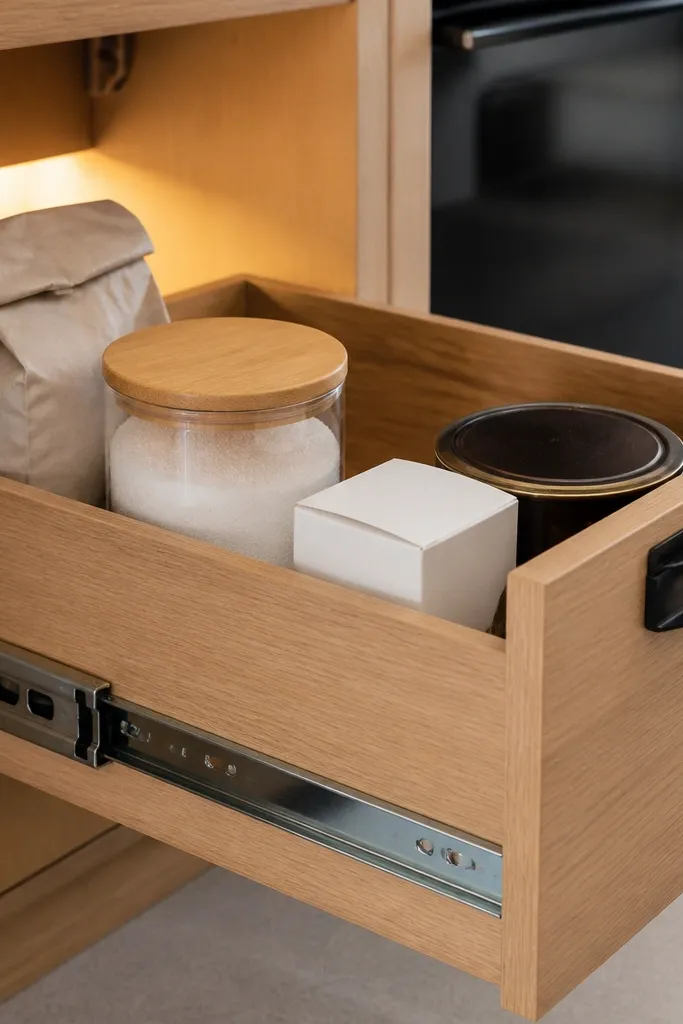
Start by measuring the usable opening inside your pantry and buy a drawer kit or build a shallow box that fits with 1/2 inch clearance on all sides. Install full-extension slides on the inside walls, then attach the drawer face so the pull sits flush with the front. Add a shelf liner inside the drawer and place uniform-height bins (same brand/shape if possible). Finally, label the front edge of each bin with a strip label maker or black marker on painter’s tape, then test pull-out clearance with the drawer fully extended.
A front-edge pull-out drawer makes deep baking storage look tidy because everything sits at the same height when it rolls forward. It fixes the “flour bag avalanche” that happens when you reach into the back for one thing and three bags shift. Use it for items you grab often — flour, sugar, baking powder, cocoa — and group them by function so the pantry reads like a set, not a pile. For the cozy look, stick to a light palette: off-white bins, kraft labels, and a simple wood or white drawer face that matches your pantry trim.
Skip thisDon’t use random bin heights in one drawer — the top edges will hide labels and you’ll lose the visual system.
Editor's noteUse rubber drawer liner under each bin so it doesn’t creep forward when you yank the drawer.
2. Clear Stackable Canisters with a "First In, Front Out" Row
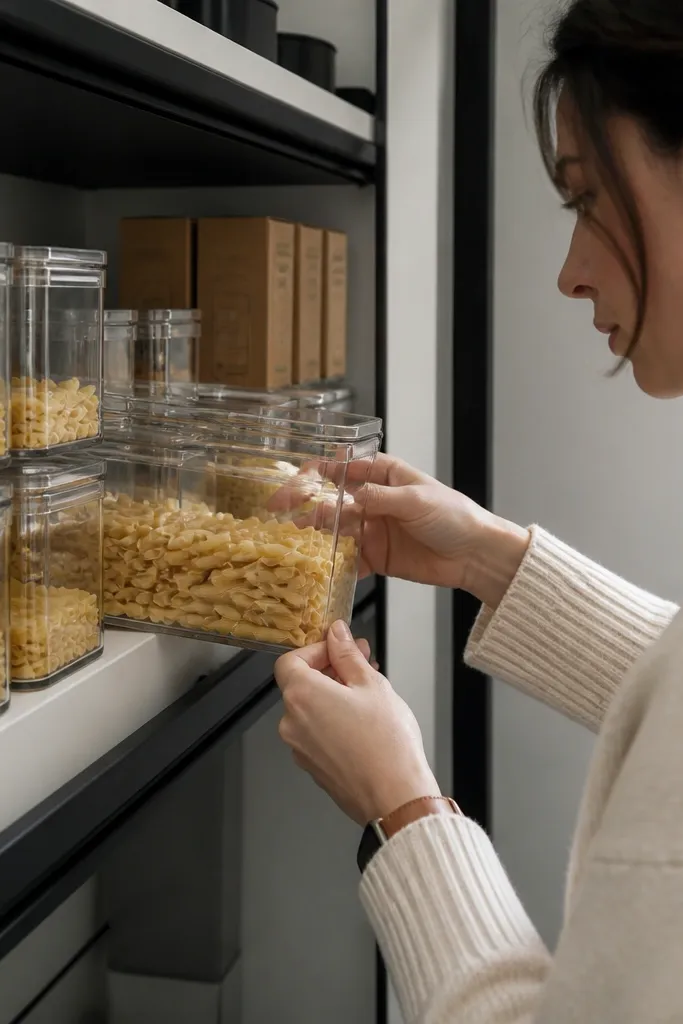
Clear stackable canisters look cozy because they show you what you have without opening anything. The trick for deep shelves is the “first in, front out” row: keep the newest items in the front stack and reserve the back shelf for backups. This stops the pantry from turning into a guessing game where you find a second can of baking soda after buying a third. Choose canisters with matching lids and straight sides so the front of the pantry looks uniform and calm.
Pick canisters that match in width and lid style, then measure your shelf depth to decide how many can fit with breathing room (usually 2-4 per row). Line the shelf with a grippy liner so canisters don’t slide when you pull one forward. Fill the front row with your active items and put backups behind them in the same shape, but leave a small gap so you can grab without reaching deep. Label every lid with a short name and a date using a label maker, then rotate by moving the back item forward when you restock.
Use label tape on the lid rim, not the side — it keeps the front view clean and readable.
Avoid mixing canisters with different heights in the same row — the labels won’t align and the pantry stops looking intentional.
3. Wire Shelf to Cozy Tray System with Sliding Acrylic Lids
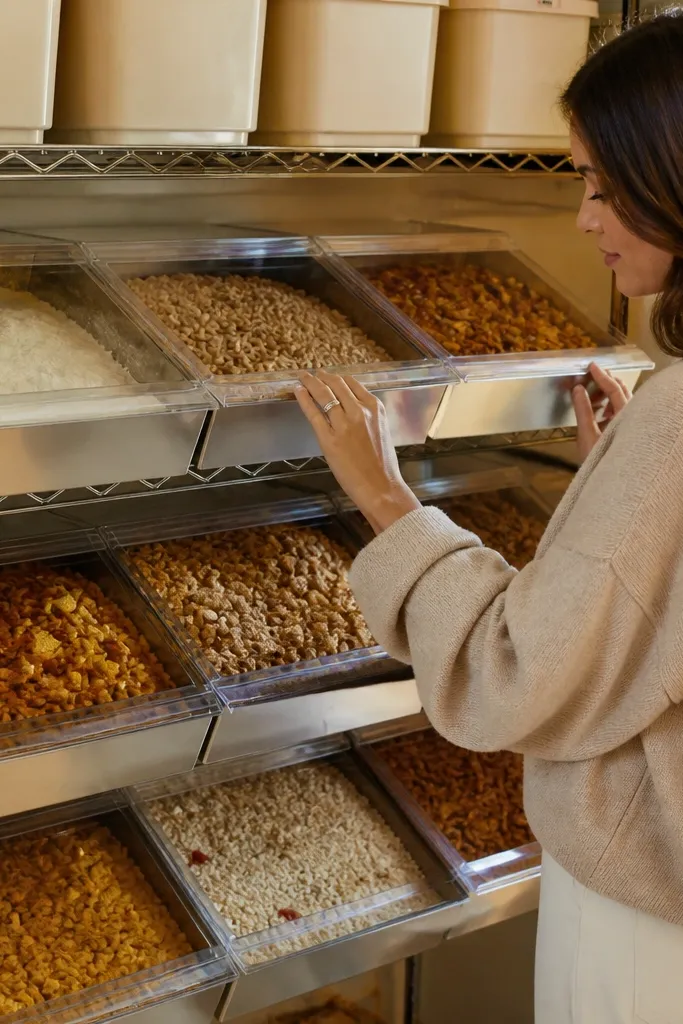
If your pantry has wire shelves, you’re fighting sag and sliding. A tray system fixes that and still looks good because trays create clean edges and a consistent front line. Sliding acrylic lids add two wins: they hide clutter and they reduce dust on flour, cereal, and snack mixes. The result is pantry storage that feels more like a boutique kitchen than a storage closet. This is a great pick if you want a cozy look but you also need fast access for day-to-day cooking.
Cut shelf liner to fit the wire shelf and add it first to grip trays. Place shallow trays on top and mark where they sit so you can remove and reinsert without drifting. Add acrylic lids sized to the tray footprint and slide them on after filling. Label on the front lip of each tray so you can identify items without pulling lids back and forth.
Choose trays with a slight lip so lids seat securely and don’t rattle.
Don’t skip the grippy liner — without it, trays slide forward and your labels end up facing the wrong direction.
4. Two-Level Lazy Susan for Deep Corner Shelves
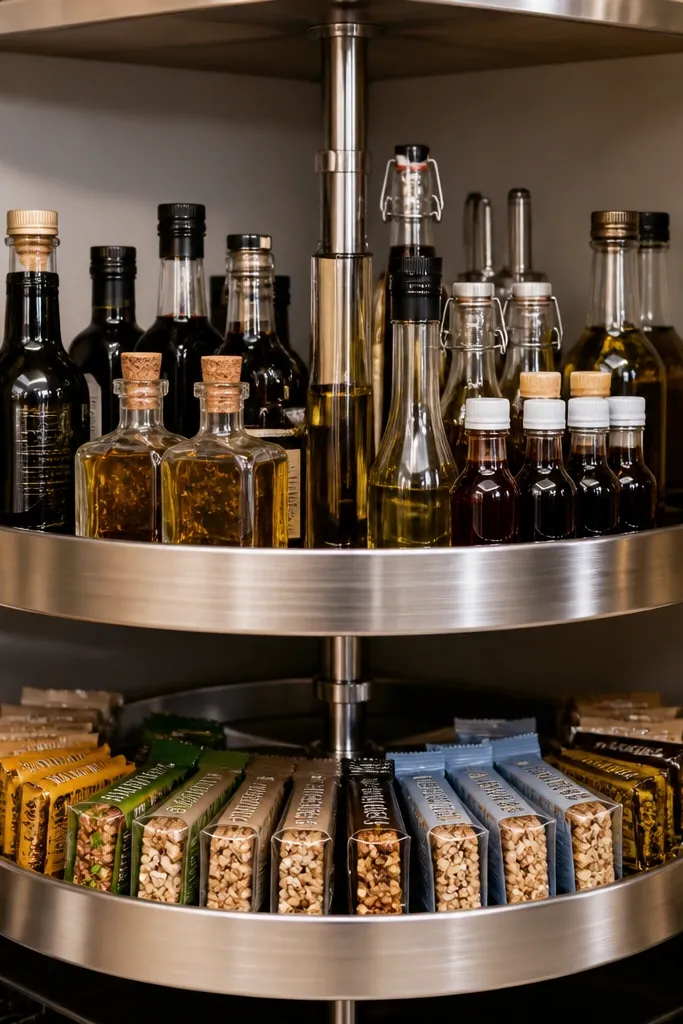
Corner shelves are where deep pantry chaos goes to breed. A two-level lazy Susan makes the entire corner reachable by turning, not stretching, and it keeps the pantry looking styled because everything sits in a neat circle. Put your “daily rotation” items on the top level (oils, vinegars, baking extracts, snack bars) and backups on the bottom level. The cozy look comes from using matching jars and consistent label placement so the turntable reads like a design feature, not storage.
Measure the corner shelf diameter and buy a lazy Susan that fits with at least 1 inch clearance. Mount the turntable on a stable platform or directly on the shelf if it’s solid. Add a second level only if your shelf height allows it without bumping lids or door clearance. Fill the top with frequently used items in uniform jars and use small baskets for snack packets, then label everything on the front-facing side so you can spot it instantly.
Use small risers under tall items so the turntable rotates smoothly without scraping.
Don’t overload it — if items touch the walls, the turntable will bind and you’ll stop using the system.
5. Pull-Out Basket Rails for Snack Zone at the Front
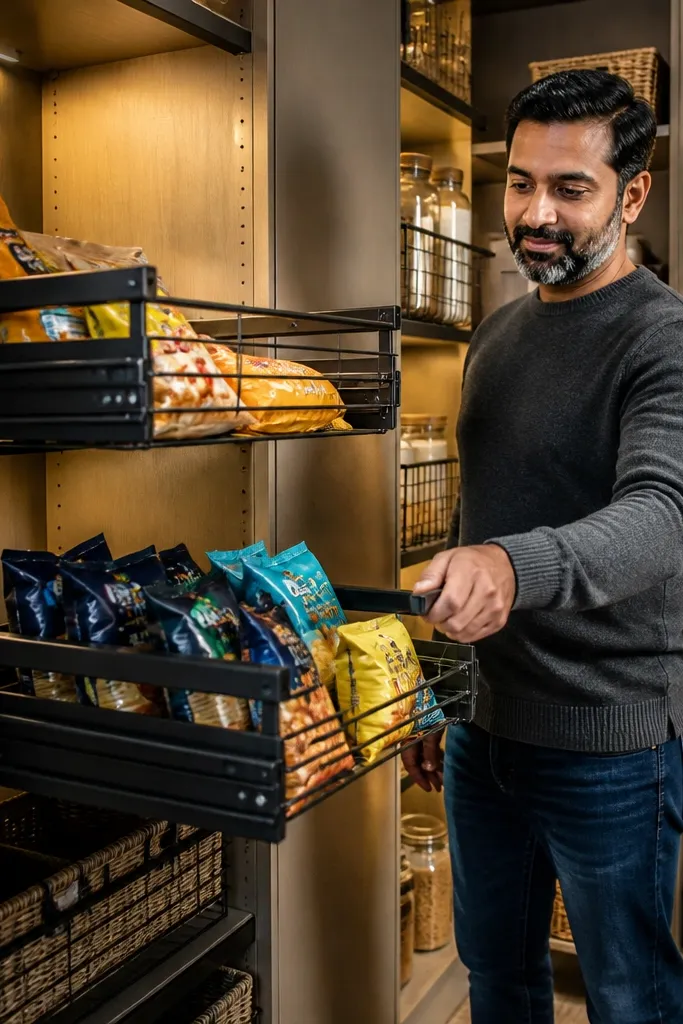
Install slide rails low enough that you can pull the basket out without blocking your view. Use baskets that match the rail footprint and add a liner or non-slip mat inside. Sort snacks into groups (breakfast bars, chips, baking snacks) and keep each group in one basket. Label the basket front and, for smaller items, use a small organizer divider so bags don’t spill when you pull the basket forward.
Create a snack zone that looks cozy by keeping the front area consistent and easy to reach. Pull-out basket rails give you deep reach without digging, and baskets hide the messy shapes of snack bags better than bins. This is one of the best cozy deep pantry organization ideas because snacks are the messiest category and also the most visible when you open the pantry. If your pantry door faces the kitchen, this setup makes the whole room feel calmer.
Skip thisAvoid putting single loose bags in the basket — they slide and make the front look messy fast.
Editor's noteKeep snack baskets shallow enough that bags stand upright; flat stacks fall over in deep storage.
6. Stacked Drawer Inserts for Spices and Small Jars
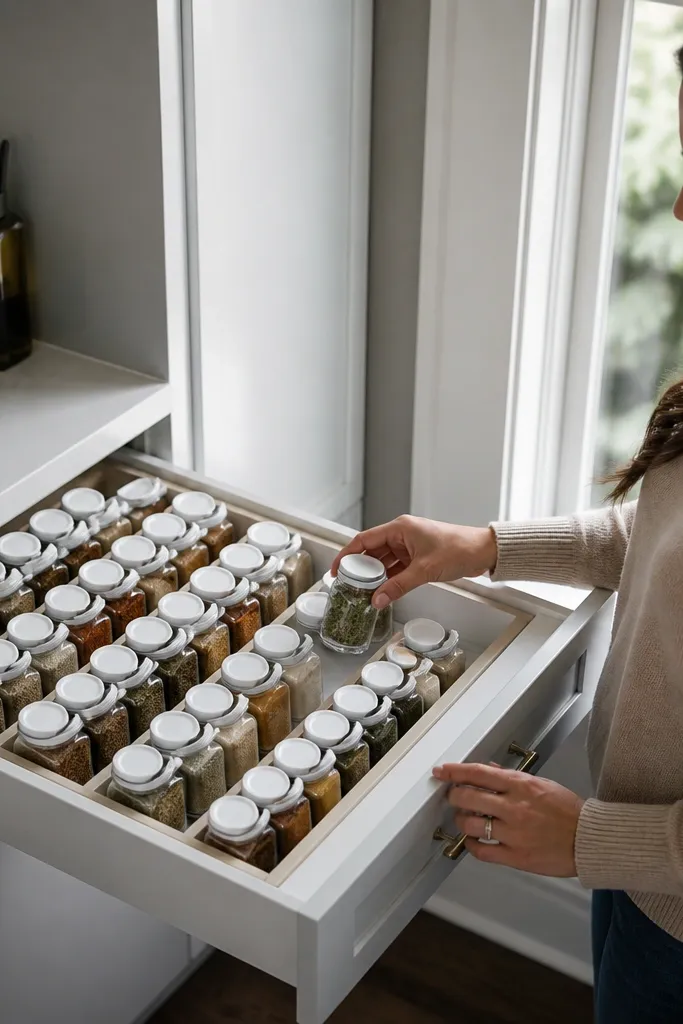
Spices and small jars make deep pantries look chaotic because they’re small, numerous, and easy to misplace. Drawer inserts solve the problem with physical boundaries, and they look cozy because they create a neat grid. Use stacked inserts so you can access the back row by sliding the insert out — no crouching, no digging. This setup also keeps your labels visible, which makes it easier to cook and reshelve correctly.
Measure your spice shelf and pick inserts that fit the width, then choose stack height so you still have room for jar lids. Place the smallest jars in the top insert and taller jars in the lower insert to prevent lid collisions. Add a thin shelf liner or non-slip mat at the base. Label each insert with a category and label each jar with a short name; keep label text on the front edge of the jar so you can read it when the insert is partially pulled out.
Use the same jar brand or at least the same jar shape so labels line up visually.
Don’t mix jar sizes randomly — you’ll lose the grid look and you’ll end up shoving jars in gaps.
7. Fabric-Panel Bin Covers for Opaque Bulk Storage
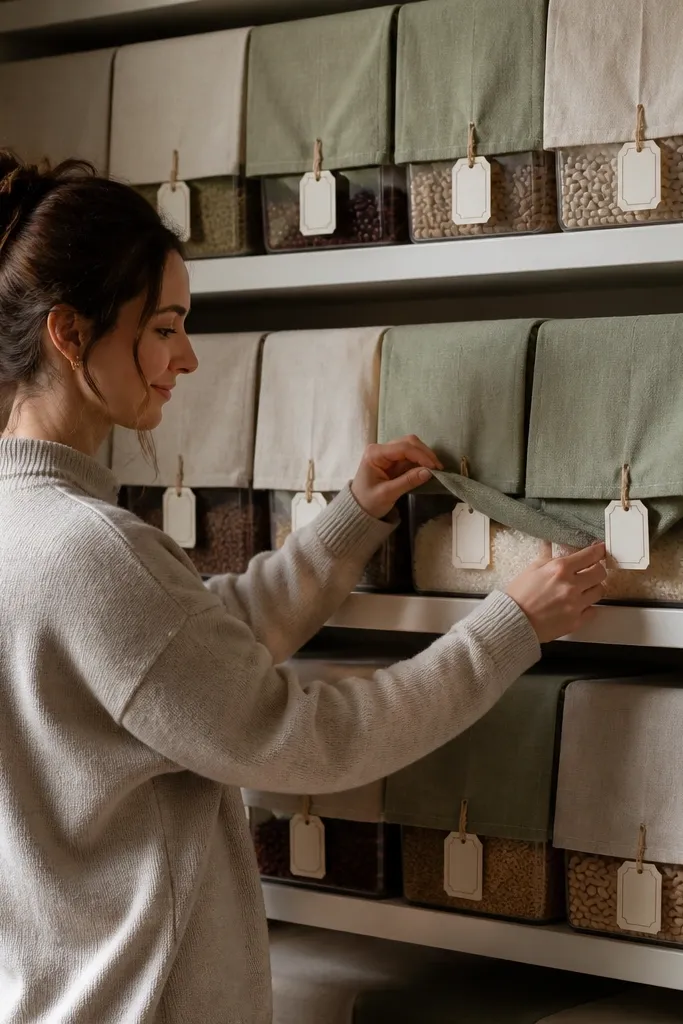
If you want cozy deep pantry organization ideas that look soft instead of industrial, use fabric-panel bin covers for bulk items. Opaque covers hide the ugly packaging of rice, beans, and flour sacks, while still keeping you organized through front labels. This works best for deep shelves because you can store large bags behind the cover without worrying about visual clutter. Choose neutral fabrics with a tight weave so they look clean and don’t sag.
Buy bins that fit your shelf depth and use removable fabric covers sized to the bin front and sides. Insert a grippy mat inside so the bin doesn’t slide. Fill bins in batches (for example, one bin for beans, one for rice) and place labels on the front panel where they’re visible at a glance. If your shelves are deep, keep the front edge of each bin aligned so the pantry looks straight from the doorway.
Use hook-and-loop fasteners on the cover edges so you can remove covers for cleaning without wrestling them.
Avoid flimsy fabric that droops — it makes the pantry look messy even when everything is sorted.
8. Expandable Shelf Dividers to Stop "Backfall"
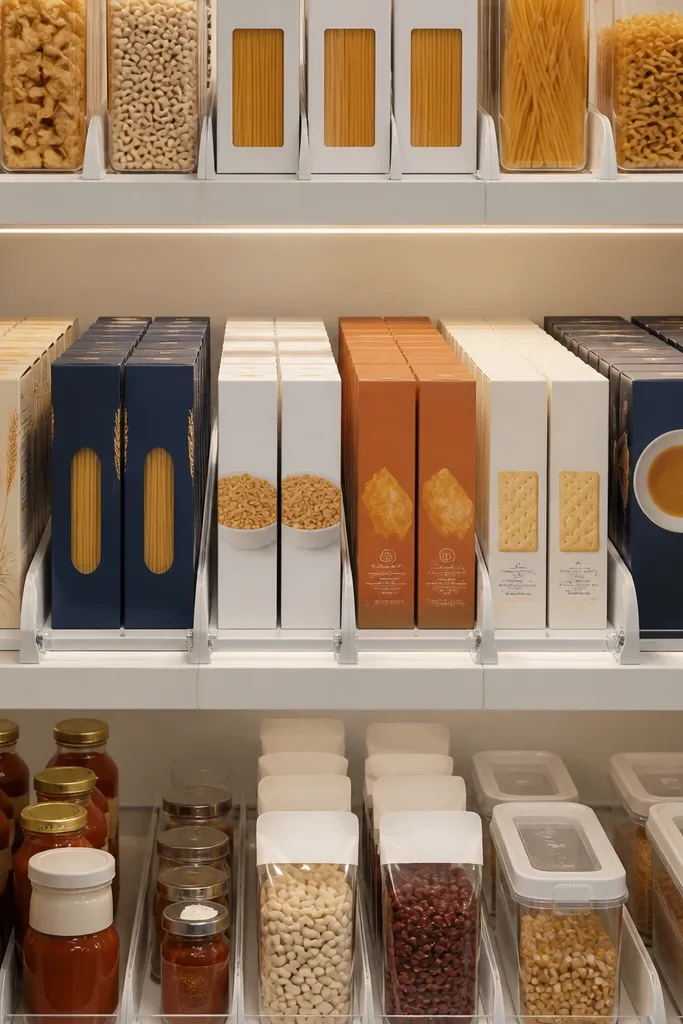
Measure the shelf width and choose dividers that expand to fit with snug pressure or that mount to the shelf. Set divider spacing to match your most common box width, usually 5-6 inches for pasta and cereal. Place dividers first, then stack items upright so each item sits within its own lane. Label each lane on the front edge with a short category label so reshelving takes seconds.
Deep pantries fall apart when boxes lean and slide into each other. Expandable shelf dividers create a clean grid that keeps items from drifting into the back, and it looks good because the front becomes straight lines. This is a strong choice for boxed goods like pasta, cereal, crackers, and broth. When dividers are the same color and height, the pantry reads as designed instead of stuffed. It’s also cheap, which matters because you’ll likely add multiple sections.
Skip thisDon’t set dividers too tight — if boxes scrape, they’ll get forced out of alignment and the grid will break.
Editor's noteUse dividers in pairs so they lock the front and back edges of each lane.
9. Transparent Door-Mounted Pocket Organizer for Pantry Labels
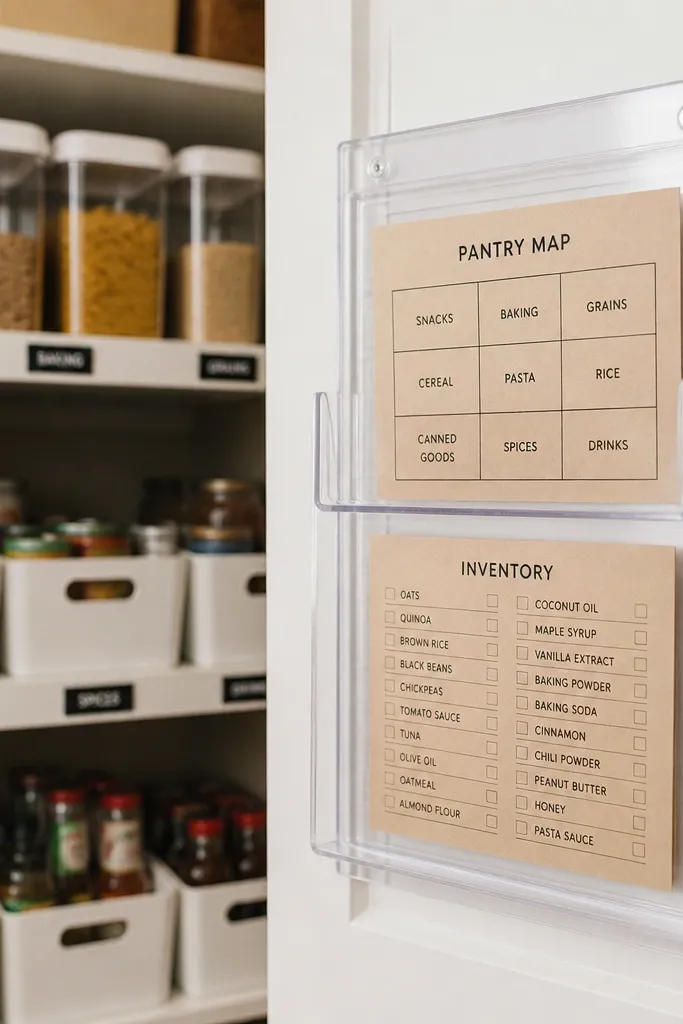
Clean and dry the pantry door surface and install adhesive or screw-mounted clear pockets at eye level. Create a label map on thick paper with the shelf zones you built (snacks front, baking mid, backups top). Add an inventory card with columns for item name and last restock date, then slide it into the pocket. When you refill bins, update the card and keep it visible so the system stays consistent.
This one is about keeping the pantry calm visually. When you can see what’s where, you stop digging and pulling everything out, which is when chaos starts. Mount a transparent pocket organizer on the inside of the pantry door and keep a label map plus a simple inventory list for quick shopping. The cozy look comes from matching label styles and using kraft or cream paper, not random loose notes. It’s not a storage container, but it prevents the pantry from falling apart again after you organize it.
Skip thisAvoid placing pockets too high — you’ll stop checking them and the pantry will drift back to chaos.
Editor's noteUse a dry-erase label sticker for the inventory card so you can update without replacing paper.
10. Magnetic Spice Strip on a Backer Board Behind the Door
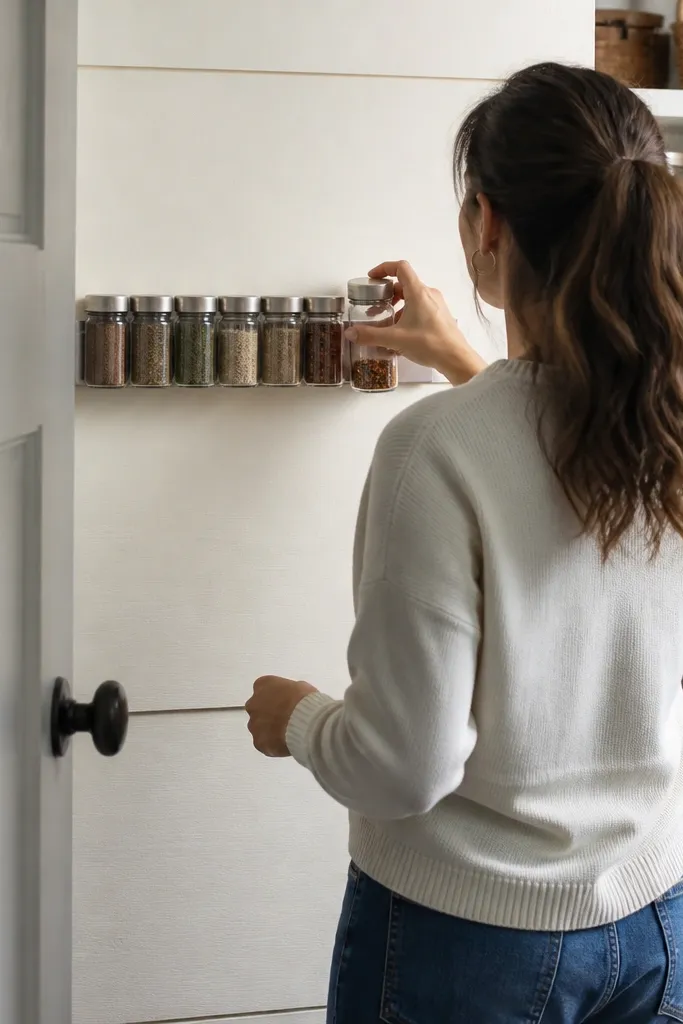
Measure the inside door area and cut a backer board (wood or MDF) to fit. Attach the board securely to the door with screws so it doesn’t sag. Install a magnetic strip across the board and place your spice jars so they stick firmly without wobbling. Label each jar and keep the labels facing outward; then store backups in a single drawer or bin on the pantry shelves.
If your deep pantry has room behind the door, magnetic spice storage looks clean and keeps spices within arm’s reach. Instead of stacking small jars on deep shelves, mount a backer board and add a magnetic strip so jars line up in a single row. This makes the pantry look designed because the jars are aligned and labels face the same direction. It also reduces shelf clutter and gives you more space for bins and pull-outs.
Skip thisDon’t mount directly on flimsy door panels without reinforcement — the board will loosen over time.
Editor's noteChoose spice jars with metal lids that grip strongly; weak magnets make jars fall when the door swings.
11. Tiered Lazy Shelf for Oils, Vinegars, and Sauces
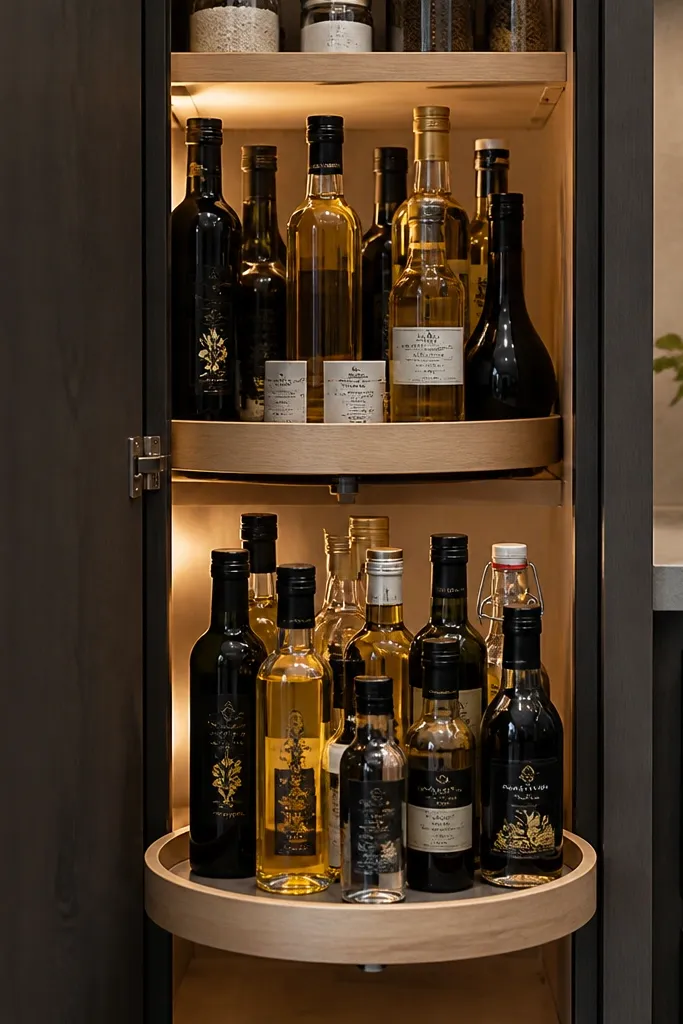
Measure bottle height and shelf depth, then choose a tiered shelf that pulls out or tilts forward while still fitting your opening. Install the unit on the pantry wall so it sits level and doesn’t rack. Place bottles by height, with the tallest toward the back tier and the most used toward the front tier. Add a drip catch tray or mat underneath each tier, then label each bottle and keep the labels facing outward.
Tiered shelves make deep bottle storage look intentional and prevent the “bottles disappear” problem. Oils, vinegars, and sauces are tall and heavy, so they need a front-facing system where labels stay visible. A tiered lazy shelf (a small platform that pulls forward) gives you access without removing everything. For cozy aesthetics, use matching bottle labels or add label tags that are the same color family across your pantry.
Skip thisDon’t stack bottles on bare wood — spills stain and the pantry stops looking clean fast.
Editor's noteUse a thin silicone mat under bottles to prevent slipping and reduce label smear if a cap leaks.
12. Clear Bin + Sliding Divider for Pasta Shapes and Rice Bags
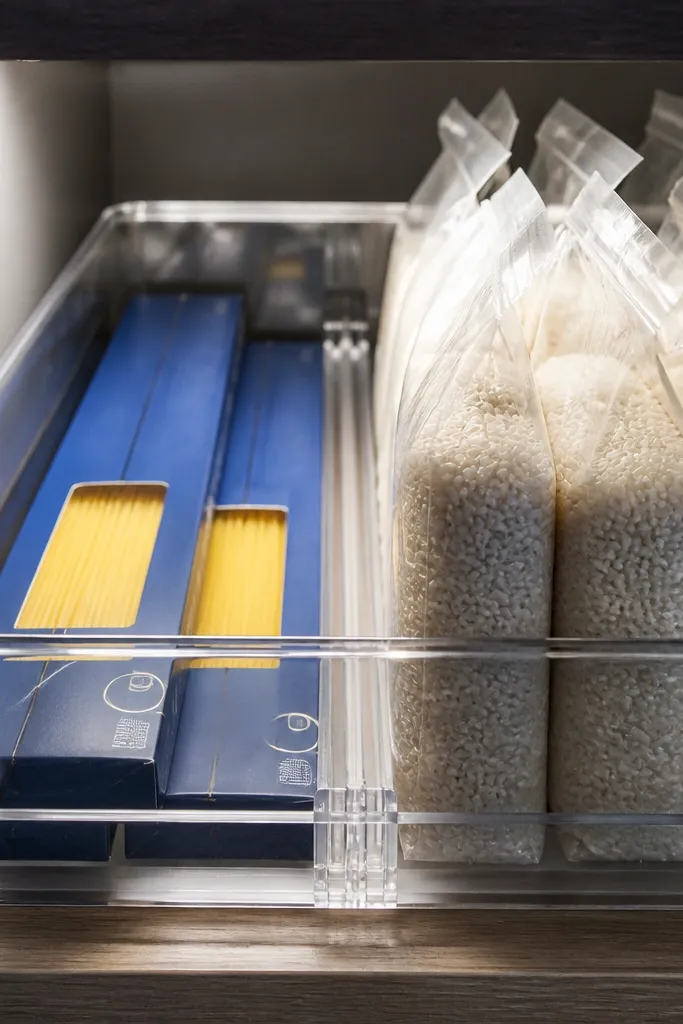
Buy a clear bin sized to your shelf depth and add an internal divider that slides or snaps into place. Line the shelf with a grippy mat, then place the bin so it sits flush at the front. Sort items by shape and width, then set the sliding divider so each category has its own compartment. Label the front of the bin and also label the divider zones so you can reshelve quickly after cooking.
A clear bin with a sliding divider keeps long pasta boxes and flexible rice bags from turning into a tangled mess. You get visibility without the clutter of loose packaging, and it looks crisp because dividers create straight lines inside the bin. This is ideal for deep shelves because the bin can sit at the back while the front divider stays reachable. Pick bins with thick walls so they don’t look flimsy and choose a consistent label style for that cozy, organized look.
Skip thisAvoid under-sizing the bin — if items force the divider, it won’t stay put and the inside turns messy.
Editor's noteUse bins with lids even if you keep things dry — dust shows up fast on clear storage.
13. Stacked Canisters on a Wood Ladder Shelf for a Cozy Display
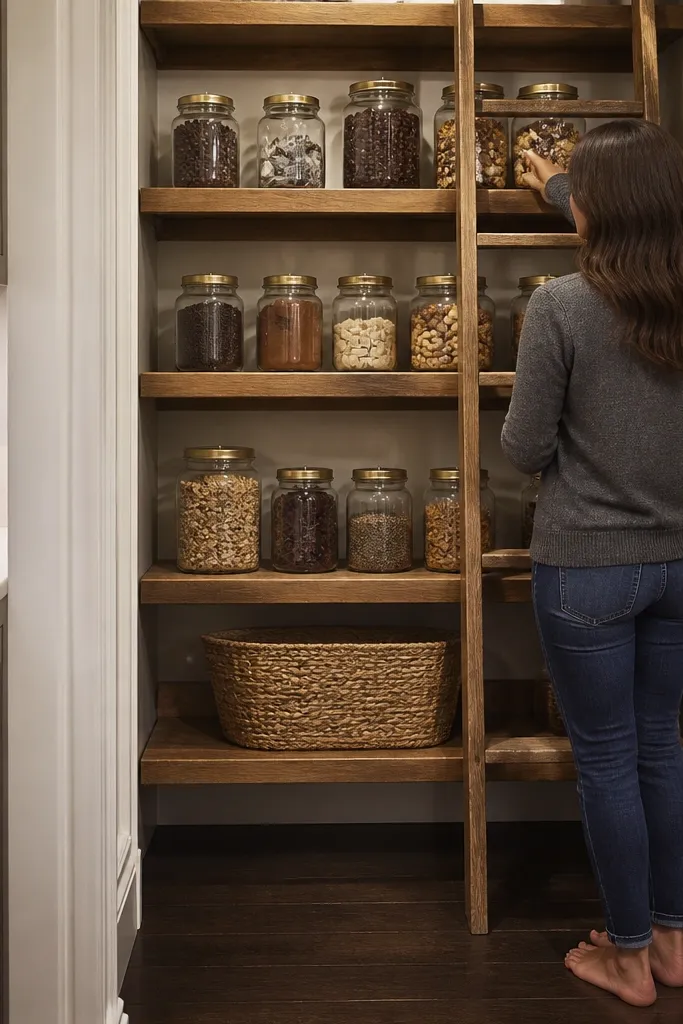
A wood ladder shelf adds warmth and makes pantry storage look like a display instead of a utility closet. Use it for items that are pretty and stable: tea, coffee, baking cocoa, granola, and snacks in jars. The ladder format is great for deep pantries because it gives you multiple levels without needing pull-outs, and you can see everything from the doorway. Keep it cozy by using warm-toned wood and matching canister shapes with consistent label placement.
Choose a ladder shelf that fits your pantry width and height with at least 2 inches clearance from the door when opened. Secure it to wall studs or solid backing so it’s stable with weight. Place canisters in descending size order so the front looks balanced, and add a small basket at the bottom for extra packets. Label every container and keep the same label color style across all jars for a clean visual rhythm.
Anchor the shelf first, then measure your canisters against it before buying — ladder shelves vary in spacing.
Don’t mix tall jars with short bins on the same rung — it throws off the neat ladder look.
14. Magnetic Label Strips for Quick Reshelving Zones
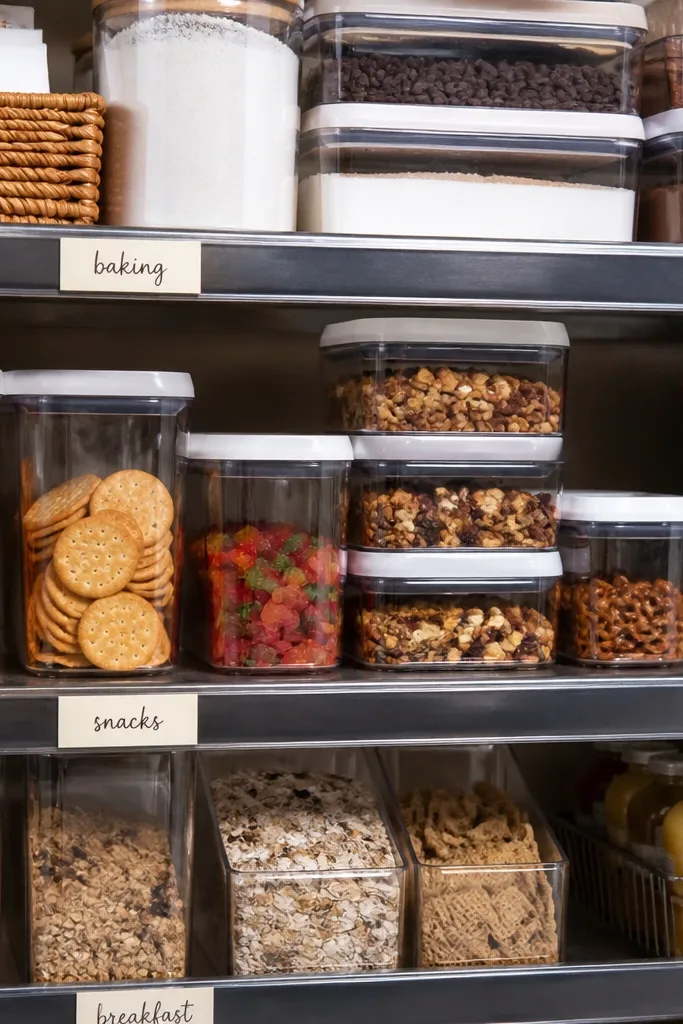
Install thin magnetic tape or a magnetic strip along the front edge of each shelf zone. Cut label cards to the same width and laminate them for durability. Slide labels into place on the strips and align them so every label starts at the same corner. After you fill bins, take a quick photo from the doorway and compare label alignment — adjust before you load heavy items.
If your goal is chaos-free, labels must be easy to update. Magnetic label strips keep your category system consistent even as you swap brands or restock. It looks cozy because labels become part of the shelf design instead of loose paper taped to containers. Put strips on the front edge of each zone: baking, snacks, breakfast, and backups. You’ll also reduce rummaging because you can reshelve without thinking.
Skip thisAvoid handwritten labels on loose tape — they peel and the shelf looks messy even when the bins are organized.
Editor's noteUse laminated labels with black text and a small icon (like a cookie or bag) so kids and guests can reshelve too.
15. Deep Shelf Step-Stop Shelf Liner to Prevent Back Slippage
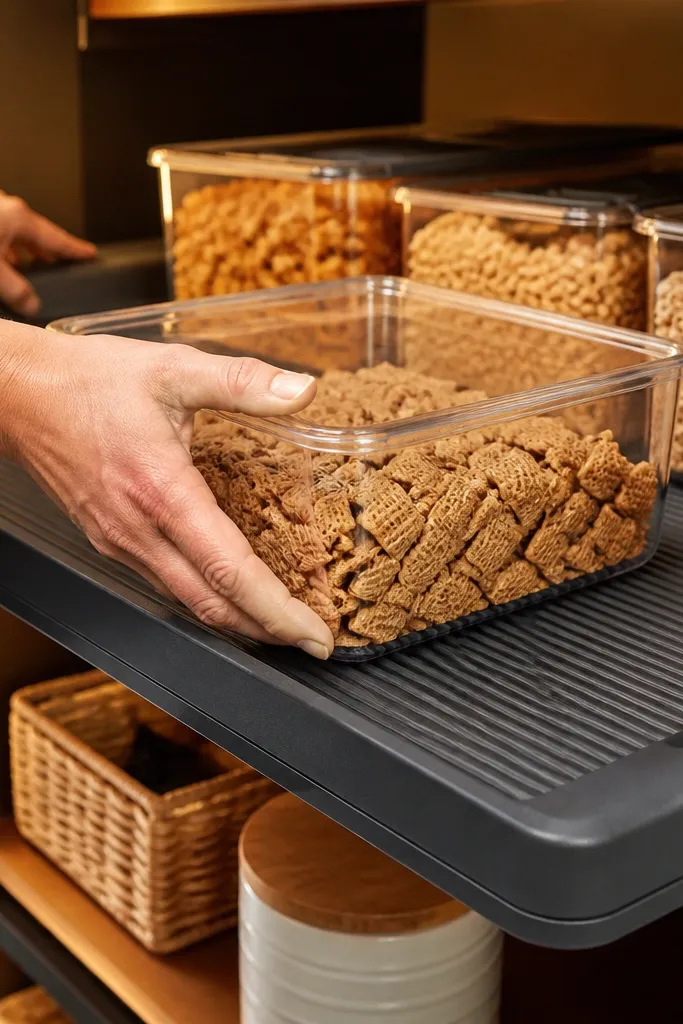
This is the unglamorous fix that makes the rest of your setup actually work. Deep shelves create a slope effect when bins are smooth or when the shelf liner is too slick, so everything inches toward the back. A step-stop liner or grippy rubber mat creates friction so your bins stay where you put them. It also looks better because the front edges of bins stay aligned, which gives you that calm, cozy look even before you add labels. If you’re fighting sliding bins, this is the first upgrade I’d do.
Measure the shelf surface and cut grippy shelf mat sheets so they fit with no curling edges. Test with one filled bin and pull it forward, then gently push it back — it should resist movement. If you use pull-out drawers or slide baskets, add smaller cut sections under the rails so the system doesn’t shift sideways. Once everything holds position, add your bins and align them to the front line you want.
Choose a mat with raised texture, not smooth foam — smooth liners let bins creep over time.
Don’t use paper liners — they look fine until they wrinkle and make bins wobble.
16. Spill-Proof Under-Shelf Trays for Oils and Vinegar
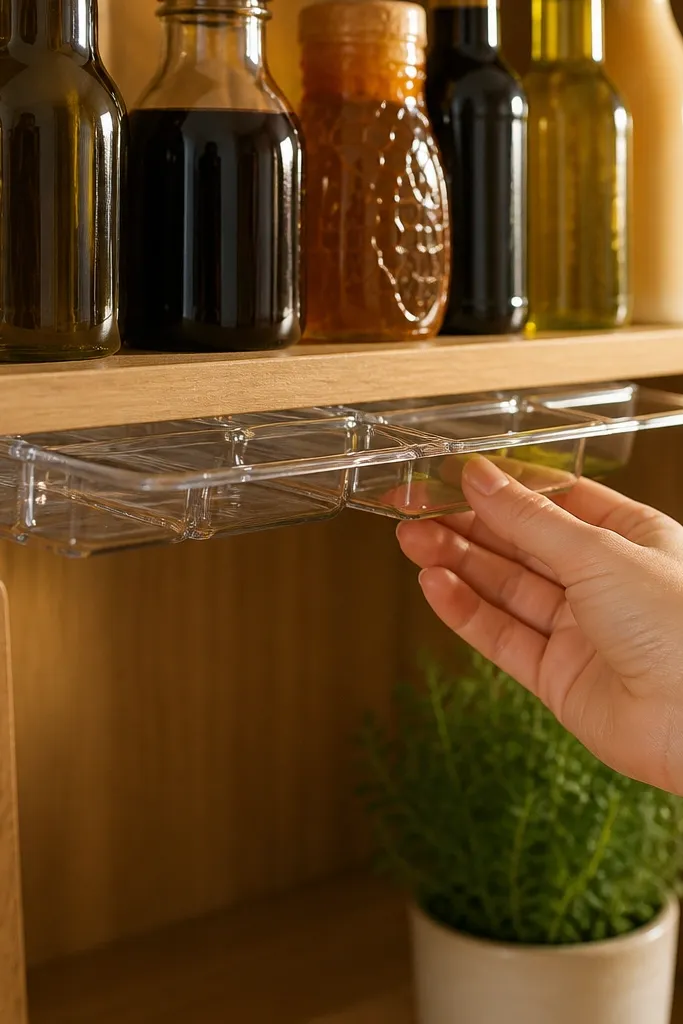
Deep pantries get gross fast when bottles leak. Under-shelf spill trays stop the mess before it stains your shelves, and they keep the pantry looking clean, which is what makes the whole system feel cozy. Put them under the highest-risk items: oils, vinegar, soy sauce, honey bottles, and any bottle you’ve ever seen “sweat” in heat. The visual trick is to keep trays clear and aligned so they don’t look like a band-aid. Pair the trays with front-labeled bins so the organized look stays intact.
Measure the shelf depth and width and buy spill trays sized to cover the area under your bottle zone. Place the trays on a grippy liner so they don’t slide. Arrange bottles in a stable row, then add a drip-absorbing mat inside the tray if you expect frequent tiny leaks. Label the shelf zone and keep the most used bottles at the front so you don’t reach deep and shake the whole row.
Add a small funnel to your kitchen station so refilling doesn’t cause drips that ruin pantry shelves.
Avoid using trays that are too small — partial coverage still lets leaks run to the back.
17. Over-the-Shelf Door Organizer for Cleaning Supplies Backups
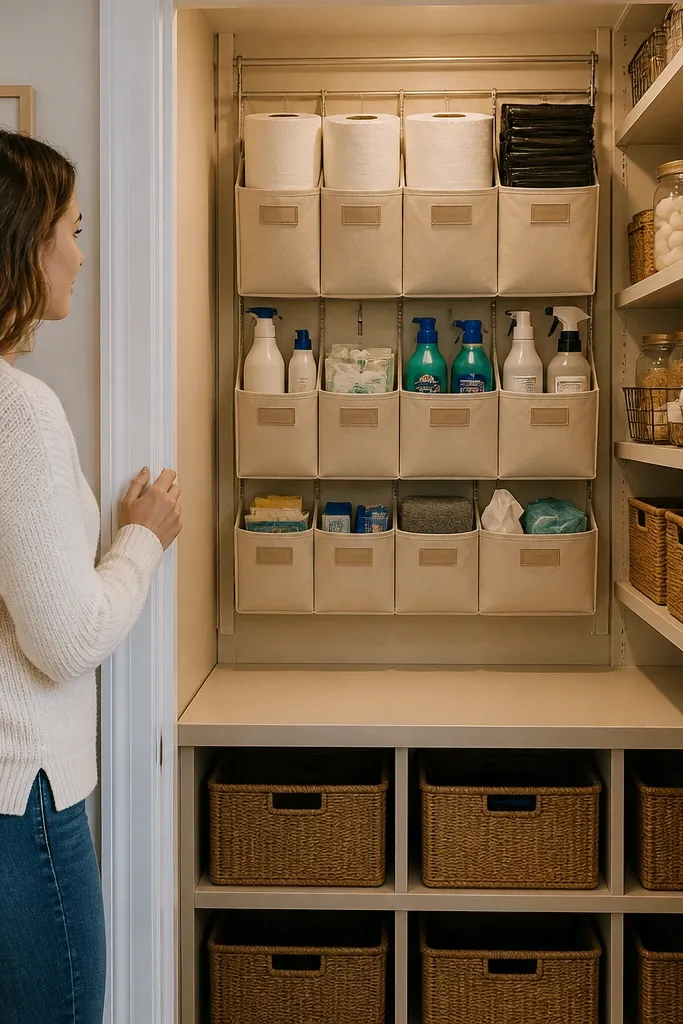
Back-of-pantry chaos often comes from “hidden” supplies like extra cleaning products, paper goods, and backup trash bags. Over-the-shelf organizers move those items off the deep shelf floor and into front-access pockets, which makes the pantry look more like a cooking space. This is cozy because it clears the main shelf line for food storage and keeps the messy stuff contained. Use it for bulky, non-food backups and keep the pockets labeled so you don’t repurchase.
Choose an over-the-shelf organizer sized for your shelf depth and that fits your shelf frame or solid shelf. Attach it securely with the included brackets so it doesn’t sag under weight. Sort backups into pockets by category and keep heavy bottles on the bottom pockets. Label each pocket with a simple category label and a restock note, then store the front shelf area for food bins only.
Put paper goods in one pocket and liquids in another so leaks don’t contaminate dry items.
Don’t overstuff pockets — once they bulge, they stop looking clean and the organizer loses structure.
18. Bamboo Lazy Shelf for Tea Bags and Snack Packs
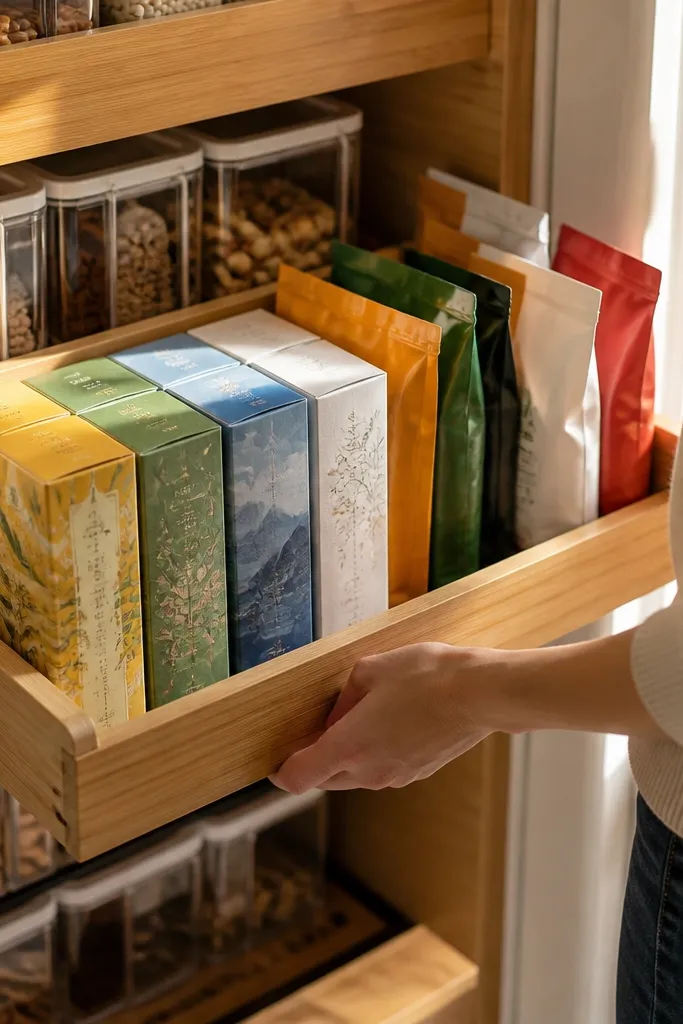
Measure shelf depth and choose a bamboo pull-out shelf that matches the width of your pantry zone. Install mounting brackets level so the pull-out glides smoothly. Place tea boxes and snack packs standing upright with the fronts aligned, then add small dividers if needed to stop leaning. Label the shelf front and add a small “refill here” note so you know where new boxes go.
Bamboo lazy shelves look cozy because they bring warmth and a natural texture into pantry storage. Use one for tea and snack packs where you want quick visibility without opening multiple bins. Deep shelves hide these items easily, and tea boxes especially are tall and awkward, so a pull-out shelf keeps labels facing forward. This setup also makes the pantry feel like a place you want to browse, not a storage spot you avoid.
Skip thisAvoid mixing loose packets with upright boxes on the same shelf — loose packets turn the surface into a pile.
Editor's noteUse felt pads under bamboo shelves to reduce wobble and noise when you pull them out.
19. Uniform Glass Jars with Brass-Tone Lids for Bulk Dry Goods
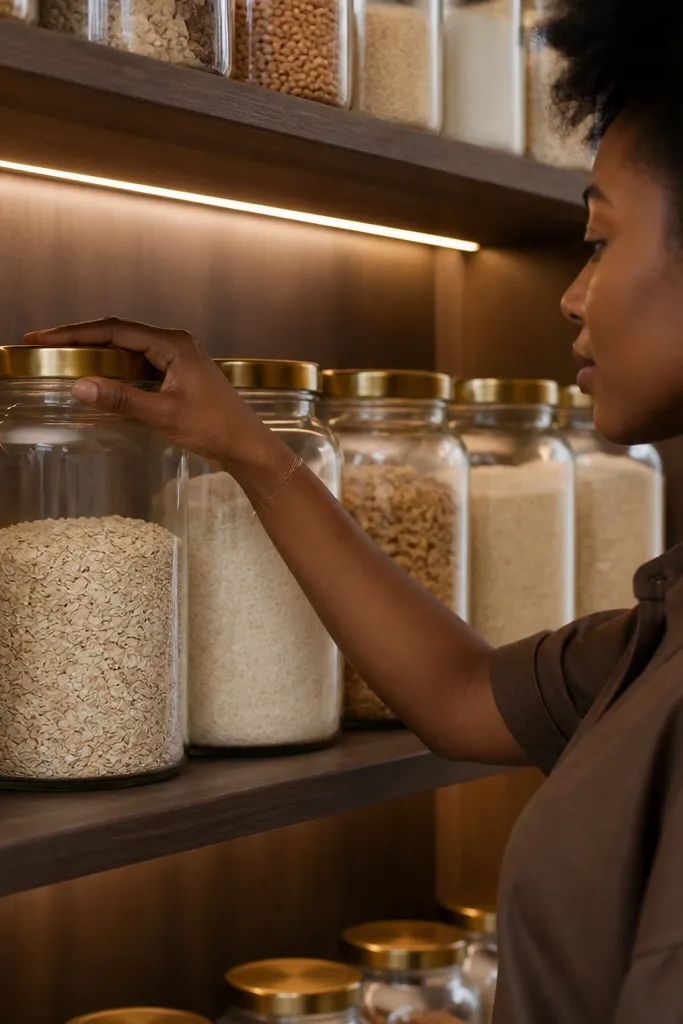
Pick jar sizes based on your shelf height and depth: tall jars for flour and wide jars for rice, plus a couple of small jars for baking staples. Wash and dry jars thoroughly, then transfer dry goods and wipe lids clean. Place jars in a single front row for active goods and a second row behind for backups, keeping a small gap for easy grabbing. Label jar lids and add a simple category label at the shelf edge to keep the whole system coherent.
If you want cozy deep pantry organization ideas that look genuinely photogenic, uniform glass jars with brass-tone lids are the move. They make dry goods look like a display because the shape stays consistent and light hits the glass nicely. This approach reduces visual clutter by replacing mismatched packaging with a single look. Store bulk dry goods like beans, rice, lentils, and flour in jars sized to your shelf depth, and keep backups in opaque bins so the jars don’t run out too fast.
Skip thisAvoid filling jars to the brim — leave a little headspace so items don’t compact and labels don’t smear.
Editor's noteWipe the rim before sealing — sticky residue makes lids look messy and attracts dust.
20. Corner Shelf Pull-Out Platform with Handle for Heavy Bags
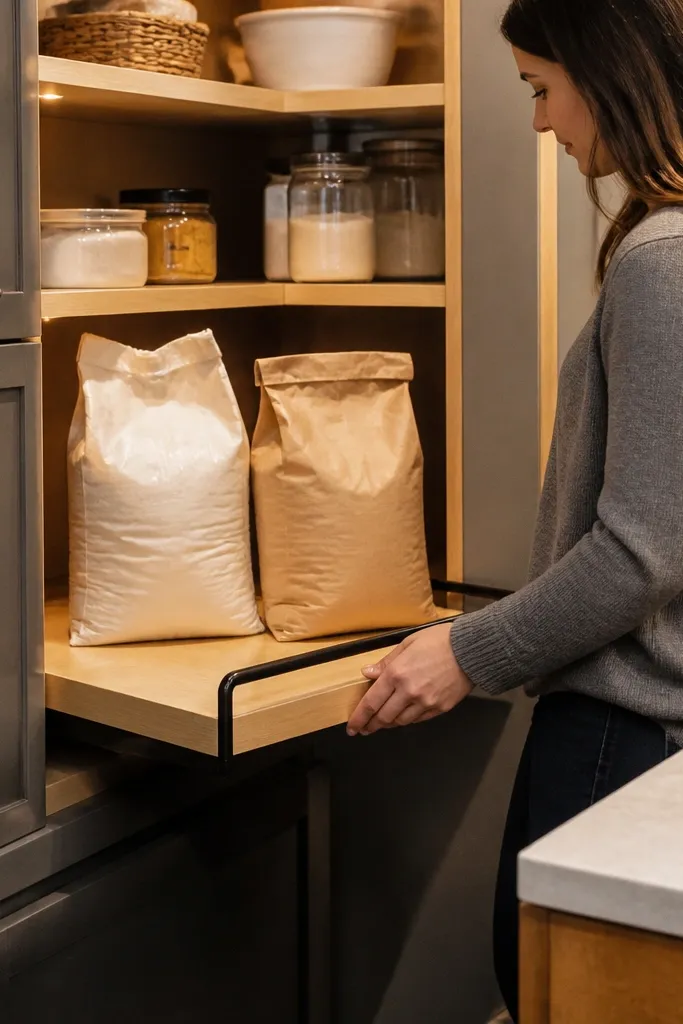
Measure the corner shelf footprint and build or buy a pull-out platform tray sized to fit with clearance for smooth extension. Install drawer-style slides rated for the weight you plan to store. Add a handle centered on the front edge so you can pull it out without grabbing the bag. Use a non-slip mat on the platform and keep bags upright; label the zone and add a quick restock note on the front.
Heavy bags in deep corners are where organization turns into a workout. A pull-out platform with a handle makes those heavy items reachable without reaching deep or tipping bags. It also looks clean because the bags stay upright in one area instead of leaning across the shelf. Use it for flour bags, bulk sugar, dog treats, or paper products. The cozy look comes from a single, defined “corner zone” with matching labels and a consistent front edge line.
Skip thisAvoid weak slides — if the platform binds, you’ll stop using the system and the corner will revert to chaos.
Editor's noteUse slides with full extension so you can access the back without leaning in.



