
1. Two-Tone Shaker Panels with a 36-Inch Chair Rail
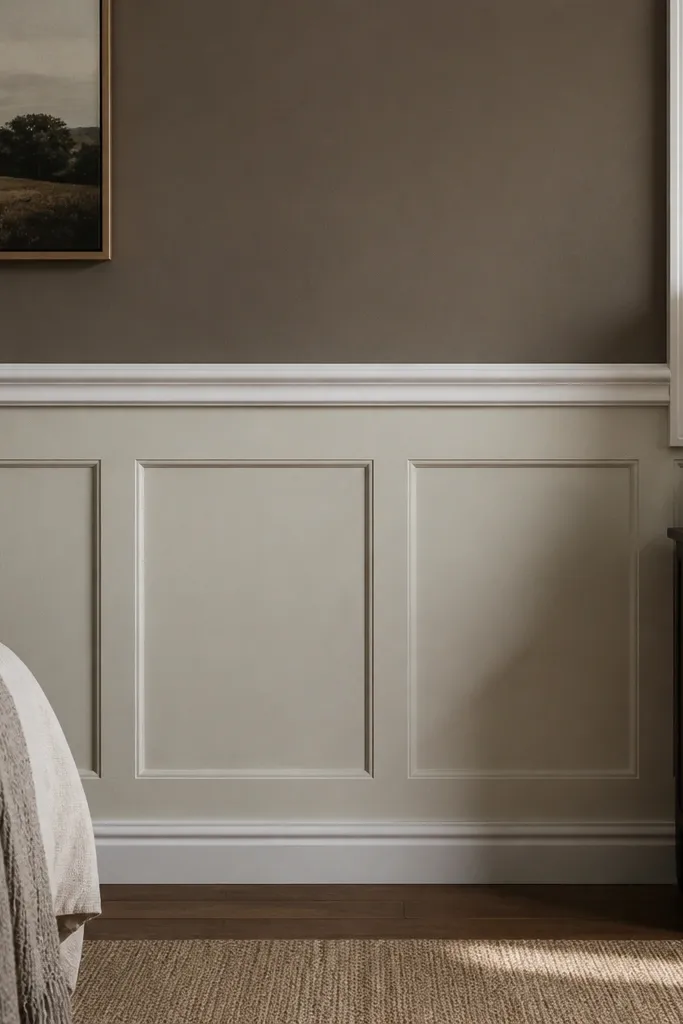
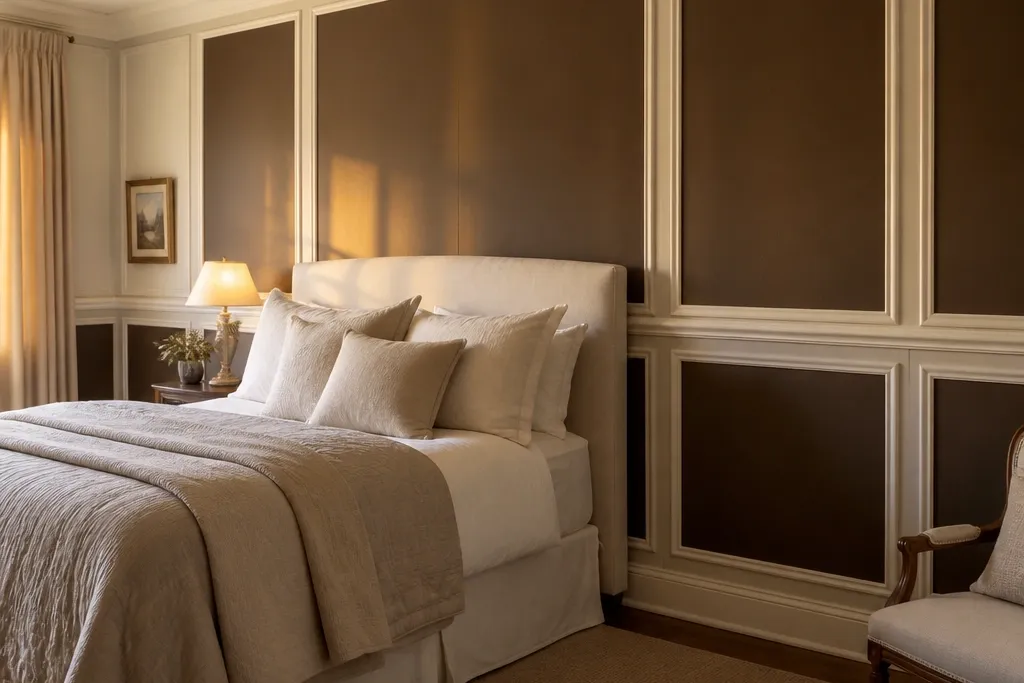
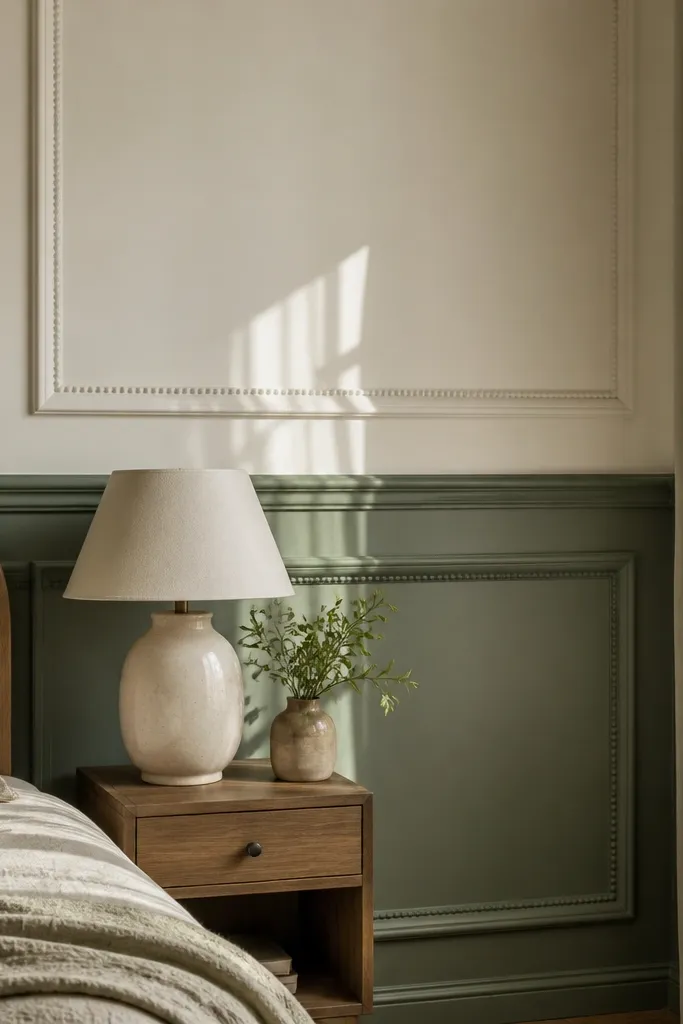
This is the cozy wainscoting idea I recommend when you want “built-in” without going fancy. Shaker-style rectangles create enough texture for warmth, and the 36-inch chair rail keeps the pattern anchored in a bedroom where people notice the wall while lying down. Use a lighter trim color against deeper wall color so the panel edges throw visible shadows. It looks great with wood furniture and brass lighting because the panel geometry adds structure while the color adds softness. It’s a solid DIY build if you can cut straight and keep your layout lines consistent.
Start by marking your chair rail line at 36 inches from the floor on every wall, then snap a level chalk line. Build a simple frame grid: install a base rail, then add vertical stiles and horizontal rails so your panels are around 16-18 inches tall. Prime and paint the trim in a satin finish, then paint the panel fields in matte or eggshell for a softer look. Finish by caulking seams and filling nail holes so the panel edges look sharp, not patched.
Editor's notePre-cut your stiles and rails in batches and label them by wall position so you don’t end up with mismatched lengths at corners.
Skip thisAvoid tiny, skinny panels; they look busy up close and feel less cozy from the bed.
2. Beaded Board Lower Wall with a Picture-Frame Border
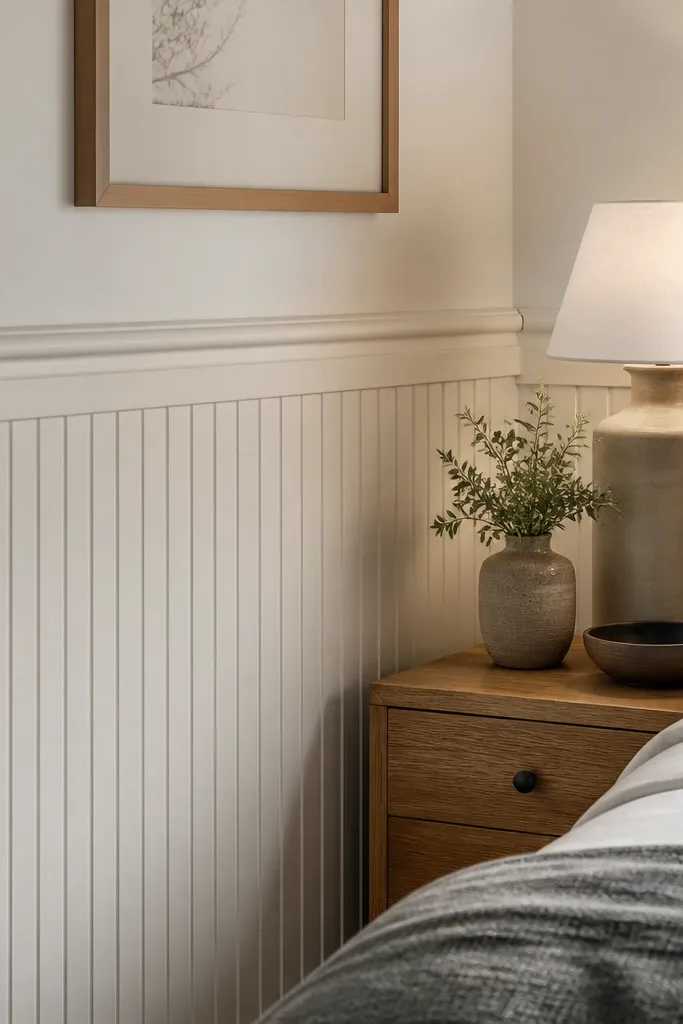
If you want cozy texture you can feel with your eyes, beaded board does it. The bead lines create a gentle rhythm that reads warm even when the room is bright and airy. Pair it with a picture-frame border so the bead texture sits inside a clean outline, which keeps the look from turning into “unfinished siding.” This works especially well in bedrooms with light wood floors and neutral bedding because the bead adds character without adding color drama. It’s also forgiving for DIYers because the bead pattern hides small imperfections.
Install a chair rail at 38 inches and a cap rail above the lower section, leaving a panel field height around 24-28 inches. Nail beaded boards horizontally or vertically depending on the look you want, but for a cozy bedroom go horizontal — it feels calmer. Frame the top and bottom edges with 1x2 or 1x3 trim boards cut to match the border thickness. Caulk the bead seams lightly, then paint the whole system with satin trim and eggshell fields.
Editor's noteUse a small finish nailer and set nails slightly below the surface, then fill and sand once before painting.
Skip thisDon’t skip a border; bare bead boards without a frame can look like a temporary wall covering.
3. Paneled Ombre Look by Painting Panel Fields in Three Warm Tones
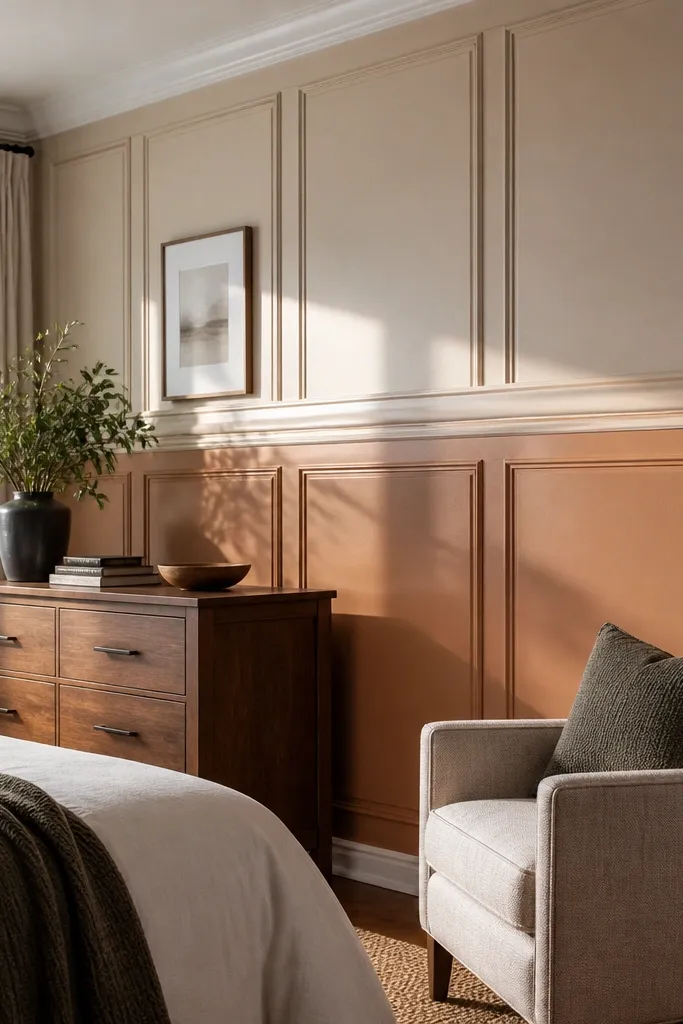
This one is for cozy wainscoting ideas that need to look intentional, not like you changed your mind on paint. By painting panel fields in three warm tones that step from lighter near the chair rail to deeper toward the base, you get a subtle depth effect that looks great in photos. The trim stays one consistent light color so the panels read as “architecture,” not a color patchwork. Choose warm neutrals like creamy white, mushroom beige, and clay taupe — they stay cozy with almost any bedding. The layout should be simple rectangles so the color gradient does the visual work.
Pick a panel grid with consistent sizes, ideally 16-18 inches tall, and keep the trim thickness consistent. Paint the trim first in satin (cream or off-white), then mask the panel fields. Apply three warm tones across the lower wall: light on the top row, medium in the middle, and deeper on the bottom row. Let each coat cure, then remove tape carefully with a sharp blade so edges stay crisp.
Editor's noteUse the same sheen for all panel fields (matte or eggshell) so the gradient looks smooth instead of blotchy.
Skip thisAvoid high-contrast colors; harsh differences make the wall feel busy instead of cozy.
4. Crown-Cap Wainscoting with a Tall Upper Border
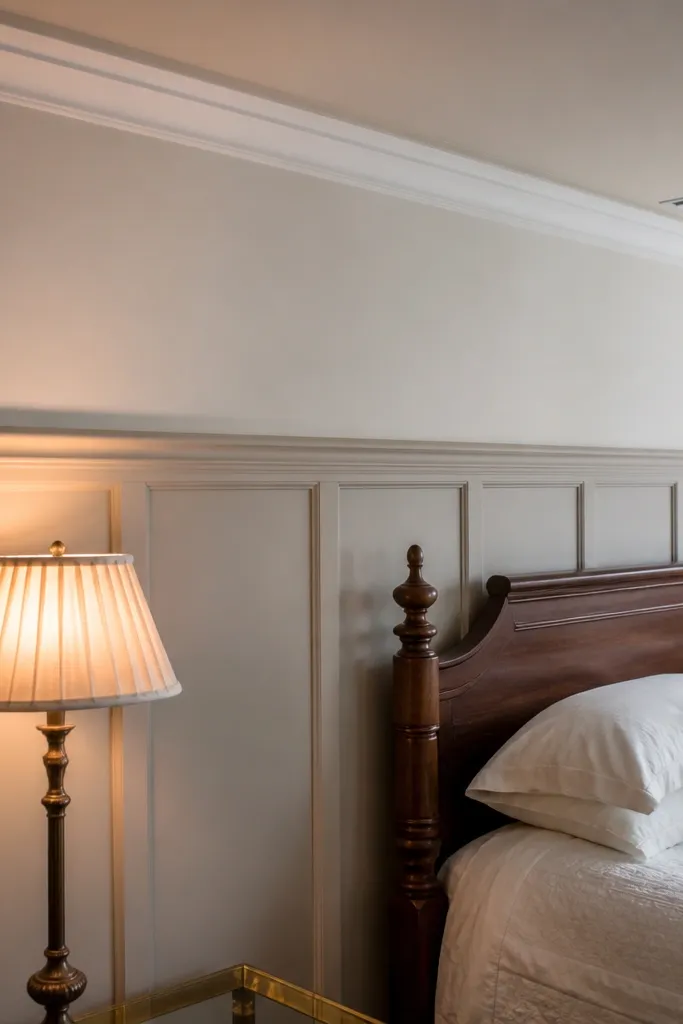
This is the “cozy but fancy” option that doesn’t feel overwhelming. A tall upper border gives your bedroom wall a finished top edge, so the room looks dressed even when the ceiling is low or you don’t have crown molding. The trick is to keep panels modest and let the upper border carry the visual weight. Choose a chair rail around 34-36 inches, then add a thicker cap border above the panel field. It pairs well with warm lighting and patterned rugs because the border frames those details without competing.
Mark your chair rail at 35 inches and install the base and chair rails. Frame a lower panel field with vertical stiles to create panels around 14-18 inches tall. Add a wider cap border above the top rail using a 1x4 or 1x6 trim board so it visually “finishes” the wall. Prime, caulk, and paint trim in satin, with panel fields in eggshell for a cozy contrast.
Editor's noteIf ceilings are under 8 feet, keep the upper border height under about 10 inches to avoid crowding the room.
Skip thisDon’t add tall borders without checking door trim heights; mismatched lines look awkward fast.
5. Arched Top Panels in the Lower Third
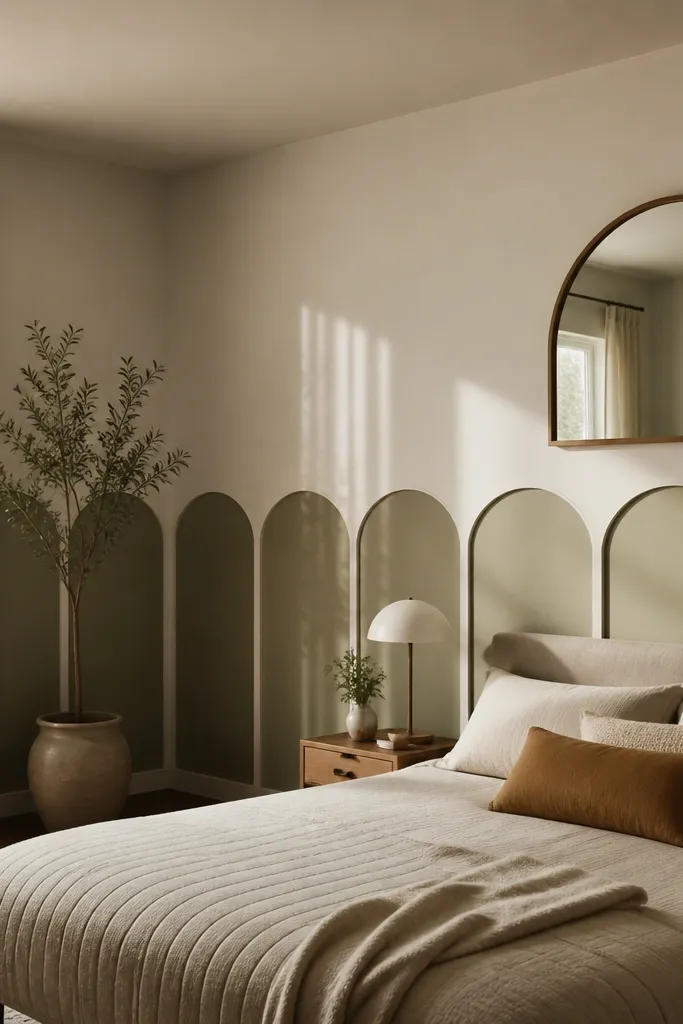
Arched tops soften the whole wall. Straight rectangles can feel a little strict; arches add a gentle curve that reads cozy, especially in bedrooms with rounded furniture edges or arched mirrors. Keep the arches only in the lower third so they look like a design feature instead of a whole-room theme. This layout looks amazing in photos because the curves catch light and create a delicate shadow line. It’s also a good middle ground between simple shaker and more ornate styles.
Set your chair rail at 36 inches and build a lower panel field about 26-28 inches tall. Use a template for the arched section: pick a panel width (like 18 inches) and draw an arch with a consistent rise, then cut identical top rails. Install vertical stiles, then attach the arched top rails so the arch profile is even across every panel. Prime and paint with satin trim and eggshell panel fields; use wood filler at seams and sand before the final coat.
Editor's noteCut one perfect template and trace it for every panel top; don’t freehand the arch shapes.
Skip thisAvoid mixing arch sizes; even one taller arch makes the wall look uneven.
6. Board-and-Batten with Thick Vertical Battens
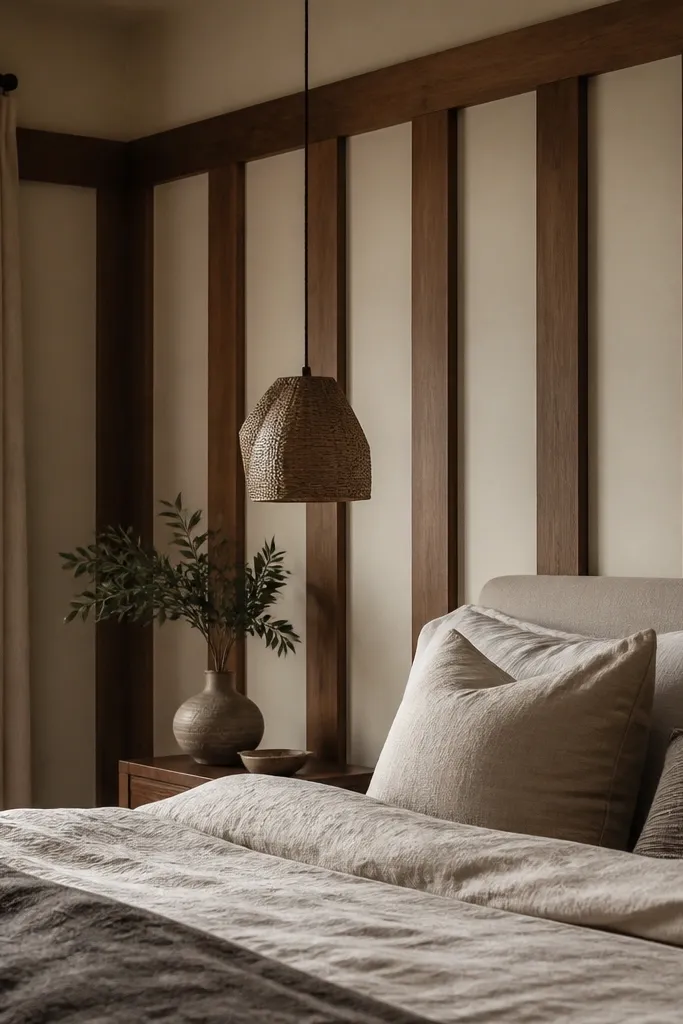
Thick battens create a bold, cozy texture that looks great in bedrooms where you want warmth without delicate detailing. Board-and-batten also hides minor wall imperfections because the vertical pattern draws the eye away from uneven drywall. Keep the battens wider than you think so the texture reads from across the room — aim for battens around 1x2 or 1x3 depending on your panel size. This style looks especially good with textured bedding and chunky knit throws because the wall has the same “tactile” vibe.
Start with a chair rail at 37 inches and decide your panel field height, around 24-26 inches. Install a backer board or wide base panel first, then add vertical battens spaced evenly, typically leaving 8-12 inches between battens depending on wall width. Use a consistent batten width across the wall and keep edges aligned to your layout lines. Caulk the batten edges, fill nail holes, then paint trim satin and battens in the same color as the panel fields for a cohesive look.
Editor's noteMeasure batten spacing from an inside corner and work outward so the last bay lands cleanly at the other side.
Skip thisDon’t use ultra-thin battens; they look too crisp and can feel cold instead of cozy.
7. Soft-Cove Wainscoting with Rounded Panel Edges
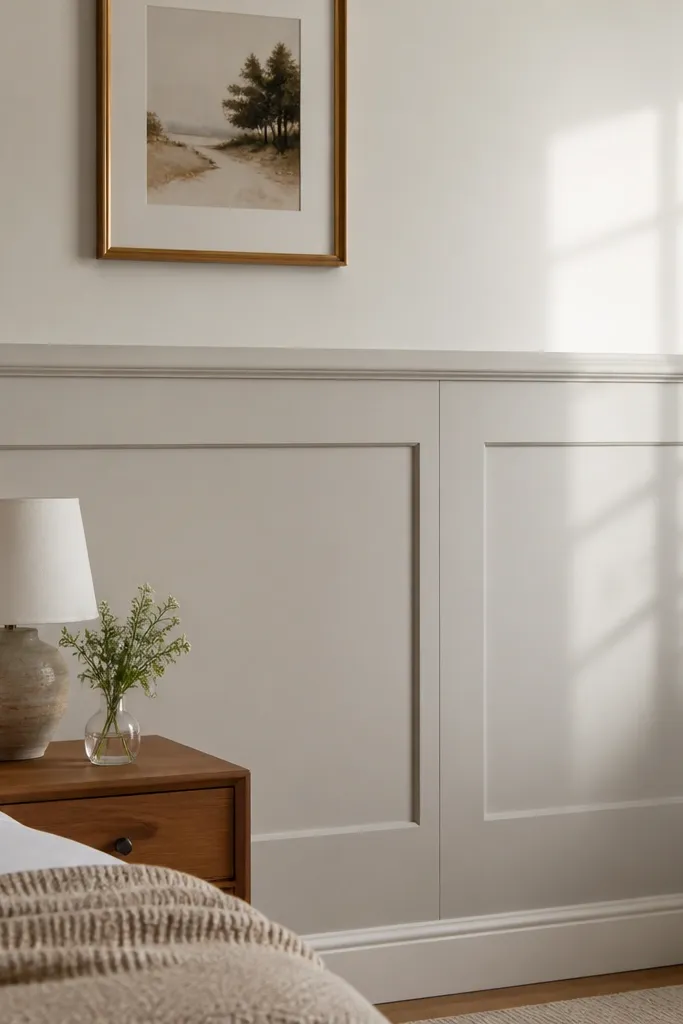
Rounded profiles are the fastest way to make wainscoting feel cozy. A soft cove trim creates a shadow that’s gentle instead of sharp, which matters in bedrooms where harsh lines can feel stark. Keep the panel layout simple: one chair rail and one panel field with a few vertical stiles. This is a great option if your room has lots of hard surfaces like tile floors or glossy furniture. The look is calm, and the rounded edges make the wall feel more forgiving and inviting.
Install a chair rail at 34-35 inches and set your panel field height around 24 inches. Use cove molding for the inner trim around each panel opening so the edge looks rounded. Cut and install vertical stiles first, then add the top and bottom rails to form consistent rectangles. Prime, caulk, and paint; use satin on the cove trim and eggshell on the panel field so the rounded shadows show.
Editor's noteTest a small scrap piece of the cove molding with your paint sheen; satin vs semi-gloss changes how the shadow reads.
Skip thisAvoid mixing cove profiles with sharp flat trim in the same panel; it makes the wall look inconsistent.
8. Vertical Panel Strips for a Narrow Bedroom Glow
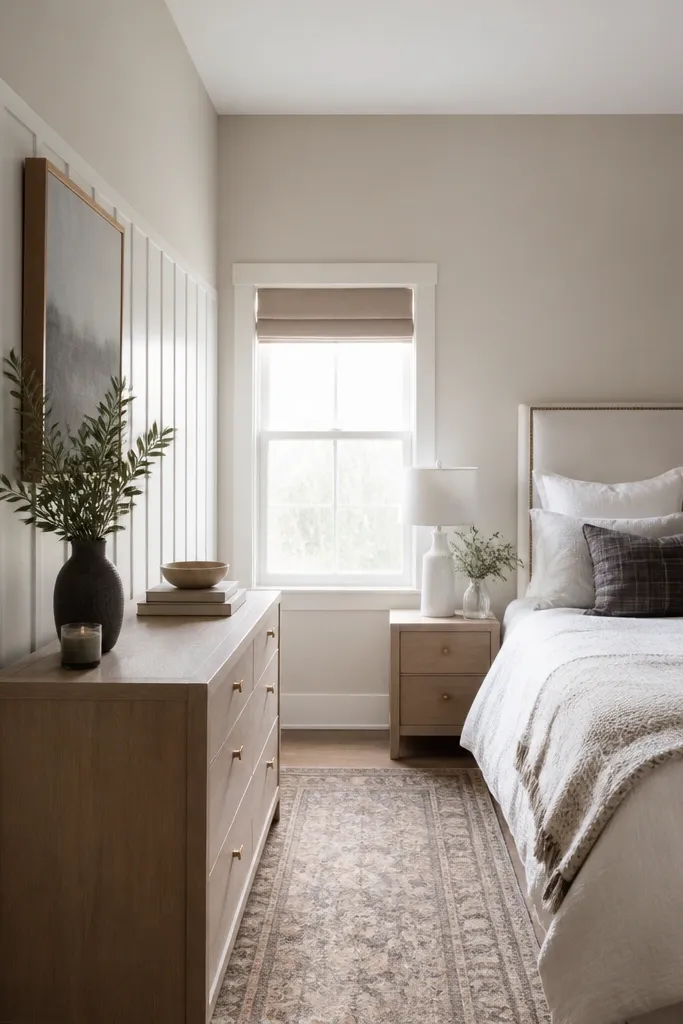
If your bedroom is narrow, horizontal panels can make the walls feel even flatter. Vertical panel strips add height and visual lift while still giving you cozy texture. This design uses fewer pieces than full grid wainscoting, so it’s easier to keep aligned. The result looks clean in photos because the vertical lines lead the eye upward, and the chair rail gives the wall a clear stop point. It’s also a smart move if you hate complicated corners.
Mark a chair rail at 38 inches and install it level. Add vertical strips of trim spaced evenly — start with 10-12 inches between strips for a balanced look. Use a top and bottom rail to frame the vertical strip area so it reads like panels, not just trim lines. Paint trim satin in warm white and paint the wall field eggshell in a complementary off-white or soft greige.
Editor's noteUse painter’s tape to map strip spacing before you cut anything; adjust spacing until it looks right from bed height.
Skip thisDon’t place vertical strips random-width; uneven spacing makes the wall look DIY in a bad way.
9. Tall Picture-Frame Wainscoting with Only One Vertical Stile per Bay
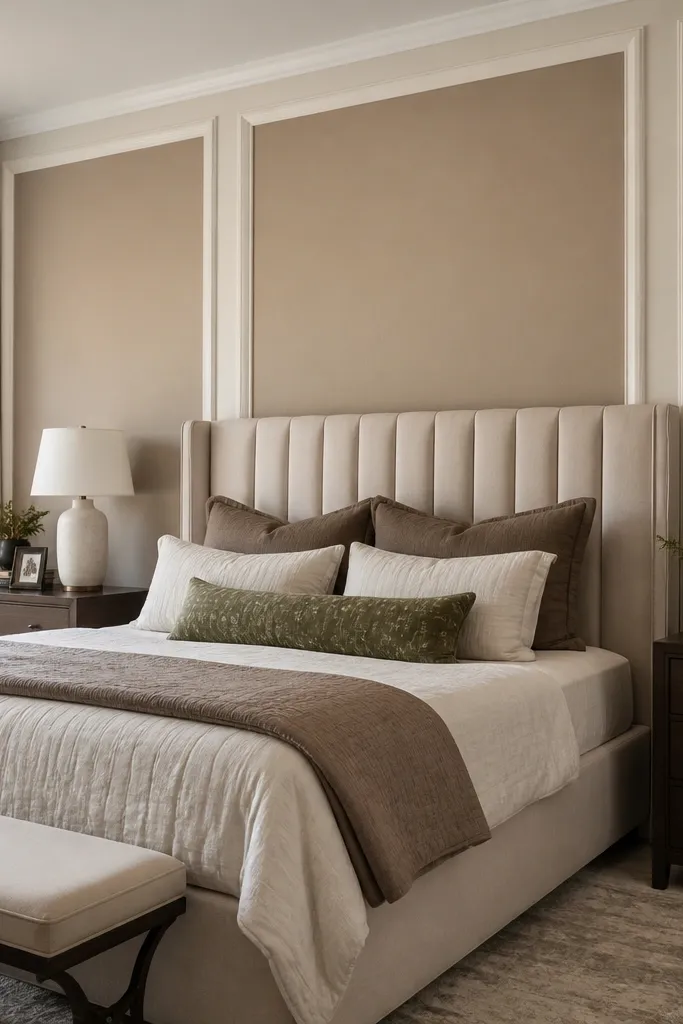
This design is cozy because it adds depth without turning your wall into a grid maze. Each “bay” is a tall picture frame, and you only use one vertical divider per bay, so the wall stays calm. Tall frames look great behind a bed because they align with headboard height and make the wall feel intentional. Keep the chair rail around 36 inches, then let the frames rise to about 60-62 inches total including rails. It’s a strong choice for bedrooms with bold bedding or a busy wallpaper feature you don’t want competing with.
Install the chair rail at 36 inches and then add a base rail so the bottom of the panel field lands around 60-62 inches. Choose bay widths that let you keep a single vertical stile, typically 24-30 inches wide per bay. Build each bay with picture-frame trim: outer frame, inner opening, and a simple inner edge trim. Fill, sand, prime, then paint trim satin and panel fields eggshell.
Editor's noteIf your bed is centered, center a full bay under the headboard so the visual symmetry looks effortless.
Skip thisDon’t add extra inner divisions; they kill the calm, cozy look.
10. Classic Raised Panels with a Dark Lower Wall and White Trim
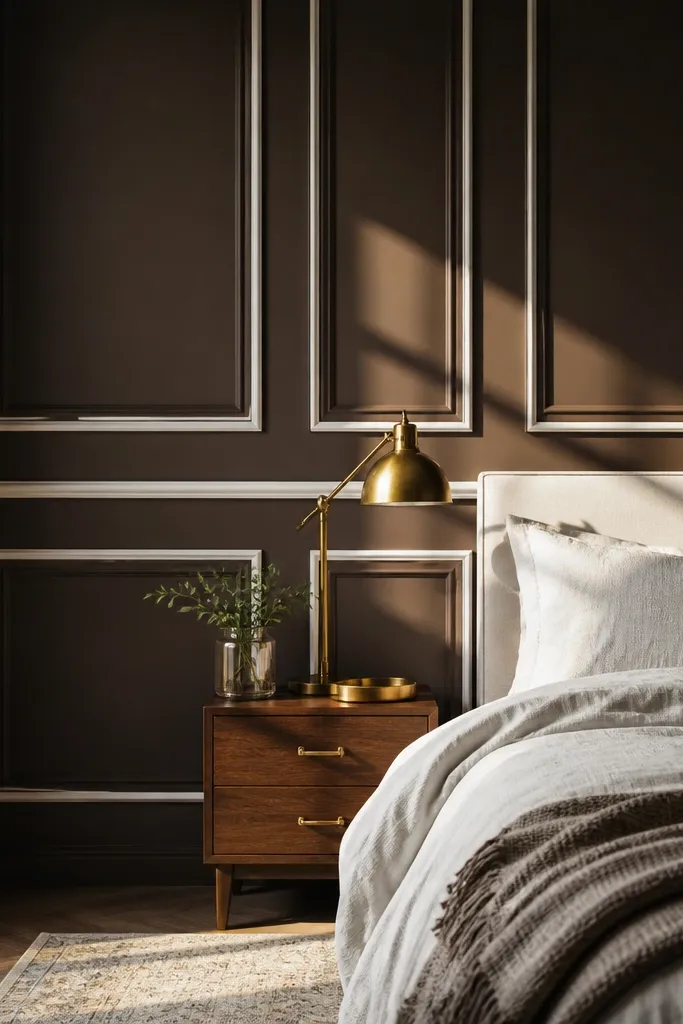
Dark lower walls plus white trim is the most reliable cozy wainscoting combo because it creates warm contrast. Raised panels add dimension and shadow, so even with a matte paint you still get visible depth. Keep the lower wall color warm — think deep olive, warm navy, or espresso brown — so it reads cozy instead of harsh. This style looks especially good in bedrooms with wood tones and brushed brass fixtures. It also hides scuffs better than bright wall paint in high-touch areas.
Mark your chair rail at 38 inches and install the rail line. Use raised panel molding or build raised squares with MDF panel inserts sized to fit your grid. Keep panel height around 16-18 inches and ensure each panel is the same width across the wall. Paint trim white satin, then paint panel fields the dark color in eggshell; caulk edges and wipe excess caulk for crisp lines.
Editor's noteUse painter’s tape pressed firmly along panel edges, then pull slowly after the paint is set but not fully cured.
Skip thisAvoid pure black or cool gray; it reads cold and makes the bedroom feel less cozy.
11. Molding-Only Wainscoting with No Panel Inserts (Budget Cozy)
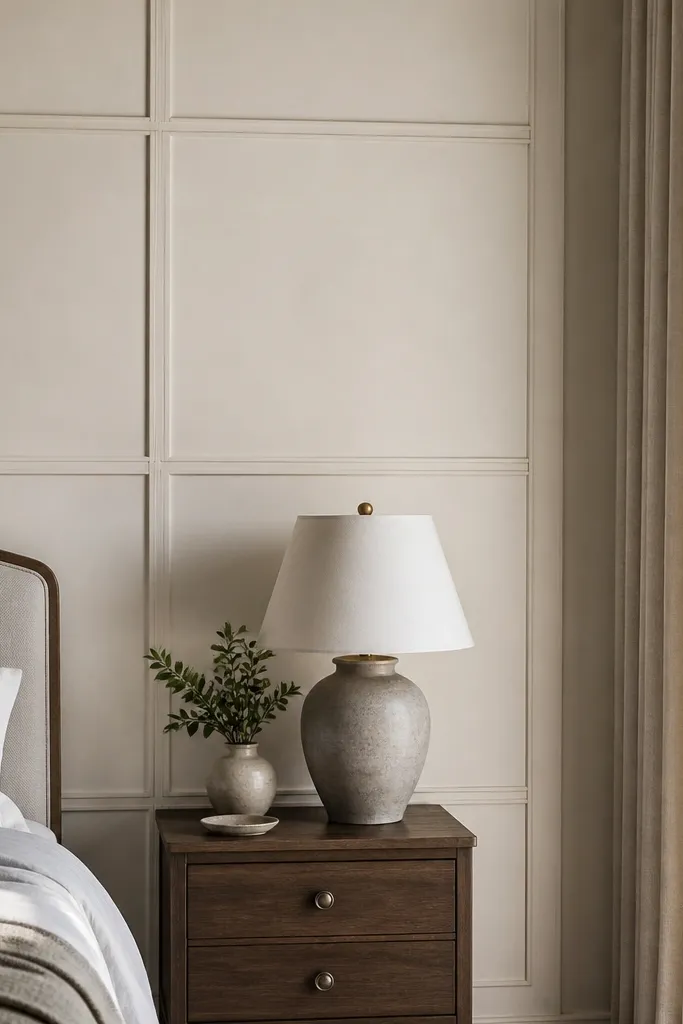
If you want cozy wainscoting ideas without buying pre-made panel inserts, this molding-only method is the move. You build a grid using thin trim strips and create a “framed” look directly on the wall. It’s lighter, faster, and still reads like architecture because the grid lines catch light. This works best when your walls are pretty straight and you can get clean caulk lines. The look is modern-cozy: crisp and warm, without heavy raised panels.
Clean and prep the wall, then mark your grid layout with level lines. Install horizontal and vertical trim strips using finishing nails, keeping spacing consistent to your chosen panel size (around 12-16 inches wide). Add a chair rail at 35-38 inches and a base rail at the bottom of the panel field. Prime the trim, then paint everything in satin for crisp lines; paint the wall field eggshell in a slightly different tone for depth.
Use a brad nailer and keep nail spacing consistent so you can fill faster and sand smoother.
Don’t skip primer on bare wood trim; raw spots soak paint and ruin uniform color.
12. Rounded Corner Wainscoting for Softer Bedside Walls
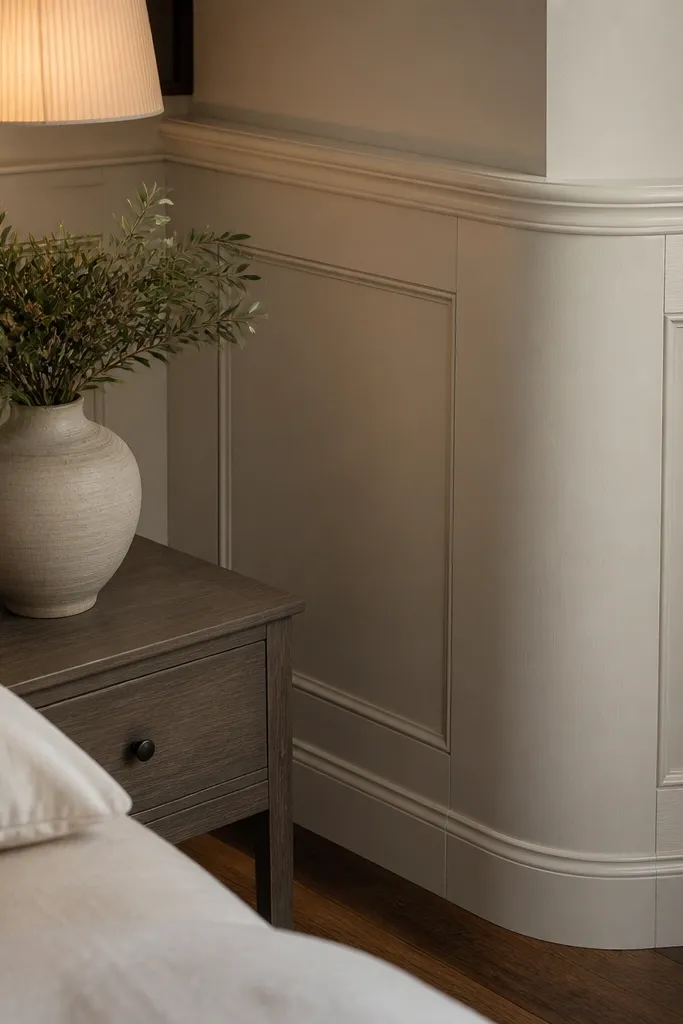
Corners are where many DIY wainscoting projects look sharp instead of cozy. Rounded corner treatment makes the whole wall feel more finished and less “cut-and-paste.” This style keeps the panel layout simple, then softens the edges at corners with rounded trim pieces or carefully mitered rounded moldings. It’s a great choice if your bedroom has rounded furniture, or if you want the wall to feel gentle rather than boxy. The result photographs well because the light rolls across the rounded corner instead of hitting an abrupt edge.
Plan your panel grid first so the corner bay is a full frame, not a skinny sliver. Use pre-made corner blocks with rounded profiles or create your corner with a flexible trim piece bent to shape. Install the outer frame trim, then add inner panel trim so the rounded corner doesn’t look like an afterthought. Fill gaps, sand smooth, and paint trim satin while keeping wall fields eggshell for that soft shadow edge.
Editor's noteDry-fit corner pieces and check with a scrap of paint on the corner to see how the shadow reads before committing.
Skip thisDon’t force rigid corner cuts on slightly out-of-plumb walls; rounded corners hide tiny gaps, but not big ones.
13. Beveled Shiplap Panels Under a Chair Rail
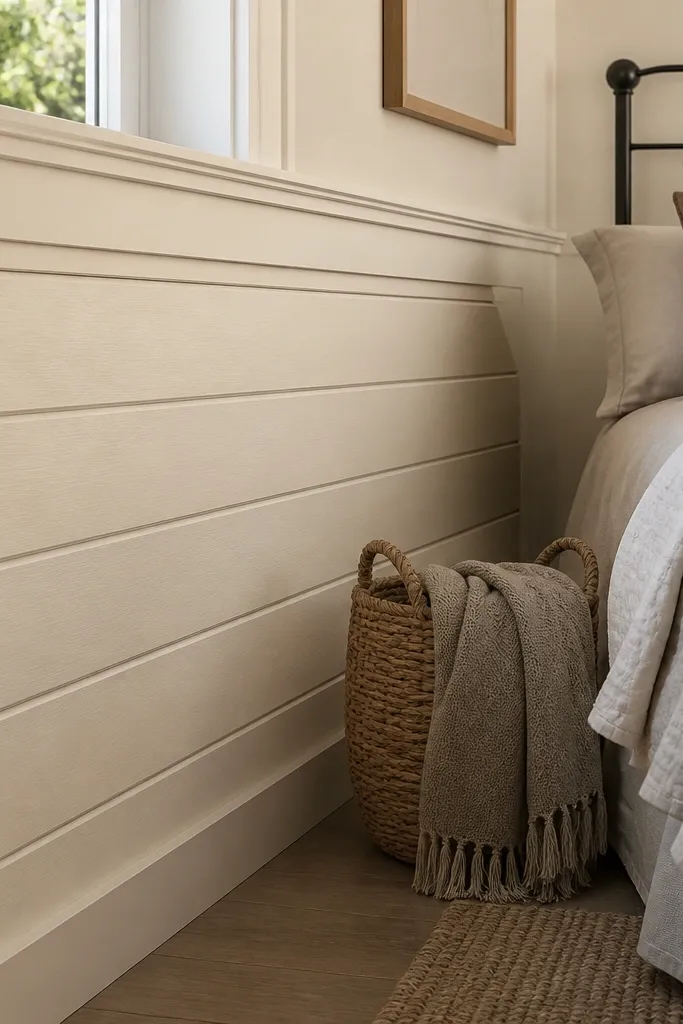
Shiplap reads cozy when it’s beveled and scaled right. The tiny shadow lines along each board create texture without needing heavy molding. Put it under a chair rail so it feels like a designed feature, not exposed wall cladding. Choose a warm white or creamy off-white for the trim and keep the shiplap field in the same family so it feels soft. This is a strong option for bedrooms with farmhouse touches, but it also works in modern rooms when the paint is clean and the chair rail keeps it structured.
Install a chair rail at 34-36 inches and mark a level bottom line for the shiplap field. Lay beveled shiplap boards horizontally, nailing into studs or solid backing where possible. Use consistent board spacing and keep seams tight so the shadow lines stay even. Caulk gaps, sand, then prime and paint; finish with satin trim at the chair rail and eggshell on the shiplap field if you want the texture to look less shiny.
Editor's noteIf your studs aren’t perfectly spaced, use blocking where you need it so boards stay solid and don’t flex.
Skip thisAvoid painting shiplap without sanding — the surface texture can cause uneven sheen.
14. Half-Wall Wainscoting with a Single Wide Base Rail
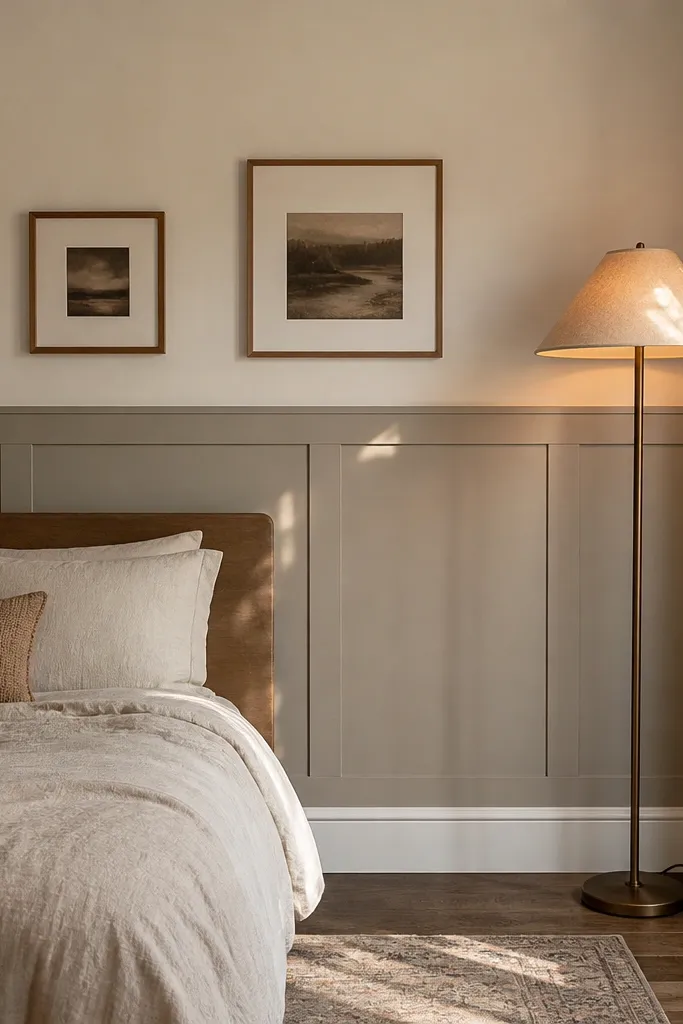
This is cozy because it looks grounded. A wide base rail gives the wall a strong bottom edge, and bedrooms read cozier when the wall has a clear “floor” line. Keep the panel pattern simple with framed squares or rectangles, so the base rail does the heavy visual lifting. This style is also easier to build than complex crown-cap designs. It looks great behind beds with low-profile headboards because the base rail aligns visually with the furniture weight.
Mark your chair rail at 38 inches and decide panel field height around 24 inches. Install a wide base rail using 1x4 or 1x6 trim, then add the chair rail above it. Build a simple grid of rectangles inside the field using 1x2 trim pieces for the inner frames. Fill seams, sand, prime, and paint trim satin; paint panel fields eggshell in a warm neutral.
Editor's notePre-plan your panel widths so the outer panels hit full width at corners; it makes the wide base rail look intentional.
Skip thisDon’t make the base rail too thin; a narrow base rail can feel flimsy and less cozy.
15. Vertical Panel + Horizontal Cap Combo for a Photo-Friendly Accent Wall
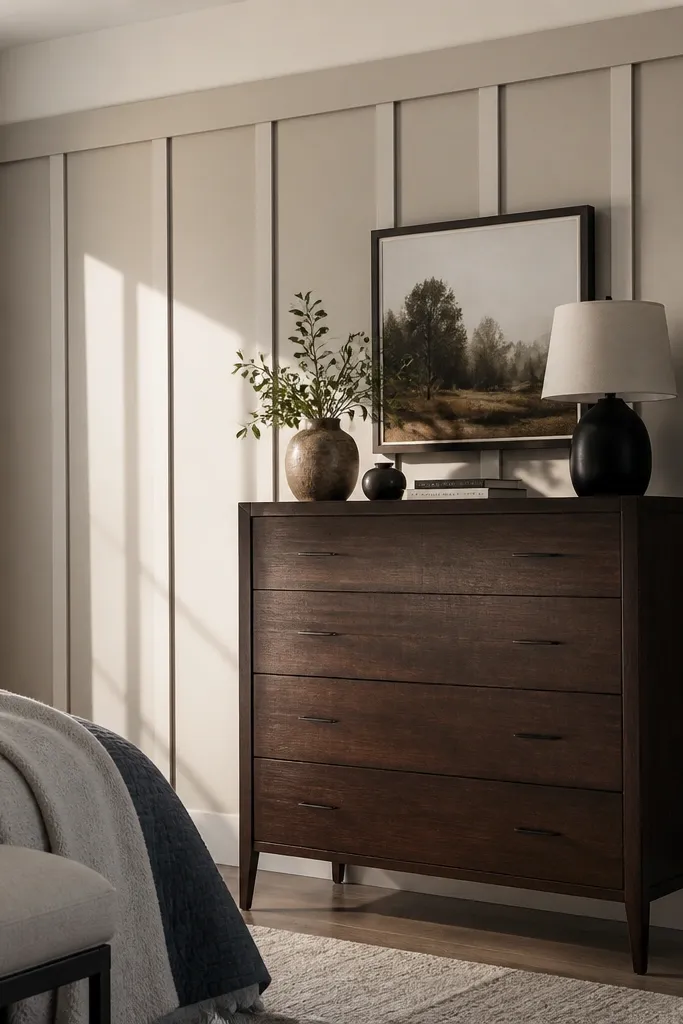
This design gives you both structure and softness. Vertical panels add height, and a thick horizontal cap border at the top of the panel field makes the wall look finished even when the room has tall furniture. It’s one of the best cozy wainscoting ideas for accent walls because the top cap creates a strong band that frames wall art, sconces, or a headboard. Choose a warm light trim and a slightly deeper panel field color so the cap border casts a visible shadow. The lines stay clean, but the texture feels inviting.
Install a chair rail at 36-38 inches and mark the panel field height so it ends around 58-60 inches total. Add vertical panel strips spaced evenly, then frame the top edge with a thicker cap board (like 1x4). Use matching inner trim so each vertical bay looks like its own framed column. Prime and paint trim satin; paint panel fields eggshell in a warm neutral or muted color.
Use a single cap width across the wall — switching cap widths makes the accent wall look accidental.
Avoid tiny vertical bays; they look busy and lose the cozy, calm effect.
16. Tall Grid Panels with a Narrow Chair Rail (Modern-Cozy)
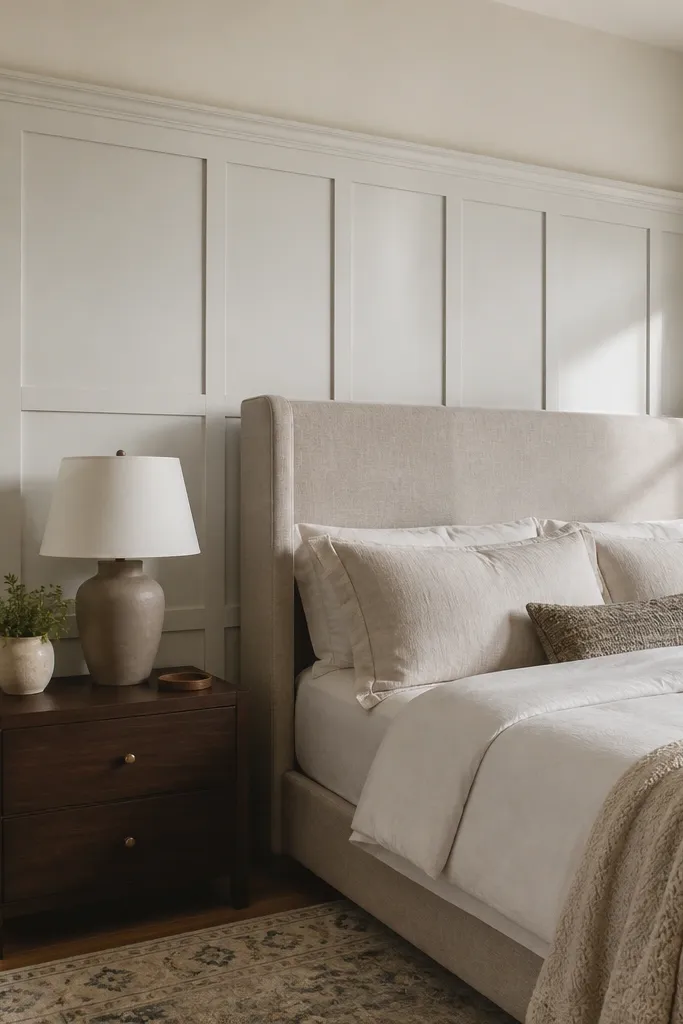
This is a modern-cozy option if you want crisp lines but still want warmth. A narrow chair rail keeps the wall from feeling heavy, while tall grid panels add depth and structure. In bedrooms, tall panels look great when the headboard is taller because the lines visually echo the furniture. It’s also a good choice for rooms with higher ceilings — the vertical rhythm keeps the space from feeling short. Keep the colors simple: light trim, slightly deeper panel field, and matte paint on the field for a soft shadow.
Mark a narrow chair rail line at 34-36 inches and install it level. Create a tall grid inside the panel field with vertical stiles spaced evenly and a few horizontal rails so panels land around 18-22 inches tall. Keep the outer frame clean with 1x2 or 1x3 trim, then add inner trim to define the panel openings. Caulk, fill, sand, prime, then paint trim satin and panel fields eggshell.
Editor's noteUse a laser level or long level for the grid rails; one off line makes the whole wall look uneven.
Skip thisDon’t add too many horizontal rails; more lines create visual noise instead of cozy depth.
17. Corner Column Wainscoting with Two Framed Columns
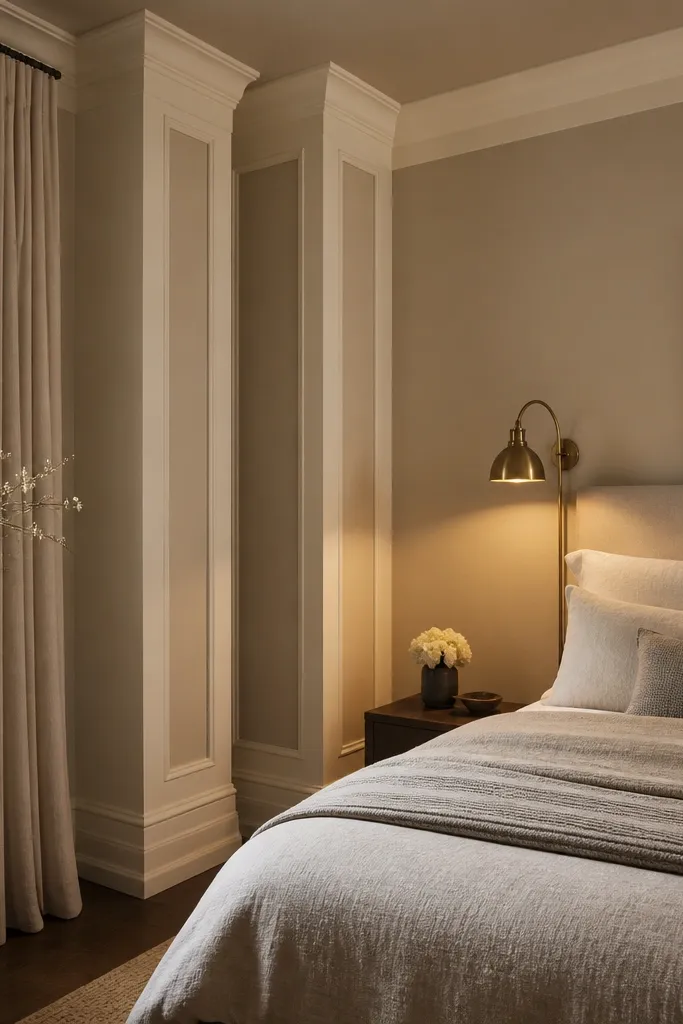
This one makes a bedroom feel designed without covering the entire wall in complex patterns. Two framed columns near corners create “architectural interest,” and the panel field stays simple. It’s cozy because the columns pull the eye inward toward the bed area, and the framed shapes add warmth through light-and-shadow. Choose a warm off-white trim and a soft muted panel field color so the columns read as feature details. This works well in bedrooms with odd wall sections or where you want to highlight a dresser or reading nook.
Install a chair rail at 36-38 inches and a base rail at the bottom of the panel field. Frame two columns using thicker trim pieces at the corners, then add a simple rectangular panel grid between and around them. Keep the columns symmetrical in width so the wall looks balanced in photos. Prime, caulk, and paint; use satin on trim and eggshell in the panel field for readable shadows.
Editor's noteMake the columns the same width as the widest panel bay you have elsewhere so everything lines up visually.
Skip thisAvoid placing columns too close to the corner; leave enough space for the frame to look intentional.
18. Mitered Shadow-Line Wainscoting with Tight Reveal
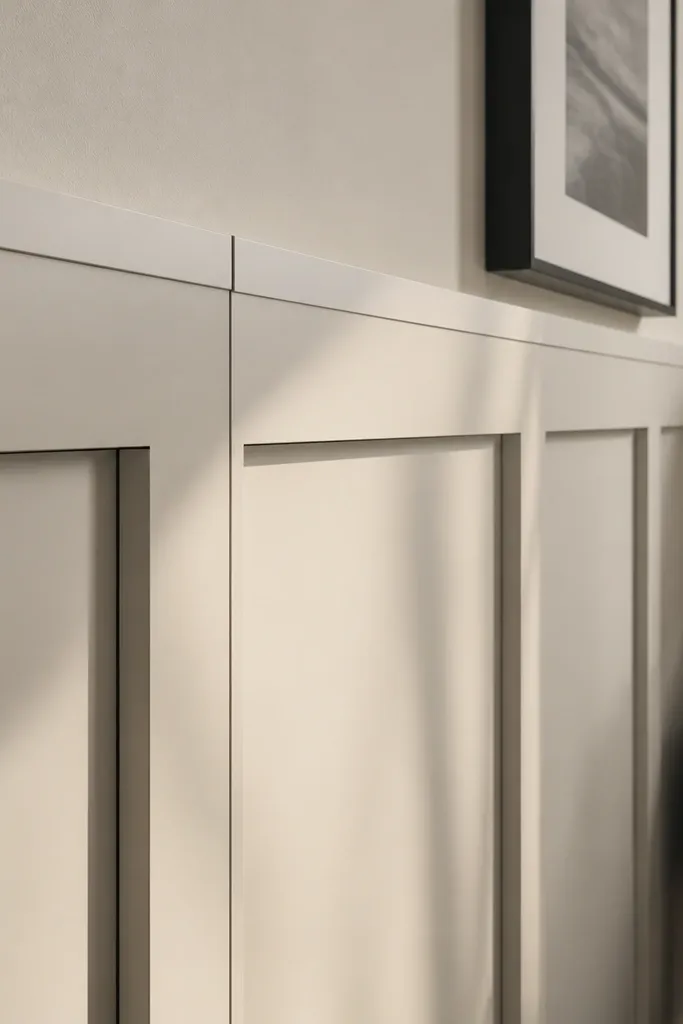
Shadow-line style is cozy when the lines are controlled. The tight reveal between trim pieces creates a thin dark shadow that makes the wall feel deeper and more dimensional. It’s a great option if you like a clean look but still want the “cozy texture” effect that photos love. Use this when your bedroom walls are already in decent shape because the crispness makes imperfections more obvious. The payoff is a very polished finish with minimal ornament.
Plan your reveal size first, then cut trim pieces so they leave a consistent gap, typically around 1/8 inch. Install your outer frame rails, then miter the inner corners so the reveal stays even across the wall. Use consistent trim thickness for the entire grid so the shadow line looks uniform. Prime and paint trim satin and panel fields eggshell, then caulk only where needed so the reveal stays visible.
Editor's noteDry-fit one full panel frame on the floor and check the reveal against a painted scrap before cutting the rest.
Skip thisDon’t over-caulk the reveal; if you fill the gap, you lose the shadow-line depth.
19. Staggered Half-Panel Layout for a Soft, Less-Formal Look
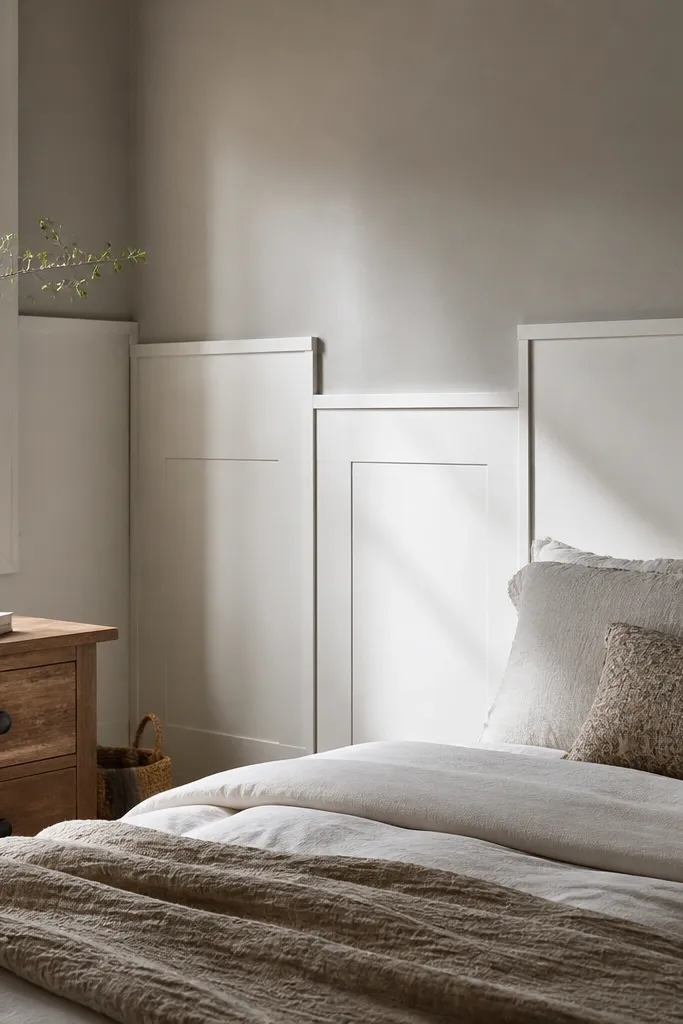
Most wainscoting looks formal because the grid is perfect. A staggered half-panel layout keeps it cozy by adding rhythm without making it chaotic. This design uses alternating panel heights so the wall feels like it has movement, which is great in bedrooms where you want calm but not boring. Keep it to the lower third of the wall so the pattern doesn’t crowd the room. It photographs beautifully because the staggered edges cast uneven shadows that look rich and inviting.
Set your chair rail at 38 inches and decide your lower field height around 26 inches. Create two panel heights — for example, 12 inches and 18 inches — and alternate them in each bay. Frame each opening with consistent trim width so the stagger looks intentional instead of crooked. Prime, caulk, and paint trim satin; paint panel fields eggshell in a warm tone that matches your bedding palette.
Mark panel heights on the wall first with painter’s tape so you can visualize the stagger from bed height.
Avoid random staggering; alternate in a repeating pattern so the wall still feels designed.
20. French-Style Paneling with a Single Center Medallion
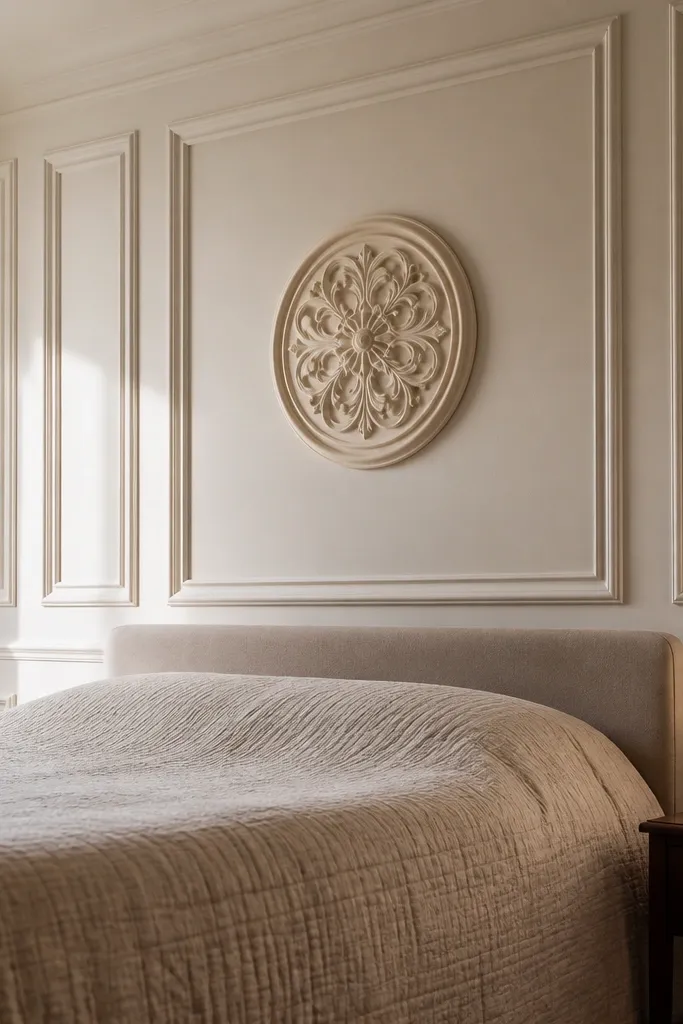
If you want cozy wainscoting ideas that feel romantic without turning into ornate wallpaper, use French-style paneling with one center medallion. The medallion pulls the eye upward and toward the center of the wall, which makes the room feel styled even if your bedroom accessories are minimal. Keep the rest of the paneling simple so the medallion is the star. This works well behind a bed or above a dresser where you want a focal point. Choose a warm white trim and a slightly deeper panel field so the medallion shadow looks soft, not harsh.
Install a chair rail at 36 inches and create a rectangular panel field below it. Frame panels using 1x2 trim so each opening is about 16-18 inches wide. Add a single medallion at the center of the wall panel field using a pre-made MDF or wood medallion, secured with wood glue and finish nails. Fill and sand around the edges, then prime and paint; keep trim satin and the field eggshell so the medallion depth shows.
Editor's noteCenter the medallion using a plumb line from the ceiling center, not by eyeballing from the floor.
Skip thisDon’t add multiple medallions; one is enough to keep the room cozy instead of busy.



