
1. Bookish Warm Neutrals Cluster Above the Bed

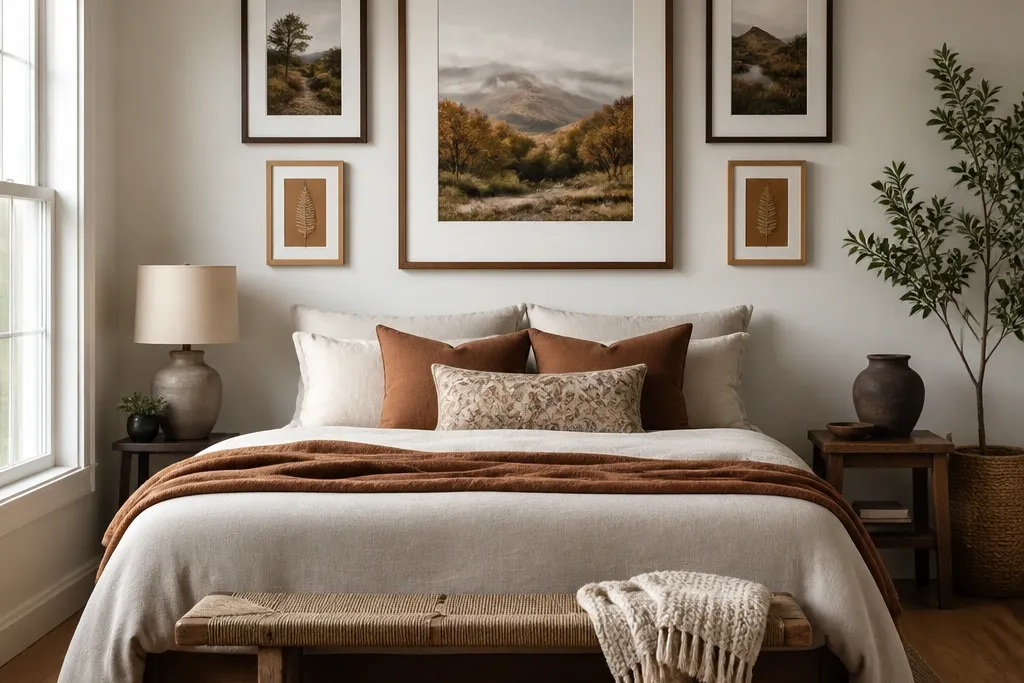
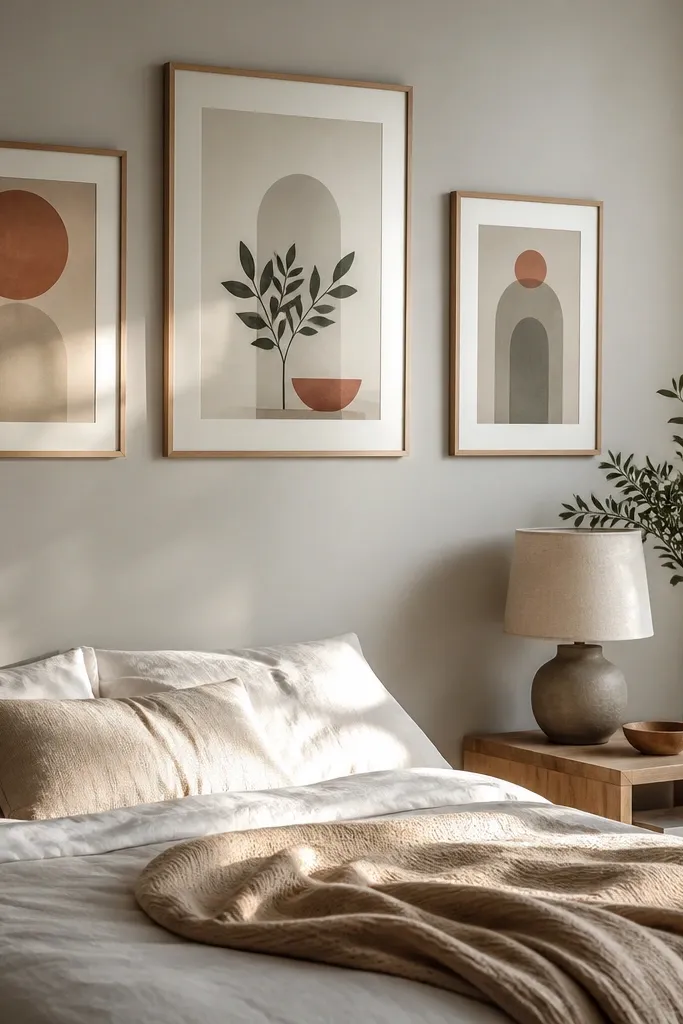
If your bed wall looks unfinished, this layout fixes it fast. You place one larger cream-matted print in the center, then flank it with two medium frames and a smaller “spine” style print at each side bottom. The warm neutrals and matte finishes calm the room while the stacked sizes create a clear focal point. It’s also forgiving — small spacing mistakes won’t look messy because the cluster is symmetrical.
Start by choosing one anchor print around 18x24 inches, then pick two medium frames around 11x14 and two small frames around 8x10. Use painter’s tape to outline the frames on the wall, keeping 3 inches between frame edges for the top row and about 2 inches near the bottom. Level the center anchor first, then build outward so all outer frames sit on a single visual line. Hang with picture hooks rated for the frame weight and add 1/8-inch felt bumpers if any frame back sticks to the wall unevenly.
Use cream mats even if your prints are already off-white; it makes the whole wall feel cohesive.
Don’t mix glossy frames and matte frames in the same cluster — reflections will make it look chaotic.
2. Mirrors + Prints Cozy Combo for Small Bedrooms
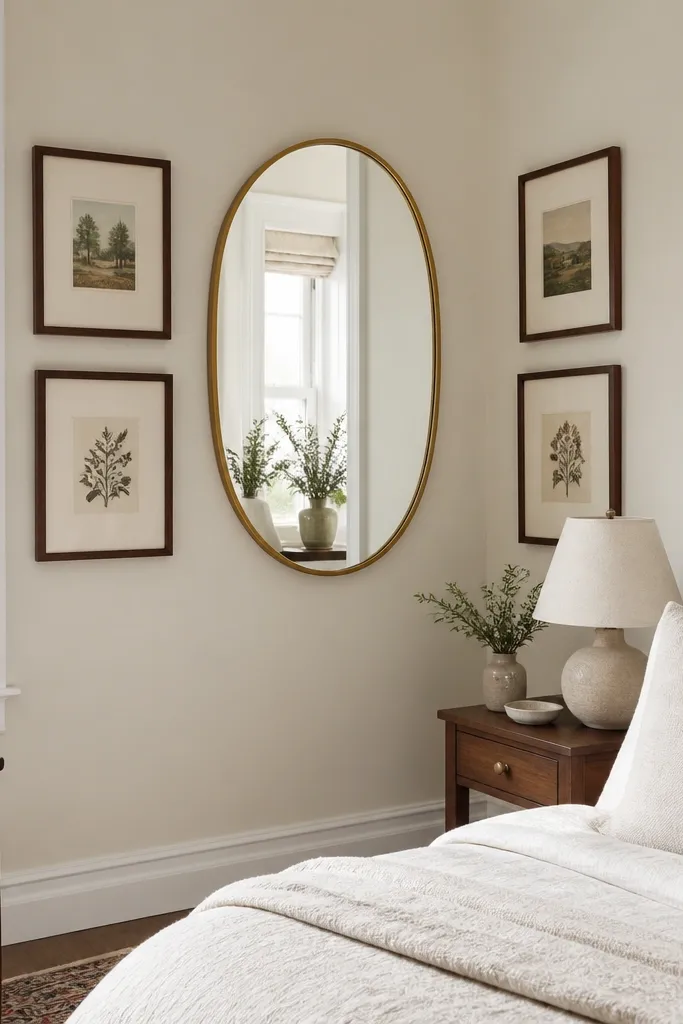
A mirror makes a bedroom feel bigger, but it also adds softness when you pair it with cozy art. This layout centers an oval or rounded mirror, then surrounds it with two to four small prints so the wall has depth without feeling crowded. The mirror lightens the space, and the frames keep everything from looking like “just a mirror on a wall.” It’s a great choice when you want cozy without adding visual clutter.
Pick one mirror 18-24 inches tall with a simple frame finish (matte black or warm wood). Choose three prints: one 11x14 in the center beneath the mirror, and two 8x10 frames on either side. Tape the outline first and aim for the mirror’s center to sit at about 60 inches from the floor. Hang the mirror level, then attach the prints so the bottom edges line up with the center print for a tidy, cozy look.
Editor's noteIf your mirror has a thin frame, mount it with two hooks instead of one so it stays perfectly level over time.
Skip thisDon’t place the mirror too high — if the mirror center is above 65 inches, the cluster stops feeling like a bedroom focal point.
3. Gallery Wall with One Big Canvas and Four Supporting Prints
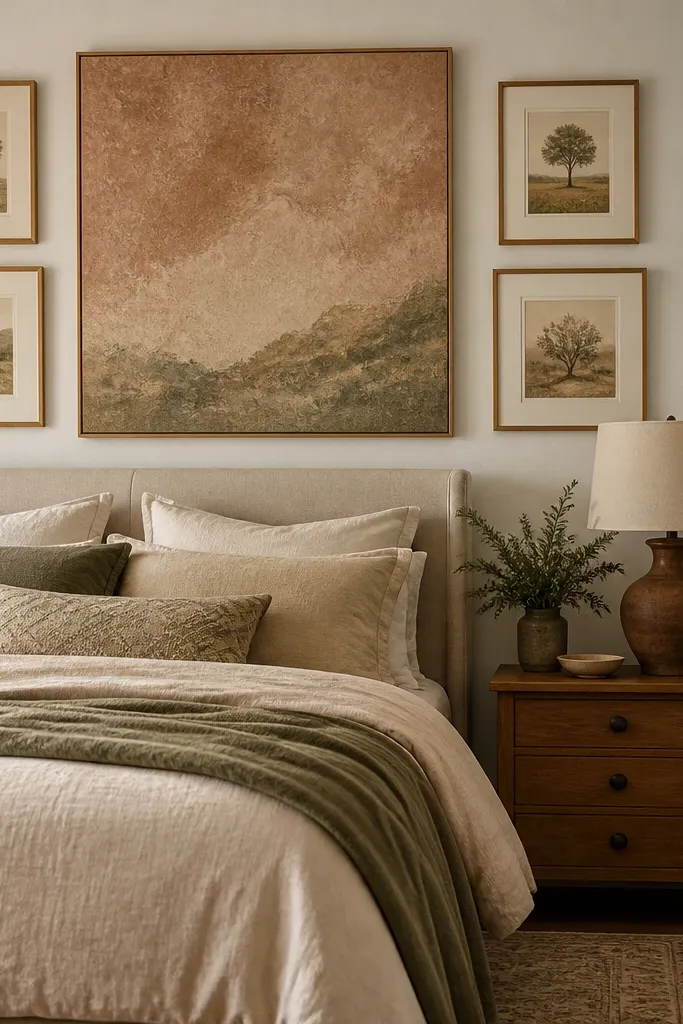
This is the easiest “cozy focal point” layout because the big canvas does most of the work. The canvas creates warmth through texture and color blocks, while smaller prints add variety without overwhelming the wall. It looks intentional from across the room because your eye hits the largest piece first. This layout also works well above a dresser when you don’t have a lot of vertical space.
Choose one stretched canvas around 24x36 inches with a warm palette (sand, clay, muted olive). Add four prints in frames sized 8x10 and 11x14, placing two on the left and two on the right in a loose rectangle around the canvas. Tape the arrangement so the canvas top sits about 6-10 inches above the furniture line (bed frame or dresser top). Hang the canvas first, then use a measuring tape to keep the smaller frames evenly spaced at 2.5-3.5 inches between edges.
Editor's notePick frames with the same mat color (cream or warm white) even if the art differs — it keeps the wall cozy instead of busy.
Skip thisAvoid using only very small prints; if everything is under 8x10, the wall can look like a random photo wall.
4. Tight Dense Grid for a Cozy Vintage Feel
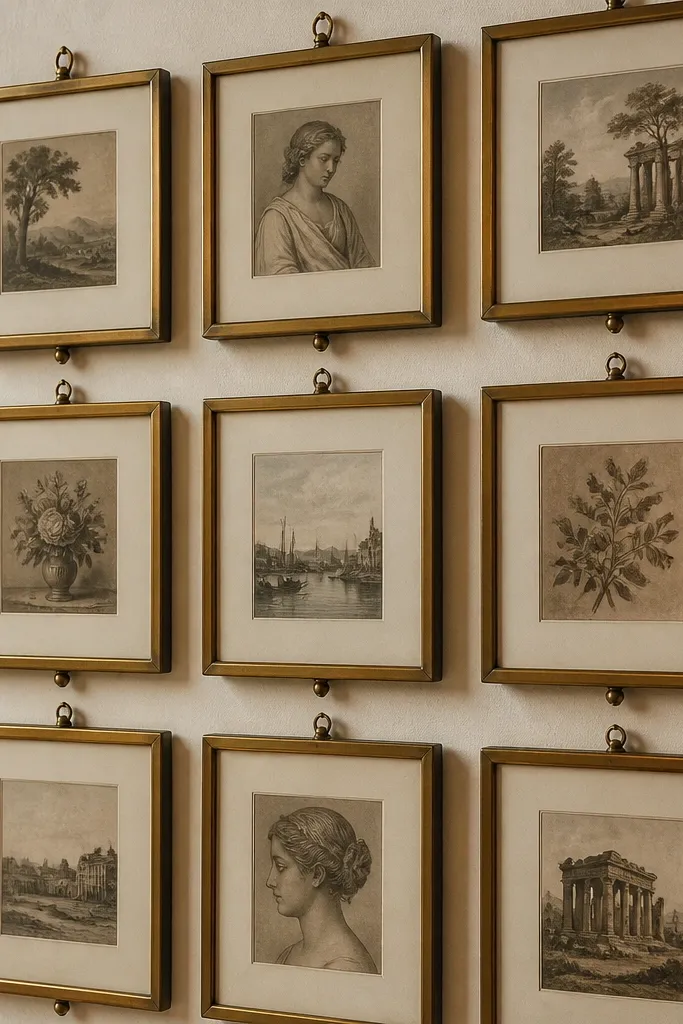
A tight grid reads cozy because it looks collected, like a wall of favorite paper pieces. The trick is keeping the spacing consistent and using frames that share a finish. This layout uses six to nine small frames, so it’s great for walls that are blank but not wide enough for a big anchor piece. When you choose vintage-style prints or botanical line art, the whole wall feels warm and lived-in.
Start with nine frames in a 3x3 grid, mixing only between 8x10 and 5x7 for variety. Use 1.75 to 2 inches between frame edges so the wall looks dense but still breathable. Tape the grid first with a ruler so each row is level; bedrooms look best when the grid is straight. Hang using a stud finder when possible, or use wall anchors rated for the frame weight if you’re on drywall.
Editor's noteIf your frames are slightly different widths, add the same-size mat to each so the grid edges line up visually.
Skip thisDon’t eyeball the spacing — tight grids fall apart fast when the gaps vary.
5. Asymmetrical Cozy Row Above a Reading Chair
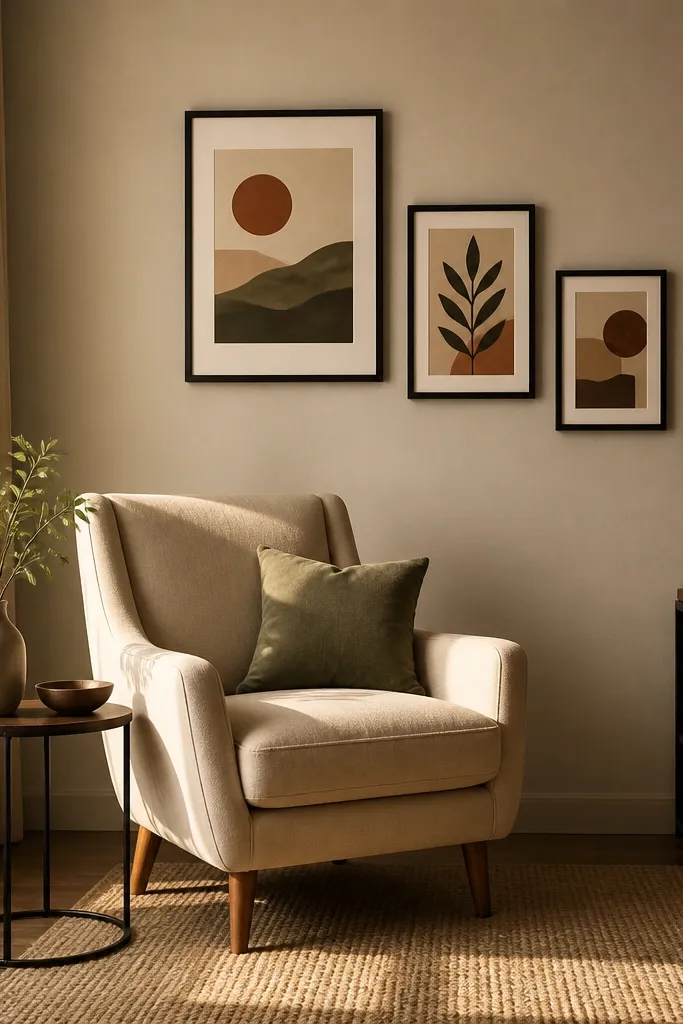
This layout is for bedrooms with a reading chair, desk, or cozy corner. You get movement without chaos by using one dominant frame, then stepping down sizes toward one side. The asymmetry makes the room feel curated, and the cozy colors keep it warm. It’s also a good fix when your wall is long and you don’t want a full cluster centered above the bed.
Pick one larger frame around 16x20, then add three medium frames around 11x14 and two smaller frames around 8x10. Tape a loose diagonal row so the dominant frame is slightly higher than the rest by about 2-3 inches. Keep gaps consistent at 3 inches between edges along the row. Hang the top anchor first, then use a level and tape marks to place each next frame so the diagonal reads smooth instead of random.
Use one repeated color in the art (like terracotta) across at least three frames to tie the asymmetry together.
Avoid mixing frame finishes like chrome, glossy white, and black — stick to two finishes max.
6. Floating Shelves for Art Layers
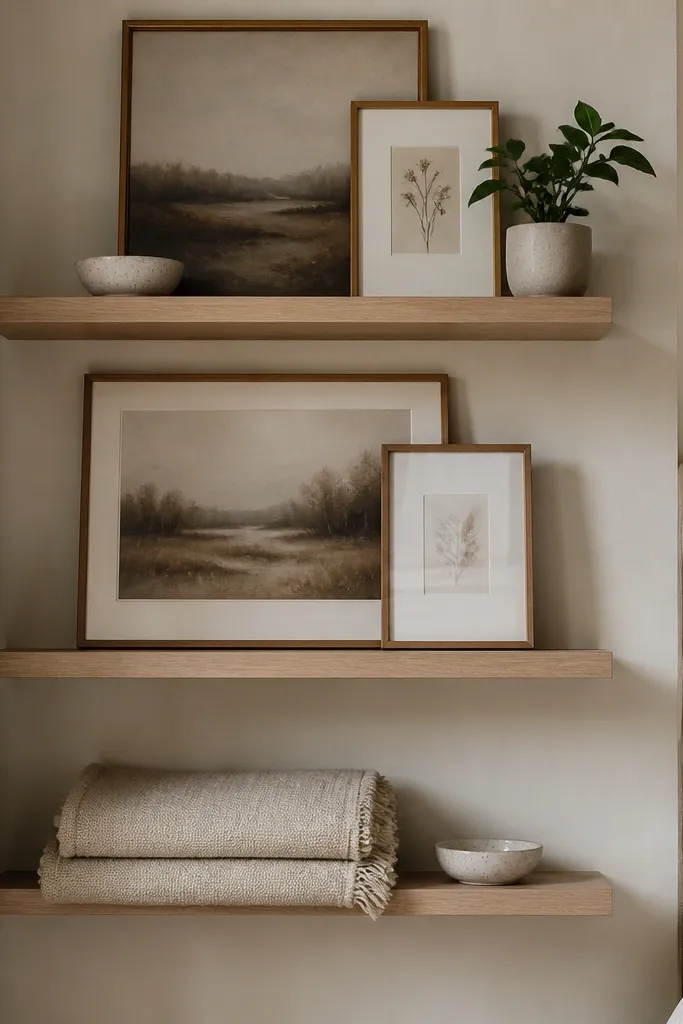
If you want cozy that feels styled, floating shelves are the easiest way to create depth. You can frame prints on the shelf backings and add small objects (a ceramic dish, a folded throw, a small plant) to make the wall feel lived-in. This looks especially good in bedrooms because it adds vertical rhythm without relying on dozens of holes. The frames on shelves also let you swap art seasonally without redoing the whole layout.
Install two floating shelves with a consistent depth, like 5-6 inches, mounted into studs. Place three frames across the top shelf and two across the bottom shelf, alternating portrait and landscape orientations. Keep the frame glass matte or use museum acrylic to reduce glare. Space shelf levels so the gap between shelves is about 10-14 inches, then set the frames so their top edges align on each shelf.
Choose frames that are the same thickness so the shelf line looks tidy from the doorway.
Don’t overload the shelf — if everything is the same height, it stops looking cozy and starts looking cluttered.
7. Vertical Story Line for Narrow Walls
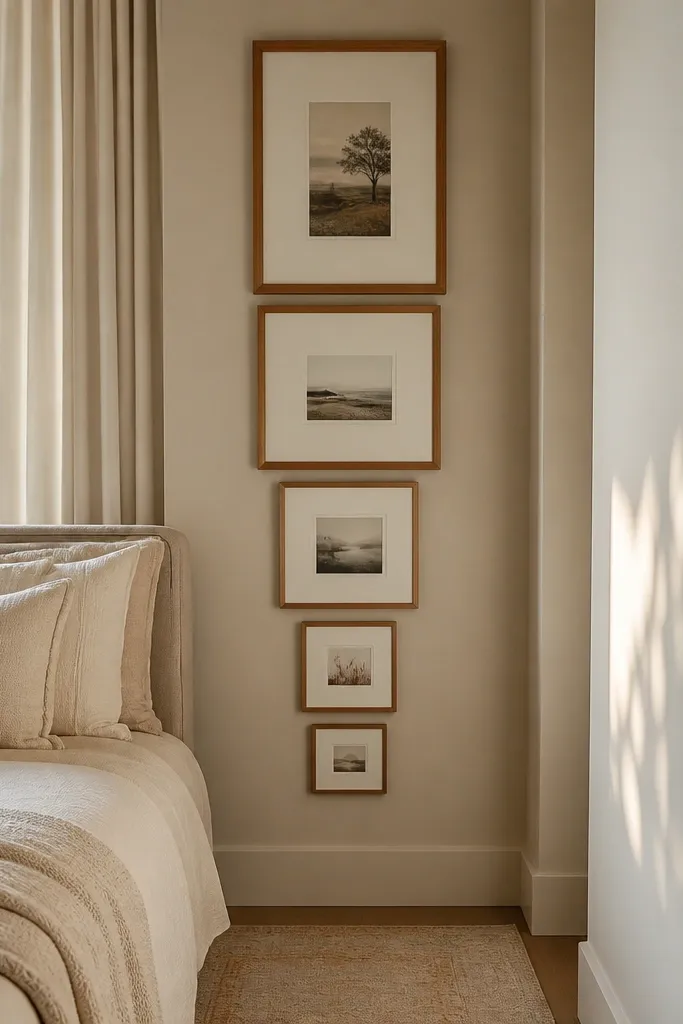
Narrow bedroom walls need vertical layouts that don’t fight the room. This one uses five portrait frames of descending size so the wall feels tall and cozy instead of cramped. The cream mats and warm frames soften the vertical line, and the consistent spacing makes it look designed. It also works when your bed is close to a corner and you can’t spread out horizontally.
Choose one larger portrait frame around 12x18 or 14x20 as the anchor. Add four smaller portrait frames down the line, stepping down by about 2 inches in width each time. Tape the layout so the top of the anchor sits around 6 inches below the ceiling, then keep 2.5-3 inches between frame edges. Hang the anchor level, then measure from the anchor top to place each next frame so the vertical story stays straight.
Editor's noteUse all-cream mats and one frame finish to keep the vertical stack calm.
Skip thisAvoid landscape frames in a narrow wall layout — they widen the visual footprint.
8. Three-Frame Triangle with a Cozy Center Piece
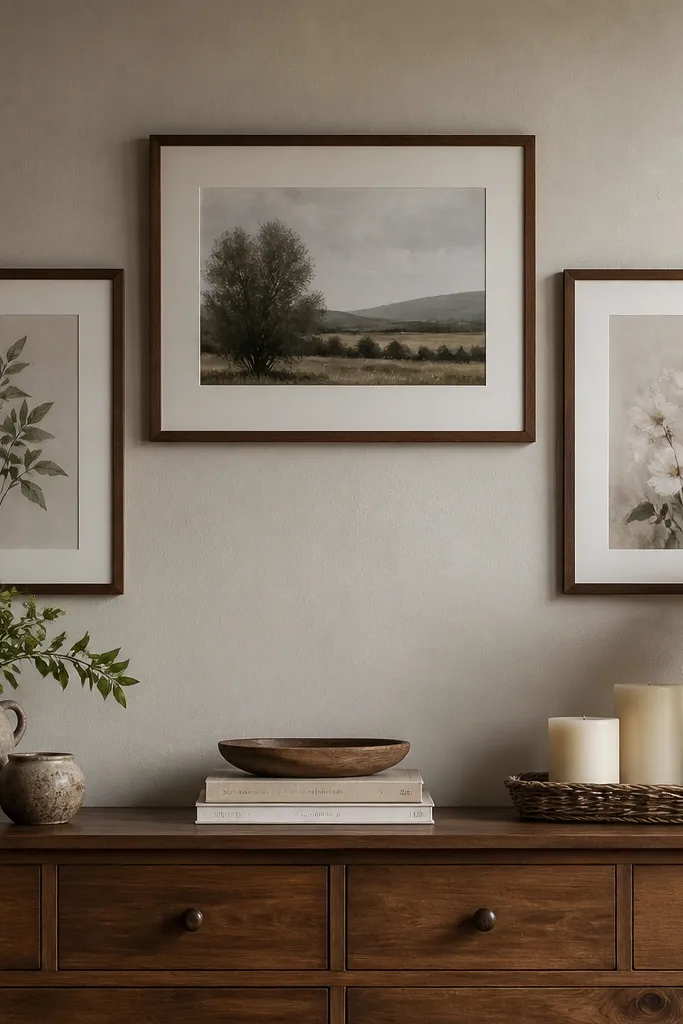
A triangle layout looks modern but still cozy because it creates a soft “conversation” between pieces. You center one larger frame and place two medium frames slightly lower on either side, forming a gentle triangle. This is a great option if you don’t want a full gallery wall but still want a focal point that looks styled. The triangle also hides small layout errors better than a strict grid.
Pick one anchor frame around 16x20 or 18x24, then choose two matching frames around 11x14. Tape the triangle on the wall with consistent 3 inches between edges, and angle the side frames so their top corners sit about 2-3 inches lower than the anchor center. Hang the anchor first, then level the side frames using a small spirit level and tape marks. Use two hanging points per frame if the frame is heavy to avoid tilt over time.
Editor's noteMatch the frame widths so the triangle feels intentional even if the art sizes differ.
Skip thisDon’t rotate frames randomly — even a few degrees off can make the triangle look messy.
9. Warm Wood Frames with Linen-Texture Prints
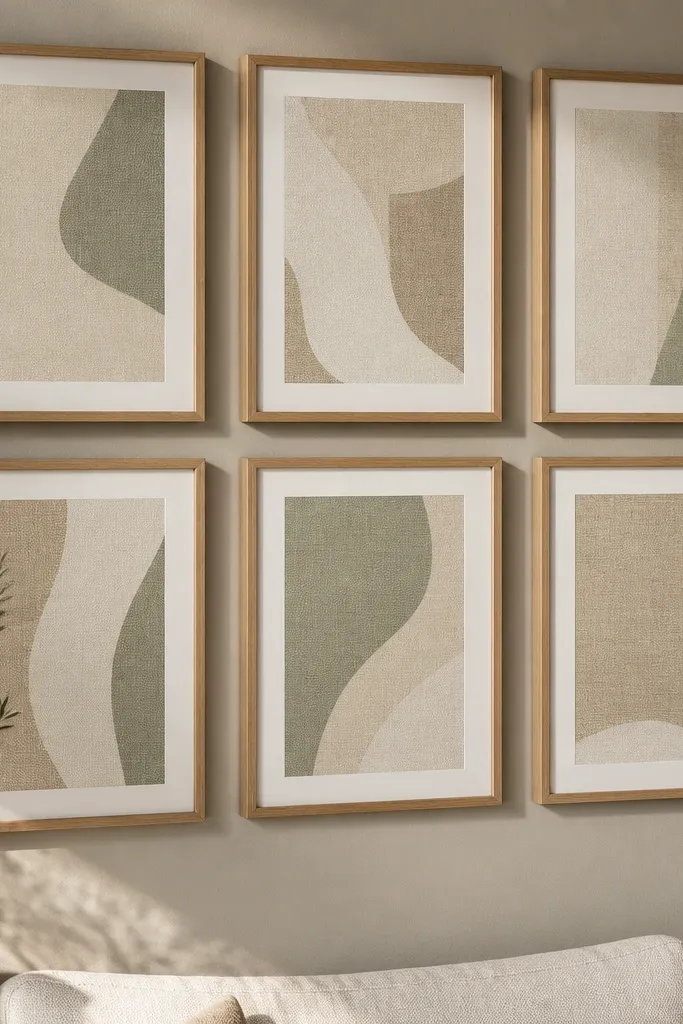
Cozy bedrooms respond to texture. This layout uses warm wood frames and prints that mimic linen or have visible paper grain, so the wall doesn’t look flat. You can do a simple three-by-two arrangement with six pieces, and it still looks rich without adding color chaos. It’s a strong choice when your room already has wood furniture or natural fibers like jute rugs and linen bedding.
Choose six frames in the same warm wood finish, with two sizes: 11x14 for the center row and 8x10 for the top and bottom. Use cream mats for all pieces to keep the grainy prints from blending into the wall. Tape a 3x2 rectangle and keep 3 inches between frame edges. Hang the center two first, then fill in the corners so the outer edges form a neat rectangle.
Editor's noteIf your prints are glossy, switch to matte print paper or use anti-glare film so texture still reads at night.
Skip thisAvoid mixing whitewashed frames with dark walnut frames — the wall loses its cozy uniformity.
10. Black Frames + Cream Mats for a Cozy Contrast Look
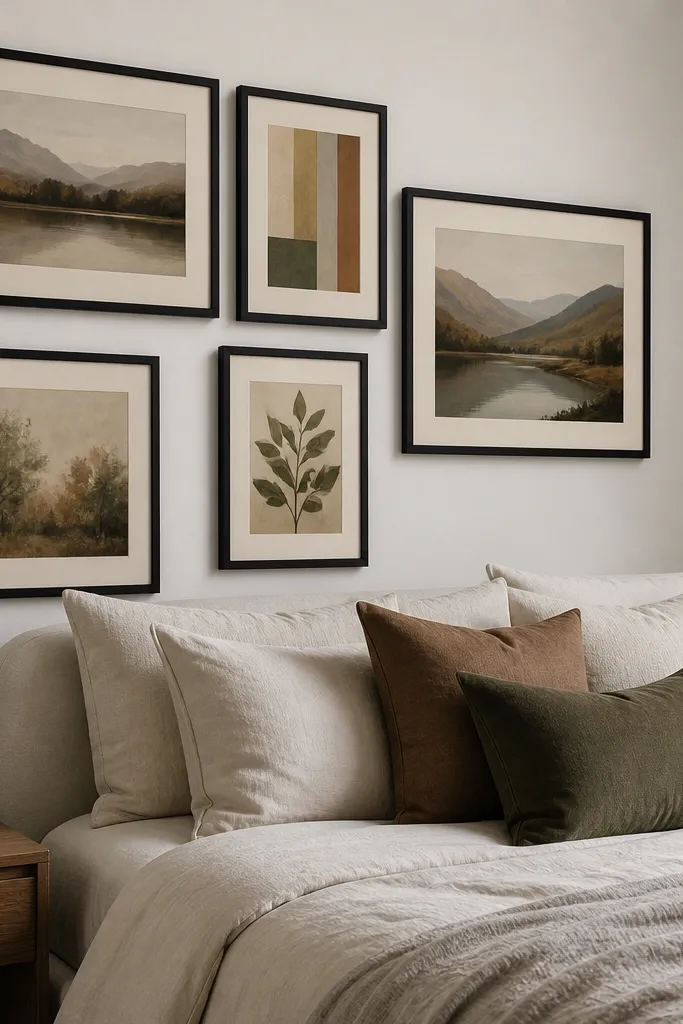
This is the “cozy but sharp” option. Matte black frames give structure, while cream mats prevent the wall from turning harsh. The key is keeping the art palette warm — think muted beige, clay, olive, and soft gray — so the contrast stays calming. This layout works in bedrooms with light walls and neutral bedding because it adds definition without looking cold.
Pick six frames all in matte black, using three sizes: two 16x20, two 11x14, and two 8x10. Use cream mats with a consistent opening size so the inner prints look similar in scale. Tape a layout with the two 16x20 frames on top corners and the two 11x14 frames centered below, then place the two 8x10 frames at the bottom corners. Hang from the top anchor down so the top row stays level and the cluster locks in.
Editor's noteUse the same mat width across every frame; it makes the wall look like one design even when prints differ.
Skip thisDon’t add bright pops like neon — black frames amplify them.
11. Gallery Wall with One Textile Art Piece
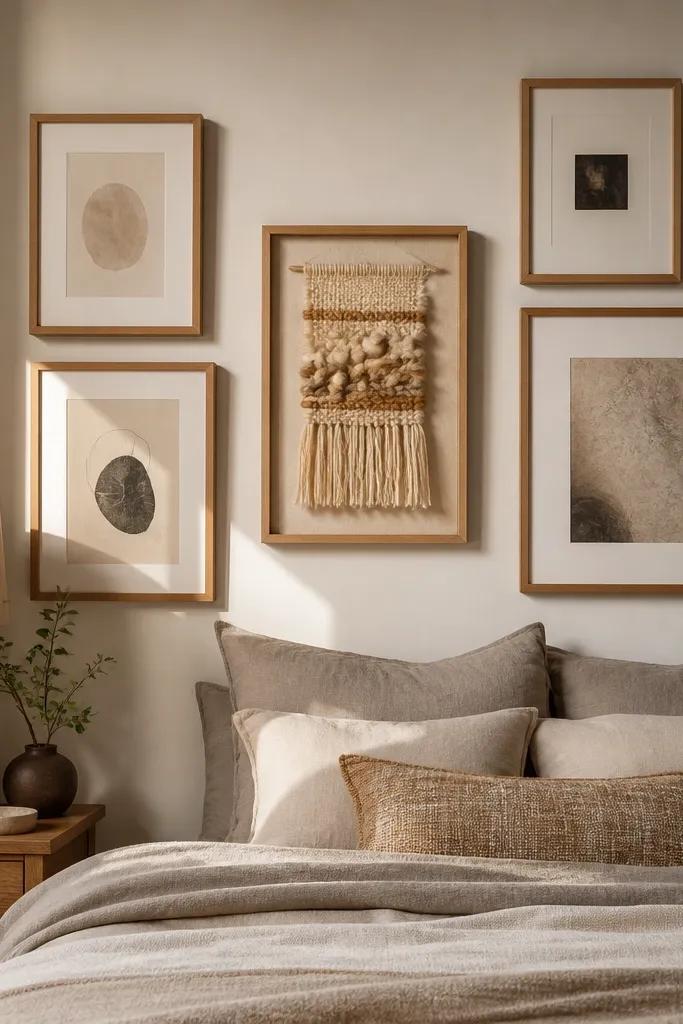
Textile art makes a bedroom gallery feel soft immediately. This layout includes one fabric piece (a small woven wall hanging or a framed textile panel) placed between prints. The contrast between flat paper and woven texture adds coziness, and the cluster still looks curated because every piece sits in a frame. It’s a great move when you want warmth without changing your whole decor palette.
Choose one framed textile panel about 12x18 or 16x20, then add four prints around it in frames sized 8x10 and 11x14. Keep all frames the same color finish, like warm oak or matte black. Tape the arrangement into a compact cluster and keep 2.5-3 inches between edges. Hang the textile piece first so it sits level and centered, then place the prints to mirror its height on both sides.
Editor's noteUse fabric-backed mounting or a shadow box frame so the textile doesn’t sag or touch glass.
Skip thisAvoid placing fabric behind standard glass without spacing — it can distort texture and catch glare.
12. Polaroid-Style Cozy Wall with Matching Frame Borders
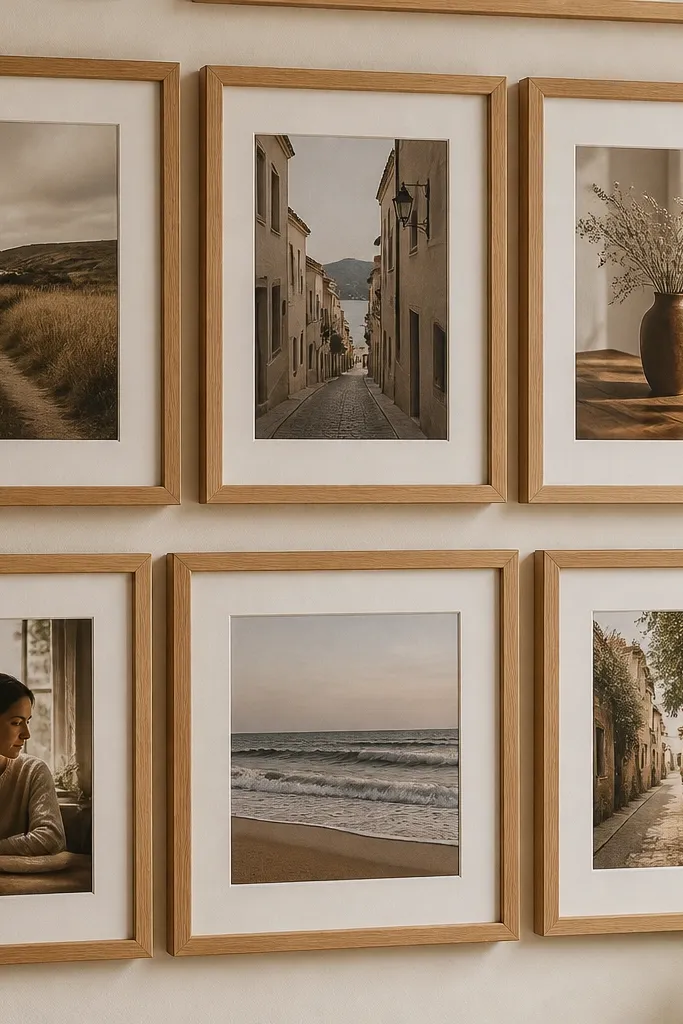
This one is cozy because it looks like a memory wall, but it stays tidy when you control the borders. Use frames that have a built-in off-white mat or insert so every piece has the same “photo border” thickness. The result is a cohesive look that still feels personal. It’s perfect for bedrooms where you want the gallery to feel warm, not gallery-stiff.
Select six to eight frames with the same mat color and border thickness, aiming for 4x6 and 5x7 sizes inside the same border style. Tape a grid-like cluster centered on the wall, keeping 2 inches between frame edges so it reads as one group. Hang the center frame first, then place the surrounding frames so their borders align visually. Use a template made from cardboard to mark hanging holes and keep the spacing consistent across frames.
Pick art that repeats one theme color like terracotta or sage so the polaroid look doesn’t turn random.
Don’t mix different border widths — that’s what turns it from cozy to messy.
13. Sunset Tones with a Center Oval Mirror Cutout
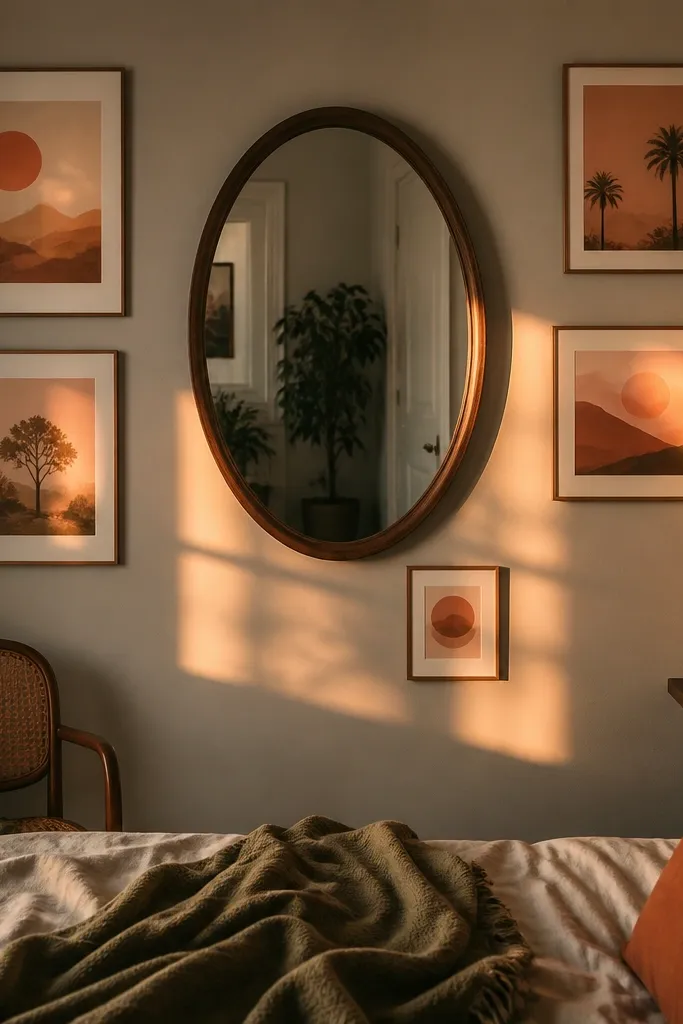
Warm sunset tones look cozy in bedrooms because they mimic late-day light. This layout uses an oval mirror as a “pause” in the middle, then frames warm-toned prints around it so the wall feels like a scene. The mirror adds brightness, and the warm art keeps the whole cluster from feeling like a showroom. It’s a strong option if your bedroom gets good evening light and you want the wall to match it.
Choose one oval mirror about 20 inches tall with a warm frame finish. Add four prints: two 11x14 on either side and two 8x10 above and below, arranged so the mirror sits centered between them. Tape the entire cluster and keep 3 inches between the mirror edge and the nearest frames. Hang mirror first, then align the frames so the top edges of the 11x14 prints form a straight line.
Use anti-glare film on prints if they’re behind glass; sunset colors show reflections fast.
Don’t use cool-toned art (icy blues) next to warm sunset tones — the mismatch makes the wall feel less cozy.
14. Playful Cluster with Uneven Frame Sizes but Consistent Spacing
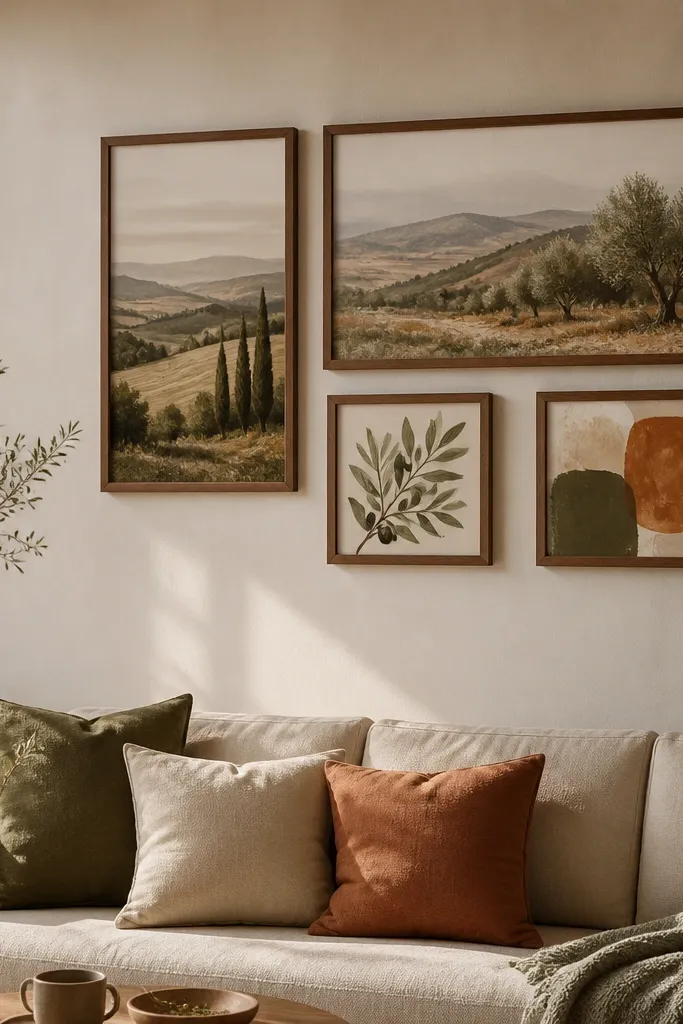
This is the layout for people who love variety but hate the look of a “random” wall. You use uneven frame sizes — one tall portrait, one wide landscape, and a couple squares — but you keep the spacing consistent so it still looks designed. The cozy part comes from choosing a single warm color palette and repeating frame finish. It gives personality without turning into visual noise.
Pick five frames: one tall portrait around 12x24, one wide landscape around 18x12, and three smaller frames around 8x10 and 5x7. Tape them on the wall without forcing a grid, but measure and keep the same gap between frame edges, around 2.75-3 inches. Place the largest frame slightly offset from center, then let the other frames “orbit” it. Hang with the largest frame first, then use a level for each frame so the top edges don’t drift.
Editor's noteKeep all frame widths within one inch of each other; it makes mixed sizes look intentional.
Skip thisAvoid mixing too many frame colors — stick to one metal finish and one wood finish max.
15. Centered Symmetry with Two Rows for a Calm Cozy Look
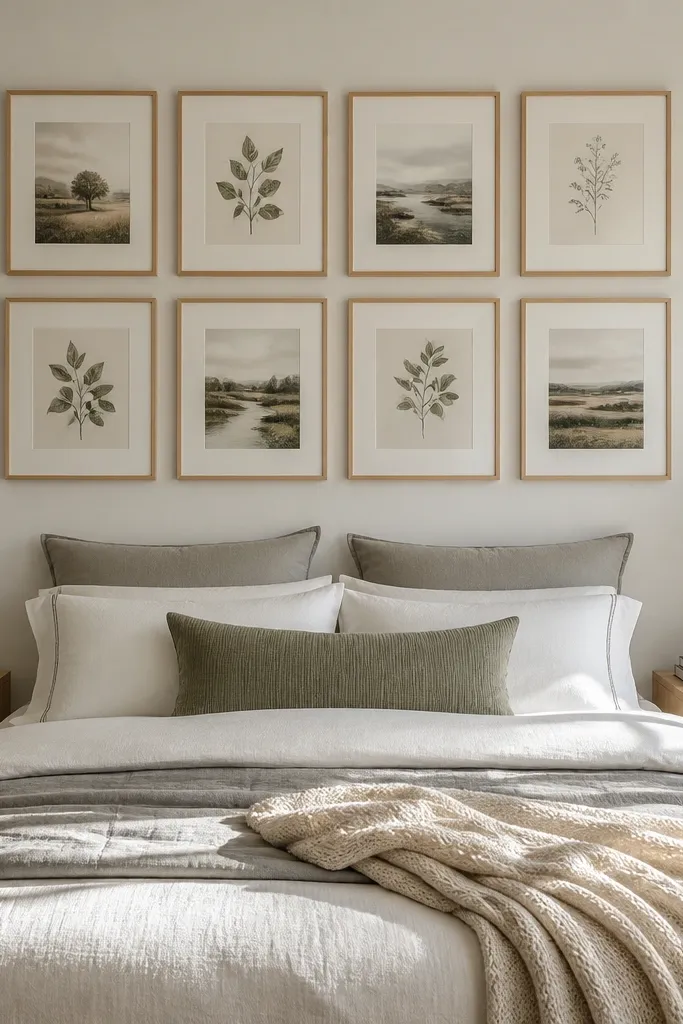
If you want cozy that feels orderly, symmetry is the move. This layout builds a calm cluster with two rows where the left and right sides mirror each other. It looks best with a limited palette and consistent matting, so the wall feels warm instead of busy. You get a strong focal point above a bed or dresser without the stress of an asymmetrical arrangement.
Choose six frames total: two large 16x20, two medium 11x14, and two small 8x10. Tape two rows with a consistent vertical gap of about 3.5 inches between frame edges. Keep the cluster centered and set the top row so the center of the layout lands around 58-60 inches from the floor. Hang the top row first, then align the bottom row by measuring from the top row edges to maintain equal spacing.
Editor's noteUse the same mat size across all frames — it makes symmetry look crisp in photos and in person.
Skip thisDon’t use mixed frame thicknesses; symmetry looks off when some frames sit visually deeper.
16. Corner-to-Wall Gallery for Rooms with No Blank Wall
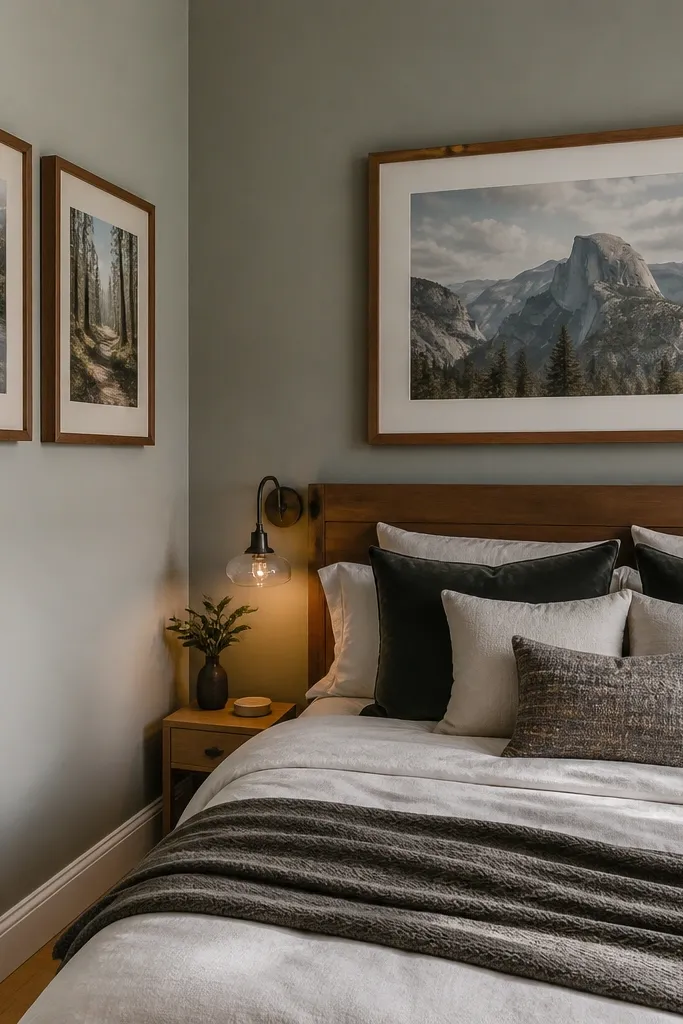
Some bedrooms have furniture in front of the wall, so you can’t hang a big centered cluster. This layout solves that by placing two frames on one wall and one frame on the adjacent wall, wrapping the gallery around the corner. The result is a cozy focal point that still reads cohesive even when the room layout is awkward. Keep the same frame finish and mat color so the corner transition looks smooth.
Pick three frames: one larger frame on the main wall around 16x20, and two smaller frames around 11x14 on the adjacent wall and the side of the main wall. Tape the frames so their inner edges are about 3 inches from the corner line, then adjust until the cluster feels centered to your eye from the doorway. Hang the main wall frame first, then measure the second wall frame from the corner so it lines up with the main piece’s mid-height. Use anchors if you can’t hit studs, but keep the frames light to avoid sag.
Use a consistent orientation for mats (all portrait or all landscape) so the corner doesn’t feel random.
Don’t put one frame in a totally different style (like a poster with a thick border) — corners show inconsistency fast.
17. Frame-and-Shadowbox Combo for Cozy 3D Texture
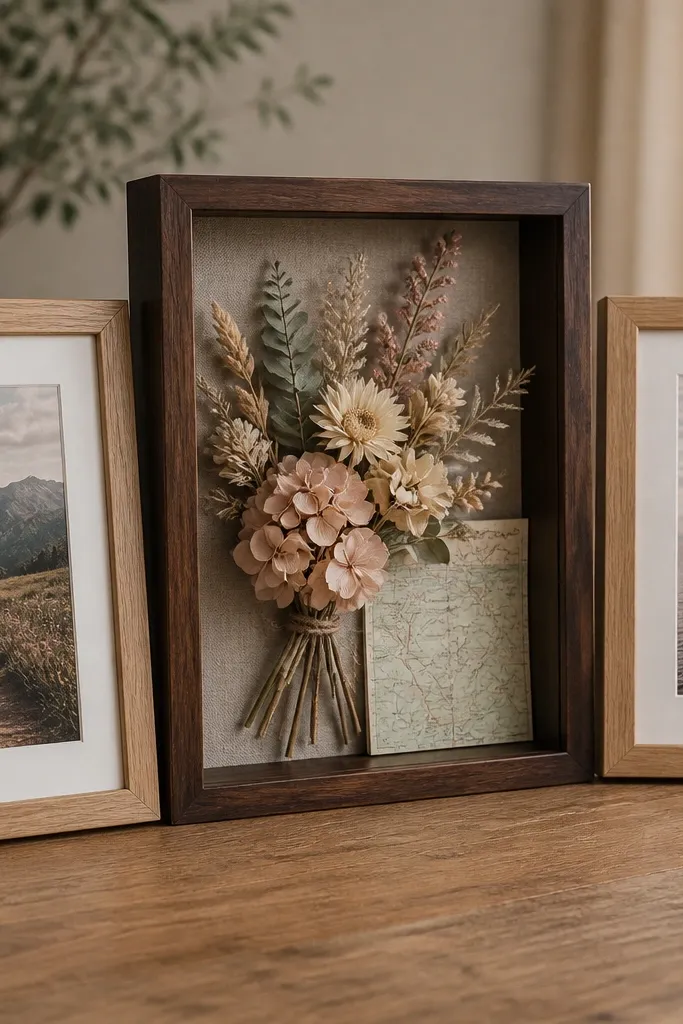
Paper art alone can feel flat. A shadowbox brings 3D texture, which makes a Cozy Bedroom Gallery Wall feel more tactile and warm. This layout uses two framed prints on the sides and one shadowbox in the center that holds dried flowers, a small fabric swatch, or a folded map-style print. The wall looks like you curated it, not like you hung random frames. It’s also a good way to display something meaningful without making the whole room look cluttered.
Choose one shadowbox frame about 16x20 with a depth of at least 1.5 inches so items don’t press against the glass. Place two prints in matching frames on either side, sized 11x14. Tape the cluster centered and keep 3 inches between the shadowbox and the side frames. Hang the shadowbox first, then hang the prints so their top edges align with the shadowbox top, keeping the spacing consistent across the set.
Use dried florals sealed in a small bag inside the shadowbox so they don’t shed petals over time.
Avoid shadowboxes with lots of reflective glass; they create glare that kills the cozy texture.
18. Gallery Wall with a Long Runner Frame at the Bottom
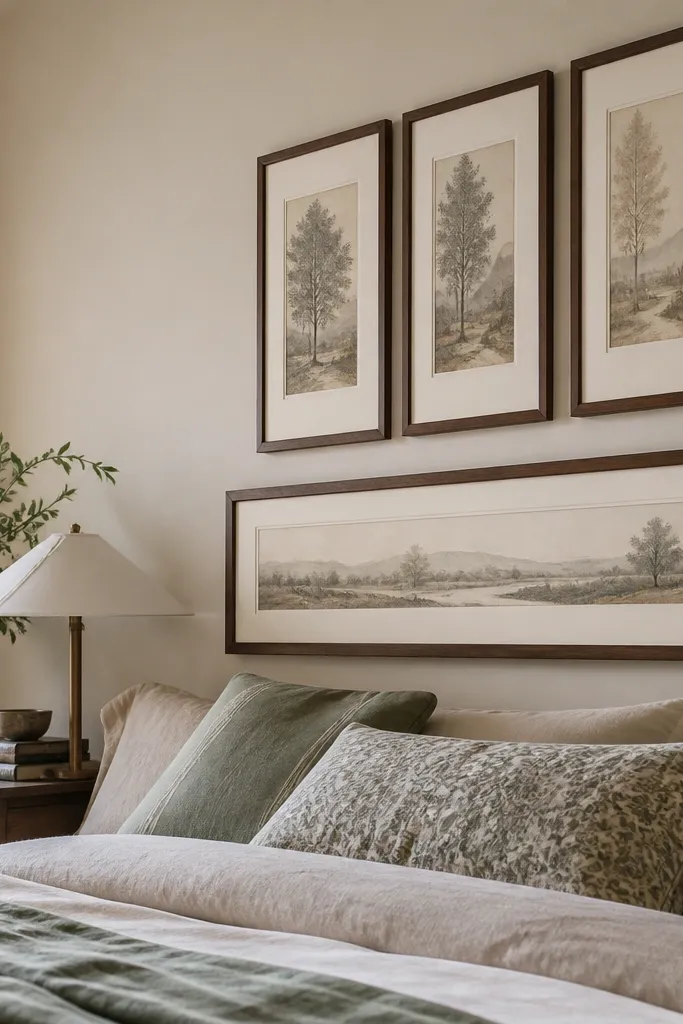
A horizontal “runner” frame adds grounding to a bedroom wall. This layout places three vertical frames above and a longer horizontal frame along the bottom, creating a cozy base line that looks great near a bed or dresser. It helps if your wall has visual height but you want the cluster to feel anchored and calm. The horizontal piece also gives you room for a long quote, landscape print, or fabric-texture artwork.
Pick three vertical frames around 8x12 to 11x14 for the top row, plus one horizontal frame around 24x12 for the bottom. Tape the arrangement so the horizontal frame sits centered under the three vertical frames with 2.5-3 inches between edges. Keep the top row’s center line aligned with the bottom frame’s center so the cluster feels balanced. Hang the horizontal frame first so it sets the anchor height, then place the vertical frames above it and level each one individually.
Editor's noteChoose a horizontal print with a warm color band near the middle — it visually centers the whole cluster.
Skip thisDon’t let the runner frame be too close to the furniture; keep at least 6 inches of clearance from the bed headboard or dresser top.
19. Floating Clip Frames for a Soft, Cozy Rotating Wall
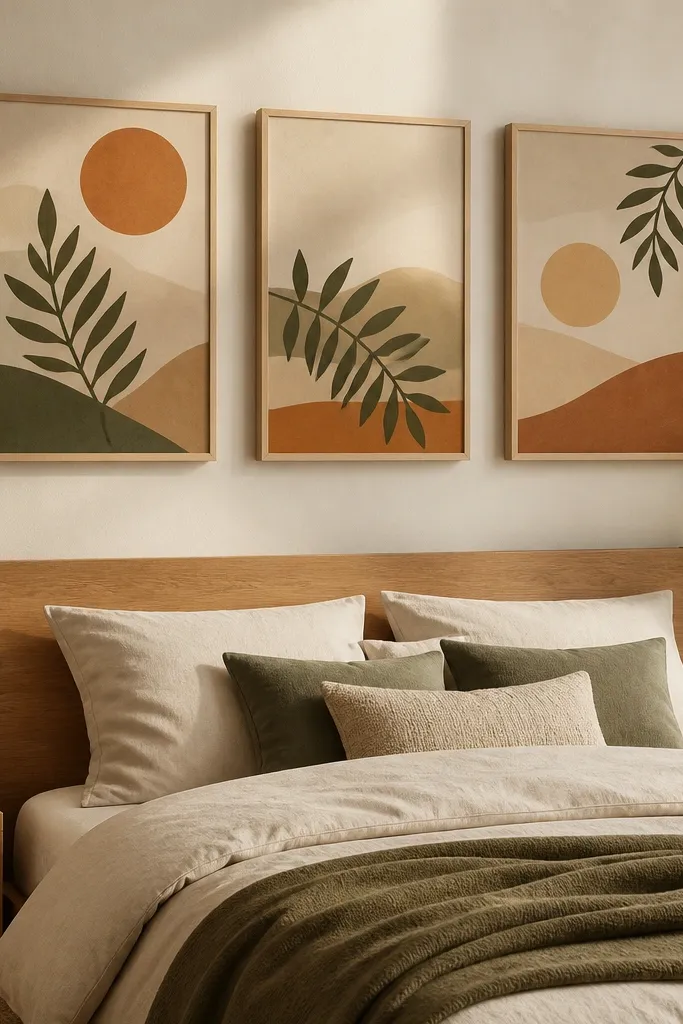
If you like changing art without redoing the wall, floating clip frames are the cozy move. The prints sit slightly forward, which creates subtle shadow and depth. This layout uses three or four frames in the same size so it’s easy to rotate prints by season while keeping the wall looking intentional. It’s especially good in bedrooms because it lets you match your bedding color changes without drilling a new layout every time.
Choose three or four identical clip frames sized around 11x14 or 12x16, with clear acrylic fronts. Tape their positions first and keep 3 inches between frame edges for a clean look. Mark hanger locations with a pencil through the frame’s mounting holes, then drill only where you’ve marked. Hang the frames level, then insert prints with the same border size each time so replacements look cohesive.
Editor's notePrint on matte paper even if your clip frame has acrylic — matte reduces glare and keeps colors warm.
Skip thisAvoid mixing frame sizes in a clip-frame layout; differences make the floating look messy.
20. Ceiling-to-Floor Gallery Rail with Hanging Art Strips
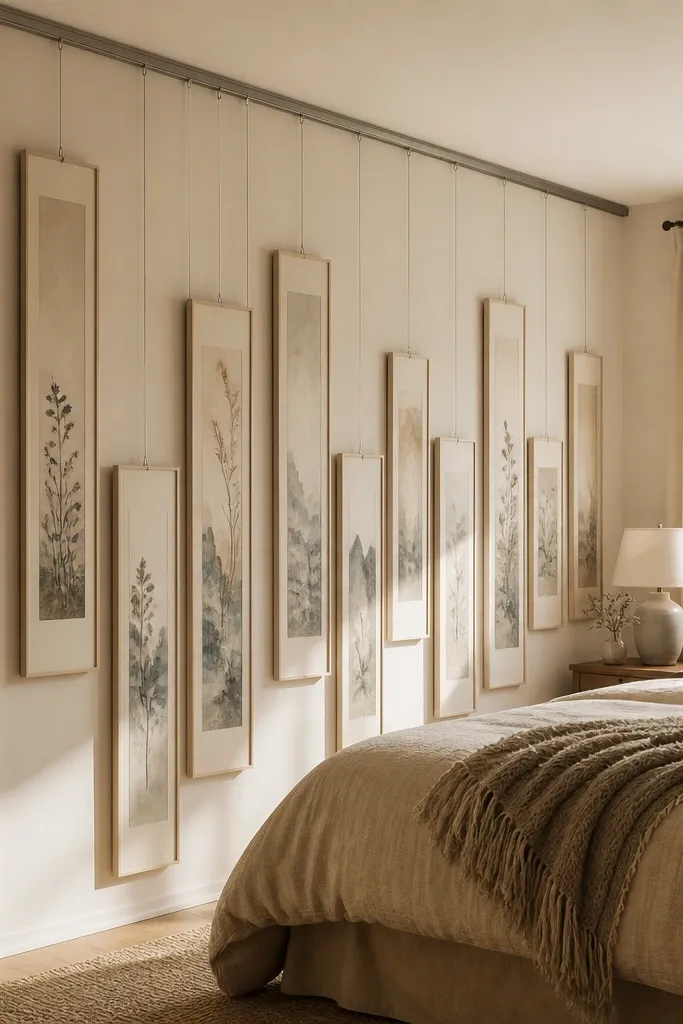
If your Cozy Bedroom Gallery Wall goal is a focal point that feels warm and dimensional, this is the move. Instead of hanging everything flat, you create a vertical “curtain” of art that catches light and softens the whole room. Use narrow frames or mat boards so the pieces don’t look heavy, then stagger the heights so it feels intentional, not random. This works especially well on a wall next to a bed, on a stair landing, or anywhere you want the gallery to pull the eye up and down. It’s a DIY project that looks custom even when you keep the hardware simple. Budget is moderate, and the time is mostly measuring and spacing, not complicated construction.
Pick your wall spot and measure the available height from about 6 in above the baseboard to 6 in below the ceiling trim. Install a picture-rail style track (a metal rail made for hanging frames) using a stud finder — use at least two mounting points into studs, spaced no more than 32 in apart. Hang lightweight frames with wire or D-rings so each frame sits 2-4 in apart vertically; aim for a stagger where the top piece is closest to the ceiling and the bottom piece ends around mid-wall. For a cozy look, use matching frame colors (matte black or warm oak) and keep mat colors consistent (cream or warm white). Finish by tightening all hanging hardware and wiping fingerprints off glass with a microfiber cloth, then stand back and check spacing from bed height.
Editor's noteCut a strip of painter’s tape the same width as your frame, mark the spacing on it, and use it as a quick spacing guide while you hang.
Skip thisAvoid hanging heavy frames on a track without anchoring into studs — the sag is obvious and it ruins the cozy, tidy look.



