
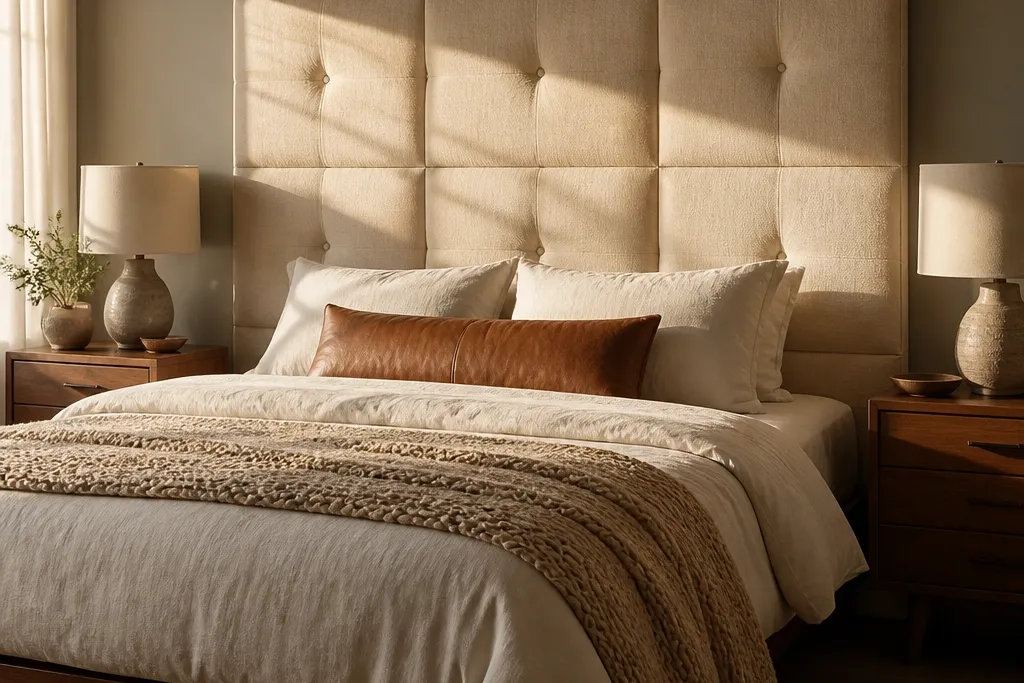

1. Button-tufted linen headboard panel
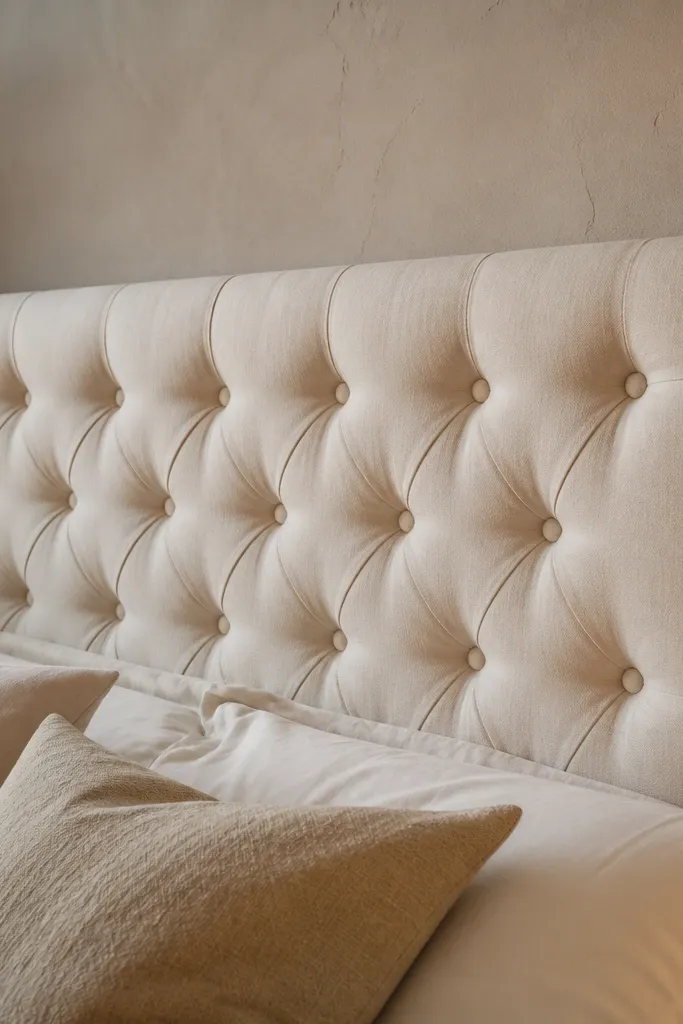
This is the easiest way to make a bed look expensive without chasing complicated carpentry. The tufting creates a repeating pattern that catches light and makes the wall behind the bed feel styled instead of bare. Linen keeps the surface soft and slightly textured, which reads cozy even in bright rooms. It also gives you a comfortable back when you sit up, because the foam and batting sit under the fabric and spread pressure.
Editor's noteUse 1-inch foam plus batting; thicker foam alone looks lumpy, while thinner foam makes the buttons look shallow.
Start with a plywood backer cut to your desired headboard size, then add a layer of 1-inch high-density foam and a thin batting layer on top. Mark tuft points with a chalk line grid, drill small pilot holes from the back, and install tuft buttons using a tufting needle or upholstery needle plus strong upholstery thread. Stretch linen tightly from the back, pull each button snug, and secure the thread with a staple gun. Finish by trimming edges clean and adding a fabric-covered dust cover or simple backing board to hide staples.
Skip thisDon’t skip batting — foam directly under fabric shows uneven dimples.
2. Channel-tufted velvet headboard with boxing

Straight channels look calm and tailored, which is a different kind of cozy than button tufting. Velvet adds a soft sheen that photographs well at dusk, but boxing the edges keeps it from looking floppy. The channels also create gentle structure so the fabric stays smooth against the wall. If you like a retreat vibe but don’t want “classic tuft,” this hits the sweet spot.
Editor's noteDo a dry run by pinning one channel first, then step back and check spacing under room lighting.
Cut a plywood panel and cover it with 3/4-inch foam for support. Add batting, then mark evenly spaced channel lines with a straightedge. Sew or attach channel lines with upholstery thread through the back so the front forms neat vertical grooves; keep the tension consistent. Frame the perimeter with 1x2 trim ripped to width, then cover the trim with the same velvet using spray adhesive and staples.
Skip thisAvoid stretch velvet without planning — it can distort channel lines if you pull too hard.
3. Walnut slat headboard with fabric-wrapped sides
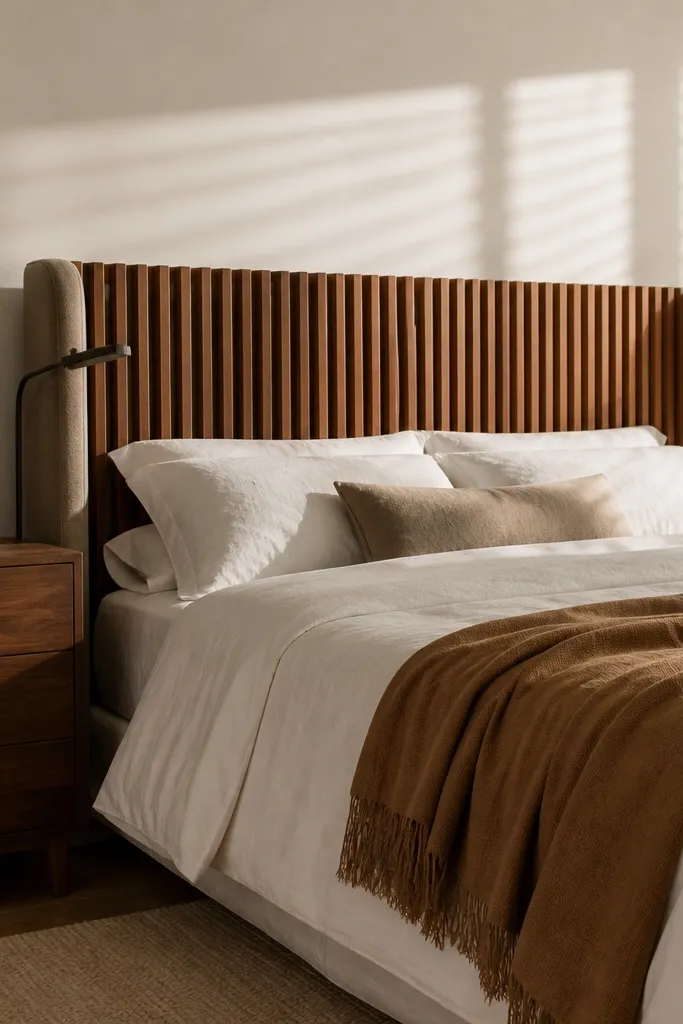
Slats add cozy texture without needing upholstery. The warm walnut tone makes the bed feel grounded, and the gaps between slats create shadow lines that look great in photos. Wrapping the side edges in fabric keeps the project from looking like a simple room divider and gives it a softer, retreat feel. This is ideal if you want a headboard that looks good even when the room is minimal.
Editor's noteUse 3/4-inch slats with 1/2-inch spacing for a shadow rhythm that doesn’t look too busy.
Build a slat frame from 1x2 lumber sized to your bed width and cut slats to span between rails with equal spacing. Sand smooth, then stain walnut and seal with a matte clear coat so it doesn’t glare. Wrap the side faces (where the frame ends) with a fabric strip and staple the fabric to the back with a neat fold. Mount the slat frame to the bed frame using brackets, or wall-mount with two sturdy cleats for a floating look.
Skip thisDon’t seal with high-gloss — it turns cozy wood into shine.
4. Oversized cane webbing headboard
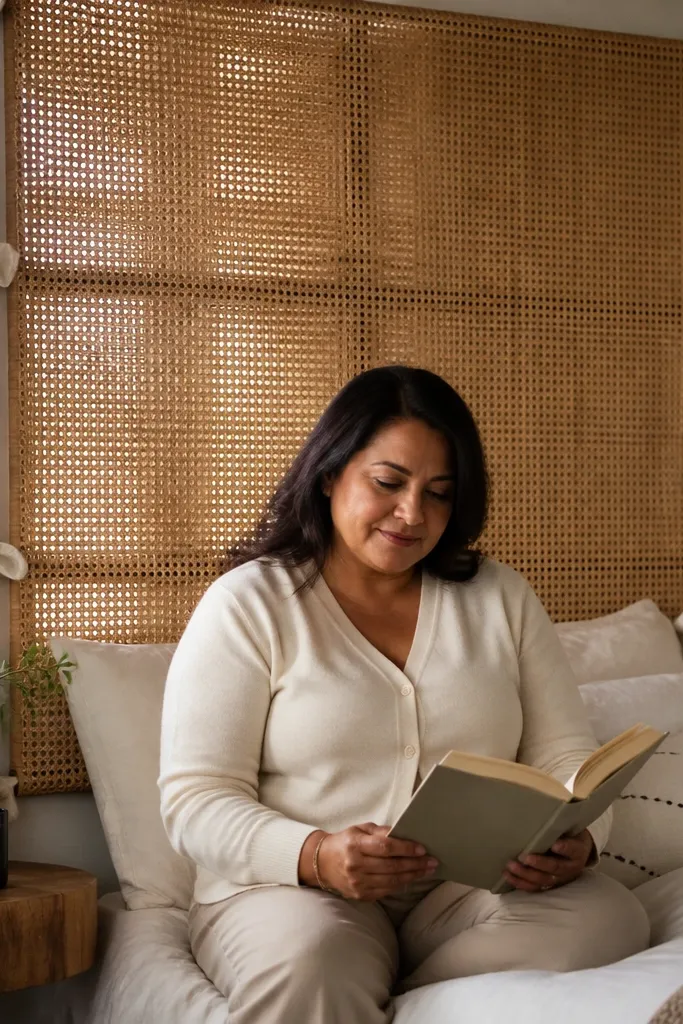
Woven cane and rattan look airy, but when you size the headboard correctly they read warm and intentional. It’s a great option for cozy bed headboard ideas when you want light filtering texture instead of heavy fabric. Cane also hides minor imperfections because the weave breaks up visual noise. Pair it with warm neutrals and matte bedding and the whole room feels like a calm guest room.
Make a rectangular frame from 1x2 or 2x2 lumber, then sand and stain in a warm tone. Stretch cane webbing across the front and staple to the back, pulling taut so the weave stays even. Add a thin backing board behind the staples so the back looks clean. Finish by sealing the wood frame with matte clear coat and installing the headboard to the bed frame with metal brackets.
Pre-soak cane webbing per the manufacturer instructions so it tightens as it dries.
Don’t cut cane too tight — leave a little slack for stretching and stapling.
5. Reclaimed wood plank headboard with softened edges
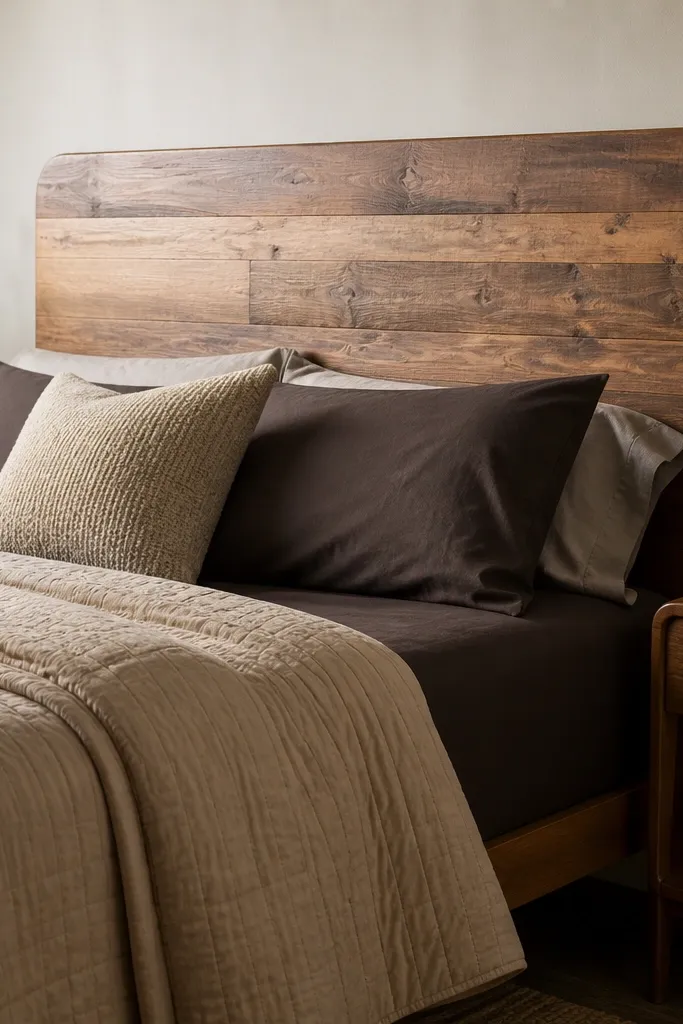
Reclaimed wood looks cozy because it has real color variation and imperfect texture. The trick is to soften the edges so it doesn’t feel rustic in a harsh way. Rounded corners and a matte finish make the grain look calm instead of loud. This works especially well in rooms with white walls and darker bedding, because it adds warmth without needing patterns.
Editor's noteKeep plank thickness consistent; mixed thickness creates bumps that show through bedding and pillows.
Cut a backer panel (plywood or hardboard) to your headboard size. Attach reclaimed planks vertically or horizontally using wood glue and finish nails, keeping gaps consistent. Sand the plank edges and apply a 1/4-round router bit to the outer perimeter if you want a softer profile. Seal with a matte clear coat tinted slightly warm, then mount with cleats or brackets to the bed frame.
Skip thisSkip glossy sealer — it makes reclaimed wood look wet.
6. Faux leather tufted headboard in warm caramel

Faux leather looks cozy when it has a warm color and gentle texture, not a shiny look. Subtle tufting adds depth without heavy button dimples, and it’s easier to keep clean than linen. This headboard makes a bedroom feel “put together” even with simple bedding. It’s also a good choice if you want a headboard that stands up to frequent use and occasional spills.
Cut plywood to size and cover it with 1/2-inch foam plus batting. Mark a few tuft points in a controlled grid — fewer points look better than dense tufting with faux leather. Punch small holes through the foam and tuft from the back using upholstery thread, then staple the fabric edges tightly. Add a perimeter frame from 1x2 trim, then wrap the trim with faux leather for clean corners.
Use a matte faux leather so the light stays soft and the surface doesn’t glare.
Don’t stretch faux leather across corners without test-fitting — it can wrinkle when tension changes.
7. Chunky knit throw blanket headboard wrap

This is cozy bed headboard ideas for people who want maximum comfort fast. A chunky knit wrap turns any flat board into a soft, plush backrest that looks great in photos because the fibers catch light. The best part is it hides minor imperfections, so you can build with simple plywood and focus on the texture. It also works with seasonal bedding changes since you can swap the fabric easily.
Editor's noteUse a foam underlayer (1/2-inch) so the knit doesn’t sag and the surface stays cushiony.
Build a simple plywood headboard frame using 1x2 lumber for a light perimeter and attach a plywood sheet to the back. Drape a large piece of chunky knit over the front, then pull it tight and staple to the back, trimming excess. For a cleaner look, fold knit edges toward the back and cover the staple line with a second fabric strip. Mount to the bed frame with brackets, or add a French cleat for wall mounting.
Skip thisDon’t use a thin, scratchy knit — it looks cozy but feels awful to lean against.
8. Felted wool wall-hang panel headboard

Felted wool gives you a soft matte surface with natural depth, and it reads cozy without looking like “craft foam.” When you stitch clean edges or add a simple border, it looks intentional and high-end. This is a great option for a quieter, Scandinavian-style room where you don’t want heavy tufting. Wool also has a slightly thick, cushy feel that makes sitting up more comfortable.
Cut a plywood or MDF panel to size, then attach a thin foam layer (about 1/2-inch) with spray adhesive. Wrap felted wool over the front, then staple behind the panel so the seam sits on the back edge. Add a fabric border strip along the perimeter to cover staples and create a crisp line. Finish by stitching the border if your felt is thick enough, then mount with bed-frame brackets.
Choose felted wool with a dense backing so it doesn’t stretch out of shape when you pull it tight.
Don’t skip foam — felt alone can look flat and hard when you lean on it.
9. Reversible fabric and batting headboard with removable cover

A removable cover is the grown-up version of changing sheets — your headboard stays fresh and you can switch colors without rebuilding. This design also helps you keep the cozy look consistent because you can re-tighten and re-smooth the outer fabric. It’s especially useful if you deal with pets or you just want an easy refresh. The build is still DIY-friendly because it’s basically a padded core with a fitted shell.
Build a padded core: plywood backer, 1-inch foam, and thin batting. Instead of stapling fabric directly to the core, sew a fitted cover with a zipper along the back edge and a separate dust cover for the inside. Attach the zipper tape to the fabric cover and keep the seam hidden behind a backing strip. Mount the core to the bed frame, then slide the cover on and zip it closed.
Use a heavy-duty zipper (at least 22-inch length) and test the zipper pull before installing the cover.
Don’t use a flimsy zipper — it will fail when the cover shifts from leaning and cleaning.
10. Macramé panel headboard with wooden dowel top
Macramé looks cozy because it adds hand-made texture and soft shadow patterns. A full panel headboard keeps it from looking like wall decor that happens to be near the bed. The wooden top dowel gives it structure and makes the fibers hang evenly, which is what makes it look good in photos. This is a great choice if your room is light and neutral and you want warmth without heavy upholstery.
Editor's noteKeep strand length consistent by measuring from the top dowel to your desired drop before tying each row.
Start with a sturdy frame: two vertical side rails and a top and bottom rail made from smooth dowels or 1x2 lumber. Tie macramé strands to a top dowel and work rows downward until the panel fills the height you want. Secure the bottom ends to the bottom rail with knots or glue-and-clamp method depending on your cord type. Mount the completed panel to the bed wall with two strong screws into studs or a cleat system.
Skip thisAvoid uneven knot spacing — it reads messy fast from across the room.
11. Slim upholstered headboard with wide welt trim

If you want cozy bed headboard ideas that look tailored instead of bulky, this is it. A slim padded board gives you a gentle back without stealing space from your nightstands. The wide welt trim creates a crisp border that frames the fabric and makes it look custom. It’s also easier to sew trim cleanly than you’d think, and it photographs like a boutique hotel headboard.
Cut a plywood panel and add 1/2-inch foam plus a thin batting layer. Stretch your upholstery fabric tight and staple to the back. Add welt cord along the perimeter by sewing it to bias fabric strips or using pre-made welt trim, then attach the welt along the front edge. Finally, wrap the back edges and install with brackets to the bed frame.
Use a medium-weight fabric with enough body to hold welt edges, like upholstery cotton or linen blends.
Don’t pick a super-thin curtain fabric — it collapses and makes the welt look uneven.
12. Vertical panel headboard with mirrored corner blocks
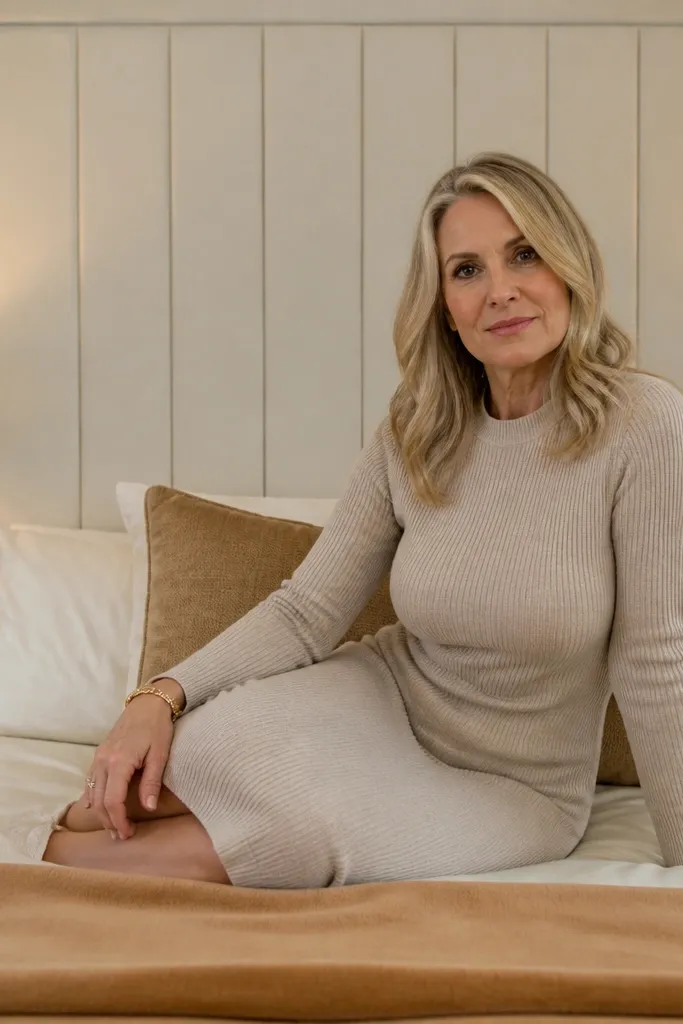
This idea is about clean lines that still feel cozy. Vertical panels create height and rhythm, while small corner blocks add a warm contrast that keeps the headboard from looking flat. The cozy part comes from a matte, paint-like finish and the way shadows form in the grooves. It works well in small rooms because the structure feels light, not bulky.
Editor's noteUse painter’s tape to mask slat spacing while you paint; it keeps grooves crisp and photo-ready.
Build a backing frame from 1x3 boards, then cut narrow vertical slats to attach with spacing. Paint the main panels in an eggshell warm white, and use a darker stain or paint for corner blocks (about 4x4 inches each). Sand edges smooth and do a second coat for an even finish. Mount to the bed frame using corner brackets so it doesn’t twist.
Skip thisDon’t rush the second coat — uneven paint makes shadows look patchy.
13. Shiplap headboard with soft sage paint and rounded top

Shiplap feels cozy because it has horizontal texture that looks good from any angle. Painting it a soft sage keeps it calm and warm instead of farmhouse-cold. Rounding the top edge makes it feel less boxy and more inviting when you lean back. This is a solid option if your room already has wood floors or woven baskets and you want the headboard to match that texture.
Cut a plywood backer and add shiplap boards in horizontal rows with consistent spacing. Sand all edges, then fill nail holes and sand again until smooth. Round the top edge using a router template or sandpaper jig so it looks intentional. Paint with a furniture-grade eggshell and seal with a matte top coat for wipeability.
Use a slightly warmer sage (more yellow than blue) so it reads cozy, not icy.
Don’t leave raw shiplap knots unsealed — they bleed through paint.
14. Stacked wood ladder headboard with anti-sag crossbars

A ladder headboard looks cozy because it creates a clear pattern line across the bed wall. The key is to keep it sturdy and not flimsy, since gaps and spacing can make it wobble. Warm stain and smooth edges make it feel inviting instead of industrial. This suits rooms where you want texture but don’t want fabric maintenance.
Build two side uprights from 2x2 lumber and cut rungs to span between them. Add crossbars behind the rungs at two or three heights so the structure doesn’t flex. Sand thoroughly, stain, and seal with matte finish. Attach to the bed frame with metal angle brackets or mount to a wall cleat if your bed doesn’t allow secure attachment.
Use 1-inch radius sanding on rung edges so the ladder feels soft against pillows.
Skip crossbars and you’ll get a headboard that shifts when you lean.
15. Woven reed panel headboard with thick foam backing
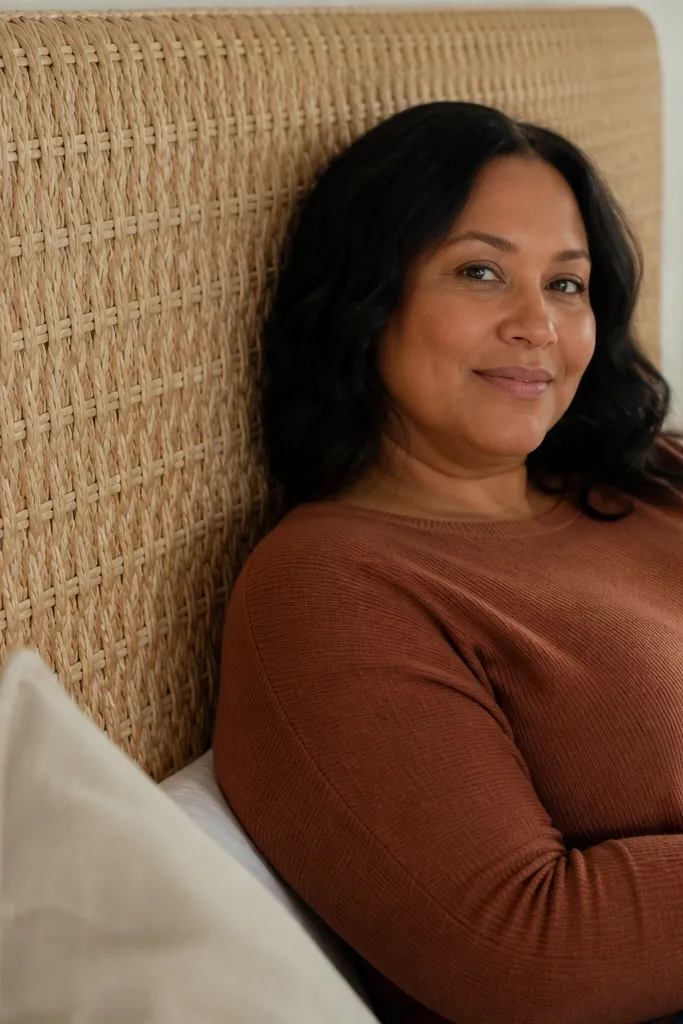
Reed and cane give you that cozy, spa-like texture, but the foam backing is what makes it comfortable. Without padding, reed looks decorative and feels scratchy. With padding, it becomes a real headrest and still photographs airy and warm. This is a smart pick for bedrooms with clean bedding and simple wall color where you want texture to do the work.
Cut plywood to size and attach 1-inch high-density foam. Cover foam with a layer of batting so the reed doesn’t imprint. Stretch reed panel material over the front and staple to the back, trimming carefully so the edges stay straight. Add a thin fabric border around the perimeter and mount using brackets.
Test reed flexibility before you buy — stiff reed looks great but can be uncomfortable if it sits too close to the foam.
Don’t staple reed directly onto foam; batting prevents snag points.
16. Macramé meets upholstery hybrid with padded sides

This is for people who want cozy bed headboard ideas that combine comfort and texture. The upholstered sides give you a soft place to lean, while the macramé center adds that handmade warmth and shadow play. It looks styled from across the room because the macramé acts like a focal panel. You also get the best of both worlds: comfort at the edges and visual interest in the middle.
Editor's noteKeep the macramé panel centered and symmetrical — asymmetry reads messy unless it’s intentional and graphic.
Build a padded core: plywood backer, 1-inch foam, and batting. Create a rectangular window in the front by leaving an opening where the macramé will hang, then cover the remaining areas with upholstery fabric. Attach macramé to a small internal frame or directly to the backer using strong eye screws and cord ties. Finish by adding a fabric border around the macramé opening and mounting to the bed frame.
Skip thisDon’t let macramé touch the upholstery; separate them by at least 1/2-inch so the fibers don’t snag.
17. Oversized upholstered headboard with curved wings
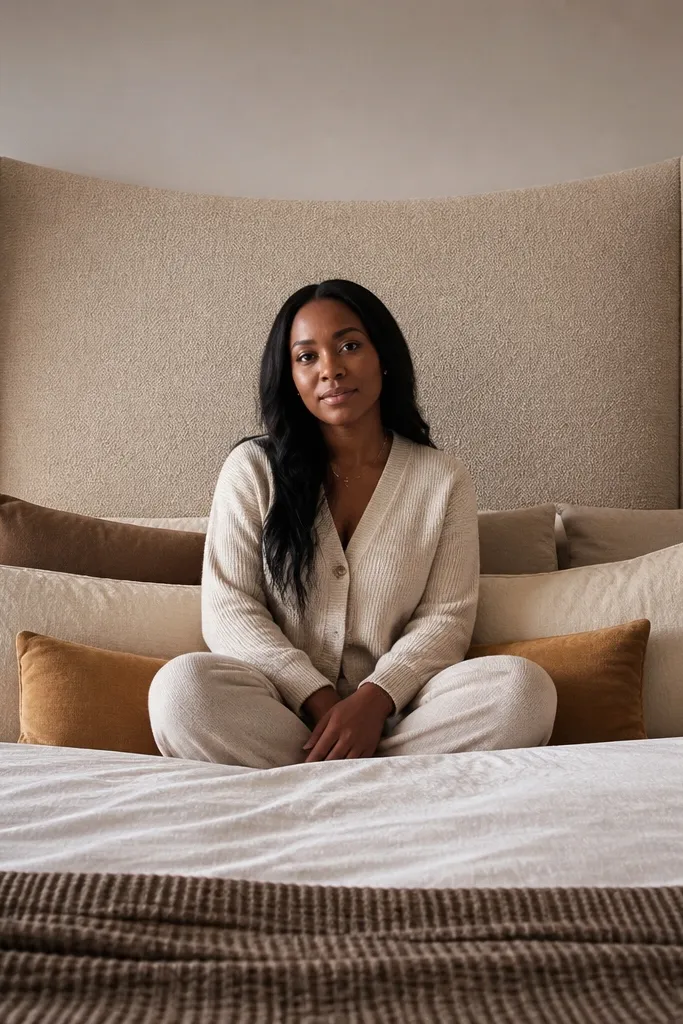
Curved wings make a bed feel like a lounge seat. The shape frames your pillows and makes the center panel look wider, which is why this reads cozy in photos. A large upholstered surface also hides wall imperfections behind the bed. Use a warm neutral fabric and add thick foam so the curves look plush, not flat.
Create a pattern for the wing curves using cardboard, then transfer it to foam and plywood backers. Cut two wing side panels, add foam layers (about 1-inch) and batting, then wrap with upholstery fabric and staple to the back. Join the wing panels to a central padded panel so the curves flow smoothly. Install with multiple brackets so the wings don’t wobble when you lean.
Pin the fabric in place before stapling — curved corners shift easily if you pull too tight.
Avoid thin foam — curved shapes collapse and look cheap.
18. Faux panel tufted headboard with linen tape grid

If you like the look of tailored panels but don’t want real tufting buttons, this delivers the same structured vibe. Linen tape grid lines create a crisp, cozy pattern without heavy hardware. The padding behind keeps it comfortable and makes the fabric look smooth. This is great for modern rooms where classic tufting feels too traditional.
Editor's noteUse narrow tape (about 3/4-inch) so the grid looks refined instead of chunky.
Cut plywood and add 3/4-inch foam plus batting. Stretch linen fabric over the front and staple the back. Mark a rectangle grid with chalk, then attach linen tape along the lines using upholstery glue and a few discreet stitches from the back. Pull the tape lines snug so they form shallow recessed channels, then finish by covering the back with a dust cover.
Skip thisDon’t use glossy tape — it reflects light and kills the soft cozy look.
19. Wallpapered statement headboard with foam edge

Patterned wallpaper is a fast way to make cozy bed headboard ideas look like a design decision, not an afterthought. The foam edge matters because it gives the wallpaper a soft border and prevents peeling at the corners. Choose a pattern with warm tones and matte finish so it doesn’t glare under lamps. This works best when your bedding is simple, so the headboard becomes the visual anchor.
Editor's noteMatch the wallpaper repeat carefully so the pattern lines up across the center panel.
Build a flat headboard base from plywood and cover it with 1/2-inch foam. Wrap the front with a smooth primer if the wallpaper needs it, then apply wallpaper using a paste sized for wall coverings. Add a foam or fabric-covered edge trim along the perimeter to protect corners and hide seams. Seal with a matte protective spray made for wallpaper surfaces, then mount securely.
Skip thisDon’t skip primer or sealing — wallpaper on bare wood lifts and bubbles.
20. Rattan frame headboard with upholstered center cushion
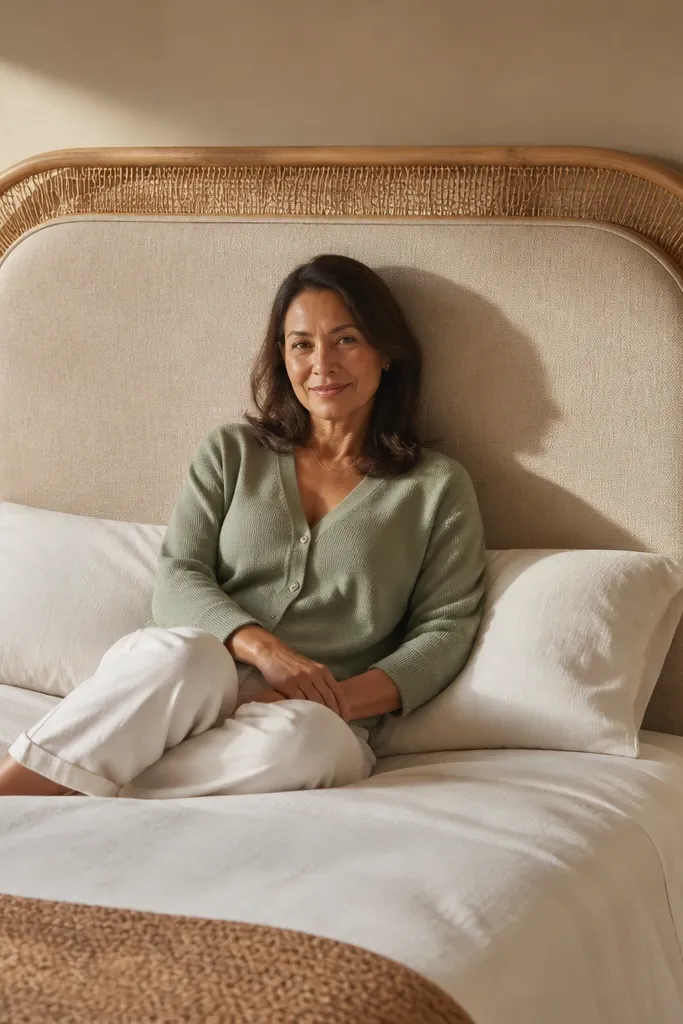
This design reads like a coastal retreat but still feels cozy and supportive. The rattan frame brings texture and warmth, while the upholstered center cushion gives you the comfort you’d expect from a real headboard. It also gives you a place to use your favorite fabric without committing to full upholstery across the whole thing. Photographically, the frame creates a nice border that makes the bed look styled.
Build a rectangular rattan frame or buy a rattan panel frame and confirm it fits your bed width. Add a plywood backer behind the rattan and attach 1-inch foam for the center cushion only. Stretch fabric over the foam and staple to the back, keeping edges flat inside the rattan opening. Attach the rattan frame over the cushion with small screws or brackets so it stays aligned, then mount to the bed frame.
Pick a cushion fabric with a slight texture like linen — it looks warmer than smooth cotton under lamp light.
Don’t make the center too thin; rattan frames look great but won’t cushion your back.
21. Painted slatted headboard with fabric-wrapped bottom rail

Slats plus a soft bottom rail is a cozy compromise: the slats add structure, and the fabric rail gives you a comfy surface where pillows rest. This also hides the “stiff” look of painted wood because the rail adds softness and warmth. Choose a warm paint color like clay, greige, or soft charcoal for depth. It’s a good option if you want the headboard to look built but you don’t want a heavy upholstery job.
Build a slat frame from 1x3 or 1x2 lumber and attach evenly spaced slats across the front. Sand and paint with eggshell so it stays matte under lighting. Add a bottom rail made from plywood or a 1x4 strip, wrap it with fabric, and staple neatly on the back. Secure the headboard to the bed frame using brackets at the top and bottom rails.
Use spacers when you install slats so the gaps stay consistent and look clean in close photos.
Avoid satin paint — it highlights roller marks and makes the surface look less cozy.
22. Floating pegboard headboard with removable fabric pockets

This one feels cozy because it’s practical. Pegboard lets you add soft fabric pockets for throw pillows, blankets, or reading accessories, so the bed area looks lived-in and organized. The floating mount also creates a shadow gap between the headboard and wall, which makes the room feel deeper. It’s best for people who want their headboard to do more than look pretty.
Cut pegboard to your headboard size and sand the edges. Paint it a warm matte color, then mount it to the wall or bed frame with spacers so it floats 1-2 inches off the wall. Add removable fabric pockets using snap-on hooks or Velcro strips so you can swap them seasonally. Back the pegboard with a thin fabric layer so the pockets hide pegboard hardware edges from view.
Keep pocket depth shallow (about 3-4 inches) so items don’t bulge and distort the look.
Don’t mount pegboard flush to the wall — it looks flat and cheap without the shadow gap.
23. Felt-backed corkboard headboard with button accents
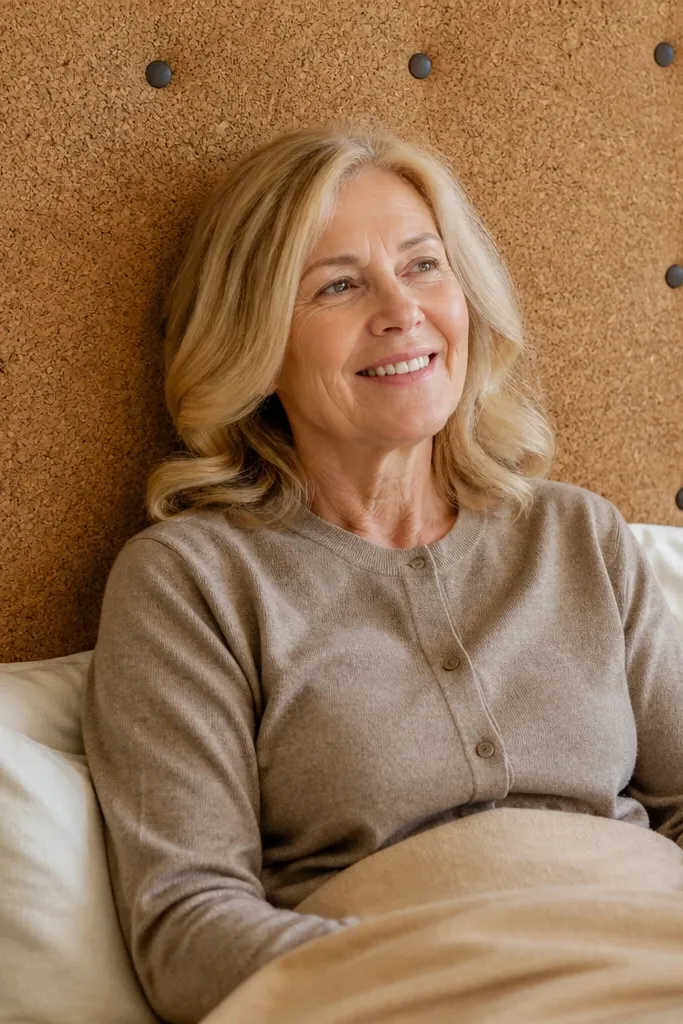
Cork gives you a cozy, warm surface, and felt makes it look soft instead of utility. Add a few button accents or small tufted circles for a designed look. This headboard is great for bedrooms where you want a spot for notes, photos, or charging reminders without cluttering the nightstands. It also absorbs sound a bit, which makes the room feel calmer at night.
Cut corkboard to size and glue it to a rigid backing panel. Cover the cork with felt using spray adhesive, then stretch felt tight and staple the back. Mark button positions and secure small tufted fabric buttons through the felt and into the backing with upholstery thread. Mount to the wall with a French cleat or to the bed frame with brackets, then add a perimeter trim strip to hide edges.
Use felt that’s thick enough to hide the cork texture so the surface looks uniform.
Don’t skip perimeter trim — raw cork edges look unfinished fast.
24. Outdoor canvas headboard with padded batting and brass grommets

Heavy canvas looks cozy when it’s padded and finished with warm hardware. Brass grommets add a subtle glow and make the build feel intentional, not utilitarian. This headboard works well in bedrooms that need texture and durability, especially if the room gets a lot of use. The canvas also photographs well because the weave shows up in soft light.
Editor's noteInstall grommets before final stapling so you can reinforce the back side cleanly.
Cut plywood and add 1-inch batting and 1/2-inch foam on top. Stretch canvas over the front and staple to the back, keeping tension even across the width. Mark grommet holes in a vertical line pattern, then install grommets with a hand grommet tool. Add a fabric-covered trim strip along the perimeter and mount with strong brackets to prevent flex.
Skip thisDon’t use thin canvas — it wrinkles and makes the grommet pattern look messy.
25. Corduroy panel headboard with diagonal top stitch

Corduroy reads cozy because it’s soft and matte with a tactile ridged surface. Diagonal top-stitch lines create movement and make the headboard look designed without going full tufting. It also works when you want a warm, grounded look in a room that’s otherwise neutral. This is a great choice if you like a cozy feel but want clean lines.
Editor's noteUse a thicker needle and test stitch on a scrap — corduroy pile can snag with the wrong needle.
Cut plywood to size and add foam (about 3/4-inch) plus batting. Stretch corduroy fabric and staple the back, then sew diagonal top-stitch lines across the front using upholstery thread. Keep stitches parallel and about 2 inches apart for a clean pattern. Add a perimeter frame from thin trim and cover the edge with matching corduroy so the corners look crisp.
Skip thisAvoid very dark corduroy if your room has cool overhead lighting; it can look flat instead of warm.



