


1. Bench seat with removable linen cushion and welted edges
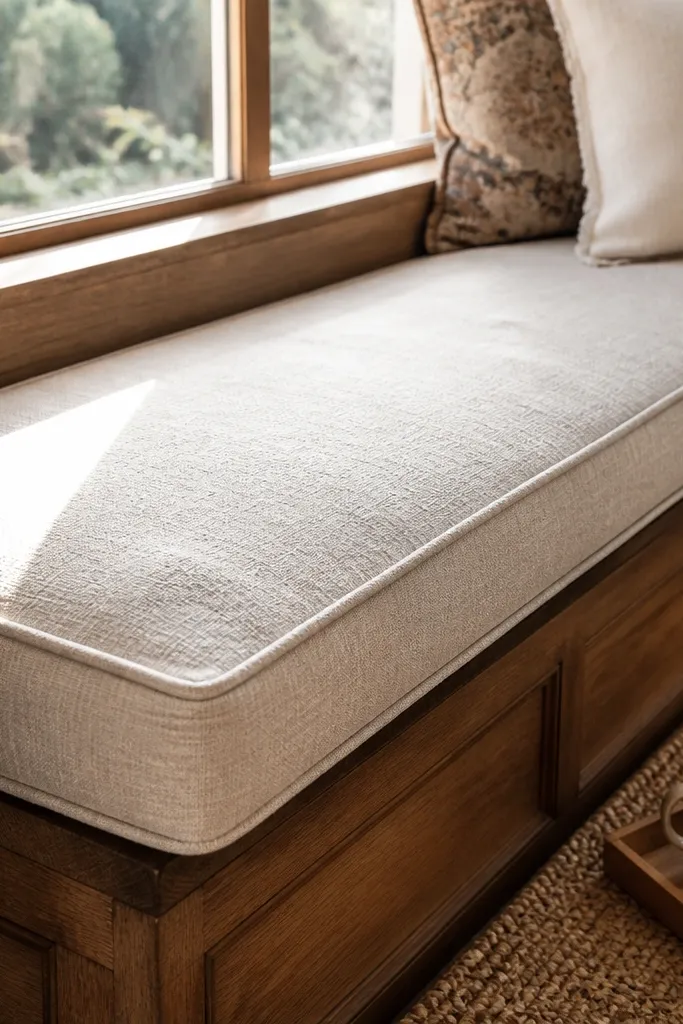
Measure the bay’s bench footprint — width across the front and depth to the radiator/trim clearance. Build a simple plywood platform at about 17-19 inches deep, then screw a frame to the wall studs or use a cleat system so it stays solid. Add a 4-inch foam insert topped with batting, and wrap with linen fabric, finishing the seam with a welt cord around the perimeter. Make the cushion cover with a zipper so you can remove it, then attach the cushion using non-slip fabric or D-rings so it doesn’t drift.
A bench turns a bay window into a morning spot instead of a display shelf. The look is cozy because linen has a soft matte finish, and welted edges make the cushion look tailored even when it’s simple. Go with a cushion that lifts off easily so you can wash it and keep the bay looking fresh. This works best in bays where you can fit a bench depth around 18-20 inches without blocking the window trim. It’s also easier to keep clean than a pile of loose cushions.
Skip thisSkip thin 1-inch cushions — they flatten fast and the bay stops looking plush.
Editor's noteUse foam with a firmer 1.8-2.0 density for a cushion that holds its shape in angled seats.
2. Layered curtain drama with a ceiling track and side panels

Install a ceiling track 3-4 inches above the window trim so the curtains don’t block light at the top. Hang sheer side panels first, cut to follow the bay’s angle with extra width for fullness. Add the heavier panels on top using rings or clips, then make sure each panel overlaps slightly at the center so you don’t see gaps. For a neat finish, hem the bottom so it lands 1-2 inches above the sill or just grazing it.
Curtains are the fastest way to make cozy Bay Window ideas look finished because they soften the harsh angles. The key is layering: sheer for morning glow and heavier panels for that warm, tucked-in feel. A ceiling track hides messy brackets and lets panels align cleanly with the bay’s angled sides. Choose warm white or oat sheers, then pair with a heavier linen blend in clay, sand, or sage. This setup looks great in photos because the fabric falls in smooth vertical lines.
Skip thisDon’t hang curtains from a window-mounted rod — the bay angles will look crooked and uneven.
Editor's noteUse curtain weights sewn into the hems so the fabric stays straight on the angled sides.
3. Rattan Roman shade with blackout underlayer
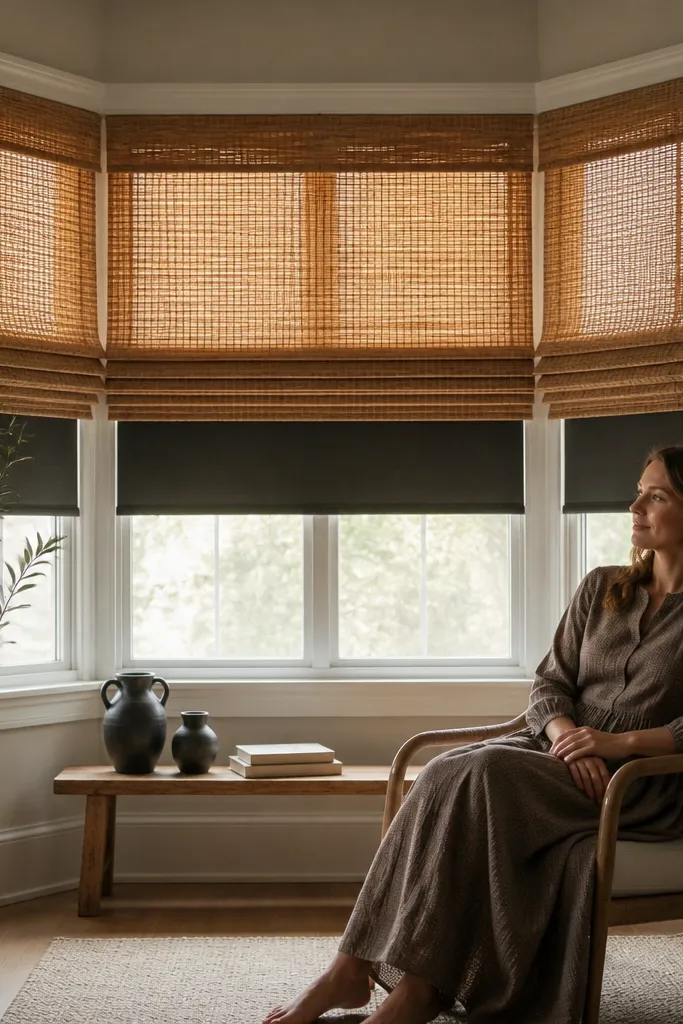
Measure each bay window section separately and order Roman shades that match the width and height of the trim area. If you’re adding blackout, install it as a separate liner (or choose a shade system that includes it) behind the woven layer. Mount the brackets level across the bay so the folds land evenly. Test the lift — it should raise without scraping the trim — then fine-tune the cord tension.
If you want cozy without heavy fabric, a Roman shade gives you soft texture and still controls light. Rattan or woven shades add warmth immediately, and the blackout underlayer keeps the bay usable for sleep or late mornings. The look stays clean because Roman folds stack neatly instead of billowing. This is a strong choice when your bay gets bright sun and you want it warm in the morning, not glaring. It also works well when you don’t want curtains eating up wall space.
Skip thisSkip super-dark weaves — they can make the bay feel smaller and less cozy.
Editor's noteChoose a woven shade in a light honey or natural tone so it reads warm even in cool morning light.
4. Floating shelf ledge with angled side niches

Pick a shelf depth around 6-7 inches for the front ledge so you don’t create a bulky look. Use a stud finder and install a level ledger or shelf brackets across the front, then add two shorter shelves to match the side angles. Use a router or edge banding on cut shelf planks so the front looks finished. Style with a repeating grid: one plant, one book stack, one framed piece per side niche.
Shelves make Bay Window ideas practical because you get storage and styling in one spot. The trick for a cozy look is using a ledge that visually breaks up the bay, plus smaller angled niches on the sides so the whole shape feels intentional. Light wood keeps the bay bright, while the shelves themselves create a clean frame for warm decor. Add plants and framed art in matching wood tones for an organized, lived-in feel. This works best when you have a bay that’s too narrow for a full bench.
Skip thisDon’t cram the shelf — leave 2-3 inches of empty space between the plant and frames.
Editor's noteStagger shelf items by height — keep the tallest piece at the outer edges, not in the center.
5. Warm-toned window seat with DIY built-in throw caddy

A throw caddy makes the bay feel cozy because it turns “extra blankets” into part of the design. Instead of storing throws in a basket you’ll forget, you build a shallow slot under the seat edge where the fabric looks neat. This is especially good for fall and winter mornings when you want to grab and go. Choose a seat finish in warm oak, walnut stain, or painted cream — then match the caddy interior to hide dust. The result is tidy, functional, and very photogenic.
Build the bench platform first and leave a 3-4 inch tall open channel along the front edge of the seat base. Install a face frame strip so the channel edges look clean and the throws don’t slip out. Sand and seal the wood with a matte clear coat so it doesn’t glare under window light. Finish by adding a cushion on top and test-fit folded throws so they slide in smoothly without snagging.
Use a 2-inch lip at the bottom of the caddy so fabric stays put even when you pull a throw quickly.
Skip glossy finishes — they reflect the window and make the bay look harsh.
6. Cushion wall panels in soft boucle with removable covers

Measure the wall surfaces between the window trim edges and plan panel sizes around 16-24 inches wide for manageable installation. Cut plywood backing, then staple foam and fabric to create a tight, rounded surface. Mount panels with screws into studs or using a cleat system so you can remove them later. Add Velcro or hidden magnets for removable covers, then seam the covers so the texture aligns across panel edges.
Boucle or textured upholstery panels add instant coziness because they catch light softly and make the bay feel padded. Instead of hanging art, you create a “soft wall” that frames the window and looks expensive in photos. Removable covers matter here because window bays collect dust and you’ll want to refresh the fabric. This works best when the bay wall is flat enough for panels and you have access behind the trim. It’s a stronger look than a simple picture wall because the texture reads at a distance.
Skip thisDon’t use slippery fabric without a backing; panels will look wrinkled and messy.
Editor's noteChoose boucle in warm greige or oat — it hides dust and looks cozy even when light is cool.
7. Sisal or jute runner sized for the bay angles
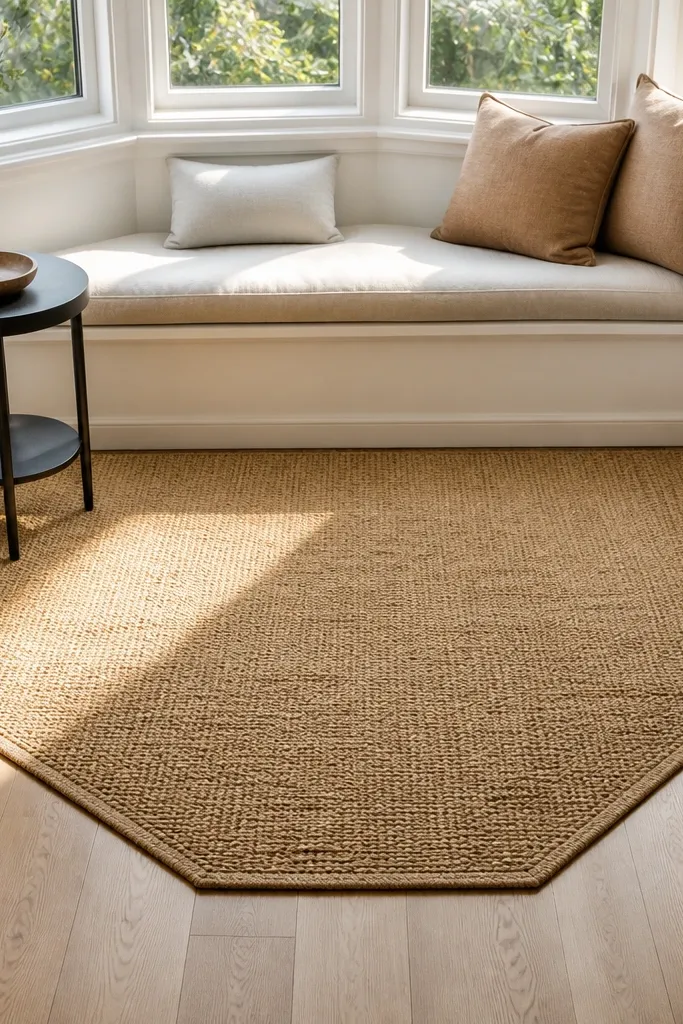
Measure the front width and the depth from the front edge to the room side where the runner should end. For a bay, you can cut a runner pattern using painter’s tape on the floor to mark the angles, then transfer to your rug backing. If your rug can’t be cut cleanly, use a rug pad plus a non-slip underlay and tuck the edges slightly under trim. Finish with a simple binding or rug tape if you cut edges.
A properly sized rug makes cozy Bay Window ideas feel grounded. Jute and sisal add warm texture without piling up dust like thick shag. The best-looking bays use an angled runner that follows the front edge and still fits the side angles without bunching. This is a good upgrade when your bay has a bench, a small table, or just seating chairs nearby. It also helps the whole corner look intentional instead of floating.
Skip thisSkip oversized rugs — when the rug spills into the bay angles, it looks sloppy.
Editor's noteUse a thin rug pad — thick pads can distort the angles and make the rug creep.
8. Grid-style plant shelves with matte black brackets

Plants make bays feel alive, but the look gets messy fast. A grid-style shelf system keeps plant placement consistent and makes the bay read like a designed corner. Matte black brackets contrast beautifully with warm wood and light walls, so the textures pop. Use small pots in matching tones so the bay looks cozy instead of chaotic. This idea is perfect if you want cozy Bay Window ideas with vertical interest and you don’t need full seating.
Choose shelf boards about 5-6 inches deep and cut them to fit the bay front and side angles. Install a horizontal rail or individual brackets into studs, spacing them so pots sit with a little breathing room. Use a consistent pot size for most plants, then keep one slightly taller plant as the “hero.” Finish by adding a small tray at the base for watering drips and wipe access.
Match pot colors to your curtain or cushion — warm terracotta and oat always look good together.
Don’t mix five pot styles — it makes the bay feel cluttered even with empty space.
9. Marble-look side table with rattan tray and candle niches

Pick a table that fits the bay depth — aim for 14-18 inches deep and a height around 24-26 inches. Place a rattan tray centered on the table and add a pair of candle holders with a drip catch tray underneath. If you want a more built-in look, install a small wall shelf behind the table at shoulder height for a single candle cluster. Add one book or a slim vase so the tray isn’t just candles.
A small table makes bay seating usable, and it’s the simplest way to add cozy lighting. A marble-look top reads clean and bright next to warm fabrics, while a rattan tray adds texture and keeps items from scattering. Candle niches or simple candle stands create that morning-to-evening vibe without extra decor clutter. This works best if your bay already has a bench or two chairs. Keep the styling minimal so the bay still feels airy.
Skip thisSkip tall candle stacks — they block the window view and make the corner feel crowded.
Editor's noteUse flameless candles for daytime photos and real candles for the evening — it’s safer near curtains and plants.
10. Warm wood window valance with slatted front and linen backing
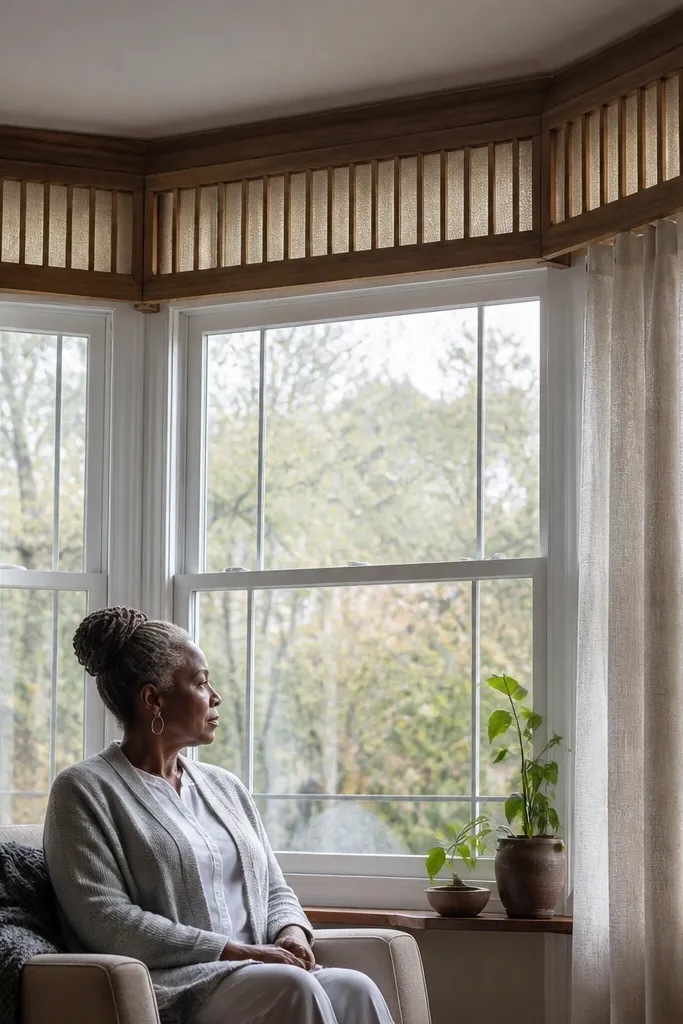
Measure the bay window width and the height from the top trim to where you want the valance to sit. Build a box frame from 1x2 boards and attach a slat grid across the front using small wood screws. Stretch linen backing behind the frame so you don’t see hardware or gaps. Stain or paint the wood, then mount the valance with a ledger cleat so it stays level across the bay’s angles.
A slatted valance makes the bay look custom without complex carpentry inside the window opening. Slats add rhythm, and linen backing keeps the look soft instead of industrial. It frames the curtains or shades and hides the top hardware so the bay reads tidy. Use warm wood tones like oak or walnut stain to keep it cozy in morning light. This works especially well when you want the bay to look designed even on days you don’t style it with many objects.
Skip thisDon’t mount too low — a valance that hangs into the light makes the bay feel smaller.
Editor's noteLightly sand edges and apply a matte finish — shiny wood under window light looks cold.
11. Gallery wall on the side walls with matching frames and angled alignment
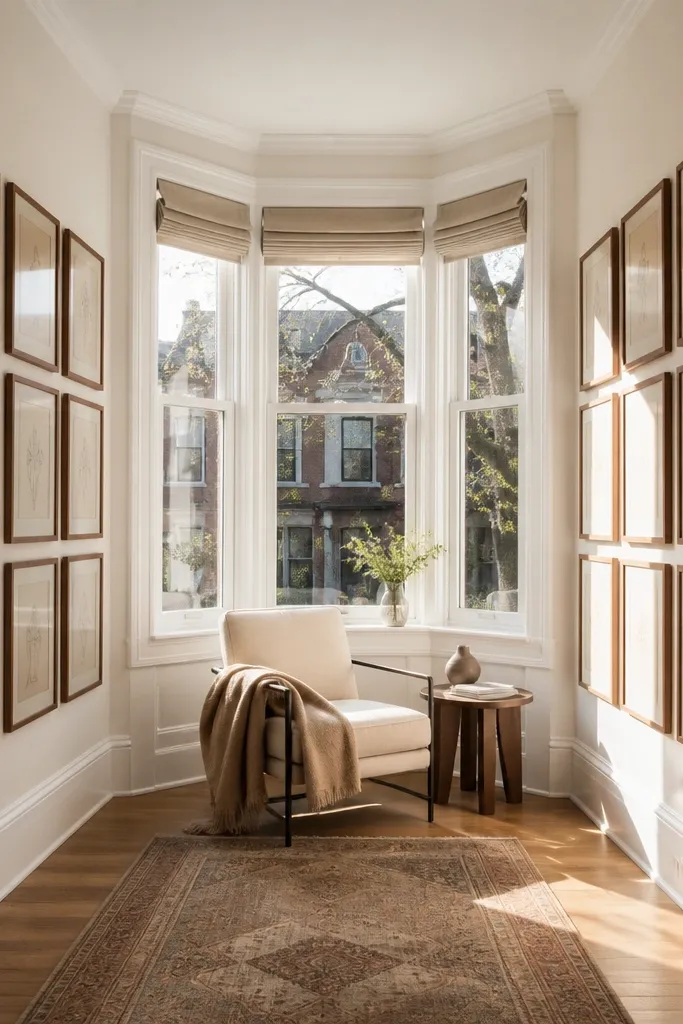
Choose 6-10 frames in the same size and finish, then decide on a layout that follows the angled side wall — one frame centered on the widest point, others stepping outward. Use painter’s tape to map the grid directly on the wall, measuring from the window trim so frames look level from the room perspective. Hang using picture wire and anchors rated for the frame weight. Keep mat colors consistent and choose art with warm backgrounds.
If you want cozy Bay Window ideas that look like a magazine spread, the easiest win is a gallery wall that respects the bay angles. Use matching frames and align the artwork as if it’s part of one continuous grid, even though the walls are slanted. Warm paper tones and simple line drawings add softness without turning the bay into a clutter zone. This suits bays where you don’t want shelves or you want to keep the window sill clear. The look is clean, calm, and very photogenic.
Skip thisSkip mixed frame finishes — the bay will look random instead of intentional.
Editor's noteUse a level for each frame, but also step back and check from the seating area — bay angles trick your eye.
12. Window sill styling with a "one tray rule" and tapered candle math

Choose a tray that fits the sill depth with at least 1 inch of space on each side. Place two taper candles centered, then add a small vase or bud jar on one side of the tray and one small texture item on the other — like a mini ceramic bowl or a folded linen napkin. Keep the rest of the sill empty so morning light has clear space to hit. Swap seasonal accents by replacing only the small items, not the whole arrangement.
A clean sill is what makes cozy Bay Window ideas look curated instead of messy. The one-tray rule means everything sits on a single tray so your view stays organized, even when you add seasonal pieces. Taper candles in pairs give symmetry, and a small vase or bud jar adds softness. This is ideal when you can’t or don’t want to install furniture or shelves. It’s also the easiest way to keep the bay looking good year-round.
Skip thisDon’t spread decor across the whole sill — it breaks the cozy, tidy look.
Editor's noteMatch candle holders to your curtain hardware or shelf brackets so the bay feels cohesive.
13. DIY window nook reading corner with a rolled-linen backrest
Pick a chair or cushion seat width so the rolled backrest can sit behind without blocking the window. Make a backrest roll using foam wrapped in batting and linen, with a diameter around 6-8 inches for a supportive look. Attach it to the wall with removable hooks or to a small backboard panel screwed behind trim. Cover with a removable linen slip so you can wash it.
A rolled backrest turns a bay into a real reading nook without building a full bench. The look is cozy because the backrest creates a soft frame behind the seat, and rolled edges feel finished and expensive. Use a chair with clean lines or a built-in corner bench, then add the rolled cushion behind it so it fills the angled gap. This works in bays where seating is already there or where you want flexibility. It also photographs well because the backrest gives the whole corner a focal point.
Skip thisSkip a roll that’s too small — it looks decorative but won’t support your back.
Editor's noteUse a darker underside or a removable cover panel so spills don’t ruin the whole piece.
14. Built-in side storage with shaker doors and open center shelf
Storage is what makes cozy Bay Window ideas last through real life. Shaker-style doors hide clutter so the bay stays photogenic, and an open center shelf gives you a place for warm decor like a ceramic pitcher or basket. This is a stronger option when your bay is the main landing spot for shoes, throws, or pantry overflow. The look feels tailored because the doors align with the bay wall panels. It also keeps the window sill clean for morning light.
Measure the side wall sections and plan two cabinet boxes with a centered open shelf between them. Build boxes from plywood, then add shaker-style door frames using 1x2 rails and stiles. Install with screws into studs, and keep the shelf opening around 10-12 inches wide so you can style without crowding. Finish with a matte paint in warm white or soft cream, then add a simple shelf liner for easy cleaning.
Add magnetic soft-close hinges or dampers so the doors feel quiet and premium.
Don’t install cabinets without confirming radiator or baseboard clearances — you’ll lose depth and alignment.
15. Soft glow bay lighting with plug-in wall sconces and warm bulbs

Choose two sconces sized for the bay walls, with an arm that lets you aim light downward and inward. Mount them at about 60-66 inches from the floor for a flattering height, then run concealed cord covers along the baseboard. Insert 2700K bulbs and test brightness — you want a warm glow, not a spotlight. Style the bay with one low tray or candle cluster so the light has something to reflect.
Cozy isn’t just fabric. Lighting makes the bay feel warm in late afternoon when daylight fades, and it makes photos look rich without heavy edits. Plug-in wall sconces are a clean DIY move when wiring is a pain, and you can aim the light to wash the side walls instead of blasting the window. Choose shades in linen or off-white glass, then use bulbs around 2700K for a cozy morning-evening tone. This works in bays used for reading, breakfast, or just sitting with coffee.
Skip thisSkip daylight white bulbs (5000K) — they make every fabric tone look cold.
Editor's noteUse a dimmer plug if your sconces support it — a 10-20% dim makes the bay look instantly cozier.
16. Chunky knit throw drape anchored with fabric clips

Choose a throw with a chunky weave and enough length to hang 8-12 inches down from the seat edge. Drape it across the front of the seat or over the backrest, then fold the top edge to create a clean line. Attach fabric clips or sew-in tie points on the underside of the seat so the throw can clip in place. Remove and re-drape for seasons without changing the whole setup.
A throw drape is a cozy Bay Window ideas move because it adds visible texture and makes the space feel lived-in. The mistake people make is draping it loosely so it slides down and looks messy. Anchor it so it stays in place and the folds look intentional. Chunky knits in cream, oatmeal, or muted clay read warm and photograph well. This works best on a bench seat or chair back where fabric naturally catches and falls.
Skip thisDon’t use slippery satin throws — they slide and ruin the cozy look.
Editor's notePress the throw with a cool steam setting before clipping — knits hold shape better when they’re not wrinkled.
17. Sill planters in built-in trough boxes with drainage

Measure the sill length and build a shallow trough box about 4-6 inches tall with a top flange that matches the sill width. Drill drainage holes every 2-3 inches and add a removable insert tray so you can lift and dump excess water. Seal the inside with waterproof wood sealer or a liner, then paint the outside to match your trim. Place plants in matching pots that fit snugly, and line the bottom with a thin layer of horticultural fabric.
Built-in trough planters make the bay feel like a designed greenhouse corner. The look is clean because plants sit at the same height and the container matches the sill line. Drainage is non-negotiable because bay windows can get condensation and you don’t want water stains. This idea is perfect for herbs, pothos, or low-light plants depending on your window direction. It also makes it easy to water without mess because everything is contained.
Skip thisSkip drainage — water trapped in a bay sill will stain and smell fast.
Editor's noteUse saucers under each pot even inside the trough — it prevents drips from staining wood.
18. Oat-toned window roller shade with fabric-covered valance

A roller shade keeps the bay looking tidy and cozy because it creates a smooth, uniform surface behind the window. Choose an oat-toned shade so the morning light turns warm instead of gray. Add a fabric-covered valance to hide the roller mechanism and give the top a soft finish like curtains without the bulk. This is a great option for bays where you want a clean look but still want cozy fabric texture. It also works well for small spaces where curtains might overwhelm.
Measure each bay section and install roller shades with inside-mount brackets if the trim depth allows; otherwise use a face mount. Pick a shade fabric in a warm neutral, then add a valance box above it made from 1x2 framing and plywood. Cover the valance with linen or a linen-look fabric and staple the edges on the underside. Install the valance as a single piece so it reads continuous across the bay front.
Choose a shade with a soft roll and quiet lift so it doesn’t rattle when you open it in the morning.
Don’t pick a cool gray shade — it cancels the cozy warmth in the bay.
19. Painted baseboard radiator cover with vent slots and fabric front
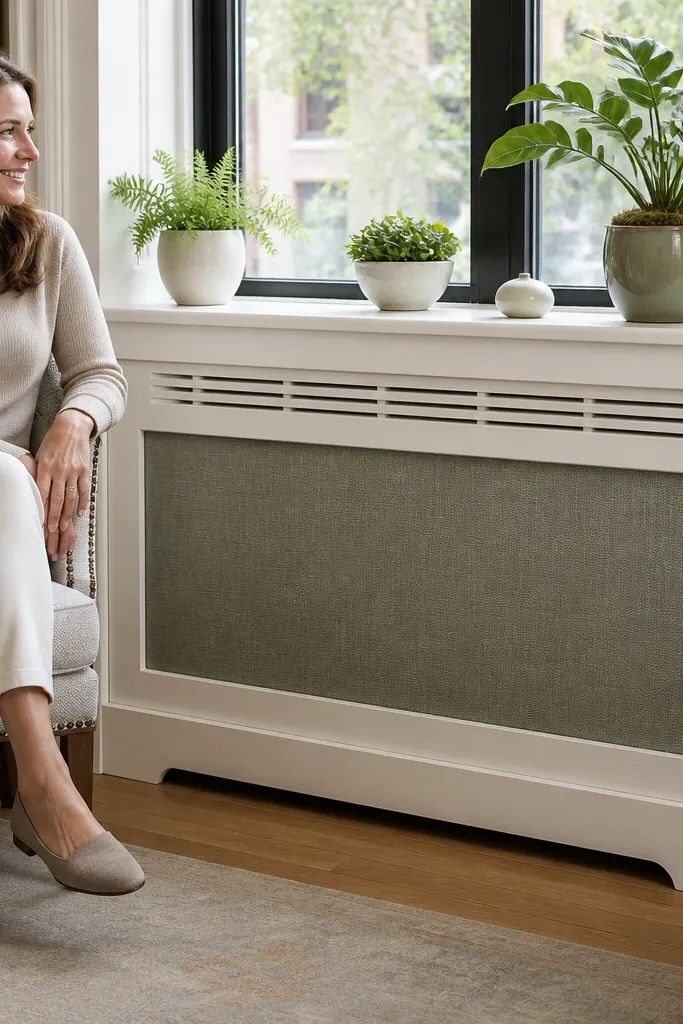
Measure the radiator face and add clearance for heat flow, leaving vent openings on both sides and across the bottom. Build a cover frame from 1x2 lumber, then cut a slatted or perforated vent panel where heat passes. Add a fabric panel over the front using a removable magnetic or Velcro system so you can remove it for cleaning. Paint the frame matte, then attach the fabric panel and confirm vents are unobstructed.
If your bay sits over a radiator or heating vent, covering it poorly kills comfort and makes the bay look bulky. A proper radiator cover with vent slots keeps heat moving and lets you create a cozy front panel that blends with the bay. Paint it warm white or the same color as the trim, then add a fabric front panel in linen or ticking for softness. This makes the bay feel warmer visually and physically because the area looks finished. Great for bays where you want seating but the heater ruins the clean line.
Skip thisDon’t use a solid wood front — it traps heat and makes the room feel colder.
Editor's noteUse a high-heat paint or a sealed primer so the cover doesn’t discolor over time.
20. Corner bar cart with chalkboard label and warm wood tray

Choose a cart with 2-3 tiers and wheels that lock; width around 18-24 inches keeps it from crowding the bay. Set the top with a warm wood tray, then add a few glass jars with matching lids and a small vase for texture. Label one small chalkboard on the cart side — use simple hand lettering in one color. Place the cart so it doesn’t block curtain paths, then wipe the tray surface before styling for photos.
A bar cart by the bay is cozy because it turns the window corner into a morning ritual station. You get height variation, storage, and a styled surface without building anything into the bay itself. Use a warm wood tray on top and add a small chalkboard label for teas or coffee — it looks handmade and intentional. This idea works best when the bay is near breakfast seating or a kitchen table. Keep the cart compact so it doesn’t fight the bay’s angles.
Skip thisSkip cluttered jar collections — three jars look cozy, ten looks like storage.
Editor's noteUse one metal tone across the cart (brass or matte black) so the look stays cohesive.
21. Overstuffed Bay Window Ottoman Base with Hidden Storage

This turns the bay into a soft landing that looks expensive but stays practical. The ottoman top sits flush across the bay angles, so it reads like one continuous piece instead of a bunch of separate cushions. You get storage for baking sheets, extra throw blankets, or holiday linens without cluttering the sill. Use a thick, overstuffed foam top so it holds shape and looks plush even in photos. This fits kitchens that need seating and storage more than open shelving, and it suits DIYers who can cut panels accurately and upholster in a straight line.
Start by measuring each bay face width and the angle where the sections meet. Build a frame first: 3/4-inch plywood base boxes with 1x2 cleats screwed to the wall studs and to the window trim framing, leaving a 1/4-inch gap for seasonal movement. Cut the ottoman tops from 1-inch hardwood plywood for stiffness, then glue 2-inch high-density foam to the top and wrap with 1/2-inch batting; cover with upholstery fabric and staple to the underside. Add lift-top hardware: install 110-degree hinges or piano hinges on the back edge of each section, then add a magnetic latch so the top closes quietly. Finish by adding a welted edge strip (or thick cording) around the perimeter so the bay looks tailored, not like a loose cushion.
Use a fabric with a directional pattern only if you’re comfortable matching it across the bay; otherwise choose a solid or small texture so seams disappear.
Skip thin foam. It collapses fast and makes the ottoman look flat by week two.
22. Linen-Fold Roman Shade with Faux Valance and Tie-Backs
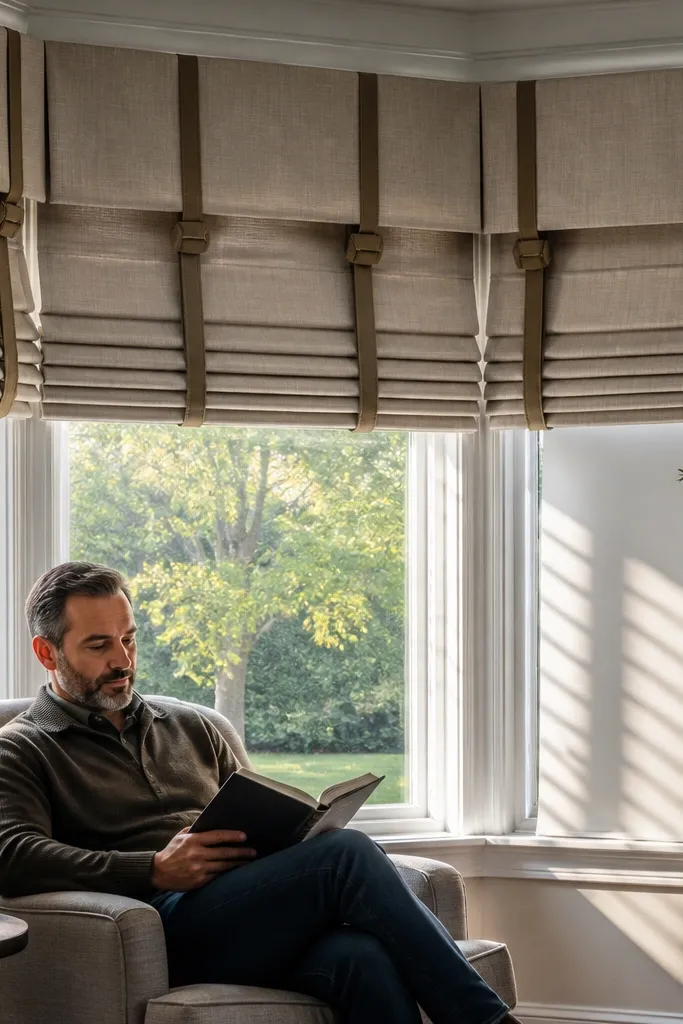
Mount a faux valance first: cut a 1x6 board to the bay’s total span, then miter the corners to match the window angles. Paint it warm white or oat, then attach it to the wall 2 inches above the window head with a level line. Install a roman shade kit or build from a shade track: attach top mounting brackets to the inside of the valance so the shade mechanism stays hidden. Use linen-look fabric and add tie-backs by sewing two fabric strips with a 1/2-inch seam allowance and attaching them to small D-rings near the sides. Hang the shade, test the fold height so the shade sits 1-2 inches above the sill when fully up, then adjust pull cords so both sides lift evenly.
This gives cozy Bay Window ideas a tailored, gathered look without adding bulky trim. The trick is pairing a clean faux valance with a roman shade that folds into neat, photo-friendly bands. Tie-backs let you control the light in each bay section so the fabric looks styled, not flat. Linen-look fabric reads warm and soft, and it hides dust and minor window hardware mess. This is a good fit for kitchens that need privacy and glare control but still want that airy, lived-in feel.
Skip thisDon’t mount the shade too low. If the roman fabric kisses the trim, it bunches and looks messy in photos.
Editor's noteChoose a shade fabric with a slight slub or texture so folds look rich even when the light hits hard.
23. Stone-Top Window Ledge with Brass Pegboard Backing
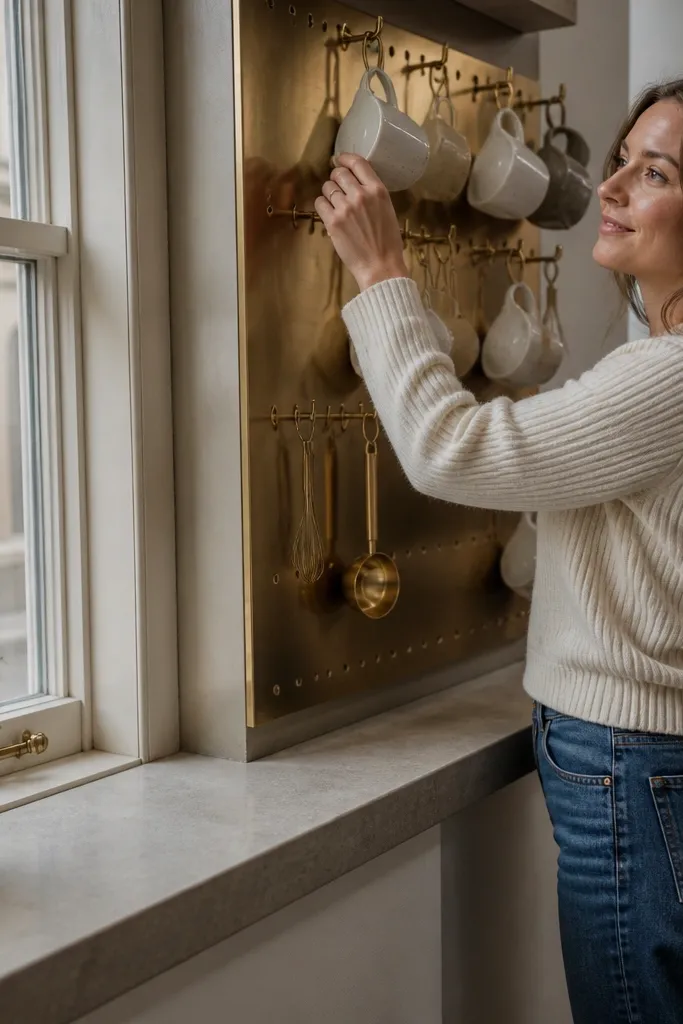
This is a functional, stylish bay setup that looks like a café corner. A stone-look top gives you that solid, high-end surface for coffee gear, while the brass pegboard behind keeps mugs, small tools, and measuring spoons in easy reach. It fixes the common bay problem — empty space that becomes clutter — by turning the back wall into organized storage. The brass hardware catches warm light and adds contrast against linen curtains or light walls. This suits kitchens where you want to display everyday items neatly and you’re comfortable with basic drilling and mounting hardware.
Build the ledge with a flat shelf board: use 3/4-inch plywood cut to bay lengths, then add angled side returns so the top reads continuous. For the surface, use a stone-look laminate or a peel-and-stick stone sheet over a sanded plywood top; seal edges with contact cement or clear edge sealer so it doesn’t lift. Mount a brass pegboard panel behind the shelf: cut pegboard to fit each bay face, then fasten it to studs or solid backing through the board’s holes with washers. Add hooks for mugs and small utensils, spacing them so cups don’t collide when you pull them. Finish by installing a slim decorative edge strip under the shelf front so the whole piece looks intentional and not like a countertop resting on brackets.
Pre-drill holes for hooks and hardware, then vacuum dust before you mount anything — pegboard hates sloppy installs and looks messy fast.
Don’t hang mugs by random heights. If the top row sits too high, mugs swing and stain the wall behind.
24. Bay Window Wallpaper Panel with Removable Frame Rails
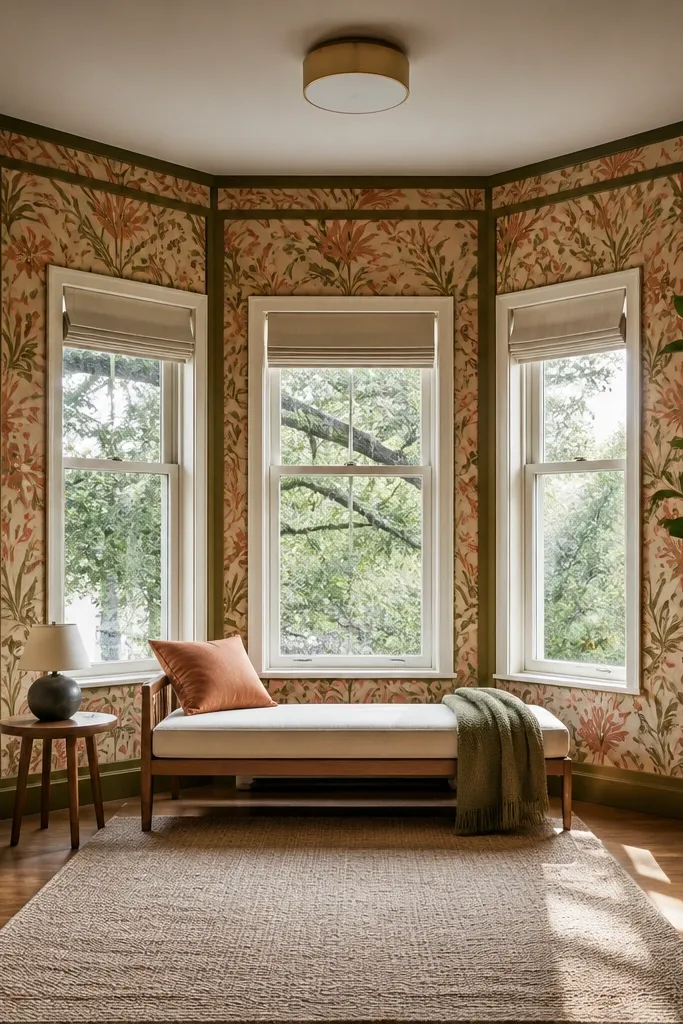
Measure each bay side wall panel area between trim lines and cut 1/4-inch hardboard or MDF backer boards to fit. Apply wallpaper to the backer boards first, smoothing with a plastic smoothing tool and trimming edges with a sharp utility knife. Build a frame with 1x2 pine rails: cut top and bottom rails to the panel width, and miter corners if needed for a crisp look. Attach the frame rails to the wall studs or to existing trim with screws, then slide the wallpaper panel into the frame. Add removable face trim by using small finishing nails into the frame only, not the wall, so the panel can be swapped later without tearing drywall.
This makes cozy Bay Window ideas feel like a design moment without committing to permanent wallpaper everywhere. You cover the side walls of the bay with a bold pattern, but you keep it clean by framing it with simple rails and removable trim. The panels look sharp and photogenic because the pattern stays flat and centered, not wrinkled around trim. Use removable wallpaper or apply wallpaper to a thin backing board so you can swap it when you get tired of the print. This works best in kitchens where the bay has plain walls and you want visual warmth without changing cabinets.
Skip thisSkip wallpaper straight onto drywall in a bay. Angles and trim edges create bubbles that show up instantly when the sun hits.
Editor's notePick wallpaper with a mid-scale pattern. Tiny prints get lost in bay light, and large prints can look chaotic across angled walls.
25. Candle-Lit Bay Shelf Ladder with Woven Baskets
Build a ladder shelf from 2x2 wood for the side rails and 1x3 or 1x4 shelves for the steps; choose a width that matches the bay depth so it doesn’t block the walkway. Cut the rails to length and mark shelf positions; keep shelves level across the bay by using a simple jig or spacer blocks during assembly. Assemble with wood glue and pocket screws, then sand all edges and round corners with 1/4-inch radius sanding to prevent snagging fabric. Finish with a warm stain or matte paint, then seal with a water-based clear coat for easy wipe-down. Add woven baskets sized to each shelf face and secure them with small basket hooks or a narrow stop strip so they don’t slide when bumped.
This is a vertical solution that makes a bay feel full even when you don’t want a bench or heavy built-ins. The ladder silhouette keeps lines airy, and woven baskets hide small kitchen mess while still looking warm. You get cozy lighting by placing battery candles inside glass jars or lanterns on the steps. The baskets also act like visual anchors so your bay styling looks intentional, not random. This fits kitchens with lots of countertop clutter where you need storage that still photographs well.
Skip thisDon’t make shelves too deep. Deep steps crowd the bay and make baskets look bulky rather than airy.
Editor's noteUse warm-white battery candles and timers, then place them inside clear glass jars so the flame glow looks softer in photos.



