
1. Felt Soap-Caddy Tray for the Counter Edge
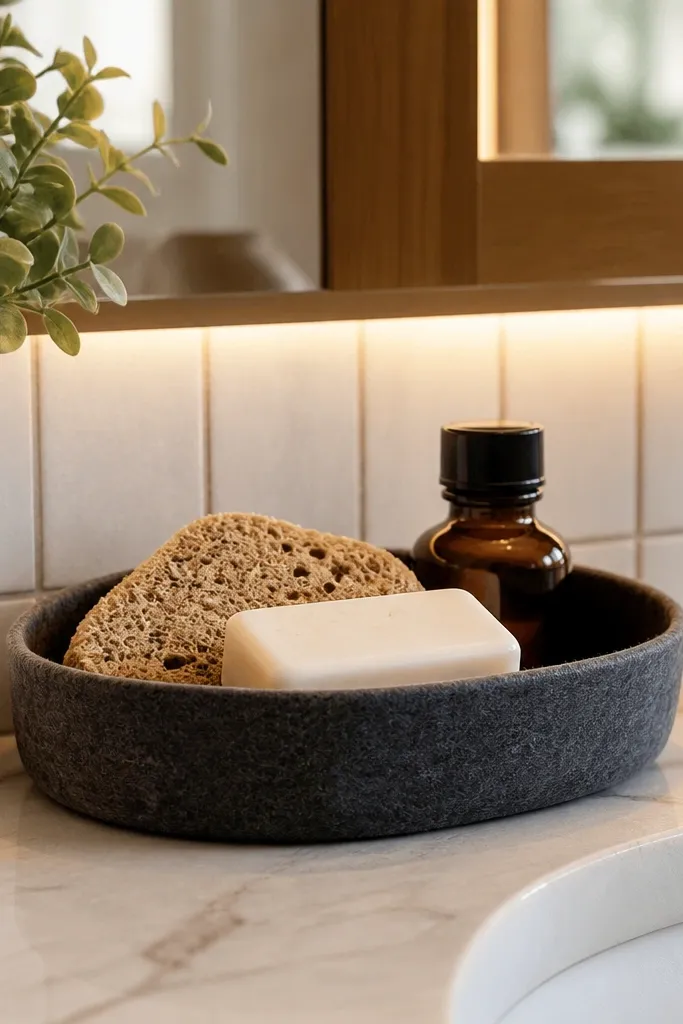
This is the fastest way to make a countertop look intentional without turning it into a storage jungle. A felt tray creates a soft landing for soap, a sponge, and one backup item so everything sits in one cozy cluster instead of spreading out. Felt also hides tiny water spots and soap residue better than slick materials, which is why it looks cleaner day after day. Use it for 3 to 5 items maximum so the tray stays airy and photogenic. If your vanity is narrow, this tray also reduces the “spill zone” where clutter creeps toward the sink.
Cut a piece of craft felt into a rectangle that matches your counter space, then fold the edges slightly to make a thicker border. Glue felt layers together with fabric glue or hot glue in short runs, then reinforce corners with a second strip of felt. Add a small inner divider by gluing a felt strip upright for sponge separation, then dry fully. Finish by pressing a non-slip backing layer under the tray so it doesn’t slide when hands are wet. Place your pump soap, sponge, and one small bottle, and keep the rest off the counter.
Editor's noteUse two layers of felt for a firmer tray that holds shape and doesn’t sag when wet.
Skip thisDon’t make the tray too large — oversized felt bins look messy because they invite extra items.
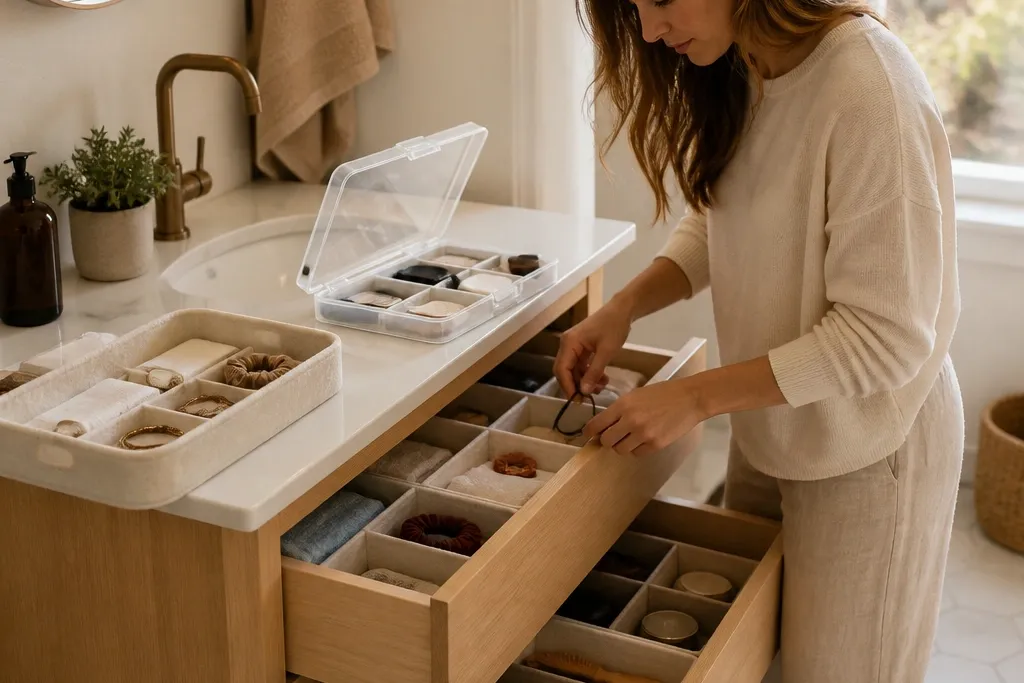
2. Drawer Dividers with Warm Wood Veneer Strips
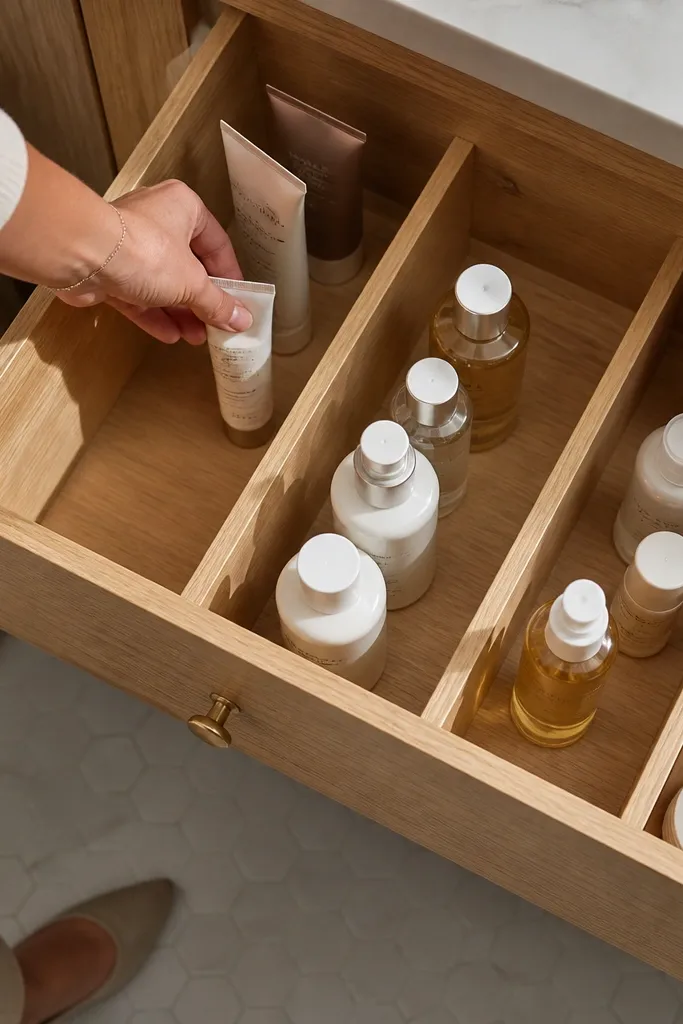
Most vanity drawers fail because bottles roll into each other and take up the whole space. Veneer strip dividers create neat lanes so tubes and pumps stay upright and easy to grab. The look is warmer than plastic dividers, and the dividers help you see what you own at a glance. This also lets you customize the layout for your actual products instead of forcing everything into one grid. It’s a solid choice for shared vanities because each person’s “lane” stays consistent.
Measure your drawer interior and cut thin veneer strips to the drawer depth minus about 1/4 inch so they sit cleanly. Create a base insert by cutting a sheet of thin plywood or MDF to drawer size, then cover it with adhesive vinyl or matte shelf liner. Glue veneer strips onto the base in straight rows, spacing them so pumps don’t touch. Seal the veneer with a matte clear coat so it wipes clean, then let it cure overnight before placing bottles. Test-fit by placing your tallest items first, then adjust spacing before final glue sets.
Mark divider positions with painter’s tape in the drawer first; it saves you from measuring twice and gluing once.
Skip glossy finishes — they reflect bathroom light and make the drawer look harsher than it needs to.
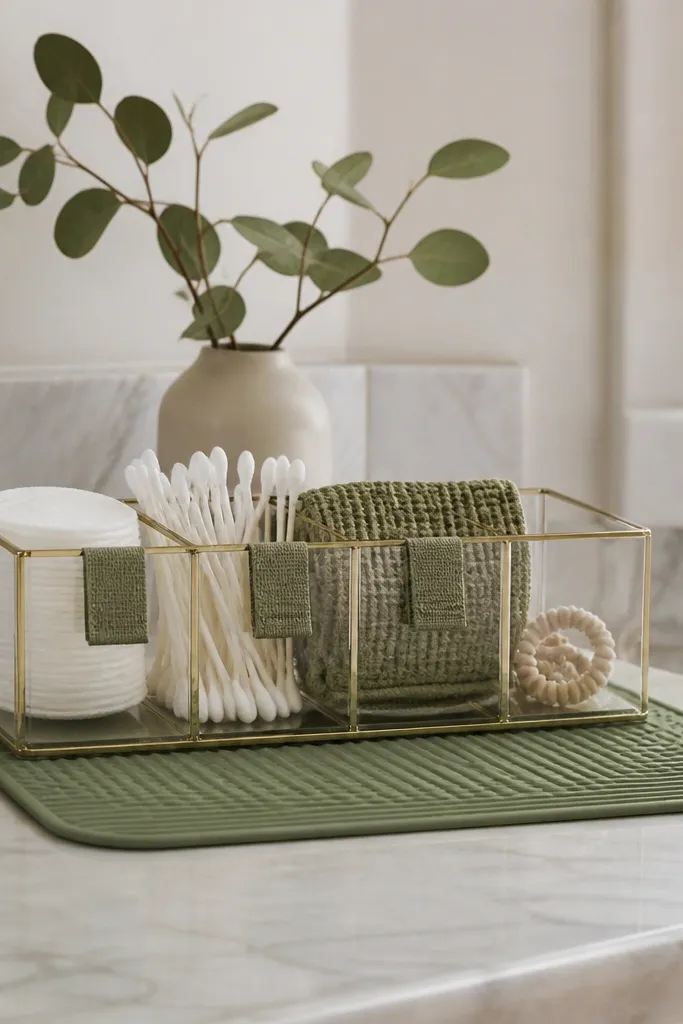
3. Clear-Lid Cosmetic Organizer Box with Fabric Label Tabs
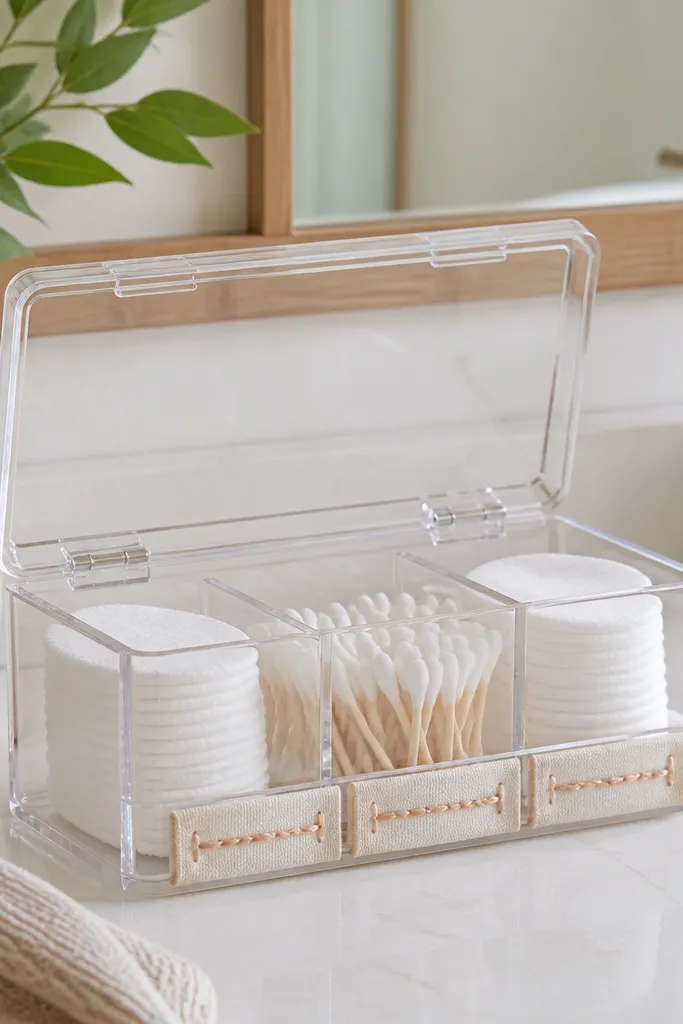
A clear-lid box is the best compromise for bathrooms: you see what’s inside, but the lid keeps dust and counter mess out. The fabric label tabs make it look cozy instead of clinical, and they’re easier to read than sticker labels on clear plastic. Use this for small supplies like cotton pads, Q-tips, hair ties, and mini tools. Keep each box to one category so you’re not hunting through mixed items. This works especially well on open shelving or inside shallow drawers where you want quick visibility.
Buy a shallow clear storage box with a flat lid, then cut fabric strips about 1 inch wide and 3 inches long. Glue or sew the fabric tabs onto the lid edge with a label placement so you can grab the lid without covering the tab. Add short labels with a fabric-safe marker or iron-on label paper. Fill the box with items you already use daily, then leave a little empty space so items don’t topple. Place the box near the sink and keep it to one category per box.
Editor's noteUse fabric that matches your bathroom towels or wall color; the tabs create a calm, coordinated look.
Skip thisDon’t stack multiple categories in one box — the clear lid makes clutter look louder.
4. Powder-Coated Wire Grid Over Cabinet Door
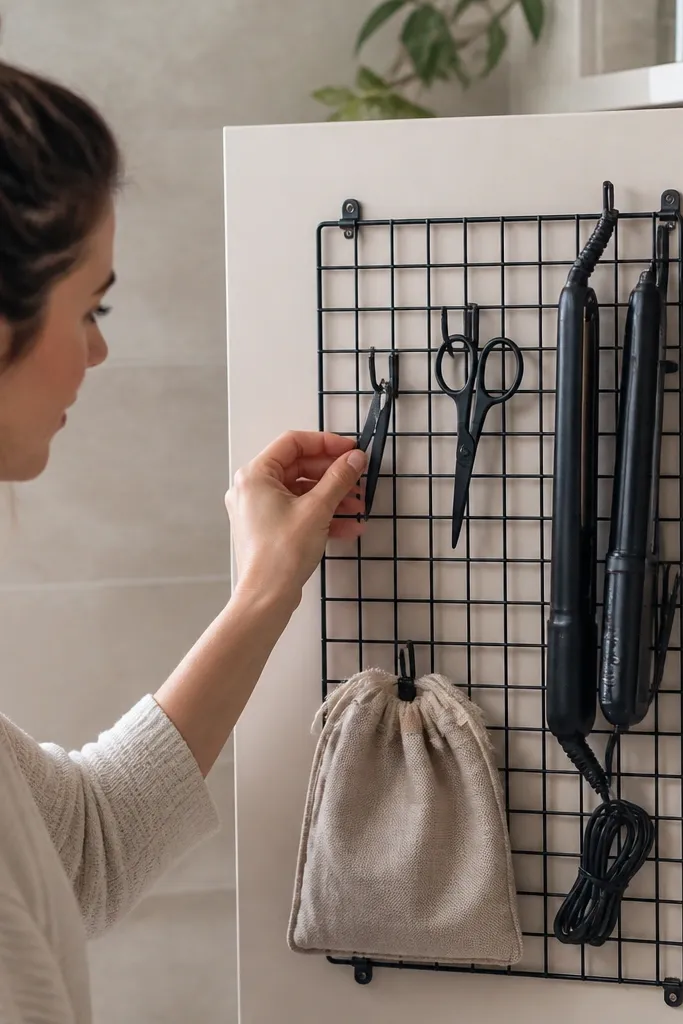
If your counter is always crowded, the cabinet door is your real storage zone. A powder-coated wire grid with small hooks gives you a place for hair tools, scissors, tweezers, and small pouches without drilling into the wall. The grid also looks airy and modern, so the area doesn’t feel visually heavy. Keep the items light and grouped — one hook line for daily tools, one for backup items. This idea is great for people who hate rummaging through drawers mid-routine.
Choose a wire grid designed for cabinet doors or make one by attaching a grid panel to a sturdy frame. Use adhesive cabinet door organizers only if your door is smooth; otherwise, screw-mount to the door with small hardware. Install so the bottom edge stays above the sink cabinet base clearance. Add S-hooks or small clips and arrange items by size, with the heaviest tools closest to the hinge side. Wipe the grid with a damp cloth after installs to remove metal dust.
Editor's noteHang tools with handles facing the same direction; the visual order is what makes it feel cozy.
Skip thisSkip hanging wet items — wire holds moisture and can leave spots on the coating.
5. Under-Sink Pull-Out Bin with Wooden Pull Handle
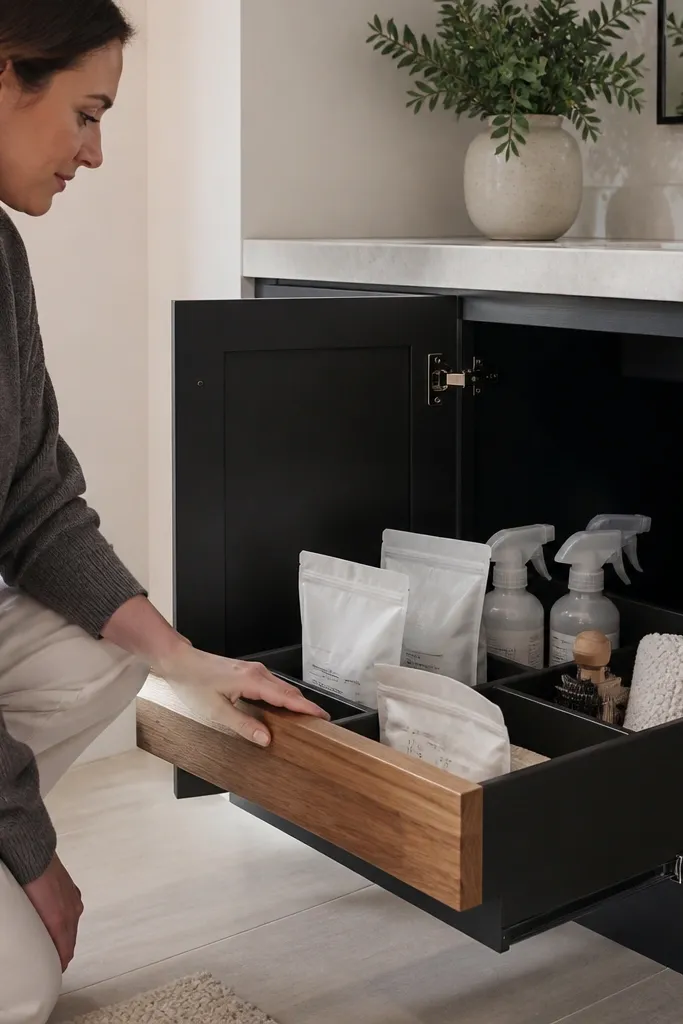
Under-sink storage looks messy fast because everything funnels into one dark space. A pull-out bin with a wooden handle keeps cleaning supplies controlled and makes the area usable. The wood pull looks warm against the usually cold cabinet interior, and you can label the bin so it stays tidy. This is best for 1 bin per category like cleaning sprays, backups, or toiletries you don’t use daily. It also prevents bottles from sliding into the back where you forget they exist.
Measure the cabinet interior width and depth, then choose a pull-out drawer slide rated for bathroom cabinet weight. Install the slide to the cabinet sides first, keeping it level, then mount the bin to the slide rails. Use a shallow bin with a lip so bottles don’t fall forward when you pull it out. Attach a wooden pull handle to the bin front using screws through a small reinforcement plate. Add a non-slip mat inside and label the bin with a tag on the inside edge.
Editor's noteUse a bin with a raised front lip; it stops pump bottles from creeping forward on pull-out motion.
Skip thisDon’t mount slides crooked — even a slight tilt makes the bin bind and you’ll stop using it.
6. Pegboard Mini Wall Panel for Daily Hair and Skincare
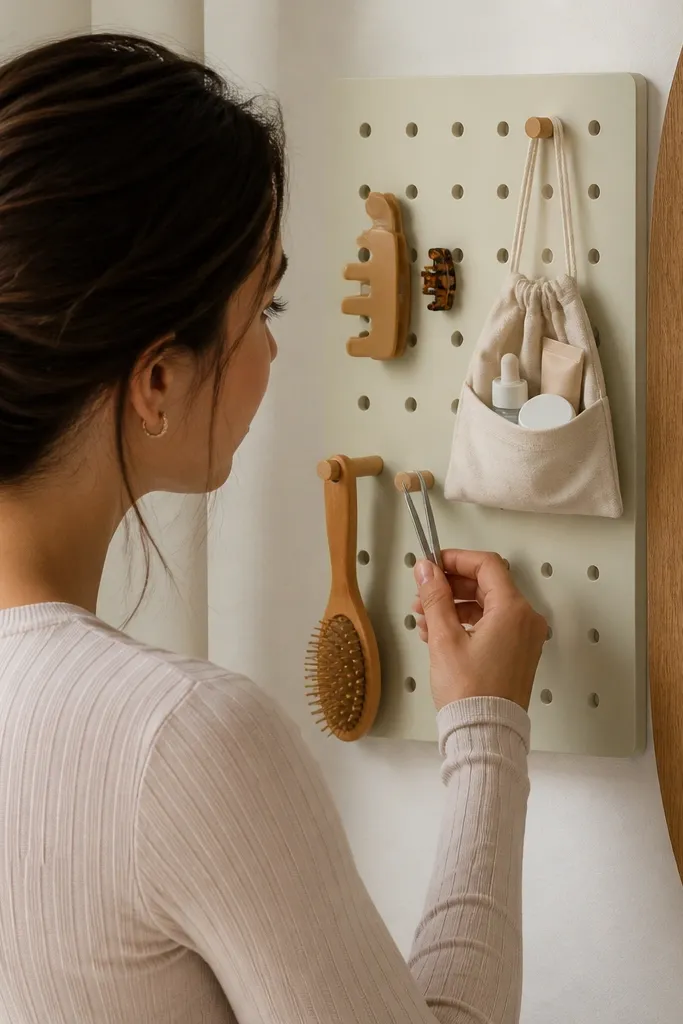
A mini pegboard panel makes your vanity feel like a tidy studio station. You hang the daily items — hair clips, a brush, tweezers, and one skincare set — where you can see them instantly. The warm part is how you finish it: a painted pegboard in soft cream or sage plus wood dowel hooks looks cozy, not industrial. It’s photogenic because the grid creates clean lines. Keep it small so it doesn’t turn into a clutter wall.
Pick a pegboard size that fits the wall space beside the mirror, then paint it in a matte finish. Use wood dowel hooks or small wooden pegs with metal inserts, and space them evenly. Mark stud or secure mounting points, then screw the pegboard panel into the wall or into a backing board. Hang items by weight, with heavier tools on sturdier hooks. Finish by adding a small tray at the bottom for lip balm or tiny bottles.
Editor's noteUse the same hook style across the panel; matching hardware makes the whole setup look intentional.
Skip thisSkip hanging bulky bottles — pegboards look best with a mix of small tools and slim containers.
7. Mason Jar Set for Cotton Pads and Q-Tips with Linen Lids
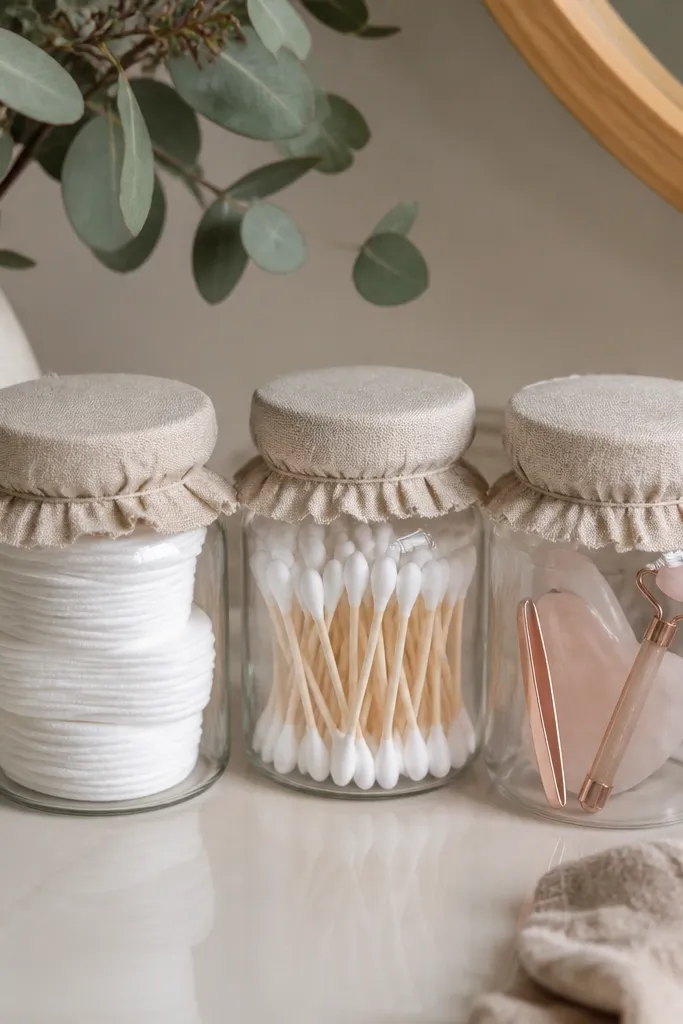
Mason jars look cozy because they’re glass and they hold shape, even when they’re not perfectly full. Linen covers soften the look and reduce the “clear plastic clutter” vibe that can happen with bathroom organizers. This set works best for cotton pads, Q-tips, and small skincare tools. If you keep the jars on the counter, the linen lids hide dust and make the whole spot feel curated. It’s also easy to refresh — swap refill jars without changing the layout.
Choose two mason jars with similar heights so the display looks aligned. Cut linen circles slightly larger than the jar opening and glue elastic or a narrow band under the rim so the fabric stays taut. Label each jar on the outside with a simple marker or a fabric label. Add a small tray underneath to catch drips and keep the area clean. Place jars on a stable coaster or shallow wood tray near the sink.
Editor's noteKeep cotton pads in a jar that’s wide enough that you can pull them without tearing the stack.
Skip thisDon’t use thin linen that sags — it looks sloppy when it gets damp.
8. Silicone Tube Holders in a Drawer with a Numbered Layout
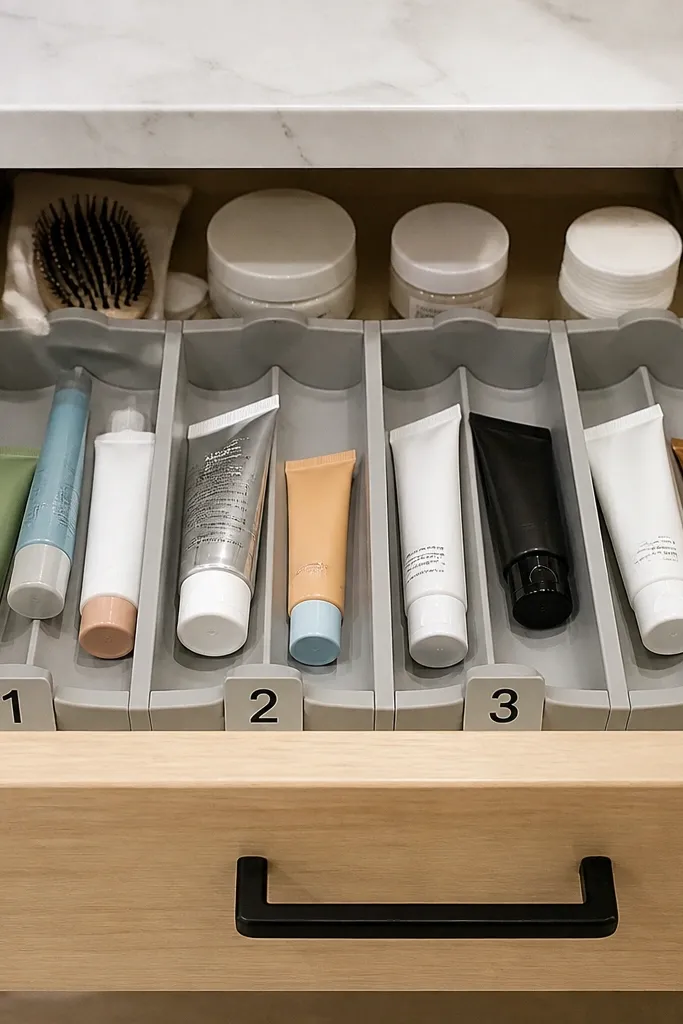
Tube products are the worst drawer offenders because they roll and smear. Silicone tube holders keep tubes upright and stop the caps from scraping other bottles. The numbered layout makes it easy to keep the drawer tidy even when you’re in a hurry — you put items back in the same lane every time. It also looks clean because the tubes line up and don’t angle randomly. This works for skincare, hand cream, and small hair products.
Line the drawer with a matte drawer liner so silicone grips and stays put. Arrange silicone tube holders in rows, then mark the outline on the liner with a pencil. Cut and place the holders, pressing them firmly into the liner so they don’t slide. Add small numbered adhesive labels to the drawer front or inside lid so each tube lane has a place. Store one tube per holder and keep the drawer to one category for a cleaner look.
Editor's noteUse pencil marks on the liner first; silicone placement looks perfect until you commit with adhesive.
Skip thisSkip mixing tube sizes in one row — it creates gaps that invite clutter.
9. Slim Stackable Tray System for Tall Bottles
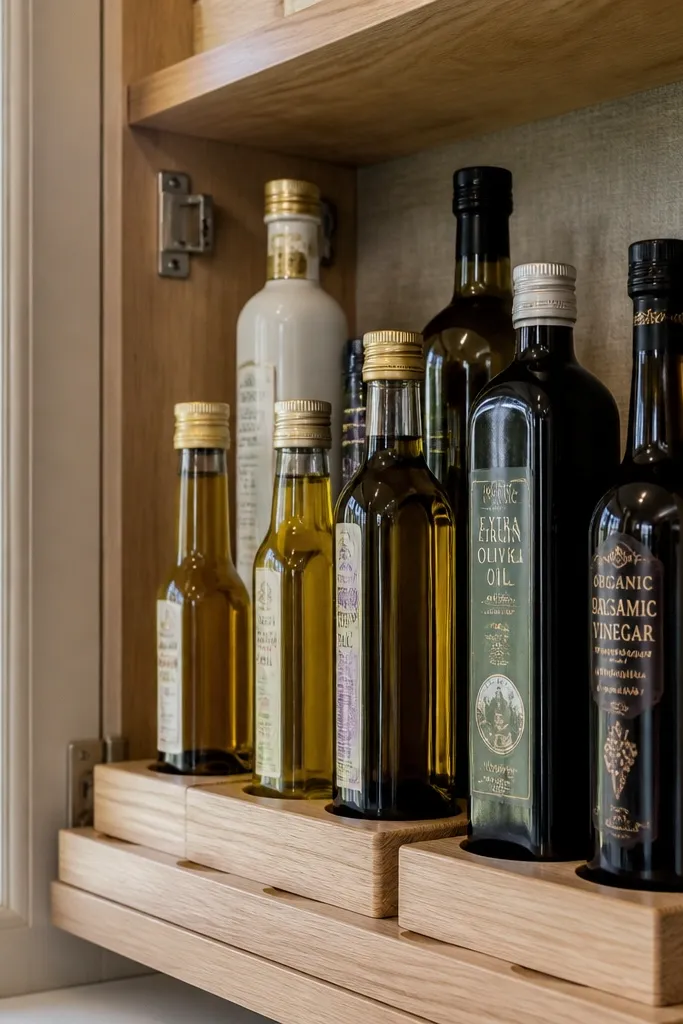
Tall bottles break organization because they block other items and force you to dig. A slim stackable tray system keeps vertical products visible while separating them by height. The trays also prevent bottles from sliding into each other, which keeps the whole arrangement photogenic. This is ideal inside cabinets where you don’t want to see everything on the counter. Choose trays in matte wood or coated metal so the look stays warm and soft.
Measure the cabinet shelf interior height so trays stack without crushing labels. Buy or build two or three slim trays with shallow sides, then test-fit one tray at a time. Arrange tall bottles on the top tray first, then place shorter items on lower trays. Add a small back stop strip so bottles don’t drift forward when you open the cabinet. Place a non-slip mat under each tray to reduce movement and noise.
Editor's noteGroup by height: tallest in back on the top tray, shorter in front — it makes the display instantly readable.
Skip thisDon’t stack too many trays — three is enough before it turns into a tower.
10. Lidded Ceramic Catchall for Daily Hair Accessories
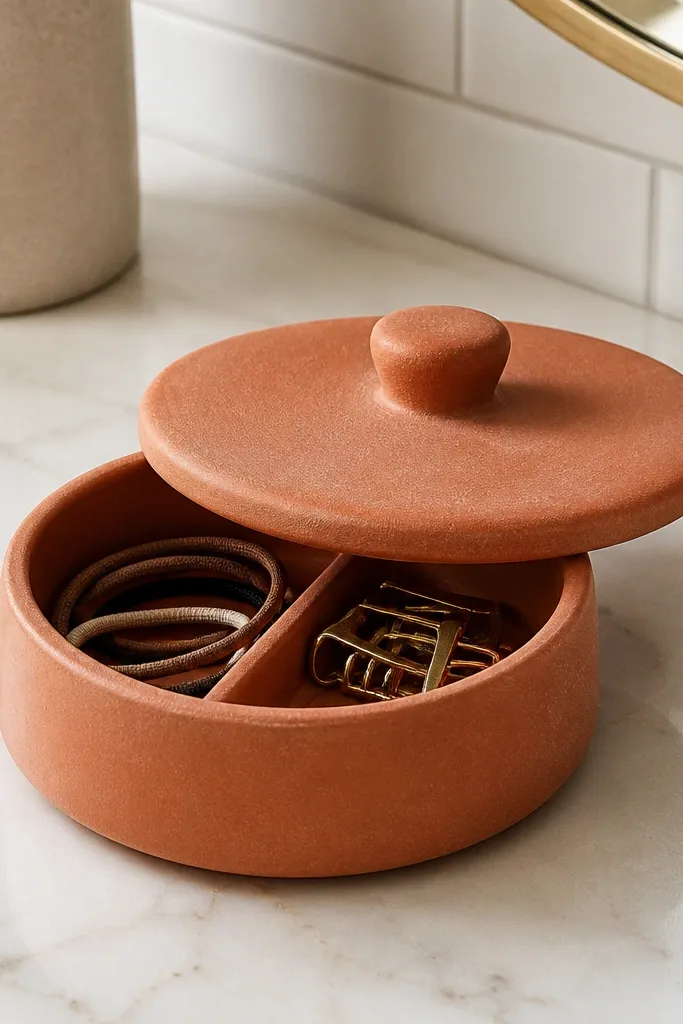
A small lidded ceramic catchall is what makes bathroom vanity organization look like decor, not storage. Ceramic looks warm and heavy, and the lid keeps loose hair ties and clips from spreading. Sort items by type inside — one side for elastics, one for clips — so you don’t dump everything in one pile. Keep it on the counter or in a shallow drawer front area for daily access. This project is perfect when your vanity feels “busy” because tiny items scatter.
Pick a ceramic catchall with a lid and a footprint that matches your counter space. Add a small divider inside using thin acrylic or felt, cut to fit the interior width. Place elastics in one section and clips in the other, then add a small label on the lid underside. Clean the ceramic surface with rubbing alcohol before placing anything adhesive. Set it near your sink and keep the rest of accessories in a separate backup container.
Use felt dividers inside ceramic; they stop metal clips from scratching and reduce noise when you open the lid.
Skip open-top piles — hair accessories look messy fast and don’t photograph cleanly.
11. Peg + Basket Combo for Face Masks and Sheet Packs
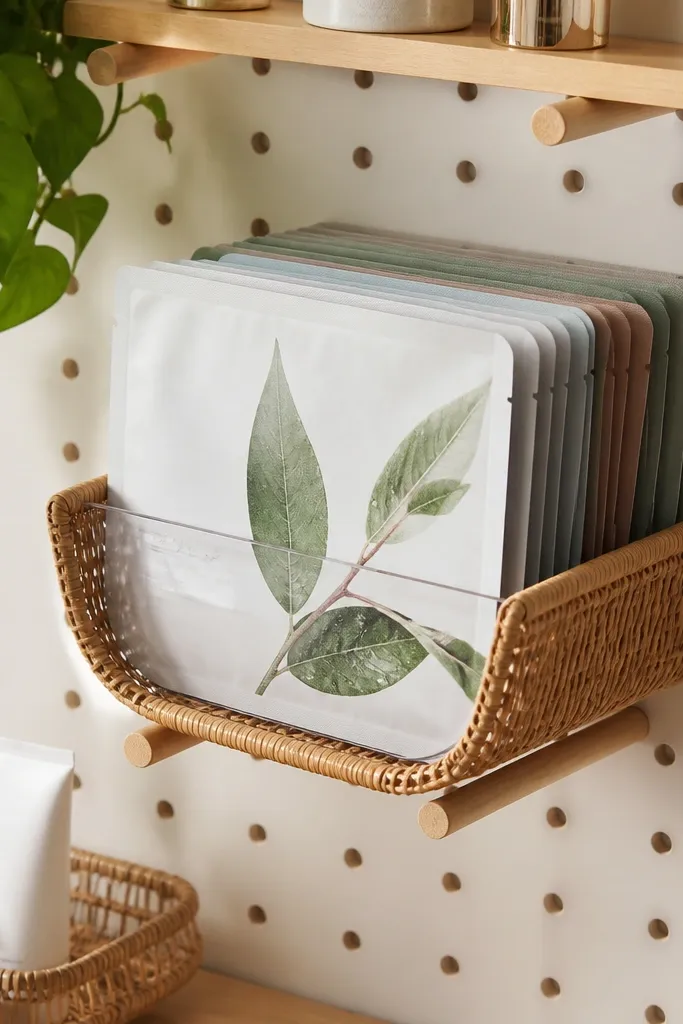
Sheet masks and face packs are paper-thin and they slide around like crazy. A peg-mounted basket solves that by creating a physical bin with a clear front edge. The basket keeps the packets from bending, and you can see what you have without digging. This looks cozy because baskets add texture and hide the stark look of plastic packaging. It’s also a great way to limit how many mask types you keep out at once.
Mount a small peg rail or pegboard strip on a wall panel or inside a cabinet. Attach a small woven basket using a metal bracket or hook so it hangs securely and stays level. Line the basket with a cotton cloth liner so packets don’t snag. Stack one category — like “night masks” — and leave a small gap at the top. Add a simple label card attached to the basket front with a clip.
Editor's noteFold mask packets into a consistent orientation so the front edges align and look tidy.
Skip thisDon’t overfill — when baskets bulge, they look cluttered even if everything is technically sorted.
12. Magnetic Spice-Strip Labels for Drawer Lid Organization
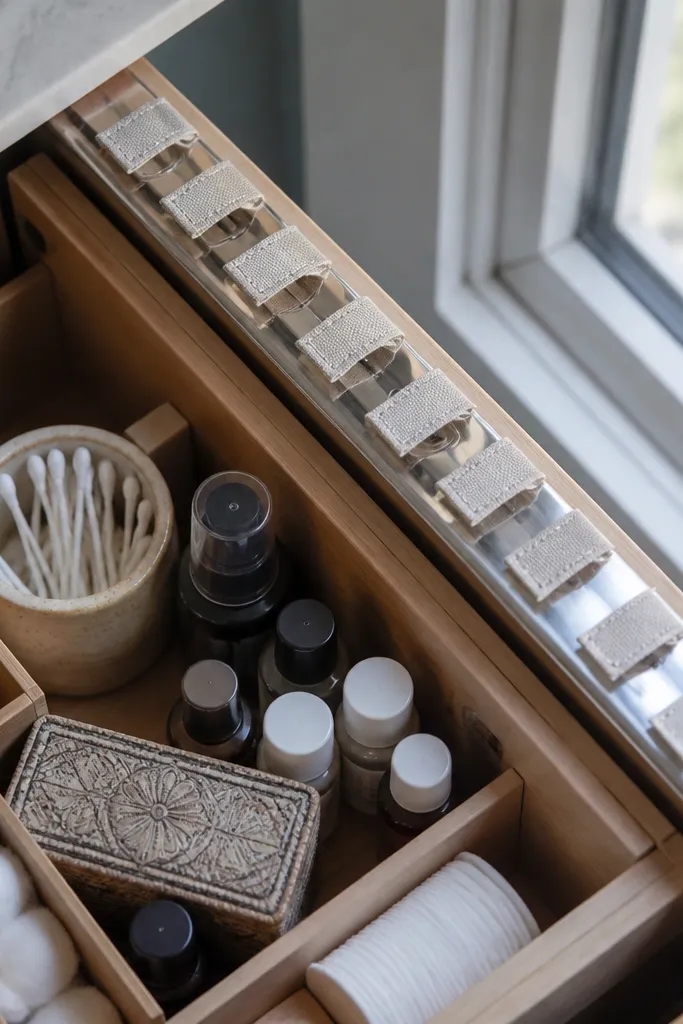
Labels are where cozy organization lives or dies. If labels are messy, crooked, or too small, the drawer becomes a guessing game again. Magnetic label strips let you add and move labels as your products change, without peeling and re-sticking. This idea is especially good for vanity drawers that hold changing seasonal items like sunscreen or retinoid tubes. It also looks clean because the label strips align across drawers.
Buy magnetic label strips or create them by attaching thin magnets to label cards. Mount the strips along the inside edge of the drawer front or on the drawer face using a straight ruler. Write category names in a consistent font or hand style with a permanent marker. Keep labels short: “AM cleanser,” “PM lotion,” “Tools.” Update labels by removing and swapping cards rather than scraping adhesive.
Editor's noteUse one color per person if you share the vanity; it keeps the organization from drifting.
Skip thisSkip tiny label text — if you need to squint, it won’t stay tidy.
13. Bottle-Size Cup Insert for Mouthwash and Tall Pumps
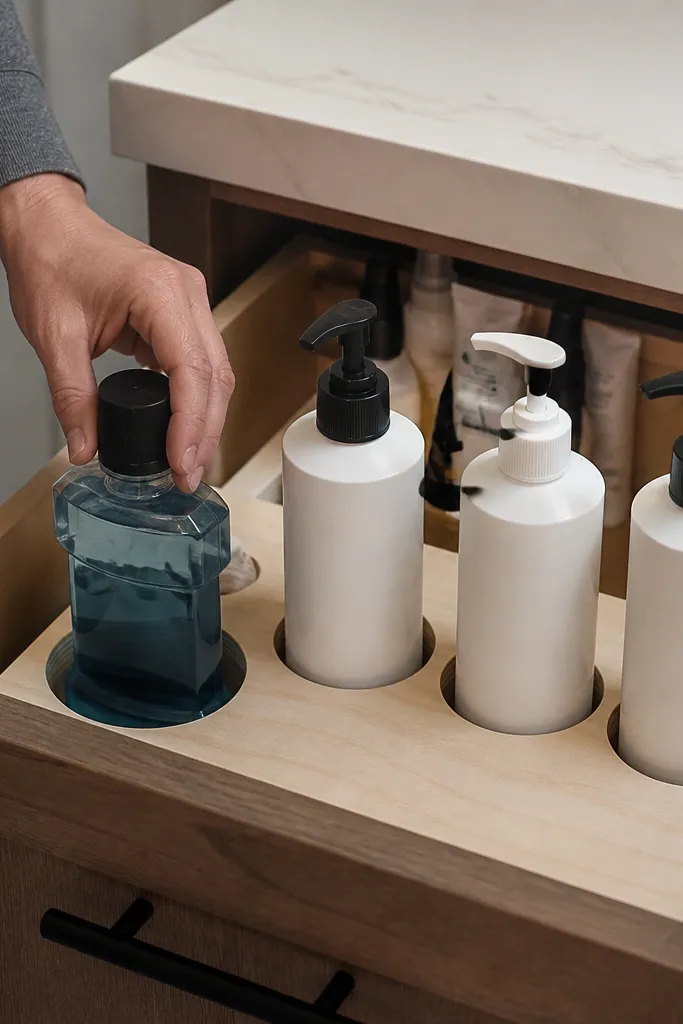
Mouthwash bottles and tall pump containers waste space because they don’t fit standard dividers. A cup insert made from foam board or thin plywood with drilled holes creates snug bottle wells. The look is neat because bottles sit upright and evenly spaced. This project makes it easy to pull everything out without tipping — the bottles have walls. It’s best for one drawer that stores daily liquids and backups.
Cut a base insert to match your drawer interior, then measure bottle diameters. Mark and drill shallow cup wells using a hole saw or create wells by cutting circles and gluing sidewalls. Line the cup wells with shelf liner so bottles grip and wipe clean. Test-fit one bottle at a time and adjust until bottles don’t wobble. Seal the base with matte clear coat or cover with vinyl, then place bottles in the wells.
Leave a 1/8 inch gap around each bottle so you can remove bottles without scraping caps.
Don’t make wells too tight — you’ll crack labels and spill when you pull bottles out.
14. Woven Basket Stack for Extra Towels and Backup Toiletries
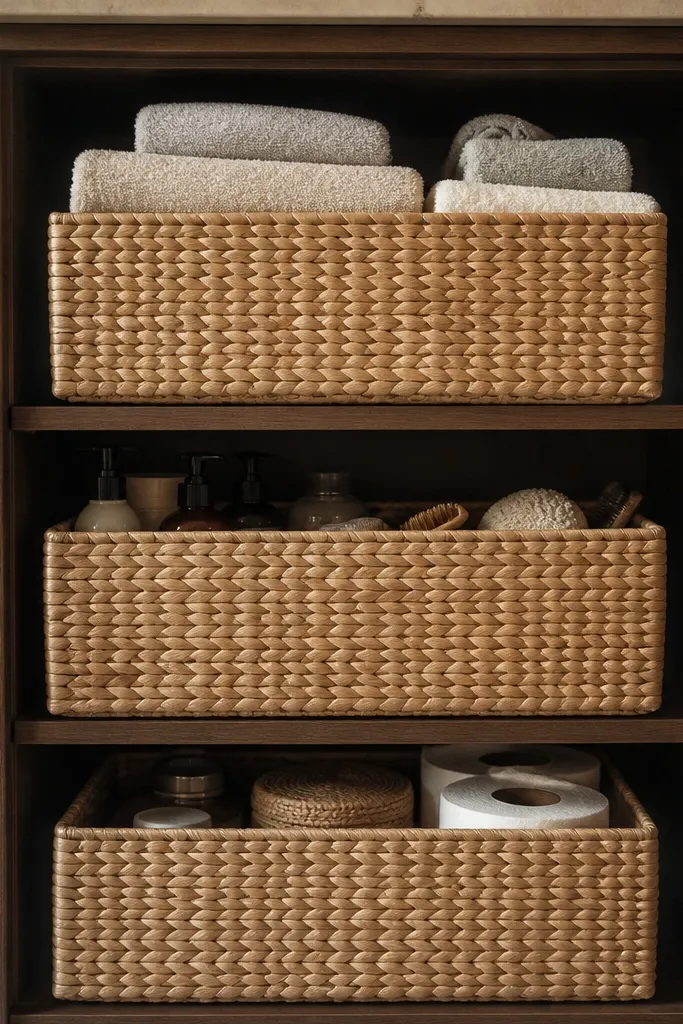
Cozy vanity organization isn’t only about what sits on top. Backup items look chaotic when they’re loose or in mismatched bags. A woven basket stack inside the cabinet keeps backups off the counter but still organized and photogenic. Woven texture makes the bathroom feel warmer, and the basket front looks neat even when you’re not perfectly stocked. Use one basket for backups and one basket for occasional-use items like travel sizes.
Choose baskets that fit your cabinet width with a small clearance on both sides. Add label cards on the basket front using a clip or stitched fabric loop so labels don’t peel. Line baskets with a thin cotton liner to protect packaging and reduce snagging. Arrange the heaviest items on the bottom basket and keep lighter items on top. Pull baskets out when you restock so you can clean the cabinet floor underneath.
Editor's notePick baskets with similar weave tightness; mismatched textures look cluttered next to each other.
Skip thisSkip baskets that are too tall — they hide items and you’ll stop restocking neatly.
15. Under-Sink Vertical File for Spray Bottles
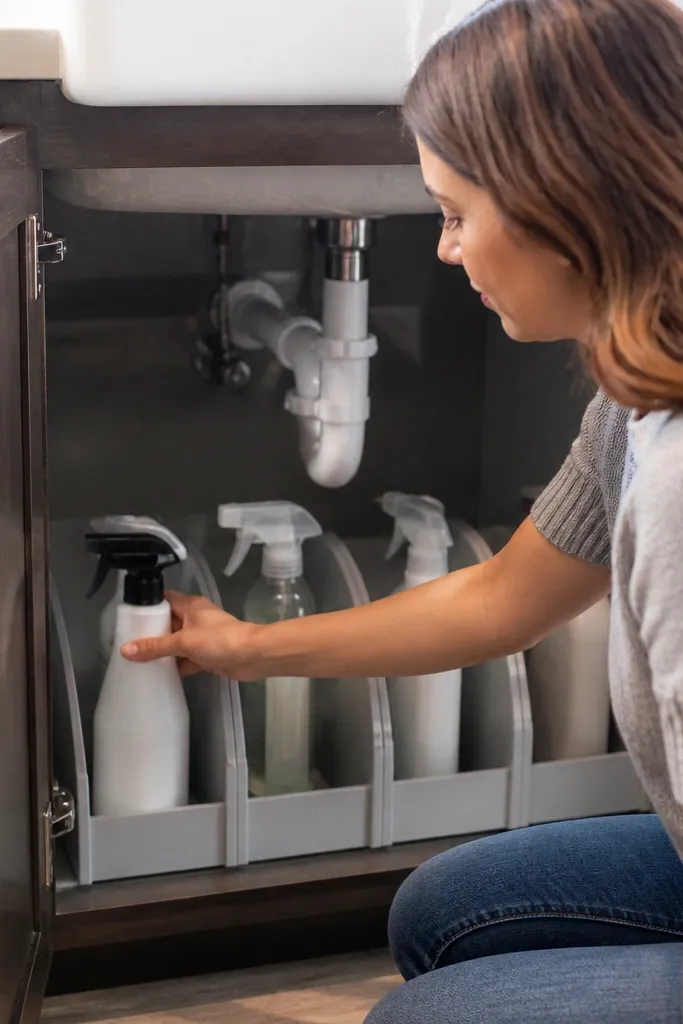
Spray bottles under the sink get kicked around and end up sideways, then you lose track of what’s where. A vertical file-style organizer keeps bottles upright and aligned, which looks clean and makes grabbing the right bottle quick. This also protects labels because bottles don’t scrape each other in a pile. Use it for 6 to 10 bottles max, grouped by type like bathroom cleaner, glass cleaner, and refill concentrates. It’s a great fix when your under-sink area looks dark and chaotic.
Build a vertical organizer by cutting two side panels and a back panel from thin plywood or thick foam board. Drill a series of holes or add bottle-sized slots using strips of PVC or wood to create channels. Attach a front lip so bottles can’t fall forward when you pull it out. Mount the organizer on the cabinet base with screws or heavy-duty Velcro pads rated for weight. Insert bottles upright, then add a removable tray for small tools like gloves and cloth.
Editor's noteUse a removable tray at the bottom for gloves and extra cloth — it keeps small items from turning into under-sink clutter.
Skip thisDon’t use channels too narrow for trigger nozzles — you’ll force bottles in and scrape labels.
16. Counter Shelf Leaner with Tiered Wooden Blocks

If your vanity has a small counter and everything looks crowded, a tiered leaner solves it. Wooden blocks with a slight angle let you stack bottles so you can see labels while keeping items separated. The angle creates depth, so the display looks styled instead of flat. This is best for 6 to 10 bottles like skincare, serums, and daily lotions. Add one small tray underneath for a cohesive base and to catch spills.
Cut two or three wooden blocks with a consistent footprint, then sand edges smooth. Angle the blocks by cutting one side at a slight bevel so bottles lean back gently. Glue blocks onto a base board covered with matte shelf liner, then let it cure. Place bottles by height, with taller bottles on the back tier and shorter ones in front. Finish the wood with matte sealant so it wipes clean.
Editor's noteKeep the number of bottles on the display limited; rotating the set weekly looks more curated than constant full capacity.
Skip thisSkip high-gloss sealant — it creates glare that makes labels unreadable.
17. Magnetic Razor + Tool Organizer Strip for Cabinet Interior
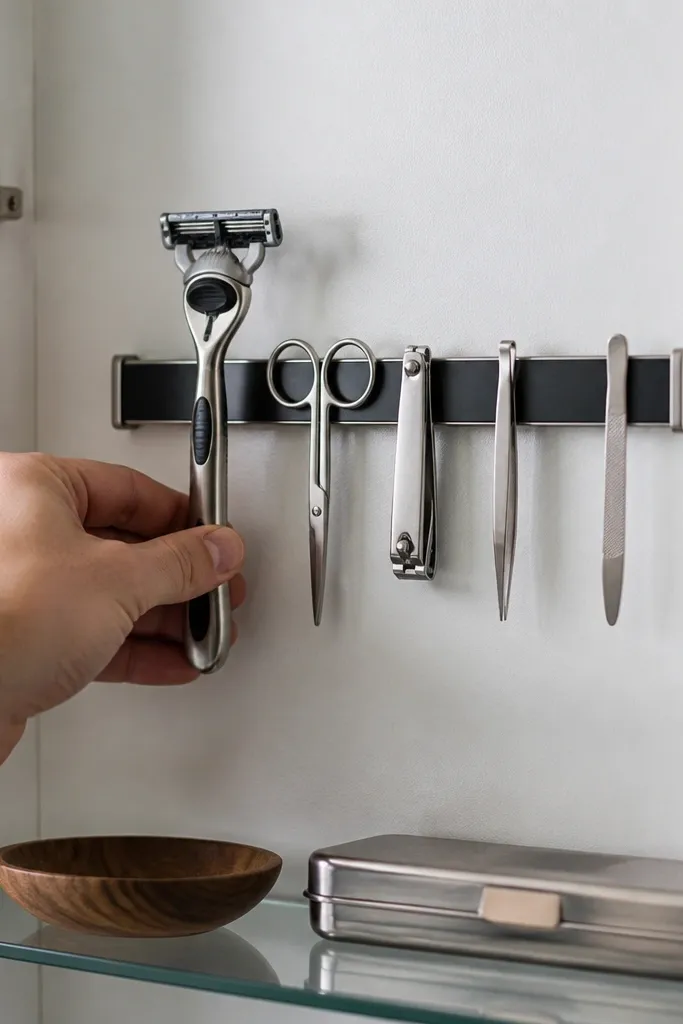
Metal tools and razors are hard to organize because they’re long, awkward, and they like to fall over. A magnetic strip inside the cabinet puts them in a straight line where you can grab them without digging. The look is clean because the tools hang neatly and don’t clutter the drawer space. It also keeps edges protected when paired with a small felt cover for direct contact points. This is a smart choice if you want the vanity to look calm even when you open drawers.
Cut a strip of metal or buy a magnetic tool strip, then mount it inside the cabinet door or side wall using screws. Add thin felt pads where tools touch so you don’t scratch finishes or dull blades. Test your razor handle alignment before final mounting, then mark screw points with painter’s tape. Place only metal tools on the strip and keep non-metal items in a separate tray. Wipe the strip monthly so water spots don’t build up.
Mount the strip higher than you think; you want tools accessible without bending into the sink cabinet.
Skip placing damp tools directly against bare metal — it can leave rust spots.
18. Fabric Drawer Roll for Hair Tools and Brushes
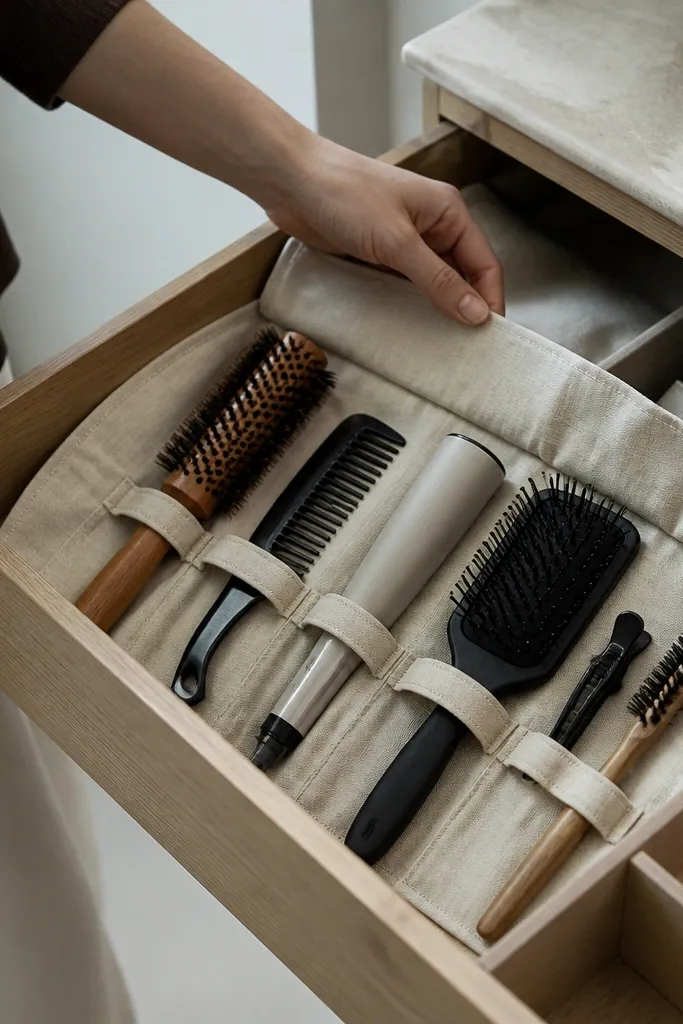
Loose brushes and hair tools clutter drawers because they don’t stack neatly. A fabric roll organizes them in a compact bundle that stays photogenic because it’s folded, not dumped. The fabric also softens the visual look and keeps the drawer from feeling like a plastic storage bin. This works great for hair tools, combs, and styling accessories you reach for daily. It also protects bristles from being crushed by other items.
Cut fabric panels to roll size and add internal pockets using coordinating fabric strips. Sew or glue small elastic loops for clips and elastics so small items don’t shift. Add a wrap strap so the roll closes tightly when you slide it into the drawer. Line the roll with a wipeable fabric on the inside if you store damp tools. Roll items by type: brush and comb in one side, clips and elastics in the pockets.
Use a medium-weight cotton canvas; thin fabric collapses and makes the roll look lumpy.
Don’t overstuff the roll — it should close with gentle tension, not strain.
19. Labelled Mini Caddies for Travel-Size Products
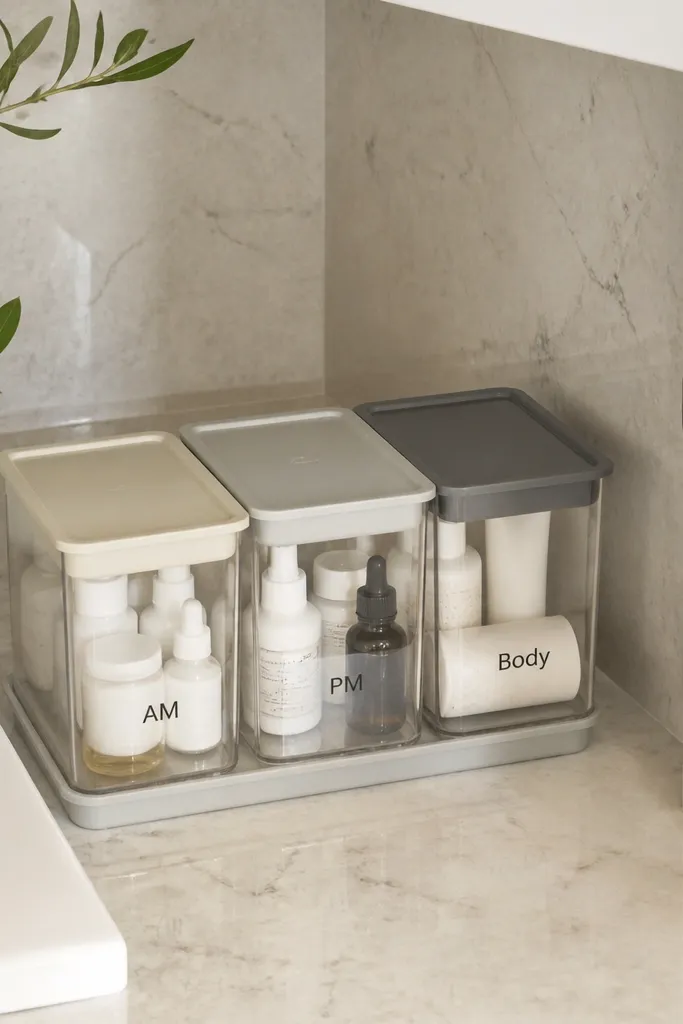
Travel-size products are the sneaky reason vanities look messy. They’re small, they multiply, and they don’t match the size of your drawer dividers. Mini caddies keep them together in a neat cluster that looks intentional. Label each caddy by routine — “AM,” “PM,” “Body” — so you don’t open three containers to find one item. This looks cozy because mini caddies can be styled in matching finishes and placed on a tray rather than scattered.
Choose three mini caddies with similar color and shape so they read as a set. Label each caddy on the front with a small tag or sticker on the handle area. Arrange travel bottles by height so labels face forward. Place caddies inside a shallow drawer section or on a counter tray with a lip. Keep one caddy per routine and store the rest in a cabinet bin.
Use a tray with a raised edge under the caddies; it keeps the whole cluster from sliding during daily use.
Skip mixing travel sizes with full-size bottles in the same space — it breaks the visual order.
20. Cloth Divider for Drawer That Holds Tall Bottles Upright
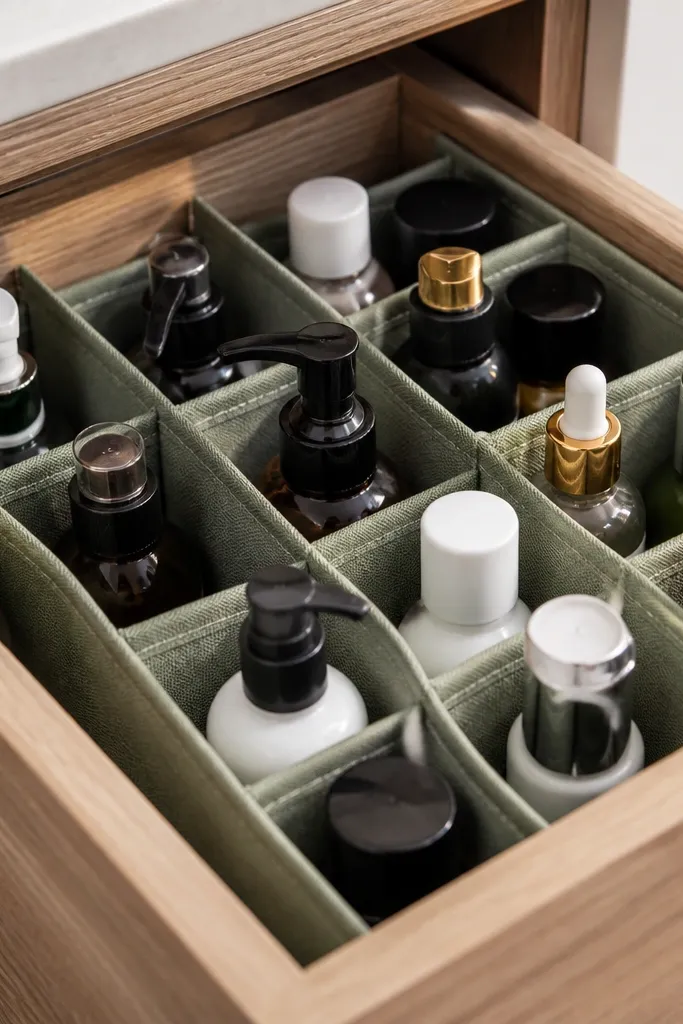
A cloth divider looks soft and cozy, but it’s still functional when it’s made with structure. Use it to create upright lanes for tall bottles that won’t fit rigid dividers. Fabric also hides minor scuffs and makes the drawer feel less industrial. The key is to use stiff fabric or add interfacing so the divider holds its shape and doesn’t flop. This is a great fit when you want a warmer look and your drawer is irregularly shaped.
Cut fabric strips to match your drawer height and length, then add fusible interfacing or sew a thin batting layer for stiffness. Attach the divider strips to a base insert using fabric glue or stitching so they stand upright. Add a non-slip liner under the base and press firmly into place. Place tall bottles into each lane and adjust divider spacing until bottles don’t touch. Seal edges with bias tape so the fabric stays neat in a humid bathroom.
Use bias tape on top edges; it keeps the divider from fraying and makes it look finished.
Don’t use flimsy fabric — if it collapses, bottles shift and the drawer loses its tidy look.



