
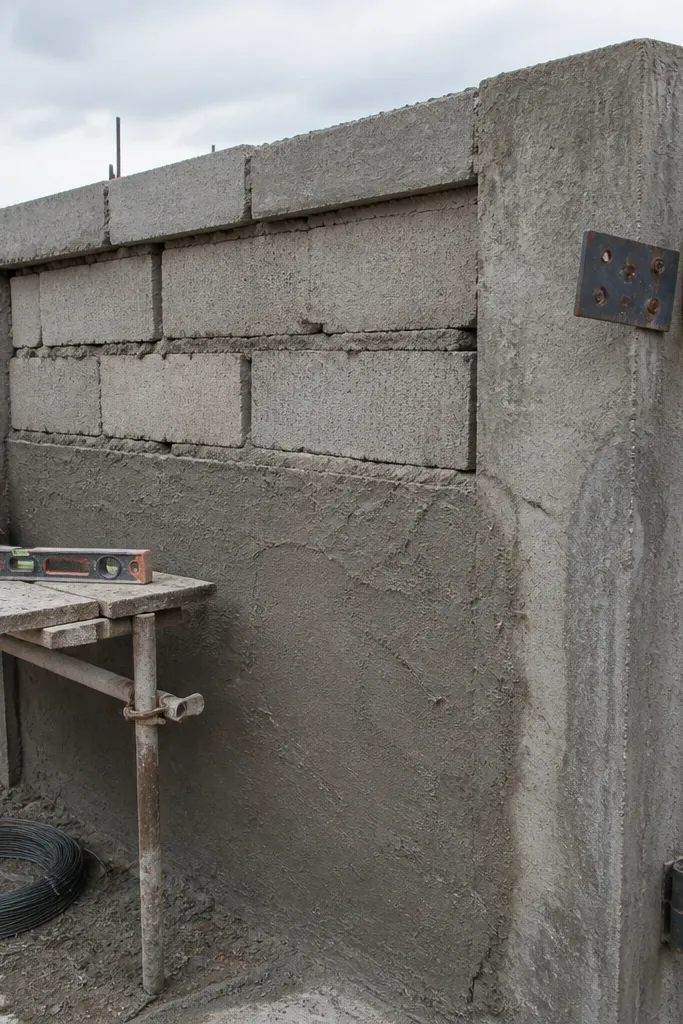
1. Underbuilt footing for the soil you actually have
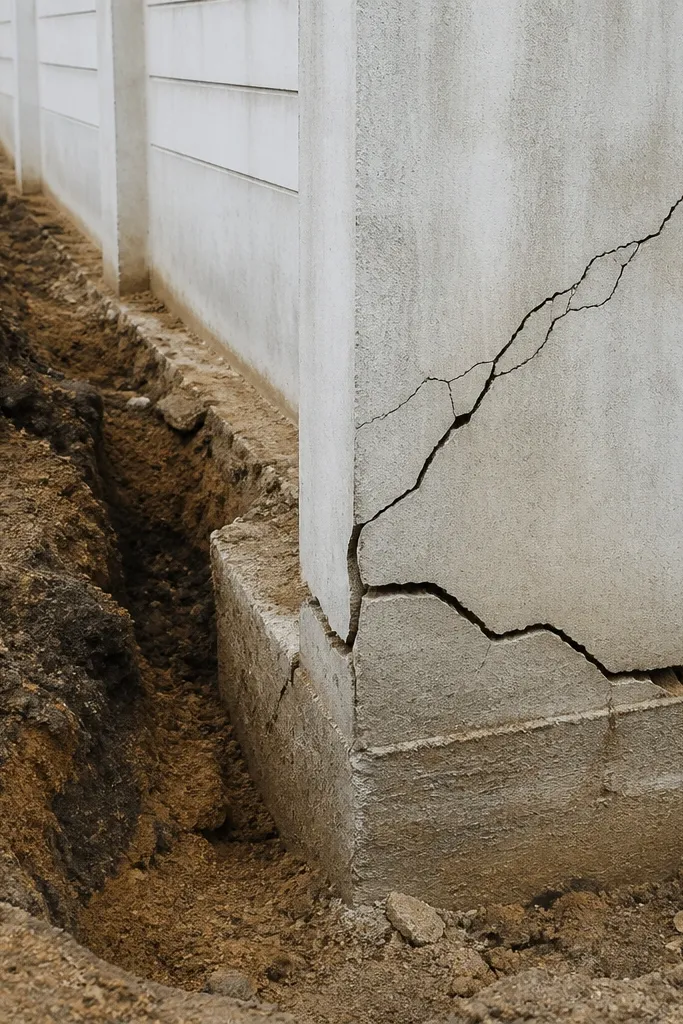
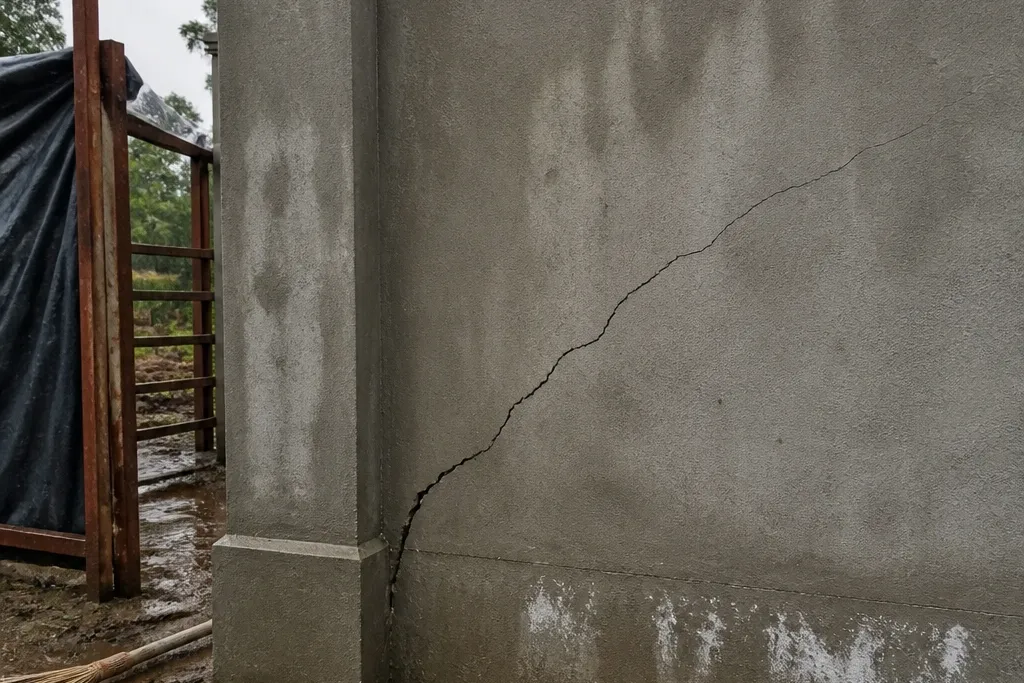
Most compound wall mistakes I made started with one thing: assuming the soil is the same across the plot. If your footing is too narrow or too shallow, the wall settles more on one side and you get diagonal cracks near pillar lines. The fix is not a thicker wall later — it’s correct footing sizing now. For DIY builds, use a footing that bears on firm soil and extends enough to reduce pressure under the pillar loads. You’ll also want a clean, level base so the rebar cage sits straight and concrete consolidates without voids.
First, dig test pits at the future pillar line — go deep enough to reach firm soil, not just clay that looks “fine” at the surface. Then set footing width so the pillar load spreads — for typical DIY compound walls, many people land around 12 to 18 inches wide depending on soil firmness and pillar size, but the key is bearing on firm strata. Next, make the base level, place a rebar footing cage with correct spacing, and pour in one go so you don’t create a cold joint at the base.
Before you pour, sprinkle water to dampen the excavation wall and remove loose debris so the concrete doesn’t lose water to the soil.
Avoid pouring footings on loose fill or after you’ve already backfilled and compacted incorrectly.
2. Rebar cage is too open in the pillar
A pillar with widely spaced stirrups bends and cracks at the exact places you don’t want — near beam level and at height changes. The steel cage is what keeps the pillar from splitting under shrinkage and minor ground movement. When the cage is too open, concrete takes strain it can’t handle, and you see vertical cracks that widen after rain. This is one of the compound wall mistakes I made that looked fine for weeks, then failed quickly once water got into the crack. The solution is straightforward: tighten stirrup spacing, tie properly, and keep cover consistent.
Start by tying a pillar cage with vertical bars and closed stirrups. Then set stirrup spacing based on your pillar dimensions and keep it consistent from bottom to top — a common DIY approach is 6 to 8 inches max in the critical zones around footing-top and near infill height transitions. Finally, use plastic cover blocks so the cage stays centered and the concrete cover is not “whatever happens.”
Editor's noteTie stirrups with a firm twist and check alignment with a string line so the cage doesn’t drift while you pour.
Skip thisDon’t skip stirrups thinking “it’s just a boundary wall.”
3. Wrong bar splicing between footing and pillar
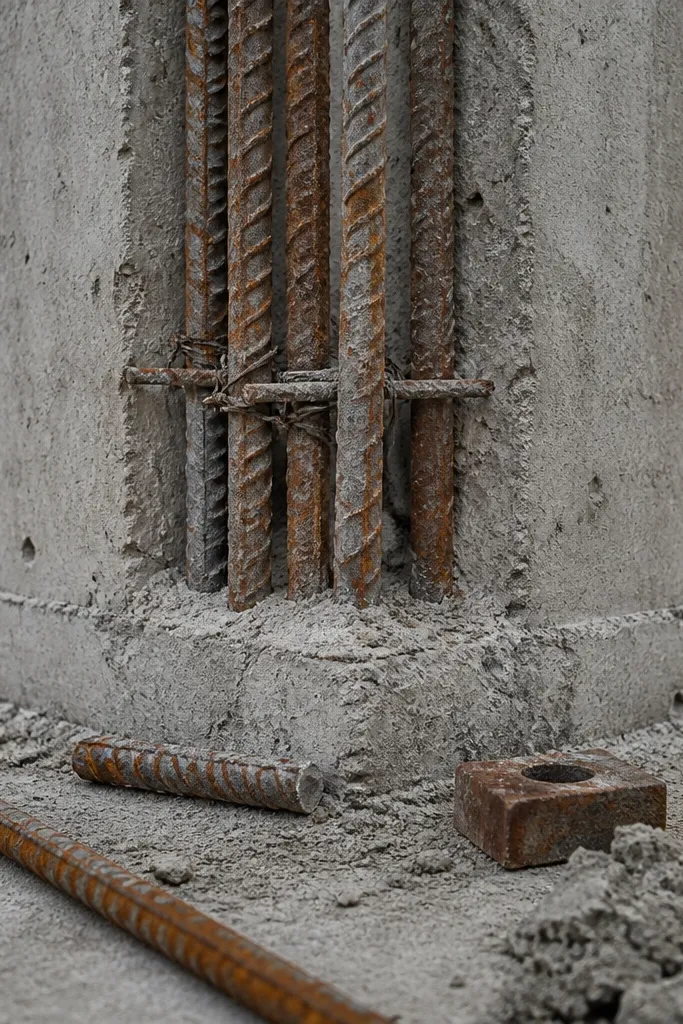
Splicing is where strength disappears if you get sloppy. If footing bars don’t overlap correctly with pillar bars, the pillar starts as a weak column and cracks form early at the junction. People also miss that overlap length depends on bar diameter and grade, so “tying bars together” is not the same as a proper splice. The result is often a thin crack line that runs along the pillar face after the first wet season. This is a classic compound wall mistake I made because the cage looked “connected,” but the structural continuity wasn’t there. Fixing it is about correct overlap and clean placement.
First, plan your bar layout before pouring the footing so you have the right bar extension height and alignment for pillar cages. Then use a proper lapped splice length — follow your bar diameter and design assumptions; as a DIY baseline, many builders use lap lengths in the range of 40-50 bar diameters for conservative detailing, but match what your local practice and bar grade require. Finally, keep overlaps staggered if you have multiple bars and ensure the splice zone is fully encased in concrete with proper cover.
Keep overlap areas dry and clean before tying so you don’t trap mud that reduces bond.
Avoid splices that touch but don’t overlap enough, or bars that are bent and re-tied after concrete is already in place.
4. Pillar spacing is too large for the infill
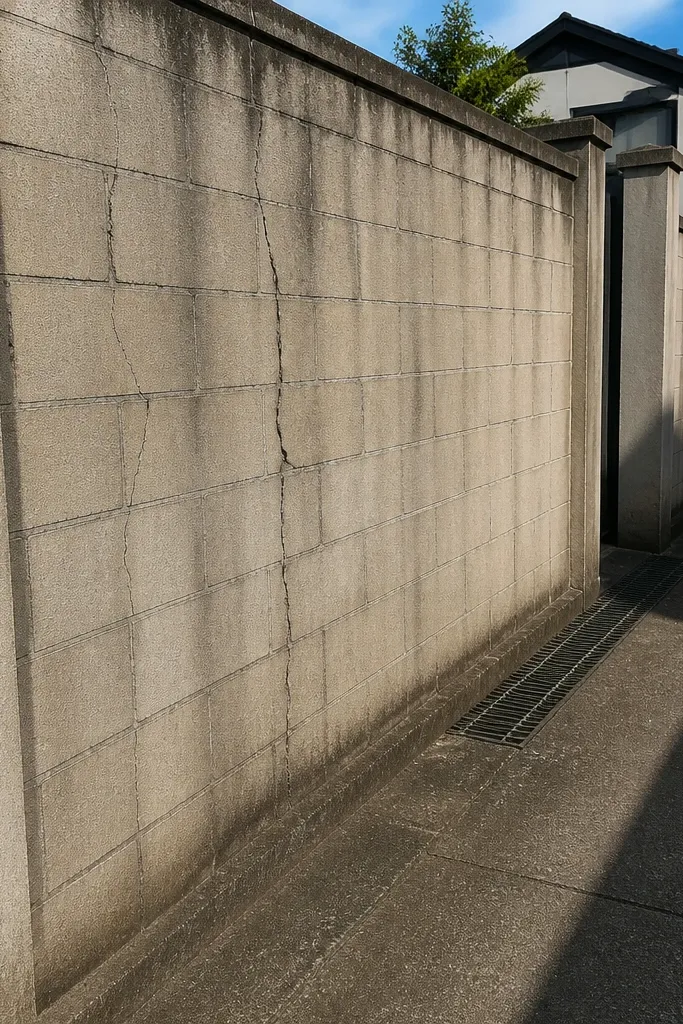
Long spans between pillars turn infill into a stressed panel, and brick or block infill hates being stressed like that. When pillar spacing is too wide, the wall flexes slightly with temperature and settling, and cracks appear mid-span. You’ll often see hairline cracks that start at mortar joints and widen where water pools. This is one of those compound wall mistakes I made that didn’t show immediately because the infill can look intact until it gets repeated wetting-drying cycles. The fix is to set pillar spacing so infill stays mostly non-structural and carries only its self-weight. If you want fewer pillars, it’s still cheaper to design spacing correctly than to repair cracks every monsoon.
First, lay out the wall line with string and measure the total length so you can calculate how many pillars you need. Then choose a pillar spacing that keeps infill spans short — many DIY walls use around 6 to 8 feet max between pillars for brick/block infill, but tighten it if your masonry is weaker or your soil is variable. Finally, keep pillar centers consistent and mark footing excavation points so the spacing doesn’t drift during construction.
Editor's noteIf you’re unsure, err toward more pillars. Extra steel and formwork is cheaper than repeated crack patching.
Skip thisAvoid “matching the neighbor’s pillar gaps” if their soil and wall system are different.
5. No proper concrete cover - steel ends up too close to the surface
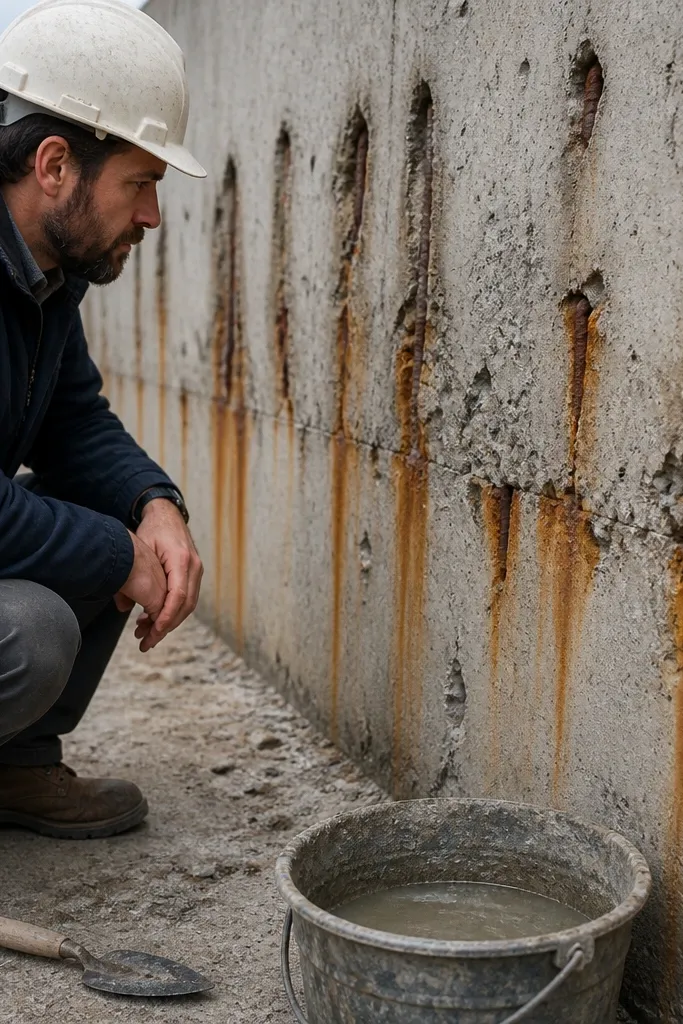
Low concrete cover is a durability killer. When steel is too close to the surface, water reaches it, corrosion expands, and the concrete cracks and flakes. You’ll often see rust stains, then spalling around the bars, even if the wall looked structurally fine early on. This is one of the compound wall mistakes I made that seems minor while you’re building — you can’t see cover quality once plastering happens. But corrosion doesn’t care about appearance. Correct cover gives you time and keeps the wall intact under rain and humidity.
First, decide the cover you need based on your wall exposure; for exterior RCC elements, plan for adequate cover rather than “close enough.” Then use cover blocks or spacers while placing the cage — don’t rely on the rebar sitting on soil or loose bricks. Finally, during pouring, check that the cage stays centered and that concrete fully surrounds the bars without voids.
Use plastic spacers, not rocks. Rocks create high spots that reduce cover and create weak interfaces.
Avoid skipping cover blocks and placing the cage directly on the excavation base.
6. Weak mix and sloppy batching
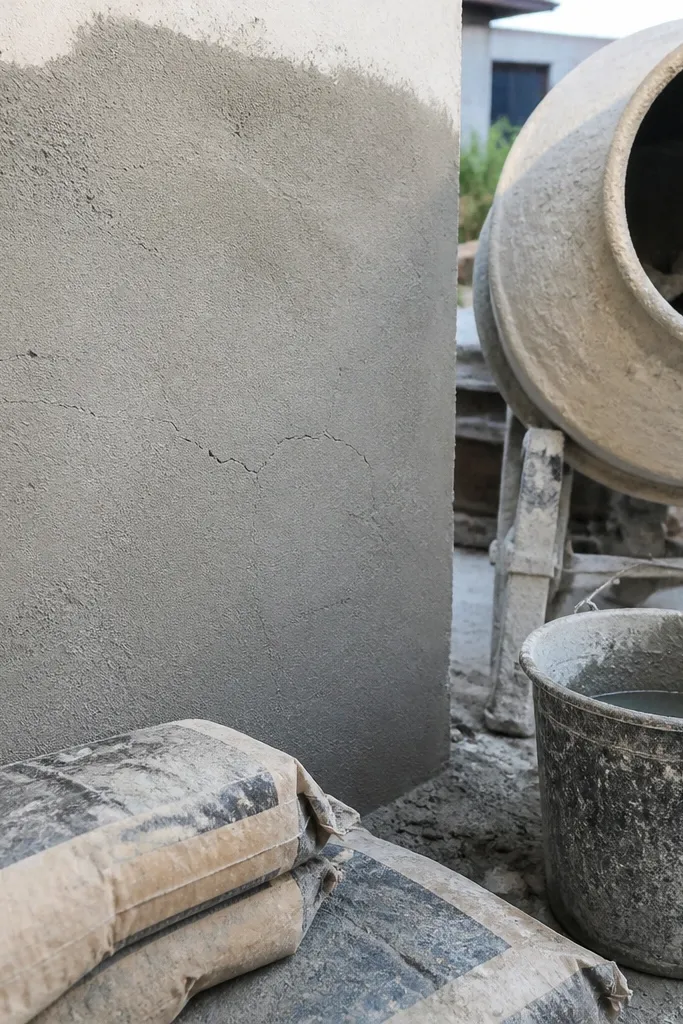
A compound wall can be properly reinforced and still fail if the concrete mix is inconsistent. Too much water lowers strength and makes the surface powdery, so you get cracking and easy water ingress. Honeycombing and voids also happen when the mix is too wet or when people don’t consolidate properly. The wall might look okay before plaster, then you see damp patches, efflorescence, and cracks after a few rains. This is one of the compound wall mistakes I made because batching “by eye” feels fast. It’s also the easiest fix: control water, measure cement and sand, and keep a consistent batch routine.
First, batch with measuring buckets or weight — pick one method and stick to it. Then keep water dosing conservative; add water slowly to reach workable consistency, not soup-like flow. Finally, place concrete in layers and consolidate with a vibrator or by rodding thoroughly, especially around corners and rebar congestion.
If you’re using ready-mix, demand a slump target and don’t let the supplier add water at the site.
Avoid adding extra water “to make it pour” — it weakens the whole section.
7. No consolidation around rebar
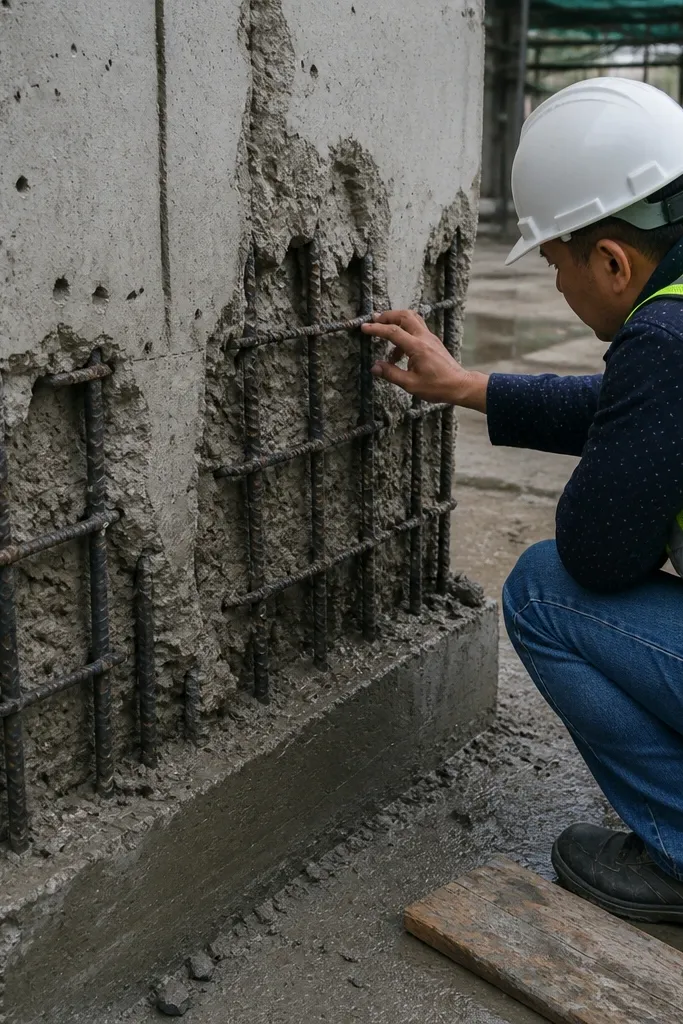
Without consolidation, concrete leaves voids around steel and near the formwork. Those voids become water channels and reduce effective cross-section, which makes cracks show earlier. You’ll see it as rough patches, bugholes, and weak edges after stripping. This mistake is common because DIY pours feel “done” once concrete reaches the top. But strength depends on full contact between aggregate, cement paste, and steel. Consolidation is how you get that contact. It’s one of the compound wall mistakes I made that looked cosmetic until the wall started leaking through hairline cracks.
First, plan your pour so you can place concrete continuously for each pillar and avoid partial set. Then consolidate in layers — rod or vibrate around each corner and along rebar, not just in the middle. Finally, strike off to level and check for voids — if you see honeycombing, don’t plaster over it and hope; patch after surface prep.
Editor's noteWork from one side so air escapes; don’t “stir” concrete after it starts to set.
Skip thisAvoid pouring into tight shutter gaps and walking away without consolidating.
8. Cure is rushed - no wet curing plan
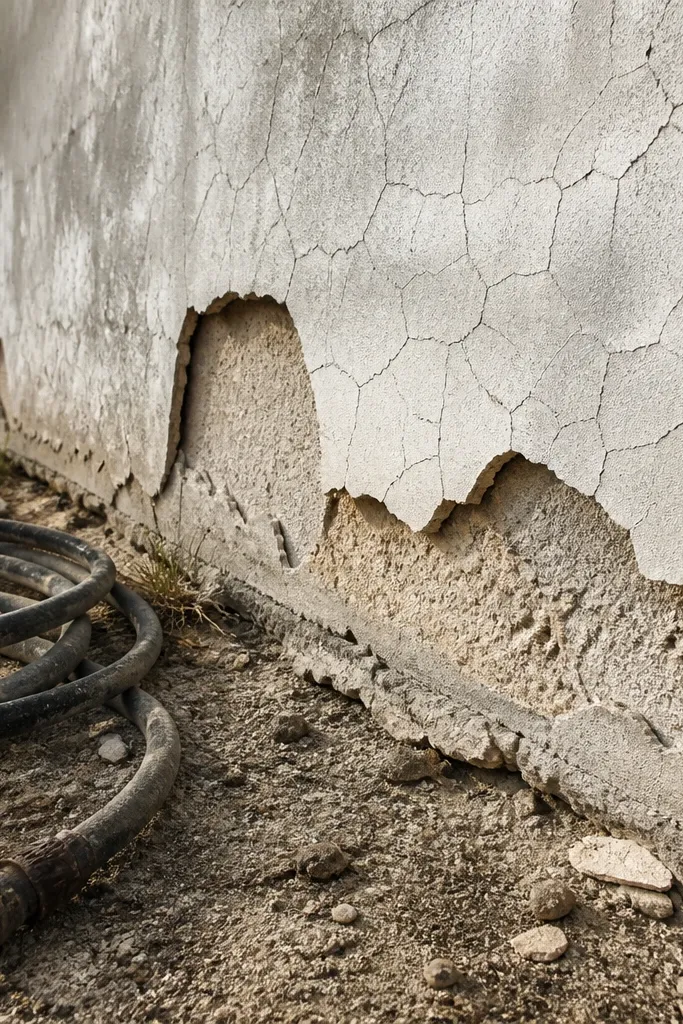
Curing mistakes create surface weakness that shows up later as cracking and peeling plaster. If you let concrete dry out in the first 24 to 48 hours, you lock in shrinkage and reduce strength where you need it most. The wall may look fine, but the surface becomes porous — rain water then soaks in and pushes salts and cracking. This is a compound wall mistake I made because curing feels optional when the weather looks mild. It isn’t optional. A simple wet-curing schedule protects both RCC and masonry bond zones.
First, after stripping shutters, keep the RCC surface moist — use wet hessian or curing sheets, not just a quick splash. Then maintain moisture for at least 7 days, and longer if the weather is hot and windy. Finally, protect from direct sun and wind by shading the wall line and scheduling curing during cooler hours.
Editor's noteIf you can’t cure daily, plan a simple sprinkler or wrap with curing sheets immediately after initial set.
Skip thisAvoid letting concrete dry under sun right after pour and then starting plaster a few days later.
9. Plaster directly on dirty masonry and RCC
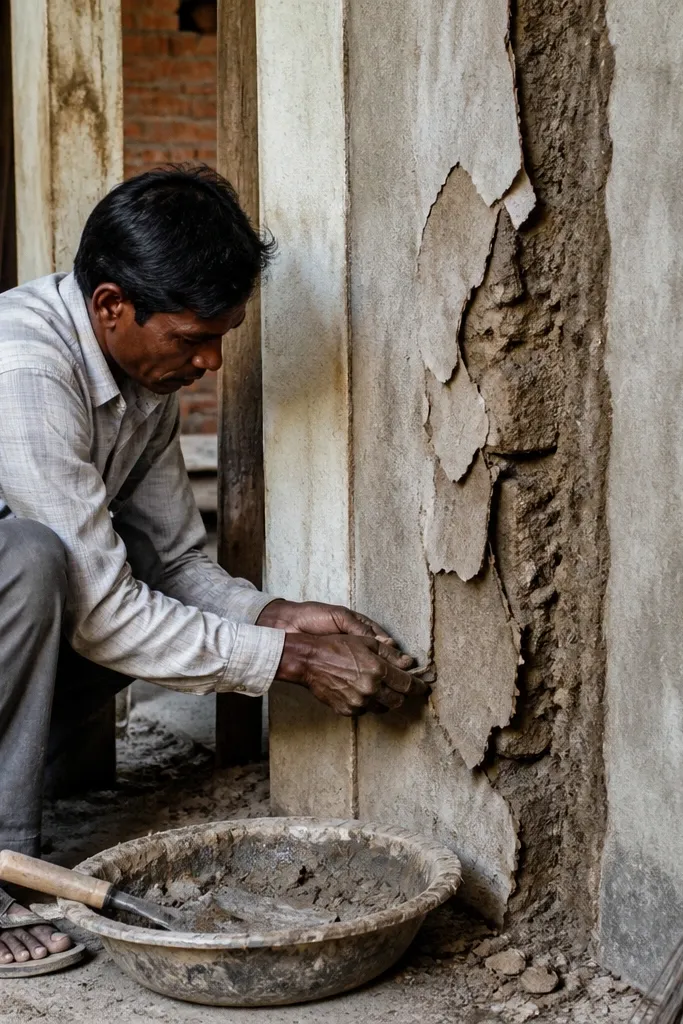
Plaster failure often isn’t the plaster — it’s the surface prep. Dust, loose mortar, and weak concrete skin prevent bond. At RCC-to-masonry junctions, the bond is already weaker, so dirty surfaces create a clear path for water and delamination. You’ll see flaking plaster along vertical seams and corners. This is one of the compound wall mistakes I made because it’s tempting to plaster “as soon as it looks dry.” It’s better to prep properly and let bonding happen mechanically and chemically. The result is fewer patch jobs and a cleaner finish.
First, remove loose mortar, dust, and laitance from RCC and masonry surfaces using a wire brush. Then wet the surface before applying plaster so the base doesn’t steal water from the plaster mix. Finally, use proper bonding steps at junctions — roughen RCC lightly if needed and keep plaster thickness even across the wall to avoid stress points.
Editor's noteTest bond by pressing a small patch; if it flakes off, stop and prep again before you commit to the full wall.
Skip thisAvoid plastering over oily form-release residue or dusty masonry blocks.
10. No control joints or wrong joint placement
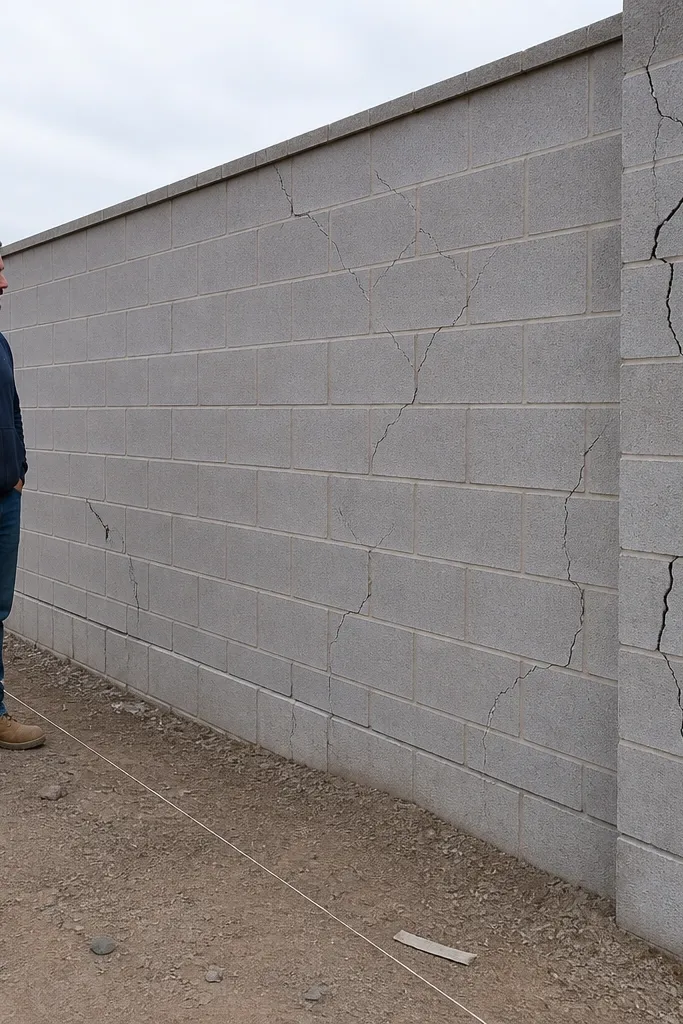
A compound wall is long and exposed. Temperature change and shrinkage create movement — if you don’t plan for it, the wall releases that stress through random cracks. Control joints give the stress a predictable location so you can repair later without rebuilding. People often skip joints because they think cracks look ugly, then they get worse cracks after a season. This is a compound wall mistake I made because I treated the wall like a single rigid slab. Masonry and RCC both move a little, so you need a plan for where that movement goes.
First, map your wall length and create a joint plan — longer runs need joints, especially where infill changes or where there are openings. Then place joints at logical locations like between panel sections, not randomly at a decorative corner. Finally, detail the joint with a proper filler and sealant system so water doesn’t enter and undermine the plaster line.
Editor's noteIf you’re building brick infill panels, align joints with pillar centers so the crack doesn’t wander into brick faces.
Skip thisAvoid placing joints only where it looks neat; place them where movement is expected.
11. Wall line setup is off - crooked wall from day one
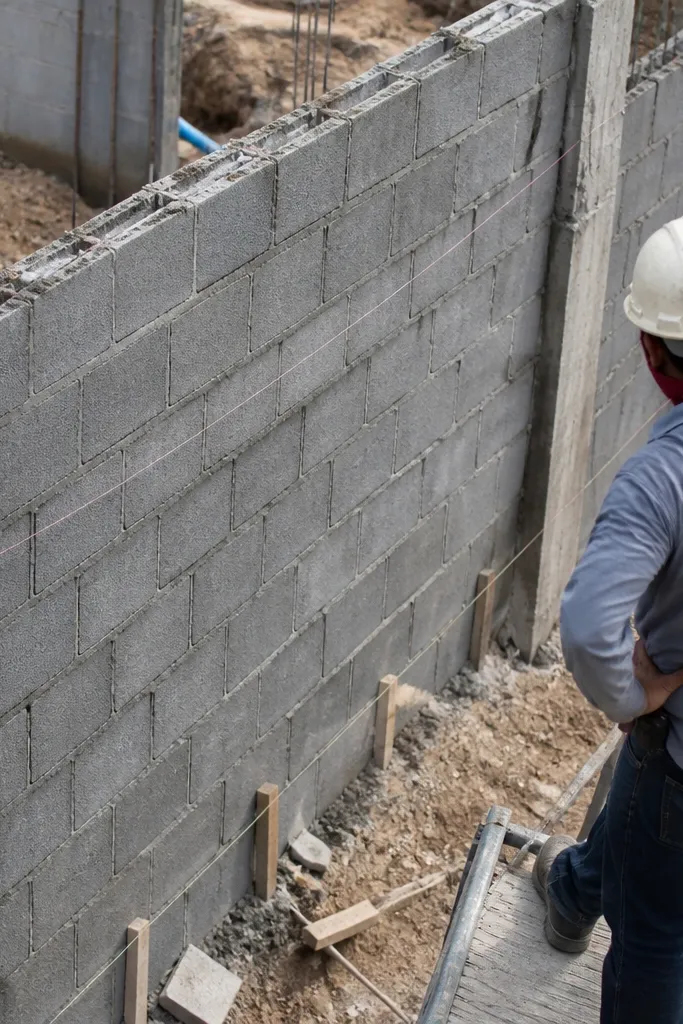
A compound wall looks straight until you measure it. String lines that drift, stakes that shift, and “we’ll adjust later” alignment cause a gradual bend that becomes impossible to correct after plaster. You’ll also see irregular mortar thickness around pillars and infill, which invites cracking and water paths. This mistake is common because builders focus on pouring and forget alignment checks during curing. This is one of the compound wall mistakes I made because the wall looked okay from the road angle. Straightness needs frequent checks at pillar centers and at top line.
First, set corner points with proper batter boards and lock the string line so it can’t sag. Then check alignment at every pillar excavation point before you place rebar. Finally, after each pour, verify top alignment using a level and adjust formwork for the next pillar before concrete sets.
Editor's noteUse two strings at different heights to catch twist early, not after the wall is fully built.
Skip thisAvoid adjusting after concrete sets by forcing mortar thickness to “make it fit.”
12. Infill isn't properly bonded to the RCC frame
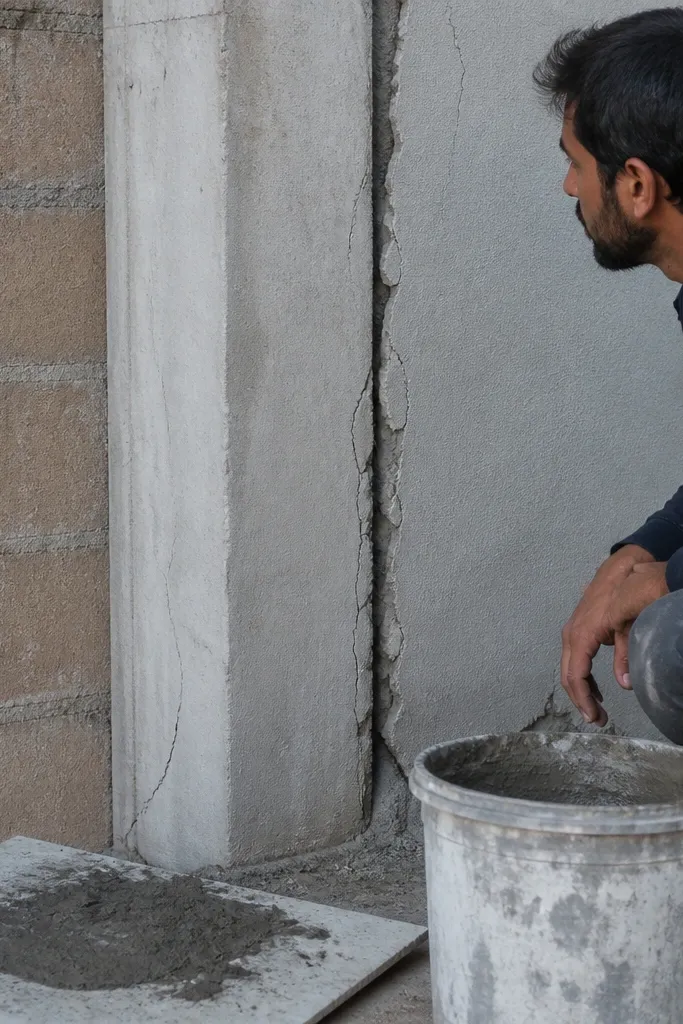
Brick or block infill needs a real bond to the frame or it behaves like a separate panel. If there are gaps or weak mortar contact, water gets trapped at the interface and the wall cracks along that line. You’ll see a thin separation strip between masonry and pillar faces, then plaster cracks follow. This is a compound wall mistake I made that looked like “small gaps” during construction. The fix is to control masonry laying technique and mortar thickness at the interface. Bonding also affects how the wall handles small movements without tearing.
First, keep the RCC frame surface clean and slightly rough so mortar keys in. Then lay masonry with full bed mortar contact and avoid leaving voids at the interface — strike mortar so it fills the contact area. Finally, use proper bond pattern in infill and ensure vertical joints are staggered so you don’t create continuous weak lines.
Editor's noteUse a consistent mortar thickness at the RCC-masonry contact. Thin mortar dries faster and loses bond.
Skip thisAvoid dry stacking the first course and filling gaps later with patch mortar.
13. Wrong brick/block orientation and weak course bonding
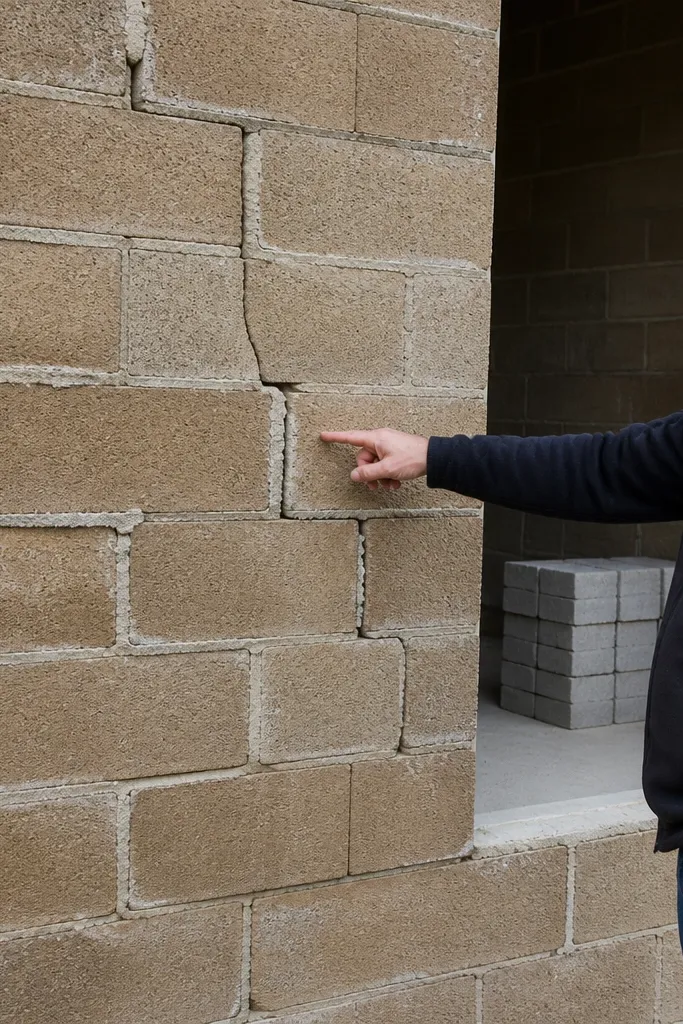
Infill failures often come from course bonding and orientation mistakes. If you stack blocks without consistent staggering, you create vertical planes of weakness that crack under movement. Uneven mortar joints also create uneven load transfer, so some courses carry more stress and crack earlier. You also get water movement through sloppy joints, which then causes plaster stains. This is one of the compound wall mistakes I made because I focused on filling height quickly. Infill is slow to fix later; it’s fast to build correctly by sticking to the bond pattern and checking levels every few courses.
First, plan your bond pattern so vertical joints stagger by at least half a unit width across the height. Then use a straightedge and level — check after every 2 to 3 courses, not after a full wall section. Finally, keep mortar joints uniform and avoid forcing blocks into place with extra thick mortar that dries unevenly.
Editor's noteUse a gauge board for mortar thickness so every course lands at the same height.
Skip thisAvoid building tall sections without leveling checks; the wall drifts and you’ll see it at pillar faces.
14. No proper drainage weep points at the base
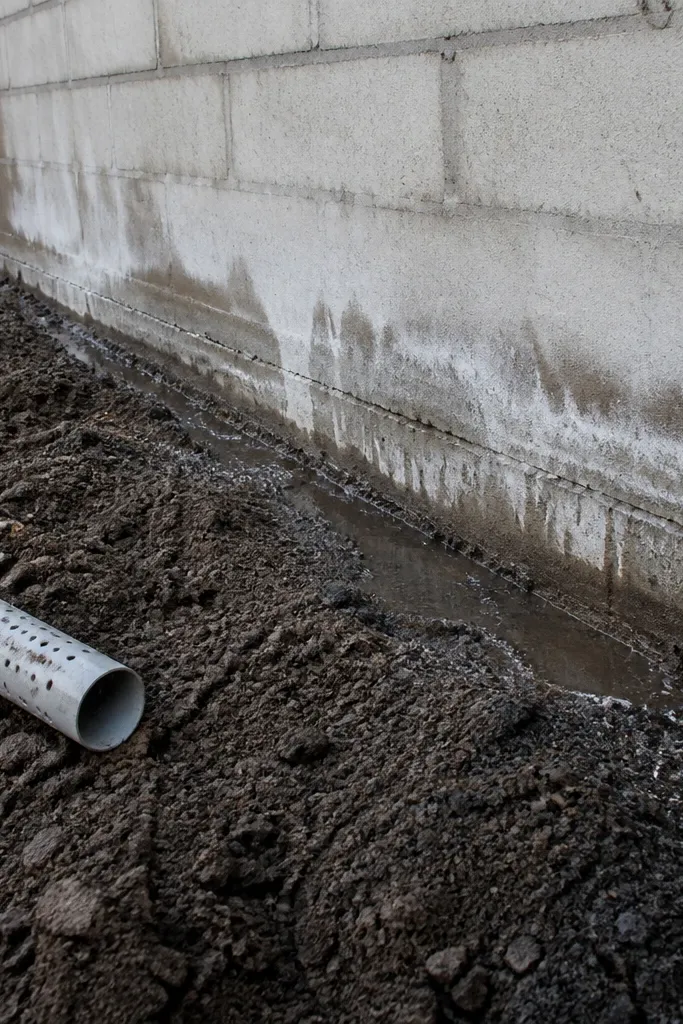
Even a well-built compound wall can fail if water sits at the base. Without drainage and weep paths, water accumulates behind infill and at junctions, saturating masonry and plaster. That moisture drives efflorescence, weakens mortar, and accelerates corrosion at steel near the base. You’ll see damp patches that repeat after every rain, and cracks widen as water enters and freezes or dries repeatedly. This is a compound wall mistake I made because it felt like “finishing work.” It’s not. Simple drainage details protect the structure and reduce maintenance.
First, inspect your site grading and plan water flow away from the wall line. Then build or maintain a small drainage gap and weep holes at regular intervals along the base where infill meets the frame. Finally, ensure the ground level doesn’t trap water against the wall and that any backfill is compacted and drained rather than holding mud.
Editor's noteIf you’re backfilling behind masonry, use a washed gravel zone near the wall and keep it separated from clay.
Skip thisAvoid backfilling with loose soil against the base and hoping the plaster will block water.
15. Seepage at RCC-masonry joints because sealant is skipped
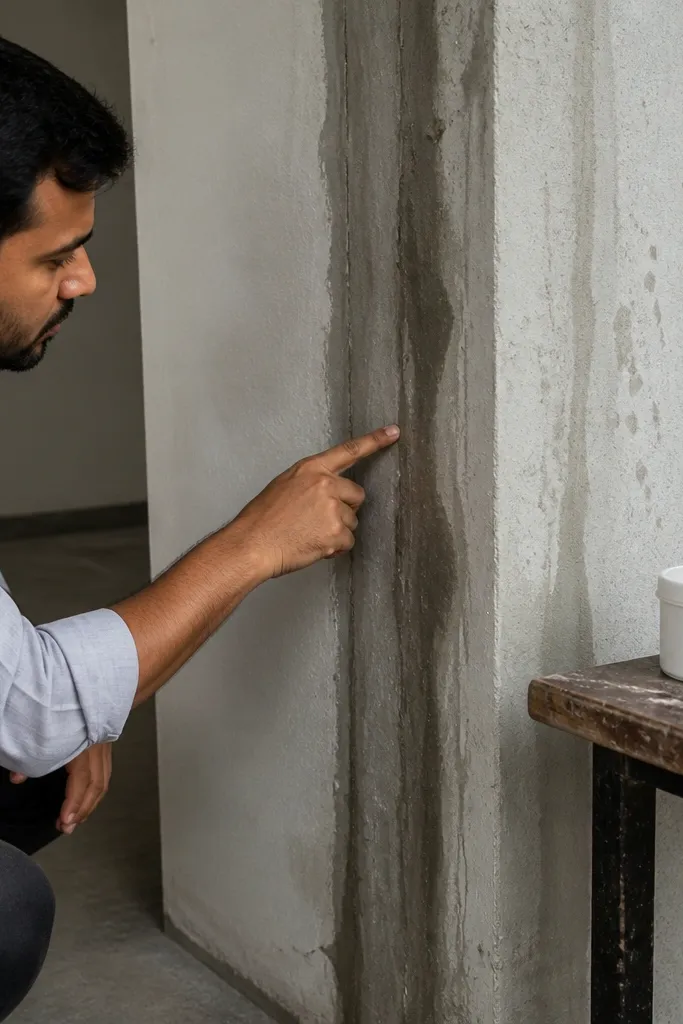
RCC and masonry expand differently. If you don’t seal the junction properly, water finds the seam and keeps coming back after rain. You’ll see recurring damp streaks right along pillar edges and corner returns. Plaster may hide it initially, then bubbles form and crack. This is one of the compound wall mistakes I made because it seems like a minor finishing step. But the seam is exactly where water intrusion begins. Proper joint sealing reduces repeated wetting and slows down corrosion and plaster breakdown.
First, identify the junction lines — where masonry meets RCC pillars and where panels meet. Then clean the joint area so sealant adheres and apply a compatible sealant system designed for exterior masonry joints. Finally, tool the sealant smooth and check for continuity along corners and around openings.
Editor's noteDon’t apply sealant over dusty mortar. Clean and dry the seam so adhesion is real.
Skip thisAvoid painting over cracks or leaving open joints at pillar faces.
16. Placing pillars without checking verticality
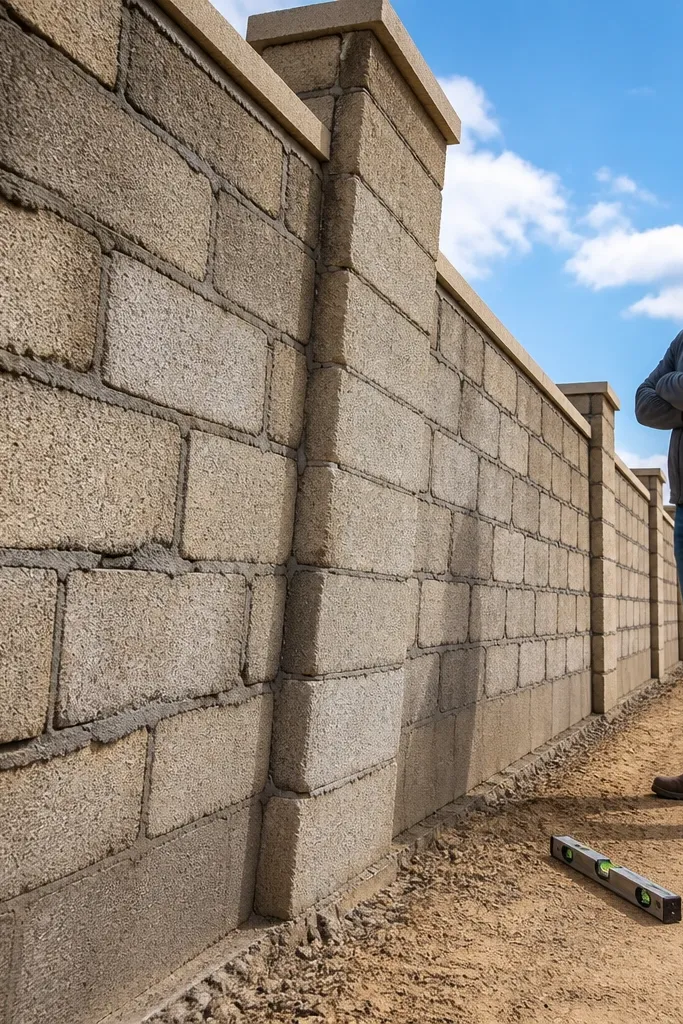
A pillar can be straight at the bottom and drift as concrete rises. If you don’t check verticality while the formwork is still adjustable, you lock in a lean. That lean then makes infill look wavy and creates uneven mortar thickness across the span. Uneven thickness means uneven shrinkage and cracking. This is a compound wall mistake I made that’s hard to correct later because you can’t “un-tilt” cured RCC without major demolition. The fix is constant checking and fast formwork correction.
First, set formwork using a plumb line and secure it so it can’t move when concrete is placed. Then check verticality after each pour lift or at least halfway up the pillar height. Finally, verify the top of the pillar aligns with the string line before you finish and strip.
Editor's noteUse a string plumb bob and mark the formwork — if it moves, correct immediately before concrete stiffens.
Skip thisAvoid relying on the rebar cage alignment alone; formwork can still drift.
17. Using the wrong plaster thickness and curing schedule
Plaster that’s too thick shrinks more and cracks, especially if curing is rushed or the base is too dry. Thin plaster can also fail if it doesn’t cover properly and leaves pinholes that feed moisture. The right approach is consistent thickness, good base prep, and a curing schedule that matches the plaster type. People often start plaster right after masonry and treat it like paint. It isn’t. Plaster is a material that needs controlled moisture to gain strength and stay bonded. This is one of the compound wall mistakes I made because the wall looked ready, but the surface wasn’t properly conditioned for plaster.
First, let masonry cure enough so it’s not releasing too much moisture into the plaster. Then apply plaster in consistent thickness — avoid piling it on to hide unevenness. Finally, cure plaster by keeping it damp and protected from sun and wind for the recommended period for your plaster system.
Editor's noteIf the wall surface is uneven, correct with leveling coats rather than a single thick coat.
Skip thisAvoid slapping a thick coat over honeycombs, voids, or dirty RCC.
18. Skipping expansion planning around gates and corners
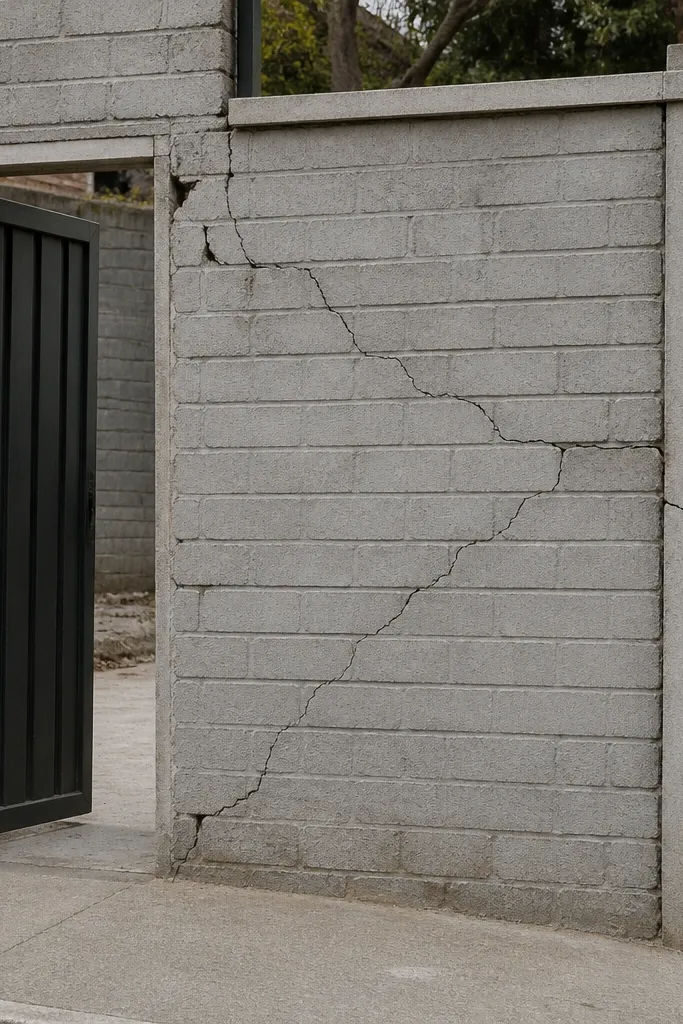
Gate openings and corners concentrate stress. If you build them like plain wall sections, cracks spread from the edges of openings and corner returns. That’s not random — it’s where movement and load transfer happen. You’ll see cracks that run diagonally or along the mortar lines, and you may also get misalignment in the gate frame. This is a compound wall mistake I made because the wall sections felt “the same” while building, but openings break that rule. Fixing it requires reinforcement continuity and a joint/seal plan at the opening edges.
First, reinforce opening edges with extra steel detailing — add proper corner bars and ensure continuity into the pillar cages rather than treating openings as cut-out holes. Then plan for movement by using joints or controlled gaps between gate frame elements and masonry. Finally, after build, seal the edges and keep water from sitting at the opening corners with proper drainage and surface slope.
Keep opening dimensions tight. If your frame is off by even a little, plaster will crack trying to accommodate the mismatch.
Avoid cutting corners by placing fewer bars around openings than you do in plain wall segments.
19. Backfilling too soon and without compaction control
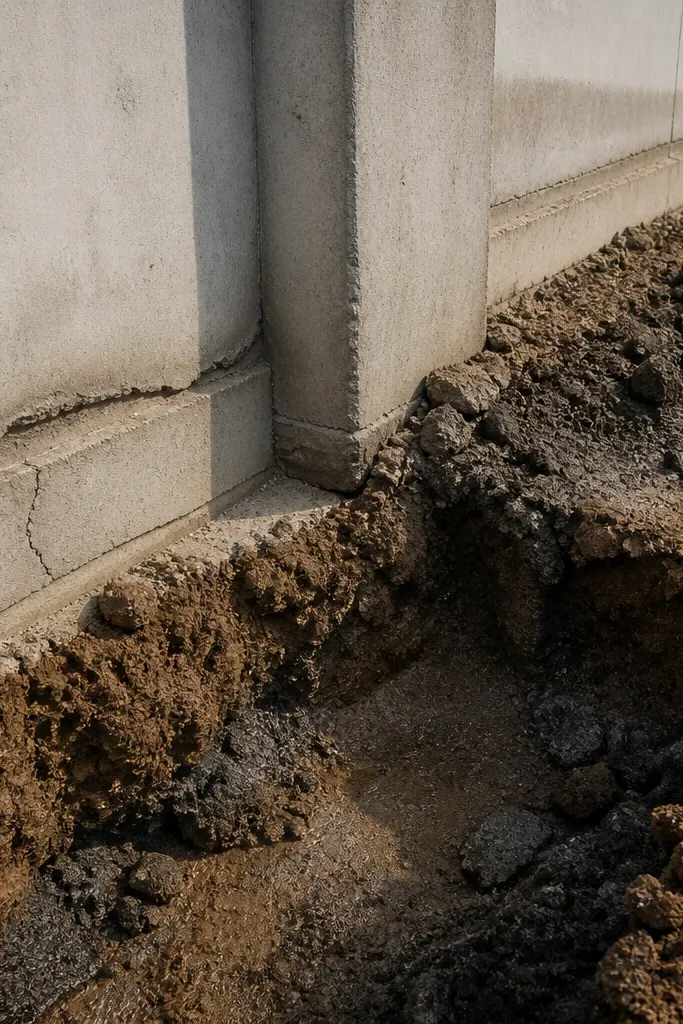
Backfill is where many DIY compound walls quietly get damaged. If you backfill before footings and lower RCC cure enough, the soil pressure can shift the structure. If you backfill with soil that holds water or compacts poorly, you get voids and settlement that show as cracks later. This is one of the compound wall mistakes I made that doesn’t look like a problem during construction because the front face still looks okay. But the back side tells the truth — dampness, settlement lines, and cracks near the base. The fix is timing and compaction, not patching.
First, wait for the footing and lower RCC to cure and gain strength before you start backfilling near the wall. Then backfill in thin layers and compact each layer — don’t dump and “press later.” Finally, use a sensible backfill material: avoid clay mud against the wall and use graded material that drains better.
If you can, keep a drainage layer behind the wall so water doesn’t stay trapped.
Avoid backfilling with loose soil in one go and assuming the wall will tolerate it.



