
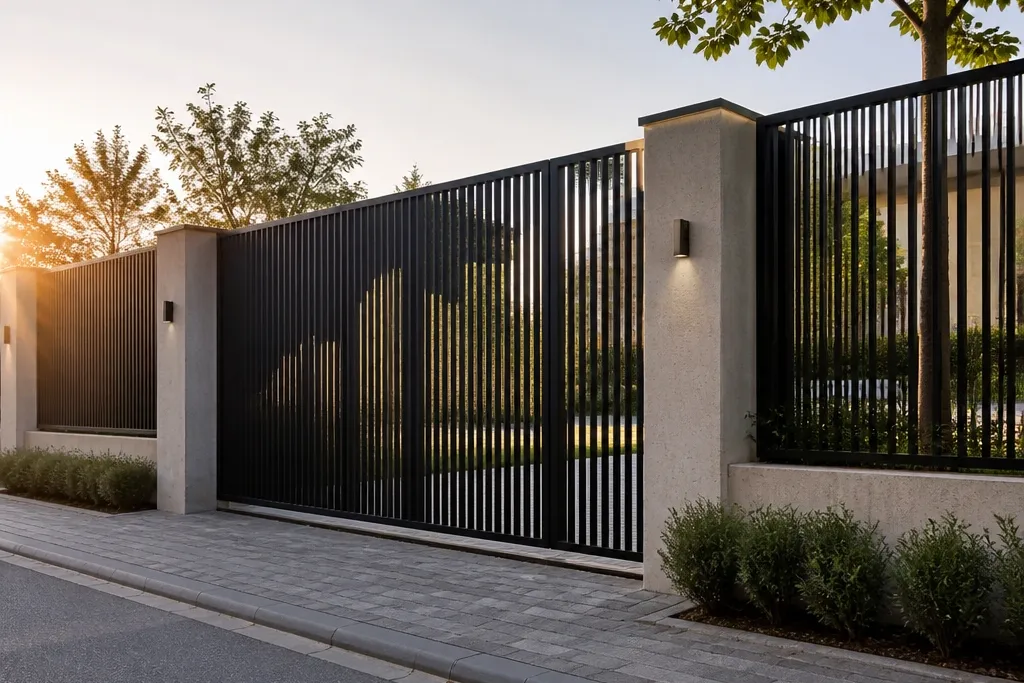
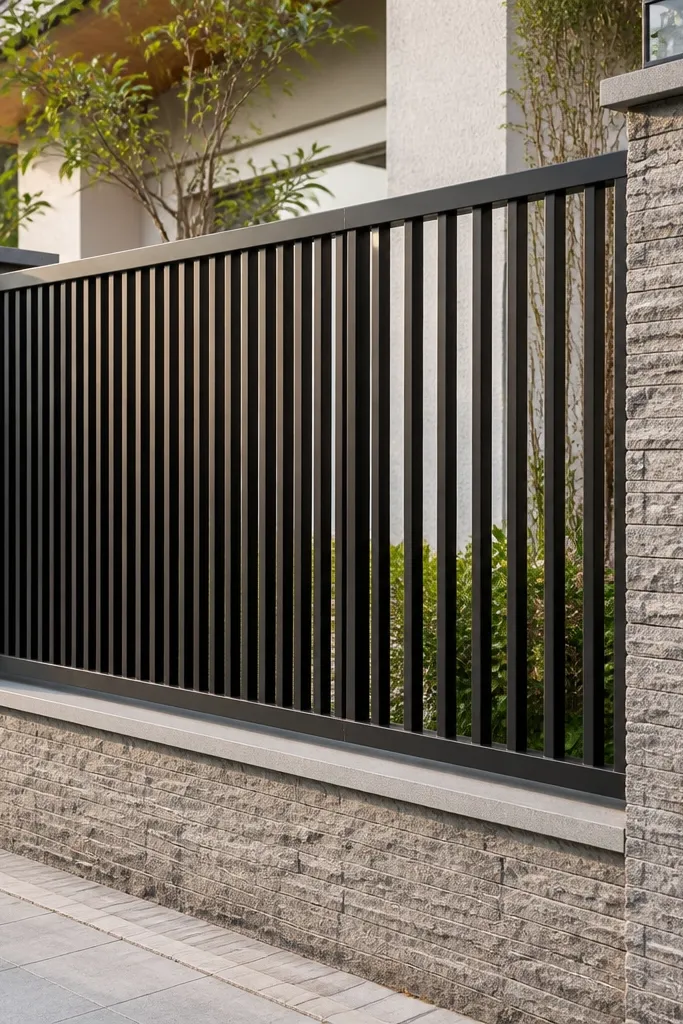
1. Charcoal Vertical Slats with a 30 mm Sightline Gap
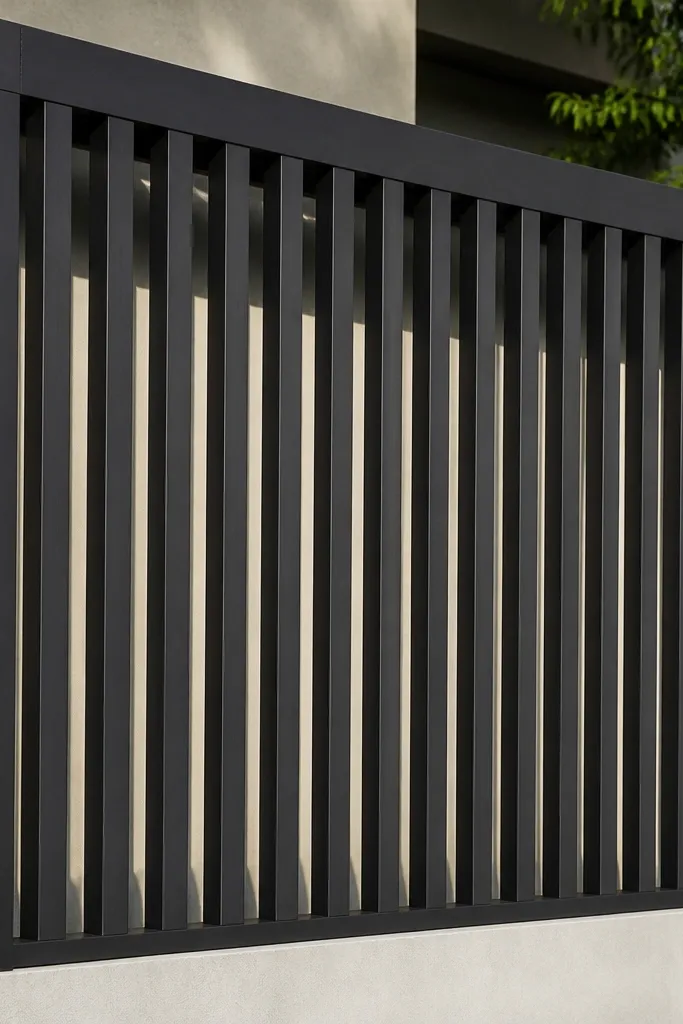
This design is the cleanest way to get privacy without making the wall feel like a cage. The look comes from evenly spaced vertical bars and a thick top and side frame that makes the grill read as one solid panel. With a clear gap around 30 mm, you block direct viewing while still letting air move through. It also photographs well because there are no busy shapes — just crisp lines and a uniform pattern. Build it if you want a modern compound wall that looks expensive but stays straightforward for first-time welding.
Editor's noteUse 30 mm spacers while welding so the gaps stay consistent across the full length.
Measure the opening width and height, then build a rectangular frame using 30x50 mm MS flat or square tube. Mark vertical bar positions so the clear gap stays at 30 mm between bars, not just “close enough.” Weld the bars in a line, then add a 20-25 mm top cap rail for a sharp edge. Prime all steel, then powder coat or paint with a two-coat system in charcoal or black. Finally, install with proper anchors into the compound wall and check alignment before tightening fully.
Skip thisDon’t eyeball spacing — even a 5 mm drift makes the grill look messy from the road.
2. Staggered Lattice Verticals (Offset Every Second Bar)
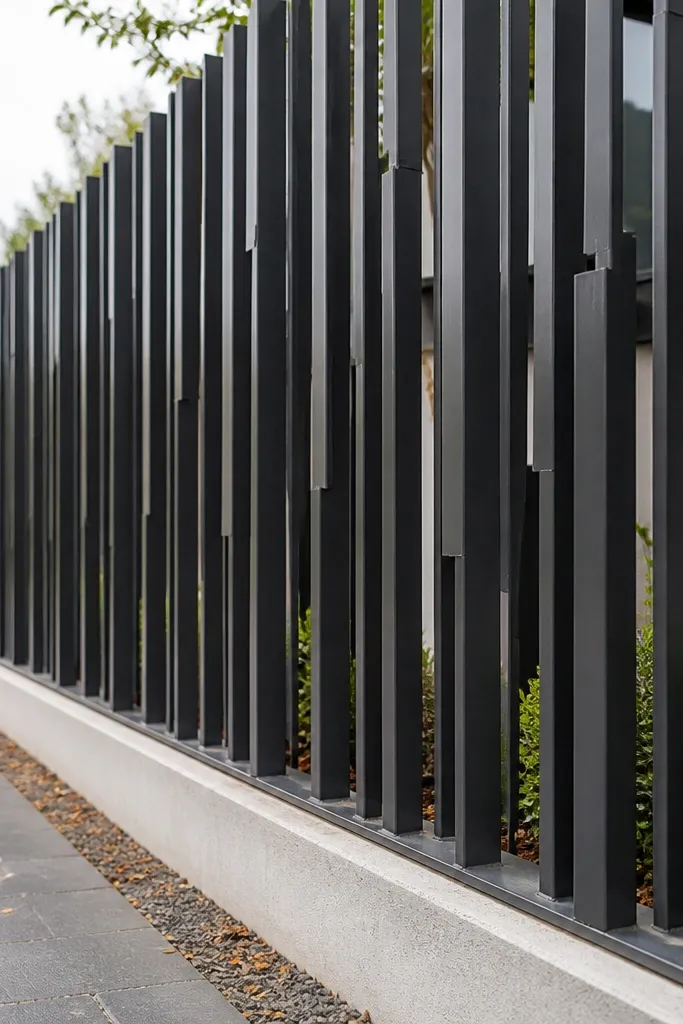
If you want privacy that feels stronger than a straight slat design, staggered verticals are the move. The offset pattern breaks straight sightlines because one bar sits slightly behind the next. It still keeps airflow because you’re not turning the panel into a solid screen. Visually, the stagger creates a subtle rhythm that looks good under morning light and shadows. This one suits front-facing compounds where you get direct line-of-sight from vehicles and pedestrians.
Editor's noteMake a paper or plywood template for the offset positions before you touch the welder.
Start with the same rectangular frame approach, then plan two vertical bar rows that alternate offsets by 10-15 mm. Mark bar locations on a template so every second bar shifts consistently. Weld the first set, then clamp the offset set using a straight guide bar so it doesn’t bow. Add a bottom rail as well, or the panel can warp over time. Prime and coat, then install with spacers so the grill sits evenly off the wall surface.
Skip thisSkip flexible welding order — tack all bars first, then finish weld after you confirm the pattern stays straight.
3. Diagonal Chevron Privacy Screen
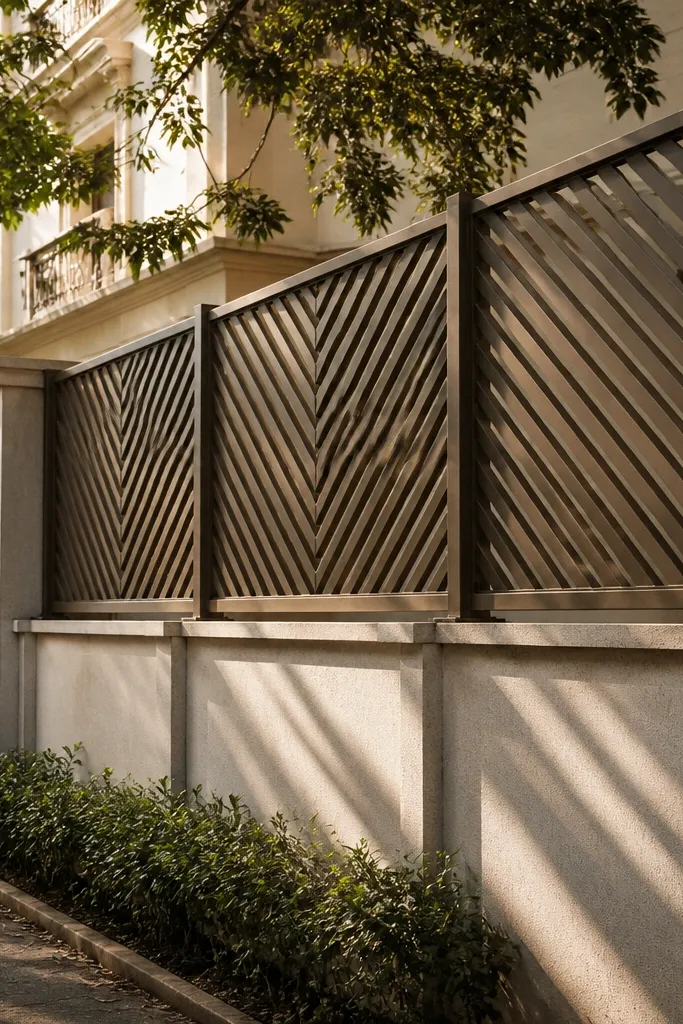
Chevron screens look sharp and they do a real privacy job because diagonal lines interrupt viewing. From the road, straight lines don’t connect through the grill, so silhouettes are harder to see. The design also hides small imperfections in bar alignment better than a strict grid. It’s a good pick if you want something more decorative without going full ornamental. Use it on long stretches of compound wall where you want consistent visual rhythm.
Build a frame first, then set two diagonal “rails” using 25x25 mm square tube or 40x6 mm strip. Cut vertical or short bars to form the chevron legs, and weld them so the diagonals meet at a consistent apex point. Keep the diagonal spacing around 60-90 mm for privacy while maintaining airflow. Tack everything, check squareness, then fully weld. Prime, then paint or powder coat; finish with a top cap rail so the chevron edges read clean.
Use a chalk line or laser level to keep the chevron angle consistent across every bay.
Don’t make the chevrons too wide — large diagonals can create easy sight gaps.
4. Box Square Grid with 25 mm Clear Gaps
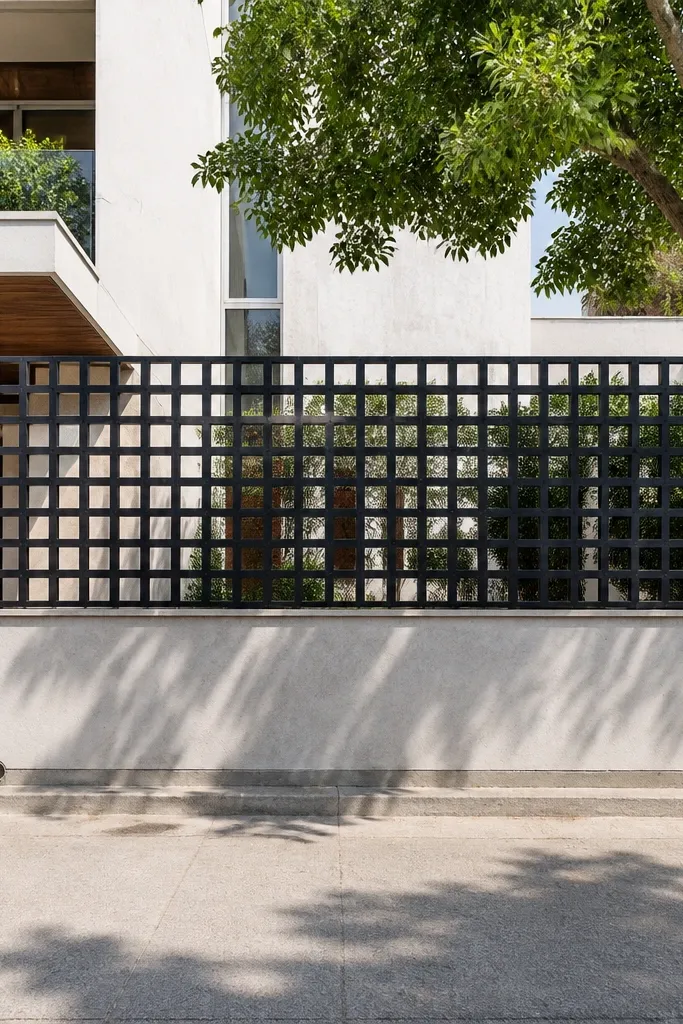
Square grid grills give privacy without blocking airflow, and they look modern on both simple and stone-faced walls. The beauty is in the uniform “boxes” — they read clean from far away and look intentional up close. For privacy, aim for small square openings, not oversized diamonds. With around 25 mm clear gaps, you block direct viewing while still letting breeze through. This works well for side compounds where neighbors can see into your courtyard.
Editor's noteSquare up the grid by measuring diagonals of the frame — match both diagonals within 2-3 mm.
Frame the opening with square tube. Use 12-16 mm vertical bars and 12-16 mm horizontal bars, but keep the intersection consistent so you get real squares. Mark a grid using 25 mm clear gaps, then weld the first row and first column to lock alignment. Add the remaining grid lines, then weld the joints at intersections for strength. Prime and coat; install with anchors and check the panel doesn’t twist before final tightening.
Skip thisDon’t mix bar sizes randomly — different thicknesses create uneven box sizes that look sloppy.
5. Half-Moon Cutout Scroll Bars (Minimal, Not Ornate)
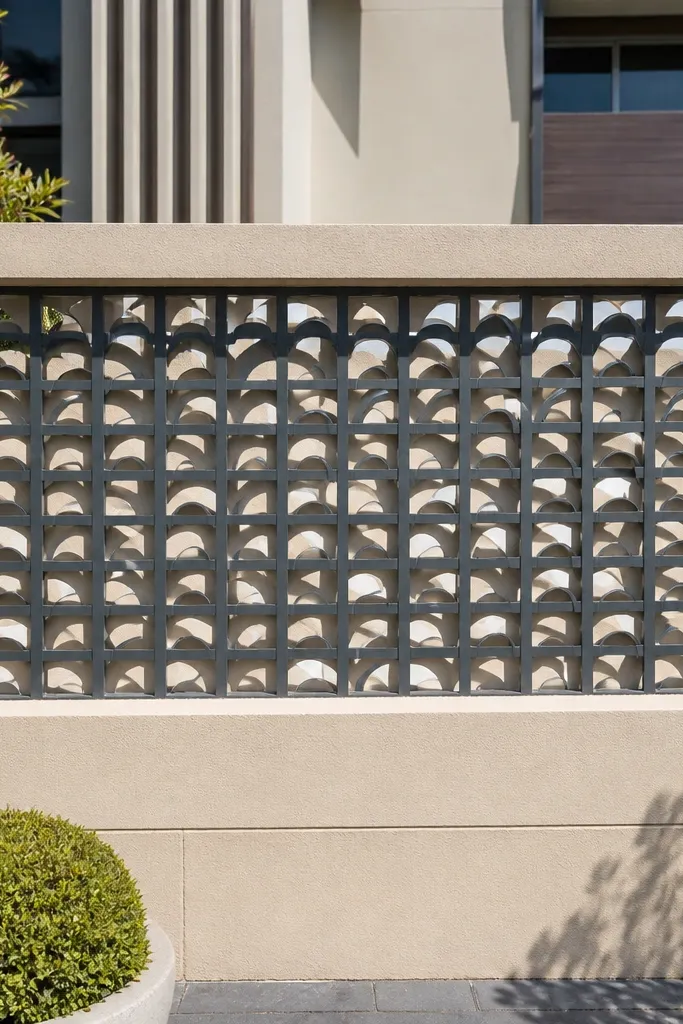
This design gives you a decorative look while still keeping privacy. The half-moon cutouts break up the straight line of sight and create a patterned shadow on the wall behind. It’s not heavy like fully ornamental scrollwork, so it stays airy and doesn’t feel closed-in. From a distance, it reads as a clean pattern; up close, the cutouts add texture. Choose this if you want something that looks traditional at the edges but stays modern in spacing.
Editor's noteMake a jig for the semicircle position so every cutout sits at the same height.
Start with a frame and vertical bars. Weld semicircle plates or punched half-moon rings to the bars at regular intervals, spacing them about 120-160 mm vertically. Keep the clear gap between vertical bars at 25-35 mm. Use consistent thickness for the semicircles so the cutout edges look crisp. Prime, then paint with a smooth finish; install and seal the mounting points to prevent rust creep.
Skip thisDon’t use thin, flimsy semicircles — they warp and the pattern becomes uneven.
6. Vertical Bars with Top Crown Border and Side Ribs
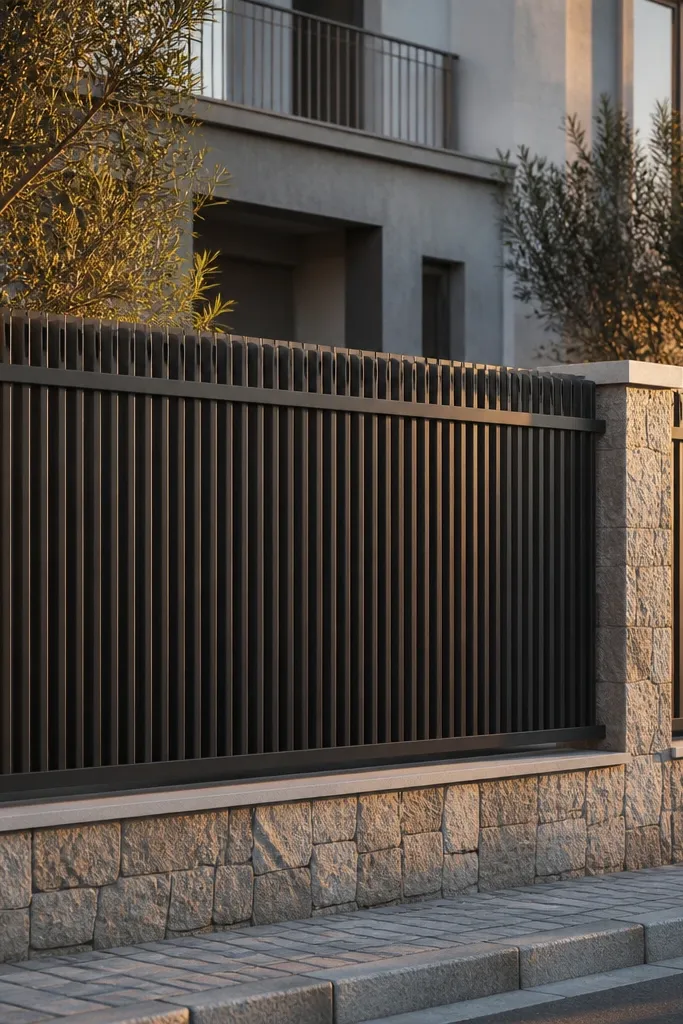
A crown border makes the whole compound wall look finished. The vertical bars keep privacy practical, while the top rib pattern adds height and structure visually. This is a strong choice if your wall height is average and you want it to look taller and more intentional. The crown also gives you a clean place to hide small welding imperfections under a thicker top rail. It’s a good balance between simple and decorative.
Build the main rectangular frame and weld vertical bars with 25-35 mm clear gaps. Add side ribs using 25x25 mm square tube or thick strip, placed flush with the frame edges. For the crown, weld repeating U-shapes or a continuous thick top rail that steps up by 30-50 mm at intervals. Grind sharp welds, then prime and coat. Install with anchors and keep a uniform 10-15 mm gap between grill and wall so water doesn’t trap behind it.
Use a thicker top rail (at least 40-6 mm strip) — it makes the entire grill look straighter and sharper.
Avoid thin crown pieces — they make the top look flimsy and reduce privacy impact.
7. Dual-Tone Privacy Grill (Dark Frame, Light Interior Bars)
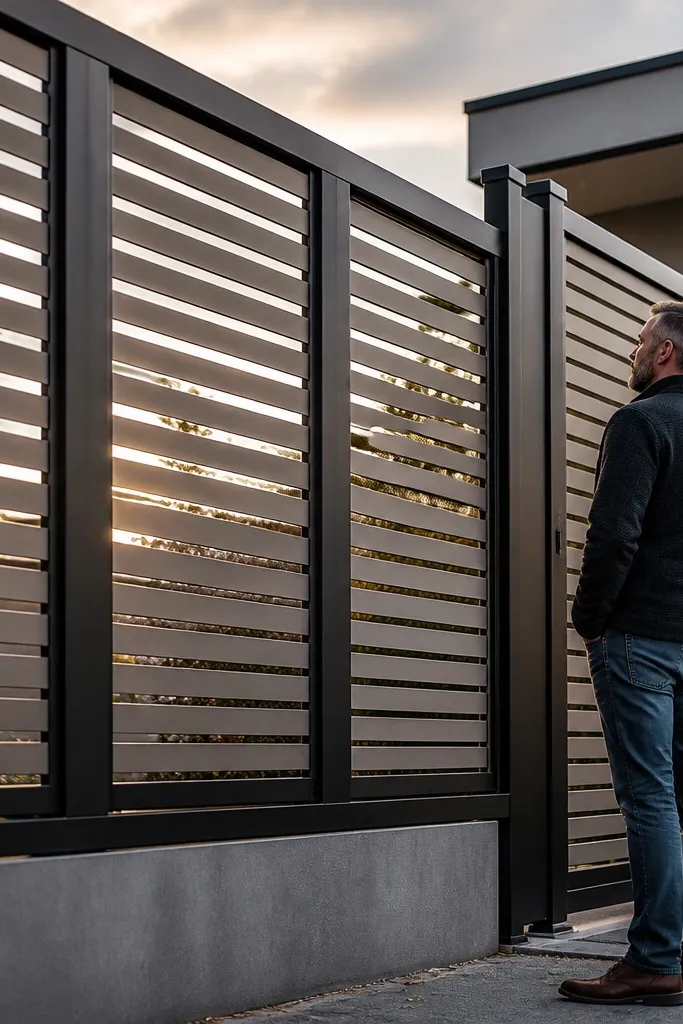
Dual-tone grills look expensive because your eye reads structure first. A dark frame with lighter interior bars creates contrast, so the pattern stays crisp even in low light. Privacy is still real because the bar spacing stays in the privacy range; you’re just changing the visual weight. This design works especially well when your compound wall is in off-white, beige, or light grey masonry. It also photographs well because the contrast makes the grill lines pop.
Editor's noteUse matte finishes for both colors; glossy coatings show welding marks and patching more easily.
Choose two coatings: dark powder coat for the frame and a lighter color for interior bars. Build the frame and weld vertical bars with 20-40 mm clear gaps. Mask the frame edges carefully before spraying or powder coating so the interior bars stay clean. After coating, assemble the panel and install with consistent shims at each corner. Seal any drilled holes so the metal doesn’t rust at the anchor points.
Skip thisDon’t pick two colors that are too close in shade — weak contrast makes the pattern look flat.
8. Vertical Bars with Horizontal "Breather" Bands

Horizontal bands add a graphic look and improve privacy in a different way. They cut the eye path across the grill, so even if someone looks straight, the bands interrupt what they can see. The vertical bars keep airflow, but the bands make the structure feel layered. This is great for people who want privacy but also want the grill to look decorative rather than plain. It suits courtyards and side walls where you want a patterned silhouette.
Editor's noteKeep band thickness consistent — uneven band height creates a wavy look from the road.
Make a frame and weld vertical bars with 25-35 mm clear gaps. Add horizontal breather bands using 25-40 mm wide flat strip at two or three heights, spaced 250-400 mm apart. Weld the band to each vertical bar so it locks the panel square. For a cleaner look, keep the band edges aligned to the frame and use the same thickness throughout. Prime and coat, then install and check the panel sits flush without gaps at the edges.
Skip thisDon’t use too many bands — it becomes visually cluttered and reduces airflow.
9. Diamond Infill with Vertical Guard Bars

Diamonds give you privacy without the heavy look of full lattice. When you combine vertical guard bars with diamond infill, you get a layered grid that blocks straight sightlines and looks crisp from different angles. The diamond pattern also throws interesting shadows on the wall behind, which makes the grill feel more “designed.” This works well for front boundaries where you want a standout aesthetic but still need practical screening. The mix of verticals and diamonds keeps airflow decent.
Build a frame and weld vertical bars at 25-35 mm clear gaps. Then add diamond infill using 12-16 mm bars or 10-12 mm strip cut into consistent lengths. Weld the diamond corners to the vertical bars so every diamond is the same size, around 80-120 mm across depending on your panel width. Start by welding one diamond row fully, then use it as a reference to continue the pattern. Prime, coat, and install with rigid anchoring at corners.
Make one diamond on a flat surface and use it as your measuring template for every repeat.
Don’t let diamonds “float” — if corners aren’t welded to verticals, the panel will flex and look crooked.
10. Horizontal Slab-Style Grill with Narrow Vertical Posts
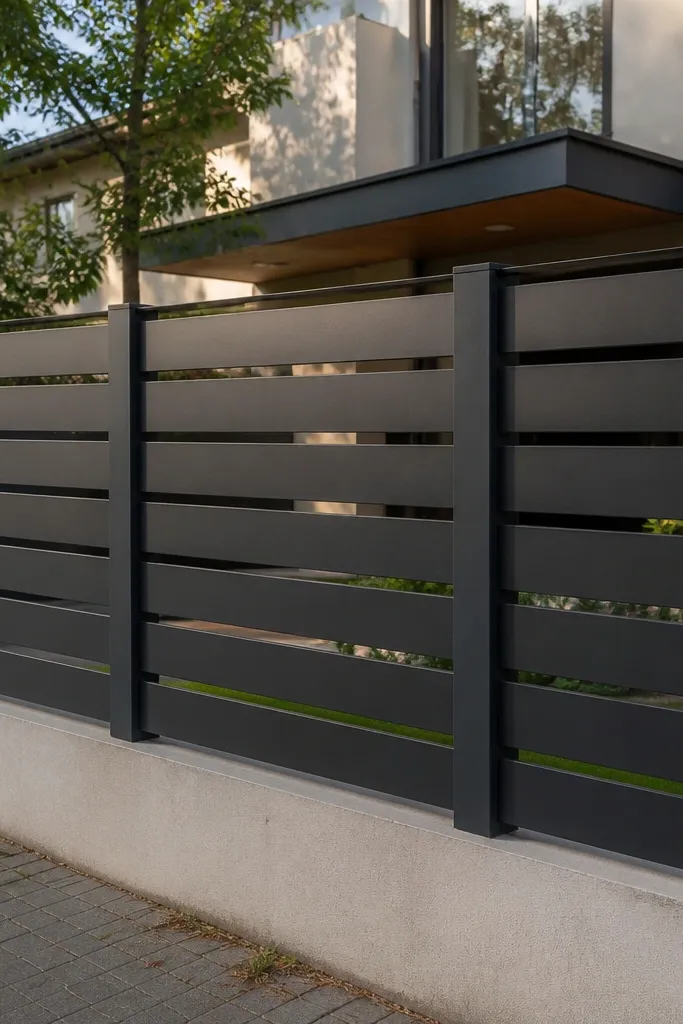
This is a privacy grill that looks architectural. Horizontal slabs read modern, and the narrow vertical posts break visibility in segments so it doesn’t feel like a flat fence. The trick is keeping the vertical posts spaced enough to allow air but close enough to block direct viewing. From the street, it looks like a structured wall detail instead of a basic grill. It suits homes with horizontal lines in their gate or window frames.
Frame the panel and install narrow vertical posts first, leaving 25-40 mm clear gaps. Add horizontal bars using flat strip or square tube, welded to each vertical post. Keep the horizontal spacing around 120-180 mm so the grill blocks sightlines while still breathing. Use a spacer jig for horizontal bar heights to prevent drift. Prime and coat; install with anchors and a level check across the top rail.
Use a long straightedge across the front during welding — it saves you from a subtle wave that shows up in photos.
Avoid wide horizontal gaps — they turn into “windows” for visibility.
11. Geometric Circle Rings Around Vertical Bars

Circle rings add a playful geometric look, but they still work for privacy when spacing is controlled. The rings interrupt sightlines and create layered shadows, so the grill looks more interesting than a plain grid. This design is photogenic because circles catch light differently across the day. It’s a good pick for corner compounds where you see the grill from multiple angles. Keep the ring size moderate so it doesn’t create large open views.
Start with vertical bars in a frame with 25-35 mm clear gaps. Weld circular rings using 10-12 mm strip, centered on each bar or between two bars depending on your pattern. Keep ring outer diameter around 90-120 mm and repeat every 250-350 mm vertically. Tack all rings first, then fully weld after you confirm the circle alignment. Prime and coat; install with proper spacing from the wall so water doesn’t sit in the back.
Use a consistent ring template — circles that vary in diameter look uneven quickly.
Don’t go too big on rings — large circles create clear “holes” for viewing.
12. Serif-Style Vertical Bars with Small Cross Caps

This one looks like typography turned into metal. The vertical bars have small cross caps that create a clean serif effect and make the top edge look intentional. Privacy stays practical because the gaps between bars remain within the screening range. It’s a great option if you want a design that looks neat even when you’re standing close. The simple caps also hide minor welding scars better than a fully flat top rail.
Frame the opening and weld vertical bars with 20-35 mm clear gaps. Add a cross cap to every bar using 10-12 mm strip cut into consistent lengths, like 30-45 mm wide caps. Place the caps at a fixed height so the top line stays straight. Tack, align, then weld all caps, focusing on clean corner welds. Prime and coat; install and check the top line is level before final tightening.
If your bars are slightly off-square, fix it with cap alignment — it’s easier to adjust at the top than across the full height.
Avoid random cap spacing — inconsistent caps make the design look DIY-chaotic.
13. Wedge Privacy Screen with Horizontal Slits
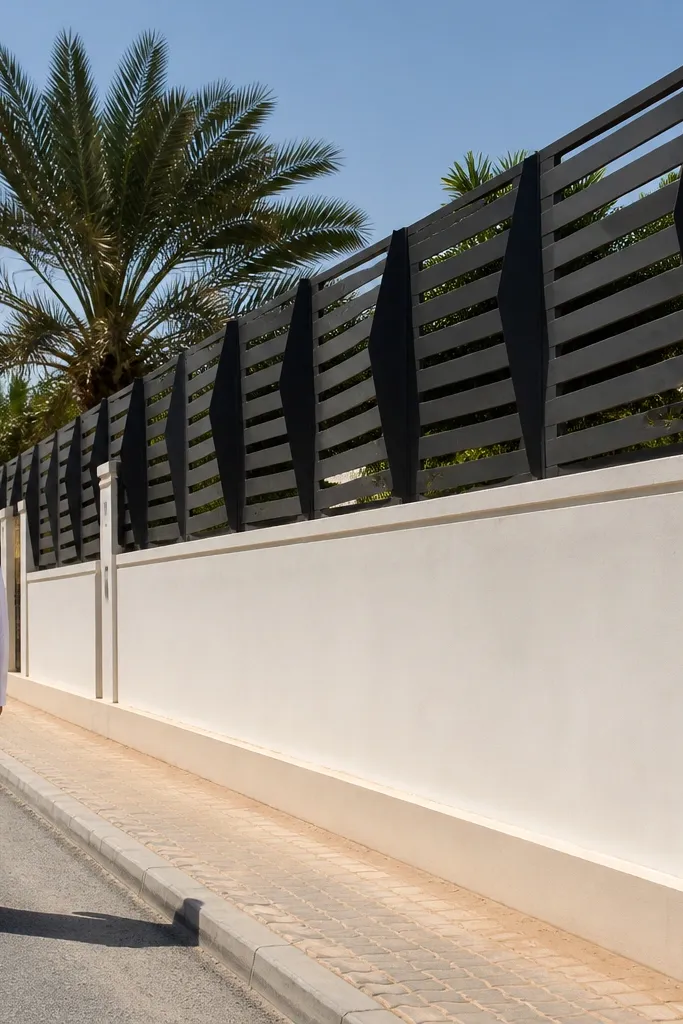
Wedge screens look sleek and they block visibility in a way that flat grills can’t. The wedges create short, angled sight breaks so someone can’t see straight through easily. You get airflow through the slits, but your view lines get chopped up by the wedge angles. This is a strong choice for hot climates where you want breeze and privacy without adding solid panels. It also looks modern against brick or stone.
Build a frame and install vertical supports first, keeping 25-35 mm clear gaps. Fabricate wedge pieces from flat strip or small angle sections, with a consistent angle, then weld each wedge so it alternates direction row by row. Keep horizontal slit height around 50-80 mm so openings stay narrow. Use a flat welding table or straight jig to hold each wedge row at the same projection distance. Prime and coat; install with spacers so the wedge shadows land evenly.
Clamp the first two rows and use them as your reference for the rest — wedge screens drift fast if you don’t lock alignment early.
Don’t mix wedge angles — one off-angle row ruins the clean pattern.
14. Tall Rectangular Frame Inserts (Panelized Privacy)
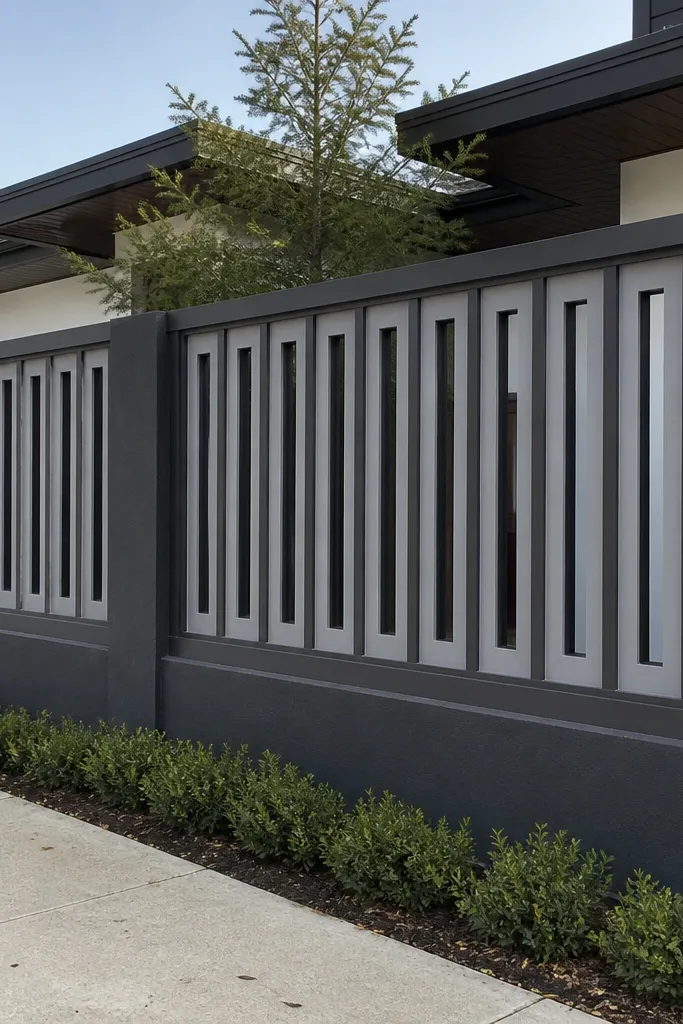
Panelized inserts make the compound wall look structured, like it’s been designed in sections. Each tall rectangle creates a privacy “cell” that interrupts sightlines better than a single flat grid. The look is crisp because the borders are thick and the interior openings are consistent. This design suits larger wall stretches because it breaks the monotony into readable blocks. It also makes repairs easier later since you can treat sections as units.
Frame the overall opening first. Then add internal vertical and horizontal rails to create tall rectangles, keeping the interior clear gaps around 25-40 mm. Weld the internal rails square and uniform so each rectangle is the same size. Use a thicker border rail (40-6 mm strip or square tube) around each inset so it reads like a frame. Prime and coat, then install by anchoring at each section border for rigidity.
Measure panel divisions from one side only and mark all internal rails before welding anything.
Avoid irregular rectangle sizes — even small differences show up from the street.
15. L-Bracket Vertical Grid with Hidden Fixings Look
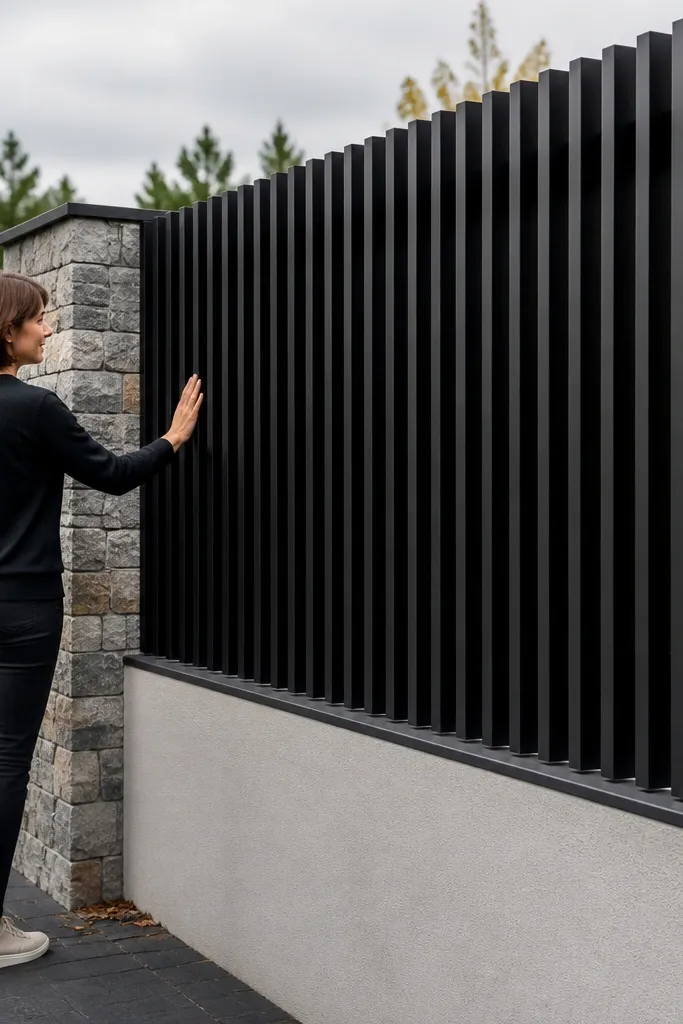
If you care about a clean, “no messy bolts” appearance, L-bracket style grids are a smart visual trick. The angled bracket edges create shadow lines that block viewing better than straight flat bars. The design looks industrial-modern but still feels tidy when the frame is done right. Privacy is achieved through tight clear gaps and the bracket silhouette. This is a good choice for people who want a strong look without heavy ornamentation.
Editor's noteKeep all bracket openings facing the same direction so the shadows look intentional, not random.
Build a main frame and use L-brackets or angle strip for vertical members so the face direction stays consistent. Set clear gaps around 20-35 mm between the bracket faces. Weld vertical brackets to the frame, then add a top and bottom rail to reduce flex. Grind welds lightly where they show, then prime and coat for a uniform finish. Install using anchors from the outside frame — keep fixings hidden behind the frame edge.
Skip thisDon’t leave sharp bracket edges unground — they catch corrosion and look rough.
16. Raised Diamond Grid with Thick Border Rails
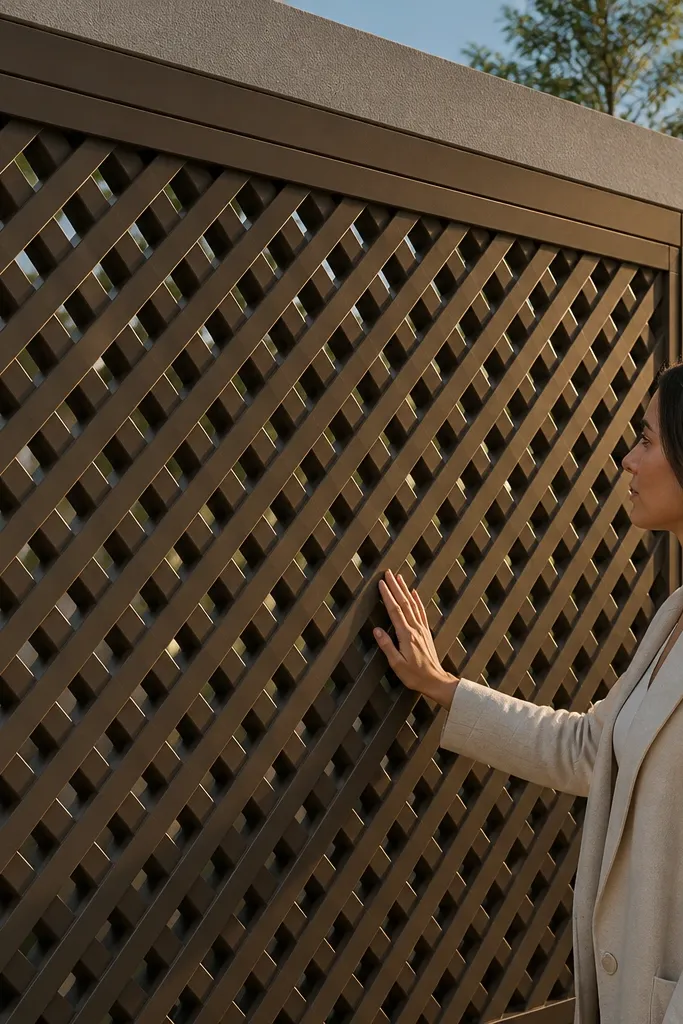
A raised diamond grid looks premium because the diamonds sit on a thicker border system. The thicker rails frame the pattern so it reads as a single designed panel, not a scattered set of bars. Privacy is strong when diamond openings are small and consistent, and the raised look blocks direct sightlines. This design suits compounds with a solid parapet top where you want the grill to feel like it belongs. It also photographs beautifully because the raised borders cast clear shadows.
Editor's noteUse the same diagonal strip length for every piece. Cut repeatably and label bundles so you don’t end up with mismatched diamonds.
Use a thick frame, then add internal diagonal members to form diamonds. Keep diamond clear opening around 70-100 mm depending on your wall width, and keep vertical and diagonal intersections welded firmly. Create the raised effect by using thicker diagonal strips or by welding a second offset diagonal layer that steps out slightly. Tack everything first, then fully weld after checking the pattern is centered. Prime and coat; install with straight shims so the raised edges don’t tilt.
Skip thisSkip the thick border rail — without it, the raised diamond effect looks flat.
17. Vertical Bars with Alternating Decorative Spacers
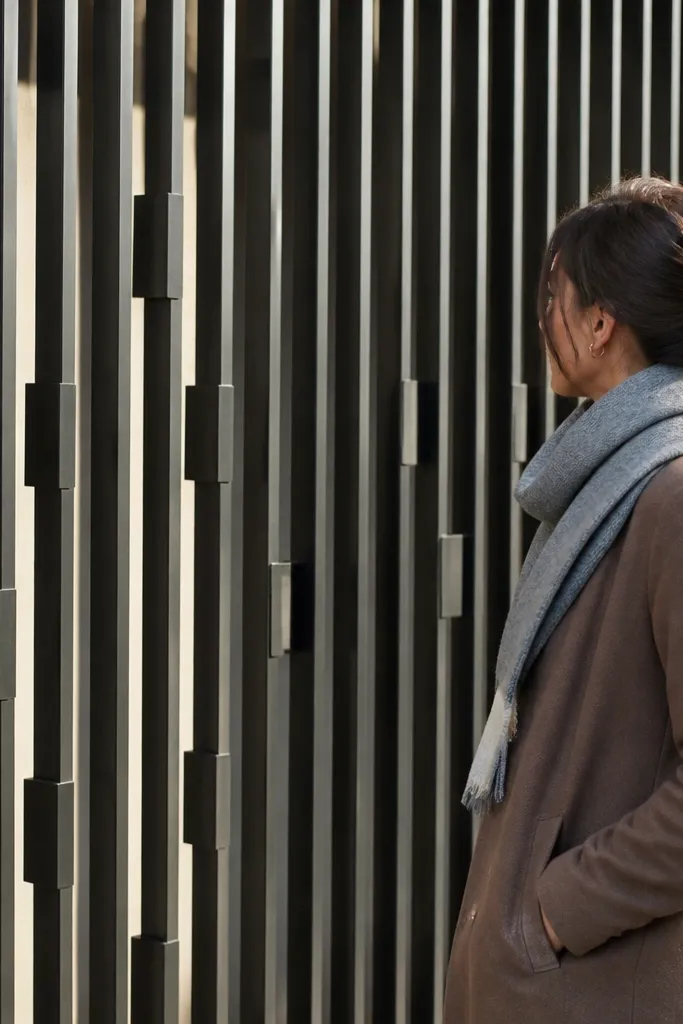
This design uses simple “spacer blocks” between bars to create a pattern that looks intentional. The blocks break the uniform gap and add a tactile rhythm, which improves privacy feel because sightlines get interrupted at multiple points. The grill still stays mostly open, so airflow is decent. Visually, it’s clean and modern — especially if you keep the spacer blocks small and consistent. Choose this when you want privacy that looks more designed than a straight slat wall.
Frame the opening and weld vertical bars with a base clear gap around 25-35 mm. Add spacer blocks — small rectangles or short tabs — between selected bars at fixed vertical intervals, like every 200-250 mm. Weld the blocks cleanly so they don’t create burrs. Keep block size consistent, around 20-30 mm tall and 10-15 mm thick. Prime and coat; install and seal mounting points to prevent rust around weld edges.
Make spacer blocks from the same stock and chamfer edges slightly so the finish looks smooth.
Don’t place blocks randomly — a steady interval is what makes it look designed.
18. Twin Rail Privacy Grill with Narrow Side Lattice
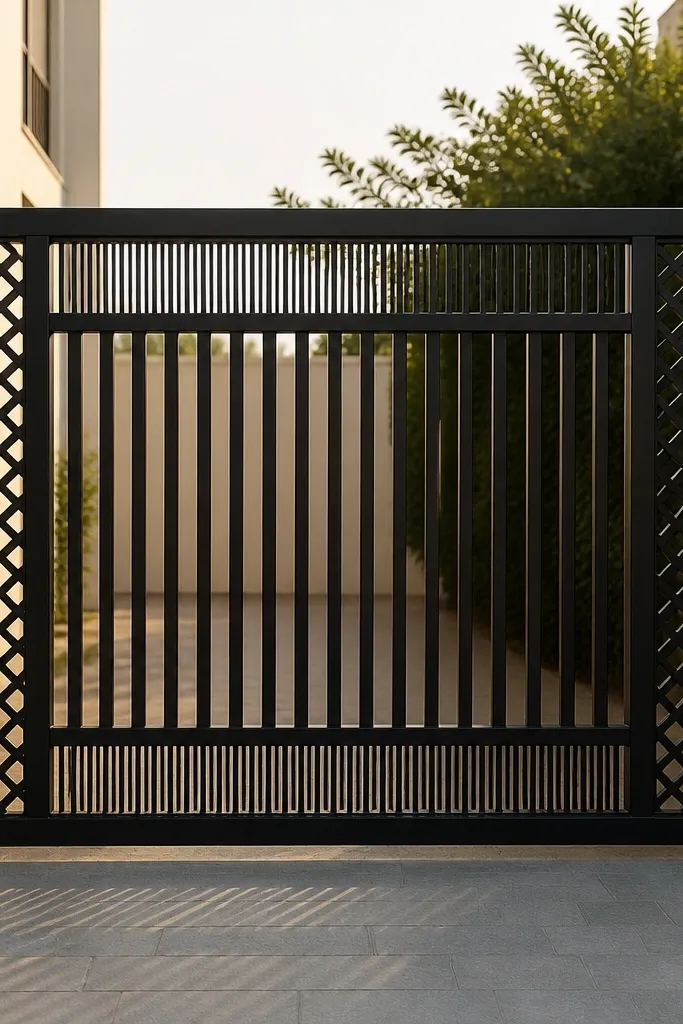
Twin rail designs look sleek because they frame the main privacy area in two horizontal bands. Add a narrow side lattice and you get a “built-in” aesthetic that looks good even if the wall has a plain finish. Privacy is strong because the main center area uses tight vertical gaps, while the side lattice blocks peripheral sightlines. This is a great option for homes with gates and windows that already use horizontal lines. The whole panel looks structured and tidy from the street.
Build a main frame and install vertical bars in the center with 20-35 mm clear gaps. Weld two horizontal rails across the panel using thicker strip or tube, placing them at heights that match your compound wall proportions. Then add narrow side lattice members using smaller bars and keep their clear gaps around 25-40 mm. Tack, align, then weld everything in a sequence that avoids warping — weld rails first, then lattice, then remaining verticals. Prime and coat; install with even shims so the twin rails sit level.
Match rail heights to your window sill line so the grill looks like part of the architecture.
Don’t make the side lattice too wide — it can reduce airflow and make the panel look heavy.
19. Triangle Spear Pattern with Tight Vertical Spacing
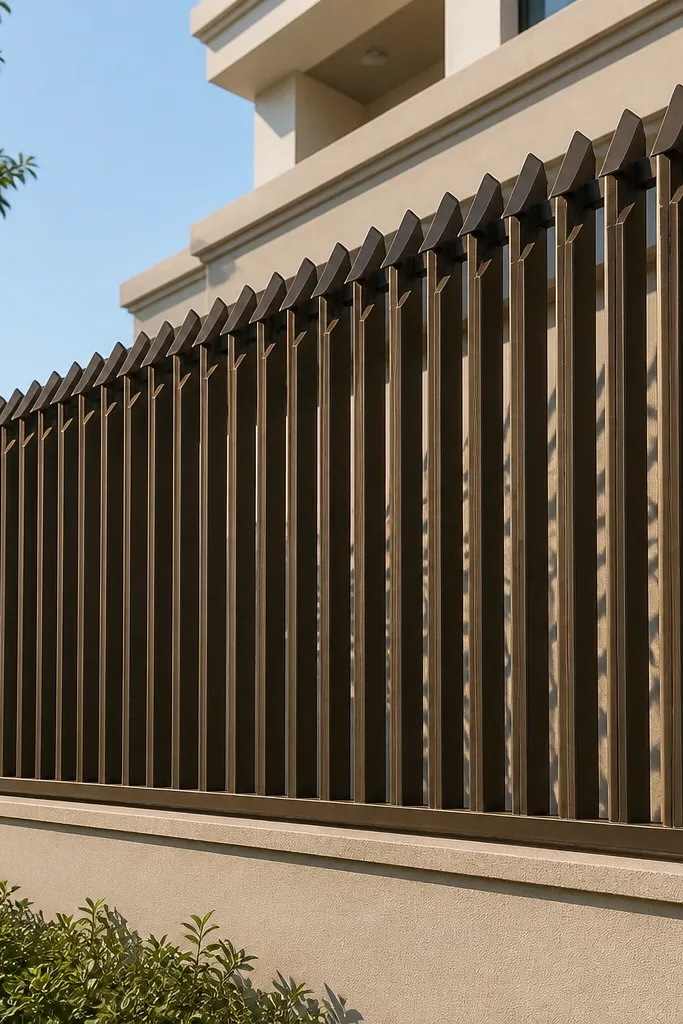
Triangle spear patterns add a sharp, protective look while still letting air through. Privacy improves because the spear tips create angled breaks and the tight vertical spacing blocks direct lines. The design is bold without being ornate, so it looks good on modern as well as traditional compounds. It also frames the top edge in a way that makes the grill feel secure. If your compound wall is tall and plain, this pattern gives it a strong silhouette.
Editor's noteUse a single cardboard or plywood template for triangle shape so every tip matches.
Frame the opening and weld vertical bars with clear gaps around 25-35 mm. Cut triangle spear tips from flat strip and weld one tip to each bar at regular intervals, usually near the top and then repeating every 250-350 mm. Keep spear base width consistent and align all tips so the top row forms a straight line. Add a top cap rail to lock alignment. Prime and coat; install and ensure the tips don’t face outward with sharp burrs — grind edges smooth before coating.
Skip thisAvoid rough weld beads near spear tips — they snag and show through the coating.
20. Ladder-Style Privacy Bars with Offset Rungs
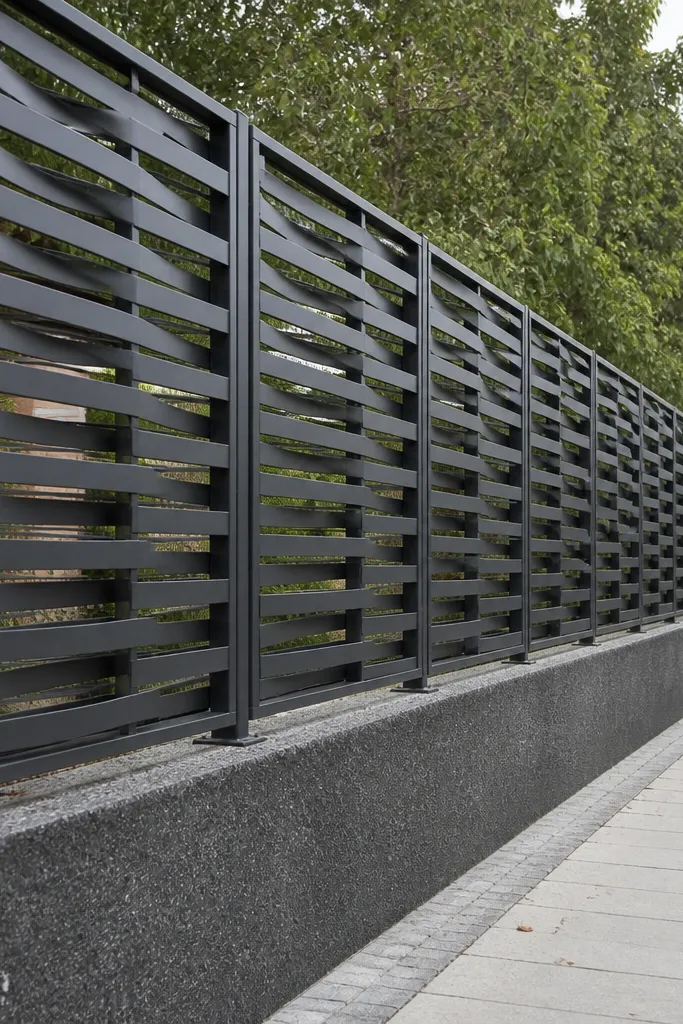
Ladder-style grills look engineered and they give privacy through both spacing and offset rungs. Straight verticals alone can still feel see-through; adding offset rungs chops the sightline in segments. The visual strength is in the repeated ladder rhythm. It’s a good pick for long boundary walls because the pattern keeps moving visually without getting busy. Choose this if you want a clean, modern industrial look.
Build a frame and install vertical bars at 25-35 mm clear gaps. Add rungs using flat strip or square tube, but offset each rung by 10-15 mm from the one above or below. Weld the rungs to vertical bars first on one side, then clamp and weld the other side so the panel stays flat. Keep rung spacing around 120-180 mm vertically. Prime and coat; install with anchors at corners and along rails to prevent flex.
Tack rungs in place first, step back, and check the offset rhythm before full welding.
Don’t keep rungs perfectly aligned — the offset is what creates the privacy effect.



