
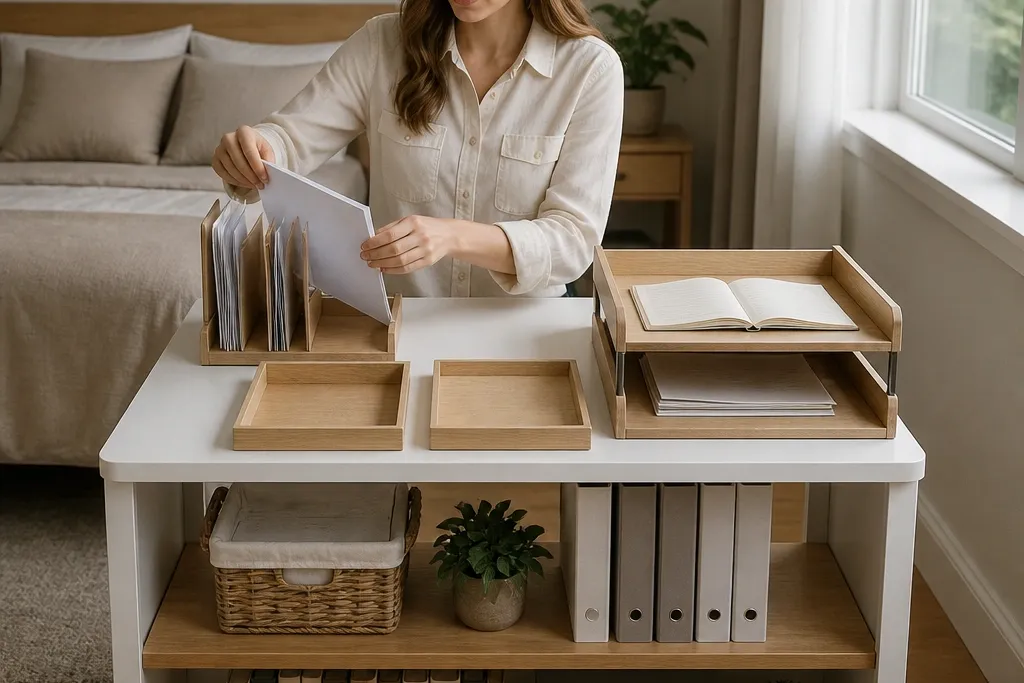
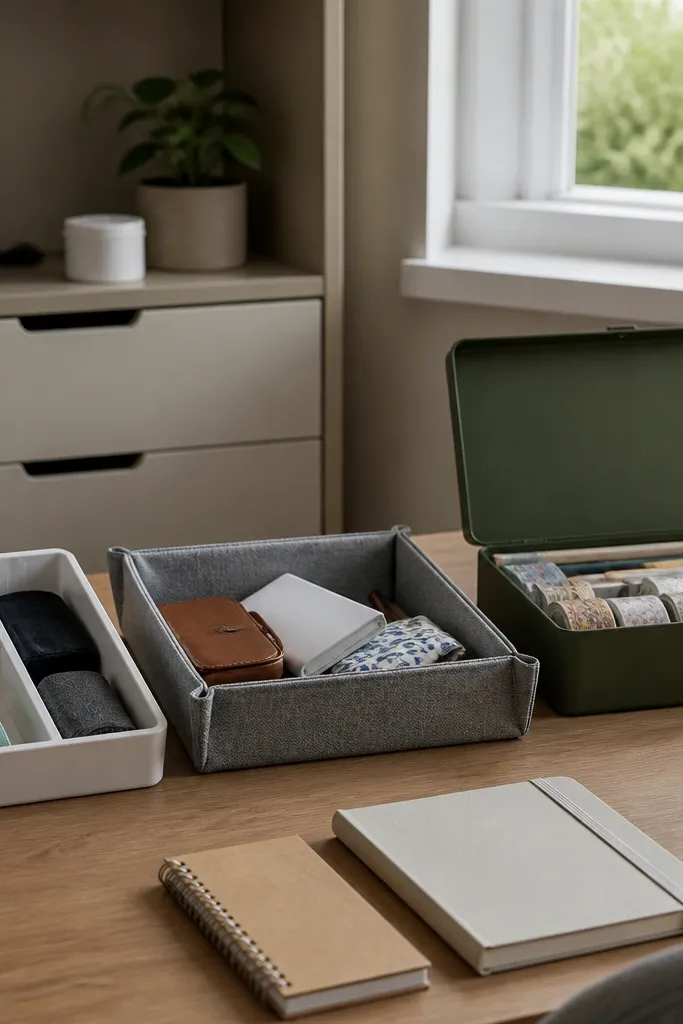
1. Two-tier letter tray for daily notebooks
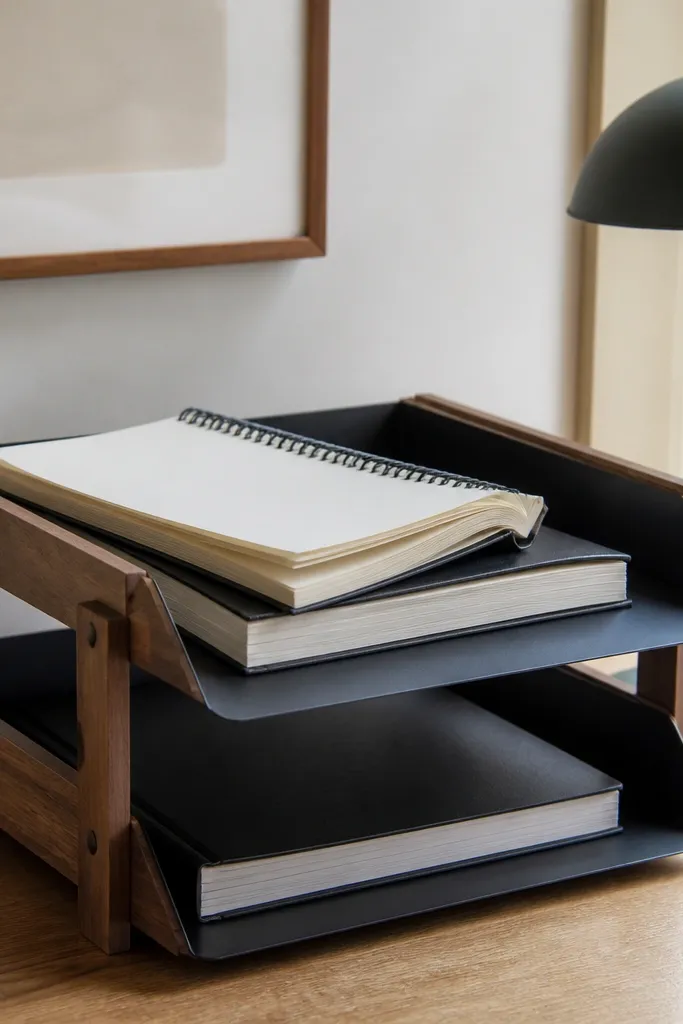
This setup fixes the “open notebook everywhere” problem by giving your current materials a front-and-center home. A two-tier letter tray keeps paper from sliding and makes the desk look styled because the paper edges align. Put your active notebook on the top tier and keep the next one behind it, so your surface stays calm. It also helps you stop re-grabbing the same items because everything you need for today is in one visible stack. Skill level is beginner-friendly, and the look is clean even if you keep a few pens nearby.
Start by measuring your desk depth and choosing a tray that leaves at least 2 inches of writing space in front of it. Place the tray at the back edge of your writing area, centered with your chair position. Add a bookend or folded paper divider so the notebook edges stay straight on the top tier. Finish by sticking a small label under each tier using plain paper and clear tape so it stays neat and removable.
Editor's noteUse matte labels instead of glossy ones — glare makes the desk look messy in photos.
Skip thisDon’t stack loose papers beside the tray; they defeat the alignment.
2. Clear acrylic pen wall with a slanted base
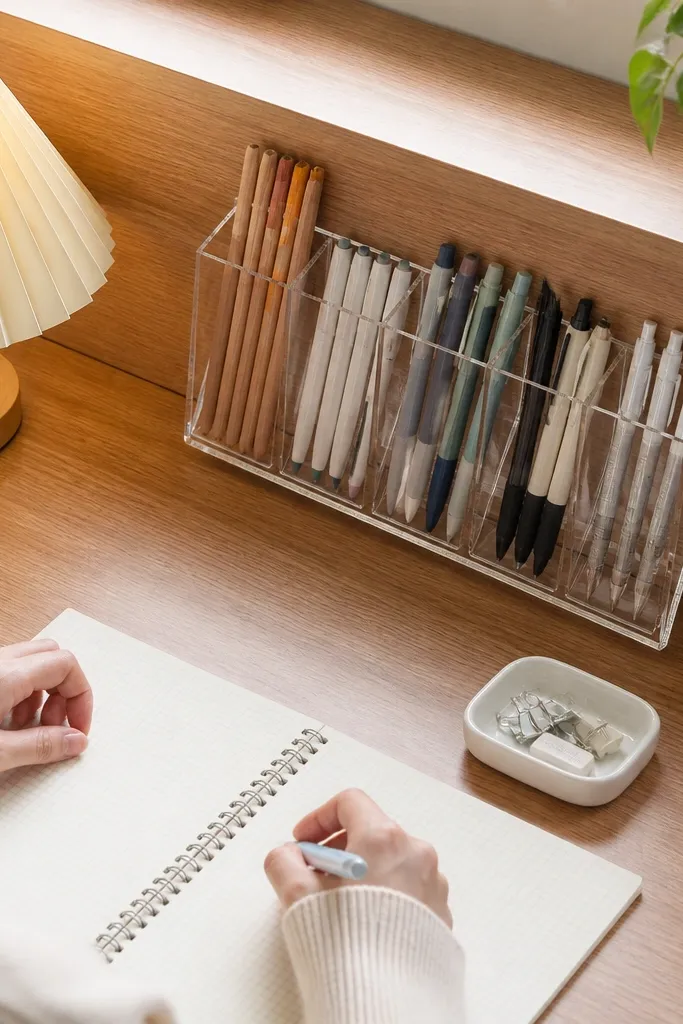
A slanted pen holder looks sharp because the pens face forward and the silhouettes line up. Clear acrylic also shows exactly how much you have, which reduces the “I swear I have another marker” scramble. Keep it simple: pens and pencils only. Add a separate small dish for clips or erasers so the top stays tidy. This is a strong choice if you want your desk to look organized without hiding everything.
Pick an acrylic holder with a flat back and a slanted front so pens don’t tip forward. Place it near your dominant hand, about 6-8 inches from your writing spot. Sort pens by type — thin pens on the left, thicker markers on the right — so the wall looks intentional. If your holder doesn’t include a base lip, add a thin silicone strip to stop sliding.
Editor's noteWipe acrylic with microfiber and a tiny bit of rubbing alcohol to remove fingerprints.
Skip thisDon’t mix pens with sticky notes in the same container; it looks chaotic fast.
3. Charging dock rail with cable clips

Cable clutter is the fastest way to make a desk look messy, even when everything else is perfect. A charging dock rail gives your chargers one clean path and keeps plugs from dangling across the work zone. The look is sleek because cables run along the desk edge and disappear into clips. You also get a practical benefit: you can unplug without yanking the whole setup. Build this if your desk has a lot of charging points or if you rotate between phone, tablet, and earbuds.
Mount a slim wood or metal rail along the back edge of the desk using screws and a level. Install two to three adhesive cable clips at measured spacing so each cable has gentle slack, not tension. Place a small dock tray or charging stand under the cable exit point. Route each charger into its own clip line and secure any extra length with a Velcro tie on the underside.
Editor's noteLeave 2 inches of slack at the device end so you don’t stress the charging port.
Skip thisDon’t route cables over the desk lip where they catch when you move your chair.
4. Under-desk pullout for supplies
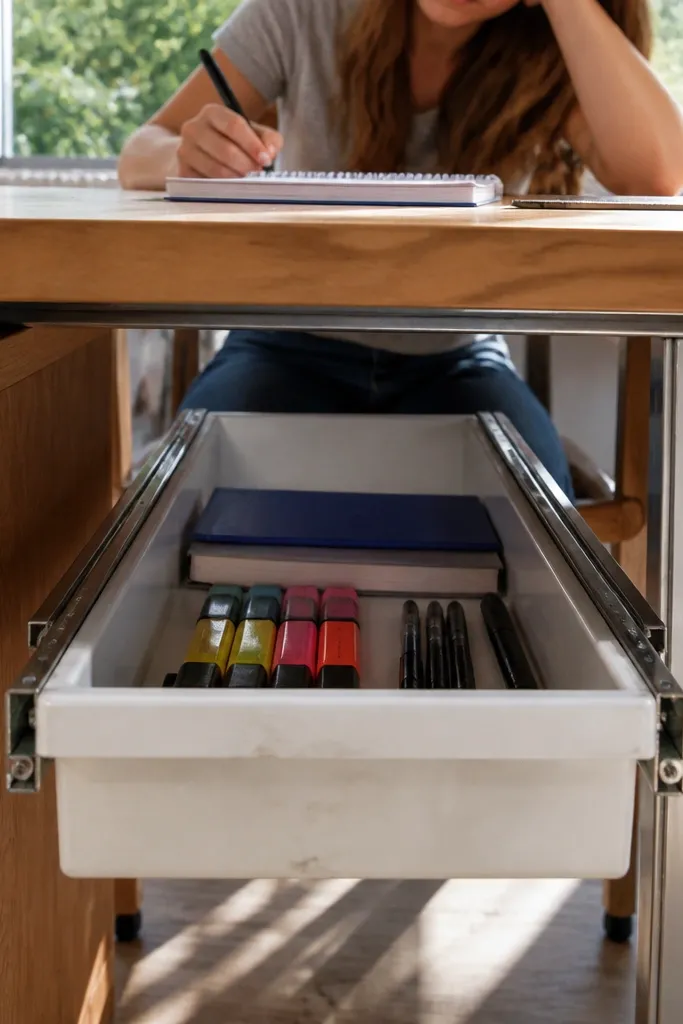
If your desktop looks crowded, the fix is usually under it. A pullout under-desk bin removes bulky supplies from sight while keeping them reachable. This idea is especially good for extra notebooks, highlighters, and backup stationery that you don’t use daily. The aesthetic is clean because your main surface stays clear, and the under-desk drawer adds a neat, furniture-like feel. It’s a mid-level build, but the payoff is huge for anyone with a small workspace.
Measure the clearance under your desk and choose a bin size that leaves at least 1 inch of air for movement. Install two side rails (or drawer slides) and attach them level so the pullout doesn’t bind. Screw a simple handle to the front of the bin and add a stop block so it doesn’t pull out too far. Line the bottom with a thin rubber mat to prevent paper sliding.
Use drawer slides with soft-close if your desk is used daily; it keeps everything quiet.
Don’t place the pullout too far forward; you’ll lose legroom and it will be annoying to use.
5. Wall-mounted pegboard behind the desk
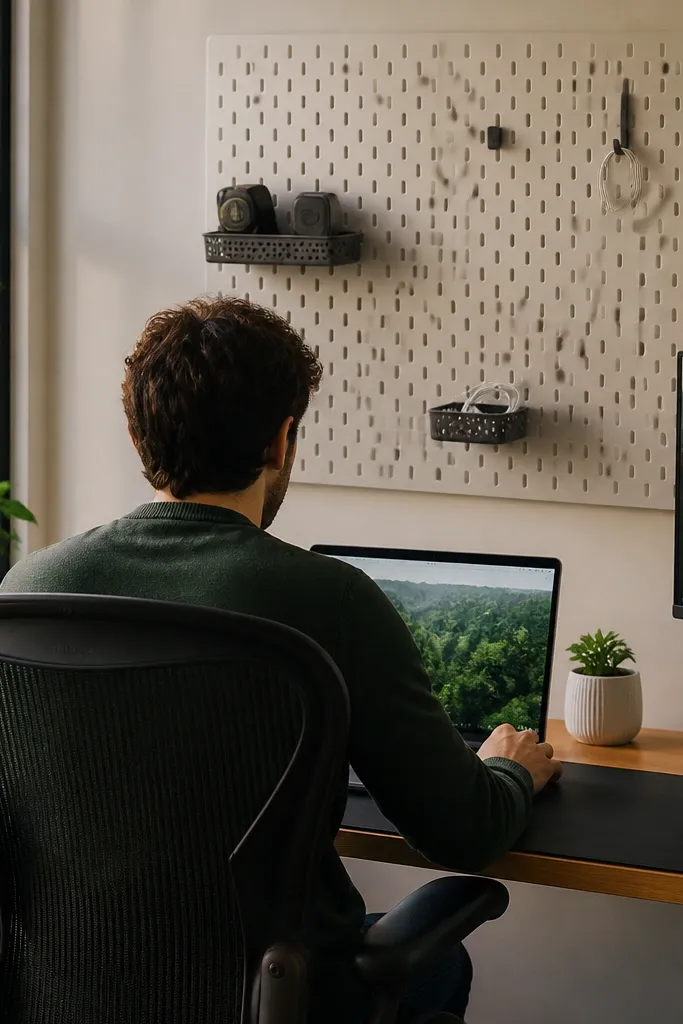
Pegboard behind the desk makes organization look intentional because it turns storage into a visible design. You can hang a few tools and small baskets so your workspace stays light and photo-ready. It also gives you flexibility: swap hooks and baskets as your subjects change. Keep it minimal — a pegboard full of random items looks like a workshop, not a study zone. This setup is great for desks pushed against a wall where you can use vertical storage without sacrificing desktop space.
Mark the wall studs and mount a pegboard using screws, not anchors, for strength. Add 3-5 hooks for everyday tools and two small baskets for sticky notes and small stationery. Keep the baskets at about eye level when seated so you can reach without leaning. Finish by adding a strip of painter’s tape as a “line” to align baskets every time you rearrange.
Editor's noteUse white or light wood baskets on a dark pegboard for high contrast and a cleaner look.
Skip thisDon’t hang heavy items on long hooks; it bends the pegboard and looks sloppy.
6. Notebook spine organizer with vertical dividers
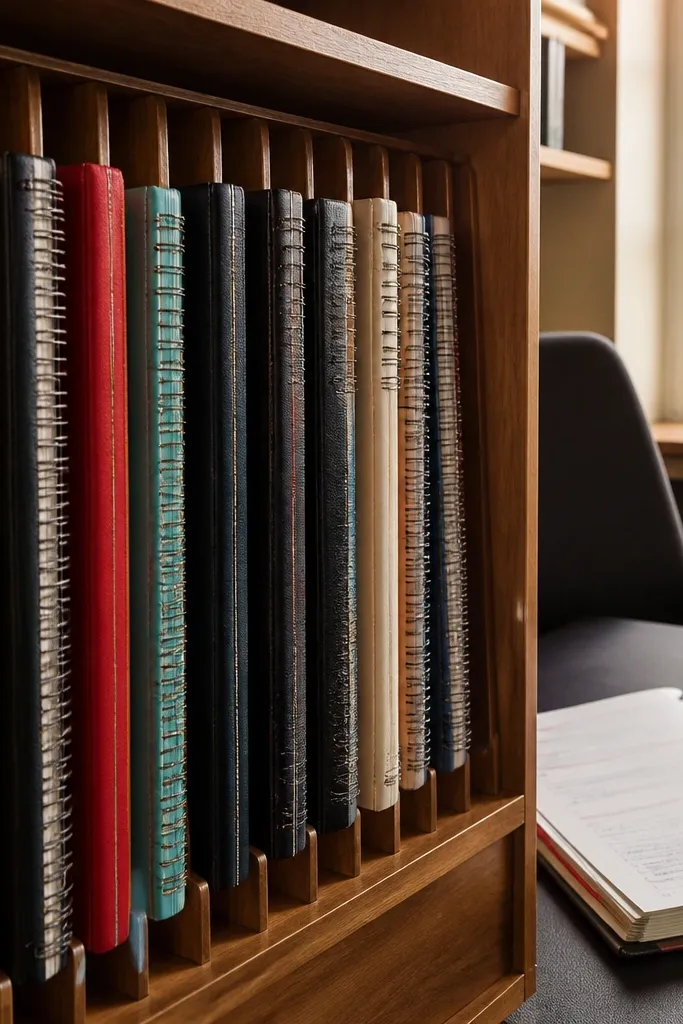
Vertical notebook storage looks clean because you can see spines and keep categories separated. It stops the “stack collapse” where notebooks slide into each other and become impossible to find. Use it for subjects, not for random paper piles. The desk looks curated because the spines form a neat grid. This is a strong choice if you use multiple notebooks at once and want your desk to look like a tidy reading nook.
Build or buy a vertical divider frame that fits your desk width, leaving 1-2 inches at the sides. Create three compartments with dividers spaced to match typical notebook thickness (about 0.75-1 inch). Place the organizer at the back of the writing zone and face the spines outward. Label each compartment with small tabs on the divider tops so you can read quickly without opening anything.
Editor's noteUse thin felt pads at the base so it doesn’t scratch your desk and it stays stable.
Skip thisDon’t cram notebooks tighter than the thickness — they warp and jam.
7. Rotating desktop file holder for active papers
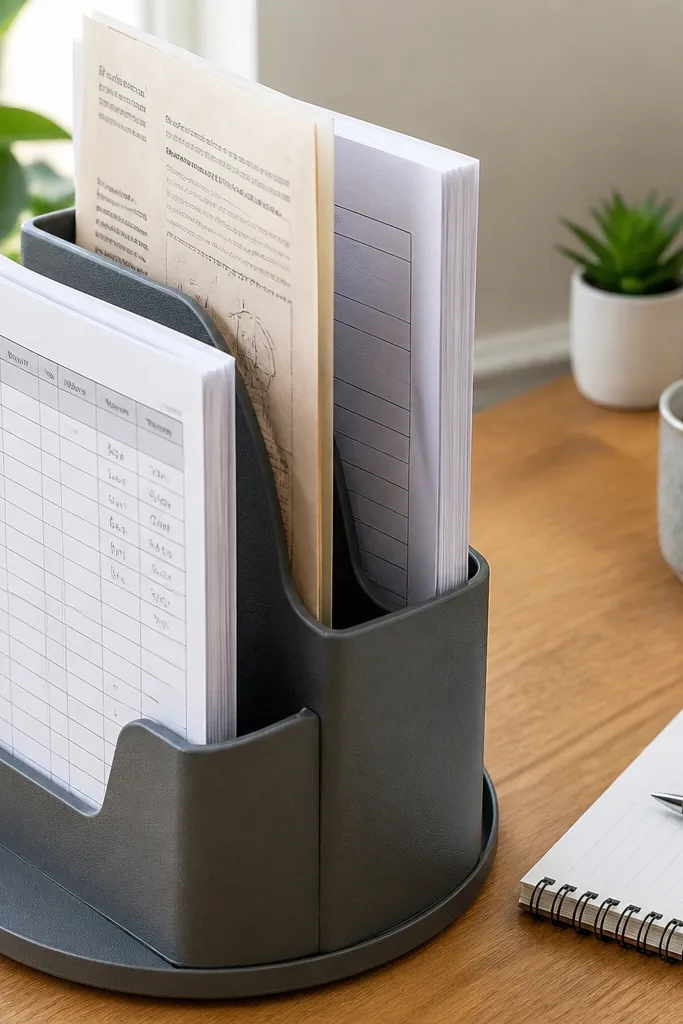
A rotating file holder is the fastest way to keep paper decisions organized without stacking. The three slots make it obvious where something belongs: today, next, and done. It keeps your desk surface photogenic because papers are always upright and aligned. This is ideal for students who handle handouts, printed assignments, and drafts daily. Build the look by keeping only one slot filled at a time if possible.
Choose a rotating organizer with at least three compartments and a stable base. Place it to the right of your writing hand so you can move paper without reaching across. Label each compartment with simple tape tabs, then set a rule: new pages go into today, finished pages get moved to done. Empty done on a schedule so the desk never looks heavy with paper.
Use a thin rubber coaster under the base if your desk is glossy so it doesn’t slide.
Don’t add a fourth “maybe” slot; it turns into a catch-all.
8. Fabric-covered desk tray for small items
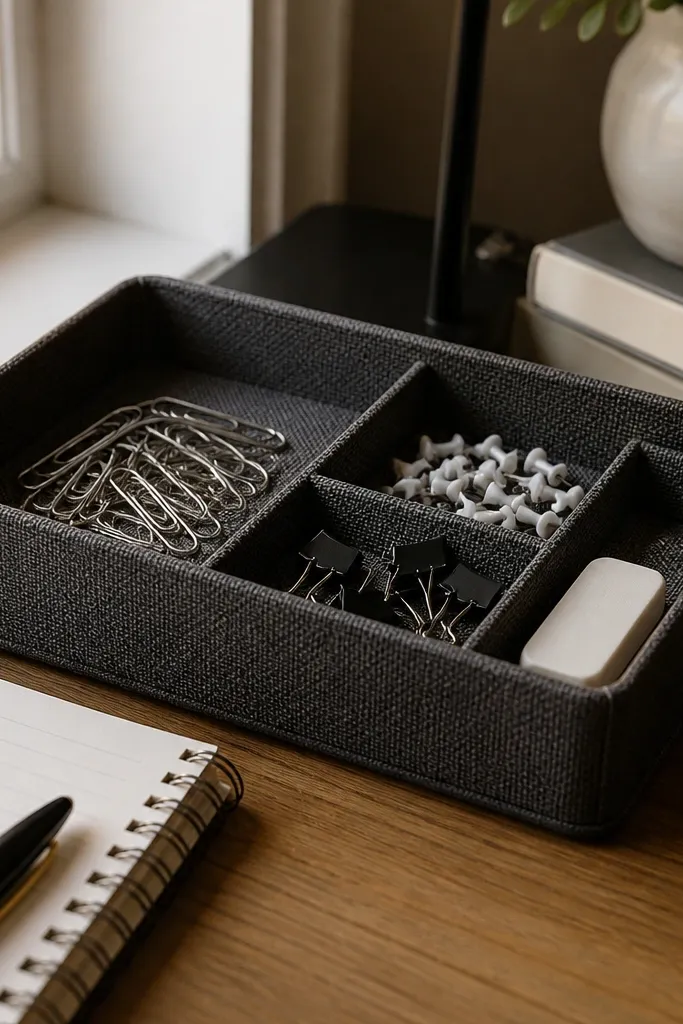
A fabric-covered tray makes small stationery look intentional instead of random. The texture hides tiny scuffs and makes everything feel softer visually, which is why it looks good in photos. Keep it for items that would otherwise roll around: paper clips, erasers, binder clips, thumbtacks. This also prevents your desk from turning into a “hard plastic” mess when you add acrylic organizers. It’s easy to make and it gives you a designated landing zone for small stuff.
Cut a tray liner from cotton canvas or linen to match the tray base dimensions with 1 inch extra on each side. Wrap the fabric tightly around the tray edges and glue it underneath using fabric glue. Add small compartments using thin foam board strips if you want categories. Place the tray near your desk edge so it doesn’t steal writing space.
Editor's notePick fabric in a neutral tone like cream, oatmeal, or charcoal to keep the palette calm.
Skip thisDon’t use bright patterns; they make the desk feel busier than it is.
9. Lidded storage box for art supplies with labeled lid
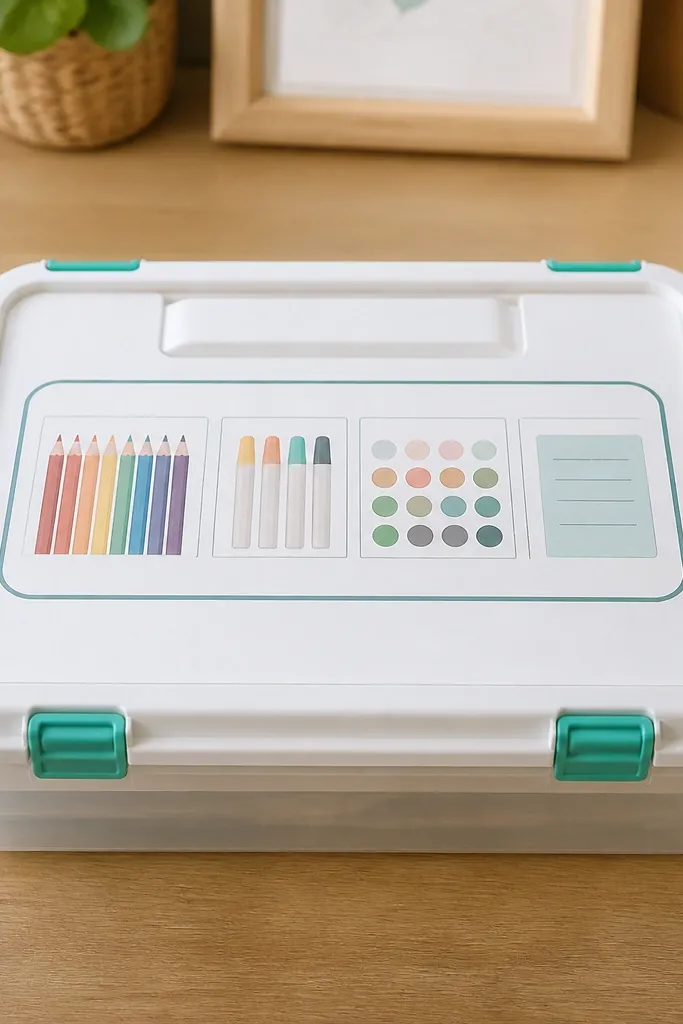
If you use markers, colored pencils, or craft tools, open bins make your desk look messy fast. A lidded box hides clutter and keeps the front of the desk clean, while the labeled lid keeps you from rummaging. This is a great idea for mixed-use desks where you study and do creative work. The look is neat because the lid creates a visual boundary. Choose a box size that fits under your main tray or beside your notebook organizer.
Choose a box with a flat lid and measure its top area so you can label it clearly. Add foam or a simple divider inside so pencils don’t roll and markers don’t leak. Label the lid with a subject tag using thick paper and clear tape. Place the box against the back edge and use it as your “in-progress” storage for the week.
Editor's noteUse thin plastic dividers instead of cardboard if you store waxy items or markers.
Skip thisDon’t overfill; lidded boxes still look bad when they bulge.
10. Tri-slot desk organizer for pens, sticky notes, and rulers
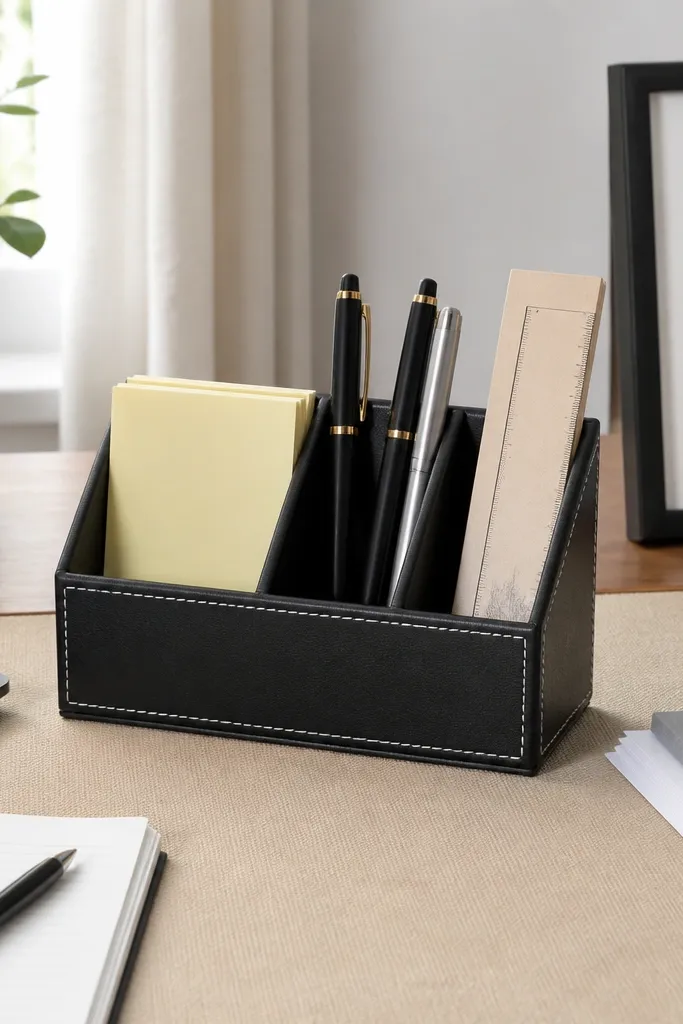
A tri-slot organizer looks clean because it creates three clear shapes on your desk. It also solves the classic problem of sticky notes sliding around and rulers getting buried under papers. Keep sticky notes upright in one slot, pens in another, and a ruler or small notebook in the third. The desk stays photogenic because the items don’t spill into random piles. This project is simple and works well for desks used for both writing and planning.
Build a small base from plywood or thick MDF about 10-12 inches wide and 3 inches tall. Create three compartments using wood dividers: two shallow slots for sticky notes and pens, and one deeper slot for a ruler. Sand edges smooth, then paint or stain to match your desk. Finish by adding felt pads underneath so it grips and protects the surface.
Editor's noteAdd a tiny lip on the sticky note compartment so notes don’t fall forward.
Skip thisDon’t make the slots too tall; wasted height looks bulky on the desk.
11. Magnetic strip for metal tools and scissors
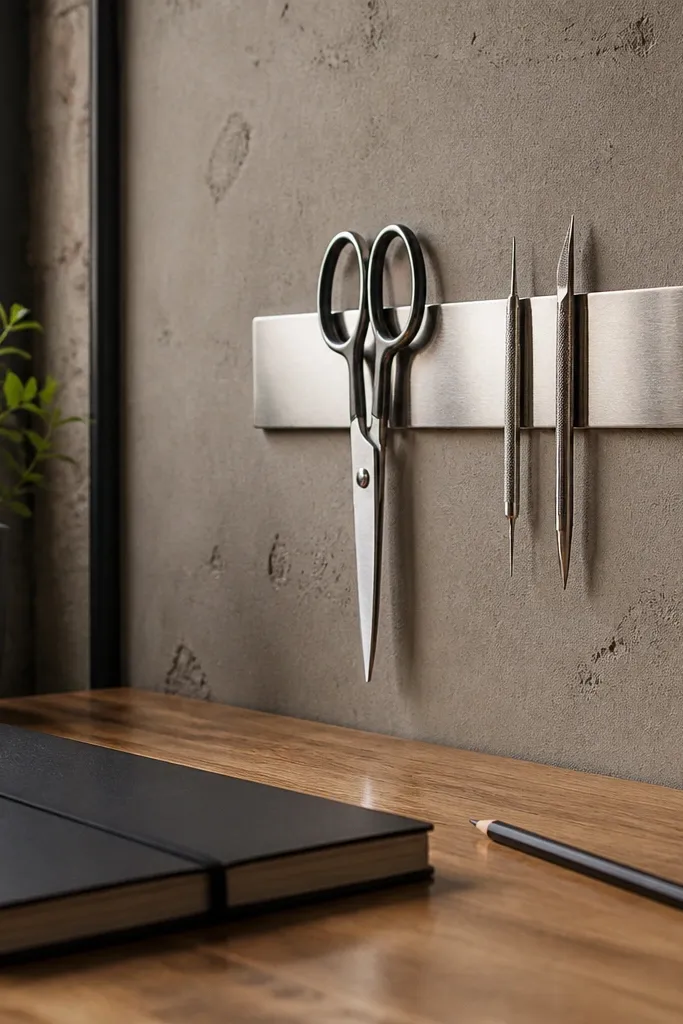
Metal tools look sharp when they hang straight. A magnetic strip turns scissors and small metal tools into clean vertical lines, which makes the desk look designed instead of cluttered. You also reduce desk top digging because everything is visible. This works best when your tools are mostly metal and you can keep them in one category. It’s a great choice for small desks where surface area is precious.
Mount a magnetic strip on the underside of a shelf or on the wall behind the desk using screws. Keep the strip length to the tools you actually use daily, usually 12-18 inches. Place scissors, a small cutter, and metal rulers on the strip in a consistent order. Add a small foam pad under the strip if you’re mounting to prevent vibration and rattling.
Editor's noteIf your scissors slip, add a second thin magnet strip instead of trying to force them with hooks.
Skip thisDon’t mount it too low where your hands hit it while writing.
12. Corner floating shelf for reference books
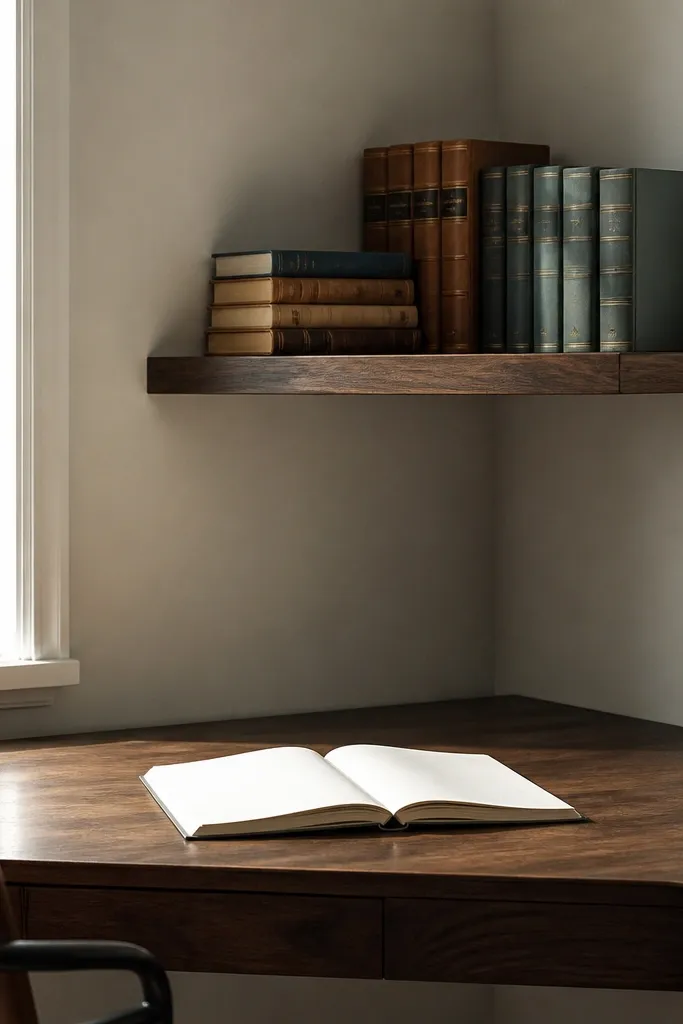
A floating shelf in the corner keeps reference books off the desk while still keeping them visible. That’s the key — you get accessibility without the surface mess. This looks good because books form a clean vertical stack and the desk front stays clear. Use it for dictionaries, formula books, or your “always open” reference. It’s a medium build, but it’s one of the best upgrades for a study setup that needs frequent lookups.
Find a corner space where your elbow won’t hit the shelf and measure the width between your wall and desk. Install a shelf using a bracket system anchored into studs. Keep the shelf depth shallow, around 6-8 inches, so it doesn’t look bulky. Style it with a book stack and one small tray for bookmarks or sticky tabs.
Editor's noteUse bookends that match your desk material so the shelf looks intentional.
Skip thisDon’t overload the shelf; leave space so the stack looks edited.
13. Desk mat with built-in pen channel
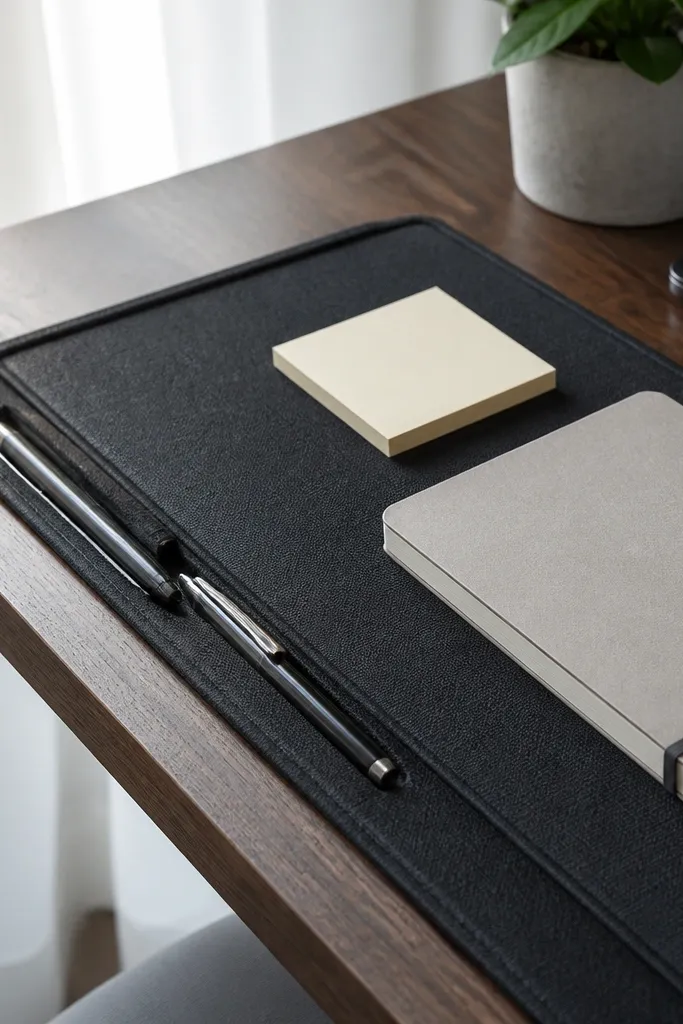
A desk mat instantly makes the surface look finished, and adding a pen channel keeps the tools from wandering. This idea fixes the “pens roll to the corner” issue and gives you a clean edge line that photographs well. Choose a mat with a subtle texture so it doesn’t show every smudge. The pen channel also reduces clutter because you’re not adding extra organizers. It’s good for smaller desks where every inch matters.
Buy a leather-look desk mat or make one from faux leather and a thin backing. Mark a straight channel along the side closest to your writing hand, about 0.75-1 inch wide. Cut and stitch or glue in a narrow divider strip to guide pens. Place the mat centered under your work area and test that your pens slide in without scraping.
Editor's noteIf you use markers, wipe the mat weekly to prevent color transfer stains.
Skip thisDon’t place the channel too close to paper edges; it will snag when you write.
14. Pegboard desktop organizer with swing arms
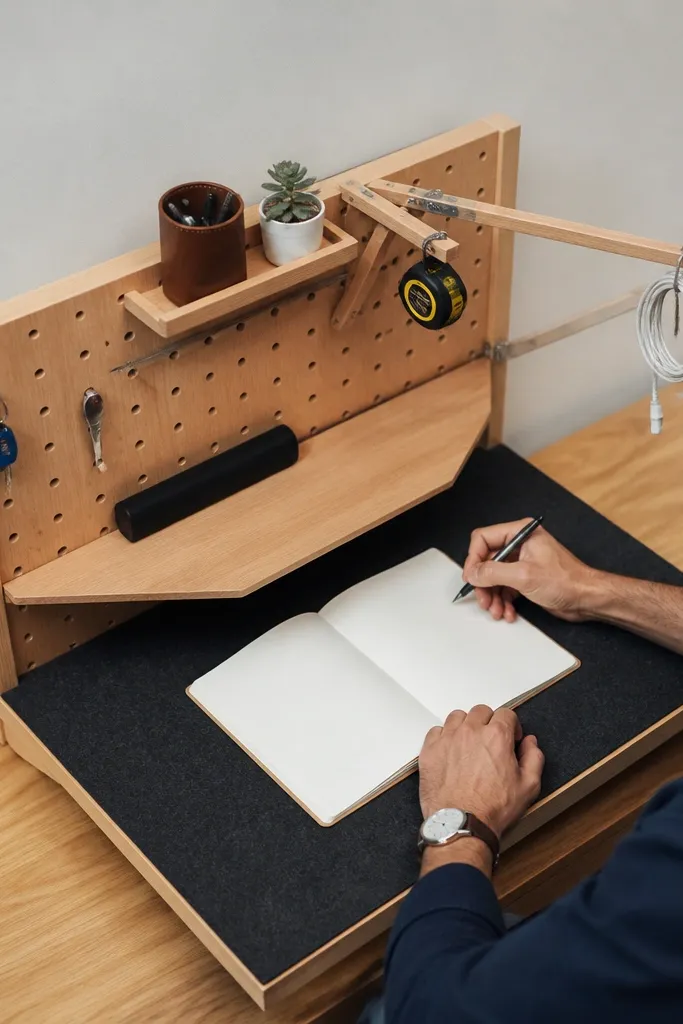
A small pegboard panel on the desk creates a “mini workstation” look. Swing arms and small hooks let you hang items like measuring tape, earbuds, or a charging cable loop without covering the writing space. It’s visually striking because it adds vertical structure on a flat desk. This setup is best for people who want their desk to look like a tidy craft-and-study station. The build is moderate because you need secure mounting to avoid wobble.
Mount the pegboard panel to the back edge of the desk using a bracket or strong adhesive mounting system rated for your panel weight. Add two small baskets and four hooks in a layout that matches your daily routine. Install one swing arm hook for your cable so it hangs neatly. Finish by placing a small tray on the front edge for paper clips so loose items don’t drift.
Editor's noteUse rubber-coated hooks so metal items don’t scratch your desk or the panel.
Skip thisDon’t hang heavy binders from it; keep it for light tools only.
15. Stackable storage cubes with a single clear front row
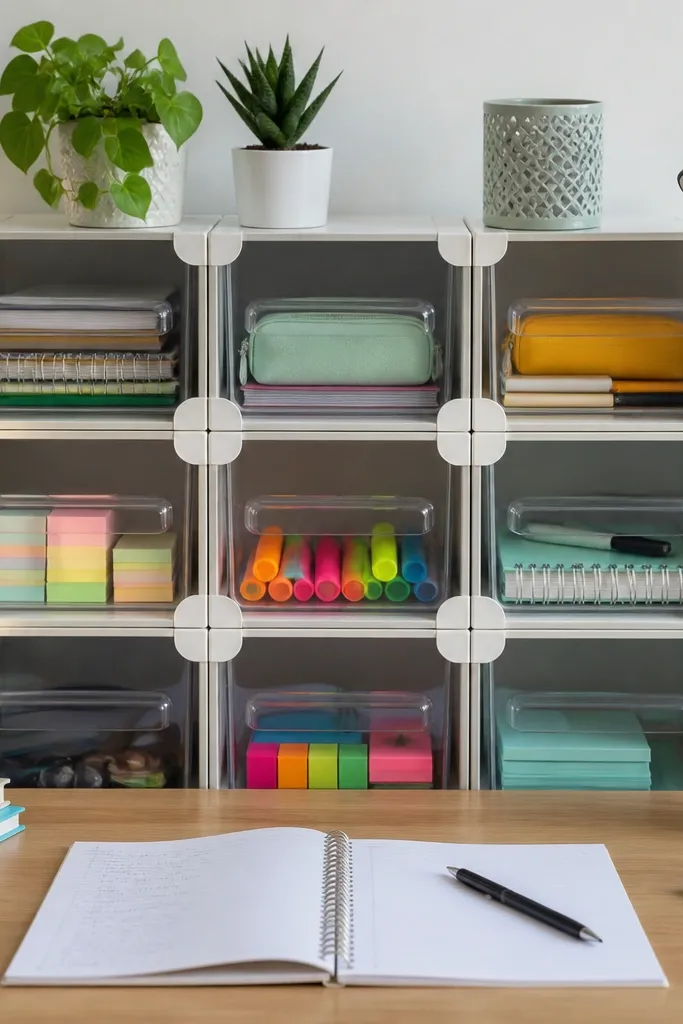
Stackable cubes look modern, and the trick is mixing visibility with hiding. Use clear bins in the front row for daily items like sticky notes, highlighters, and small notebooks, while the deeper cubes hide extra supplies. This gives you that organized look where you can scan what you need without opening doors. It also prevents the desk from creeping back into clutter because you have real storage volume. This works best when you have space beside or behind your desk for a compact shelving block.
Choose cubes that fit your desk height and leaving at least 2 inches from the wall for breathing room. Add clear bins in the front row and fabric or solid bins in the back. Label each bin with a single-word tag, then keep the number of bins small so the look stays clean. Anchor the unit to the wall if it’s taller than your shoulder.
Editor's noteUse white labels on black tape for contrast; it reads clearly without looking loud.
Skip thisDon’t mix too many bin colors; two is enough for a clean aesthetic.
16. Drawer organizer inserts for the top drawer
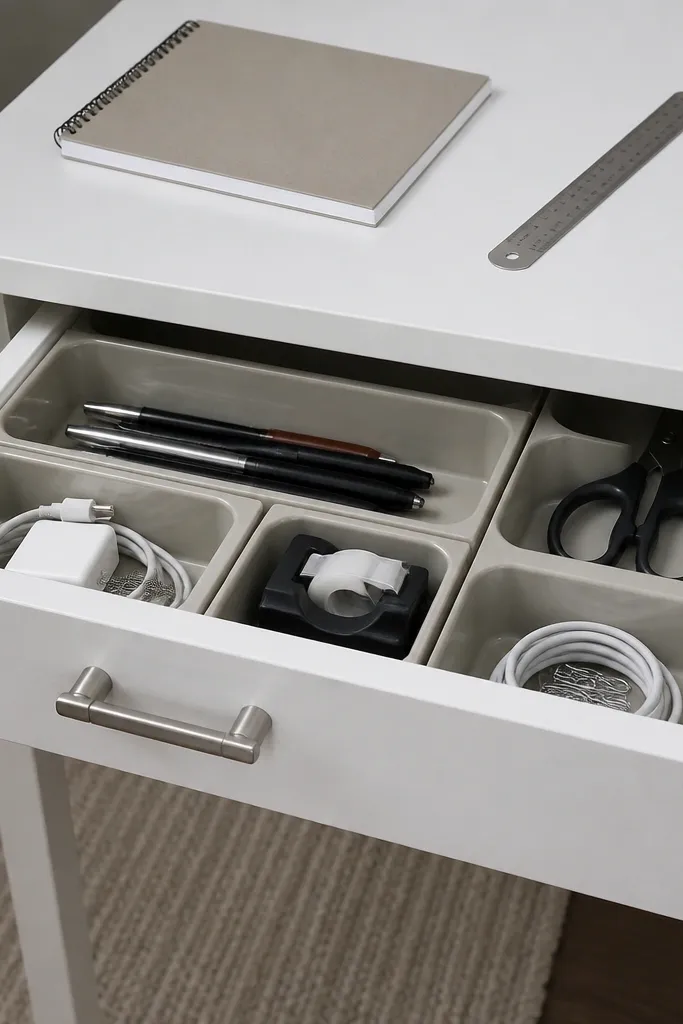
A pretty desk can still look messy if the drawer is a junk pit. Drawer inserts make the desk aesthetic last because small items don’t migrate onto the surface. Use inserts for pens, tape, scissors, and chargers accessories so everything stays in place when you close the drawer. The desk remains clean because you can quickly reset your surface by returning items to their compartments. This is a practical, beginner-friendly upgrade that improves organization more than any surface-only trick.
Measure your drawer interior and choose inserts that match the length and width without leaving big empty gaps. Arrange compartments by frequency: daily items in the front section, backups in the back. Add labels on the top of each divider using a label maker or printed tape. Test the drawer close and open motion — if it scrapes, trim or adjust inserts before you finish.
Use felt tape at divider edges to stop noise and reduce sliding.
Don’t force random sizes of inserts; gaps become catch-alls.
17. Side-by-side bookends with a slim tray on top
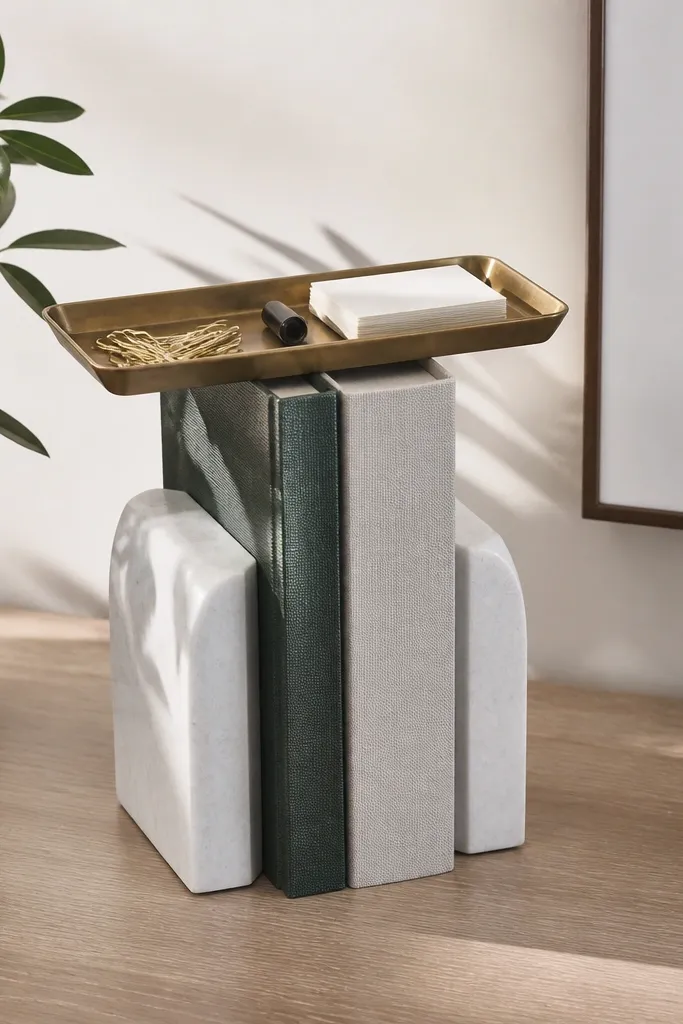
This is a simple styling trick that also solves a real problem: where do you put loose items that don’t belong to bins? Bookends create a visual frame, and the slim tray on top holds tiny daily things like paper clips, a pen cap, or a small notepad. Keep the books minimal — two or three with consistent spine heights. The result looks intentional and calm, not like a stack that’s about to topple. It’s great for desks that already have a good writing surface and need better “landing zones.”
Place two matching bookends at the back edge of your desk, spaced to fit your book widths. Set a slim tray on top only if it doesn’t wobble; otherwise, use a tray with a lip. Put one thin notebook or planner inside the book frame and keep the tray for small items. Add a small label on the tray base so you remember what goes there.
Editor's noteUse the same finish for bookends and trays to keep the look cohesive.
Skip thisDon’t store heavy stacks on top; the tray will slide and ruin the neat look.
18. Magazine file with vertical dividers for assignments
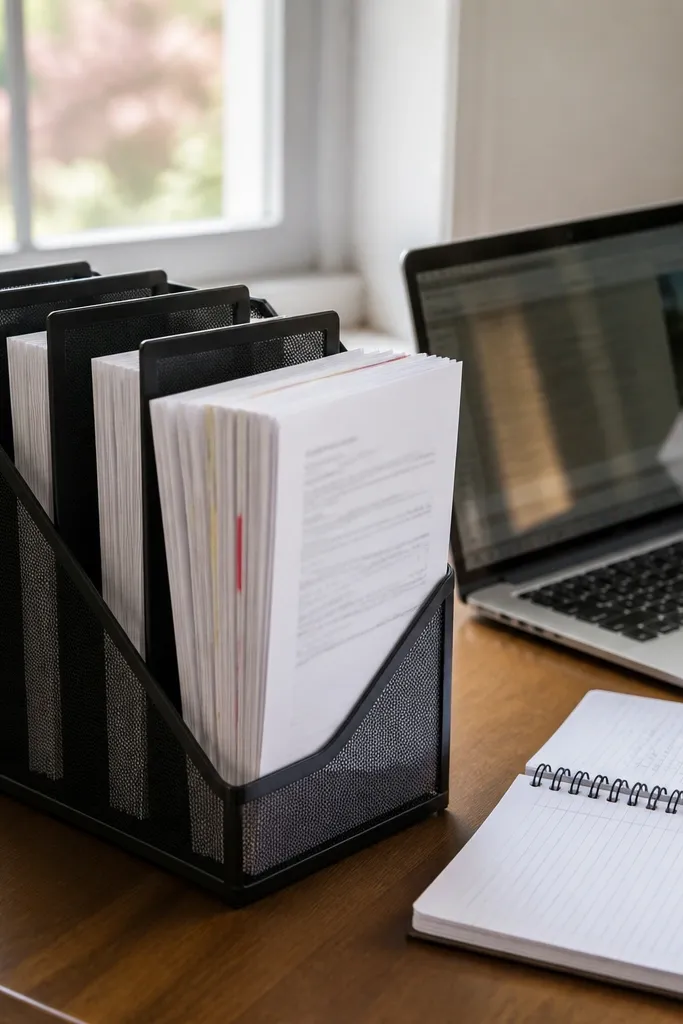
A magazine file with dividers makes assignment tracking visible, which keeps your desk from turning into a pile. It’s photogenic because the papers stand upright and line up. This idea is best for people who print assignments or keep handouts by subject or week. Keep the number of dividers tight — too many tabs makes it look messy. The file also helps you finish tasks faster because you always know which section holds what.
Buy a magazine file holder with enough width for your paper size, then add vertical dividers using thin plastic sheets cut to match. Label dividers with tape tabs on the front edge. Place the file at the left or right side of your desk so it doesn’t block your writing. Add a rule: incoming papers go into the first divider, completed pages move to the final divider at the end of the day.
Editor's noteUse colored divider tabs for subjects, but keep the colors limited to three so it stays clean.
Skip thisDon’t let it become a third pile; empty completed sections on a schedule.
19. Small rotating organizer for highlighters and markers
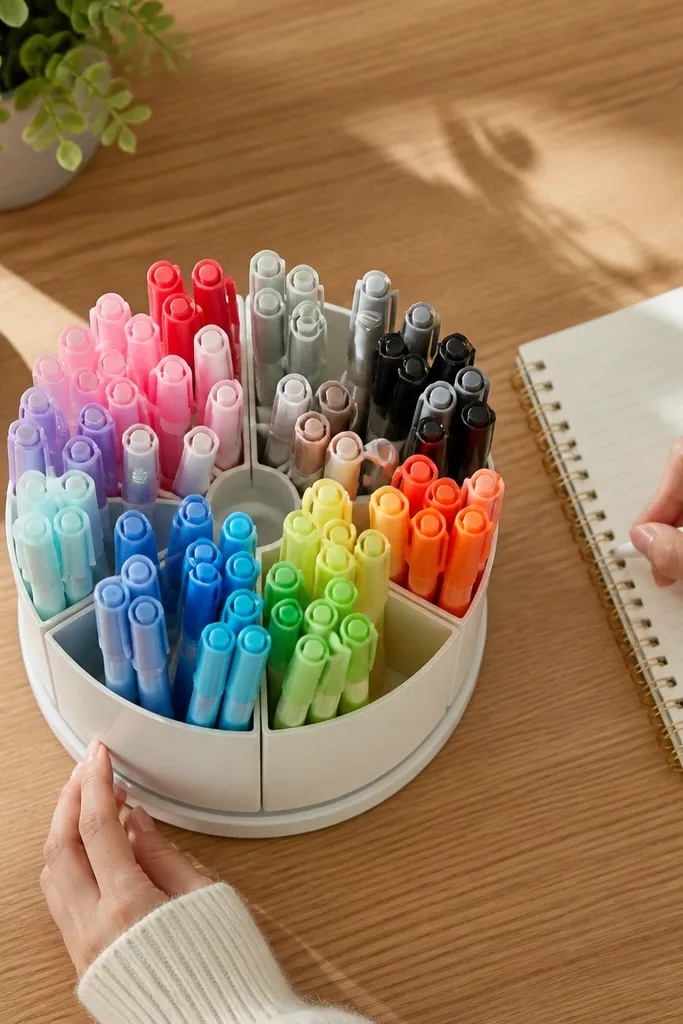
Highlighters and markers are the desk clutter offenders because they multiply and roll. A small rotating organizer keeps them upright and separated by color family or type, so you can pick quickly. The look is striking because the rotation unit creates a neat circle or grid pattern on the desk. It also keeps marker caps from getting lost. This is perfect if you do lots of reading, studying, or annotation work and want your desk to look like a tidy classroom.
Choose a rotating organizer with shallow compartments so markers don’t tip. Place it near your note area where you highlight, not across the desk. Sort by thickness: thin highlighters in one row, chunky markers in another. If your organizer doesn’t include dividers, add small acrylic strips with double-sided tape.
Editor's noteStore one “active” color set and hide backups in a lidded box to keep the desk calm.
Skip thisDon’t store paint pens or thick markers in the same compartment; they snag.
20. Desk corner tray for daily keys, earbuds, and phone
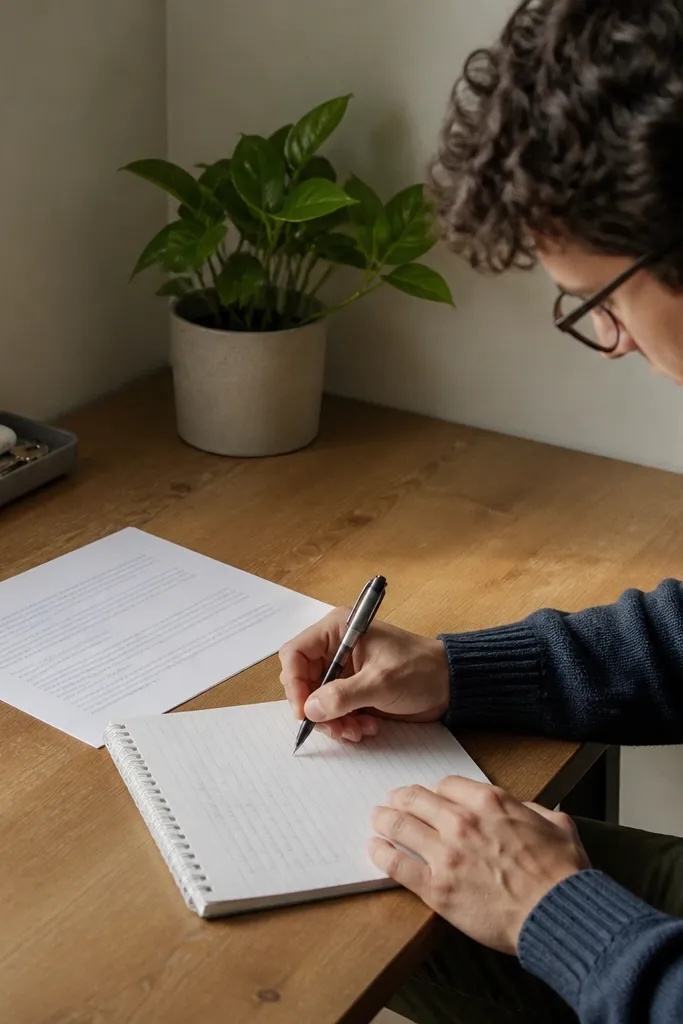
Every desk gets distracted by non-study items. A dedicated corner tray stops those items from wandering onto your paper and makes your desk look intentional. Keep it small and focused: phone, earbuds case, and one small item like keys or a card holder. This creates a clean visual boundary where your brain expects “daily carry” to live. It also reduces the mess when you switch from studying to meetings or chores. The look works in any room because the tray reads like furniture styling, not storage clutter.
Pick a tray size that fits in one corner without crossing into your main writing area. Place it at the side closest to where you grab your phone. Add a simple divider using foam board so the phone sits flat while earbuds stay in a separate section. Keep the tray empty of paper and only use it for carry items.
Editor's noteUse a tray with raised edges so cases don’t slide when you bump the desk.
Skip thisDon’t put chargers loose in the tray; route them through the charging rail.
21. Laminated label system for every container
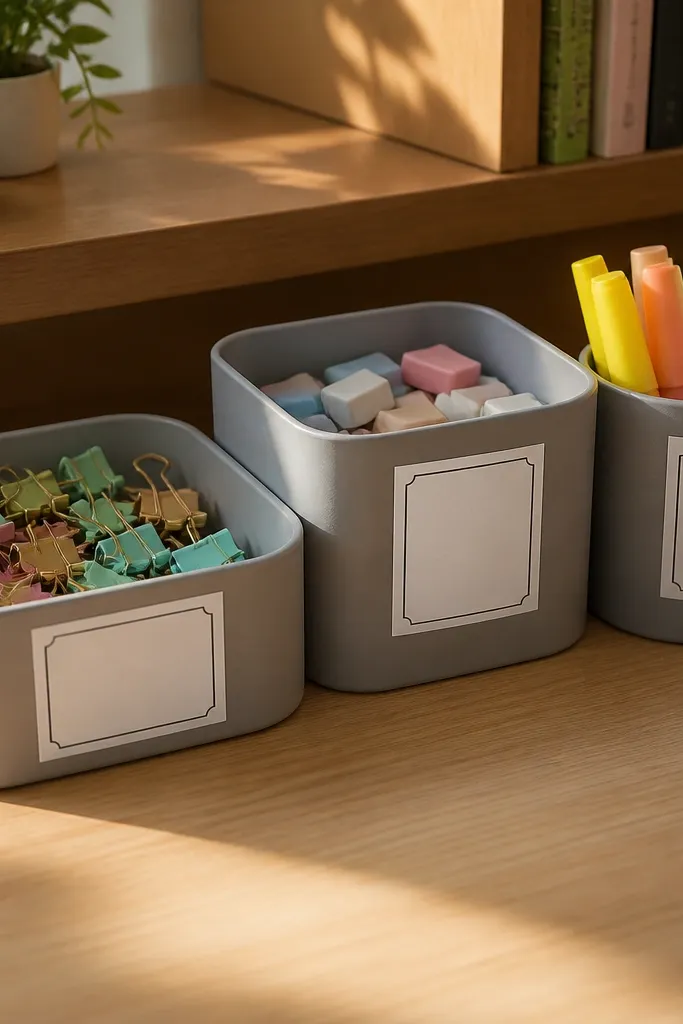
Labels are what makes organization stick. Without labels, you end up moving items around because you’re guessing where they go. A laminated label system also makes the desk look crisp because the text is consistent and sits in the same position on every container. This is the difference between “organized today” and “organized next week.” It’s not just a functional upgrade; it’s visual order, and that’s what makes desks look styled in real life.
Make labels on thick paper and laminate them with a clear pouch laminator or clear tape laminate. Standardize label placement: front edge, top-left corner, same font size. Label only what you actually store in each container — no long sentences. After labeling, do one desk reset: put everything back into its labeled home, then remove any container that stays empty for a week.
Use short labels like “Pens,” “Sticky,” “Done,” “Next” so they read instantly.
Don’t label the desk mat or the entire drawer; label the containers, not the furniture.
22. Wall shelf with drop-down organizer for study sessions
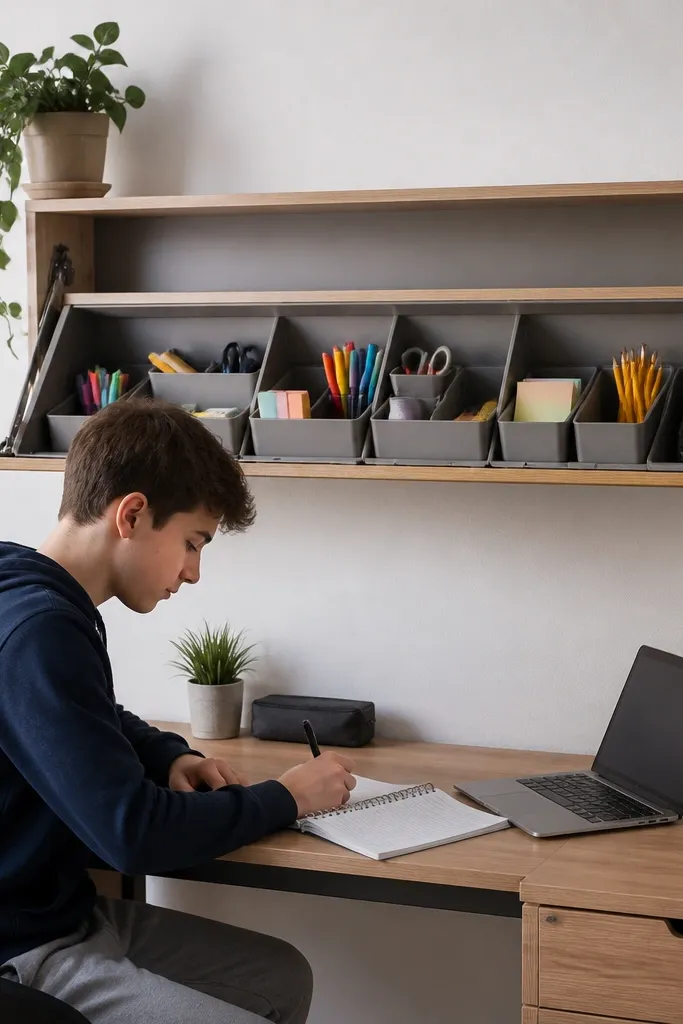
A drop-down organizer panel gives you a hidden storage zone you pull down only when you’re working. The look is clean because the wall shelf stays mostly empty, then you reveal tidy bins when you need them. It’s great for shared rooms where the desk needs to look presentable even when you’re not studying. You also get a practical benefit: your papers stay protected while you eat or clean around the desk. This is a stronger build choice if you can drill into studs and you’re comfortable with basic hardware.
Mount a shelf on wall studs at a height that matches your seated eye line. Attach a fold-down panel under the shelf using a hinge kit rated for the panel weight. Add two small bins to the panel using screws and spacers so they don’t swing. When closed, keep bins empty or store only lightweight items so the shelf stays neat.
Editor's noteUse soft-close hinges so the panel doesn’t slam and rattle the bins.
Skip thisDon’t load heavy books on the drop-down panel; it will sag over time.
23. Color-blocked paper tray for drafts and final copies
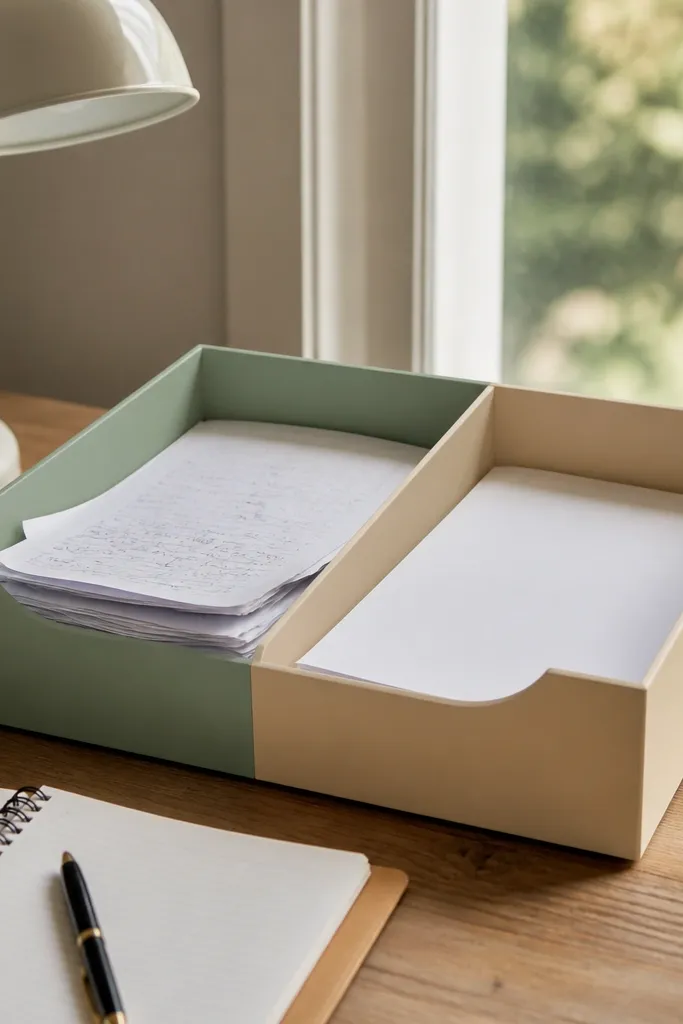
This idea makes paper organization look like a design project. Split a tray into two color-block zones so drafts and final copies never mix. The visual difference reduces decision fatigue and keeps your desk surface looking clean. It’s especially good for students who revise and print multiple versions of assignments. The look is bold but controlled if you use two muted colors that match your desk palette. This is a small build that changes your desk rhythm immediately.
Use a shallow tray and divide it with a straight divider made from thin wood or acrylic. Paint or wrap each side with matte contact paper in two matching muted tones. Label each side with a simple word label on the front edge. Set the tray at the front-left of your desk so drafts and finals stay within the same glance zone.
Editor's noteChoose matte contact paper to avoid glare in daylight photos.
Skip thisDon’t use three or more colors; it stops looking organized and starts looking decorative.
24. Satin-finished desk riser for laptop and notes
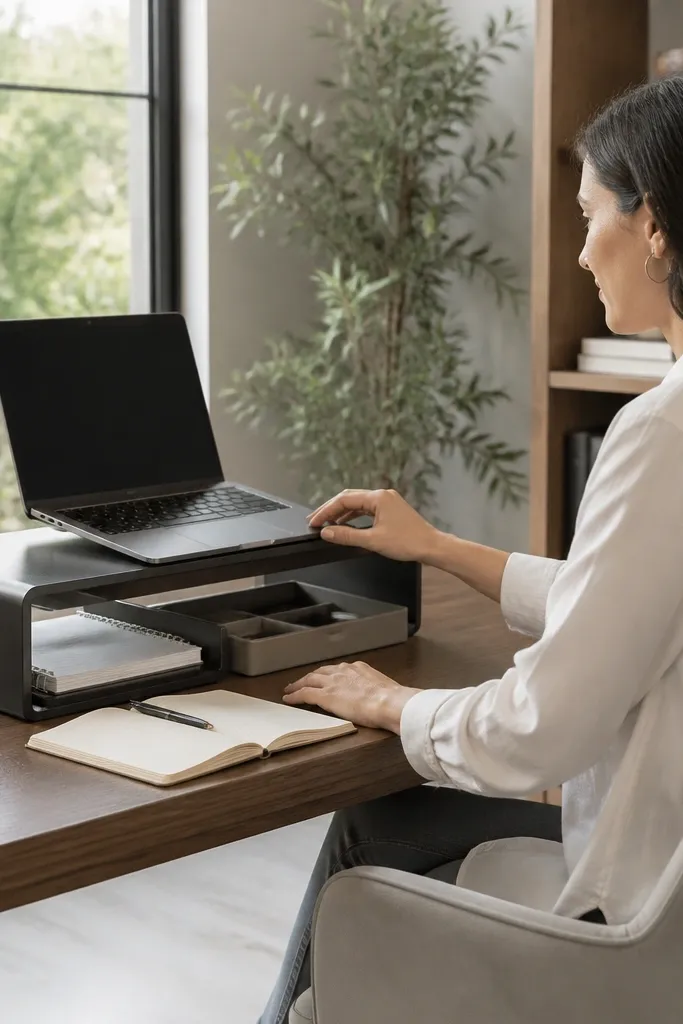
A laptop riser changes the whole desk layout by creating a clean “stack” for your notes. When your laptop sits higher, the space below or beside it becomes usable for a notepad stand and a small organizer. The desk looks more intentional because you get clear height layers instead of everything sitting flat on one plane. This is perfect if you take notes on a tablet or laptop and want your paper to stay visible. The build is straightforward and can be done with wood scraps.
Build a simple riser using two side blocks and a top platform, aiming for a height of 3.5-5 inches. Sand edges smooth and apply satin varnish or matte paint so it doesn’t look shiny and cheap. Place a slim notepad stand on the right side of the riser for quick access. Add four small rubber feet to prevent slipping and protect your desk surface.
If you use a laptop, leave an air gap at the back so heat doesn’t build up.
Don’t make the riser too tall; it pushes your notes out of the comfortable reach zone.
25. Over-the-Desk Clamp Task Light + Cable-Managed Timer Dock
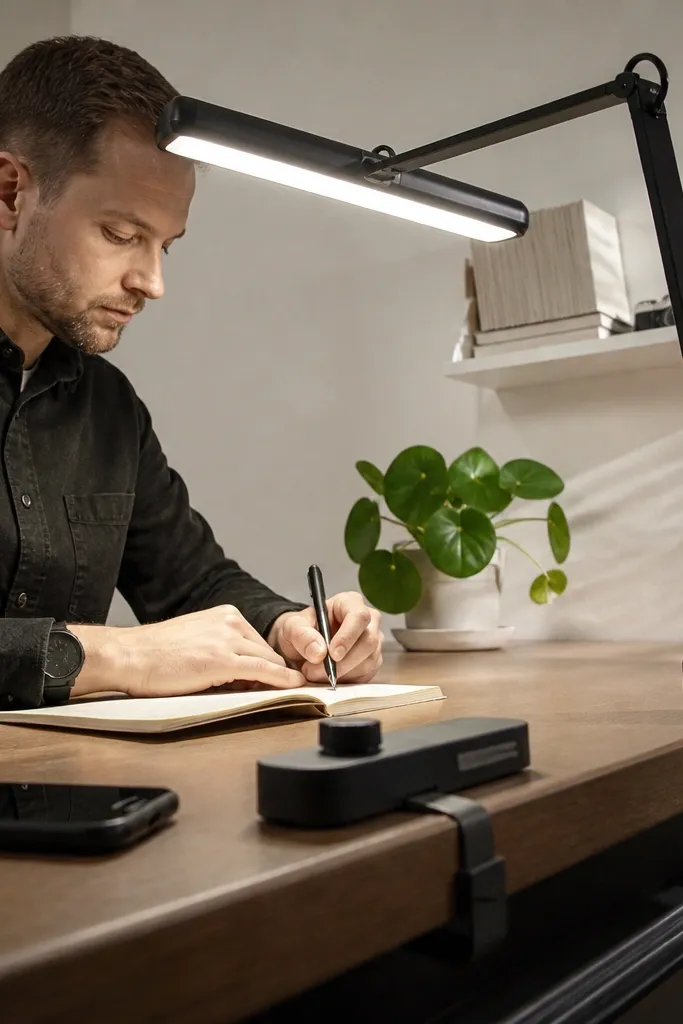
A study table gets messy fast because the light, the timer, and the charger all fight for the same spot. This setup gives you one clean overhead anchor for the lamp and one slim “landing pad” for your timer so nothing ends up face-down in a paper pile. The look is bright and intentional — matte black hardware, a light wood dock, and a single cable line that disappears under the desk edge. You get better focus because the timer sits exactly where your eyes already land when you start a session. Build time is about an hour, and it only needs basic tools like a drill and a hand saw. It fits small desks, dorm setups, and any study space where you want fewer loose gadgets on the tabletop.
1) Make the dock: cut a 10 in x 3 in piece of 3/4 in plywood and sand it to 220 grit. Add a 1/4 in deep lip along the back edge by screwing a 3/4 in wide strip of wood on top of the plywood so the timer sits snug and can’t slide. Finish with matte clear coat or matte paint, then let it cure fully before mounting. 2) Clamp the lamp and route the cable: attach an over-desk clamp task light (with a flexible gooseneck) so the light lands on your work area, not the wall. Run the timer power cable along the underside front edge of the desk using adhesive cable clips every 6-8 inches; keep the cable slack just enough that you can move the dock without yanking. 3) Mount the dock under the desk edge: mark the underside where your timer will sit when you reach forward, then screw two small L-brackets or a cleat to the underside. Align the dock so its lip faces the desk surface, and test-fit the timer before tightening everything down. Finish by pressing the last cable clip flat so it won’t snag sleeves.
Editor's noteUse a lamp with a clamp arm that lets you aim the light without touching the desk surface — it keeps your organization plan intact. If your timer is powered by USB, pick a short USB cable so the cable run stays straight and easy to clip.
Skip thisDon’t mount the dock flush to the desk edge if your timer has a plug on the back — leave a 1/2 in clearance so cords don’t bend sharply.



