
1. Slab-Top Workbench With Replaceable Sacrificial Skin
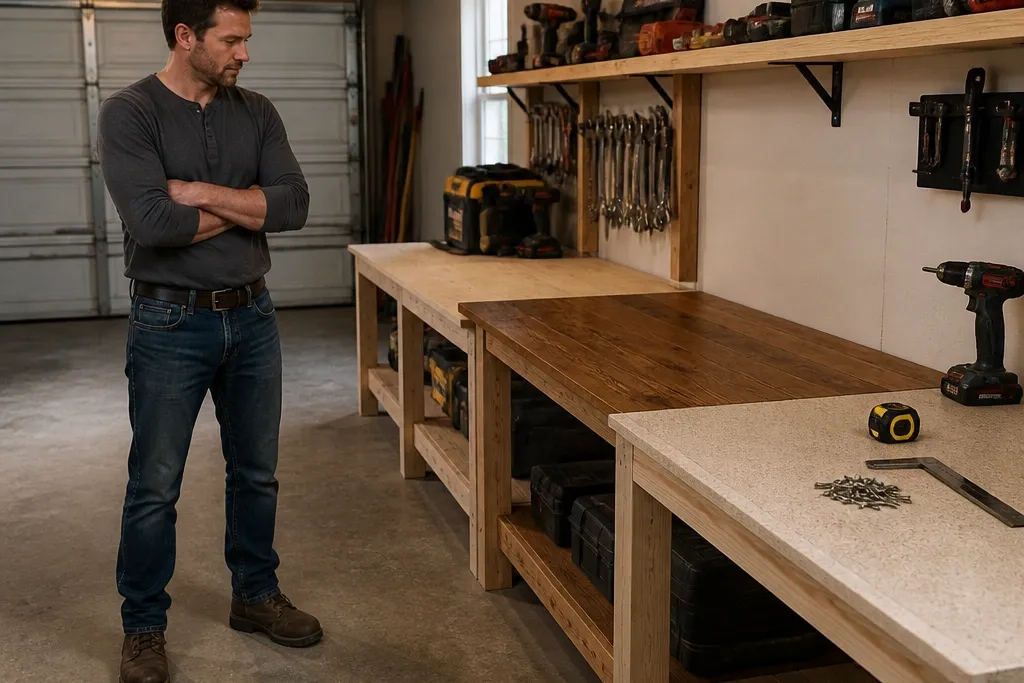
This bench idea looks clean because the top stays visually “solid” even when you change the work surface. The replaceable sacrificial skin is the practical part: you can sand and swap a worn sheet without rebuilding the whole bench. Use thick cabinet-grade plywood for the base structure so it doesn’t sag, then add a darker top sheet that hides minor scratches. The result is a photogenic, workshop-style surface that still handles glue, paint drips, and normal abuse. Skill level is medium, but the setup time is short because you’re building one strong top and matching storage around it.
Start by building a rectangular base from 2x4s or 2x6s, then screw a 3/4-inch plywood deck on top. Cut a second “sacrificial” sheet the same size (1/2-inch plywood or 3/4-inch MDF if you do light work) and attach it with countersunk screws in the perimeter only, so you can remove it later. Finish the wood base with a hard clear coat, then stain or paint the sacrificial skin a dark color for contrast. Finally, add side panels or a back rail so the bench looks framed instead of floating.
Use T-nuts or threaded inserts on the sacrificial skin so future swaps are fast and you don’t chew up screw heads.
Don’t glue the sacrificial sheet down — you lose the whole point of easy replacement.
2. Industrial Steel Frame Bench With Powder-Coat Look
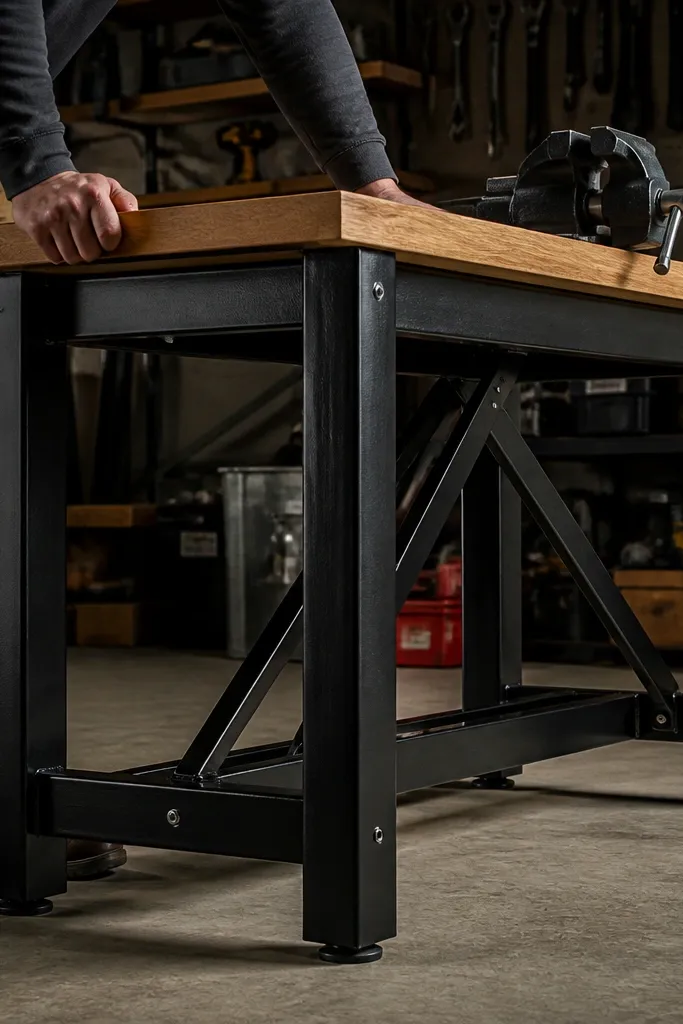
If you want your garage to look like a real shop, build the frame out of steel and keep the top warm with wood. The steel legs and cross-bracing make the whole bench feel rigid, and the matte black finish looks sharp under garage lighting. This idea is great for heavier projects because it resists racking and holds clamps without shifting. You get a clean, modern silhouette, and the back tool rail makes it easy to keep frequently used tools in view. Plan on a medium skill level because you’re drilling steel and aligning everything, but the payoff is a bench that looks “finished” even before you add storage.
Cut and square steel angle or square tubing for the base rectangle, then drill matching holes for bolts at the corners and cross members. Assemble the frame dry first, check it for squareness, then tighten and add diagonal bracing. Mount a wood top (at least 1-1/8-inch thick if you want clamp stability) with threaded inserts so you can remove it later. Finish the steel with a high-heat matte black paint or powder-coat style coating, then mount a simple tool rail using evenly spaced brackets.
Use leveling feet on the legs and set them before you tighten the top — it stops wobble and makes the bench photograph straight.
Don’t skip diagonal bracing; a steel frame without it still racks and looks sloppy.
3. Plywood Box-Drawer Bench With Hidden Cable Pass-Through
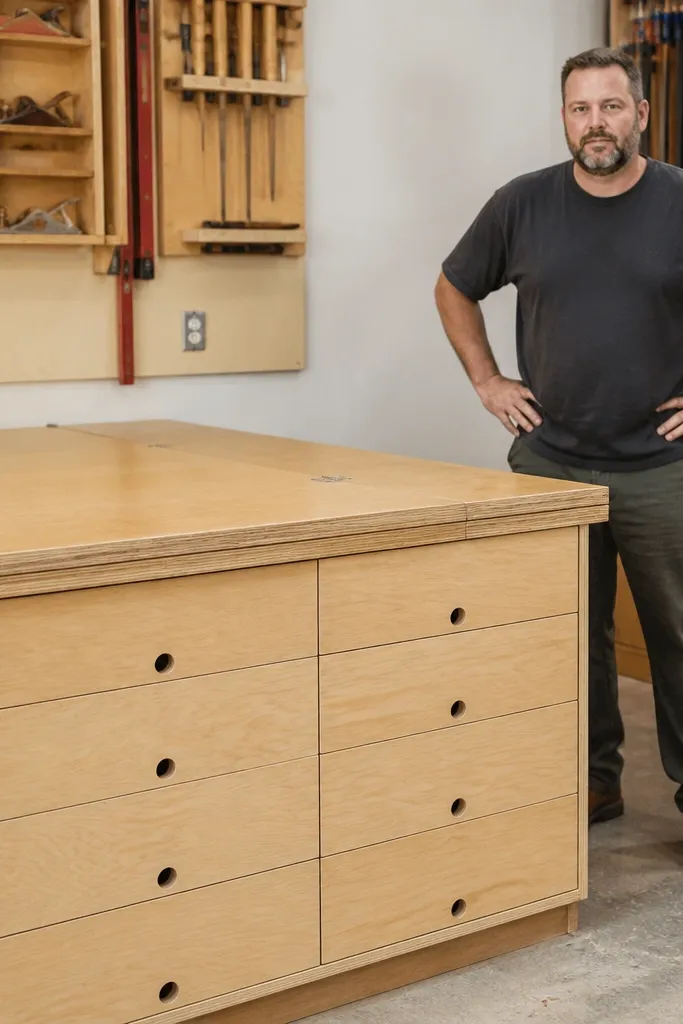
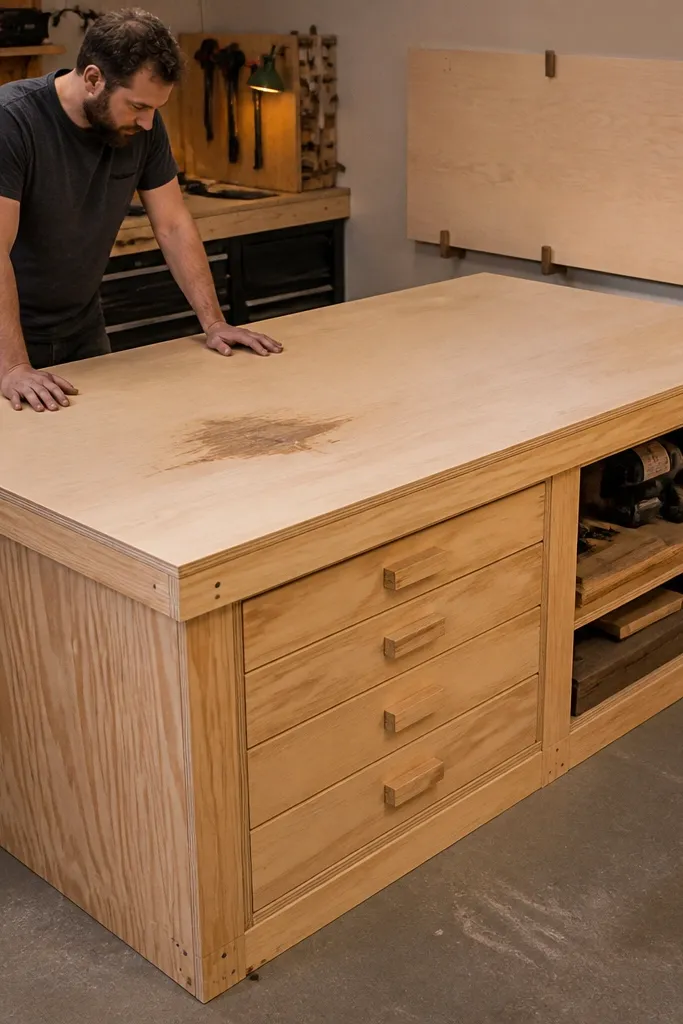
This is the bench for people who hate clutter. Box-drawer storage keeps tools and consumables behind flat fronts, so the bench looks tidy even when you’re mid-project. The hidden cable pass-through is what makes it feel modern: you can run a power strip or charger cord under the top without a mess of visible cords. The look is bright and clean, especially if you use a light top and pale drawer fronts. It’s also forgiving to build because plywood boxes are straightforward, and you can upgrade the drawer system later.
Build a bench frame with 2x4s and add a drawer bank using plywood boxes sized to your slides (for example, 20-inch wide boxes with full-extension slides). Install the drawer slides level first, then screw the drawer fronts on after you confirm gaps. Cut a rectangular pass-through hole at the back of the top and add a grommet for cords. Finish with a clear top coat on the wood and paint the drawer fronts for a crisp, shop-like look.
Mark drawer slide height with painter’s tape strips before you screw anything — it keeps the fronts aligned.
Don’t mount drawers to a frame that’s even slightly out of square; you’ll fight uneven gaps forever.
4. Workbench With Wall-Mounted Tool Rail and Floating Shelf

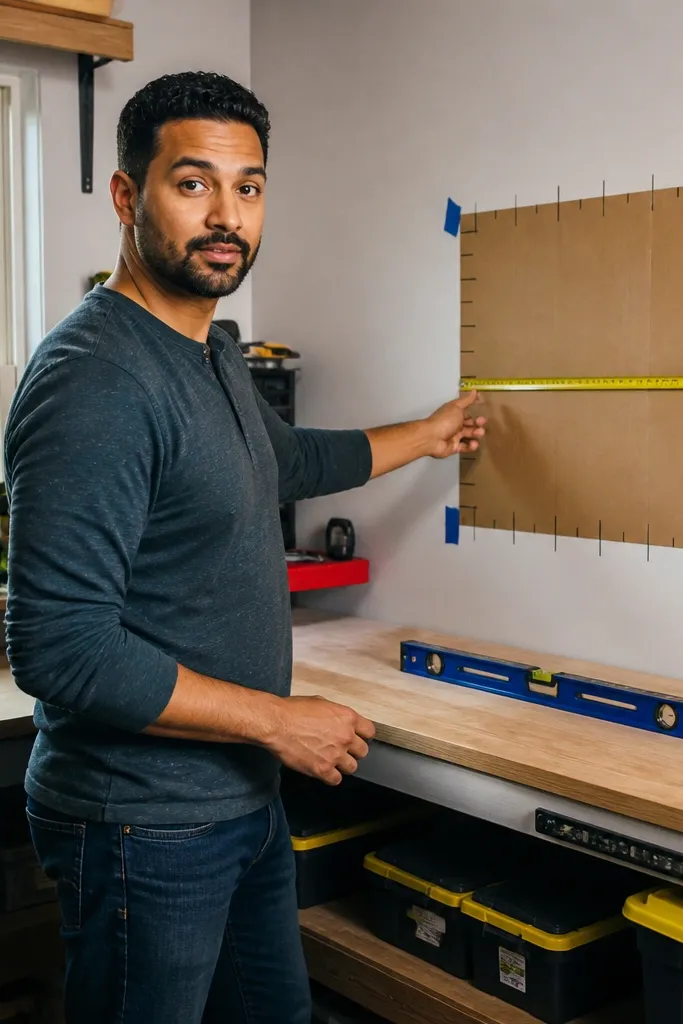
This setup looks great because it uses vertical space and keeps the bench surface clear. A wall-mounted tool rail gives you a clean, repeating pattern of hooks, and a floating shelf above makes the whole area feel intentional. It’s ideal for garages where you don’t want to build heavy cabinets or you have limited depth. The shelf also gives you a perfect place for bins, a small vise, or a dedicated spot for sandpaper and measuring tools. Building is mostly carpentry and layout, so it’s beginner-friendly if you take your measurements seriously.
Editor's noteUse consistent hook types on the rail — repeating shapes look cleaner in photos and in real use.
Start by marking wall studs or using heavy-duty anchors for the rail brackets, then install the tool rail at a height that matches your standing reach (about chest level). Mount a floating shelf anchored to studs so it can hold weight without sagging. Build a simple bench base with a stable top and leave the back open for the rail to “own” the visual space. Add a back lip or small cleat to keep items from sliding off the shelf edge.
Skip thisDon’t mount the rail too high; reaching up makes the bench feel awkward and tools end up on the surface.
5. Two-Tone Top Bench With Stained Maple Edge Band
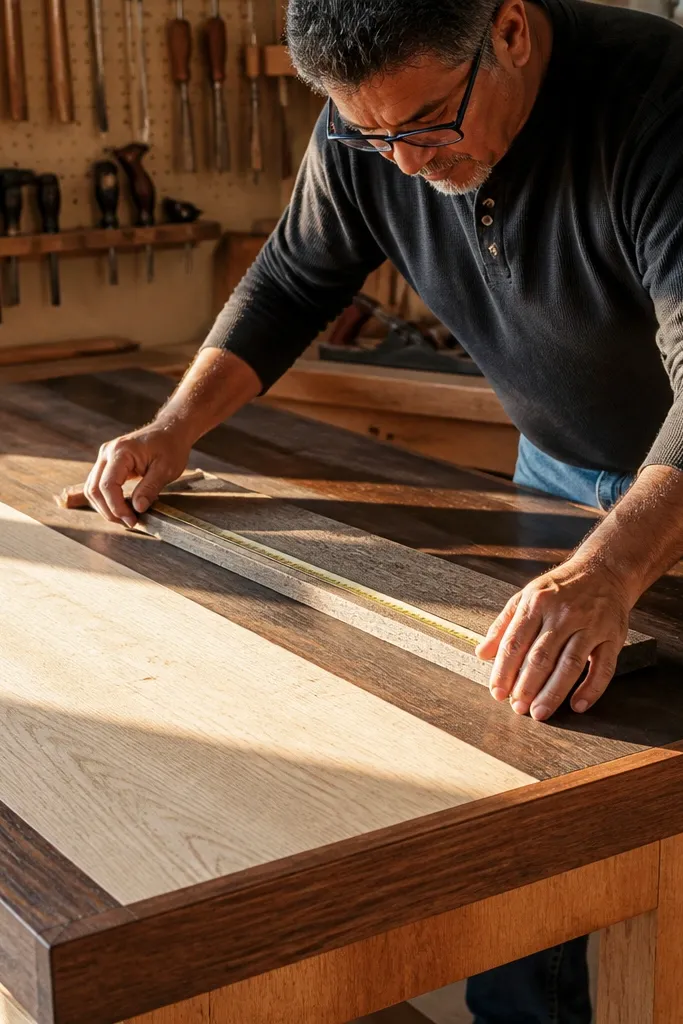
Two-tone tops look premium because the eye reads contrast instantly. This idea uses a lighter main top and a darker work surface layer, with an edge band that frames the whole bench like furniture. It’s a style move that also helps function: the darker surface hides stains, while the lighter wood around it stays bright and clean. The edge band makes the bench look less like a “project board” and more like a built-in piece. Skill level is medium because you need clean edge trimming, but time is reasonable if you prep measurements carefully.
Editor's noteUse a foam brush for stain and wipe in one direction — it prevents blotchy edges that show up under garage lights.
Build the bench top from 3/4-inch plywood and sand flat. Add a darker stain or a thin top skin on the center area, keeping a consistent border around the perimeter. Edge band the outer border with a 3/4-inch strip of maple or birch, then glue and clamp it tightly. Finish everything with a wipe-on hard clear coat, then add a matching stop rail on the back so boards don’t slide.
Skip thisDon’t skip edge sanding between stain coats — rough fibers ruin the crisp two-tone line.
6. Pegboard Back Wall Bench With Color-Matched Tray System
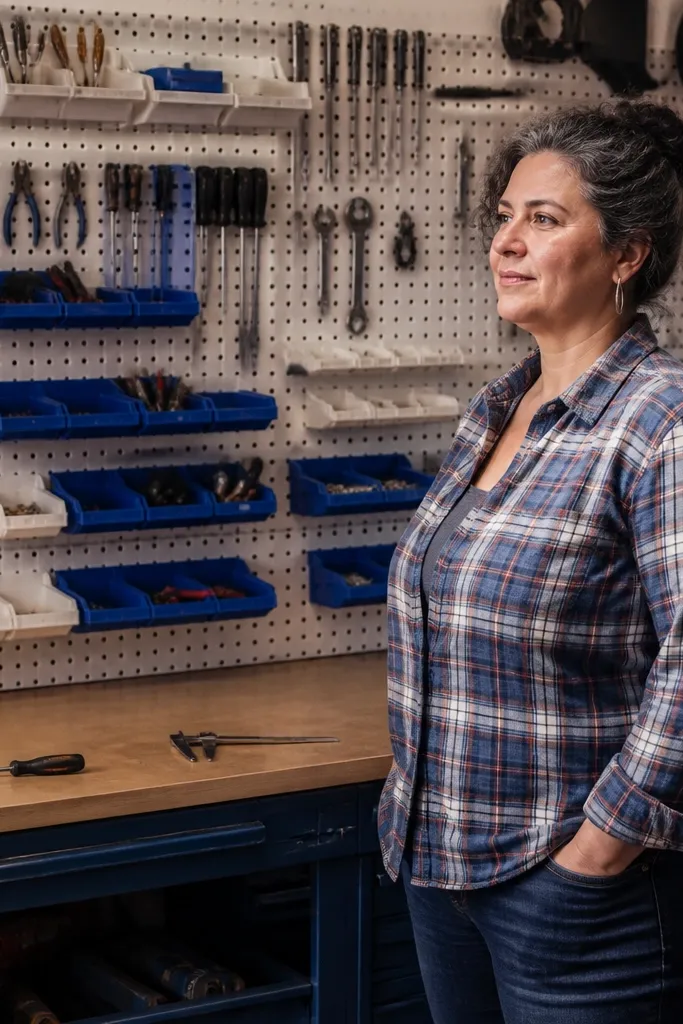
A pegboard back wall is the easiest way to make a bench look organized. The tray system is what takes it from “random hooks” to a clean, showroom-like grid. You can keep frequently used hand tools in view and store small parts in matching trays so the bench doesn’t look busy. It also makes your workflow visible, which reads great in photos. Build this if you want a strong visual structure without deep carpentry.
Mount a 1/4-inch pegboard sheet to studs using spacers so it sits slightly off the wall if you need wire access. Paint the pegboard a matte color that matches your garage — black looks industrial, white looks crisp. Add trays and hook sets in a grid layout, starting with heavy tools lower and light tools higher. Build a bench base with a top that aligns visually with the pegboard — keep the bench width close to the pegboard width for a clean block.
Label trays with small color dots on the pegboard itself, not on the tray lids — it keeps the front clean.
Don’t mix too many peg sizes and hook styles; the wall ends up looking chaotic.
7. Sliding Top Workbench With Inset Storage Drawer

This idea is for people who want “clean surface, hidden storage.” The sliding top panel gives you a smooth, uninterrupted work area when it’s closed, and then it reveals storage when you need it. It looks sleek because the front face stays flat and the hardware is hidden. This is also a smart space saver in shallow garages because you don’t need deep cabinets sticking out. Skill level is medium because you’re building a track and keeping alignment tight, but the result is very photogenic.
Editor's noteUse felt or UHMW tape where the panel contacts the frame to stop squeaks and scuffs.
Build a bench frame with a drawer box inset at the front or side, then install full-extension drawer slides for the hidden compartment. Create a sliding top panel with 3/4-inch plywood and add runners that ride on hard plastic or metal guides mounted to the frame. Cut clearance slots so the panel doesn’t rub when it moves. Finish the top panel with durable clear coat and add a subtle pull handle set into the underside so it stays invisible from the front.
Skip thisDon’t skip a test fit before final screws — one misaligned guide makes the panel stick.
8. Workbench With Concrete Tile Inlay Work Surface
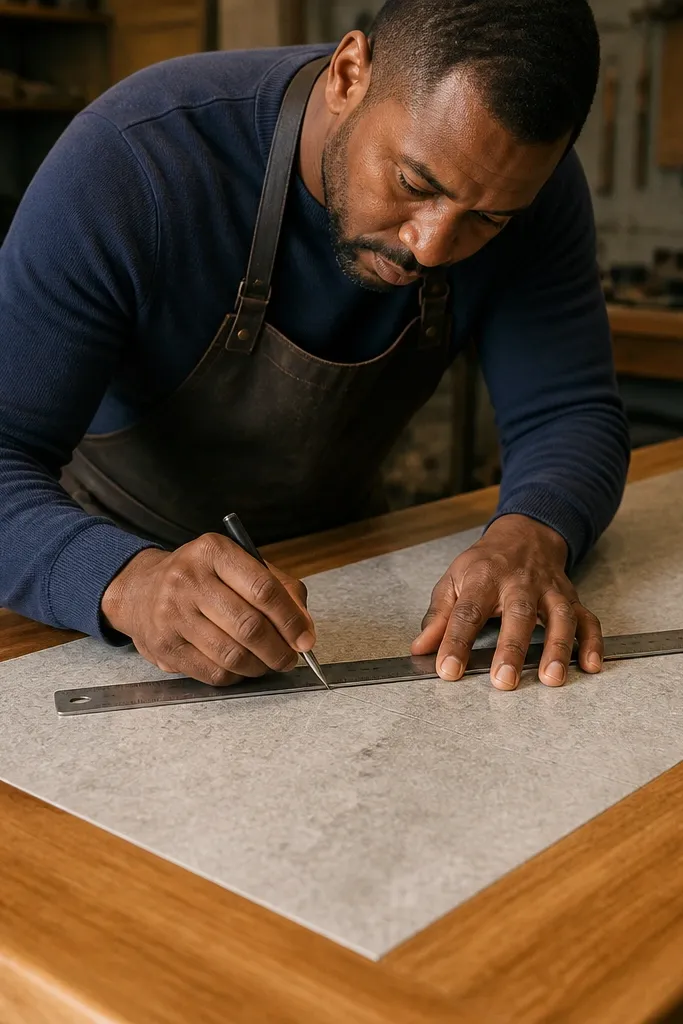
Concrete tile inlay looks architectural and it’s practical for marking and light metal work. The tile surface is flat, heat tolerant, and easy to wipe clean, so paint and oil don’t soak into wood. You still get the warm look of wood rails around it, which keeps the bench from feeling cold. This setup is great for layout tasks, small repairs, and surface-clean work where you want a crisp reference area. It’s medium skill because tile work needs careful cutting and leveling, but you end up with a distinctive, high-contrast top.
Editor's noteChoose matte or lightly textured tiles so pencil marks and scratches don’t reflect harshly under bright lights.
Build the bench top frame from plywood and add a flat plywood deck thick enough to support tile thinset. Lay tiles dry first in a grid pattern, then measure and cut with a wet saw or tile cutter for straight edges. Set the tile with thinset and grout, then let it cure fully before sealing. Finish with a clear sealer made for tile and add a wood border frame around the edges to keep tools from catching on tile corners.
Skip thisDon’t grout too wet or too soon — messy grout lines look bad and are harder to clean.
9. Laminated Countertop Bench With Matching Base Cabinets
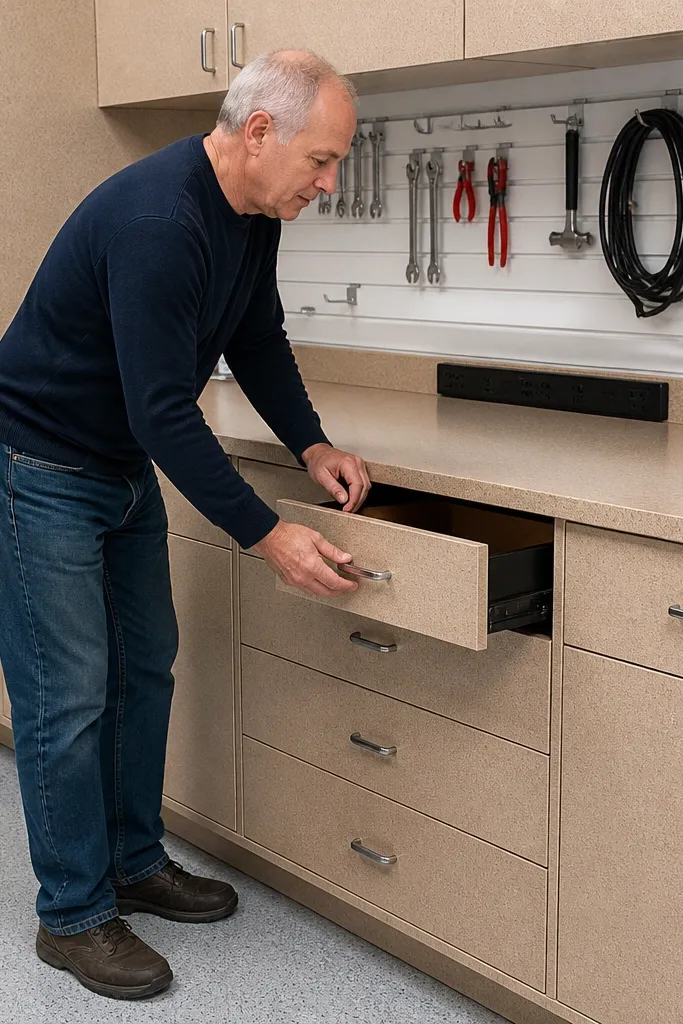
If you want “easy clean + furniture look,” use a laminate countertop style top and build matching base cabinets. The laminate surface resists stains better than bare wood, and the clean edges make the bench look like it belongs in a real workshop showroom. This idea works well for garages where you want a tidy, symmetrical look and you don’t want to maintain a lot of finishes. The cabinet doors also hide clutter, and you can add a single drawer for frequently used items. Skill level is beginner to medium if you’re comfortable with cabinet assembly.
Use a laminate countertop slab or build a top from plywood and apply laminate with contact cement and edge trim. Build the base using plywood or stock cabinet frames, then align doors so gaps are even. Install soft-close hinges if you want the “quiet, clean” feel. Add a drawer at the most-used height and drill a clean hole for a power strip cord with a grommet.
Use black hardware across doors and drawers for a consistent visual rhythm.
Don’t put the power cord hole in the center of a flat face — it looks like a mistake instead of a design feature.
10. Hanging Vise Station With Wood Backboard and Tool Shadow Lines

A vise station instantly upgrades the look because it creates a focal point. This build uses a wood backboard behind the vise and adds slim trim strips so you get clean shadow lines that read modern. It’s great for people who do metalwork, clamping for assembly, or anything where you need a firm anchor. The backboard also gives you a place to mount a small tool rail without cluttering the bench top. Skill level is medium because you’re aligning the vise mounting and cutting trim cleanly.
Editor's noteUse a metal ruler and a square for vise alignment — crooked vises look wrong fast in photos and in use.
Mount a backboard to the wall or to the bench frame and mark your vise location by checking the vise’s bolt pattern. Cut the vise plate into the bench top or bolt through the top into reinforcement blocks below. Add slim trim strips (1/2-inch) around the backboard edges so it frames the vise area. Sand and finish the backboard in a matching wood tone, then mount a small tool rail or hooks around the vise.
Skip thisDon’t mount the vise only to thin plywood — reinforce underneath with blocks so it doesn’t flex.
11. Workbench With End-Grain Cutting Insert for Woodworking

End-grain inserts look sharp and feel good under blades. This is the bench setup for woodworking where you want to cut, chop, and mark without destroying the main top. The recessed insert keeps the insert flush, so hand planes and clamps don’t catch on edges. Visually, the end-grain grid creates a pattern that looks intentional and professional. It also protects your bench top from deep cuts, which keeps the bench looking new longer. Build difficulty is medium because you’re cutting and fitting the insert precisely.
Build the bench top from plywood and add a recessed rectangular opening where the end-grain insert will sit. Make the insert from end-grain hardwood blocks glued into a panel, sized to the opening with a small clearance. Dry fit first, then glue the insert in place and sand it flush. Seal the surrounding wood with a clear finish, and seal the end-grain with a board oil or hard wax made for cutting surfaces.
Use blocks with a consistent grain direction so the cutting surface looks uniform and doesn’t show uneven wear.
Don’t rush glue-up — gaps around the insert show up as shadows and weaken the fit.
12. Fold-Down Wall Bench With Slim Tool Storage Cabinet
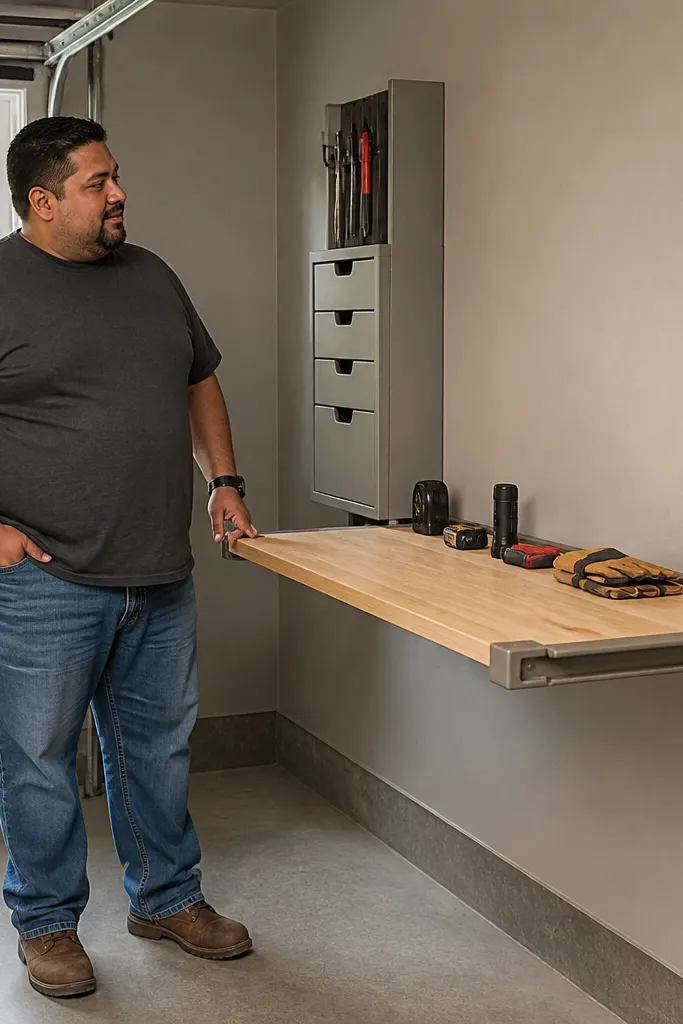
This one solves the space problem while still looking tidy. A fold-down bench disappears when you’re not using it, and the slim tool cabinet keeps the wall area visually clean. It’s a strong choice for small garages because you still get a real work surface without dedicating a full footprint year-round. The cabinet lines create a clean block on the wall, and the bench top can be finished in a contrasting wood tone for a furniture look. Skill level is medium because hinges and mounting must be solid.
Find studs and mount a wall cabinet base first, then install heavy-duty folding bench hardware at the correct height. Build the bench top from 3/4-inch plywood with a stiff frame underneath so it doesn’t sag when folded down. Add a locking latch so the bench stays rigid under clamping pressure. Finish the top with durable clear coat and paint the cabinet with a semi-gloss for easy wipe-down.
Mount a small shelf under the bench when it’s down so small parts don’t fall to the floor.
Don’t mount folding hardware into drywall — anchor into studs or use proper rated anchors.
13. Pegboard Front Tool Wall With Drawer-Lip for Small Parts
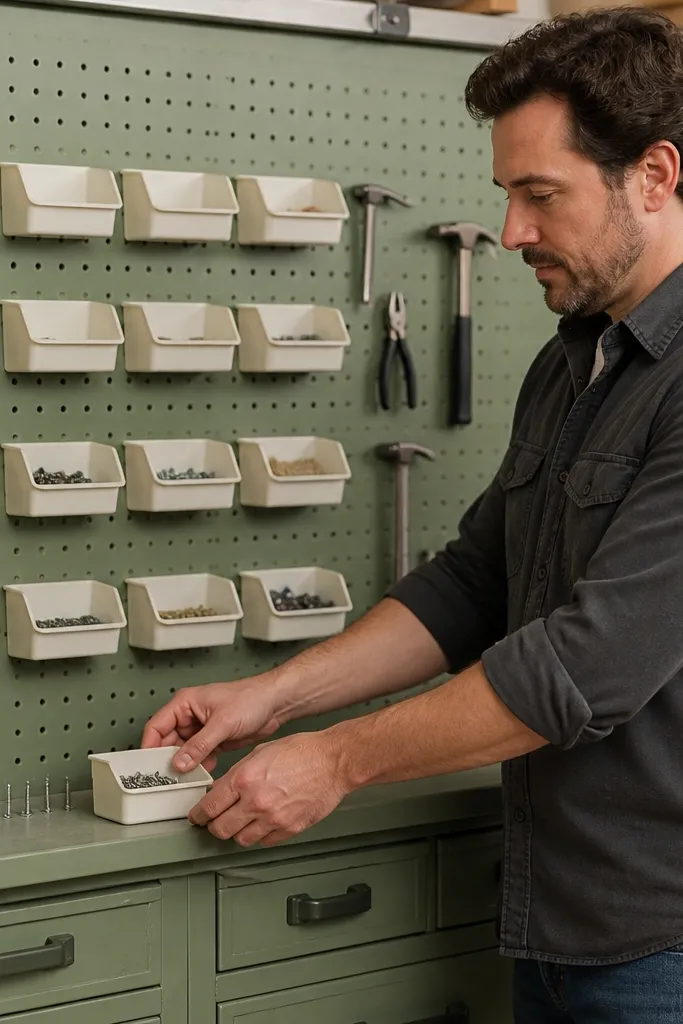
This design looks busy in a good way because it turns your bench into a tidy parts station. A pegboard front lets you hang tools and add small bins, while a drawer lip gives you a clean ledge for screws, tape, or a small container. The visual grid makes the bench feel organized even when you’re mid-build. It’s ideal for electronics, model work, and small repairs where you need lots of small items within reach. Skill level is medium since you’re building the bench face panel and aligning bins.
Build the bench frame, then attach a pegboard panel to the front face using spacers so the hooks seat correctly. Add a narrow lip shelf on top of the pegboard to catch small parts and stop them from slipping off. Install bins and small trays directly onto the pegboard grid so everything has a home. Finish the bench top with a smooth clear coat and add a back power strip pass-through so cords don’t cross the pegboard.
Use one bin color family and keep labels off the front — the pegboard looks cleaner.
Don’t overload the pegboard with every tool — leave negative space so it stays visually calm.
14. Steel Slatwall Side Panels With Tool Hooks and Magnetic Strip

Slatwall panels look sharp because the holes create a consistent grid. Pair that with a magnetic strip for bits and small metal tools, and you get a bench that’s functional and camera-friendly. This setup keeps your bench surface clear while showing off your system — tools hang in a repeating pattern, and magnets keep small pieces from falling into drawers. It’s a strong choice for garages where you want an industrial aesthetic without building full cabinets. Skill level is beginner to medium because it’s mostly mounting panels and building a simple top.
Build a basic bench frame and top, then mount slatwall panels to the sides at a consistent height. Add a magnetic strip along the side panel using appropriate anchors or mounting tape designed for the magnet weight. Install hooks and hangers in a planned pattern so heavy items sit lower and lighter tools sit higher. Finish the top with a durable clear coat and add a small back stop so boards don’t slide off.
Plan your hook spacing based on the largest tool footprint you’ll hang, not the small ones.
Don’t mount magnets on a dusty, unfinished surface — they lose hold and the strip creeps.
15. Tall Workbench With Overhead Pegboard and Crown Molding Look
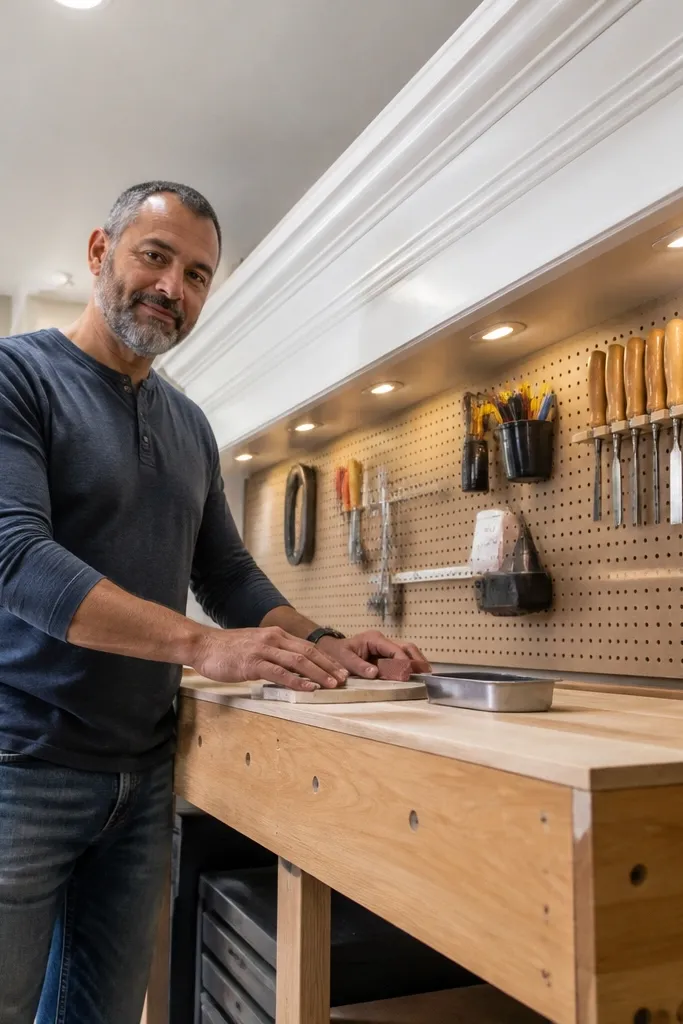
A tall bench makes the whole area look more “serious,” and the overhead pegboard adds a clean upper layer. The crown molding style trim around the overhead storage makes it feel like furniture instead of a garage shelf. This is great if you do frequent tasks standing up, like assembly, painting touch-ups, or sanding small parts. Visually, the tall frame creates strong vertical lines that read well in garage corners. Skill level is medium because you’re building a taller base and mounting overhead storage securely.
Build a taller base using 2x4s with cross braces so it doesn’t wobble, then mount a thick top panel. Install an overhead pegboard to studs above the bench, and add slim trim strips beneath it to create a boxed look. Keep the pegboard layout simple: a few tool rails and bins, then stop. Finish the entire wood surface in one matching tone so the bench and overhead area look like one piece.
Use a level and a laser line to align the overhead pegboard — it keeps the trim lines straight.
Don’t skip bracing on a tall bench — flex makes clamping frustrating and looks bad.
16. Corner L-Shape Bench With Matching Storage Return
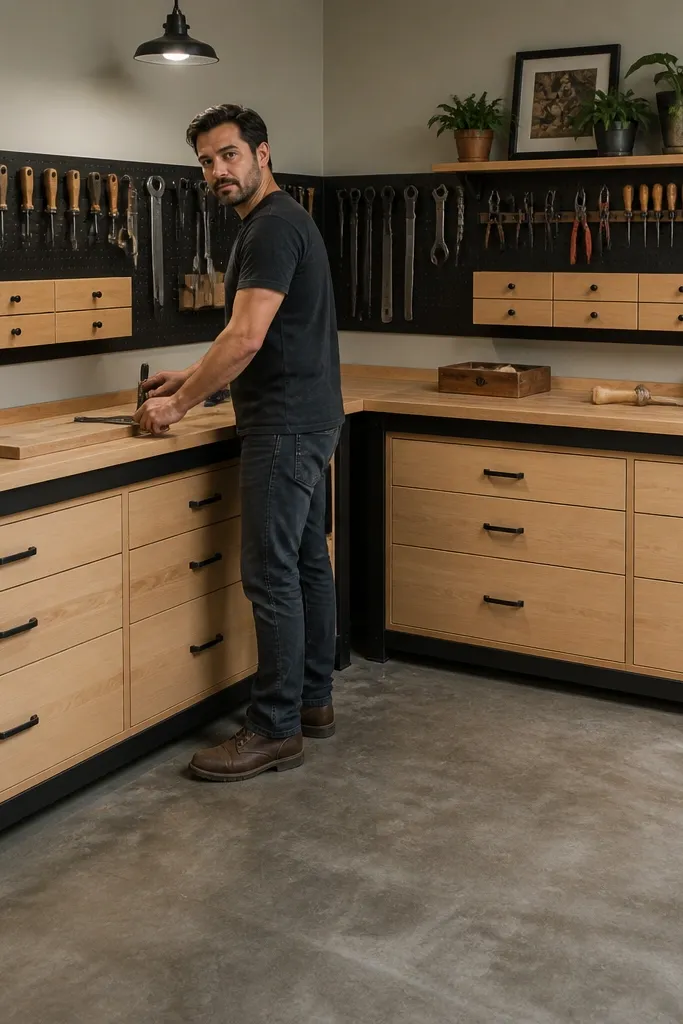
Corner benches look clean because they make use of awkward space and create a single continuous work zone. The matching storage return is what makes it photogenic — your eyes see one continuous face, not a separate side table. This setup is great for garages where you have power on one wall and you want to keep tools organized along both directions. It also improves workflow because you can rotate between cutting and assembling without walking around the bench. Skill level is medium since you’re cutting and aligning two tops and building storage on multiple faces.
Measure the corner and plan two widths that fit your reach, then build a main bench run and a return run with matched heights. Use a continuous top material if you can, or join two sections with a clean seam line. Add drawer banks under both runs and keep drawer fronts aligned so the visual grid stays straight. Finish with a durable top coat and add a tool rail on the inside corner to keep frequently used tools in reach.
Make the seam location part of the design — place it where you’ll mount a small stop rail or a tool holder.
Don’t make one side deeper than the other if you’re clamping a lot; your tools will overhang unevenly.
17. Workbench With Built-In Air Hose Reel and Coiled-Cord Dock
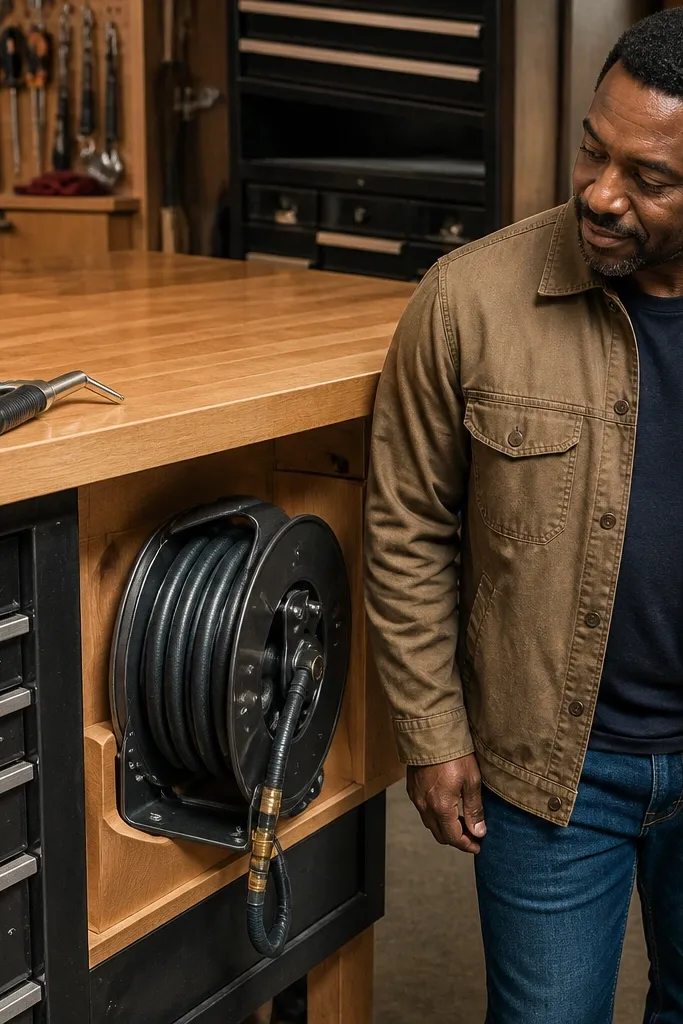
A built-in hose reel makes a bench look engineered, not improvised. It keeps the hose off the floor, prevents tangles, and makes your setup feel like a real shop station. The coiled-cord dock is the detail people notice: it gives the hose a clean “parking spot” so it doesn’t drag across the bench top. This is best for garages where you use air for impact tools, inflating, or cleaning parts. Skill level is medium because you’re mounting a reel securely and planning cord routing.
Choose a hose reel size that matches your hose length and mount it under a shelf or to a side panel with through-bolts. Install a coiled-cord dock or a small guide hook near the reel so the hose loops sit neatly. Build the bench frame so the reel mount area has reinforcement blocks. Finish the top with a hard clear coat and add a small drip tray area if you use pneumatic tools that spit condensation.
Route the air line through a grommeted hole in the back so the hose line stays hidden.
Don’t mount the reel on thin plywood — it will loosen and look crooked after a few months.
18. DIY Laminate Slat Shelf Bench With Hidden Tool Cabinet Base
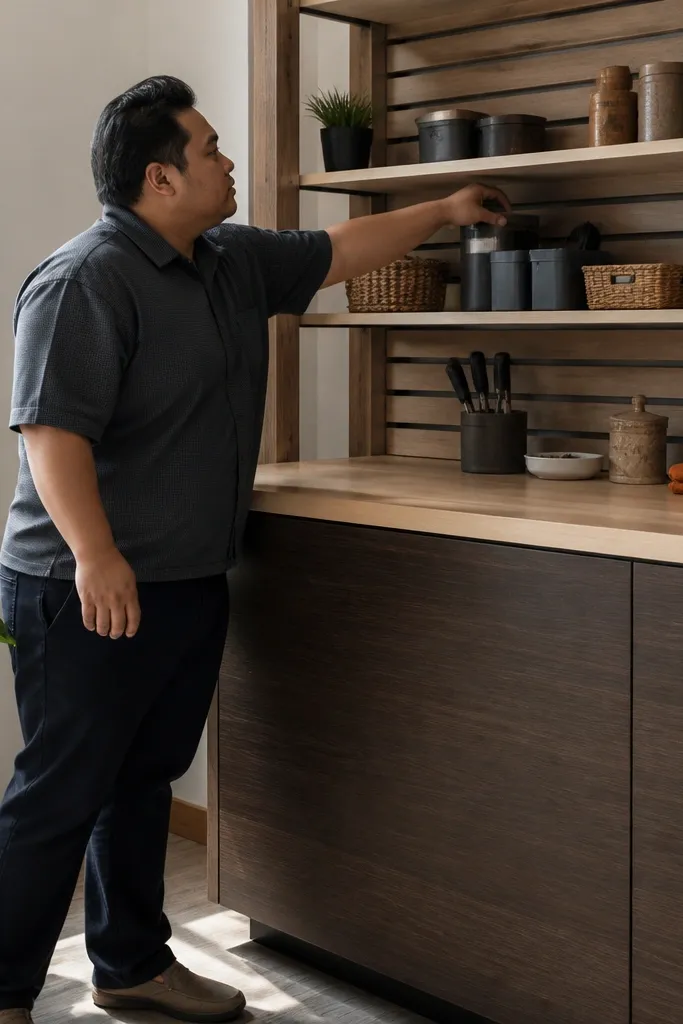
This bench looks layered and intentional because it has a slatted shelf detail above the work zone and a hidden cabinet base below. The slats create texture and break up the visual mass, while the hidden cabinet keeps clutter out of sight. It’s a great compromise: you get open storage for frequently grabbed items and closed storage for everything else. The laminate top handles drips and wipes clean fast, which keeps the bench looking good between projects. Skill level is medium because you’re building shelves and aligning the cabinet door.
Build the base cabinet frame first, then install a laminate top sheet on a plywood deck. Add a slatted shelf above the bench with evenly spaced boards, anchored into studs or strong brackets. Use a recessed toe-kick or clean cabinet face so the base looks built-in. Finally, route power through the back and add a simple cord tie point under the shelf so the cords stay out of the slats.
Keep the slat spacing consistent (for example 2 inches on center) — it’s a big part of the “designed” look.
Don’t set the shelf too low; you’ll bump it and the whole setup becomes annoying.
19. Mobile Workbench On Locking Casters With Lift-Out Tray
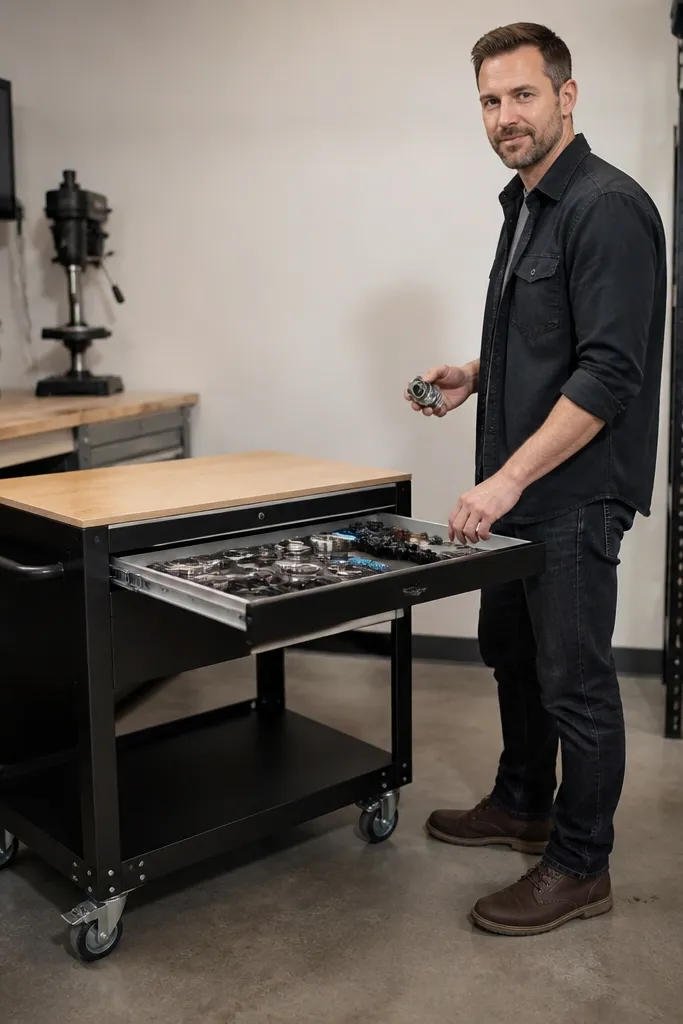
A mobile bench looks great because it’s compact and clean, and the casters make the setup feel flexible. The lift-out tray is the aesthetic and functional detail: you get a neat small-parts area that moves with you, and you can pull it out to work on a larger piece elsewhere. This style is ideal for garages where you sometimes need floor space for vehicles or larger projects. Skill level is medium because you’re building a stable rolling frame and making sure the top doesn’t rack when locked.
Editor's noteUse two swivel casters and two rigid casters for easier straight rolling without constant correction.
Build the bench base with a rigid frame, then mount four locking casters rated for the bench weight. Add corner cross braces and a center support to prevent wobble. Create a lift-out tray from plywood with a lip that locks into a recess on the bench top. Finish the top with a durable clear coat and add a small stop block so the tray can’t slide when the bench is moving.
Skip thisDon’t use cheap casters; soft wheels make the bench feel unstable even when locked.
20. Painted Steel Cabinet Bench With Countertop and Tool Drawer Stack
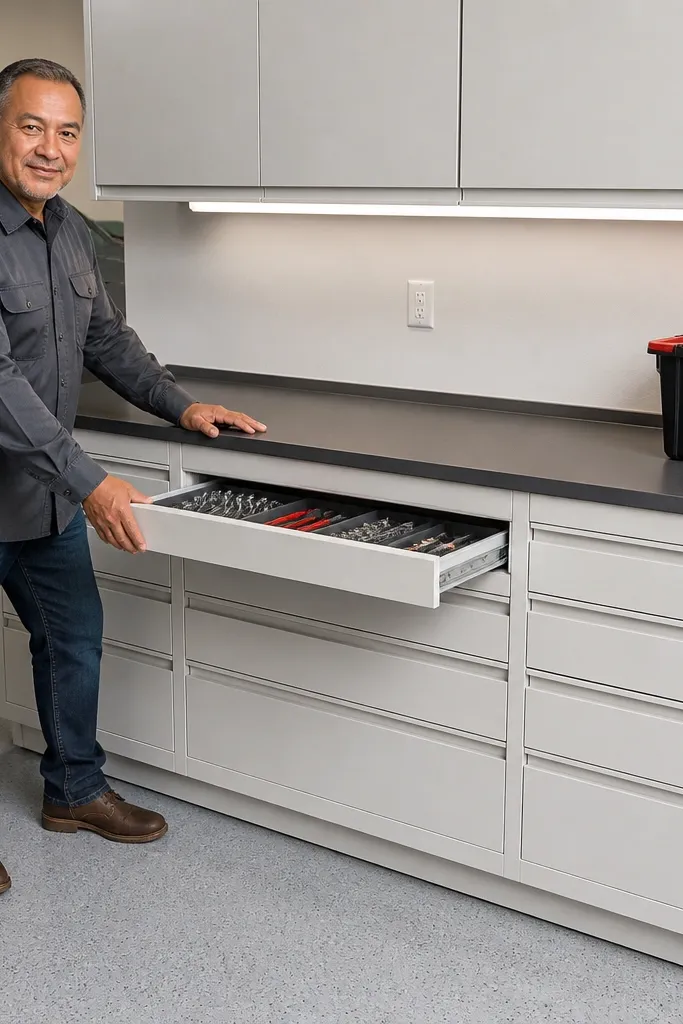
This is the bench that looks like it came from a commercial shop. Painted steel drawers and cabinet panels give you crisp lines, sharp corners, and a durable surface that wipes clean. The drawer stack layout is also practical: you can separate hand tools, fasteners, and consumables without rummaging. It’s a strong choice if your garage gets dusty and you want the bench to look clean even when you have projects going. Skill level is medium because you’re working with sheet metal or prefabricated cabinet components, but the result looks high-end quickly.
Start with a steel cabinet base or build steel-like panels from thick plywood and paint them with a durable enamel. Install a drawer stack using heavy-duty slides and align the fronts so gaps stay even. Add a countertop on top using a plywood deck and a hard top surface like laminate or a clear-sealed wood top. Mount a tool drawer at the most-used height and add a back rail for hanging tools so the top stays open.
Use magnetic catches or soft-close drawer latches so the drawer fronts look clean and stay shut under vibration.
Don’t overpaint thin panels; paint cracks around screw holes and edges show up fast.



