
1. Two-zone lighting plan for double height (wall wash + table height)
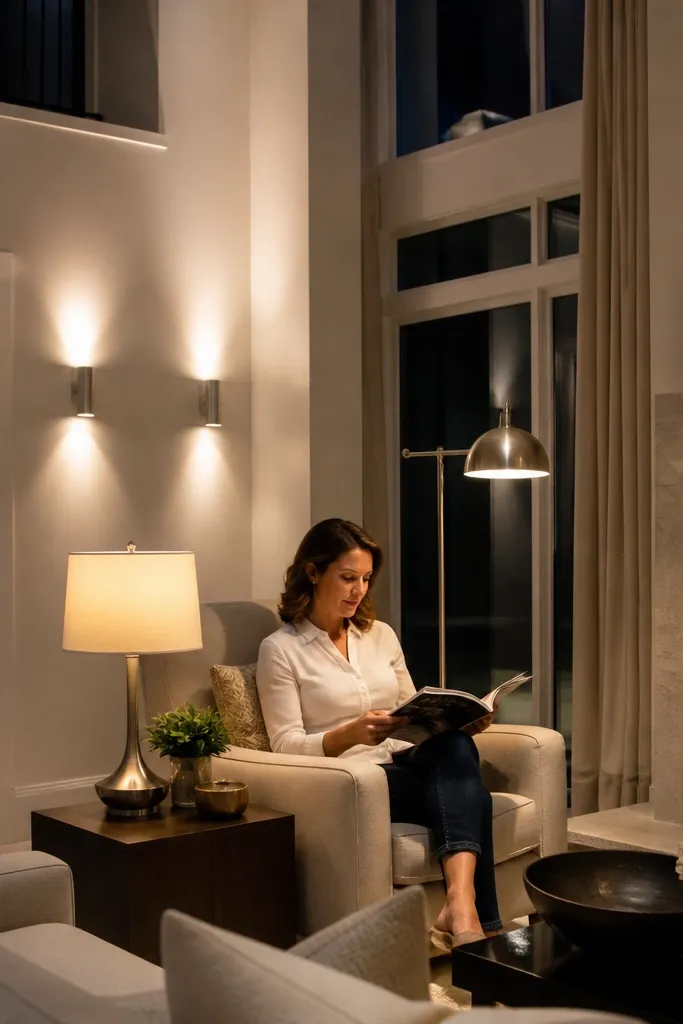
This is the fix for the most common double height problem: the room looks tall, but the seating area feels underlit. You’re building two lighting layers on purpose. Wall wash sconces bounce light across the lower walls, so faces and fabrics look natural. Then you add table or floor lamps around eye level so reading and conversation stay comfortable. It’s especially useful in open-plan homes where the living room shares sightlines with the kitchen or entry.
Step 1: Place wall-wash sconces so their light hits the wall about 2-3 feet above the sofa back height, not at the ceiling. A good starting point is 60 inches from finished floor to the center of the fixture for typical living-room seating, then adjust to your sofa height. Step 2: Add at least two independent sources in the seating zone (one floor lamp and one table lamp, or two floor lamps) so you can dim one side without going dark everywhere. Use bulbs in the 2700K to 3000K range and pick fixtures with diffusers to avoid glare.
Editor's noteRun a dimmer circuit for the wall wash and keep the table lamps on separate switches so you can switch moods without rewiring.
Skip thisDon’t rely on a single ceiling fixture in a double height room — you’ll get bright top and shadowy seats.
2. Ceiling fan direction for comfort in double height
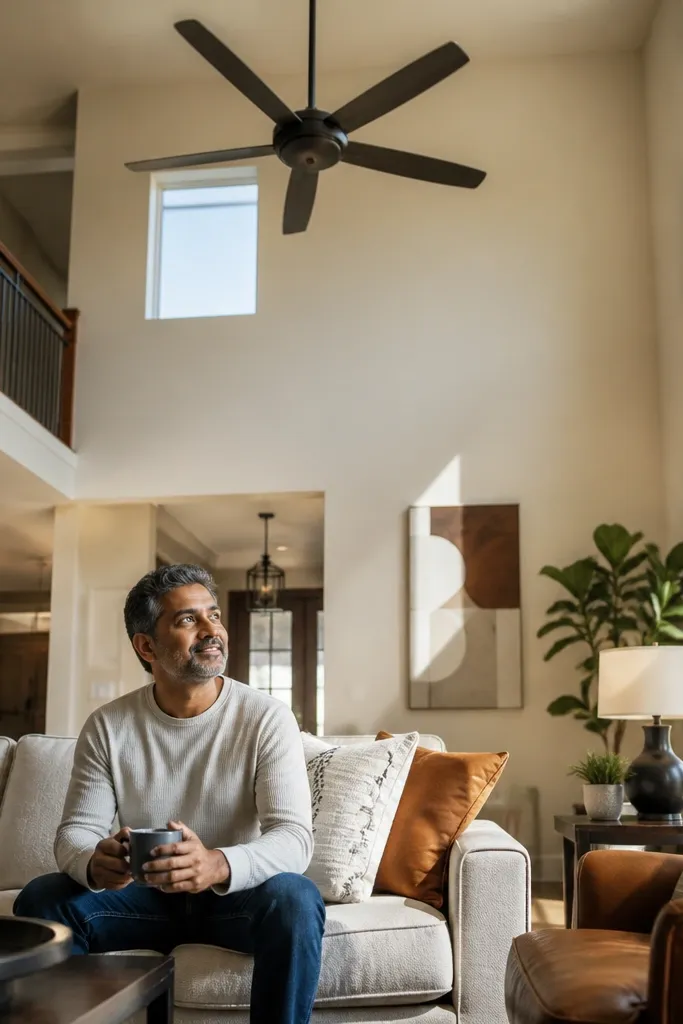
Double height spaces trap heat up high, which makes the room feel colder at seating height even when the thermostat is set right. A properly set ceiling fan helps move air down the zone where people sit. In summer, you want airflow that creates a light breeze across faces; in winter, you want gentle upward movement that pushes warm air near the ceiling back down. This is one of the most practical DIY comfort upgrades because it changes how the room feels without changing its look.
Step 1: Install or tune a ceiling fan rated for the room size, then set the direction control by season. In winter, use the forward/reverse setting that pulls air up and then gently circulates it downward along the ceiling plane. Step 2: Use a low-to-medium speed for comfort; high speed can feel drafty in a tall room. Finally, keep furniture placement so the fan has a clear air path — don’t block it with tall planters right under the blades.
Editor's noteIf you have a vaulted or open ceiling, measure blade clearance and aim for at least 8 feet from floor to fan blades for safe, quiet operation.
Skip thisDon’t run a fan at maximum speed to “fix” lighting or heating — it usually just creates noise and drafts.
3. Full-height curtains to kill echo and soften double height
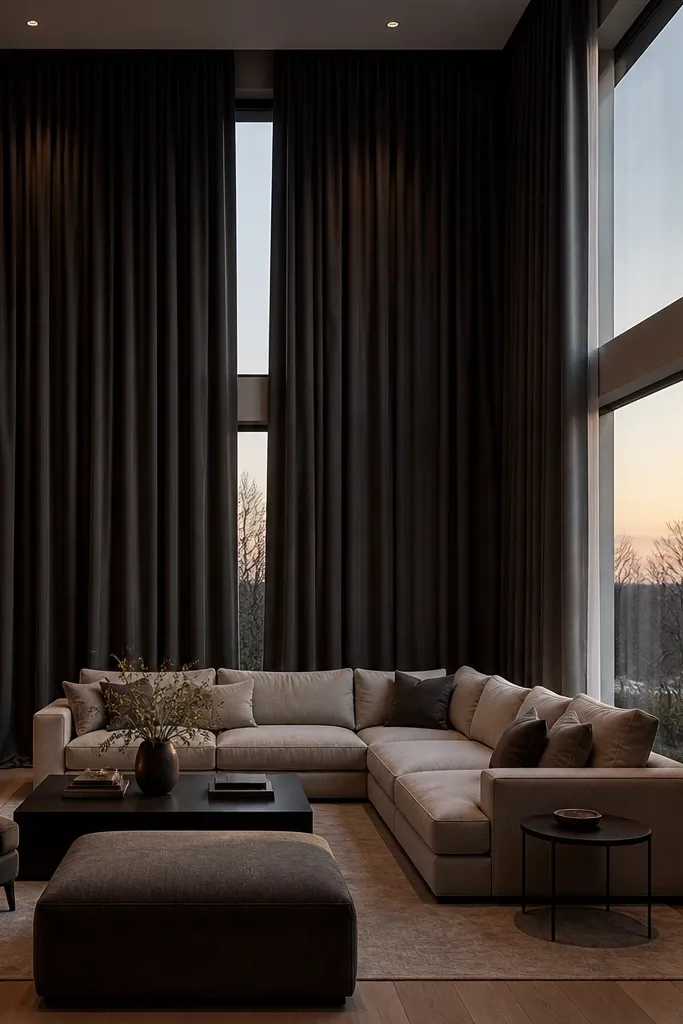
Double height rooms often sound sharp because hard surfaces have more vertical space for sound to bounce. Full-height curtains reduce that by adding a thick, moving layer across windows and parts of the wall. The goal is not just coverage — it’s weight and pooling at the floor so the fabric actually absorbs. Choose a curtain fabric that feels substantial, not thin and glossy. In a standard living room, curtains help too, but double height makes the difference more noticeable.
Step 1: Mount a ceiling track or high wall brackets so the curtain starts near the ceiling height line, not mid-window. For width, cover beyond the window edges by 6-10 inches on each side so light doesn’t leak and sound doesn’t find gaps. Step 2: Use a floor break of about 1/2 to 1 inch (fabric just touches the floor or lightly pools) and hem carefully so it doesn’t drag. Install curtain weights at the hem if your fabric wants to blow back.
Editor's noteIf you’re painting nearby walls, hang curtains after the last coat so you don’t get paint flecks stuck in fabric folds.
Skip thisDon’t use sheer curtains alone in a double height space — you’ll get softness visually, but not much sound control.
4. Standard living room with a "focal wall" paint move
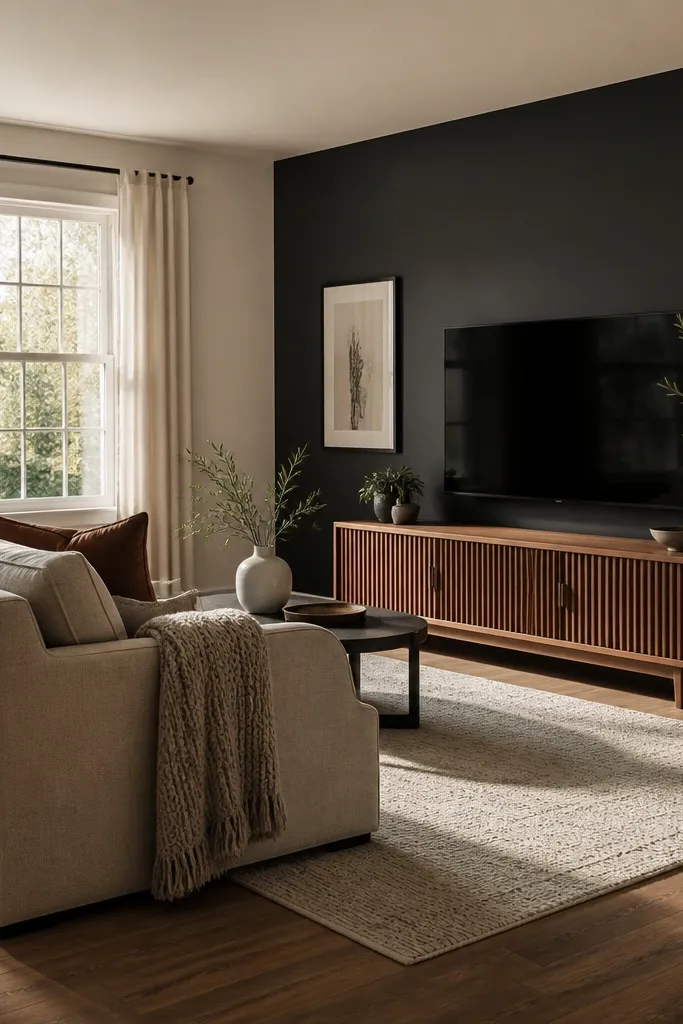
In a standard living room, you don’t have the vertical drama of double height, so you need a different kind of structure. A focal wall paint move gives the eye a place to land and makes furniture feel anchored. Pick one wall behind the main sofa or media unit, then keep the other three walls a lighter neutral. This approach also makes art placement easier because your frame colors pop against a consistent background. It’s a straightforward DIY win with big payoff.
Step 1: Choose a shade that is 2-3 steps darker than your other walls, and test it on a 2x2 foot patch at eye level. Let it dry fully and check it at night with your existing bulbs so you don’t get surprises. Step 2: Prep with patching and sand, then prime if you’re going darker or covering stains. Paint the focal wall first, then mask carefully and keep a clean edge with a sharp brush for the trim line.
Editor's noteUse a matte or eggshell on walls depending on how cleanable you want it — eggshell hides scuffs better.
Skip thisDon’t pick a focal color that’s too close to the existing wall tone; the wall needs to read as clearly different.
5. Double height gallery rail for art at a controlled height
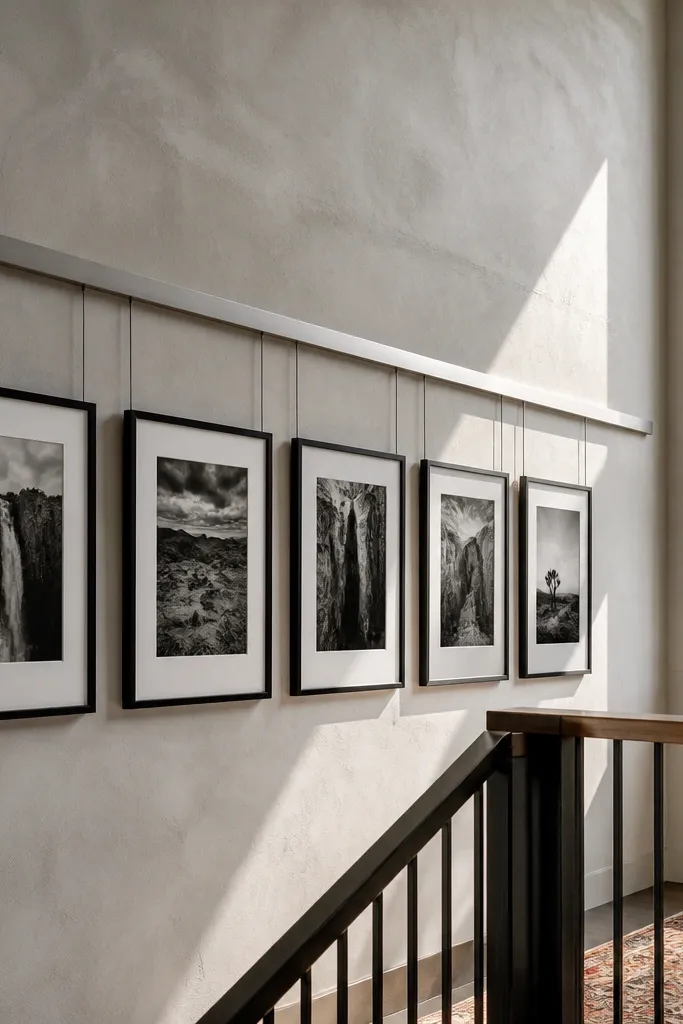
In double height rooms, art can float because viewers see it from multiple angles. A gallery rail or a strict “art line” solves that by making the artwork sit on one believable horizon. You get a curated look without needing to guess how high each frame should be. This is best when you have a large open wall adjacent to the staircase or balcony. It also helps you avoid the common mistake of hanging art too high just because the ceiling is tall.
Step 1: Decide your art line by measuring from the floor to the center of your most important piece. A strong default is 57-60 inches to the picture center for seating zones, then adjust if your sofa back is tall. Step 2: Use a level and a chalk line to mark the rail or mounting points so every frame aligns to the same baseline. If you’re hanging multiple sizes, hang the largest first and use the rest as spacing siblings, not random pieces.
Editor's noteDry-fit frames on the floor first and measure the total width so the gallery doesn’t end up awkwardly cut off by trim.
Skip thisDon’t hang a single small frame centered on a huge double height wall — it will look lost.
6. Standard living room built-in look using shelving and trim
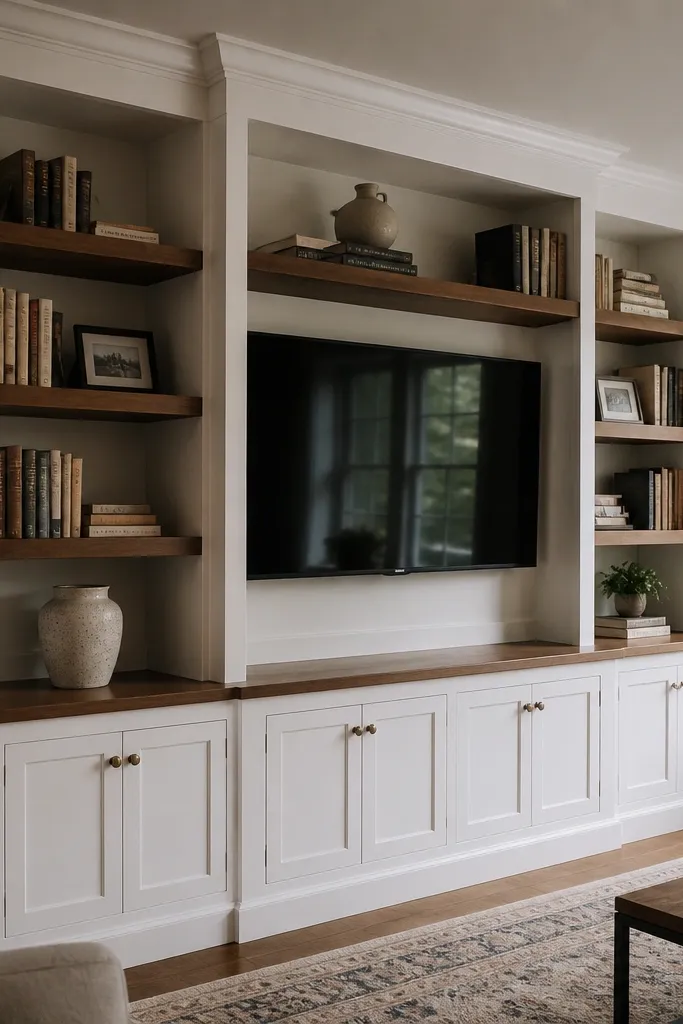
A standard ceiling can feel flat, so you need vertical rhythm. A built-in look using shelving with matching trim gives you that rhythm without full carpentry. The advantage is you can control the proportions: shelf height, spacing, and the “frame” around the unit. This is great if you want storage and a cleaner backdrop for TV or a reading corner. It also makes the room look more expensive than it is because the trim creates a continuous visual edge.
Step 1: Pick a shelving layout that matches your wall width and anchor it to studs. Keep the top shelf about 8-10 inches below the ceiling so it reads intentional, not cramped. Step 2: Add 1x2 or 1x3 trim around the sides and top to create a boxed-in look, then caulk the seams. Paint the shelves and trim the same color as the wall for a subtle built-in effect, or match trim to ceiling for a crisp line.
Editor's noteIf your wall isn’t perfectly flat, use shims behind the shelf brackets so the unit sits straight before you trim.
Skip thisDon’t skip stud location — wall anchors alone will loosen under shelf weight.
7. Double height half-wall with vertical paneling for separation
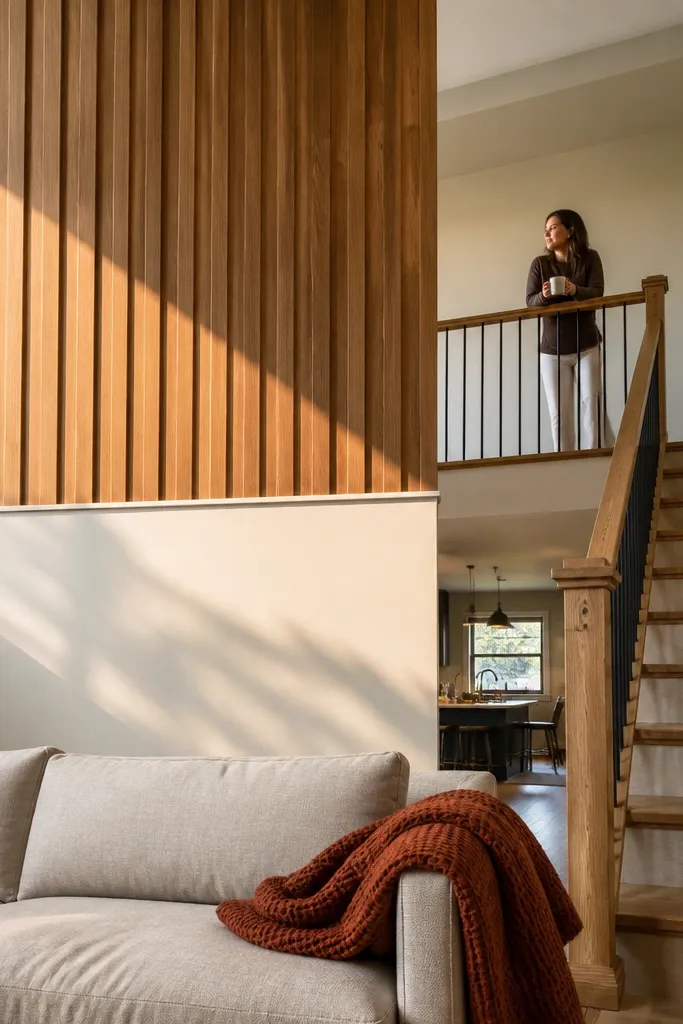
If your double height includes a mezzanine or open landing, a half-wall can make the room feel designed instead of exposed. Vertical paneling adds structure and also breaks up sound a bit more than plain drywall. You get a clear boundary between the upper visual zone and the lower seating zone, which helps people feel grounded while still enjoying height. This direction works best in open-plan homes where you want the living room to feel like a “space,” not a void.
Step 1: Decide your half-wall height and keep it consistent across the opening; a typical DIY-friendly range is about 36-42 inches tall depending on sightlines. Build a simple stud frame anchored to the existing structure, then sheath with plywood or drywall based on your finish plan. Step 2: Apply vertical slats or battens spaced evenly (commonly 1.5-2 inches between slats) and finish with paint or stain matched to your trim. Seal edges and caulk the corners so the panel lines look crisp.
Editor's noteUse a spacer jig for slat spacing so your lines stay straight even if the wall is slightly out of square.
Skip thisDon’t leave the half-wall unfinished — unfinished edges show through and make the whole feature look temporary.
8. Standard living room rug sizing with a 6-inch rule
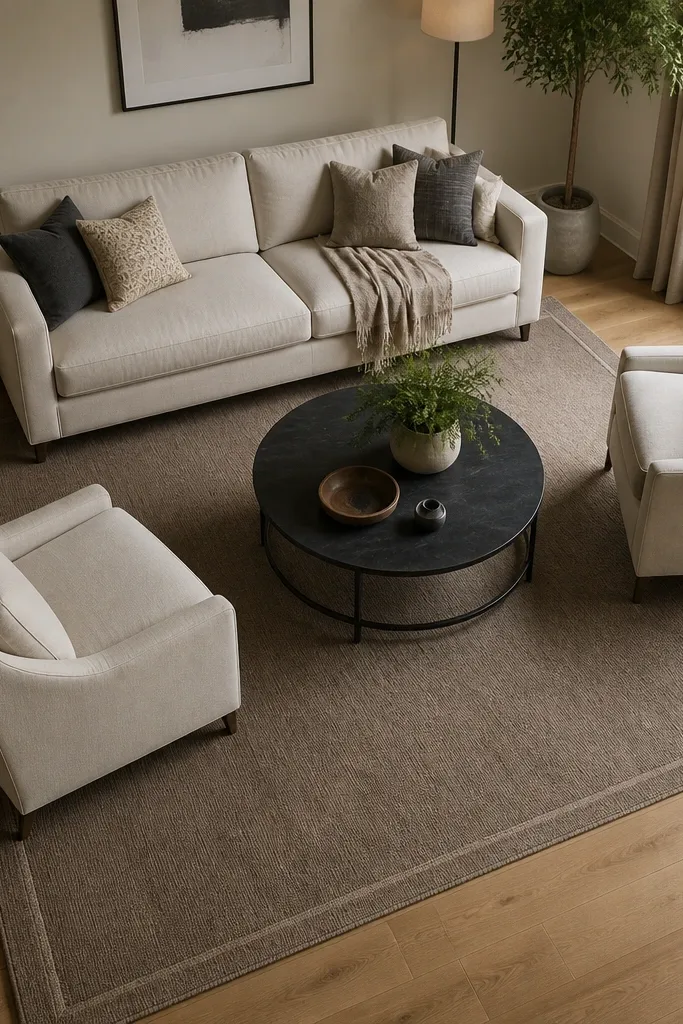
Rugs are one of the fastest ways to make a standard living room feel larger and more intentional. The trick is sizing so the rug “captures” furniture, not just sits under a coffee table. In a standard room, the ceiling is lower, so the floor becomes a bigger visual anchor — a good rug makes everything look planned. This also helps with acoustics because rugs reduce hard reflections. It’s a DIY-friendly move that changes the entire room mood within a day.
Step 1: Measure your seating area and choose a rug size where at least the front legs of the sofa and chairs sit on the rug. A common starting point is adding 6 inches beyond the front legs for comfortable overlap. Step 2: Center the rug based on the main seating line, not the room’s geometric center. Use painter’s tape on the floor to mark the corners and walk around to check that the doorway paths don’t get blocked.
Editor's noteIf you’re between sizes, size up. A rug that’s too small makes a standard room look chopped into sections.
Skip thisDon’t buy a rug based on the coffee table alone — the furniture needs to land on it.
9. Double height seating layout that avoids a 'floating' sofa
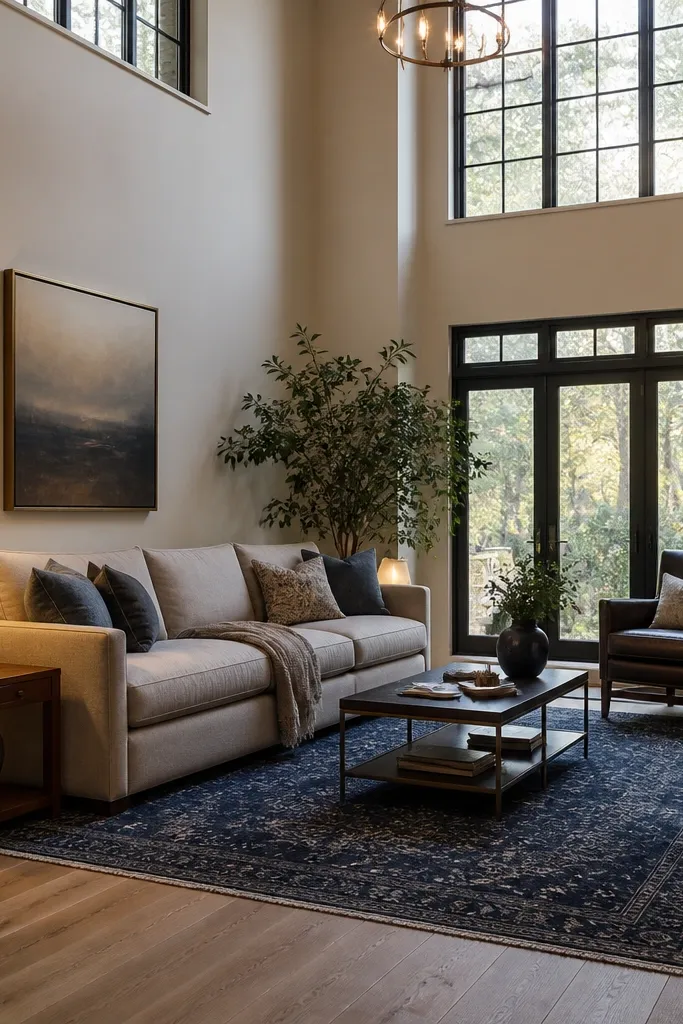
In double height rooms, furniture can drift away from the viewer because the eye reads more empty space. The fix is layout that gives the seating zone a defined footprint. Pull the sofa out from the wall enough that you can build a lighting and texture layer behind or beside it. Add side tables and one tall element like a lamp to create vertical balance. This direction matters because it changes how tall the room feels — not by changing the ceiling, but by controlling the visual weight below.
Step 1: Measure the wall behind the sofa and aim for a consistent buffer of 12-18 inches if you’re placing a console, art, or a lamp behind/near it. If you’re using wall-mounted lighting, keep the sofa at a distance where the light hits the seating area instead of shining into the back of your head. Step 2: Place one rug that extends under the front legs of seating, then position the coffee table so it doesn’t feel like it’s floating — keep it centered on the rug’s main rectangle.
Editor's noteUse two different heights in the seating zone (lamp + side table) so the room doesn’t look top-heavy.
Skip thisDon’t push the sofa flush to the wall in a double height room — it makes the lower zone look dead and the wall look empty.
10. Standard living room sound control with fabric panels behind seating
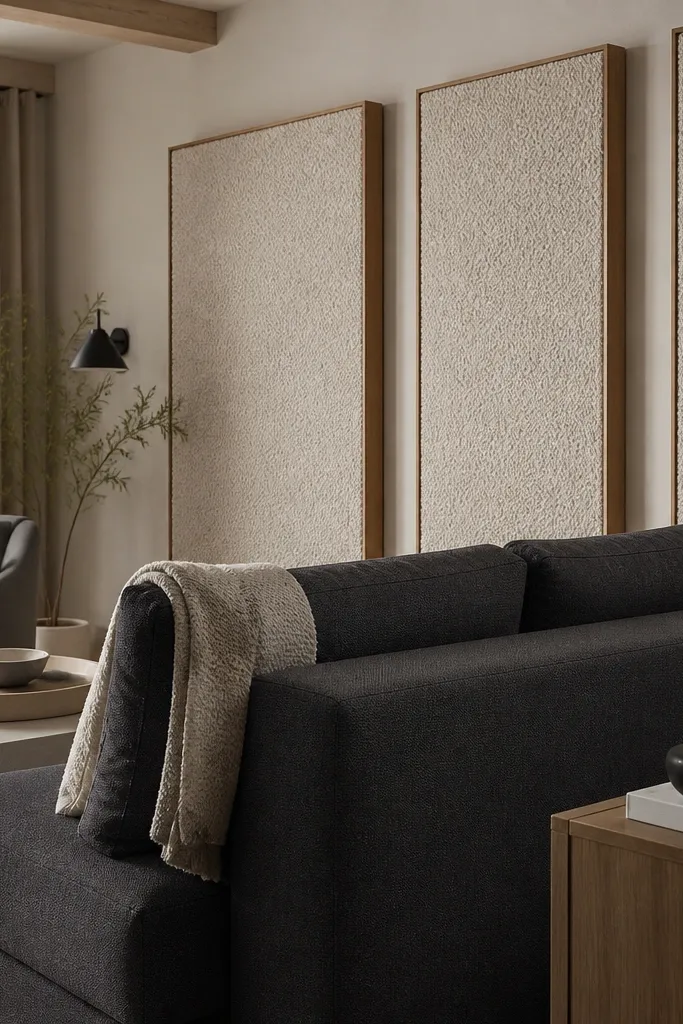
Standard living rooms still get echo, especially with tile floors and bare walls. You can improve comfort fast by adding soft absorption where sound bounces — behind or slightly to the side of the main seating. Fabric panels are easier to DIY than people think if you choose a simple frame. The benefit is less harsh reverb when you watch TV or have conversations, and it also makes the room feel warmer. This is a practical upgrade if your room has big windows, hardwood, or a lot of hard trim.
Step 1: Build or buy simple rectangular frames and stretch acoustic fabric over them, then mount the panels at ear-to-shoulder height behind the seating. A workable DIY height is roughly 24-60 inches from the floor depending on your couch height and wall height. Step 2: Use wall anchors or studs for secure mounting, and leave a small gap if the wall is very reflective. Add a thick rug under the seating to keep the absorption working together.
Match fabric color to your curtains or rug so the panels read as design, not “hardware.”
Don’t cover everything with heavy drapes without a rug — you’ll reduce echo but still have hard reflections from the floor.
11. Double height window treatment layering with roller shade + curtains
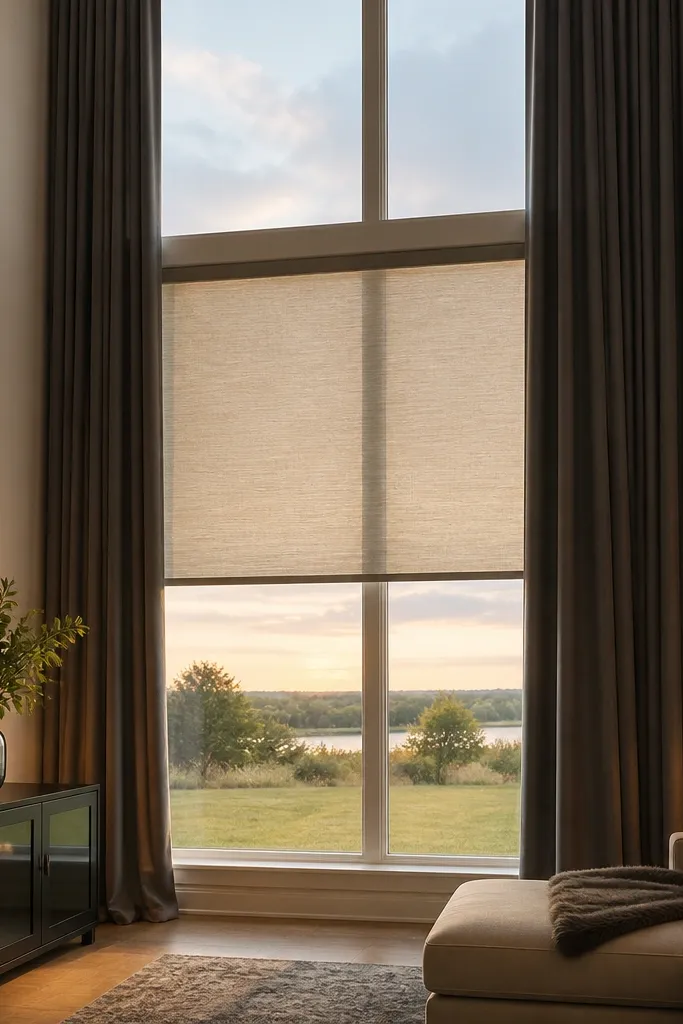
Double height windows can be a lighting problem and a glare problem. Roller shades give you control over daylight without fighting ceiling-high curtains every time. Then you add curtains for texture and sound absorption. This combo lets you keep the room bright when you want it and dark when you need TV or movie comfort. It also helps keep the lower seating zone from turning into a shadowed cave during late afternoon.
Step 1: Install an inside-mount or face-mount roller shade so it covers the full window opening and closes flush. Measure the width so the shade overlaps the trim edges by about 1/2 inch on each side. Step 2: Add curtain track hardware above the shade line and let the curtains fall freely to the floor. Use fabric with a matte surface so it doesn’t reflect glare back into the room.
If you’re dealing with glare, choose a shade fabric labeled for light control and keep it consistent across the room for an even look.
Don’t use only sheer curtains on large double height windows — you’ll keep light control but lose glare control.
12. Standard living room media wall with vertical slats
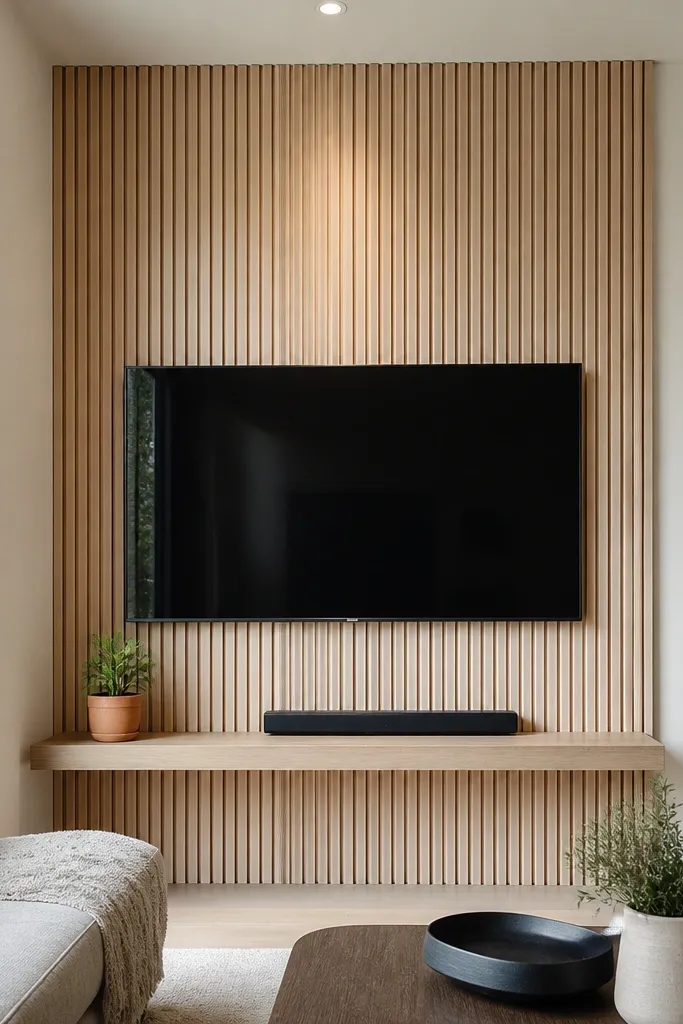
A media wall can make a standard living room feel taller because vertical lines pull the eye upward. Vertical slats also hide cables and create a clean frame for your TV and shelves. This direction is a good DIY compromise between double height drama and standard constraints. It works well when you want a focused focal wall but don’t want to commit to full built-ins. The result is calmer visuals, fewer clutter distractions, and better sound diffusion than flat drywall.
Step 1: Mark stud locations and build a slat backing frame or use a batten system anchored to studs. Keep slat widths consistent and set a repeat spacing pattern, like 2 inches between slats, then dry-fit. Step 2: Mount the TV using a bracket rated for the TV weight and keep clearance around the back for airflow. Finish by painting the slat background and sealing slat edges before you mount shelves.
Editor's notePlan cable routes before slats go up — once the slats are installed, moving outlets is painful.
Skip thisDon’t guess on TV height — measure from your seating eye level to the TV center, then lock it in.
13. Double height half-and-half paint strategy for visual grounding
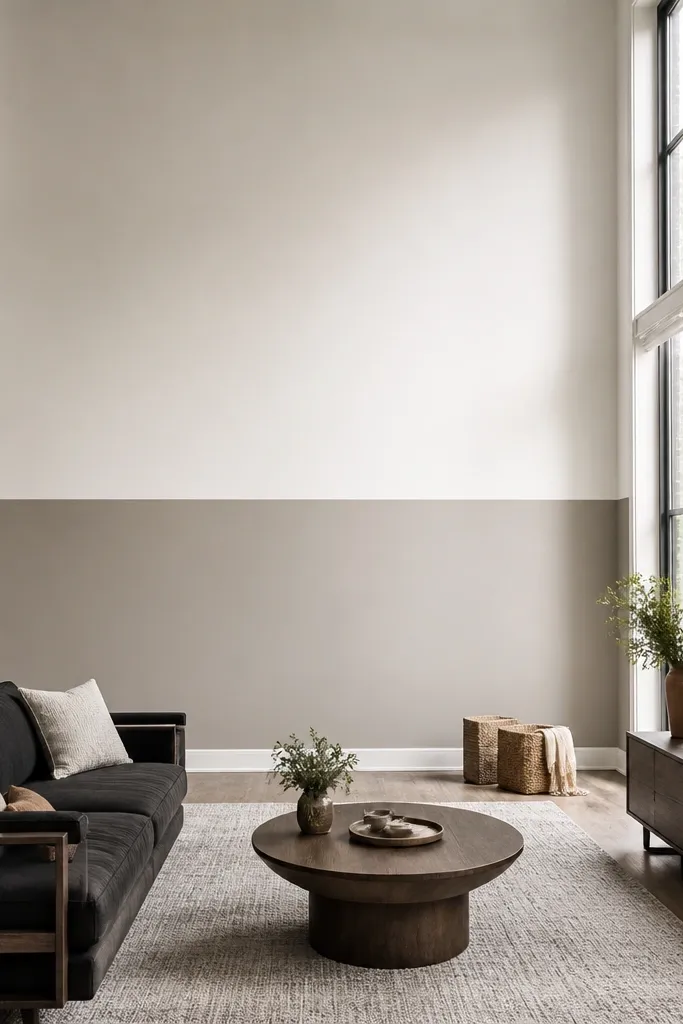
Double height walls look tall, sometimes too tall for comfort. A two-tone paint strategy grounds the lower half and keeps the upper half from feeling like a blank void. The idea is to stop the wall color abruptly at a measured height, so the eye has a “resting shelf.” Use the lighter color on top and a slightly deeper neutral on the lower portion, then keep trim crisp so the line reads intentional. This works best when your seating is pushed away from the wall and you want that wall to feel like part of the seating zone.
Step 1: Choose a line height around 48-60 inches from the floor depending on sofa height and how much of the wall your art will cover. Use painter’s tape for a straight edge and confirm it with a quick level check in multiple spots. Step 2: Paint the lower portion first, let it cure, then mask and paint the upper portion. Finish with caulk at the trim line for a clean boundary and touch up with a small foam roller for uniform coverage.
Editor's noteUse the same sheen family on both colors (both eggshell, for example) so the split line doesn’t look patchy.
Skip thisDon’t pick two colors with wildly different sheens — the line will look accidental.
14. Standard living room corner 'reading nook' with floor lamp and wall shelf
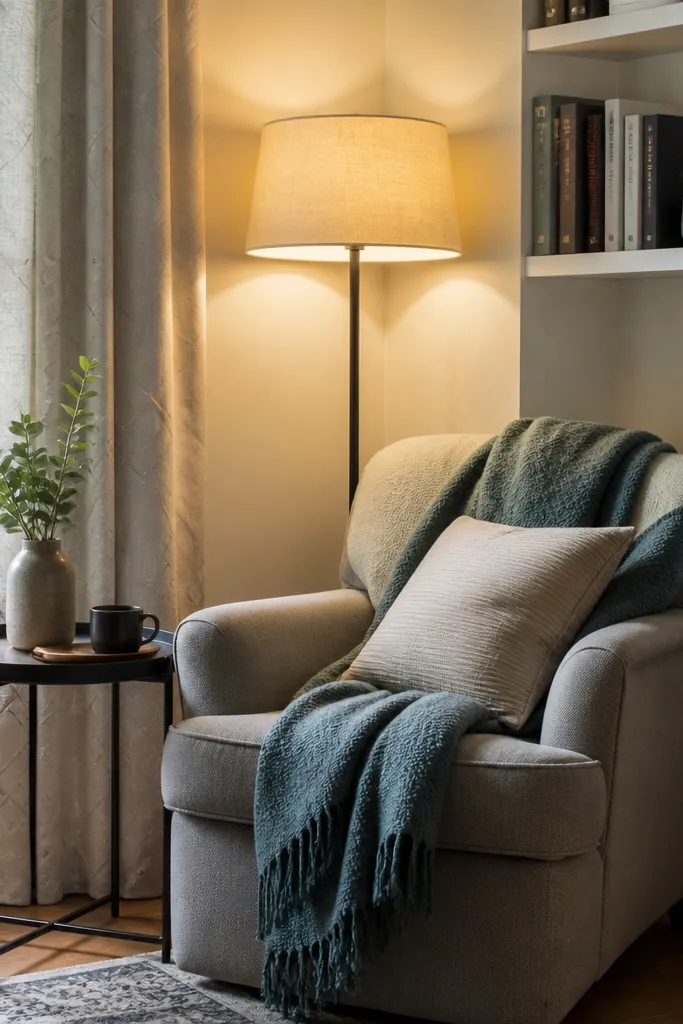
Standard living rooms often feel busy because there’s no strong “use” for the corners. A reading nook gives the corner a job and creates a natural place to stop and look. You anchor it with a floor lamp that casts downward light and a wall shelf for books so the corner doesn’t become storage chaos. This also improves lighting because you’re adding a second light source near where people look. It’s a small DIY build that makes the whole room feel more livable.
Step 1: Pick a chair that fits the corner with at least 18 inches clearance from the walkway, then place the floor lamp so it lands light on the seat, not the ceiling. Step 2: Install a wall shelf at about 48-60 inches from the floor so books are reachable while sitting. Use a level and mount into studs or use proper anchors rated for shelf loads.
Editor's noteChoose a lamp with a shade that blocks glare — a simple fabric shade makes a huge difference at night.
Skip thisDon’t mount the shelf too high — you end up creating a “decor shelf” you never use.



