
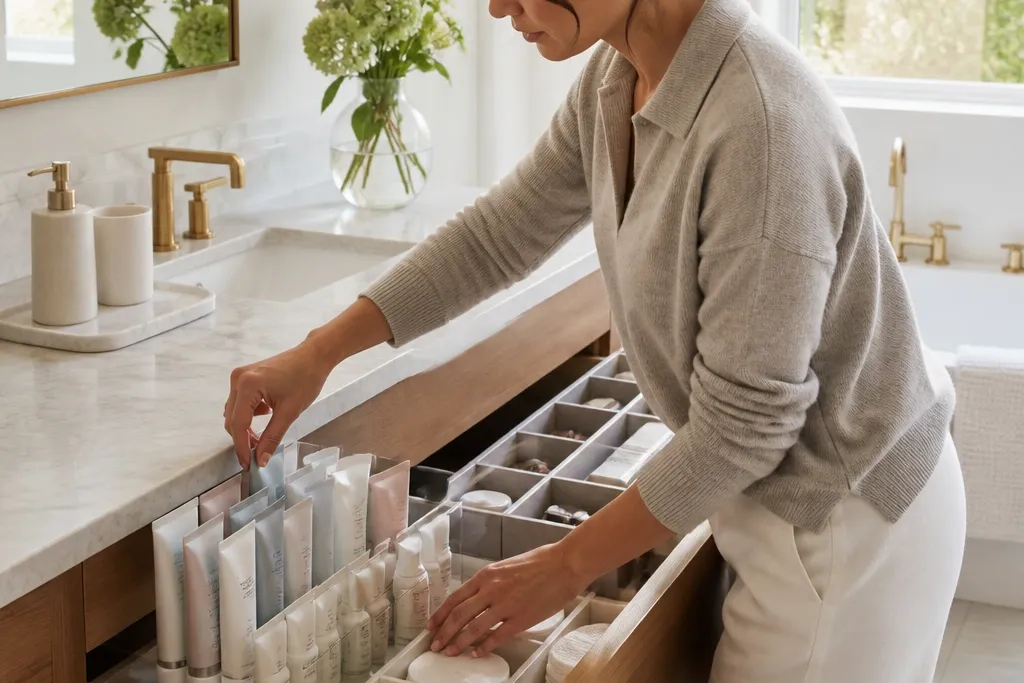

1. Foam-Board Beauty Grid with Fabric Covers
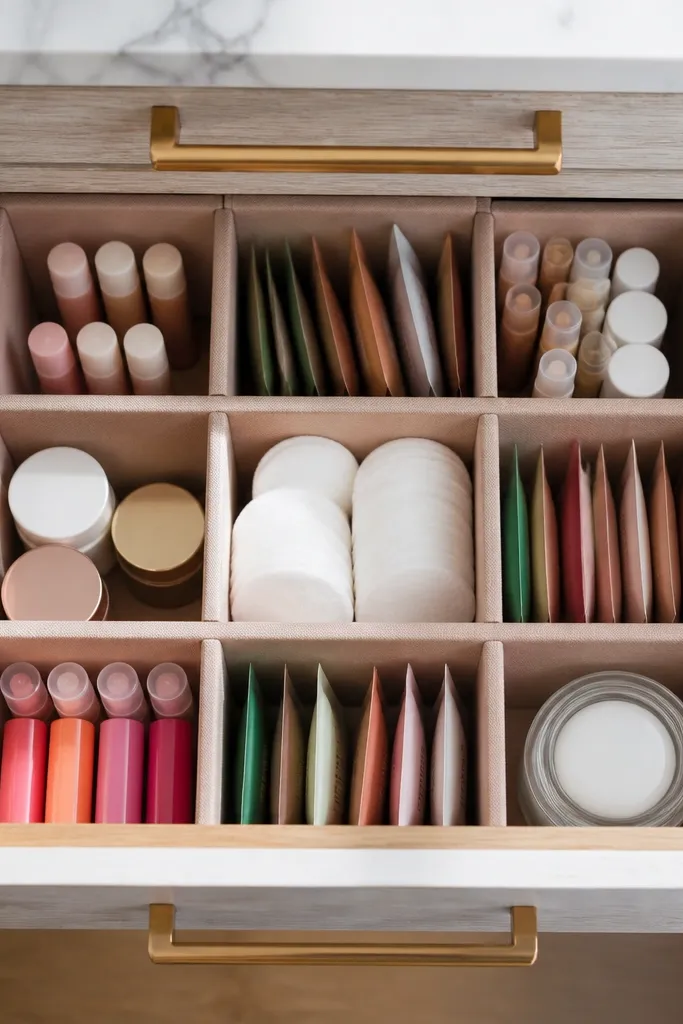
This is the cleanest-looking option for drawers that currently feel like a storage bin. You build a tight grid with consistent lines, then wrap each panel in fabric so it looks soft and styled instead of “DIY board.” It works best for small daily items like lip balms, face masks, cotton rounds, and travel-size products that otherwise slide around. The fabric also hides scuffs and minor dents that happen from constant opening and closing. Skill level is beginner-friendly and the time is about a day if you measure carefully and cut straight.
Start by measuring the drawer interior and cutting foam board to the base size. Then cut divider walls at 2-inch and 3-inch heights depending on bottle sizes, and hot-glue them to the base in a straight grid. Wrap the base and divider faces with fabric using spray adhesive, smoothing edges so the lines stay crisp. Finally, seal the fabric edges with a thin brush coat of Mod Podge or clear fabric sealer so humidity doesn’t fuzz the material.
Editor's noteUse a metal ruler and a fresh utility blade for foam cuts; dull blades make uneven edges that ruin the “photo neat” look.
Skip thisSkip stretchy fabric — it warps the grid and makes dividers look crooked.
2. Acrylic Drawer Insert with Frosted Divider Rows

If you want a drawer that looks modern and airy, acrylic wins. The clear base keeps everything visible, and frosted dividers hide labels so the drawer still looks calm and curated. This works especially well for skincare bottles you like to display, because you can see them without them falling over. It also makes it easier to spot when you’re low on a product. You’ll feel the difference in daily use because you stop rummaging and start grabbing.
Choose an acrylic sheet thickness around 1/8 inch for the base so it doesn’t flex too much. Cut the base to drawer size, then measure bottle footprints to create divider spacing of 2.5 to 3 inches. Use acrylic glue for the divider walls, then add small non-slip pads under the insert. After assembly, wipe with isopropyl alcohol so the surface stays clear and streak-free.
Editor's notePlan one “tall lane” for pump bottles and one “flat lane” for tubes — it keeps the layout logical.
Skip thisDon’t use super-thick acrylic; it’s harder to cut cleanly and often looks bulky in shallow drawers.
3. Sealed Wood Slat Organizer with Square Wells
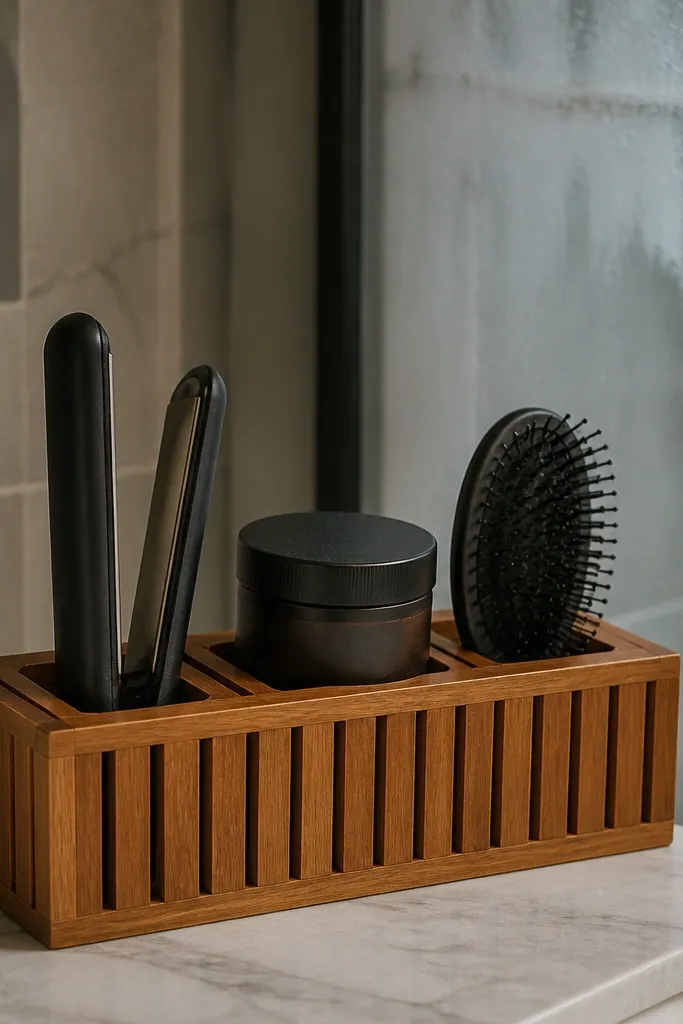
This one looks expensive because it has real wood grain and straight slats. You create square wells for items like hair tools, styling creams, and small jars, so nothing tips into the next compartment. The sealed finish matters for vanity bathrooms because wood can warp if it gets frequent humidity. It’s also sturdy enough for heavier items like tweezers and mini brushes. Build time is longer than foam, but the drawer stays attractive for years.
Cut slats from thin hardwood (like maple or birch) into strips that form a grid, then sand edges smooth. Build a shallow base frame that matches the drawer footprint, and screw or glue slats to it with equal spacing. Cut a set of removable “well” inserts from thin plywood or sealed wood strips for a modular look. Seal everything with two coats of water-based polyurethane, letting it cure fully before placing items.
Seal the underside too; that’s where moisture damage starts.
Skip untreated wood — even one splash can leave rough spots that catch the light.
4. Magnetic Spice-Style Mini Trays for Tools and Tweezers
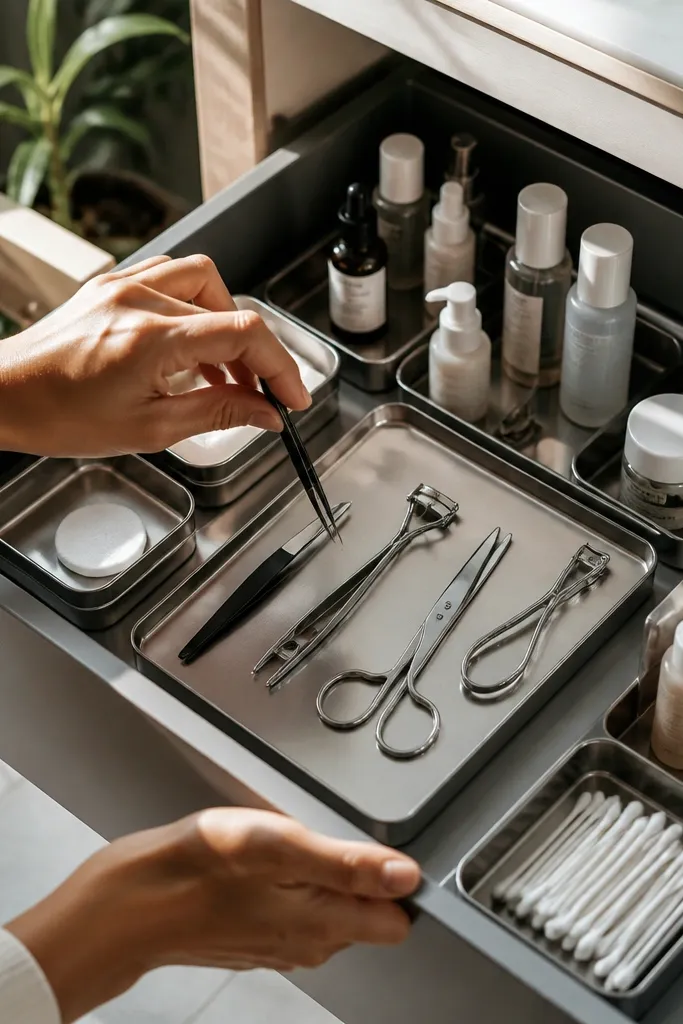
When your drawer holds tools that need fast access, this layout makes it feel like a workstation. Mini trays keep tweezers, scissors, lash applicators, and nail clippers from mixing with skincare. The magnetic base makes the trays snap into exact positions, which keeps the drawer looking tidy even after a busy morning. It’s photogenic because the trays line up with consistent spacing and clean front labels. This is a mid-level DIY because you need accurate placement.
Start by cutting a thin metal sheet or magnetic strip base to the drawer footprint, using a file to smooth edges. Then make mini tray boxes from acrylic or wood, with front lips so they sit flush. Place magnets under each tray bottom, then test alignment by sliding each tray into position. Add label cards on the front lip with clear tape or a label sleeve so they don’t peel.
Editor's noteKeep tray widths consistent, like 3 inches and 4 inches, so the drawer grid looks intentional.
Skip thisDon’t rely on loose magnets; weak hold makes trays drift and ruins the neat look.
5. Leatherette Drawer Liner with Matching Divider Frames
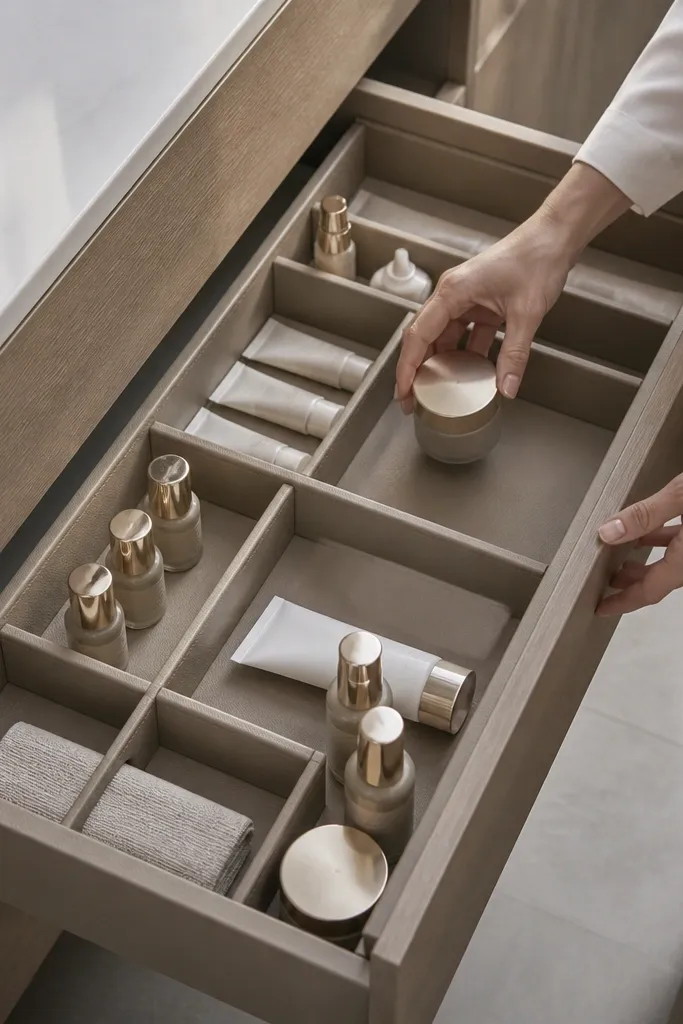
Leatherette gives you that luxe, styled look without actual leather. The trick is to use the liner as the visual base, then build dividers that match the same finish so the whole drawer looks like one product. This works well for neutral bathrooms and for people who store mostly tubes and small bottles. It also helps prevent items from sliding, so your drawer stays organized longer. The look is especially good with brass or gold hardware nearby.
Cut leatherette to drawer size with extra overlap, then adhere it to the base using contact cement. Build divider frames from foam board covered in leatherette, keeping the front edges tight and straight. Glue the covered divider frames into the liner, then add a thin strip of matching leatherette along the divider top edges. Finish by trimming corners with a sharp blade so the edges look factory-made.
Editor's noteUse contact cement and press with a roller; it prevents bubbles that show up in photos.
Skip thisSkip thick glue blobs — they create lumps under the divider faces.
6. Chalk-Painted Round Catchalls with Clear Front Bands
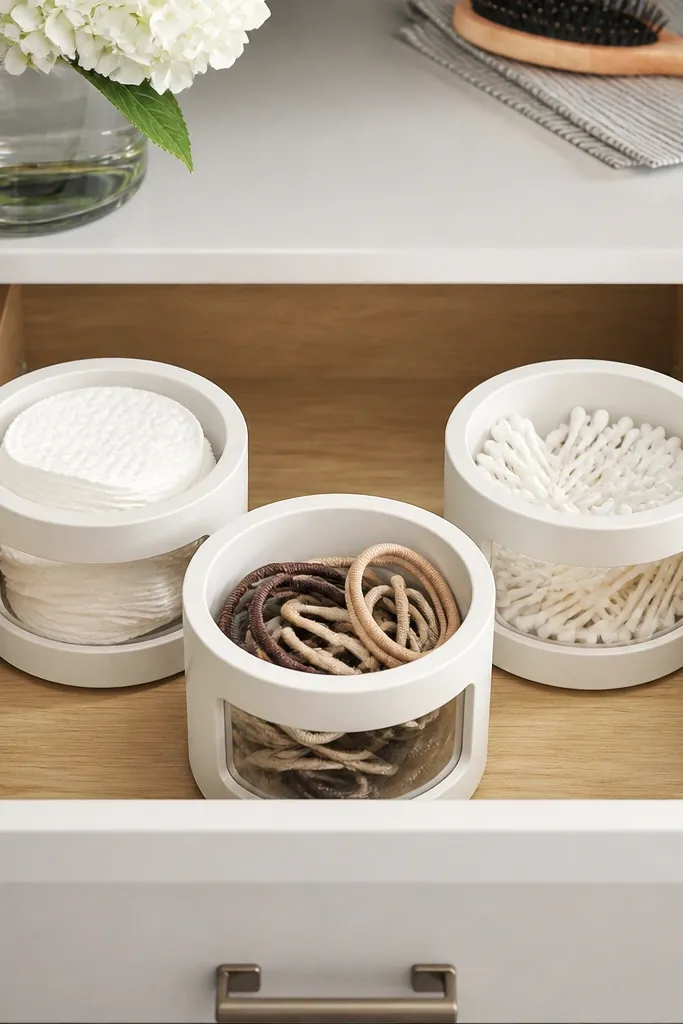
This layout is playful and pretty because circles soften the drawer’s geometry. You get round catchalls for cotton pads, Q-tips, and hair ties, plus clear bands on the front so you can see what’s inside. The chalk paint finish looks matte and hides minor scratches, which matters in daily use. It’s ideal for drawers that need a little personality but still want order. Total build time is quick because you’re assembling pre-cut shapes and sealing them.
Paint small round acrylic or wood containers with chalk paint, then seal with a matte clear coat. Add a clear acrylic strip across the front edge of each container using small screws or adhesive. Arrange containers in a pleasing staggered layout, then build a simple foam base to hold them in place. Measure spacing so each round catchall has 1/4 inch of breathing room and doesn’t scrape when the drawer slides.
Editor's noteLabel with white paint pen on the clear band for a clean, no-sticker look.
Skip thisDon’t use glossy clear coat — it reflects bathroom light and makes labels hard to read.
7. Bamboo Divider Frame with Wipe-Clean Liners
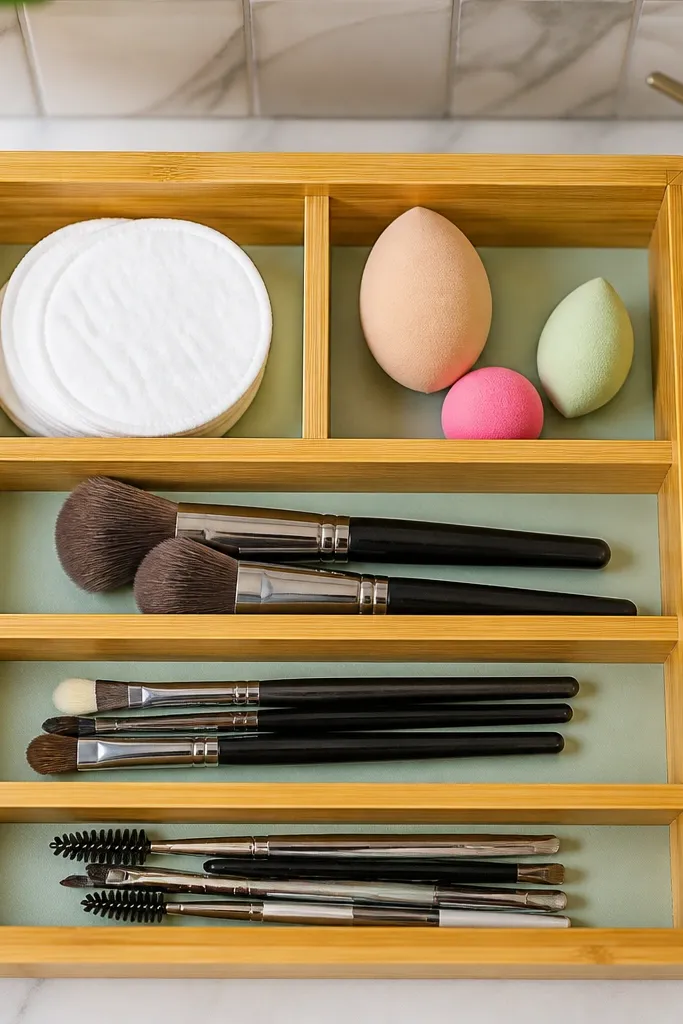
Bamboo looks warm and natural, and a divider frame keeps everything upright. The wipe-clean liners are the practical part: they protect the bamboo from moisture and make cleanup fast. This works for bathrooms where the drawer gets splashed or where products leak. It also photographs well because the bamboo grain adds texture without clutter. Build it if you want a drawer that feels calm and spa-like.
Build a rectangular bamboo frame that fits the drawer, using bamboo strips cut to length. Add vertical dividers at 3-inch intervals for tubes and small bottles, and include one wider divider for larger jars. Line the base and divider bottoms with removable vinyl or coated fabric sheets that can be wiped. Seal the bamboo with a clear water-resistant varnish before placing liners to reduce moisture absorption.
Editor's noteMake the liners removable so you can lift and wipe underneath weekly.
Skip thisSkip unsealed bamboo — it darkens unevenly when it gets damp.
8. Split-Level Organizer for Tall Bottles and Flat Skincare
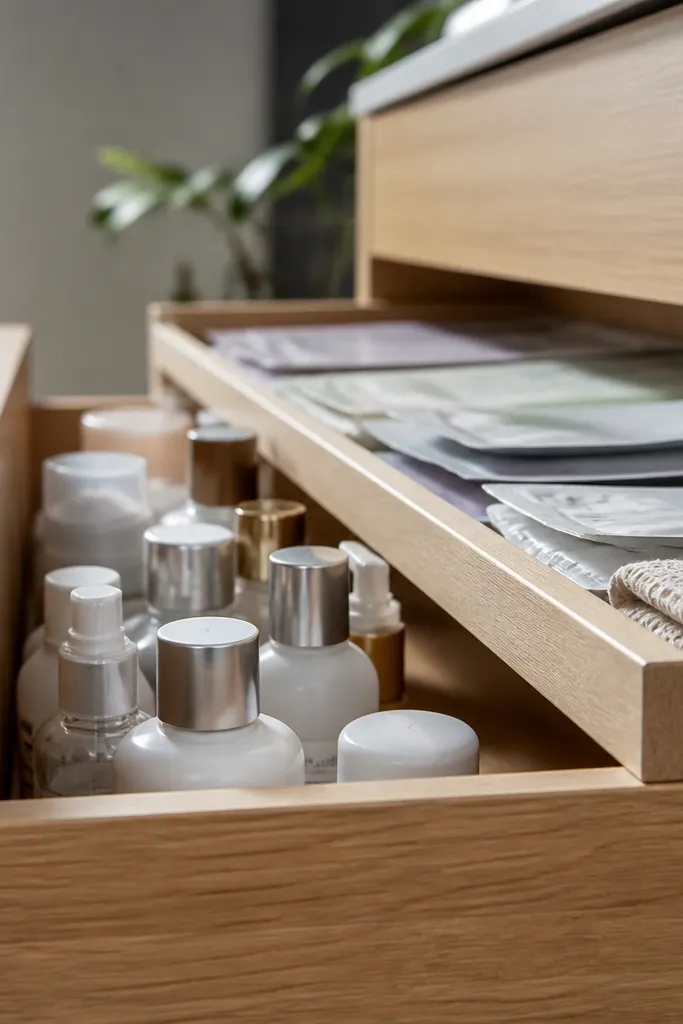
This is a smart solution for mixed-height routines. You get a split-level design so tall bottles stand without tipping, while flat items like masks and sheets stay visible on the upper plane. It looks structured because the levels create clean horizontal lines. This is the answer for drawers where you keep both pump bottles and thin products but can’t fit them in a single-height grid. It’s mid-level DIY because you’re building a stable step inside the drawer.
Measure drawer height first, then build a base and a second platform raised by 2.5 to 3 inches. Use wood boards or foam board sealed on all sides, then add dividers on the lower level for tall bottles spaced about 3 inches apart. On the top platform, add shallow channels for flat items using thin strips. Seal the whole organizer with water-resistant clear coat if you’re using wood, and test placement by sliding the drawer in fully.
Editor's noteAdd a small stop strip at the back so items can’t slide down the step.
Skip thisDon’t make the step too shallow; flat items will slide off and break the tidy look.
9. Folded-Fabric Ribbon Organizer Bands
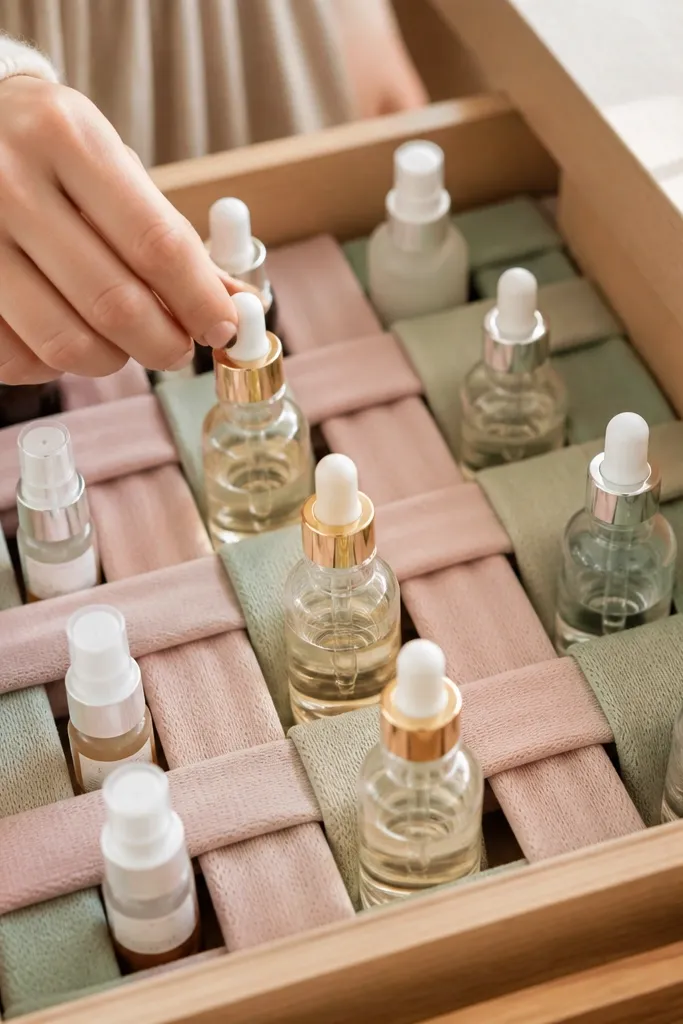
This one looks soft and styled, but it’s actually functional. You make “bands” that hold bottles upright using fabric tension, so they don’t topple into each other. It’s great for slender items like serums, face oils, and small spray bottles. The aesthetic is a clean fabric grid — especially pretty in blush, sage, or warm white tones. Skill level is beginner, but the key is consistent band spacing.
Cut fabric strips about 2.5 inches wide and long enough to wrap around a bottle’s diameter plus seam allowance. Sew or hot-glue the strips into loops, then attach them to a base board using fabric Velcro or small staples. Place the loops in a grid, spacing them so each bottle stands with a 1/4 inch gap. Add a wipeable liner under the board so spills don’t soak into the material.
Use cotton canvas for the bands; it holds shape better than thin jersey.
Skip stretchy fabric — it loosens and bottles start leaning.
10. Pegboard Drawer Insert with Color Caps
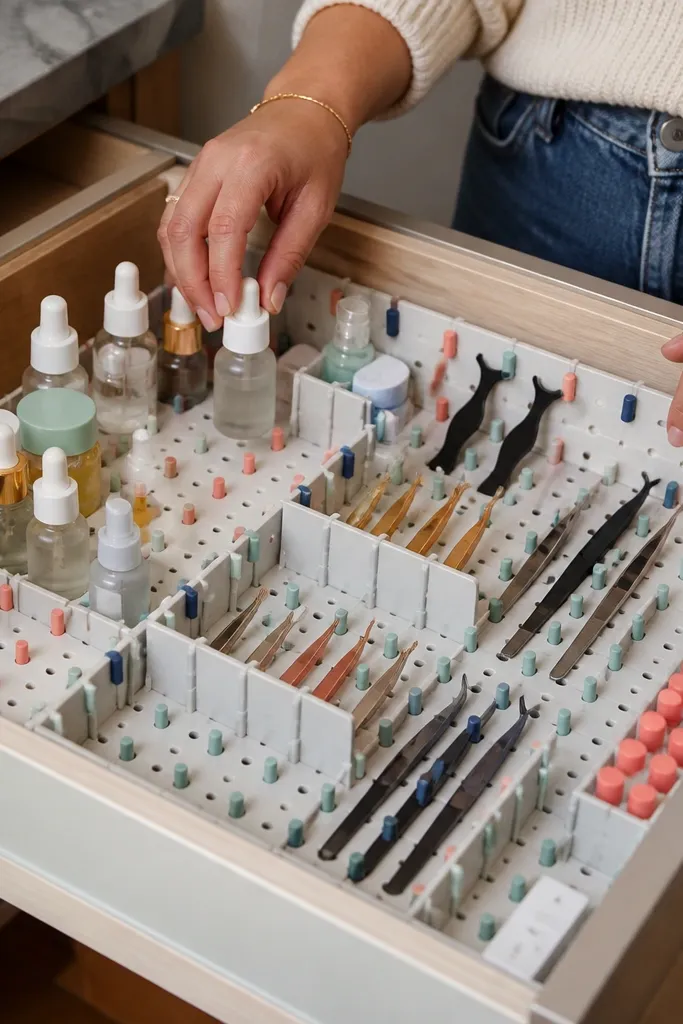
Pegboard inside a drawer looks like a mini craft station, and it’s surprisingly photogenic. You can reposition dividers as your routine changes, which keeps the drawer from falling into the same old clutter. Color caps make it look intentional — like a design choice, not a DIY afterthought. This setup works best for small tools and bottles with handles or flat sides. Build it if you want flexibility without losing the tidy grid.
Cut pegboard to drawer size and seal it with two coats of clear spray so it wipes clean. Add pegboard rails or small standoffs to create shallow compartments, then insert dividers made from acrylic or wood. Color-code using removable caps on the front edge of each divider, like blush pink, sage green, and soft gray. Arrange items by grab zone, then adjust divider placement over a few days until the drawer feels fast to use.
Use the drawer’s front edge as your alignment line, not the back — it keeps the layout straight in photos.
Don’t skip sealing pegboard — humidity turns it fuzzy and rough.
11. Rattan Basket Trio with Custom Foam Base
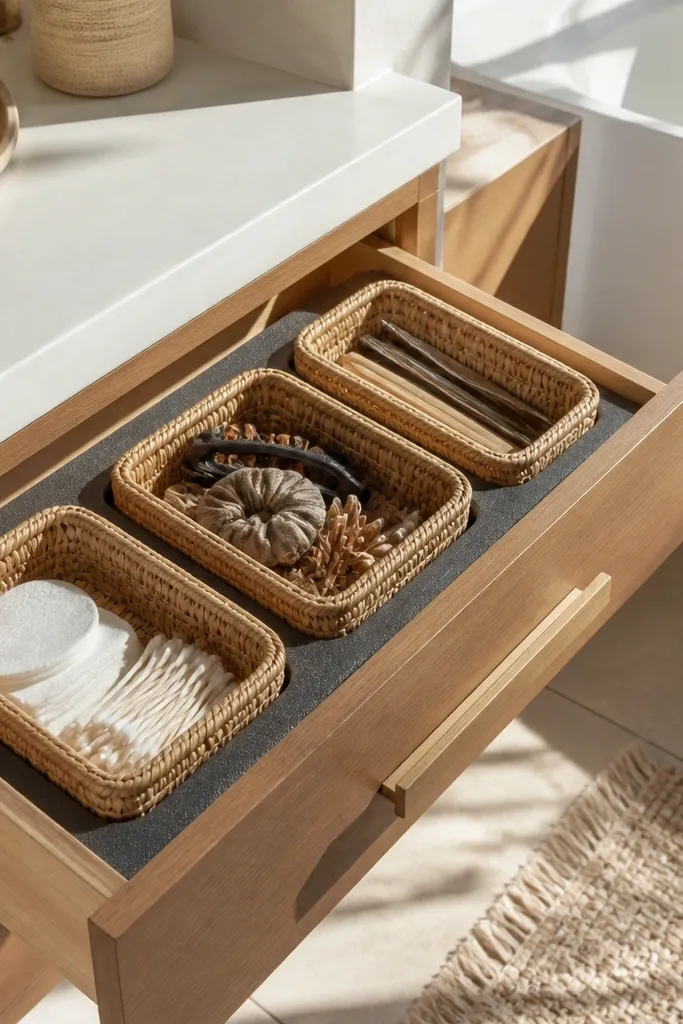
Rattan baskets make your vanity look like a boutique bathroom, and the drawer stays organized because each basket has a job. Use three baskets: one for cotton and pads, one for hair accessories, and one for tools like tweezers. The basket texture is beautiful in daylight and hides small messes inside. This layout is best when you store items that you don’t mind grouping together. It’s easy to build because you’re customizing placement, not cutting complex dividers.
Pick three rattan baskets that fit your drawer spacing with 1/2 inch gaps. Cut a foam base to drawer size, then carve shallow wells to seat each basket so it can’t slide. Cover the foam with fabric or faux linen, then glue it down with spray adhesive. Place baskets in the carved wells and add thin felt pads under basket bottoms for quiet drawer movement.
Editor's noteChoose baskets with matching heights so the drawer top line stays clean.
Skip thisDon’t pick baskets that are too tall; the drawer will feel cramped and you’ll lose access.
12. Clear Lid Tray System for Mini Jars and Lip Products
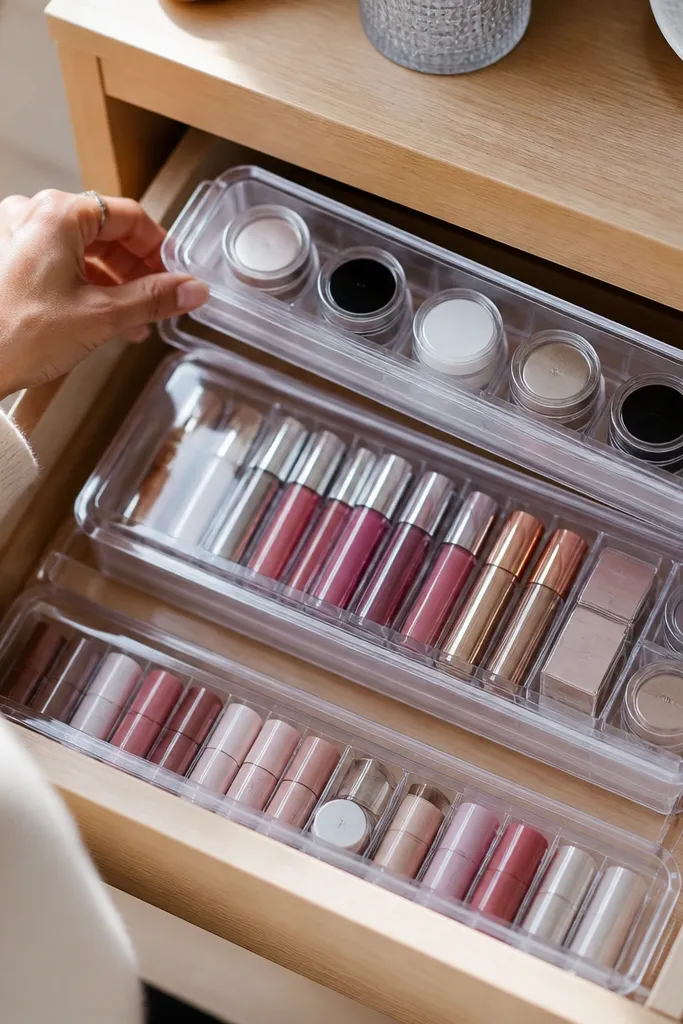
This looks crisp because the lids create a uniform top surface. You can store mini jars and lip products in clear trays so you see color and labels without opening anything. The lids also block dust and prevent tiny items like lip caps from rolling. It’s a great choice for people who want their drawer to look neat even when they’re not actively organizing. Build it if you have a drawer that holds lots of small containers and you hate hunting for the right one.
Buy clear acrylic or plastic trays sized for your drawer, then measure the maximum depth you can use without blocking drawer closure. Add matching lids or small clear covers that fit each tray footprint. Arrange trays in a grid with 1/2 inch space between them for easy grip, then anchor the trays to the base with non-slip adhesive pads. Label the front edge with a label maker and clear tape over it so humidity doesn’t smear ink.
Editor's noteUse a label color that matches your bathroom hardware — gold labels on warm wood looks especially clean.
Skip thisSkip uncovered trays; dust and hair product grit collect and ruin the polished look.
13. Color-Blocked Drawer Zones with Matte Paint Labels
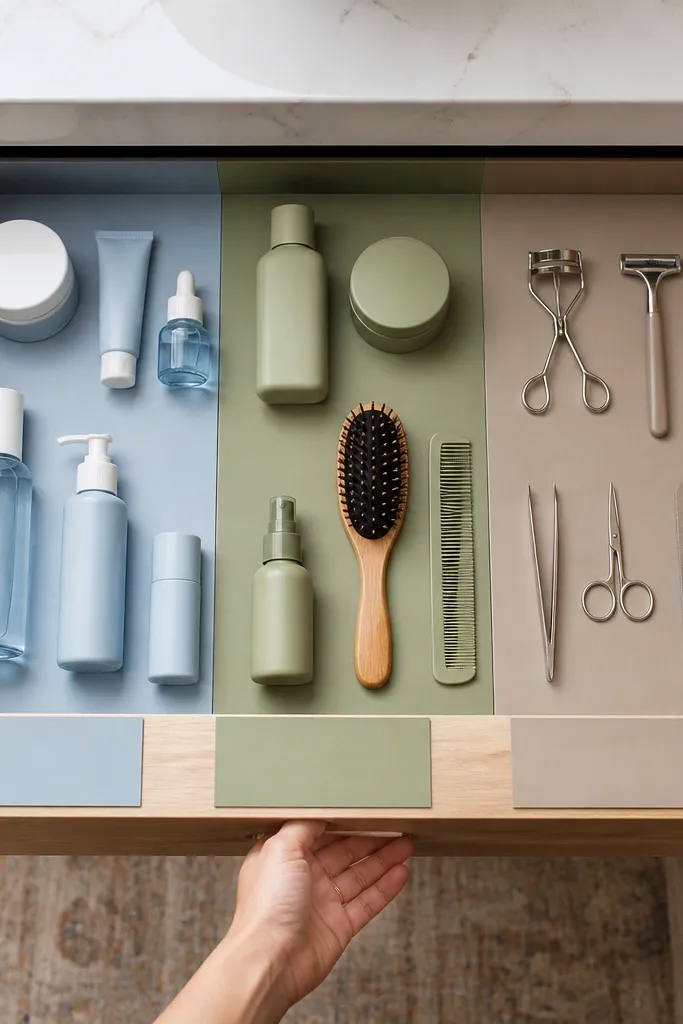
If your drawer feels messy because everything is mixed, color-blocking fixes it fast. You paint sections of the drawer base in two or three calm colors, then add matching label cards on the front edge. Each color zone becomes a visual rule: blue for skincare, green for hair, neutral for tools. The drawer looks like a design system, not storage. This is a beginner project with big visual payoff.
Clean and lightly sand the drawer base, then apply a primer made for laminate or wood. Paint three zones using matte acrylic paint, keeping boundaries straight with painter’s tape. Cut label cards from cardstock, then seal them with clear matte spray so they resist bathroom humidity. Add small foam strips under each label card so they sit above the painted surface and don’t smear when you slide items in.
Use matte paint, not satin — satin glare makes labels look messy in photos.
Don’t paint directly over dusty drawers; paint fisheyes show up instantly.
14. Slim Tube Organizer with Angled Dividers
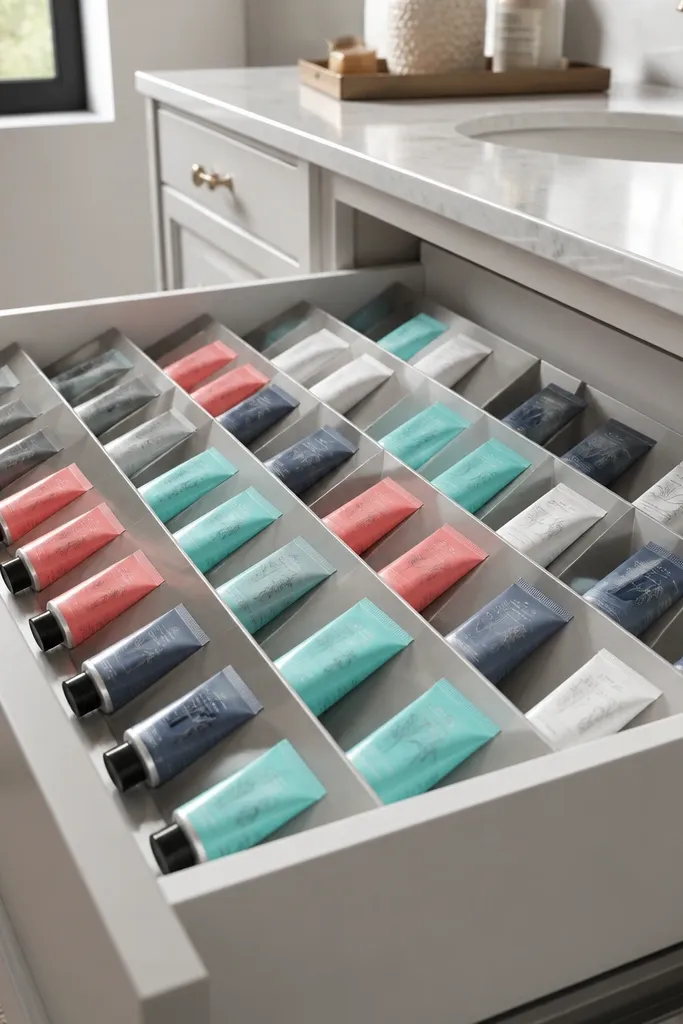
Tubes are the hardest items to organize because they tip and slide. Angled dividers solve that by giving tubes a lean point so caps face the same direction. It looks clean because the tubes line up like a display wall, and the angled lines look intentional. This layout is best for toothpaste-sized tubes, hand creams, and sunscreen tubes that you use daily. It’s a medium DIY because you’re building precise angles for stable seating.
Cut divider panels from wood or foam board and sand edges smooth, then set the angle so tubes rest without rolling. A good starting angle is about 15 to 20 degrees from vertical, depending on tube length. Build a base frame to match drawer size, then install dividers with equal spacing of 2.25 to 2.5 inches. Line the base with non-slip shelf liner and add a small back lip so tubes can’t slide out when you open the drawer.
Editor's noteTest one tube before final glue — tube caps vary in shape and you want a firm seat.
Skip thisSkip tall dividers for short tubes; they leave wasted space and make the drawer look lopsided.
15. Drawer Insert with Hidden Compartments for Backup Products
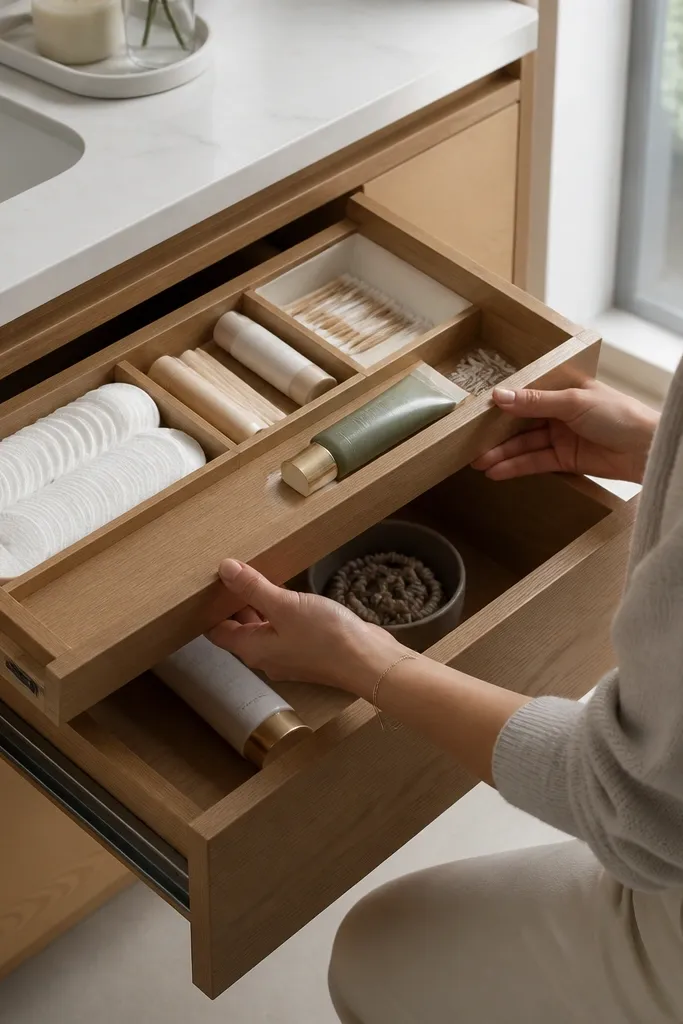
This is for people who keep backup products but hate seeing them in the main drawer. The hidden compartment makes the drawer look calm while still letting you stash extra cotton pads, spare hair ties, and backup sunscreen. It’s visually striking because the top layer stays clean and uniform. The lift-out section keeps backups from mixing with daily items. Skill level is mid-level because you’re adding a removable panel and hinge or finger-lift access.
Build a top organizer layer with standard dividers, then create a base tray that has a removable panel. Use thin plywood or sealed foam board for the hidden panel, and add finger cutouts on both sides for easy lift. Install stop blocks under the removable panel so it sits flush and doesn’t rattle. Line the hidden area with wipeable fabric or vinyl, then label backups on the inside edge so you know what’s there without opening the whole drawer.
Use a soft-close felt strip on the removable panel edge to stop clicking noises.
Don’t make the hidden compartment too deep; you’ll forget what’s inside and it becomes dead storage.
16. Round-Corner Acrylic Dividers for a Soft Modern Look
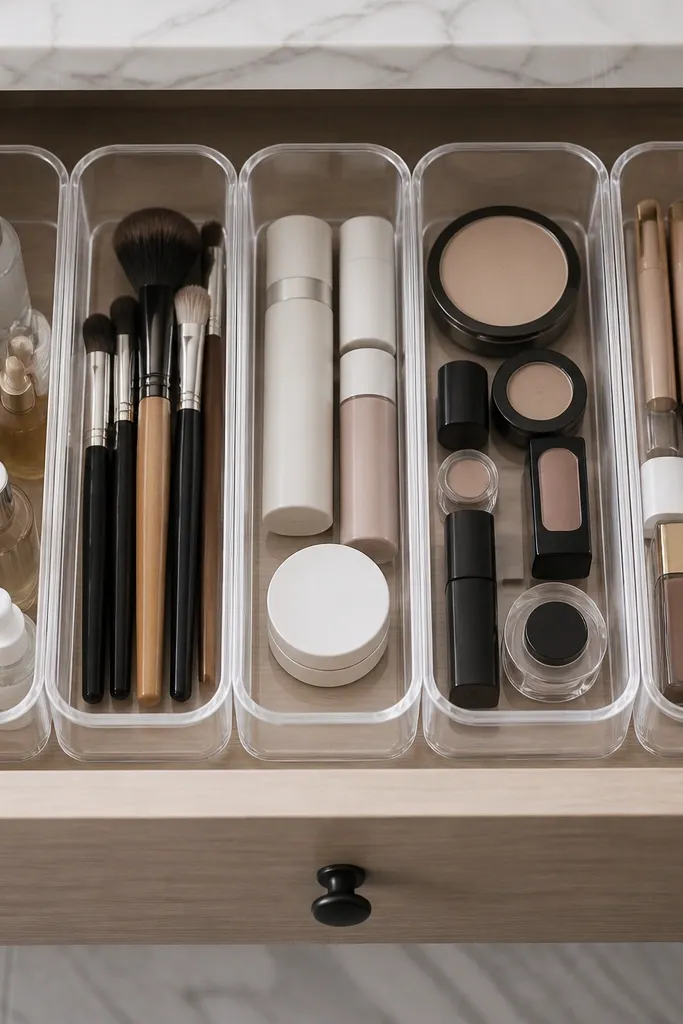
Sharp dividers look harsh in photos, especially in bathrooms with soft lighting. Rounded-corner acrylic dividers keep the drawer feeling calm and modern while still making everything easy to grab. Use this if you store mostly small bottles and makeup tools that need separate lanes. It’s also easy to wipe down, which matters when products leak. Build time is straightforward if you can cut acrylic cleanly or buy pre-cut divider pieces.
Cut or purchase acrylic divider pieces with rounded edges, then set them into a clear base tray that fits your drawer. Measure bottle widths and create lane spacing that leaves 1/4 inch between items. Attach dividers with acrylic glue, then sand any rough edges so they don’t scratch items. Add a non-slip mat under the base so the whole organizer stays put when you pull the drawer.
Editor's noteRound the front edges more than the back — it’s what you see most when the drawer is open.
Skip thisAvoid cloudy acrylic; it makes small labels look messy and reduces the clean look.
17. Ceramic Tile Base with Painted Divider Channels
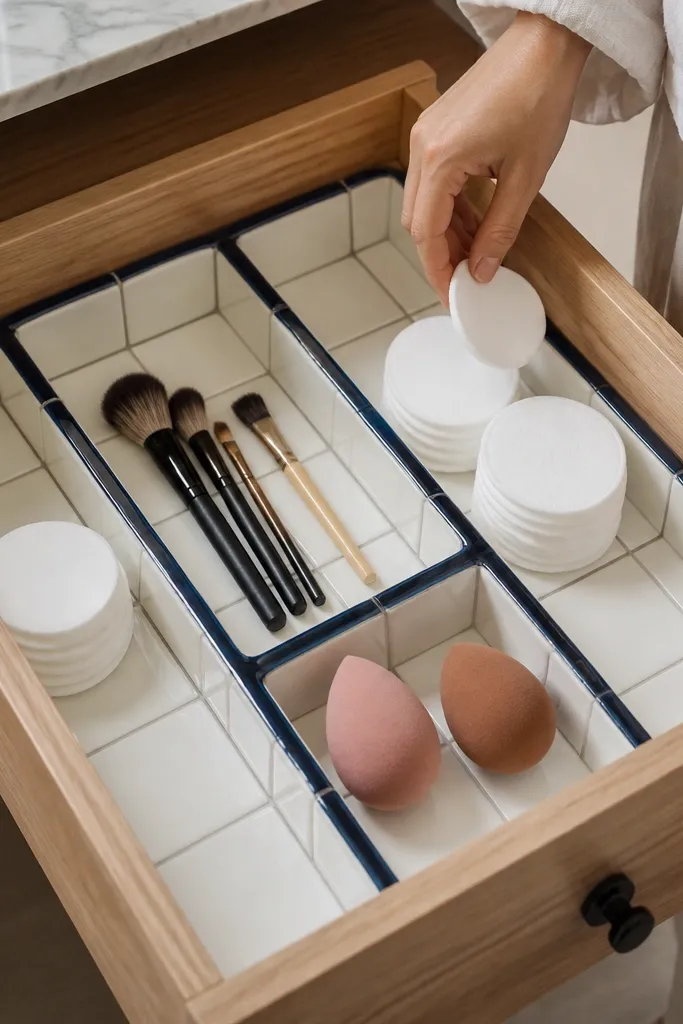
This one looks high-end because ceramic tile gives a clean, patterned foundation and stays wipeable. Divider channels painted in a matching color keep everything organized without needing tall walls. It’s great for arranging cotton rounds, small brushes, and makeup sponges where you want items visible and protected. The tile also prevents stains from oils or leaky products. It’s a DIY with more steps, but the result is durable and looks great in bright bathroom light.
Cut or size ceramic tiles to drawer base dimensions, then set them using thin-set or tile adhesive rated for small surfaces. Let cure fully, then fill grout lines lightly or keep seams minimal so dividers sit flat. Paint divider channels from sealed wood strips in a matte color and glue them into the tile using strong construction adhesive. Seal the top edges and test drawer movement so nothing catches.
Use a grout sealer even if you keep grout lines narrow; humidity gets into grout fast.
Don’t rush the cure time; moving the tray early cracks thin adhesive layers.
18. Magnetic Strip + Felt Liner for Clip-On Hair Tools
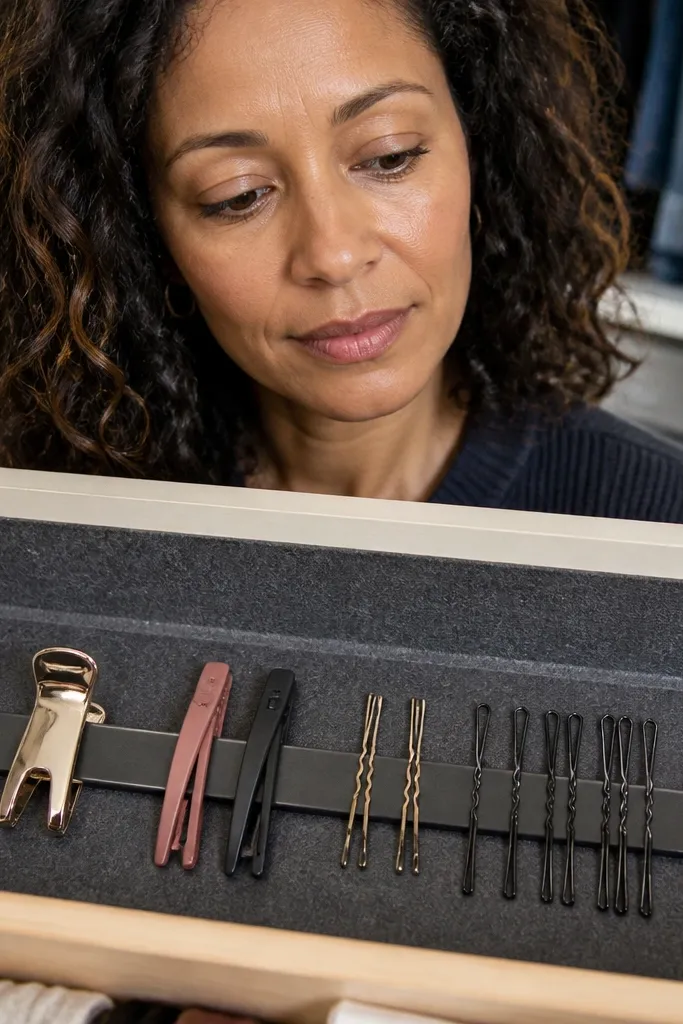
Hair clips and small metal tools are always the messiest drawer items. A magnetic strip holds them in a neat line, and felt keeps them scratch-free and quiet. This setup looks tidy because you get a straight “row” of clips instead of scattered piles. It’s best for clip-on hair tools, bobby pins in small cases, and metal tweezers. If your drawer always looks chaotic by evening, this is a direct fix.
Cut felt to drawer base and glue it down so it lies flat without wrinkles. Install a magnetic strip along one side or near the back, using screws or strong adhesive made for metal-to-wood. Add small felt bumpers around the strip so clips don’t rattle. For bobby pins and tiny tools, add a small removable tray near the magnet and label it on the front edge.
Editor's noteKeep the magnet strip at the same height as clip loops so everything lines up naturally.
Skip thisSkip felt thickness that’s too high; thick felt makes clips sit crooked.
19. Pegboard + Clear Pocket Front for Makeup Brushes
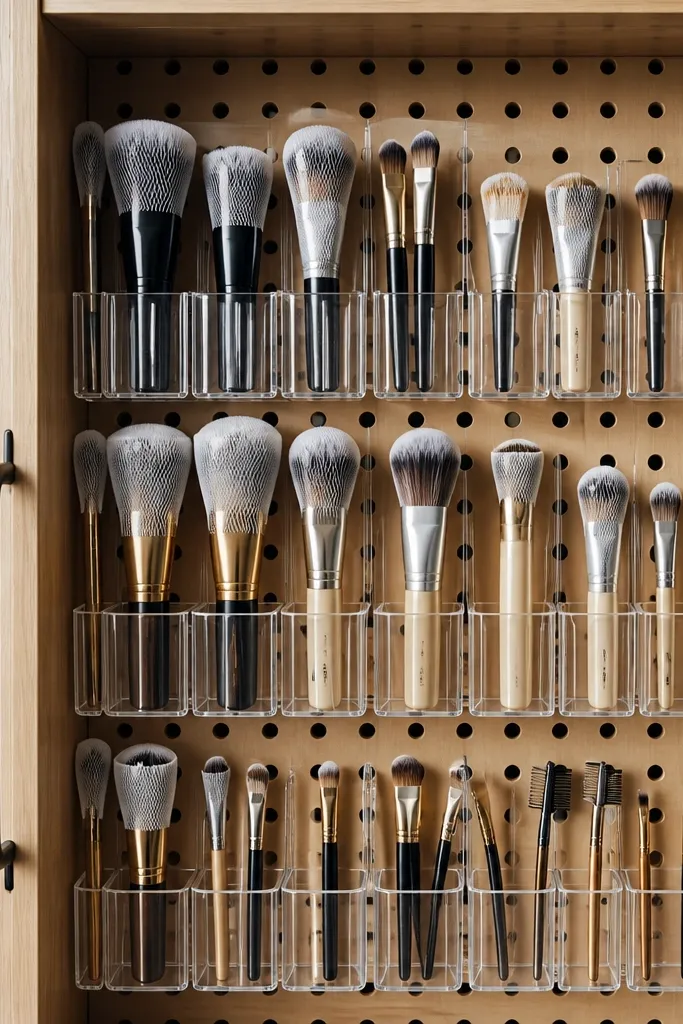
Makeup brushes look messy when they’re loose in a drawer. This system gives each brush a clear pocket so the bristles stay protected and the drawer stays photogenic. You can see brush shapes and sizes at a glance, which makes daily use faster. Pegboard lets you adjust pocket positions as your brush collection changes. It’s a strong choice for vanity drawers that also store makeup tools and palettes.
Cut pegboard to drawer size and seal it with clear coat. Add horizontal peg rails, then attach clear pocket holders using peg hooks or small fasteners that won’t wobble. Position pockets so longer brushes sit in the back row and shorter ones in the front row. Add a wipeable liner under the pegboard and test drawer closure with the pockets fully loaded.
Editor's noteUse clear pockets that open from the top so you can slide brushes in without bending bristles.
Skip thisDon’t pack pockets too tight; brushes need a tiny gap to avoid bristle crush.
20. Stackable Drawer Lids for Overnight Masks and Sheet Packs
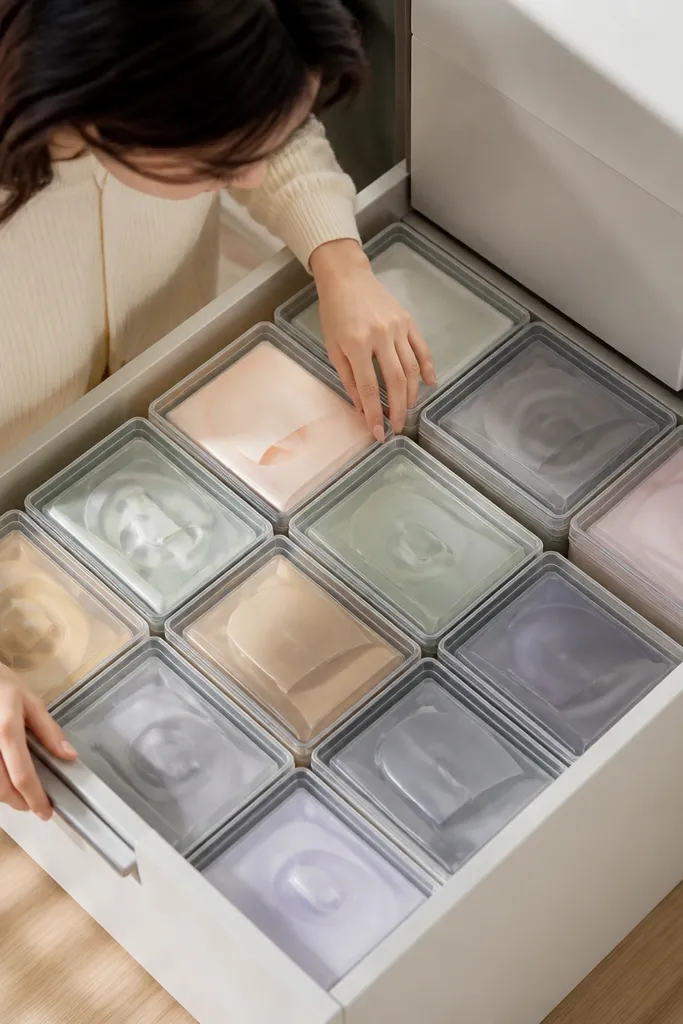
Sheet masks and overnight packs look chaotic because they’re flat but bulky. Stackable trays with lids keep them neat, visible, and protected from humidity. The drawer stays clean because the top layer looks like a uniform set of boxes, not a pile of wrappers. This is a great choice if your vanity has a separate “treat myself” routine you want easy to reach. Build it if you want a drawer that looks like a product shelf.
Measure drawer depth and pick trays that stack with at least 1 inch of clearance for drawer closure. Add lids or clear covers so the top surfaces look consistent and dust-free. Arrange trays in a staggered grid, then anchor each stack with non-slip pads so they don’t slide. Label each tray front with a category like “Sheet masks” and “Overnight” using sealed label cards.
Editor's noteUse identical tray sizes for a cleaner look; mixed sizes look accidental in photos.
Skip thisSkip open trays; the wrappers get crinkled and the drawer looks messy fast.



