
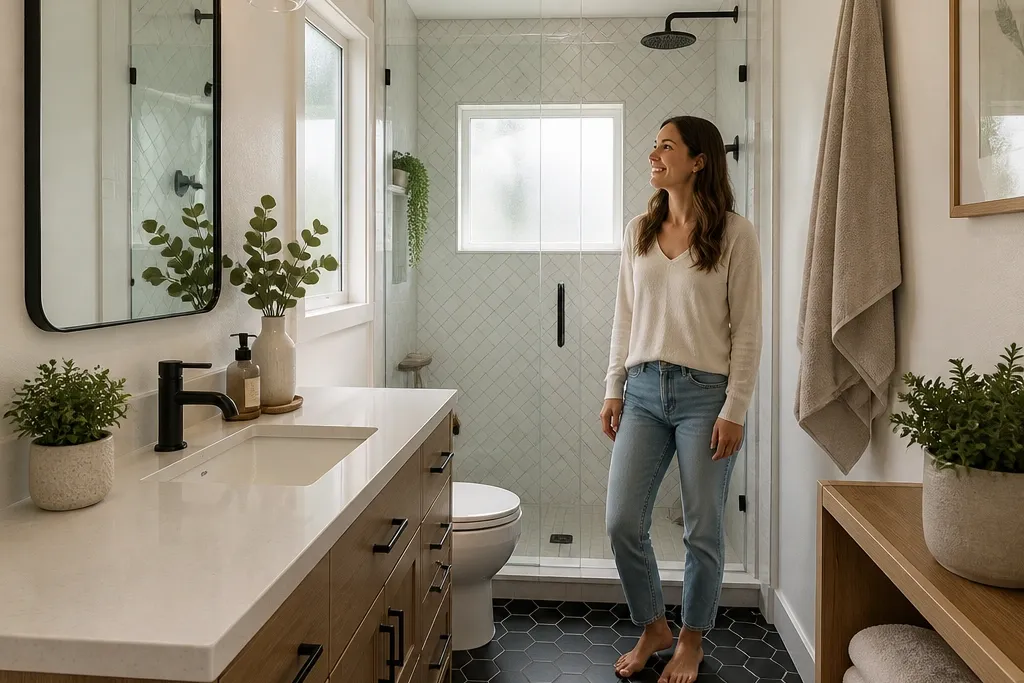
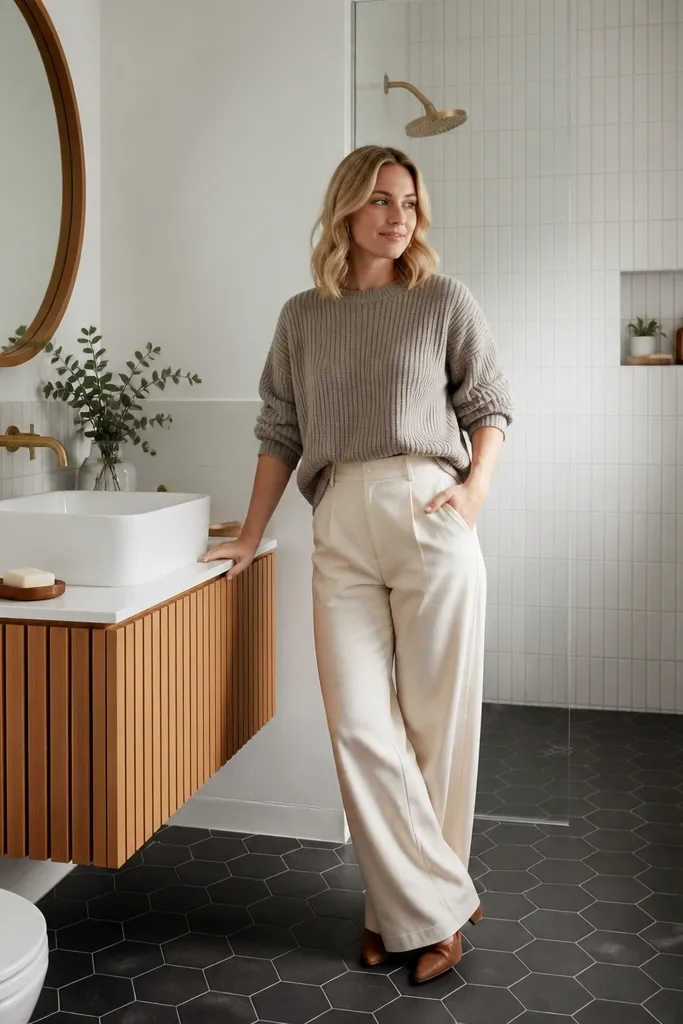
1. Herringbone Shower + Matte White Walls
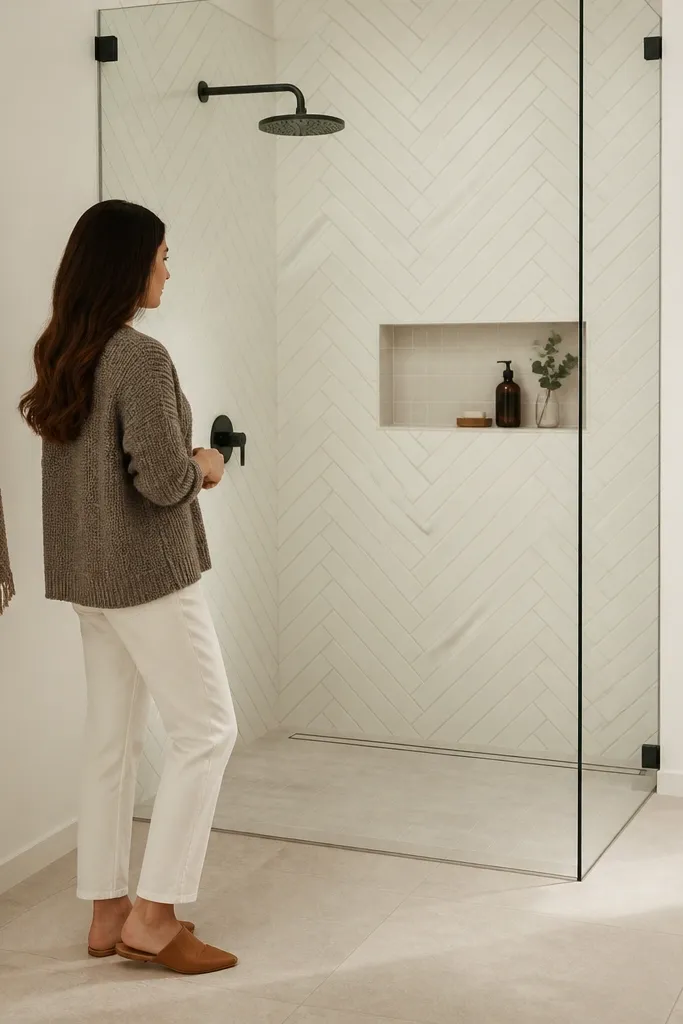
This design makes a small bath feel styled, not cramped, because the herringbone pattern is contained to the shower zone. Keep the rest of the room matte white so the pattern doesn’t multiply visually. Use a large-format floor tile in the same family as the shower tile, but in a simple grid so your eye has calm space to rest. A dark-framed glass panel adds structure and makes the shower look intentional even when the bathroom is tiny. Skill level is medium because you’re cutting herringbone pieces accurately, but the payoff is a clean, magazine look without changing your whole floor plan.
Start by prepping the shower wall flat and waterproofing with a cement board system or a membrane rated for wet areas. Dry-lay a test strip at eye level to confirm how the herringbone lines hit your valve and corners — adjust before you mix thinset. Install the herringbone with 1/8-inch joints and use a grout color close to the tile body or slightly darker for sharper lines. Finish by setting a large mirror over the vanity and adding mirror lights that spread light evenly across your face.
Use a laser level for the herringbone angle so the lines stay straight across multiple rows.
Avoid mixing grout colors across the shower — it makes the pattern look messy and smaller.
2. Floating Vanity With Warm Oak Slats
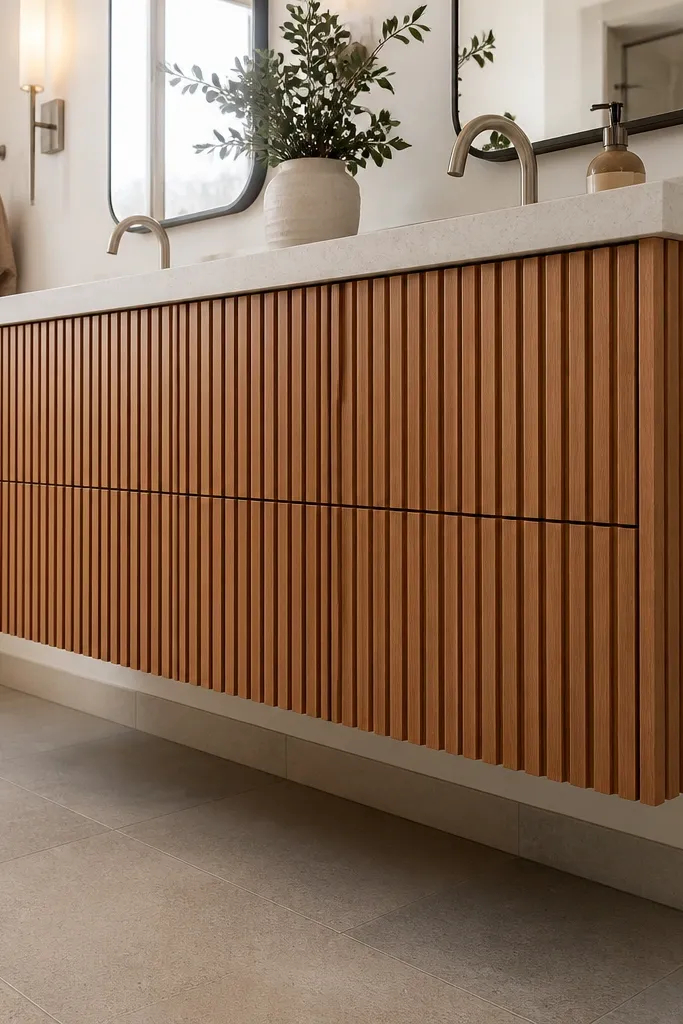
Floating vanities make the floor feel bigger because you see more open space underneath. Add warm oak slats to the front to bring cozy texture without adding visual clutter. Pair the slats with a light countertop like a creamy quartz that doesn’t reflect harsh glare. Keep the backsplash simple — a narrow tile strip or a solid slab — so the wood is the star. This remodel works best when your bathroom is narrow and you need a vanity that looks lighter but still holds storage.
Choose a vanity width that fits your wall with breathing room for door clearance, then anchor the mounting rail into studs. Install the floating frame first, confirm level, and test the door swing before you tile or paint. Add the oak slat panel to the vanity front using exterior-rated wood and a waterproof finish, then seal edges around the sink cutout. Finish with a large mirror and two matching wall sconces or a single long mirror light.
Seal wood slats with a moisture-resistant clear coat before install so the finish survives daily bathroom humidity.
Don’t pick a vanity top that’s too shiny — glossy quartz can turn a small bathroom into a glare box.
3. Black Hex Floor + Cream Subway Walls
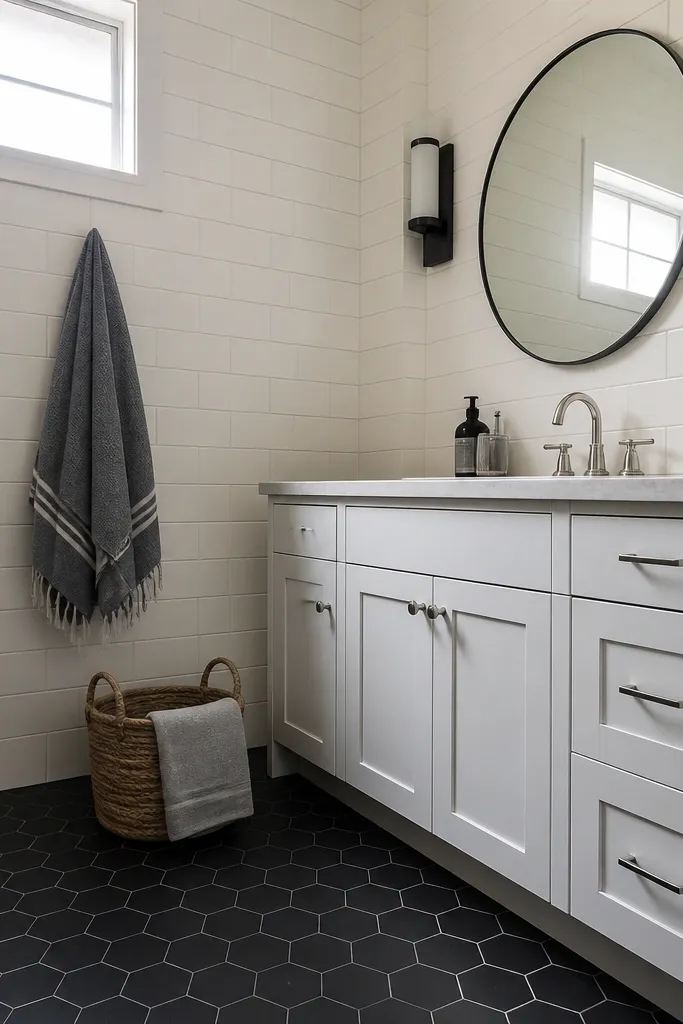
A black hex floor grounds the room and adds pattern without overwhelming the walls. Cream subway tiles on the walls keep the look classic and bright, which matters in small bathrooms that lack window light. The contrast makes the bathroom feel designed even when square footage is limited. Choose a white vanity with simple shaker doors so the floor pattern stays the focal point. This is a strong pick if you want cozy, timeless style and you’re willing to do careful tile layout on the floor.
Start by planning the floor layout so a full hex lands near the entry line — dry-lay a few rows to find the center. Set black hex tiles with a thin grout joint and use a grout color that matches the black tile tone. Tile the walls with subway bricks aligned to a level line, using spacers to keep grout lines uniform. Finish by installing a framed mirror and a matte black faucet so the floor and hardware feel related.
Use a grout release on the hex floor — it makes cleanup faster and keeps edges crisp.
Don’t install subway tiles without a level reference line — crooked lines show up immediately in small spaces.
4. Peel-and-Stick Accent Wall Behind the Toilet
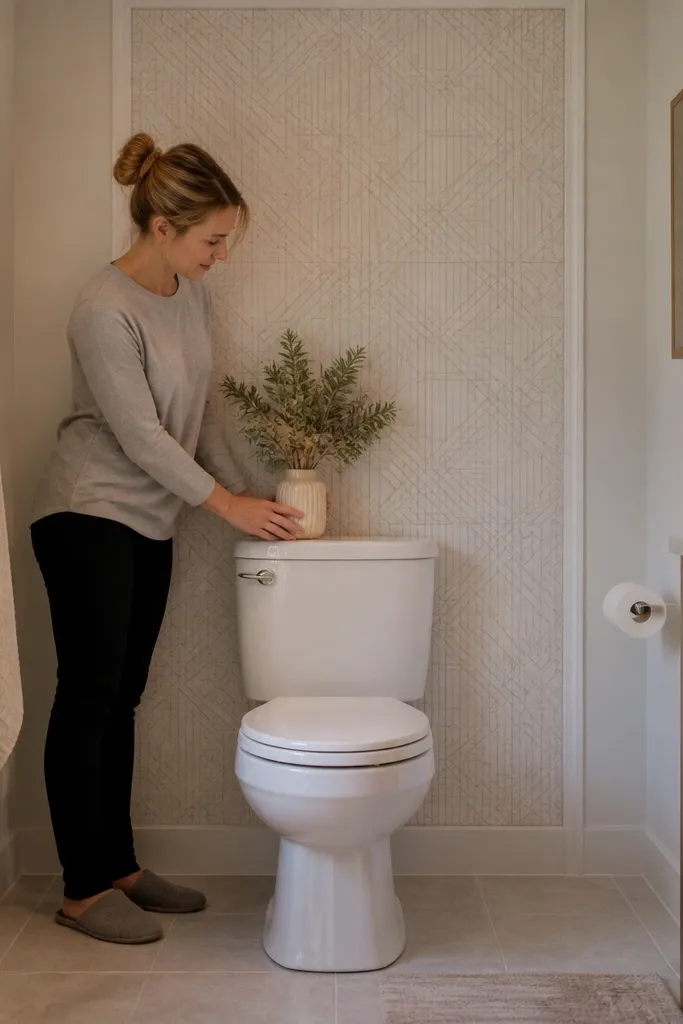
When you can’t justify a full tile demo, a single accent zone behind the toilet makes the bathroom look finished. Choose a peel-and-stick waterproof panel or vinyl wallpaper look rated for bathrooms so it survives steam. Keep the rest of the walls painted in a warm white and add simple trim to frame the accent. This design is cozy because the pattern sits at eye level and creates depth. It’s also the fastest remodel look on this list, great for renters or for clients who want big visual impact with minimal construction.
Paint the wall first so the surface is smooth and evenly sealed, then measure the accent panel height including how it will align with the toilet tank. Cut the panel precisely around the toilet outline and use a smoothing tool to remove bubbles. Add two trim strips or a small chair-rail style molding to frame the accent area. Finish with a mirror that has a similar trim color and a toilet paper holder in the same metal finish as the towel bar.
Warm the panels with a hair dryer before sticking to help edges lie flat around curves and corners.
Don’t stick over glossy paint — scuff and prime so the adhesive actually grips.
5. Spa Floor With Large Porcelain Slabs
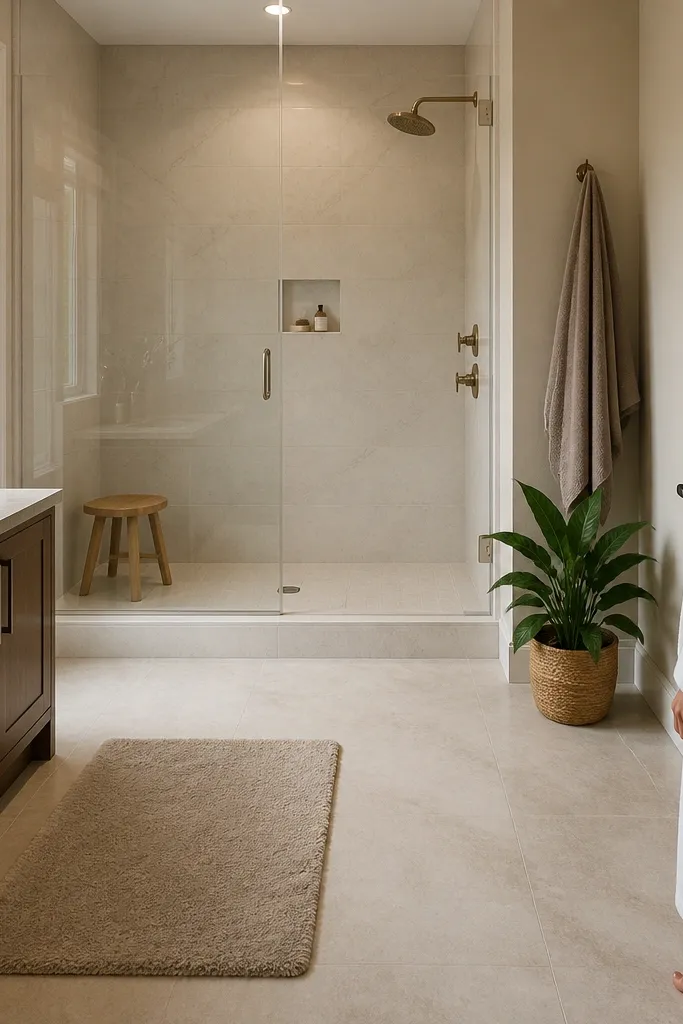
Large-format floor slabs reduce grout lines, which makes small bathrooms feel quieter and bigger. Pair them with a simple shower surround in the same visual family — think light stone-look floor and a clean white or light greige shower wall. Keep the shower niche minimal and centered so it looks intentional rather than random. This design reads spa-clean because the surfaces are smooth and the lines are long. It works best when your floor is already flat enough or you’re willing to re-level it to avoid lippage.
Plan your layout so the cut tiles at the bathroom entrance are not tiny wedges — start with a chalk line for the main row. Use a leveling system if your slabs are 12x24 inches or larger to keep edges flush. Waterproof and tile the shower walls with a simple layout, then install a niche at a height that matches the products you use daily. Seal grout where needed and finish with a frameless or low-profile glass door.
Dry-lay the floor with spacers before thinset so you can see lippage risk and adjust starting points.
Don’t skip leveling — uneven slabs make the bathroom feel cheap fast.
6. Classic Penny Tile Shower With Brass Fixtures
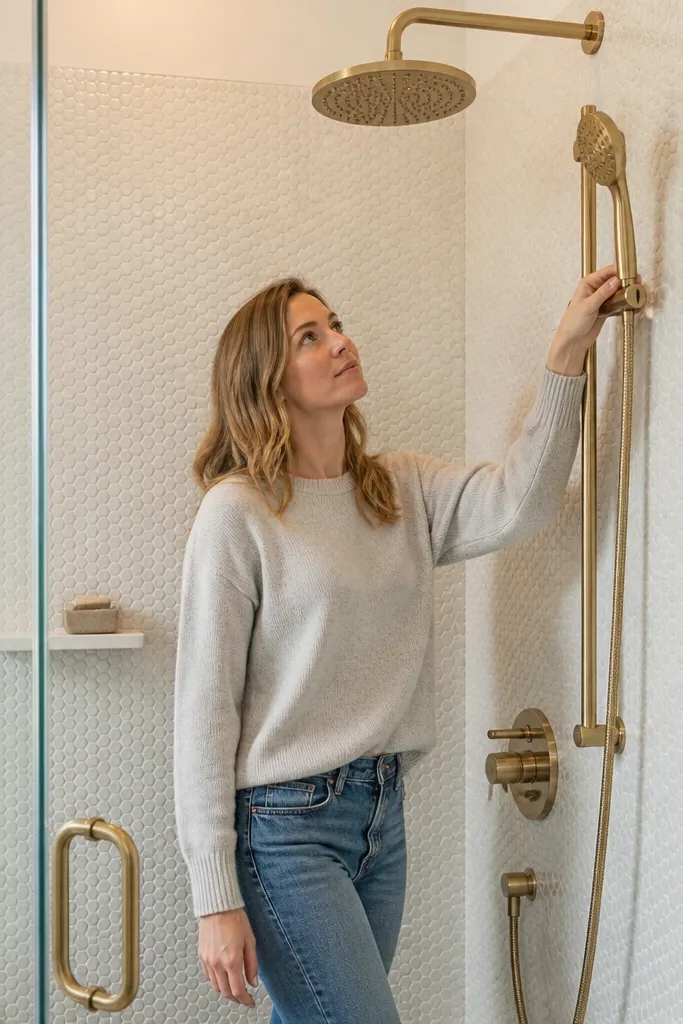
Penny tile looks cozy because it has motion — tiny rounded pieces catch light and hide minor wall imperfections better than large tiles. Warm brass fixtures add softness compared to chrome and make the whole bathroom feel warmer. Keep the walls around the shower simple, like solid white or a light textured paint, so the penny tile stays the feature. This is a smart choice if you want a traditional look that still feels current. It’s medium skill because penny tile is time-consuming, but the visual reward is real and photogenic.
Use a shower waterproofing system, then apply penny tile sheets starting from a centered reference line. Press the sheets into thinset and check spacing constantly because penny tiles can drift on curved areas. Choose grout that matches the tile — slightly darker grout makes the penny texture pop. Install brass fixtures after the tile is cured so you can set trim plates cleanly and avoid chipping.
Back-butter the mesh sheets lightly if you’re seeing hollow spots — it prevents loose tiles later.
Don’t use bright white grout with warm brass — it can look stark and cold next to metal.
7. Vertical Tile Stripes Up the Wall
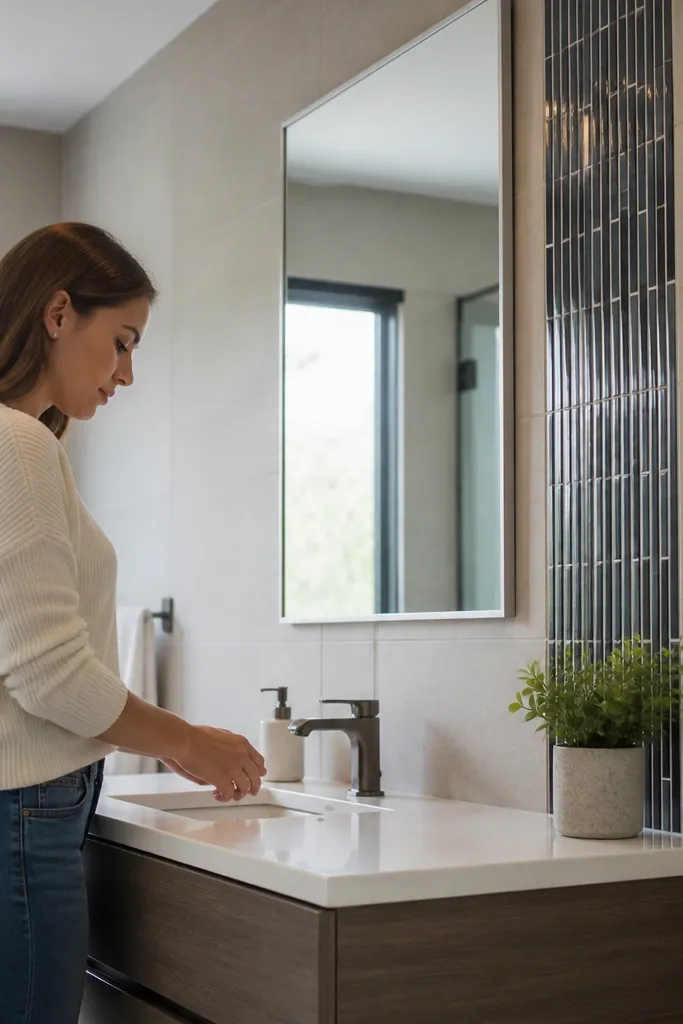
Vertical stripes are the fastest way to make a short bathroom wall feel taller. Use a narrow accent strip of tile or a glossy insert behind the vanity or along the main wall where you’ll see it in photos. Keep the surrounding tiles matte and neutral so the stripe looks crisp. This design is particularly good when you have a standard vanity but the room feels visually squat. It’s also easier than full accent walls because you’re controlling pattern placement to one zone.
Mark the stripe centerline with a tape measure and level so it’s symmetrical to the mirror. Tile the main wall first with the neutral tile, then install the stripe panels using the same grout joints. If you’re using a glossy accent tile, match its thickness with the main tile or use thinset leveling to avoid ridges. Finish with a mirror that has clean edges and wall lights aligned with the stripe for a pulled-together look.
Use painter’s tape as a temporary guide on the wall before you spread thinset for the stripe.
Don’t center the stripe based on the vanity — center it based on the mirror or it will look off in photos.
8. Dark Floor + Light Wall Contrast
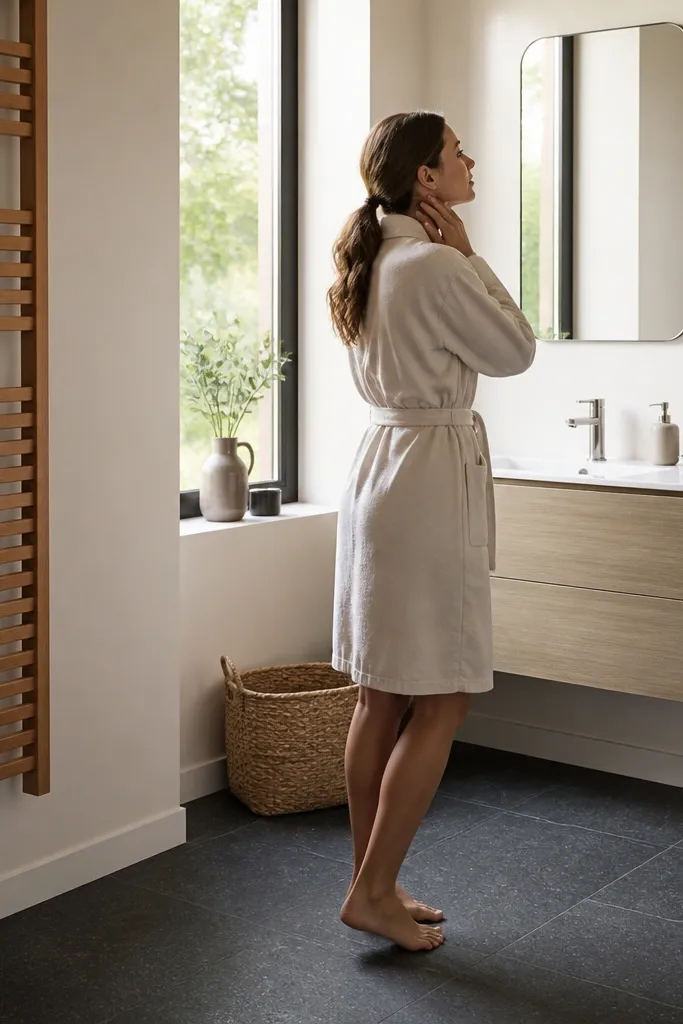
Dark floors add sophistication and make light walls feel brighter, which is exactly what small bathrooms need. The trick is to keep the walls simple — solid white or soft off-white — so the room doesn’t feel top-heavy. Choose a dark floor with a subtle texture or stone look so it doesn’t show every speck. Add warm wood or tan accents, like a light oak vanity or a woven bath mat, to keep it cozy rather than cold. This design looks great in natural light and also holds up at night when you add proper mirror lighting.
Select a dark floor tile with a matte finish and grout that matches the tile undertone. Set the floor first and plan cuts at doorways so you don’t end up with tiny slivers. Tile the walls in a bright off-white and keep grout lines consistent. Install a white vanity with a simple backsplash and add a large mirror to bounce light across the dark base.
Editor's noteUse a grout color with gray or taupe undertones so the floor doesn’t look muddy next to white walls.
Skip thisAvoid glossy dark tile — it shows water spots and fingerprints instantly.
9. Rounded Corner Vanity + Soft Curves
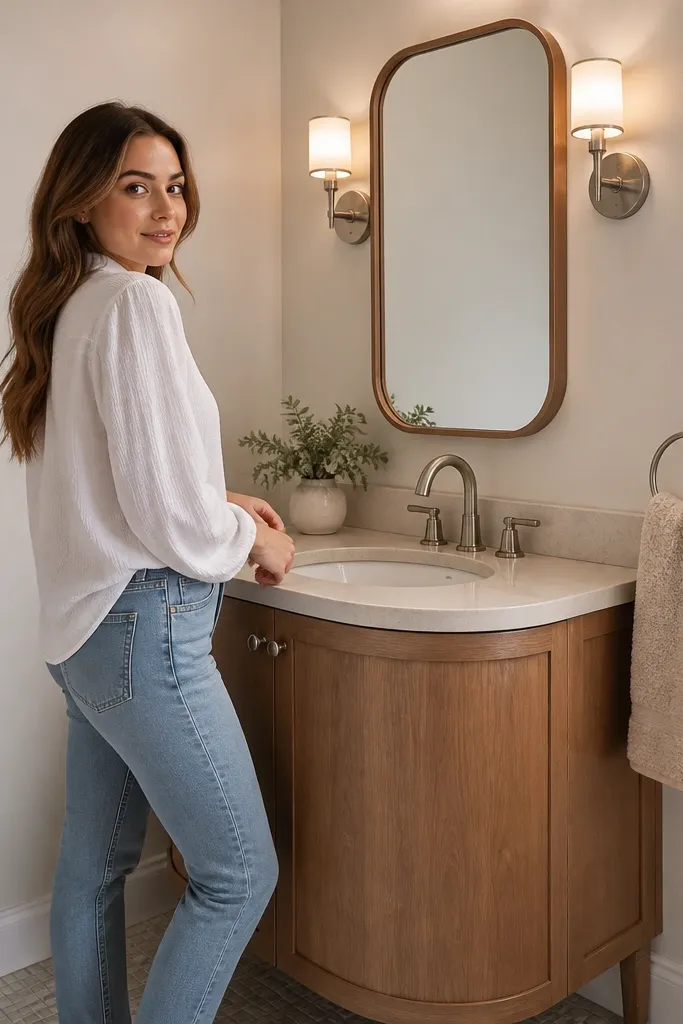
Hard corners make small bathrooms feel boxed-in. A rounded vanity corner and a rounded mirror create a softer silhouette that reads cozy in photos. Pair soft curves with a light wall color and a simple tile floor so the design doesn’t fight the room shape. Choose a countertop with a gentle radius and keep hardware minimal — one pull style or a simple bar. This is the right pick if your bathroom has awkward corners and you want the remodel to feel intentional instead of cramped.
Pick a vanity style that has a rounded corner or a curved end panel, then measure clearance around the door swing and toilet. Install a backer board if needed for wall anchoring, then mount the vanity level. Use a rounded mirror sized so it doesn’t overlap the door or light switch. Finish with wall paint and a narrow tile border that follows the room’s straight lines for contrast.
When you tile, keep the floor lines straight and let the curves live in vanity and mirror — it looks balanced.
Don’t add too many curves in one room — curved shower glass plus curved mirror can look chaotic.
10. Two-Tone Vanity: White Top With Wood Base
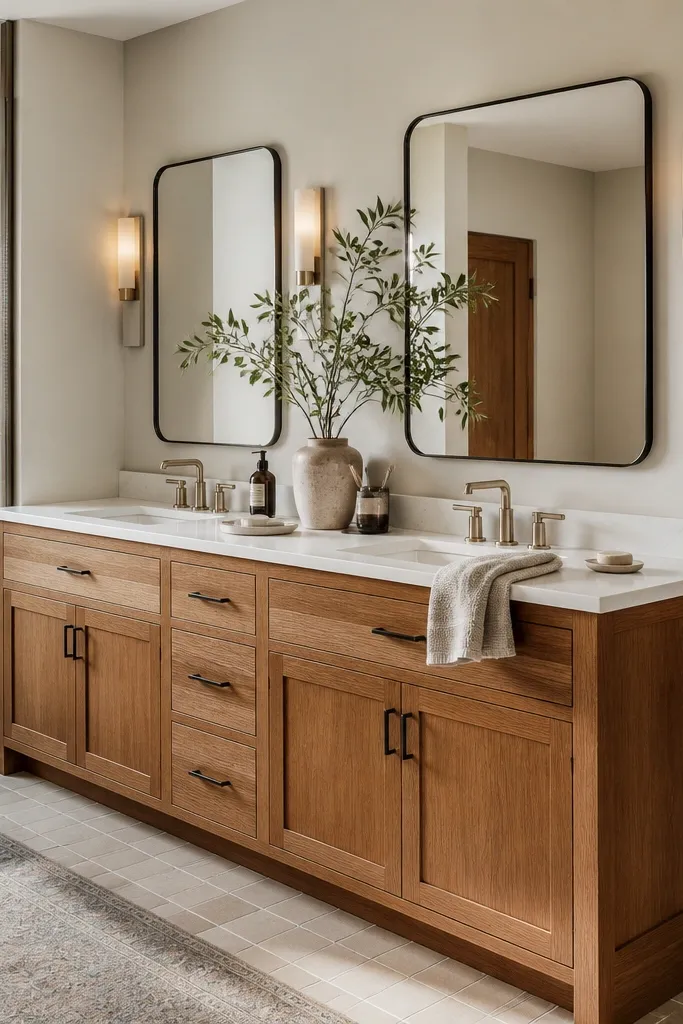
Two-tone vanities make small spaces look layered without adding clutter. Use a white countertop or light quartz top paired with a wood base in a warm tone so the bathroom feels cozy and not sterile. Keep the wall color neutral and matte, then match the wood in one more place like towel trim or a small shelf. The look is photogenic because the contrast frames the sink area and creates a focal point that’s easy to read from across the room.
Choose a vanity with a wood base and a removable or finished top so you can match quartz color. If you’re building or refacing, use waterproof plywood or cabinet-grade board and seal all edges. Install the vanity first, then tile the backsplash up to the underside of the mirror line. Mount mirror lights at the same height as the countertop edge so the face lighting is even.
Match the undertone: warm wood needs warm grout and warm wall paint so everything looks cohesive.
Avoid mixing cool gray wood tones with warm white tile — it reads mismatched fast.
11. Niche-First Shower With Shelf Lighting
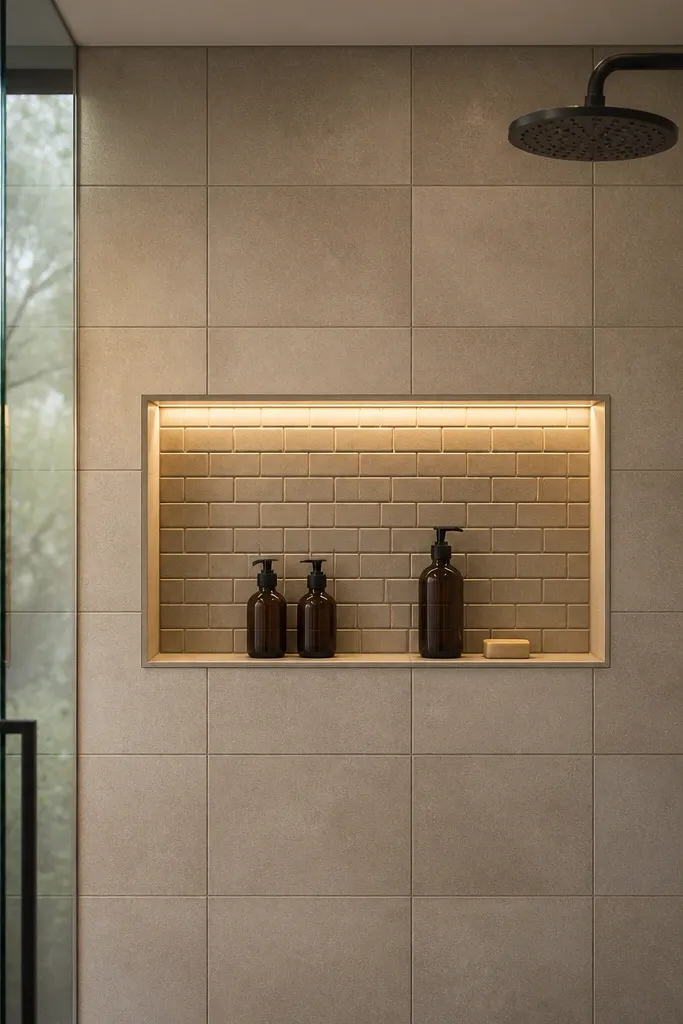
A niche that’s built for your bottles beats a cluttered shower caddy every time, and it looks great in photos. If you add a subtle LED strip inside the niche, the shower becomes a focal point and the bathroom feels more expensive. Keep the tile pattern simple — small subway or large matte square — so the niche light does the work. This design is best when you’re remodeling the shower anyway, because niche framing and waterproofing take planning. Skill level is medium to high due to waterproofing details and electrical safety.
Plan your niche location before you tile and make sure it fits between studs or cement board seams. Waterproof the shower fully, then cut the niche opening and install a niche kit or build the frame with waterproof boards. Run the LED wiring through a safe junction path and use a transformer rated for wet locations. Tile the niche surround last, then seal all edges and test the light before closing up the wall.
Use a warm LED color temperature around 2700K so the niche looks flattering, not blue.
Don’t mount the niche light too high — it should illuminate bottles, not only the back wall.
12. Patterned Wallpaper in a Half-Wall Frame
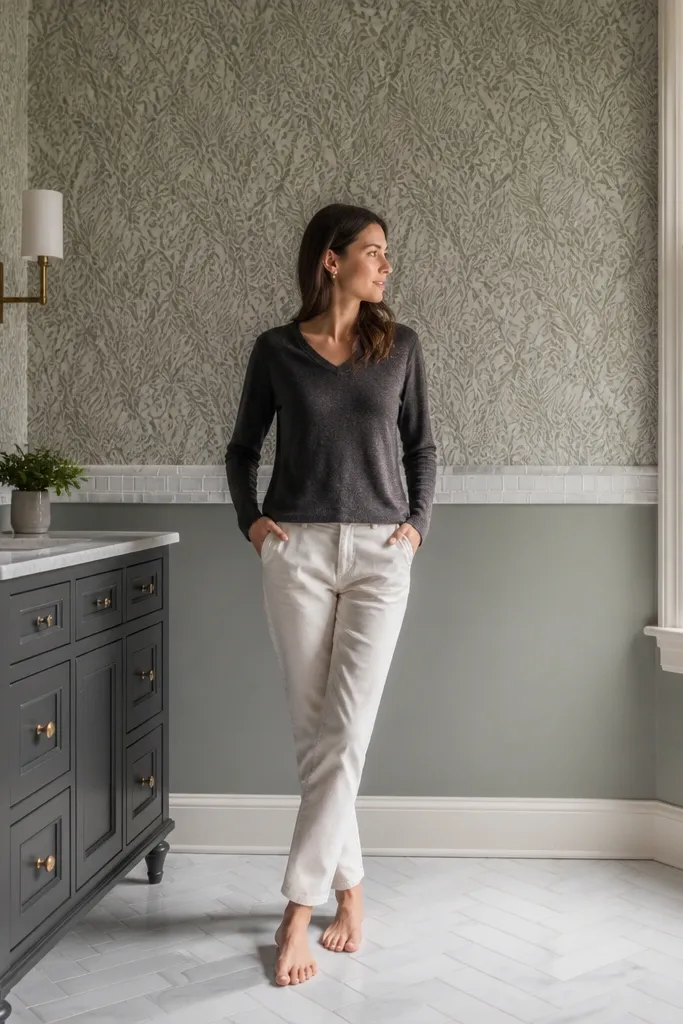
Patterned wallpaper can work in small bathrooms if you control where it goes. A half-wall frame keeps the busy pattern from taking over the whole room, and it gives you a clean visual boundary. Use moisture-rated wallpaper or vinyl designed for bathrooms, and pair it with painted lower walls or a simple tile band. This setup is cozy because the pattern adds personality while the frame keeps it tidy. It’s best for bathrooms with a window or good exhaust fan so the wallpaper stays happy.
Paint the lower half first and install a trim line at the height you want the frame to sit. Apply moisture-rated wallpaper on the upper half only, smoothing carefully around outlets and corners. Use a top and bottom trim piece to create a sealed edge so water vapor doesn’t creep under seams. Finish with matching metal hardware and a mirror that has a simple frame to keep the pattern from fighting reflections.
Let the paint cure fully before wallpaper so seams don’t lift when humidity changes.
Avoid full-wall wallpaper in a bathroom with poor ventilation — edges will peel.
13. Matte Black Rain Shower + Light Marble-Look
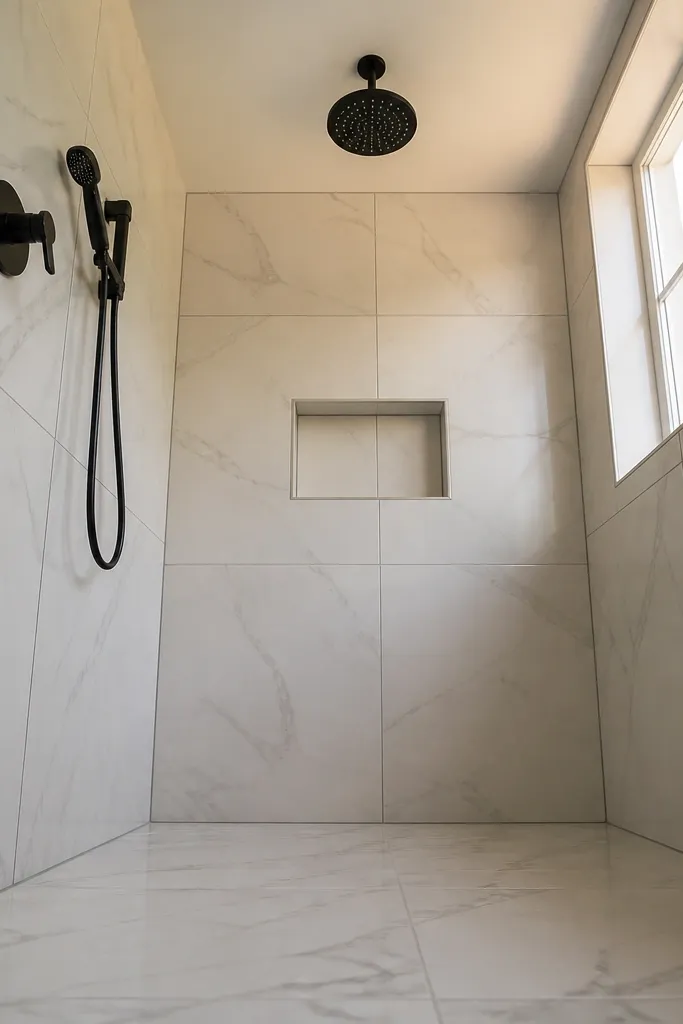
This is the clean, cozy contrast look: light marble-look tile makes the room feel bright, while matte black brings a grounded, modern feel. A rain shower head adds visual wow without needing extra space. Keep the grout lines consistent and slightly darker than the tile so the marble veining looks crisp. Pair with a simple vanity and a large mirror so the bathroom stays uncluttered. This design is ideal if you want a spa look but your small bathroom still needs warmth.
Pick marble-look porcelain or ceramic with a matte finish so the veining looks soft, not glossy. Waterproof the shower, then install tiles with consistent joint spacing and keep the pattern aligned across the main wall. Install the matte black valve trim and rain head after waterproofing but before final wall tile completion if your rough-in allows it. Finish with a frameless glass panel and a mirror light that spreads light evenly across the shower and vanity.
Choose a marble-look tile with subtle variation — heavy veining can overwhelm a small shower.
Don’t use a shiny marble-look tile with matte black — it can look streaky and busy.
14. Soft Green Paint + White Tile Border
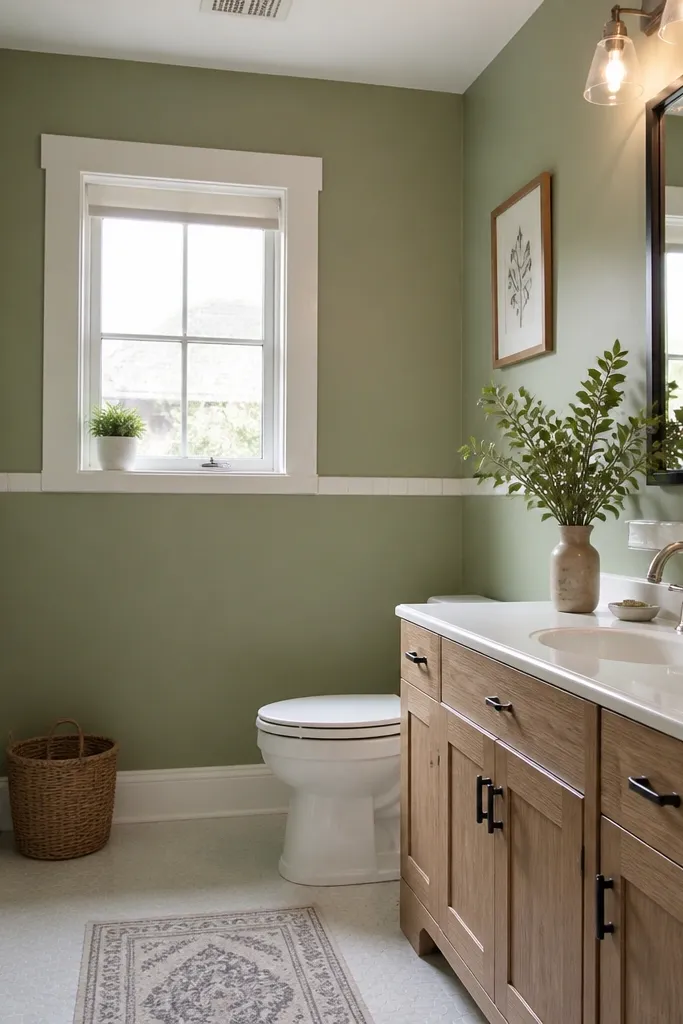
Paint is the fastest way to make a small bathroom feel cozy, and soft green does it without turning the space dark. Use green only on the walls, then anchor it with a white tile border or a simple subway band that runs around the room. That border keeps the paint from looking unfinished and gives your eye a visual frame. Pair with white fixtures and a light wood vanity for warmth. This design works well in bathrooms with natural light because the green reads fresh, not swampy.
Choose a soft sage or muted green and paint with a bathroom-rated matte or eggshell finish. Install a white tile border at a height that lines up with the vanity backsplash or mirror bottom. Caulk edges carefully and use mildew-resistant grout and sealant where needed. Finish with brushed nickel or warm brass hardware so the metal doesn’t fight the green tone.
Editor's noteDo a test patch on the wall and check it under night lighting — green can shift a lot after sunset.
Skip thisAvoid super dark green — it shrinks the room and makes the bathroom feel damp.
15. Warm White Shiplap on the Ceiling Only
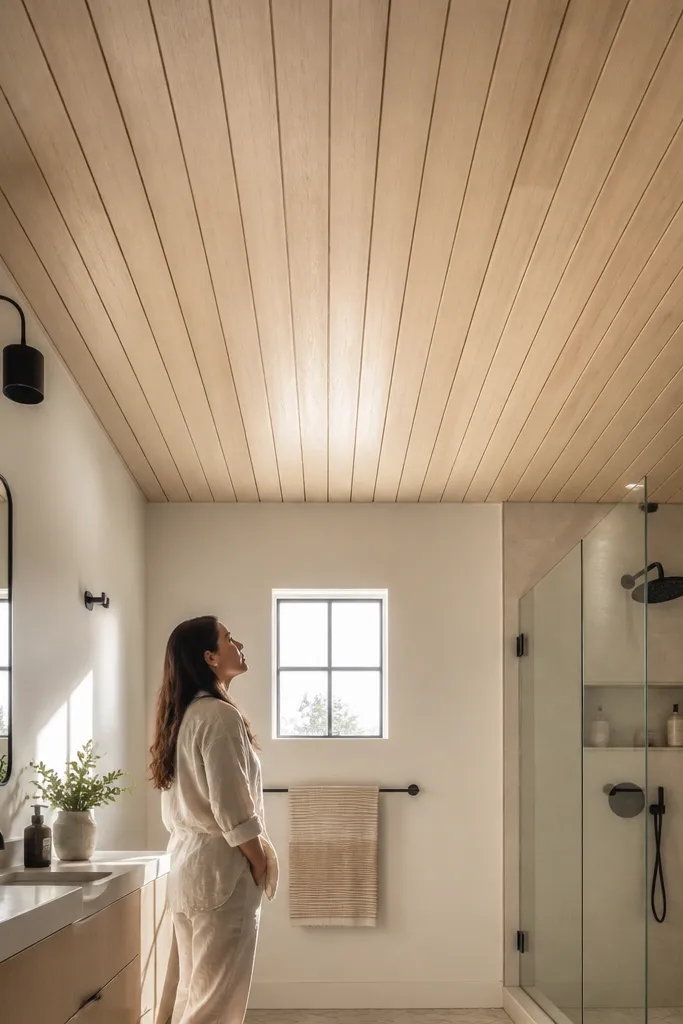
Ceiling shiplap is a cheat code for cozy. It adds texture at the top of the room without taking up wall space, which matters in small bathrooms. Keep the walls and shower smooth and simple so the ceiling texture becomes the only focal texture. A warm white ceiling also makes the light feel softer. This design is best if your bathroom has a flat ceiling and you want a cozy farmhouse-modern look without gutting everything.
Prep the ceiling surface and install moisture-tolerant panels or shiplap boards rated for humid spaces. Prime and paint with a bathroom paint system so it resists steam and condensation. Keep the boards aligned with a chalk line and screw into joists or furring strips. Finish by adding a simple flush-mount light or a damp-rated ceiling fixture and keep wall trim minimal.
Use a damp-rated primer and paint; regular interior primer can fail with bathroom humidity.
Don’t install shiplap if your ventilation is weak — ceiling boards will warp.
16. Square Niche + Floating Shelf Vanity Combo
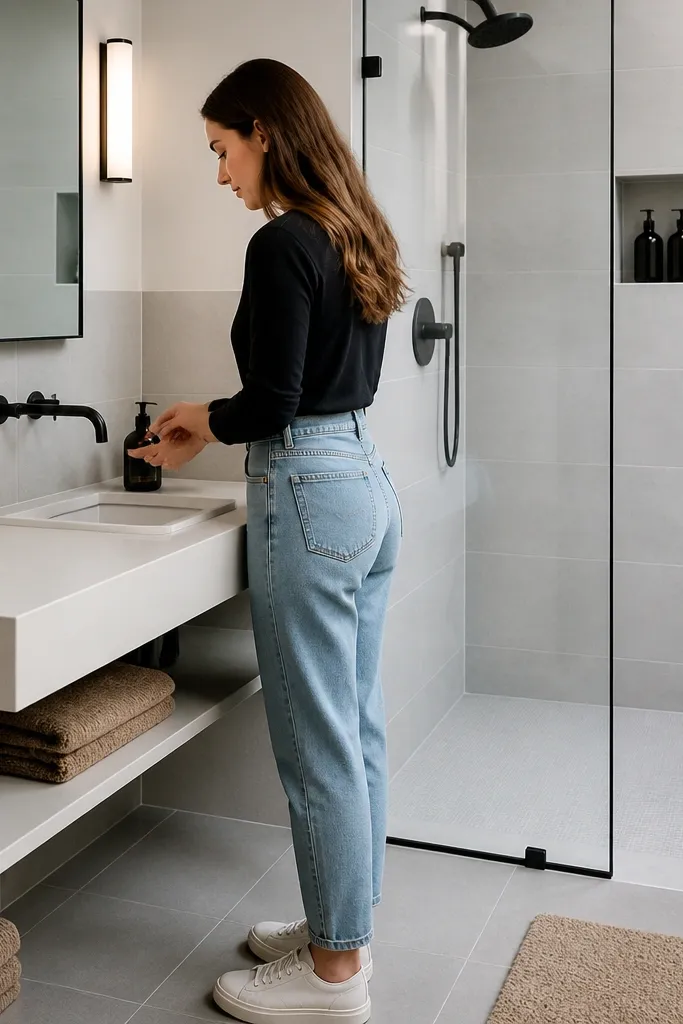
This design pairs storage you can see with clean lines you can photograph. A square niche in the shower gives you a place for shampoo without clutter, and a floating shelf vanity keeps the bathroom light. Use light gray tiles with crisp edges so the square shapes look sharp. The result is a modern, cozy bathroom that feels organized even when it’s small. It suits bathrooms where you need storage but don’t want bulky cabinets.
Frame the niche and shelf spaces first, then waterproof the shower areas before any tile goes up. Install a floating vanity or shelf unit anchored into studs with a support cleat. Tile the shower with consistent spacing so the niche edges stay square and clean. Finish with a single long mirror that aligns with the vanity shelf line for a tidy composition.
Dry-fit the niche and vanity together so their lines match visually across the room.
Avoid mixing shelf materials that look different from your tile finish — mismatched textures read messy.
17. Textured Wall Tile Behind the Vanity
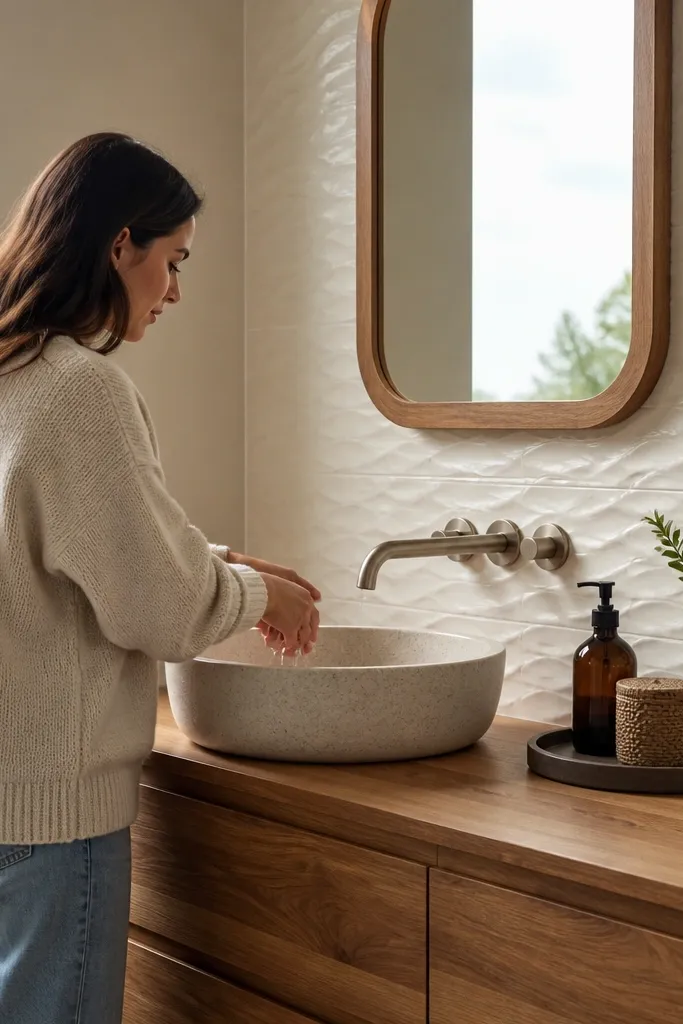
If your bathroom feels plain, add texture where you’ll notice it — behind the vanity. Use a small-format textured tile panel like a subtle wave or raised pattern, then keep the rest of the walls smooth. Textured tile makes light bounce in a way paint can’t, so the space looks cozy even on cloudy days. Pair with a warm metal faucet finish and a simple mirror so the texture is the star. This remodel is great for small bathrooms because it adds interest without eating floor area.
Mark the vanity centerline and measure the backsplash area you want covered, usually from countertop height up to mirror bottom or a bit above. Waterproof the wall area if needed, then install the textured tile with a consistent thinset thickness. Use a grout color that matches the texture base tone so the raised areas stay clean visually. Finish by caulking edges around the countertop and installing mirror lights that hit the textured surface evenly.
Editor's noteUse a grout color slightly darker than the base tile for cleaner contrast in the texture ridges.
Skip thisDon’t extend textured tile across the whole room — it reads busy and makes the bathroom feel smaller.
18. Cozy Beige Tile With Dark Grout Lines
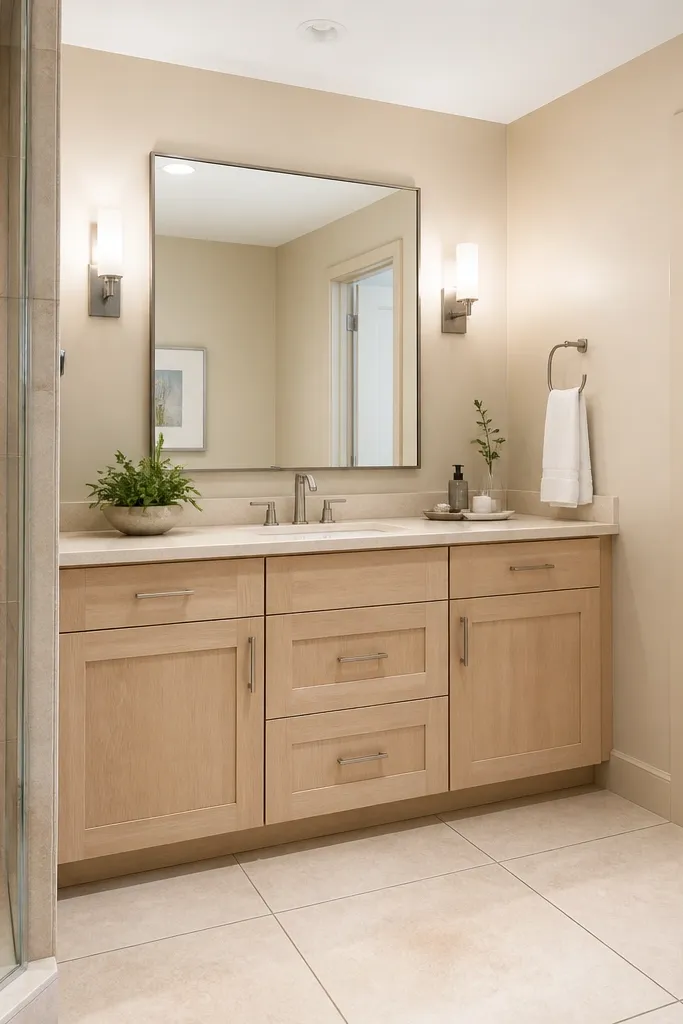
Beige tiles can look flat unless you add contrast, and dark grout lines do that work. The contrast makes the tile pattern visible and gives the bathroom a tailored look. Keep the rest light — white ceiling, light vanity top, and a simple mirror frame — so the space stays bright. This is a cozy choice for people who want warmth without going fully brown. It’s also forgiving because grout contrast hides minor unevenness in tile placement better than light grout.
Pick a beige tile with a matte finish and a grout color 1-2 shades darker with a warm undertone. Plan your layout so the tile joints line up across the shower and vanity wall, then set your first row using a level ledger. Apply grout after tiles cure and wipe slowly to avoid pulling grout out of the joints. Seal the grout if your tile system requires it and finish with warm wood accessories.
Use a grout haze remover suited for your tile to keep beige tiles from looking dull after cleanup.
Avoid gray cool grout with warm beige — it can turn the whole bathroom ashy.
19. Black Frame Mirror + Gold Hardware
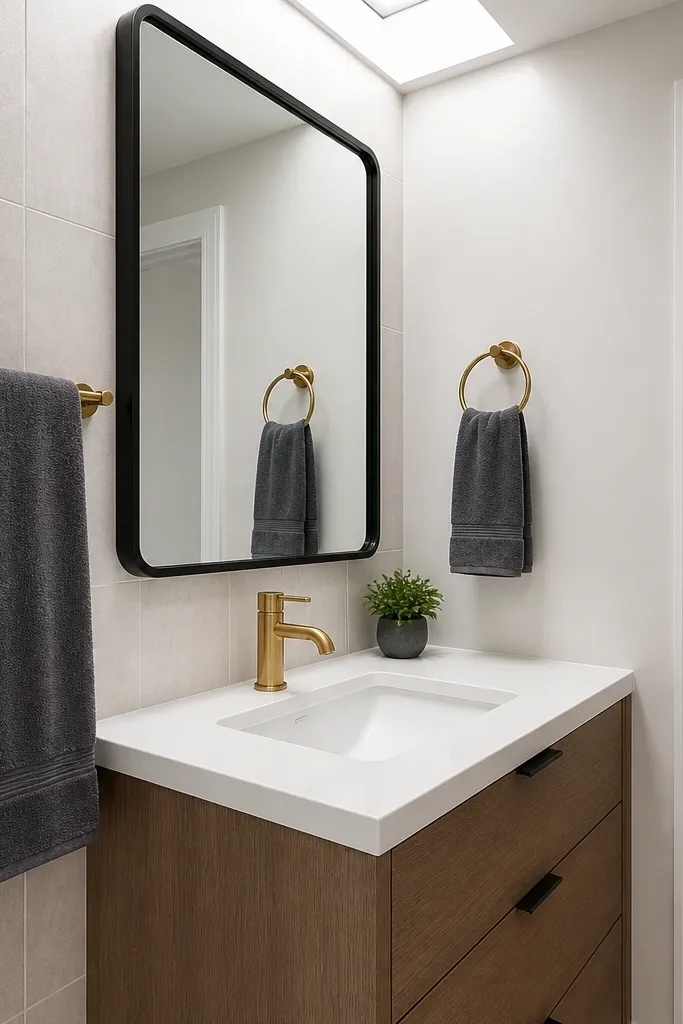
Mixing finishes can look intentional in a small bathroom if you keep the pattern simple. A black frame mirror creates structure, while gold hardware adds warmth and softness to the look. Keep the rest monochrome — white counters, light walls, and simple light tile — so the two metals feel like a design choice, not a mismatch. This style is photogenic because the mirror frame catches light and creates a strong focal point. It’s also a low-to-medium remodel since you can change hardware and lighting even if you don’t redo every surface.
Choose a mirror with a black frame that matches your lighting hardware finish. Install the vanity and faucet first or confirm your existing rough-in heights, then mount the mirror centered over the sink. Replace towel bar, toilet paper holder, and faucet with matching gold tones. Add a vanity light with glass shades or a diffuser so the light looks soft and the mirror doesn’t glare.
Match the mirror frame to the shower glass hardware or curtain rod so the black reads consistent across the room.
Avoid three metal finishes — it makes a small bathroom look busy.
20. Patterned Floor Tile Runner Effect
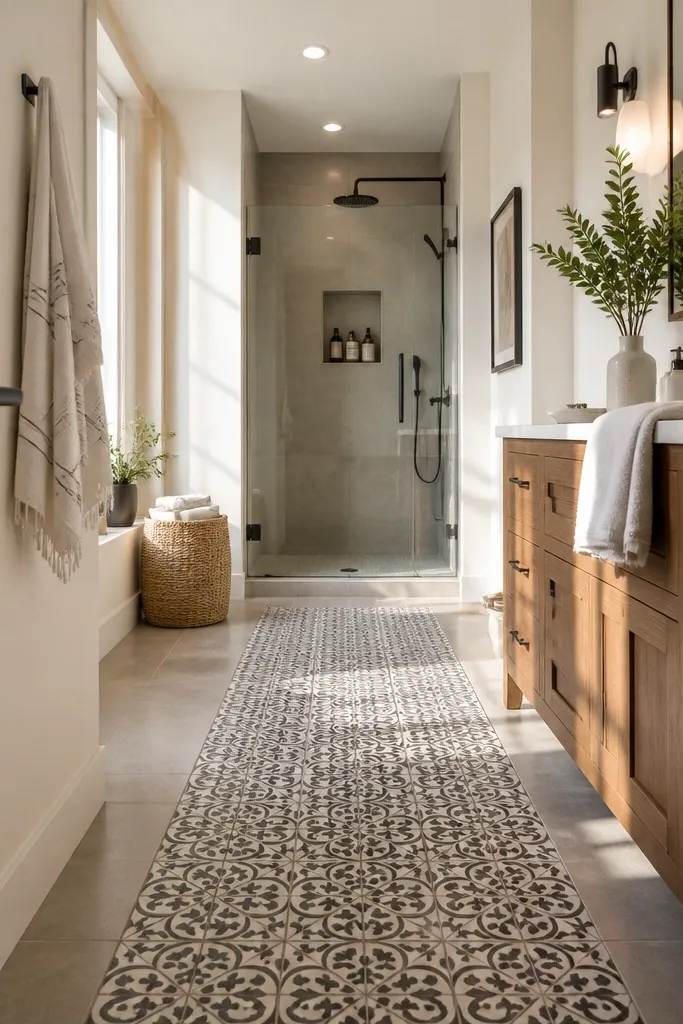
A patterned floor tile runner effect creates direction and makes the room feel longer, even when it isn’t. You’re guiding the eye with a band of pattern that runs from near the entry toward the vanity or shower. Keep the surrounding floor plain and neutral so the pattern reads like a design element, not random tile. This is a cozy remodel look because it feels styled and intentional underfoot. It works best when you’re redoing the floor anyway because layout matters more than the tile choice.
Pick a patterned tile that looks good in small grout joints and choose a neutral surrounding tile that matches the undertone. Measure the room and decide the runner width, usually 12-18 inches, so it stays visible but not cramped. Dry-lay the runner first, then tile the surrounding area so edges are clean at the transition lines. Seal grout and keep the vanity hardware simple so the floor pattern stays the focal point.
Use the same grout color across the runner and the rest of the floor to avoid a harsh break.
Don’t center the runner on the door — center it on the vanity or shower feature you want people to notice.
21. Vertical Slab Wall Panels in the Shower
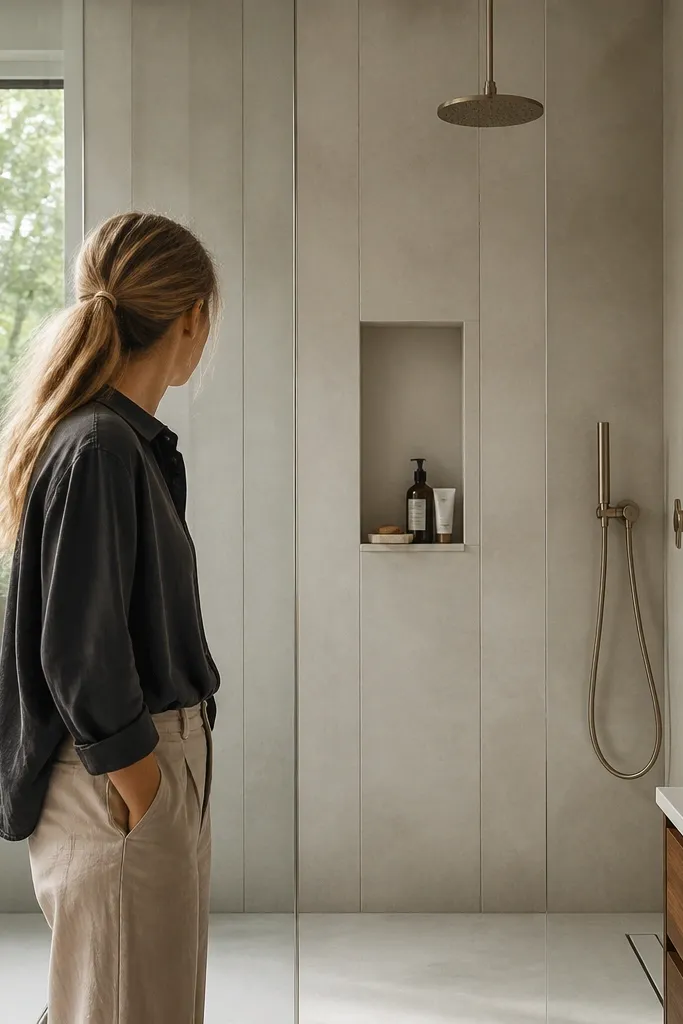
Vertical slab panels in the shower make a small bathroom feel taller because the lines go up. They also reduce grout maintenance compared to lots of small tiles. Keep the color light and warm — off-white, pale greige, or light beige — so the bathroom feels cozy instead of sterile. Add a frameless glass panel and a slim niche for products. This design is a strong choice if you want a modern spa look but don’t want to spend months on tile cutting.
Choose waterproof wall panels or large-format tile slabs rated for wet areas, then plan seam locations so you don’t get narrow slivers at corners. Waterproof the shower area, then install panels with proper thinset or adhesive per manufacturer instructions. Cut around valve trim and niche openings carefully and seal all edges with wet-area caulk. Finish by installing glass and adding a light mirror to keep the shower bright.
Dry-fit panels in place and mark seam lines with pencil before adhesive — it prevents crooked joints.
Avoid cheap panel adhesives not rated for wet areas — seams fail and look bad fast.
22. Cozy Corner Shelf With Same-Tile Backing
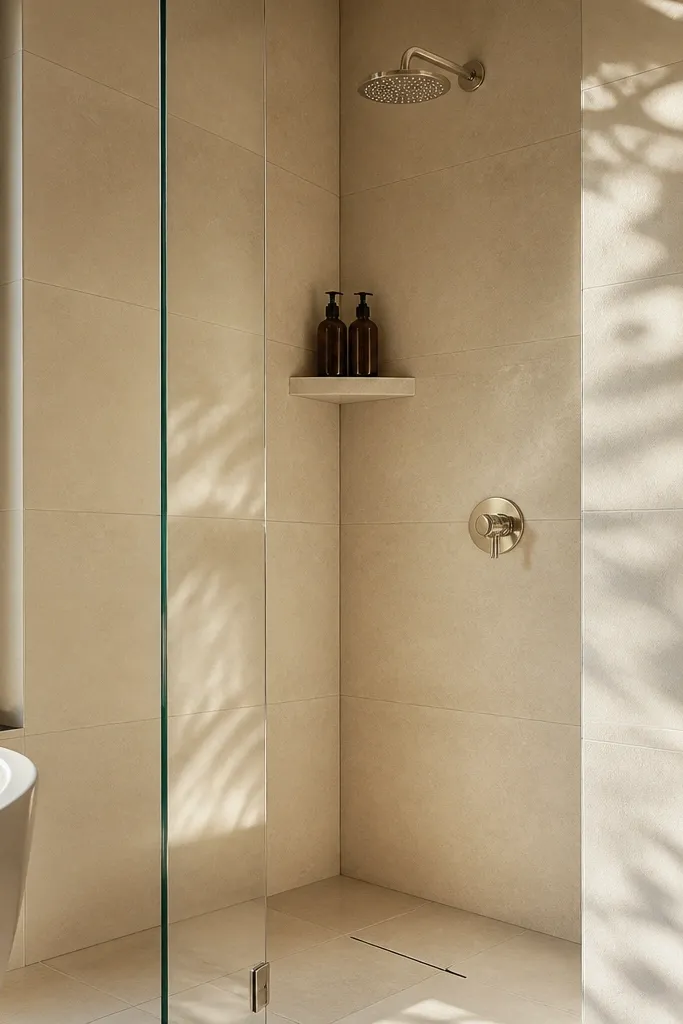
A corner shelf built into the shower or next to the vanity gives you storage without extra furniture. When the shelf has the same tile finish as the wall, it looks built-in and intentional, which makes the room feel higher-end. Use a small shelf depth so it doesn’t collect clutter, and pair it with a clean glass panel or a simple curtain rod. This is a practical design that still photographs well because the shelf lines up with the room’s geometry. It suits small bathrooms where every inch counts and you don’t want a bulky cabinet.
Plan shelf location so it sits at a comfortable reach height and doesn’t block the shower spray line. Build a waterproof shelf backing using waterproof cement board or a niche kit system, then waterproof the whole wall area. Tile the shelf with the same pieces and grout as the wall, and seal the shelf edges. Install the glass or curtain after the tile cures so you can align the shelf visually with the opening.
Editor's noteUse a slightly darker grout on the shelf edges — it hides scuffs and looks cleaner over time.
Skip thisDon’t make the shelf too deep — deep shelves look crowded and collect water stains.
23. Cream Vanity With Arched Mirror Frame
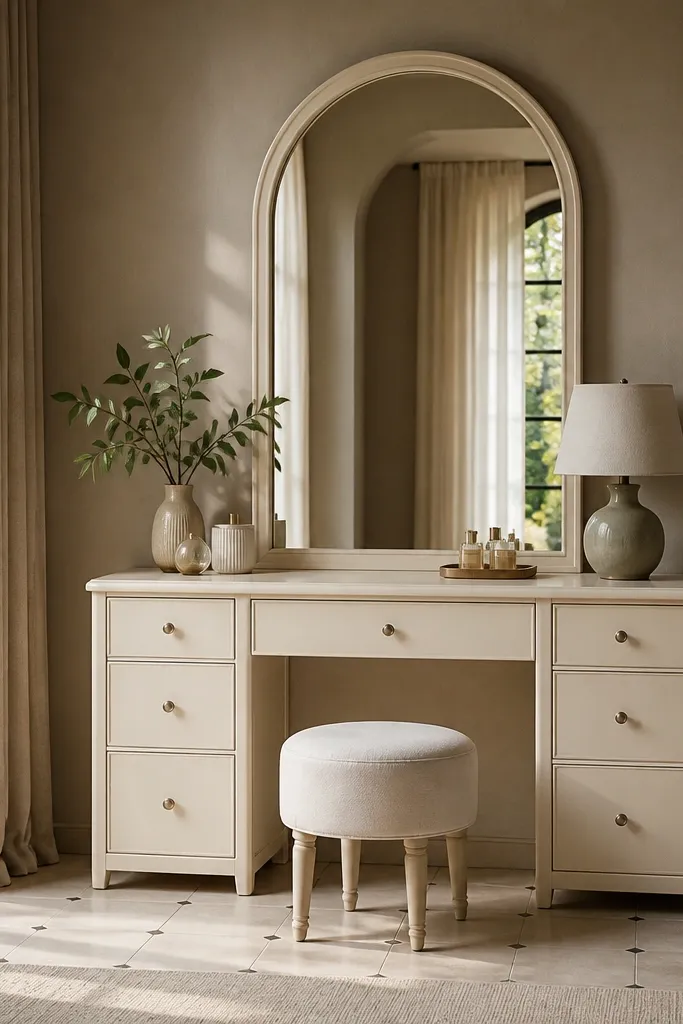
Arched mirrors soften a small bathroom and make the vanity area look welcoming. Pair an arched mirror with a cream vanity and simple hardware so the shape becomes the main design detail. Keep the wall color warm and matte, and choose a tile floor with a small pattern or simple grid so the arch doesn’t fight busy surfaces. This design is cozy, classic, and easy to photograph because the mirror shape pulls focus to the sink. It’s best if you want a remodel that feels gentle rather than sharp and modern.
Choose an arched mirror with a frame width that doesn’t overlap your faucet line or any light switch nearby. Set the vanity height and backsplash tile height first so the mirror sits centered at eye level. Tile the floor with a simple layout and keep grout lines consistent. Finish with warm lighting around the mirror — two lights on the sides or a long bar with diffusers.
Editor's noteMatch the mirror frame color to your towel hardware so the bathroom looks coordinated from every angle.
Skip thisAvoid overly ornate mirror frames — they can overwhelm a small room.
24. Tiny Bathroom Wet Room With Curbless Feel
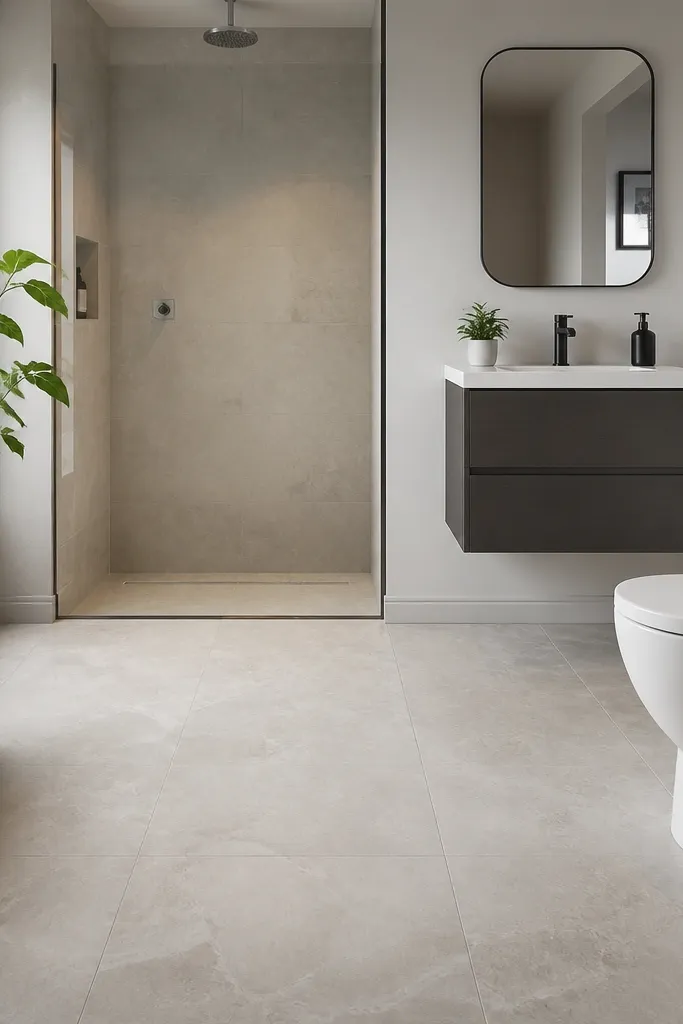
A wet room style with a curbless feel makes the whole bathroom look continuous. The key visual is the uninterrupted floor surface that carries into the shower area, which makes the room feel bigger. Use a linear drain and a gentle slope under the floor for real function, not just looks. Choose light stone-look tile to keep it bright, and use a clear glass panel to control splash. This design is bold and photogenic, but it requires real waterproofing and floor prep, so it’s for bathrooms that need a floor redo anyway.
Plan the drain location and slope before you install underlayment — this is the part you can’t fake. Remove the existing floor and build a proper waterproofing system rated for wet rooms, then install the linear drain. Set the same tile across the bathroom floor and shower zone, keeping grout lines consistent. Install a clear glass panel and add a bathroom-rated ventilation fan to handle the extra moisture.
Editor's noteUse a tile with low porosity and seal if required — wet-room floors get scrubbed more than you think.
Skip thisDon’t skip slope planning — puddles ruin the look and the function quickly.
25. Wainscoting Lower Walls With Tile Upper Band
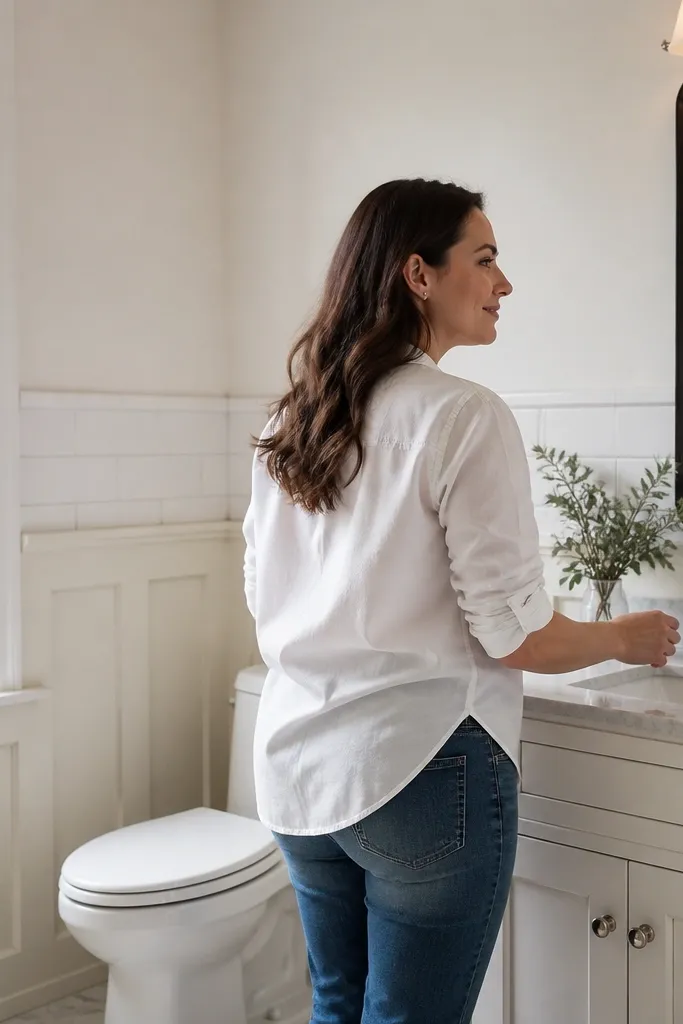
Wainscoting gives small bathrooms a structured, cozy feel because it breaks the wall into sections. Pair it with a narrow tile band above the wainscoting to protect the wall from splashes and keep the look crisp. This design is especially good if you like traditional styling but want the bathroom to look clean and updated. Use a warm white paint for the wainscoting and a light neutral tile band. The room looks taller when the upper section stays bright and uncluttered.
Install wainscoting panels or raised trim on the lower wall, anchored into studs and sealed at edges. Paint with a bathroom-rated finish and let it cure fully. Tile a narrow band above the wainscoting to a height that lines up with the mirror bottom or vanity splash zone. Caulk all seams and edges carefully, then install a simple mirror frame and matching hardware.
Editor's noteUse satin paint for wainscoting — it cleans better than matte in splash zones.
Skip thisAvoid wainscoting that stops too low — it makes the wall feel chopped and shorter.



