
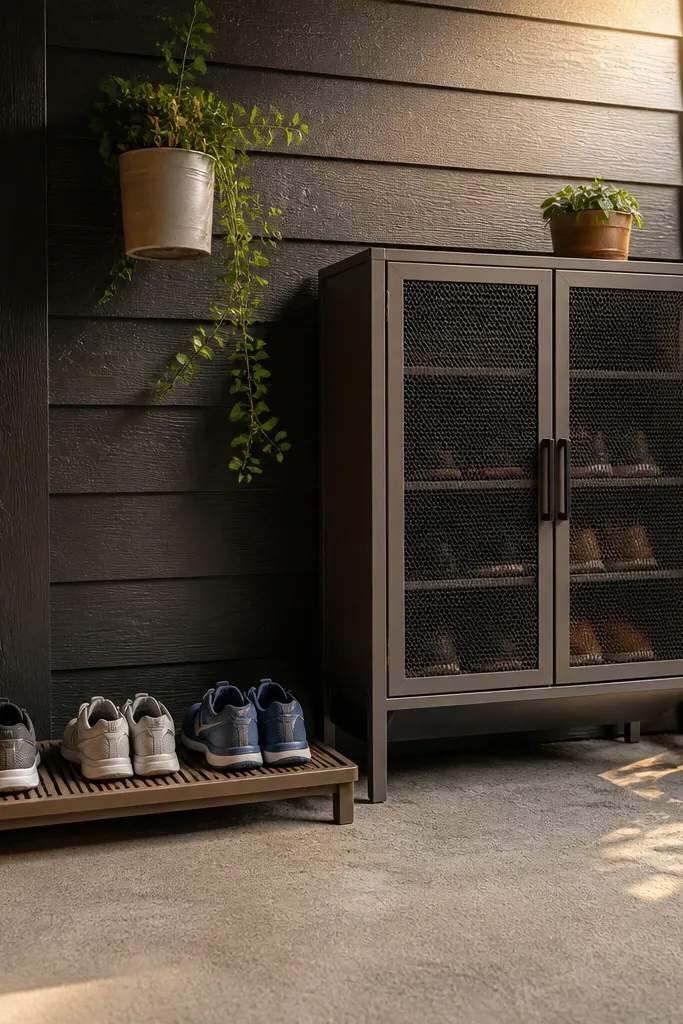
1. Slatted Cedar Bench with Raised Shoe Slots
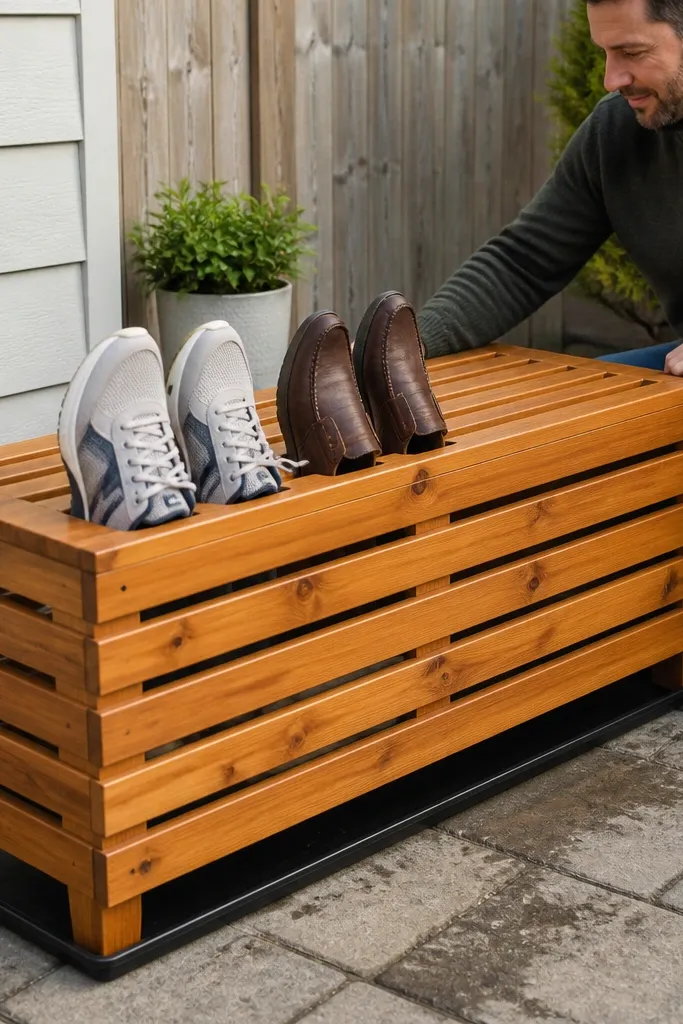
This is the outdoor shoe storage idea that looks built-in because it is. A cedar bench hides shoes in narrow, raised slots so pairs sit upright instead of collapsing into a heap. Cedar also resists outdoor moisture better than most softwoods, and the slats let airflow reach the shoes so dampness doesn’t linger. The best part visually is the clean front line — each slot reads like a neat row, not a random stack. Plan for a bench depth that keeps shoes from sticking out beyond the edge, which makes it look tidy from the sidewalk.
Cut a bench frame from cedar (or outdoor-rated lumber) and build a top with a slight overhang so rain doesn’t hit the shoe openings directly. Install internal dividers spaced for your biggest pair width — start with 4.5 inches between dividers for average sneakers and adjust up if you store boots. Add slats across the bottom of each compartment with 1/4-inch gaps so water drains and air circulates. Finish with two coats of exterior clear sealer or deck stain, then add non-slip pads under the bench feet.
Seal the cut ends of cedar with exterior sealer before assembly — end-grain soaks up water fast.
Avoid solid bottoms inside the slots; they trap moisture and make the bench smell.
2. Galvanized Ladder Lean Rack for Patio Shoes
A leaning ladder makes shoe storage look like decor because it uses vertical lines. Each rung becomes a visual “shelf” and shoes stay separated by rungs, so you don’t get one big pile. Galvanized metal also reads crisp against brick, concrete, or dark siding, and it wipes clean when dirt tracks in. This setup works best when you keep the shoe silhouettes consistent — think sneakers, slides, and loafers in matching tone families. The ladder’s angle matters: too steep and shoes fall forward, too shallow and the bottom shelf looks cluttered.
Pick a ladder that’s small enough to lean comfortably — aim for a 20-30 inch wide footprint and 5-6 rungs depending on your shoe count. Sand any sharp edges and clean with degreaser, then prime and spray with a rust-inhibiting metal paint if the finish is bare. Add optional horizontal wood slats to the rungs using outdoor screws so soles sit flat. Lean it against a wall using two anti-slip standoff pads and anchor the top rung into studs or masonry with appropriate hardware.
Use a strip of weatherproof felt or rubber on the top contact point so the ladder doesn’t scratch siding.
Avoid placing it flat on the ground without anchoring — rungs shift and shoes end up uneven.
3. Outdoor Shoe Drying Cabinet with Mesh Doors
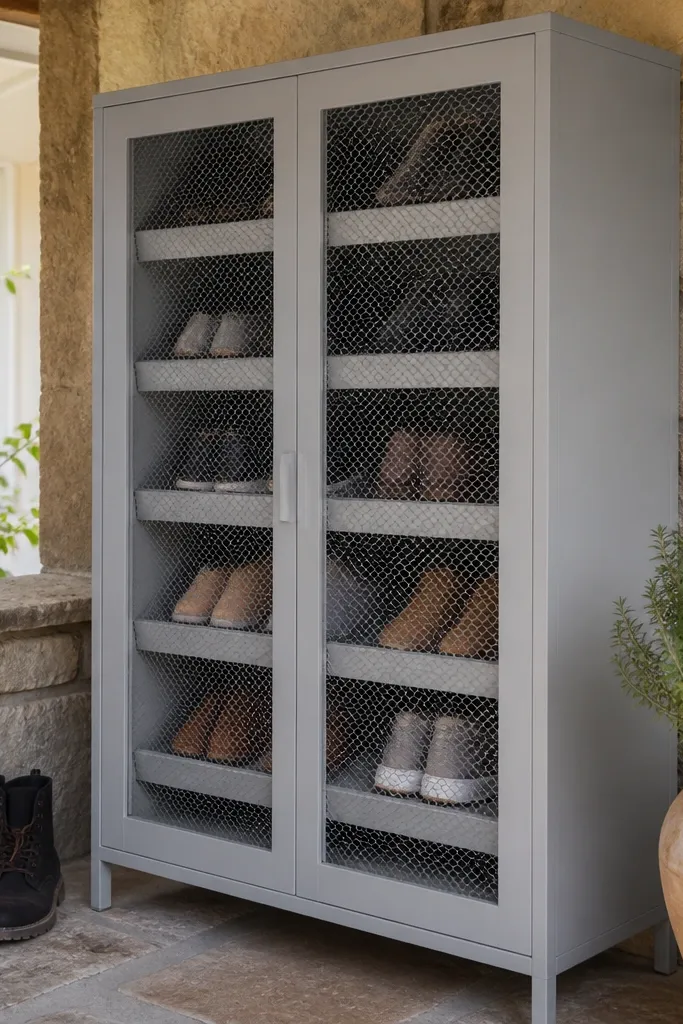
Build a cabinet frame from outdoor plywood or treated lumber and cover the front with wire mesh panels cut to size. Install two or three angled shelves with a 10-15 degree tilt so water runs down into a removable drip tray. Add a drip tray at the bottom using a shallow plastic or metal pan with a lip, then drill small drainage holes so it doesn’t hold water. Finish the wood with exterior paint or sealer, and attach hinges and a magnetic latch so the doors stay shut in wind.
If your porch shoes are always damp, a cabinet with mesh doors is a smart aesthetic fix. The mesh keeps the storage from looking bulky while still letting air move through — you get that clean, contained look without trapping moisture. Angled shelves make shoes sit neatly and drain better than flat shelves. This idea looks sleek because the doors create a single rectangle of order, and you can choose a finish that matches your outdoor furniture. It’s a great fit for narrow porches where open racks look messy.
Skip thisAvoid solid doors; they trap humidity and turn the cabinet into a smell machine.
Editor's noteUse stainless or coated screws throughout — rust streaks show fast on patio furniture colors.
4. Perforated Metal Shoe Wall with Removable Trays
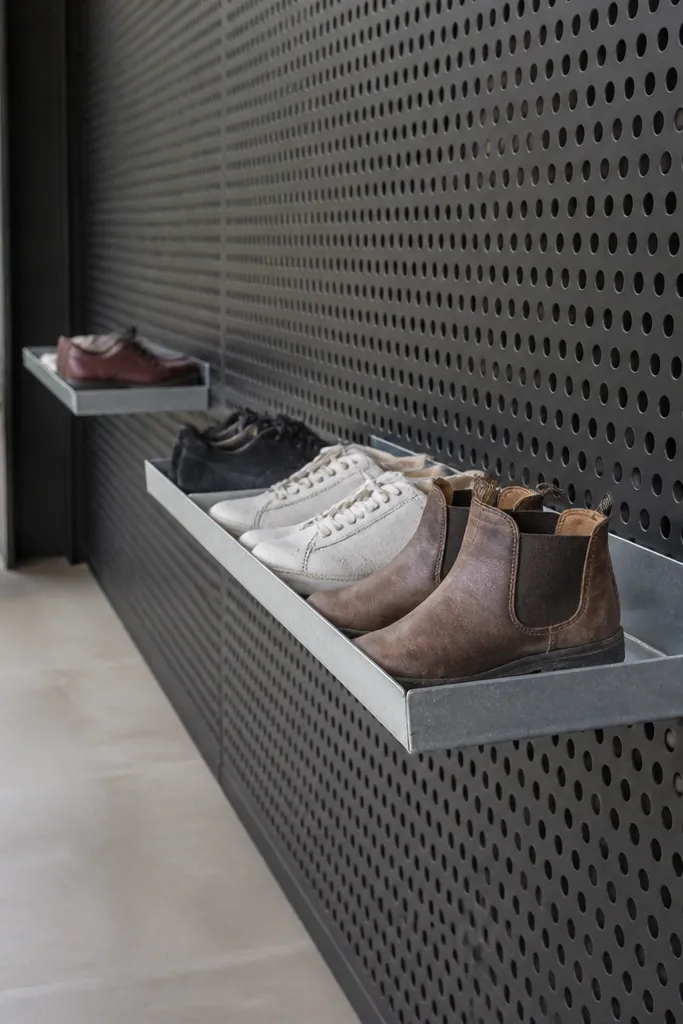
A perforated metal wall looks modern and keeps shoes visible without looking chaotic. The holes make airflow easy, so shoes dry even when stored in an open system. Removable trays let you swap pairs based on season, and they keep soles off the metal so they don’t leave black marks. Visually, each tray creates a neat block, so the wall reads like a gallery of organized pairs. This is best for porches with a blank wall section where you want storage that looks intentional.
Mount a perforated metal panel to studs with spacers so air can circulate behind it. Hang small powder-coated metal or wood trays using brackets that lock at the edges. Space trays so there’s at least 2 inches between the top of one shoe and the tray edge above — that keeps everything from touching. Add a removable drip mat or small tray under the lowest row and hose-wipe the panel when needed.
Paint the tray brackets to match the panel so every connection point looks clean.
Avoid storing shoes directly on bare perforated metal without a tray; dirt and moisture stain surfaces.
5. Wicker Basket Set with Rigid Liners and Drain Holes
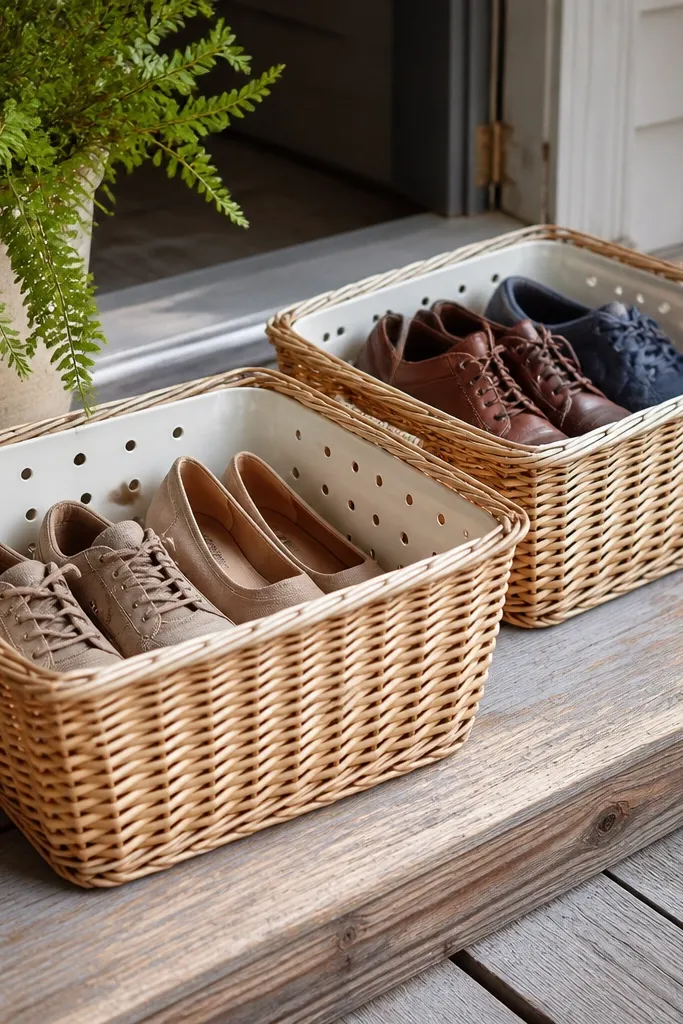
Wicker looks warm and porch-friendly, but loose liners and no drainage ruin it fast. The trick is using rigid liners inside the baskets so the basket keeps its shape and your shoes don’t press into the weave. Add drain holes to the liner so moisture escapes, and you get that cozy look without the mildew problem. This setup is photogenic because wicker texture reads well in natural light. It works best when you group baskets by shoe type: sandals in one, sneakers in another, slip-ons in a third.
Choose baskets with sturdy handles and thick weave so they don’t sag under shoe weight. Line each basket with a cut-to-fit plastic or rubber tray liner, then drill 1/4-inch drainage holes in the lowest area. Add a removable absorbent mat on top (like a thin outdoor felt pad) so you can pull it out and shake it. Set baskets in a row and keep them the same height using a simple wood base or porch shelf.
Wipe wicker with a damp cloth first, then let it dry fully before you add liners; trapped grime stains.
Avoid leaving shoes directly in wicker without a liner; the weave holds moisture and dirt.
6. Outdoor Boot Rack with Steel Pipe Uprights
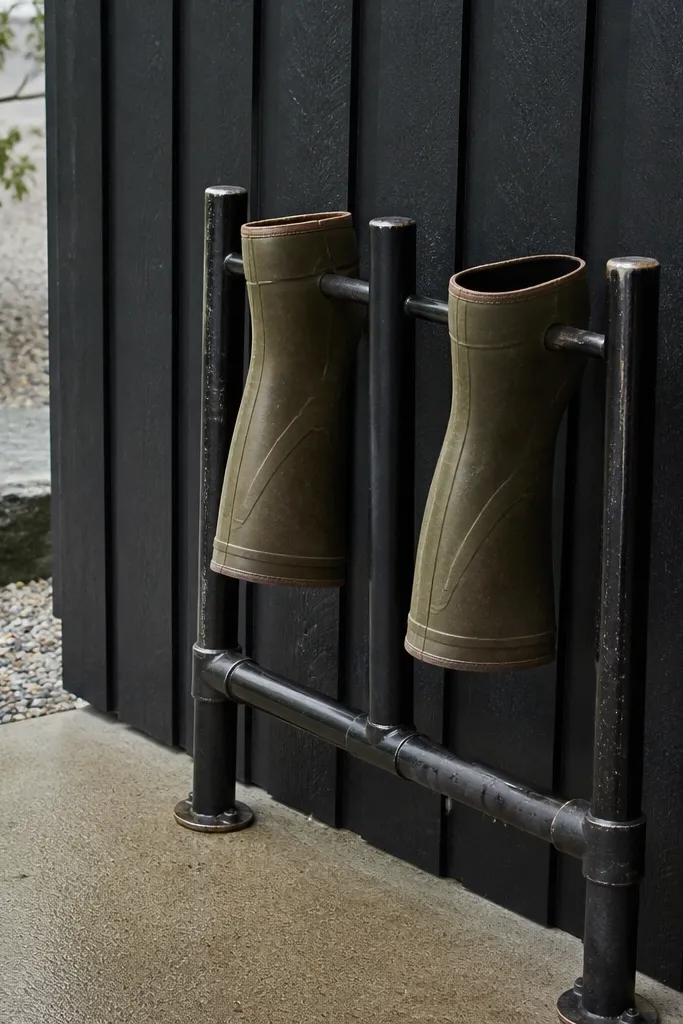
For taller boots, the best-looking storage is the kind that keeps them upright. Steel pipe uprights create clean lines, and you can space them so each boot hangs without folding. This prevents creases and keeps the shaft shape, which is what makes it look neat even when you’re not perfectly organized. The pipes also look industrial in a good way on porches. Use it for boots and taller shoes only, and you’ll get a display that looks intentional instead of cluttered.
Build two vertical frames from steel pipe and fittings, then anchor the base to a stable outdoor platform or directly to porch structure. Add horizontal pipe rails at heights that match your boot shaft opening — aim for 10-14 inches above the boot opening edge. Use simple boot hangers or straps that hook onto the rails so boots don’t slide. Add a drip tray under the lowest point and paint or seal the metal if you’re in heavy rain areas.
Wrap the contact points with a thin rubber sleeve so metal doesn’t scuff boot leather.
Avoid hanging boots by the toe only; they tip and the rack looks messy.
7. Raised Planter Shelf with Shoe Storage Under the Lip
Build a planter shelf frame and set it on short blocks or a base so the underside is at least 10 inches above the porch floor. Add a front skirt panel with a 1-2 inch gap at the bottom for airflow, then install a slatted inner floor for drainage. Place a removable tray or drip mat under the slats so water doesn’t soak the wood. Finish the shelf with exterior paint and seal the underside so it handles splashback.
This idea hides storage in a way that still looks decorative. A raised planter shelf creates a visual “ledge” for plants, while shoes live underneath the lip in a dark, tidy zone. Because the shelf lifts shoes off the ground, you get less dirt transfer and better airflow than ground-level bins. It’s also good for small porches because it uses the space you already have. Make the lip wide enough that shoes don’t show when you glance toward the seating area.
Skip thisAvoid sealing the underside completely; trapped moisture warps wood over time.
Editor's noteUse a light color under the shelf; dark wood makes scuffs and dirt look worse.
8. Outdoor Floating Ledge for Slippers and Flats
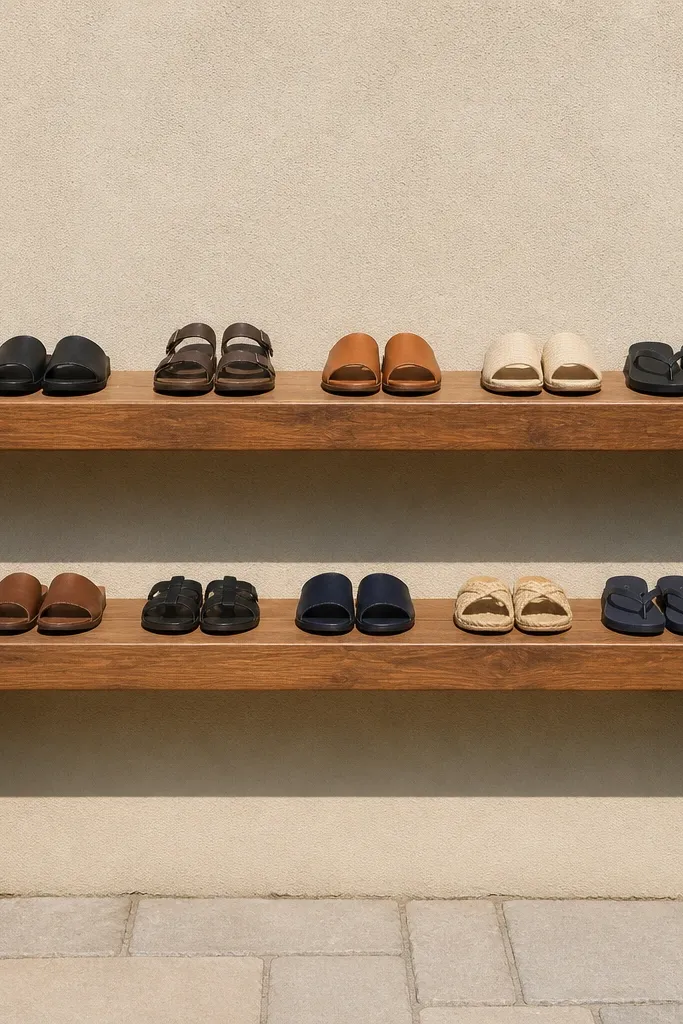
Mount a ledge board to studs with heavy-duty brackets spaced every 16 inches. Cut a shallow lip on the front edge or add a narrow 1x2 cleat so shoes don’t slide off. For airflow, leave a small gap behind the ledge using standoff blocks so moisture can escape. Seal with exterior polyurethane or marine varnish, then add a drip edge detail at the front using a small metal strip.
A floating ledge turns shoe storage into a clean wall display. It’s especially good for flats, slippers, and low-profile shoes because they sit flat and show their shape. The aesthetic is crisp: two or three ledges create a tidy rhythm and you can keep pairs facing the same direction. For outdoors, you want a ledge that handles splash and rain — so use treated wood and seal it well. This is a strong choice when you have limited floor space and want the porch to look organized fast.
Skip thisAvoid ledges with no lip; shoes slowly drift and the line looks sloppy.
Editor's notePre-drill bracket holes and use stainless screws; rust heads show up fast on light finishes.
9. Coir Doormat + Under-Shelf Tray System
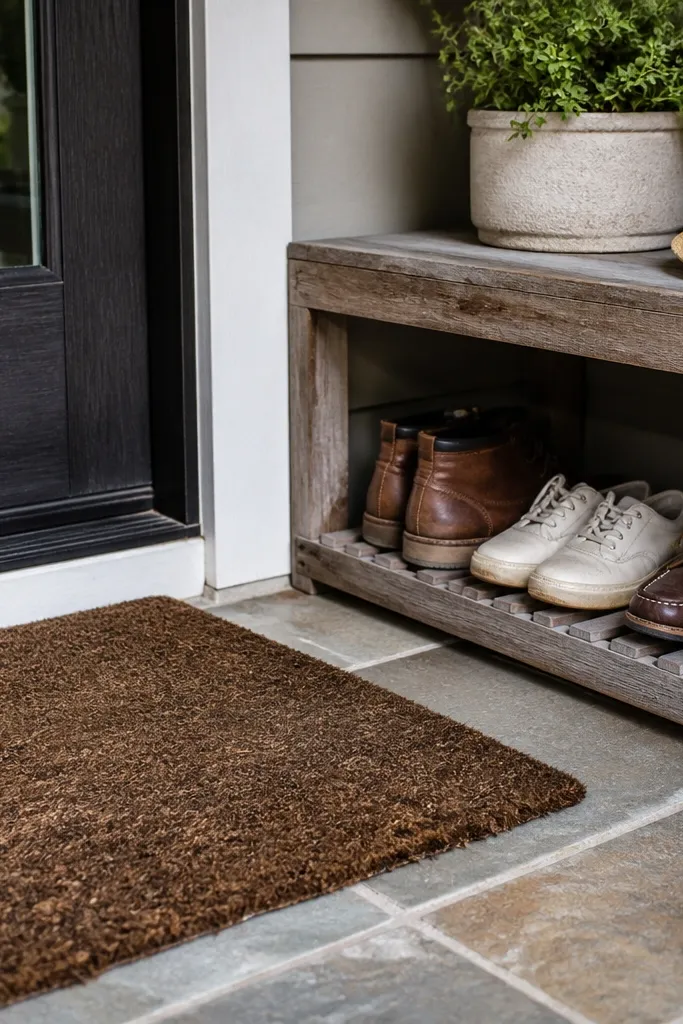
Install a short frame shelf using outdoor-grade lumber and mount it near the door threshold with clearance for the door swing. Use slats or a wire shelf so water can drain — aim for 1/4-inch gaps. Position the shelf so shoes sit 1-2 inches behind the mat edge; this reduces dirt transfer. Seal the shelf and add a removable tray at the bottom so you can clean without dismantling the unit.
This is a practical storage setup that also looks good because it’s tied to the entry routine. A coir doormat catches dirt, then a small slatted shelf under the door area holds shoes so they don’t sit on wet ground. The shelf keeps pairs aligned and the coir texture makes the whole entry look intentional. This idea works best when you want a “landing zone” for shoes right by the door, not across the porch. Keep the shelf low and close to the ground so it doesn’t visually dominate the entry space.
Skip thisAvoid storing shoes on a flat shelf right after rain; the mat helps, but the shelf still traps moisture.
Editor's noteUse a tray with a lip so muddy water doesn’t run off onto the porch floor.
10. Outdoor PVC Shoe Rack with Clear Front Grid
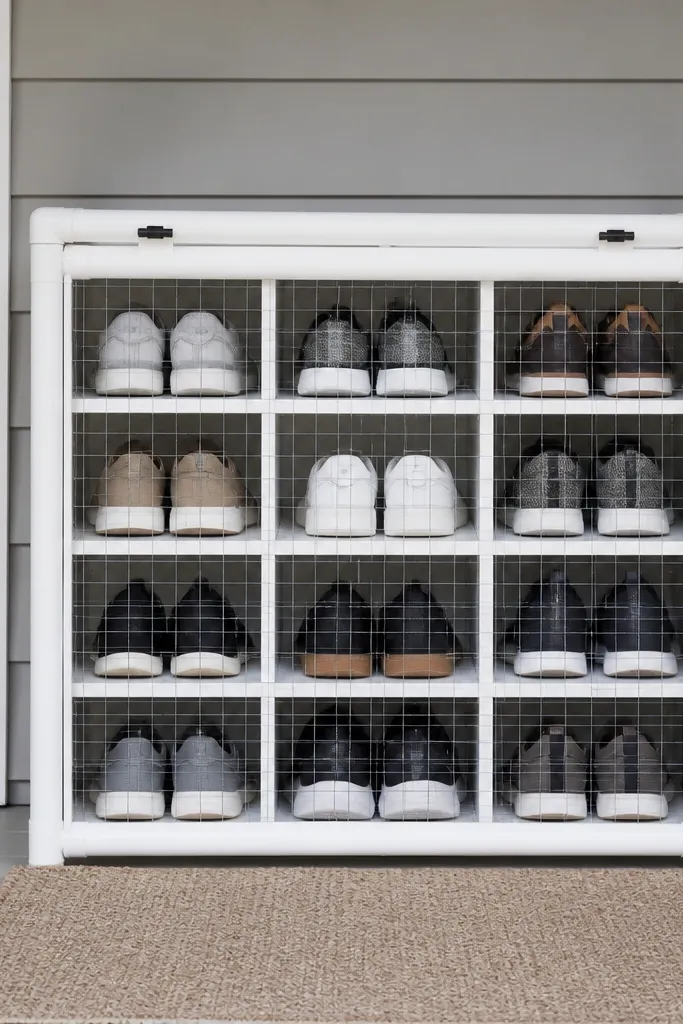
PVC is a cheat code for outdoor shoe storage because it doesn’t rot and it wipes clean in seconds. A clear front grid keeps shoes from looking like a chaotic pile while still letting you see the lineup. The aesthetic is clean and bright, especially in gray or white porches. This setup works best for sneakers and casual shoes that are easy to align. It’s not glamorous in the “wood cabin” way, but it looks sharp and controlled.
Build a rectangular PVC frame using schedule 40 PVC and outdoor-rated connectors. Add internal vertical supports spaced to match your shoe toe width — start around 3.5-4 inches for most sneakers. For the clear grid, attach clear polycarbonate strips across the front using screws with washers so it holds up to sun. Build feet pads and keep the bottom open or add drainage holes so water doesn’t sit in the base.
Rough up the PVC lightly with sandpaper before attaching polycarbonate so it grips better.
Avoid a closed base; trapped water turns PVC into a humid box.
11. Vintage-Style Wall-Mounted Shoe Hooks with Weather Cap
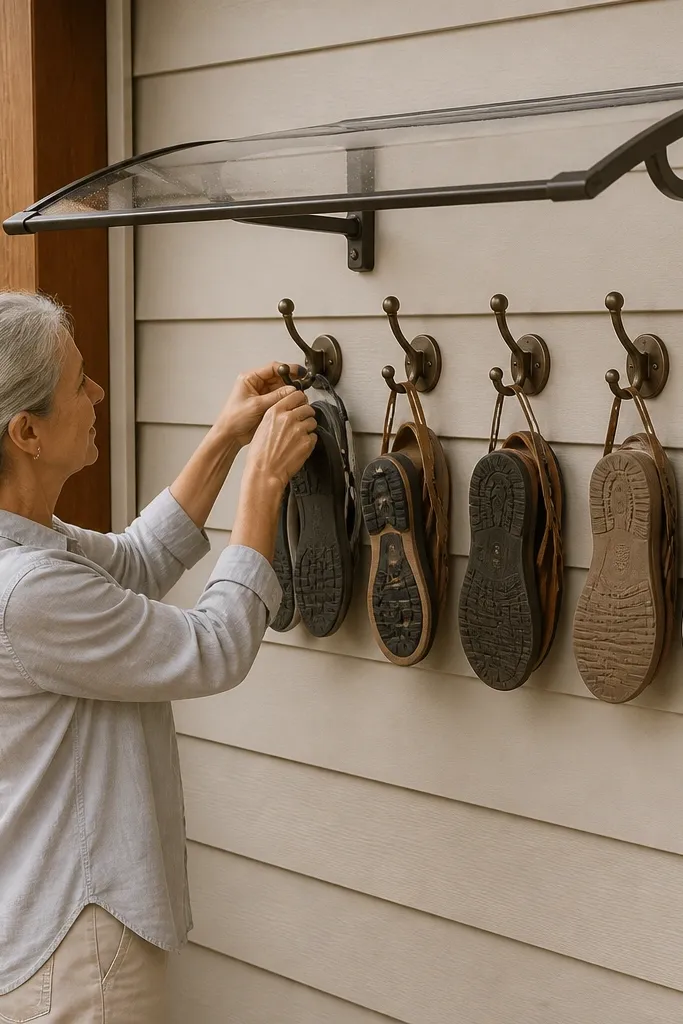
Hooks are the fastest way to get a tidy look, but outdoor hooks need a small weather strategy. If you mount hooks under a small awning or build a simple cap, you keep rain off the straps and soles. The look is charming and photogenic because it shows footwear like decor — especially sandals and slip-ons. Use hooks in a small cluster for a front porch routine, not as the only storage for all shoes in the house. Pair them with a matching bench or wall planter so the whole entry reads designed.
Mount a horizontal board to studs and install heavy-duty hooks spaced 6-8 inches apart. Add a simple rain cap above the board using outdoor plywood or metal flashing, angled so water runs away. If you store sandals, add small strap holders or clips so the hook grips the strap instead of the sole. Seal the board and use stainless screws so you don’t get rust spots around the hooks.
Hang sandals by the strap, not the toe; it keeps the shape and looks cleaner on the hook.
Avoid hooks mounted on bare siding without sealing; water gets behind and stains the wall.
12. Woven Rope Shelving with Spaced Perches
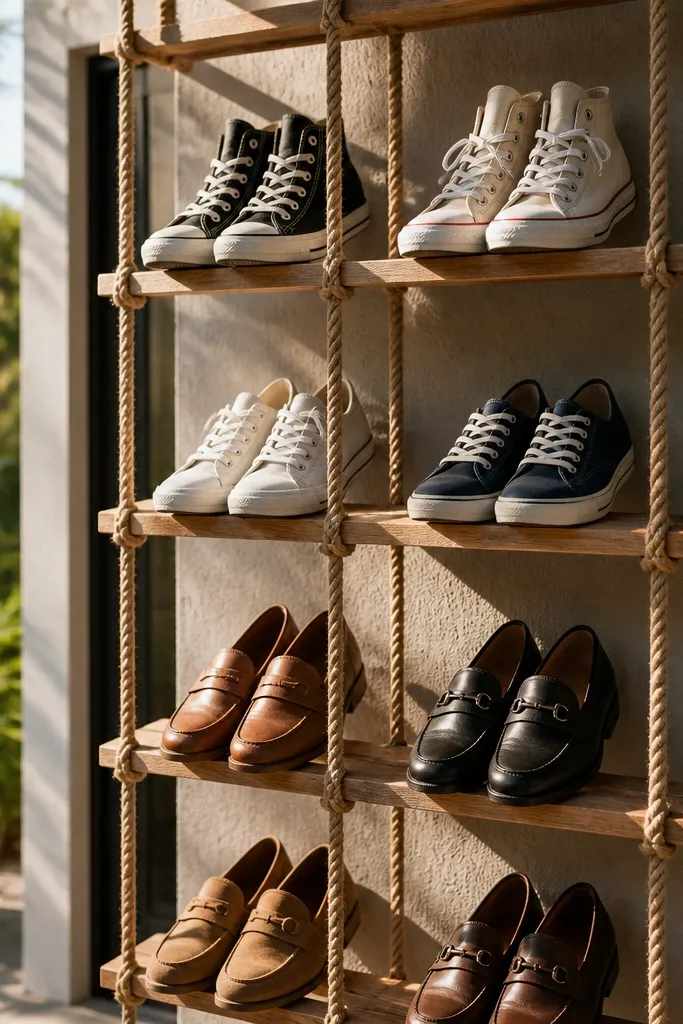
Build wooden perches with a slight front lip and smooth edges so shoes don’t scuff. Drill holes at the corners and suspend the shelf using weatherproof rope or coated cable — keep the rope taut and evenly spaced. Add a bottom support line under each shelf to stop sagging. Finish the perches with exterior sealer and leave 1/2-inch gaps between perches so shoes dry quickly.
Rope shelving looks airy and porch-friendly, which is exactly what you want when you’re storing shoes that need airflow. The open structure keeps shoes from feeling boxed in, and the spaced perches stop pairs from leaning into each other. It looks great in bright sunlight because rope texture catches highlights and makes the storage feel like decor. This works best under a covered porch or near a sheltered wall. If it’s exposed to constant rain, you’ll need a more weatherproof system.
Skip thisAvoid tight spacing between perches; shoes press together and the shelf starts looking messy.
Editor's noteTie rope with adjustable knots so you can level the shelf after installation.
13. Outdoor Storage Crate with Slatted Doors and Pair Labels
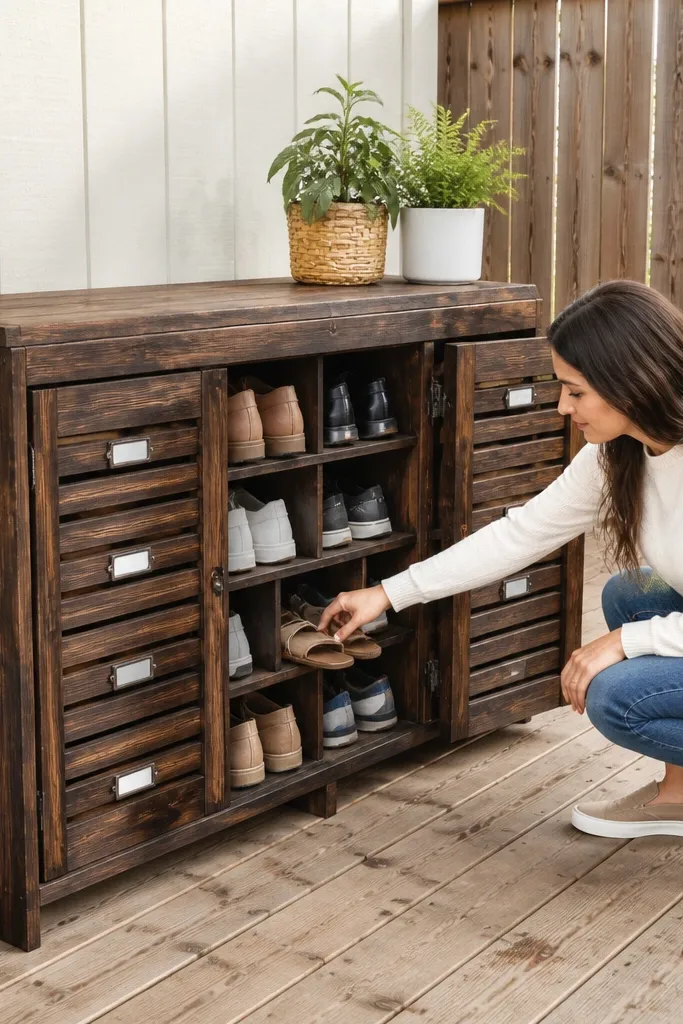
A weather-ready crate gives you that organized, slightly rustic look while still handling real moisture. Slatted doors keep airflow moving and prevent the “sealed box smell” that ruins outdoor storage. Pair labels are the secret sauce for aesthetics — when each compartment has a clear label, the storage looks intentional even when it’s used daily. This is a good choice for families because it reduces the “where do these go?” chaos. Keep the crate color consistent with your porch furniture so it looks like part of the design.
Build a crate frame from outdoor-rated lumber and attach slatted doors using hinges rated for outdoor use. Inside, add compartment dividers so each shoe pair has its own space — aim for 6-7 inches of width per compartment for most adult shoes. Drill drainage holes in the bottom and add a removable drip tray. Sand edges, then paint or stain and seal all wood surfaces, especially the interior.
Use white outdoor paint for labels and coat them with clear sealant so they don’t fade.
Avoid fully solid doors; they trap dampness and make the crate smell.
14. Terracotta Tile Base with Raised Shoe Mat Inserts
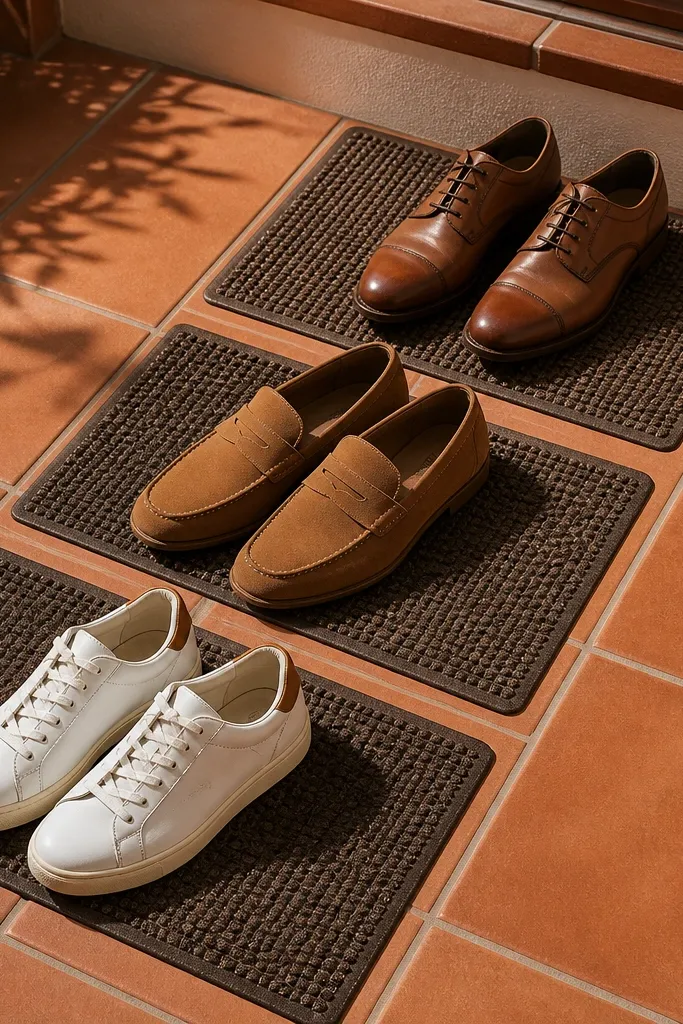
Lay terracotta tiles on a stable, level surface or a prepared outdoor base so they don’t rock. Add raised mat inserts using outdoor rubber floor mats cut to shoe footprint size, then place them on top of the tile. Keep inserts separated by 1 inch so water can evaporate. Seal grout if needed and sweep out debris regularly so the tile stays clean-looking.
If you want the cleanest look on a patio, treat shoe storage like a floor feature. A terracotta tile base with raised mat inserts keeps shoes off dirt and makes the area look designed instead of improvised. The matte tile looks warm and matches outdoor styles, and it’s easy to wipe down. Raised inserts create airflow and stop puddles from forming under shoes. This is ideal when your porch is already finished and you don’t want a big piece of furniture.
Skip thisAvoid placing shoes directly on tile without inserts; soles scrape, and water pools in grout lines.
Editor's noteUse a grout sealer made for outdoor use; unsealed grout darkens fast in wet climates.
15. Canvas Side Panel Shoe Storage Bench with Removable Liners
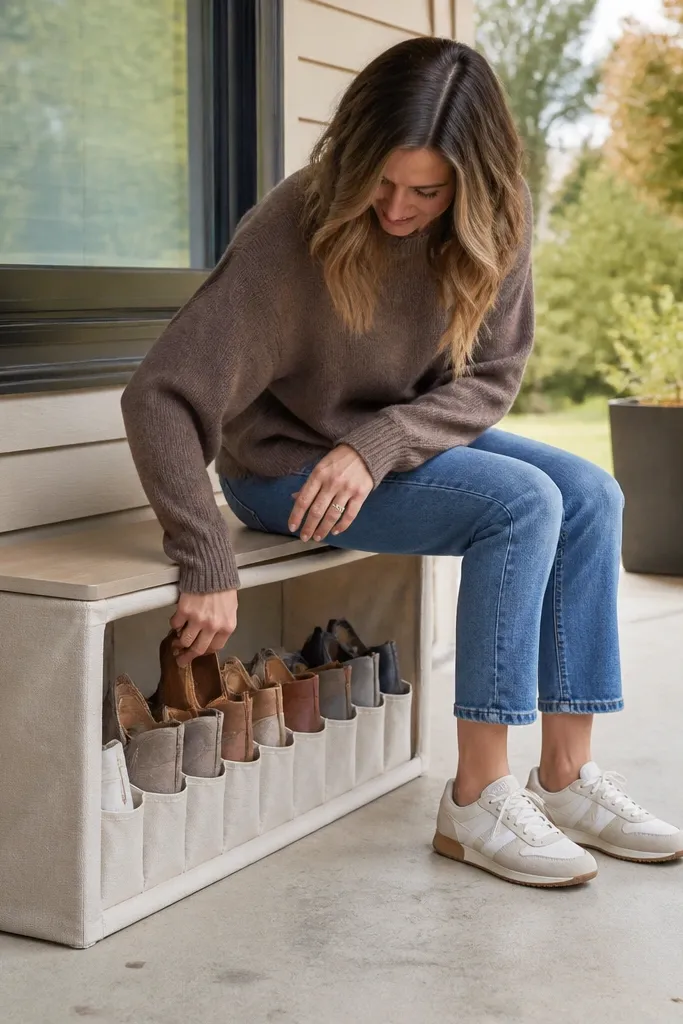
Build a simple bench frame from treated lumber and add a slatted interior base for airflow. Stretch outdoor canvas panels on the sides, then sew or attach pockets or dividers inside the canvas so each compartment has shape. Add a removable liner tray inside each compartment using washable outdoor fabric or plastic-coated inserts. Seal the bench frame and use rust-resistant hardware for the canvas attachments.
Canvas side panels give you a soft look that still organizes shoes tightly. The aesthetic is great for porches where you want something lighter than wood crates. Removable liners matter because they let you wash or replace the part that gets dirty. This setup keeps pairs from sliding around and makes the storage look neat even when multiple people use it. Use it for sneakers, flats, and casual shoes where you want easy grab-and-go.
Skip thisAvoid non-removable liners; cleaning becomes impossible and the whole bench looks dingy.
Editor's noteAdd a zipper or hook-and-loop closure at the top so liners come out without fighting the canvas.
16. Shallow Under-Stair Shoe Niche with Vent Slats
Under a porch stair or entry alcove, a shallow niche can look built-in and clean. Vent slats keep airflow moving so stored shoes dry, and aligned cubbies make the space look neat instead of cramped. This is one of the best storage ideas for porches because it uses awkward geometry that people usually ignore. The look is crisp when the cubbies are consistent height and depth, so shoes don’t stick out at random angles. Keep it for everyday pairs so you don’t overcrowd the niche.
Frame the niche with outdoor-rated lumber and keep it shallow — 10-12 inches deep works for most sneakers and flats. Install vent slats on the back or sides with 1/4-inch gaps to encourage airflow. Add dividers to make each cubby the same width, then include a removable bottom tray for dirt. Seal and paint the interior so it wipes clean and doesn’t absorb moisture.
Use a light interior color so scuffs show less and the niche reads brighter.
Avoid stuffing shoes deeper than 12 inches; they tip and the niche looks cluttered.
17. Outdoor Boot Tray Wall with Pegboard and Drip Shelf
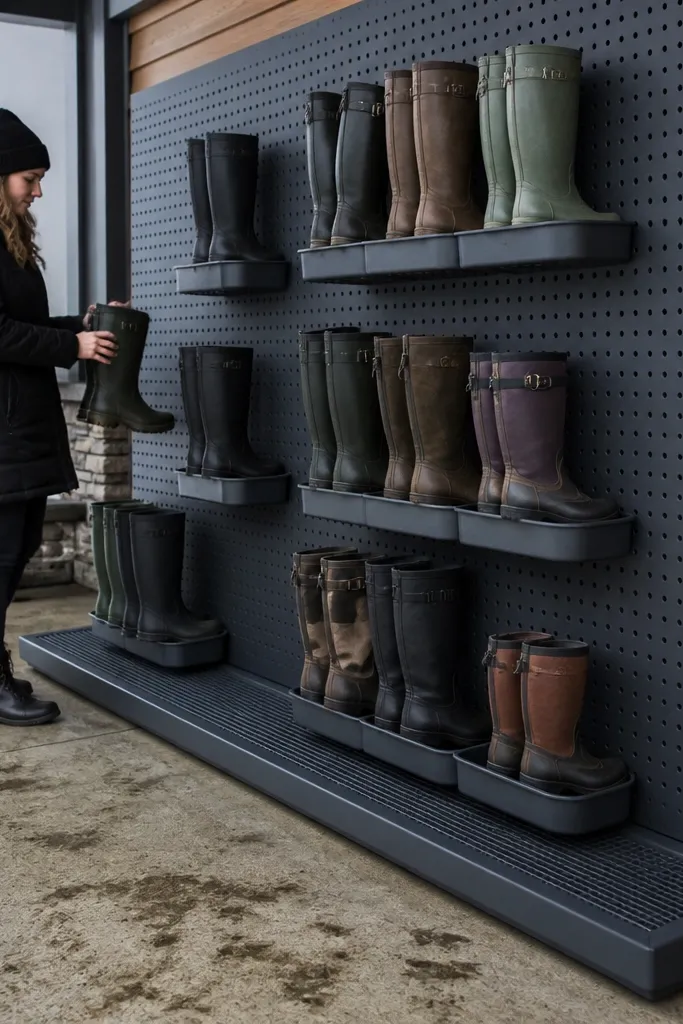
Pegboard gives you a modular look — you can adjust spacing as your shoe lineup changes. Add trays instead of hooks and you get a more stable, aligned display that still dries. A drip shelf at the bottom keeps water from running onto the floor, which keeps the whole entry area looking clean. This setup looks great in porches because it’s visually structured: grid lines, consistent tray shapes, and a tidy bottom row. Use it in a covered area for best results.
Mount exterior-rated pegboard to studs with spacers so air moves behind it. Hang shallow trays using pegs or brackets, spaced so each tray holds one pair without crowding. Install a bottom drip shelf with a slight slope and a removable pan. Seal the pegboard with exterior paint and use stainless fasteners so it doesn’t rust around screw heads.
Pre-plan tray spacing with your widest boots; adjust holes before you hang anything.
Avoid using bare pegboard with no trays; shoes slide and the grid turns messy.
18. Clear Acrylic Shoe Display Boxes with Air Vents
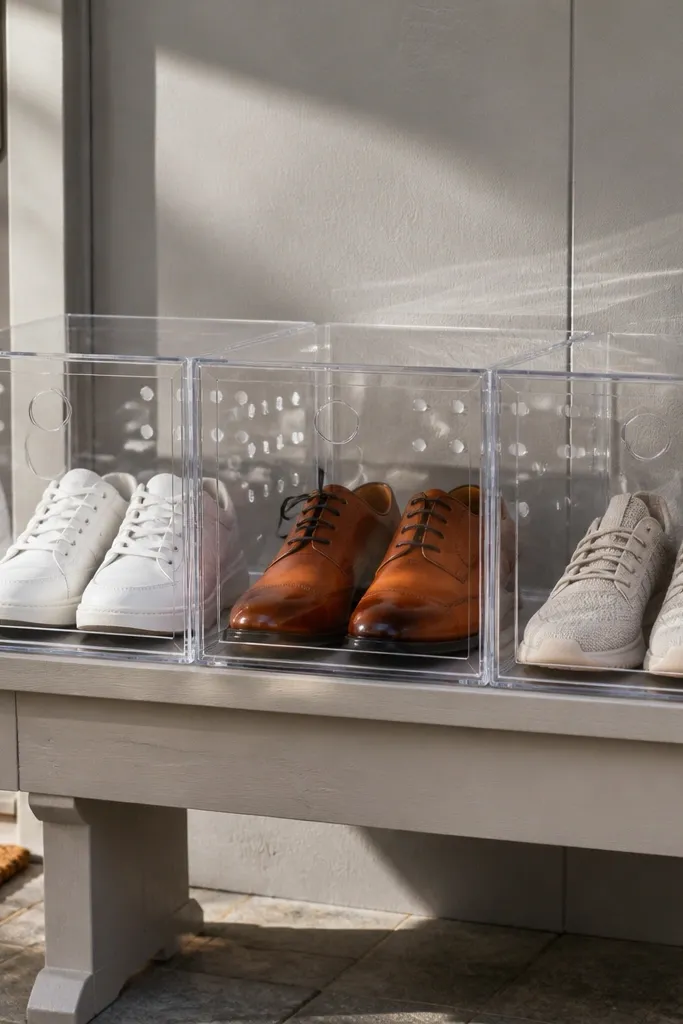
Clear boxes make shoes look like display items, which is why this works for aesthetic porches. The key is adding air vents so the storage doesn’t trap moisture. When boxes are aligned and labeled, the porch entry looks styled rather than functional. This is best for clean, dry shoes you rotate seasonally, because you’ll still want a drying system for truly wet pairs. If you use these for everyday damp shoes, they’ll fog and smell.
Build or buy clear acrylic boxes and drill vent holes near the top and bottom so air can circulate. Mount boxes on a wall shelf or set them on a raised, slatted base. Keep box rows aligned by using a consistent spacing jig while mounting. Add a removable base tray inside each box so you can clean dust and wipe scuffs easily.
Use small microfiber wipes for acrylic; paper towels scratch and leave haze.
Avoid fully sealed clear boxes; trapped humidity shows up as fog and odor.
19. Raised Wire Basket Ottoman with Weatherproof Base
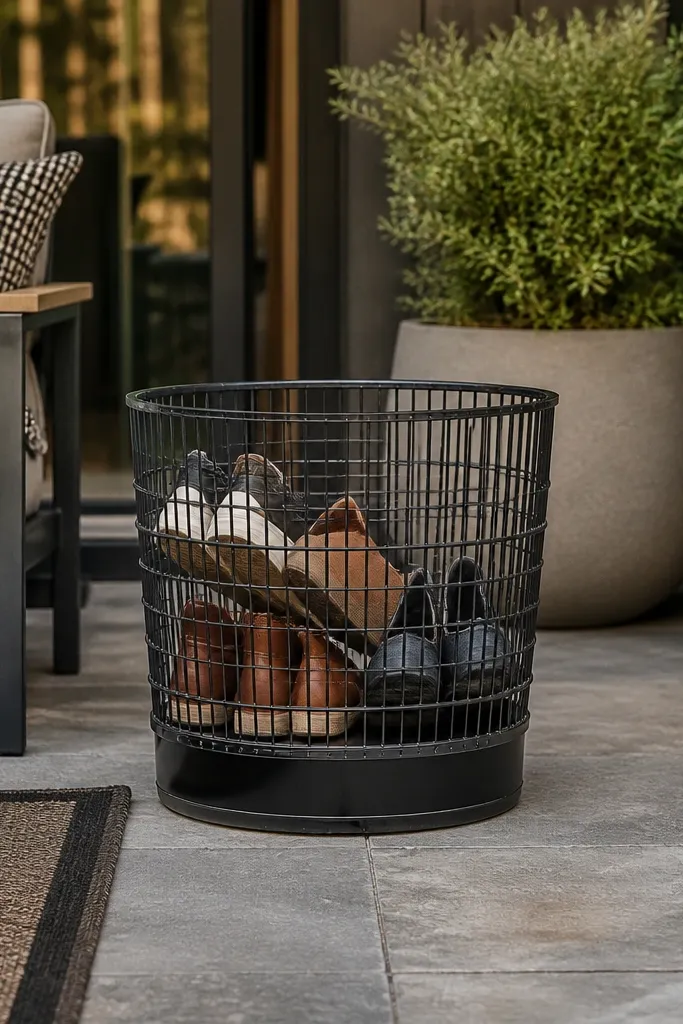
Choose an outdoor wire basket ottoman frame or build a basket frame from outdoor-rated wire. Add a raised platform inside using a slatted wood insert or a perforated metal sheet so shoes sit above any moisture. Anchor the ottoman so it can’t tip, then add a removable liner mat for easy cleaning. Finish wood inserts with exterior sealer and check all joints for sharp edges.
A wire basket ottoman looks light and modern, and it’s great for patio seating areas. Shoes inside stay separated because the basket shape doesn’t let them pile into a messy mound. Wire also promotes airflow, so dampness clears faster than with solid containers. The raised base keeps shoes off the floor so dirt doesn’t grind into the soles. This setup is photogenic because the basket silhouette is consistent and the storage reads like furniture, not clutter.
Skip thisAvoid storing shoes directly on the bottom wire without an insert; grit collects and makes the basket look dirty.
Editor's notePut a small rubber mat under the basket feet so it doesn’t slide on wet concrete.
20. Outdoor Rolling Shoe Cart with Slatted Shelves
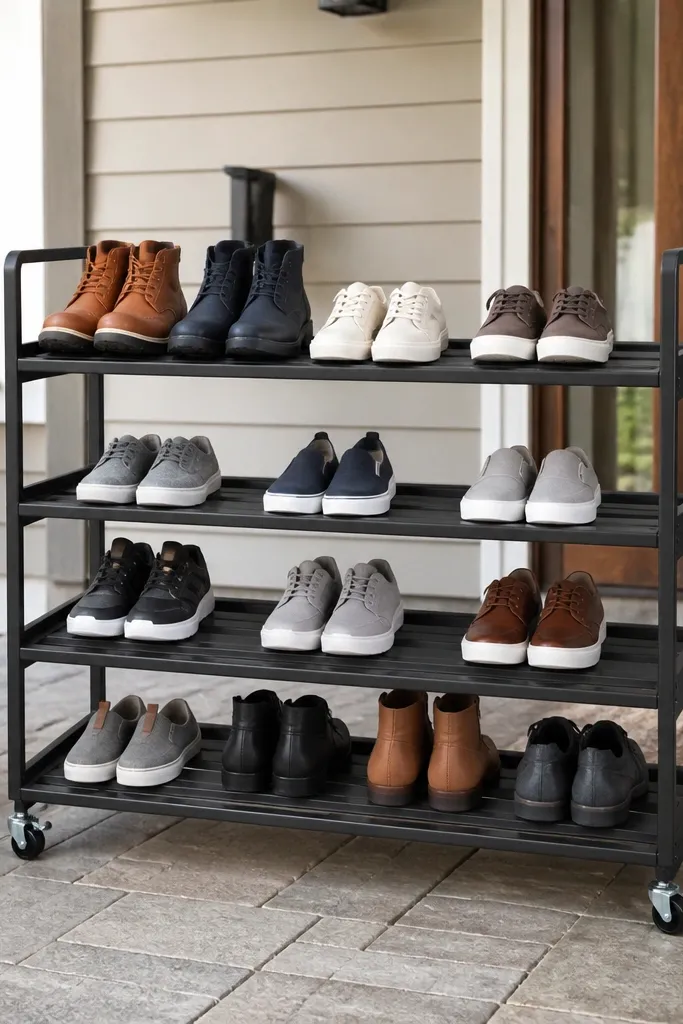
A rolling cart is a practical way to keep shoe storage out of sight when you want a clean porch view. Slatted shelves make airflow predictable, and the cart shape keeps pairs aligned so it looks like a system. You can move it under cover during storms, which keeps it from getting soaked and stops the “wet shoe smell” from spreading. Visually, a cart reads tidy when shelves are evenly spaced and shoes face the same direction. This is a solid choice for porches used by kids or guests because the cart keeps shoes contained.
Build a compact cart frame from outdoor lumber or metal, then install slatted shelves with 1/4-inch gaps. Use four locking casters rated for outdoor use so the cart can sit stable on patio surfaces. Add a back panel or side rails to stop shoes from sliding off the front edge. Finish with exterior paint or sealant, and add a removable drip tray at the bottom.
Set shelf height to your tallest shoe by measuring the boot height from sole to top — then add 1 inch of clearance.
Avoid solid shelves; the cart becomes a humidity box fast.



