
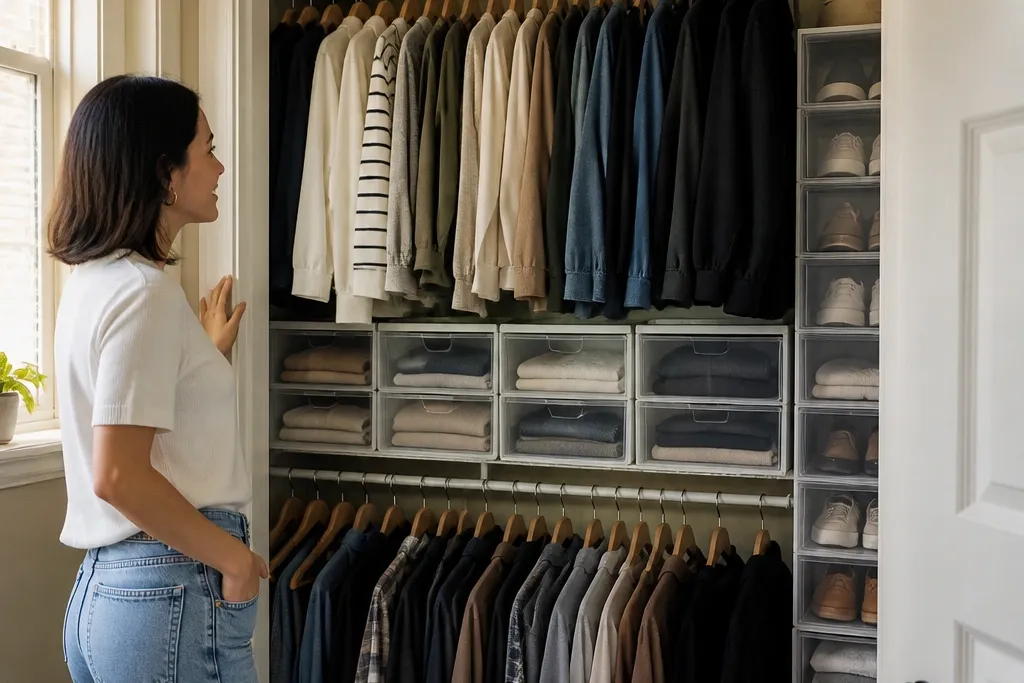
1. Clear-lid cubby bins on a tension shelf wall
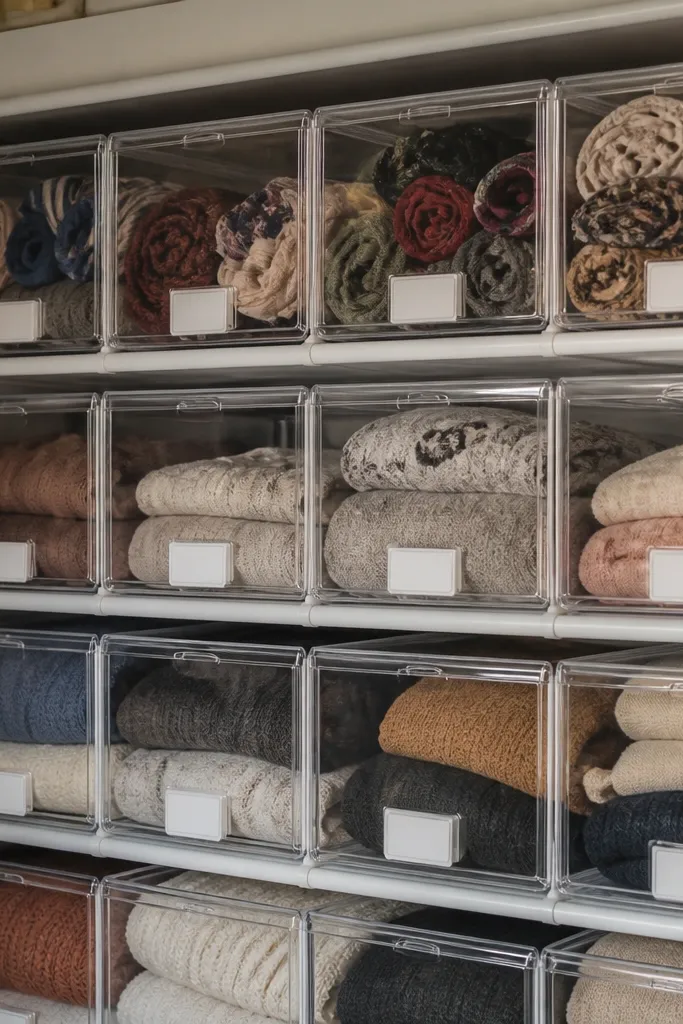
Start by measuring the closet width and the clear depth you can use without bumping the door. Install a tension shelf or two (depending on your height) so the bins sit flat and don’t sag. Place bins in a neat row, then add white labels to the front lip so they line up. Finally, add a small strip of felt or shelf liner under each bin corner to reduce sliding when you pull one out.
This is the easiest way to make a rental closet look intentional without installing cabinetry. Clear-lid cubby bins let you see what’s inside, so you stop digging and shifting piles. The matching labels create a clean grid effect, which reads “organized” in person and in photos. Put bulky but light items in the bins — scarves, workout gear, and spare accessories — and use the top shelf for seasonal stuff. It’s a solid skill level for beginners and takes about an afternoon once you have the bins and shelf plan.
Skip thisAvoid mixing bin sizes and brands — the visual chaos is what makes closets look messy.
Editor's noteChoose bins with the same lid hinge direction so the fronts align perfectly.
2. Over-the-door organizer with color-matched fabric sleeves
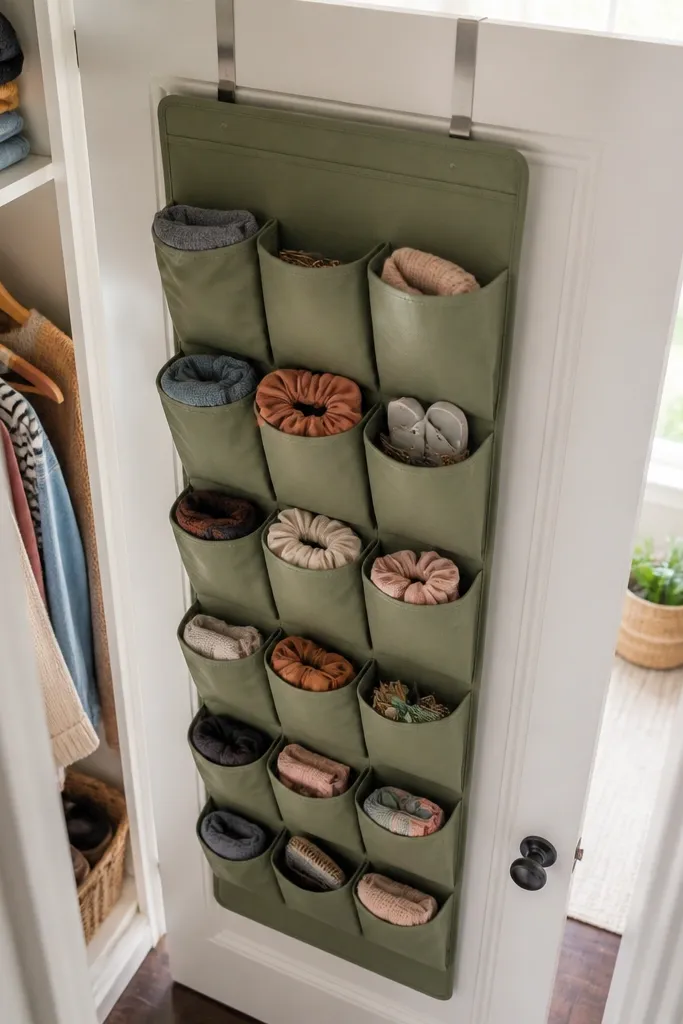
Hang the organizer on the door first and test the fit with the door fully opened and closed. Add fabric sleeves or removable organizers in a tight set so each item has a dedicated pocket. Group by type: belts together, accessories together, hair tools together. Then add a small hook or clip on the inside door edge for one “always used” item like a tote strap or lint roller.
An over-the-door organizer is a renter’s cheat code because it uses vertical space you’re already ignoring. The trick for a good-looking closet is swapping generic pockets for fabric sleeves or removable panels with a consistent color. That keeps the door area from looking like a clutter net. Use it for small daily items — hats, gloves, belts, and hair tools — so they’re easy to return to. This setup works best in narrow closets where you can’t spare shelf depth.
Skip thisAvoid using it for bulky items — the door area gets lumpy fast.
Editor's notePick sleeves that are the same thickness so the door closes without bulging.
3. Two-level hanging using a second rail at mid-height
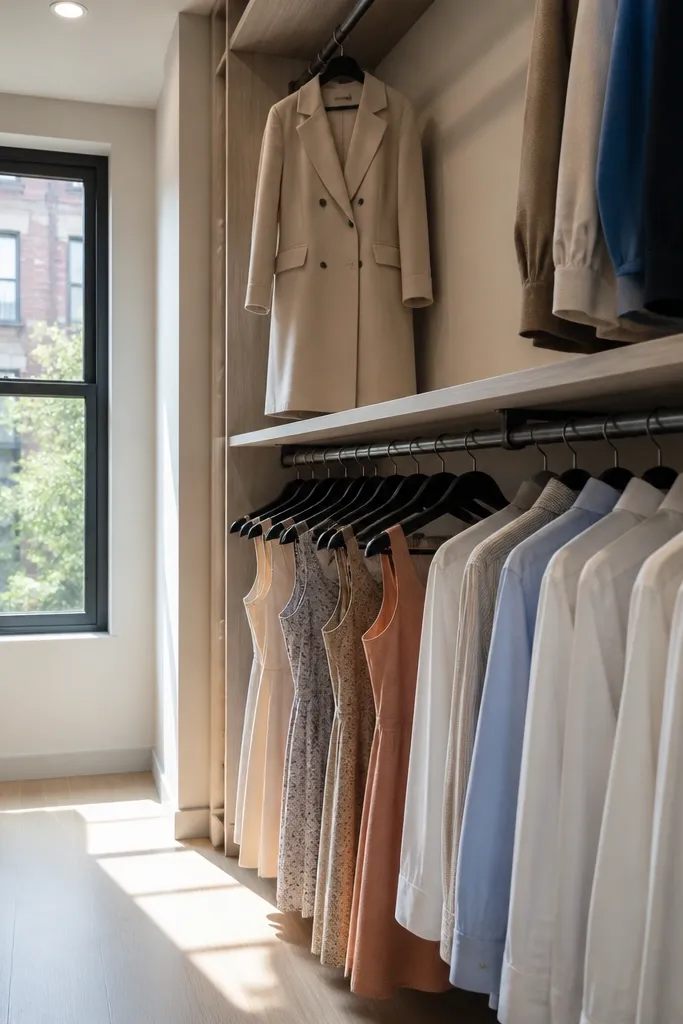
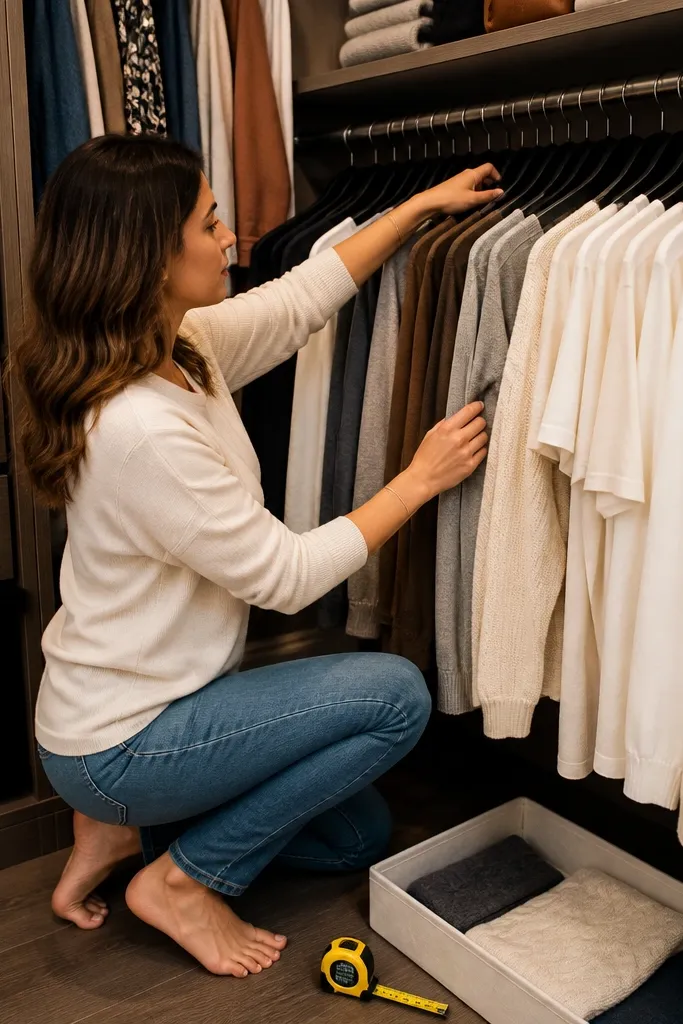
Measure your closet height from the floor to the lowest obstruction, then decide the clearance you need for your longest hanging item. Install a second rail using a drill-free tension or freestanding rail system that can handle the weight of your garments. Hang short items on the lower rail and long items on the upper rail, keeping hanger hooks aligned. Finish by swapping to slim hangers so the rails don’t look crowded and the clothing line stays clean.
Double-hanging is how you fit more without building anything. The goal isn’t cramming — it’s creating two clear hanging zones so you don’t stack everything at the top. A second rail at mid-height gives you an easy place for shirts, skirts, and lightweight dresses, while the top rail stays for coats or long items. It looks sharp when hanger types match and colors stay consistent. Skill level is moderate because you need accurate placement, but the result is dramatic in a small closet.
Skip thisAvoid placing the second rail too low — you’ll hit hems on the floor and ruin the look.
Editor's noteUse the same hanger model for both rails so the visual lines match.
4. Shoe wall with vertical clear stacks
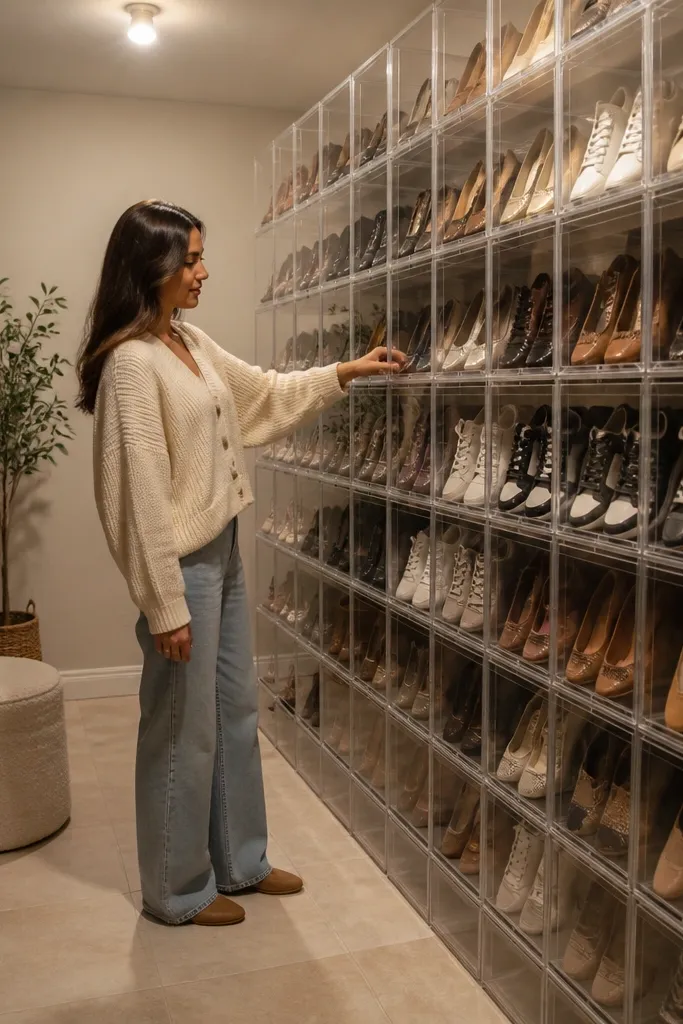
Measure the width of the closet floor area and choose vertical organizers that fit without blocking the door swing. Place organizers in one continuous row so the fronts align. Slide shoes in with toes facing the same direction for a consistent look. Add a small shelf liner or non-slip mat under the base so the stacks don’t creep when you pull a pair out.
Shoes are the quickest way to make a closet look chaotic, even when everything else is clean. Vertical clear shoe stacks keep pairs visible and stop the “pile at the door” effect. You get a tidy, grid-like look that photographs well and makes it easy to grab the right pair without moving everything. Use this for everyday shoes and keep boots in a separate bin or box. This is renter-friendly and takes about a few hours once you’ve picked your stack size.
Skip thisAvoid mixing open stacks with boxed shoes — the visual mismatch makes the floor look cluttered.
Editor's noteStore half sizes together in one slot rather than forcing them into separate stacks.
5. Folded-shirt display on a wire shelf with drawer-style bins
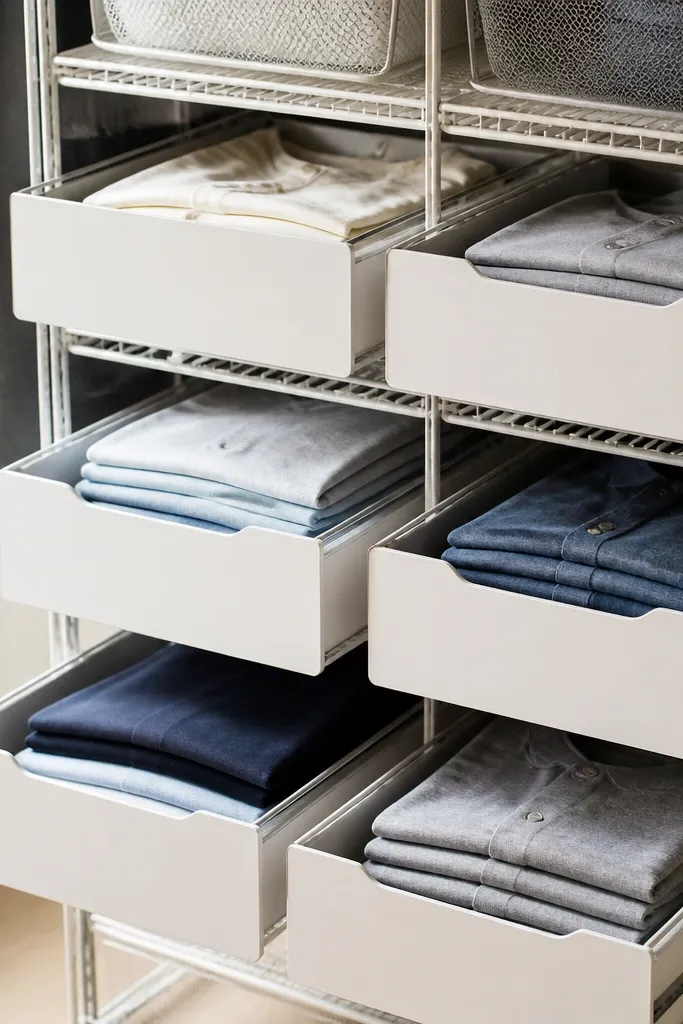
If your folded items always become a messy stack, the issue is access and compression. Drawer-style bins on a shelf let you pull one section at a time, so shirts don’t get crushed and shoved back. The clean look comes from uniform folding and consistent bin fronts. This works especially well for small closets where shelf depth is limited but width is usable. You’ll spend less time searching and the closet stays photo-ready.
Start by choosing bins with smooth fronts and lids that can slide out easily. Line up the bins on a wire shelf or sturdy tension shelf so each bin has a clear opening. Fold shirts using a consistent method (think flat, equal width), then load each bin by category. Label the bin fronts at eye level so you don’t have to open lids repeatedly.
Fold once, then keep that fold method — don’t switch between styles mid-system.
Avoid using deep, open baskets — they hide the mess and encourage over-stuffing.
6. Wall-mounted peg rail for belts, scarves, and bags
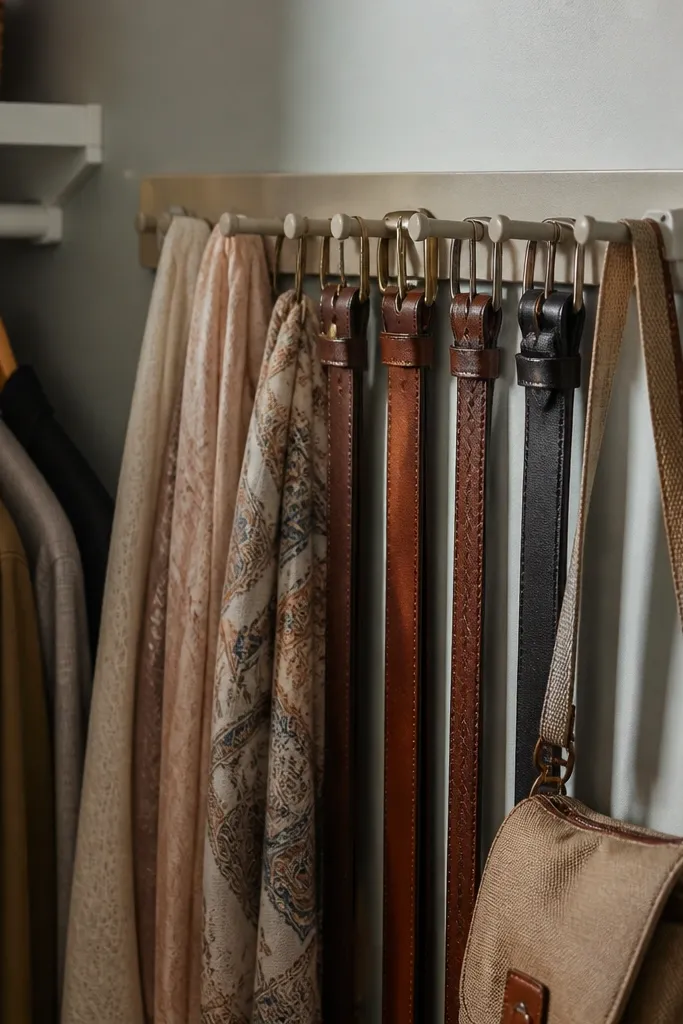
Decide which wall section has the cleanest line of sight from the doorway. Choose a drill-free peg rail system with strong anchors or adhesive rated for the surface type. Install the rail, then add hooks in pairs: one for belts, one for scarves, one for bags. Hang items by length so the tops align; finish by adding one small hook for a daily carry item like a key clip or mini pouch.
A peg rail makes accessories look curated instead of stored. The visual win is simple: items hang in a straight line, with consistent spacing, so the closet reads organized immediately. This is best for thin accessories that tangle — belts, scarves, and small crossbody bags. In a rental, choose a drill-free peg rail that attaches securely with hardware rated for the weight you’ll use. It’s a quick install and gives you the most “designed” look per effort.
Skip thisAvoid hanging heavy bags on a lightly anchored rail — sag makes the whole wall look sloppy.
Editor's noteUse matching hook types — mixed hooks change the silhouette and ruin the clean look.
7. Fabric garment dust covers with matching hangers
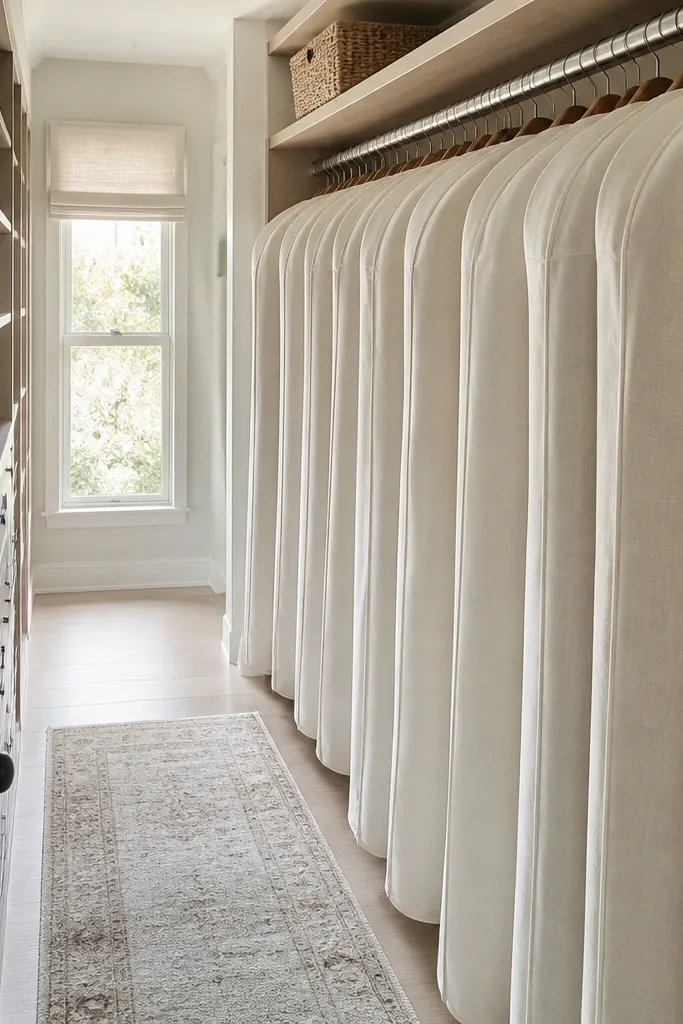
Pick garment covers sized for your longest covered item, and choose a consistent hanger type to match the width of the covers. Slide covers onto garments after you fold or hang them, then hang them on the same rail section. Leave everyday items uncovered to keep access fast. Add a simple label on the cover top edge for quick identification.
Dust covers aren’t just for protection — they create a uniform visual line in a closet. When clothes are in different fabrics and colors all mixed together, the closet looks messy even if it’s technically sorted. Covering only the “in-between” items (like formal wear, dress shirts, and seasonal pieces) gives you a clean block of hanging silhouettes. Choose fabric covers that breathe and hang smoothly so they don’t look crinkled. This is a beginner-friendly upgrade that makes the closet look styled without rearranging everything.
Skip thisAvoid using plastic covers on delicate fabrics — they trap moisture and look wrinkled.
Editor's noteUse slim hangers under covers so the closet doesn’t look bulky.
8. Top-shelf bin line with matching baskets and height markers
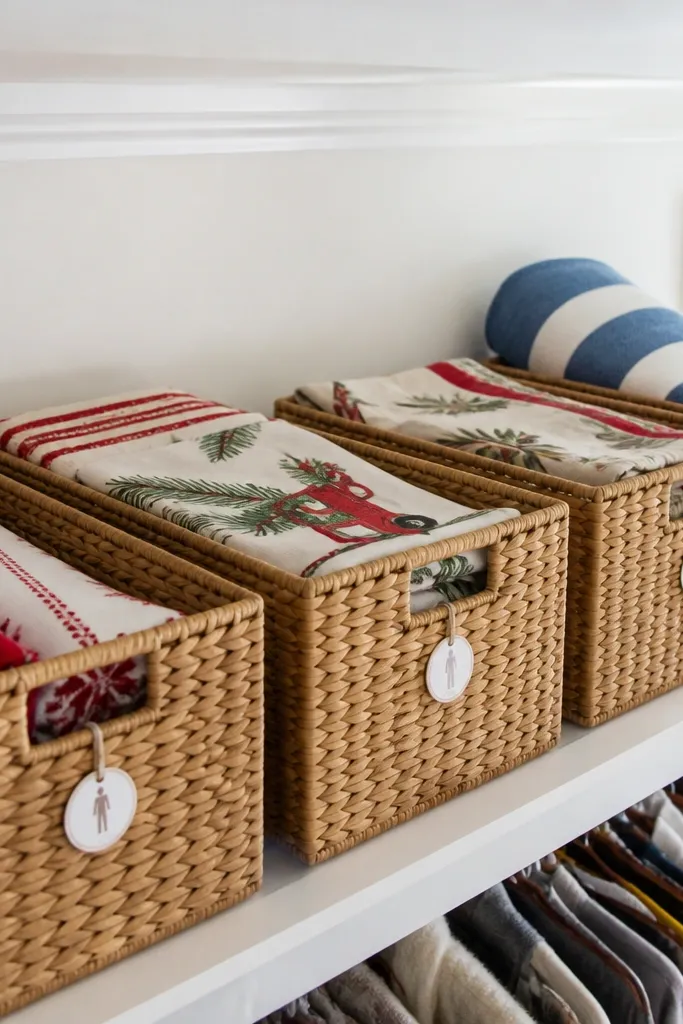
Measure the shelf depth and choose baskets that fit without overhang. Place baskets in a row and adjust so all fronts line up with the shelf edge. Add height markers by placing a stack of folded cloth or a foam spacer behind shorter baskets so everything sits at the same height. Label each basket with a short category so you don’t pull everything down to find one item.
Top shelves are where renters hide things, and that’s exactly why they look messy. A straight line of matching baskets fixes the “random stack” problem and makes the closet feel calm. Use this for seasonal items: extra sweaters, holiday decor, and bulky inflatables like swim gear. The look stays clean because the basket fronts align and the labels are consistent. It’s a low-skill setup that improves the whole closet’s aesthetic instantly.
Skip thisAvoid leaving open gaps between baskets — gaps make the shelf look uneven and unfinished.
Editor's noteUse the same label placement on every basket so the top-shelf grid looks intentional.
9. Cabinet-style drawer bins for socks and underwear
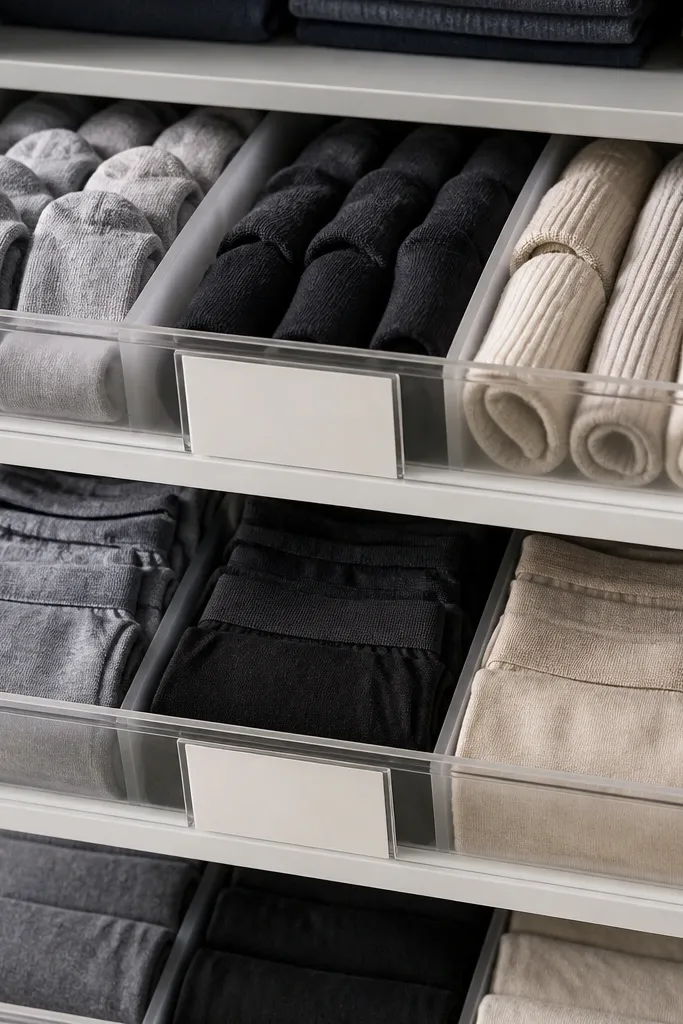
Choose two to three drawer bins that match in color and depth. Add dividers inside each bin so categories have fixed spots. Fold socks and underwear to the same footprint, then load by color or type. Label the bin fronts and keep the heaviest items in the back corners to prevent sliding.
Small drawers make closets look expensive, even when you don’t have real drawers. If your closet has a shelf for folded basics, drawer-style bins with dividers create the same effect. The aesthetic comes from clean rows and visible color blocks. The functional win is big: socks and underwear stay separated, so you stop rummaging and pulling out half the bin. This works best in closets with at least one shelf that’s wide enough for two bins.
Skip thisAvoid stuffing dividers full — once they bulge, the rows stop looking neat.
Editor's noteStore socks by color families, not by brand — it looks better and you grab faster.
10. Bottom shelf shoe boxes with matching fabric pull tabs
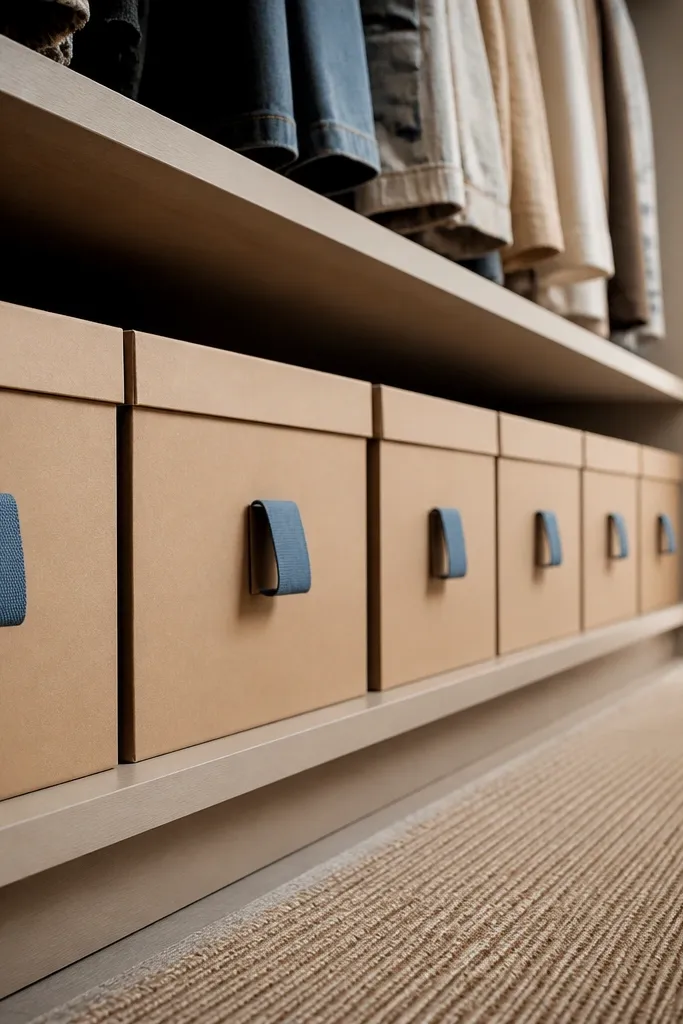
Shoes look best when they’re contained and identical. Matching shoe boxes on the bottom shelf create a clean baseline, and fabric pull tabs make it easy to open without yanking. This is a renter-friendly alternative to built-in drawers, and it keeps the floor area from turning into a dumping zone. Use boxes for shoes you don’t wear weekly, while keeping daily pairs in a separate organizer. The look is cohesive because the boxes share the same shape and the tabs add a uniform detail.
Measure the bottom shelf space and choose stackable shoe boxes that fit without forcing. Add fabric pull tabs to each box lid so you can lift with one finger. Line boxes up in one row, then label the front with a simple tag. Add a non-slip mat under the row so boxes don’t slide when you pull one out.
Use the same color fabric for every tab so the bottom shelf looks designed.
Avoid mixing open shoes and boxed shoes in the same zone — it breaks the clean visual line.
11. Hanger color sorting with a three-rail rule
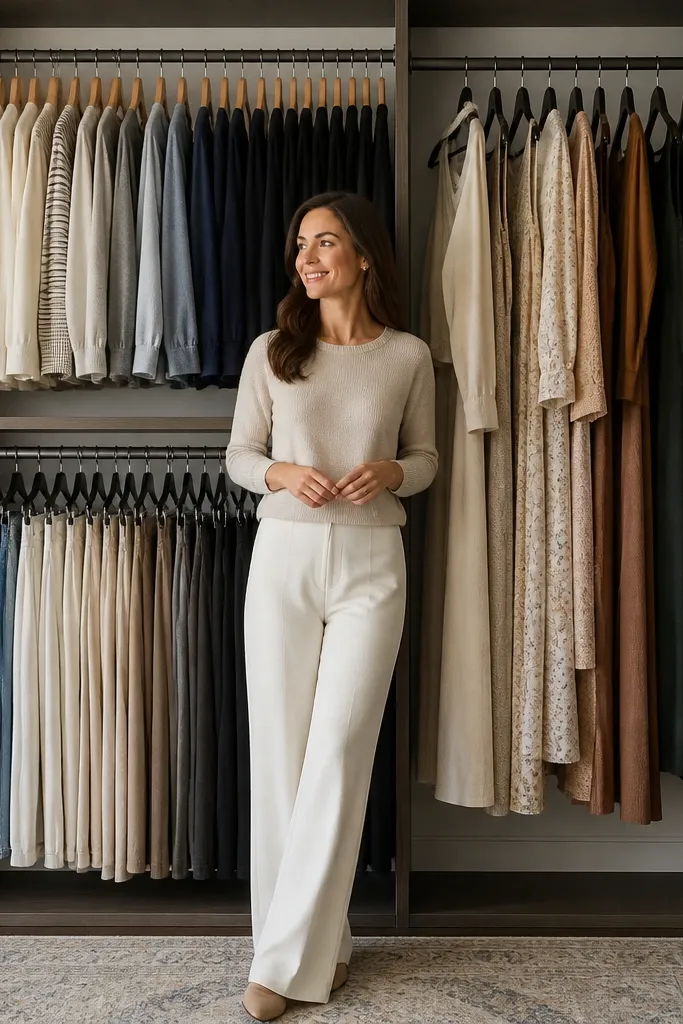
This is the fastest aesthetic fix for a closet that’s technically organized but still looks messy. The issue is often the hanger mix — wood, plastic, and different hook styles create visual noise. A three-rail rule keeps categories separate: tops, bottoms, and dresses/coats each get one rail section. Use slim hangers in one or two neutral colors, then sort by category so the closet reads clean. It’s not a storage unit addition, but it changes how everything looks instantly.
Pick one hanger type and color you like, then replace all hangers on the main rails first. Divide each rail into three zones using a simple visual divider like a folded scarf or a thin fabric strip for your own reference. Hang tops together, bottoms together, and dresses/coats together, keeping similar lengths adjacent. Finish by aligning hangers so the hooks form a straight line when viewed from the doorway.
If you can’t replace everything, do the front half of the closet first. That’s what people see.
Avoid leaving a few mismatched hangers — the eye catches them immediately.
12. Folded sweater stacks in uniform-lid bins with front labels
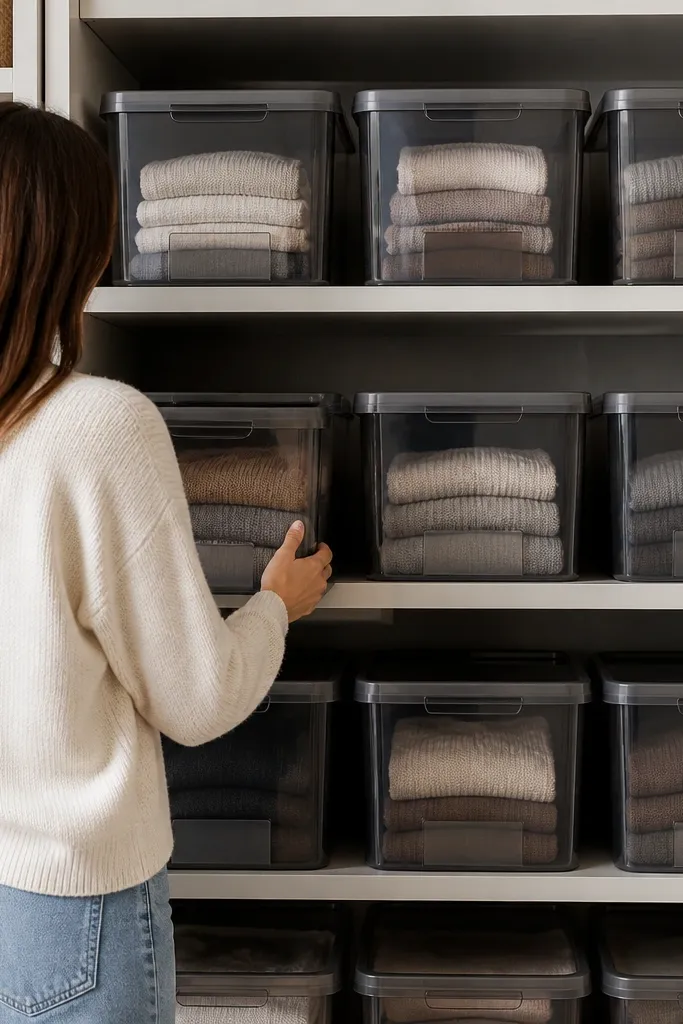
Choose bins with the same height and lid style that fit your shelf width. Fold sweaters using a consistent flat fold so they stack evenly without bulging. Place stacks inside bins by category (work, weekend, seasonal) and keep each bin to one type. Label the bin front with a simple category so you can grab without opening multiple lids.
Sweaters take up space and they look bulky even when neatly folded. Uniform-lid bins solve both problems by containing the bulk and keeping stacks at a consistent height. The look is clean because the bin fronts create a repeating pattern instead of random folds. This is best for wool, knits, and anything that you don’t want hanging. Skill level is easy, time is about an hour, and it’s very renter-friendly.
Skip thisAvoid overfilling bins — once lids won’t close smoothly, the closet looks messy again.
Editor's noteUse tissue paper or thin felt sheets between sweaters to keep them from snagging and to reduce stretching.
13. Command-strip fabric shelf dividers for narrow shelves
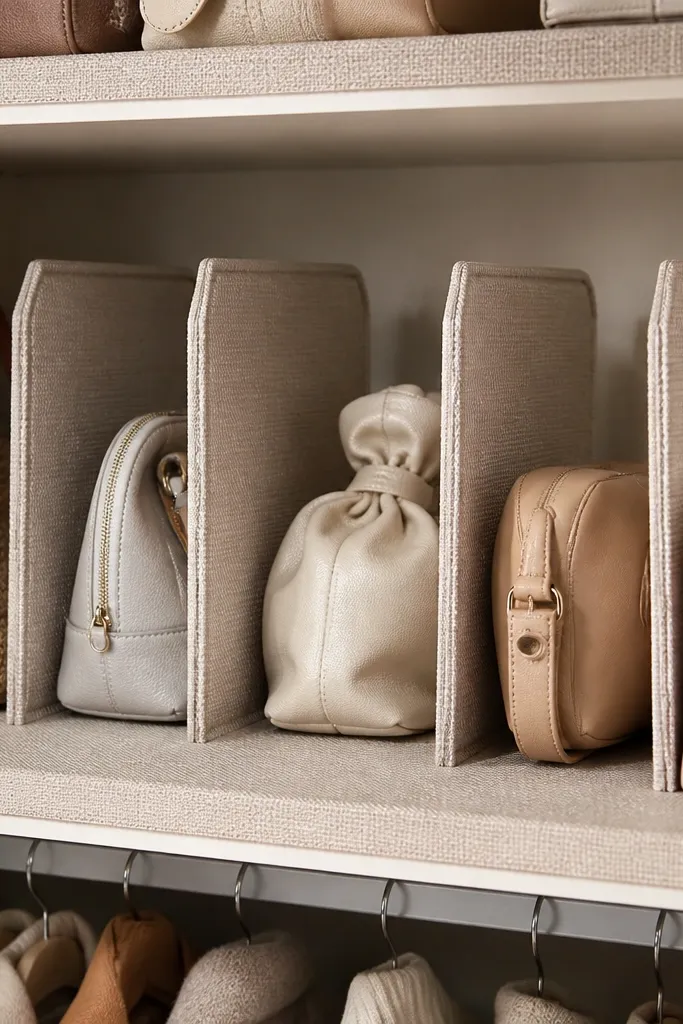
Clean the shelf surface with rubbing alcohol so adhesive grips. Install fabric dividers using adhesive strips placed at the corners and along the base so they don’t peel when you pull items out. Arrange items so each section has one category and one height level. Add a liner underneath to keep everything from sliding and to keep the color consistent.
Narrow shelves are where small items spill into each other and the whole closet looks disorganized. Fabric shelf dividers are a clean fix because they create boundaries without hard edges. The aesthetic is better when the dividers match the shelf liner color and the items line up behind them. Use them for bags of accessories, small toiletries, and folded tees. This is the kind of project that takes 20 minutes and makes a closet look “finished.”
Skip thisAvoid placing dividers where you need to slide bins in and out — you’ll hate the setup after a week.
Editor's noteUse one divider height across the shelf — mixed heights look uneven fast.
14. Freestanding closet rail with matching storage cubes
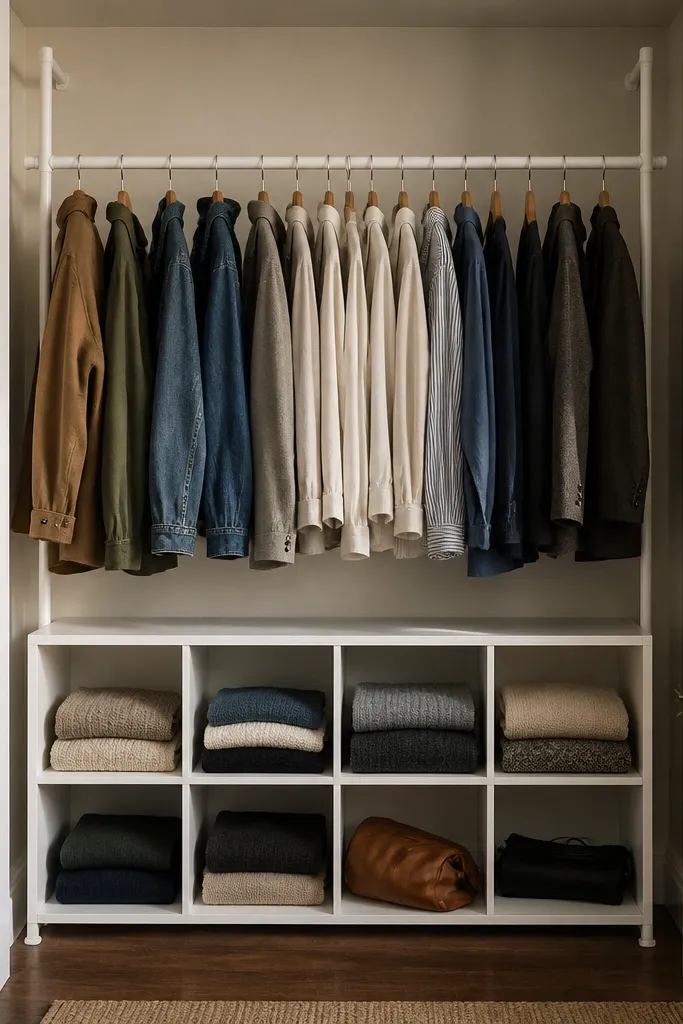
Choose a freestanding closet rail system that fits your closet width and has adjustable feet. Place it so the hanging section doesn’t block drawers or the door swing. Add matching cubes beneath and keep cube openings facing the same direction. Hang garments in a tight category order, then load cubes with folded items, keeping the heaviest items on the bottom cubes.
When a closet is missing structure, you can add it without drilling. A freestanding rail gives you a clean hanging zone, and matching storage cubes below create a balanced, built-in look. This works for closets that are too shallow for bins on the back wall or for renters who can’t mount anything permanently. The key aesthetic detail is uniform cube fronts and consistent spacing under the rail. It’s beginner-friendly if you pick a rail rated for your garment weight and level it carefully.
Skip thisAvoid cubes with different front styles in the same row — it looks like leftovers.
Editor's noteLevel the rail before you hang anything — crooked rails make everything look off in photos.
15. Clear label pockets on the inside of closet doors
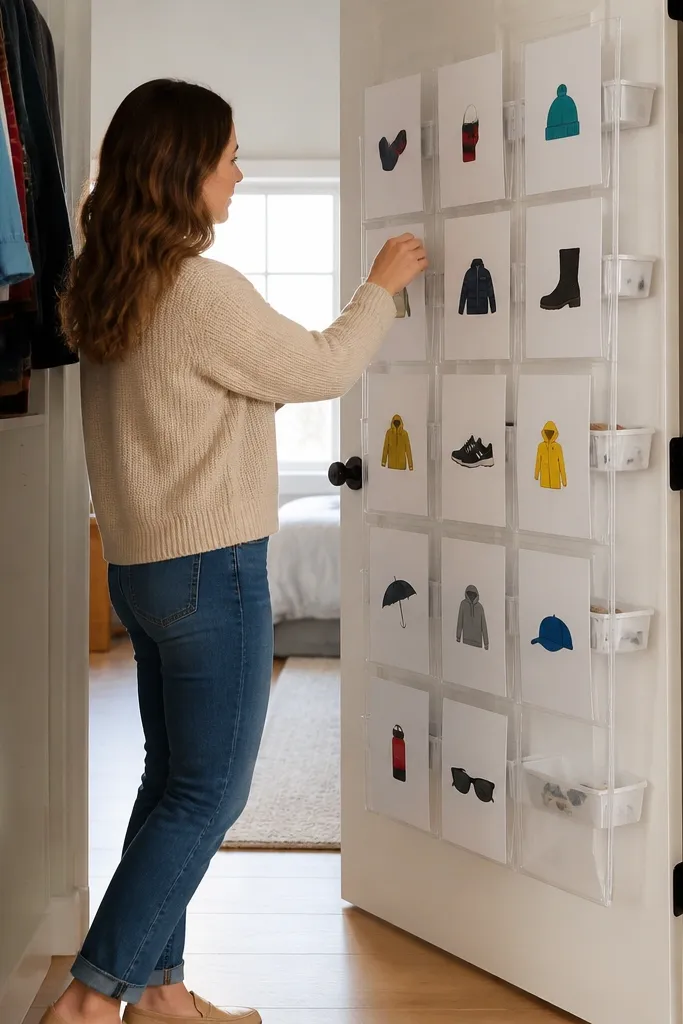
This is the hidden trick for keeping organization from collapsing. When you can see what goes where from the doorway, you stop “temporary” piles. Clear label pockets look clean and match well with any color scheme. Put them inside the door for bins and hanging categories you use daily. It’s not a storage container — it’s a visual system that makes the closet act organized. Skill level is easy and the install takes minutes.
Measure your door interior and choose clear label pockets that can be mounted flat. Label each pocket with the exact category you’re storing — for example, “Belts,” “Workout,” or “Weekend tees.” Attach pockets at eye level so you can read them without leaning. Then place one bin or hook per label, so the label always matches the spot.
Use short labels with consistent wording length so the door looks tidy.
Avoid vague labels like “Misc” — they train you to throw things anywhere.
16. Hanging organizers with fabric pockets for small garments and accessories
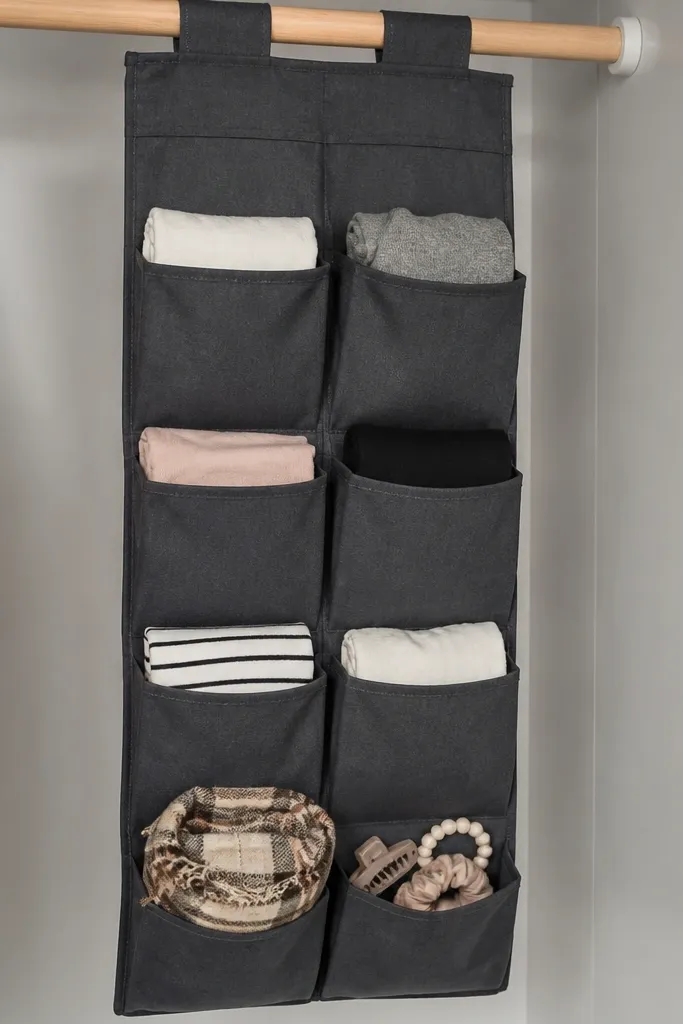
Fabric pocket hanging organizers keep small items from falling between hangers or getting lost behind jackets. The look improves when the organizer is a single color and the pockets are filled evenly, not lopsided. Use it for intimates, lightweight tees, and accessories you grab often. This is a smart choice for renters because it adds storage without changing your closet’s architecture. It also gives you a clean, vertical pattern that looks intentional in a small space.
Hang the organizer on a rail or approved hook so it stays flat and doesn’t twist. Sort items by category and fill pockets evenly so the organizer hangs straight. Use thin folders or small stackable bundles for pocket items to keep edges crisp. Add a simple label to the top edge of each pocket group so you can return items quickly.
If the organizer twists, adjust from the top pocket first — the whole shape corrects.
Avoid overstuffing pockets — bulges make the closet look messy instantly.
17. Neutral fabric laundry-style hamper for "wear again" clothes
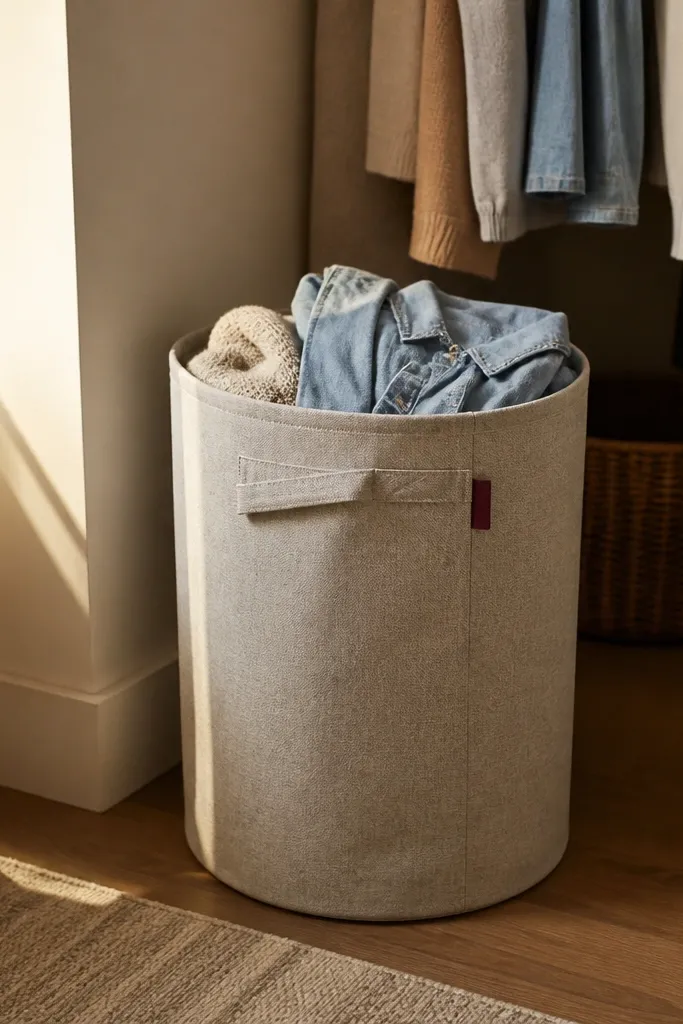
Choose a hamper in a neutral color that matches your closet shelf or liner. Place it on the closet floor or right beside the closet, where it’s still easy to reach. Use a simple rule: anything worn once goes in, then you sort back to hangers or into the wash bin. Add a small tag on the hamper rim so you remember the purpose and don’t turn it into a general junk basket.
A closet looks disorganized when “almost clean” clothes keep migrating onto chairs and the floor. A neutral, fabric hamper gives you one proper holding place, and the closet stays visually calm. This idea is about aesthetics and function together: the hamper looks like part of the system instead of a random bin. Keep it near the closet so you can decide quickly what goes back on the hanger. This is especially helpful in small apartments where every surface becomes storage.
Skip thisAvoid using a bright patterned hamper — it pulls visual attention and reads like clutter.
Editor's noteUse a hamper with a rigid rim so the opening stays shaped and looks tidy.
18. Satin-finish closet liner on shelves and hanging zones
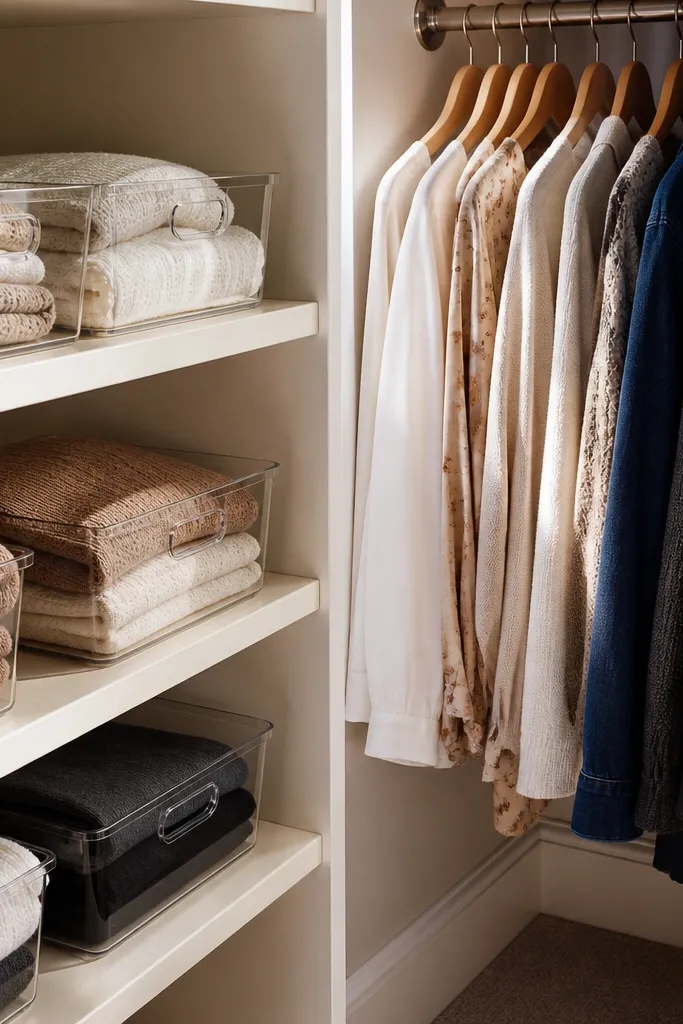
Measure shelf lengths and cut liner pieces with a sharp utility knife so edges look straight. Clean the shelf with rubbing alcohol first so liner sticks (or lay it flat with non-slip backing if you want removability). Apply liner to shelves where bins sit and to any ledges where small items slide. Trim edges neatly at corners and press firmly so there are no bubbles.
If you want the closet to look expensive, start with the surfaces. Shelf liner and a satin-finish closet liner make everything look cleaner because it hides small scuffs and gives bins a consistent base color. The visual effect is subtle but huge: clear bins and labels look sharper on a smooth liner, and items don’t slide into sloppy positions. This is not a “storage” add-on, but it makes your organization hold its shape. It’s easy to apply and takes about an hour even for slow, careful people.
Skip thisAvoid textured liners that bunch — they make bins wobble and look uneven.
Editor's noteUse a liner color that’s slightly warmer than white. It hides dirt better and looks softer.
19. Adjustable shelf risers for top-of-shelf accessories
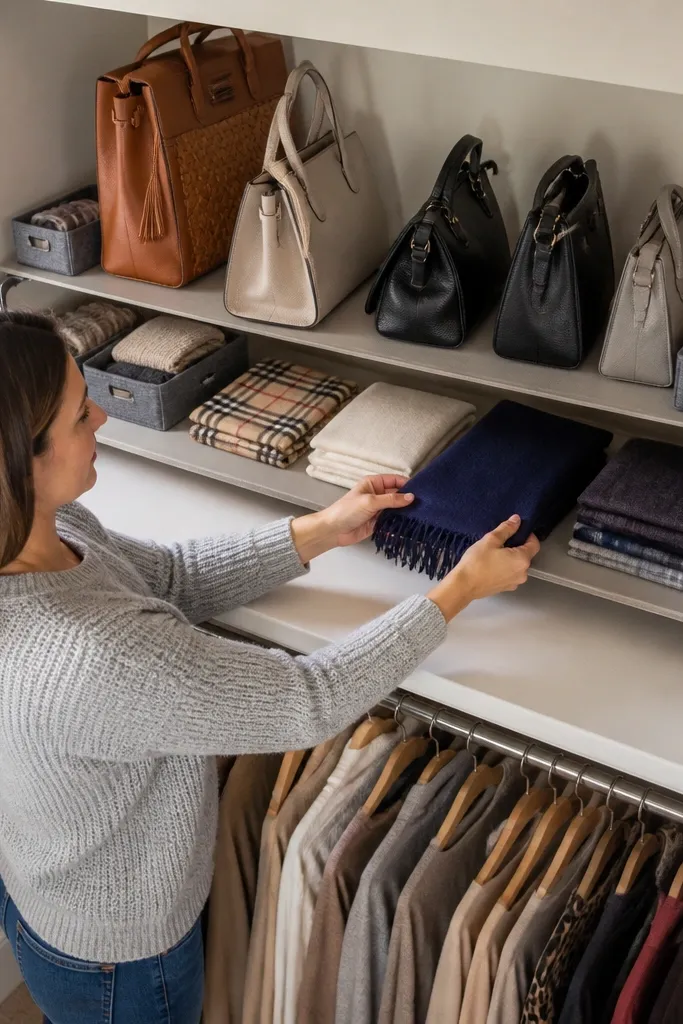
Measure the shelf depth and pick risers that fit without blocking the shelf edge. Place risers at consistent spacing so you get a clean two-tier layout. Add small matching containers on each tier and label the front. Stage items by frequency: the top tier holds what you grab most, bottom tier holds less-used pieces.
Shelf risers are how you stop top shelves from becoming one deep, unreachable wall. With two levels, you can keep accessories visible and prevent “mystery piles.” The look is better when the risers are uniform and the items are staged in small, matching containers. Use this for handbags, hats, and folded scarves you want to see without digging. This is a renter-friendly upgrade and it’s fast: you’re just adding structure to what you already have.
Skip thisAvoid stacking random heights of containers on risers — the shelf looks like a pile.
Editor's noteKeep risers the same height across the shelf so the lines stay crisp.
20. Magnetic bobby-pin strip + drawer-side label system
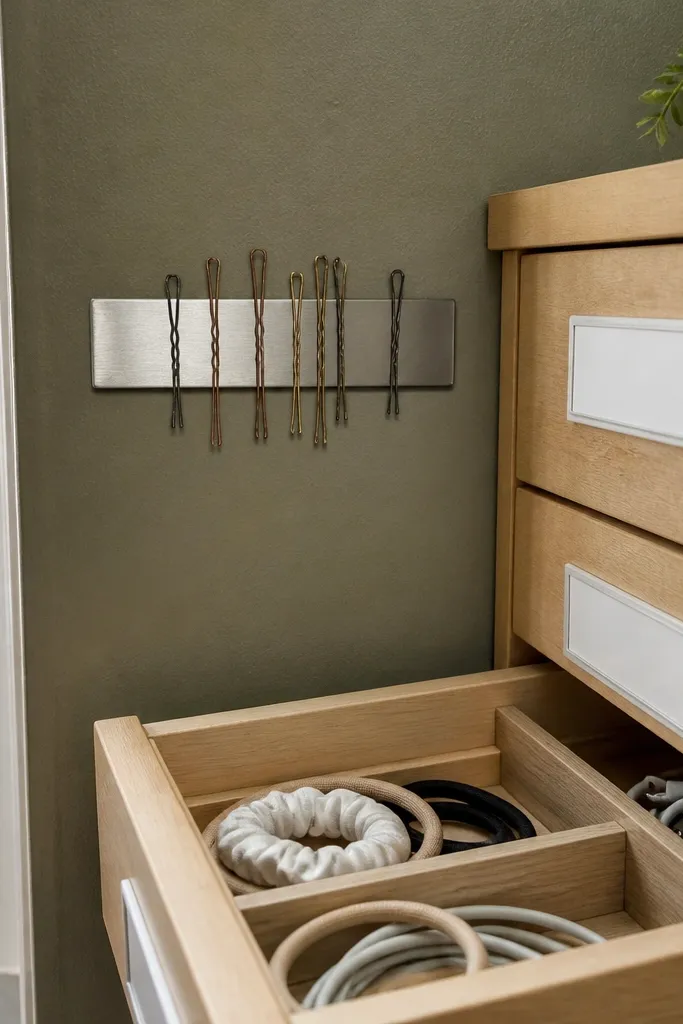
Pick a spot inside the closet where you have a narrow wall panel or the side of a small rolling drawer unit — aim for a level line at about 48-54 inches from the floor so hair stuff is easy to grab. Cut a 12-inch aluminum or stainless magnetic strip (or buy one cut-to-length) and mount it with removable adhesive strip pads rated for smooth surfaces, or with tiny screws into a board you can remove later. Add a small drawer organizer insert with 3-4 sections so hair ties and cables don’t slide around, then label the drawer sides with color-coded vinyl label tape and a clear label window on top of each label. Finish by wiping the wall with rubbing alcohol before mounting and press everything for 30 seconds to set the adhesive. Test pull strength by tugging the drawer and strip gently, then load the magnetic strip with only metal items so it stays secure and uncluttered.
Tiny closets fail when small stuff disappears — bobby pins, hair ties, lint rollers, and charging cables end up in random corners. This setup keeps those items visible and reachable while still looking tidy. The magnetic strip holds metal hair tools flat against the wall so they don’t tangle, and the drawer-side labels make each drawer feel like a mini station. It’s a renter-friendly build that uses removable hardware and doesn’t require drilling into the closet frame. You get a clean, photo-ready grid look because the strip lines up with the drawer fronts and the labels match your closet color palette. Plan on about 2 hours total if you already own a basic drill and measuring tape.
Skip thisAvoid mounting the strip too high or too low — if it’s off by even a few inches, you’ll stop using it and the closet will drift back to chaos.
Editor's noteUse two label colors: one for hair items and one for accessories. It makes the closet look intentional fast, and you’ll stop mixing categories.



