
1. Ignoring the 4-inch gap rule when planning infill
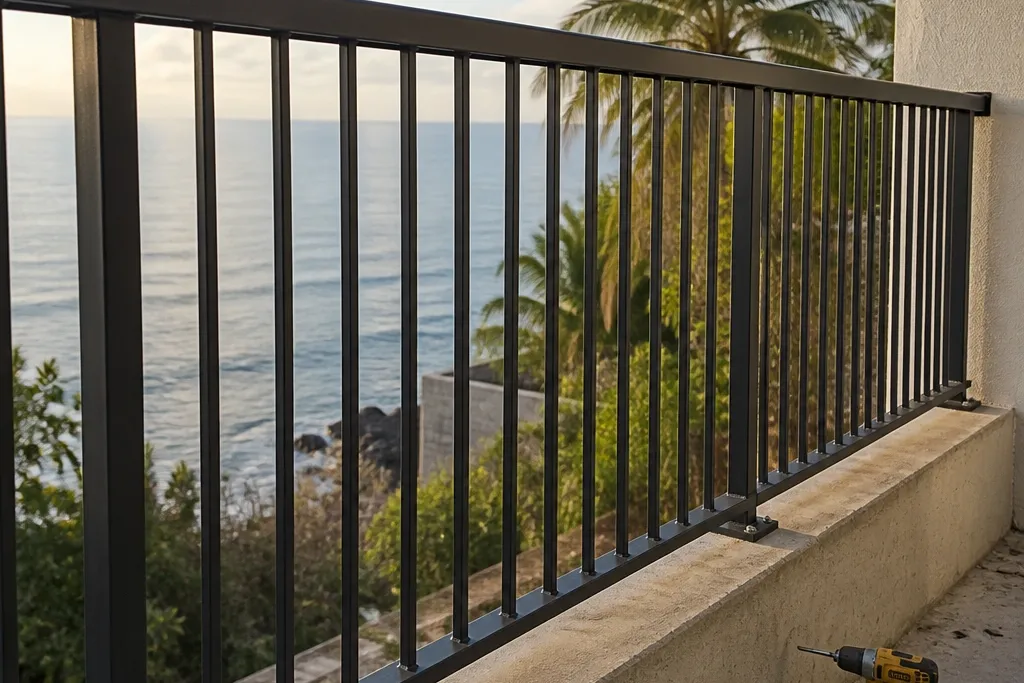
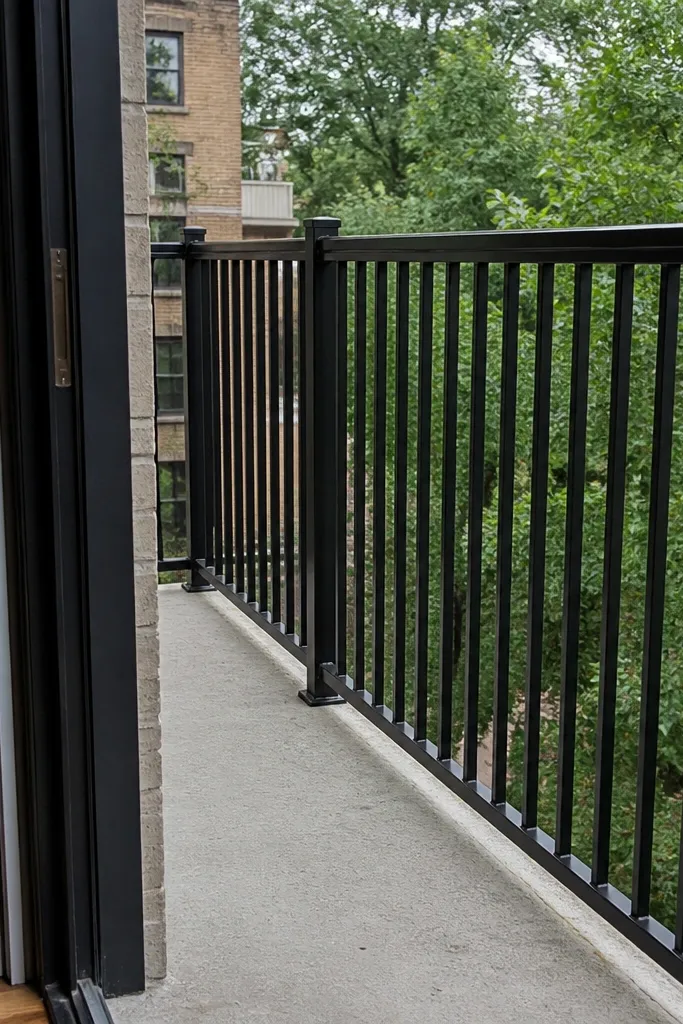
Start by measuring the clear opening between the inside faces of the posts at both top and bottom. Calculate your infill gap with a real formula: (clear width — infill frame thickness) ÷ number of spaces. Choose a bar/slat count that lands you at or under a 4-inch maximum opening and double-check it with a cardboard template cut to the gap. Then build a simple spacer jig from scrap wood or metal that matches your calculated spacing so each bay stays identical. Finally, install from one end to the other and re-check the gap every few sections, not at the end.
Most balcony railing DIY disasters start with a simple layout mistake: the infill gaps are too large. When the bars or panels leave openings bigger than about 4 inches, you’re creating a passage for fingers and, in worst cases, a child’s head. The fix is not “add one more bar later” — it’s redesign the pattern so the opening size stays consistent across every bay. Measure the clear opening between posts, subtract the frame thickness, then divide by your chosen bar count to hit the target gap. If you’re using horizontal cables or wood slats, spacing matters even more because the geometry changes slightly from the top rail to the bottom rail.
Skip thisDon’t guess spacing by eye — measure the clear opening and calculate the gap.
Editor's noteCut a cardboard “4-inch check” and test it against your plan before you buy any bars.
2. Using the wrong post spacing and then forcing panels to fit
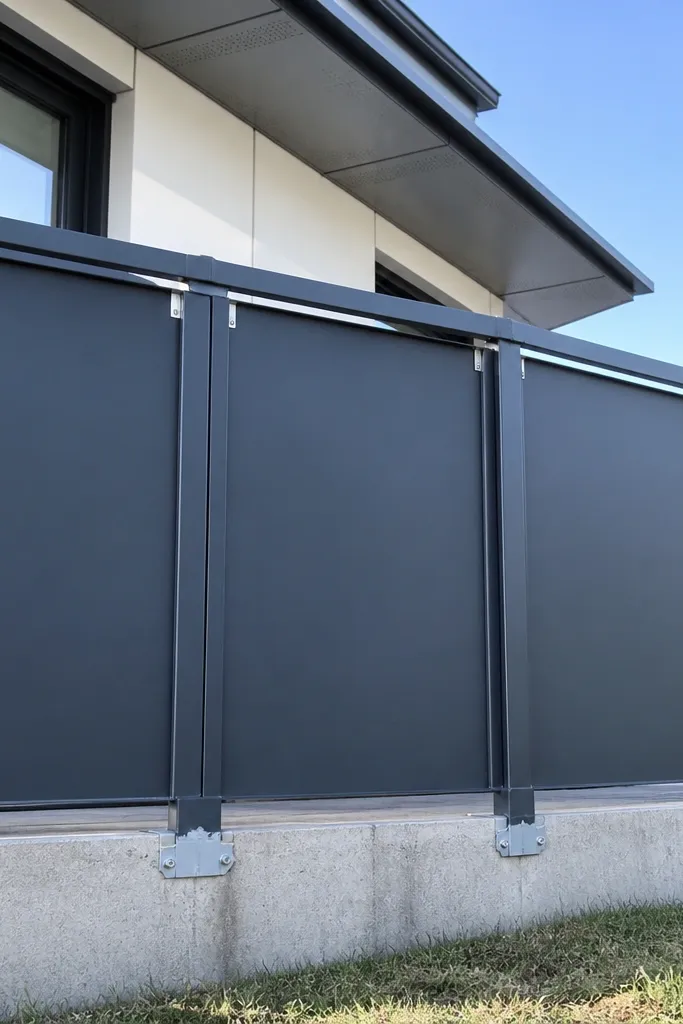
Post spacing controls everything: strength, how the infill sits, and whether the whole run looks straight. When people pick post spacing based on “it seems right” and then force infill panels to fit, the result is a railing that drifts out of level and shows inconsistent gaps. Panels that are forced will also put stress into the fasteners, which loosens joints over time. The clean solution is to set post spacing to match your infill material dimensions and keep the bay widths consistent. This makes the build faster because you’re repeating a known measurement, not improvising every section.
Start by listing your infill material widths — for example, metal balusters, wood slats, or cable runs — and decide your target gap. Measure your balcony span and divide by a bay size that works with whole numbers of infill pieces. Mark post locations on the balcony surface using a chalk line and confirm each post is plumb with a level before drilling anything. Then install posts first, and only after they’re anchored, cut infill to the actual bay dimensions. Re-check level and alignment at the top rail before you tighten the final fasteners.
If your bay sizes don’t divide cleanly, adjust the post spacing slightly rather than changing infill spacing mid-run.
Don’t force infill to “make it fit” — redesign bay widths so spacing stays consistent.
3. Anchoring posts into hollow or weak surfaces
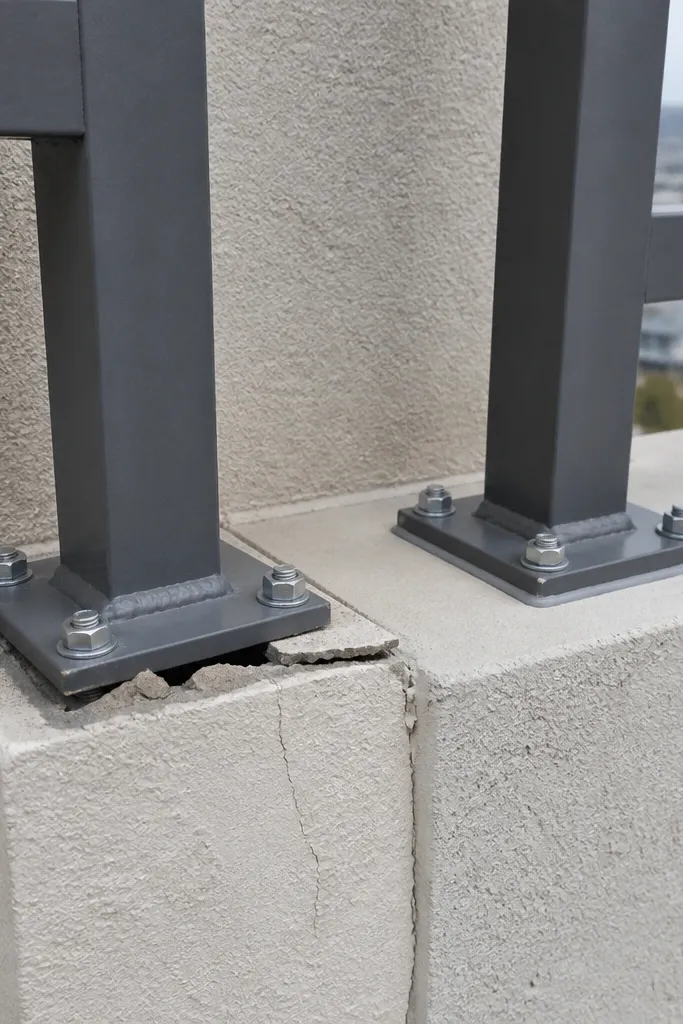
Start by testing the substrate: tap the area around your planned post location and look for flex or hollow sound. If you can access the underside, inspect what the edge is built from; otherwise, drill a pilot hole in a hidden area to see what you hit. Use a base plate or post bracket designed for exterior loads and attach it with anchors rated for the substrate type. For concrete, use wedge anchors or through-bolts with washers sized for the base plate holes. For wood framing, use structural screws or bolts into studs/joists, not into trim boards.
A railing can look straight and still be unsafe if the posts don’t bite into solid structure. Hollow balcony edges, thin stucco over framing, or loose tile over concrete are classic traps. If you screw into something that moves, the post will rack sideways when someone leans, and the fasteners will loosen. The fix is to anchor into structural material or use a mounting system that transfers load properly into solid substrate. This is where DIYers lose weekends — because you have to verify what’s actually behind the surface before you commit to hardware.
Skip thisDon’t mount posts to tile, trim, or hollow material and hope the screws “hold anyway.”
Editor's notePick post locations that land on framing members when you can — it saves you from guessing anchor holding power.
4. Skipping post bracing and letting the railing rack
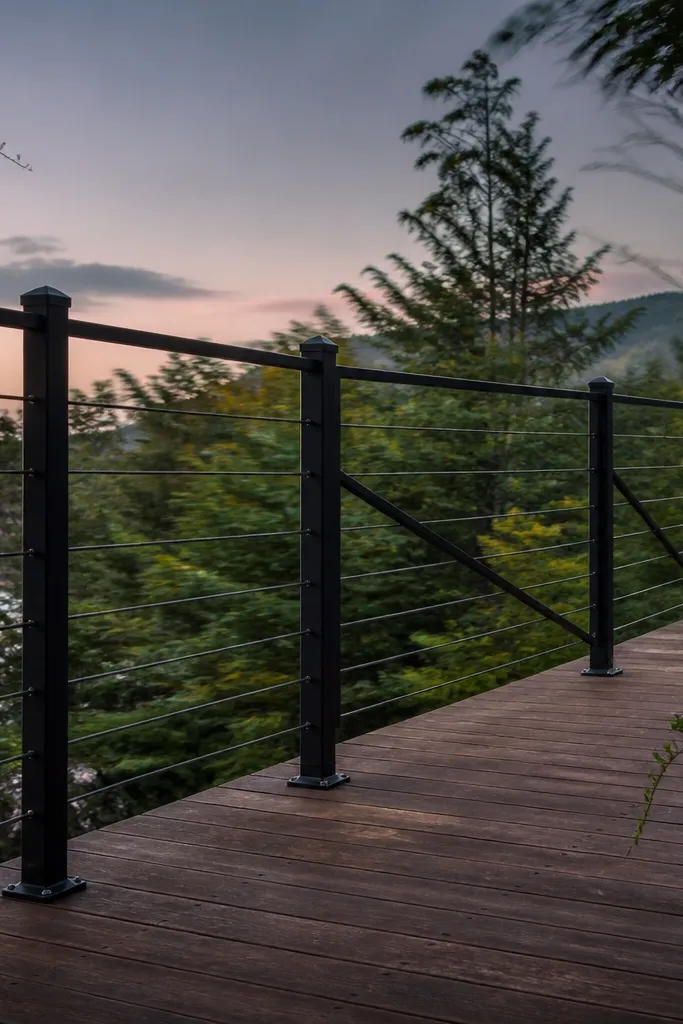
Start by planning your lateral load path: decide where the top rail will connect rigidly to posts. If you’re using steel posts, add diagonal braces behind the infill or connect a steel top rail that wraps the posts with solid hardware. For wood top rails, use metal brackets rated for exterior use and avoid relying on screws alone. Install bracing before infill so you can keep everything square while tightening. After the frame is assembled, push-test at the middle bay and check for movement; if it shifts, add bracing before you close it up with infill.
Racking is the sideways wobble that makes a railing feel flimsy even when it’s not visibly falling apart. It happens when posts are anchored but the run has no diagonal bracing, moment resistance, or rigid top rail tying everything together. Wind pushes, people lean, and small movement compounds until your railing line looks crooked. The fix is to add bracing at the right spots: diagonal braces between posts, a rigid top rail connection, or a system designed to resist lateral loads. This is one of the most “worth it” upgrades because it improves feel and safety at the same time.
Skip thisDon’t build posts and infill as separate pieces — the frame needs lateral stiffness.
Editor's noteSquare the frame first. Once infill is on, you lose the ability to correct twist easily.
5. Using galvanized fasteners in a salt-air setup without protection
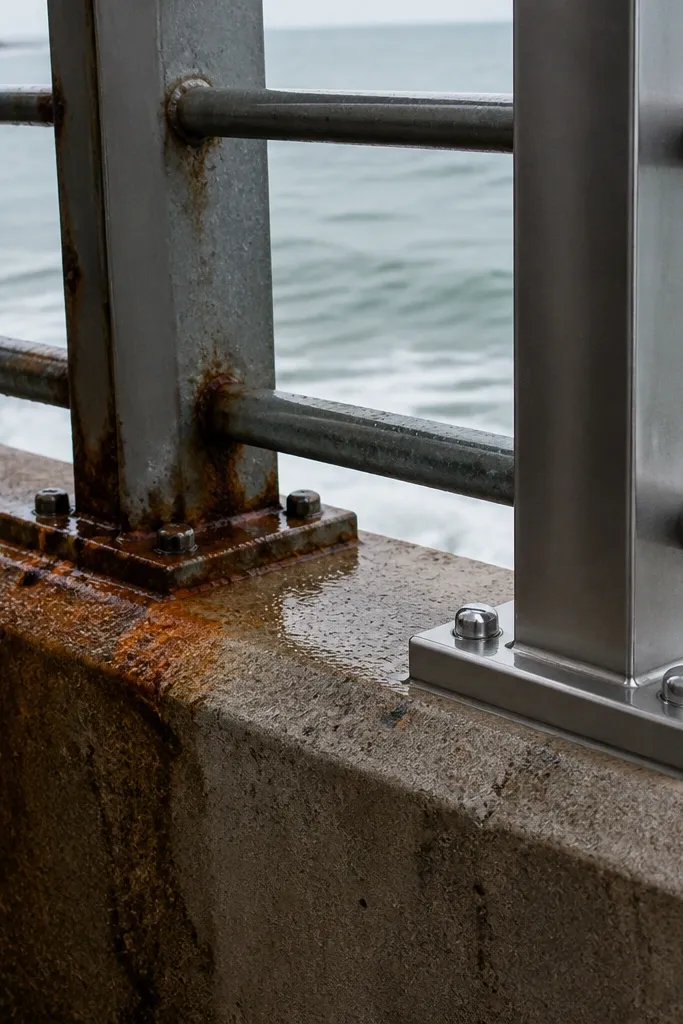
Galvanized hardware can still corrode in salty coastal air, and it’s worse when water sits in seams around the railing base. Rust stains the surface, but more importantly it loosens fasteners so the railing gradually goes soft. The fix is to use exterior-rated fasteners that match the coating system and environment, and to prevent water from trapping at joints. If you’re in a place with salt spray or heavy rain, treat the railing like an outdoor structural assembly, not a furniture project. Choose stainless hardware or properly coated systems and keep the water path clear.
Start by identifying your railing material: powder-coated steel, aluminum, or wood. Then match fasteners to that material and environment — stainless (like 304/316 for harsher coastal conditions) or exterior-rated coated hardware. Use washers under bolts and keep a thin barrier where dissimilar metals contact, like a compatible isolator or sealant made for outdoor metal joints. When attaching base plates, use sealant sparingly around the perimeter to stop water intrusion, not as a glue layer. Finally, inspect after the first heavy rain and check for seepage at fastener heads.
If you see water pooling at the post base, fix the drainage before you swap hardware again.
Don’t assume “galvanized” equals rust-proof outdoors.
6. Coating the railing but leaving cut ends bare
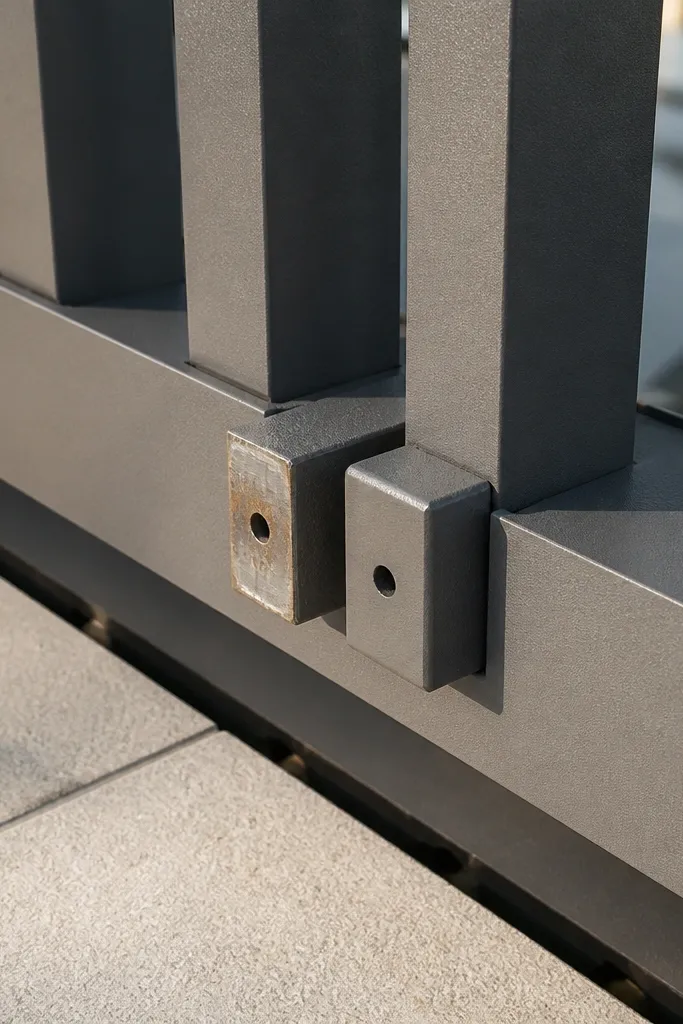
It’s easy to forget that every cut is new metal exposed to water. A powder-coated railing looks perfect until you notice the cut ends, drilled holes, or damaged edges — that’s where rust starts first and spreads. The fix is to treat every cut and drilled area with the right touch-up coating. For DIY work, that means using a compatible primer and topcoat system, or a manufacturer-approved touch-up paint for the powder-coat finish. This is one of those small steps that keeps the railing from looking worse after one season.
Start by planning cuts so you minimize how many you need after powder coating. If you’re cutting on-site, clean the bare metal with a wire brush or abrasive pad until it’s free of dust and oils. Apply a rust-inhibiting primer made for bare steel, then follow with the topcoat color that matches your system. For drilled holes, wipe away metal shavings so the coating sticks and doesn’t flake. Let the touch-up cure fully before you install, especially in cool or humid weather.
Keep a small “touch-up kit” in your garage for future repairs — matching the finish later is harder.
Don’t paint over dirt or leave bare steel at cut edges.
7. Top rail that's too small for a comfortable grip
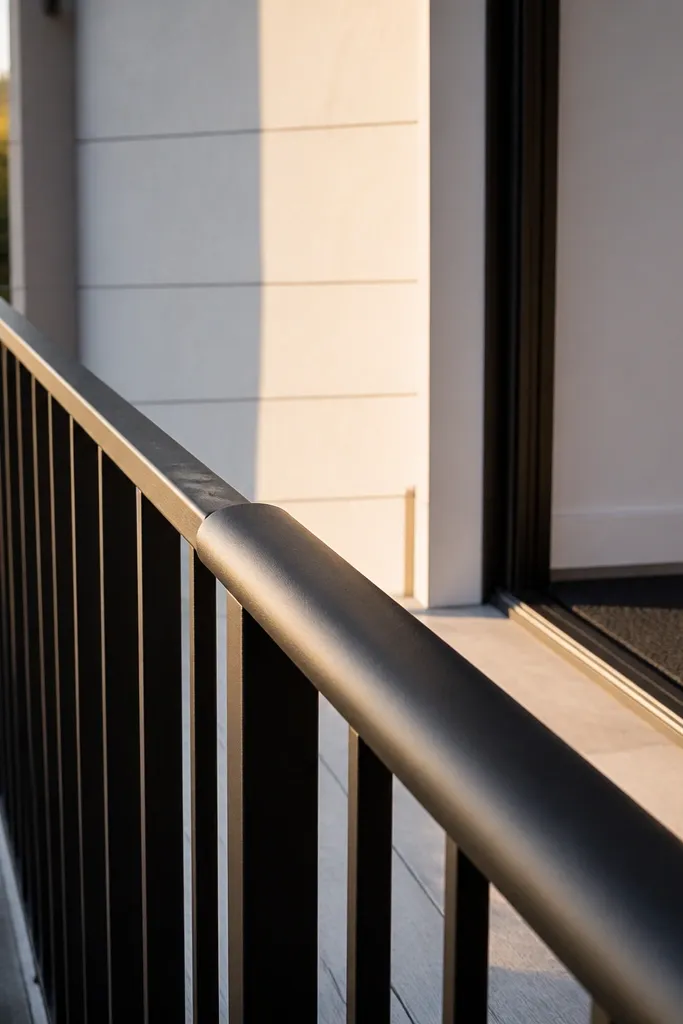
Start by choosing a top rail size based on your handhold needs: look for a rounded profile or a flat top with a smooth edge and no sharp corners. If you’re using metal, round the outer edges or buy a rail profile with a factory radius. If you’re using wood, use exterior-grade lumber and sand the top edge so it feels smooth, then apply a marine-grade exterior finish. Mock up a section temporarily and test how your palm sits on it. After you decide, install the top rail last so you can align it perfectly and avoid scratching the finish.
A railing top rail is a handhold, not a decoration. If the top rail is too narrow, the grip feels awkward and people grip closer to sharp corners or fasteners. That leads to wear spots, loose clothing caught on hardware, and more pressure on weak joints. The fix is to pick a top rail profile that feels solid in the hand and has rounded edges. This is especially important if your balcony sees kids, frequent guests, or older family members. A comfortable rail also helps you “trust” the railing, which matters for how people use it.
Skip thisDon’t use a thin, sharp-edged rail just because it looks minimal.
Editor's noteRound-over matters. A 1/8-inch radius on wood feels better than a crisp corner.
8. Mismatched infill heights that make the railing look crooked
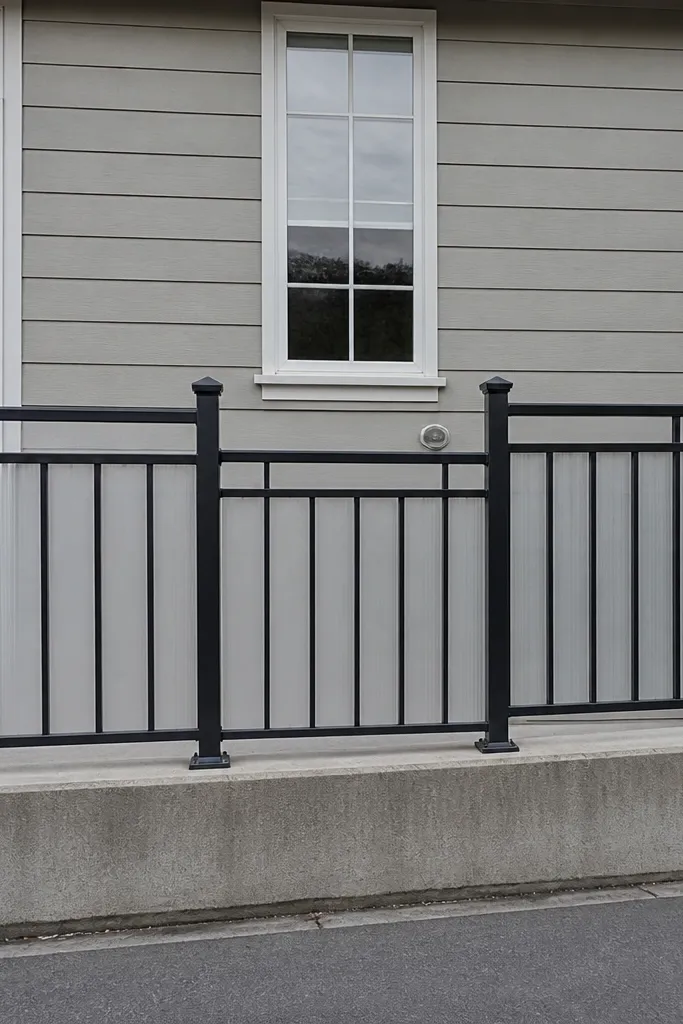
Start by finding your reference line: usually the top rail height measured from the highest point. Mark a level line along the posts and confirm it with a 4-foot level or laser. Then install the top rail and lock its position before cutting infill. Measure each bay’s infill length individually and cut pieces to match, especially if your balcony has slope. Install from top to bottom and keep the spacing jig consistent so the gaps stay even even when lengths differ slightly.
Uneven infill height is the fastest way to make a railing look DIY, even if the structure is solid. It happens when you assume the balcony edge is perfectly level or when you cut infill pieces before you lock the top rail height. Real balconies have slope, and sometimes the post bases aren’t identical because the substrate isn’t flat. The fix is to measure from a fixed reference line and cut infill with that in mind. When you keep the top alignment consistent and let bottom pieces vary slightly, the whole run looks intentional.
Skip thisDon’t measure once and cut everything if your balcony edge isn’t perfectly level.
Editor's noteCut two representative pieces first and dry-fit them before you cut the entire batch.
9. Using cheap cable fittings that loosen under tension
Cable railings look clean, but the hardware is where quality shows. Cheap turnbuckles and cable clamps can creep under tension, and salt-air accelerates corrosion at the clamp points. When that happens, cables sag and the railing looks sloppy even if the posts are fine. The fix is to use marine-grade or stainless cable and hardware, and to tension cables consistently with the right tools. Also, plan for cable stretch and re-tension after the first weather cycle. Done right, cables stay tight and look crisp.
Start by using the correct cable diameter and match it to the clamp and turnbuckle system you buy. Install posts and top rail first so your anchor points are aligned. Thread cables through the anchors, tension them to the manufacturer’s recommended tension, and tighten clamps with the specified torque if available. After the first full day in place, re-check tension and adjust if they have settled. Finish by inspecting clamp bite marks and making sure there are no sharp edges where cables contact metal.
Mark cable lengths with tape before tensioning so you can repeat settings across bays.
Don’t use random cable clamps or guess tension on cable railings.
10. Over-tightening infill screws and crushing wood or thin metal
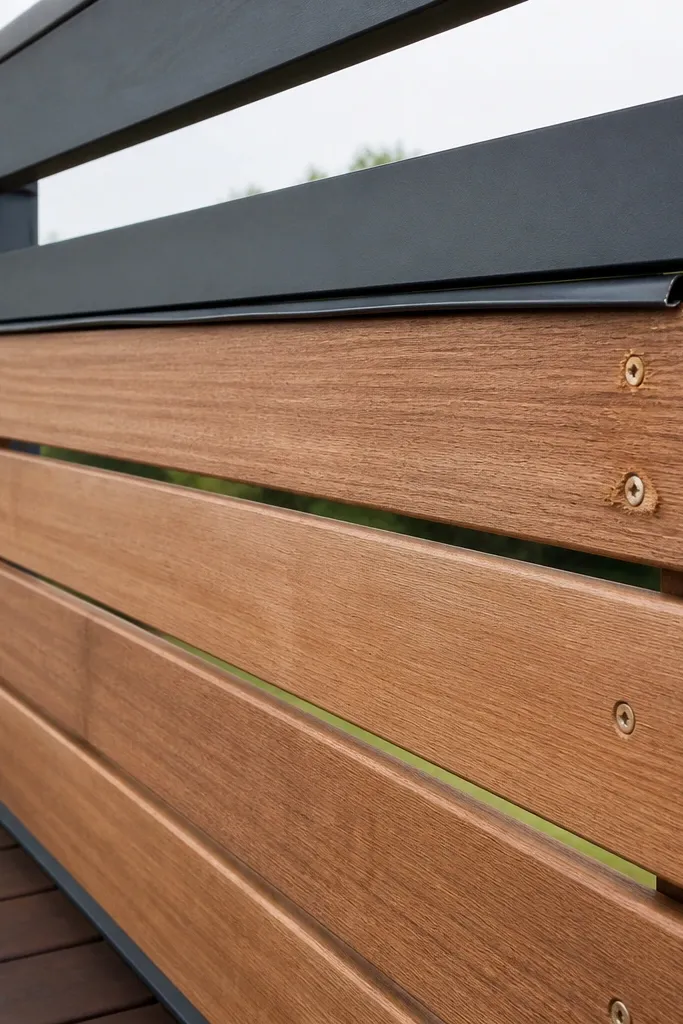
Over-tightening looks minor until it causes cracks, stripped holes, or warped metal panels. Wood slats split at the end grain, and thin balusters deform, which then changes spacing and creates gaps you can see from across the balcony. The fix is to use the right pilot hole sizes and stop tightening once the piece seats. For metal infill, use spacers or washers so the fastener clamps without bending the panel. This is also where pre-drilling and torque control saves you from “why does it look worse now?” frustration.
Start by pre-drilling pilot holes for screws into wood — match the drill bit to the screw core diameter so the wood doesn’t split. For thin metal, use washers and avoid crushing the infill against the frame. Tighten until the infill is snug and aligned, then stop; if you’re using a drill driver, switch to a clutch setting before you start. Dry-fit the first slat or bar and check how it sits before you repeat. After installing a bay, check spacing and alignment before moving on.
If you have to force a screw, your hole is wrong — fix the hole, don’t brute-force it.
Don’t crank screws until wood cracks or metal bows.
11. Leaving sharp edges on cut metal and wood ends
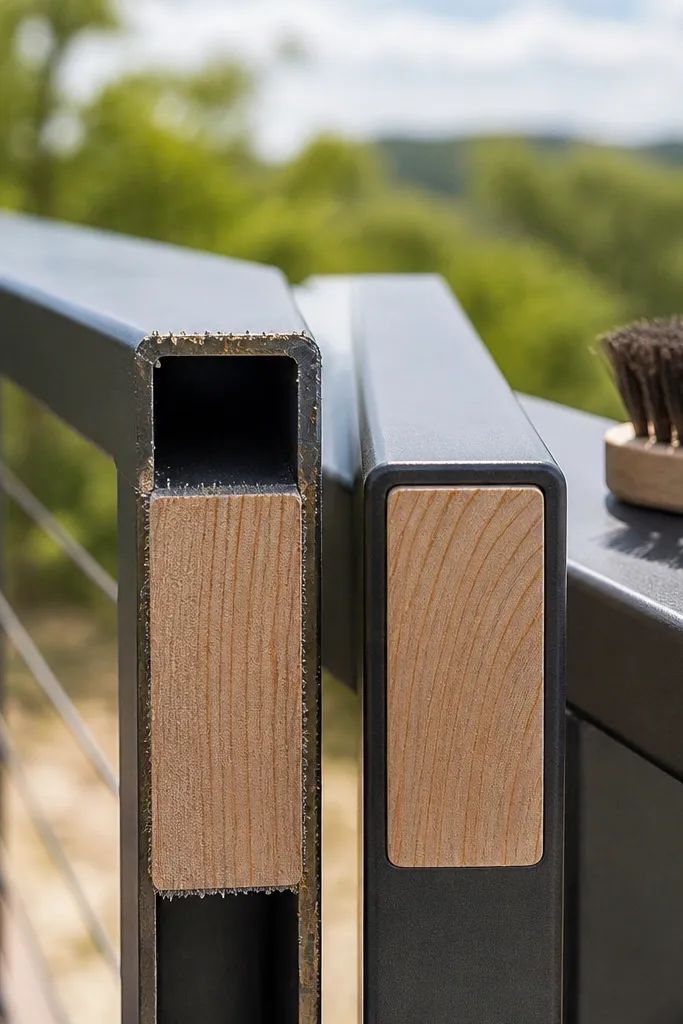
Start by deburring cuts right after you finish machining. Use a file and then sand with progressively finer paper until you can’t feel a ridge with your fingertip. For metal, wipe off dust and apply touch-up primer and topcoat to the bare edge. For wood, sand the end grain smooth, then seal it with exterior finish — two coats at the ends beats one coat on the flat. After coating cures, inspect by dragging a gloved hand gently along the areas people touch.
Sharp edges are a real safety and comfort problem. People catch sleeves, kids scrape palms, and you can even get tiny cuts when you clean the railing. It’s also a durability issue because sharp corners chip coatings faster and create rust starting points. The fix is simple: deburr every cut, radius the edge where your hand passes, and seal wood ends. If you’re using metal, run a deburring tool or file along cut edges and then touch up the finish. For wood, sand the ends and apply a finish that seals end grain so water doesn’t wick in.
Skip thisDon’t leave factory-sharp corners on your cut pieces.
Editor's noteRun a gloved finger along the top rail edge. If it catches, deburr again.
12. Forgetting drainage at the bottom of the railing frame
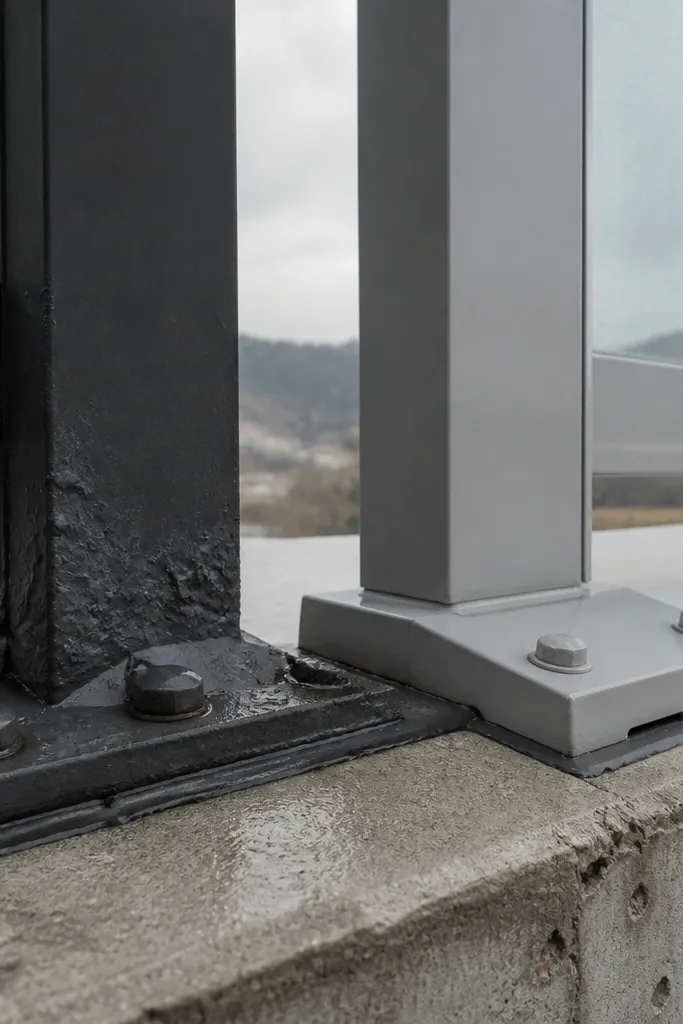
Start by inspecting the bottom edges of your frame design. If you have closed sections, add or drill small drainage holes in the lowest points where water collects, then touch up the holes. When installing base plates, avoid sealing everything airtight; allow water to escape instead of trapping it under the plate. Use shims or spacers only where needed so the frame sits with a slight slope away from trapped seams. After installation, run a water test with a hose and watch where the water goes — it should move out, not pool.
Water management is a hidden make-or-break detail. If your railing frame traps water at the bottom, you’ll get rust, finish peeling, and fastener corrosion. Even powder-coated steel can fail when water sits in seam pockets around base plates and joints. The fix is to design drainage paths: sloped surfaces where water can run off, small weep gaps, and sealed but breathable joints where appropriate. This is especially important for rail systems with closed tubing or boxed frames. A clean drainage design keeps the railing looking new longer without constant re-coating.
Skip thisDon’t seal the bottom joints shut and hope rain will magically evaporate.
Editor's notePut a small bead of sealant only where you want to block water entry, not as a blanket around the whole base.
13. Using pressure-treated wood without exterior coating system
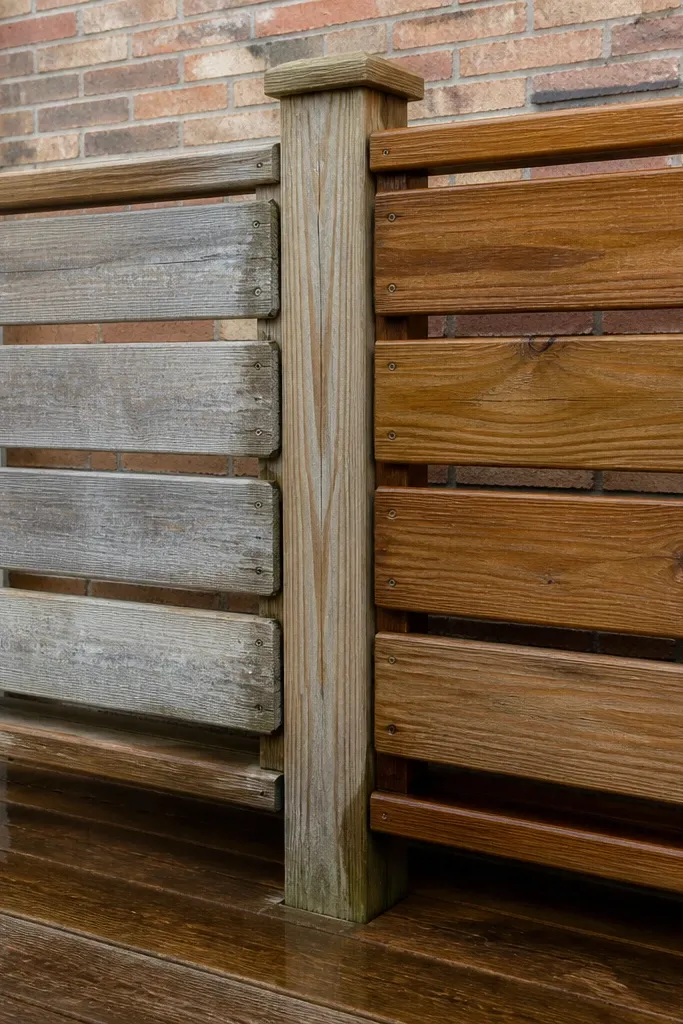
Start by letting pressure-treated boards dry to a workable moisture level so coatings adhere. Sand the surfaces smooth and focus on end grain — seal it first with an exterior wood sealer. Then apply a topcoat designed for outdoor rail use, like a marine spar varnish or an exterior deck finish system. For the best results, apply two coats at the top rail and at least one full coat on all sides, including edges. Re-check after a heavy rain; if water soaks in quickly, you need more sealant and possibly a different product.
Pressure-treated wood is not a finish. It slows rot, but it still needs a real exterior coating system to resist water absorption and UV damage. Without it, wood turns gray fast, joints swell, and screws loosen over time. The fix is to seal end grain, then apply a finish that matches your exposure: horizontal top rails need more abrasion resistance than vertical faces. If you want a railing that stays looking clean, treat wood like the component that sees the most wear. That means sanding, sealing, and maintaining the finish schedule.
Skip thisDon’t rely on pressure treatment alone to keep the wood looking decent.
Editor's noteSeal end grain twice. It soaks up finish faster than the rest of the board.
14. Installing posts out of plumb and covering it with infill
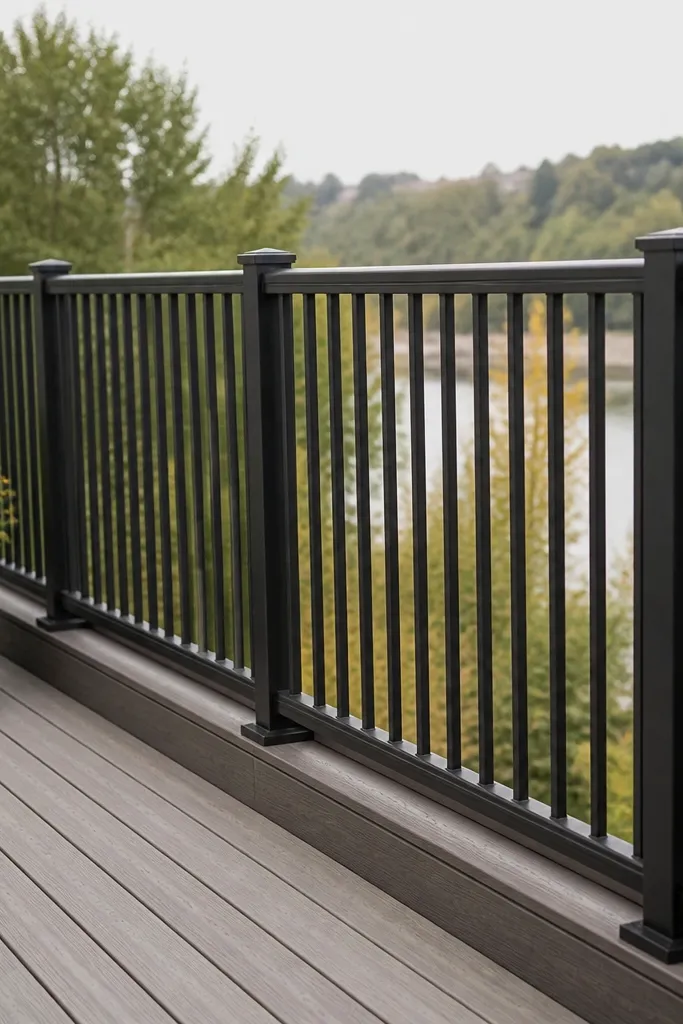
Start by marking each post location and setting a temporary brace or clamp so the post can’t move while you level it. Use a 2-foot level for quick checks and a longer level or straightedge for the full run. Shim under the base plate or bracket until the post is plumb, then tighten fasteners gradually, alternating sides. Confirm the top rail height between posts before you remove bracing. Only then install infill so spacing stays consistent and the top line stays straight.
If your posts are out of plumb, the entire railing will fight you. Infill spacing will look inconsistent, the top rail will look wavy, and you’ll end up with gaps that are impossible to correct without tearing it apart. People hide this mistake by adjusting infill length, but that leads to uneven gaps and a railing that looks “off” even if it’s structurally okay. The fix is to plumb posts before any infill goes on. Use shims and temporary bracing so the posts stay true while you tighten anchors.
Skip thisDon’t build infill to “fix” crooked posts — fix the posts first.
Editor's noteCheck plumb twice: once right after you set it, and again after you tighten the last bolt.
15. Choosing a finish color that hides defects and then regretting it
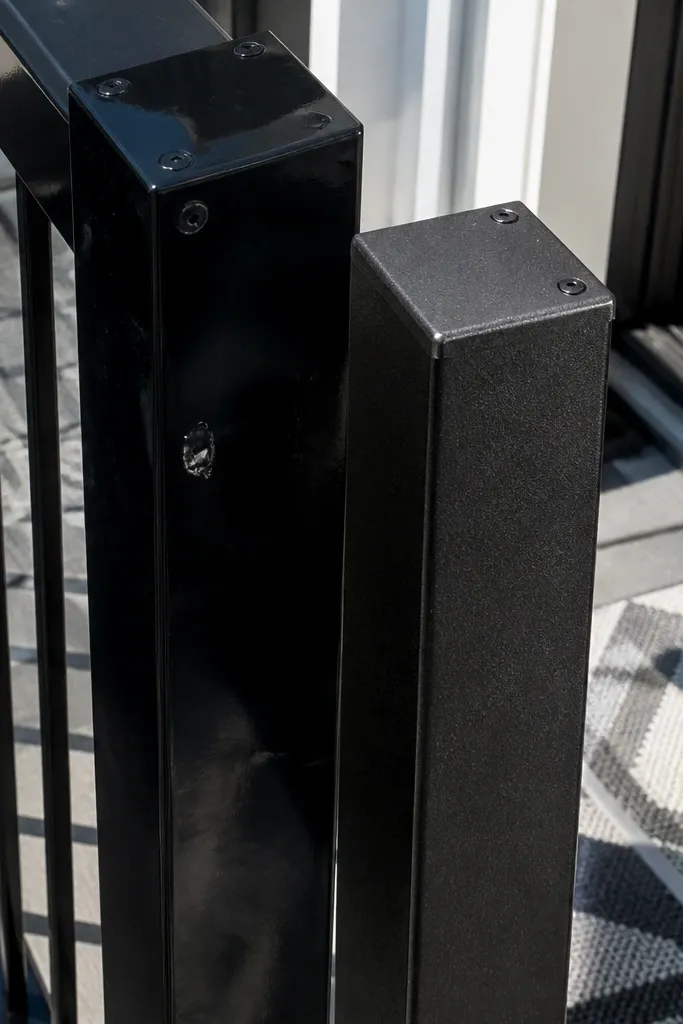
Start by deciding whether your railing frame is powder-coated or field-painted. If it’s field-painted, do test swatches on scrap metal and wood to see how the finish looks after drying and in daylight. For powder-coated systems, plan touch-up kits for cut edges and drill holes so you don’t end up with mismatched spots. Choose a satin finish that looks consistent from different angles and reduces glare. Before final assembly, clean and degrease parts so the finish lays evenly, then allow full cure time before you handle the railing.
Color choice affects how obvious workmanship is. Light colors, glossy blacks, and high-contrast finishes make scuffs, fingerprints, and uneven touch-up paint stand out instantly. That doesn’t mean you should avoid them — it means you should plan for touch-ups and wipe-downs. Dark matte finishes hide minor scuffs, while glossy finishes show every wave in the top rail. If you’re doing DIY, pick a finish that matches your skill level for alignment and finishing. My opinion: if you’re new to metal fabrication, go matte or satin for the frame and keep the sharpest contrast for accents.
Skip thisDon’t pick a glossy light color if you’re not ready for frequent touch-ups.
Editor's noteDo one “practice bay” off the balcony first so you can see how your chosen color behaves with real shadows.
16. Mounting horizontal rails that let small children climb
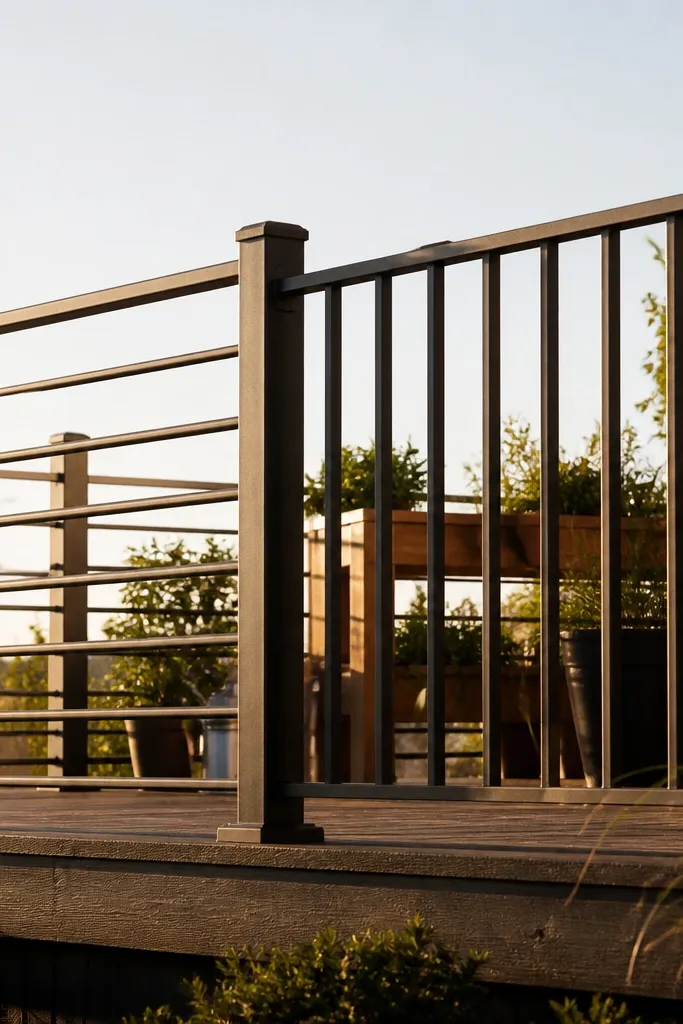
Start by mapping where a child’s foot could land — look at your infill orientation and count any repeated horizontal surfaces. If you see multiple climbable planes, switch to vertical balusters or a panel design with minimal horizontal ledges. When using a top rail, keep it as the primary horizontal element and avoid adding secondary horizontal bars below it. If you’re using wood slats, install them vertically and keep spacing consistent. After you finalize the design, check the pattern from a seated height perspective using a tape measure as a “kid eye line.”
Horizontal elements can turn a railing into a ladder. If you use multiple horizontal rails or closely spaced horizontal slats, kids can climb using the steps the structure creates. Even when the infill gaps meet the 4-inch target, climbability can still be a problem. The fix is to choose vertical balusters, tapered designs, or infill that doesn’t create easy footholds. If you want a horizontal top rail for hand comfort, keep other horizontal elements minimal and avoid repeated “rungs.” This is one of those design decisions that affects safety and also how the railing feels to use.
Skip thisDon’t stack horizontal bars or slats that create step-by-step climb points.
Editor's noteA quick test: hold a spare scrap board at toddler height and see if it “rests” on multiple rungs.
17. Using decorative balusters with weak attachment points
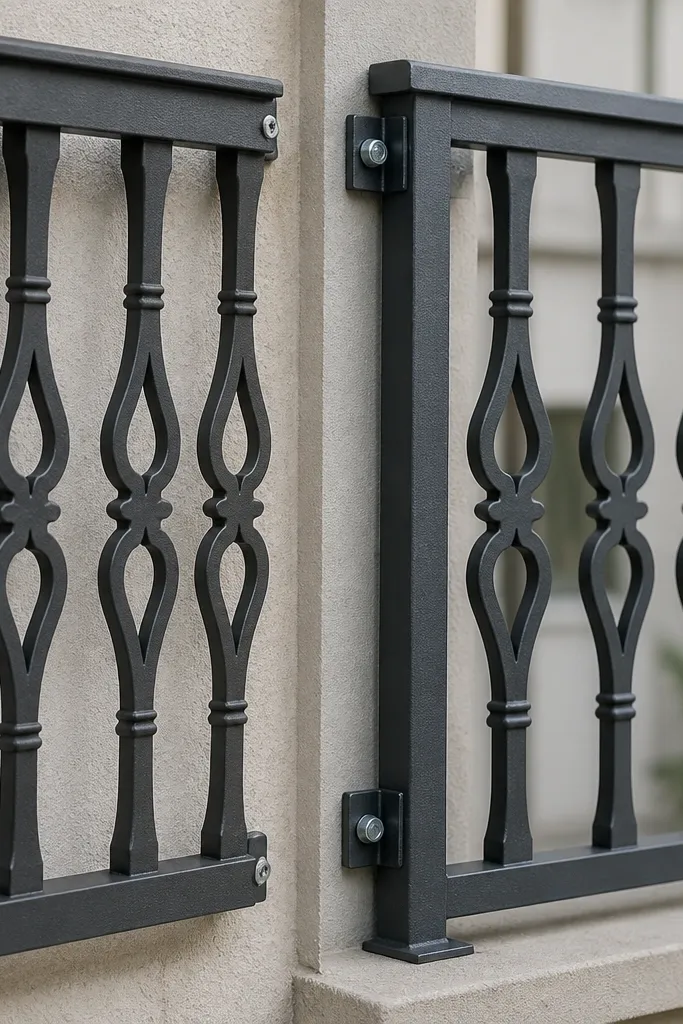
Start by reading the mounting method implied by the baluster design — look for through holes or sturdy base plates, not just small decorative tabs. Dry-fit one baluster to the frame and test for wiggle before you commit. If the attachment point is weak, add a proper bracket or build a simple mounting frame behind the baluster so the load transfers into the main structure. Pre-drill mounting holes and use exterior-rated hardware with washers. Then install the balusters with consistent spacing using your spacer jig and tighten in a pattern so nothing pulls sideways.
Decorative balusters look great until you realize how they attach. Some ornate pieces rely on small screws into thin sections, which weakens joints and makes spacing drift as the screws loosen. The fix is to use balusters with clear, sturdy attachment methods: through-bolts, properly sized brackets, or a frame that spreads load. Also, check the baluster’s flat mounting surface — if it’s curved or thin, it needs a different bracket strategy. This mistake is common because decorative parts are easy to buy, but they’re not always easy to mount safely on a balcony edge that sees real weather and movement.
Skip thisDon’t mount decorative balusters with tiny screws into thin decorative sections.
Editor's noteIf a baluster can be moved by hand after tightening, it needs a different bracket or stronger attachment, not “a bit more torque.”
18. Forgetting to match railing height to the walking surface
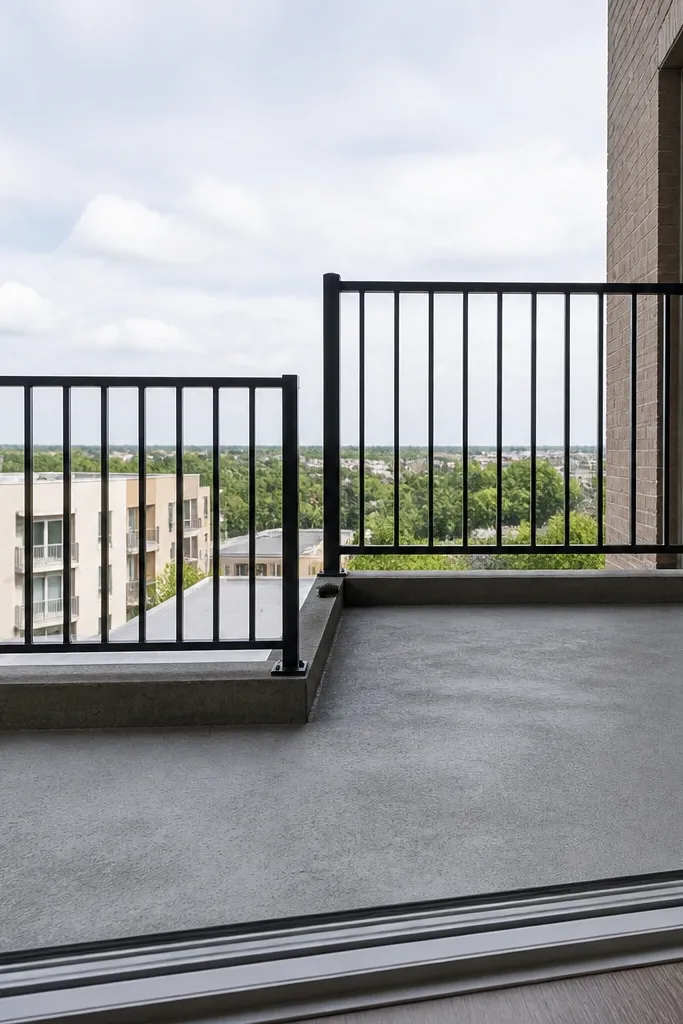
Railing height mistakes are common because people measure from the wrong reference point. If you measure from the top of the balcony curb instead of the walking surface, your real handhold height ends up too low. That’s a safety and compliance issue, not a style one. The fix is to measure from the finished walking surface — the place someone’s feet stand — up to the top of the rail where hands go. Keep the measurement consistent across the run, especially if the balcony has slope. A taller rail can also change how the infill pattern reads visually, so plan your design after you lock the height.
Start by identifying the finished walking surface and measure from there, not from the curb edge or tile transition. Mark your target height line along the balcony posts and confirm it with a level. Set your post heights using that line before installing any top rail. If your balcony slopes, keep the top rail aligned to a consistent line and let the bottom opening vary rather than dropping the top rail. After assembly, measure again at multiple points to confirm the height stays consistent where it matters.
Use a tape measure with a helper and check height at both ends before you cut posts.
Don’t measure from the curb or from the lowest edge and assume it transfers correctly.



